

My traditional H22a civic swap!
 01-11-2014, 01:26 PM
#1
Honda-Tech Member
Thread Starter
Before I start I would like to say that this whole swap was one hell of a learning experience. I did a good portion of this swap by myself with the exception of my good buddy who helped weld and do misc things. Please keep in mind also that none of this was mommy and daddy funded and because I just freshly turned 18 I do still live at home. I assistant manage a pizza shop 6 days out of the week and that payed for everything I've done. With that being said let�s get down to the nitty gritty.
This swap was done as of:
Dec. 22, 2013
Mods:
I'm not to sure whether I should be posting this in the Hybrid section or this but relocate accordingly.
They day I picked it up

Parts and know how.
Parts information: The parts you�ll absolutely need
-H series motor of course
-Motor mounts. Hasport & Innovative are the only ones in my opinion. But if you must cheap out on the only thing supporting your motor I�m sure Egay will be your go to place. I choose Innovative
-Axles (more detail on that later in the thread)
-A prelude rear mount bracket (I believe some accord ones work also)
-Slim Fan
-Custom clutch line
-92-96 prelude or accord shifter cables and shifter
-Lower radiator hose from a prelude/accord or a 1994 Del Sol Si
-Custom Gas line
-An ECU (p13 or p28)
-Custom exhaust welding
-Honda resistor box
-If you need an alternator belt you can use any 6 ribbed 37� long belt as long as your not running P/S or A/C
-Oil, coolant, fluids
Things you�ll need to know:
-How to do basic wiring
-How to swap a motor
-How to chip an ECU (unless you�re using a p13)
-How to weld
-Basic mechanics
Tools:
- Sockets, ratchets basic tools
-Wire cutters/strippers
-Soldering iron and heat shrink
-Drill
-Sawsall or an angle grinder
-Engine hoist
-Welder
-Multimeter
-Pen/Pencil with paper
If I am forgetting anything throughout this whole thread please let me know!!
The breakdown
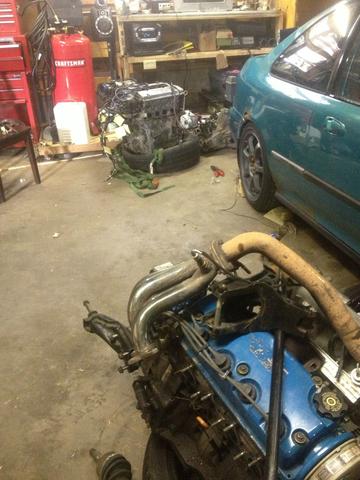
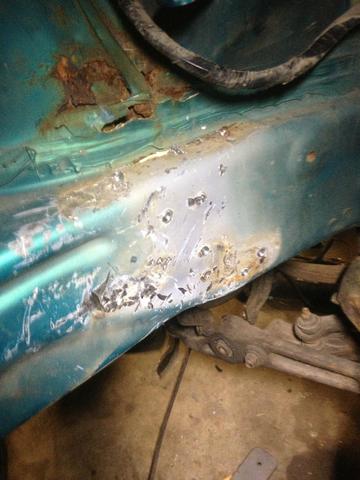
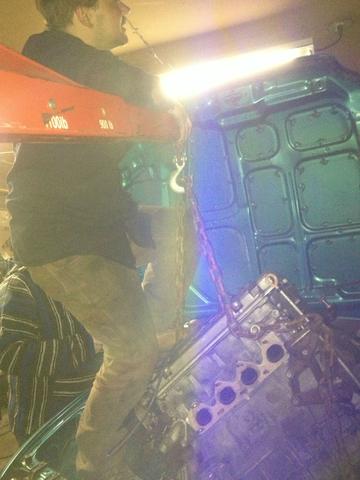
Pulling the old motor: Pretty self-explanatory, if you don�t know how you may want to go back to the drawing board.

Old vs New
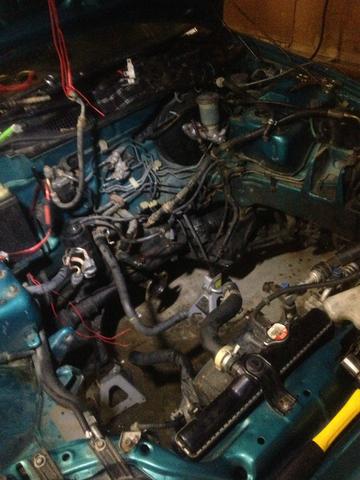
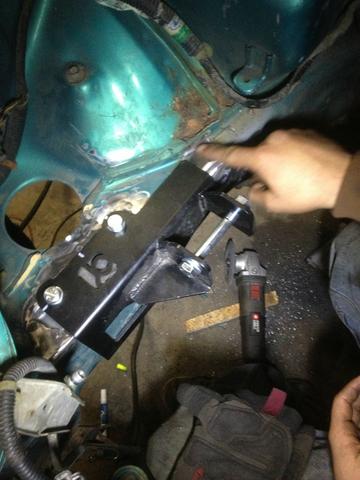
Engine Bay Prep:
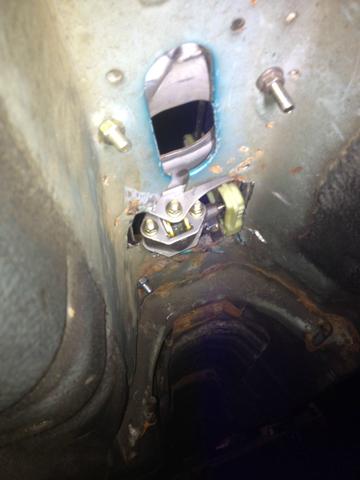
Drill out the spot welds on the transmission mount and rip it off the frame.
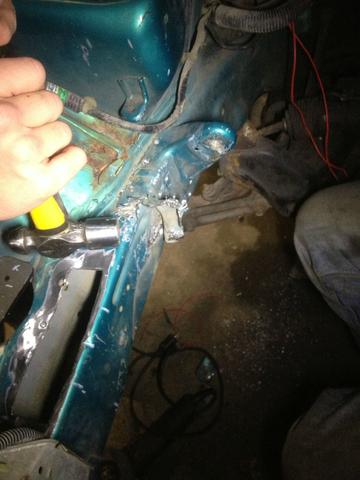
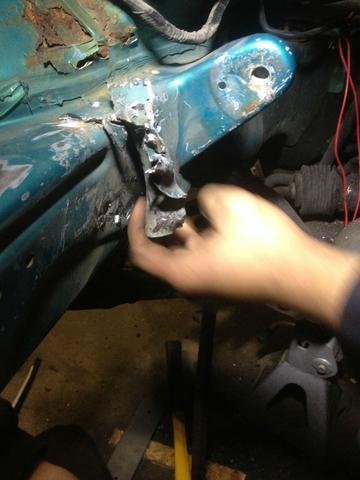
Drill holes in the passenger frame rail to fit innovative�s/hasports new bracket mount and tighten them suckers down. We welded in a reinforcement plate.
Take out a/c lines
Clean it while the motors out
Wiring & Ecu options:
I�ll start off by saying you must use the civic motor harness and rewire from there. The prelude one won�t work because of the shock tower plugs being different. Also it is much easier to rewire the harness with the motor out of the car.
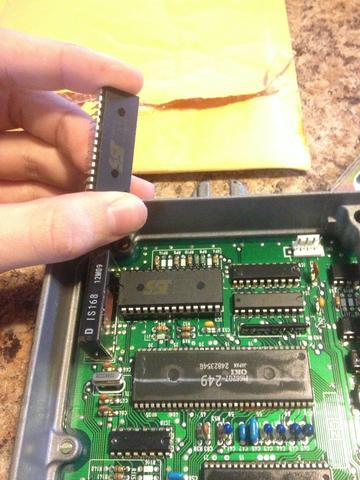
For the ecu you can use a p13 ecu (prelude ecu)
Or you can use a P28 that you will have to buy a chip and run a H series basemap for. Personally I went with the p28 for multiple reasons.
1. I had 2 of them laying around.
2. The p28 is completely tunable if I ever decide I need more pep on the step.
3. The wiring. If you use the p28 with a H basemap the computer doesn't recognize some sensors that the P13 does. Thus making wiring a bit less of a PITA.
My chipped P28
Wiring for the P28
-You have to use the Prelude injector clips

- Lengthen the Alt. wires to reach to alt.
-Lengthen the IACV wires

- Lengthen the starter signal wire
-Lengthen the oil pressure sender wire
-Lengthen 02 sensor wires if yours is downstream like mine
-Add a resistor box
- For reverse lights I had to run 2 wires from the plug into my cabin to the old automatic shift harness. IIRC it is the solid green and green with black stripe wires you splice into.
-You won�t have to wire for the EGR, Knock sensor or the IAB�s if you use the p28 as the P28 does not recognize those. For the IAB if you run a vacuum line to it it will work under vacuum just not as effectively
Wiring for the p13
-All the same steps as the p28 except you will have to wire for the EGR, Knock and IAB�s. I�ll provide a link from Poison's thread on that.
https://honda-tech.com/forums/hybrid-engine-swaps-18/%5Bfaq%5D-%2A%2A%2Ah22a-into-civic-eg-ek-information-post-all-h22a-hybrid-info-here%2A%2A%2A-650329/
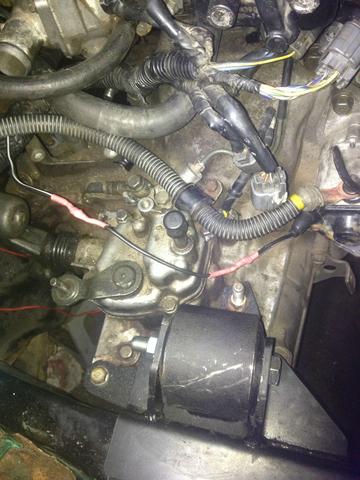
Getting the motor in:

I will not lie getting the motor in was a bitch. It did not want to budge anywhere and in the civics engine bay it�s a very tight fit. Having an engine leveler would have made this much easier but sadly I didn't have one. I have found through the 4-5 engine swaps I've done it�s much easier to bolt the rear mount up first and go from there.
IMPORTANT NOTE: With Innovatives swap mounts you have to beat the frame in a bit to fit the transmission in nicely. If you�re worried about beating on things you picked the wrong swap haha.
The Motor needed a bit of improvising lol
Motor In:
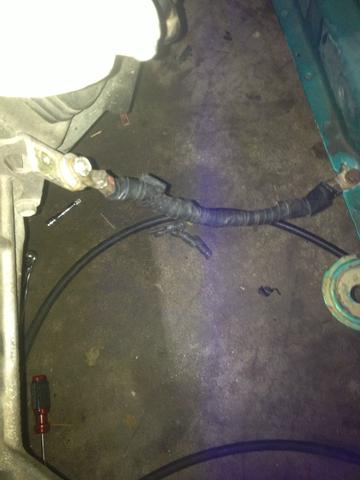
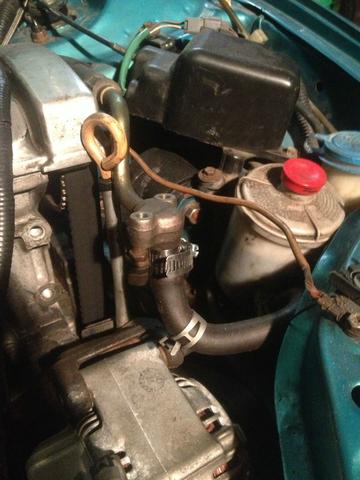
With the motor in now would be a good time to run your clutch line and install your slim fan. For the clutch line I used a braided 5ft line with a 90 fitting on the master cylinder.
-For the radiator fan my buddy managed to find a prelude fan and those are already slimmed down so we mocked it up with brackets and welded the bottom fan arms to fit.
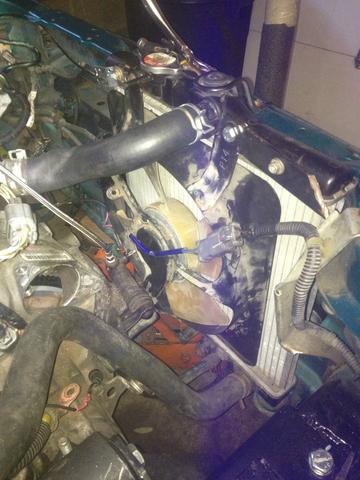
-You�ll need to replace one of the heater hoses as the old civic one doesn't have the right angles or length.
-Connect your grounds
-Start plugging in your sensors but leave your fuel injector clips unplugged.
Here�s why
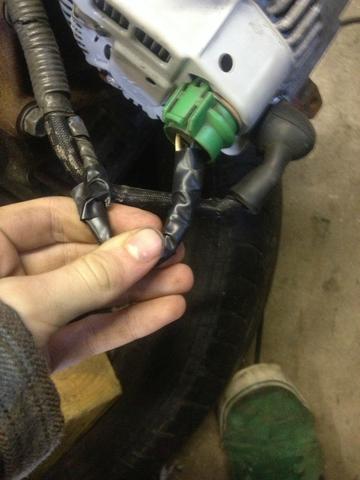
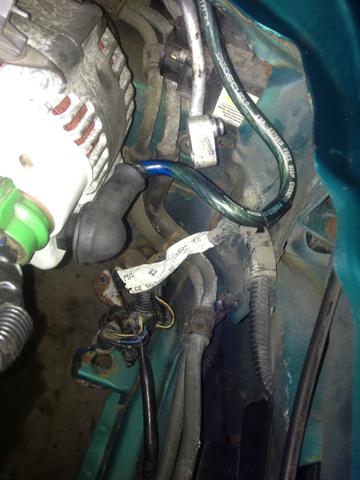
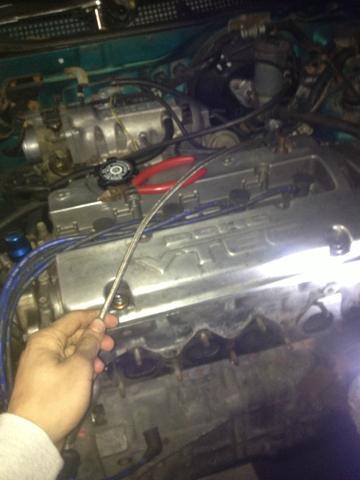
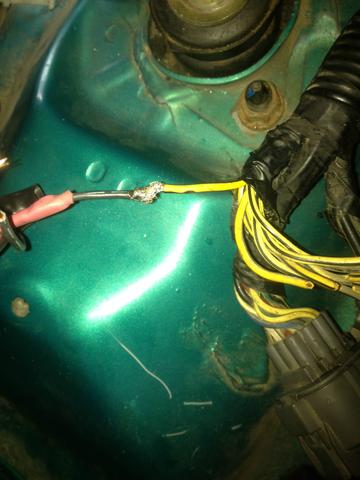
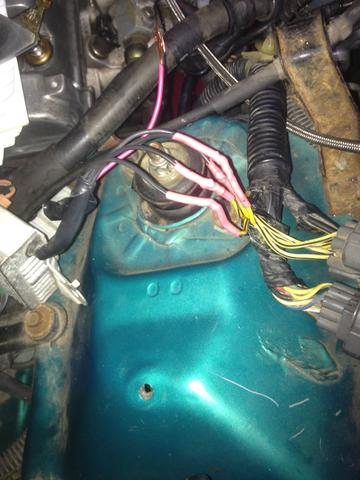
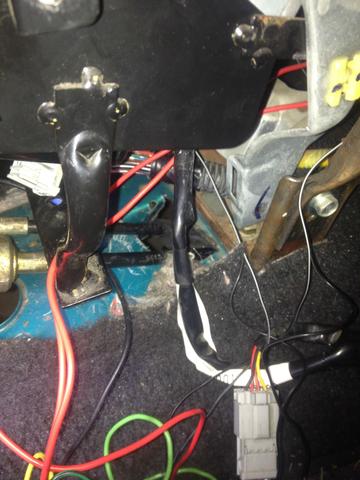
Resistor Box Wiring:
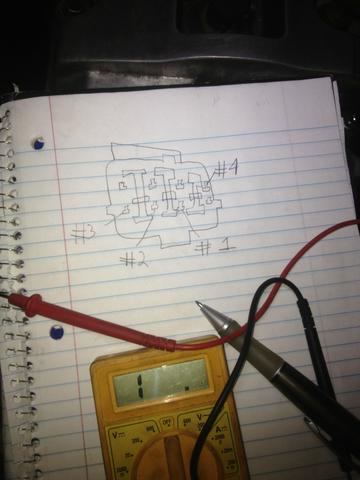
To wire the resistor box go on the driver�s side shock tower harness and you�ll see a big plug that�s blocked by a plate. Unpin the plate from the plug and grab a notebook and a writing utensil. Draw a sketch of the plug and all the prongs in it.
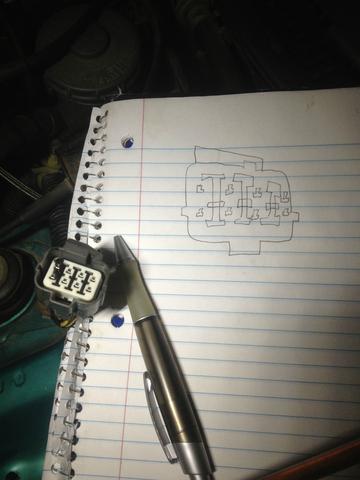
Take your positive lead on your multimeter and probe that into the fuel injector. Take your negative lead and poke around the distribution block plug until you get continuity.
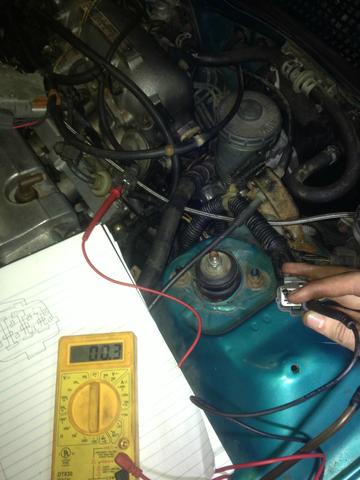
Mark that prong on your drawing. Do this for all 4 injector clips and mark them all down on the drawing.
Mine looked like this
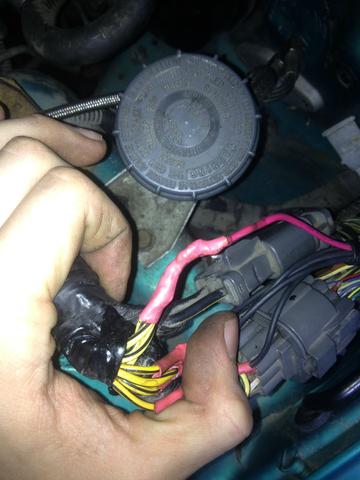
Then grab your resistor box and strip every wire. There should be 4 of the same color wires on the box and one different colored. Mine was 4 black 1 red.
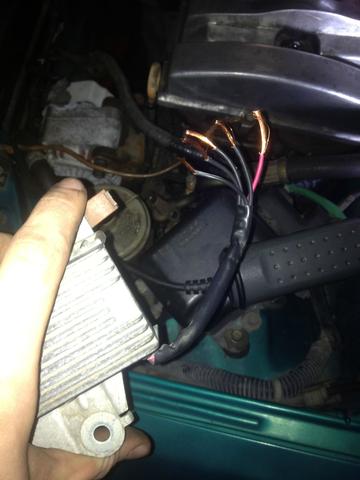
Take 1 black wire and solder it to one of the wires you marked on the distribution block plug. Do this to the 3 others also. It does not have to be in any particular order just make sure your connecting the marked ones.

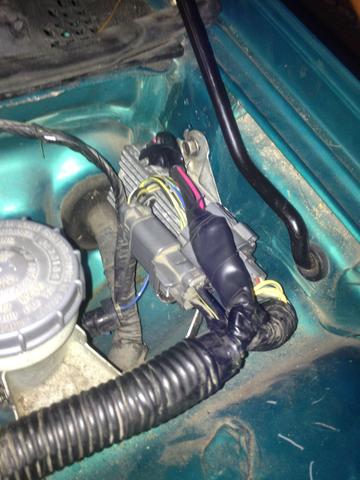
With the 1 different colored wire you have left take that and solder it into the other 4 wires you have left on the distribution block plug. Yes solder them all together. Once you�re done with that and you�ve heat shrinked everything tape em up and mount your box by the master cylinder if you�d like.
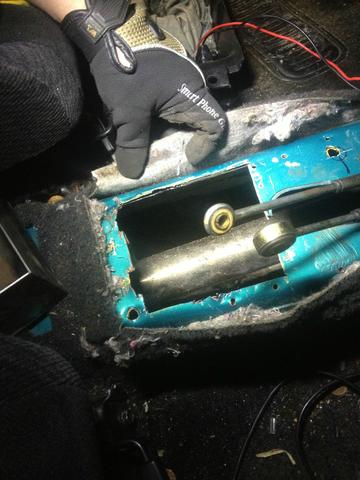
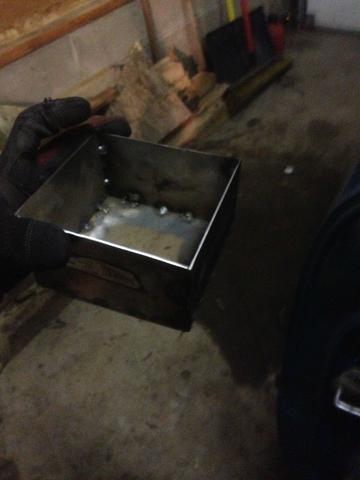
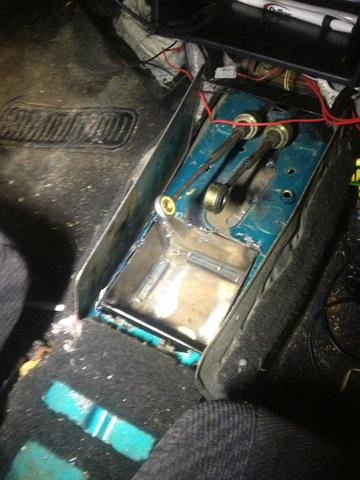
Shifter box/cable routing:
Once again there is no way too beat around the bush on this one. It sucks. I had one hell of a time getting this right. You will need to cut a hole in your floor for the shifter and the cables so they can run into your cabin.
Start by running your cables in between your subframe, powersteering rack and the car body.
Firsts things firsts if you have a front swaybar, take it out. All it will do is **** you off and make you wanna take an air hammer to it. (Ask me how I know )
)
To do this you need to start off to the side of your subframe first by your steering gear and there will be a little space to put the cables ends through. With manual racks I have heard this is a little easier but I have powersteering stock so I had to deal. Now go up top and grab those lines and bring them to the transmission and put them on. Go back underneath and look at your subframe. You�ll see a little gap where the car body sits a bit higher away from the subframe. That�s where you have to jam the cables into. Grab the cables and pull them into that little grove I was talking about.
Hook your swaybar back up now.
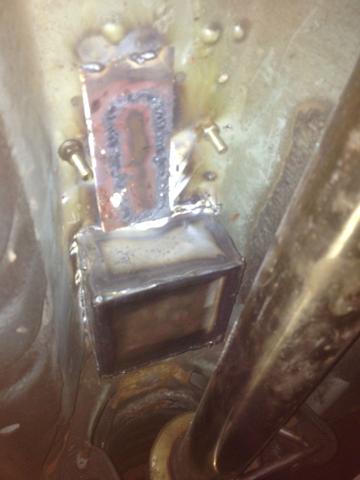
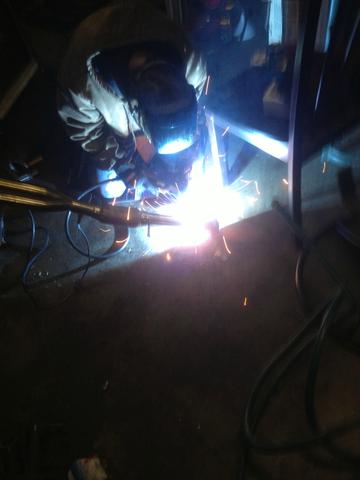
Now run the cables up into the cabin and hook them up also. Bolting the shifter mechanism down is pretty self-explanatory but a little tip is to hike the back of the box up a bit too keep the shifter cables as straight as possible. The less sudden bends and crimps in the cables the smoother the shifting will be. Test your shifter out! Mine worked great! To cover the holes me and my buddy fabbed up a little box and welded that box to the floor.
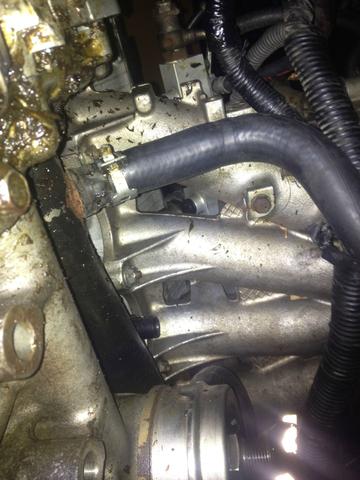
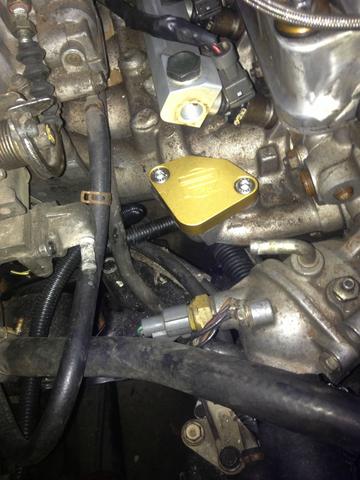
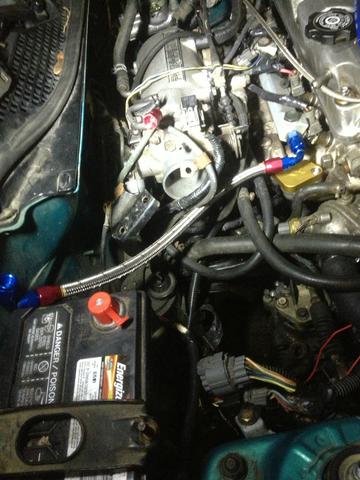
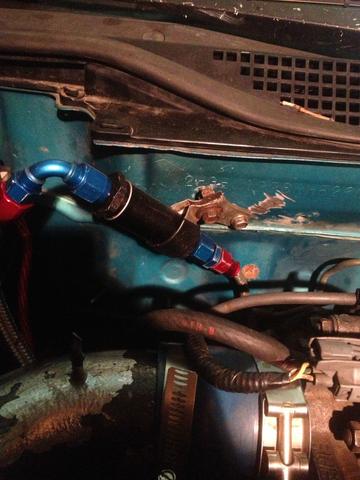
Fuel line:
For the fuel line I decided I wanted to run with an inline filter and custom braided line. So I got ahold of Anplumbing.com and ordered in a filter, 90 fittings, a braided hose and a hardline fitting. If you have a stock fuel rail for an h22a your fuel inlet will be on the left side so you too will need to improvise a fuel line. When I bought the motor it came with an AEM rail so it was tapped for -6n on both sides and I figured why the hell not? I wasn't using EGR anyway so I bought a block plate and hook up then line. I enjoy the look a lot more of a smaller filter and braided line. I�d recommend going my route but most hose places can make a custom line for you too.
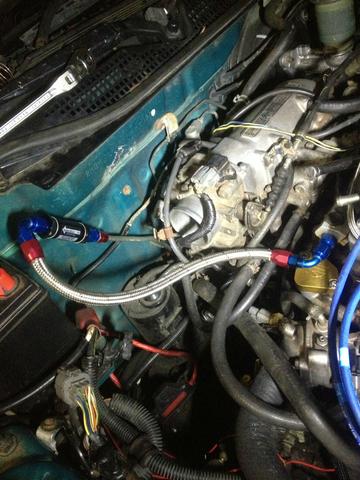
[DO NOT FORGET TO SECURE THE FUEL FILTER
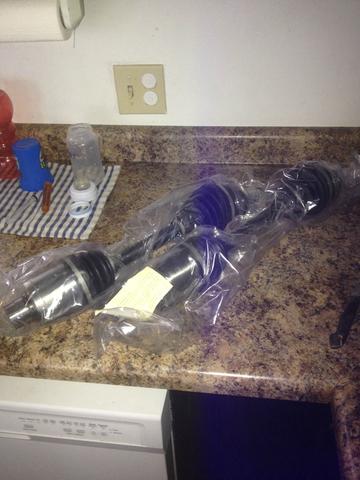
Axles:
For the axles you have multiple options.
1. The accord midshaft with 90-93 integra axles. You will have to change the inner snout of the passenger side to the accord/prelude inner snout because it�s a tid bit longer. Raxles, DDS or any axle shop can make this setup for you.
2 .I choose to go with the prelude midshaft and custom axles from Innovative. If you are looking to go this way you must have the prelude midshaft as Hasport and Innovative only make swap axles for that intermediate shaft. The prelude shaft has a male end and the accord shaft has a female end. Yes, they are a bit more expensive but I�d rather have reliability and a piece of mind.
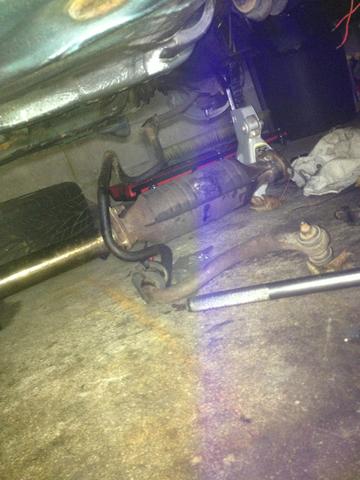
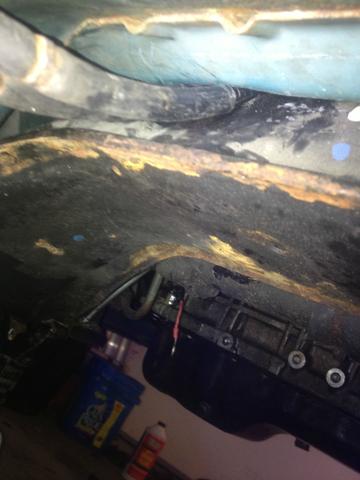
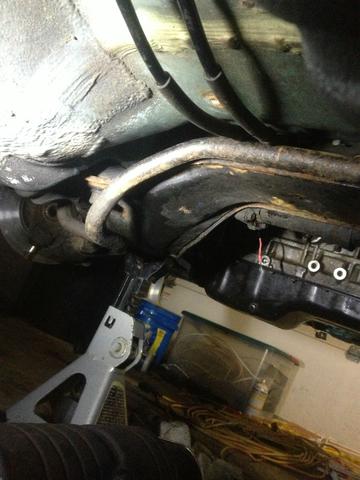
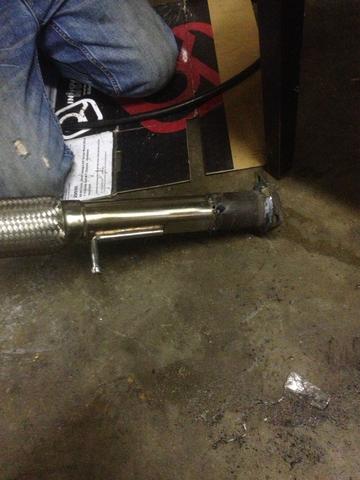
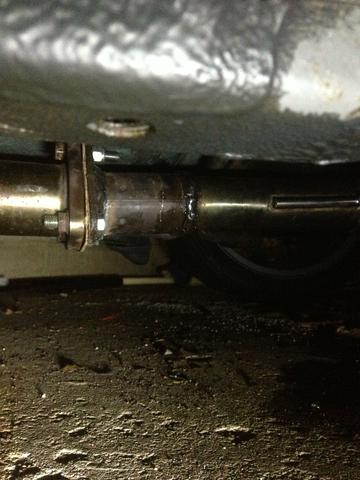
Exhaust:
So close!!!!! Alright for the exhaust you will need to customize it somehow. Whether it�s making the header shorter and changing the flange or relocating the cat do whatcha gotta do.
Air intake:
For the air intake your old civic one won�t work unless you have the stock intake which is pretty unlikely (amirite?) You�ll have to find or buy a stock intake, an em1 civic CAI or a prelude CAI
Powersteering:
I do plan on running powersteering eventually. Right now I just have the system halfass plugged as I don�t drive the car during winter. But you have two options
1. Loop the P/S lines, there is a thread on it I�ll look for it. Looping is fully reversible
2. Get a 97-02 pump and bracket and customize a line.
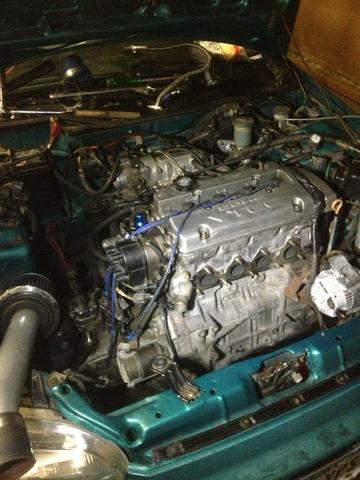
Start up:
Fill up all your fluids; make sure you�re not leaking anything. Fire her up and listen to the sound of our people. You my friend just completed your swap.
Friendly H series civic reminders:
1. You cannot ride low you will bind, you will break axles like toothpicks
2. The oil pan sits pretty low to the ground. Be cautious. I�m on 17�s with 45 series tires with about an inch of wheel gap and the pans still only about 4� from the ground.
3. It wouldn�t hurt to beef the suspension up a little more now. Especially with the bit of extra weight over the axles like that. I run progress #450 in front and #350 in back and I handle great!
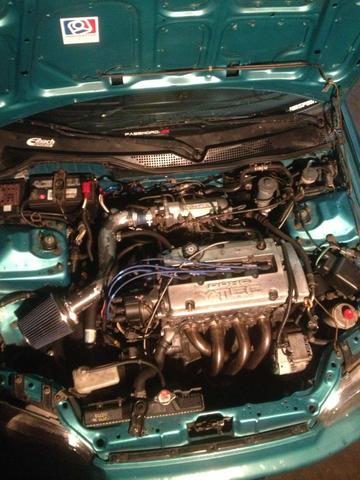
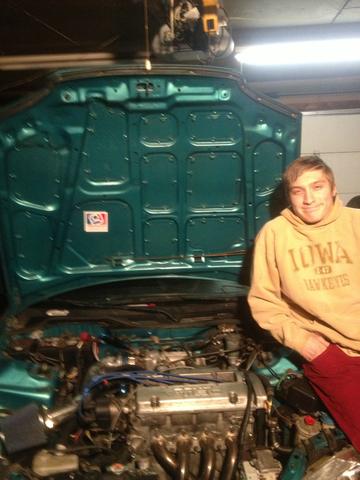
Me and my baby
Thanks for viewing!
This swap was done as of:
Dec. 22, 2013
Mods:
I'm not to sure whether I should be posting this in the Hybrid section or this but relocate accordingly.
They day I picked it up
Parts and know how.
Parts information: The parts you�ll absolutely need
-H series motor of course
-Motor mounts. Hasport & Innovative are the only ones in my opinion. But if you must cheap out on the only thing supporting your motor I�m sure Egay will be your go to place. I choose Innovative
-Axles (more detail on that later in the thread)
-A prelude rear mount bracket (I believe some accord ones work also)
-Slim Fan
-Custom clutch line
-92-96 prelude or accord shifter cables and shifter
-Lower radiator hose from a prelude/accord or a 1994 Del Sol Si
-Custom Gas line
-An ECU (p13 or p28)
-Custom exhaust welding
-Honda resistor box
-If you need an alternator belt you can use any 6 ribbed 37� long belt as long as your not running P/S or A/C
-Oil, coolant, fluids
Things you�ll need to know:
-How to do basic wiring
-How to swap a motor
-How to chip an ECU (unless you�re using a p13)
-How to weld
-Basic mechanics
Tools:
- Sockets, ratchets basic tools
-Wire cutters/strippers
-Soldering iron and heat shrink
-Drill
-Sawsall or an angle grinder
-Engine hoist
-Welder
-Multimeter
-Pen/Pencil with paper
If I am forgetting anything throughout this whole thread please let me know!!
The breakdown
Pulling the old motor: Pretty self-explanatory, if you don�t know how you may want to go back to the drawing board.
Old vs New
Engine Bay Prep:
Drill out the spot welds on the transmission mount and rip it off the frame.
Drill holes in the passenger frame rail to fit innovative�s/hasports new bracket mount and tighten them suckers down. We welded in a reinforcement plate.
Take out a/c lines
Clean it while the motors out
Wiring & Ecu options:
I�ll start off by saying you must use the civic motor harness and rewire from there. The prelude one won�t work because of the shock tower plugs being different. Also it is much easier to rewire the harness with the motor out of the car.
For the ecu you can use a p13 ecu (prelude ecu)
Or you can use a P28 that you will have to buy a chip and run a H series basemap for. Personally I went with the p28 for multiple reasons.
1. I had 2 of them laying around.
2. The p28 is completely tunable if I ever decide I need more pep on the step.
3. The wiring. If you use the p28 with a H basemap the computer doesn't recognize some sensors that the P13 does. Thus making wiring a bit less of a PITA.
My chipped P28
Wiring for the P28
-You have to use the Prelude injector clips
- Lengthen the Alt. wires to reach to alt.
-Lengthen the IACV wires
- Lengthen the starter signal wire
-Lengthen the oil pressure sender wire
-Lengthen 02 sensor wires if yours is downstream like mine
-Add a resistor box
- For reverse lights I had to run 2 wires from the plug into my cabin to the old automatic shift harness. IIRC it is the solid green and green with black stripe wires you splice into.
-You won�t have to wire for the EGR, Knock sensor or the IAB�s if you use the p28 as the P28 does not recognize those. For the IAB if you run a vacuum line to it it will work under vacuum just not as effectively
Wiring for the p13
-All the same steps as the p28 except you will have to wire for the EGR, Knock and IAB�s. I�ll provide a link from Poison's thread on that.
https://honda-tech.com/forums/hybrid-engine-swaps-18/%5Bfaq%5D-%2A%2A%2Ah22a-into-civic-eg-ek-information-post-all-h22a-hybrid-info-here%2A%2A%2A-650329/
Getting the motor in:
I will not lie getting the motor in was a bitch. It did not want to budge anywhere and in the civics engine bay it�s a very tight fit. Having an engine leveler would have made this much easier but sadly I didn't have one. I have found through the 4-5 engine swaps I've done it�s much easier to bolt the rear mount up first and go from there.
IMPORTANT NOTE: With Innovatives swap mounts you have to beat the frame in a bit to fit the transmission in nicely. If you�re worried about beating on things you picked the wrong swap haha.
The Motor needed a bit of improvising lol
Motor In:
With the motor in now would be a good time to run your clutch line and install your slim fan. For the clutch line I used a braided 5ft line with a 90 fitting on the master cylinder.
-For the radiator fan my buddy managed to find a prelude fan and those are already slimmed down so we mocked it up with brackets and welded the bottom fan arms to fit.
-You�ll need to replace one of the heater hoses as the old civic one doesn't have the right angles or length.
-Connect your grounds
-Start plugging in your sensors but leave your fuel injector clips unplugged.
Here�s why
Resistor Box Wiring:
To wire the resistor box go on the driver�s side shock tower harness and you�ll see a big plug that�s blocked by a plate. Unpin the plate from the plug and grab a notebook and a writing utensil. Draw a sketch of the plug and all the prongs in it.
Take your positive lead on your multimeter and probe that into the fuel injector. Take your negative lead and poke around the distribution block plug until you get continuity.
Mark that prong on your drawing. Do this for all 4 injector clips and mark them all down on the drawing.
Mine looked like this
Then grab your resistor box and strip every wire. There should be 4 of the same color wires on the box and one different colored. Mine was 4 black 1 red.
Take 1 black wire and solder it to one of the wires you marked on the distribution block plug. Do this to the 3 others also. It does not have to be in any particular order just make sure your connecting the marked ones.
With the 1 different colored wire you have left take that and solder it into the other 4 wires you have left on the distribution block plug. Yes solder them all together. Once you�re done with that and you�ve heat shrinked everything tape em up and mount your box by the master cylinder if you�d like.
Shifter box/cable routing:
Once again there is no way too beat around the bush on this one. It sucks. I had one hell of a time getting this right. You will need to cut a hole in your floor for the shifter and the cables so they can run into your cabin.
Start by running your cables in between your subframe, powersteering rack and the car body.
Firsts things firsts if you have a front swaybar, take it out. All it will do is **** you off and make you wanna take an air hammer to it. (Ask me how I know
) To do this you need to start off to the side of your subframe first by your steering gear and there will be a little space to put the cables ends through. With manual racks I have heard this is a little easier but I have powersteering stock so I had to deal. Now go up top and grab those lines and bring them to the transmission and put them on. Go back underneath and look at your subframe. You�ll see a little gap where the car body sits a bit higher away from the subframe. That�s where you have to jam the cables into. Grab the cables and pull them into that little grove I was talking about.
Hook your swaybar back up now.
Now run the cables up into the cabin and hook them up also. Bolting the shifter mechanism down is pretty self-explanatory but a little tip is to hike the back of the box up a bit too keep the shifter cables as straight as possible. The less sudden bends and crimps in the cables the smoother the shifting will be. Test your shifter out! Mine worked great! To cover the holes me and my buddy fabbed up a little box and welded that box to the floor.
Fuel line:
For the fuel line I decided I wanted to run with an inline filter and custom braided line. So I got ahold of Anplumbing.com and ordered in a filter, 90 fittings, a braided hose and a hardline fitting. If you have a stock fuel rail for an h22a your fuel inlet will be on the left side so you too will need to improvise a fuel line. When I bought the motor it came with an AEM rail so it was tapped for -6n on both sides and I figured why the hell not? I wasn't using EGR anyway so I bought a block plate and hook up then line. I enjoy the look a lot more of a smaller filter and braided line. I�d recommend going my route but most hose places can make a custom line for you too.
[DO NOT FORGET TO SECURE THE FUEL FILTER
Axles:
For the axles you have multiple options.
1. The accord midshaft with 90-93 integra axles. You will have to change the inner snout of the passenger side to the accord/prelude inner snout because it�s a tid bit longer. Raxles, DDS or any axle shop can make this setup for you.
2 .I choose to go with the prelude midshaft and custom axles from Innovative. If you are looking to go this way you must have the prelude midshaft as Hasport and Innovative only make swap axles for that intermediate shaft. The prelude shaft has a male end and the accord shaft has a female end. Yes, they are a bit more expensive but I�d rather have reliability and a piece of mind.
Exhaust:
So close!!!!! Alright for the exhaust you will need to customize it somehow. Whether it�s making the header shorter and changing the flange or relocating the cat do whatcha gotta do.
Air intake:
For the air intake your old civic one won�t work unless you have the stock intake which is pretty unlikely (amirite?) You�ll have to find or buy a stock intake, an em1 civic CAI or a prelude CAI
Powersteering:
I do plan on running powersteering eventually. Right now I just have the system halfass plugged as I don�t drive the car during winter. But you have two options
1. Loop the P/S lines, there is a thread on it I�ll look for it. Looping is fully reversible
2. Get a 97-02 pump and bracket and customize a line.
Start up:
Fill up all your fluids; make sure you�re not leaking anything. Fire her up and listen to the sound of our people. You my friend just completed your swap.
Friendly H series civic reminders:
1. You cannot ride low you will bind, you will break axles like toothpicks
2. The oil pan sits pretty low to the ground. Be cautious. I�m on 17�s with 45 series tires with about an inch of wheel gap and the pans still only about 4� from the ground.
3. It wouldn�t hurt to beef the suspension up a little more now. Especially with the bit of extra weight over the axles like that. I run progress #450 in front and #350 in back and I handle great!
Me and my baby
Thanks for viewing!
 01-11-2014, 01:55 PM
#2
Honda-Tech Member
Good write-up. Nice and thorough. I sent a link to my buddy. He's wanting to do the same swap and this should help out a lot.
01-11-2014, 03:19 PM
#3
Honda-Tech Member

Join Date: Mar 2013
Location: Iowa
Posts: 9
Likes: 0
Received 0 Likes
on
0 Posts
You did a very good job on the write up. Keep in mind tho that we used tig welding to weld the box and cover that hole up, the reason for was there's no splatter w which means no fire or burn marks in the carpet, seats, or exposed wires. Tig welding is easy if u know what you doing but if you don't don't try it! Take your seats out soak the carpet and cover anything remotely close to the weld area

Trending Topics
01-13-2014, 01:02 PM
#11
B*a*n*n*e*d

How much faster is it? Surely that extra torque from the 600cc extra displacement lets you pull pretty hard off the line in a car weighing ~2600 lb.
AND POST VIDEO OF IT RUNNING PLS RESPOND.
AND POST VIDEO OF IT RUNNING PLS RESPOND.
01-13-2014, 02:37 PM
#12
Honda-Tech Member
Thread Starter
Well I have the stupid accord trans on it for now so it pulls decent. I can't wait to get ahold of a prelude trans it'll pull so hard.
I might post a vid.
I might post a vid.
01-20-2014, 08:10 PM
#13
Honda-Tech Member

Join Date: Oct 2013
Location: kelowna.bc canada
Posts: 5
Likes: 0
Received 0 Likes
on
0 Posts
great post buddy,im reading reading reading before i attempt my swap my 98 civic lx is up on stands motor/tranny removed harness out and i have a complete 97 prelude sh in my driveway just got it towed home today it was rear ended so no good but good fore a SWAP my biggest concern about this swap is the wiring ive got the complete car and all its parts plus i have my si. stuff i just pulled out of my lx i did a d16y7 swapout for a d16y8 vtec it wasnt makeing me smile so on to the next swap lol any words of wisdom from ya would be great and im going to post progress as i get going on it....thanks in advance
02-09-2014, 06:40 PM
#15
Honda-Tech Member
Thread Starter
I would also recommend getting a traction bar. Im on 205/45/17's with hankook v2s and all I do is stand and burn all the way through 1st and mostly 2nd.
02-14-2014, 06:06 PM
#16
Honda-Tech Member

i recently bought a 93 coupe with a h22A4 with a M2Y4 trans(prelude trans) not sure what axles and mounts it has but the passenger side axle popped out 2 times in the 3rd week ive been driving it. he said that he got the stuff from the guy who originally had a j32 swap in it he had it and drove it for 6 months no issues. but it happend when i turned out of my drive way and went to go i moved alil and thunk.came out. secound time was at a stop light and went to go and thunk. should i just redo the mounts and axles with hasport stuff? i paid $2K for it. has skunk2 pro coilovers, skunk2 camber kit, 195/55/15 rims off a saturn ion painted black (i know) 3 finger gap so no scrapes, and a full roll cage, nrg removable steering wheel with some italian wheel. planning on doing some racing this summer so id like to fix it in a reliable way. planning on 16s soon
02-14-2014, 07:34 PM
#17
B*a*n*n*e*d
i recently bought a 93 coupe with a h22A4 with a M2Y4 trans(prelude trans) not sure what axles and mounts it has but the passenger side axle popped out 2 times in the 3rd week ive been driving it. he said that he got the stuff from the guy who originally had a j32 swap in it he had it and drove it for 6 months no issues. but it happend when i turned out of my drive way and went to go i moved alil and thunk.came out. secound time was at a stop light and went to go and thunk. should i just redo the mounts and axles with hasport stuff? i paid $2K for it. has skunk2 pro coilovers, skunk2 camber kit, 195/55/15 rims off a saturn ion painted black (i know) 3 finger gap so no scrapes, and a full roll cage, nrg removable steering wheel with some italian wheel. planning on doing some racing this summer so id like to fix it in a reliable way. planning on 16s soon
02-15-2014, 07:47 AM
#18
Honda-Tech Member
i would, but, new member just need to post 2 and wait 5 days till i can do that. this is something i need to get done by the end of those 5 days and was needing some info. Sorry to upset the holy bible rules of hondatech.
03-03-2014, 04:21 PM
#19
Honda-Tech Member
Thread Starter
i recently bought a 93 coupe with a h22A4 with a M2Y4 trans(prelude trans) not sure what axles and mounts it has but the passenger side axle popped out 2 times in the 3rd week ive been driving it. he said that he got the stuff from the guy who originally had a j32 swap in it he had it and drove it for 6 months no issues. but it happend when i turned out of my drive way and went to go i moved alil and thunk.came out. secound time was at a stop light and went to go and thunk. should i just redo the mounts and axles with hasport stuff? i paid $2K for it. has skunk2 pro coilovers, skunk2 camber kit, 195/55/15 rims off a saturn ion painted black (i know) 3 finger gap so no scrapes, and a full roll cage, nrg removable steering wheel with some italian wheel. planning on doing some racing this summer so id like to fix it in a reliable way. planning on 16s soon

Thread
Thread Starter
Forum
Replies
Last Post