Honda: How to Apply Matte Vinyl Wrap
Is the paint on your car showing signs of sun damage, but you can't afford a professional paint job? Then, your other option is to wrap it in vinyl. This article will guide you through the process of vinyl wrapping your Honda Accord or Civic.
This article applies to the Honda Civic/Del Sol (1992-2000), and Accord (1990-2002).
The exterior of your car has been through a lot. Everything from harsh weather conditions to scratches from inattentive pedestrians or drivers. More commonly, sun damages your car's clear coat and causes it to peel over time. This also makes the finish of your paint job appear dull. A professional paint job can cost thousands. Painting the car yourself, without proper knowledge of the craft, can end up with worse results than the condition the paint was in. Luckily, in recent years, enthusiasts have had the opportunity to "wrap" their cars in vinyl. Vinyl comes in many different colors and finishes. Similar to the concept of tinting your windows, vinyl is applied to the exterior of your car, and it can be removed later if you wish to change the color, finish, or because you simply don't like it. Furthermore, the vinyl can protect your paint, and (when removed) will not leave any residue behind. The best part is that if you do it yourself, it only costs a fraction of the price for a professional paint job!

Materials Needed
- Three rolls of vinyl wrap
- Heat gun
- Various squeegees
- Razor blades or X-Acto knife
Step 1 – Wash and detail car
Before the vinyl wrap can be applied, the car's exterior must be squeaky clean.
- Wash your car, and dry it thoroughly.
- Use a clay bar to remove any stubborn dirt and grime.
- Park your car in a shaded area. Preferably in your garage, so no dirt can creep underneath the wrap.
Step 2 – Cut the vinyl wrap to fit
- Choose a panel of the car you wish to wrap first.
- Unroll the vinyl wrap over the panel, leaving enough to overlap the panel's edges.
- Measure the wrap twice to make sure you have enough for the entire panel.
- Then, cut the wrap.

Figure 2. Wrap should overlap the entire panel. 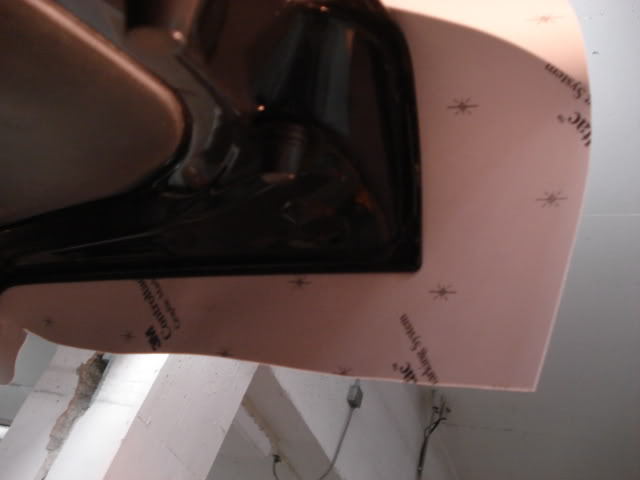
Figure 3. Excess wrap around the corners and edges.
Pro Tip
People have recommended starting with the hood because it's the biggest area. This can be challenging and time consuming. Alternatively, you can start with a smaller piece like a fender.
Step 3 – Apply the vinyl wrap
After the vinyl wrap is cut, it can be applied without any adhesion.
- Remove the backing film from the vinyl.
- Apply it to panel, and make sure to lay it down smoothly over the corners.
- Also, use a heat gun over the corners while you are applying the wrap. Be careful not to use too much heat.
- Use a squeegee to further flatten the wrap and remove any excess air bubbles or looseness.
- Apply vinyl wrap to the remaining desired panels of your car, following the same steps as above.

Figure 4. Pull the wrap smoothly over the panel. 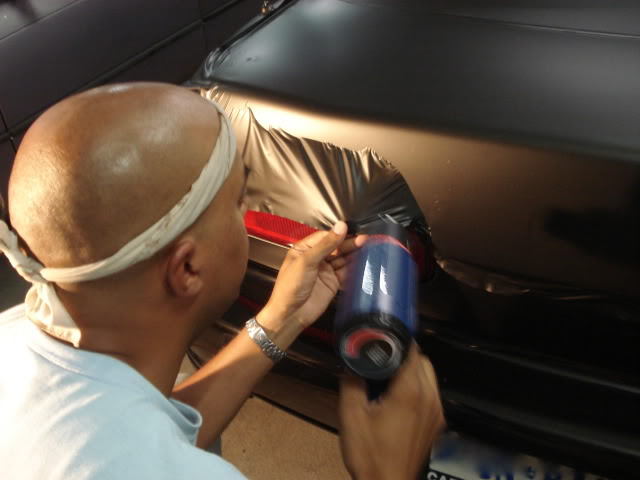
Figure 5. Use the heat gun to loosen the wrap. 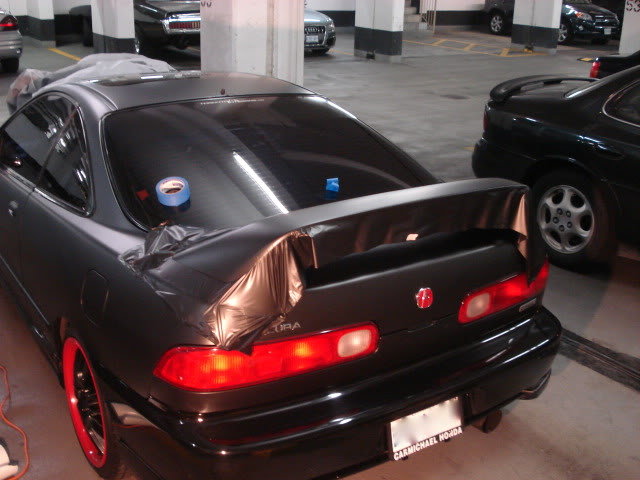
Figure 6. Cover one panel at a time.
Featured Video: Carbon Fiber Vinyl Roof Wrap
Related Discussion
- Matte Black Vinyl Wrapped Integra - Honda-Tech.com