Honda Civic: Why Does My Radio Turn On and Off?
There are a few logical explanations as to why your radio acts like it's possessed, so don't be scared. Read on to give your radio back its functionality. This article will go through the reasons why your Civic's radio is malfunctioning, and what you can do to resolve it.
This article applies to the Honda Civic/Del Sol (1992-2000).
The way your radio works can be quite complex. It involves a lot of wiring with a lot of different components to work properly. But what can you do if your radio consistently turns on and off by itself? There are a few reasons why this might be happening. Some of the reasons might be issues with the wiring, the pilot relay, or even a faulty alternator. Perform these diagnostic steps to solve the problem with your Civic's radio.
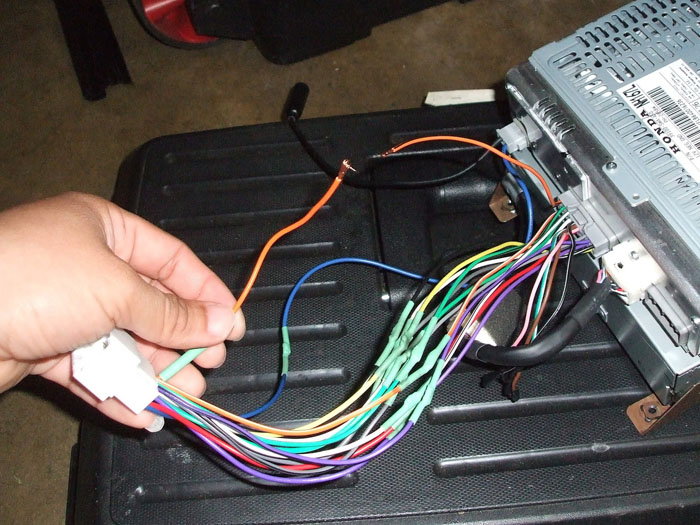
Step 1 – Check the radio wiring
Faulty wiring might have caused a short. Repairing the problem yourself will cost you between $10 to $15, and between $60 to $80 at a shop. This DIY project should take you 25 to 45 minutes to complete.
Most intermittent radio problems are usually traced back to faulty wiring. This is one of the easiest fixes, and the reason why It's the first one recommended to check.
In order to identify faulty or damaged wiring, follow these steps:
- Remove the radio unit.
- Trace every wire originating from the radio unit to the ground and power connectors.
- If anything is cracked or loose, replace it with a 16 gauge wire.
If all wires are intact and the radio is still not functioning properly, move on to the next step.
Step 2 – Check the ground wire
The ground wire may have come loose or has shorted. Repairing the issue yourself will cost between $4 to $7, and $50 to $65 at a shop. This DIY project should take 10 to 15 minutes to complete.
The ground wire acts as a circuit or "return path" for the electricity to loop, and work properly. So if your ground wire is loose or damaged, the electrical circuit that your radio operates through will not be complete, causing it to cut out or not work at all.
To check the ground wire:
- Run your fingers through the black wire coming from the back of the radio unit. This is the ground wire.
- Run your fingers completely through the wire, and inspect its condition.
- Make sure the ground is in good condition, and is tightly secured with the bolt or nut.
- Make sure the ground wire connected to the radio unit is tightly secure as well.
- if the wire is loose or damaged, either wrap it in electrical tape and tighten it or replace it with a new one.

If the ground wire is in good condition and is properly secured, move on to the next step.
Step 3 – Check the fuse and pilot relay
The fuse could be blown, or the pilot relay could be loose and not functioning. The DIY cost for repairing this problem is between $5 to $16, and it will cost you $50 to $65 at a shop. This repair should take you 10 to 15 minutes to complete.
Pull out the fuse for the stereo unit from under the hood. If it's blown, replace it with a new fuse of the same amperage. If it's not blown, check the pilot relay.
Pilot relays are installed when major components such as additional lights, big stereos or other high power equipment is installed on a car. They act as "buffers" to protect electrical components from harmful currents. If damaged or loose, the pilot relay could be drawing an additional surge of power away from the radio, causing it to rob it and other components of vital power. Look to the owner's manual for the proper location of your radio's pilot relay. Visually inspect the relay to make sure it is tightened and not damaged. Tighten it if it's loose, and test the radio. If it's still not functioning properly, replace the relay and test the radio again.
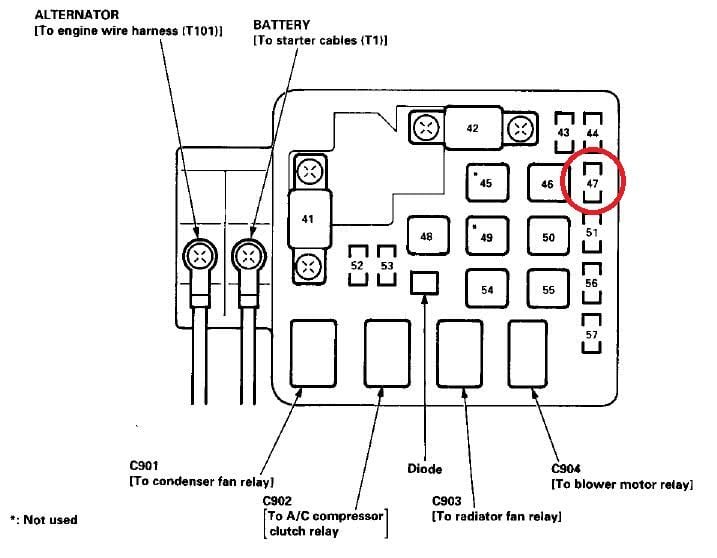
Figure 3. Location of audio unit fuse (circled in red) under the hood of a Honda Civic. 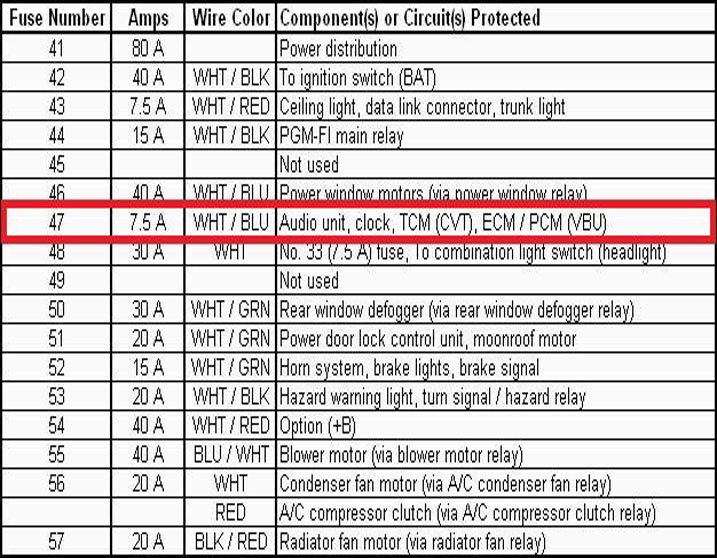
Figure 4. Honda Civic diagram of under-hood fuse box with the audio unit fuse number circled.
If the fuse is not blown and the pilot relay is intact or securely connected, move on to the next step.
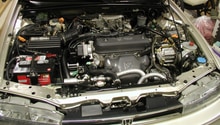
Step 4 – Check the alternator
The alternator might not be providing enough power to other components. Repairing the problem yourself will cost you between $125 to $165, and it will cost $265 to $330 taking it to a professional. It will take you an hour to two hours to complete.
The alternator provides your car with the necessary power to keep your engine running, the battery charged, and the electronic components working sufficiently. So if your alternator isn't working properly, there could easily be a lack of voltage needed to supply power to the electronic components like your radio. To diagnose if this is the cause of the problem, use a voltmeter to measure the voltage output coming from the alternator, while the engine is running. If it produces less than the optimal range of 11 to 12 volts, it may need to be replaced.
If the previous steps have not solved the issue, you may want a second opinion from an automotive mechanic before replacing the alternator. The problem could be caused from a more complicated source.

Related Discussions
- Alternator Affecting the Radio - Honda-Tech.com
- Pilot Relay Causing Radio to Turn Off - Honda-Tech.com