Honda Civic: How to Replace Your Side Mirror
Here's the cost-effective guide to replacing the side view mirrors on your Honda Civic.
This article applies to the Honda Civic (1992-2000).
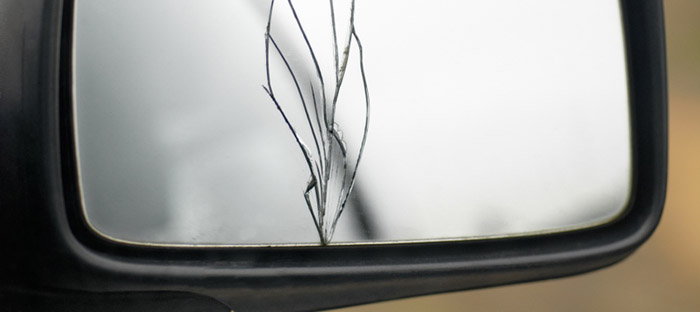
From the moment you turn the ignition in your Honda Civic, you are reminded of the importance of your side view mirrors. These reflective surfaces assist you in navigating through traffic, and help you avoid costly collisions when merging. Because of the cost and required skill level to replace your side view mirrors, it wouldn't be practical to visit your local Honda dealership for this repair. Simply grab your tool belt and head out to your garage. You'll be done in no time!

Materials Needed
- Pre-cut mirror replacement (if necessary)
- Black rubber sealant (optional)
- New Honda Civic Side Mirror (if necessary)
- Glass cleaner
- 8mm socket and ratchet
- Flat head screwdriver
Stick on Glass Replacement
Step 1 – Place the pre-cut mirror
This step will show you how to replace the glass without replacing the entire side mirror assembly. If the extent of damage to your mirror is a minor crack, it is recommended repairing this damage with a pre-cut mirror. This is the cheapest and easiest solution if it is only the glass that is damaged.
- First remove any loose pieces of broken glass, and wipe down the base of the housing using glass cleaner.
- Peel back the adhesive strip from the back of the pre-cut mirror. You might also want to reinforce the bond with a layer of black rubber sealant.
- Apply the adhesive to the mirror housing, and hold for several seconds to ensure it is securely mounted.
Full Replacement
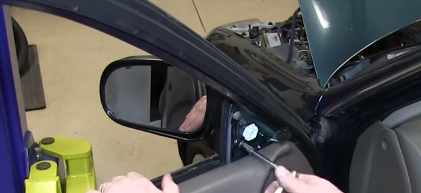
Step 1 – Remove triangular panel and disconnect the harness
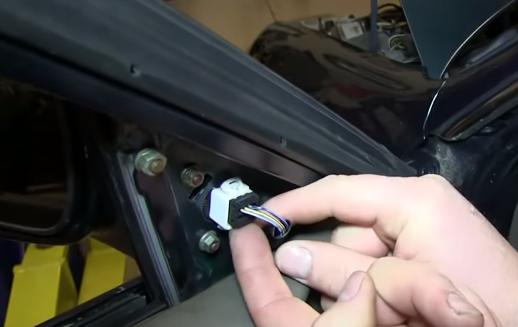
To replace the entire side mirror assembly, begin with removing the triangular panel and disconnecting the harness.
- Remove the plastic triangular panel that covers the side mirror mount and harness.
- Then disconnect the harness by releasing its bottom plastic locking tab, and pulling it straight out.
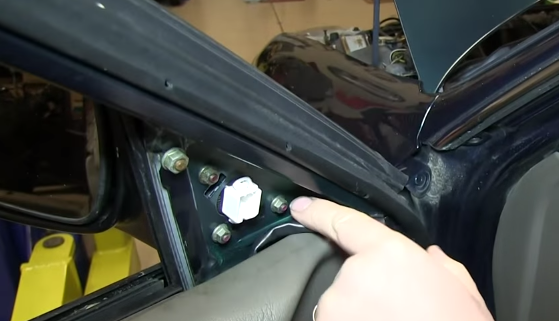
Step 2 – Remove the old side mirror
- Remove the three 8mm nuts surrounding the harness.
- Use a flat head screwdriver to pry and loosen the mirror housing from the door trim.
- Then, gently tug the mirror housing up and down to pull it off.
Step 3 – Prep the new side mirror
New Honda Civic side mirror packages should come with a padding to cushion the mirror housing.
- Peel off the triangular paper adhesive, and attach it to the new side mirror mount.
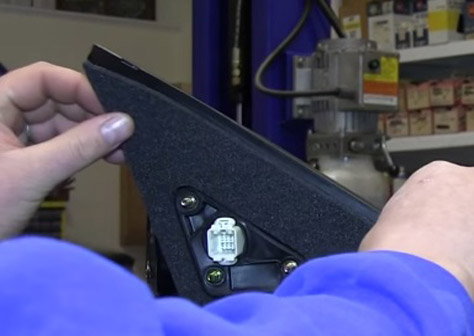
Figure 4. Apply padding to the new side mirror housing. 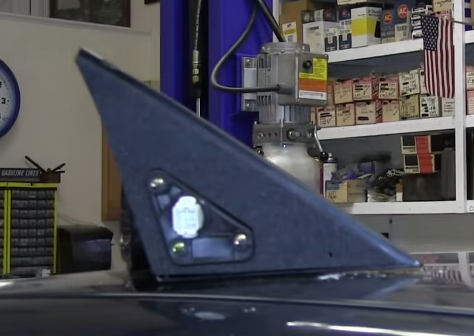
Figure 5. Properly applied adhesive padding.
Step 4 – Install and test the new side mirror
Install the new side mirror in reverse order to the steps above.
- Line up the new mirror assembly to the mount, and slowly ease it into the door trim.
- Bolt and secure the mirror mount with the three 8mm nuts.
- Reconnect the wiring harness.
- Snap the side mirror panel back into place.
- Turn the car on and confirm that the new side power window is working.
Featured Video: How to Install/Replace Side Mirror
Related Discussion
- Replacing the Driver Side Mirror - Honda-Tech.com