Honda Civic: How to Install Power Mirrors
Are you tired of reaching over to the passenger's side view mirror to adjust it? Are you tired of doing it for the fifth time because it is just not perfect? Power mirrors in your Honda Civic are the stress-reducing option, so continue reading to find out how to install them.
This article applies to the Honda Civic (1992-2000).
This how-to article will demonstrate how to convert your Honda Civic's manual side view mirrors to power mirrors. 5th generation (and 6th generation) Honda Civics did not have power mirrors as a standard feature, which nowadays can be quite an annoyance. If you're looking to heighten your control of blind spots and curbs, follow these steps. This job requires some wiring and soldering, so it is suggested having this installation done at an auto shop if you are not comfortable doing it yourself.

Materials Needed
- OEM power mirrors from donor Honda Civic 1996-2000 EX, LX, or Si
- OEM power mirror switches from donor Civic
- Wiring harness (with door-jamb grommet)
- Soldering kit
- Electrical tape, wire looms, and zip ties
- Option plug or female quick disconnect
- 8mm socket and ratchet
- Phillips and flat head screwdrivers
- Panel popper and pick
- Wire strippers
Step 1 – Remove the door panels
- Before starting, disconnect the negative (black) terminal from the battery.
-
With a flat head screwdriver, gently pry out and remove the tweeter cover.
-
Located on the front of the door panel is a clip. Remove it with a panel popper.
- With a Phillips screwdriver, remove the screws located behind the door handle, and inside the armrest as well. Remove both parts from the door panel.
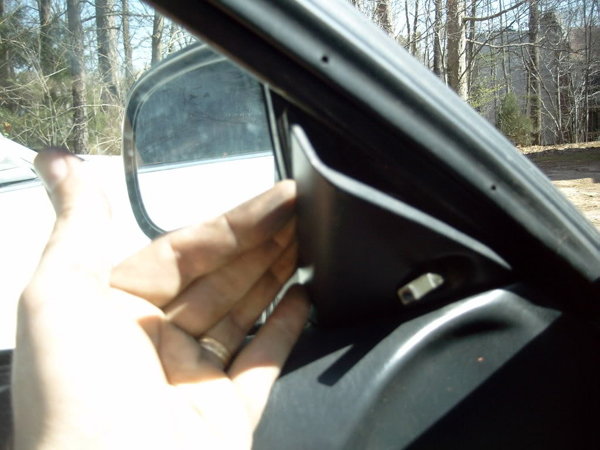
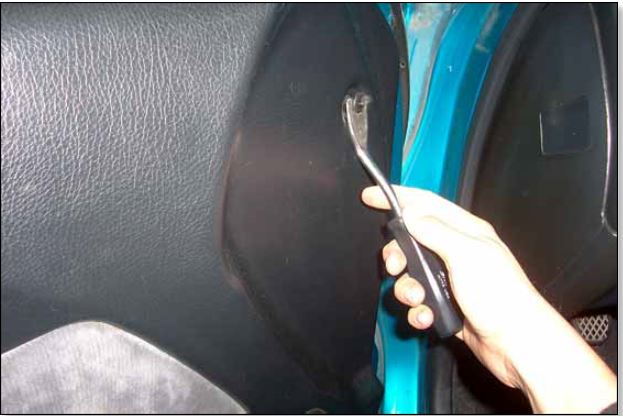
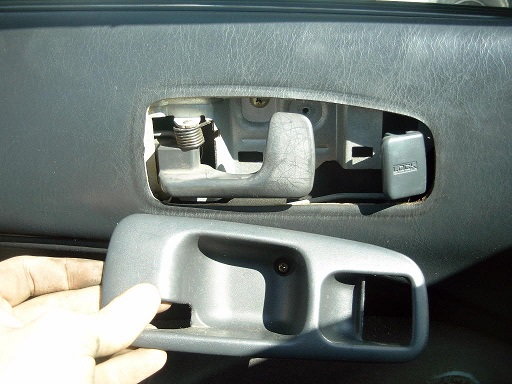
Figure 3. Door handle cover removed. 
Figure 4. Remove screw in the armrest well.
-
A gold clip secures the window crank to the window gear. Slide a pick behind the window crank, hook it onto the clip, and pull it out.
- Pull out the speaker panel, and remove a Phillips screw just below the speaker.
- There are five clips around the inside edges of the door panel, which are securing it to the door. Insert your flat head screwdriver between the bottom of the door panel and the frame.
- Gently pull out the door panel, starting from the bottom. The brittle plastic window trim may get damaged if you start from the top.
- Push the door panel up, and out from the door frame.
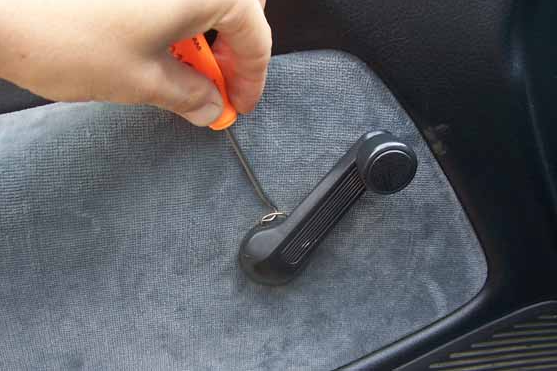
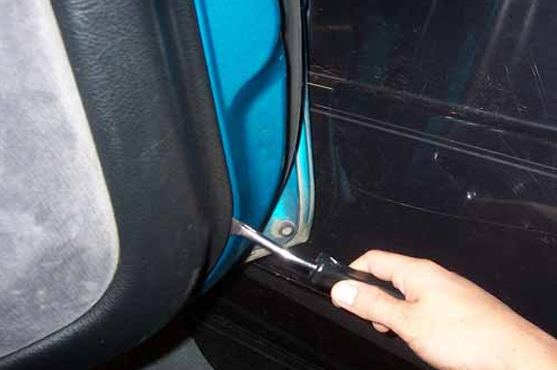
Figure 6. Pry out bottom of the door panel first. 
Figure 7. Push up on the door panel, and remove it. 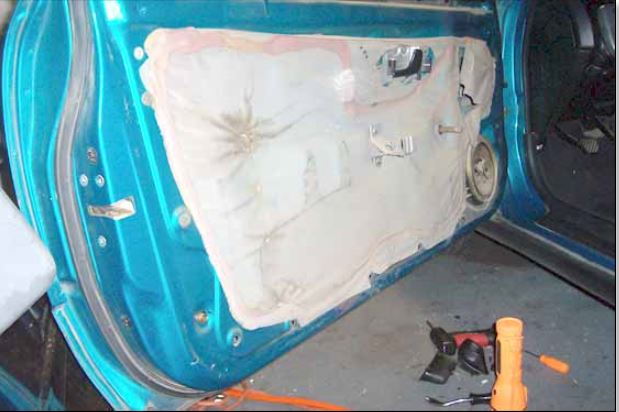
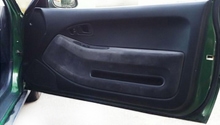
Figure 8. Driver's side door panel removed.
Step 2 – Remove the speaker and door grommet
- Remove the speaker and the door grommet.
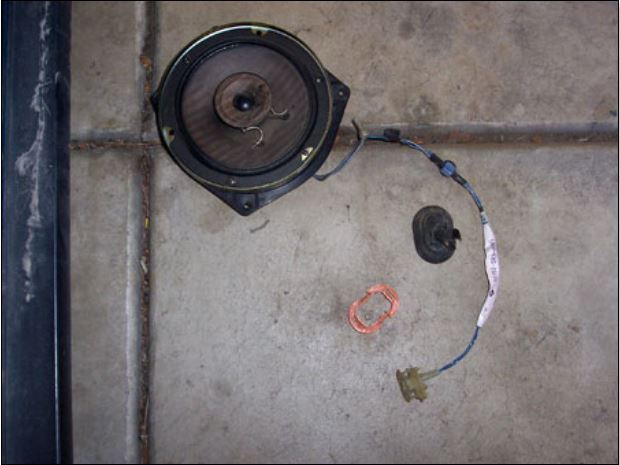
- Remove two pins from the speaker's 2-pin wire harness, so it matches the donor harness connector.
- Insert the speaker wire through the door frame grommet.
- Snap the donor harness connector to the speaker wire harness.
Pro Tip
If you have previously run two wires for the door lock actuator, you can force these through empty pins in the harness.
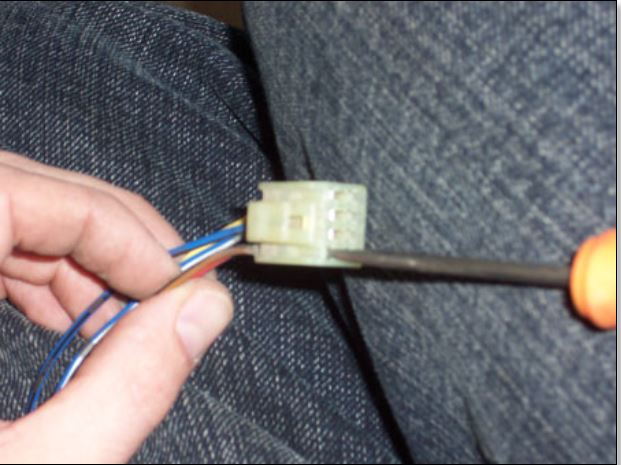
Step 3 – Route the wires
- Route the power window harness underneath the dashboard, and along the front of the heater box.
- Secure the wire harness to the factory wire with zip ties.

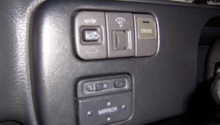
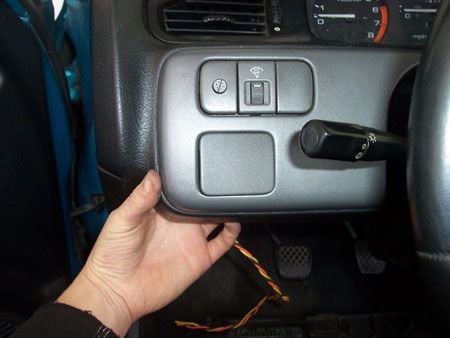
Step 4 – Install and wire the power mirror switch
- From behind the driver's side dash, pop out the delete panel. This is where the power mirror switch will be mounted.
- Push the power mirror switch into the slot, and snap it into place.
- Each mirror has three wires. One wire is the used by both mirrors, the other is used for the power supply, and the last is the ground.
- Keep the yellow/black wires paired with the blue/white wires.
- Keep the yellow/red wires paired with the blue/black wires.
- The yellow/white wire is the common wire (used by both mirrors).
- Do not mix the wires because the mirror movement may be weak, or the mirror directions may be inconsistent.
-
Run all of the mirror wires to the switch.

Figure 14. Wire the power mirror switch. 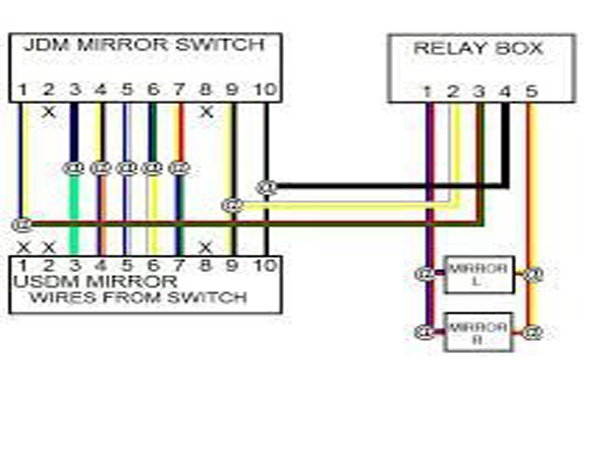
Figure 15. Power mirror wiring diagram.
- The option outputs on the under-dash fuse box provide a clean, easy power source.
- Connect the two power wires from the switch to the relay box. Do so by soldering them to the third power connector from the left. This is the "Ignition 2" power slot, which corresponds to the a 7.5 Amp fuse. Refer to Figure 16.
- Then, secure the ground wire from the power mirror switch to any bolt on the metal door frame.
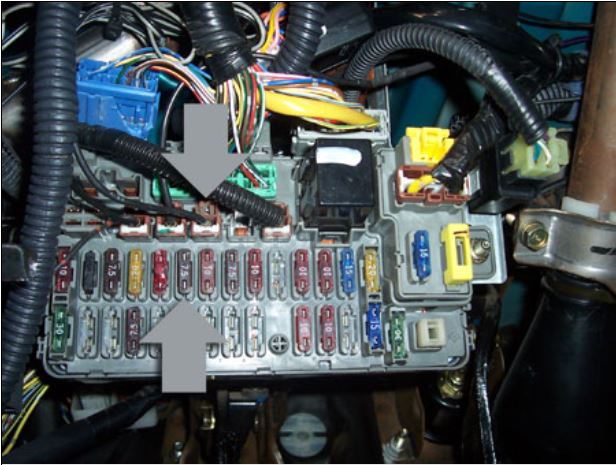
Figure 16. The third one from the left is "Ignition 2." Use the 7.5 Amp fuse. 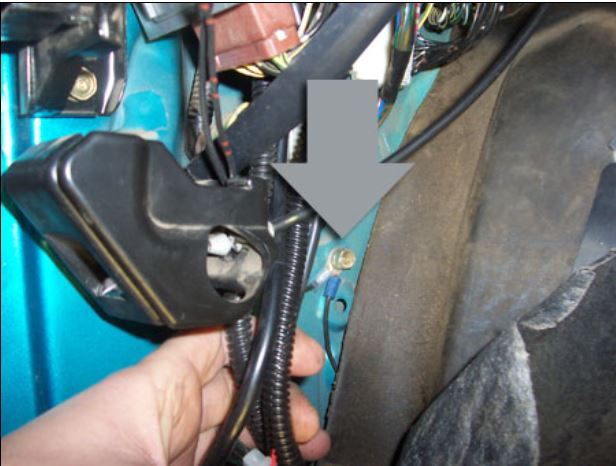
Figure 17. Ground the power wire switch.
- Loom the wire harnesses to prevent them from disconnecting.
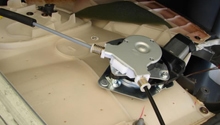
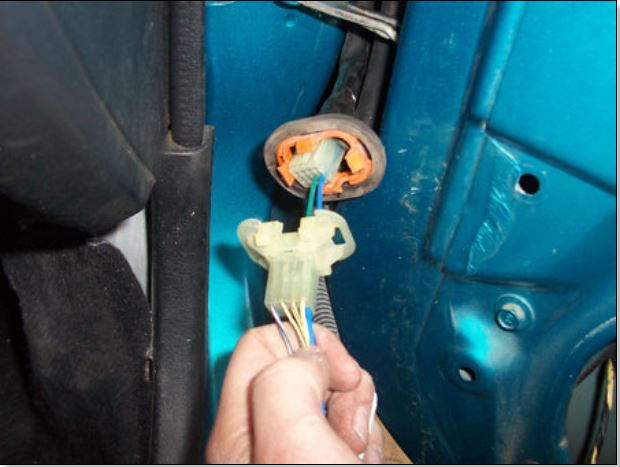
Step 5 – Install the power mirror
- Remove three Phillips screws that secure the manual side view mirror to the door frame. Remove the mirror and set it aside.
- Install the power mirror with the same three Phillips screws.
- Connect the power mirror switch harness to the door harness.
- Reconnect the negative (black) battery terminal, and test the power mirrors.
- Re-assemble the dashboard and door panels.
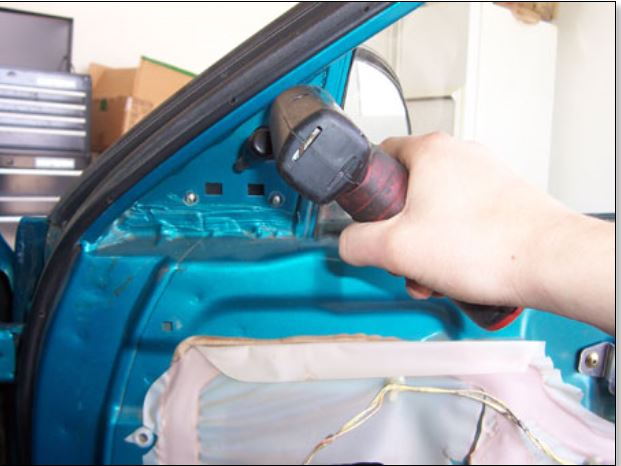
Figure 19. Remove manual side view mirror. 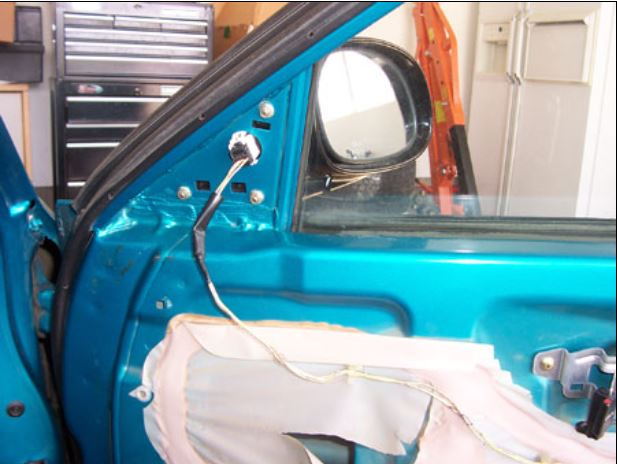
Figure 20. Install and power the power side view mirror.
Related Discussion
- DIY: 1992-1995 Civic EX Coupe - Honda-Tech.com