Honda Civic: How to Install Power Locks
Power door locks can come in handy in a variety of situations, but what do you do if your Civic didn't come equipped with them? Read our guide to find out how to install an aftermarket power door lock conversion kit.
This article applies to the Honda Civic/Del Sol (years 1992-2000).
Power door locks are a convenience feature rather than a necessity, but some people would argue with that statement. Power door locks are not only convenient, but they could also be considered a safety feature, specifically in case of a dangerous situation like theft or an accident. Converting your current manual door locks to power involves quite a bit of work, as well as wiring, so if you feel you are not up to the task, then visiting a shop is recommended.

Materials Needed
- Needle nose pliers
- Adjustable wrench
- Flat head screwdriver
- Electrical tape
- Power Door Lock Conversion Kit
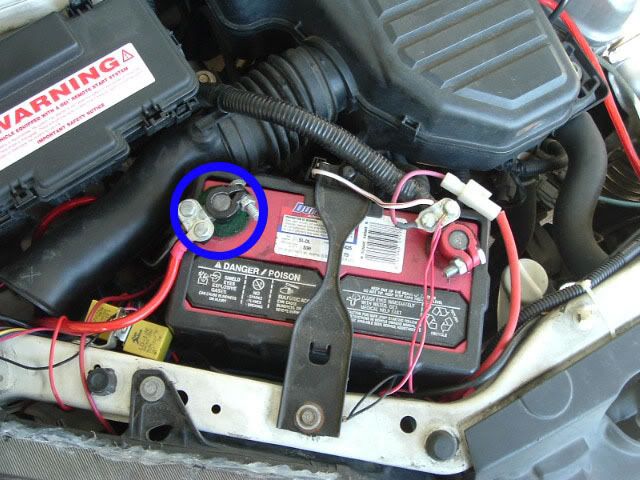
Step 1 – Disconnect the battery
Before you begin any work, use your adjustable wrench to disconnect the battery. Disconnect the negative (black) terminal first, then the positive (red) terminal.
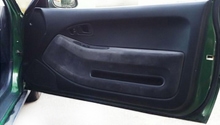
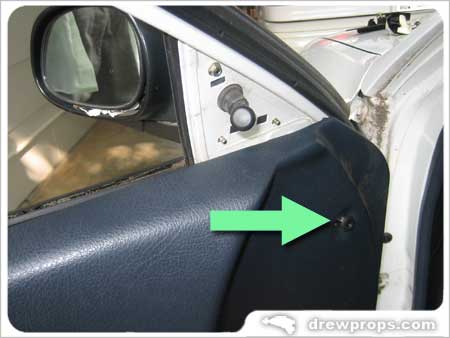
Step 2 – Remove door panel
- Locate the plastic retaining screw located close to the door hinges and unscrew it.
- Push on the door panel surrounding the window roller.
- Use pliers to remove the retaining wire that clips the roller to the door.
- Remove window roller.
- Lift door panel up, remove and set aside. Use flat head screwdriver to pry panel if needed.

Figure 2. Locate retaining points that may keep the door panel in place. 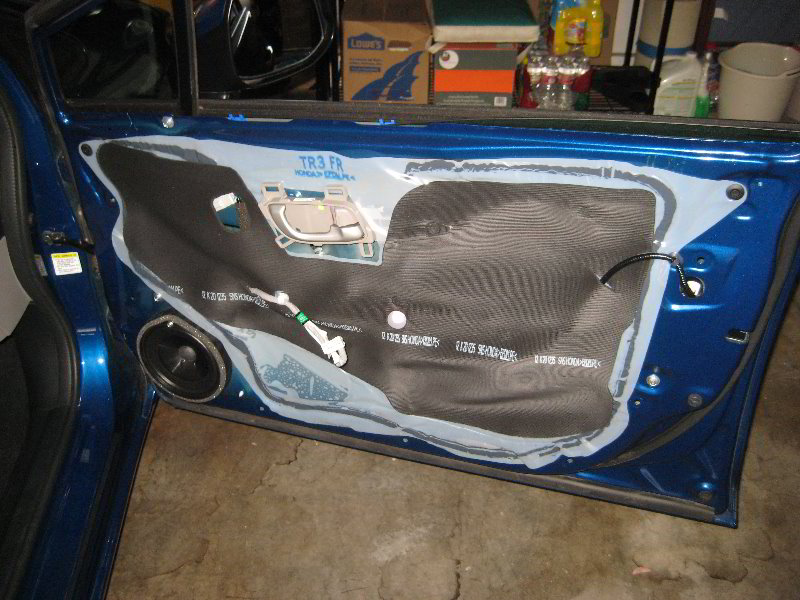
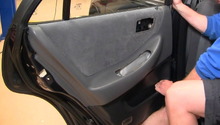
Figure 3. You may have to replace the protective plastic once work is complete.
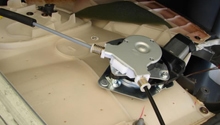
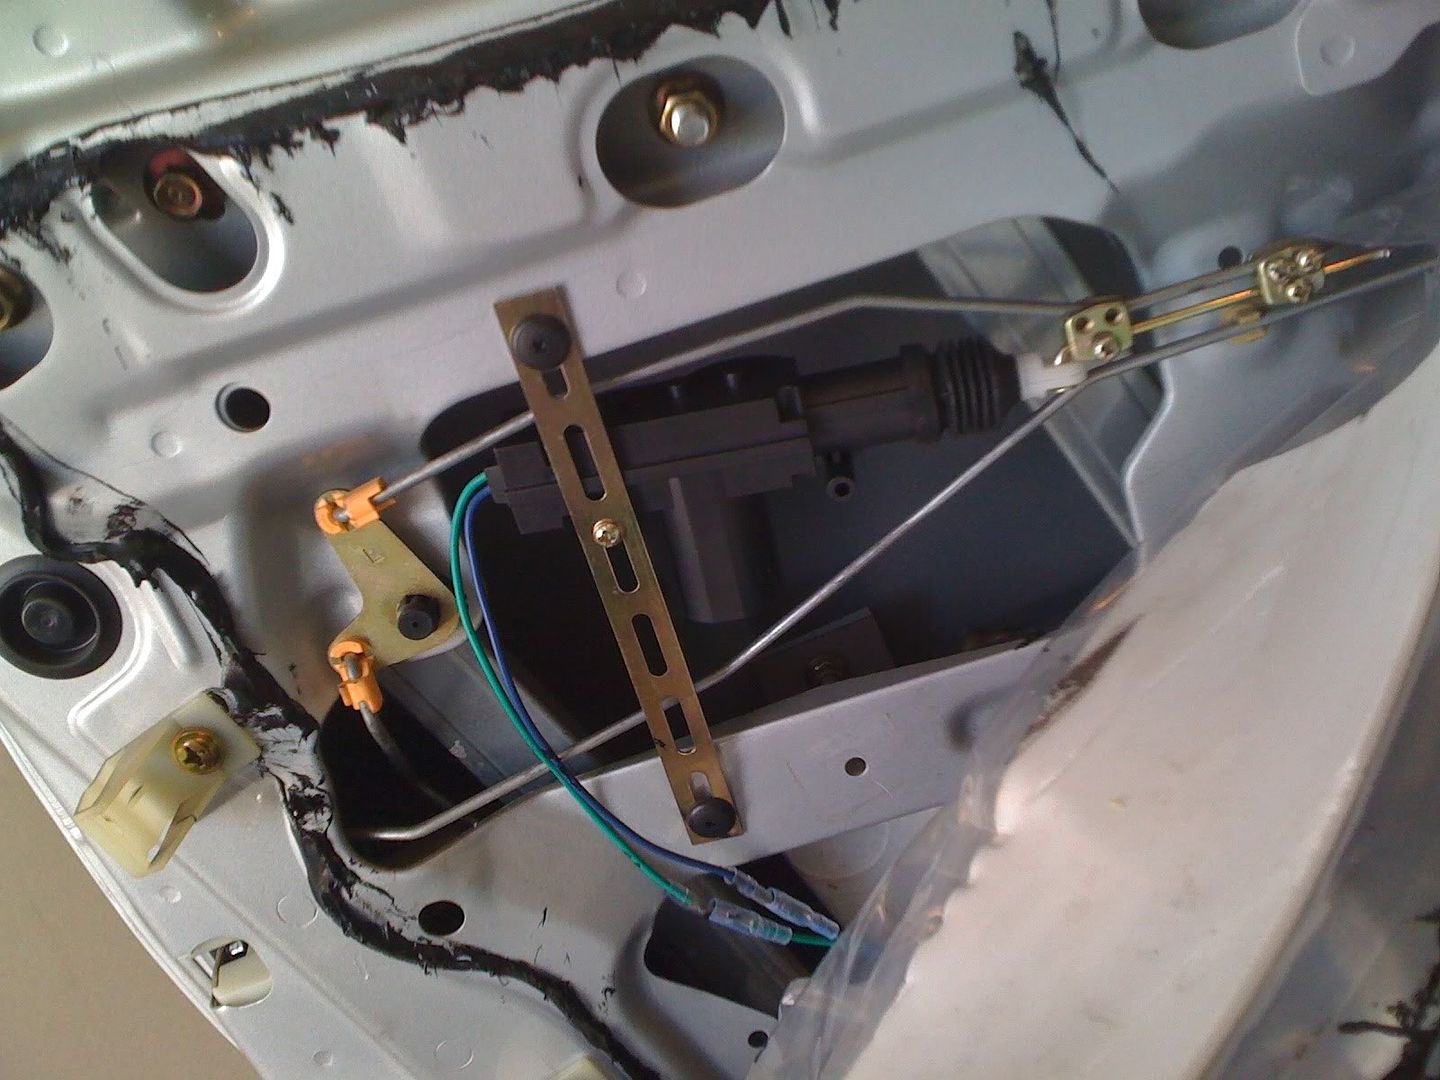
Step 3 – Mount the actuator
- Locate a good spot to mount the bracket. This must be parallel to the factory door lock rod.
- Screw the actuator onto the bracket.
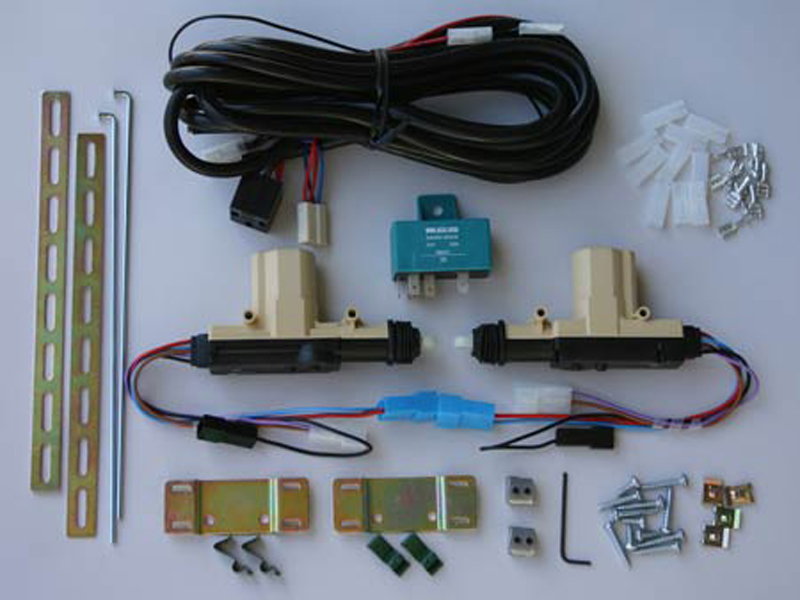
Figure 4. Refer to the brackets on the left. 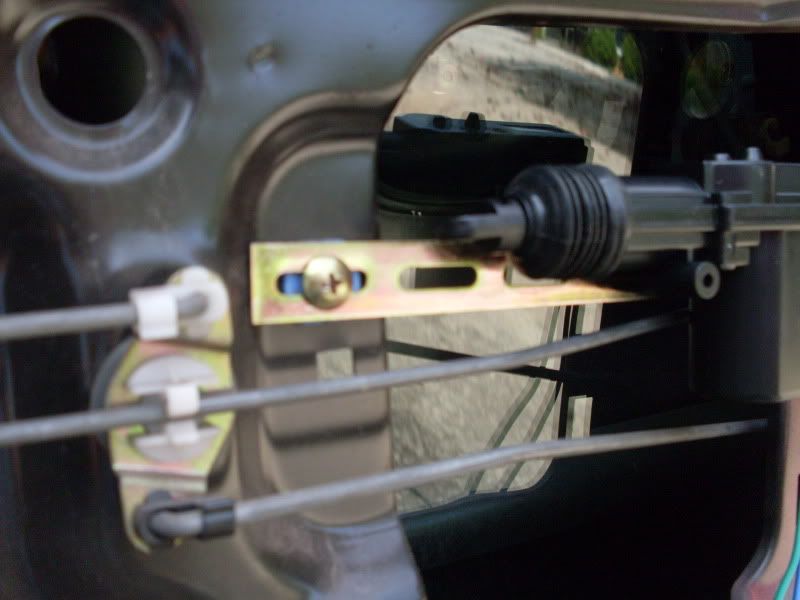
Figure 5. Note the bracket screwed onto the door frame.
Step 4 – Attach adapter rod
It's time to attach the factory door lock rod to the power actuator rod provided with the kit. This will allow the actuator to lock and unlock the factory lock on demand.
- Position both rods parallel to each other.
- Use the clamp to secure both rods together.
Step 5 – Plug in the wiring harness
It's important to run the new wiring properly to avoid any future issues. These following steps will explain how to run the wiring along the door and connect the color-coded wiring harness.
- Locate the factory rubber guide or tube that connects from the door to the main cabin.
- Run the wiring harness out of the door through the rubber tube until it peeks out at the end of it.
- Plug wiring harness into the second harness with a plug connector at the end.
Make sure that none of the wiring is in the way of the window mechanism.

Figure 7. Rubber boot that guides wiring. 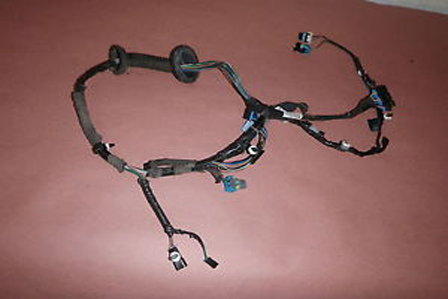
Figure 8. Wiring harness from beginning to end.
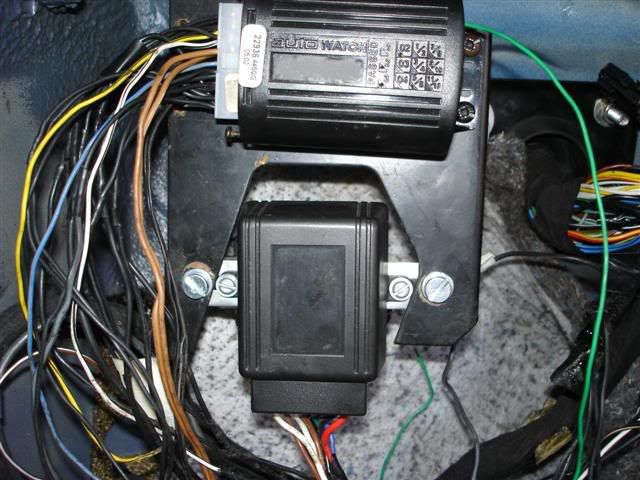
Step 6 – Plug in central locking control box
Plug in the wiring harness plug that is now hanging out the door into the locking control box.

Figure 9. Central locking box. 
Figure 10. Connectors attached to the central locking box.
Step 7 – Provide power
Before you mount the central locking control box, follow these steps:
- Connect the red wire from the central locking control box to a source of 12v power (Use power windows if existent, or cigarette lighter adapter).
- Connect the black wire from the central locking control box to GROUND (Use any bolt or surface attached to the door frame or use the ground for the fuse box).
Step 8 – Finalize installation and reconnect battery
- Use zip ties to mount the central locking control box.
- Use zip ties or electrical tape to organize lose wiring.
- Reconnect battery. Connect negative (black) terminal first, then positive (red) terminal.
Step 9 – Test and replace panel
It's time to make sure everything works properly.
- Test the system by locking and unlocking the door multiple times.
- Remount the door panel.
- Attach window roller.
- Replace window roller retaining wire.
- Screw door panel retaining screw back in.
Featured Video: Installing AutoLoc
Related Discussions
- Step-by-step Guide - Honda-Tech.com
- DIY Door Locks - Honda-Tech.com