Honda Civic: How to Install Amber Red Dash Lighting
Transform your bland, stock white dashboard lighting into a personalized amber glow. This article will go through the steps of how to install amber dash lights onto your Honda Civic. So continue reading to make the interior of your car unique.
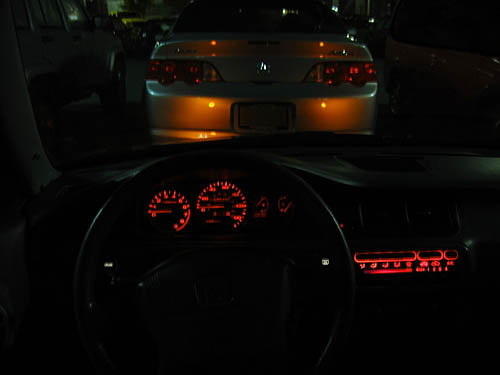
This article applies to the Honda Civic (1992-2000).
Maybe one or more of your instrument panel lights have burnt out. Maybe you simply want to give your dash a face-lift. But no matter the reason, replacing stock bulbs with amber red light bulbs is a simple project, even for the novice DIY-er. The difficulty is from the number of steps you must take to actually access the bulbs, but once you do, the installation is simple.

Materials Needed
- Orange spray paint (optional)
- New automotive bulbs (five #24 and three #74)
- Scotch tape
- Phillips screwdriver
- Flat head screwdriver
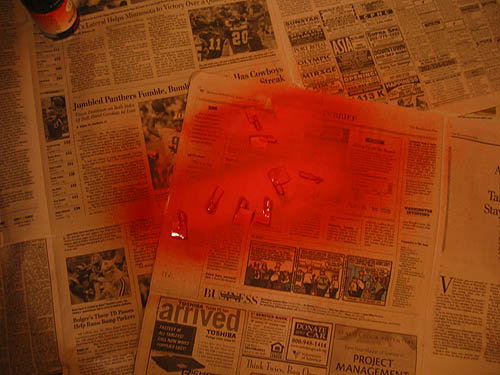
Step 1 – Paint the new bulbs (optional)
There is no reason for you to stick with tired white lights. So if you can't find amber bulbs in the right size, simply paint the white bulbs. Just be sure to replace each bulb at the same time if you decide to go this route. Having different lights on your dashboard may create a distraction, and using bulbs that were installed at different times may leave some lights brighter than others.
- Purchase new bulbs for installation.
- You need five #24 automotive bulbs and three #74 bulbs.
- Wrap each bulb socket with scotch tape, and spray the bulbs with orange paint. You will likely need to apply several coats.
- Let the bulbs dry overnight.
Pro Tip
It is recommended using a can of Testors Competition Orange #1628.
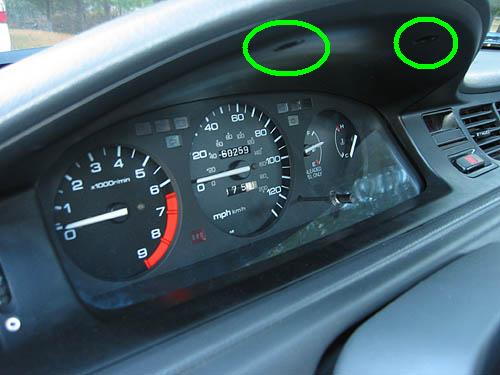
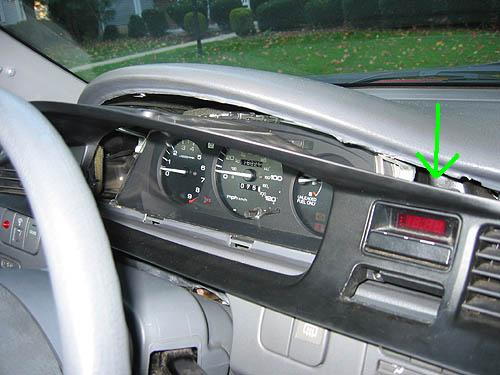
Step 2 – Remove the dashboard screws
- First, remove the negative terminal (black cover) from the battery.
- With a Phillips screwdriver, remove the pair of screws located above the gauge cluster and along the top of the dashboard.
Step 3 – Remove the hazard switch and screw
- Use a flat head screwdriver to carefully pop out the hazard switch.
- Then, unplug the wire harness connected to the back of the hazard switch.
- With your Phillips screwdriver, remove the screw located inside of the slot (on the top left corner).
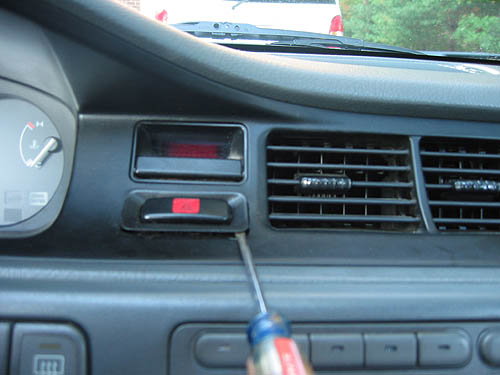
Figure 3. Pry off the hazard switch with a flat head screwdriver. 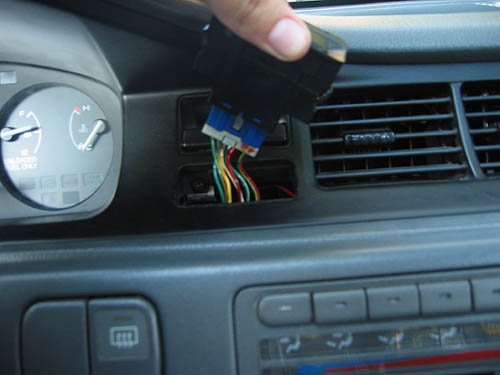
Figure 4. Disconnect the wire harness from behind the hazard switch. 
Figure 5. Remove the screw inside of the hazard switch slot.
Step 4 – Remove the trim piece
- Use the flat head screwdriver to pry out the trim piece. There are six or seven clips holding it in place, so make sure to pry up each clip.
- Once the trim is removed, unplug the wire harness from behind the clock.
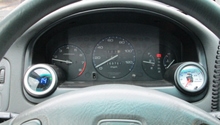
Step 5 – Remove the gauge cluster
- Use the Phillips screwdriver to remove four screws on both sides of the gauge cluster.
- Angle the gauge cluster face down, and slowly work it out of the dash.
- Then, pull out four plugs from behind the cluster to completely remove it.
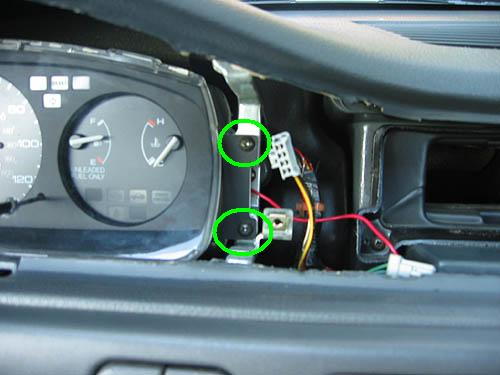
Figure 7. Remove two screws from the right side of the gauge cluster. 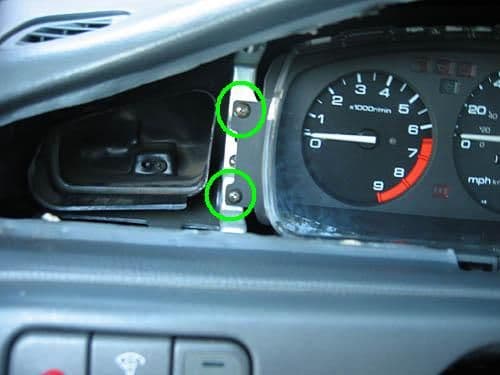
Figure 8. Remove two screws from the left side of the gauge cluster. 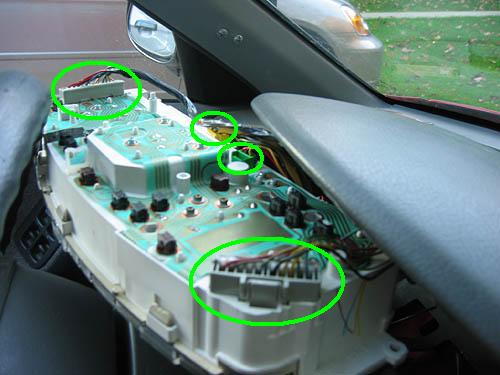
Figure 9. Flip gauge cluster over, and disconnect the wire harnesses.
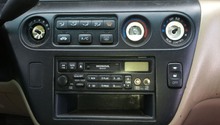
Step 6 – Remove the lower console panel and the radio
- Use the Phillips screwdriver to remove four screws from the lower console of the dashboard.
- Then, disconnect the wire harness from the cigarette lighter.
- Radios differ depending on the Civic model year. To remove your radio, either pull it straight out from the front or push it out from behind.
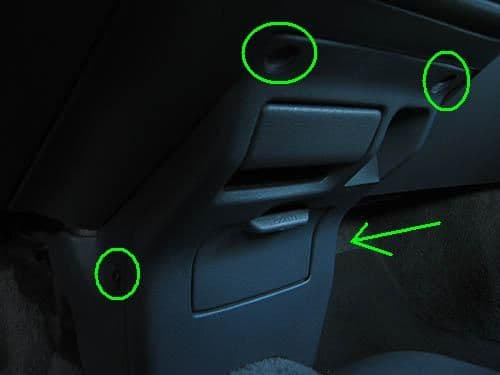
Figure 10. Remove the lower console panel screws (as indicated by the green arrow and circles). 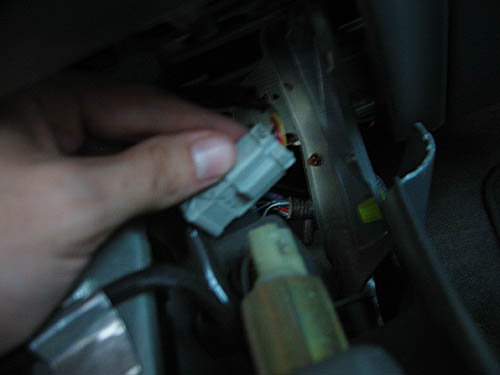
Figure 11. Disconnect the cigarette lighter's wire harness. 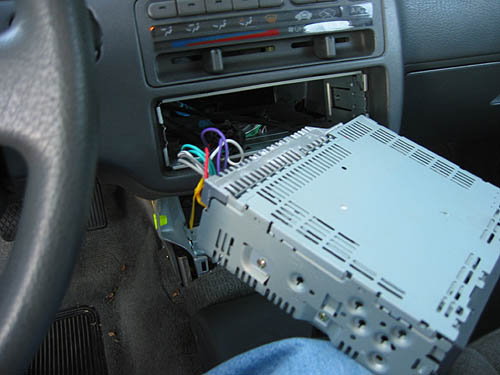
Figure 12. Push or pull the radio out.
Step 7 – Remove the climate control unit
- Disconnect the heater control cable from its bracket and control mechanism. These connections are located under the dashboard, near the glove box on the passenger's side.
- With the Phillips screwdriver, remove three screws holding the climate control unit in place. Two screws are located directly underneath the front of the unit, and one is located on the bottom center.
- Disconnect the two wire harnesses from the back of the climate control unit.
- Then, unsnap the locking clips from the bottom of the unit.

Figure 13. Remove the heater control cable. 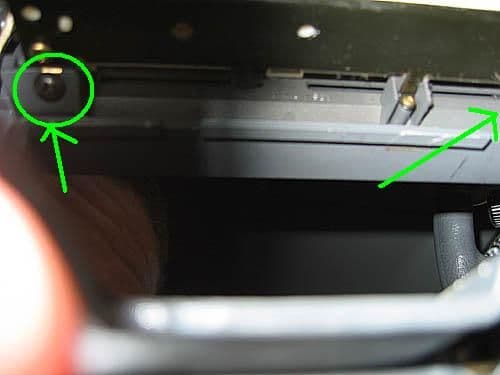
Figure 14. Remove two screws underneath the front of the climate control unit. 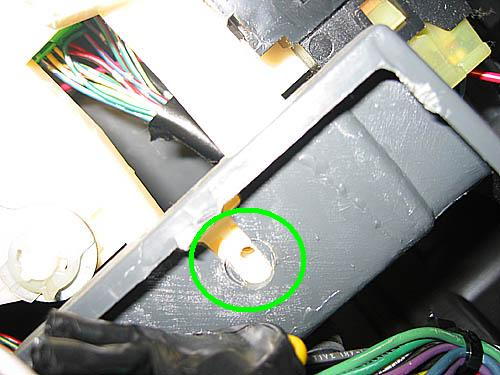
Figure 15. Remove the final screw holding the climate control unit in place. 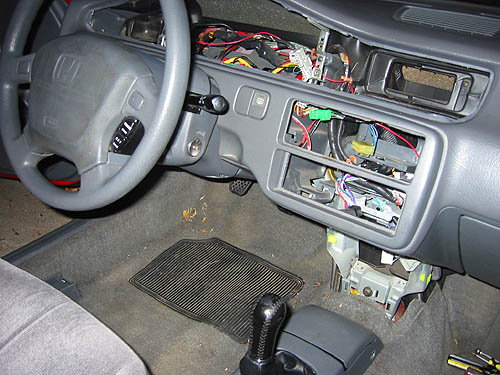
Figure 16. Honda Civic with removed panels, gauge cluster, radio, and climate control unit.
Step 8 – Install new bulbs to the gauge cluster
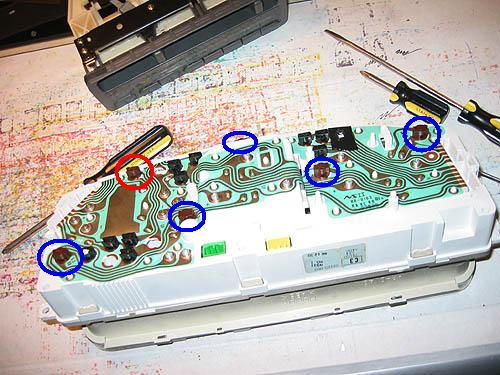
- Remove six bulbs from back of gauge cluster. You should simply be able to pull them out.
- Insert the #74 bulb into the bottom right corner of the cluster.
- Insert five #24 bulbs into the remaining original sockets.
Step 9 – Install new bulbs to the climate control unit
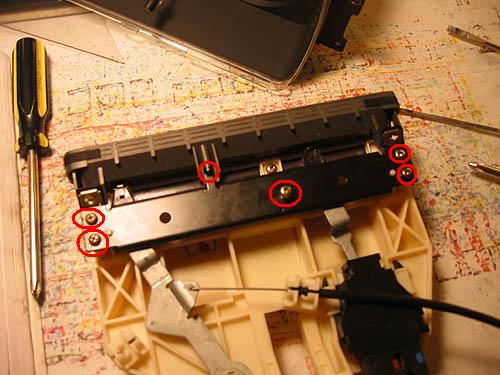
- Use the Phillips screwdriver to remove six screws securing the faceplate to the climate control unit.
- Unhook the heater cable and blower control unit cables.
- Remove two bulbs from inside the climate control unit.
- insert the two new #74 bulbs.
Step 10 – Reassemble the dashboard and components
- Screw the faceplate back onto the climate control unit.
- Re-install the climate control unit.
- Re-install the radio.
- Insert the gauge cluster back into the dash and screw it in.
- Reattach the trim piece.
- Re-install the hazard switch.
- Fasten the two screws to the top of the dashboard.
Step 11 – Test the new lights
- Reconnect the negative (black) terminal of the battery.
- Turn on your car, and test out the new amber red lights.
Related Discussions
- How to Install Amber Red Dash Lights - Honda-Tech.com
- Amber Red Gauge Cluster and Climate Control Bulb Pictures - Honda-Tech.com