Honda Civic: How to Install a Wink Mirror
A wink mirror not only gets rid of those blind spots, but also allows for safe driving. It is easy to install, making it an ideal DIY project. Continue reading to learn how to install a wink mirror in your Honda Civic.
This article applies to the Honda Civic (1992-2000).
A wink mirror offers enhanced visibility, virtually banishing those pesky blind spots. Some owners choose to replace their existing sun visors with a wink mirror, while others find ways to install the mirror around the visor. Either way, this relatively simple DIY project requires a bit of free time and a few general supplies. Most wink mirrors are available with four or five panels for easier visibility and installation. Most users mount a wink mirror directly where the sun visors mount, but it may be necessary to make a few adjustments—especially to the L brackets.

Materials Needed
- Wink mirror kit
- Dremel rotary tool kit
- Ruler and cardboard for template (optional)
- Bracket tie (if working without a mounting kit)
- 15 mm box wrench
This project assumes that the brackets from the wink mirror kit are not long enough. In that case, new mounting brackets must to be made to gain some space between the mirror and the visors.
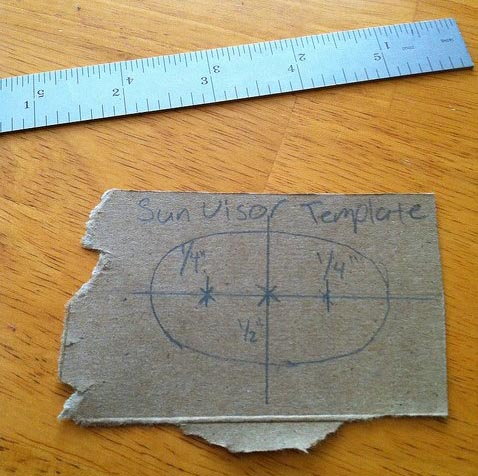
Step 1 – Make a template (optional)
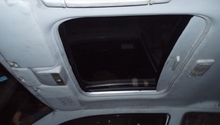
To make a template, you will need to make an outline of the visor mounts. Remove the driver's side visor, and set aside the screws. Use a ruler for precise measurements. While this step is optional, it is also useful to ensure better-looking visor brackets.
Step 2 – Create the bracket
- Measure the bracket from the wink mirror kit on the template.
- Using your bracket tie of choice along with your cardboard cutout for guidance, draw the designated cutout lines and instructions onto the bracket. Be sure to note important lines and measurements as you go.
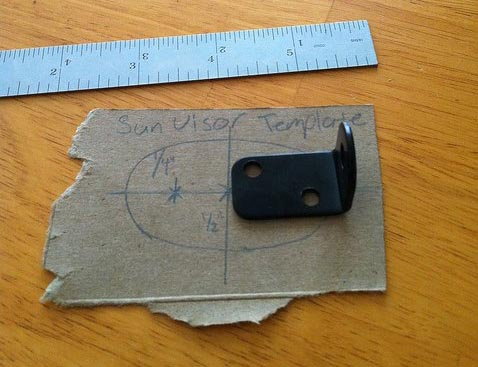
Figure 2. Measure bracket mount from the kit. 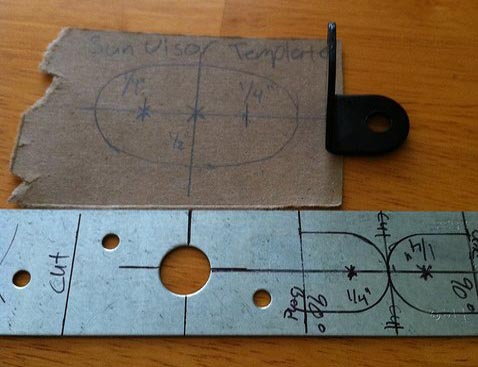
Figure 3. Create the new mounting bracket outline.
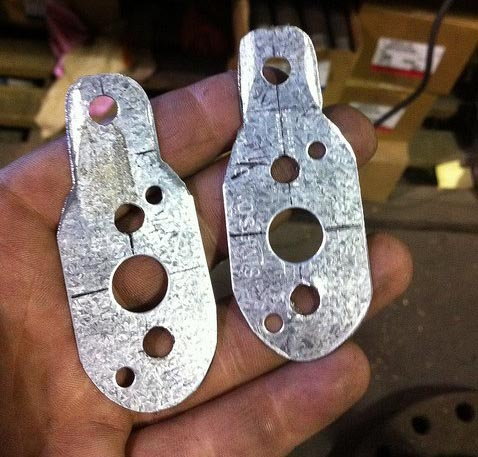
Step 3 – Cut and shape the bracket
- Using the drill (from the Dremel kit), make the necessary holes in the bracket.
- Then, use the Dremel rotary sander to grind out and shape the outline of the bracket.
Step 4 – Attach the visor and hanger brackets
- Using a 15 mm box wrench, attach the hanger brackets to the shorter edge of the visor brackets with the supplied nuts and bolts.
- Locate the two threaded holes where the visor mounts should be attached. Place the new bracket in between the original visor mount and headliner. Then, screw them in place using the old screws.
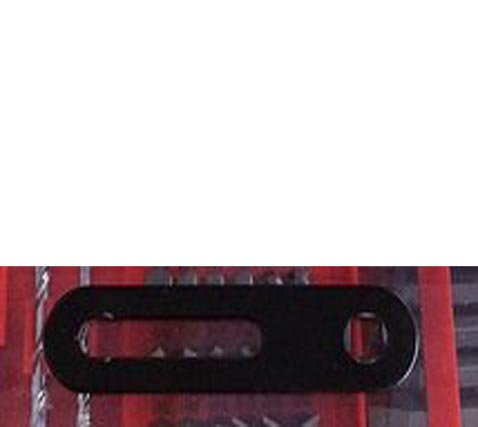
Figure 5. Attach hanger brackets to the new visor brackets. 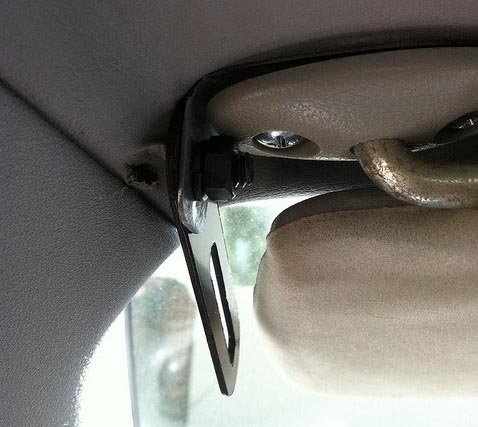
Figure 6. Secure the visor bracket with the hanger bracket.
Step 5 – Install the wink mirror
- Raise the wink mirror so that both ends align with the hanger brackets. This might require the help of another person.
- With the hand knobs from the wink mirror kit, thread the knob screw through the hanger bracket and into the the side of the wink mirror.
- With the other hand knob, secure the opposite side of the wink mirror to the hanger bracket.
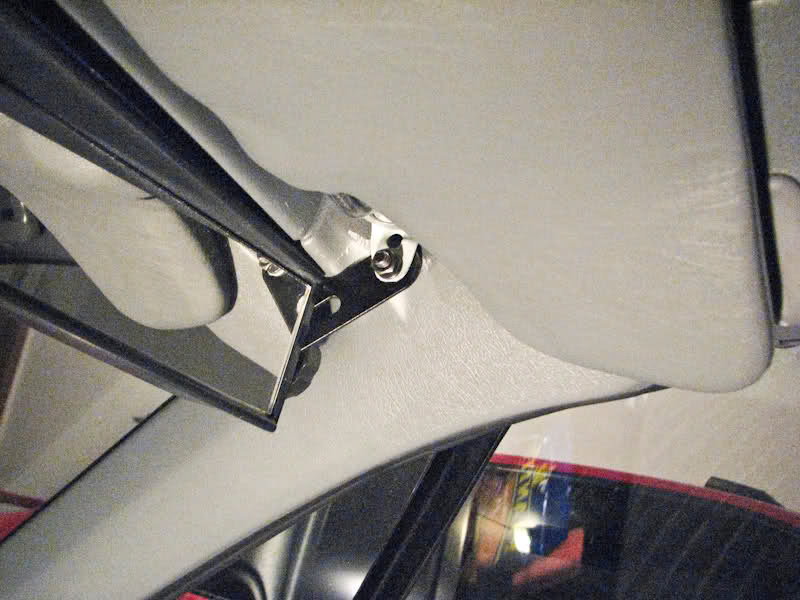
Figure 7. Secure wink mirror to the hanger brackets. 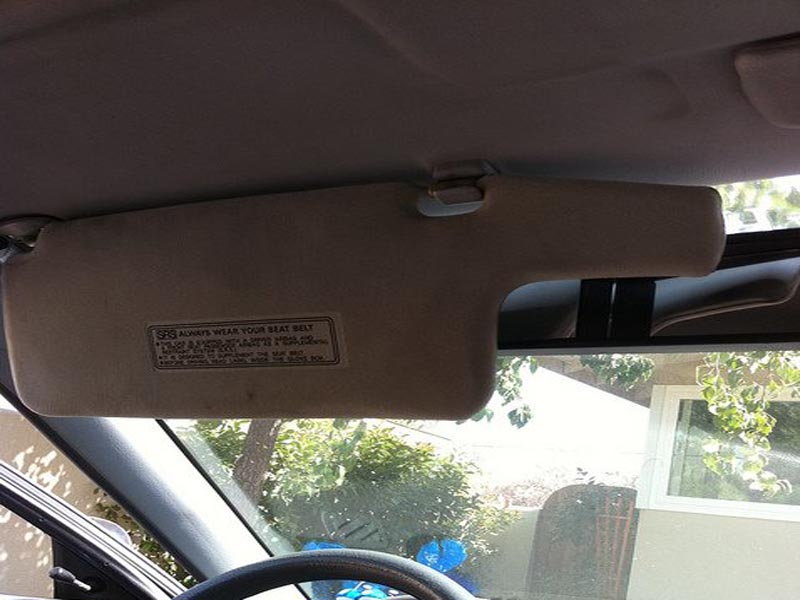
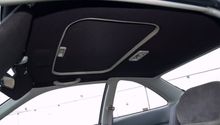
Figure 8. Properly mounted wink mirror with functional use of the sun visors.
Related Discussions
- DIY Wink Mirror Install - Honda-Tech.com
- Wink Mirror! - Honda-Tech.com