Honda Accord: Why Does My Dash Tail Lights' Fuse Keep Blowing?
You won't need a SWAT team to prevent your Accord's fuse from blowing. Here's the DIY guide for saving your car's dash tail lights' fuse, and feeling like a hero.
This article applies to the Honda Accord (1990-2002).
So you've changed the tail lights' fuse in your Honda Accord, but it continues to blow out. The problem could be attributed to the fuse's circuit or its amperage rating could be off, but don't panic. There are a number of things that can cause a fuse to blow, and not all are expensive to repair or require the help of a professional mechanic. Here are a few simple things you can do to stop the problem.

Materials Needed
- Owner's manual
- Replacement fuses
- Multimeter or circuit tester
- Voltmeter (optional)
- Fuse puller
- Wire cutter
- Male and female connectors
- Electrical tape (optional)
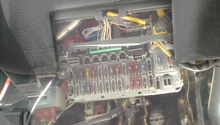
Step 1 – Check the amperage rating
The fuse's circuit might not have the correct amperage. Repeated breaks are a strong indication that the replacement fuses do not have the correct amperage rating, and must be replaced.
- Check your owner's manual to determine the correct fuse rating and the maximum amount of power the circuit can handle.
- The fuse amperage can also be found inside or outside the fuse box's cover.
- Determine the amp load for that circuit, and check to see if it is being overloaded—for example, are the other fuses pulling too much power.
- Change out blown fuses for new ones. Be sure they have the correct amperage rating.

Pro Tip
Inspect the front of the fuse to determine the correct number of amps that can be pulled through the fuse before it blows.
Step 2 – Troubleshoot an electrical dead short
A dead short can cause a circuit to break, which cuts off the power the the fuses. This may be what you are experiencing.
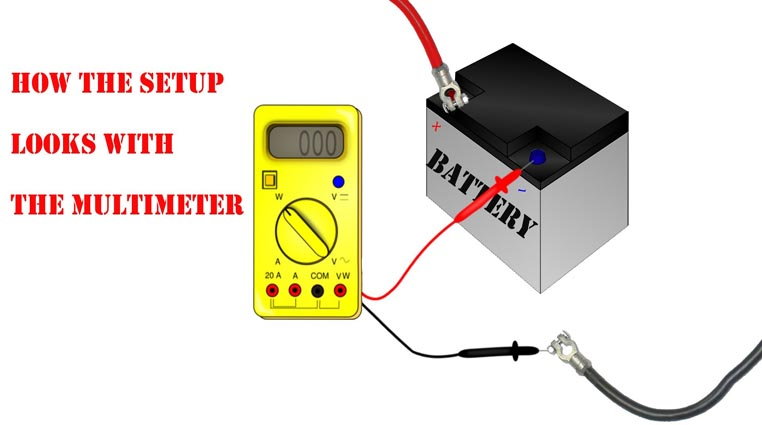
- Disconnect the negative (black) terminal connector from the battery.
- Attach one point of the circuit test (or multimeter) light to the negative terminal connector.
- Bring the other point of the test light into direct contact with the negative terminal of the battery.
- If the tester does not light up, you do not have a short in your car's electrical system.
- If the tester does light up, you have a short.
- With the points of the circuit still attached, pull the dash tail light fuse with a fuse puller.
- If the light goes out, you've just confirmed the circuit has a short.
How to resolve the problem:
- Inspect the wires of the tail lights' circuit leading to and from the fuse in the fuse box.
- Cut the wire at the point of the short using a pair of wire cutters.
- Install a male connector to the end of one wire and a female connector to the other.
- Plug in the connectors.
- Install a replacement fuse.
- Test the circuit once more to confirm the short has been fixed.
Pro Tip
Digital multimeters cost upwards of $20 (online), while circuit testers are relatively less expensive. For the purposes of this DIY, either will suffice.
Step 3 – Check for a bad ground wire
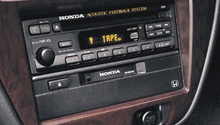
The problem is most likely a bad ground wire if you are also experiencing audio issues or other electrical glitches. It is highly suggested that you have an auto mechanic diagnose and make the repair, unless you have experience doing it yourself.
- Use a voltmeter to pinpoint breaks within the wire cladding of the car's electrical wiring system.
- Tighten breaks with electrical tape or replace the faulty ground wires.
Pro Tip
Your car contains many wires, which you may have trouble identifying and handling properly. So if you don't have experience, it would be best to have a professional inspect and repair it.
Related Discussions
- Honda Accord Dash Tail Light Fuse Blowing - Honda-Tech.com
- Short Causes Fuse to Blow - Honda-Tech.com