Honda Accord: How to Replace Your Side Mirrors
Side mirror replacement options vary, but it is very affordable and do not require special tools. Continue reading to learn how to replace the side mirrors on your Accord.
This article applies to the Honda Accord (1990-2002).
Side view mirrors offer a direct view of the road behind you, allowing you to signal and safely merge to avoid costly collisions. While you could turn your head to check the traffic behind you, doing so on a regular and ongoing basis could be unsafe. Using just a few tools and/or materials, you can hide unsightly scratches and cracks on the glass without replacing the actual unit. If a complete replacement is necessary due to extensive damage, this article will show you how to do that as well. You won't spend all day completing this DIY project. The cost is very affordable, and all materials are available online or through an auto parts store. There are two options for replacing your side view mirrors. The first is to replace it with a stick on glass, and the other is to do a full replacement.

Materials Needed
- Replacement mirror (glass only)
- Flat head screwdriver
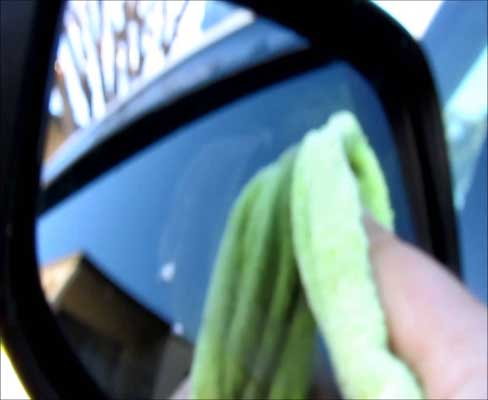
- Microfiber cloth or lint-free towel
- Shop towel
- Heat gun (optional)
Stick on Glass Replacement
Step 1 – Place the new mirror
For scratches, cracks or other surface damage, the best and most practical solution may be to simply attach a replacement mirror. Because most replacement mirrors are manufactured with an adhesive already molded on one side for easy attachment, you don't have to worry about purchasing additional materials. Simply fit the replacement mirror to the original mirror, ensuring the specs evenly line up. Peel off the adhesive backing and attach as directed by the manufacturer. Allow the adhesive to harden before driving because the vibrations could cause the replacement mirror to loosen.

Full Replacement
Step 1 – Remove the actuator shafts
Wrap the flat head screwdriver in a shop towel and pry out the bottom of the mirror. You may feel some tension as the actuator shafts come out of the actuator or mirror.
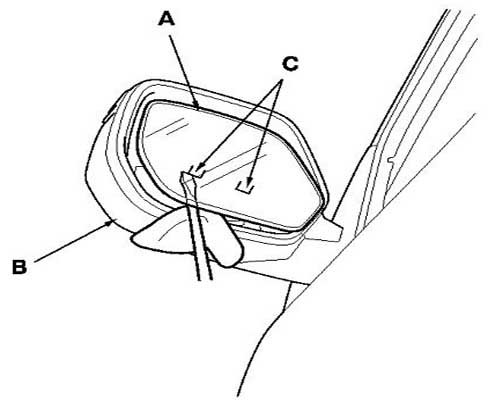
Step 2 – Re-install the actuator shafts and attach the new mirror
Check the mirror to determine if the actuator shafts are still attached. If they are, remove by hand and re-install on the actuator by seating the rubber boots on the actuator.
Then, install the new mirror. Lubricate and align the tabs on the actuator shafts with the slots on the back of the mirror. Push firmly for a proper and secure fit. If after several minutes the mirror does not attach, warm the shafts and the pivot using a heat gun set to a low-heat setting.
Pro Tip
Any premium automotive lubricant will suffice. Prices typically ranges between $6 and $15.
Step 3 – Clean the mirror
Wipe any prints from the glass using a microfiber cloth or lint-free towel. Test that the mirror properly moves from side to side without becoming unseated. If it does, re-install the new mirror as you did in Step 2.
Related Discussions
- Replacing Mirror Glass - Honda-Tech
- Mirror Replacement - Honda-Tech