Honda Accord: How to Replace Blower Motor Assembly
No A/C? No problem! Replacing the blower motor assembly will likely resolve the issue, and have you cool (or hot) in no time. So check out this step-by-step guide on how to replace the blower motor of your Honda Accord.
This article applies to the Honda Accord (1990-2002).
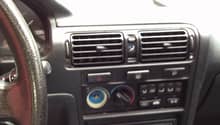
Has this ever happened to you? You turn on the A/C, and nothing happens. It doesn't matter if you want cold or hot air, nothing happens. Maybe it works intermittently like on certain speeds, but not on all speeds. A fluid leak can damage the blower motor assembly, and keep it from working. If you don't hear the blower motor engage as you turn on the A/C, then it is likely shot. Replacing it is doable (even for a novice DIY-er), but getting help will make the job easier. If you hear the blower motor assembly engage, but there is no air coming from your vents, then the problem is likely related to the airflow controls and not to the blower motor assembly. Before replacing your blower motor assembly, check the fuse to make sure it hasn't blown out. Your owner's manual will have information about which fuse controls the blower motor assembly. If replacing the fuse solves the problem, then there’s no need to replace anything. If it doesn't solve the problem or if it solves the problem for just a short time, then you likely have no other choice but to replace the blower motor assembly.

Materials Needed
- Phillips screwdriver
- 10mm deep docket
- Ratchet
- Extension (two to four inches)
- Flathead screwdriver
- Needle nose pliers
- Vacuum with hose (optional)
- New blower motor
Step 1 – Prepare to remove blower motor assembly
Turn on the car, and select the air to come from the outside rather than from interior circulation. Turn off the car. Open the glove box. Using the Phillips screwdriver, remove the screw and washer on the right side of the glove box, holding the glove box damper in place. Let the damper dangle, so that it isn't in the way. Close the glove box, and disconnect the negative (black) terminal of the battery.
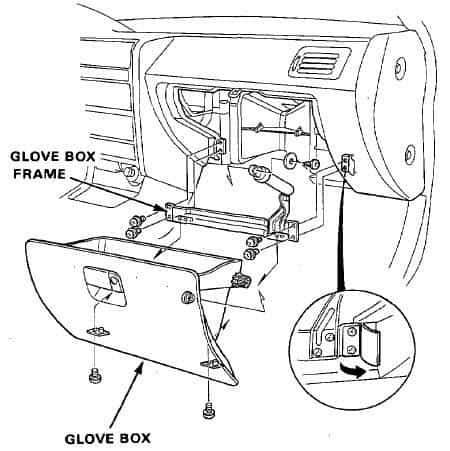
Step 2 – Remove glove box and frame
Use the Phillips screwdriver to remove two screws under the glove box. You’ll find one on each hinge. The glove box will swing out when you remove these screws. Open the glove box, remove it, and set it aside. You’ll re-install it later.
Use the Phillips screwdriver to remove four screws holding the glove box frame in place. There are two screws on each side of the frame. To get to the screws, you must lift up two flaps. After detaching the glove box frame, set it aside.
Step 3 – Remove heater duct
If you don't have air conditioning:
Remove the self-taping screws holding the heater duct in place. The heater duct is located on the left side of the blower motor assembly.
If you do have air conditioning:
- Remove the passenger's side floor mat. Turn over the passenger's side carpet, and pull it back as far as you can without tearing it.
- Un-clip the three clips holding the interior colored side cover in place, and set it aside.
- Use 10mm deep socket ratchet and extension to remove the four nuts holding the ECU bracket (which is a large silver plate) in place. There are two nuts on top of the bracket, and there are two nuts on the bottom of the bracket. After removing the nuts, remove the bracket. You may be able to simply pull it out, or you may need to rock it back and forth to loosen it before you can pull it out.
- Use the 10mm deep docket ratchet and extension to remove the three nuts holding the ECU to the bracket, and then unplug the ECU.
- Use the Phillips screwdriver to remove the two screws under the cover on the bottom of the blower. Set the cover aside.
- Use the needle nose pliers or flat head screwdriver to remove the cover on the front of the blower assembly. To do this, you must remove the tiny clip holding the cover in place. Set aside the cover.
- Unplug the plug on the top left of the blower motor assembly.
- Use the Phillips screwdriver or 10mm deep socket ratchet and extension to remove the metal band holding the blower assembly to the heater assembly. This connection is on the left side of the blower assembly. Set aside the metal band. It may be connected to the harness you unplugged earlier, but there’s no need to separate the two.
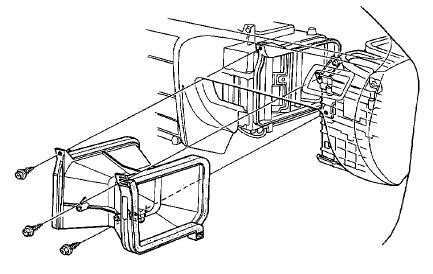
Step 4 – Disconnect blower assembly and remove screws
Disconnect the blower assembly from the blower motor resistor, recirculation motor, and the blower motor. There is one plug for each connection that you must unplug. Then, use the Phillips screwdriver to remove the three screws holding the blower assembly in place.
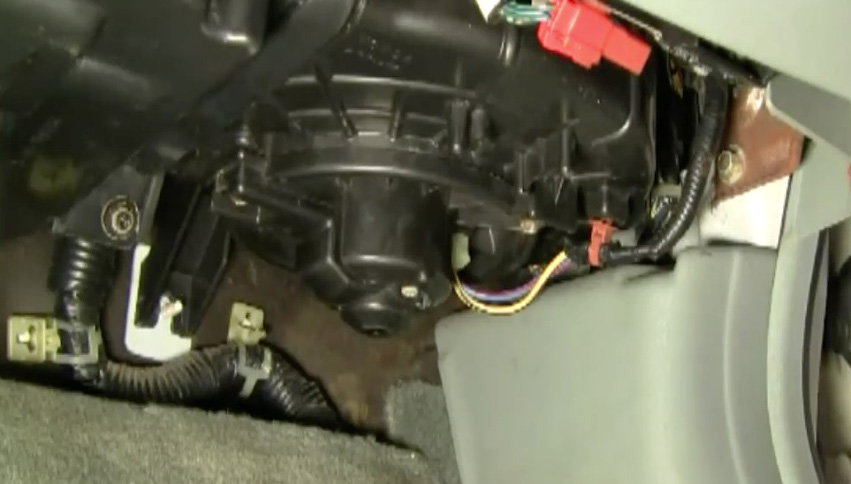
Figure 4. Disconnect blower assembly. 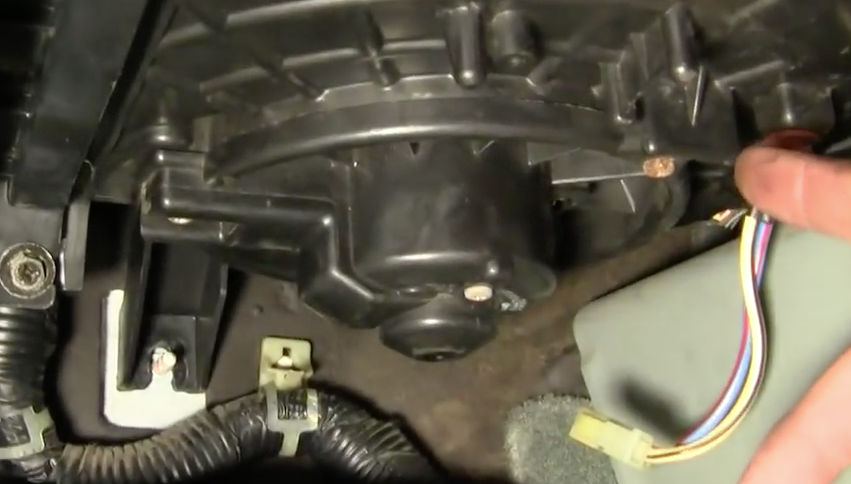
Figure 5. Remove three screws holding blower assembly in place.
Step 5 – Improve access to blower motor assembly
Use the flat head screwdriver to pry up the two round covers on the passenger's side of the dashboard. The passenger's door must be open to do this. With the covers up, use the 10mm socket and ratchet to remove the two bolts.
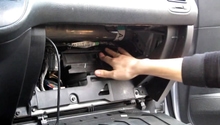
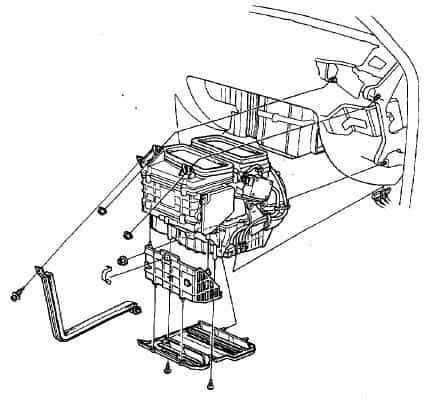
Step 6 – Remove blower assembly and install new one
Pull aside the right side of the dashboard assembly. Once you can access the blower assembly, remove it. If you have trouble removing it, you will get better clearance if you remove the bracket that holds the plugs in place. This bracket is on the bottom right side of the blower assembly. If you decide to remove it, then disconnect the resistor first.
Install the new blower motor assembly. Before continuing, now is the best time to clean the heater assembly. Use the vacuum to remove the dirt, dust, leaves, and other things that may clog it.

Figure 6. Remove blower assembly. You may need to pull it out at an angle. 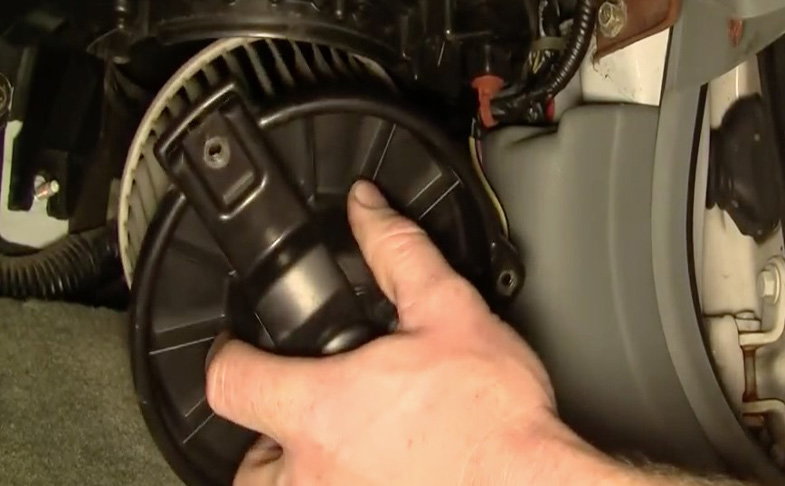
Figure 7. Install new blower assembly. It can only go in one way.
Step 7 – Re-install and test blower motor assembly
- Reconnect the resistor.
- Re-install dashboard with the two 10mm bolts and bolt covers.
- Attach the blower motor assembly with the two 10mm bolts.
- Reconnect blower assembly, which includes the blower motor resistor, recirculation motor, and the blower motor.
- Re-install the heater duct.
- Re-install the glove box frame.
- Re-install the glove box.
- Reconnect the battery.
Turn on the car and the A/C. If it works, then you have successfully replaced the blower motor assembly. If it doesn't work, then you may need to start over because there is no other way to figure out where you missed a step.
Related Discussions
- 1990-1993 Honda Accord Blower Motor Assembly - Honda-Tech.com
- 1999 Honda Accord Blower Motor Replacement Instructions - Honda-Tech.com
- Blower Motor Works On Speeds 3/4 But Not On 1/2 - Honda-Tech.com
- Blower Motor Removal - Honda-Tech.com