Honda Accord: How to Replace Ball Joints
If your steering feels tired, it's time for new ball joints. Continue reading to learn how to replace the ball joints on your Honda Accord.
This article applies to the Honda Accord (1990-2002).
Ball joints wear out over time (especially if you drive on rough roads), and replacing them is a costly venture since each joint is nearly $400. Therefore, it might just be worth doing yourself. Because of the large amount of disassembly required, this job is best left to those with intermediate or above skills. Even then, there are some specialized tools that will be needed. Some tools are worth investing in, while others are available on a lending basis. Complications can arise in areas where rust and corrosion are rampant. Therefore, prepare to spend an entire day if you are going to do all of the ball joints. Also, realize that any other repairs like the brakes or CV joints are recommended to do as well.
During replacement, the ball joints will need to pressed in. For the uppers, you can buy a control arm with a new joint in it, which adds additional cost. For the lowers, you will need specialized tools to press them out. Some suggest using hammers to drive the ball joint out, whereas others use jacks. This tutorial emphasizes the use of presses and specialized tools. You may have to use a combination of these methods, depending on how stubborn the joint is.

Materials Needed
- Metric Sockets (10, 12, 14, 15, 17, 19, and 36 mm)
- Rachet and extensions
- Combination wrenches (12, 14, and 17 mm)
- Heavy hammer
- Needle nose pliers
- Jack stands
- Ball joint press
- Pickle fork
- Flat blade screwdriver
- C-clamp
- Pry bars
Step 1 – Jack up the vehicle and gain access to the ball joint
Set the parking brake, and block the rear wheels. Loosen the front lug nut. Then, jack up the vehicle. Place the vehicle securely on the jack stands under the frame rails before proceeding. Remove engine splash shield, which is secured with small clips, as well as 6 and 8mm fasteners.
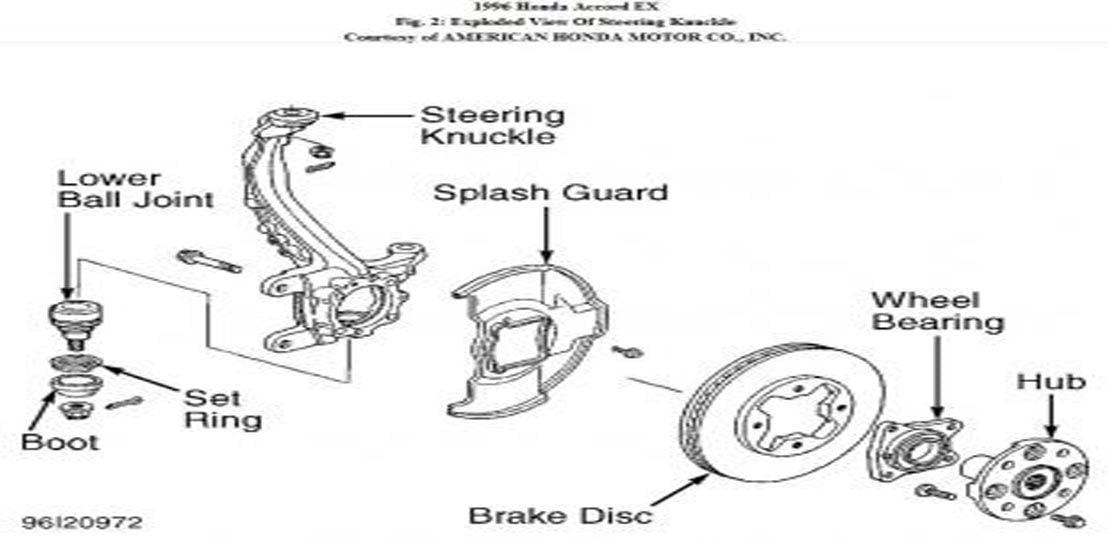
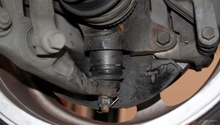
Figure 1. Ball joint assembly for a 1995 Accord. 
Figure 2. Assembly 5-6 shows the upper ball joint in the control arm, while 4 is the lower ball joint.
Pro Tip
Keep the jack ready to use in case you have to adjust the height, or move the jack stand to gain access.
(Related Article: How to Jack Up Your Accord - Honda-Tech.com)
Step 2 – Remove the brakes and the rotor (optional)
Although you can replace the lower ball joint without removing the brakes and rotor, you may want to remove them anyway. Use the needle nose pliers to take the cotter pin out of the axle nut, then loosen the CV axle nut. Remove the lug nuts and the wheel. Now you can remove the axle nut.
Remove the brakes and the rotor. First, remove the ABS brake sensor by removing the bolt with a 10 mm wrench. Gently pry the ABS module loose. Avoid forcing it or breaking it as it will require an expensive replacement. Remove the brake caliper bolts (17 mm) and the caliper. Remove the brake shoes, and then remove the rotor. You now have access to the ball joints.
Pro Tip
Have a wire, wire tie, or string available to hang the caliper with, so that it doesn't dangle on the brake line or get in the way.
Step 3 – Remove the ball joints
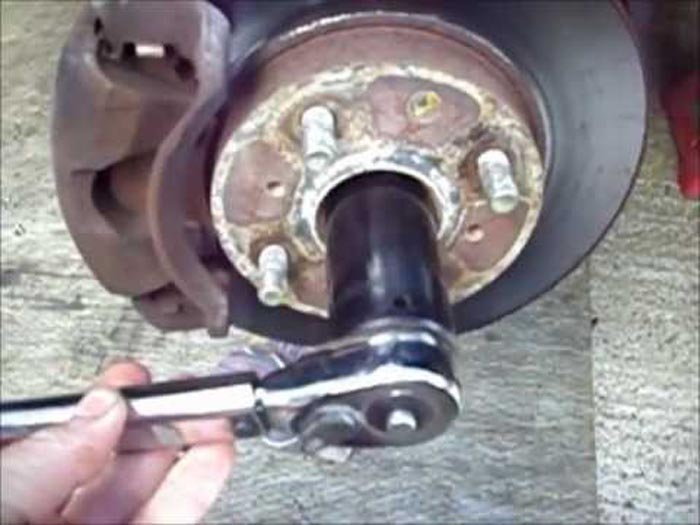
Removing the ball joint is a two-step process. The ball joint is unbolted, and then pressed out of its fixture. First, remove the cotter pin and castle nut. Use the needle nose pliers to remove the pin. Then, use a socket or wrench to remove the nut. Next, use a ball joint removal tool to remove the ball joint.

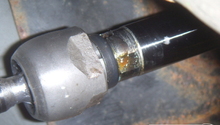
Figure 4. Ball joint removal tool in action. 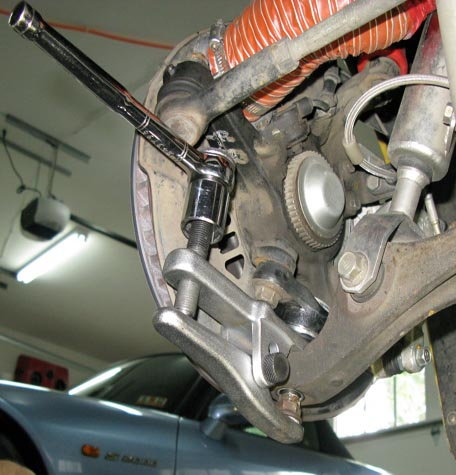
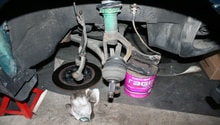
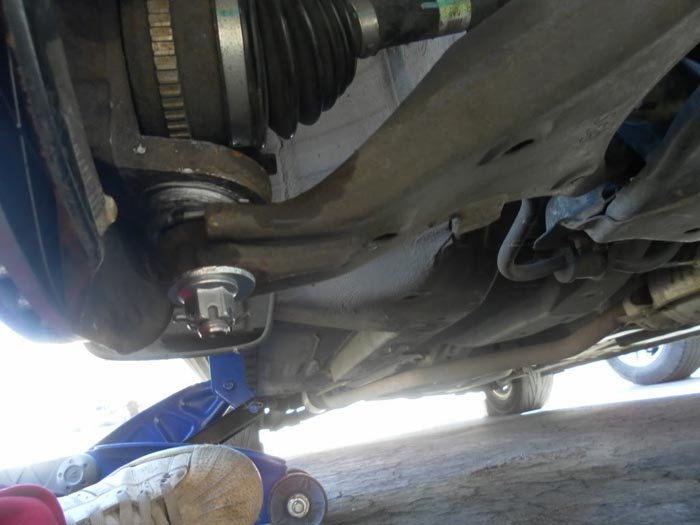
Figure 5. Removing the lower ball joint. 
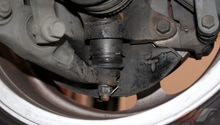
Figure 6. The lower ball joint separated from the control arm. 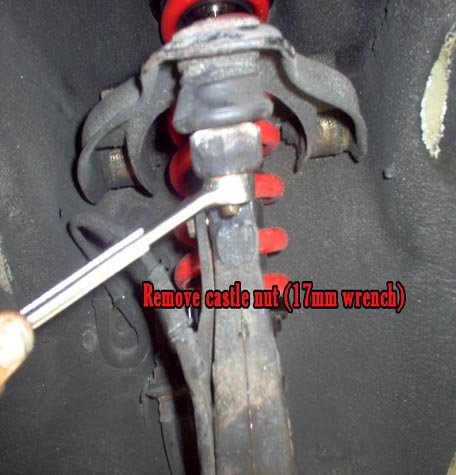
Figure 7. Removing the castle nut from the upper ball joint.
Step 4 – Replace the ball joint
Clean the ball joint hole and line it with grease, so the joint slips in easier. Install adjustable ball joint in upper control arm. Install the support washer with the flat side up. Install the lock nut. Tighten just enough to where the ball joint can just turn in the control arm. Install the ball joint stud into the steering knuckle, install the nut and torque it to 30-35 ft lbs. Install a cotter pin and re-install the cover.
Replace the lower ball joint by inserting it in the steering spindle assembly, and then drawing it through the knuckle by tightening the nut. Don't forget to install the boot before inserting the joint into the knuckle. Align the nut with the hole for the cotter pin and insert the pin. Make sure to expand the pin, so it won't slip back out.
Step 5 – Reassemble the brakes, tire, and wheel
Reassemble the brakes by putting the wheel and rotor back on. Feed the axle through the wheel, install, and tighten the nut. Use a new cotter pin to hold the nut on.
Put the caliper and brakes back on. It may be necessary to use a C-clamp to push the brake cylinders back into the caliper, so the pads and caliper fit over the rotor. Tighten the caliper to specification. Replace the ABS sensor.
Replace the wheel and tire assembly. Install and tighten the lug nuts. Lower the vehicle off the jack stands and test drive. You should feel an improvement in steering and response.
Featured Video: Honda Accord Front Ball Joint Replacement
Related Discussions and Site
- Upper Ball Joint Replacement - Honda-Tech
- Front Ball Joint Replacement - Honda-Tech
- Ball Joint Loosening - Honda-Tech
- Adjustable Upper Ball Joint Installation Instructions - NorthStarMFG.com