Honda Accord: How to Install XM Satellite Radio
Once you have the kit that includes the radio, connectors, and antenna, you can install the XM radio quickly. Continue reading to install your new XM radio kit to your Honda Accord, and jam out the same day.
This article applies to the Honda Accord (1990-2002).
Before installing the XM kit, think about (1) where you want to mount the XM antenna on the outside of the vehicle, (2) where you want to place the XM radio module in the passenger's compartment, and (3) which method you want to receive the XM signal. This guide will go through the different antenna and module placements, as well as the different signal options. Once you have determined where to install the antenna, the XM radio, and how you want to receive the signal, then you can begin.

Materials Needed
- XM radio kit with mounting included
- Hair dryer (optional)
Step 1 – Antenna and module placement choices
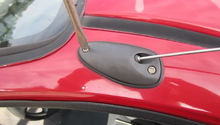
You will place the antenna either on the front of the car near the windshield, or on the rear roof of the car. Take into consideration the place for best reception (XM radio receives signals from satellites in the southern sky), but also make sure the antenna and wire are not near an luggage rack, ski rack, or a similar item.
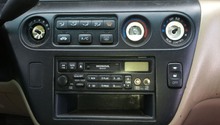
For placement of the XM radio module and cradle, you will want to consider visibility. In other words, if you place it on the center console, you must look down at the screen for information. This not only makes it uncomfortable, but makes you vulnerable to an accident if you take your eyes off the road or hands off the steering wheel while driving. If you place it on the dashboard, you want it out of the way of the steering wheel, airbags, or other similar items, but in your line of sight.

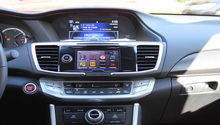
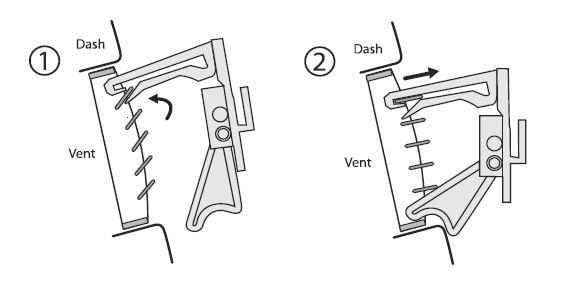
Figure 1. Mounting the radio on the vent. 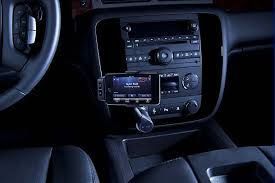
Figure 2. Another mounting option.
Step 2 – Signal choices
If you have an “audio out” connection in your car, you can use the audio cable that comes with the kit to receive the XM signal. Other choices (all sold separately) include the XM SureConnect, a cassette adapter, or FM Direct. The XM SureConnect allows you to receive the signal by connecting to an unused FM channel on your radio. The cassette adapter allows you to receive the signal through an adapter you place into your Accord's cassette player. On the other hand, the FM Direct connects directly to your Accord's audio system and antenna. It is recommended to have a professional install the FM Direct.
Step 3 – Mount the antenna
Place the radio cradle on the dashboard of your car (you will permanently mount it later). A strong magnet enables you to attach the antenna to your Honda. Place the antenna on the front roof near the windshield, above the driver’s side door, or on the rear roof away from luggage racks or another antenna.
If you are installing the antenna near the windshield, gently lift the weather seal and place the wire underneath. Continue to route the antenna wire underneath the weather seal to the door jam. Place the wire inside the door jam, routing it inside the car and underneath the floor mat until it reaches the radio cradle.
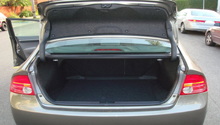
To mount the antenna on the rear, place the wire underneath the weather seal to the point where the rear window meets the trunk lid. Run the wire into the trunk, and into the rear passenger's compartment. Then, route the wire into the front passenger's compartment either under the carpeting or under the driver's/passenger's side door molding to the radio cradle.
Pro tip
As you install, make sure you leave enough slack for the door's or trunk's opening and closing. Also, choose the lowest point to cross the weather seals, so it reduces the chances of leaks.
Step 4 – Install the cradle and swivel mount
You can install the cradle and swivel mount on a flat surface or on a vent. Do not install on a leather surface. Before installing the cradle as well as the swivel mount, make sure there is enough room for both the cradle and radio.
For mounting on a flat surface, be sure of the installation point because the adhesive you will use for the swivel mount is difficult to remove once it is installed. Ambient temperature must be at least 60 degrees Fahrenheit (15 degrees Centigrade). Clean the surface where you want to place the swivel mount. Peel off the protective film. Press the mount to the surface, and hold for 30 seconds. Allow it to dry thoroughly, preferably for 24 hours. Use the adjustment screw to adjust the tension of the mount.
If you are installing the mount on a vent, choose a vent with sturdy, vertical slats. Adjust the clamps on the mount to fit the vent. Snap the mount onto the vent. Push, and then lift the mount from the vent to remove.
Pro Tip
If you need to remove the swivel mount, you can use a hair dryer to soften the adhesive. Then, pry off the adhesive pad with a spoon or your fingers.
Step 5 – Connect the antenna and power
On the back of the cradle, connect the antenna connector to “antenna” and connect the power adaptor to “5V DC.”
Place the XM radio in the cradle, so it rests firmly. Turn on the XM radio and your car radio. You may have to wait a few moments for the XM radio to power up.
Pro Tip
Since some Honda Accord's auxiliary power sockets or cigarette lighters are always "on," remove the XM radio from the cradle or disconnect the power adapter if you leave your vehicle unattended.
Step 6 – Connecting the XM radio with the audio cable, SureConnect, or FM Direct
If your Accord has an audio output jack, connect the audio connector to “line out” on the back of the cradle using the audio cable.
SureConnect (sold separately) employs an unused FM radio channel on your Accord’s stereo system to connect with the XM radio module. On the radio’s screen, select Menu>Settings>Vehicle Settings>Frequency Finder.
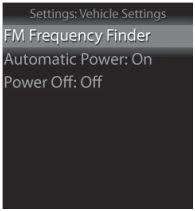
Figure 4. Image of the Frequency Finder. 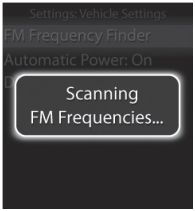
Figure 5. The radio automatically scans for an unused channel. 
Figure 6. Recommended frequencies.
The screen then lists the best frequencies for the XM radio to tune to. The manufacturer recommends using the first frequency listed. If you are not happy with the sound quality from that frequency, use the control wheel scroll to other frequencies and select it with the “XM button.” If you want to see a list of 100 other frequencies, scroll to “View All FM Frequencies.”
The FM Direct (also sold separately) connects the XM cradle directly to your Accord’s antenna and audio system. The manufacturer recommends professional installation for the FM Direct.
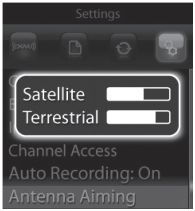
Step 7 – Positioning the XM antenna for best reception
Your XM radio receives its signal from satellites, so you will need to aim the antenna for best reception. On the menu, go to Settings>Antenna Aiming. The bars on the screen show your current reception levels. “Satellite” indicates reception directly from satellites. “Terrestrial” indicates signals from repeaters on the ground. If needed, monitor the screen as you adjust the position of your antenna.
Step 8 – Automatic power
Normally your XM radio turns on automatically if it is plugged in and receiving power. However, you can change it to manually turn the radio on or off. On the menu, go to Vehicle Settings>Automatic Power. Then, use the XM button to switch between power on to power off. Take note that you cannot use the remote to turn the XM radio on when the XM radio is in the cradle.

Figure 8. The Automatic Power turned on. 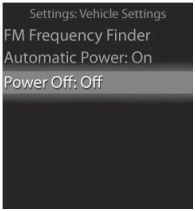
Figure 9. The Power turned off.
You can use this option if you are using the radio cradle, your cigarette lighter is powering your XM radio, and the lighter is always on. From the menu go to Vehicle Settings > Power Off. Then, press the XM button to choose whether you want the XM radio to turn off automatically after 60, 90, 120 or 160 minutes. Press the button again to confirm.
Related Discussions
- XM Tuner with Aftermarket Radio? - Honda-Tech.com
- Is XM Worth It? - Honda-Tech.com