
Energy Suspensions trailing arm bushing install
 02-27-2010, 12:07 PM
#1
Honda-Tech Member
Thread Starter
Join Date: May 2009
Location: So-Cal
Posts: 1,722
Likes: 0
Received 0 Likes
on
0 Posts
Mods. If I am in the wrong section feel free to move. I hardly ever venture far from this section.
Energy Suspensions Trailing arm bushing install
Hello honda-techers
I put together an install thread to help those of you whom love these damn ED/EF 88-91 Honda civic hatchback, sedan, wagon, crx...etc
This is my Favorite platform from honda by far but they are getting older and older. The last ones to roll off the assembly lines were doing so in 1991 which makes them close to 20 years old with the 1988 cars at 22! With the passing years the factory bushings tend to swell and crack, become worn or completely gone
Many of us Older Honda enthusiasts know that these old components should be the first inline for any restoration or uprade.
Yes!!, I know that it is easier to just press out the complete factory trailing arm bushings and replace them with new one's but this thread isnt about that. It is about installing Energy Suspension Trailing arm bushings.
NOTE: I am not liable for anything you do and by reading this you hold me responsible for nothing!
If you burn your house down then that shows that you do not know the basic's of fire. This job is done with close proximity to the gas tank and you should keep that in mind foo!!!
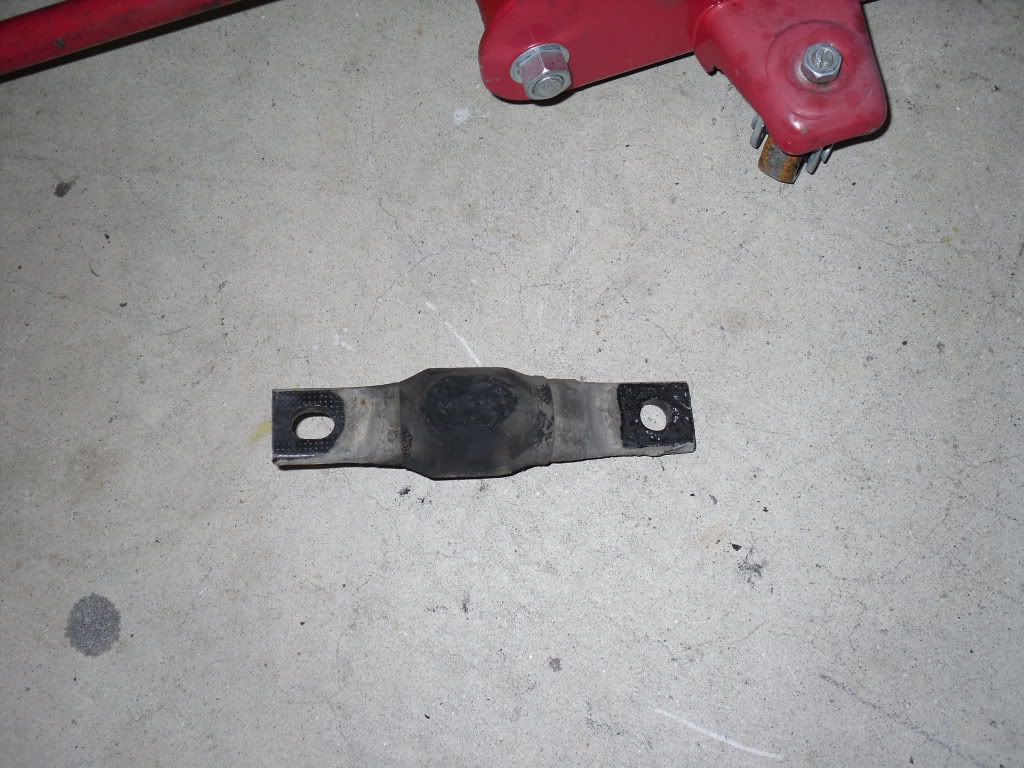
The E.S. bushing replaces the factory rubber AND REUSES THE FACTORY DOGBONE so to do this we must remove the factory rubber
and mark the orientation of the Dogbone. It only goes one way.
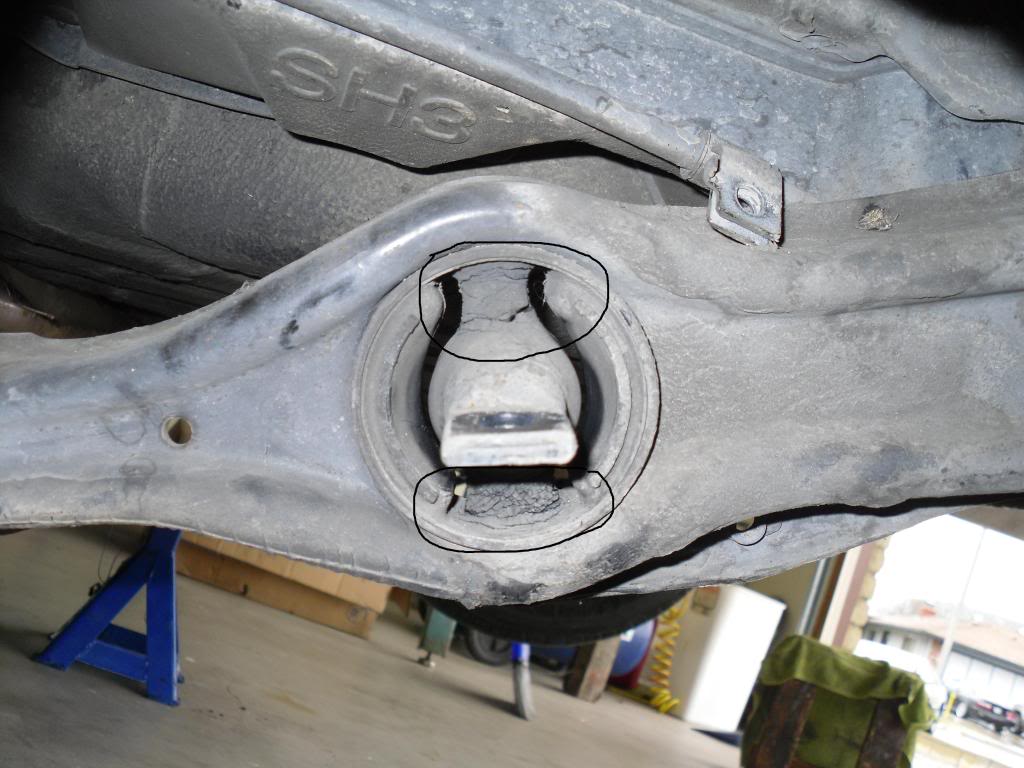
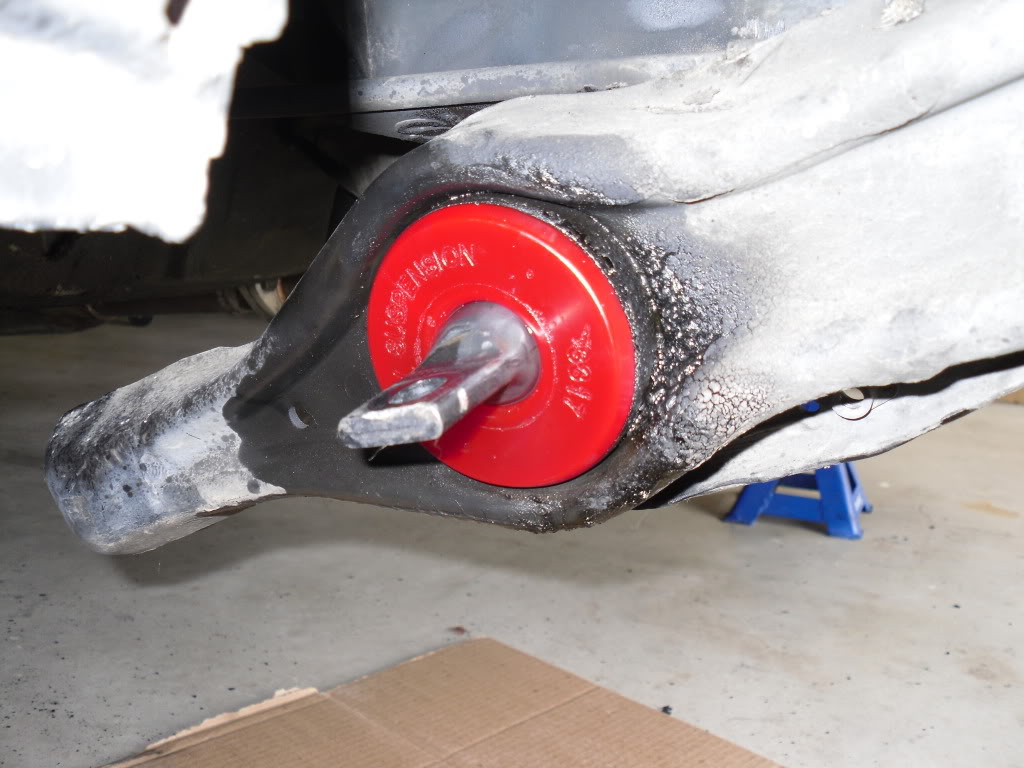
Pic of the 19 year plus old factory bushing
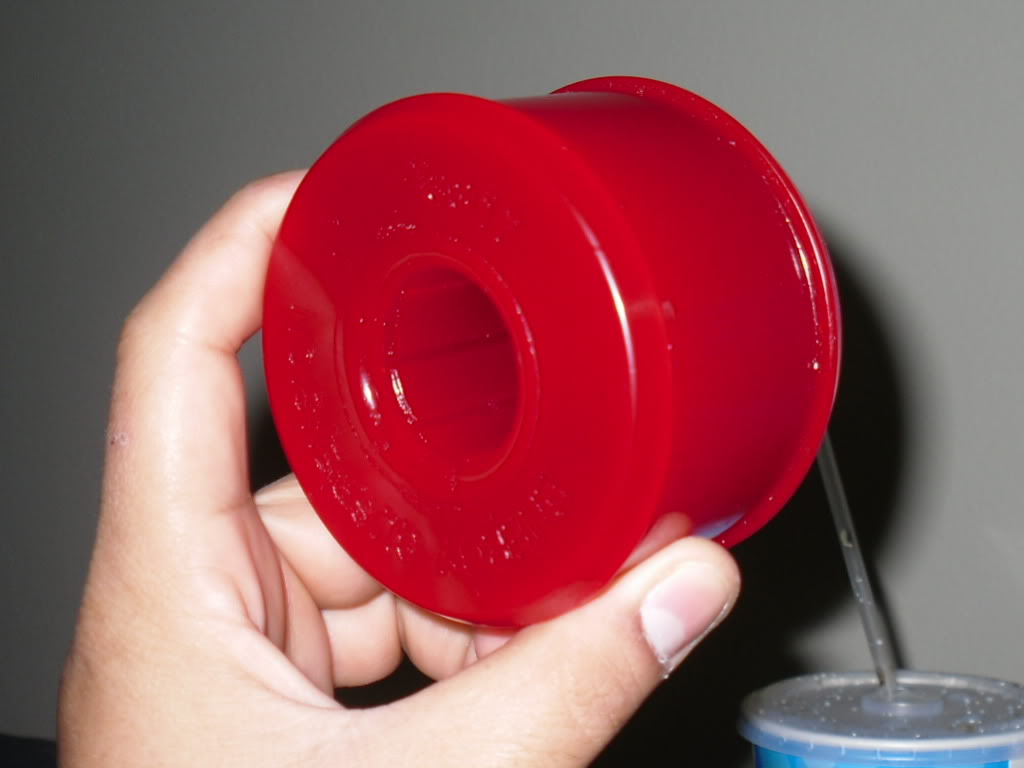
The red we all know
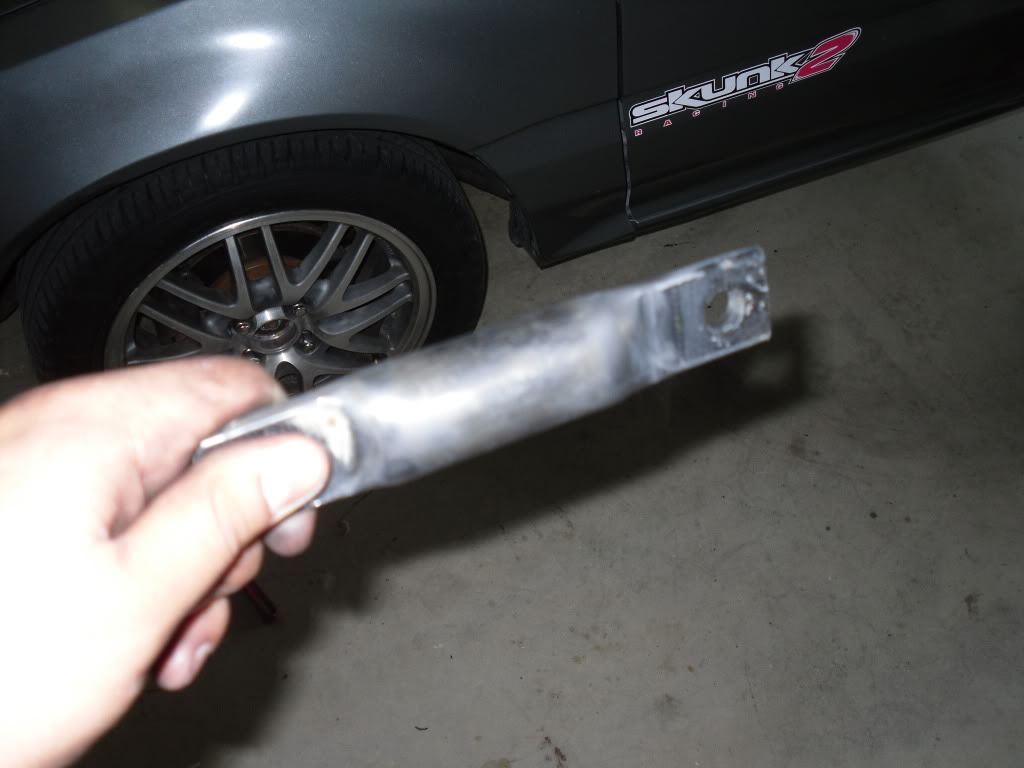
Some of the tools Needed. (aside from the basics) you will need a torch of some kind, a 2 dollar steak knife, and the install tool you can make for 6bux. I happen to have a Throughwrench set that kicks a$$
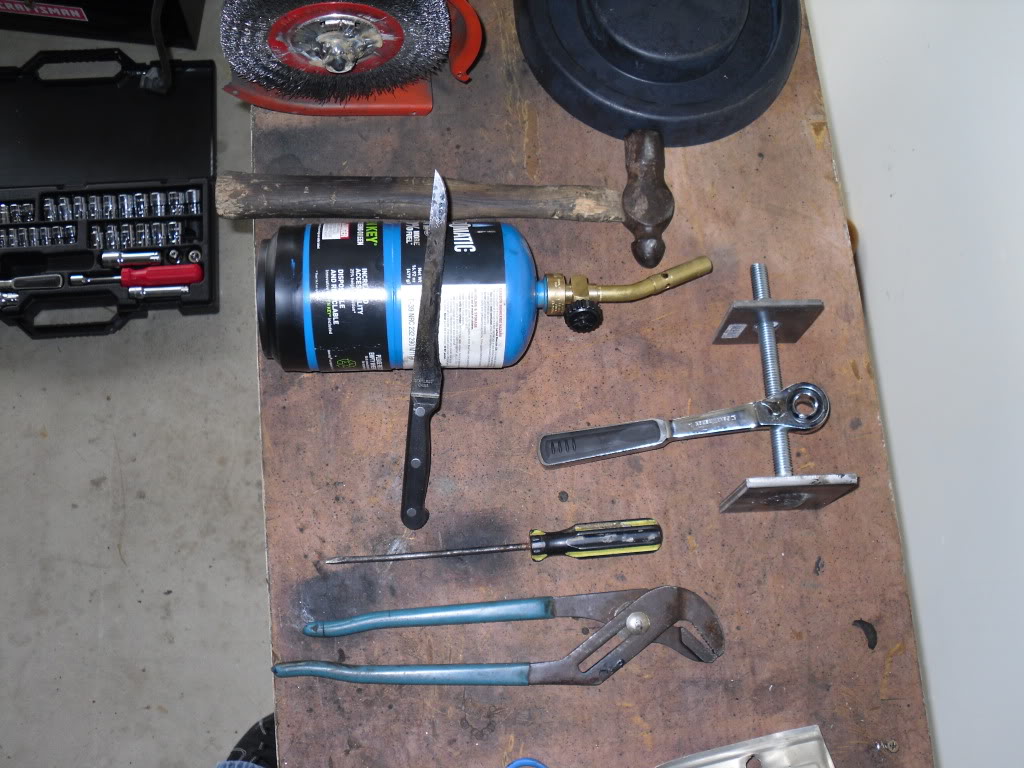
This is what I used to press in the E.S. bushing. I went to Lowes and got these large square washers from the Simpson set area
The bolt is just a basic 7" bolt and a nut. I welded the bolt end to the Simpson washer to keep it from turning. You can get a regular Bolt head yadayada.

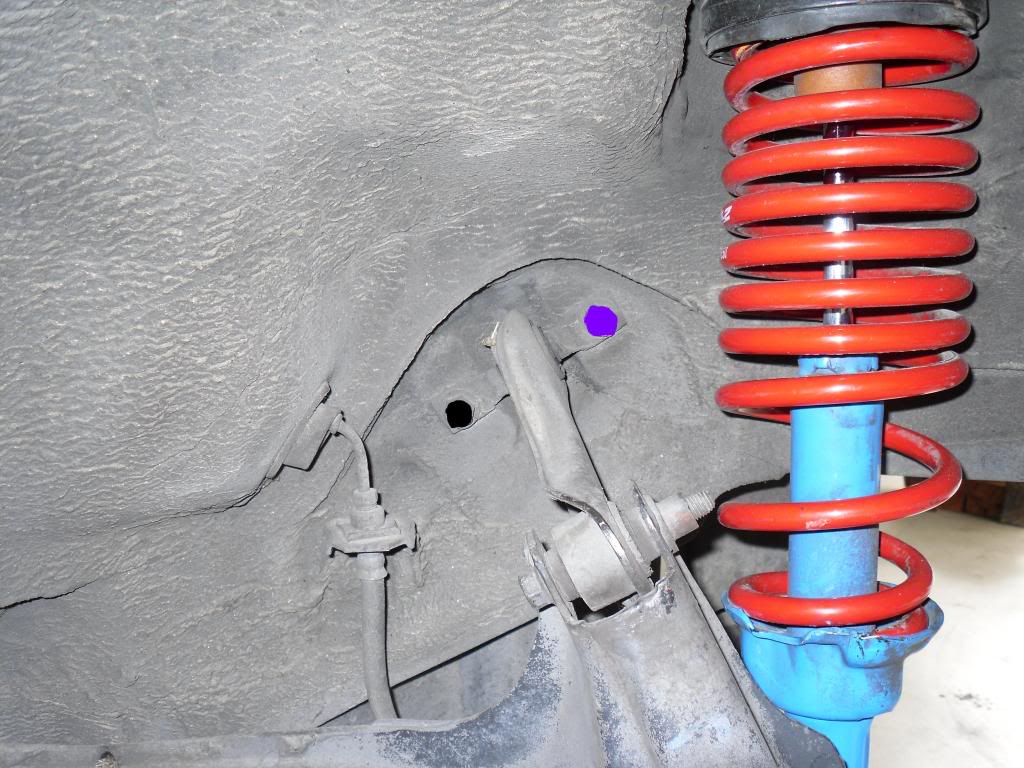
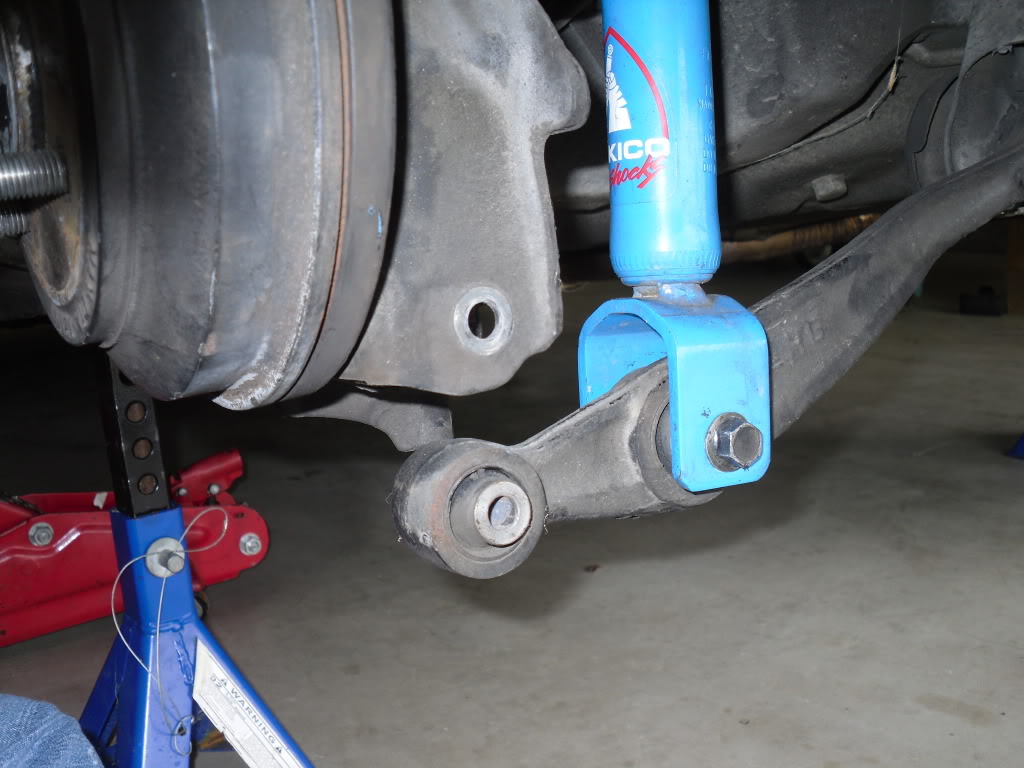
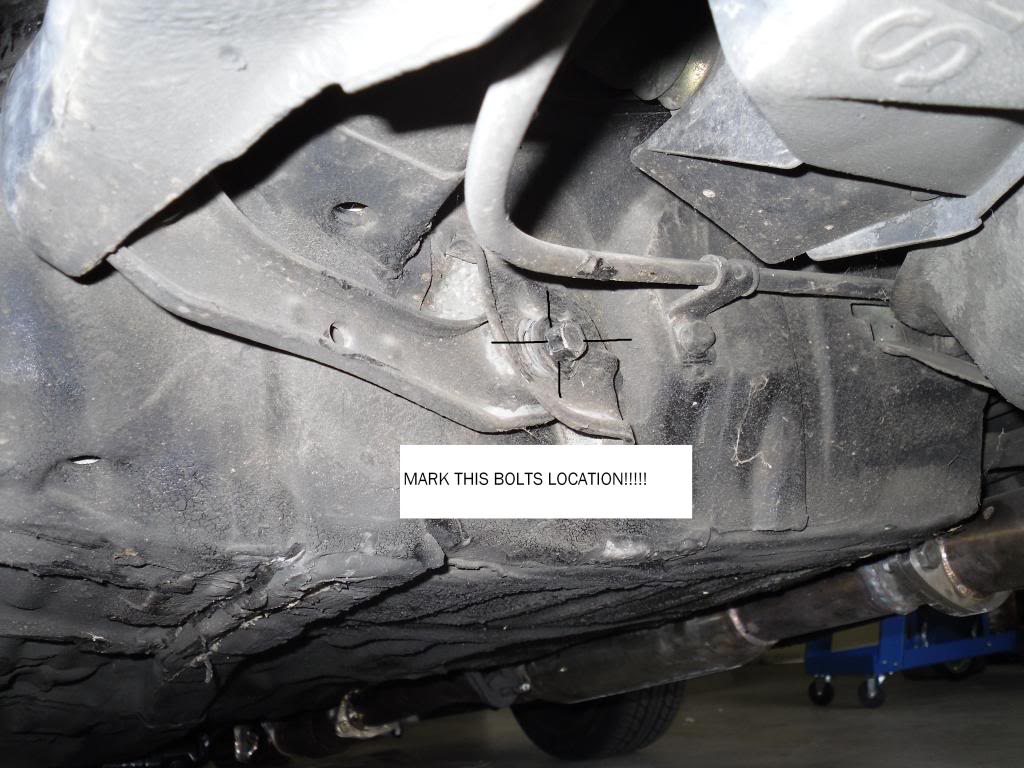
Unbolt the wheel and get to the trailing arm. Go under and find this bolt
Note that the toe alignment bolt should be marked for reference now before removal

Remove the bolt marked in Blue (i'm color blind sorry) and back out the black bolt about 7 turns
Remove the lower LCA bolt to release the trailing arm assembly
Follow by removing these 2 Trailing arm bushing bolts..

Now you are able to let it hang. There is a bolt on the backside holding the parking brake cable. Remove this also.
Here you see what we are working with. A nasty, beaten, old, crusty T.A. bushing
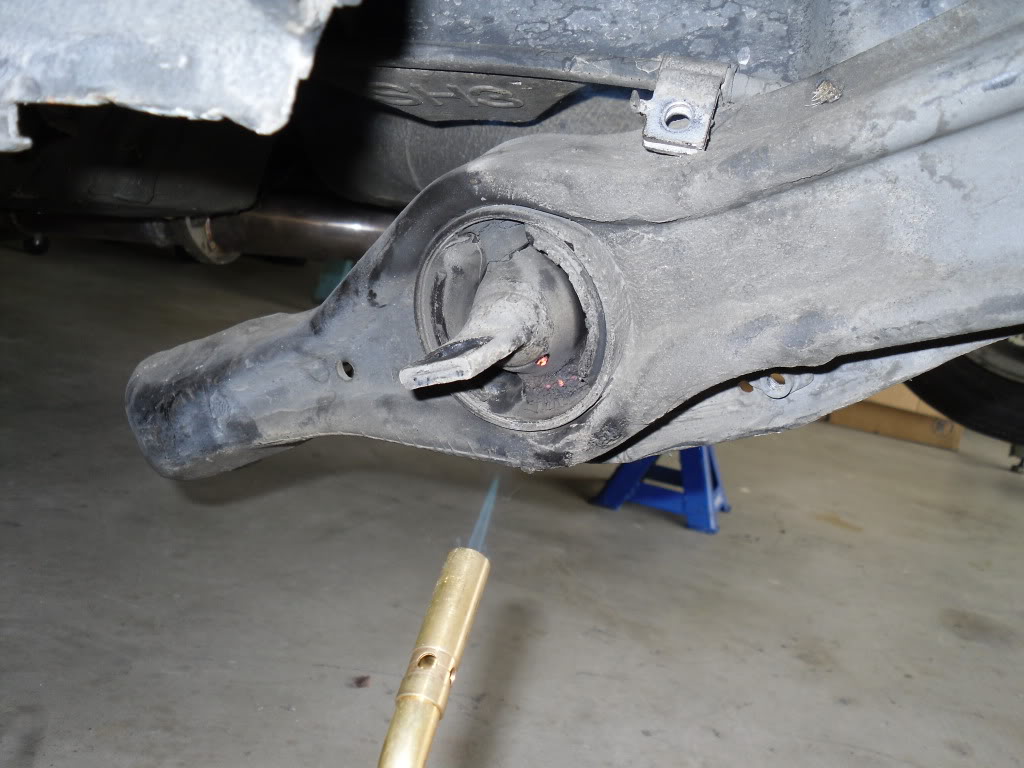
Torch the Steak knife to a glowing red. This is where it gets fun AND DANGEROUS! BE CAREFUL!
now start piercing through the old smelly rubber with your red hot steak knife. It takes awhile but you can do it. And it get easier.
This is the factory dogbone which we will re use. Note the offset hole location
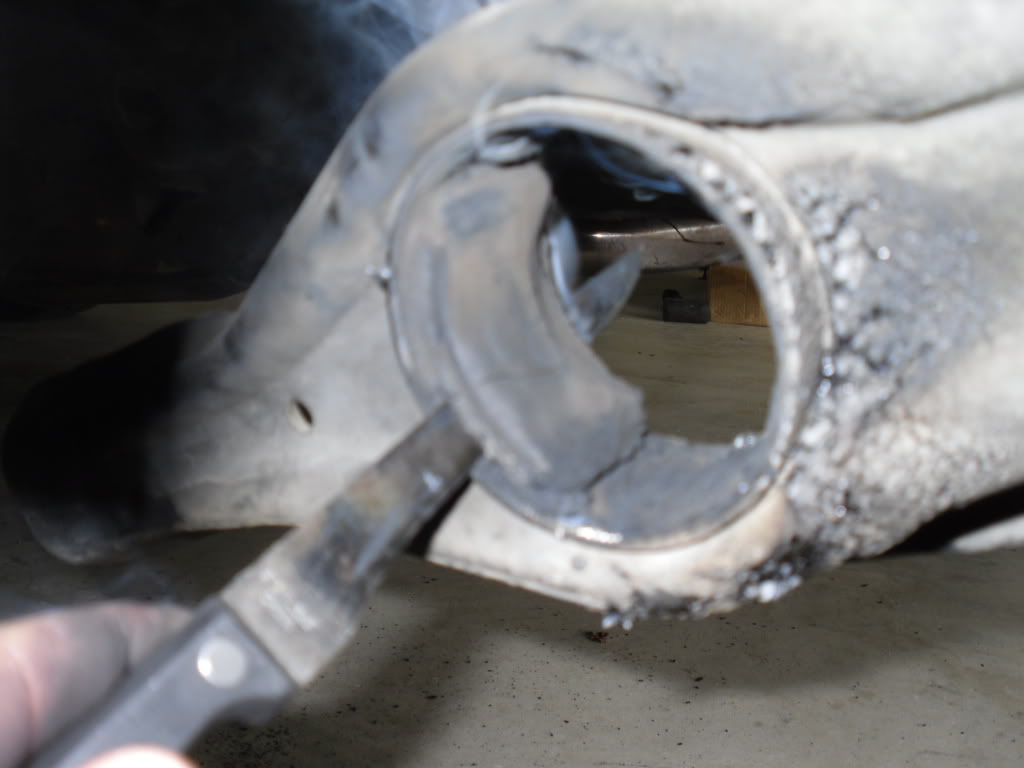
Keep heating, melting, heating, cutting you get the picture.
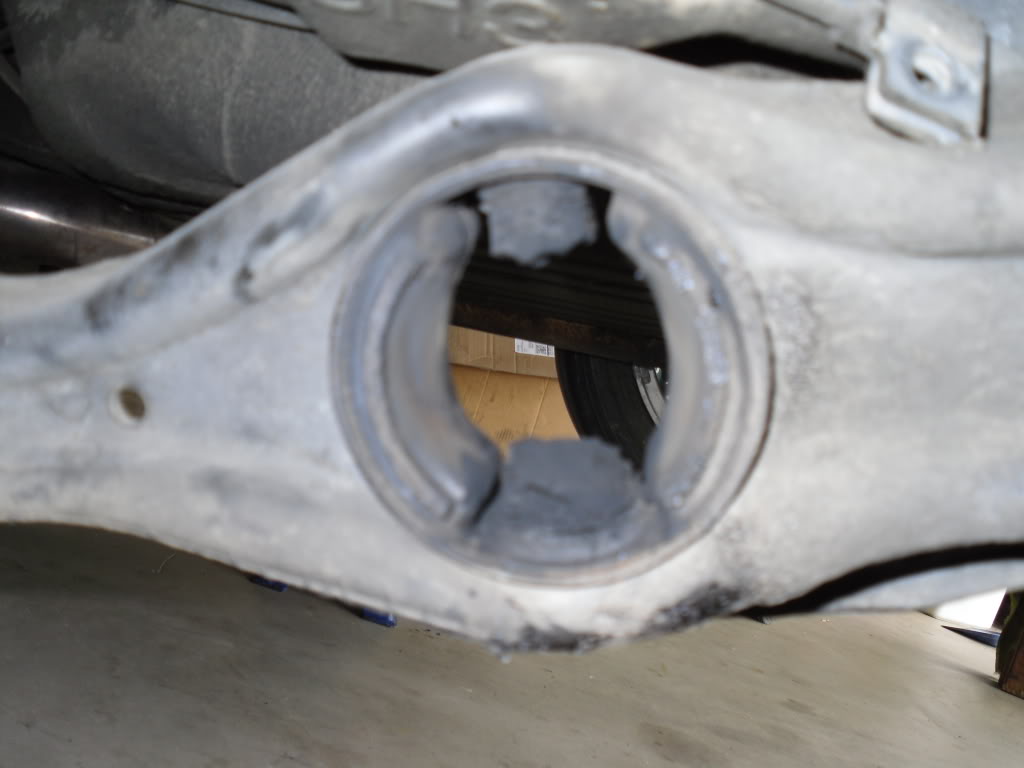
End up here as much rubber removed as possible.
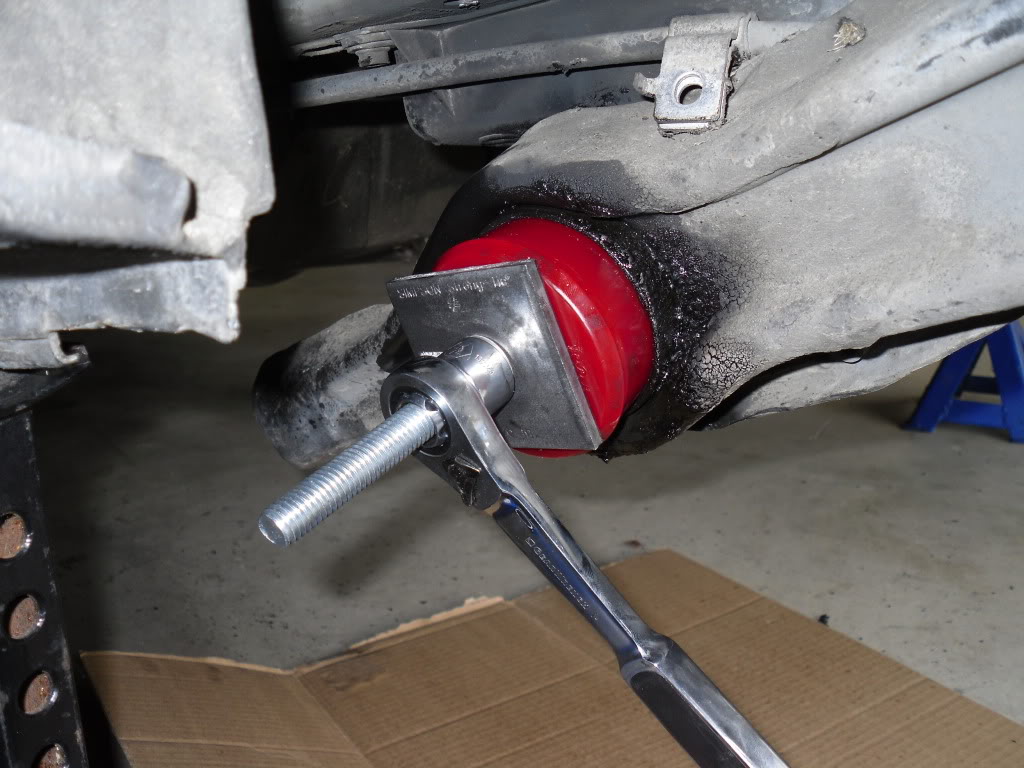
Now set the tool like this
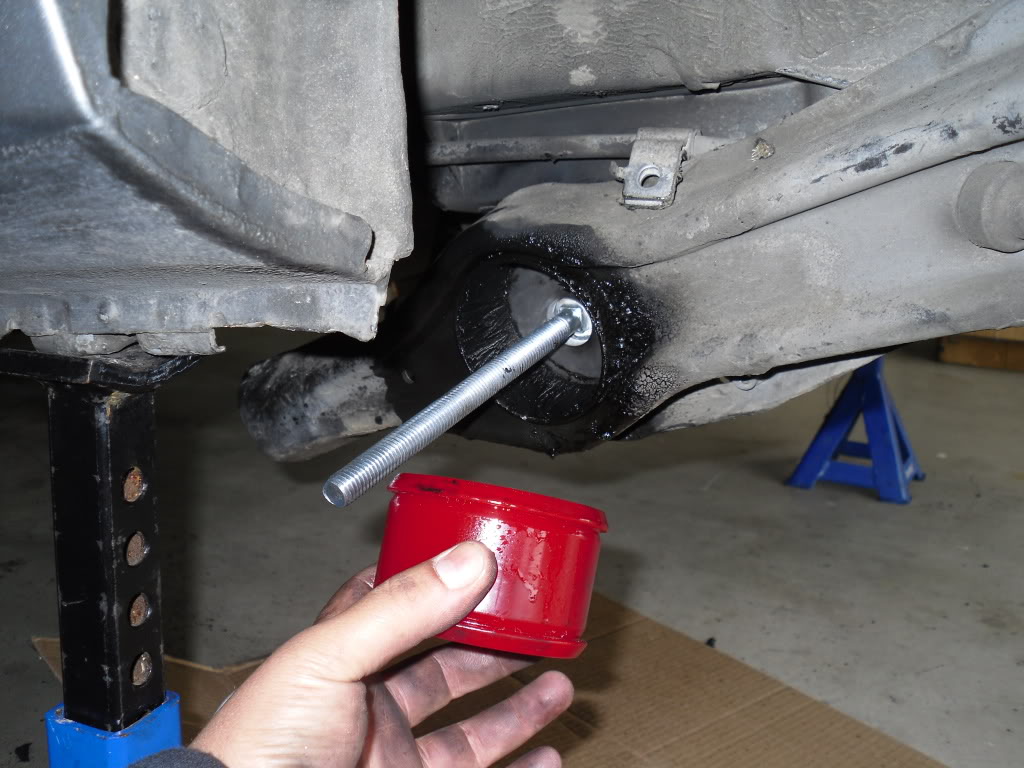
Start installing. An ocean of wd40 helps. Now you see my through wrench at work. You will get to a point where the E.S. bushing stops against the tool. back out the tool and space it with 2 screwdrivers or anything else
Now your here It is time for the dogbone. you cut off the rubber the same way as before. Heat, cut, heat, cut.
I have a power wheel and ended up like this. If you do not have a Power wheel then just cut as much rubber as possible.
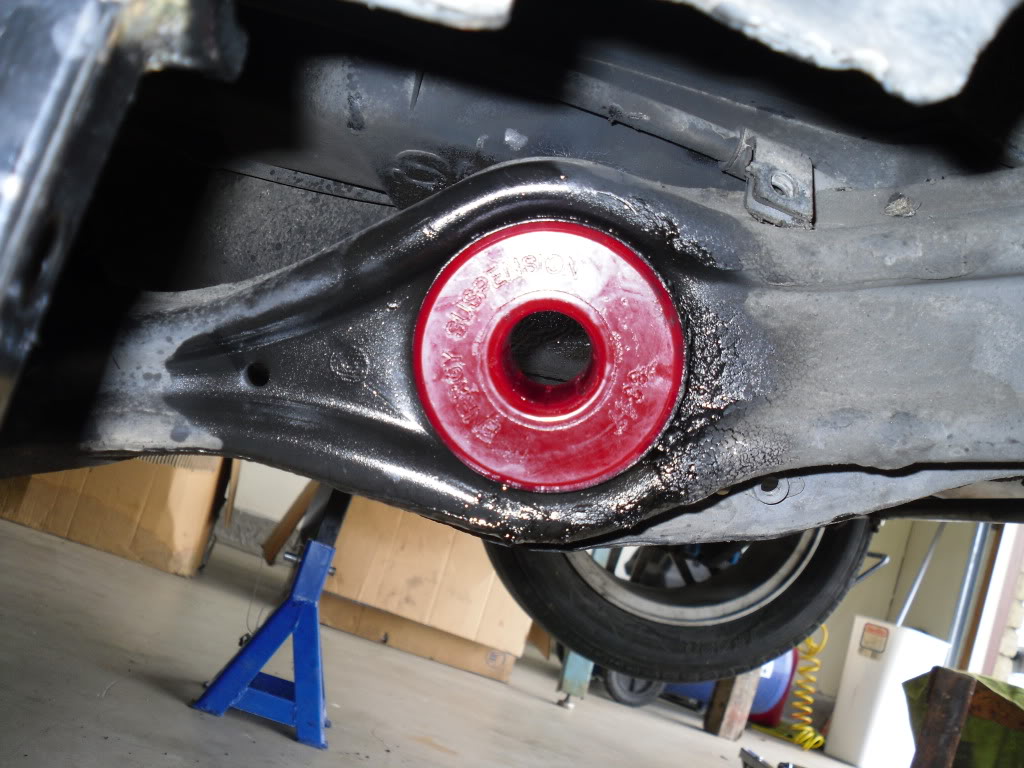
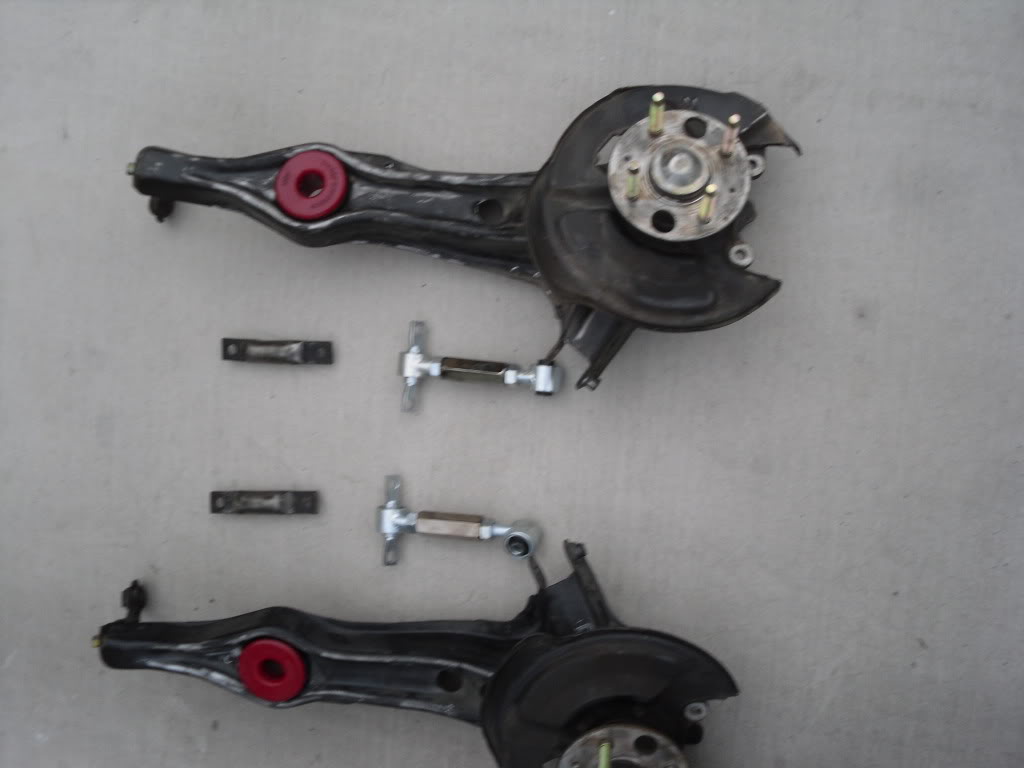
Now you take a Nylon covered Ball peen hammer and tap it in remeber that there is an offset. the longer end goes first.
Your done!
Assemble and finish off. Double check all your bolts and DRIVE! Straight to the alignment shop.
Energy Suspensions Trailing arm bushing install
Hello honda-techers
I put together an install thread to help those of you whom love these damn ED/EF 88-91 Honda civic hatchback, sedan, wagon, crx...etc
This is my Favorite platform from honda by far but they are getting older and older. The last ones to roll off the assembly lines were doing so in 1991 which makes them close to 20 years old with the 1988 cars at 22! With the passing years the factory bushings tend to swell and crack, become worn or completely gone
Many of us Older Honda enthusiasts know that these old components should be the first inline for any restoration or uprade.
Yes!!, I know that it is easier to just press out the complete factory trailing arm bushings and replace them with new one's but this thread isnt about that. It is about installing Energy Suspension Trailing arm bushings.
NOTE: I am not liable for anything you do and by reading this you hold me responsible for nothing!
If you burn your house down then that shows that you do not know the basic's of fire. This job is done with close proximity to the gas tank and you should keep that in mind foo!!!
The E.S. bushing replaces the factory rubber AND REUSES THE FACTORY DOGBONE so to do this we must remove the factory rubber
and mark the orientation of the Dogbone. It only goes one way.
Pic of the 19 year plus old factory bushing
The red we all know
Some of the tools Needed. (aside from the basics) you will need a torch of some kind, a 2 dollar steak knife, and the install tool you can make for 6bux. I happen to have a Throughwrench set that kicks a$$
This is what I used to press in the E.S. bushing. I went to Lowes and got these large square washers from the Simpson set area
The bolt is just a basic 7" bolt and a nut. I welded the bolt end to the Simpson washer to keep it from turning. You can get a regular Bolt head yadayada.
Unbolt the wheel and get to the trailing arm. Go under and find this bolt
Note that the toe alignment bolt should be marked for reference now before removal
Remove the bolt marked in Blue (i'm color blind sorry) and back out the black bolt about 7 turns
Remove the lower LCA bolt to release the trailing arm assembly
Follow by removing these 2 Trailing arm bushing bolts..
Now you are able to let it hang. There is a bolt on the backside holding the parking brake cable. Remove this also.
Here you see what we are working with. A nasty, beaten, old, crusty T.A. bushing
Torch the Steak knife to a glowing red. This is where it gets fun AND DANGEROUS! BE CAREFUL!
now start piercing through the old smelly rubber with your red hot steak knife. It takes awhile but you can do it. And it get easier.
This is the factory dogbone which we will re use. Note the offset hole location
Keep heating, melting, heating, cutting you get the picture.
End up here as much rubber removed as possible.
Now set the tool like this
Start installing. An ocean of wd40 helps. Now you see my through wrench at work. You will get to a point where the E.S. bushing stops against the tool. back out the tool and space it with 2 screwdrivers or anything else
Now your here It is time for the dogbone. you cut off the rubber the same way as before. Heat, cut, heat, cut.
I have a power wheel and ended up like this. If you do not have a Power wheel then just cut as much rubber as possible.
Now you take a Nylon covered Ball peen hammer and tap it in remeber that there is an offset. the longer end goes first.
Your done!
Assemble and finish off. Double check all your bolts and DRIVE! Straight to the alignment shop.
Last edited by beansandrice; 02-27-2010 at 06:59 PM.
 02-27-2010, 12:16 PM
#2
Honda-Tech Member
iTrader: (2)
Join Date: Nov 2007
Location: Pasadena, CA, USA
Posts: 7,217
Likes: 0
Received 0 Likes
on
0 Posts
Good stuff, I'm going with a different Poly bushing.  It has a metal mount ring, and comes with the dog bone.
It has a metal mount ring, and comes with the dog bone.
02-27-2010, 12:27 PM
#4
B*a*n*n*e*d
just an fyi you dont have to, and it's probably better if you do not loosen this bolt.
if you undo the bolt that attaches the compensator arm to the rear trailing arm, you will not affect your toe at all. reinstallation takes a little more work, but at least you know your alignment won't be off.
great, detailed write up none the less though.
oh and just curious, did you apply any of the supplied bushing grease? it helps reduce any squeaking from the bushings.
Last edited by EFRue57; 02-27-2010 at 04:13 PM.
 02-27-2010, 02:08 PM
#6
Honda-Tech Member

Join Date: May 2008
Location: Boulder, Co, USA
Posts: 351
Likes: 0
Received 0 Likes
on
0 Posts
Very cool, good write up. I'm lovin the tool you made, and thank you for taking good pics. I don't know why more people don't document their work. 
02-27-2010, 04:11 PM
#7
Honda-Tech Member

Join Date: Dec 2009
Posts: 64
Likes: 0
Received 0 Likes
on
0 Posts
great write up. i was looking for something like this a few days ago before i did mine. doing a rear disc upgrade to my ef. so i had mine off the car not installed yet. i hammered the whole thing out from the back and used a big vise to push the bushing in. extended the lug nuts too.
here is a pic.
here is a pic.
Trending Topics
02-27-2010, 04:16 PM
#8

Join Date: Aug 2009
Posts: 6
Likes: 0
Received 0 Likes
on
0 Posts
PROPS! Very nice job, good pics. I'm currently looking to swap my rear drum brakes from my 96 civic ex coupe, looking fo GSR brakes. If you know anyone with the parts please let me know!.
02-27-2010, 04:19 PM
#9
B*a*n*n*e*d
Sorry for the thread jack, lol.
Last edited by EFRue57; 02-27-2010 at 04:34 PM.
02-27-2010, 04:28 PM
#10
Join Date: Aug 2009
Posts: 6
Likes: 0
Received 0 Likes
on
0 Posts
THANKS for the info EFRue57! Let me know if you know where i can find what i need to get my rear brake conversion done. BTW keep up the good work with ur CRX.
02-27-2010, 06:54 PM
#11
Honda-Tech Member
Thread Starter
Join Date: May 2009
Location: So-Cal
Posts: 1,722
Likes: 0
Received 0 Likes
on
0 Posts
Thanks for the props guys. I just wanted to post up some informative stuff. And thanks for the input. 
05-25-2010, 08:46 AM
#12
Honda-Tech Member

Join Date: Jan 2010
Posts: 107
Likes: 0
Received 0 Likes
on
0 Posts
sorry I know this is quite old but I did this DIY and putting the dog bone in was a PITA. did you have a hard time installing the dog bone? I tried hammering it but it won't go in.
 05-25-2010, 01:19 PM
#16
Honda-Tech Member
Join Date: Jan 2010
Posts: 107
Likes: 0
Received 0 Likes
on
0 Posts
05-25-2010, 02:25 PM
#17
Honda-Tech Member
Thread Starter
Join Date: May 2009
Location: So-Cal
Posts: 1,722
Likes: 0
Received 0 Likes
on
0 Posts
Inserting the Dog bone. I used Wd-40 and a nylon padded ball peen hammer.
Let me inform you it did not go in like "butter" that is why you should use some sort of padded hammer.
Let me inform you it did not go in like "butter" that is why you should use some sort of padded hammer.
05-25-2010, 07:05 PM
#19
Honda-Tech Member
Join Date: Aug 2006
Location: S0C4L, CA
Posts: 947
Likes: 0
Received 0 Likes
on
0 Posts
05-26-2010, 08:01 AM
#20
Honda-Tech Member
Join Date: Jan 2010
Posts: 107
Likes: 0
Received 0 Likes
on
0 Posts
^^ thanks. i've used a hammer too and it kinda like flattened the part where I hit it but that's no issue cuz that thing still is functional. i've also used a 3/8 extension and a long thick screwdriver to turn the dogbone while pushing it inwards because at some point, the hammer wasn't working like when the dog bone was halfway through.
05-26-2010, 11:55 AM
#21
Honda-Tech Member
Join Date: Apr 2003
Location: San Jose, CA
Posts: 1,786
Likes: 0
Received 0 Likes
on
0 Posts
Great write up. That's exactly how I did my RTA bushings. However, I used a press at my old work for installation. They'll probably add this to the stickies.
05-26-2010, 12:20 PM
#22
Honda-Tech Member
Those bushings are worse than crap, they are dangerous. Use stock or spherical bearings. Those poly bushings cause snap over-steer in light turning decelerations conditions. I almost totaled my car once coming off the throttle around 60is while making a very gradual turn. Not trying to take away from the write up, it was very nicely done, I would just hate to see someone get hurt because of these bushings.
http://www.hondaautomotiveparts.com/...VIN+Number+---
http://www.hondaautomotiveparts.com/...VIN+Number+---
05-26-2010, 02:07 PM
#24
Honda-Tech Member
Thread Starter
Join Date: May 2009
Location: So-Cal
Posts: 1,722
Likes: 0
Received 0 Likes
on
0 Posts
Those bushings are worse than crap, they are dangerous. Use stock or spherical bearings. Those poly bushings cause snap over-steer in light turning decelerations conditions. I almost totaled my car once coming off the throttle around 60is while making a very gradual turn. Not trying to take away from the write up, it was very nicely done, I would just hate to see someone get hurt because of these bushings.
http://www.hondaautomotiveparts.com/...VIN+Number+---
http://www.hondaautomotiveparts.com/...VIN+Number+---
I have used these bushing for a long time with no problems. Was there maybe another issue with your suspension that led to this catastrophic failure?
SH!FT as far as the P# I do not know I bought these off a
fellow Honda-Tech'er