
Speedo, tach, temp, and fuel guage needle calibration instructions.
 03-25-2008, 10:29 AM
#1
Honda-Tech Member
Thread Starter
Join Date: Oct 2006
Location: URANUS
Posts: 542
Likes: 0
Received 0 Likes
on
0 Posts
This is primarily for 92-95 Civics, but will probably work for 96-00 Civics and 94-01 Integras. This is in no way the most professional way to do this, but it is DIY, it's free, and most importantly....................IT WORKS!!!
Last year I got rid of my indiglo guages and lumineedles. I didn't want to swap clusters, and I wanted to keep the original mileage. I wanted a JDM looking cluster, but still have MPH and the cruise control light.
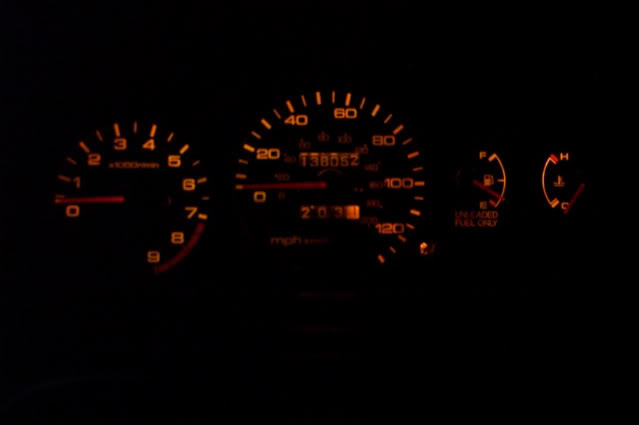
So bought a JDM Vti cluster and swapped the red lit needles to my USDM cluster and also used #74 amber bulbs to make it light up amber. The results were damn near perfect!!!! See the pics below.
When I did all this, I had to recalibrate all 4 needles. Here is a solid way to do this without spending an arm and leg at a shop, or having to hassle with a dealership who generally don't cater to modified Hondas.
Before you take anything apart, see where everything reads. It is also best to buy or borrow a digital timing light with tach readout.
1) Run the car to proper temp and allow the radiator fan to kick on. This will ensure that idle speed is normal and steady. Compare the tach reading with the digital timing light. If all is good, then you know the tach in the cluster is calibrated.
2) When the radiator fan kicks on, note where the temp guage needle reads, usually at about the 8 o'clock position.
3) Now drive the car on the highway with a passenger. You need to compare the RPM on the tach to the speed readings. I did this in 5th gear at 50, 60, and 70mph. Keep the speed steady and read out the RPM on the tach and have the passenger write the numbers down.
4) Now you can rebuild the cluster...............this is a whole write up onto itself.
5) When the cluster is all put back together, leave the needles off, plug the cluster in the dash harness, use just a couple screws to temporarily hold the cluster in place, leave the lens off, and leave the dash bezel off. Make sure you have the hazard switch plugged in or else the turn signals will not work.
6) Run the car the same as in step 1 and connect the digital timing light. When the idle is steady, then gently postion and lightly push the needle on the post. Do not push it all the way down in case you need to readjust. Once you are confident the the needle is where it needs to be, then push the needle down all the way. Make sure to not push it too hard as the needle could possibly get stuck on the guage face.
7) Now position the temp needle where it needs to be the moment the fan kicks on.
8) Now comes the tricky part..................the positioning of the speedo needle. The safest way is to have the car on a rolling dyno of some sort. If no rolling dyno, then I suppose you could run the car with the front end on jackstands and get up to speed. The least safe way, which I did, was actually drive the car while postioning the needle. So this will require that you are in little traffic and on some straight stretches of roads.
So I drove the car, loosely and GENTLY postioned the speedo needle as compared to the RPM's, then checked my readings compared the RPM at 50, 60, and 70mph in 5th gear. This took me a few tries to get it right since the little silver pole that protrudes out from the speedo mechanism can easily get misaligned. You would know what I am talking about if you took a cluster apart. Anyway, when I was confident that I had the speedo postioned correctly, I gently but firmly pushed the needle all the way on.
9) On the way home from the drive, fill the car up all the way, and position the fuel needle where it needs to be.
10) Put the lens back on the cluster, the little rubber boot over the trip meter post, install the cluster, dash bezel, and hazard switch.
11) Mission accomplished!!!!!
More about my "hybrid" speedo cluster
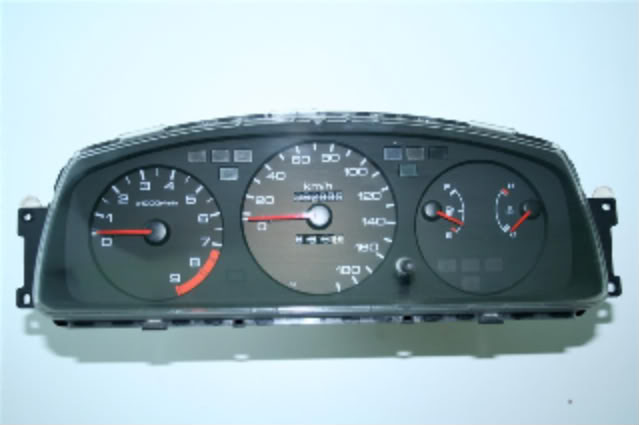
Here is a JDM Vti cluster
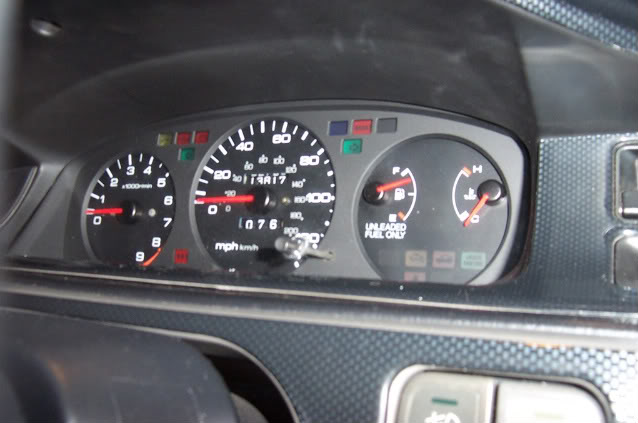
My cluster looks like this
Last year I got rid of my indiglo guages and lumineedles. I didn't want to swap clusters, and I wanted to keep the original mileage. I wanted a JDM looking cluster, but still have MPH and the cruise control light.
So bought a JDM Vti cluster and swapped the red lit needles to my USDM cluster and also used #74 amber bulbs to make it light up amber. The results were damn near perfect!!!! See the pics below.
When I did all this, I had to recalibrate all 4 needles. Here is a solid way to do this without spending an arm and leg at a shop, or having to hassle with a dealership who generally don't cater to modified Hondas.
Before you take anything apart, see where everything reads. It is also best to buy or borrow a digital timing light with tach readout.
1) Run the car to proper temp and allow the radiator fan to kick on. This will ensure that idle speed is normal and steady. Compare the tach reading with the digital timing light. If all is good, then you know the tach in the cluster is calibrated.
2) When the radiator fan kicks on, note where the temp guage needle reads, usually at about the 8 o'clock position.
3) Now drive the car on the highway with a passenger. You need to compare the RPM on the tach to the speed readings. I did this in 5th gear at 50, 60, and 70mph. Keep the speed steady and read out the RPM on the tach and have the passenger write the numbers down.
4) Now you can rebuild the cluster...............this is a whole write up onto itself.
5) When the cluster is all put back together, leave the needles off, plug the cluster in the dash harness, use just a couple screws to temporarily hold the cluster in place, leave the lens off, and leave the dash bezel off. Make sure you have the hazard switch plugged in or else the turn signals will not work.
6) Run the car the same as in step 1 and connect the digital timing light. When the idle is steady, then gently postion and lightly push the needle on the post. Do not push it all the way down in case you need to readjust. Once you are confident the the needle is where it needs to be, then push the needle down all the way. Make sure to not push it too hard as the needle could possibly get stuck on the guage face.
7) Now position the temp needle where it needs to be the moment the fan kicks on.
8) Now comes the tricky part..................the positioning of the speedo needle. The safest way is to have the car on a rolling dyno of some sort. If no rolling dyno, then I suppose you could run the car with the front end on jackstands and get up to speed. The least safe way, which I did, was actually drive the car while postioning the needle. So this will require that you are in little traffic and on some straight stretches of roads.
So I drove the car, loosely and GENTLY postioned the speedo needle as compared to the RPM's, then checked my readings compared the RPM at 50, 60, and 70mph in 5th gear. This took me a few tries to get it right since the little silver pole that protrudes out from the speedo mechanism can easily get misaligned. You would know what I am talking about if you took a cluster apart. Anyway, when I was confident that I had the speedo postioned correctly, I gently but firmly pushed the needle all the way on.
9) On the way home from the drive, fill the car up all the way, and position the fuel needle where it needs to be.
10) Put the lens back on the cluster, the little rubber boot over the trip meter post, install the cluster, dash bezel, and hazard switch.
11) Mission accomplished!!!!!
More about my "hybrid" speedo cluster
Here is a JDM Vti cluster
My cluster looks like this
 03-25-2008, 11:14 AM
#2
Honda-Tech Member
Join Date: Feb 2006
Location: Long Beach, California, United States
Posts: 406
Likes: 0
Received 0 Likes
on
0 Posts
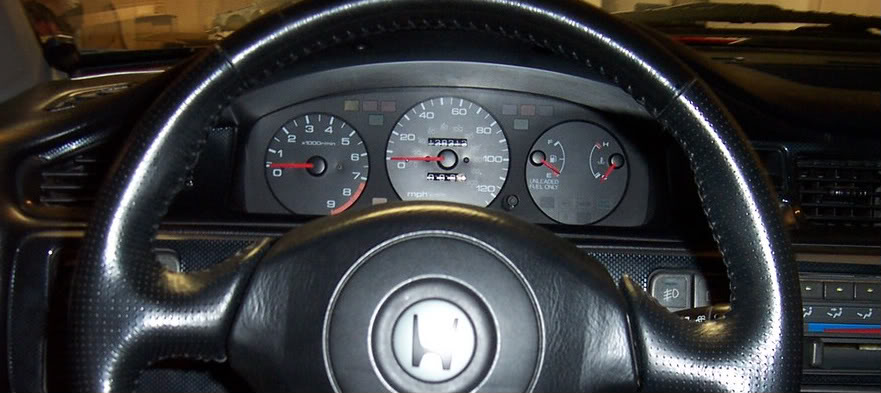
what did you need to do for that s2000 steering wheel swap???
03-25-2008, 11:23 AM
#3
Honda-Tech Member
Thread Starter
Join Date: Oct 2006
Location: URANUS
Posts: 542
Likes: 0
Received 0 Likes
on
0 Posts
<TABLE WIDTH="90%" CELLSPACING=0 CELLPADDING=0 ALIGN=CENTER><TR><TD>Quote, originally posted by doubleoazn03 »</TD></TR><TR><TD CLASS="quote">what did you need to do for that s2000 steering wheel swap???</TD></TR></TABLE>
The short answer is:
I transplanted a 96-00 EK Civic steering column over. The spline post for 92-95 Civics are too small. The EK column needs to be lenghtned about 3 inches towards the bottom of the column. Any good machine shop can do this. The column then bolts right in. You also need an S2000 cable reel so the connectors for the horn, cruise, and airbag hook up. You then need to splice those cable reel wires to the dash harness under the dash itself.
03-25-2008, 08:07 PM
#4
Honda-Tech Member
Join Date: Oct 2003
Location: Pacific NW
Posts: 977
Likes: 0
Received 0 Likes
on
0 Posts
Very nice write up, this is what I need to do.
BTW--You only got 203 miles to that much of the gas tank?
BTW--You only got 203 miles to that much of the gas tank?
03-25-2008, 09:20 PM
#5
Honda-Tech Member
Thread Starter
Join Date: Oct 2006
Location: URANUS
Posts: 542
Likes: 0
Received 0 Likes
on
0 Posts
<TABLE WIDTH="90%" CELLSPACING=0 CELLPADDING=0 ALIGN=CENTER><TR><TD>Quote, originally posted by VN712 »</TD></TR><TR><TD CLASS="quote">Very nice write up, this is what I need to do.
BTW--You only got 203 miles to that much of the gas tank?</TD></TR></TABLE>
When I took that pic, I had just finished putting the cluster together. In doing so, I had to press the trip meter post somewhere in mid tank.
I actually get about 300-330 miles to a tank depending on driving conditions. I've gotten as high as 35mpg before on the highway. When the needle directly points to empty and I go to fill up, it it usually is in the low 10 gallon range. My average city fuel economy is 26mpg and average hwy fuel economy is 33mpg. That is with a built B18C1 with 180WHP.
03-18-2013, 04:37 PM
#6
Honda-Tech Member

Join Date: Nov 2006
Location: NYC
Posts: 1,565
Likes: 0
Received 0 Likes
on
0 Posts
resurrecting from the dead..did you also swap over the clear plates from the JDM cluster to the USDM cluster?
06-02-2016, 08:04 PM
#7
Honda-Tech Member

Join Date: Mar 2016
Posts: 54
Likes: 0
Received 0 Likes
on
0 Posts
I know, it's an old thread but I'm completely dumbfounded that anyone would recommend recalibrating the tachometer and speedometer while driving. Just do a factory reset. This should work on any honda.
28th the gauges exposed and the needles off the tachometer and speedometer, turn the ignition on(don't turn it over). After you do that, reattach the needles so that they sit directly below the stopper that keeps it from dropping below 0 rpm/mph. Then carefully lift the needles over the stoppers. They should both sit on the stopper at 0mph/rpm. Turn the ignition off. Now turn it back on without starting the car. If the gauges still read 0 then start the car and take note of the isle speed. Is it correct? Now wait till the engine drops to a low idle. Again, does it look correct? If your tachometer reads high and low idle correctly then the rest will also be correct. Your tachometer is now recalibrated and you never moved your car an inch. The speedometer should also be recalibrated. You just need to test it by matching the speed with the tachometer. Note that no recalibration takes place at this time. In my car, 2500 rpms in 5th gear = 65mph. If everything looks good at this point, you're good to go.
The fuel gauge recalibration seems fine, though I question the temp gauge recal. There's gotta be a better way than bringing the engine to temperature and guessing.
Trending Topics


Thread
Thread Starter
Forum
Replies
Last Post
Lucid_Dream
Honda Civic / Del Sol (1992 - 2000)
12
03-06-2007 03:03 PM
Do_Ster
Honda Civic / Del Sol (1992 - 2000)
13
04-08-2005 11:49 PM
89DXDann
Honda CRX / EF Civic (1988 - 1991)
3
06-04-2004 11:38 PM
01, acura, calibrate, cars, civic, crx, guage, honda, integra, light, lumineedles, needles, recalibration, speedometer, tachblinkersclock, working