
My paint project (56k uncertain)
 05-30-2005, 11:12 AM
#1
Member
Thread Starter
Join Date: Mar 2004
Location: racine, Wi, usa
Posts: 2,239
Likes: 0
Received 0 Likes
on
0 Posts
Well about two weeks ago now, I started the tedious process of painting my entire car. Currently its Frost White? soon to be 05 Fiji Blue pearl as seen in the last pic.
This is taking me so long in part to:
A: Ive never done anything remotely like this before
B: I'm doing 90% of the work on my own
C: I'm find lots of hidden damage and rust I didn't know was there
D: There's just not enough hours in the day
E: I'm a perfectionist, so it has to look like a show car when I'm done
Really the hardest part so far, has just been taking off the hood and trunk because you really need twp people to get them all off, and making sure not to damage the numerous seals you need to keep, along with the um-teen thousand plastic clips. I'm for seeing a trip to the junk yard to salvage a bunch up for completion.
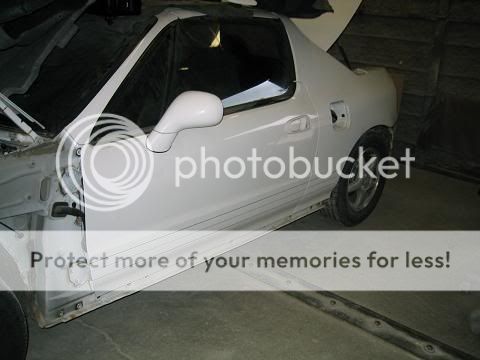
These are a few before Pics of the car before I started.

I really HATE Wisconsin winters
Here's one of the only known major damage. The master brake cylinder failed while I was driving one day and I wasn't able to completely stop in time. Luckily no one was hurt and the guy I hit was really cool about it. (Didn't care - his car didn't have a mark on it.)
Now on to the fun stuff
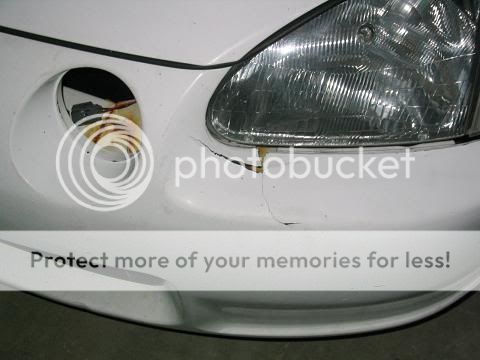
Stripping the front end. This step was fairly easy and took me about 45 minutes to do. The hardest part here was getting the screws holding down the top of the front bumper. Since I wasn't going to reuse it it got trashed (New one from certifit $34).
This Im going to leave white BTW. the fenders will all be painted blue along with the bumper and hood,
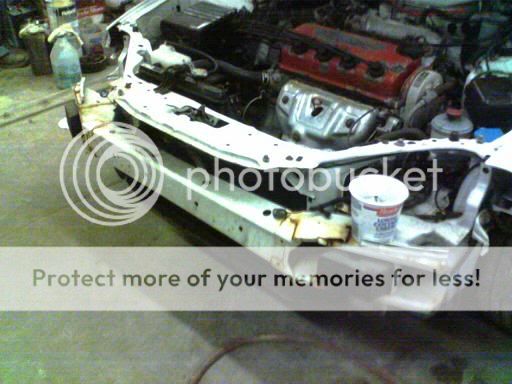
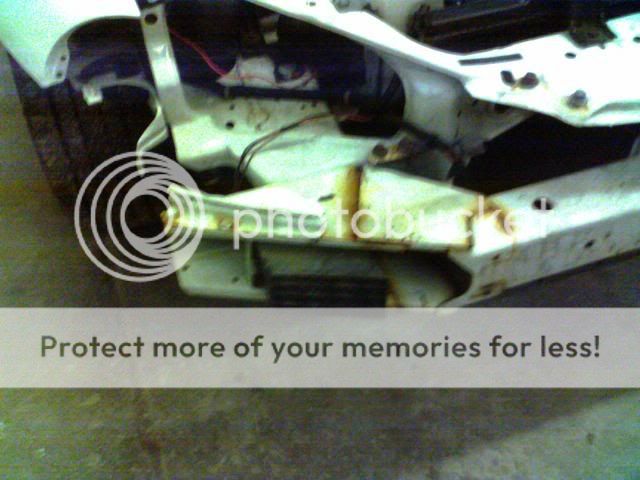
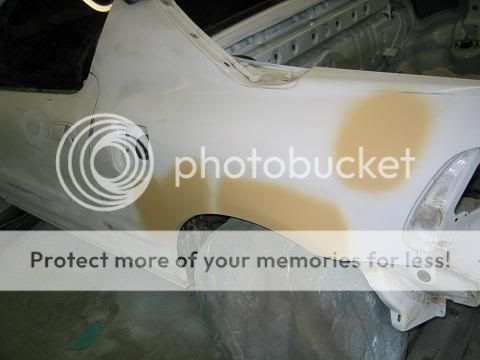
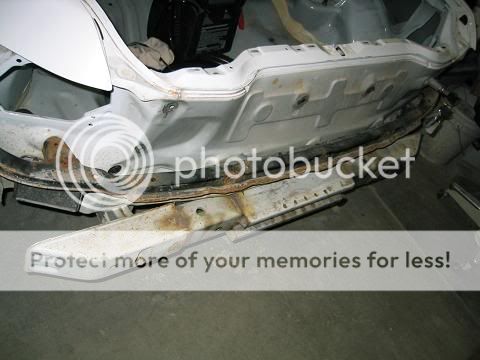
With the bumper gone we survey the damage. Pretty rusty but noting that cant be sanded out thankfully and repainted. This will be painted blue only because you can see it when the head lamps are installed.
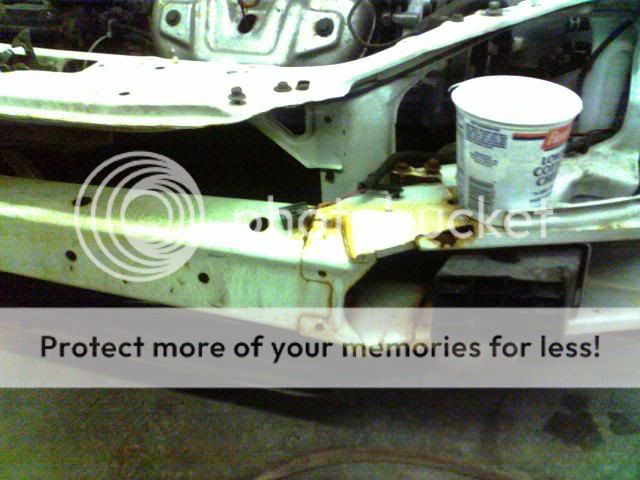
Close up of the bent bumper support. This will get pulled during the reassembly before it gets repainted. Sorry for the bad pic I took this one with my camera phone. It will probably take longer to chain the car up then it will to pull.
Here's a pic of the other side, As you can see its pretty rusted so I'm going to sand it all down before reassembly.
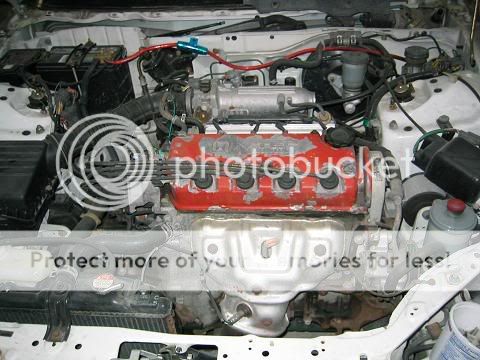
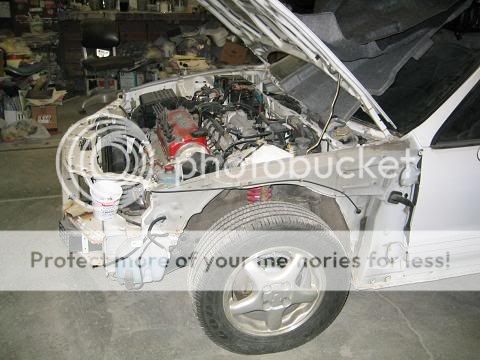
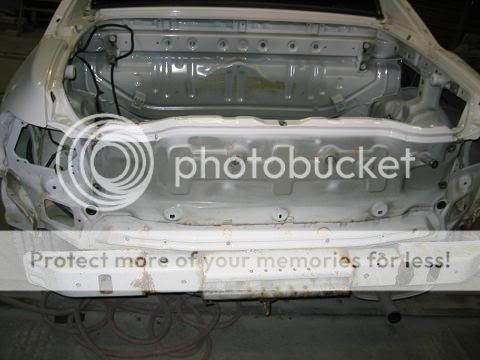
Here's a pic of my engine bay. Nice ain't it? Im going to go thro and clean this up pretty good after I do my tranny swap (Again) the valve cover is also going to be powder coated. Who ever had the car before me painted it red.
Onto the rear!
Doesn't look to bad does it? Just some rust from under the side moldings. Think again. There were a few dings and hail damage from last summer.
One pic after being sanded and bondo'd out.
One more pic to show the rear most part of the car.
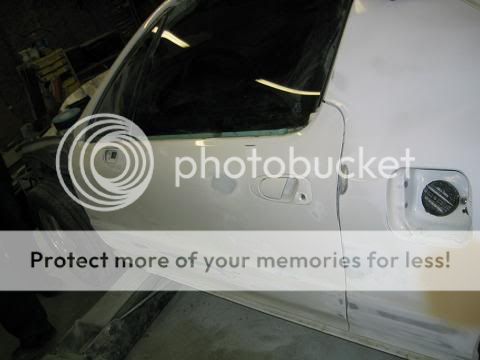
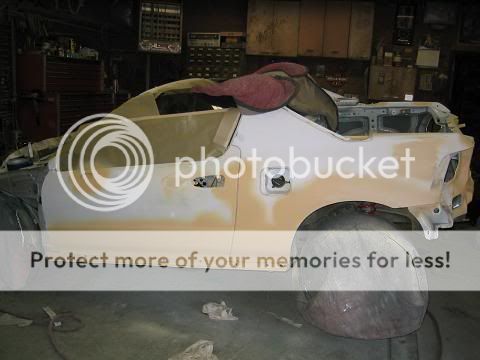
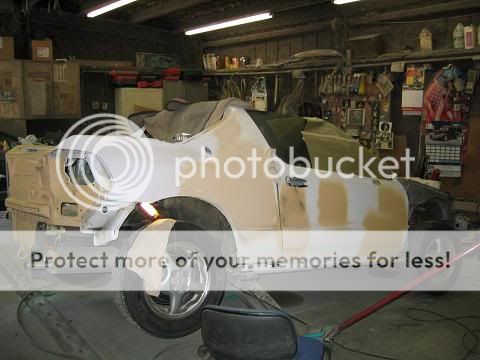
Here's a shot of the passenger side, This one was by far the most dented and damaged.
Here's a close up of some hidden damage I found one I removed the side skirts. this is just going to be straightened out the best I can, I don't think im going to bondo it because it will just be covered. Ill sand it and paint over it.
 One shot of the passenger side door after I went thro and fixed the dings and hail damage.

One more shot of the passenger side. Thankfully most of these were shallow and didn't require much work to fix.
Now onto the trunk!
Hey look Ma, more rust! Why should we stop here right?
I took the once black bumper support to be sand blasted and I have to say it looks pretty good now that I got it back. You can tell its been sandblasted from the pitting but who cares? Its covered up and you don't see it so a few coats of black primer and were good to go.
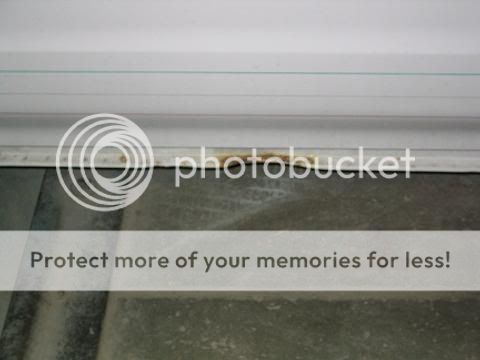
This is probably the worst spot of rust I found once I removed the trunk seal, and was also one of the hardest to sand out because of the tight space I ended up doing it by hand taking up a lot of time.
We cant go thro all this and neglect the top of the car can we? Of course not!
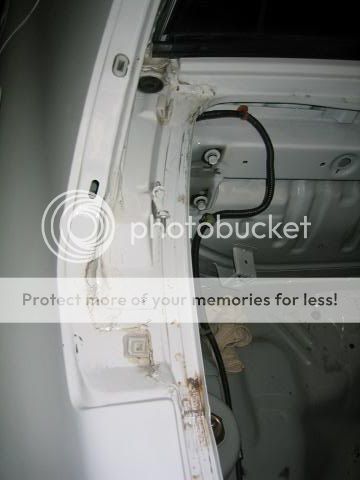
Here's one of the top piece of the windshield. Not to bad but it needs some work to get it into shape none the less.
What about the trunk and the hood you ask? Fear not I left nothing out.
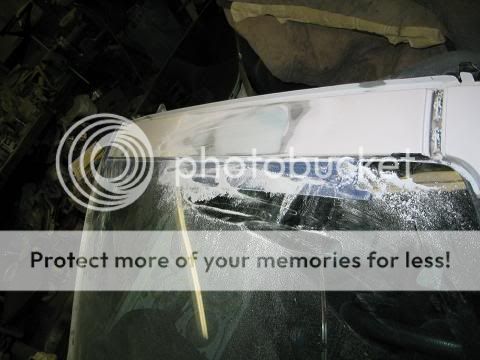
Here's one of the trunk, not to bad one dent from hail and the others where from the spoiler (Stock). I had a better one but it became corrupt somehow and Ill have to take anther one.
The hood was determined to not be worth the trouble of fixing so we went ahead and ordered a new one of those too. $120 why bother?
Finally one pic of the target color Im going for, its Fiji Blue Pearl Honda paint number B529P.

I think it will look pretty sweet when I'm all done.
More pics are to follow when I reassemble everything and paint the car.
Modified by nocturnaldragon at 12:07 AM 6/04/2005
Here's an update.
Ive been working and sanding my *** off, I swear Ive lost all hope in this war against rust. After 2 weeks of sanding everyday I think I MAY have won.
Anyhow here's some updated pics, I could of swore I had taken more but ohh well here you go!
This is an updated picture of the trunk. You can see the holes drilled for the spoiler, about an inch after that there were dents from everyone grabbing the spoiler when closing the trunk, you cant see them with the spoiler installed but hey I'm a perfectionist so they got fixed. The spot in the upper right is from hail damage and defiantly was fixed.
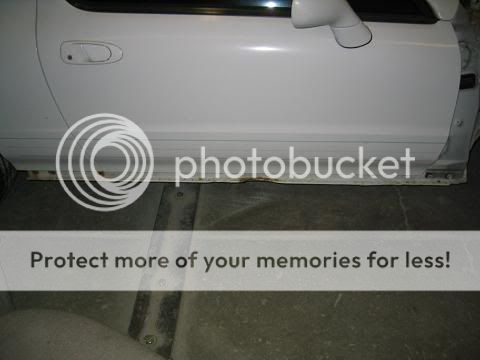
Here's a pic of the drivers side after primer, the bottom of the car was complete sanded do to spots of surface rust hiding under the side skirts. and the rear wheel wells were complete sanded from the INSIDE. There wasn't a mark on the outside but after looking at the insides with an inspection mirror I was sadly disappointed with the situation.
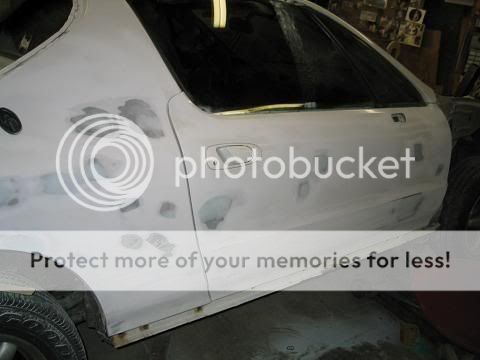
This is a shot of the passenger side, the side skirt still hasn't gotten its coat of primer in this shot but ohh well. The area behind the door was mostly hail damaged, along with the doors.
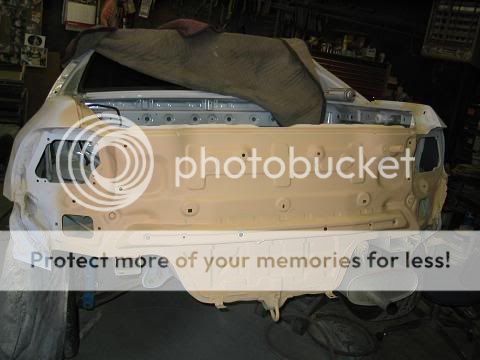
This is a shot of the rear. There wasn't any damage here other then rust spots so they ALL got sanded down and primed over.
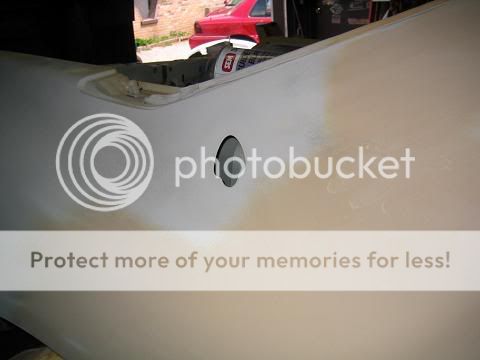
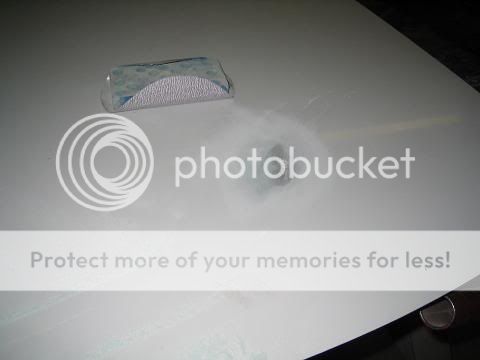
This is a shot of the antenna hole, Im putting there here only as a reference to people who say "Hey why not do such and such to get a power antenna?" well because of the shape of that hole and its angle 45' its just not fricken possible unless you but the Honda oem one. If someone else has figured out how and pictures to back up there claim by all means let me know!
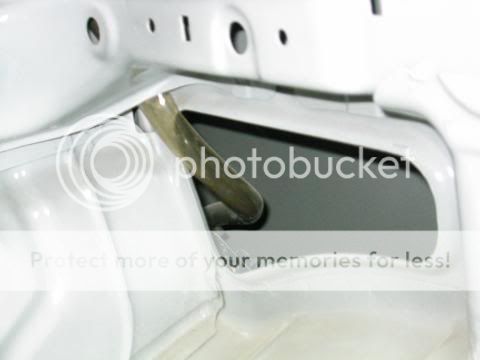
This is just a pic of the bracket that holds the antenna in place.
Well that's it for now, Sealer is going on tomorrow to make the color one color again before paint. HOPEFULLY MY %^$^$%#$ paint will be in tomorrow, I ended up getting for about $300 for 3 qts.
Hey sorry I havent updated in a while but Ive been having some issues over here first one being its been like 100'+ here so that makes for slow moving and little motavation when I could be home swiming. Also the giant cotton wood tree defying my threats to stop shedding its evilness everywhere If it wasent over 90 youd swear it was snowing!
Anyhow I forgot to take some pictures with just the primor on, ohh well picture the car being white thats about it.
The car got 2 layers of sealer mostly because the first coat dident cover everything perfectly due to the fact it was just crap in a car, it ended up leaving the car with a rough drywall effect so it all had to be wetsanded. Took about an hr and a half to sand it all down and make it look pretty again.
Anyhow paint followed that day leaving my car with 1 coat of primor, 2 coats of sealer, 3 coats of paint, and 3 coats of clear.
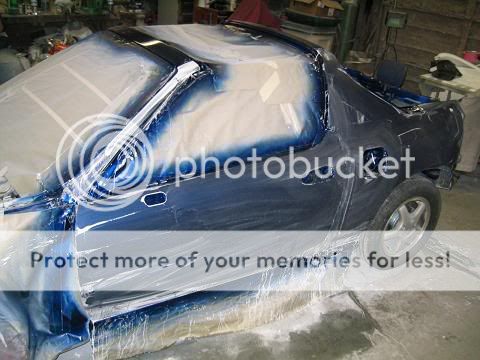
Heres a picture of the drivers side after paint and being wet sanded. I was to bored and unmotavated to clean off the soap stuff before pictures.
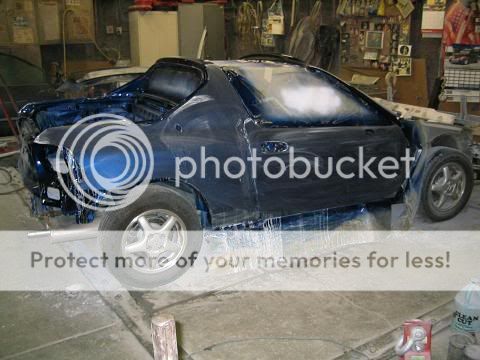
Heres a shot of the passenger side of the car. its hard to see the paint but trust me its nice.
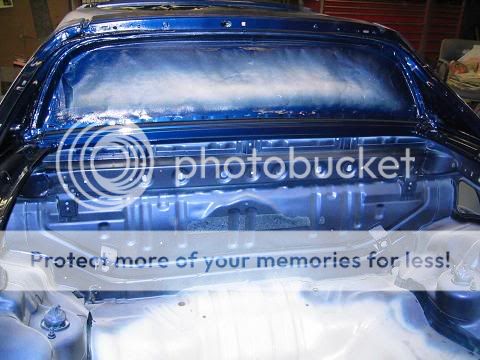
This is a shot of the rear of the car, I dident wet sand it yet so you can really see the blue, the trunk dident get any clear cause well why?
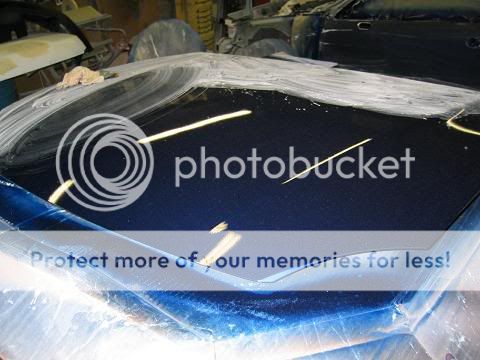
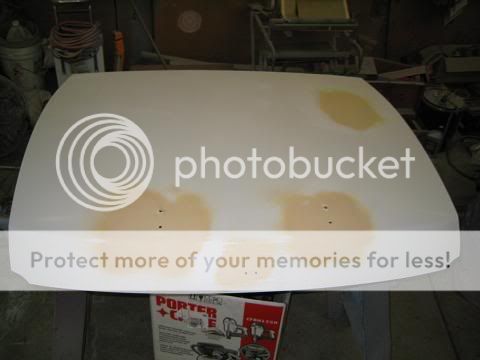
Heres a shot of the hood half sanded and half not, to give you a contrast. I think its looking pretty good. If you can see the little spots in the paint its dust and will all come out with the wetsanding.
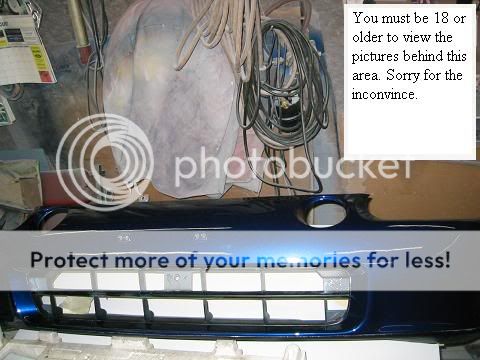
Heres a shot of the front bumper cover and let me tell you it took me more time to tape the thing up nice and keep the lines with the black and blue then it did to actually paint it.
Well thats all I have for now HOPEFULLY tomarrow Ill start painting the misc trim and stuffs so I can start reassembling the car which will be ohh so much fun so I dont scratch anything. I want to let the paint dry nice and good so it isent too wet and soft.
Ill be updating this again sortly!!! I PROMISE
Well guess what guys I'm finally updating!!!
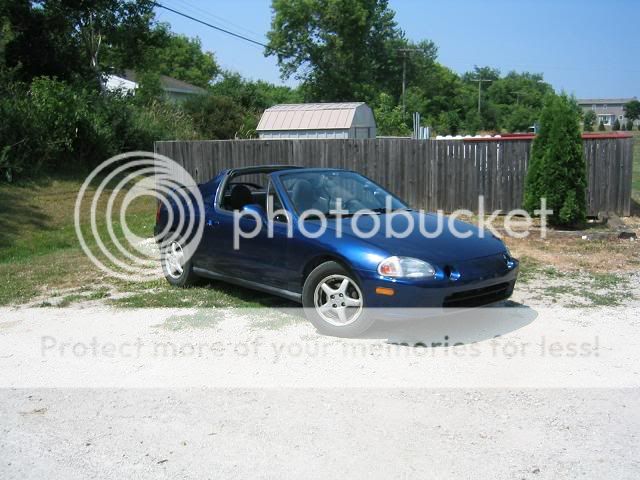
Heres a nice side shot of the car, I'm showing most of the pics from this side because of the sun. It really brings the contrast in the paint out a lot better.
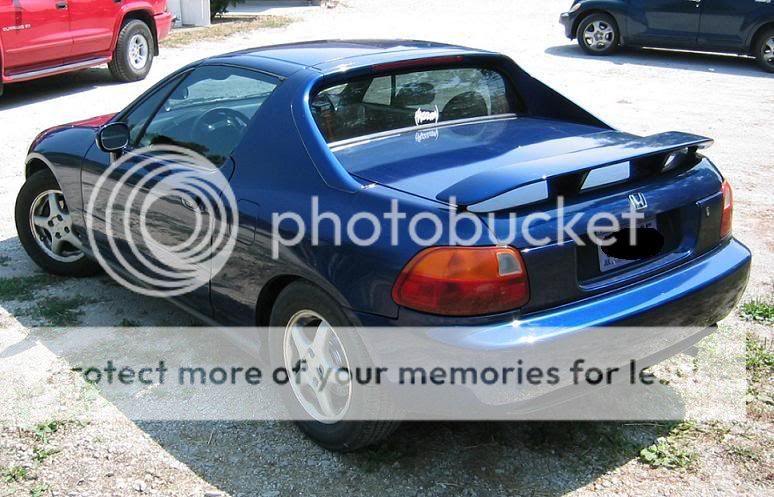
Heres a nice shot from the rear of the car. Notice how I blacked out my licence plate? I did that with MSPaint along with all my resizing. LEARN HOW TO DO IT!!!
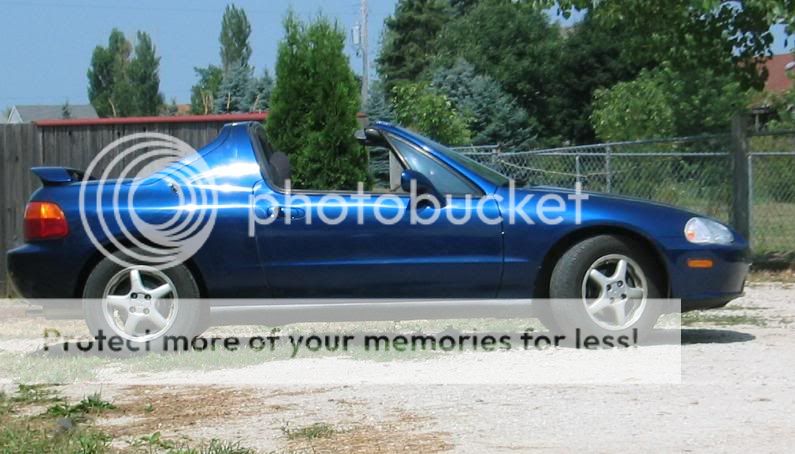
Heres a close up of the side, this is as close as I want to get for the moment because I still need to have the car detailed and waxed.
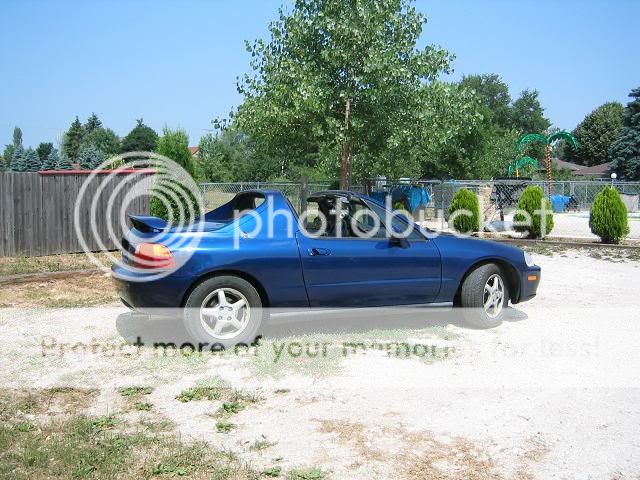
I think this is my favorite one so far, it really shows the difference the sun makes in the paint.
So far my cost of painting the car has been about $700 - $800 for MATERIALS only, Since I did 99% of the work myself it really helped. I'll get some totalls on how much material I ended up ussing. So far it was about 3qts of paint, I'd recomend getting 4qts because I ended up needing a little bit more because I had to repaint some parts up to 5 times to get them the way I wanted them. (I'm very picky! not to mention its a bitch to wet sand a run or dust out in something with a lot of curves in it without going thro the paint) I also ussed about the same in clear coat, and about $200 in misc clips from Honda, along with a new drivers side door window seal.
Modified by nocturnaldragon at 3:16 PM 7/15/2005
This is taking me so long in part to:
A: Ive never done anything remotely like this before
B: I'm doing 90% of the work on my own
C: I'm find lots of hidden damage and rust I didn't know was there
D: There's just not enough hours in the day
E: I'm a perfectionist, so it has to look like a show car when I'm done
Really the hardest part so far, has just been taking off the hood and trunk because you really need twp people to get them all off, and making sure not to damage the numerous seals you need to keep, along with the um-teen thousand plastic clips. I'm for seeing a trip to the junk yard to salvage a bunch up for completion.
These are a few before Pics of the car before I started.
I really HATE Wisconsin winters
Here's one of the only known major damage. The master brake cylinder failed while I was driving one day and I wasn't able to completely stop in time. Luckily no one was hurt and the guy I hit was really cool about it. (Didn't care - his car didn't have a mark on it.)
Now on to the fun stuff
Stripping the front end. This step was fairly easy and took me about 45 minutes to do. The hardest part here was getting the screws holding down the top of the front bumper. Since I wasn't going to reuse it it got trashed (New one from certifit $34).
This Im going to leave white BTW. the fenders will all be painted blue along with the bumper and hood,
With the bumper gone we survey the damage. Pretty rusty but noting that cant be sanded out thankfully and repainted. This will be painted blue only because you can see it when the head lamps are installed.
Close up of the bent bumper support. This will get pulled during the reassembly before it gets repainted. Sorry for the bad pic I took this one with my camera phone. It will probably take longer to chain the car up then it will to pull.
Here's a pic of the other side, As you can see its pretty rusted so I'm going to sand it all down before reassembly.
Here's a pic of my engine bay. Nice ain't it? Im going to go thro and clean this up pretty good after I do my tranny swap (Again) the valve cover is also going to be powder coated. Who ever had the car before me painted it red.
Onto the rear!
Doesn't look to bad does it? Just some rust from under the side moldings. Think again. There were a few dings and hail damage from last summer.
One pic after being sanded and bondo'd out.
One more pic to show the rear most part of the car.
Here's a shot of the passenger side, This one was by far the most dented and damaged.
Here's a close up of some hidden damage I found one I removed the side skirts. this is just going to be straightened out the best I can, I don't think im going to bondo it because it will just be covered. Ill sand it and paint over it.
One shot of the passenger side door after I went thro and fixed the dings and hail damage.One more shot of the passenger side. Thankfully most of these were shallow and didn't require much work to fix.
Now onto the trunk!
Hey look Ma, more rust! Why should we stop here right?
I took the once black bumper support to be sand blasted and I have to say it looks pretty good now that I got it back. You can tell its been sandblasted from the pitting but who cares? Its covered up and you don't see it so a few coats of black primer and were good to go.
This is probably the worst spot of rust I found once I removed the trunk seal, and was also one of the hardest to sand out because of the tight space I ended up doing it by hand taking up a lot of time.
We cant go thro all this and neglect the top of the car can we? Of course not!
Here's one of the top piece of the windshield. Not to bad but it needs some work to get it into shape none the less.
What about the trunk and the hood you ask? Fear not I left nothing out.
Here's one of the trunk, not to bad one dent from hail and the others where from the spoiler (Stock). I had a better one but it became corrupt somehow and Ill have to take anther one.
The hood was determined to not be worth the trouble of fixing so we went ahead and ordered a new one of those too. $120 why bother?
Finally one pic of the target color Im going for, its Fiji Blue Pearl Honda paint number B529P.
I think it will look pretty sweet when I'm all done.
More pics are to follow when I reassemble everything and paint the car.
Modified by nocturnaldragon at 12:07 AM 6/04/2005
Here's an update.
Ive been working and sanding my *** off, I swear Ive lost all hope in this war against rust. After 2 weeks of sanding everyday I think I MAY have won.
Anyhow here's some updated pics, I could of swore I had taken more but ohh well here you go!
This is an updated picture of the trunk. You can see the holes drilled for the spoiler, about an inch after that there were dents from everyone grabbing the spoiler when closing the trunk, you cant see them with the spoiler installed but hey I'm a perfectionist so they got fixed. The spot in the upper right is from hail damage and defiantly was fixed.
Here's a pic of the drivers side after primer, the bottom of the car was complete sanded do to spots of surface rust hiding under the side skirts. and the rear wheel wells were complete sanded from the INSIDE. There wasn't a mark on the outside but after looking at the insides with an inspection mirror I was sadly disappointed with the situation.
This is a shot of the passenger side, the side skirt still hasn't gotten its coat of primer in this shot but ohh well. The area behind the door was mostly hail damaged, along with the doors.
This is a shot of the rear. There wasn't any damage here other then rust spots so they ALL got sanded down and primed over.
This is a shot of the antenna hole, Im putting there here only as a reference to people who say "Hey why not do such and such to get a power antenna?" well because of the shape of that hole and its angle 45' its just not fricken possible unless you but the Honda oem one. If someone else has figured out how and pictures to back up there claim by all means let me know!
This is just a pic of the bracket that holds the antenna in place.
Well that's it for now, Sealer is going on tomorrow to make the color one color again before paint. HOPEFULLY MY %^$^$%#$ paint will be in tomorrow, I ended up getting for about $300 for 3 qts.
Hey sorry I havent updated in a while but Ive been having some issues over here first one being its been like 100'+ here so that makes for slow moving and little motavation when I could be home swiming. Also the giant cotton wood tree defying my threats to stop shedding its evilness everywhere If it wasent over 90 youd swear it was snowing!
Anyhow I forgot to take some pictures with just the primor on, ohh well picture the car being white thats about it.
The car got 2 layers of sealer mostly because the first coat dident cover everything perfectly due to the fact it was just crap in a car, it ended up leaving the car with a rough drywall effect so it all had to be wetsanded. Took about an hr and a half to sand it all down and make it look pretty again.
Anyhow paint followed that day leaving my car with 1 coat of primor, 2 coats of sealer, 3 coats of paint, and 3 coats of clear.
Heres a picture of the drivers side after paint and being wet sanded. I was to bored and unmotavated to clean off the soap stuff before pictures.
Heres a shot of the passenger side of the car. its hard to see the paint but trust me its nice.
This is a shot of the rear of the car, I dident wet sand it yet so you can really see the blue, the trunk dident get any clear cause well why?
Heres a shot of the hood half sanded and half not, to give you a contrast. I think its looking pretty good. If you can see the little spots in the paint its dust and will all come out with the wetsanding.
Heres a shot of the front bumper cover and let me tell you it took me more time to tape the thing up nice and keep the lines with the black and blue then it did to actually paint it.
Well thats all I have for now HOPEFULLY tomarrow Ill start painting the misc trim and stuffs so I can start reassembling the car which will be ohh so much fun so I dont scratch anything. I want to let the paint dry nice and good so it isent too wet and soft.
Ill be updating this again sortly!!! I PROMISE
Well guess what guys I'm finally updating!!!
Heres a nice side shot of the car, I'm showing most of the pics from this side because of the sun. It really brings the contrast in the paint out a lot better.
Heres a nice shot from the rear of the car. Notice how I blacked out my licence plate? I did that with MSPaint along with all my resizing. LEARN HOW TO DO IT!!!
Heres a close up of the side, this is as close as I want to get for the moment because I still need to have the car detailed and waxed.
I think this is my favorite one so far, it really shows the difference the sun makes in the paint.
So far my cost of painting the car has been about $700 - $800 for MATERIALS only, Since I did 99% of the work myself it really helped. I'll get some totalls on how much material I ended up ussing. So far it was about 3qts of paint, I'd recomend getting 4qts because I ended up needing a little bit more because I had to repaint some parts up to 5 times to get them the way I wanted them. (I'm very picky! not to mention its a bitch to wet sand a run or dust out in something with a lot of curves in it without going thro the paint) I also ussed about the same in clear coat, and about $200 in misc clips from Honda, along with a new drivers side door window seal.
Modified by nocturnaldragon at 3:16 PM 7/15/2005


Trending Topics
05-30-2005, 01:30 PM
#10
Member
Thread Starter
Join Date: Mar 2004
Location: racine, Wi, usa
Posts: 2,239
Likes: 0
Received 0 Likes
on
0 Posts
<TABLE WIDTH="90%" CELLSPACING=0 CELLPADDING=0 ALIGN=CENTER><TR><TD>Quote, originally posted by sebZZ »</TD></TR><TR><TD CLASS="quote">how did u fix the dents?</TD></TR></TABLE>
Some where able to just be sanded out, the rest once they were sanded down to metal I ussed bondo to make them smooth.
Some where able to just be sanded out, the rest once they were sanded down to metal I ussed bondo to make them smooth.
05-30-2005, 03:12 PM
#11
Member
Join Date: Nov 2002
Location: Raleigh, NC, USA
Posts: 2,530
Likes: 0
Received 0 Likes
on
0 Posts
<TABLE WIDTH="90%" CELLSPACING=0 CELLPADDING=0 ALIGN=CENTER><TR><TD>Quote, originally posted by 00mofo »</TD></TR><TR><TD CLASS="quote">keep us updated</TD></TR></TABLE>
05-30-2005, 03:20 PM
#12
White Trash Wish Cash
You say this is your first time painting and repairing all the damage? From the pics, it shows that you have done a very good job! Don't get too excited and rush things, keep it slow and smooth, and good luck with the rest, I want to see pics of this once the car is done. 
05-30-2005, 04:09 PM
#13
Member
Join Date: Dec 2003
Location: Pittsburgh, PA, USA
Posts: 1,226
Likes: 0
Received 0 Likes
on
0 Posts
looks like it's coming along pretty good, you might already know this, but just in case you don't ... leak prevention
I had my Sol reshot a few years ago and needed to go back and take care of this, it was mind boggling how it was leaking until I saw that thread.....
anyways good luck, cya when it's done!
I had my Sol reshot a few years ago and needed to go back and take care of this, it was mind boggling how it was leaking until I saw that thread.....
anyways good luck, cya when it's done!
05-30-2005, 05:47 PM
#17
Junior Member
Join Date: Nov 2004
Location: centreville, Va
Posts: 122
Likes: 0
Received 0 Likes
on
0 Posts
Hey man its sure coming along, i know how hard this stuff is im doing this same project on my coupe and liek you i have no experience, im going with Vivid Blue though.
05-30-2005, 08:11 PM
#20
Honda-Tech Member
Join Date: Sep 2003
Location: Racine, WI, USA
Posts: 1,198
Likes: 0
Received 0 Likes
on
0 Posts
<TABLE WIDTH="90%" CELLSPACING=0 CELLPADDING=0 ALIGN=CENTER><TR><TD>Quote, originally posted by senpai »</TD></TR><TR><TD CLASS="quote">yea, wisconsin sux</TD></TR></TABLE>
hell yeah it does
hell yeah it does
05-30-2005, 08:20 PM
#21
<TABLE WIDTH="90%" CELLSPACING=0 CELLPADDING=0 ALIGN=CENTER><TR><TD>Quote, originally posted by nocturnaldragon »</TD></TR><TR><TD CLASS="quote">Some where able to just be sanded out, the rest once they were sanded down to metal I ussed bondo to make them smooth.</TD></TR></TABLE>
do you have to sand down to metal to used bondo?
do you have to sand down to metal to used bondo?
05-30-2005, 08:26 PM
#22
Guest
Posts: n/a
You should be sandblasting every single tiny spot of rust off and using duraglass instead of bondo to make sure it doesn't rust again. If you cover up any rust with bondo, it will rust underneath the bondo and it will crack/fall off = Definitely not show-quality action. Also, Minnesota winters suck even worse 
