
JBPnoman/NotARacist/DblDtchRddr/whatever-you-want-to-call me build thread


 12-31-2013, 07:41 AM
#27
lulz 
Unfortunately, I'm still waiting for my nuts from ARP so no new build progress. I've been trying to get the oil pump seal and rear main seal on, but the oil pump seal is being a pain in the dick and I need to buy or borrow the tool. The rear main, I just haven't gotten around to pulling the carrier off to install it. Next paycheck will have a metric shitload of PTO on it, though, as well as a bunch of 2.5x holiday pay, so best believe I'll be ordering some parts then.
Unfortunately, I'm still waiting for my nuts from ARP
so no new build progress. I've been trying to get the oil pump seal and rear main seal on, but the oil pump seal is being a pain in the dick and I need to buy or borrow the tool. The rear main, I just haven't gotten around to pulling the carrier off to install it. Next paycheck will have a metric shitload of PTO on it, though, as well as a bunch of 2.5x holiday pay, so best believe I'll be ordering some parts then.
12-31-2013, 07:51 AM
#29
Nope. I've found that if I put a timeline goal on myself, I'll sacrifice my own well-being just to make up the financial goal. I have an "end result" goal, I know exactly what I want my finished car to be, do, and look at, but I don't want to pigeonhole myself. Ramen works, but chicken is better, and I'd rather eat chicken and get my car finished a month later than eat Ramen and get my car finished a month earlier.
As it sits, I'll be fully swapped in about $1500, boosted another ~$2200 after that, track ready another ~$2000 later, and fully and completely done another $3000 after that. I'm doing it all in phases, and in those phases - I'm not buying anything for boost until I have the swap done, and the only "track" category thing that I'll buy before I complete phases 1 and 2 are brakes, since my rears will need to be replaced shortly anyway. Going to Hawk HP Plus pads.
As it sits, I'll be fully swapped in about $1500, boosted another ~$2200 after that, track ready another ~$2000 later, and fully and completely done another $3000 after that. I'm doing it all in phases, and in those phases - I'm not buying anything for boost until I have the swap done, and the only "track" category thing that I'll buy before I complete phases 1 and 2 are brakes, since my rears will need to be replaced shortly anyway. Going to Hawk HP Plus pads.
12-31-2013, 08:01 AM
#30
Nope. I've found that if I put a timeline goal on myself, I'll sacrifice my own well-being just to make up the financial goal. I have an "end result" goal, I know exactly what I want my finished car to be, do, and look at, but I don't want to pigeonhole myself. Ramen works, but chicken is better, and I'd rather eat chicken and get my car finished a month later than eat Ramen and get my car finished a month earlier.
As it sits, I'll be fully swapped in about $1500, boosted another ~$2200 after that, track ready another ~$2000 later, and fully and completely done another $3000 after that. I'm doing it all in phases, and in those phases - I'm not buying anything for boost until I have the swap done, and the only "track" category thing that I'll buy before I complete phases 1 and 2 are brakes, since my rears will need to be replaced shortly anyway. Going to Hawk HP Plus pads.
As it sits, I'll be fully swapped in about $1500, boosted another ~$2200 after that, track ready another ~$2000 later, and fully and completely done another $3000 after that. I'm doing it all in phases, and in those phases - I'm not buying anything for boost until I have the swap done, and the only "track" category thing that I'll buy before I complete phases 1 and 2 are brakes, since my rears will need to be replaced shortly anyway. Going to Hawk HP Plus pads.
I do the same thing. Pick a portion of the car and finish that first. Good way to do it.
 01-02-2014, 04:19 PM
#32
New nuts finally arrived! I apologize in advance for the lack of pictures in this post - I left my phone in the car when I was getting everything installed. I'll snap some shots the next time I'm home.
Unfortunately, I'm house sitting for the parents until Saturday. My 90-something year old grand mother had a stroke on the 31st, so they drove over to Ohio to help out. I brought my Xbox and laptop over with me, but it's just not worth my time dragging a motor and rotisserie over here too.
I got off work EXTREMELY early tonight, though, so I made a quick stop at home to get the studs and nuts properly installed and torqued. I borrowed a thread chaser from the maintenance shop at work (who would have thought our chief engineer knows about ARP?), removed the caps and studs, blasted some brake cleaner down the holes, hit it with the thread chaser, hit them with some compressed air, then hit them with the thread chaser again. Installed the studs, dry tightened them "hand tight" like ARP calls for, added some more assembly lube, installed the caps, reapplied the graphite torque lube, and installed the nuts.
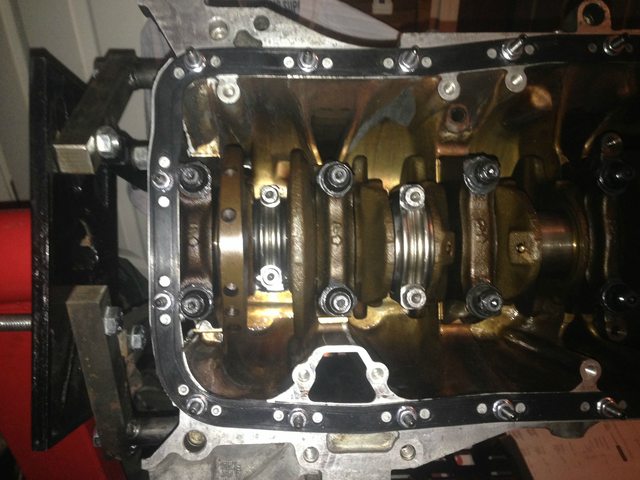
Another "unfortunately", the ARP nuts call for 80 ft/lbs of torque in three steps, following OEM pattern, but my torque wrench only goes up to 75. Being perfection-obsessed, I decided to torque them to 40 in pattern, then to 60 in pattern, checking for smooth rotation after EVERY STEP on EVERY CAP. My step brother is bringing his big-*** torque wrench from work, as well as the proper 12 point socket, and I'll finish torquing them down...whenever I get the chance. Up to this point, crank nose play is well within spec, the crank is rotating freely, and the short block is almost complete.
The parents should be home Saturday, and conveniently enough my next day off is Saturday. I'll finish torquing the mains down, shaving the rings, installing the pistons and rods (using brand new rod bolts from ARP for added insurance), bolting up the windage tray and oil pickup, doing a final check for free rotation, torquing down the oil pan, and cleaning the block with some more Simple Green, brake cleaner, and some wire brushes. Work and recovery Sunday, then going skiing Monday morning. Plan on Monday is to finish cleaning and painting the block.
Next paycheck is fixing to have about 10 hours of overtime, plus two days worth of Holiday pay, so I'll most likely be ordering my head studs, and possibly a head gasket as well
Unfortunately, I'm house sitting for the parents until Saturday. My 90-something year old grand mother had a stroke on the 31st, so they drove over to Ohio to help out. I brought my Xbox and laptop over with me, but it's just not worth my time dragging a motor and rotisserie over here too.
I got off work EXTREMELY early tonight, though, so I made a quick stop at home to get the studs and nuts properly installed and torqued. I borrowed a thread chaser from the maintenance shop at work (who would have thought our chief engineer knows about ARP?), removed the caps and studs, blasted some brake cleaner down the holes, hit it with the thread chaser, hit them with some compressed air, then hit them with the thread chaser again. Installed the studs, dry tightened them "hand tight" like ARP calls for, added some more assembly lube, installed the caps, reapplied the graphite torque lube, and installed the nuts.
Another "unfortunately", the ARP nuts call for 80 ft/lbs of torque in three steps, following OEM pattern, but my torque wrench only goes up to 75. Being perfection-obsessed, I decided to torque them to 40 in pattern, then to 60 in pattern, checking for smooth rotation after EVERY STEP on EVERY CAP. My step brother is bringing his big-*** torque wrench from work, as well as the proper 12 point socket, and I'll finish torquing them down...whenever I get the chance. Up to this point, crank nose play is well within spec, the crank is rotating freely, and the short block is almost complete.
The parents should be home Saturday, and conveniently enough my next day off is Saturday. I'll finish torquing the mains down, shaving the rings, installing the pistons and rods (using brand new rod bolts from ARP for added insurance), bolting up the windage tray and oil pickup, doing a final check for free rotation, torquing down the oil pan, and cleaning the block with some more Simple Green, brake cleaner, and some wire brushes. Work and recovery Sunday, then going skiing Monday morning. Plan on Monday is to finish cleaning and painting the block.
Next paycheck is fixing to have about 10 hours of overtime, plus two days worth of Holiday pay, so I'll most likely be ordering my head studs, and possibly a head gasket as well
01-08-2014, 07:24 PM
#33
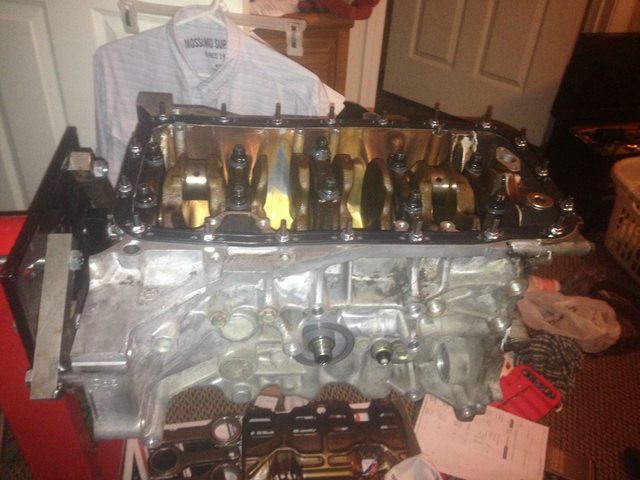
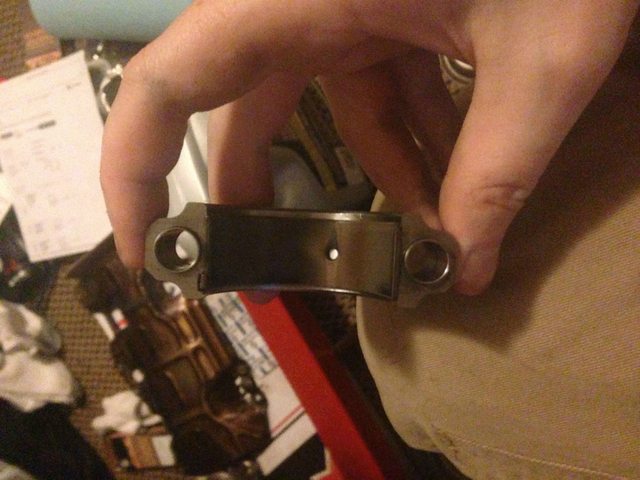
Finally got around to torquing my main studs down.
No long-winded update this time around. My feeler gauges have run away, so my step brother is bringing his home from work tomorrow. I'll pick up a set of files, and then clearance my rings and get my short block assembled.
******* finally.
No long-winded update this time around. My feeler gauges have run away, so my step brother is bringing his home from work tomorrow. I'll pick up a set of files, and then clearance my rings and get my short block assembled.
******* finally.
01-08-2014, 07:40 PM
#34
Ferio Wdm Edition
Freakin sick man. I still havent finished my bottom end lol. Keep a lookout though!
01-08-2014, 07:51 PM
#35
Thanks. Motor assembly is easy stuff, you just have to be VERY careful with clearances and measurements. There's no such thing as "good enough". It's either right, or it's wrong.
I'm off work tomorrow, so it'll be a day of cleaning the **** out of the apartment, finishing up the short block, then masking it off, attacking it with a brass brush, and giving it a few coats of this black pearl metallic paint I bought a while ago.
I'm off work tomorrow, so it'll be a day of cleaning the **** out of the apartment, finishing up the short block, then masking it off, attacking it with a brass brush, and giving it a few coats of this black pearl metallic paint I bought a while ago.
01-09-2014, 04:14 PM
#36
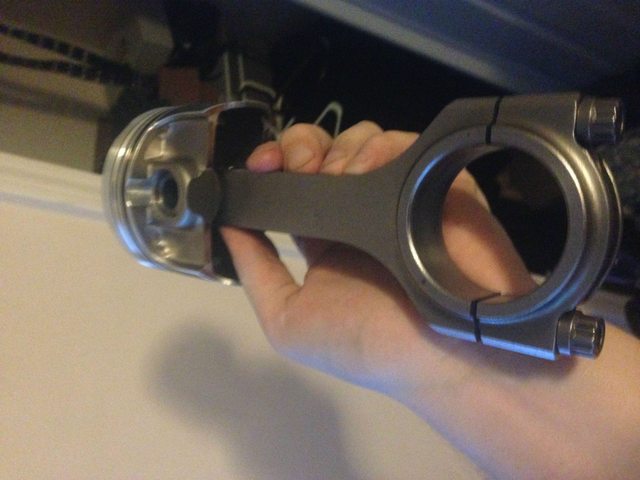
More short block assembly! Today, the pistons and rods go in the motor.
As it sat on my motor rotisserie

Step one is assembling the piston/rod unit. You'll need to use the piston to level the rings within the cylinder so you can properly clearance them. In order to do that, you need to put the piston on the rod. It's extremely easy.
First off, you need to insert one of the circlips, and lube up the parts of the piston and rod that will contact the wrist pin. When inserting the circlip, use your fingers.. Do not use ANY kind of tool. Any scratches or nicks on the piston means it's as good as destroyed. Remember, when you're building an engine, precision is the name of the game!
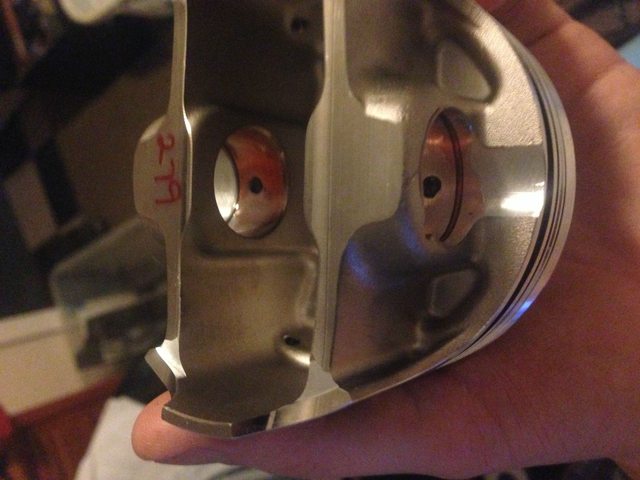
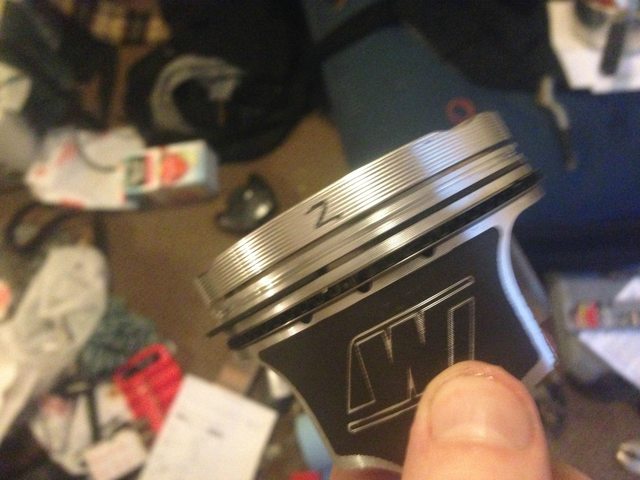
Lubricate the piston. You can see the circlip on the left-most hole, and the groove for the second circlip on the right-most hole.
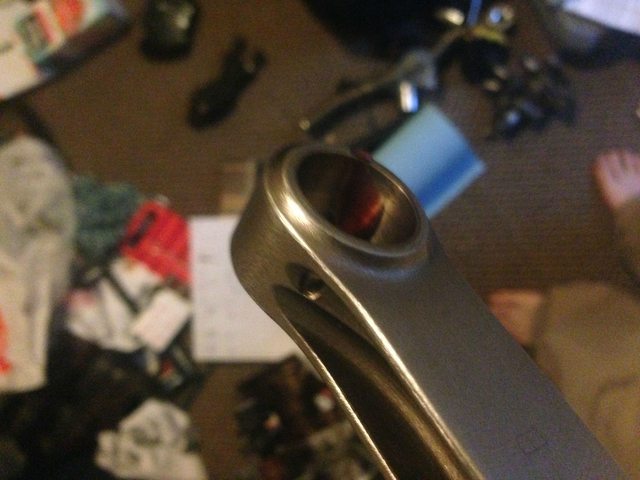
Lubricate the rod.
Push the wristpin through the assembly, insert the second circlip (once again, fingers only!), and you have a piston/rod assembly! It's that easy.
Now we move onto clearancing the rings. If you don't do this correctly, you motor will not run correctly. Too tight, and you won't have any blowby - air will literally fight against your motor, greatly degreasing power, and possibly damaging your rotating assembly. Too loose, and you'll have air and oil going all over the place in your motor. You'll loose compression, killing power, and you'll burn oil like a 1960's diesel motor. You need three things. A metal file, feeler gauges (straight, not bent), and half a clue about what your clearances should be. Wiseco has a useful PDF with all of the info you need.
I'm working with a stock bore B18B1, which is 81mm. The Wiseco PDF is all in inches, so convert from mm to inches by dividing by 25.4. 81/25.4=3.18898. I'm building a "street-moderate turbo/nitrous" motor, so I need to multiply my bore by .0050 for my top ring, and .0055 for my second ring. Oil control rings should always be a minimum of .0100".
Top ring - .01595"
Second ring - .01754"
Oil Control rings - .01000"
So for my feeler gauges, I'm using .016", .018", and .010".
Lube up the cylinder wall with some motor oil, or WD40, and insert the ring into the cylinder, straight in. Don't try to get it flat with your fingers - you can't. "kind of flat" is good enough for this step.
Ring kind of flat in the cylinder
Insert your piston/rod assembly upside down into the cylinder, and lightly push on the ring. You want it roughly halfway down the cylinder. Tapping the ring with your piston will get it perfectly flat in the cylinder, and ready for measurement.
Inserting the piston/rod assembly upside down
Using feeler gauges to spec the ring
Repeat the process for all of your rings. Keep all rings separated by what cylinder you measured in!. Not every cylinder is exactly the same, and you should measure the ring in the cylinder it will be used in. Measure all of your rings before installing them on your piston - you can't exactly use a ringed piston to flatten another ring.
Now that I had my first cylinder done, I decided to start installing the rings. I don't own ring expanders, so I used the spiral method. I would highly recommend buying, borrowing, or renting ring expanders - the spiral method is extremely touchy, and risky even if you know exactly what you're doing. You seat one tip of the ring in the ringland where it belongs, and carefully "spiral" it onto the piston. Don't let the ring bend! If it does, just throw it away and order new ones. A kinked or bent ring won't seal correctly, and can't be repaired with whatever you might have at home. As with the circlips, be careful not to scratch the piston!
Second ring, and oil control rings installed
Once you have the rings installed, you need to clock them. "Clocking" a ring simply means making sure it's properly rotated on the piston. If all of your rings have their openings in the same place, it'll only encourage blowby. Honda/Acura has their own recommendations for ring clocking which are listed in the FSM, so if you're using stock pistons, use the FSM specs. I'm using Wiseco pistons and rings, so I'll use Wiseco specs. Once again, they're shown in that nifty PDF.
Now that the rings are installed on my first piston, it's time to start looking into installing the assembly in the block. Start off by attacking the rod journal with with some brake cleaner and a lint-free cloth or rag.
Cleaned rod journal
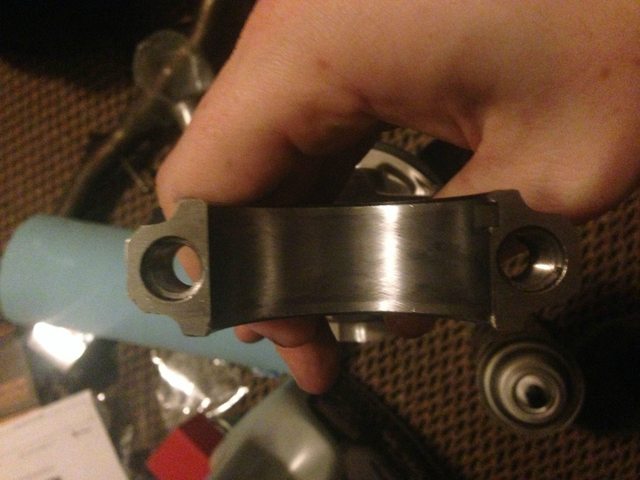
Install your bearing. Remember those keyways from the crank journal bearings? Same deal on the rod journals. make sure to line up the tang on the bearing with the indent on the rod.
Bearing installed
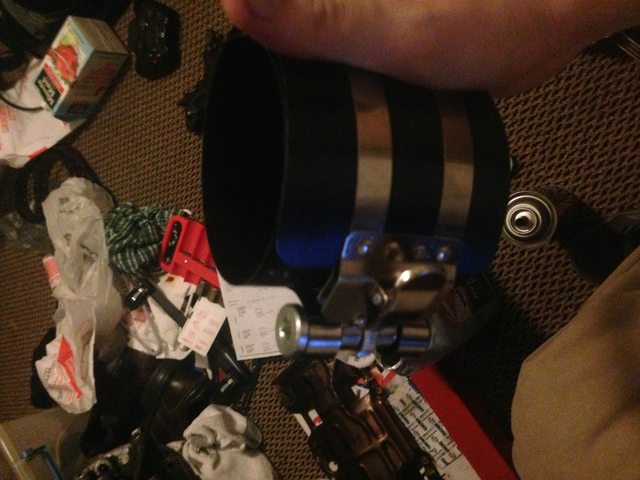
Lube up the bearing. Same deal as the main bearings - there's no such thing as too much lube. Get it nice and slopped on there, and spread it around with your finger. Now bring out your ring compressor. I'm using a cheap $15 compressor from Autozone, and it's a royal pain in the ***. Get yourself a quality ring compressor. ARP sells them, Craftsman sells them, Snap-On sells them, and they all end up being about the same price. A couple extra bucks is worth it - get a good one.
Here's my shitty one
Wrap it around your piston, leaving a little bit of your piston skirt hanging out of the bottom. If you don't, you won't be able to line it up in the cylinder, and you'll just end up tapping it into the sleeve - very bad! Get that ring compressor tightened down as much as you can. Don't worry - you won't hurt anything. If it isn't tight enough, the rings won't be tight enough, and they'll just end up cracking on the top of the sleeve. Once again, very bad!
Whoops, too high

There we go, that's better
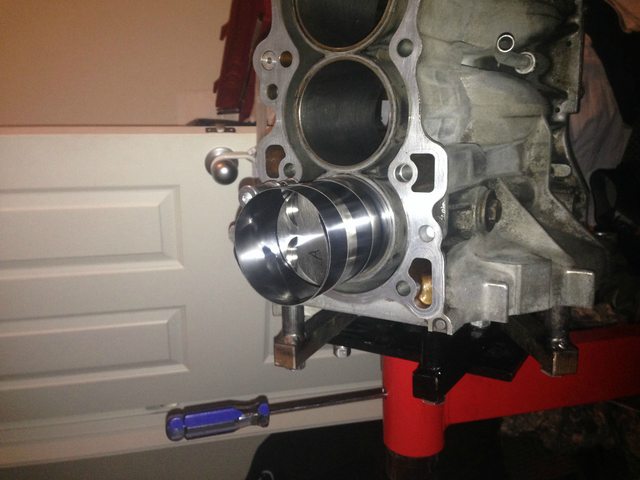
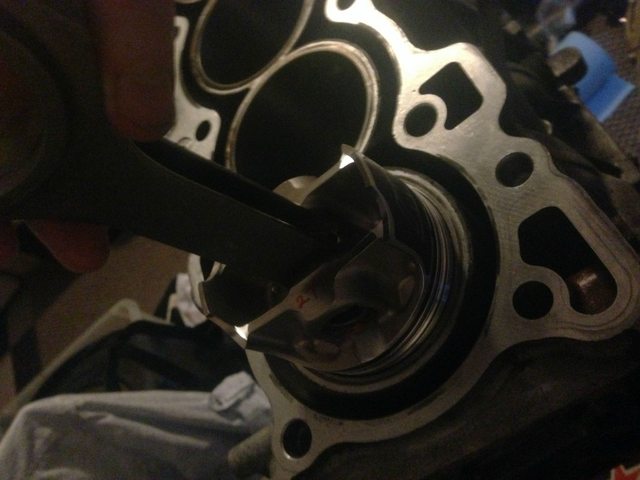
Once you have it properly set up, insert the assembly in the cylinder, and start gently tapping it down into your cylinder. You need to be very careful not to damage the piston - do not use anything metal!
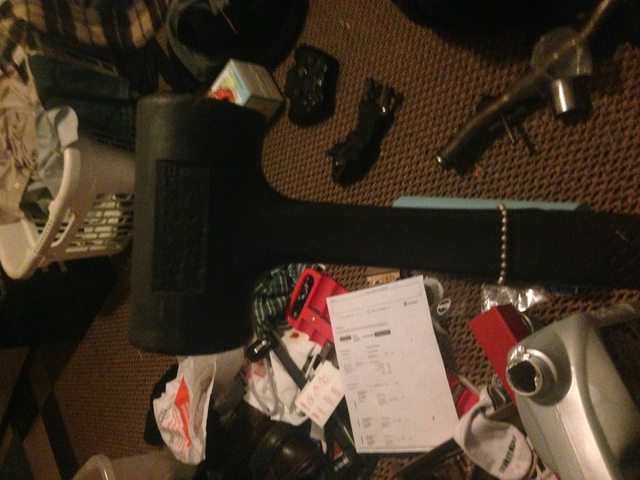
I use my trusty rubber deadblow hammer
Piston tapped into the cylinder
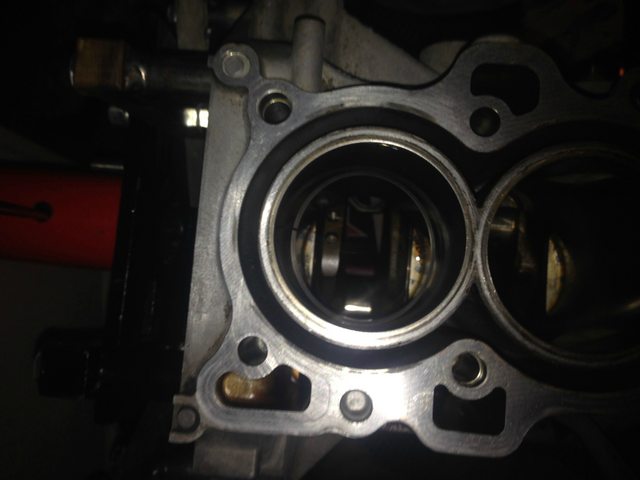
Now you need to flip the motor over. if you were smart enough, you made sure that the crank journal is pointed towards where your oil pan would be. Keep gently tapping the piston down into the cylinder until your rod journal is making full contact with the crank. Give it a couple more taps, just to be 100% sure.
Rod journal firmly against the crank
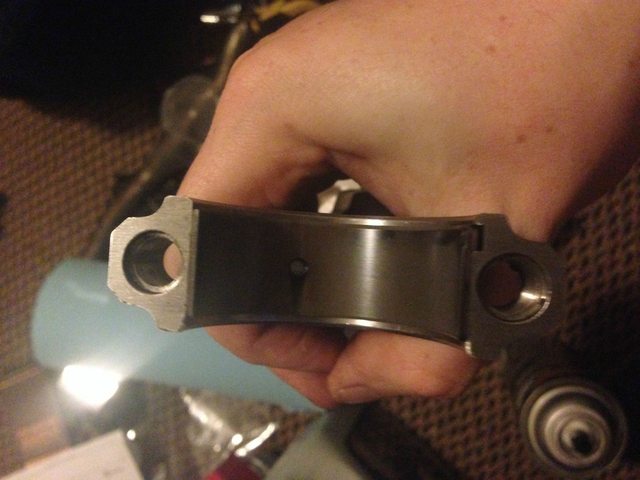
Now you need to install the second half of the bearing in your rod cap. As with all of your other journals, clean it down with brake cleaner and a lint-free cloth. Install the bearing, and lube it up. As usual, no such thing as too much assembly lubricant.
Cap bearing installed
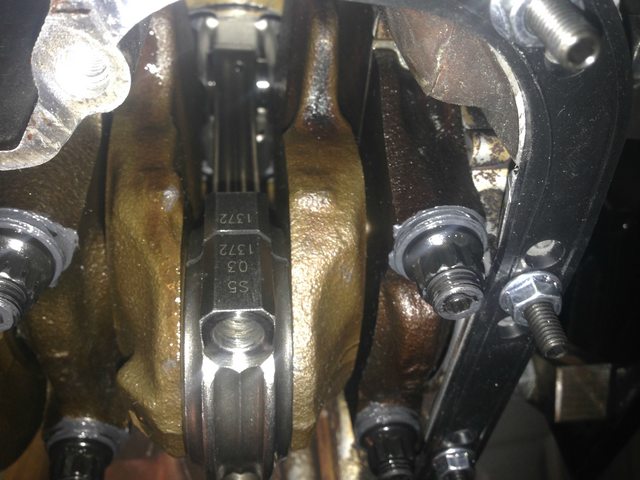
Now put the rod cap on the rod. Notice how the rods are engraved with numbers? Make sure the numbers line up. Eagle will also engrave cylinder numbers on their rods. The cap and rod are forged as a solid assembly. Do not mix your caps!
Cap installed, notice the matching numbers
Now get out your ARP torque lube. It's that graphite stuff that comes in a small blue packet. Get a glob of it on the tip of your finger, then apply it liberally to the threads of your rod bolts. As with all other lubricants, liberal is the name of the game. Too much won't hurt anything - too little may give you inaccurate torque values, which is bad.
Liberal application of graphite lube
Hand-tightened rod bolts

The assembly instructions don't say anything about stepped torquing, but logic says you should step your torque values to avoid damaging anything. I started off with hand-snugging them, then alternating with one quarter turn until the cap was fully seated on the rod. From there, I torqued to 50 ft/lbs, then to the ARP/Eagle spec of 75 ft/lbs.
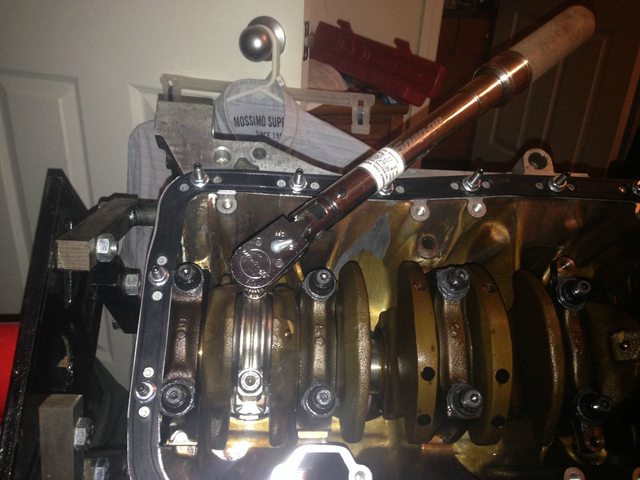
Torque wrench is your best friend!
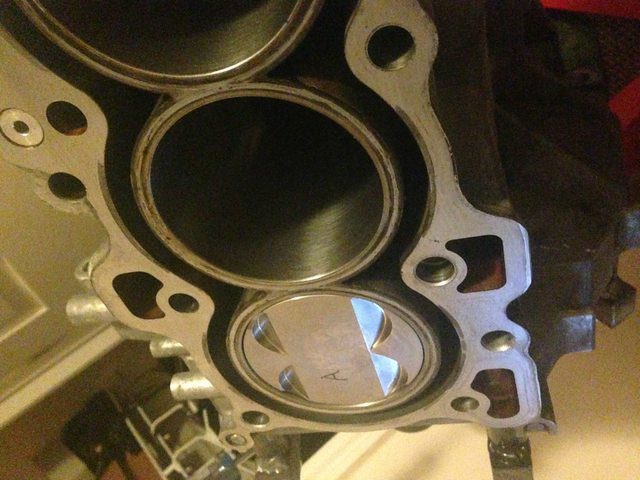
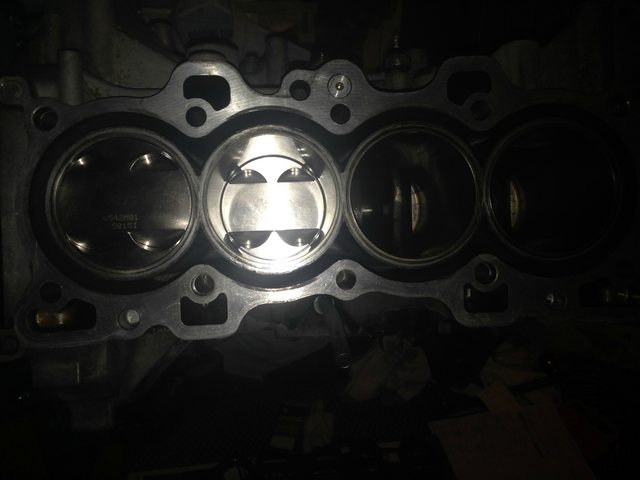
I have two cylinders installed so far. Now I just need to finish up the last two, then I'll be installing the windage tray, oil pickup, and oil pan.
Two pistons done, bottom view
Two pistons done, top view
I'm going to go do some laundry, finish up my last two cylinders, then get started on the windage tray, pickup, and pan. I should have another update later tonight, including proper torque values and patterns.
As it sat on my motor rotisserie
Step one is assembling the piston/rod unit. You'll need to use the piston to level the rings within the cylinder so you can properly clearance them. In order to do that, you need to put the piston on the rod. It's extremely easy.
First off, you need to insert one of the circlips, and lube up the parts of the piston and rod that will contact the wrist pin. When inserting the circlip, use your fingers.. Do not use ANY kind of tool. Any scratches or nicks on the piston means it's as good as destroyed. Remember, when you're building an engine, precision is the name of the game!
Lubricate the piston. You can see the circlip on the left-most hole, and the groove for the second circlip on the right-most hole.
Lubricate the rod.
Push the wristpin through the assembly, insert the second circlip (once again, fingers only!), and you have a piston/rod assembly! It's that easy.
Now we move onto clearancing the rings. If you don't do this correctly, you motor will not run correctly. Too tight, and you won't have any blowby - air will literally fight against your motor, greatly degreasing power, and possibly damaging your rotating assembly. Too loose, and you'll have air and oil going all over the place in your motor. You'll loose compression, killing power, and you'll burn oil like a 1960's diesel motor. You need three things. A metal file, feeler gauges (straight, not bent), and half a clue about what your clearances should be. Wiseco has a useful PDF with all of the info you need.
I'm working with a stock bore B18B1, which is 81mm. The Wiseco PDF is all in inches, so convert from mm to inches by dividing by 25.4. 81/25.4=3.18898. I'm building a "street-moderate turbo/nitrous" motor, so I need to multiply my bore by .0050 for my top ring, and .0055 for my second ring. Oil control rings should always be a minimum of .0100".
Top ring - .01595"
Second ring - .01754"
Oil Control rings - .01000"
So for my feeler gauges, I'm using .016", .018", and .010".
Lube up the cylinder wall with some motor oil, or WD40, and insert the ring into the cylinder, straight in. Don't try to get it flat with your fingers - you can't. "kind of flat" is good enough for this step.
Ring kind of flat in the cylinder
Insert your piston/rod assembly upside down into the cylinder, and lightly push on the ring. You want it roughly halfway down the cylinder. Tapping the ring with your piston will get it perfectly flat in the cylinder, and ready for measurement.
Inserting the piston/rod assembly upside down
Using feeler gauges to spec the ring
Repeat the process for all of your rings. Keep all rings separated by what cylinder you measured in!. Not every cylinder is exactly the same, and you should measure the ring in the cylinder it will be used in. Measure all of your rings before installing them on your piston - you can't exactly use a ringed piston to flatten another ring.
Now that I had my first cylinder done, I decided to start installing the rings. I don't own ring expanders, so I used the spiral method. I would highly recommend buying, borrowing, or renting ring expanders - the spiral method is extremely touchy, and risky even if you know exactly what you're doing. You seat one tip of the ring in the ringland where it belongs, and carefully "spiral" it onto the piston. Don't let the ring bend! If it does, just throw it away and order new ones. A kinked or bent ring won't seal correctly, and can't be repaired with whatever you might have at home. As with the circlips, be careful not to scratch the piston!
Second ring, and oil control rings installed
Once you have the rings installed, you need to clock them. "Clocking" a ring simply means making sure it's properly rotated on the piston. If all of your rings have their openings in the same place, it'll only encourage blowby. Honda/Acura has their own recommendations for ring clocking which are listed in the FSM, so if you're using stock pistons, use the FSM specs. I'm using Wiseco pistons and rings, so I'll use Wiseco specs. Once again, they're shown in that nifty PDF.
Now that the rings are installed on my first piston, it's time to start looking into installing the assembly in the block. Start off by attacking the rod journal with with some brake cleaner and a lint-free cloth or rag.
Cleaned rod journal
Install your bearing. Remember those keyways from the crank journal bearings? Same deal on the rod journals. make sure to line up the tang on the bearing with the indent on the rod.
Bearing installed
Lube up the bearing. Same deal as the main bearings - there's no such thing as too much lube. Get it nice and slopped on there, and spread it around with your finger. Now bring out your ring compressor. I'm using a cheap $15 compressor from Autozone, and it's a royal pain in the ***. Get yourself a quality ring compressor. ARP sells them, Craftsman sells them, Snap-On sells them, and they all end up being about the same price. A couple extra bucks is worth it - get a good one.
Here's my shitty one
Wrap it around your piston, leaving a little bit of your piston skirt hanging out of the bottom. If you don't, you won't be able to line it up in the cylinder, and you'll just end up tapping it into the sleeve - very bad! Get that ring compressor tightened down as much as you can. Don't worry - you won't hurt anything. If it isn't tight enough, the rings won't be tight enough, and they'll just end up cracking on the top of the sleeve. Once again, very bad!
Whoops, too high
There we go, that's better
Once you have it properly set up, insert the assembly in the cylinder, and start gently tapping it down into your cylinder. You need to be very careful not to damage the piston - do not use anything metal!
I use my trusty rubber deadblow hammer
Piston tapped into the cylinder
Now you need to flip the motor over. if you were smart enough, you made sure that the crank journal is pointed towards where your oil pan would be. Keep gently tapping the piston down into the cylinder until your rod journal is making full contact with the crank. Give it a couple more taps, just to be 100% sure.
Rod journal firmly against the crank
Now you need to install the second half of the bearing in your rod cap. As with all of your other journals, clean it down with brake cleaner and a lint-free cloth. Install the bearing, and lube it up. As usual, no such thing as too much assembly lubricant.
Cap bearing installed
Now put the rod cap on the rod. Notice how the rods are engraved with numbers? Make sure the numbers line up. Eagle will also engrave cylinder numbers on their rods. The cap and rod are forged as a solid assembly. Do not mix your caps!
Cap installed, notice the matching numbers
Now get out your ARP torque lube. It's that graphite stuff that comes in a small blue packet. Get a glob of it on the tip of your finger, then apply it liberally to the threads of your rod bolts. As with all other lubricants, liberal is the name of the game. Too much won't hurt anything - too little may give you inaccurate torque values, which is bad.
Liberal application of graphite lube
Hand-tightened rod bolts
The assembly instructions don't say anything about stepped torquing, but logic says you should step your torque values to avoid damaging anything. I started off with hand-snugging them, then alternating with one quarter turn until the cap was fully seated on the rod. From there, I torqued to 50 ft/lbs, then to the ARP/Eagle spec of 75 ft/lbs.
Torque wrench is your best friend!
I have two cylinders installed so far. Now I just need to finish up the last two, then I'll be installing the windage tray, oil pickup, and oil pan.
Two pistons done, bottom view
Two pistons done, top view
I'm going to go do some laundry, finish up my last two cylinders, then get started on the windage tray, pickup, and pan. I should have another update later tonight, including proper torque values and patterns.
01-09-2014, 04:59 PM
#38
Honda-Tech Member

Cracked ring lands are not from too much boosting..... it normally happens from too aggressive of a tune and too much timing added.....
01-09-2014, 06:43 PM
#39
Cracked ring lands are caused by detonation, which is caused from multiple things, including a bad tune, too much timing, bad fuel, or too much boost.
Now that we have block diagnostics 201 covered, more building! This whole bit is is pretty self-explanatory, so there will be more pictures and specs, less explanation and paragraphs.
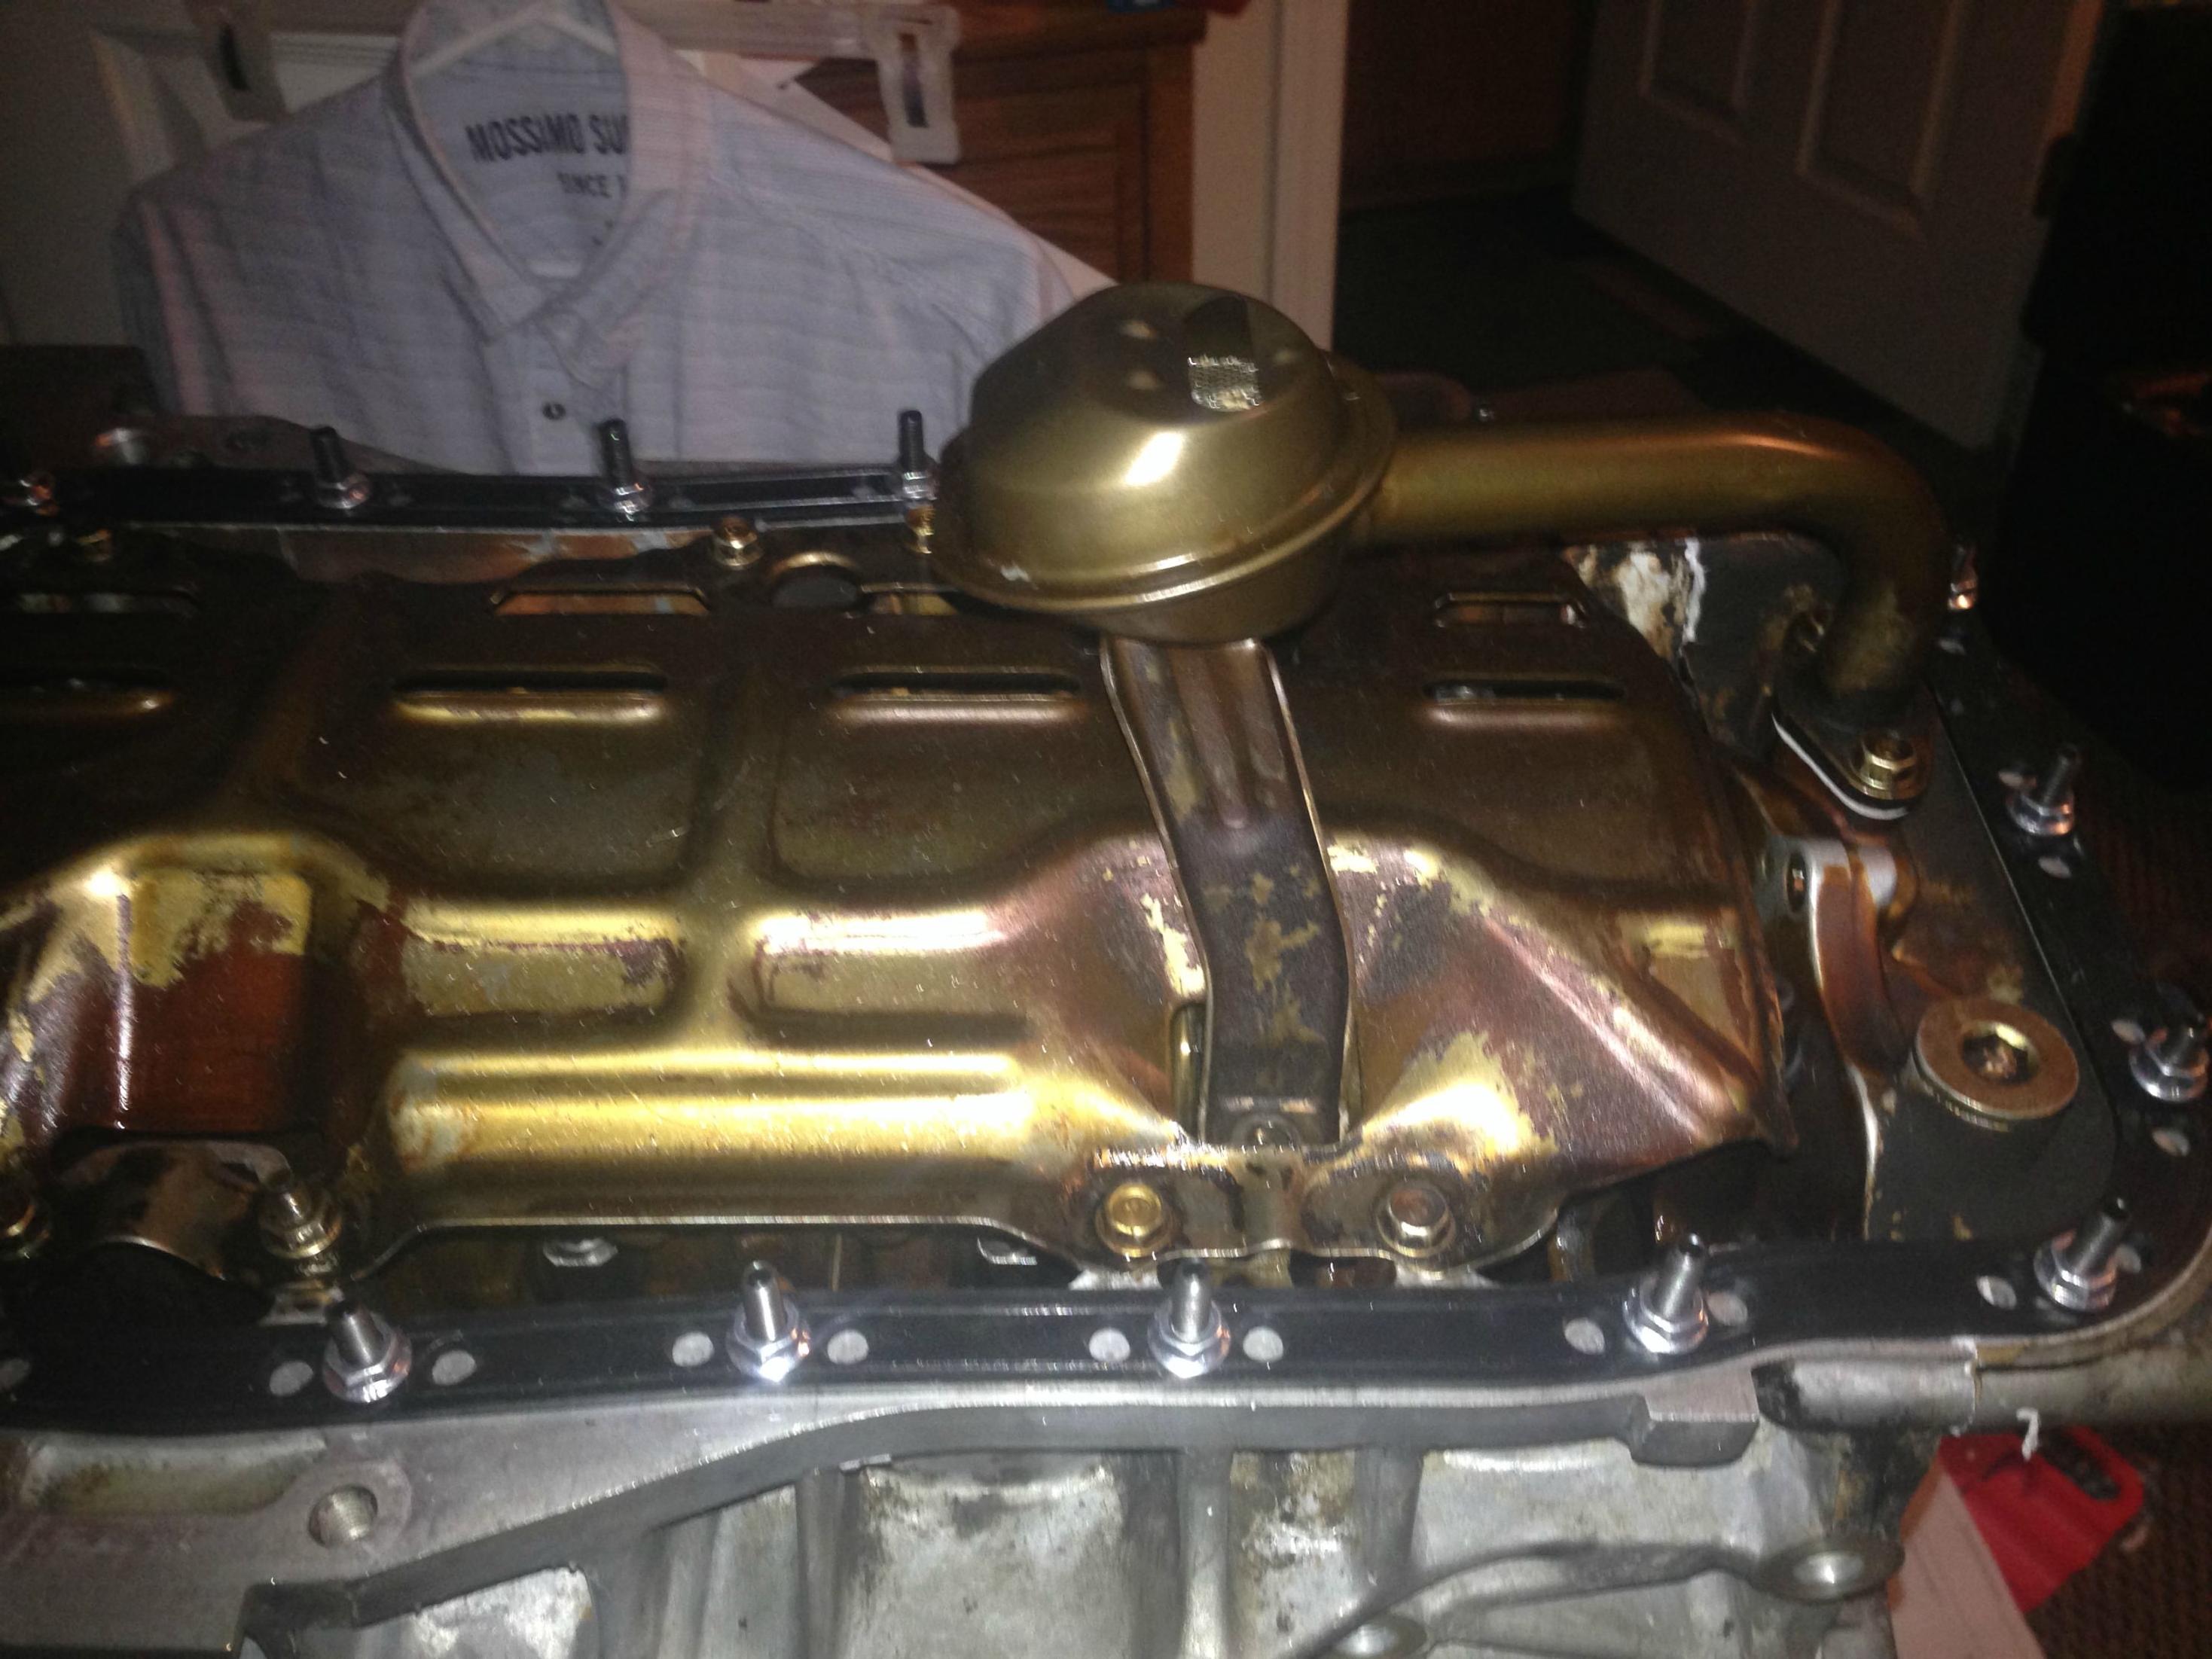
Drop on the windage tray, and toss on the bolts. FSM says torque to 8 ft/lbs, so 8 ft/lbs it is. I still had PLENTY of ARP torque lube, so I used some on every nut and bolt. Also, always chase your holes before tossing in new studs or bolts. Thread chasers are cheap - use them!
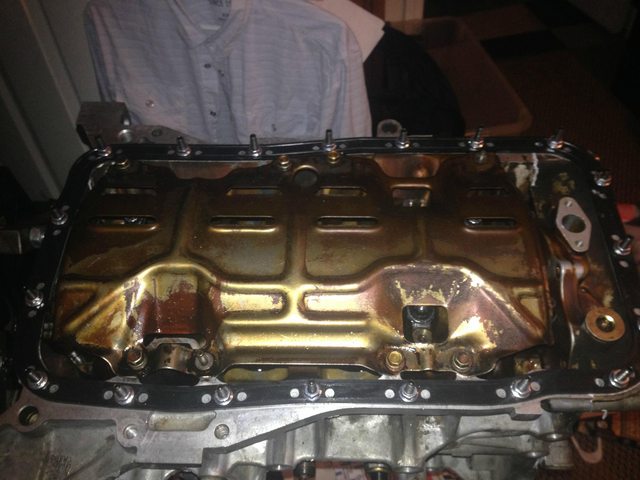
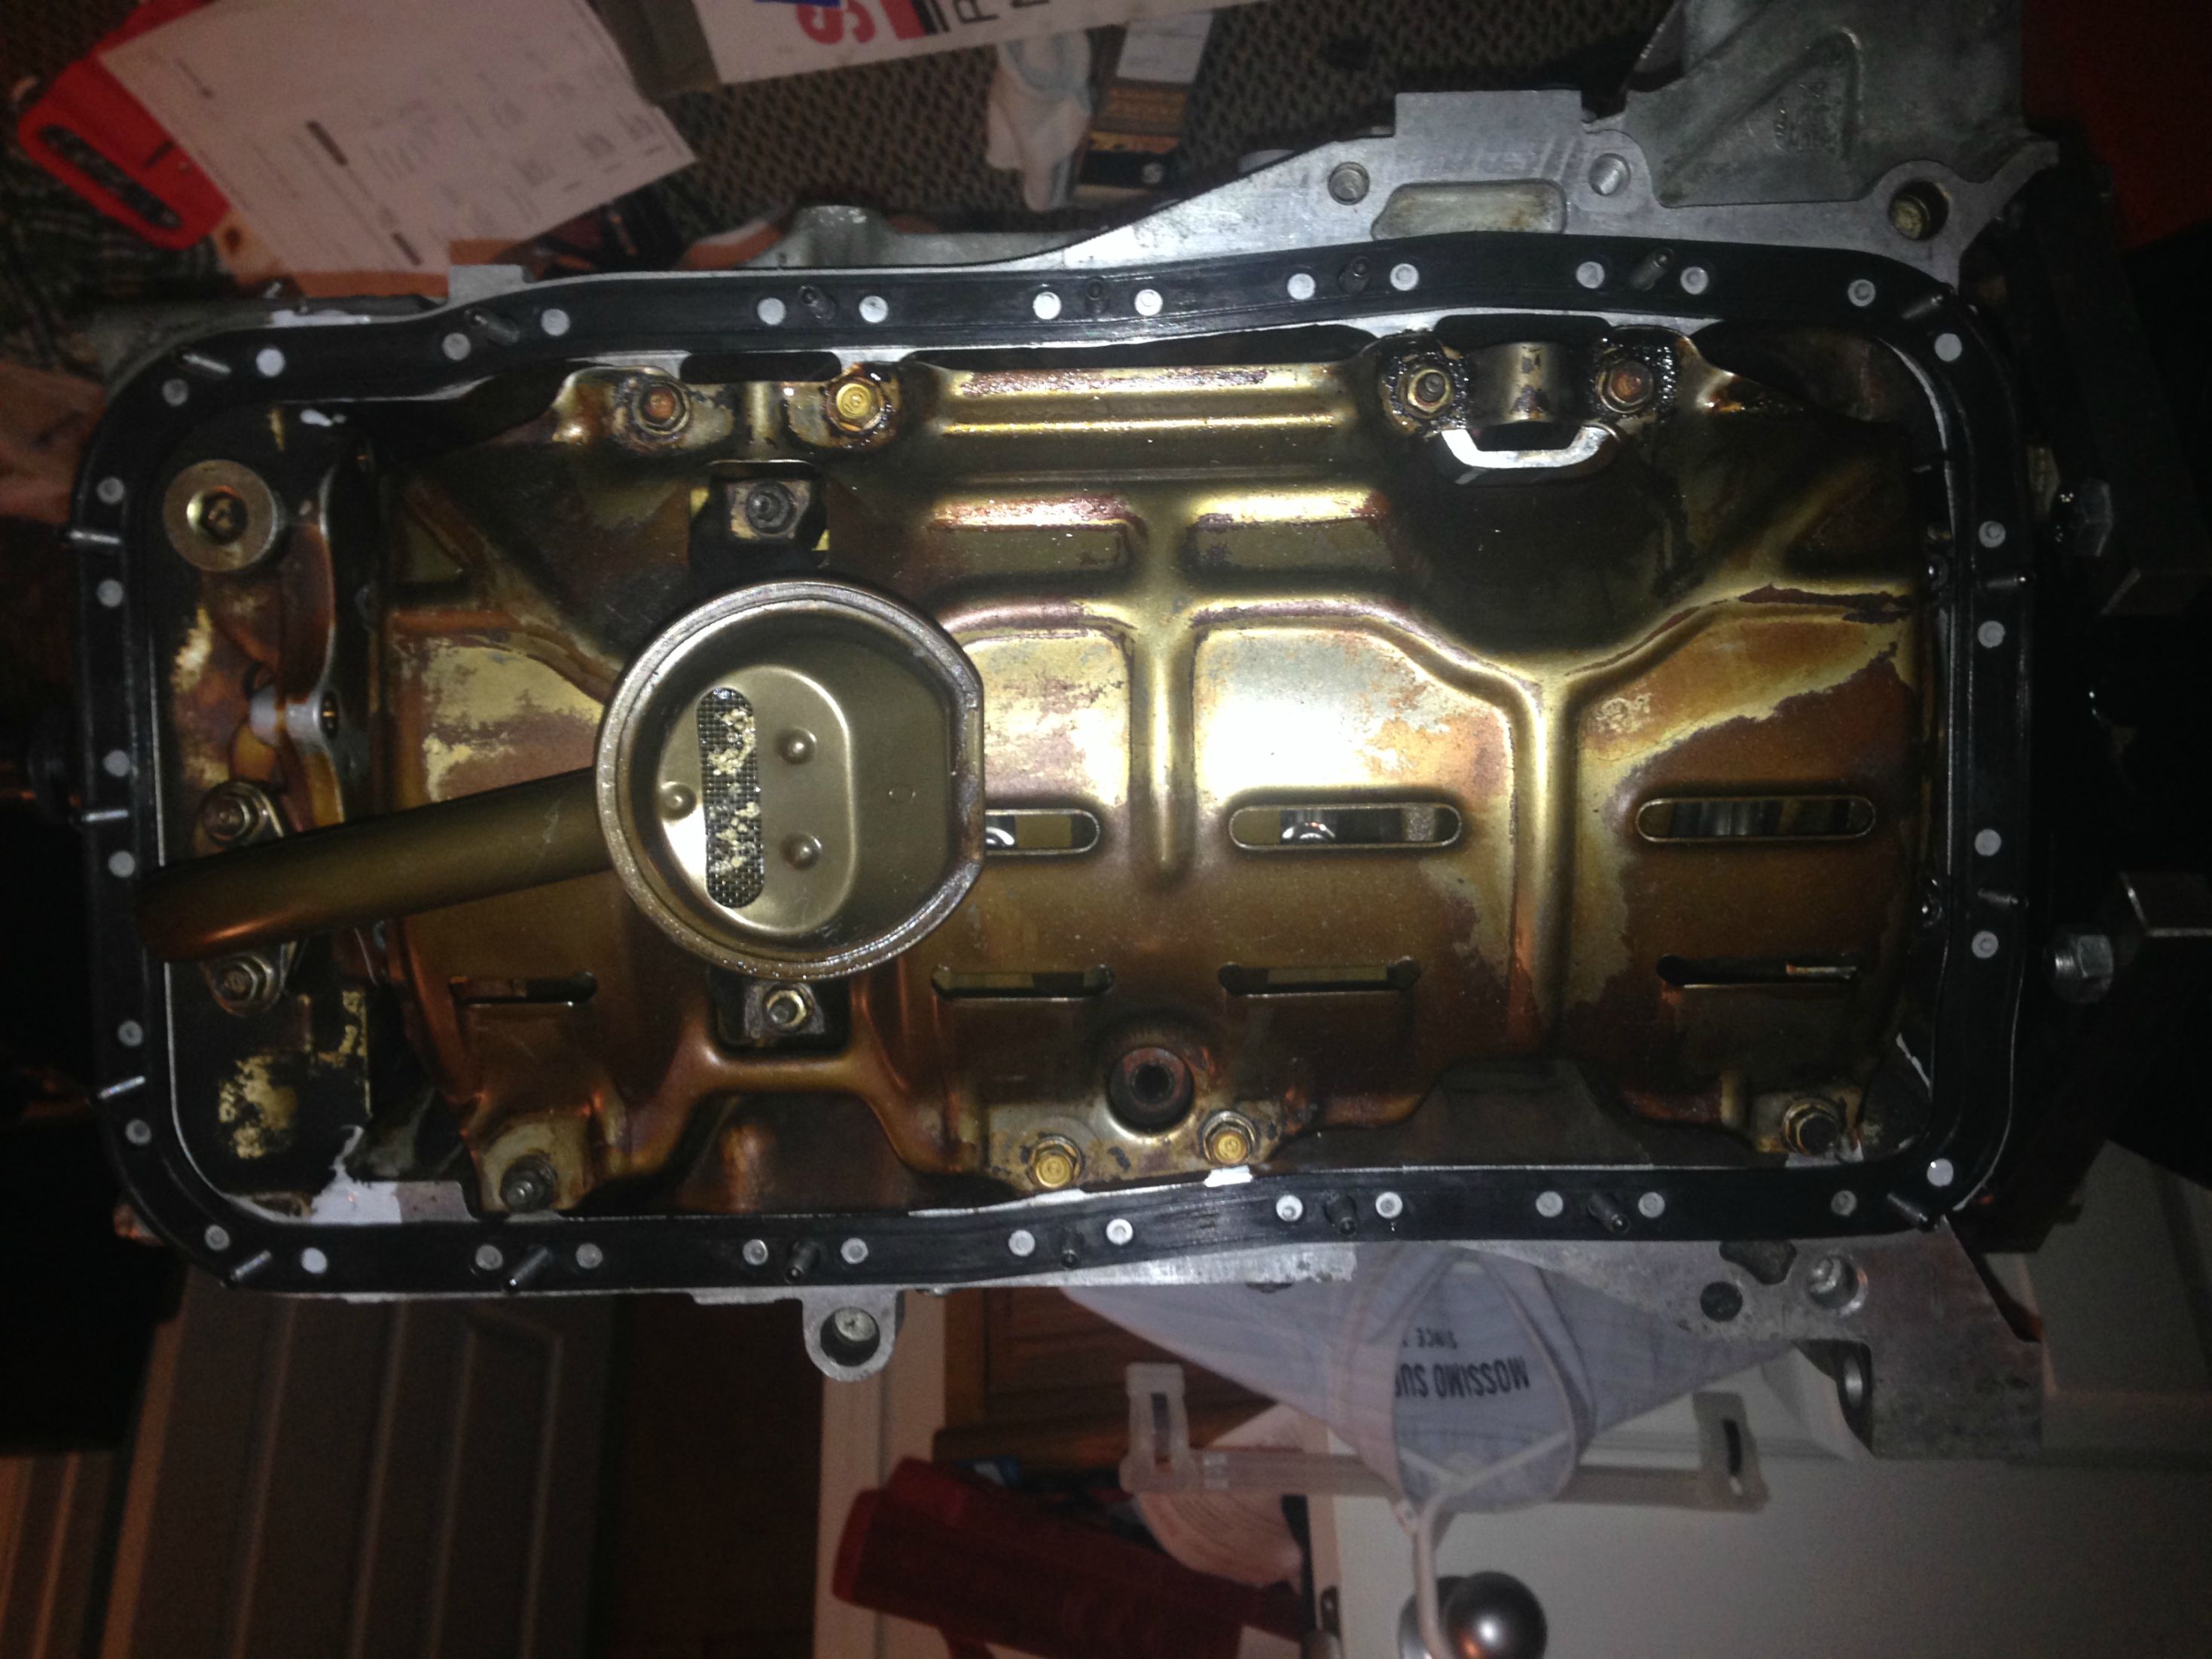
Windage tray on and torqued down
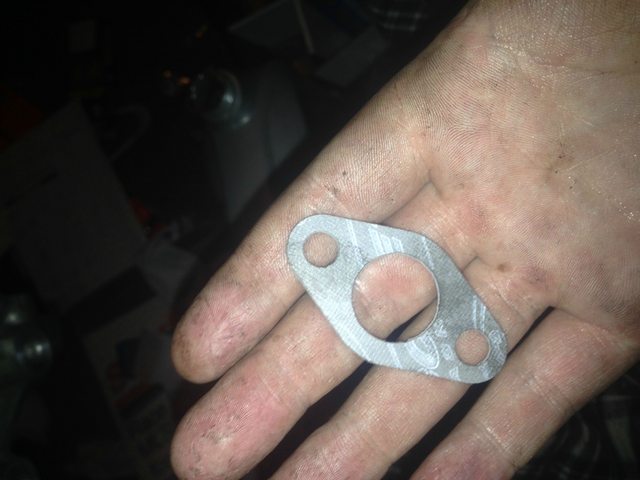
Cometic StreetPro kit comes with a new oil pickup gasket - use it!
Bolting down the oil pickup. All bolts, 8 ft/lbs
I had the oil pan gasket, as well as my new hardware from My Honda Habit mocked up, mainly so I didn't accidentally lose anything. The kit from My Honda Habit is hardened steel full studs. Hardened steel is far superior to OEM, new is far superior to used, and full studs are far superior to the OEM stud/bolt combination. If you're ever replacing your oil pan gasket, this kit is definitely $20 well spent.
Gasket removed, studs removed, lubes, and reinstalled
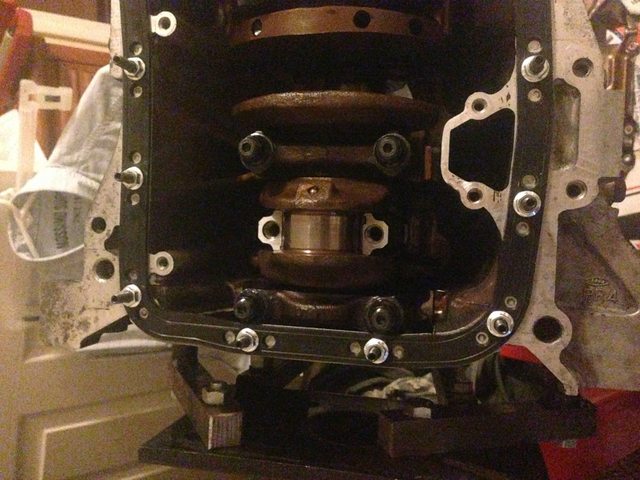
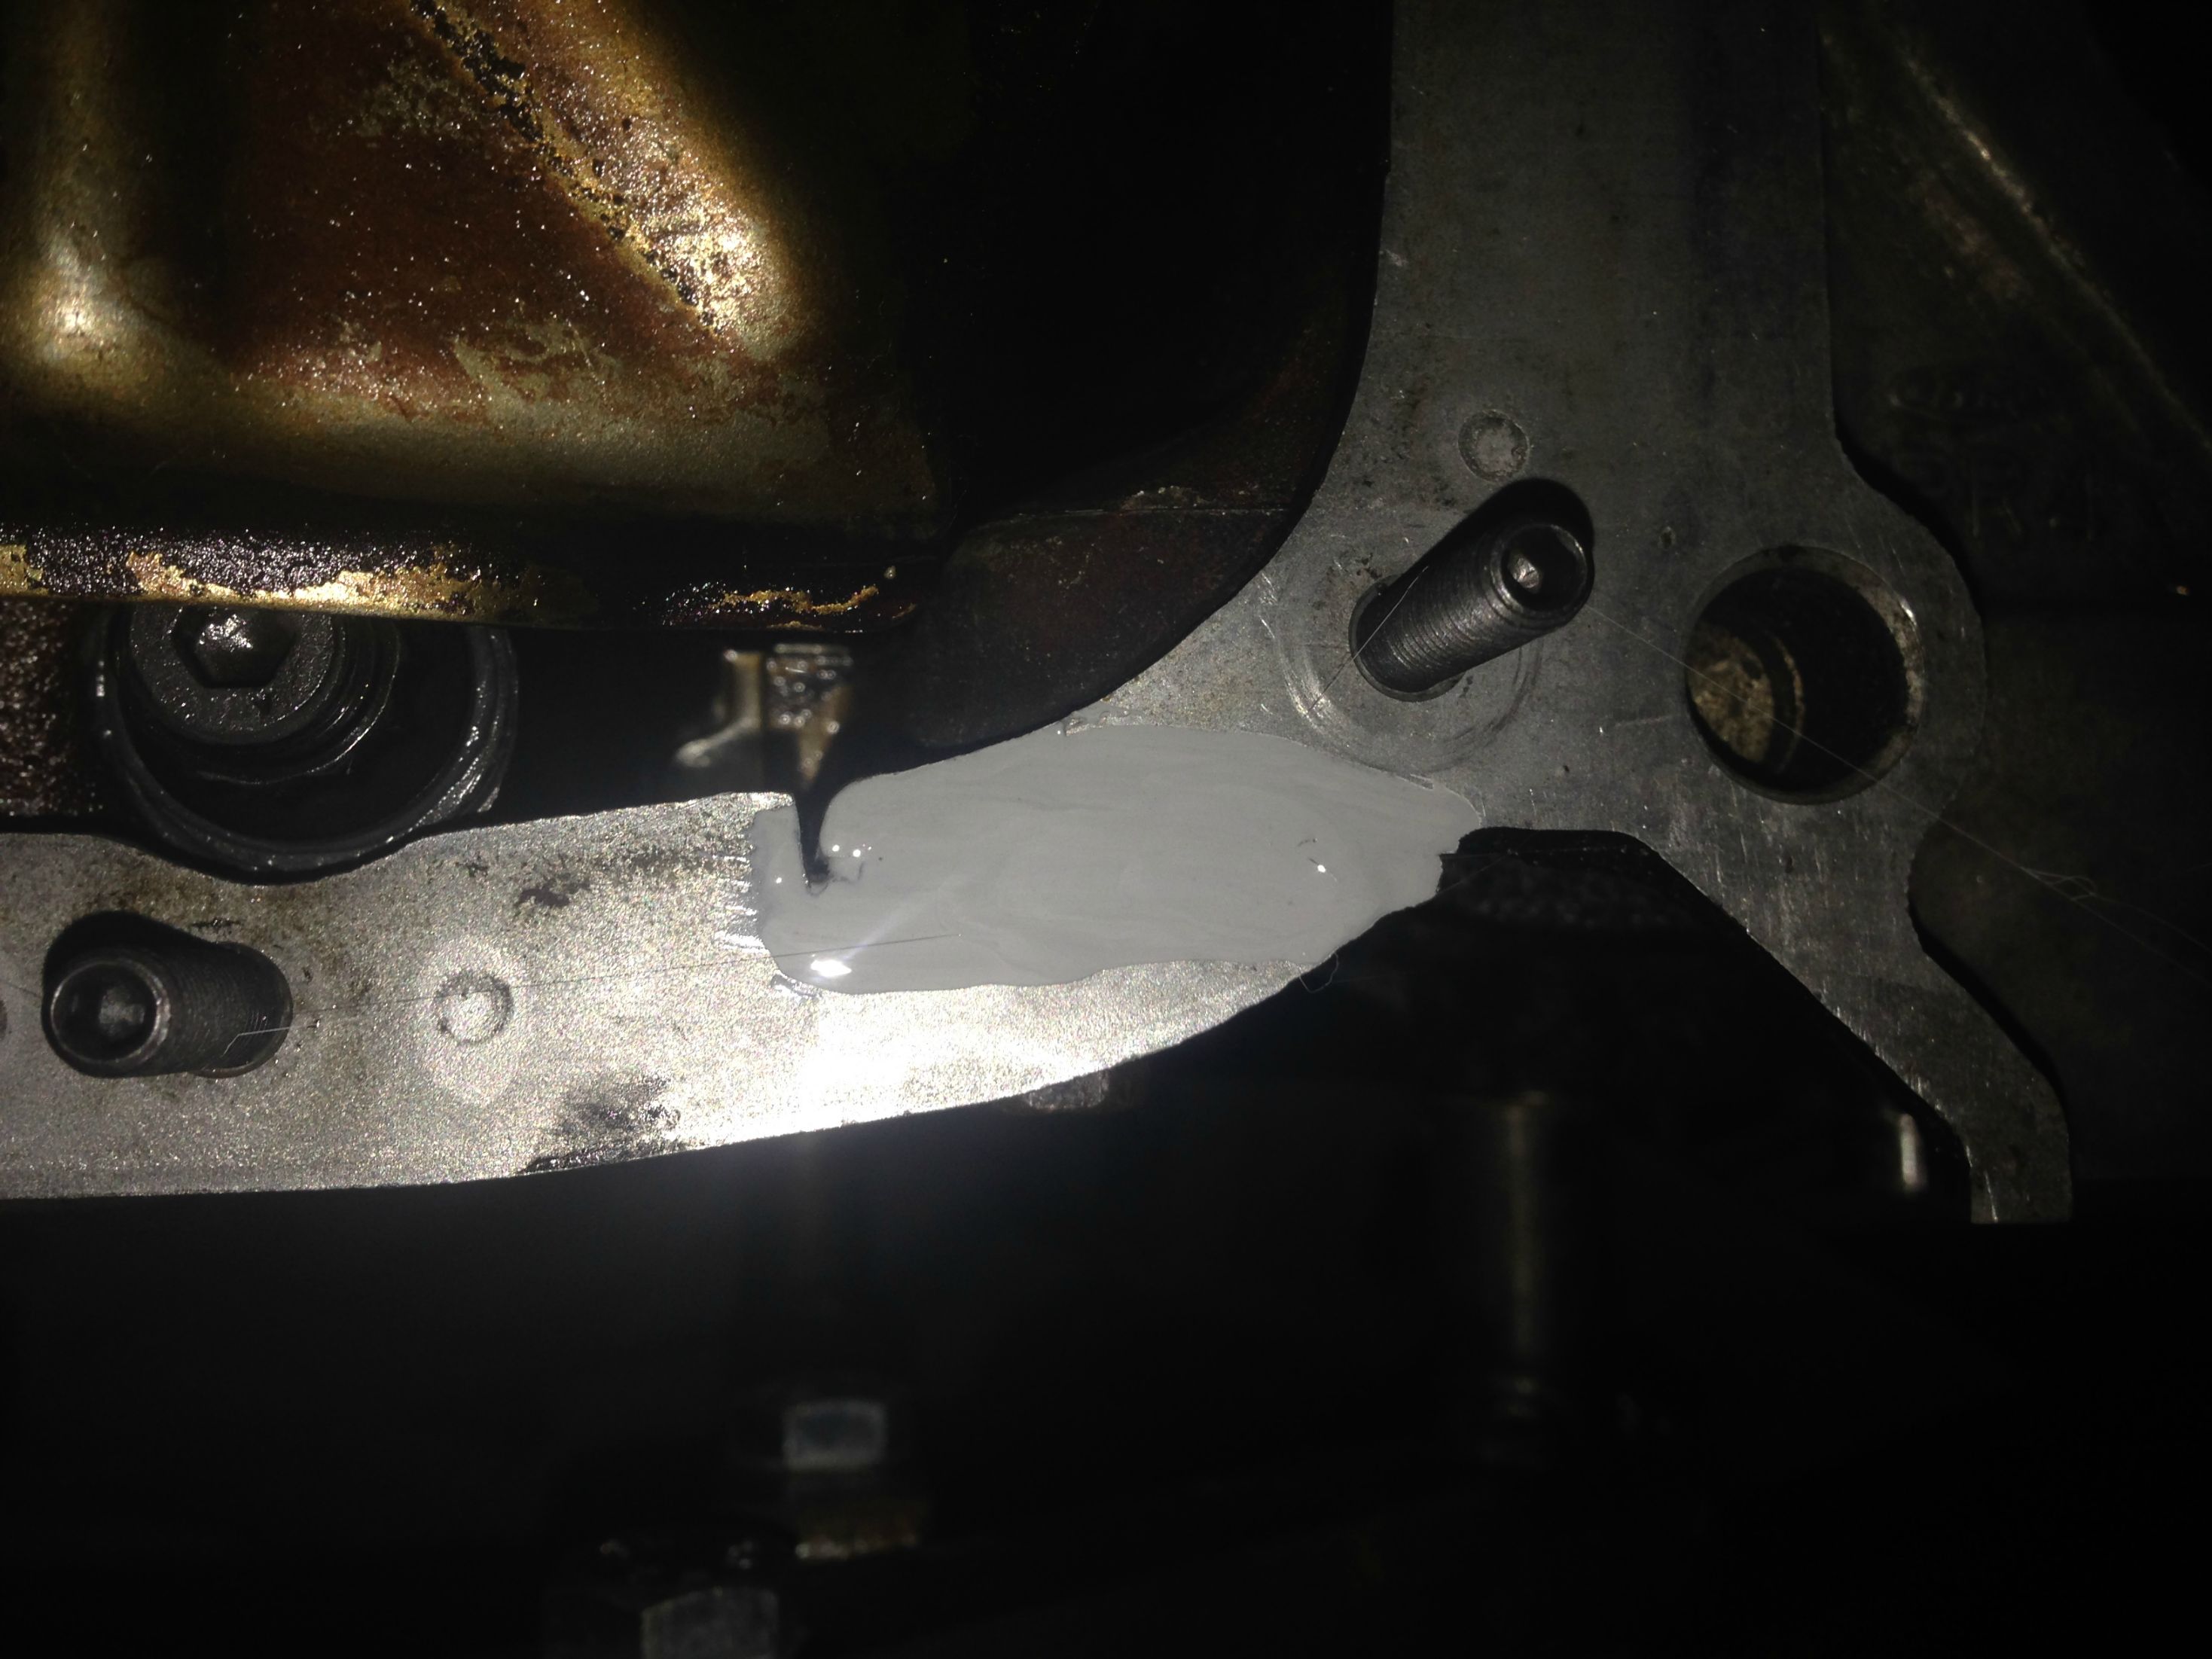
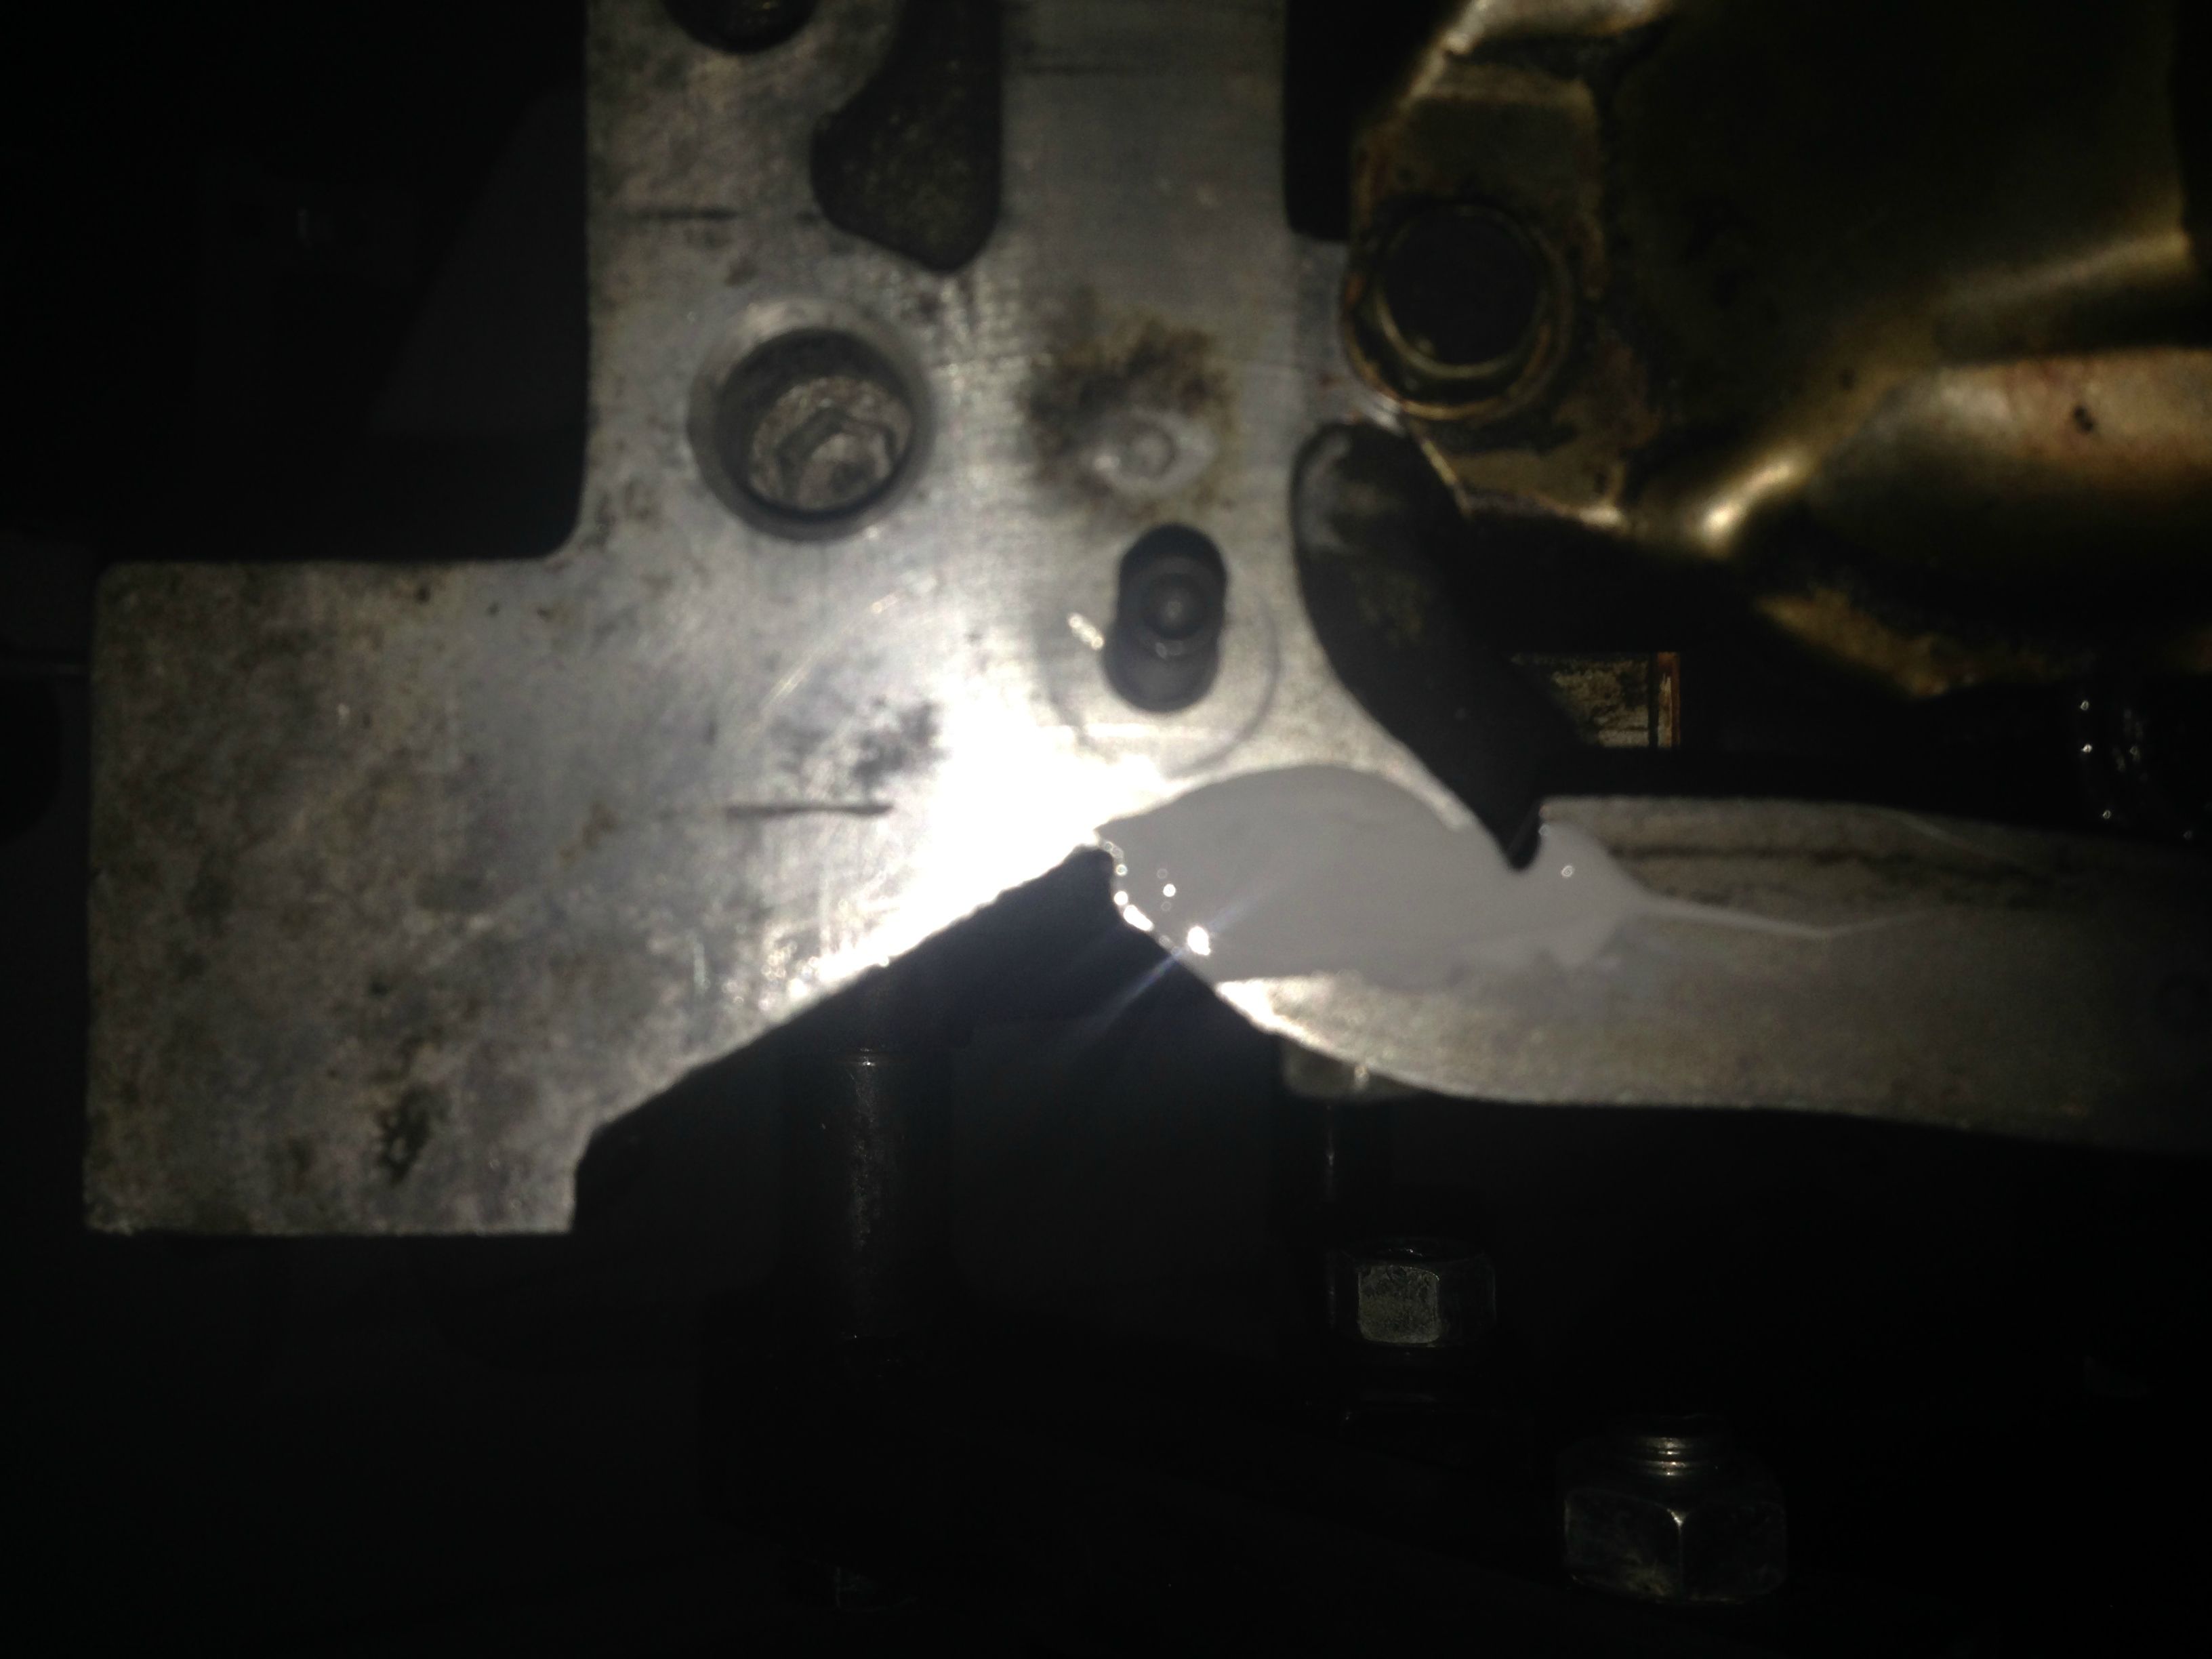
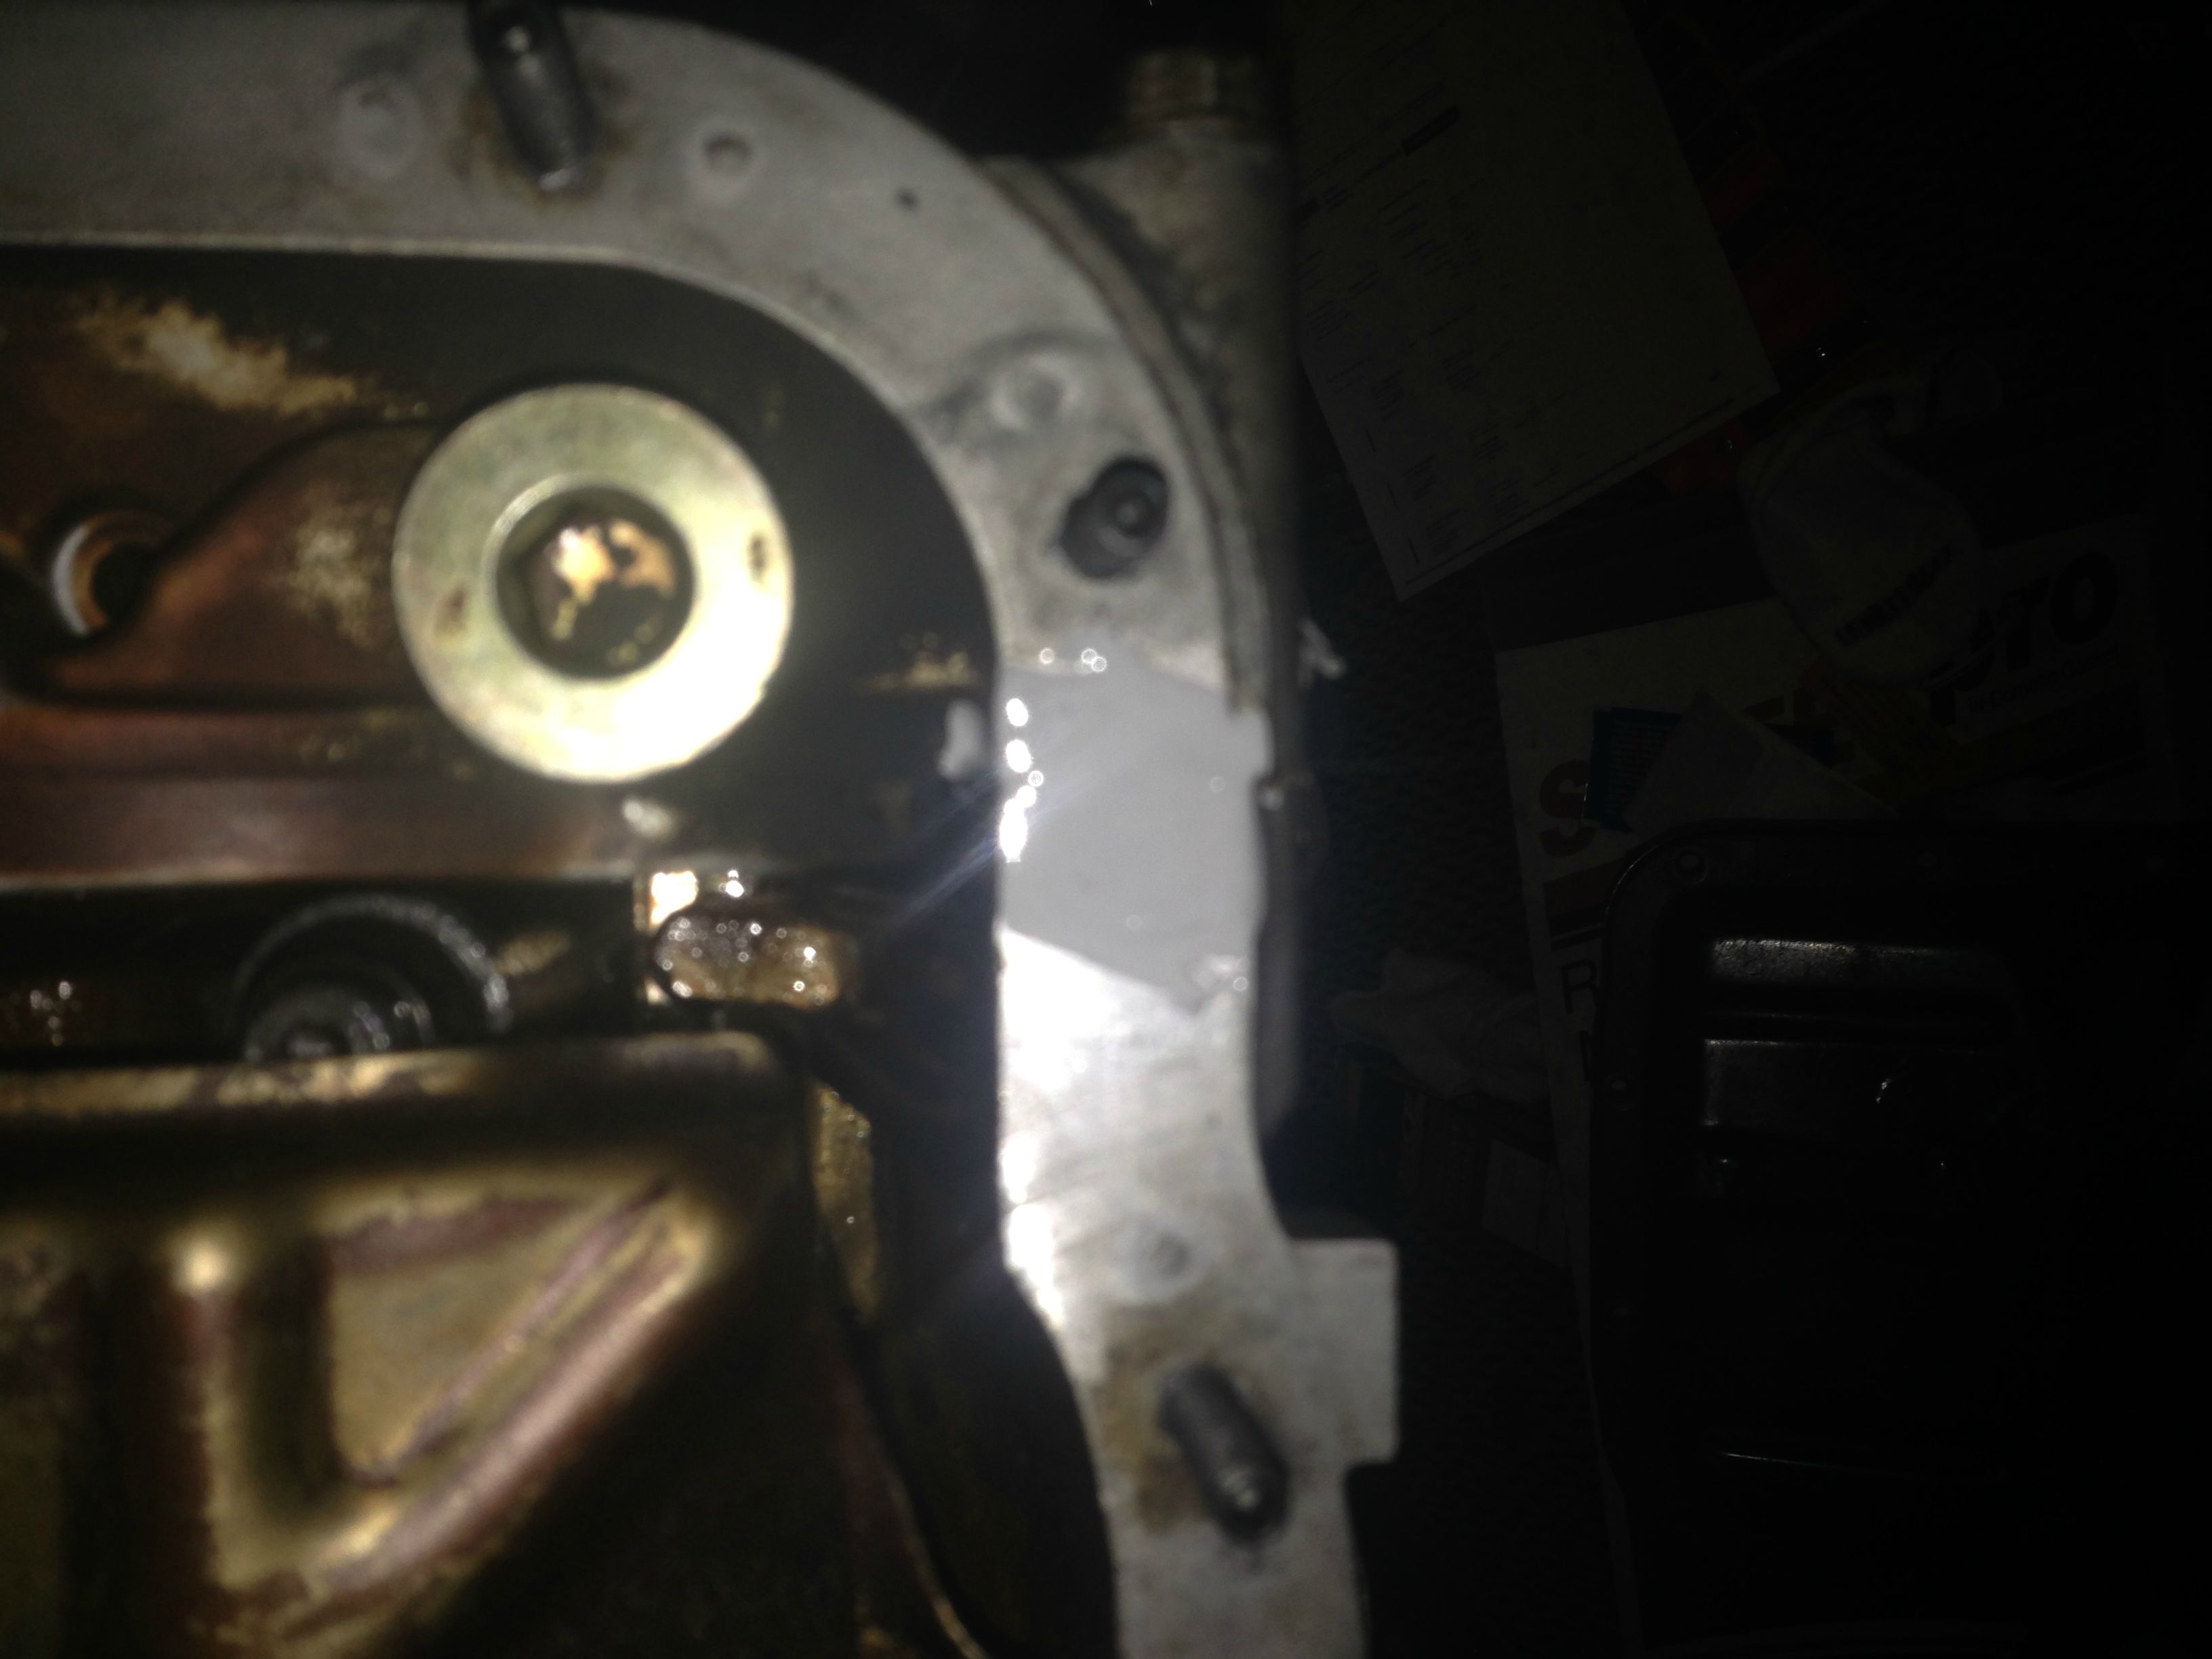
The FSM direction for installing an oil pan gasket are pretty straight forward. You would think it's stupidly simple, but if you over-simplify it, you'll just have another leak with your new gasket. Do it once, do it right. You apply HondaBond at the mating surfaces between the main seal carrier and block, as well as the oil pump and block. Lay the new gasket down, then install your oil pan. Lightly thread your nuts onto the studs, just so you don't accidentally lose them. Hand tighten six of those nuts - the top middle, bottom middle, two on the main seal carrier, and two outers on the oil pump. Once those six nuts are hand tight, pull your torque wrench out. FSM says to torque to 8.7 ft/lbs in three steps, starting at the top middle nut and working clockwise. It doesn't specify what those three steps are, so I went around at 3 ft/lbs, then 5 ft/lbs, then 9 ft/lbs.
Applying HondaBond to the mating surfaces
Laying down the new gasket
Laying down the oil pan
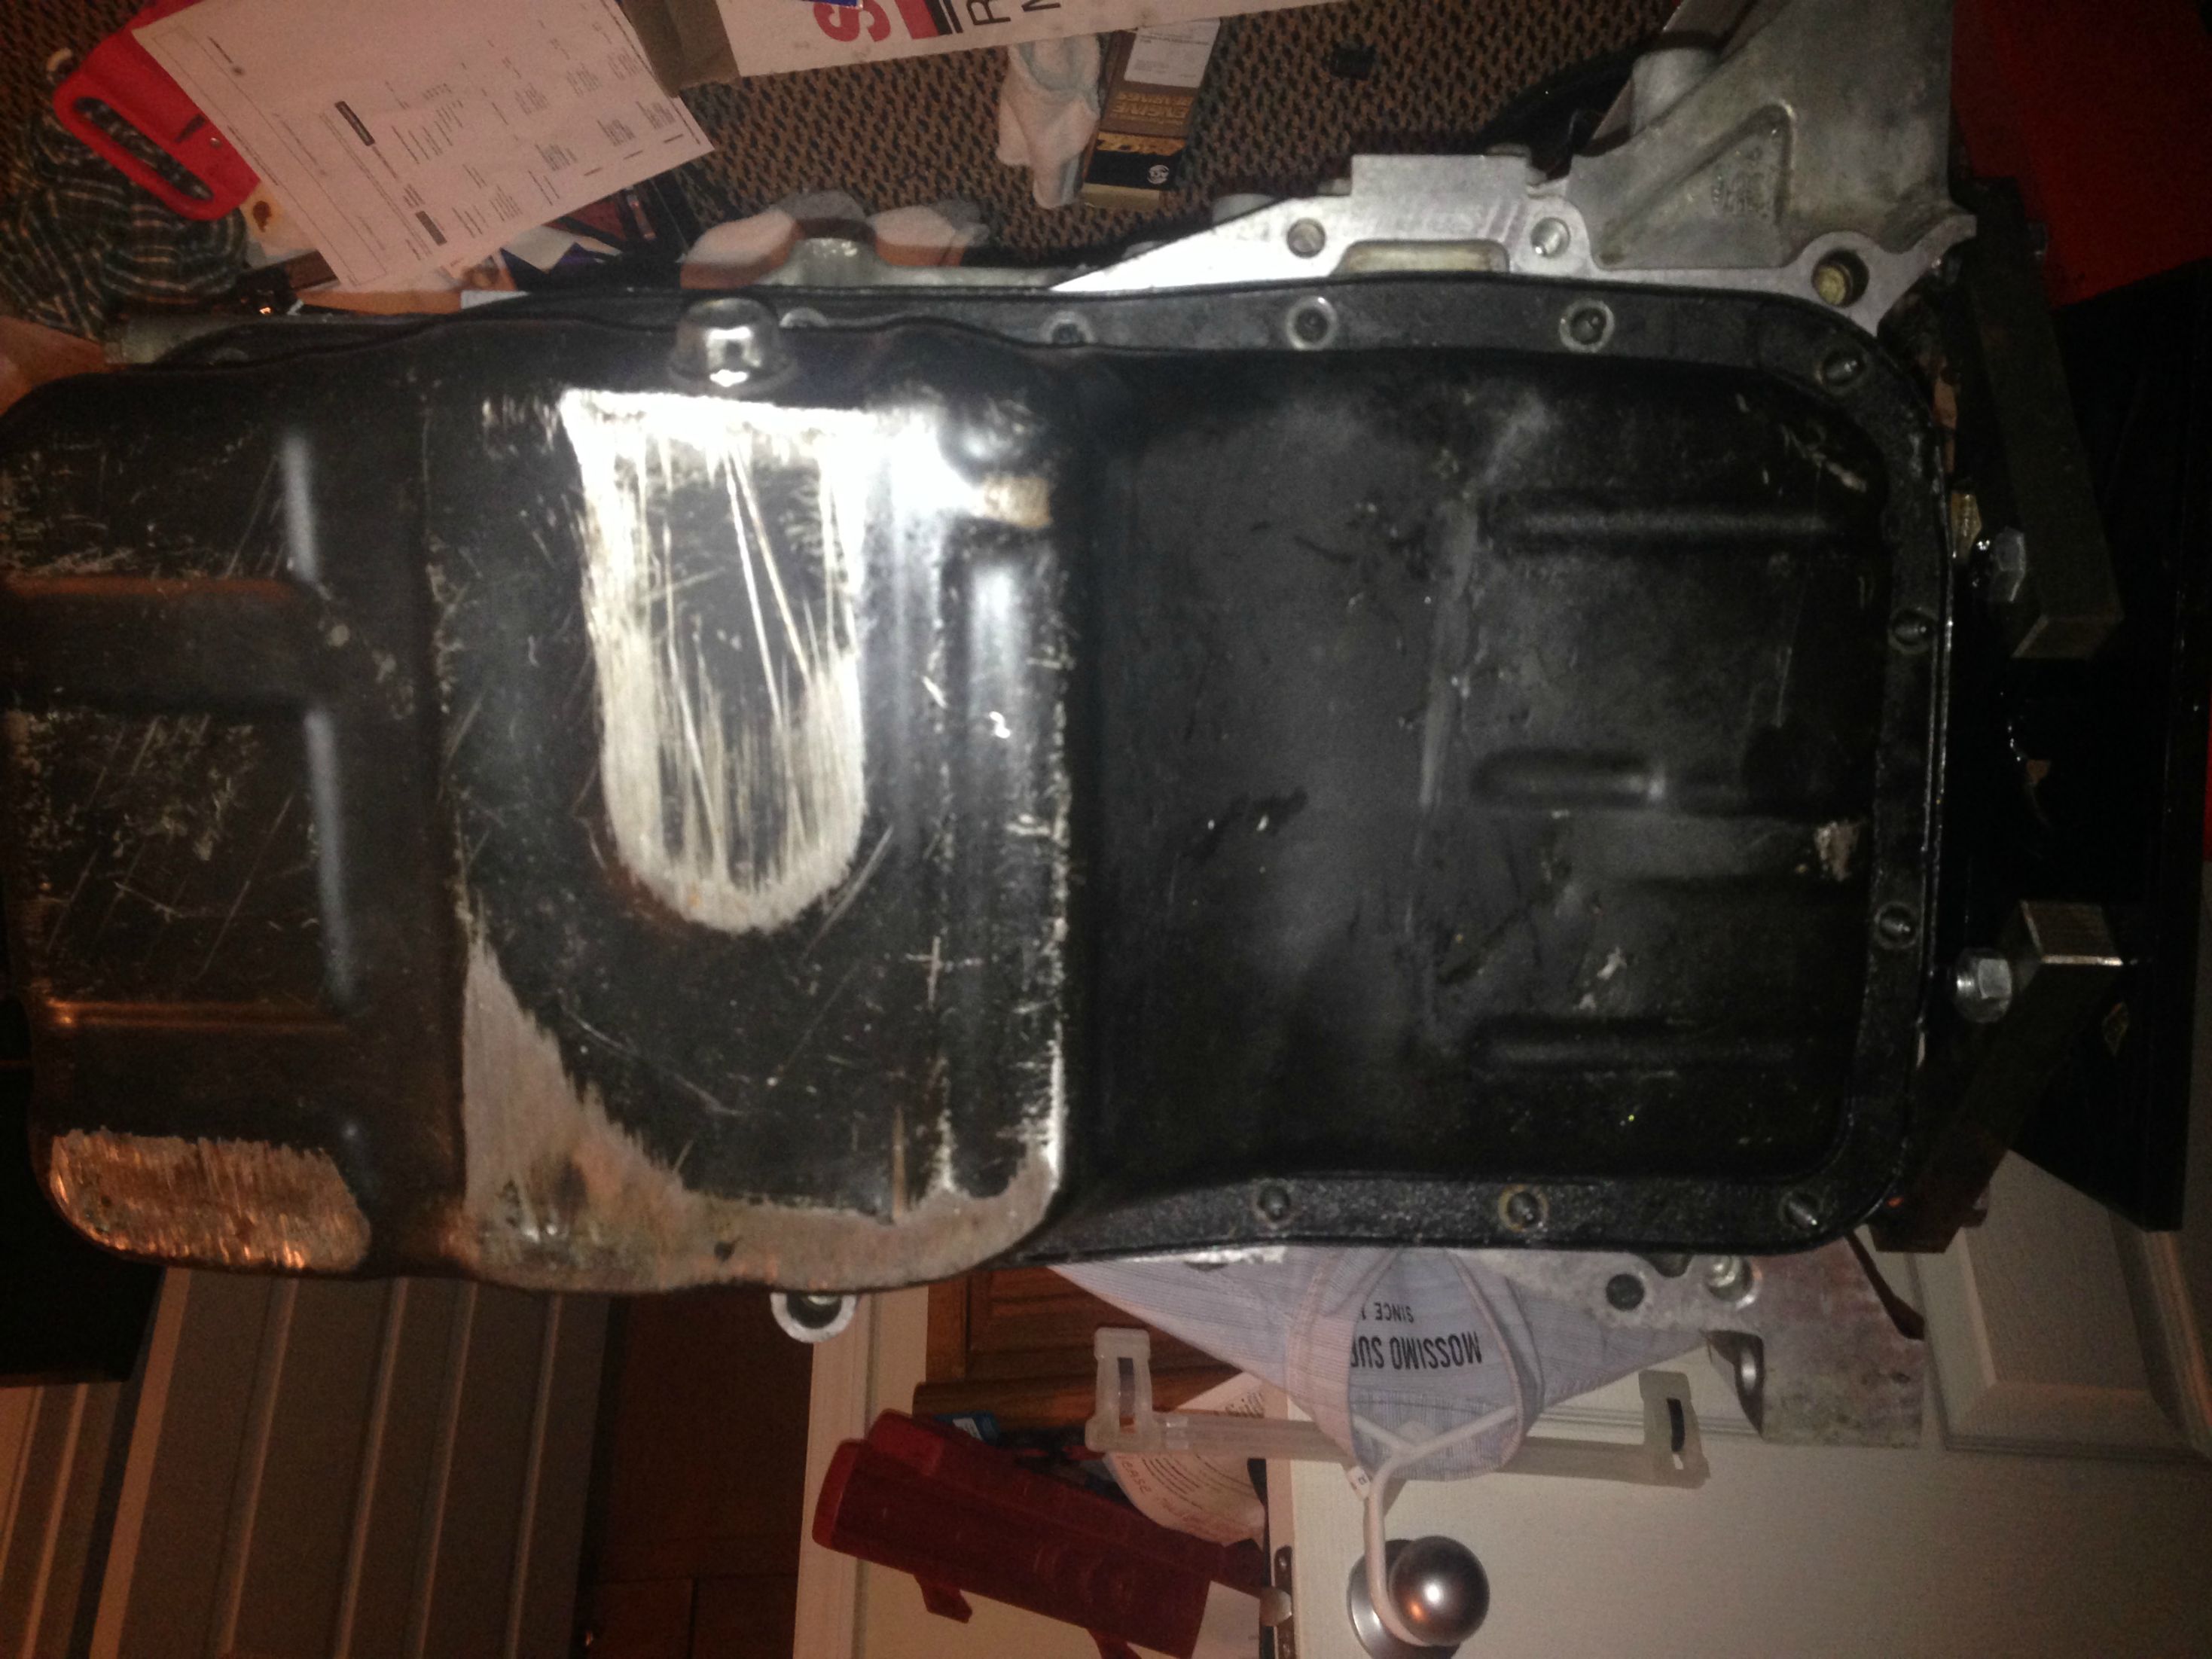
Torque it all down as mentioned above, and you now have a complete short block!

I borrowed a couple of brass bristle brushes from work, and still have half a bottle of Simple Green, so I'll be spending the rest of the night doing laundry, cleaning my apartment, and cleaning the block. If time allows, I might go ahead and lay down my first coat of paint as well. Honestly, though, I'm thinking about holding off on painting it until I have the head bolted on and torqued down as well. That way, I'll completely avoid the risk of getting any paint on the head gasket mating surfaces, and I'll be able to keep the layers of paint on my head and block even.
Now that we have block diagnostics 201 covered, more building! This whole bit is is pretty self-explanatory, so there will be more pictures and specs, less explanation and paragraphs.
Drop on the windage tray, and toss on the bolts. FSM says torque to 8 ft/lbs, so 8 ft/lbs it is. I still had PLENTY of ARP torque lube, so I used some on every nut and bolt. Also, always chase your holes before tossing in new studs or bolts. Thread chasers are cheap - use them!
Windage tray on and torqued down
Cometic StreetPro kit comes with a new oil pickup gasket - use it!
Bolting down the oil pickup. All bolts, 8 ft/lbs
I had the oil pan gasket, as well as my new hardware from My Honda Habit mocked up, mainly so I didn't accidentally lose anything. The kit from My Honda Habit is hardened steel full studs. Hardened steel is far superior to OEM, new is far superior to used, and full studs are far superior to the OEM stud/bolt combination. If you're ever replacing your oil pan gasket, this kit is definitely $20 well spent.
Gasket removed, studs removed, lubes, and reinstalled
The FSM direction for installing an oil pan gasket are pretty straight forward. You would think it's stupidly simple, but if you over-simplify it, you'll just have another leak with your new gasket. Do it once, do it right. You apply HondaBond at the mating surfaces between the main seal carrier and block, as well as the oil pump and block. Lay the new gasket down, then install your oil pan. Lightly thread your nuts onto the studs, just so you don't accidentally lose them. Hand tighten six of those nuts - the top middle, bottom middle, two on the main seal carrier, and two outers on the oil pump. Once those six nuts are hand tight, pull your torque wrench out. FSM says to torque to 8.7 ft/lbs in three steps, starting at the top middle nut and working clockwise. It doesn't specify what those three steps are, so I went around at 3 ft/lbs, then 5 ft/lbs, then 9 ft/lbs.
Applying HondaBond to the mating surfaces
Laying down the new gasket
Laying down the oil pan
Torque it all down as mentioned above, and you now have a complete short block!
I borrowed a couple of brass bristle brushes from work, and still have half a bottle of Simple Green, so I'll be spending the rest of the night doing laundry, cleaning my apartment, and cleaning the block. If time allows, I might go ahead and lay down my first coat of paint as well. Honestly, though, I'm thinking about holding off on painting it until I have the head bolted on and torqued down as well. That way, I'll completely avoid the risk of getting any paint on the head gasket mating surfaces, and I'll be able to keep the layers of paint on my head and block even.
01-09-2014, 11:59 PM
#40
Honda-Tech Member

Join Date: Feb 2013
Location: Des Moines IA
Posts: 117
Likes: 0
Received 0 Likes
on
0 Posts
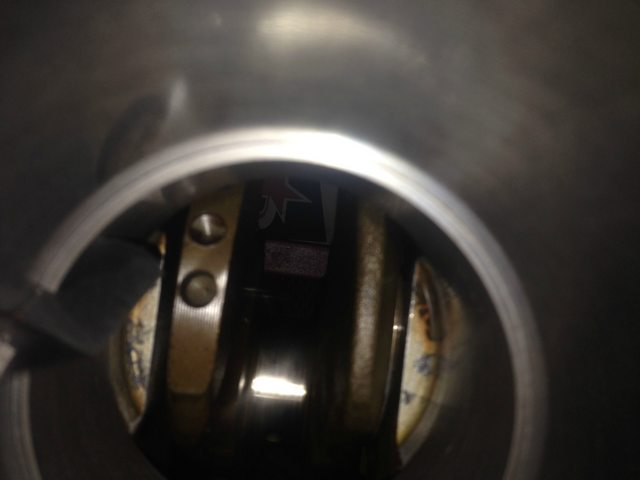
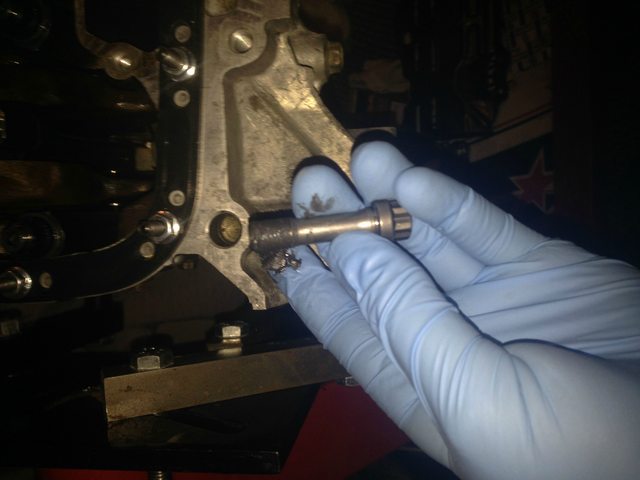
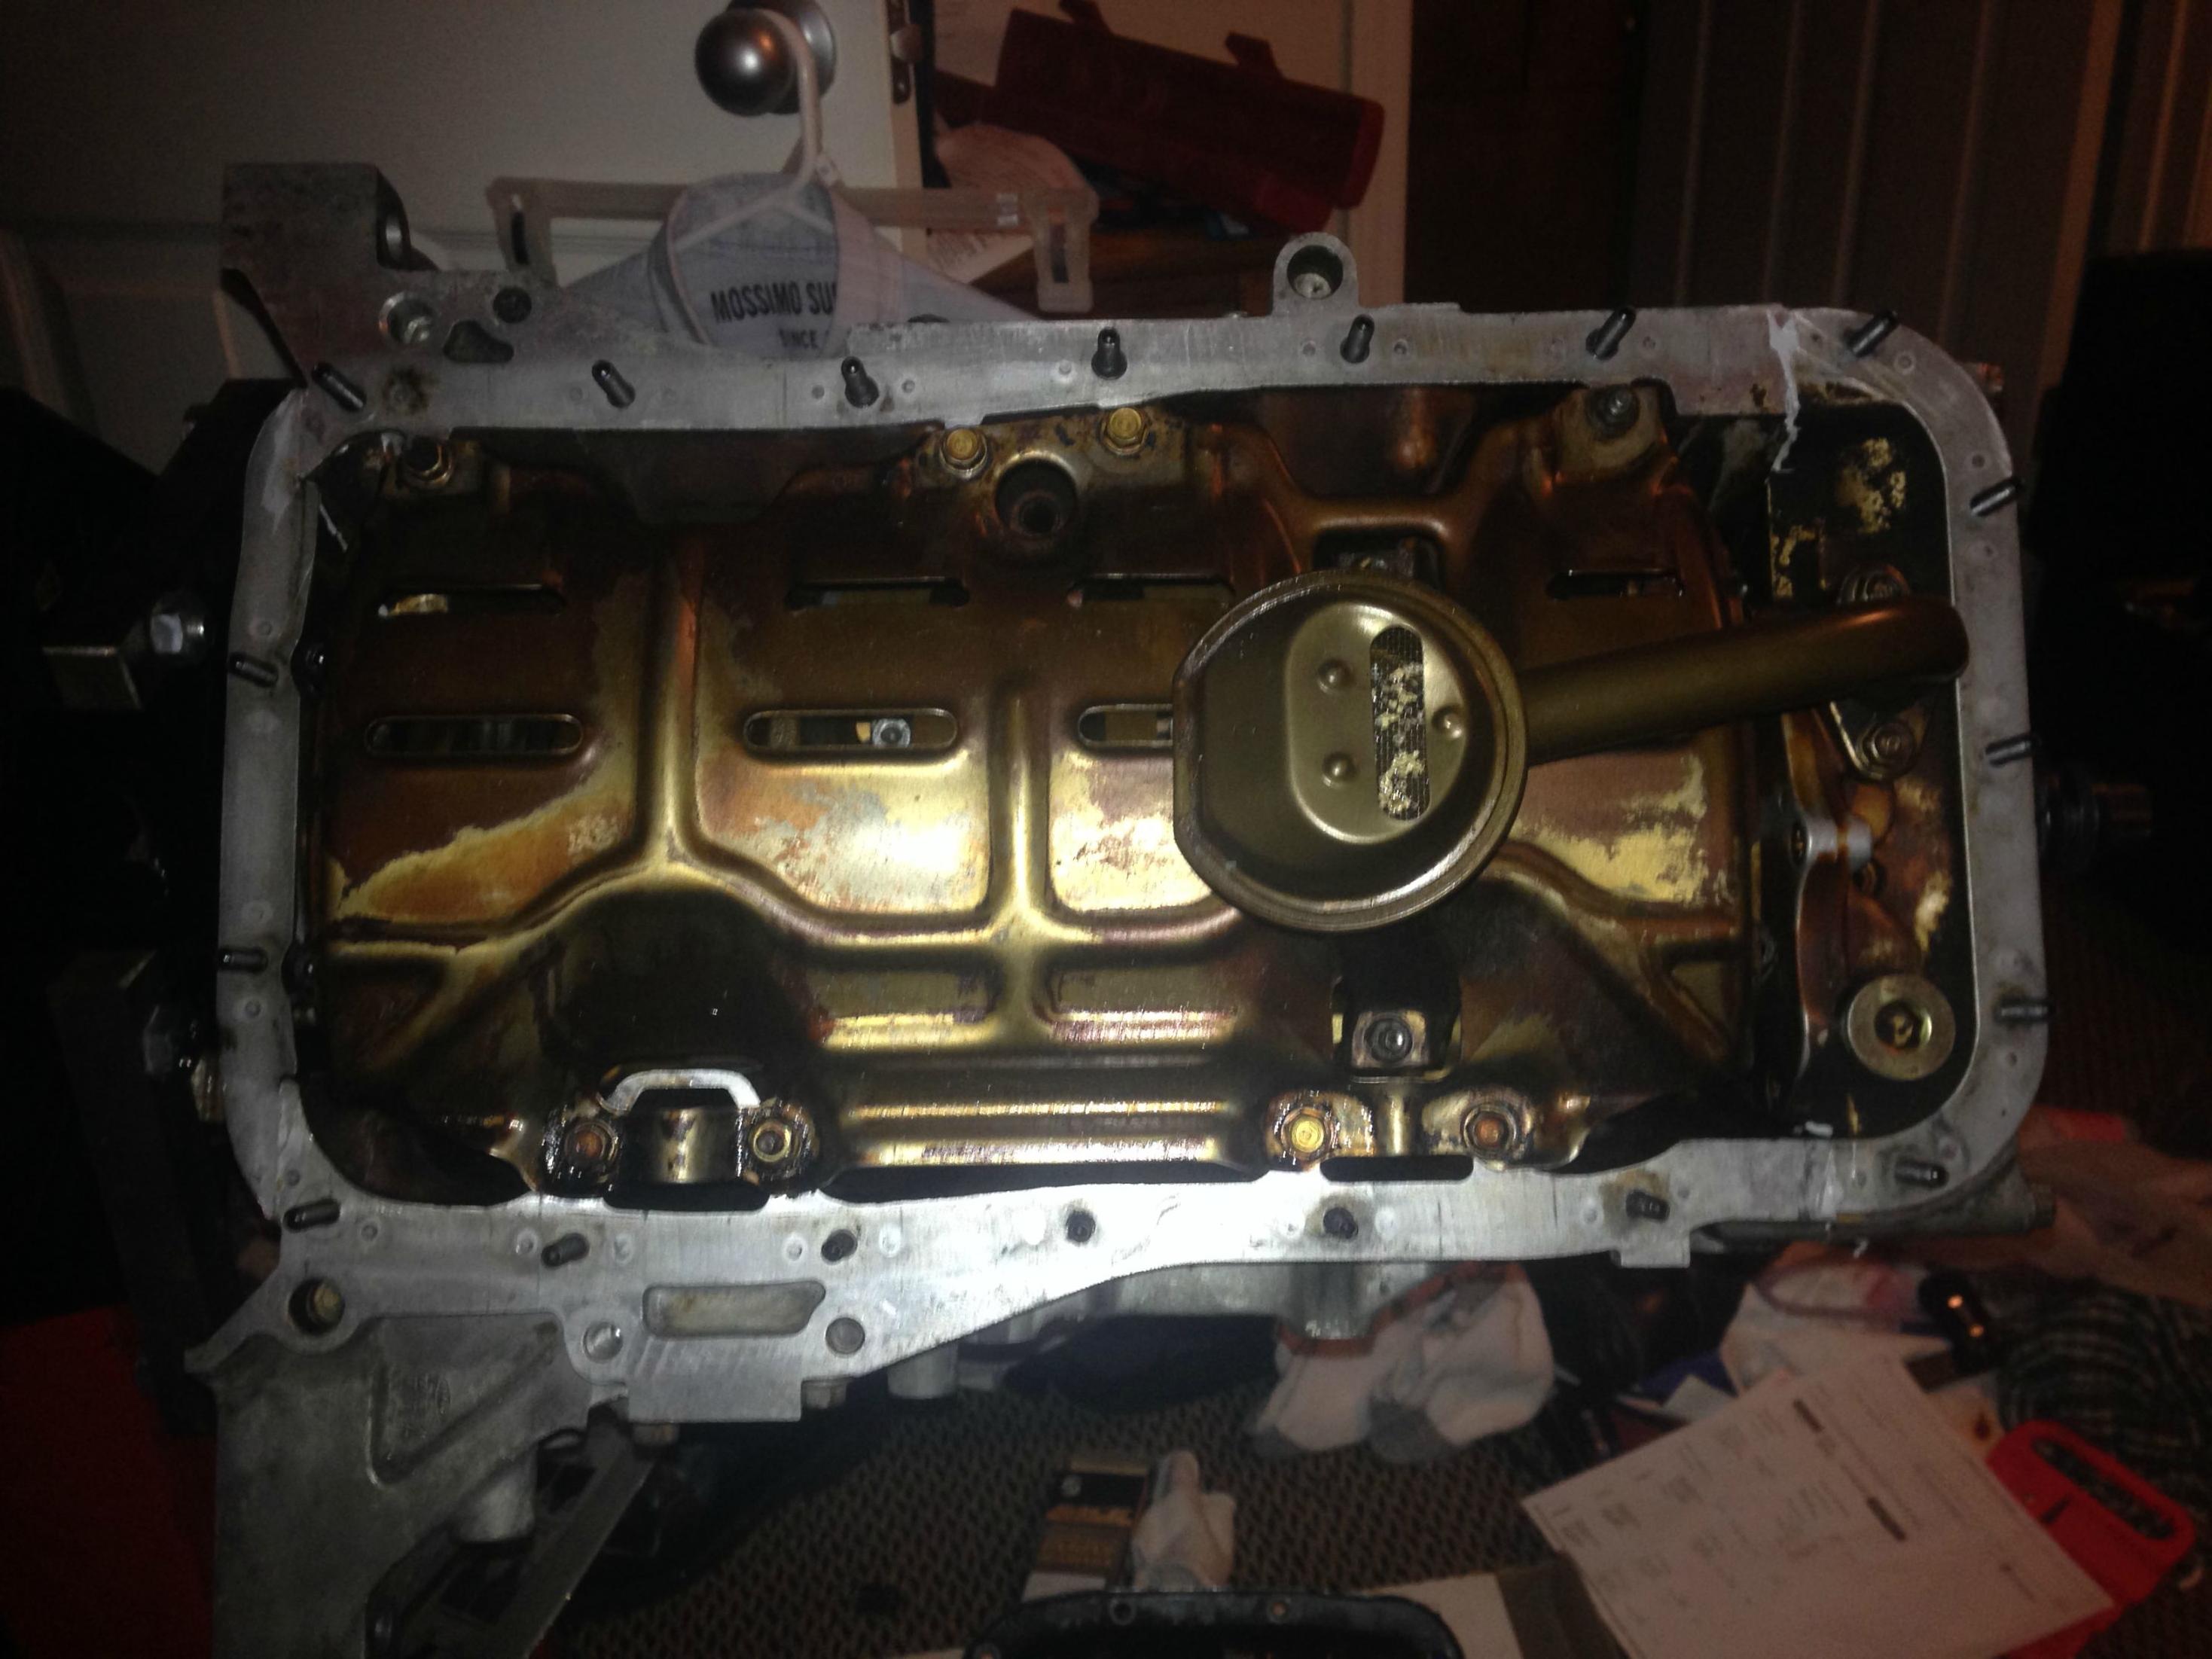
ummmm, hey dude, might want to clean your oil pickup tube. looks like a bunch of bearing material leftover in there..
01-10-2014, 08:08 AM
#41
It's not bearing material, it's just general detritus from 250,000 miles of use - I've known the owner of this motor since it was new, and he never spun a bearing. I pressurized it from both sides, and that stuff just isn't moving.
Good eye, though
Good eye, though
01-10-2014, 08:01 PM
#43
Honda-Tech Member
Join Date: Feb 2013
Location: Des Moines IA
Posts: 117
Likes: 0
Received 0 Likes
on
0 Posts
 01-10-2014, 08:36 PM
#44
ahhh ok. just had to point that out lol. but ever think about picking up a better tube? im not totally sure id use that on my own engine at lease. only because it seems like it could potentially restrict flow a bit. just my opinion tho. other than that, nice build so far
I'll be calling up Myles at English Racing to order my head studs on Monday, ARP of course. I'm still undecided between getting the Cometic top end kit, or piecing everything together separately. All of the same "stuff" from Acura would cost $16 more. JE also makes a good head gasket that I can get a good price on, then totally piece everything else together separately.
Too many options!
01-14-2014, 01:39 PM
#45
Honda-Tech Member

Join Date: Sep 2010
Posts: 217
Likes: 0
Received 0 Likes
on
0 Posts
I just go for the less expensive options, but that could also be why I haven't even started really working on my eg project after owning it for over 1.5 years just accumulating parts for it atm, can't wait to get her boosted...
Thanks for lots of updates, maybe I'll start to feel bad enough to get started..
Thanks for lots of updates, maybe I'll start to feel bad enough to get started..
01-14-2014, 02:53 PM
#47
Ferio Wdm Edition
freakin sweet man! lovin all the pics. question. the timing gear that goes behind the crank pulley, do you have 1 guide or 2? the pic from majestic honda or acura shows teh gear and 2 guides, but theres only 1 part number for the 1 guide and not the other. i havent the slightest clue... you still going to assist me in my build, right? would be nice since you know what you are doing lol
01-14-2014, 03:37 PM
#49
Holy **** I'm still in your sig!
Nothing major today. Changed oil in the car and fixed my fuel leak. Turns out my FPR o-ring had uh...vanished? Ended up using an extra o-ring a buddy had laying around from when his ears were stretched to 00, and it fit perfectly. Dabbed a little bit of non-hardening, gas safe gasket maker, and bolted it back down, no more leak!
Also got my ARP head studs ordered through English Racing, and I'm still undecided on which damn top end gaskets to get!
01-15-2014, 05:28 PM
#50
freakin sweet man! lovin all the pics. question. the timing gear that goes behind the crank pulley, do you have 1 guide or 2? the pic from majestic honda or acura shows teh gear and 2 guides, but theres only 1 part number for the 1 guide and not the other. i havent the slightest clue... you still going to assist me in my build, right? would be nice since you know what you are doing lol
Thank you. I know exactly what I want out of the finished product, which makes it a LOT easier to budget, plan, and build. I've made the "just do a bunch of random stuff" mistake in the past, and learned the hard way that it never ends well.I also have a minor update for today. My ARP head studs have already arrived
 I only ordered them two days ago, so yeah, I'm happy.

I also placed a few orders today for the last of the stuff I need to get the head on the block, and get my timing components done. Ordered the Gates timing kit (belt, tensioner, pump, and gasket) from eBay, Cometic PRO2004T gasket kit from Autoplicity, and all of the fun timing-related plastics and bolts, as well as two new woodruff keys from EBHparts.com. The eBay seller has a 99.7% rating, so I don't anticipate any problems there. Autoplicity has some negative stuff floating around on other forums, but I've ordered from their sister companies THMotorsports and clutchflywheel.com before without problem, so once again, not anticipating any problems. EBHparts.com is another online dealer, similar to hondaautomotiveparts.com, and they had all of the same stuff for about $20 less than HAP, so I went with them. Their shipping was also much cheaper.
All products after shipping:
Gates kit - $81.56
Timing plastics - $177.04
Gasket kit - $162.42
Total: $421.02
I'll probably go ahead and get the head studs threaded in when I get home from work tonight, and wait for the rest of the hardware to come in. I also found a CRV complete intake manifold with the surge tank that I'm thinking about picking up, I just have to look more into it. I'm not sure if the surge tank will clear my hood, and on top of that, I don't know how good a plastic surge tank will be for boost.