
JBPnoman/NotARacist/DblDtchRddr/whatever-you-want-to-call me build thread
 05-17-2015, 05:41 PM
#451
So, we have a little bit of good news/bad news. Good news, the brakes are now replaced, and awesome. As is the exhaust manifold. So, in the spirit of the DIY, let's do a brake how-to!
Before we get into this, I will preface with this. Your brakes are important, for obvious reasons. If you **** something up in following this, and wreck, that's on you. I'll try not to leave anything out, but I do brake jobs in my sleep. I'll try not to, but if I forget to put something in this write-up, I hold no responsibility for what may happen. Always make sure your brakes work before hitting the road with other cars. If you are not fully comfortable accepting the risk, don't do your own brakes. Take it to a professional.
Now that we have that out of the way...
From sitting for a year, my brakes were rough as ****. I wouldn't trust them to stop a bicycle, let alone a car.
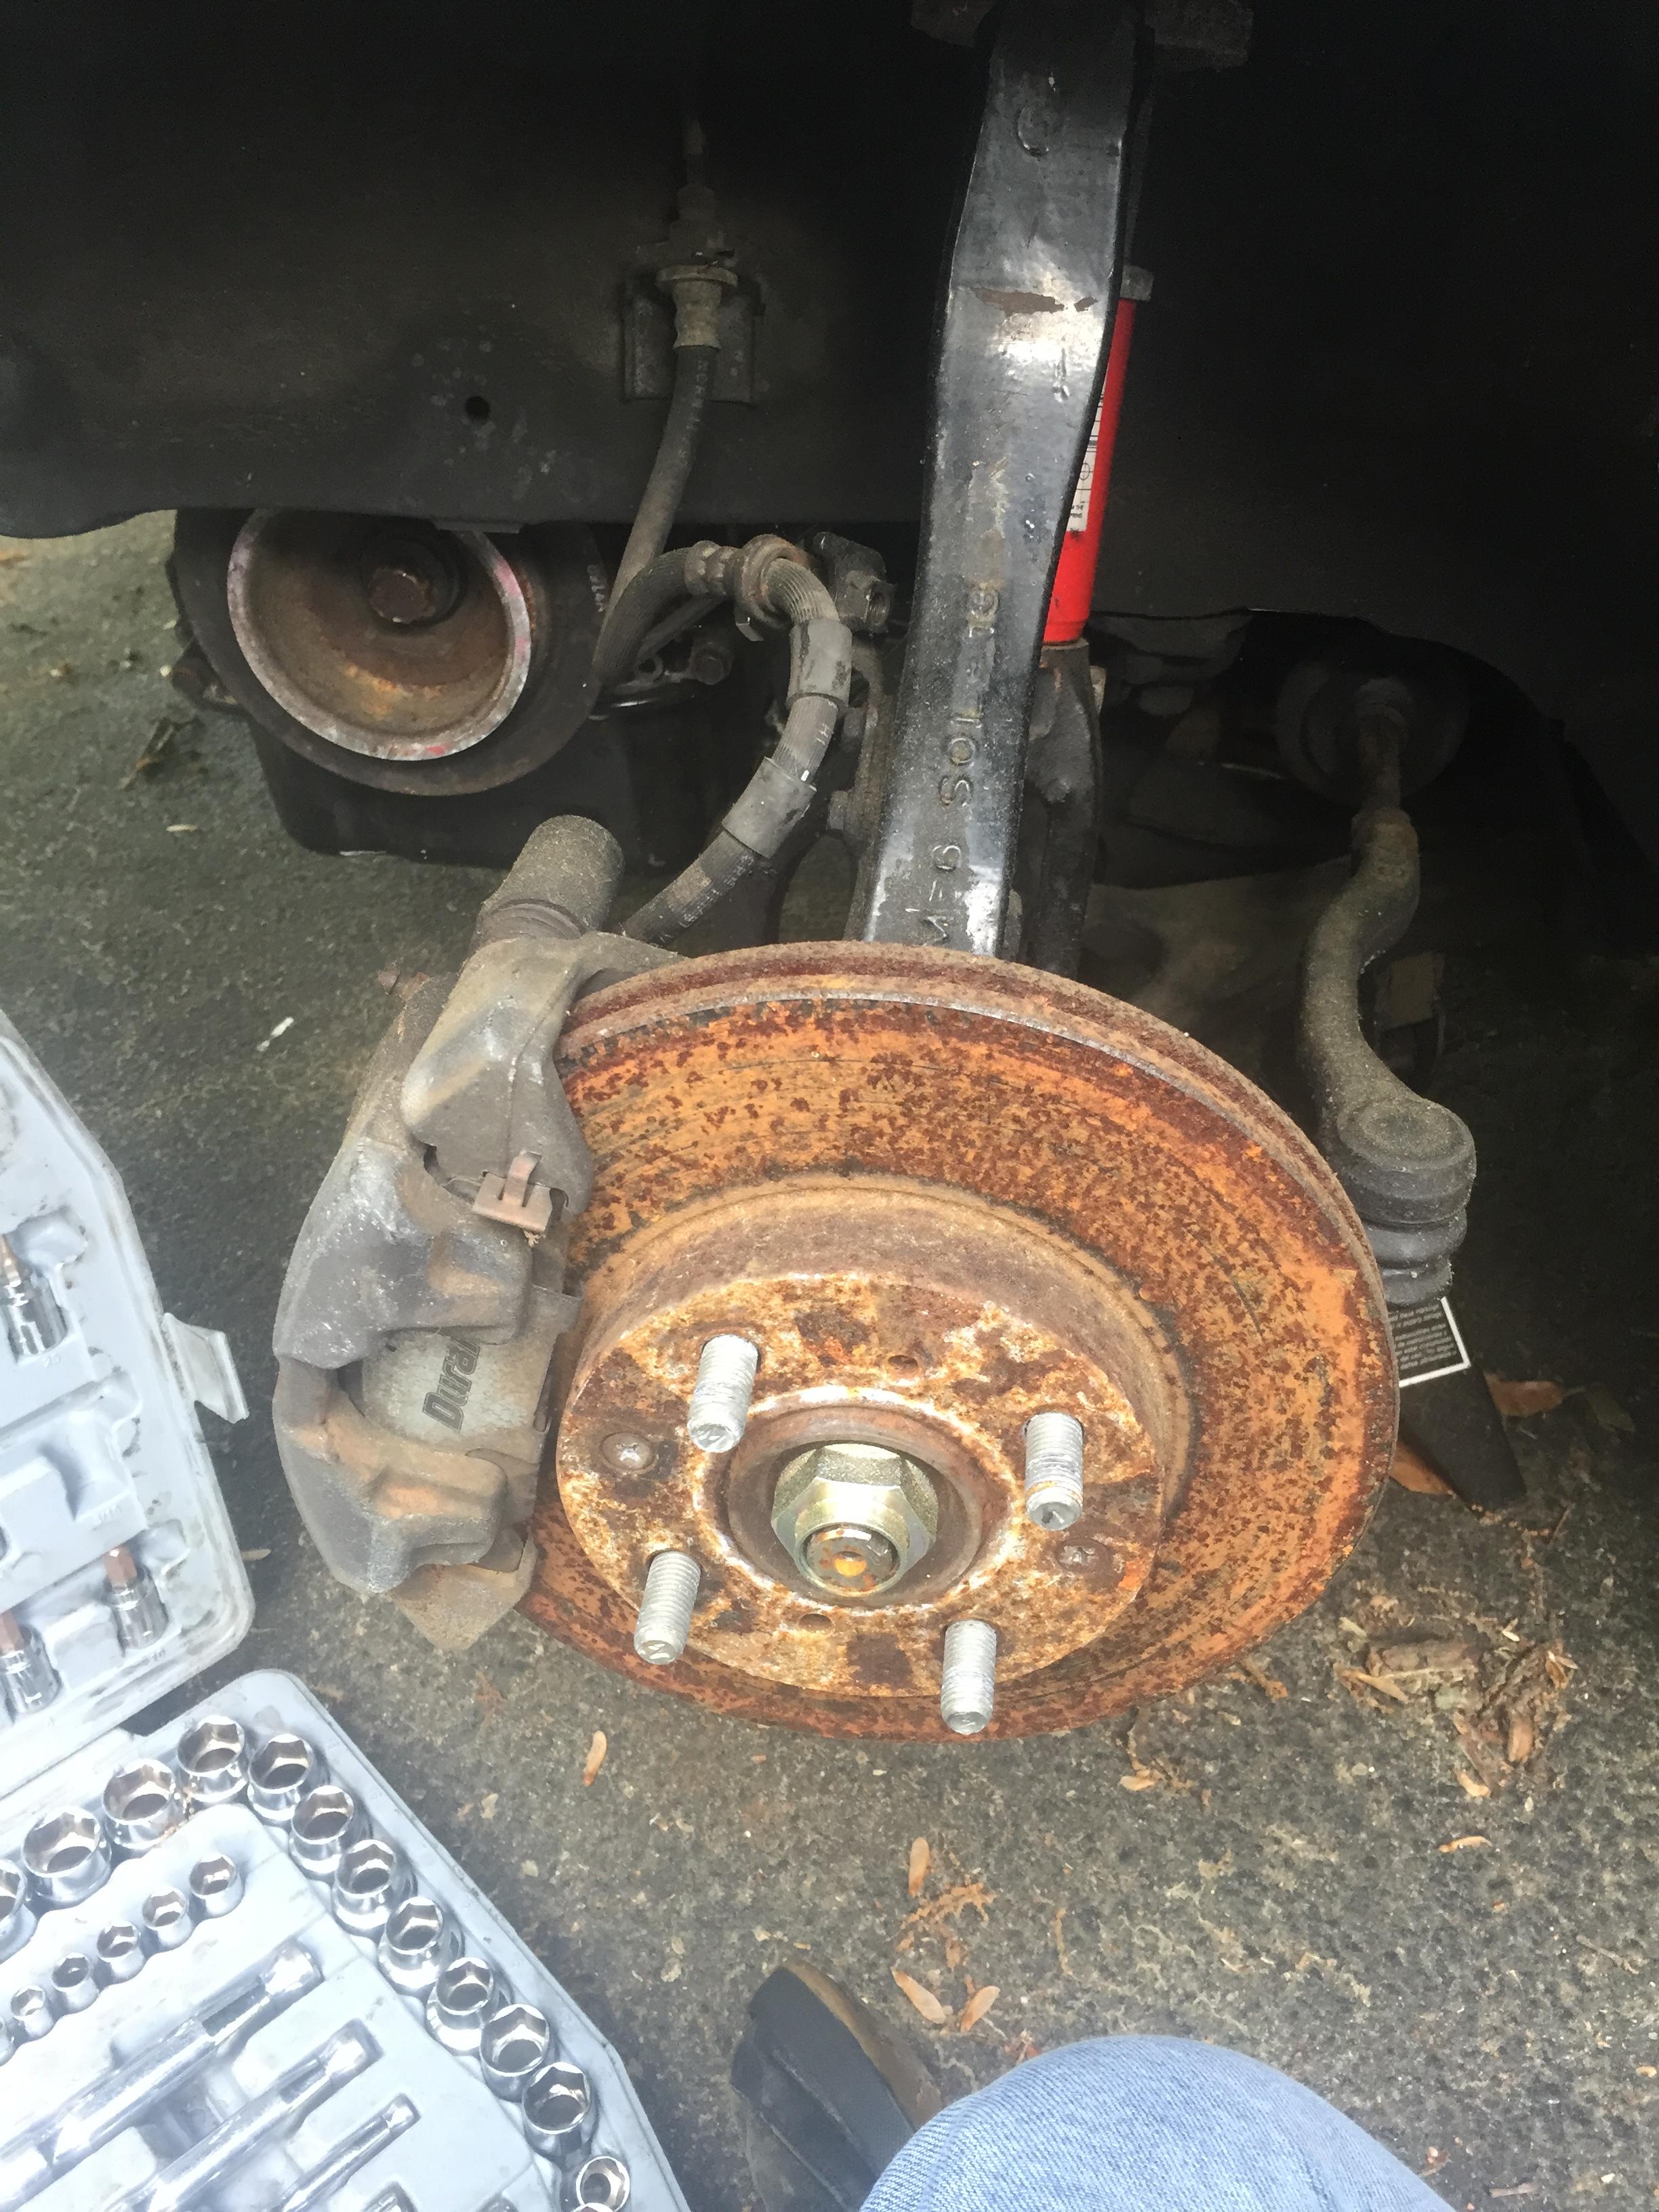
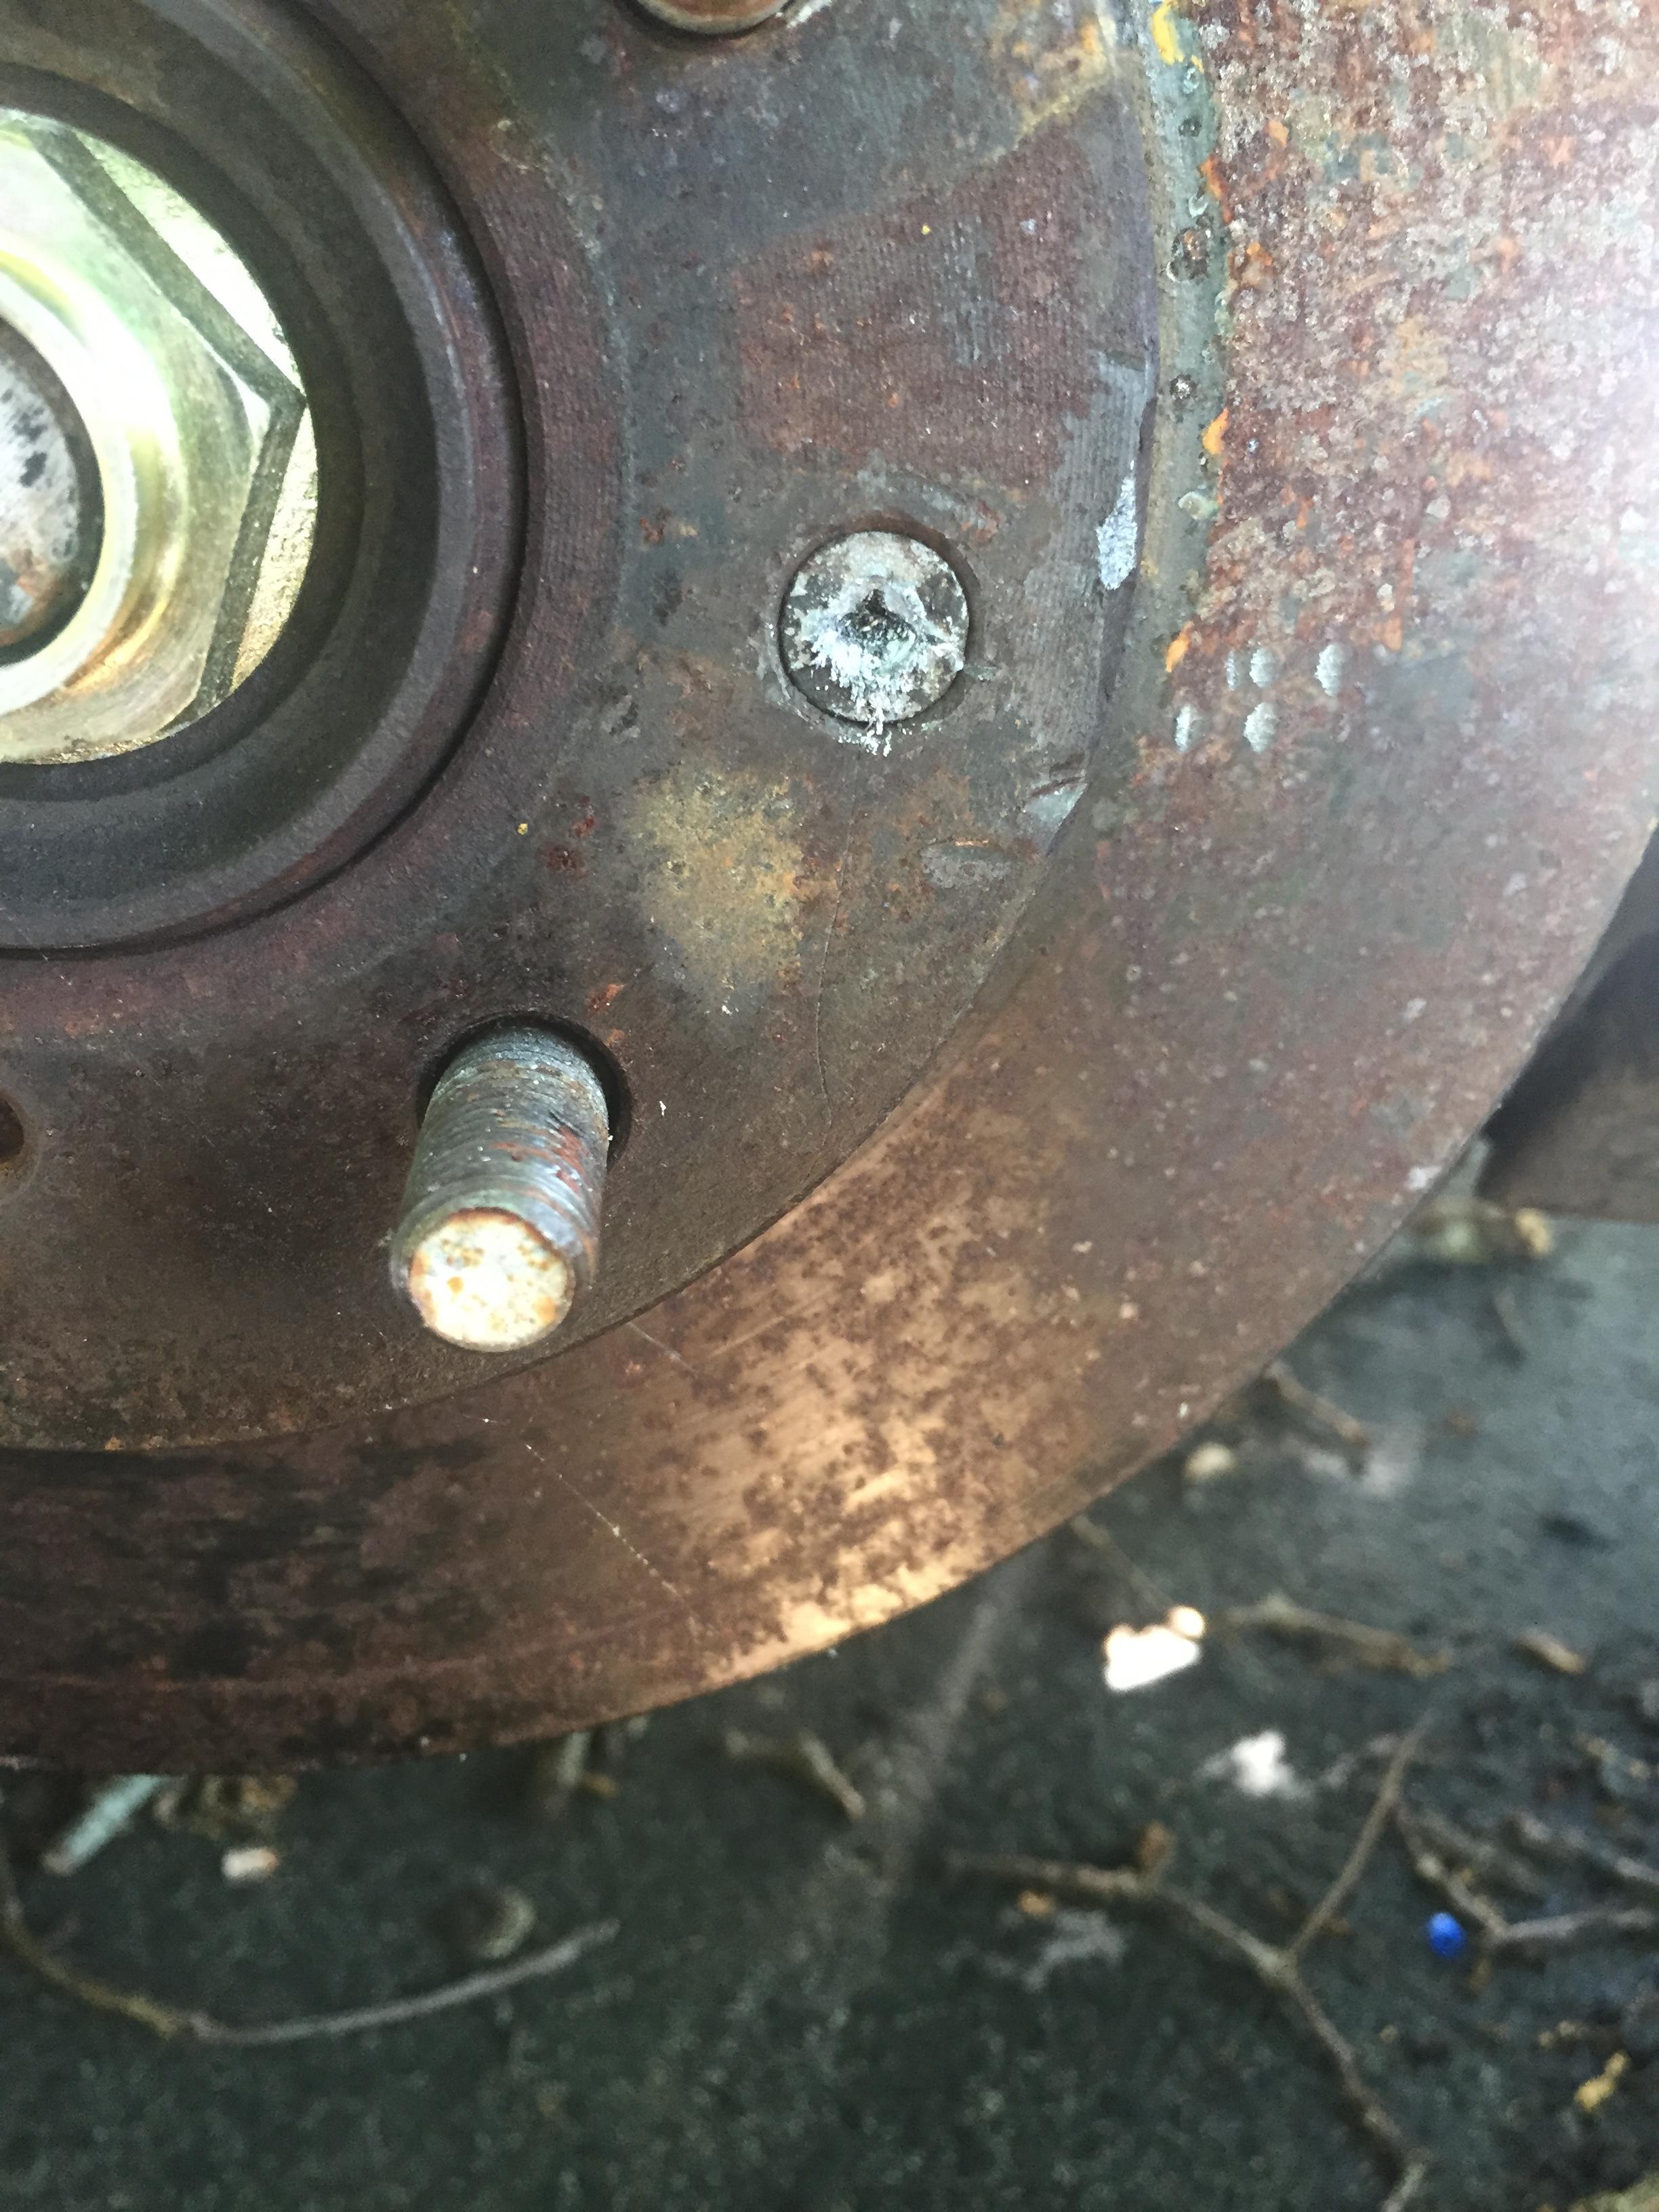
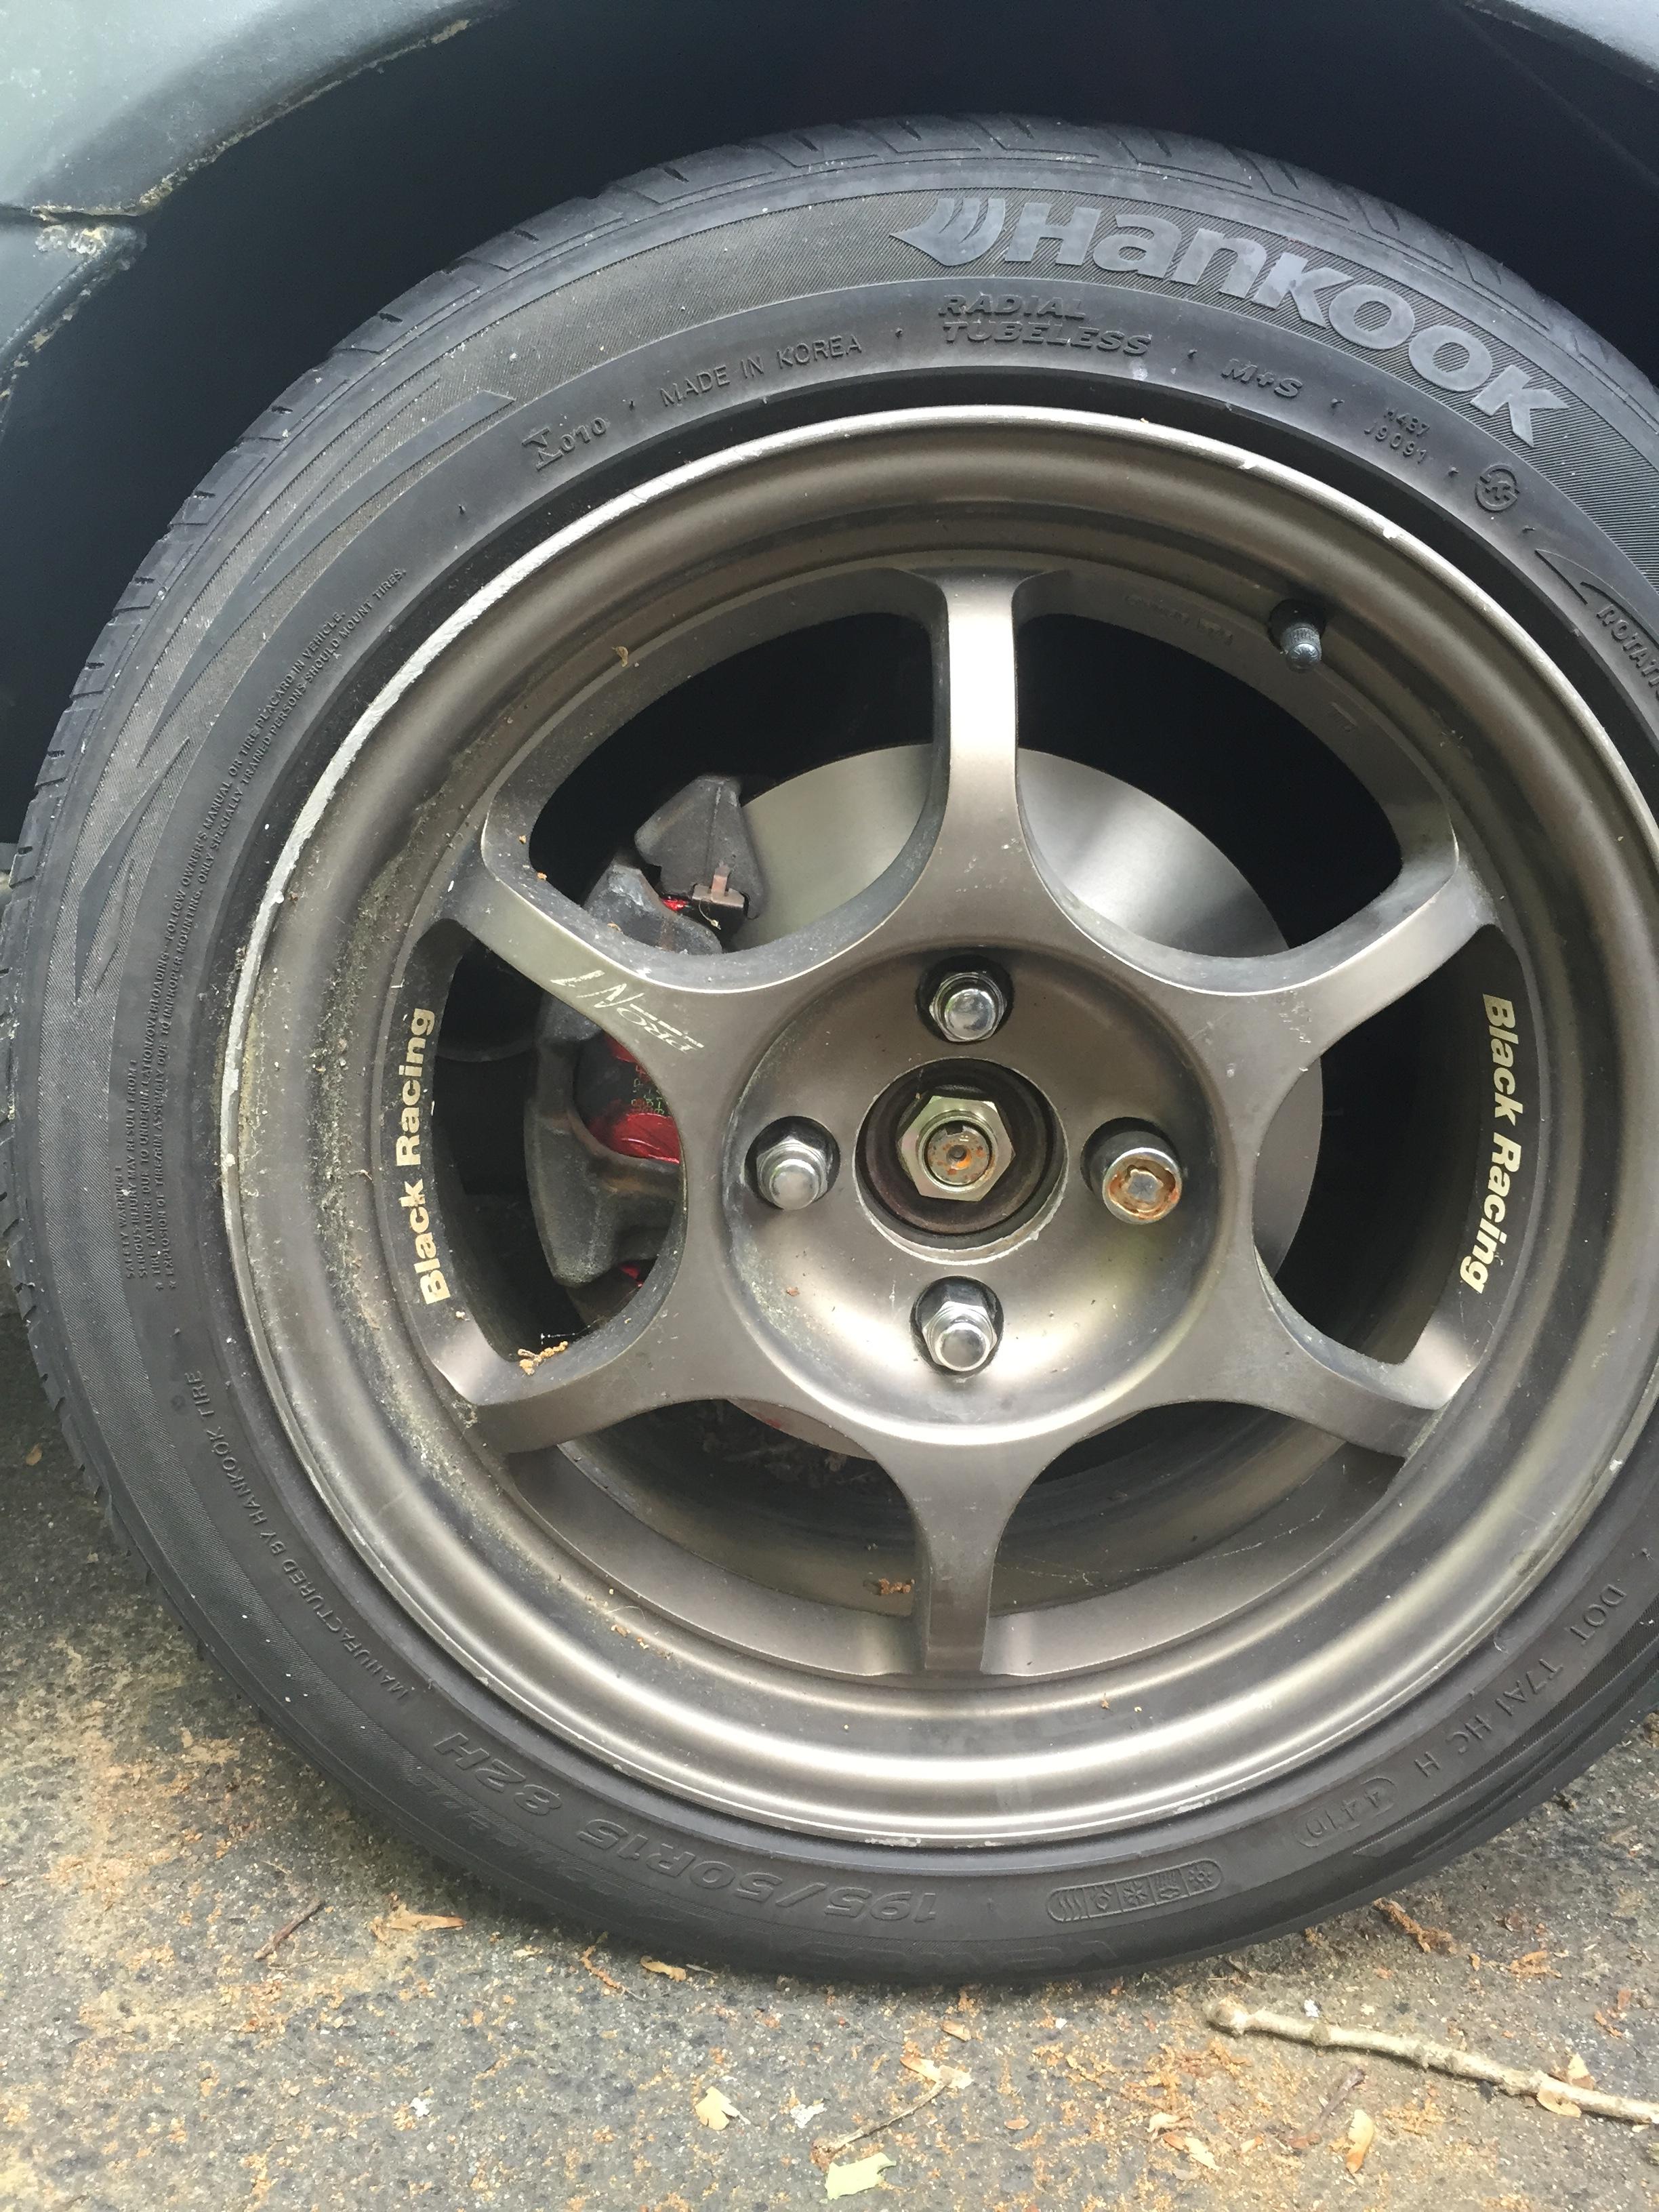
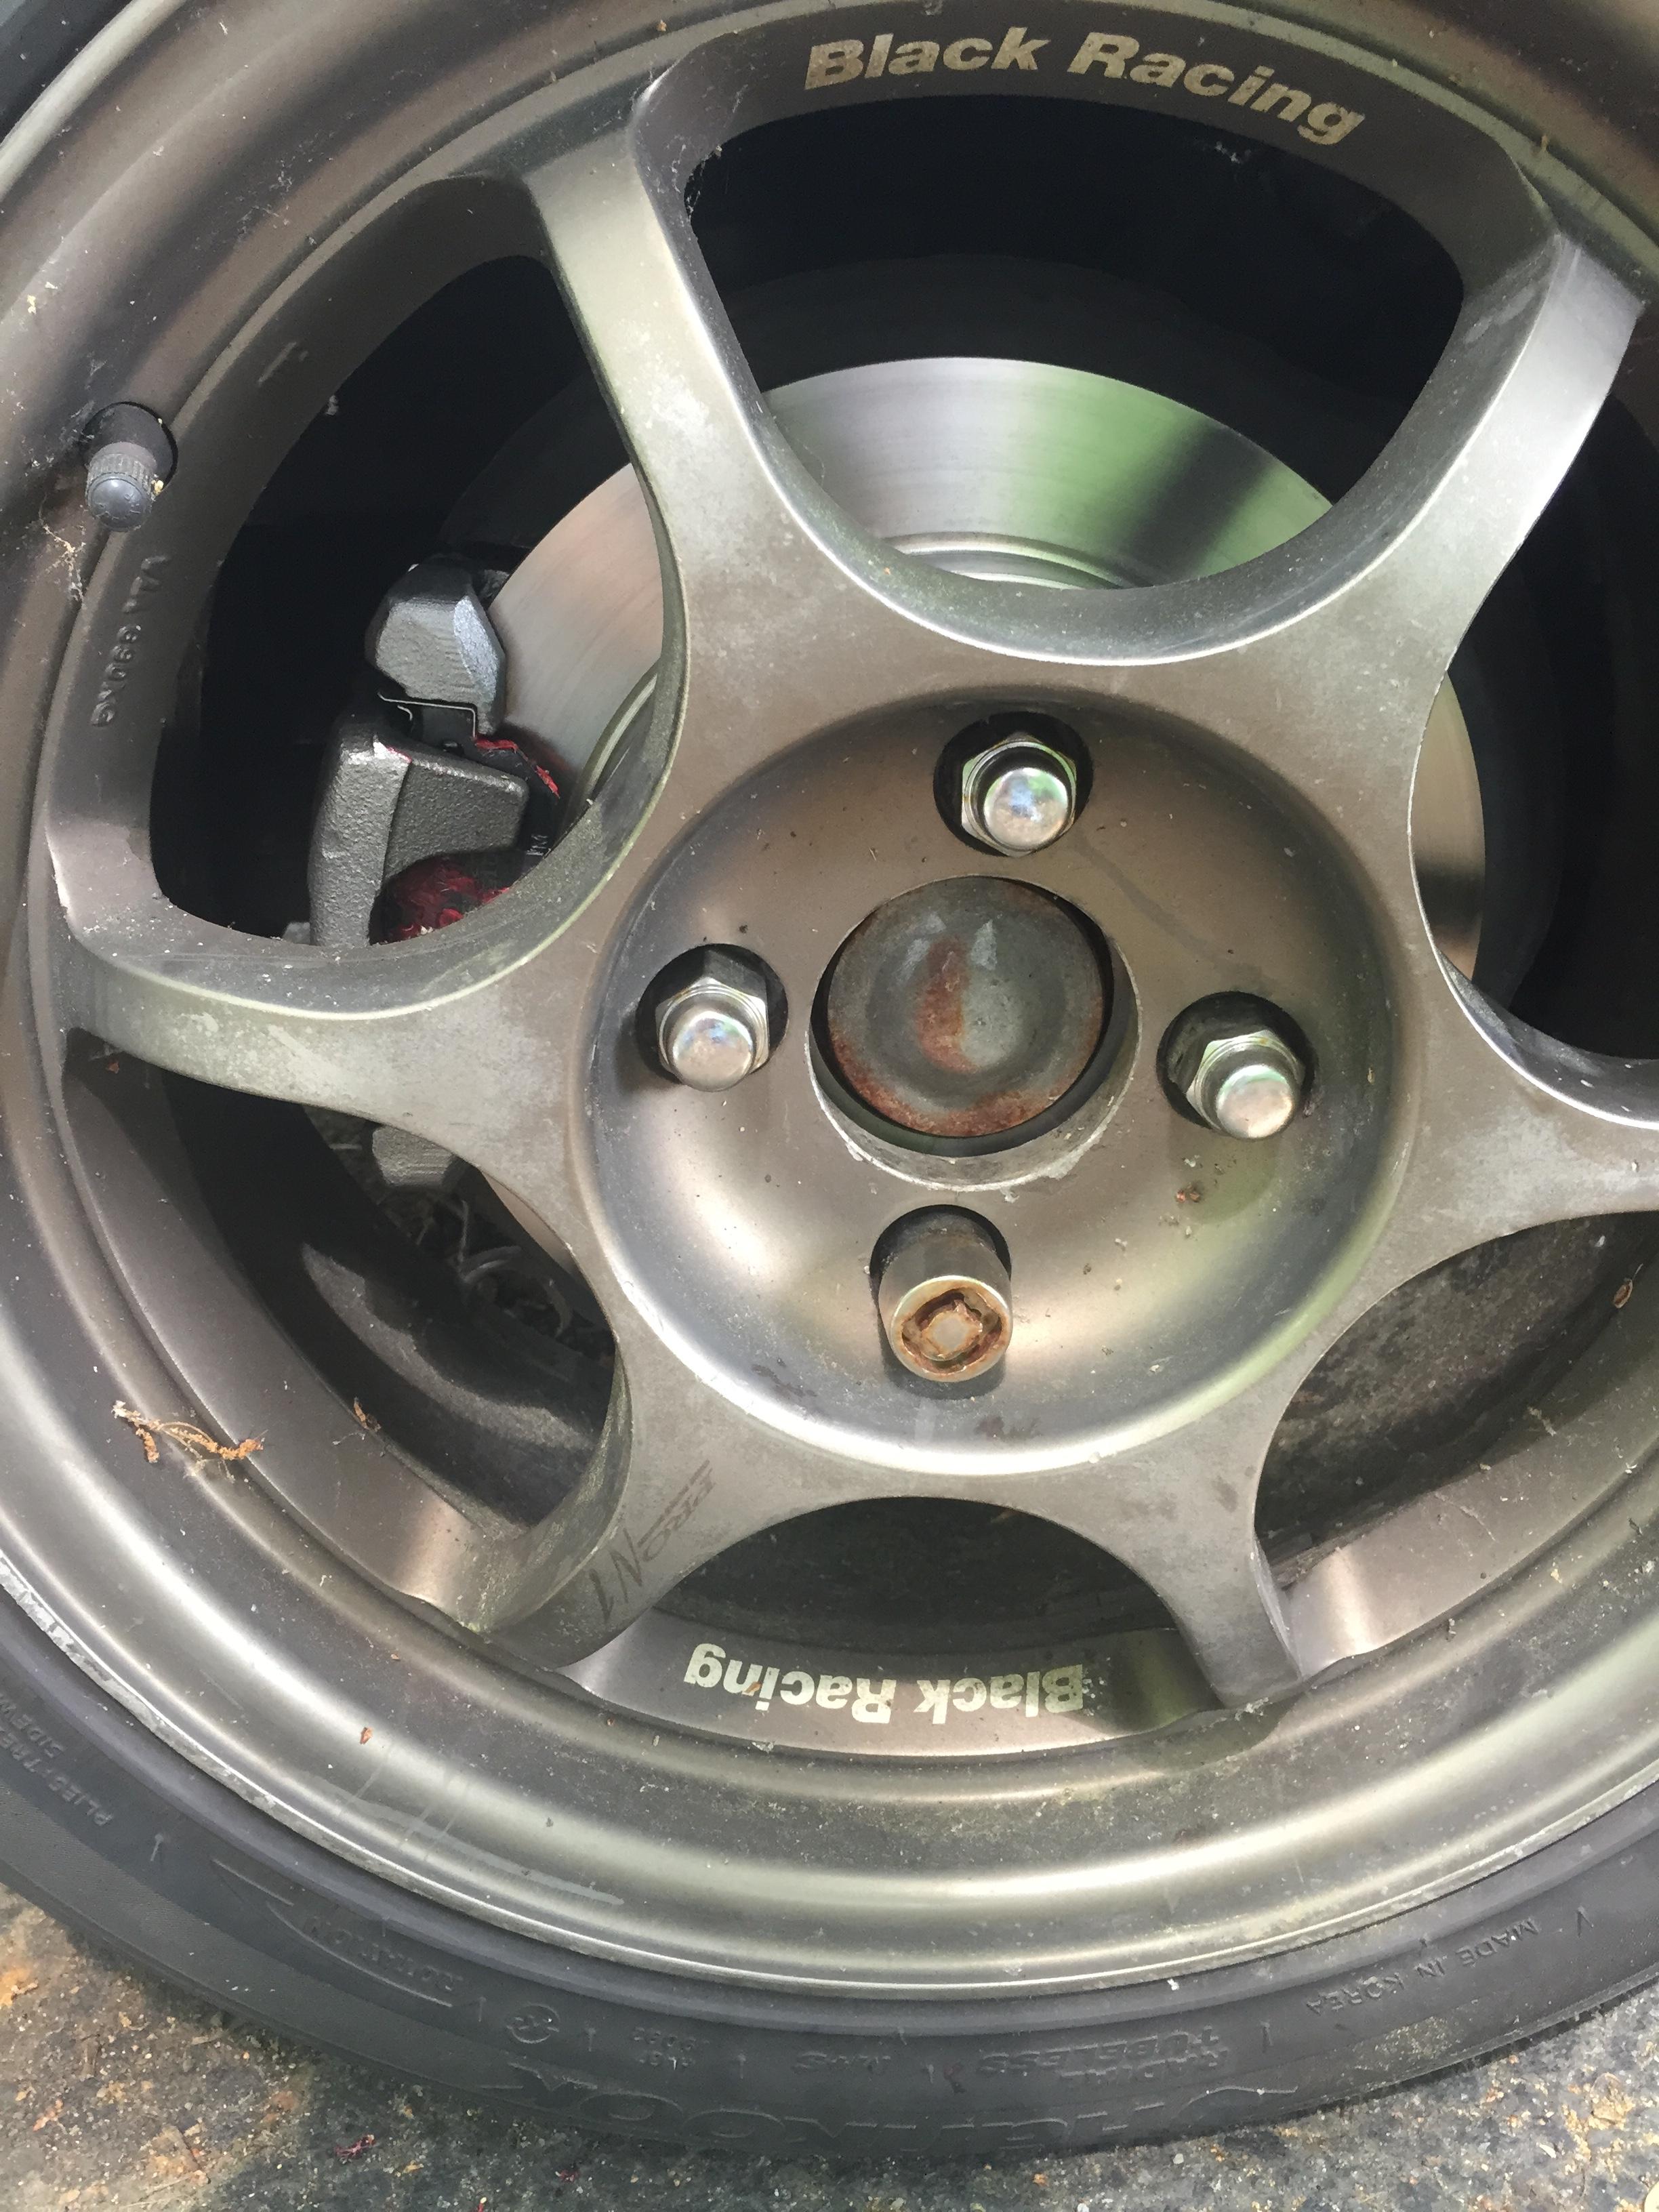
So, since we're doing pads and rotors, step 1 is to remove everything. Every ******* thing. The first pain in the *** that I was expecting was the rotor set screws. Their purpose is to keep the rotor aligned while installing the calipers. Once the wheel is installed over the brakes, they keep the rotor in place. Translation: If you know how to use both hands at the same time, they are superfluous. They also have a tendency to rust to ****, and really **** up your day.
These are the little bastards I'm talking about. 2 per wheel. Throw those ******* away.

We'll get back to what to do when they're stuck later.
The next thing to remove is the caliper, and caliper bracket. If you're just replacing your pads, you don't need to remove the bracket, but since we're doing a full brake job, the bracket must come off. On the back of a Civic's front calipers, there are 4 bolts. One holds the caliper onto the bracket. One is for the brake line. The other two hold the bracket onto the knuckle. For now, we will concern ourselves with the caliper to bracket bolt, and the two bracket to knuckle bolts.
Yes, it's a horrible picture. Yes, you can kind of see my beard. Yes, one of the bracket bolts is hidden by the caliper.

Start off by removing the one bolt holding the caliper onto the bracket. 12mm bolt. That will allow us to unload the pads before removing the assembly. Once you have that bolt removed, you'll be able to use something to pry the caliper and pads off of the rotor. If the pads don't come with the caliper, that's OK. Get something to pry with (I used a big screw driver), and swing the caliper up. That's why we're only removing one bolt for now.
Prying the caliper
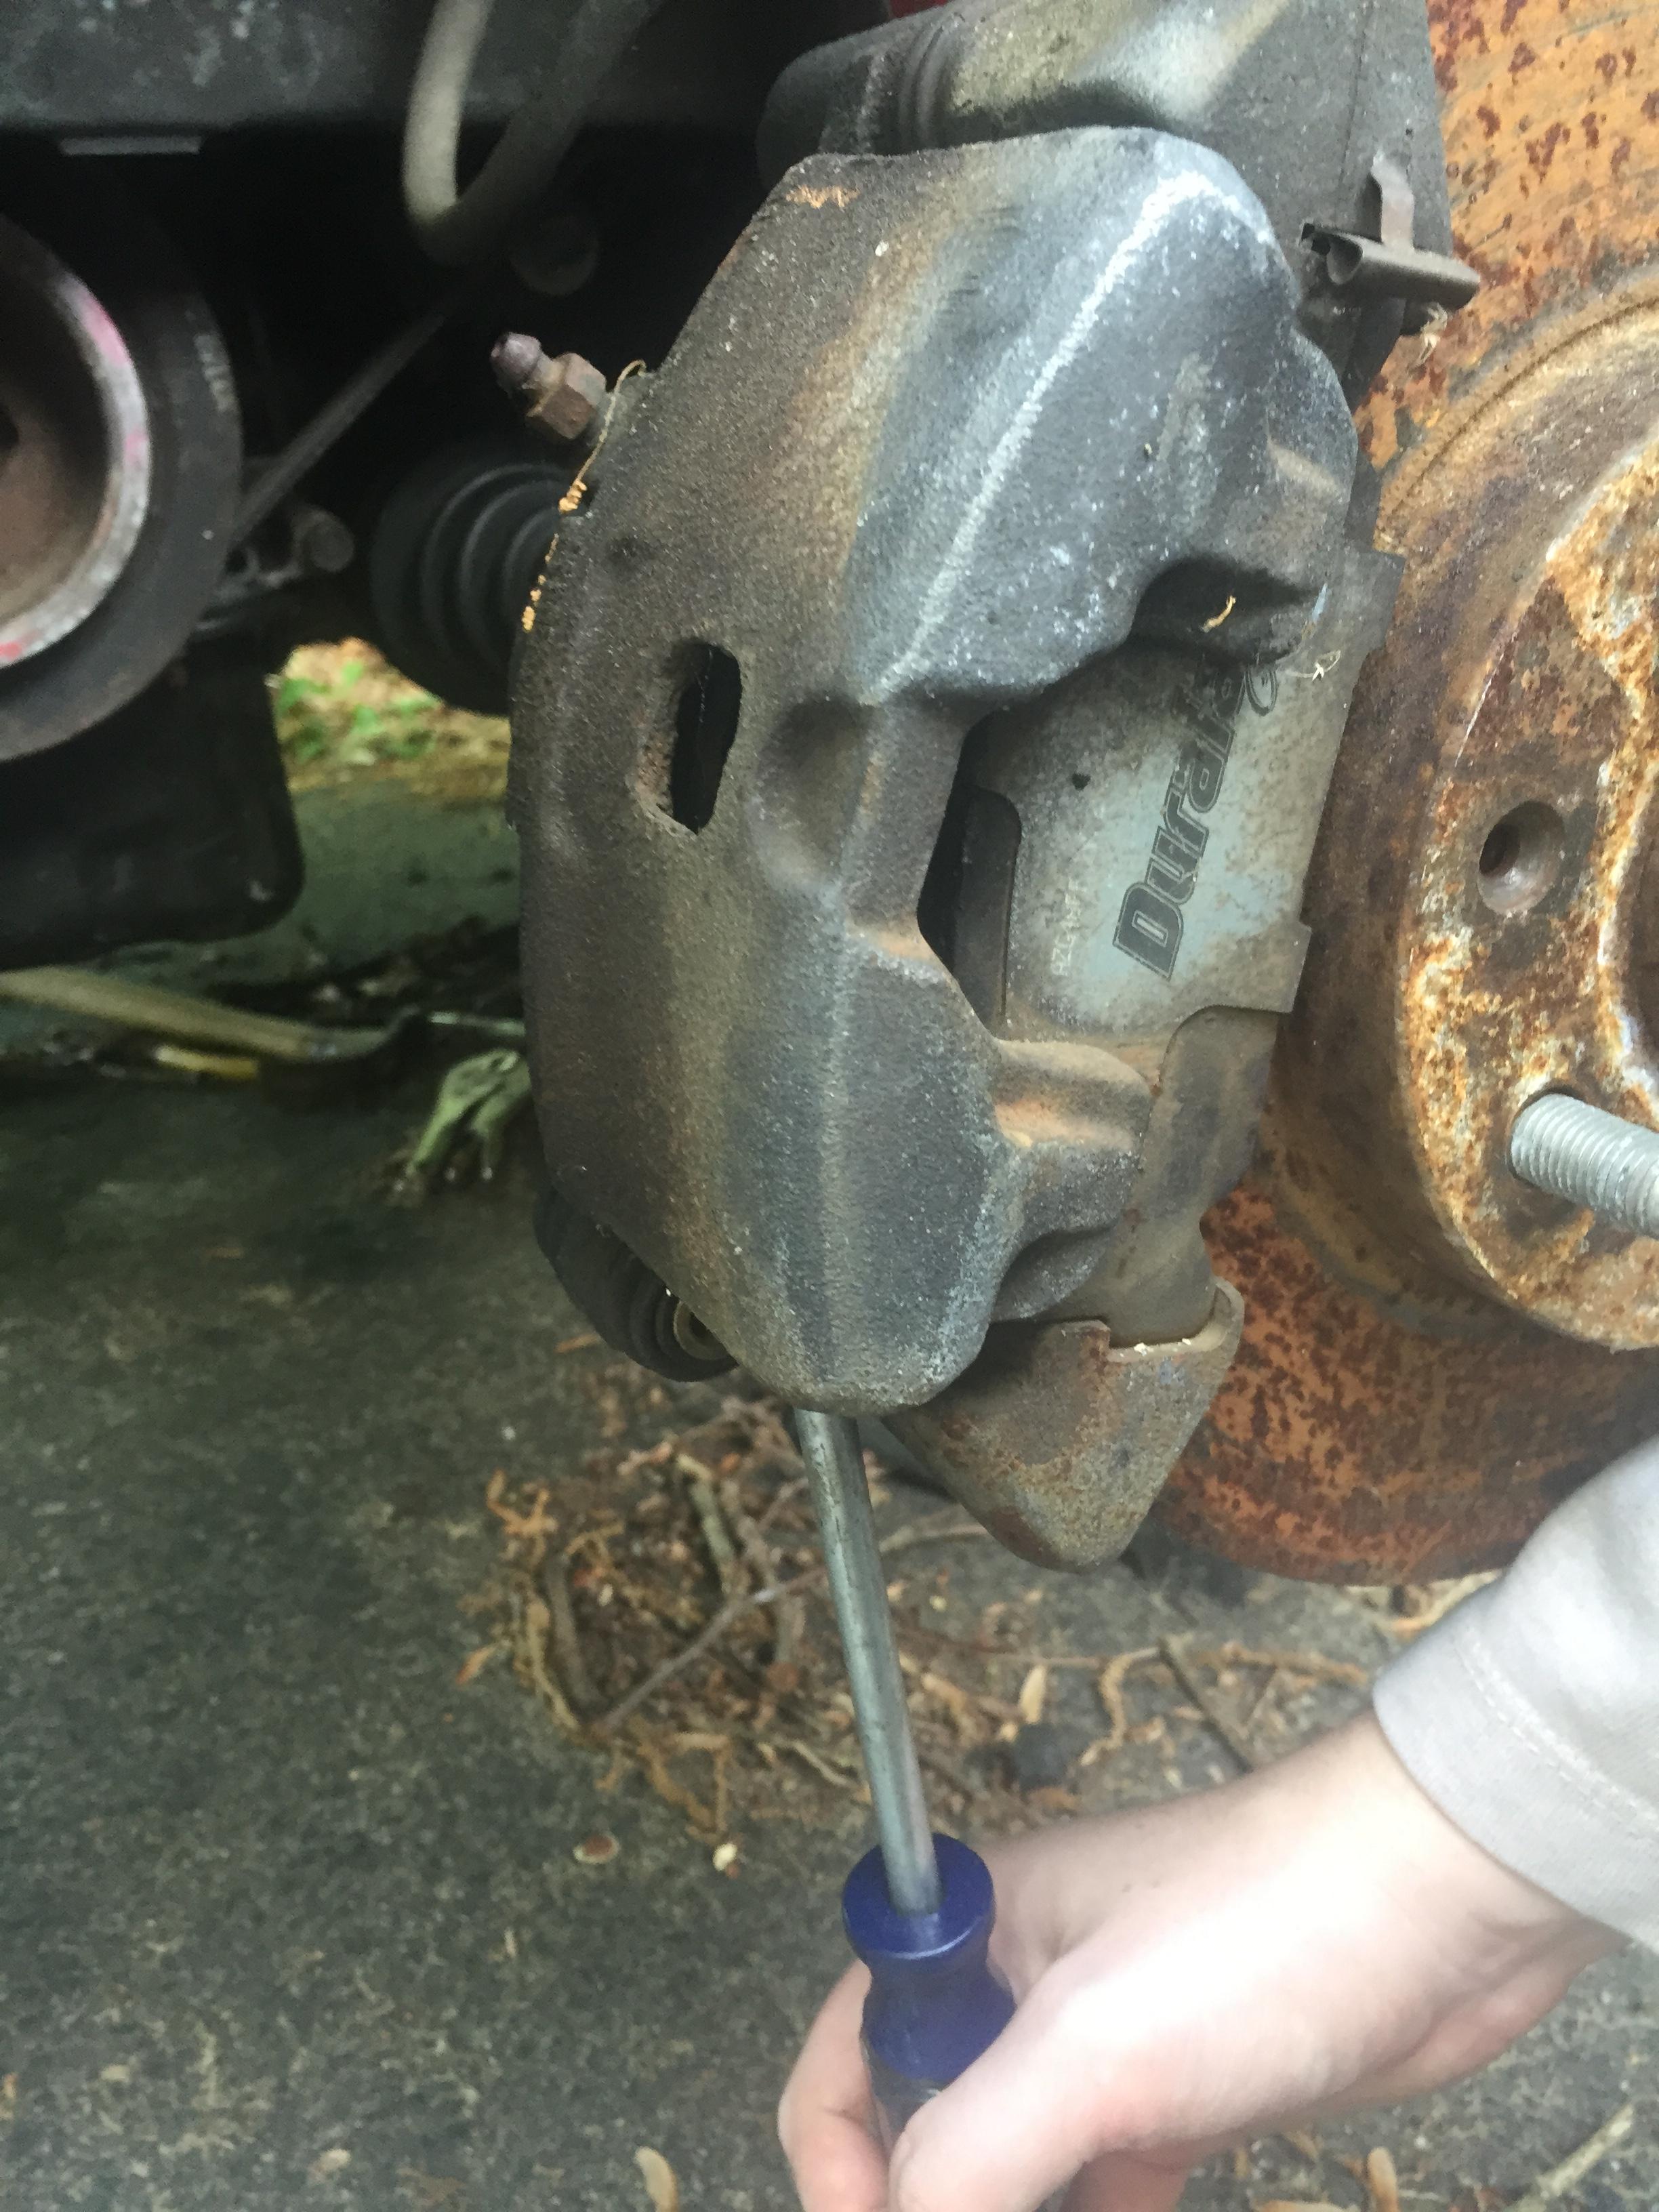
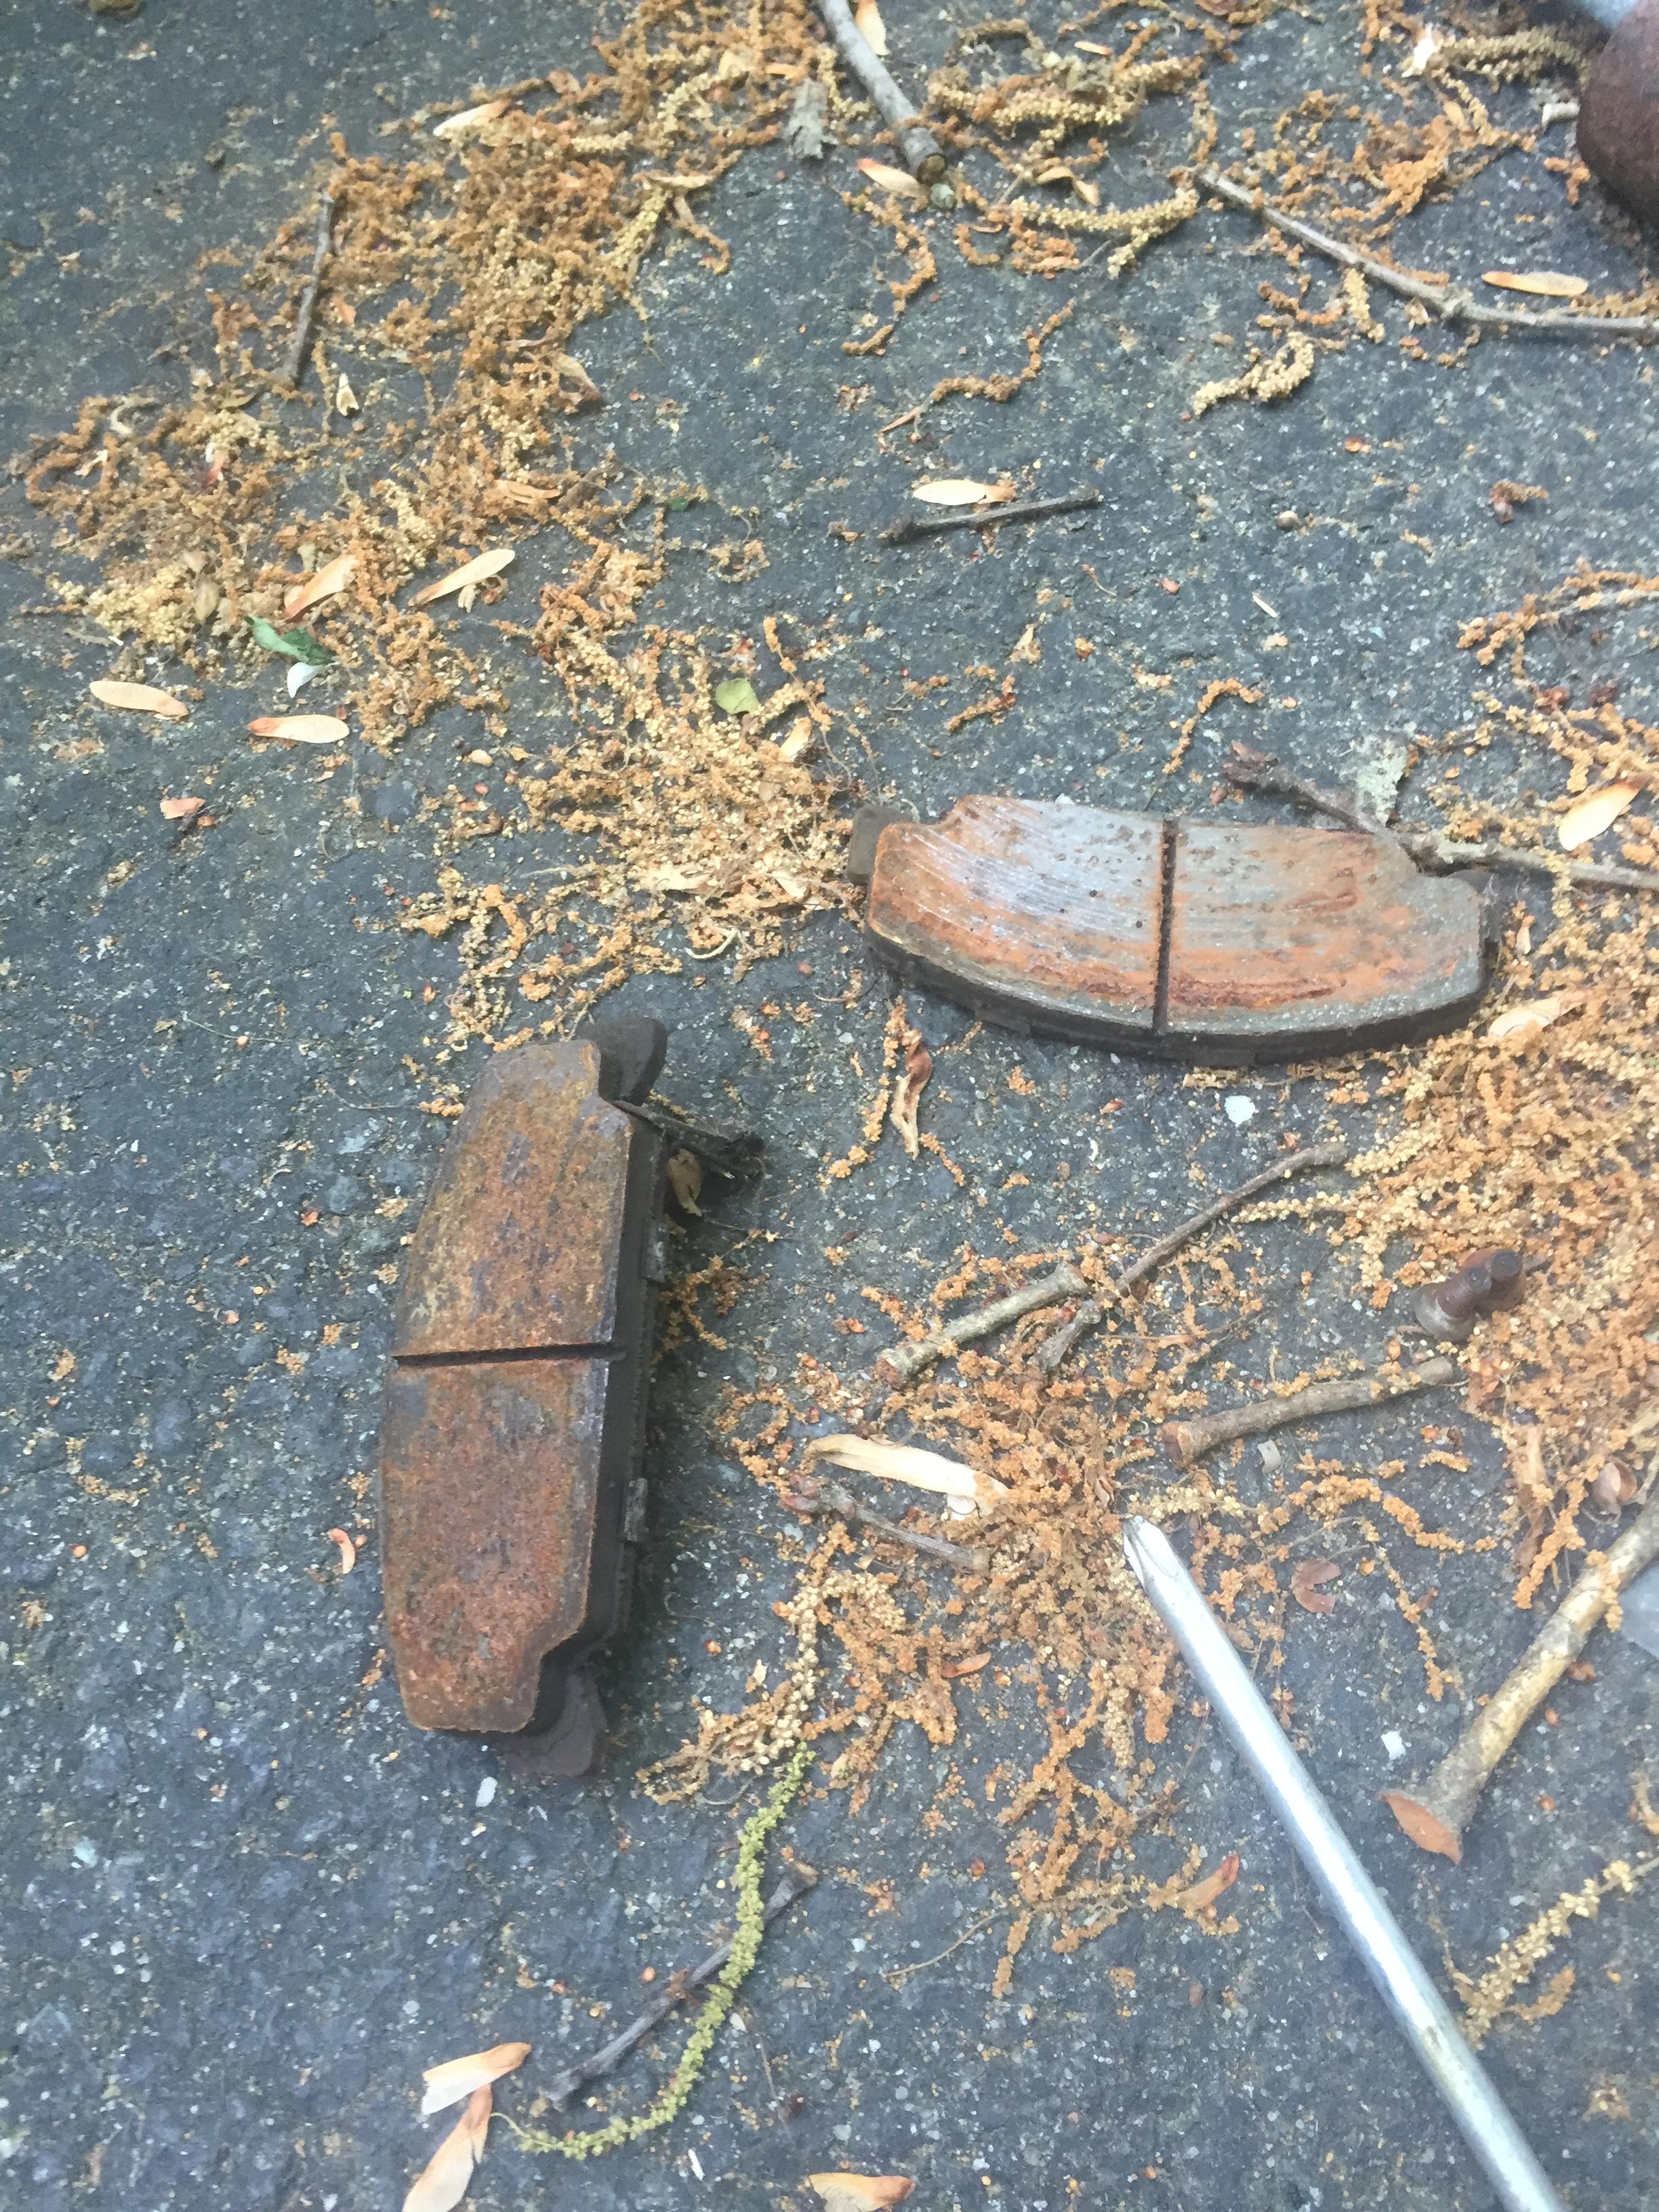
Once you had the caliper swung up, you can remove the pads. Like I said, I wouldn't trust these things to stop a bicycle at this point, let alone my car.
So much rust!
Now, what do you do when the rotor set screws inevitably get stuck? Well, you extract them, or my personal preference, you ******* destroy them with the might of a thousand drill revolutions (so many entendres in that, I can't keep track of them all). You do that with these awesome little *******. If you're going to the store to buy parts and tools to do the job, just go ahead and buy these now. 99% chance you'll need them.
Removers
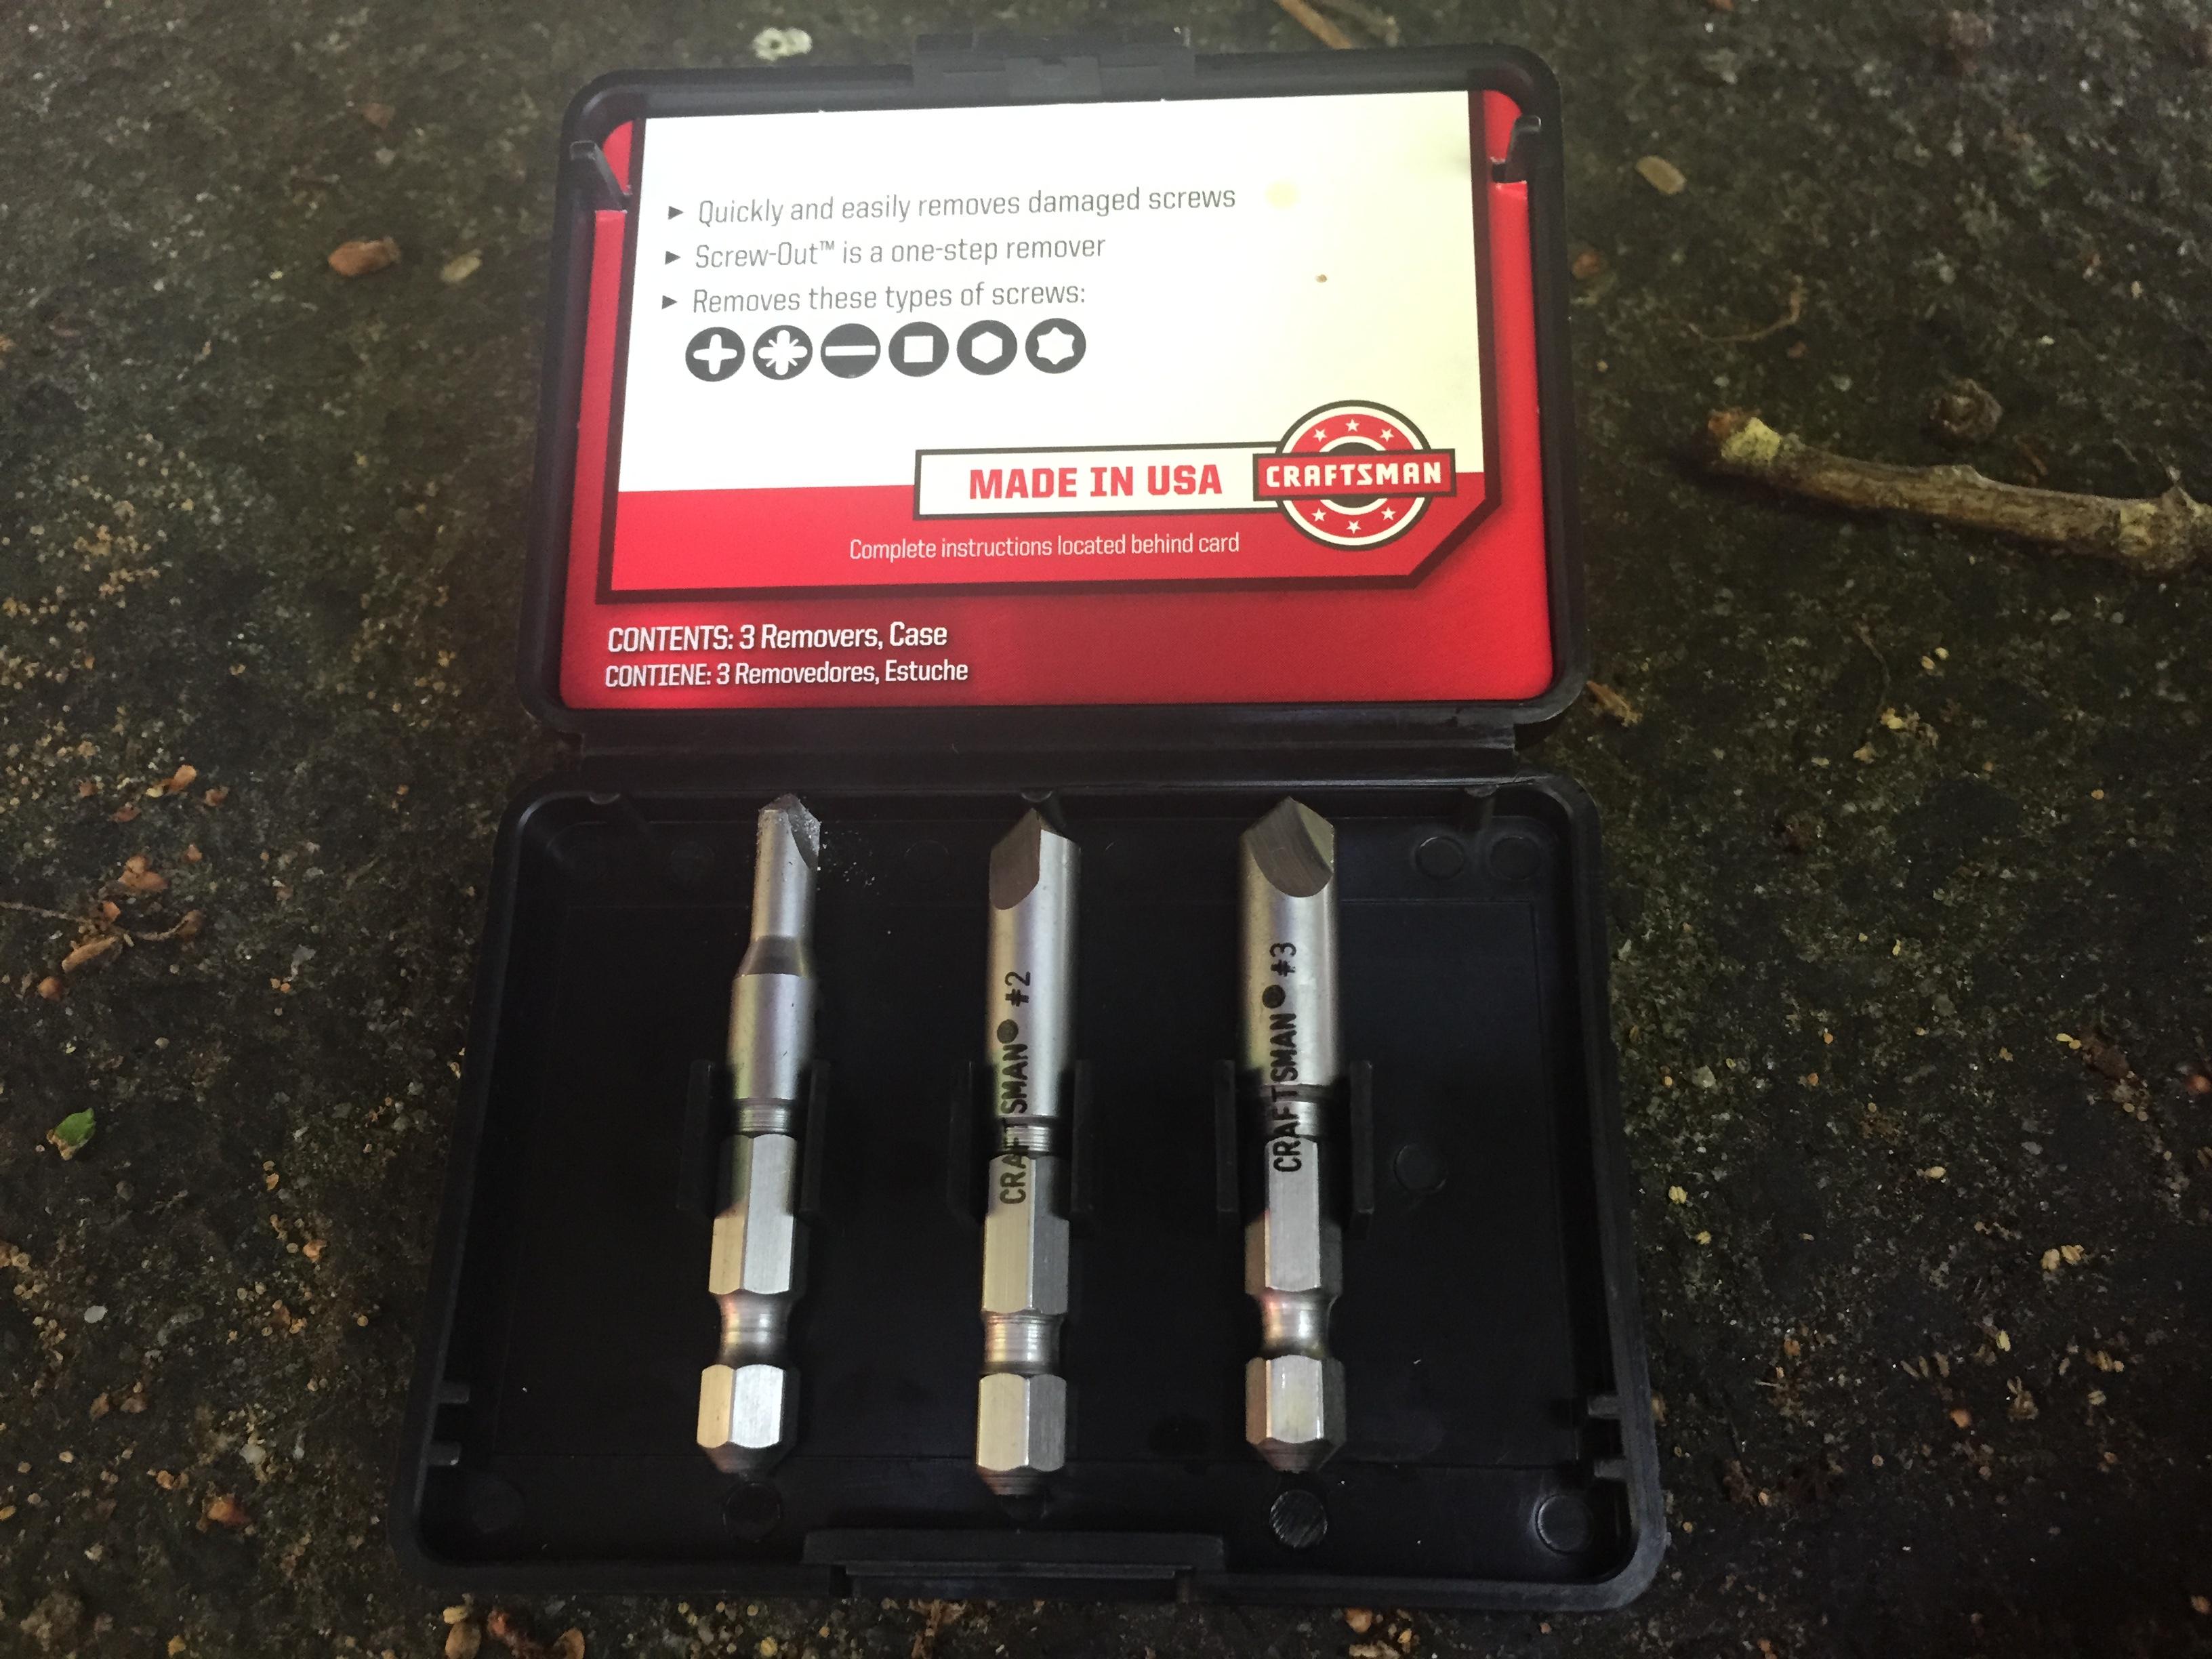
Why you need them
The removers are extremely easy to use. Put them in a power drill (preferably plug in, but if you only have a battery powered drill, make sure you have an extra battery), set them in the middle of the stripped head, and drill slowly in reverse. Yes, in reverse. In a perfect world, they will bite into the bolt/screw, and turn it out in one piece. In a more realistic world, they'll cut the head off, allowing you to remove whatever it's holding in place (in this case, your rotor). If your slow drilling has worn the metal down to where the bit has nothing to try to bite into, go full speed in reverse and use it just like you would any other drill bit (only in reverse). I started with the #1 to get down to the shank of the screw, then switched to the #2 to cut off the head, then back to the #1 to get the shank out of the hub. Your end result will be a bare, exposed hub, and a loaded, hanging caliper.
Bare hub and caliper
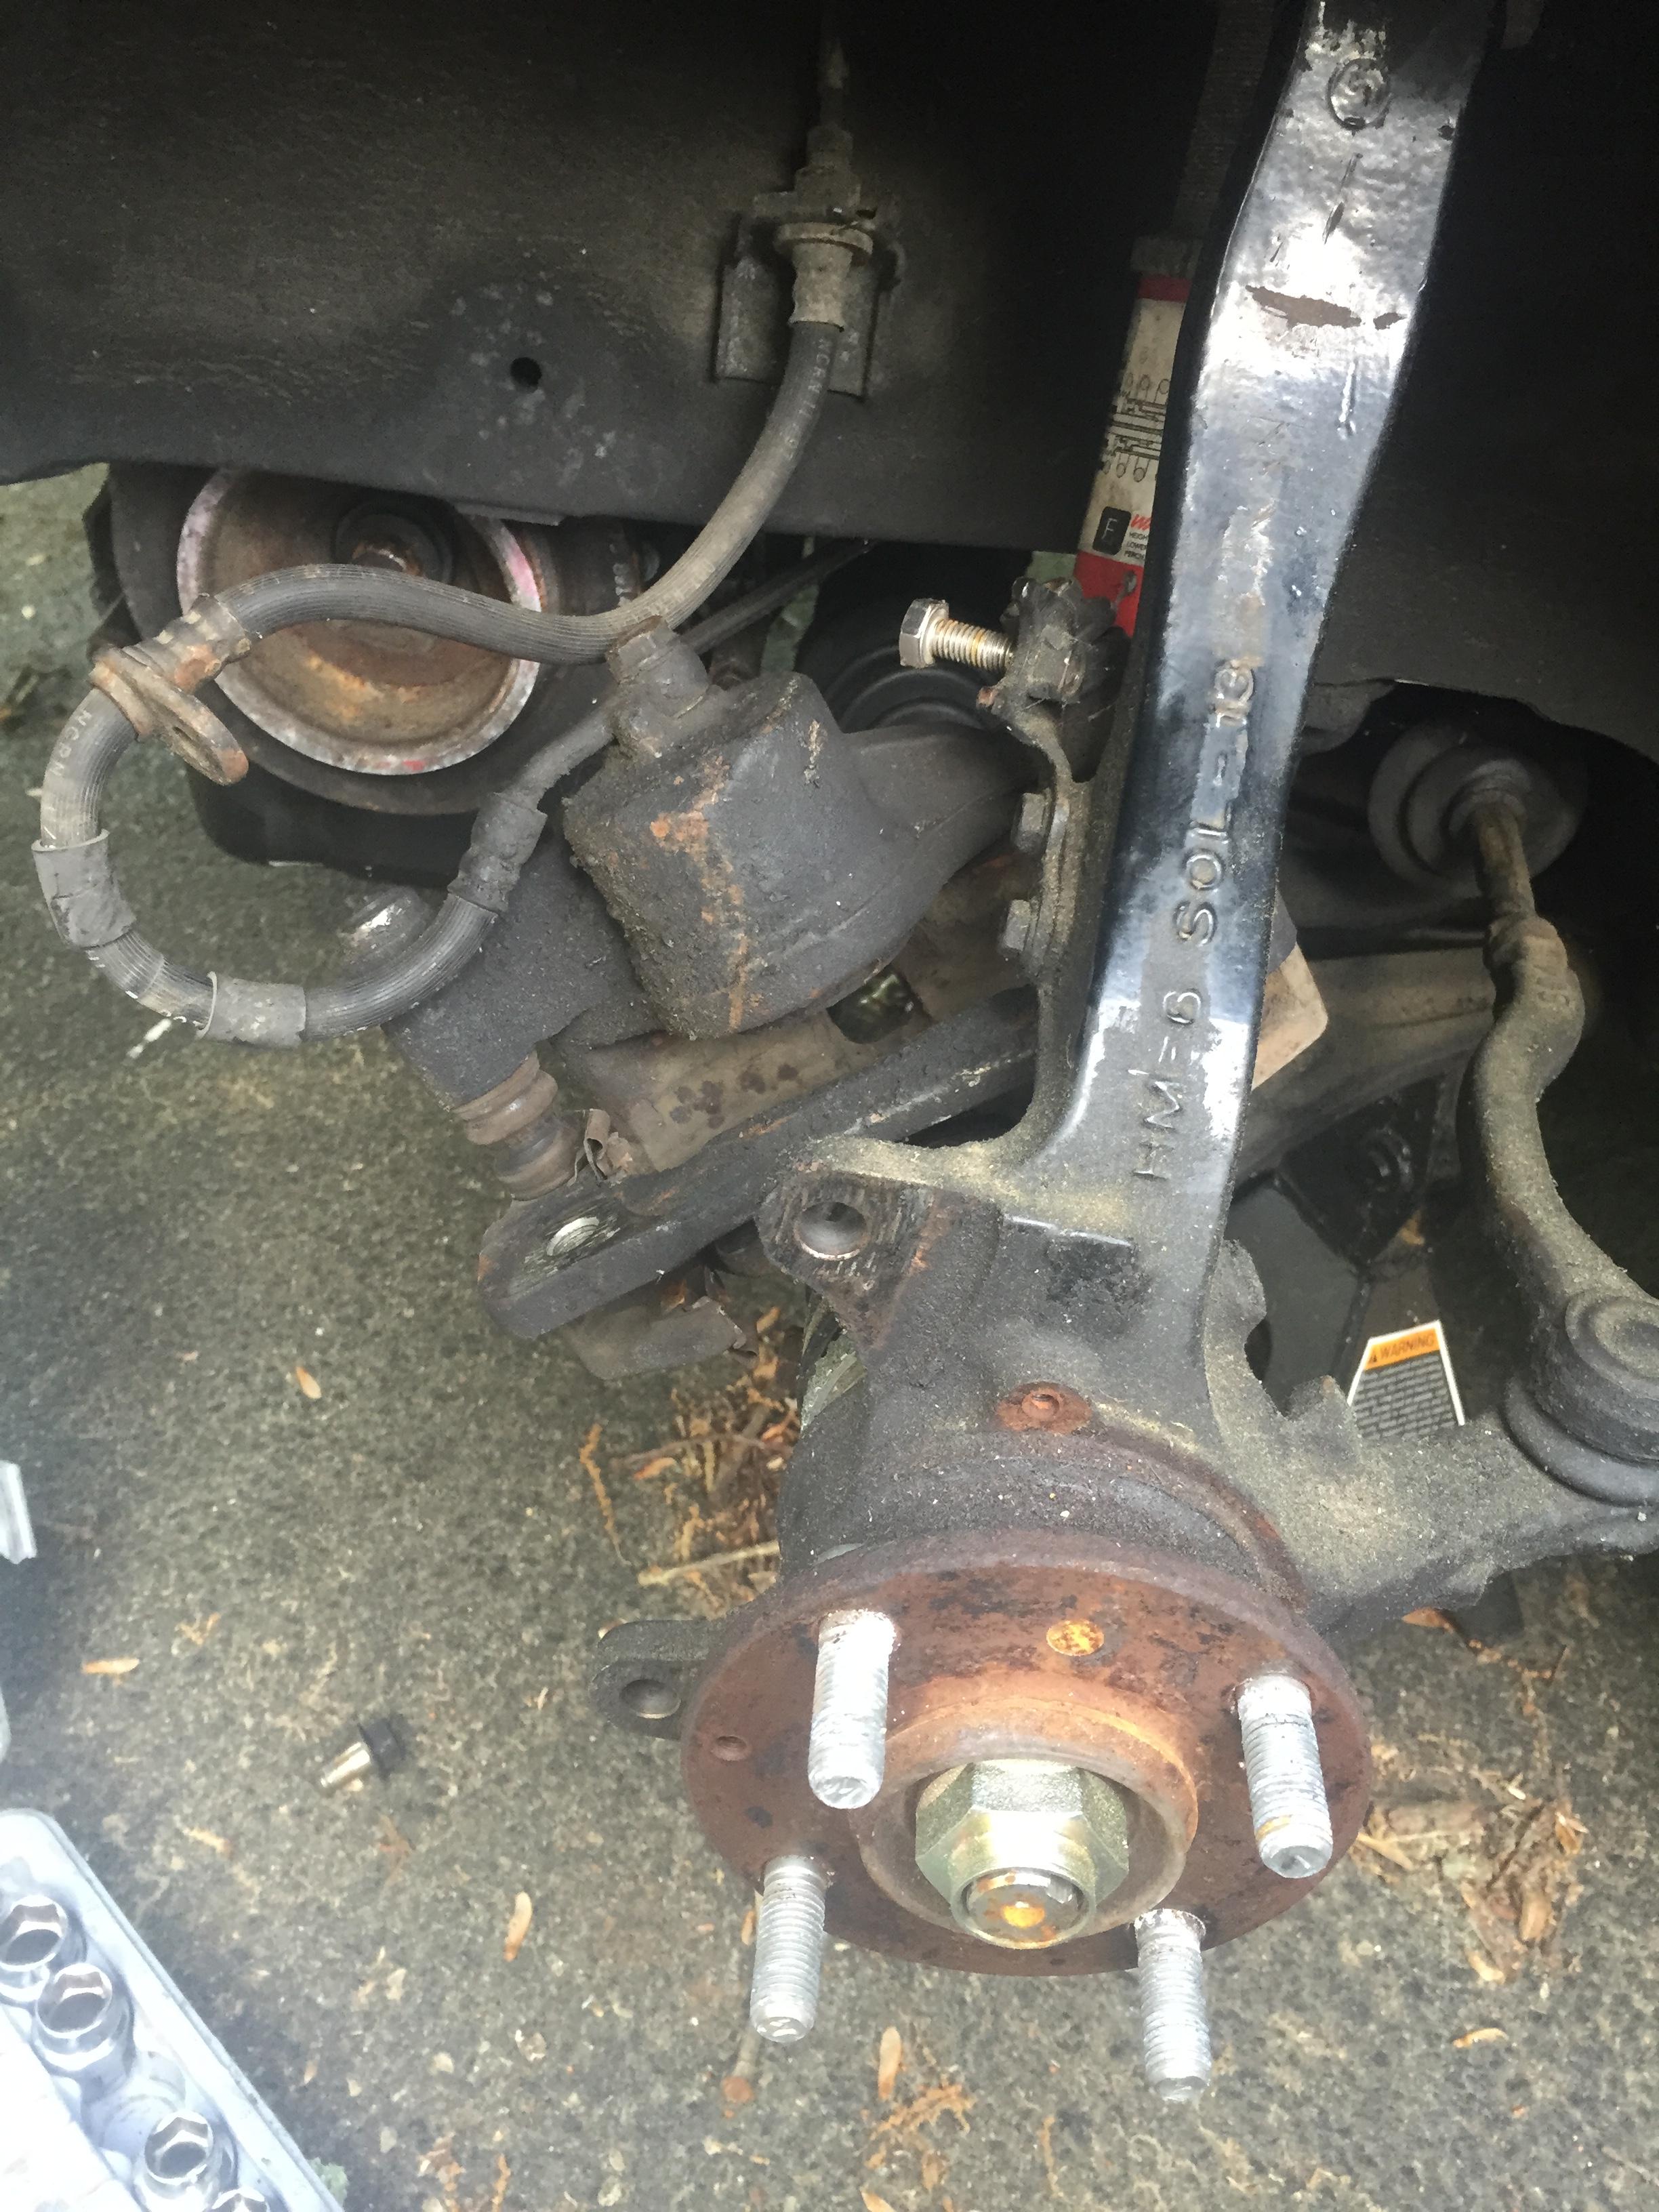
Do not let the caliper hang on the brake line! This is a fast way to damage the brake line! Best case, you've weakened the line for it to fail on you while you're driving. Worst case, you just stripped out the line and now you have to replace it. The easiest way to prevent this is to use a metal coat hanger (or similar) to hang the caliper off of the upper control arm. People in shops do it all the time. I didn't have a metal coat hanger, so I wedged it in between the knuckle and shock, as you can see in the above picture.
After you have removed the pads, and the rotor set screws, you need to remove the two bolts holding the bracket onto the knuckle. Two 14mm bolts. Lefty loosey righty tighty. See above reference picture.
Now, we install the new goodness. First, you put the rotor on the hub. I didn't take a picture, because round peg goes in round hole. It's pretty hard to **** up putting a rotor on a hub. Once the rotor is sitting there, you can either use the rotor set screws to hold the rotor in place (easier, but seriously, **** those screws), or you can just use one hand, while the other handles the bracket. Or, in my case, use your elbow to hold it, while you use that hand to line up the bracket, and the other hand to thread the bolt. It's kind of funny how it goes in there, and you can't really get a good visual for lining it up, you just have to keep fiddling with it until it catches. Personally, I've always found it easier to do the bottom bracket bolt first.
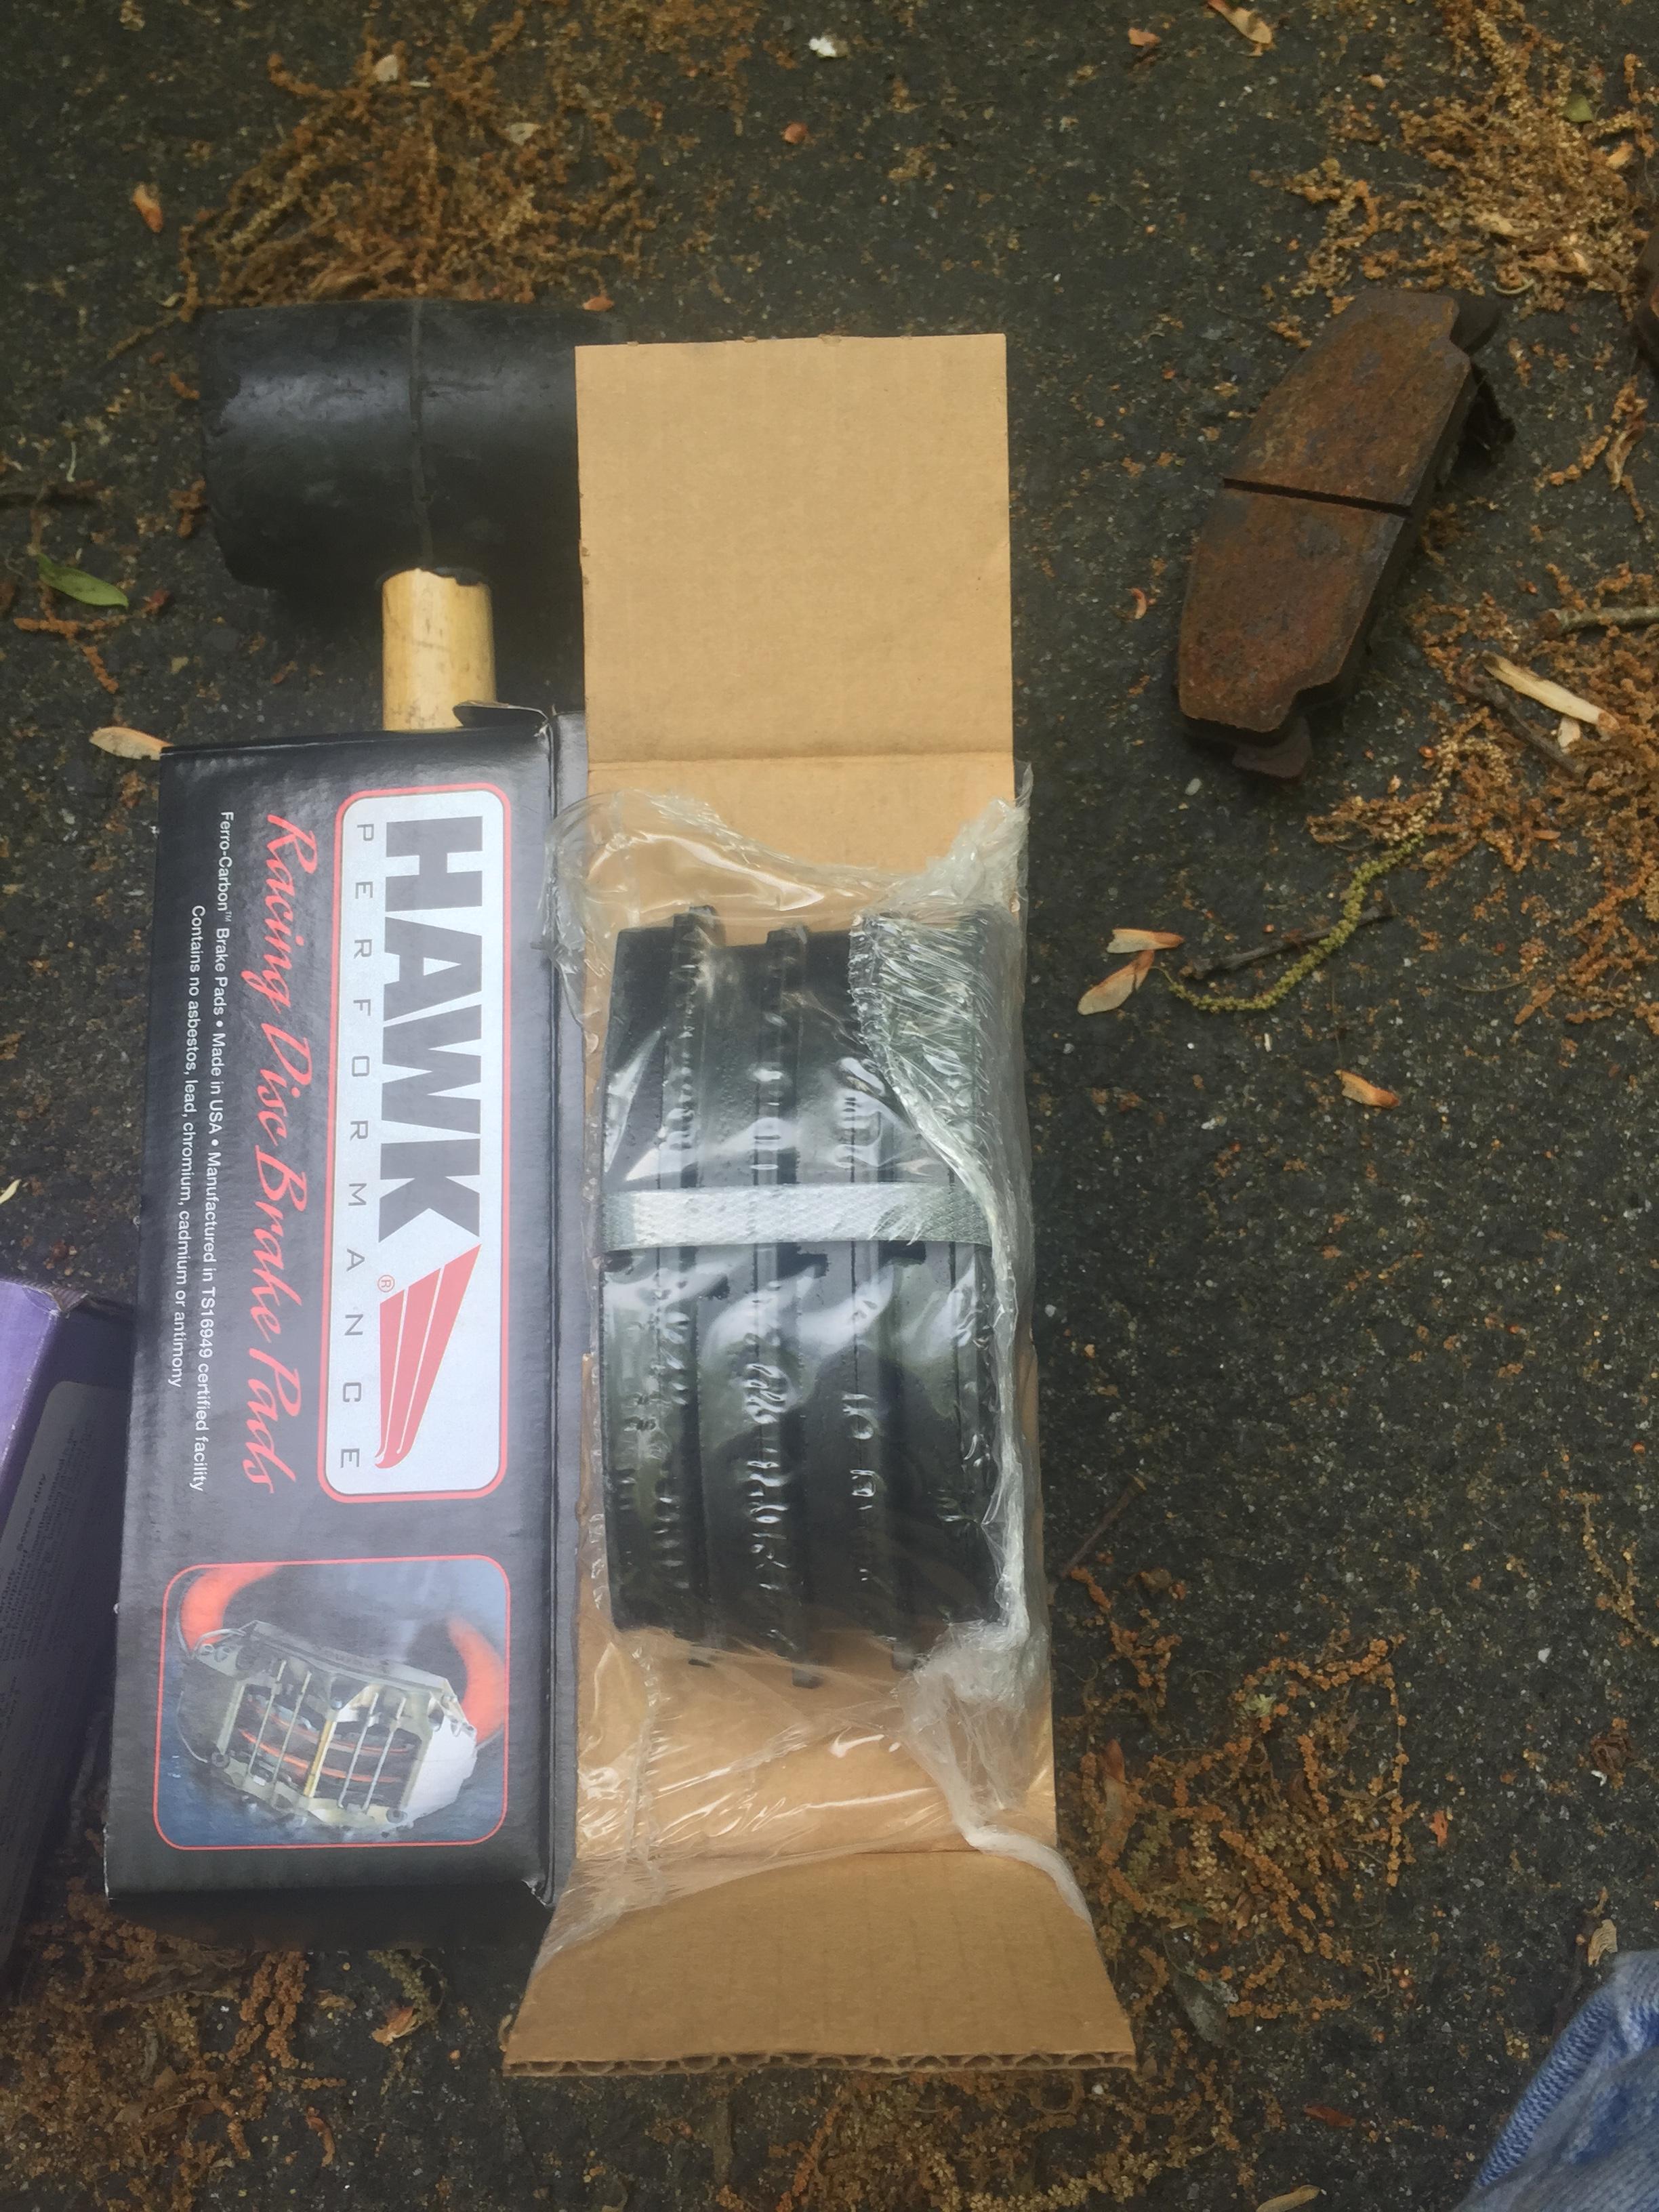
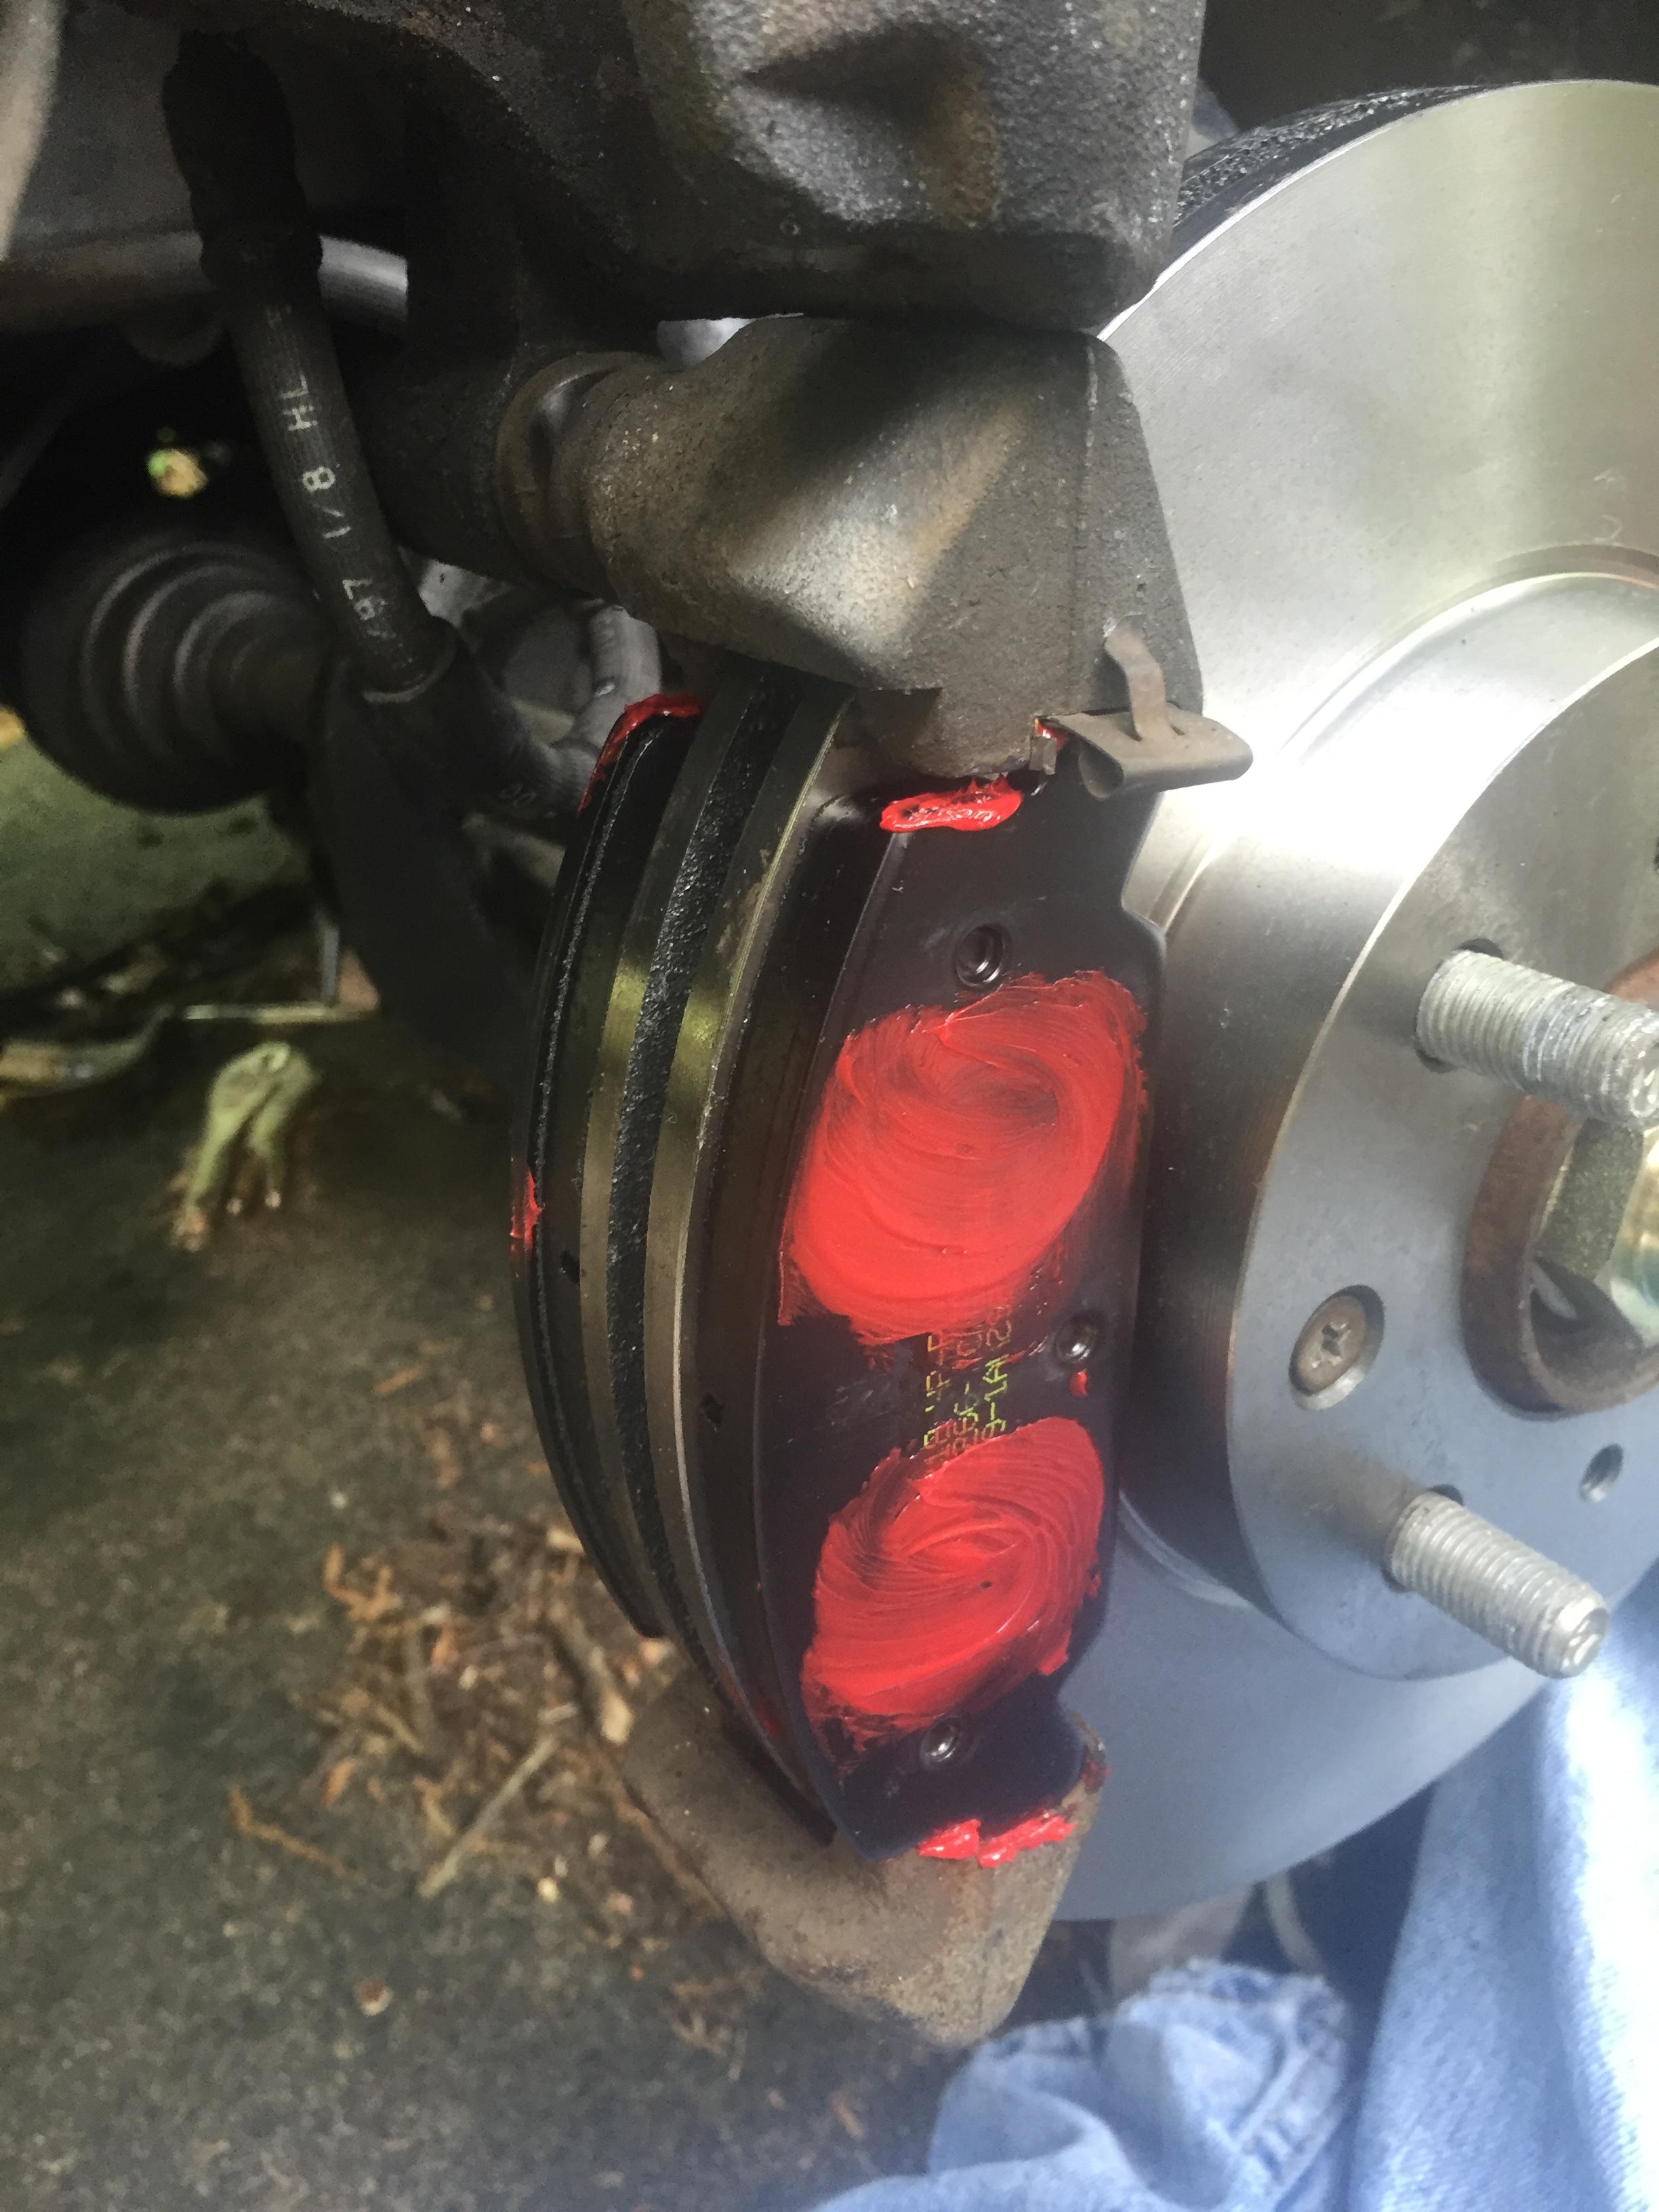
Now that your rotor and bracket are reinstalled, it's pad time. I'm using Hawk HP+ in the front, and Hawk HPS in the rear. Hawk does an amazing job of overpackaging their pads. They also include the necessary pad lube, and even a little sticker, if you want to put that on your car to let thieves know you have nice pads behind your nice wheels. I'm going to look into Hawk and see if they have a sponsor contingency program before I put the sticker on. Contingency programs are awesome, but something we can talk about later.
Awesomely overpackaged pads
And the included grease!
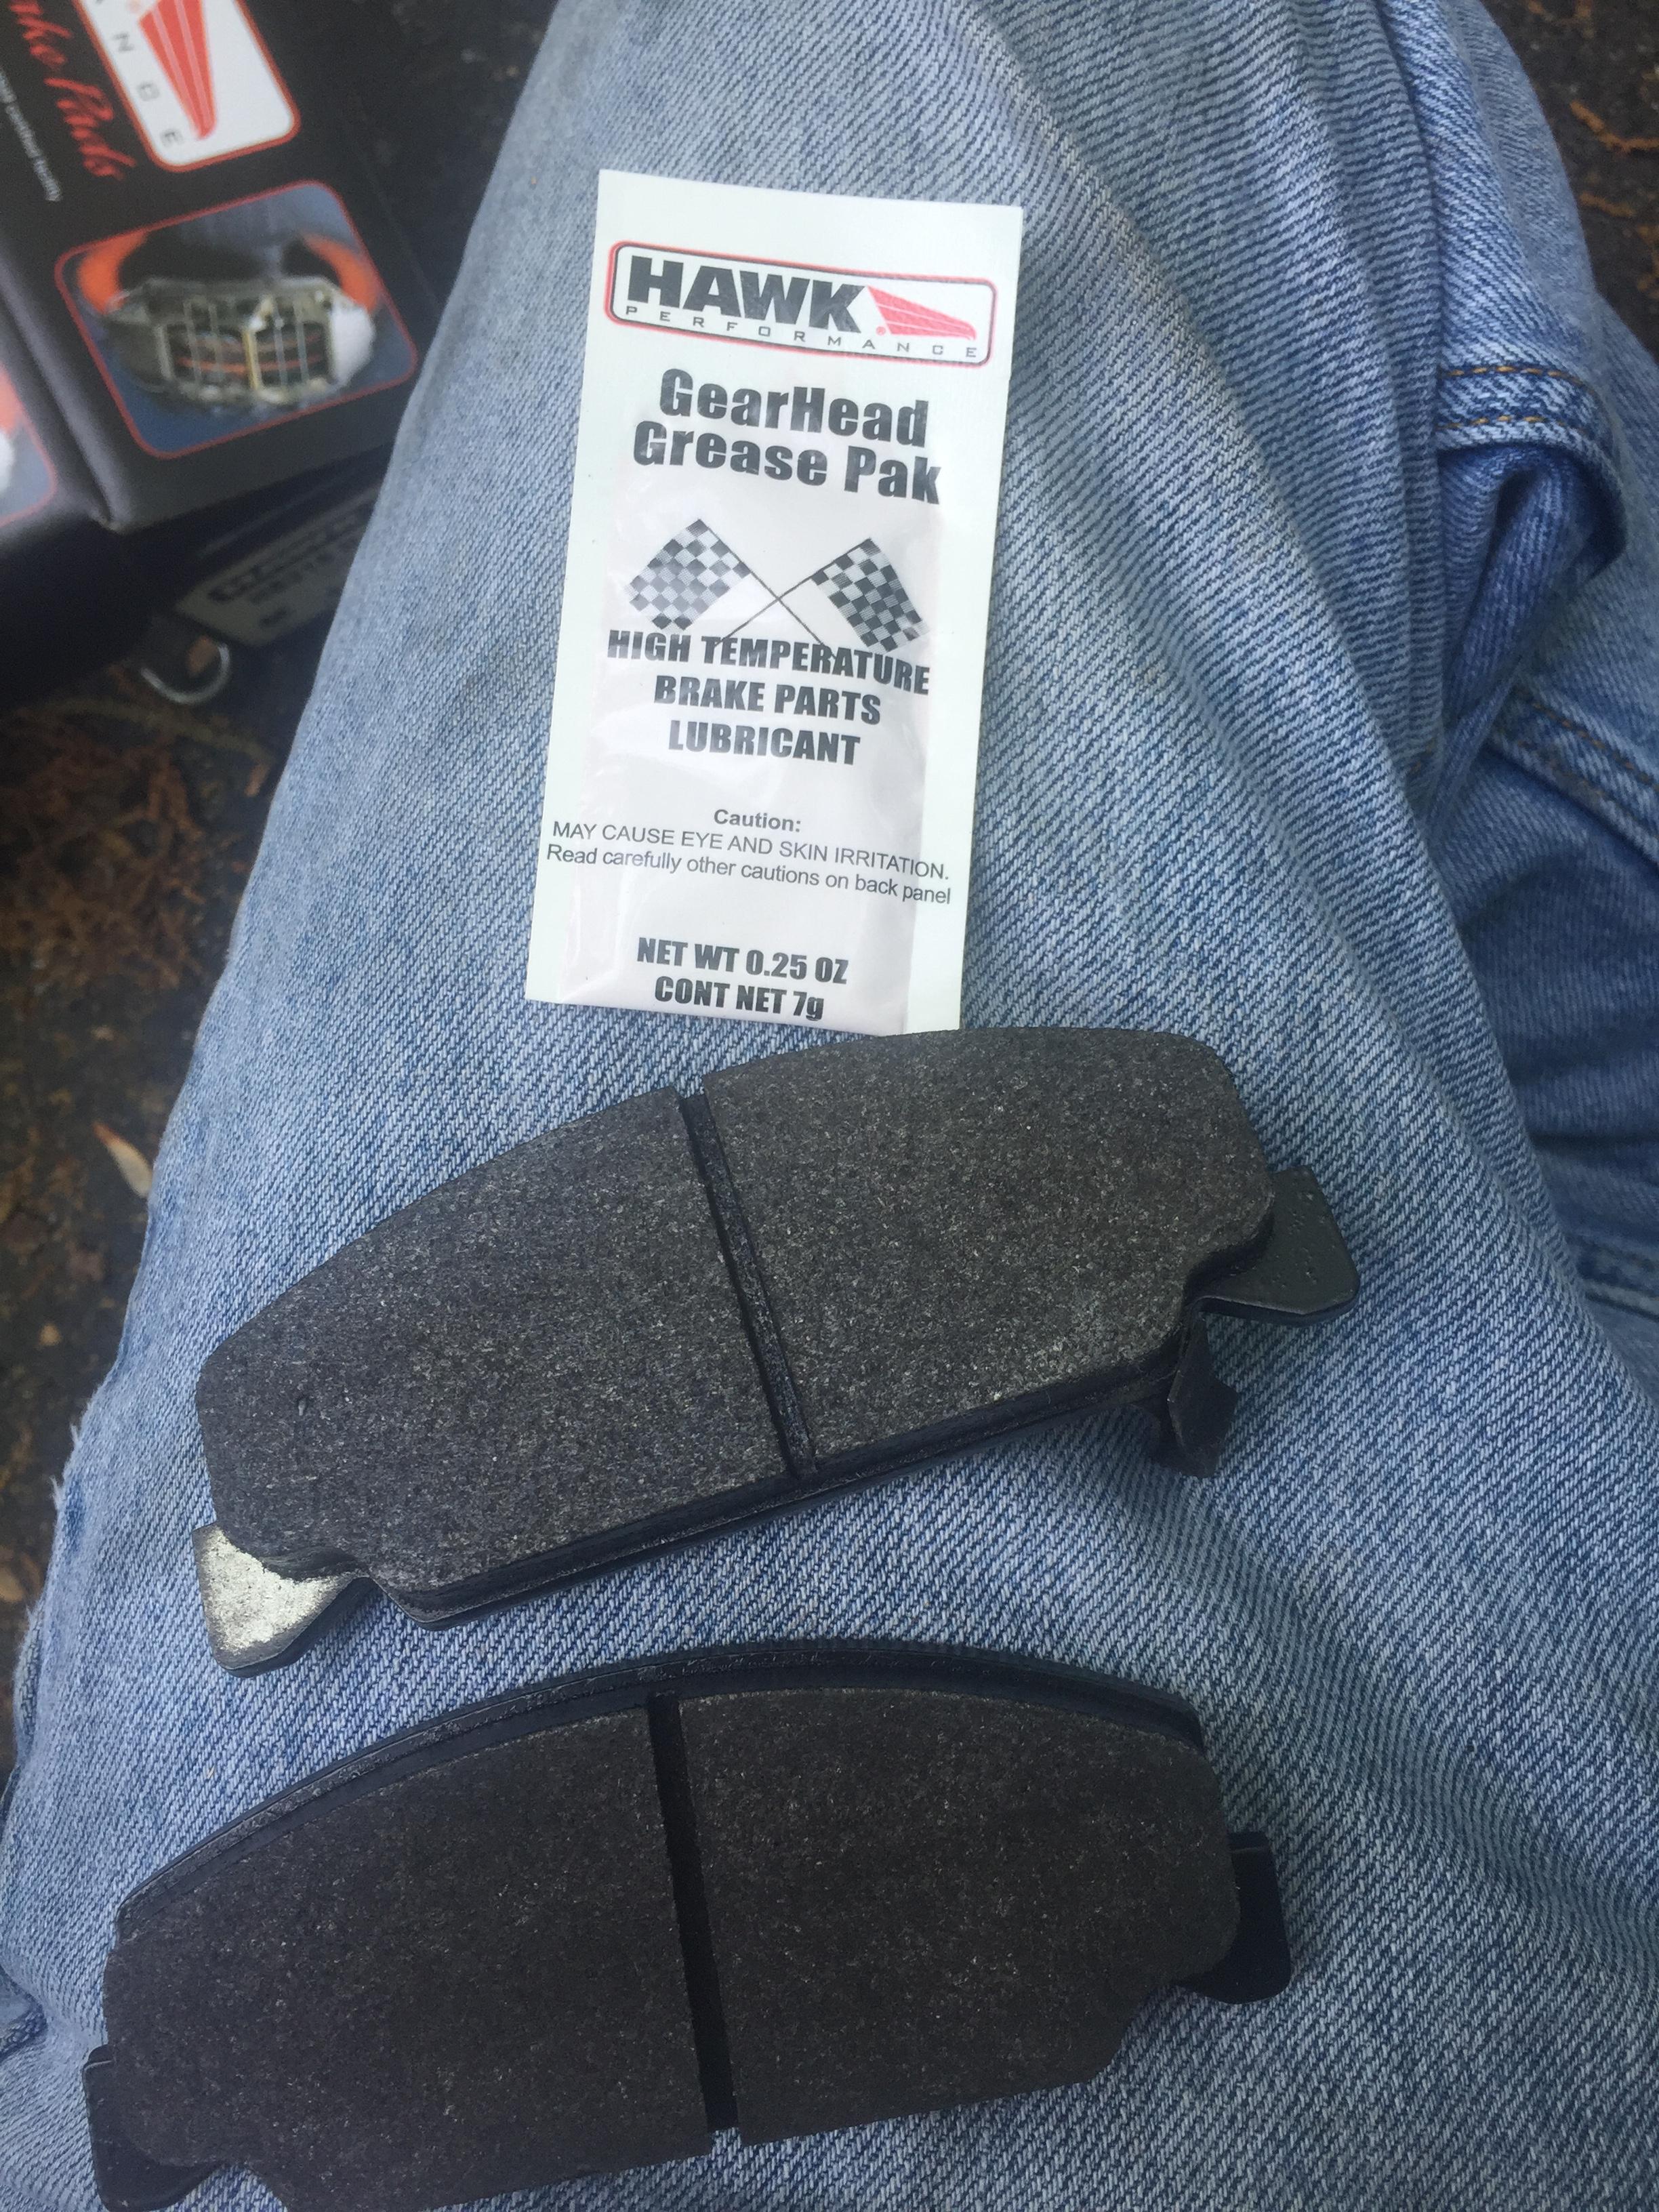
Simply apply grease to the places that the pad makes contact with the caliper, as well as with the bracket, but do not get any on the braking surface! It's lube. Braking surfaces and lubrication should not mix. That should go without saying, but I'm covering my bases here. The points of contact between the pad and the bracket are frequently overlooked, even by professionals. Make sure not to miss it, or your brakes will be squealing. Unlike the engine building, there is such a thing as too much grease. Make sure you use enough, but not so much that it gets on the rotor surfaces, or on the braking contact point of the pads
All greased up
Next, you need to compress the caliper. I didn't take pictures of this, but it's fairly simple. You'll need a large enough C clamp (a 6" clamp is what I use), as well as one of your old brake pads. Remove your brake fluid reservoir cap, place an old brake pad on the piston, and use the C clamp to compress it. There is also a proper tool for it, but all that tool is, is a C clamp with a metal shim that acts as a pad. You may need to open the bleeder valve as well. We'll be bleeding the brakes later, so there's no harm in getting a little bit of air in the line. After you've done this, remove the old pad, and carefully inspect the seal around the brake piston. If it shows any signs of cracking, leaking, or other damage, replace the caliper. If it absolutely refuses to move, even after opening the bleeder, then it is seized and needs to be replaced. Always replace brake parts in pairs. If one caliper is bad, how much longer do you think the other one has? Just replace them both.
Compressing the piston (picture taken from a Lotus forum, because I didn't take one)

credit: Lotus Forum - Lotus Talk
Once the piston is compressed, and you've checked to make sure the seal isn't damaged, simply hold the rotor in place, make sure the pads are seated fully against the rotor, and swing the caliper down over the pads. Reinstall the caliper to bracket bolt, and...no wait, you aren't done yet!
Caliper installed
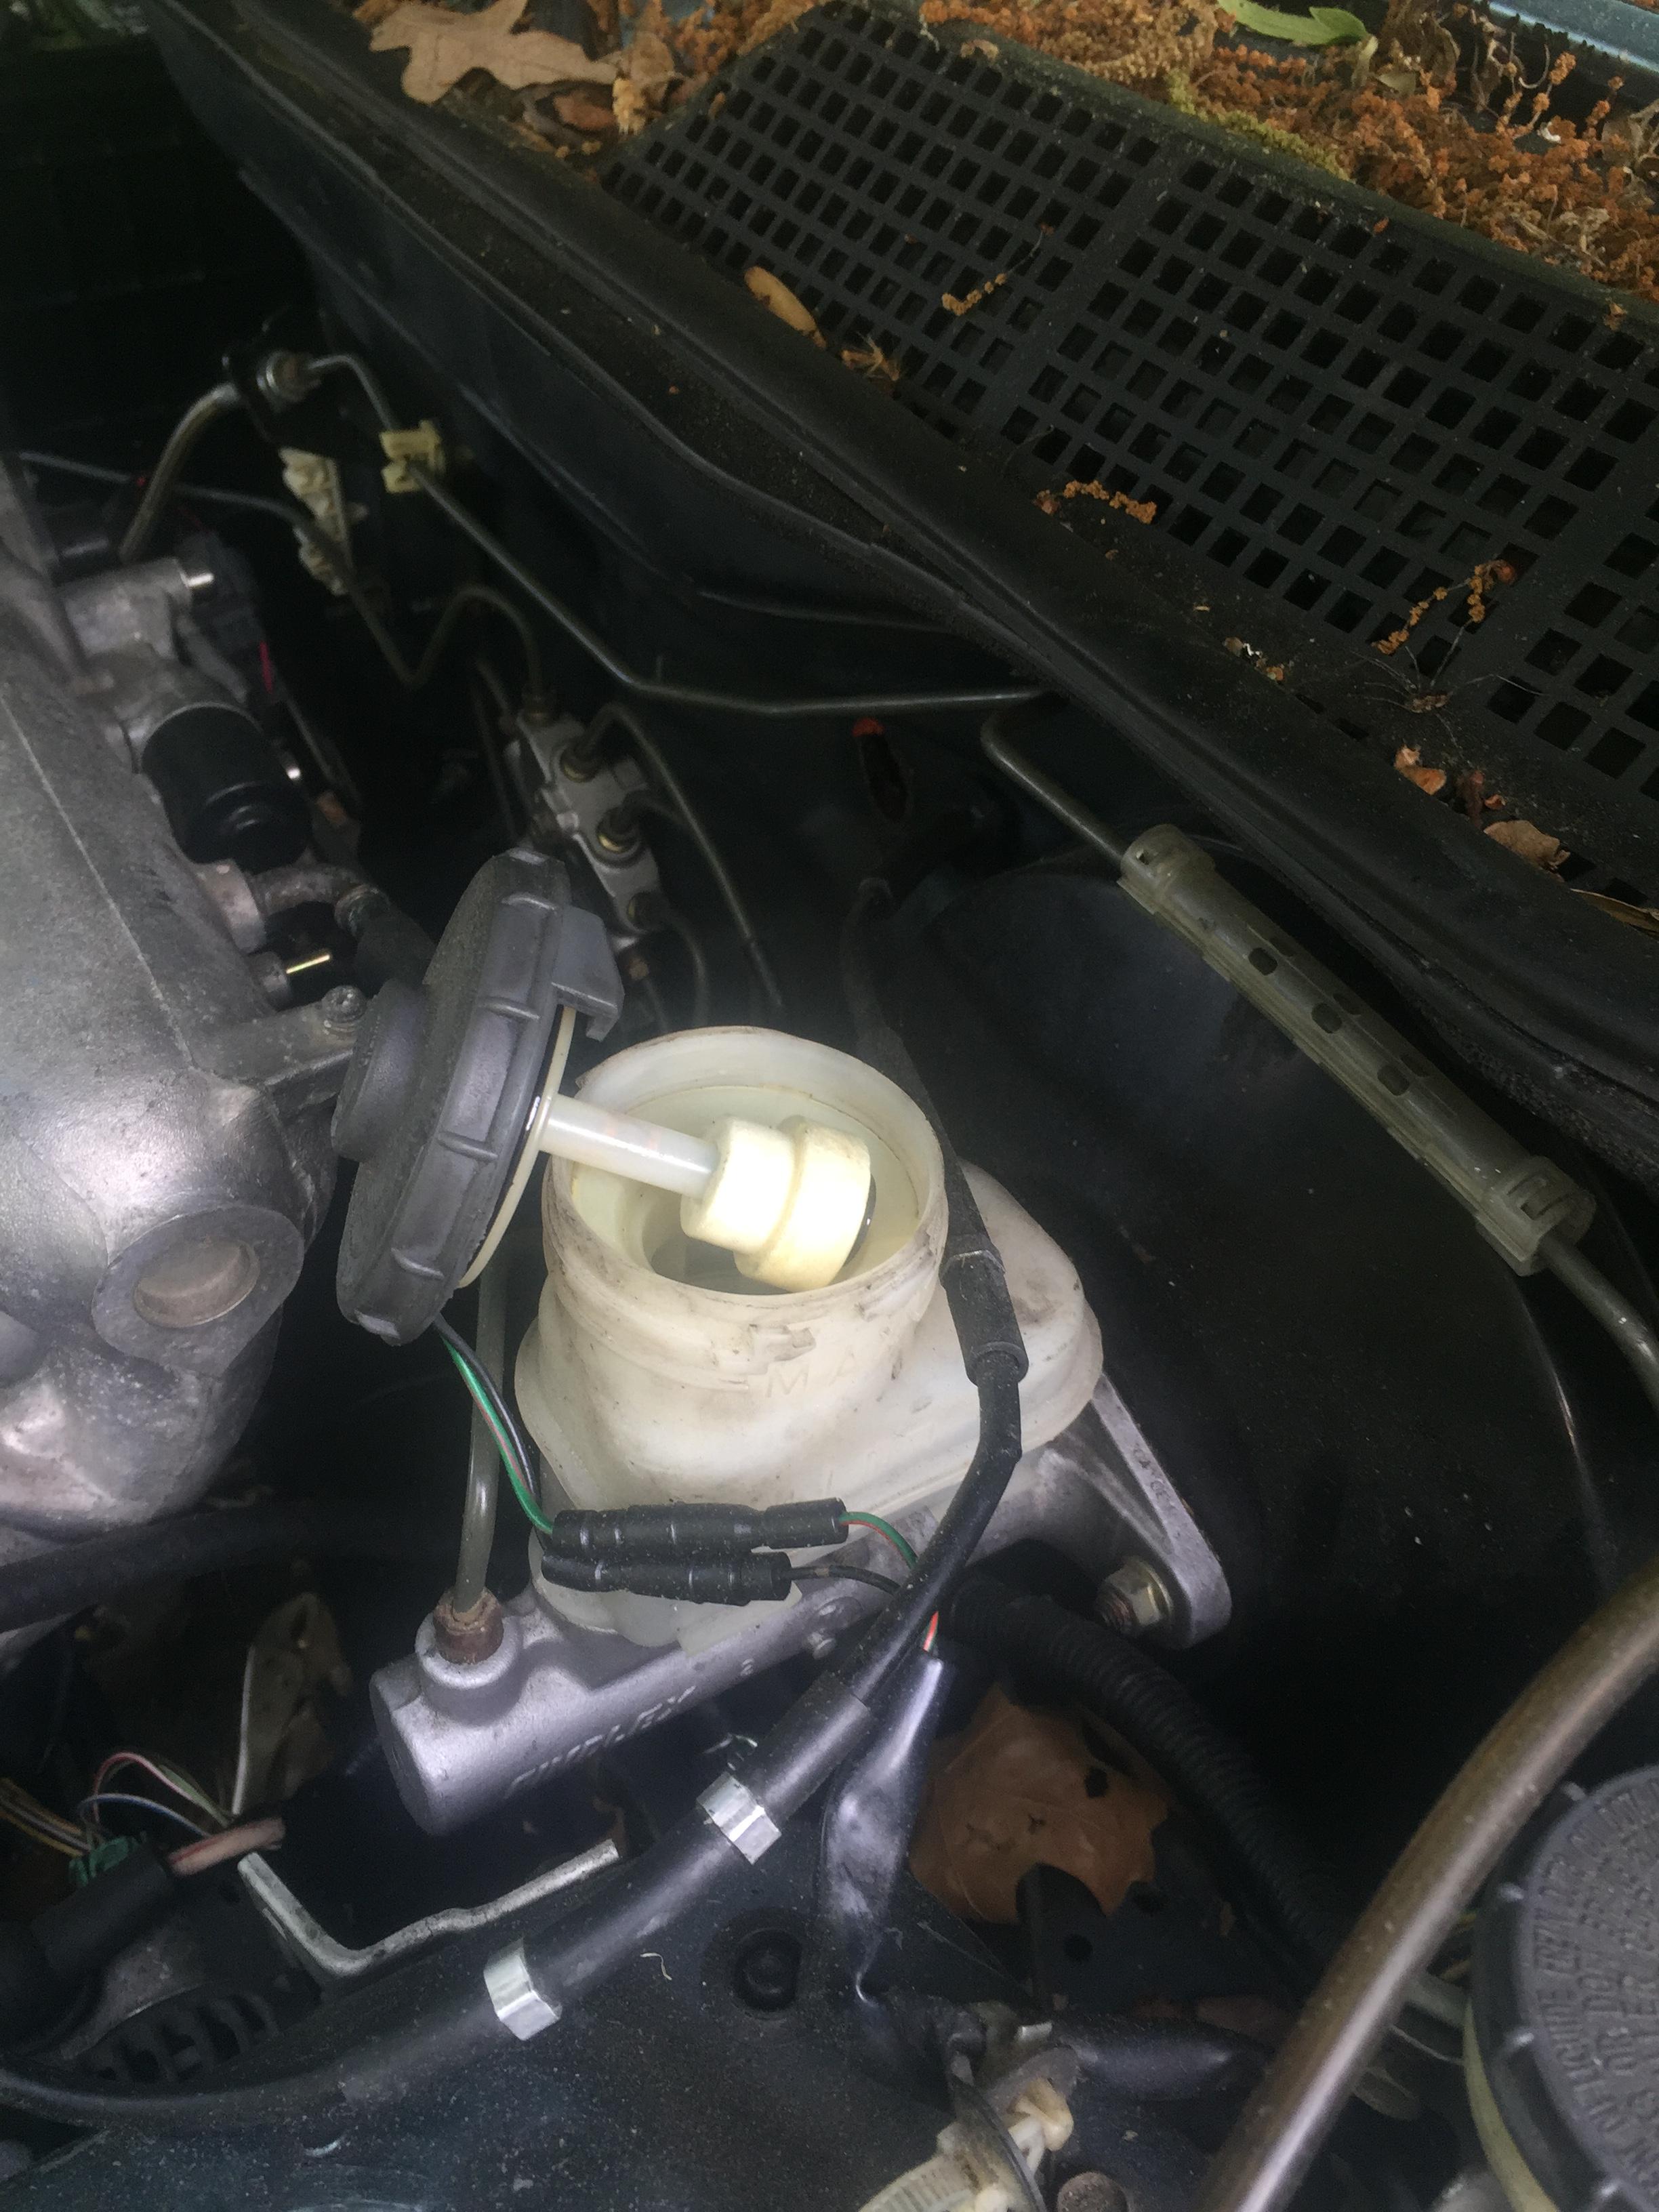
Now comes the most important part - bleeding the brakes. There are many methods. Some people reverse bleed with a hand pump. Some people use speed bleeder valves. Some people use the bottle and hose method. I went for the good old fashioned "have a buddy pump the brakes while you handle the bleeder valve" method. First, make sure your brake fluid reservoir is completely topped off. Next, have your friend get in the car and pump the brakes. For the first time, I like to go 8 pumps, then 3 pumps on subsequent valve openings. After the 8th pump, instead of releasing the brake pedal, have your friend keep his foot down. It might go all the way to the floor - that's OK for now. While the helper's foot is down, give the bleeder valve (10mm) a quarter turn left, then re-tighten when the fluid (or more likely for the first bleed, air) stream gets weak. 3 more pumps, hold, loosen, tighten when fluid/air stream gets weak. Rinse and repeat until absolutely no air bubbles are in the brake fluid. If you are going to a full brake system flush, keep repeating until you see fresh, new brake fluid coming out. After every 4 cycles, be sure to check the brake fluid reservoir. If the reservoir goes dry, you'll just be pumping air into the system, which not only completely defeats the purpose of what we're doing, it also risks damaging the brake master cylinder. Once you have finished your bleed/flush on that wheel, move onto the next one. Once all four wheels have new brakes on them, you may have to come back and re-bleed, but just keep that in the back of your mind until after you've finished.
Brake fluid reservoir, cap off, just in case you...didn't know what it looks like? If you don't know what a brake fluid reservoir looks like, we might have a problem
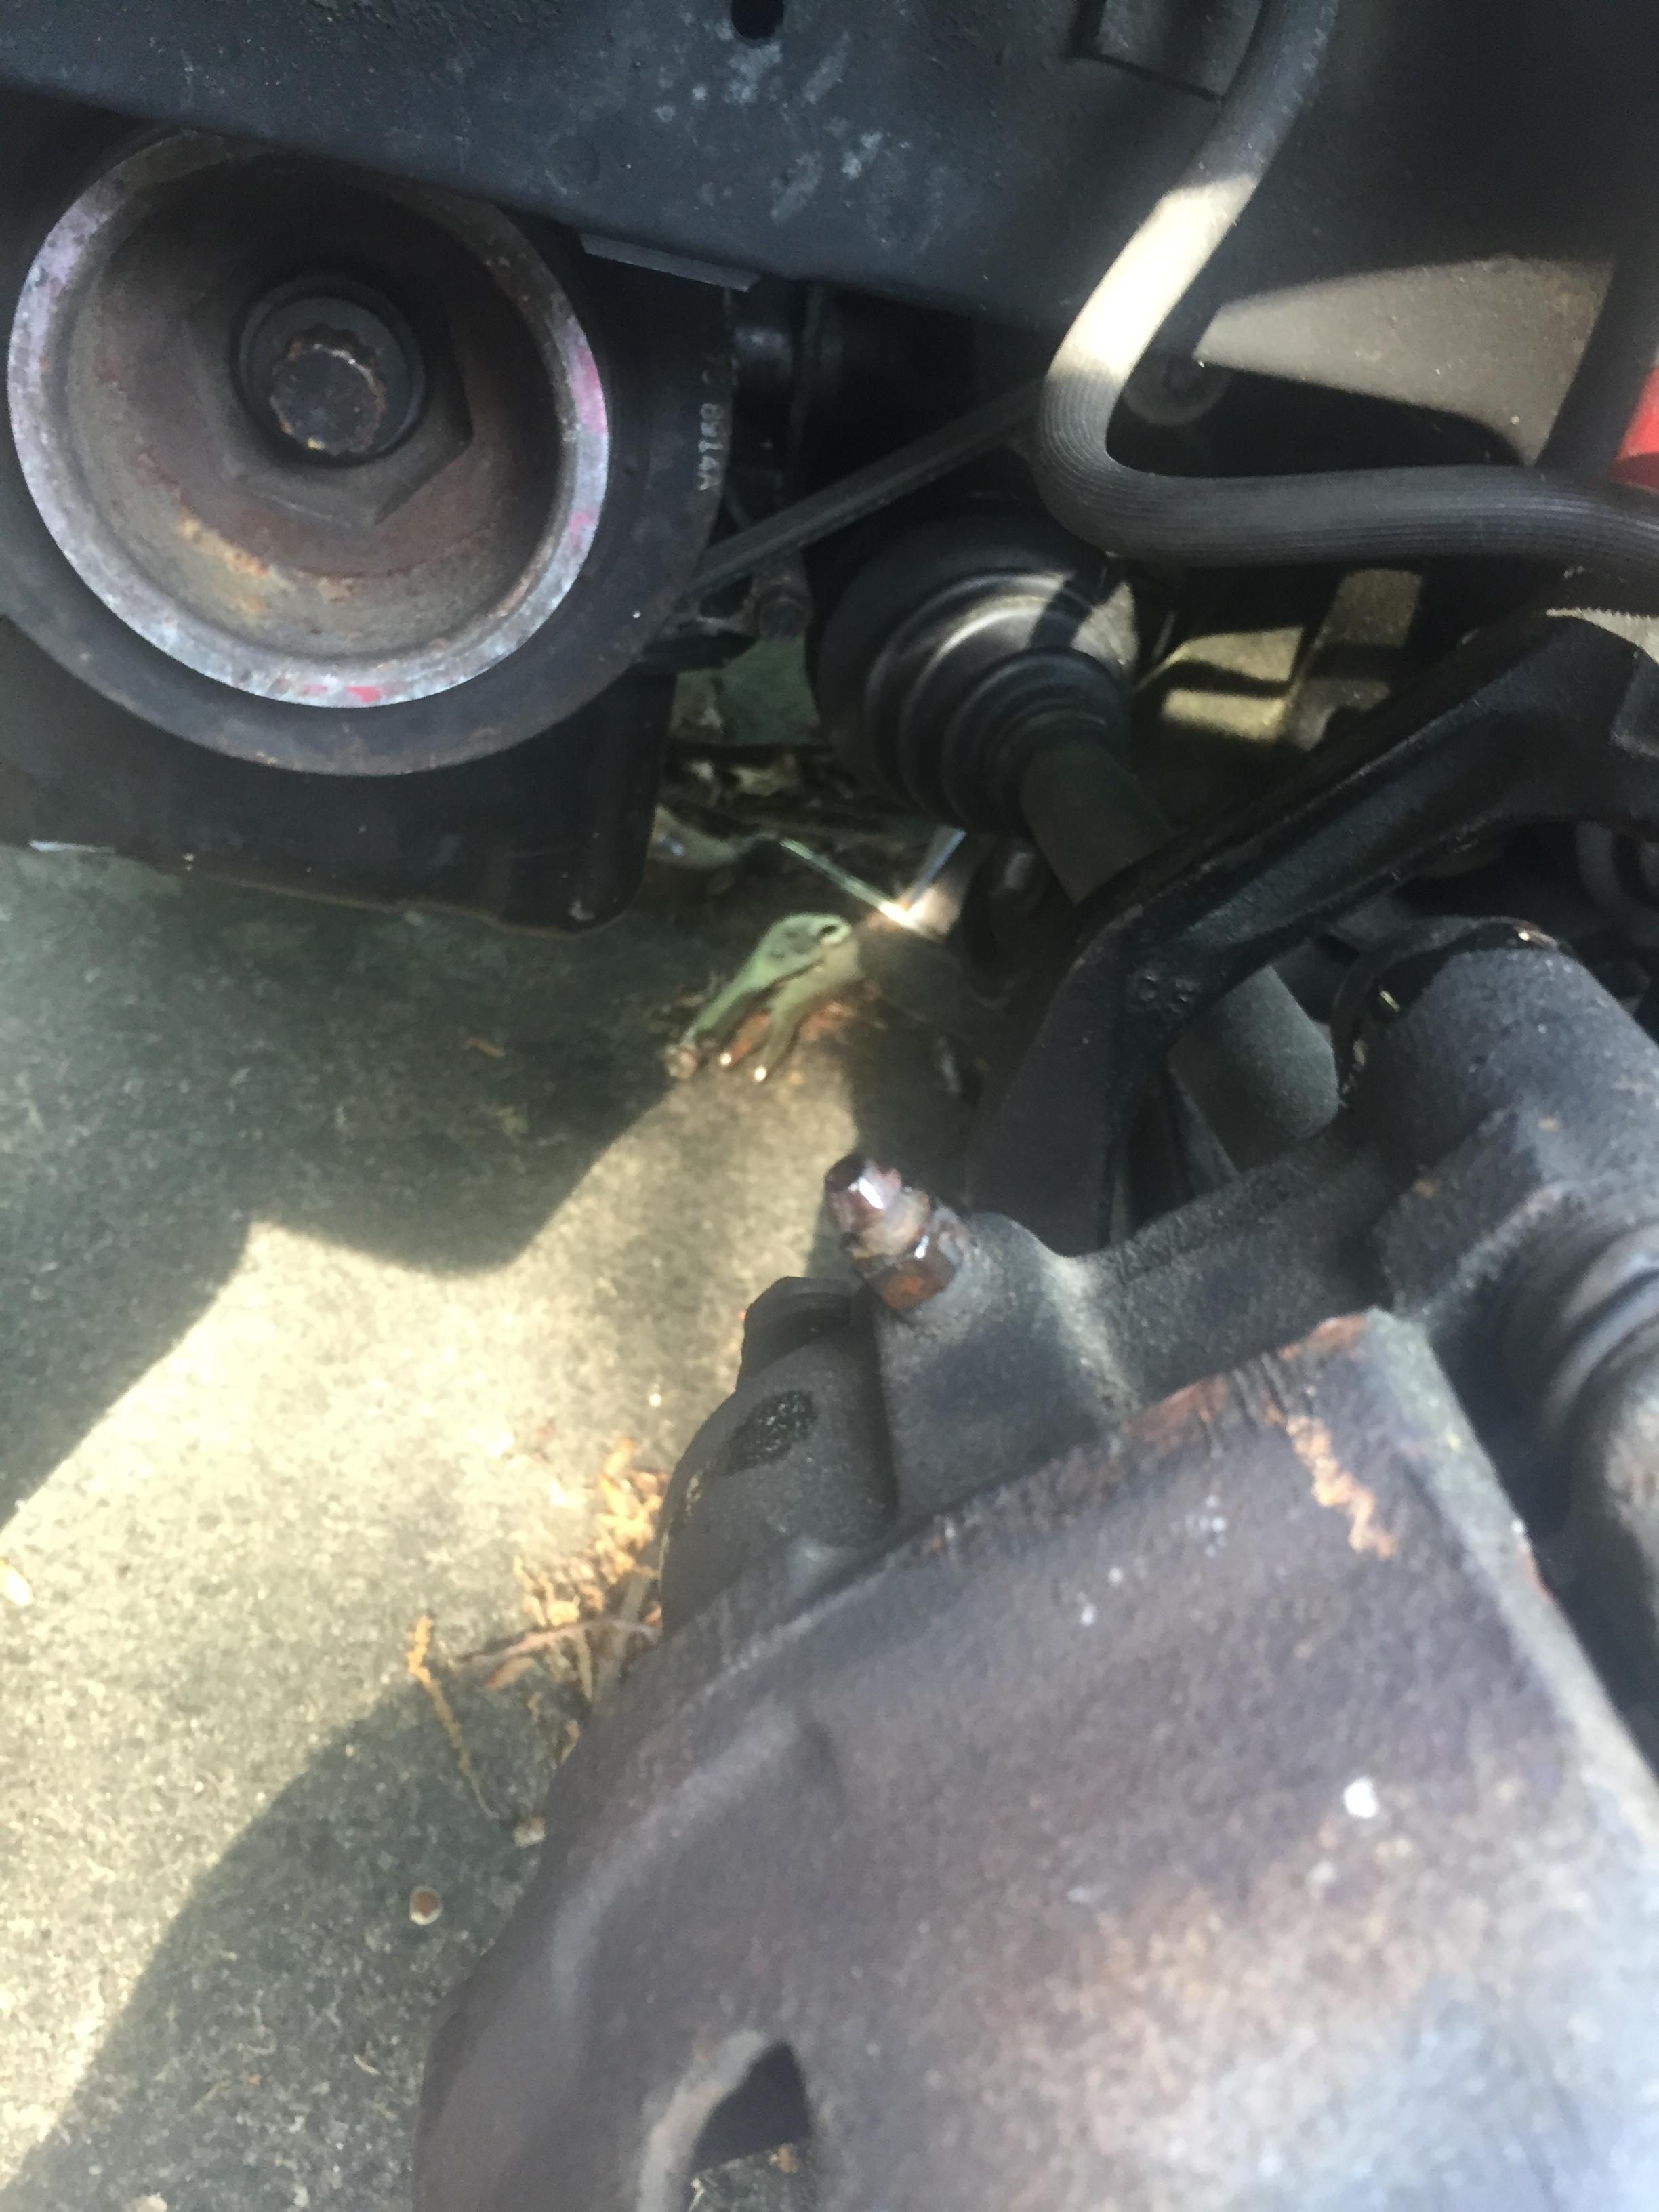
Caliper bleeder valve
Now reinstall the wheel, and you are done with that corner. Carry on, repeating the procedure for the other three wheels. If you are like me and already have a rear disc swap, it'll be roughly the same procedure for all four. If you have drums, the rear will be different. It will also be a righteous pain in the ***. Do yourself a favor, find a 97-01 Integra in a junk yard, and rip the rear trailing arm assembly out of it. Buy some 99-00 Civic SI parking brake cables, install those, and boom, you now have a rear disc assembly. The Integra rear calipers have some minor differences. First, there are two bolts holding them to the bracket, rather than one bolt and a swing joint. You can simply loosen one bolt, and remove the second, so you can swing the caliper in the same way you did the fronts. Second, and more importantly, the Integra rear calipers compress in a different way. Do not try to C clamp Integra rear calipers! You risk destroying them. You'll notice they have an X recessed into them. That's so you can use a special tool to "screw them in" and compress them. Just stick that tool on a 3/8" ratchet, and use it to "screw" the piston back in. As per usual, righty tighty. Conveniently enough, the "groove" on the outside of the caliper is the perfect size to hold a Craftsman standard 3/8" ratchet in place.
Here's the tool

Why do I mention all of this? Is it just out of the goodness of my heart, in case it happens to someone else? Am I just going for thoroughness? Or maybe...were both of my rear calipers seized, and I had to replace both of them?
...Yeah, I had to replace both of them. $75 each from the parts store, $30 core (each), lifetime warranty. **** it. Oh well, at least I have two new calipers in the rear, and new pads and rotors on all four.
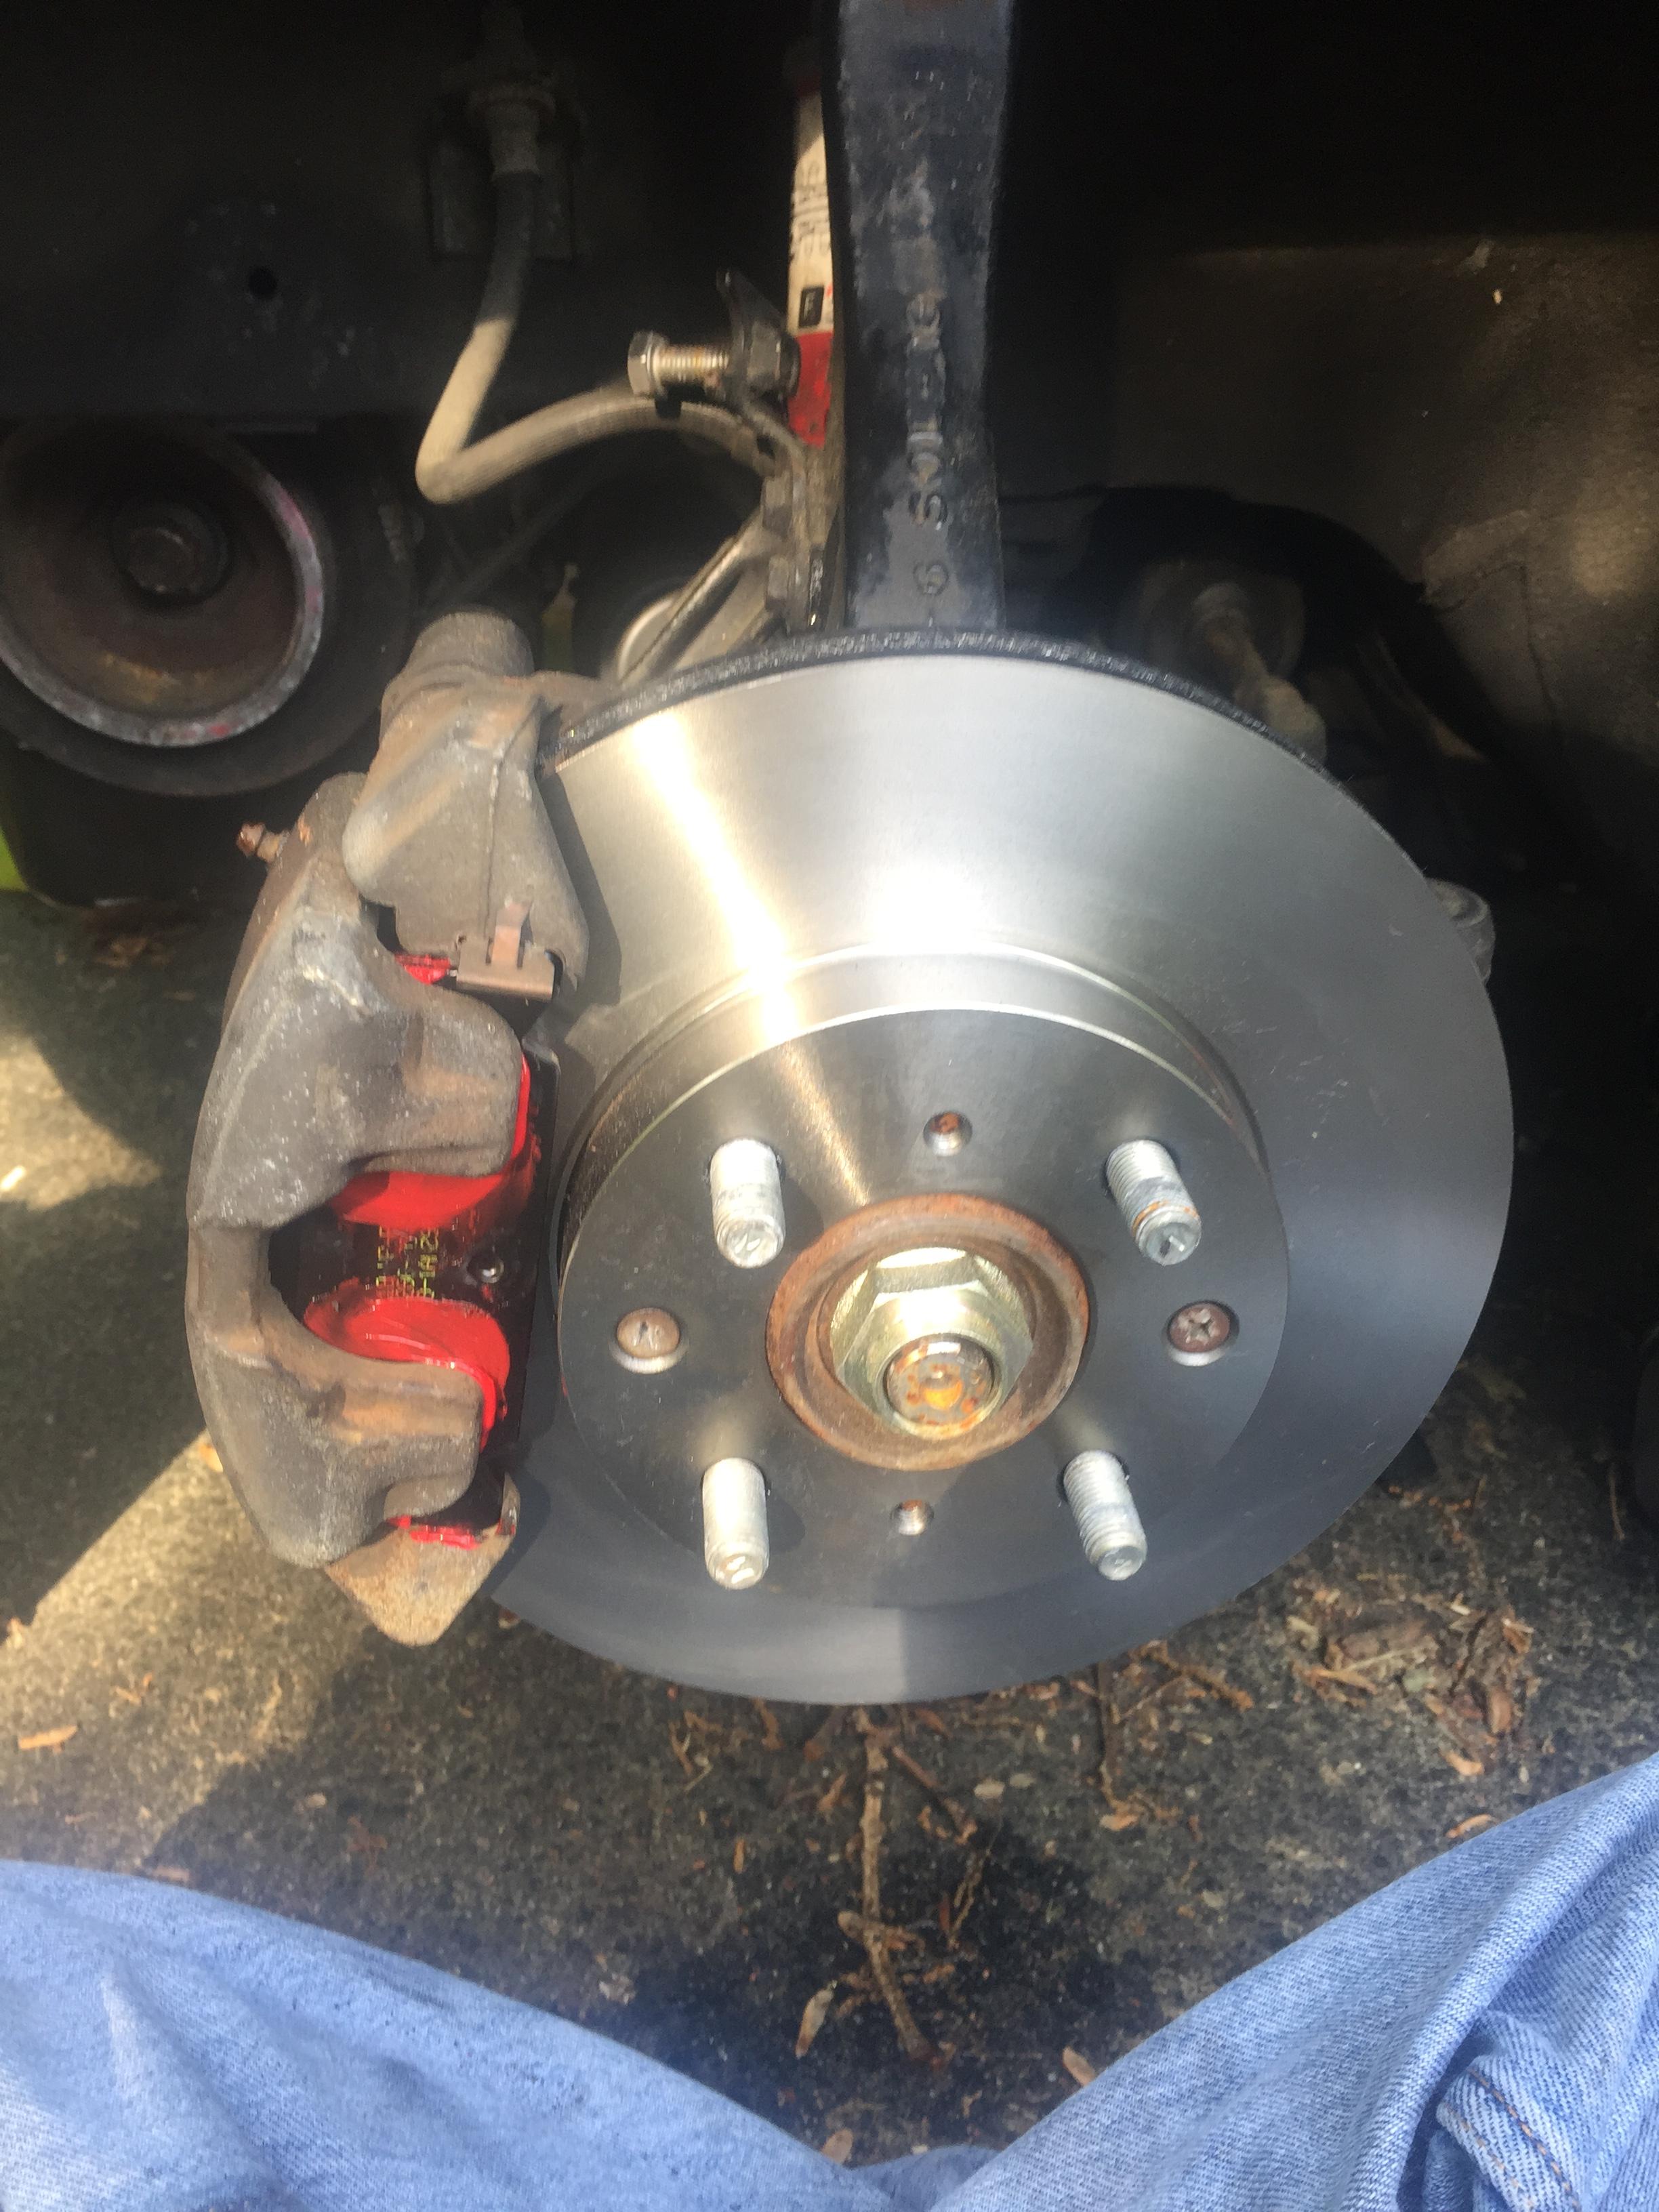
Completed fronts
Completed rears
And that, ladies and gentlemen, concludes today's DIY portion. Coming up next, manifold replacement, and why my car still isn't running!
Before we get into this, I will preface with this. Your brakes are important, for obvious reasons. If you **** something up in following this, and wreck, that's on you. I'll try not to leave anything out, but I do brake jobs in my sleep. I'll try not to, but if I forget to put something in this write-up, I hold no responsibility for what may happen. Always make sure your brakes work before hitting the road with other cars. If you are not fully comfortable accepting the risk, don't do your own brakes. Take it to a professional.
Now that we have that out of the way...
From sitting for a year, my brakes were rough as ****. I wouldn't trust them to stop a bicycle, let alone a car.
So, since we're doing pads and rotors, step 1 is to remove everything. Every ******* thing. The first pain in the *** that I was expecting was the rotor set screws. Their purpose is to keep the rotor aligned while installing the calipers. Once the wheel is installed over the brakes, they keep the rotor in place. Translation: If you know how to use both hands at the same time, they are superfluous. They also have a tendency to rust to ****, and really **** up your day.
These are the little bastards I'm talking about. 2 per wheel. Throw those ******* away.
We'll get back to what to do when they're stuck later.
The next thing to remove is the caliper, and caliper bracket. If you're just replacing your pads, you don't need to remove the bracket, but since we're doing a full brake job, the bracket must come off. On the back of a Civic's front calipers, there are 4 bolts. One holds the caliper onto the bracket. One is for the brake line. The other two hold the bracket onto the knuckle. For now, we will concern ourselves with the caliper to bracket bolt, and the two bracket to knuckle bolts.
Yes, it's a horrible picture. Yes, you can kind of see my beard. Yes, one of the bracket bolts is hidden by the caliper.
Start off by removing the one bolt holding the caliper onto the bracket. 12mm bolt. That will allow us to unload the pads before removing the assembly. Once you have that bolt removed, you'll be able to use something to pry the caliper and pads off of the rotor. If the pads don't come with the caliper, that's OK. Get something to pry with (I used a big screw driver), and swing the caliper up. That's why we're only removing one bolt for now.
Prying the caliper
Once you had the caliper swung up, you can remove the pads. Like I said, I wouldn't trust these things to stop a bicycle at this point, let alone my car.
So much rust!
Now, what do you do when the rotor set screws inevitably get stuck? Well, you extract them, or my personal preference, you ******* destroy them with the might of a thousand drill revolutions (so many entendres in that, I can't keep track of them all). You do that with these awesome little *******. If you're going to the store to buy parts and tools to do the job, just go ahead and buy these now. 99% chance you'll need them.
Removers
Why you need them
The removers are extremely easy to use. Put them in a power drill (preferably plug in, but if you only have a battery powered drill, make sure you have an extra battery), set them in the middle of the stripped head, and drill slowly in reverse. Yes, in reverse. In a perfect world, they will bite into the bolt/screw, and turn it out in one piece. In a more realistic world, they'll cut the head off, allowing you to remove whatever it's holding in place (in this case, your rotor). If your slow drilling has worn the metal down to where the bit has nothing to try to bite into, go full speed in reverse and use it just like you would any other drill bit (only in reverse). I started with the #1 to get down to the shank of the screw, then switched to the #2 to cut off the head, then back to the #1 to get the shank out of the hub. Your end result will be a bare, exposed hub, and a loaded, hanging caliper.
Bare hub and caliper
Do not let the caliper hang on the brake line! This is a fast way to damage the brake line! Best case, you've weakened the line for it to fail on you while you're driving. Worst case, you just stripped out the line and now you have to replace it. The easiest way to prevent this is to use a metal coat hanger (or similar) to hang the caliper off of the upper control arm. People in shops do it all the time. I didn't have a metal coat hanger, so I wedged it in between the knuckle and shock, as you can see in the above picture.
After you have removed the pads, and the rotor set screws, you need to remove the two bolts holding the bracket onto the knuckle. Two 14mm bolts. Lefty loosey righty tighty. See above reference picture.
Now, we install the new goodness. First, you put the rotor on the hub. I didn't take a picture, because round peg goes in round hole. It's pretty hard to **** up putting a rotor on a hub. Once the rotor is sitting there, you can either use the rotor set screws to hold the rotor in place (easier, but seriously, **** those screws), or you can just use one hand, while the other handles the bracket. Or, in my case, use your elbow to hold it, while you use that hand to line up the bracket, and the other hand to thread the bolt. It's kind of funny how it goes in there, and you can't really get a good visual for lining it up, you just have to keep fiddling with it until it catches. Personally, I've always found it easier to do the bottom bracket bolt first.
Now that your rotor and bracket are reinstalled, it's pad time. I'm using Hawk HP+ in the front, and Hawk HPS in the rear. Hawk does an amazing job of overpackaging their pads. They also include the necessary pad lube, and even a little sticker, if you want to put that on your car to let thieves know you have nice pads behind your nice wheels. I'm going to look into Hawk and see if they have a sponsor contingency program before I put the sticker on. Contingency programs are awesome, but something we can talk about later.
Awesomely overpackaged pads
And the included grease!
Simply apply grease to the places that the pad makes contact with the caliper, as well as with the bracket, but do not get any on the braking surface! It's lube. Braking surfaces and lubrication should not mix. That should go without saying, but I'm covering my bases here. The points of contact between the pad and the bracket are frequently overlooked, even by professionals. Make sure not to miss it, or your brakes will be squealing. Unlike the engine building, there is such a thing as too much grease. Make sure you use enough, but not so much that it gets on the rotor surfaces, or on the braking contact point of the pads
All greased up
Next, you need to compress the caliper. I didn't take pictures of this, but it's fairly simple. You'll need a large enough C clamp (a 6" clamp is what I use), as well as one of your old brake pads. Remove your brake fluid reservoir cap, place an old brake pad on the piston, and use the C clamp to compress it. There is also a proper tool for it, but all that tool is, is a C clamp with a metal shim that acts as a pad. You may need to open the bleeder valve as well. We'll be bleeding the brakes later, so there's no harm in getting a little bit of air in the line. After you've done this, remove the old pad, and carefully inspect the seal around the brake piston. If it shows any signs of cracking, leaking, or other damage, replace the caliper. If it absolutely refuses to move, even after opening the bleeder, then it is seized and needs to be replaced. Always replace brake parts in pairs. If one caliper is bad, how much longer do you think the other one has? Just replace them both.
Compressing the piston (picture taken from a Lotus forum, because I didn't take one)
credit: Lotus Forum - Lotus Talk
Once the piston is compressed, and you've checked to make sure the seal isn't damaged, simply hold the rotor in place, make sure the pads are seated fully against the rotor, and swing the caliper down over the pads. Reinstall the caliper to bracket bolt, and...no wait, you aren't done yet!
Caliper installed
Now comes the most important part - bleeding the brakes. There are many methods. Some people reverse bleed with a hand pump. Some people use speed bleeder valves. Some people use the bottle and hose method. I went for the good old fashioned "have a buddy pump the brakes while you handle the bleeder valve" method. First, make sure your brake fluid reservoir is completely topped off. Next, have your friend get in the car and pump the brakes. For the first time, I like to go 8 pumps, then 3 pumps on subsequent valve openings. After the 8th pump, instead of releasing the brake pedal, have your friend keep his foot down. It might go all the way to the floor - that's OK for now. While the helper's foot is down, give the bleeder valve (10mm) a quarter turn left, then re-tighten when the fluid (or more likely for the first bleed, air) stream gets weak. 3 more pumps, hold, loosen, tighten when fluid/air stream gets weak. Rinse and repeat until absolutely no air bubbles are in the brake fluid. If you are going to a full brake system flush, keep repeating until you see fresh, new brake fluid coming out. After every 4 cycles, be sure to check the brake fluid reservoir. If the reservoir goes dry, you'll just be pumping air into the system, which not only completely defeats the purpose of what we're doing, it also risks damaging the brake master cylinder. Once you have finished your bleed/flush on that wheel, move onto the next one. Once all four wheels have new brakes on them, you may have to come back and re-bleed, but just keep that in the back of your mind until after you've finished.
Brake fluid reservoir, cap off, just in case you...didn't know what it looks like? If you don't know what a brake fluid reservoir looks like, we might have a problem
Caliper bleeder valve
Now reinstall the wheel, and you are done with that corner. Carry on, repeating the procedure for the other three wheels. If you are like me and already have a rear disc swap, it'll be roughly the same procedure for all four. If you have drums, the rear will be different. It will also be a righteous pain in the ***. Do yourself a favor, find a 97-01 Integra in a junk yard, and rip the rear trailing arm assembly out of it. Buy some 99-00 Civic SI parking brake cables, install those, and boom, you now have a rear disc assembly. The Integra rear calipers have some minor differences. First, there are two bolts holding them to the bracket, rather than one bolt and a swing joint. You can simply loosen one bolt, and remove the second, so you can swing the caliper in the same way you did the fronts. Second, and more importantly, the Integra rear calipers compress in a different way. Do not try to C clamp Integra rear calipers! You risk destroying them. You'll notice they have an X recessed into them. That's so you can use a special tool to "screw them in" and compress them. Just stick that tool on a 3/8" ratchet, and use it to "screw" the piston back in. As per usual, righty tighty. Conveniently enough, the "groove" on the outside of the caliper is the perfect size to hold a Craftsman standard 3/8" ratchet in place.
Here's the tool
Why do I mention all of this? Is it just out of the goodness of my heart, in case it happens to someone else? Am I just going for thoroughness? Or maybe...were both of my rear calipers seized, and I had to replace both of them?
...Yeah, I had to replace both of them. $75 each from the parts store, $30 core (each), lifetime warranty. **** it. Oh well, at least I have two new calipers in the rear, and new pads and rotors on all four.
Completed fronts
Completed rears
And that, ladies and gentlemen, concludes today's DIY portion. Coming up next, manifold replacement, and why my car still isn't running!
 05-17-2015, 05:56 PM
#452
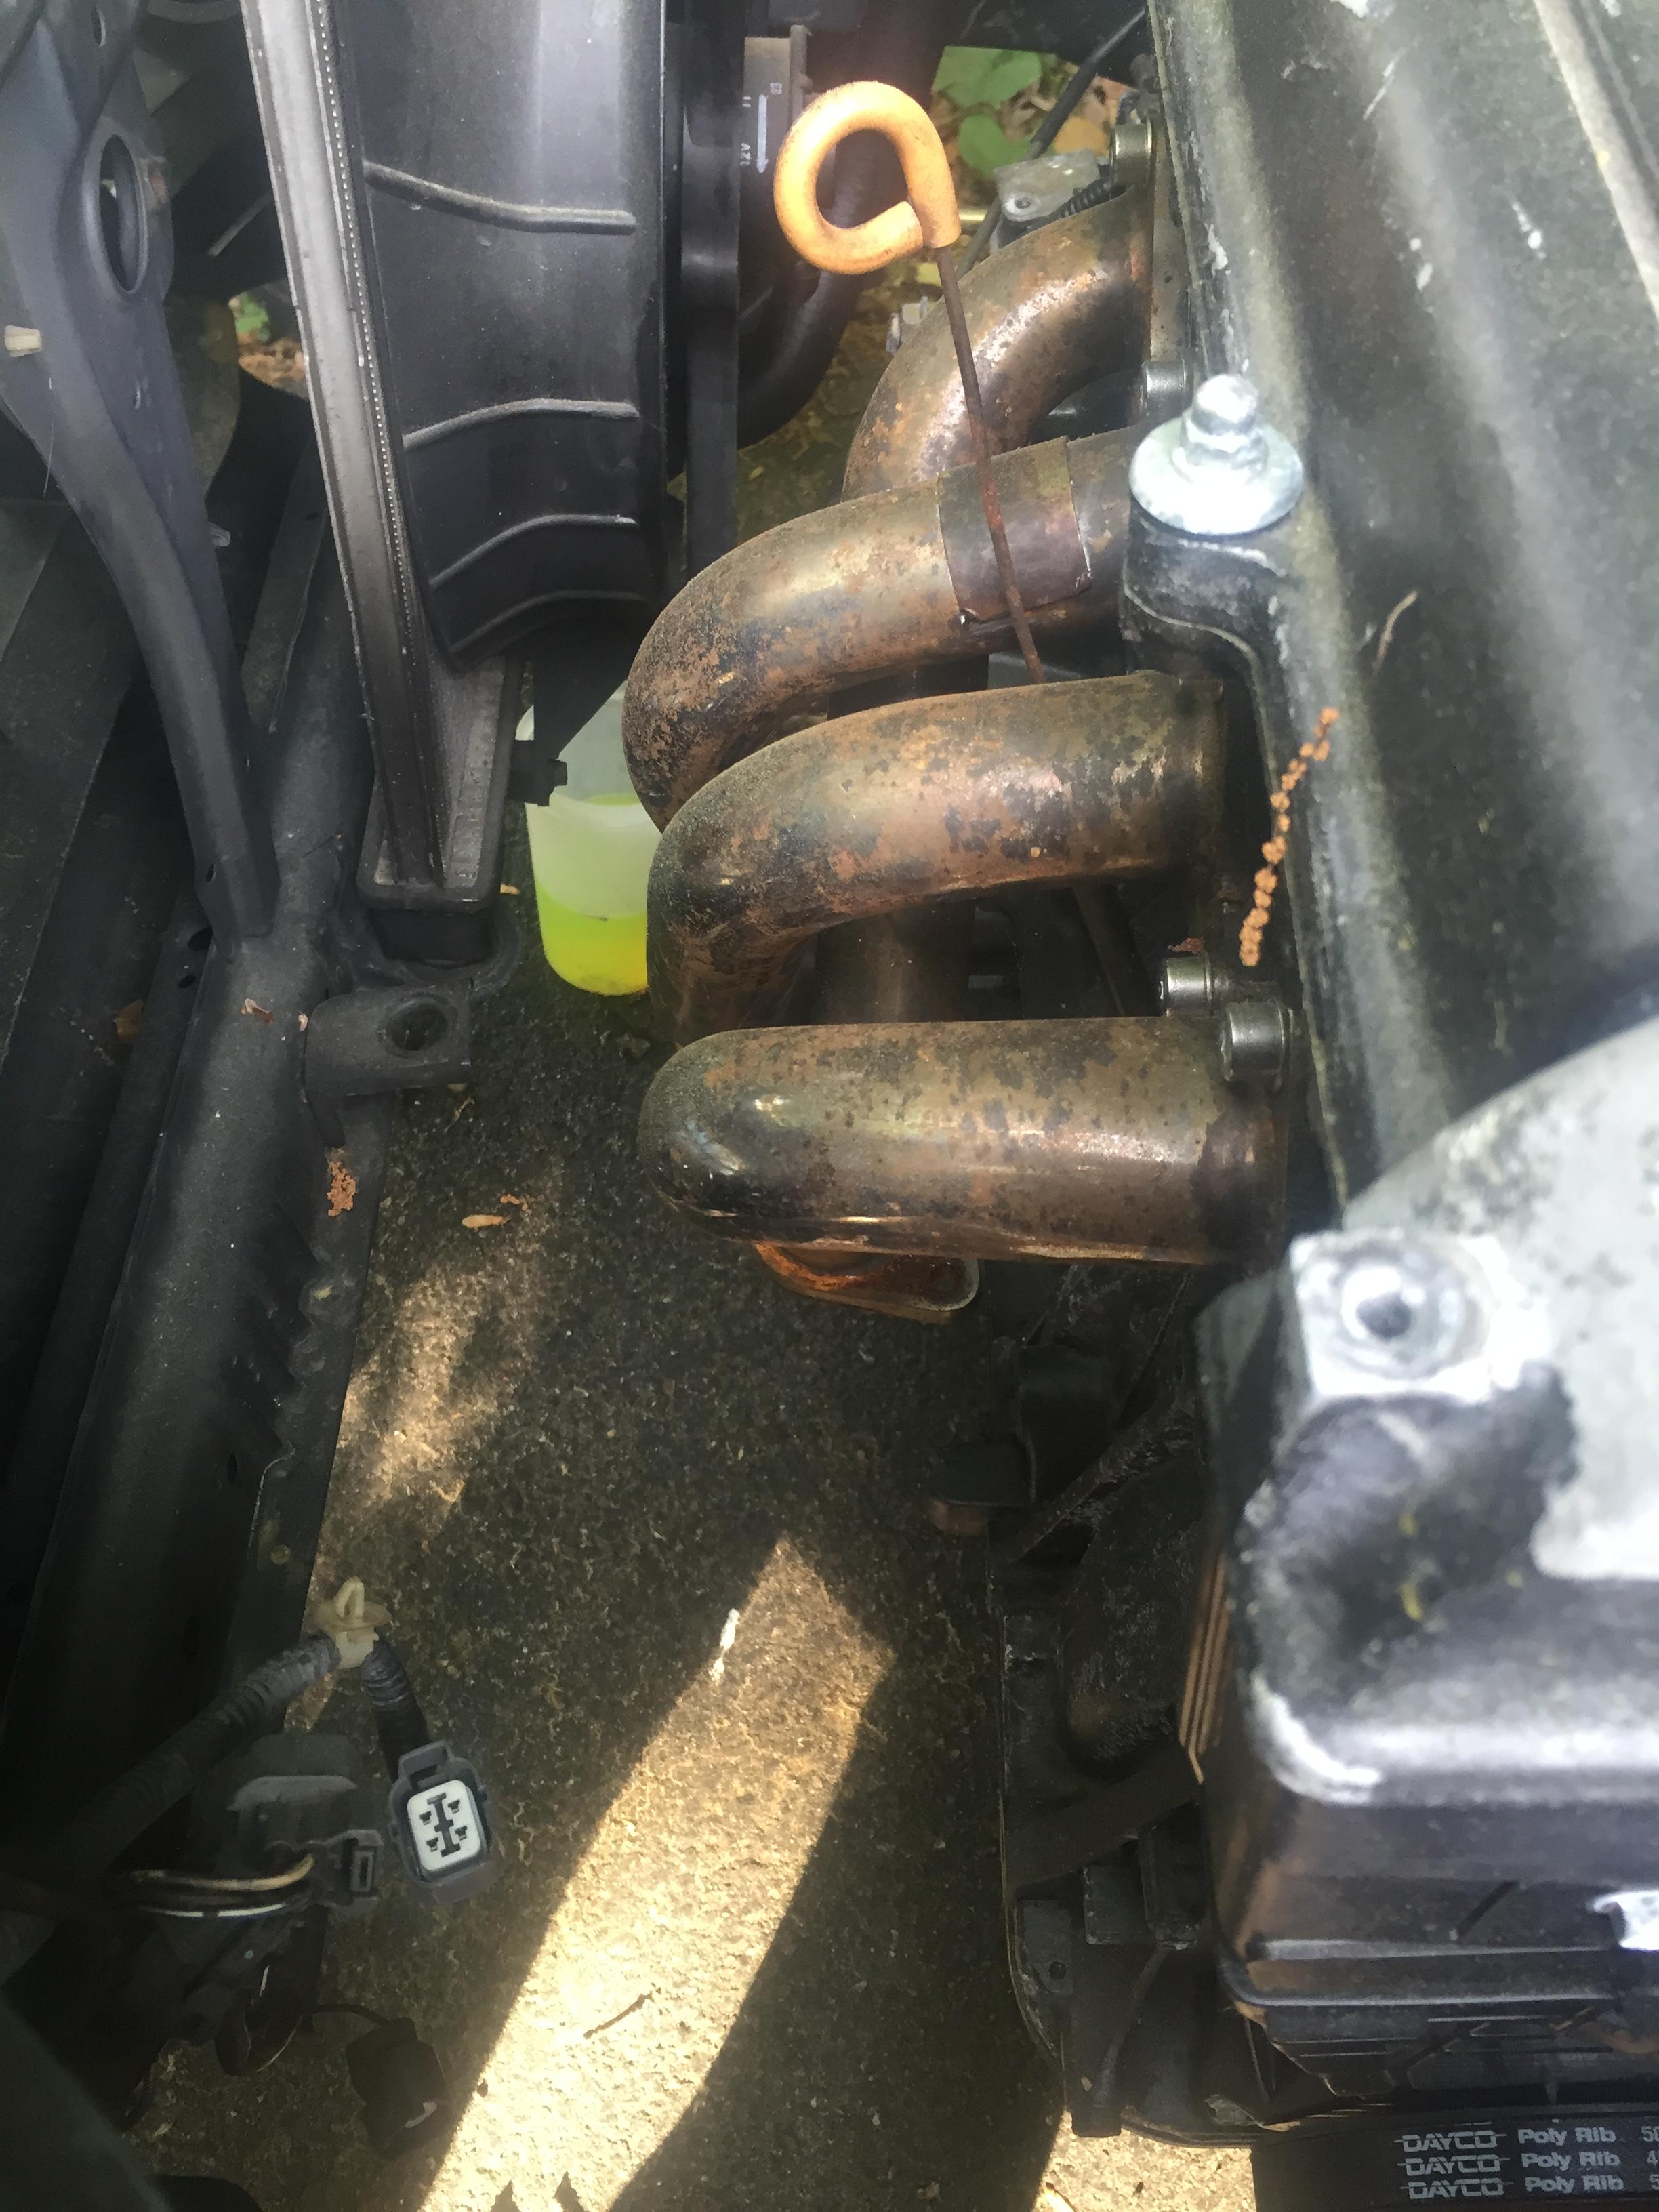
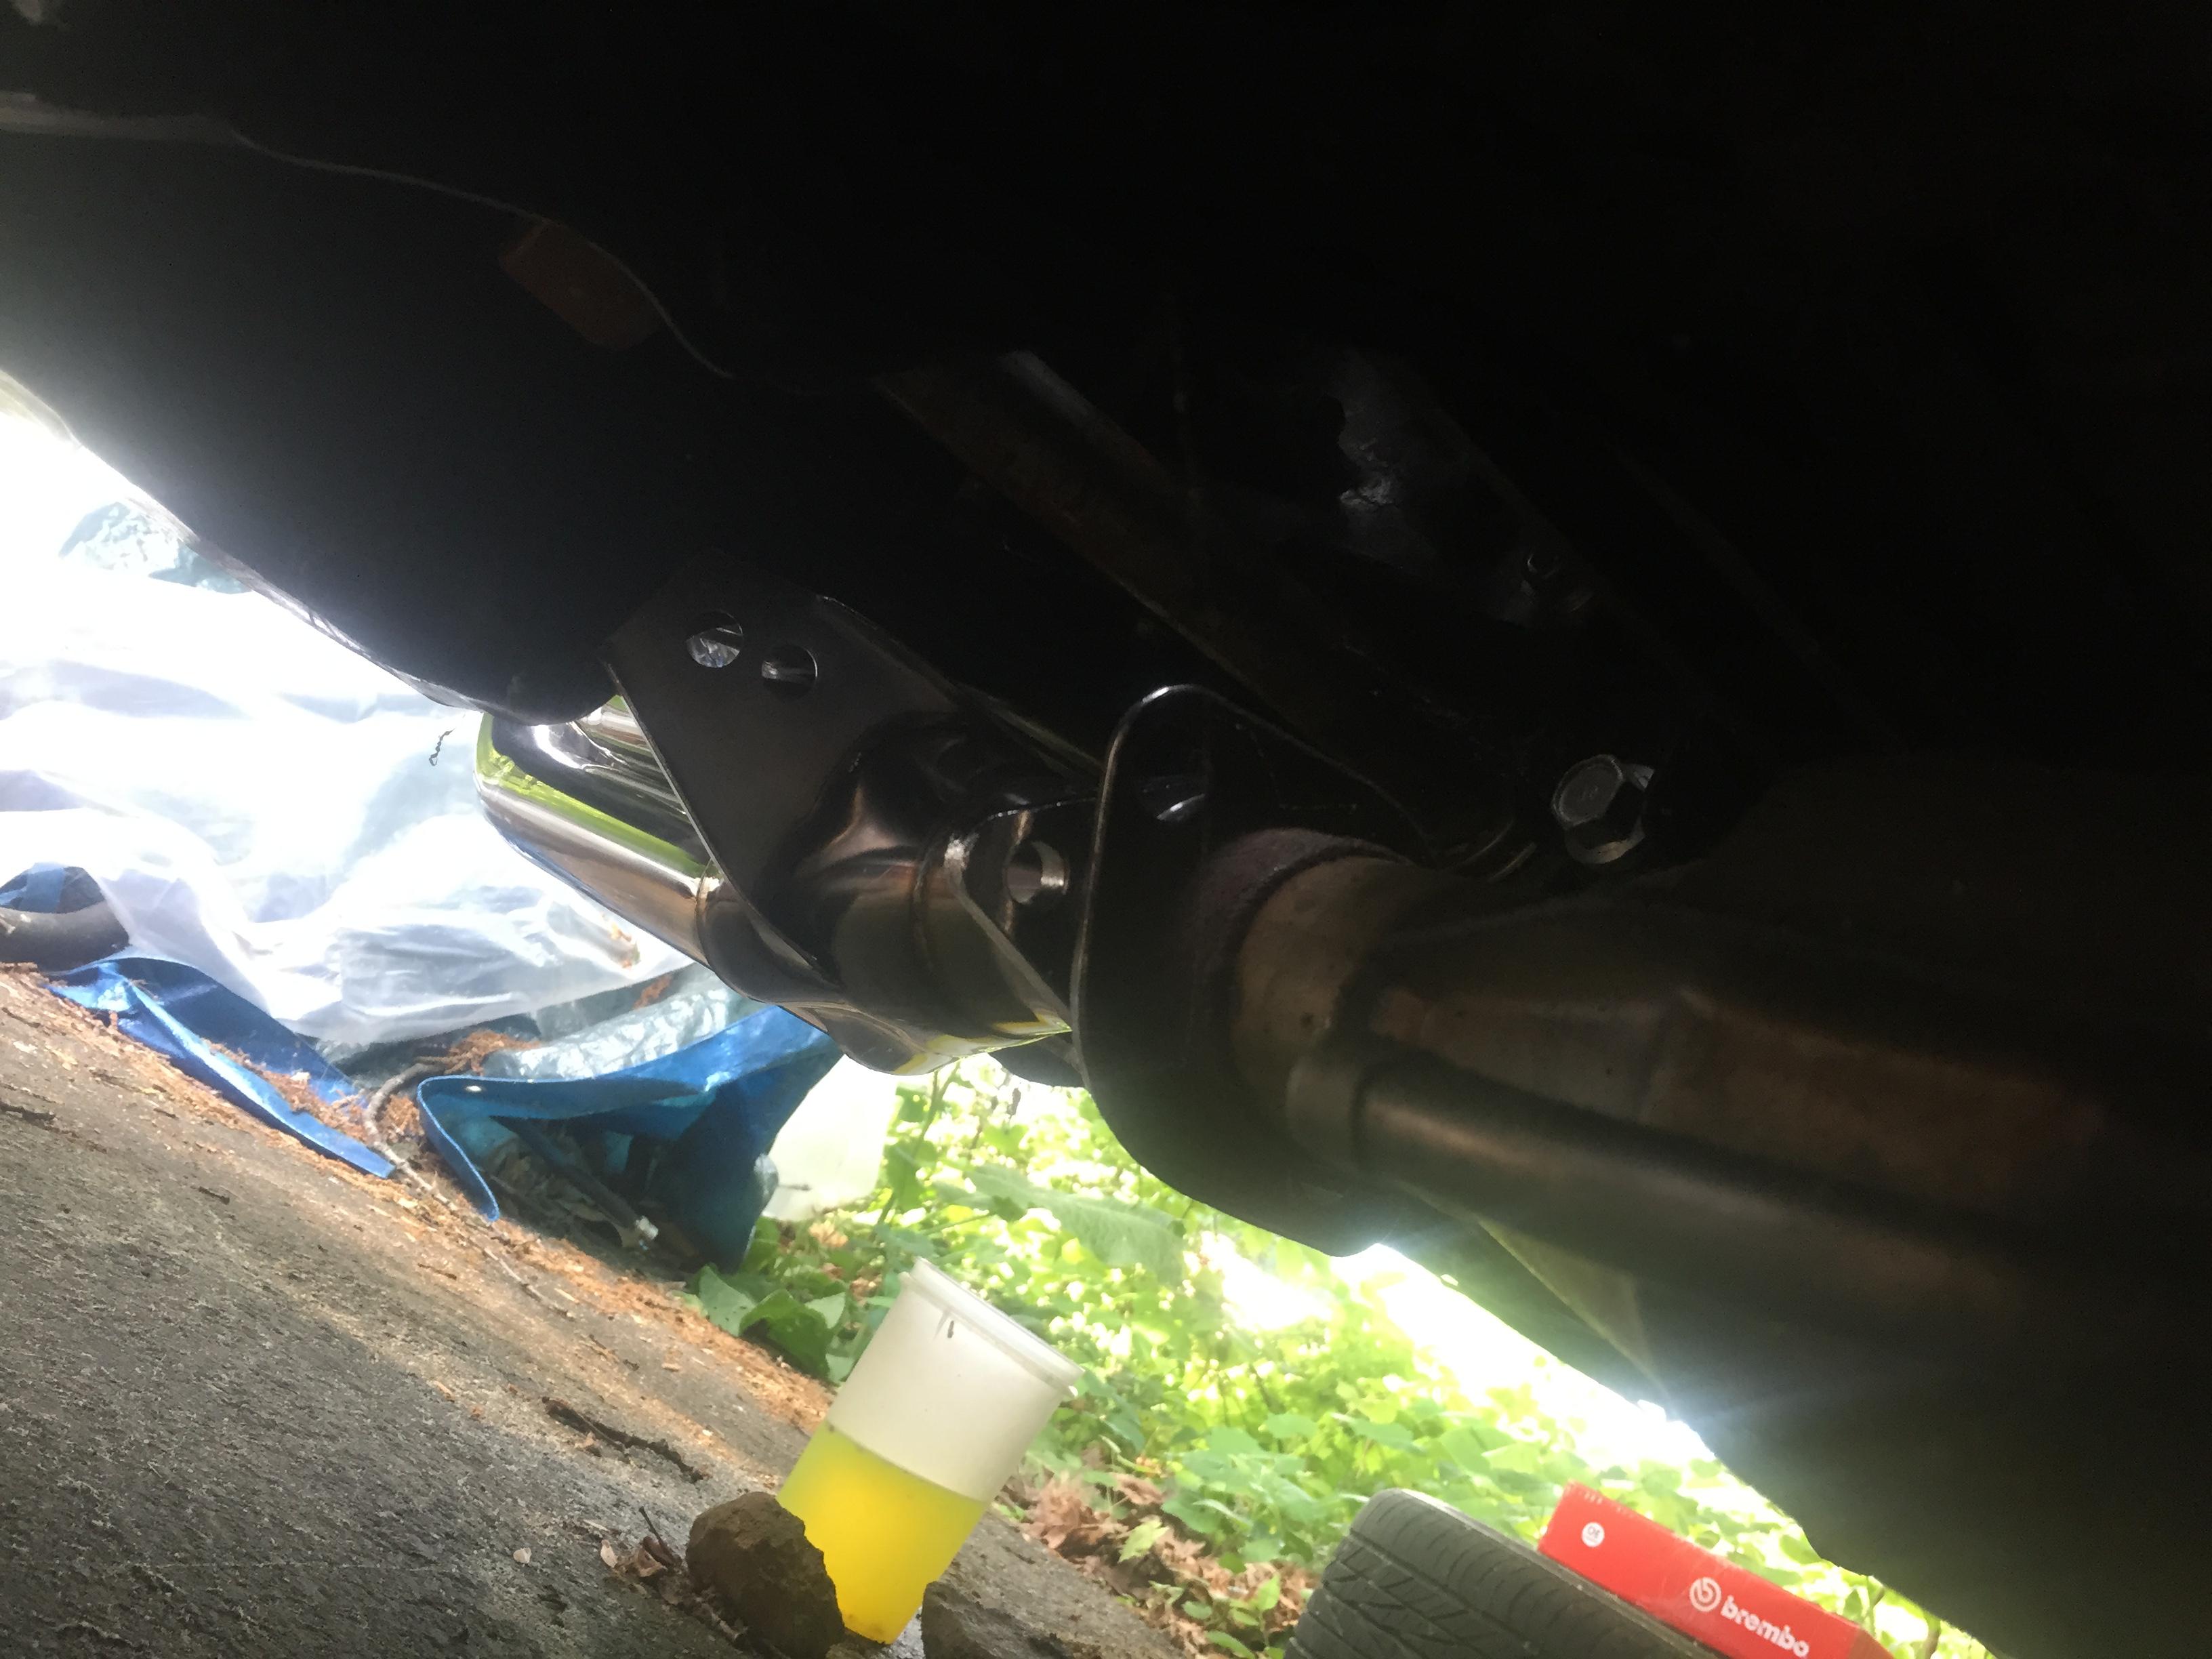
The B series exhaust manifold that I had, I got for free from a junk yard if I remember correctly. It's been so long since I got it. The catch? The bottom half had been bottomed out to ****, so it was worthless. I got it in hopes that the bottom half of my D series header could bolt to it. Unfortunately, the bolts didn't line up, so I had to buy a proper exhaust manifold. I found a 4-1 "ITR style" manifold on eBay for $60, and jumped on it. Removed the old half manifold, and installed the new one.
Out with the old...
And in with the new!
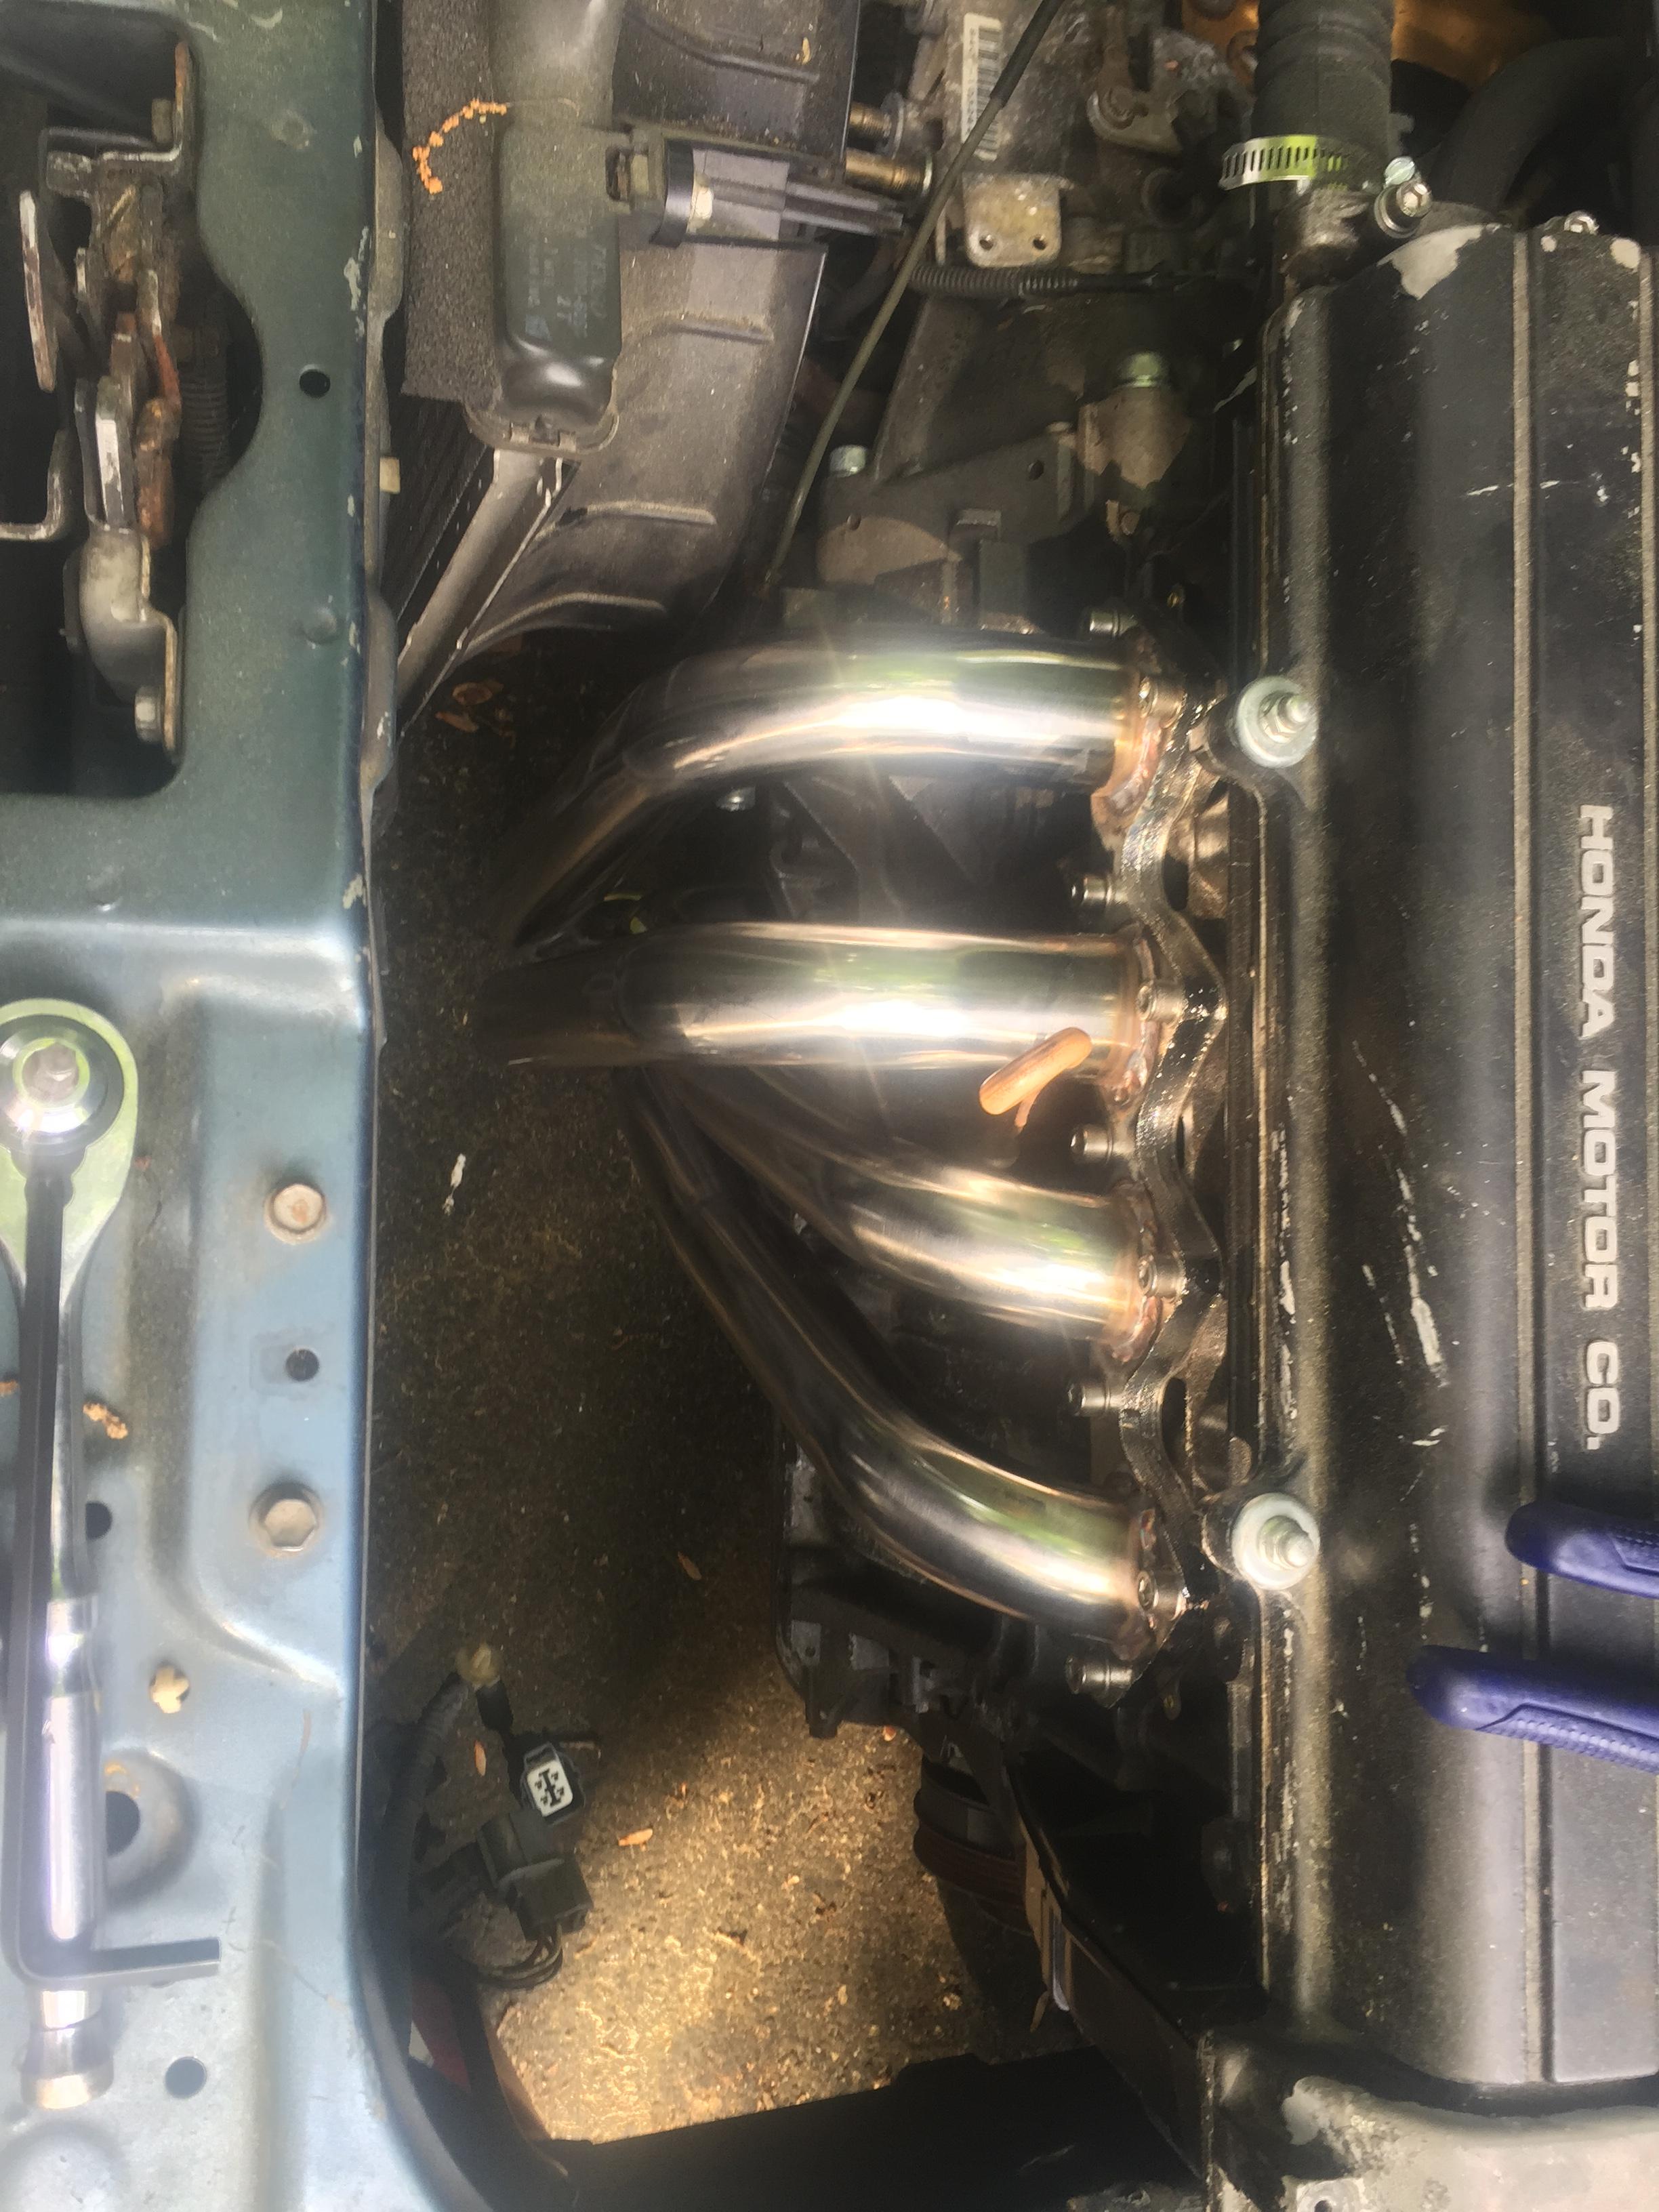
One minor problem, though. The B series manifold and exhaust pipe bolts are at a different angle than the D series manifold and exhaust pipe bolts. Why Honda decided to do this is completely beyond me, but oh well. After the engine is running properly, and after it's been tuned, I'll drive to an exhaust shop and have them cut and weld the flange. This was fully expected - it's just another step in the process of a B swap.
They don't line up
Now, after doing all of this work, I decided to try starting my car and seeing if I was just imagining things. Nope, I have a dead cylinder. Specifically, cylinder 2. After ~30 seconds of running, I cut the engine, and used the thermometer probe that came with my voltmeter on my runners. I don't remember the exact numbers, but runners 1, 3, and 4 were considerably hotter than runner 2. Houston, we have a dead cylinder.
The plugs and wires were given to me by the friend that gave me the motor. He took good care of his stuff, but I had no real way of knowing how old they were, so I replaced them. Also, the distributor came with a "new cap and rotor from NAPA" according to the guy who sold it to me, but, well...people are ******* schiesters. Don't trust them. I went across the street to Advance, and bought new NGK cap, rotor, and wires, as well as 3 sets of NGK V power plugs. Why 3 sets? Because tuners like having extra plugs, so I'll bring them with me to break-in and tune. Tested the distributor components (passed with flying colors), and installed the new components. Cylinder 2 still dead. Could I have tested the old hardware before replacing it? Yes, but considering the time, effort, and money I've put into this motor, I think it deserves a brand new ignition system to go along with the brand new every-*******-thing else.
Next step, compression test. Yes, it's a brand new motor with a slightly-higher-than-stock CR, but I didn't expect amazing numbers, simply because I haven't sat the rings yet.
Cyl 1: 170 PSI
Cyl 2: 75 PSI
Cyl 3: 170 PSI
Cyl 4: 170 PSI
Well, that explains it then. Followed up with a wet test on cyl 2, and gained as near as makes no difference nothing, so it isn't a ring problem. Either my valves aren't seating properly, or I have a head gasket issue. Unfortunately, I don't have an air compressor handy to do a leakdown test, but thankfully, I think we still have an old one at work. It loves to pop breakers, and can only put out 150 PSI, but it'll work for our purposes. I'll just have to buy/borrow/rent a set of pressure gauges for it, and see where the air is going.
As they say, one step forward, two steps back. If anyone else has any ideas as to what I should look at for the low compression in cyl 2, I'm all ears.
Out with the old...
And in with the new!
One minor problem, though. The B series manifold and exhaust pipe bolts are at a different angle than the D series manifold and exhaust pipe bolts. Why Honda decided to do this is completely beyond me, but oh well. After the engine is running properly, and after it's been tuned, I'll drive to an exhaust shop and have them cut and weld the flange. This was fully expected - it's just another step in the process of a B swap.
They don't line up
Now, after doing all of this work, I decided to try starting my car and seeing if I was just imagining things. Nope, I have a dead cylinder. Specifically, cylinder 2. After ~30 seconds of running, I cut the engine, and used the thermometer probe that came with my voltmeter on my runners. I don't remember the exact numbers, but runners 1, 3, and 4 were considerably hotter than runner 2. Houston, we have a dead cylinder.
The plugs and wires were given to me by the friend that gave me the motor. He took good care of his stuff, but I had no real way of knowing how old they were, so I replaced them. Also, the distributor came with a "new cap and rotor from NAPA" according to the guy who sold it to me, but, well...people are ******* schiesters. Don't trust them. I went across the street to Advance, and bought new NGK cap, rotor, and wires, as well as 3 sets of NGK V power plugs. Why 3 sets? Because tuners like having extra plugs, so I'll bring them with me to break-in and tune. Tested the distributor components (passed with flying colors), and installed the new components. Cylinder 2 still dead. Could I have tested the old hardware before replacing it? Yes, but considering the time, effort, and money I've put into this motor, I think it deserves a brand new ignition system to go along with the brand new every-*******-thing else.
Next step, compression test. Yes, it's a brand new motor with a slightly-higher-than-stock CR, but I didn't expect amazing numbers, simply because I haven't sat the rings yet.
Cyl 1: 170 PSI
Cyl 2: 75 PSI
Cyl 3: 170 PSI
Cyl 4: 170 PSI
Well, that explains it then. Followed up with a wet test on cyl 2, and gained as near as makes no difference nothing, so it isn't a ring problem. Either my valves aren't seating properly, or I have a head gasket issue. Unfortunately, I don't have an air compressor handy to do a leakdown test, but thankfully, I think we still have an old one at work. It loves to pop breakers, and can only put out 150 PSI, but it'll work for our purposes. I'll just have to buy/borrow/rent a set of pressure gauges for it, and see where the air is going.
As they say, one step forward, two steps back. If anyone else has any ideas as to what I should look at for the low compression in cyl 2, I'm all ears.
05-17-2015, 07:36 PM
#454
Seriously. I'm ready to rip it down the street. The plugs came out slightly oily (expected, once again, because fresh rebuild and rings not broken in yet), but other than #2, they smelled and looked good, so it's definitely good to go, aside from the one low cylinder. Unfortunately, regardless of what a leakdown tells me, I have a feeling the head will be coming off. I just hope it's something that can be solved with a trip to a machine shop with the head, rather than a complete tear down. If it takes a complete tear down...**** it, I'm going to buy a complete engine locally, swap that one in, and drop this ****** off at a builder, let them deal with it.
05-22-2015, 06:21 PM
#455
Leakdown test DIY time? Leakdown test DIY time! (Well, kind of).
First off, let me preface by saying that this is not a proper leakdown test. A proper leakdown test involves using a special gauge set (a leakdown gauge), which will tell you the % of compression being lost. I don't actually care about the % being lost, I only care about where it's going, so I didn't spend the money (or time waiting) on the gauge set. If you need to do a full, proper leakdown test, you can already find a complete DIY here. Summit sells a nice leakdown gauge, $75, found here.
Now then, let's see where this pressure is going!
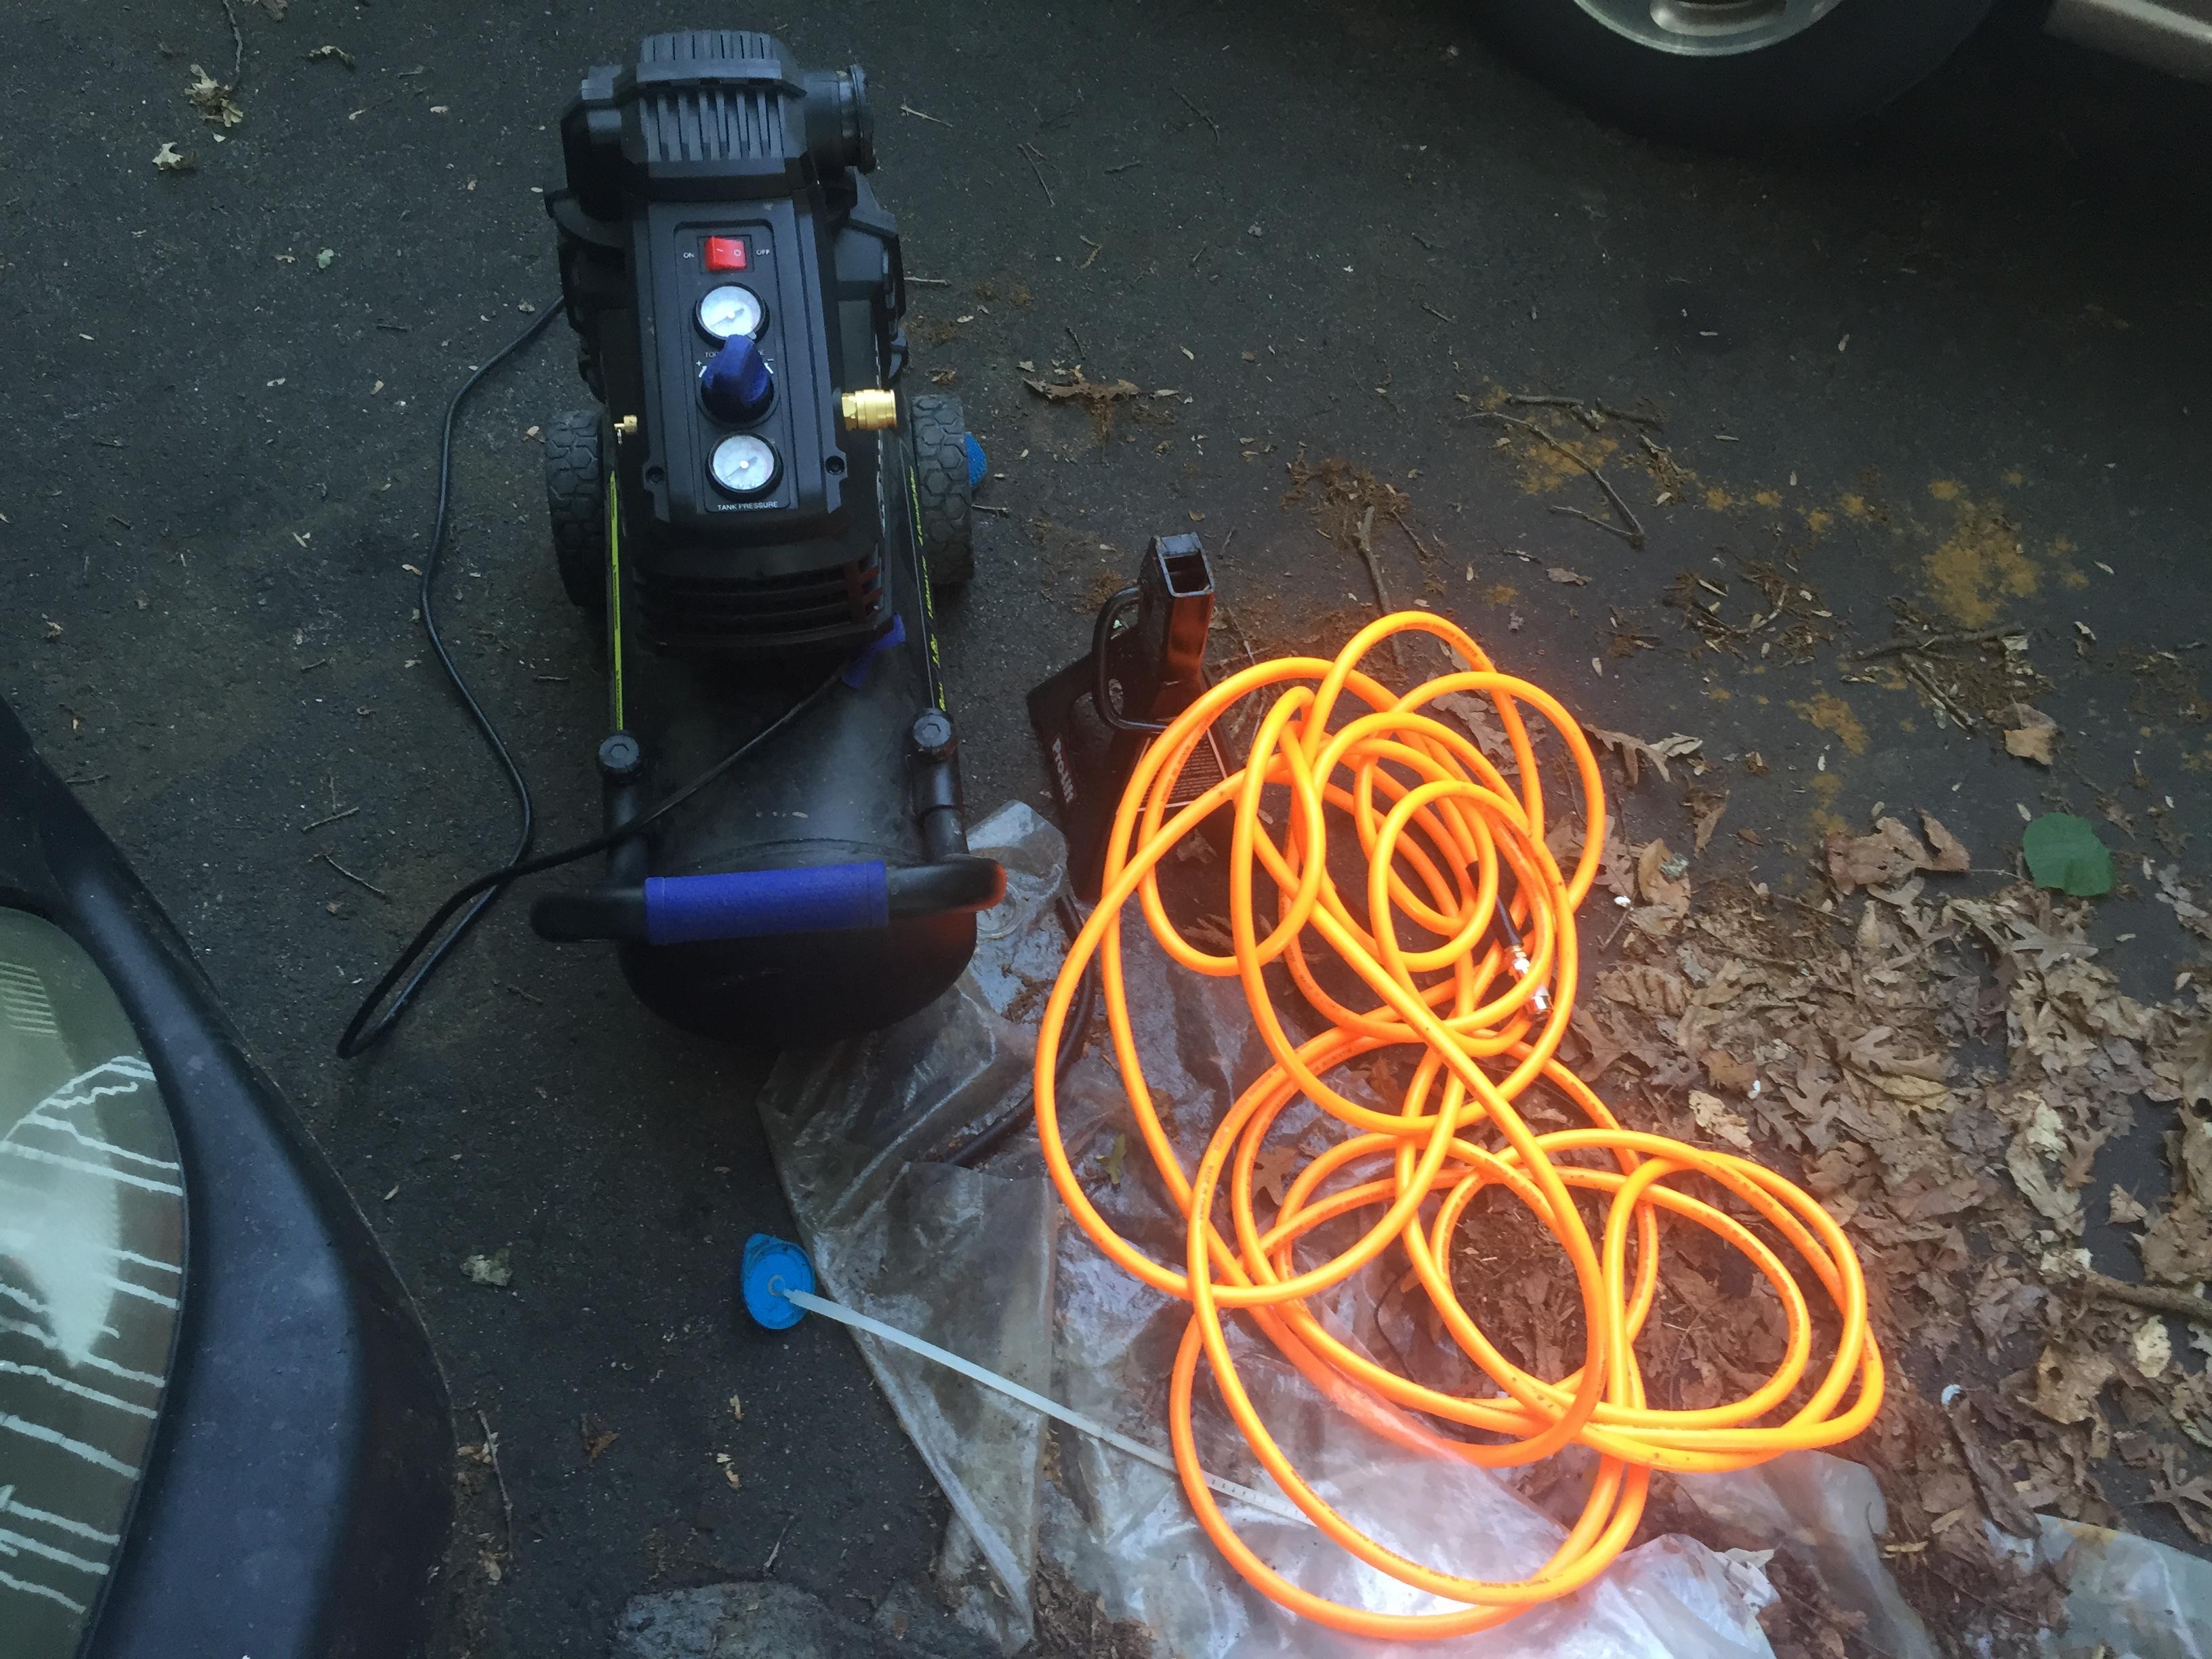
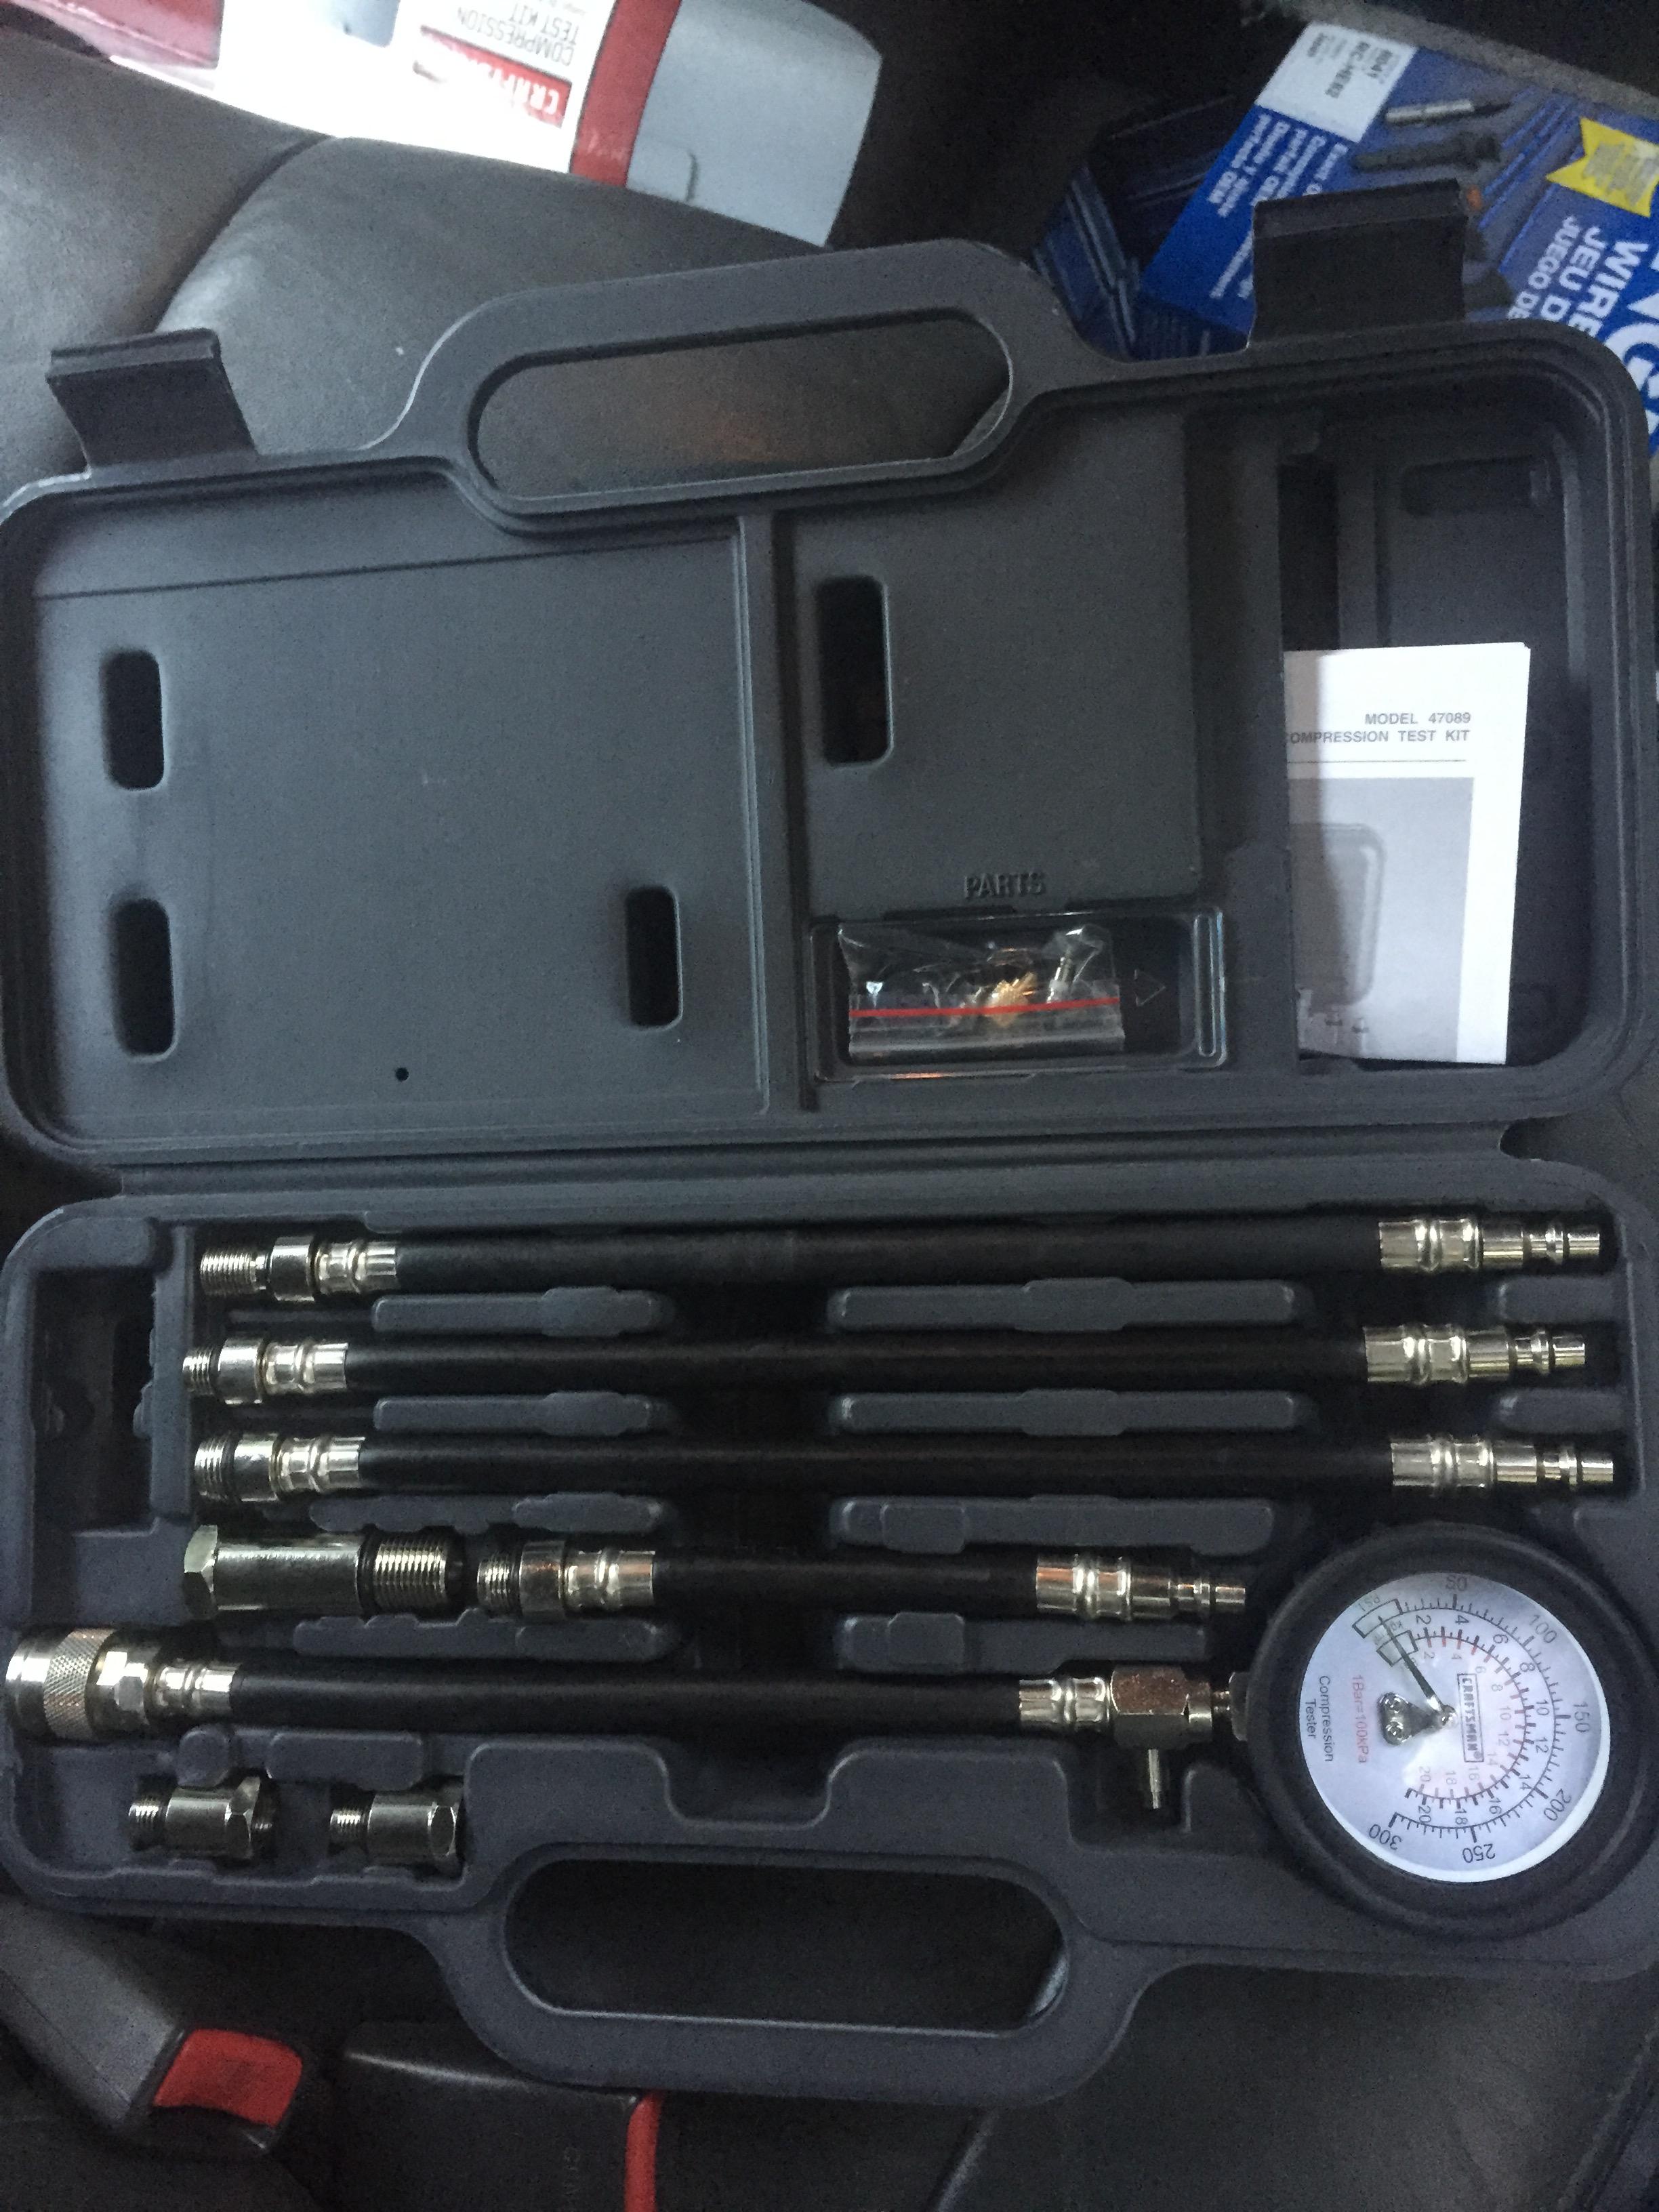
First, you need an air compressor. I borrowed one from work. This is one of those tools that everyone should at least have access to. If you don't own one, find a friend who does. If you don't have a friend who does, you can get a smallish one from Lowes for a reasonable price (they have a Porter Cable compressor for $99). As long as it can push 100 PSI, you're good. You'll also need something that allows you to hook the air compressor up to the motor. If you're using a leakdown gauge, that should already be included. If not, a good compression tester kit will have exactly what you need. I have a basic Craftsman kit, which includes the detachable hose, and all of the other fun little bits and pieces you need.
Kobalt air compressor, 150 PSI max, along with plenty of extra hose
Craftsman compression tester kit. Note the small compartment of parts, you'll need that later
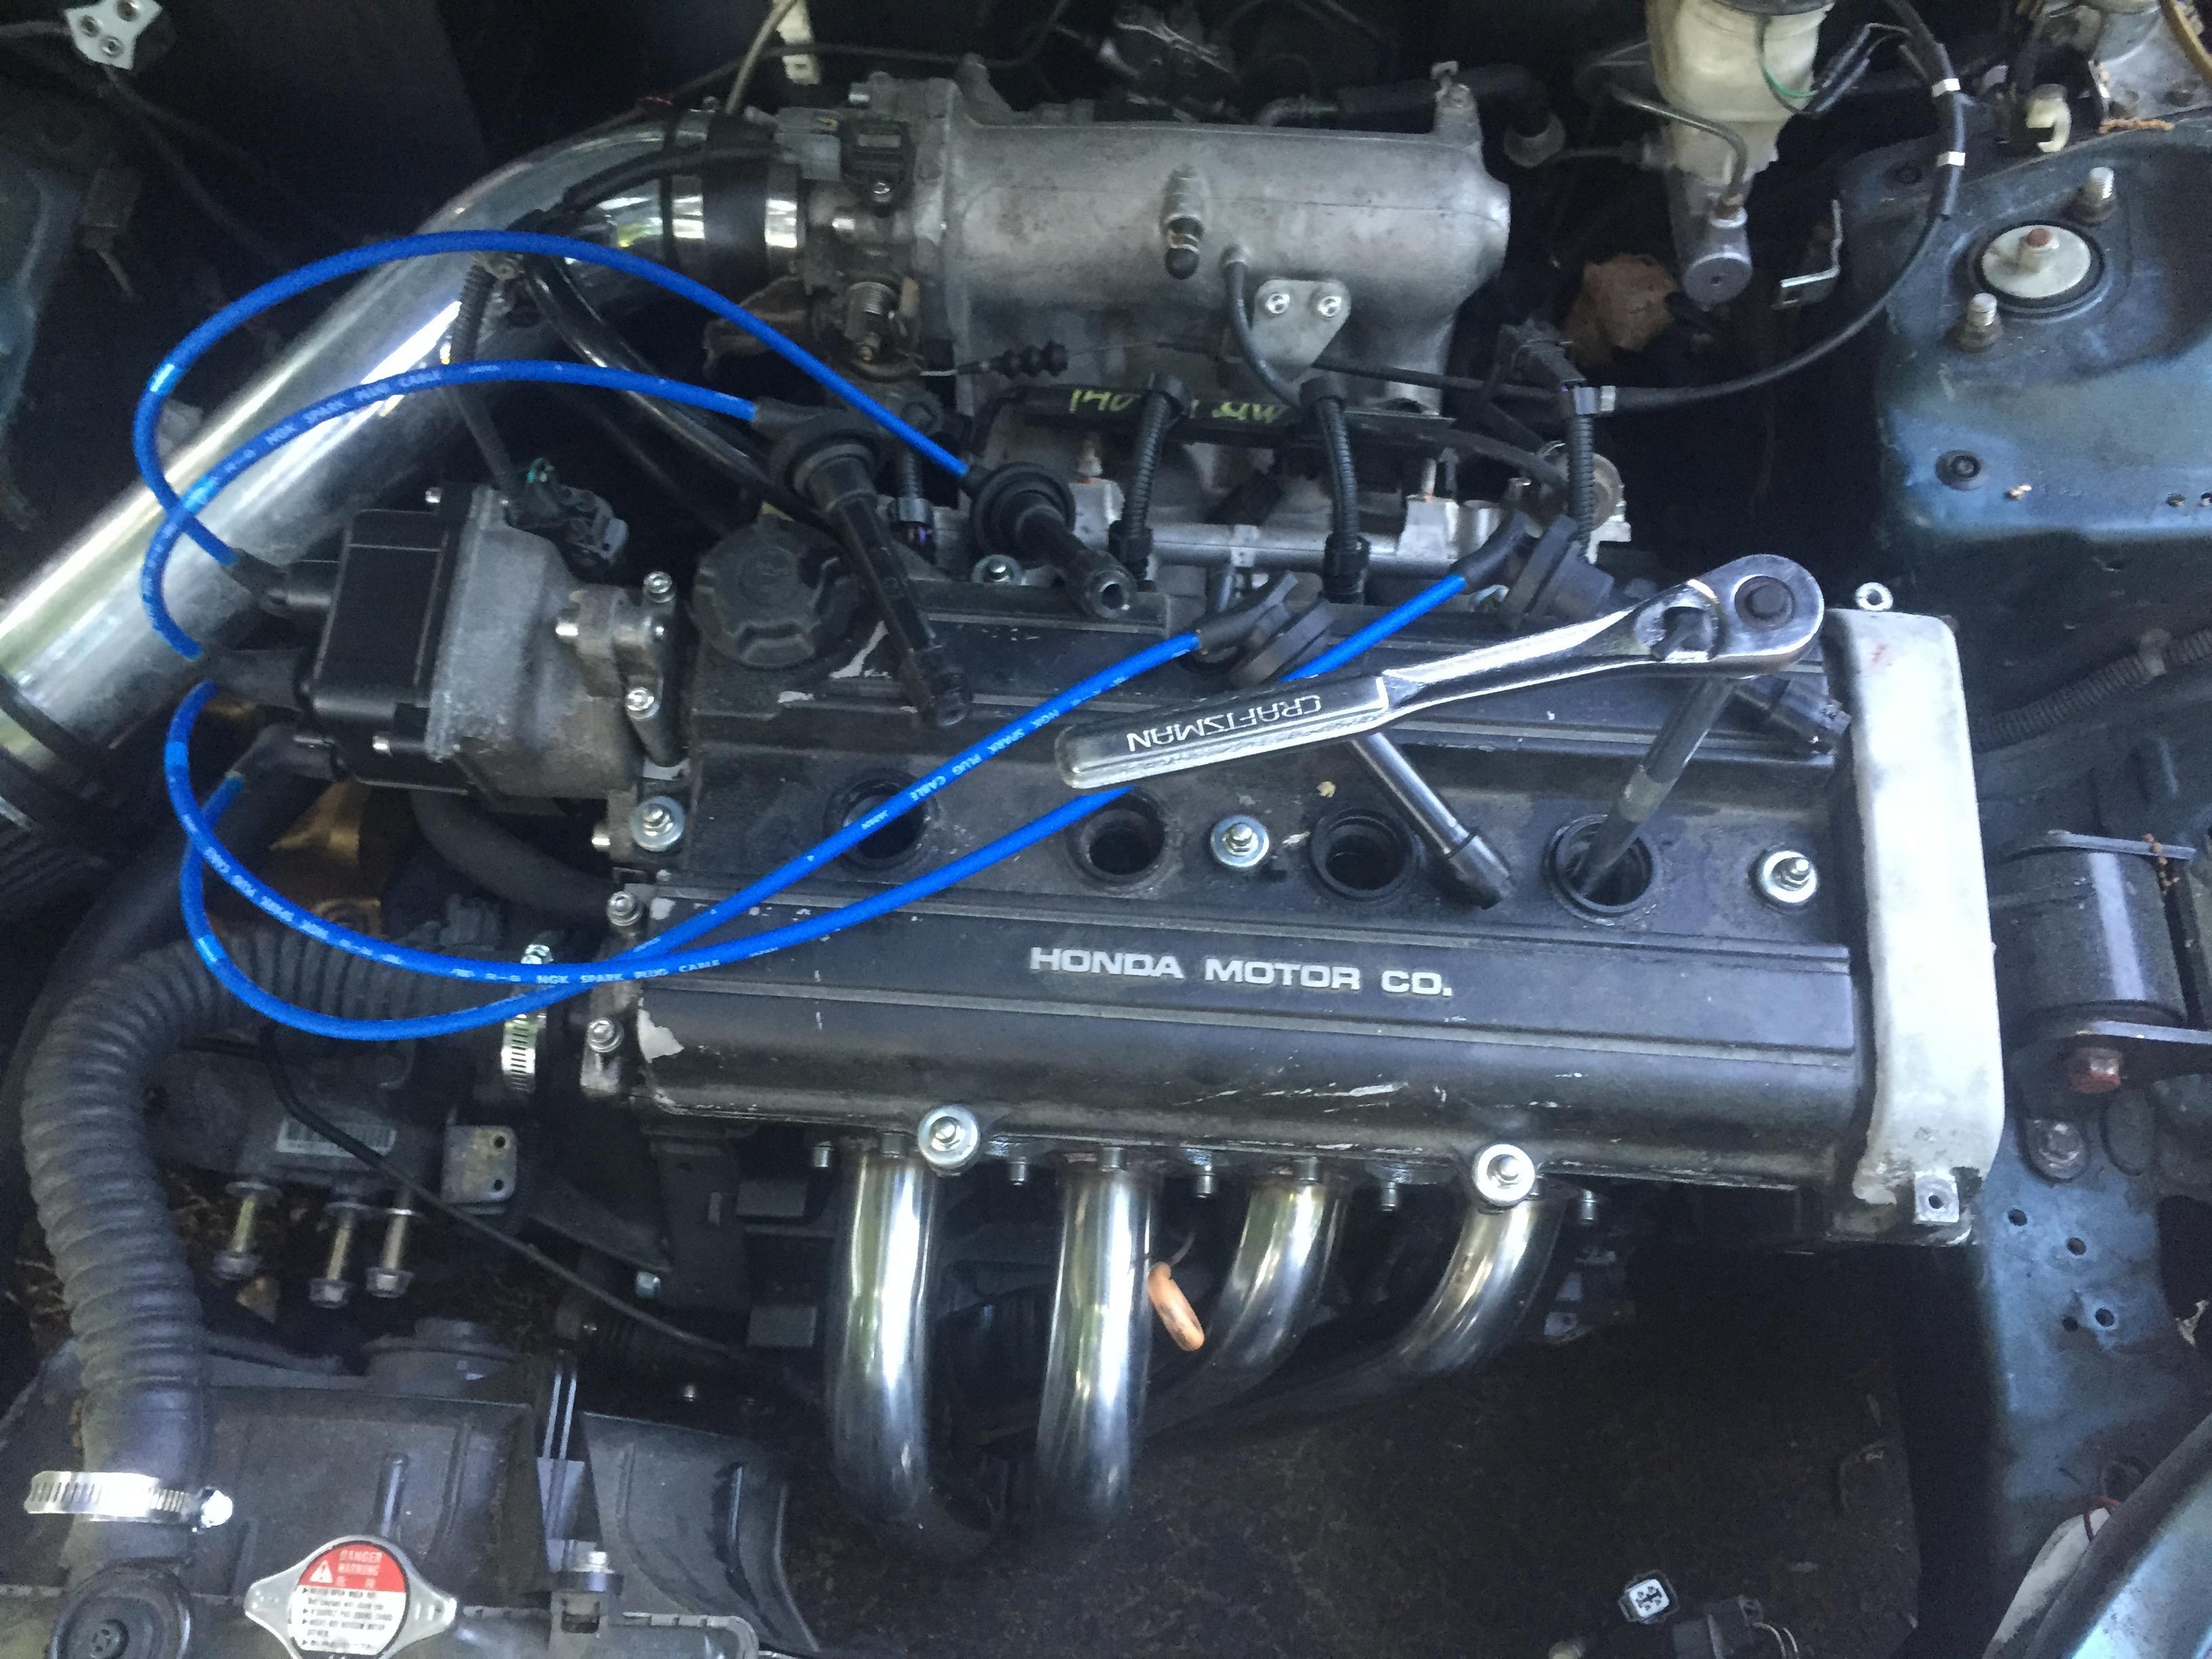
Now, just like doing a compression test, we need to remove all of the spark plugs. Simple enough job. Also, if you have awesome NGK spark plug wires, they already have a little number on them for each cylinder, so you don't have to try to remember what goes where.
Removing the plugs and wires
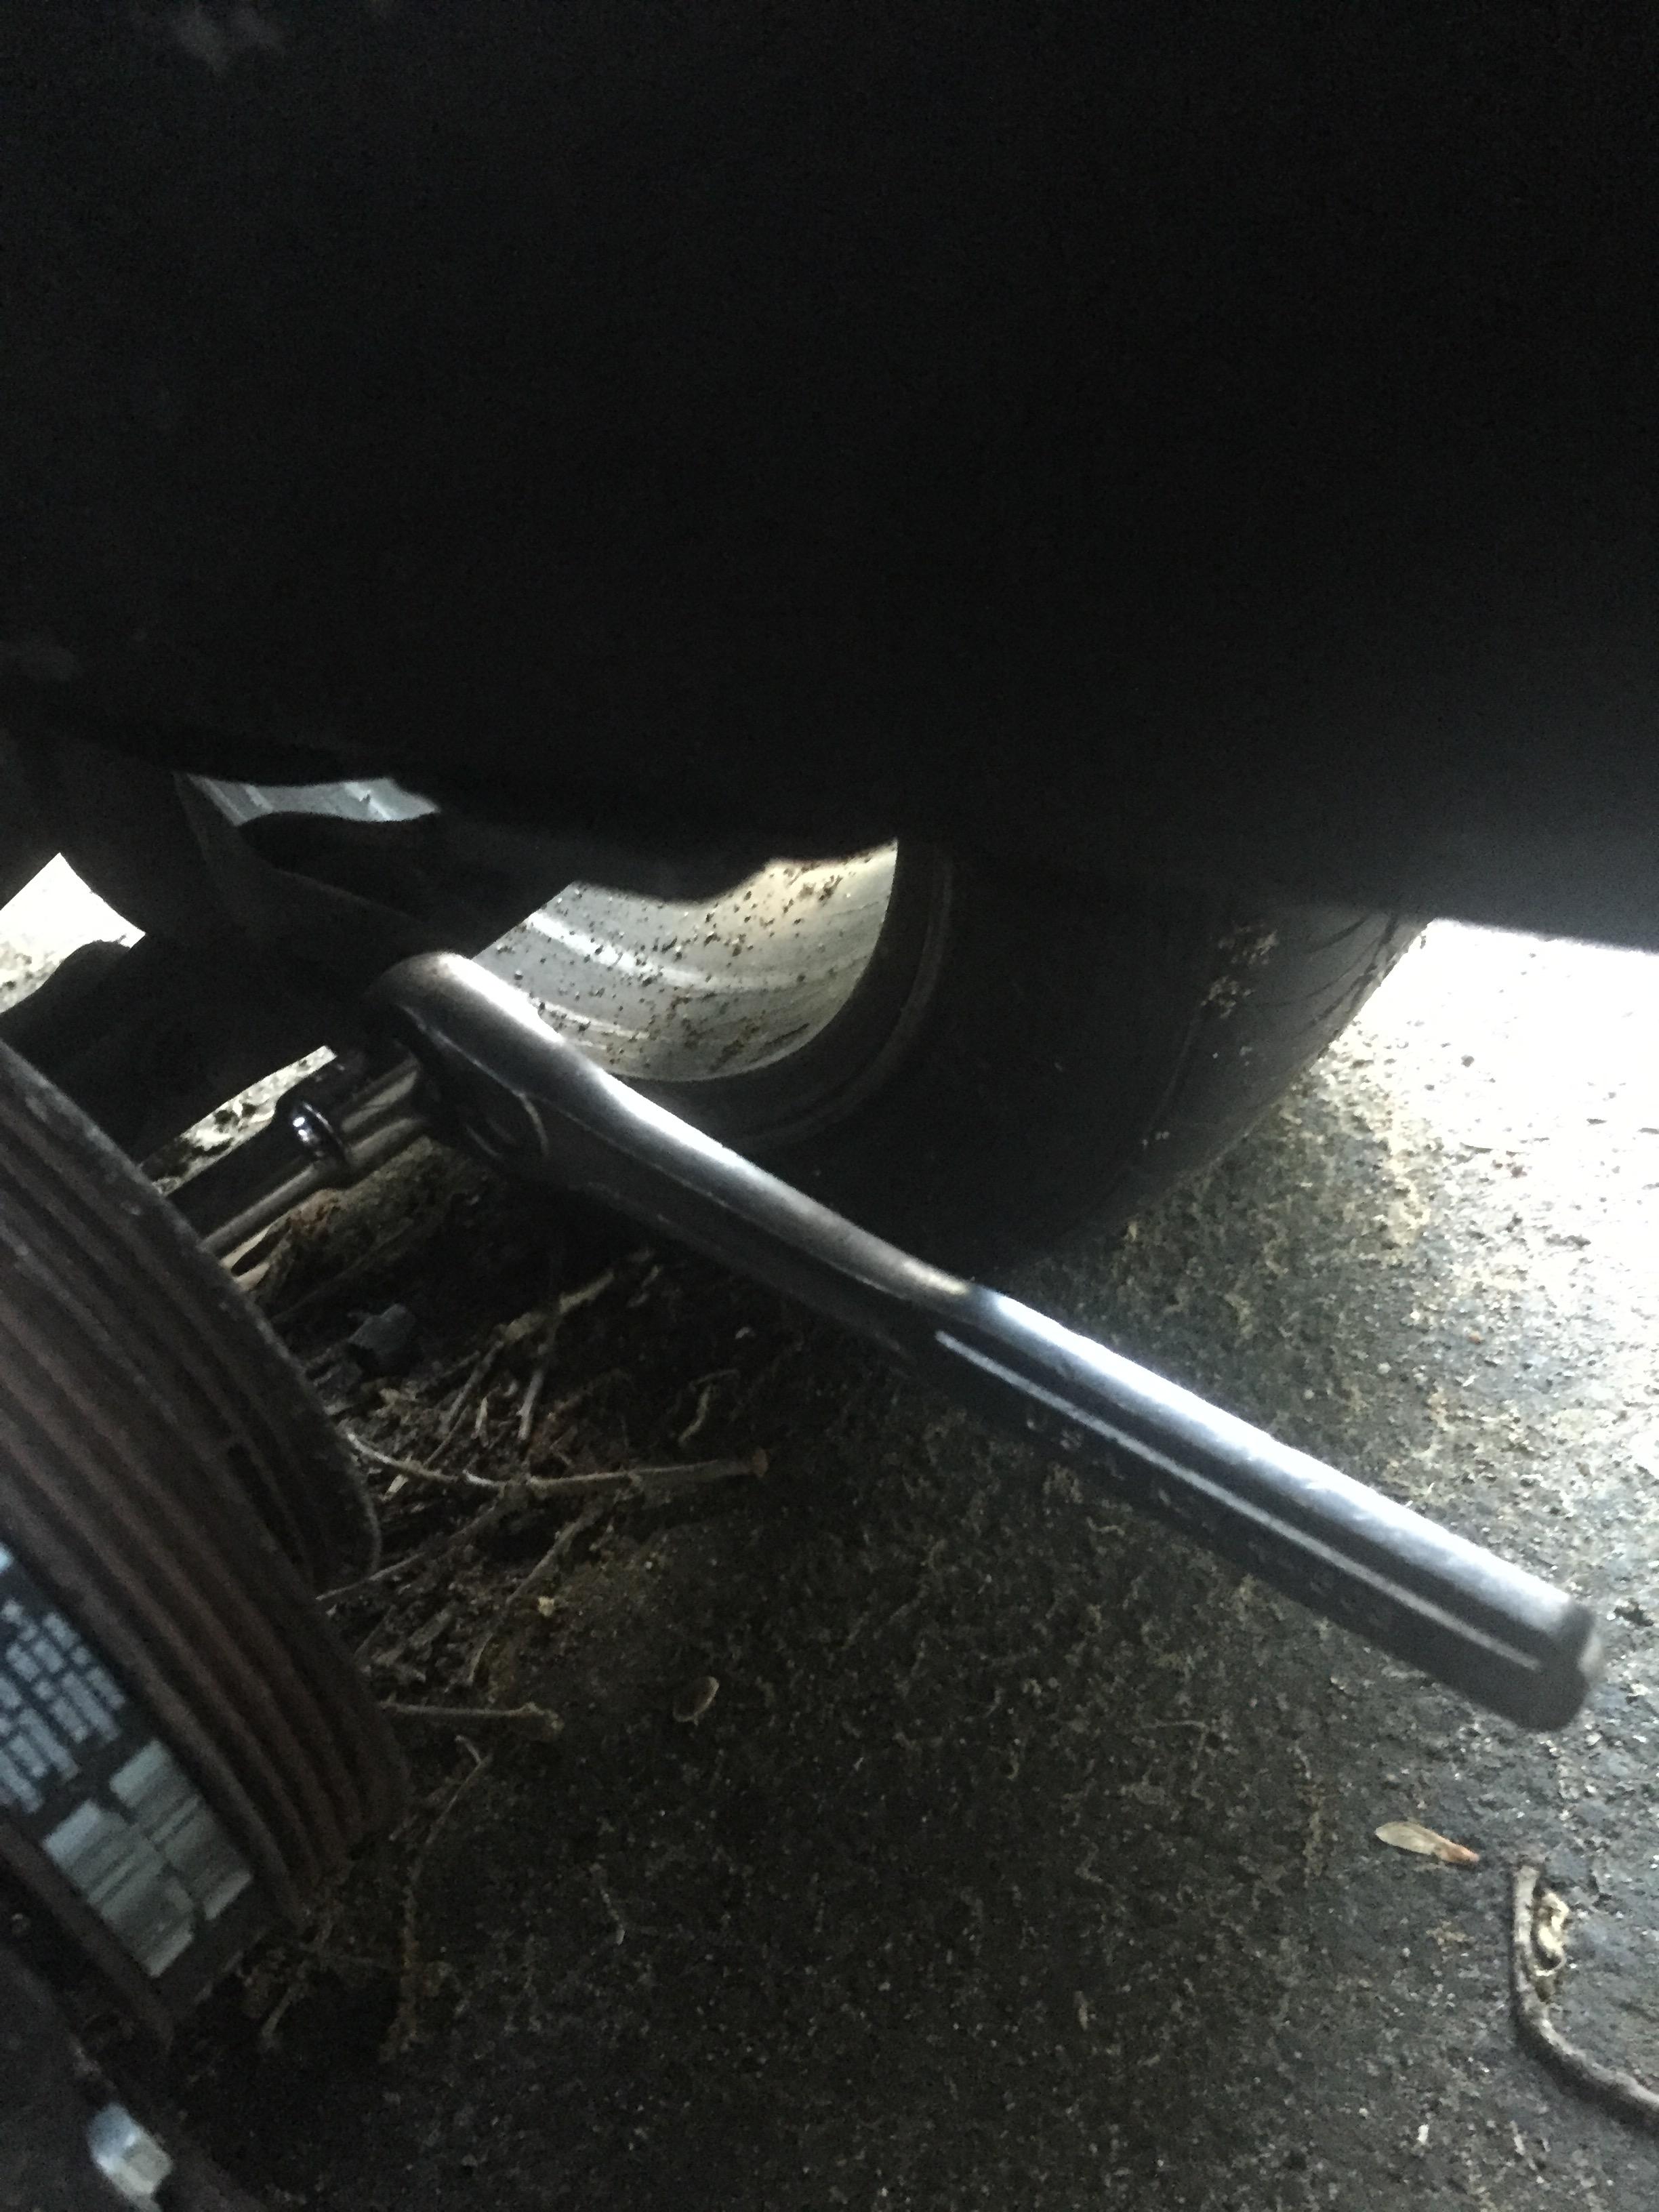
The next important step is making sure your engine is at TDC for the cylinder you are testing. If you're testing multiple cylinders, you'll need to set cylinder TDC between each test. Since I'm only doing Cyl 2, I went ahead and set it to Cyl 2 TDC. I believe the OEM crank bolt is a 6 point 19mm, but since I have an ARP crank bolt, it's a 12 point 19mm. 12 point socket, 2" extension, and ratchet. Spin the engine until at TDC. For cyl 2, that means the "UP" arrows on the cam gears should both be pointing to the right.
Turning the engine
Cam gear UP arrows pointed to the right
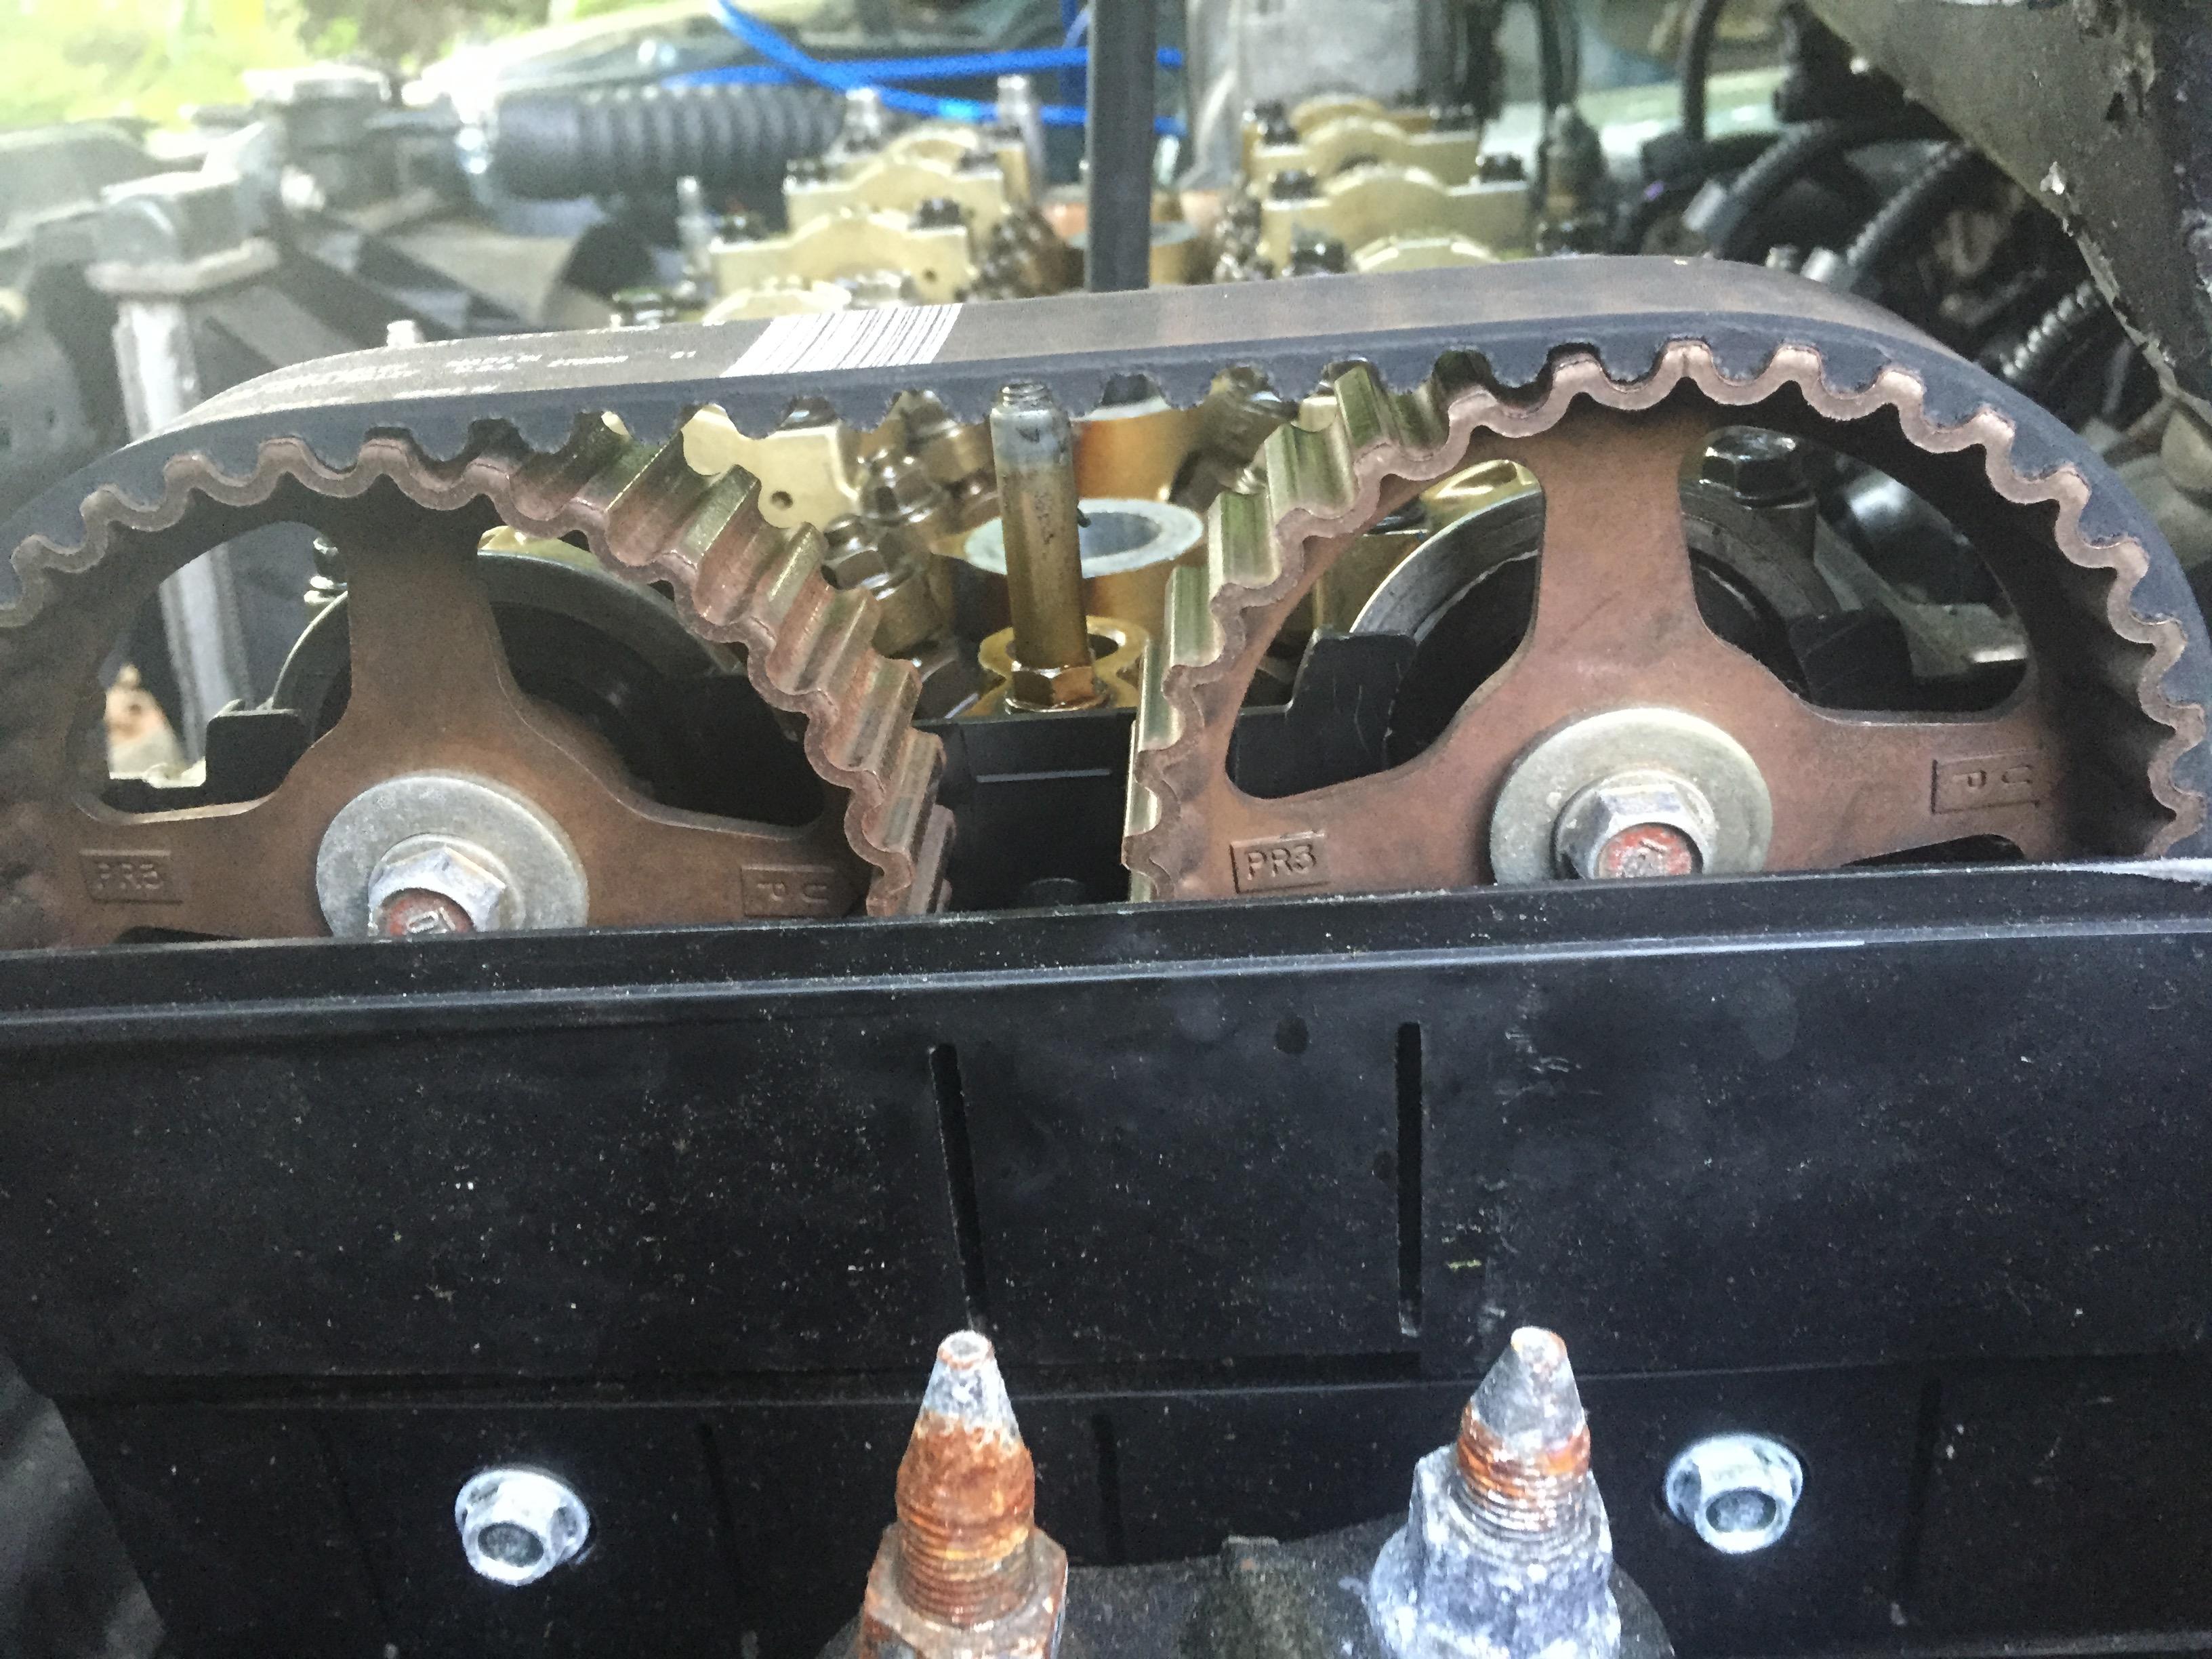
One thing I noticed while doing this, after running my engine, it appears that one of my cams is off a tooth. Since it's a problem with one specific cylinder, and not all four, that's not the cause of my problems, but I will come back and fix that later.
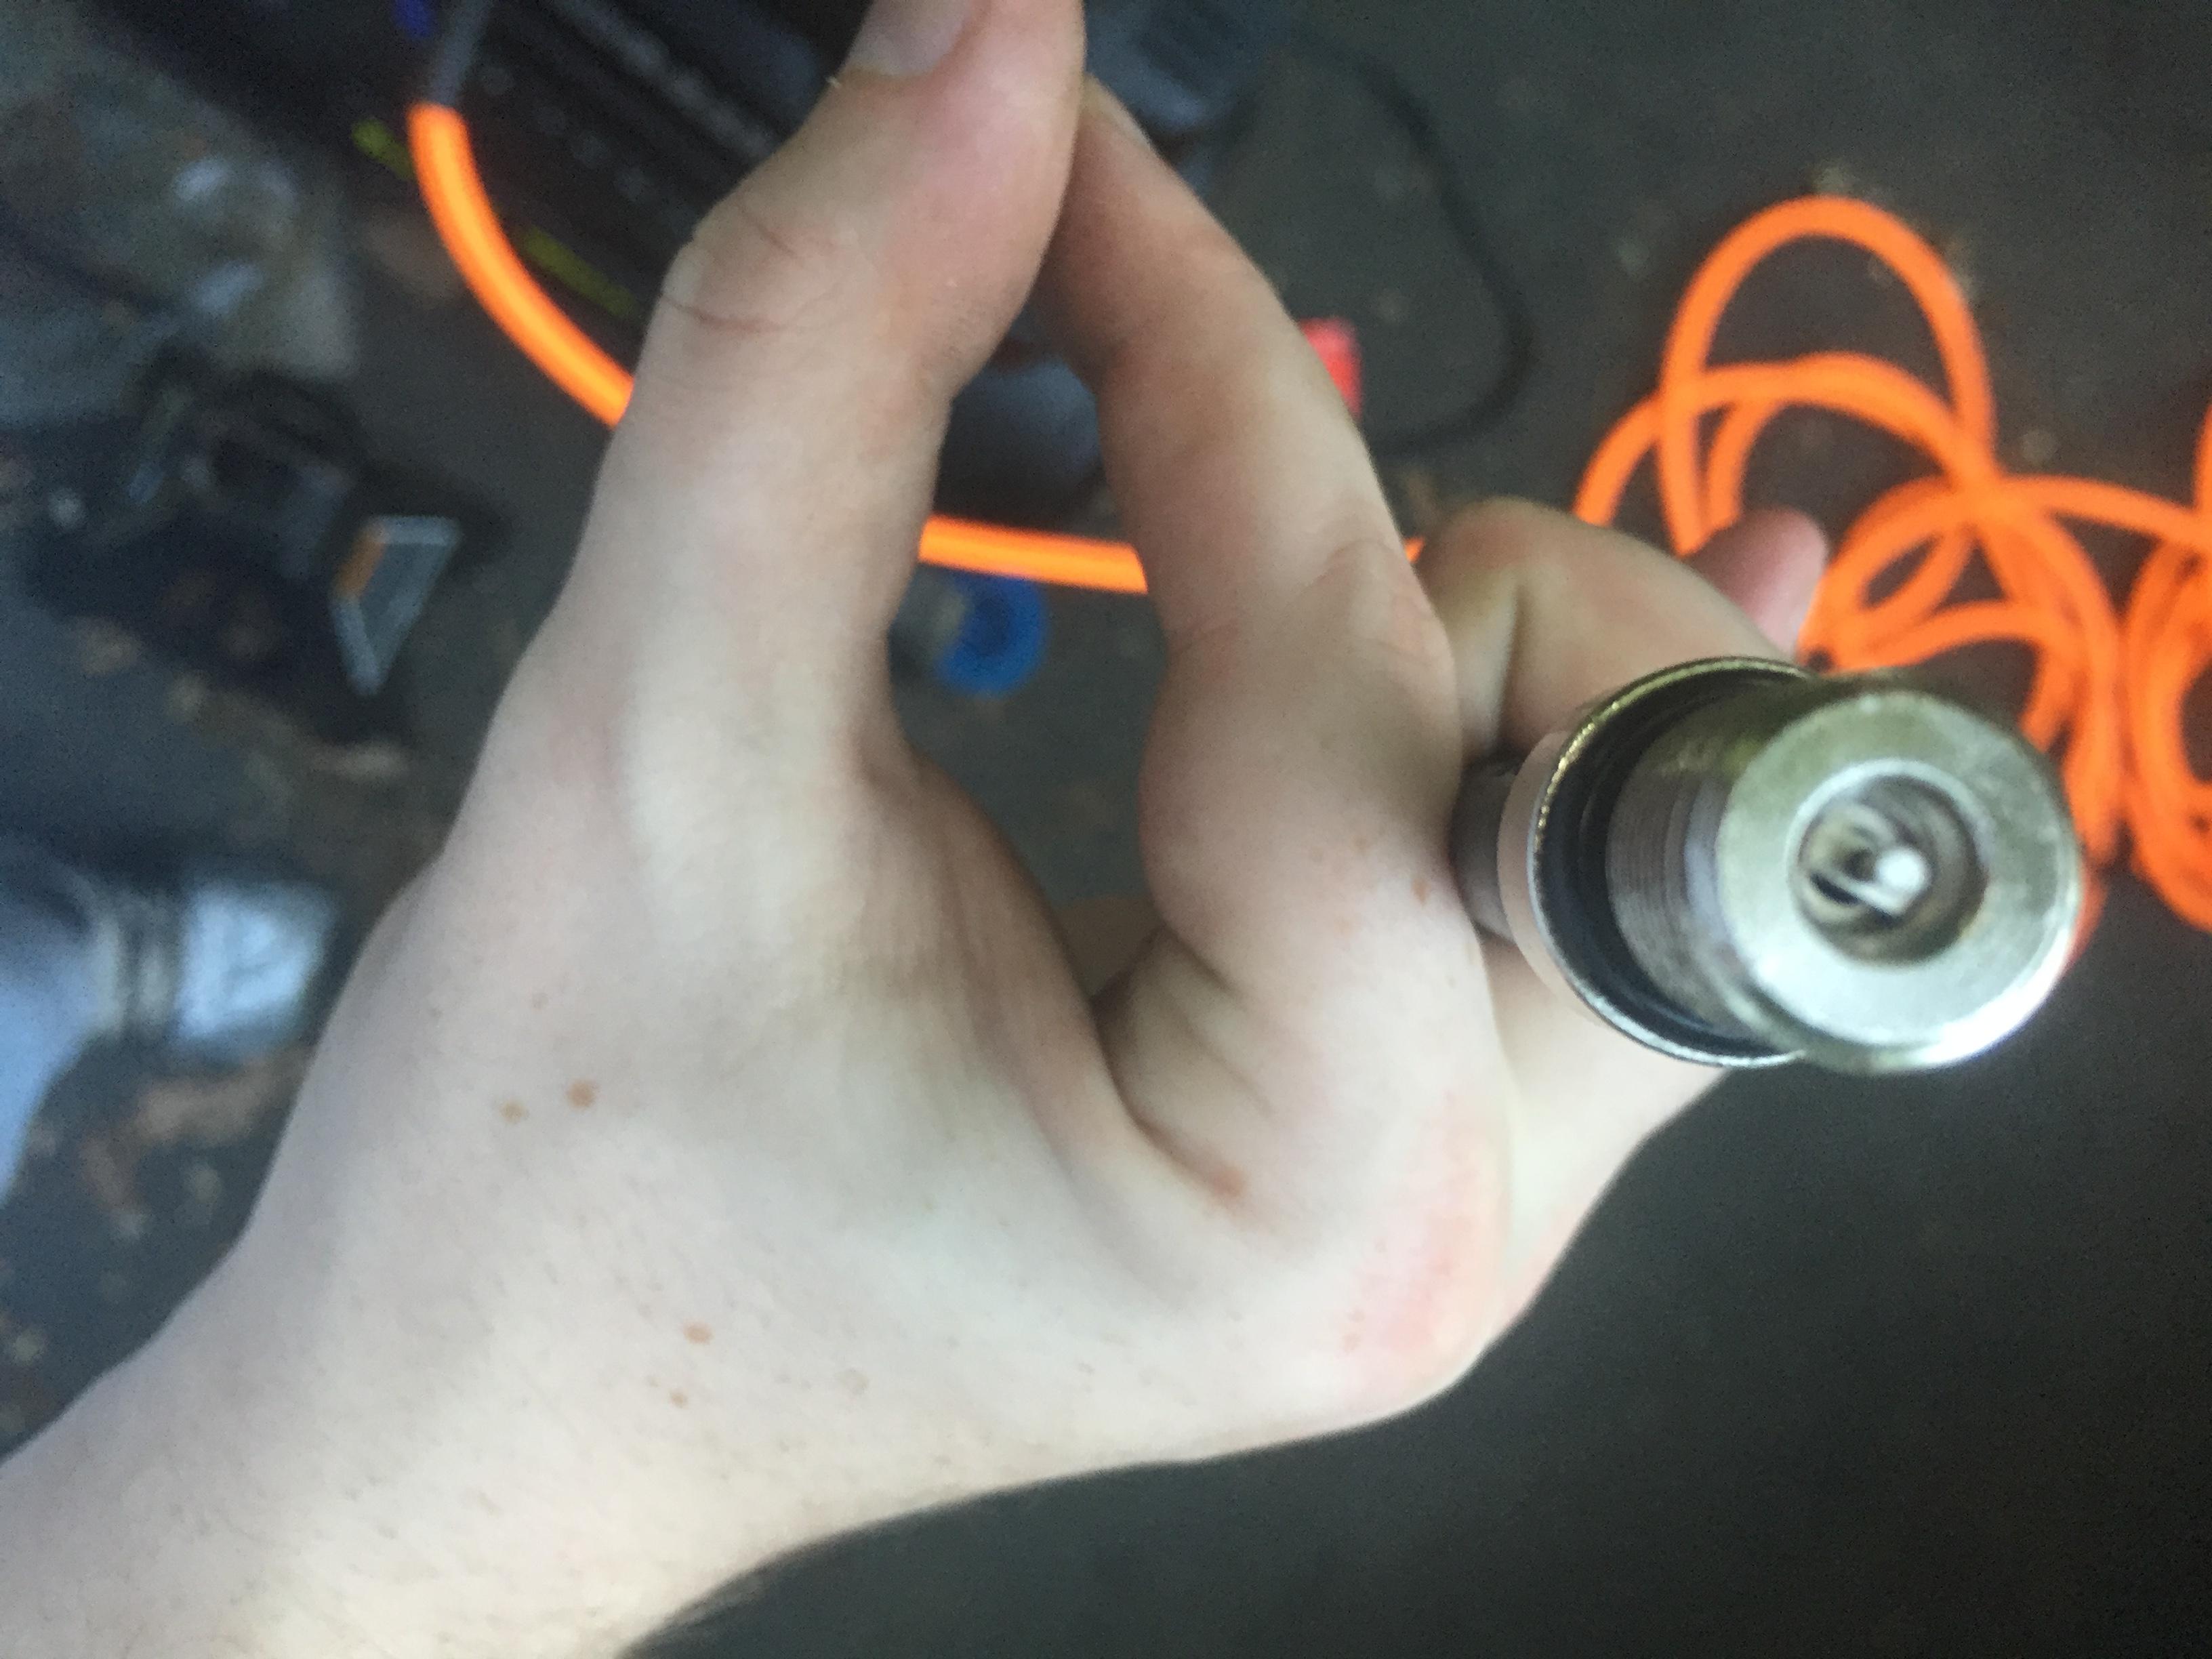
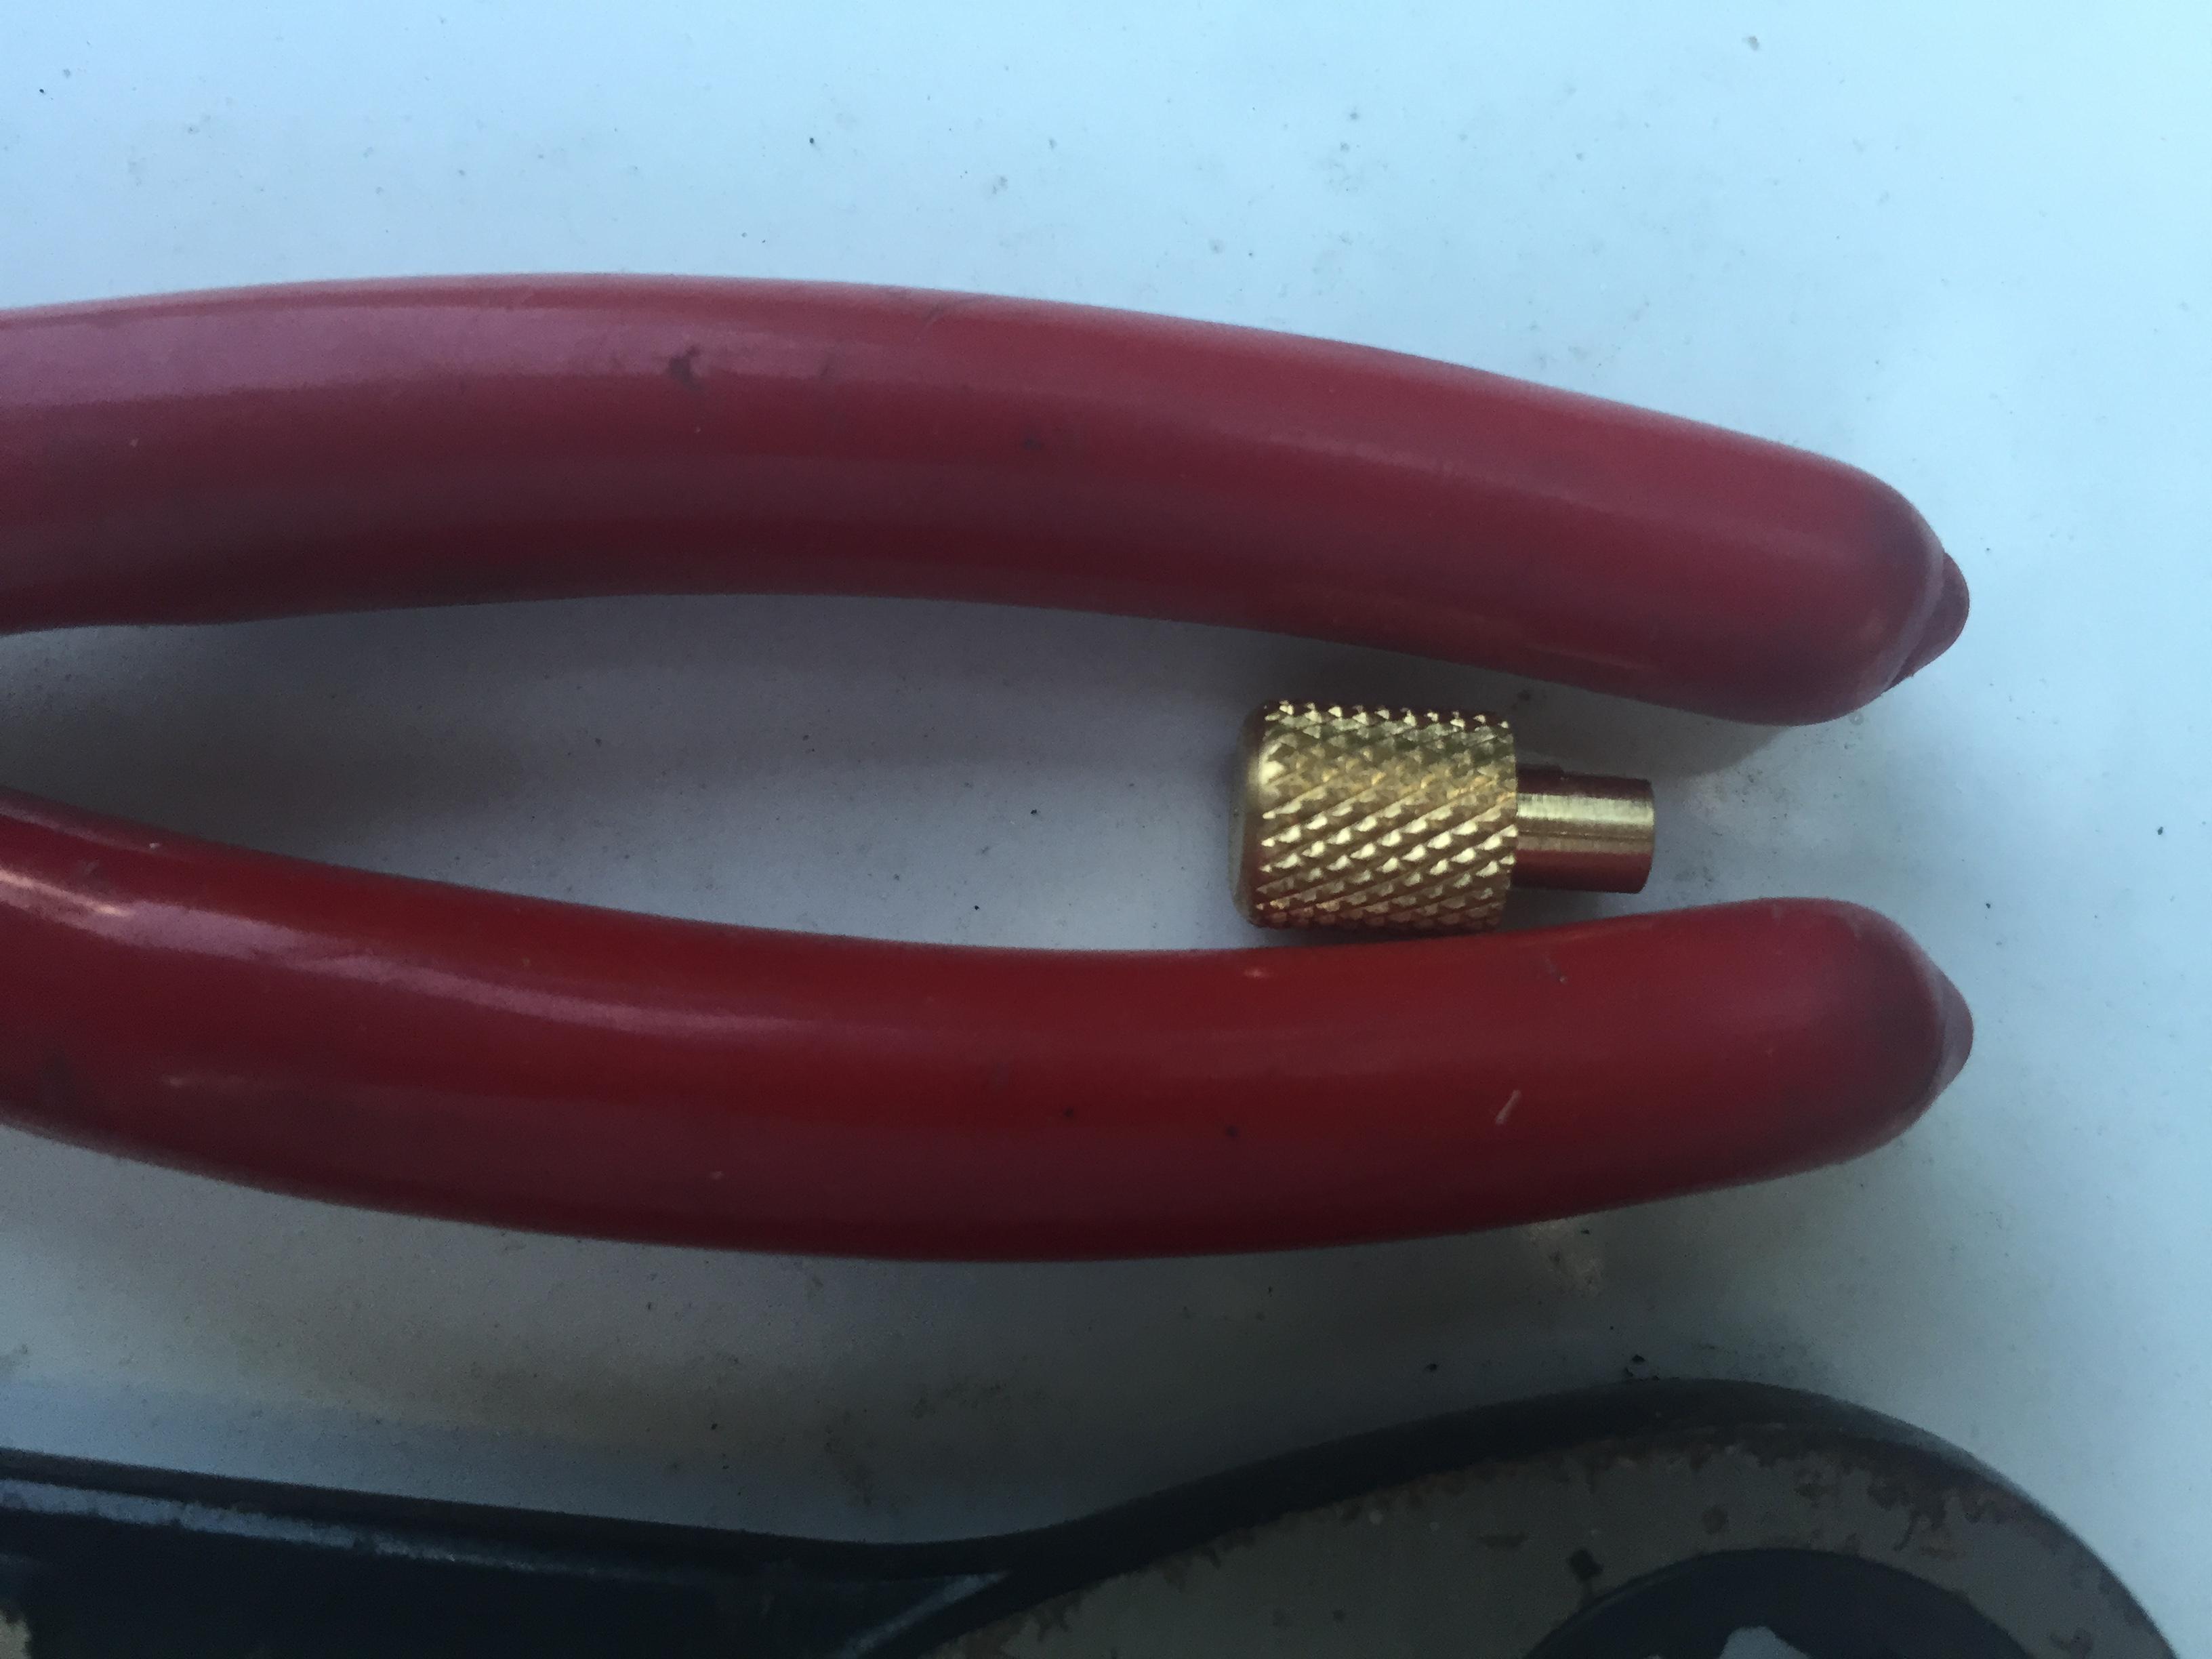
Now comes the fun part. The compression tester is made to hold the pressure in the line, so you can see it on the gauge. For this test, though, we need to force air OUT of the line. To prevent this from happening, the hose has a small bleeder nipple on it, just like a valve stem would. We have to remove that. Remember when I said the small thing of extra stuff included with the compression tester would be needed? Well, we're at that part now. There's a small brass thing, looks like a reverse screw driver. It's called a valve stem seal remover. Use that to remove the bleeder nipple from inside the line.
Bleeder nipple, all up in our way and ****. Yes, I failed at focusing on it.
Valve stem seal removal tool. It's a tiny ******. Don't lose it!
Now that we have that done, screw the hose down into the cylinder just like you would for a compression test. Since we won't actually be cranking the motor, you don't need to remove any fuses.
Hose inserted, screwed in
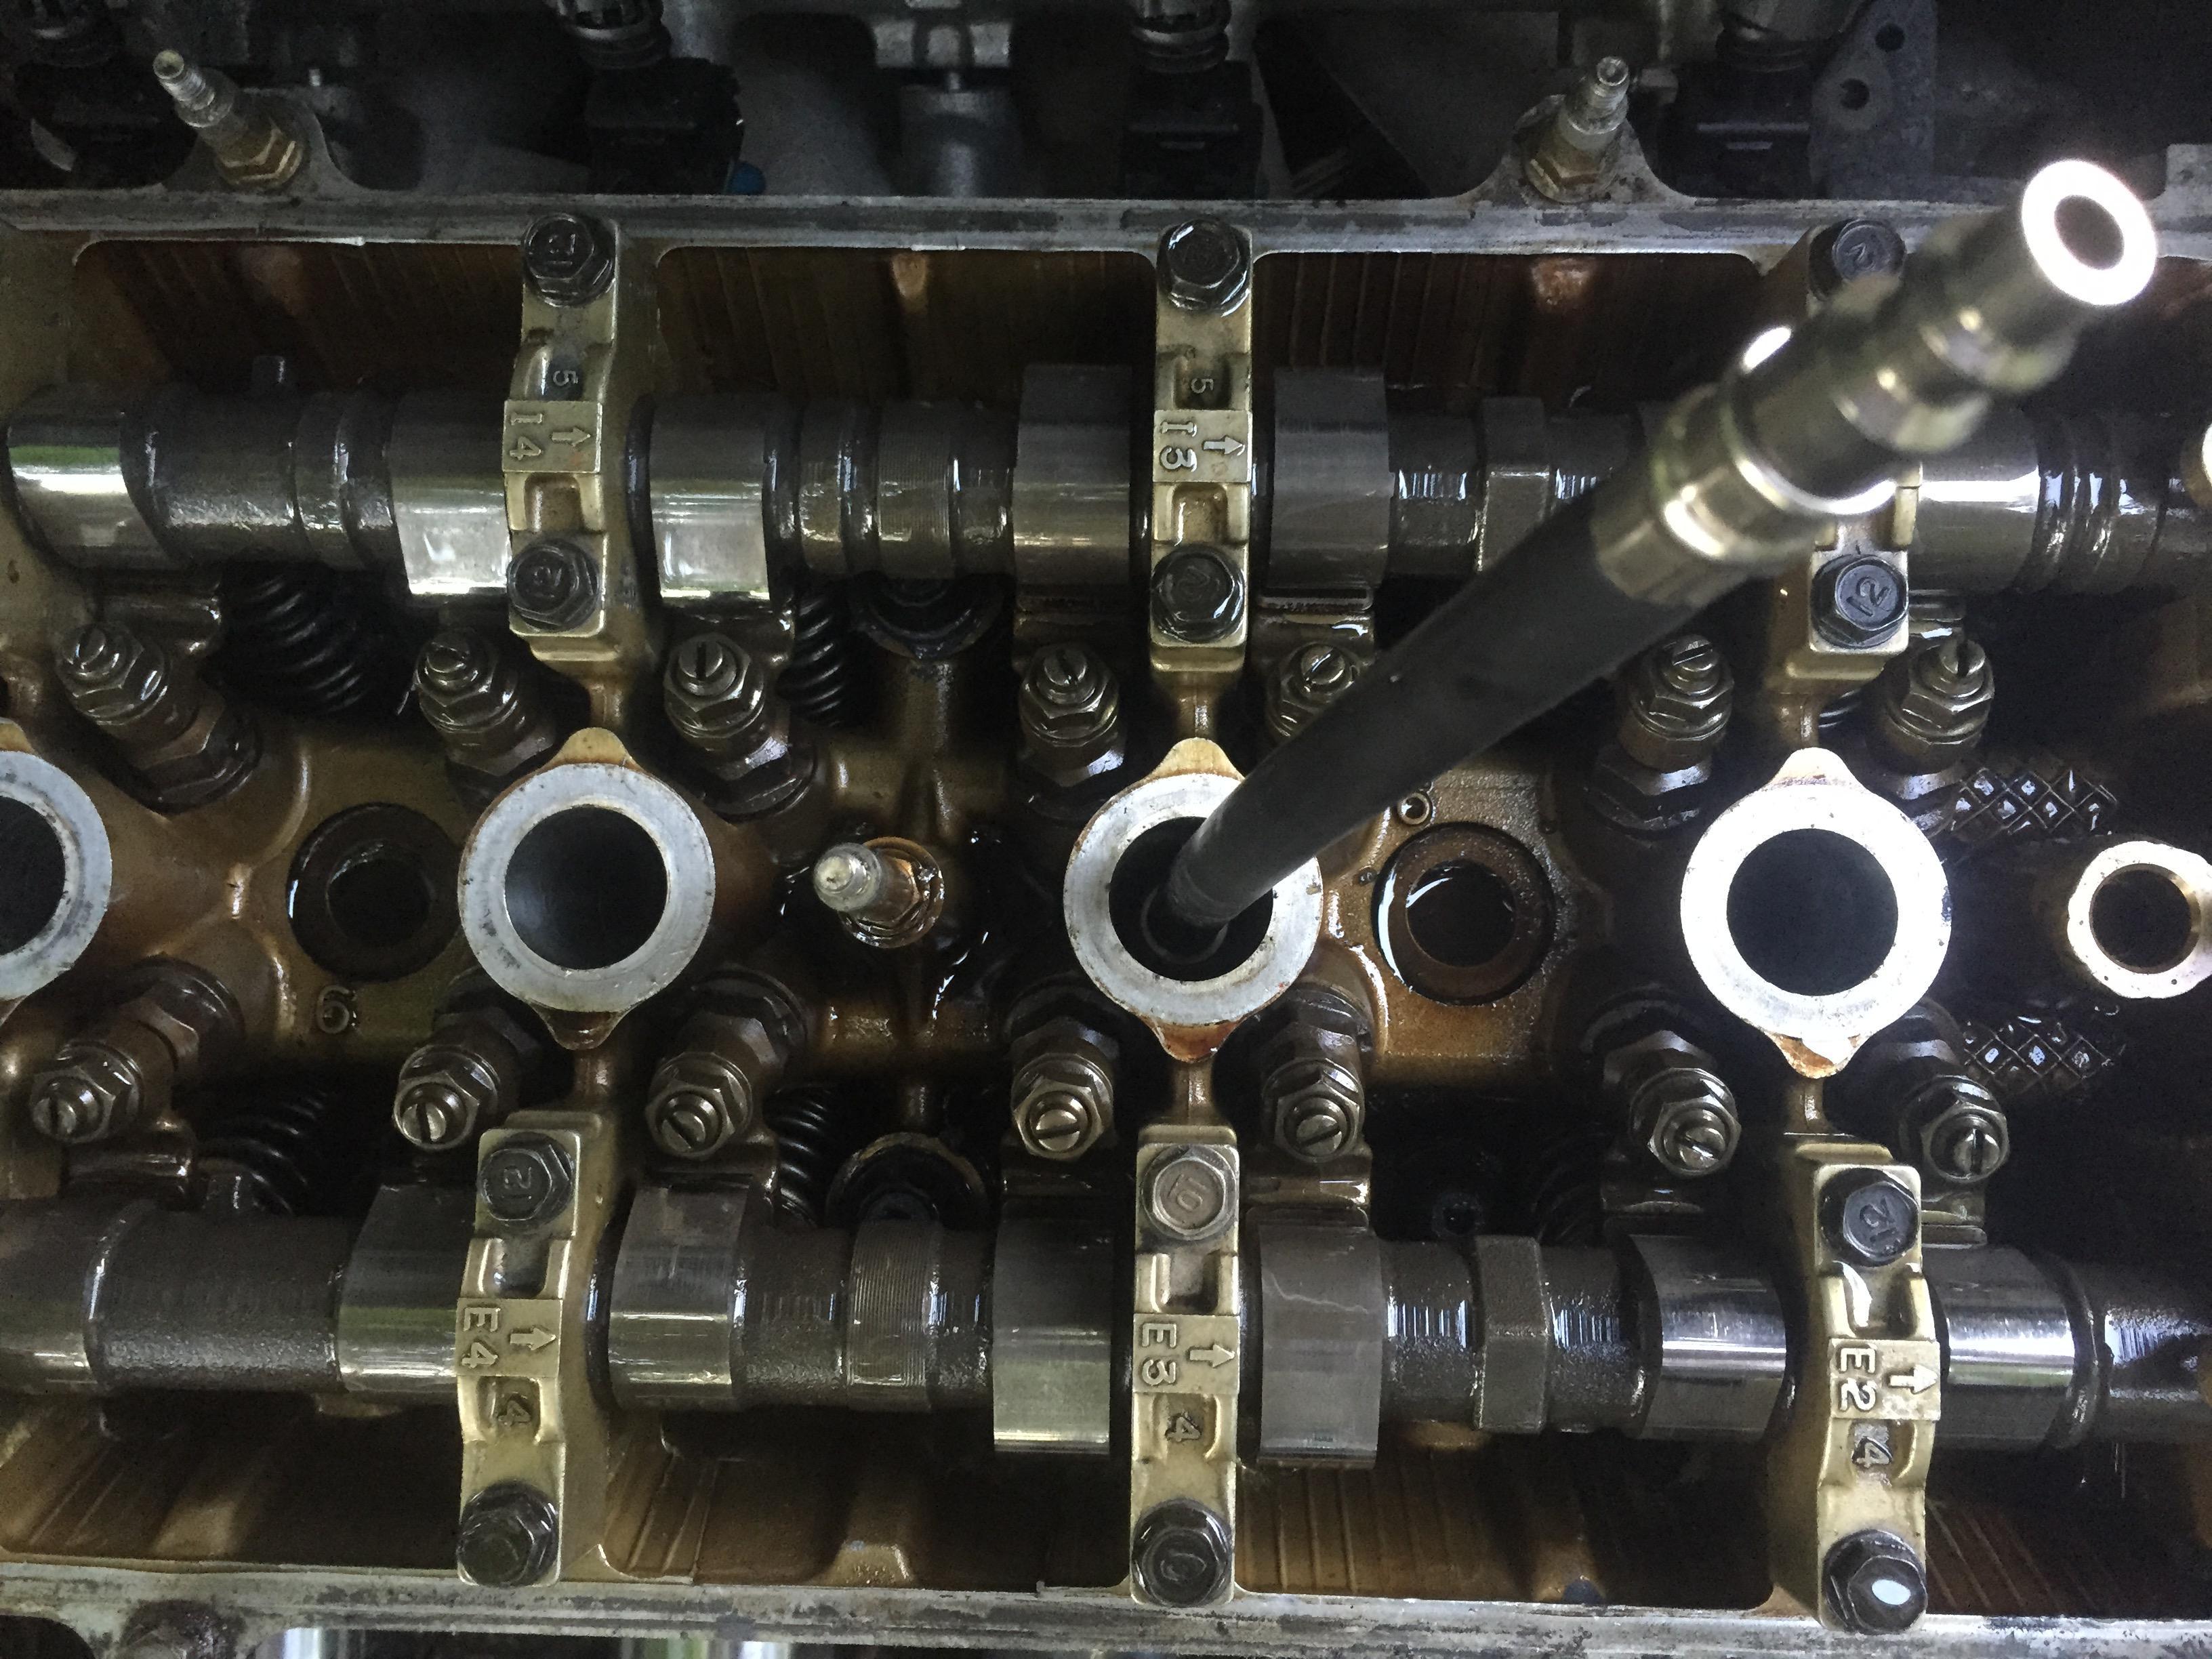
Now attach your air compressor line to it, and turn that sucker on. Let it get up to at least 50 PSI, then turn it off and listen closely. Try to pinpoint where the air is escaping. Use your hands. Use your ears. Use a leaf, if that's what gets you there. There will be a sound of air coming out from somewhere, and depending on where it's coming from, you might even be able to feel it. If you can't hear or feel it, turn the pressure up and keep trying. If it's leaking from your head gasket, you'll feel it coming out of another spark plug hole. If it's leaking from an intake valve, you'll hear it going through the intake, and feel it coming out of the throttle body. If it's coming out of an exhaust valve, you'll hear it, and if you remove your manifold, you'll feel it there, too. If it's going past your rings, you'll feel it through your dipstick tube.
This is one of those moments that having a stainless steel header was beneficial - the sound of air on the header was undeniable. That said, I need to find a machine shop that'll redo my head, then I need to order a new head gasket, and stitch it all back up. I might not have closure, but at least I have a diagnosis.
First off, let me preface by saying that this is not a proper leakdown test. A proper leakdown test involves using a special gauge set (a leakdown gauge), which will tell you the % of compression being lost. I don't actually care about the % being lost, I only care about where it's going, so I didn't spend the money (or time waiting) on the gauge set. If you need to do a full, proper leakdown test, you can already find a complete DIY here. Summit sells a nice leakdown gauge, $75, found here.
Now then, let's see where this pressure is going!
First, you need an air compressor. I borrowed one from work. This is one of those tools that everyone should at least have access to. If you don't own one, find a friend who does. If you don't have a friend who does, you can get a smallish one from Lowes for a reasonable price (they have a Porter Cable compressor for $99). As long as it can push 100 PSI, you're good. You'll also need something that allows you to hook the air compressor up to the motor. If you're using a leakdown gauge, that should already be included. If not, a good compression tester kit will have exactly what you need. I have a basic Craftsman kit, which includes the detachable hose, and all of the other fun little bits and pieces you need.
Kobalt air compressor, 150 PSI max, along with plenty of extra hose
Craftsman compression tester kit. Note the small compartment of parts, you'll need that later
Now, just like doing a compression test, we need to remove all of the spark plugs. Simple enough job. Also, if you have awesome NGK spark plug wires, they already have a little number on them for each cylinder, so you don't have to try to remember what goes where.
Removing the plugs and wires
The next important step is making sure your engine is at TDC for the cylinder you are testing. If you're testing multiple cylinders, you'll need to set cylinder TDC between each test. Since I'm only doing Cyl 2, I went ahead and set it to Cyl 2 TDC. I believe the OEM crank bolt is a 6 point 19mm, but since I have an ARP crank bolt, it's a 12 point 19mm. 12 point socket, 2" extension, and ratchet. Spin the engine until at TDC. For cyl 2, that means the "UP" arrows on the cam gears should both be pointing to the right.
Turning the engine
Cam gear UP arrows pointed to the right
One thing I noticed while doing this, after running my engine, it appears that one of my cams is off a tooth. Since it's a problem with one specific cylinder, and not all four, that's not the cause of my problems, but I will come back and fix that later.
Now comes the fun part. The compression tester is made to hold the pressure in the line, so you can see it on the gauge. For this test, though, we need to force air OUT of the line. To prevent this from happening, the hose has a small bleeder nipple on it, just like a valve stem would. We have to remove that. Remember when I said the small thing of extra stuff included with the compression tester would be needed? Well, we're at that part now. There's a small brass thing, looks like a reverse screw driver. It's called a valve stem seal remover. Use that to remove the bleeder nipple from inside the line.
Bleeder nipple, all up in our way and ****. Yes, I failed at focusing on it.
Valve stem seal removal tool. It's a tiny ******. Don't lose it!
Now that we have that done, screw the hose down into the cylinder just like you would for a compression test. Since we won't actually be cranking the motor, you don't need to remove any fuses.
Hose inserted, screwed in
Now attach your air compressor line to it, and turn that sucker on. Let it get up to at least 50 PSI, then turn it off and listen closely. Try to pinpoint where the air is escaping. Use your hands. Use your ears. Use a leaf, if that's what gets you there. There will be a sound of air coming out from somewhere, and depending on where it's coming from, you might even be able to feel it. If you can't hear or feel it, turn the pressure up and keep trying. If it's leaking from your head gasket, you'll feel it coming out of another spark plug hole. If it's leaking from an intake valve, you'll hear it going through the intake, and feel it coming out of the throttle body. If it's coming out of an exhaust valve, you'll hear it, and if you remove your manifold, you'll feel it there, too. If it's going past your rings, you'll feel it through your dipstick tube.
This is one of those moments that having a stainless steel header was beneficial - the sound of air on the header was undeniable. That said, I need to find a machine shop that'll redo my head, then I need to order a new head gasket, and stitch it all back up. I might not have closure, but at least I have a diagnosis.
05-28-2015, 05:14 PM
#456
 05-28-2015, 05:27 PM
#457
Yes, I set my valve lash when it was still on the motor rotisserie. Double checkbot? Wat? I double and triple checked it, and even completely loosened them so the valves had zero pressure from the cams, even at TDC. One of the exhaust valves just isn't sealing.
06-01-2015, 01:25 PM
#460
Called up Inline Pro, gonna drop my head off with them tomorrow. $75 for hot tank, $250 for valve lapping and reassembly. $900 for P/P, so...yeah, I'm gonna hold off on that one. Now I have to make a decision - either I have them clean and reassemble the head with the stock springs and retainers and take it home the same day, or I order the Crower springs and retainers, have them shipped to the shop, and have them ship the head back to me. I still have the Crower 403's sitting there ready to be installed, I just don't want to have to wait 
06-01-2015, 02:19 PM
#462
Yeah, and the $250+$75 would do that, hopefully same day. I just have these Crower 403's sitting here ready to go in, but can't put them in until I get the upgraded springs and retainers, and if I decided to do that later, it'd cost me another $400 to get them installed. I'm probably just going to suck it up and get it rebuilt with the OEM hardware for now. Just gotta find another new head gasket.
06-01-2015, 02:42 PM
#463
Honda-Tech Member

Join Date: Apr 2015
Location: Central PA
Posts: 30
Likes: 0
Received 0 Likes
on
0 Posts
I vote crower hardware put in now. It'll be apart and right there. I can't think of any good reason to skip it now. You've waited this long, what's another week or two?
06-01-2015, 03:09 PM
#464
This thing has been sitting for so damn long, I'm just tired of waiting. I'm also struggling to maintain interest in it, and I think that actually being able to drive it and have some fun with it will remind myself of why I'm doing this all in the first place.
Also, if I'm being entirely honest, I finally settled a lawsuit I've been involved in (on the losing side. Note to other people: Never sign a lease agreement with a coke head. They'll bail, and leave you holding the proverbial bag), and I don't think it would be fiscally responsible of me to spend the $200+ on springs and retainers. At least, not until this settlement is paid off. I can legitimize "necessary to get the car running again." I have a hard time legitimizing "want it for an extra 30 WHP."
If money were no issue, I'd have them do the full P/P job, new valve seats, springs, retainers, guides, and possibly even shave the head a little to give me a slight bump in compression. All said and done, that'd cost me in the region of $1400+, and would gain me 50-60 WHP.
06-01-2015, 03:23 PM
#465
Honda-Tech Member
Join Date: Apr 2015
Location: Central PA
Posts: 30
Likes: 0
Received 0 Likes
on
0 Posts
I didn't know you were having issues like that. If you need to finish it to keep interest in it, then do it up. Sorry to hear about all that lease bullshit, that sucks man. Good luck with the build. I know I'm enjoying the updates anyways.
06-01-2015, 06:14 PM
#466
Steve at Heart
This thing has been sitting for so damn long, I'm just tired of waiting. I'm also struggling to maintain interest in it, and I think that actually being able to drive it and have some fun with it will remind myself of why I'm doing this all in the first place.
Also, if I'm being entirely honest, I finally settled a lawsuit I've been involved in (on the losing side. Note to other people: Never sign a lease agreement with a coke head. They'll bail, and leave you holding the proverbial bag), and I don't think it would be fiscally responsible of me to spend the $200+ on springs and retainers. At least, not until this settlement is paid off. I can legitimize "necessary to get the car running again." I have a hard time legitimizing "want it for an extra 30 WHP."
If money were no issue, I'd have them do the full P/P job, new valve seats, springs, retainers, guides, and possibly even shave the head a little to give me a slight bump in compression. All said and done, that'd cost me in the region of $1400+, and would gain me 50-60 WHP.
Also, if I'm being entirely honest, I finally settled a lawsuit I've been involved in (on the losing side. Note to other people: Never sign a lease agreement with a coke head. They'll bail, and leave you holding the proverbial bag), and I don't think it would be fiscally responsible of me to spend the $200+ on springs and retainers. At least, not until this settlement is paid off. I can legitimize "necessary to get the car running again." I have a hard time legitimizing "want it for an extra 30 WHP."
If money were no issue, I'd have them do the full P/P job, new valve seats, springs, retainers, guides, and possibly even shave the head a little to give me a slight bump in compression. All said and done, that'd cost me in the region of $1400+, and would gain me 50-60 WHP.

In the end it will be running.
 06-01-2015, 09:15 PM
#468
Honda-Tech Member
Join Date: May 2008
Location: Southern Oregon
Posts: 1,892
Likes: 0
Received 0 Likes
on
0 Posts
Just get the damn thing running properly with the stock hardware in the head and sell me the 403s lol jk. Even 300whp in these light little civics is a **** load of fun! My vote is do whatever you can to get it boosted asap so you can finally start enjoying the car. You have put a lot of hard work into this build man. Props.
06-02-2015, 06:05 AM
#469
I had a guy up and move back ACROSS COUNTRY on me, leaving me with a lost security deposit, 400$ gas bill (In FKing OHIO, that's nearly impossible to get in a 750sqft apartment), and an additional 600$ to replace the carpet in the living room that he ruined.
Good luck with that head man.
06-02-2015, 07:18 AM
#470
Fish Twig
Join Date: Nov 2005
Location: Still hunting that foo up there
Posts: 15,555
Received 309 Likes
on
285 Posts
I've been there, it really puts a hamper on plans and ruins friendships.
I had a guy up and move back ACROSS COUNTRY on me, leaving me with a lost security deposit, 400$ gas bill (In FKing OHIO, that's nearly impossible to get in a 750sqft apartment), and an additional 600$ to replace the carpet in the living room that he ruined.
Good luck with that head man.
I had a guy up and move back ACROSS COUNTRY on me, leaving me with a lost security deposit, 400$ gas bill (In FKing OHIO, that's nearly impossible to get in a 750sqft apartment), and an additional 600$ to replace the carpet in the living room that he ruined.
Good luck with that head man.
06-02-2015, 11:34 AM
#471
Eh, less "terms I could agree on", and more "terms that were better than if I had tried to fight it". That's neither here nor there, though. Dropped the head off at Inline Pro earlier today, just waiting on a call back to see what's going on. Hopefully a strip, hot tank, lap, and reassembly fixes it. If not...well, I just hope I don't have to put too much money into the head.
06-02-2015, 11:36 AM
#472
Fish Twig
Join Date: Nov 2005
Location: Still hunting that foo up there
Posts: 15,555
Received 309 Likes
on
285 Posts
Can't wait until we get to the next page, that damn post of yours is too damn big.
 06-02-2015, 01:00 PM
#474
So I just got GREAT news from the machine shop. There's nothing wrong with the head, I just had a valve stem seal all sorts of fucked up. His exact words were "chewed to hell", but yeah. I fucked it up. It's all good. Crisis averted, they're going to hot tank it, fix it up, and ship it back to me. Hopefully it's back by Saturday, just have to order a new head gasket, and I should theoretically be up and running on Saturday!
06-02-2015, 04:38 PM
#475
Honda-Tech Member
Join Date: May 2008
Location: Southern Oregon
Posts: 1,892
Likes: 0
Received 0 Likes
on
0 Posts
How does a bad valve seal cause a huge loss in compression? I can see how an out of spec valve guide would cause the valve to not seal and lose compression. Are they replacing any valve guides or just doing a valve job? Hope you get this thing on the road soon!
I put too much money into my ls head, I bought it ported and then it ended up needing valve guides, valve job, and resurfaced. Some how after that I kept finding crazy good deals on cl and now have 4 ls heads lol. So no vtec for me haha.
I put too much money into my ls head, I bought it ported and then it ended up needing valve guides, valve job, and resurfaced. Some how after that I kept finding crazy good deals on cl and now have 4 ls heads lol. So no vtec for me haha.