
How to: Progress 22mm Rear Swaybar Install
 12-16-2010, 02:17 PM
#1
Ek Forever y0!
Thread Starter
Join Date: May 2005
Location: Beating people with a stick, GA
Posts: 16,712
Likes: 0
Received 6 Likes
on
6 Posts
I really wish I'd done a step by step for installing my Progress CS-II's. Maybe I can at a later date, just hard to without pictures. I could give pictures for references on the already assembled car.
Okay, for the swaybar install. Took my longer than I expected but here we go.
Step 1) Chuck your front tires and put your car in gear. Loosen up your lugnuts and jack up your car's rear end and put it on Jack stands.

Then take the wheels off:

Step 2) get out all your stuff. You'll need what's in the picture, + a set of metric and SAE sockets. I only had metric so I'm not telling you which sockets I used due to a lot of trial and error. The bottom shock/lca bolt you need to flip around per the progress instructions is a 14mm however. In my case, it's a 14mm and a 17mm.

Step 3) With your car jacked up you can now install the progress specific brackets. Be warned. Pay attention to the instructions provided. If you do not have the higher mounting hole for your progress bracket you need to drill the hole out with a 1/2" bit and tack weld some support behind it. Fortunately in my case I didn't need one being that I drive a 6th generation civic.

Step 4) Next I installed the brackets and bushings onto the swaybar. Be sure to lube them very good. Progress provides loads of lube so use it liberally.

Step 5) Next I installed the "L-Bracket" Provided by progress. This mounts on the front side of the lower shock bolt once you're flipped it around so that the nut is facing the rear of the car. Be sure the larger hole is facing down, this is where the endlink runs through.

Step 6) Mount up the swaybar. Using the brackets on the swaybar, match them to the subframe brackets you've already installed and use the shorted bolts and be sure to use plenty of washers when installing these onto your subframe.

Step 7)Okay, now it's time to assemble and install the end-links. Follow the instructions it's very simple. I wasn't sure but I wagered that the lip on the bushing fits inside the swaybar and washers on the endlink, so I put the smooth side of the bushing on the cup washers.
Here are several pictures of them assembled. After doing it I've found it's much easier to install the end-links on my car once you have the swaybar-endlink mounting holes lined up and already on the car. Maneuvering the endlinks around your subframe is a pain in the ***.

And on the car:

Step 7) Tighten down all of the mounting brackets for the swaybar. DO NOT TIGHTEN DOWN THE LOWER SHOCK BOLT. Or any bolt that goes through a bushing for that matter.
Step 8) DO tighten the endlinks. Michelle at Progress told me to tighten them while the car was in the air and just such that the sleeve in the middle quits spinning. You don't want the bushings compressed already when you lower the car, but you do want it snug.
Step 9) Put your wheels back on and lower the car. Put your car in neutral and roll it around so the suspension settles. Now tighten the lower shock bolts. it's a serious pain in the *** to maneuver a wrench on the front facing side of the shock. Trust me, it will fit, just go at it from the top and maneuver your wrench around various parts. I believe it went somewhere between the swaybar and the compensator arm to get the head of my wrench onto the bolt. I then tightened the lower shock bolt nut from the rear. Plenty of stuff on the front side to hole your wrench in place.
Step 10) Go for a ride and be amazed at how you just made the best suspension modification to your car. I thought the shocks did a lot. The Progress CS-II's + the Swaybar makes my car a totally different vehicle.
Updated with a newer picture of my car with my much better camera:
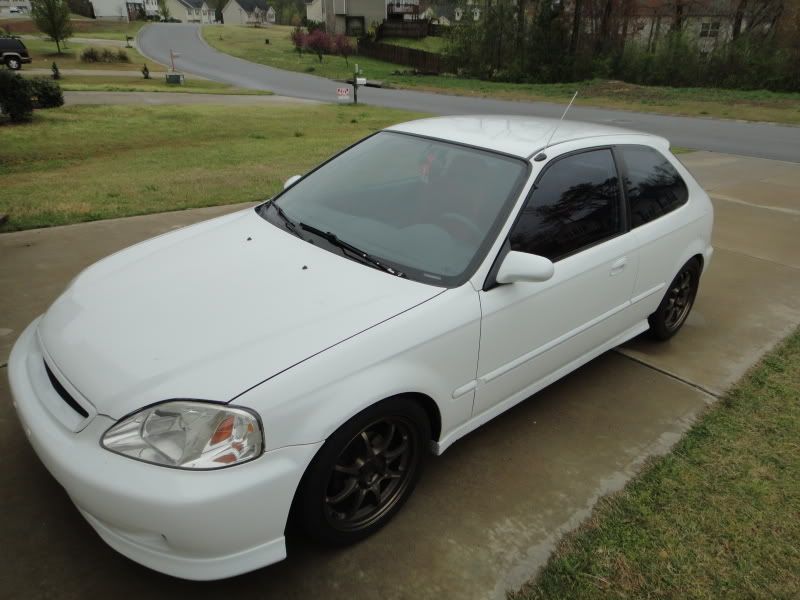
Fantastic product. Fantastic customer service. I love the folks over at progress. If you've ever hesitated to buy their products you need to give Michelle or Jeff a phone call. Some of the nicest people I've ever spoken to on the phone.
Okay, for the swaybar install. Took my longer than I expected but here we go.
Step 1) Chuck your front tires and put your car in gear. Loosen up your lugnuts and jack up your car's rear end and put it on Jack stands.
Then take the wheels off:
Step 2) get out all your stuff. You'll need what's in the picture, + a set of metric and SAE sockets. I only had metric so I'm not telling you which sockets I used due to a lot of trial and error. The bottom shock/lca bolt you need to flip around per the progress instructions is a 14mm however. In my case, it's a 14mm and a 17mm.
Step 3) With your car jacked up you can now install the progress specific brackets. Be warned. Pay attention to the instructions provided. If you do not have the higher mounting hole for your progress bracket you need to drill the hole out with a 1/2" bit and tack weld some support behind it. Fortunately in my case I didn't need one being that I drive a 6th generation civic.
Step 4) Next I installed the brackets and bushings onto the swaybar. Be sure to lube them very good. Progress provides loads of lube so use it liberally.
Step 5) Next I installed the "L-Bracket" Provided by progress. This mounts on the front side of the lower shock bolt once you're flipped it around so that the nut is facing the rear of the car. Be sure the larger hole is facing down, this is where the endlink runs through.
Step 6) Mount up the swaybar. Using the brackets on the swaybar, match them to the subframe brackets you've already installed and use the shorted bolts and be sure to use plenty of washers when installing these onto your subframe.
Step 7)Okay, now it's time to assemble and install the end-links. Follow the instructions it's very simple. I wasn't sure but I wagered that the lip on the bushing fits inside the swaybar and washers on the endlink, so I put the smooth side of the bushing on the cup washers.
Here are several pictures of them assembled. After doing it I've found it's much easier to install the end-links on my car once you have the swaybar-endlink mounting holes lined up and already on the car. Maneuvering the endlinks around your subframe is a pain in the ***.
And on the car:
Step 7) Tighten down all of the mounting brackets for the swaybar. DO NOT TIGHTEN DOWN THE LOWER SHOCK BOLT. Or any bolt that goes through a bushing for that matter.
Step 8) DO tighten the endlinks. Michelle at Progress told me to tighten them while the car was in the air and just such that the sleeve in the middle quits spinning. You don't want the bushings compressed already when you lower the car, but you do want it snug.
Step 9) Put your wheels back on and lower the car. Put your car in neutral and roll it around so the suspension settles. Now tighten the lower shock bolts. it's a serious pain in the *** to maneuver a wrench on the front facing side of the shock. Trust me, it will fit, just go at it from the top and maneuver your wrench around various parts. I believe it went somewhere between the swaybar and the compensator arm to get the head of my wrench onto the bolt. I then tightened the lower shock bolt nut from the rear. Plenty of stuff on the front side to hole your wrench in place.
Step 10) Go for a ride and be amazed at how you just made the best suspension modification to your car. I thought the shocks did a lot. The Progress CS-II's + the Swaybar makes my car a totally different vehicle.
Updated with a newer picture of my car with my much better camera:
Fantastic product. Fantastic customer service. I love the folks over at progress. If you've ever hesitated to buy their products you need to give Michelle or Jeff a phone call. Some of the nicest people I've ever spoken to on the phone.
Last edited by Libertariat; 04-06-2011 at 12:42 PM.


 12-16-2010, 07:50 PM
#6
Honda-Tech Member
Join Date: Feb 2010
Location: Florida
Posts: 84
Likes: 0
Received 0 Likes
on
0 Posts
Nice write up. I bought an SI rear sway for now to use with my set up. I bet you can really feel a difference with the 22 mm bar!
12-17-2010, 02:21 AM
#7
Ek Forever y0!
Thread Starter
Join Date: May 2005
Location: Beating people with a stick, GA
Posts: 16,712
Likes: 0
Received 6 Likes
on
6 Posts
I was amazed at how much a rear end modification makes the car turn in so much better. If the Progress CS-II's did a lot for my car. I think the 22mm sway did a similar level of noticeable increase.
Trending Topics
12-17-2010, 04:32 AM
#8
Ek Forever y0!
Thread Starter
Join Date: May 2005
Location: Beating people with a stick, GA
Posts: 16,712
Likes: 0
Received 6 Likes
on
6 Posts
Just noticed how HUGE those pictures are. Think I should tone them down a bit? Or are they appropriate? Any recommendations or suggestions for changes to the thread are welcomed. I'm certainly not an expert at this thing but I'm doing my best to try to help out with some DIY's to point people in the right direction for these things.
Well, at least they look little on my 19" monitor at work. My 25" monitor at home makes them look normal.
Well, at least they look little on my 19" monitor at work. My 25" monitor at home makes them look normal.
 02-22-2011, 05:46 PM
#12
Honda-Tech Member

Join Date: Dec 2010
Posts: 42
Likes: 0
Received 0 Likes
on
0 Posts
i am looking for a sway bar set up for a EG w/and integra suspension set up. i really would like to purchase a 25mm rear sway bar. my main concern is finding an adjustable solid rear sway bar. i have had many bad experiences with hollow bars.
any suggestions on a solid rear sway bar?
any suggestions on a solid rear sway bar?
02-24-2011, 03:27 PM
#13
Ek Forever y0!
Thread Starter
Join Date: May 2005
Location: Beating people with a stick, GA
Posts: 16,712
Likes: 0
Received 6 Likes
on
6 Posts
i am looking for a sway bar set up for a EG w/and integra suspension set up. i really would like to purchase a 25mm rear sway bar. my main concern is finding an adjustable solid rear sway bar. i have had many bad experiences with hollow bars.
any suggestions on a solid rear sway bar?
any suggestions on a solid rear sway bar?
http://progressauto.com/products/sfI.../productID/573
04-06-2011, 12:43 PM
#14
Ek Forever y0!
Thread Starter
Join Date: May 2005
Location: Beating people with a stick, GA
Posts: 16,712
Likes: 0
Received 6 Likes
on
6 Posts
Updated, sorry I forgot I had broken the image links when I organized my photobucket folders.
Back on track and with a newer and better quality picture of my car
Back on track and with a newer and better quality picture of my car
01-20-2014, 01:59 PM
#17
Honda-Tech Member
Join Date: Apr 2007
Location: GTA, ON
Posts: 308
Likes: 0
Received 0 Likes
on
0 Posts
Bringing this back from the dead to see if there are any more reviews or opinions on this bar. There is very little info on the Progress bar when I search online and most of it is misinformation from people who don't actually own it.
The main selling point for me on this unit is that it doesn't require additional subframe bracing due to how Progress designed the brackets, making it very affordable. Even comparing to an ITR bar the Progress seems like the cheapest option for an EK since it's designed as a complete bolt on and go kit.
So anyone else out there using this bar? Libertariat, are you still running this?
01-26-2014, 09:00 AM
#18
Honda-Tech Member
iTrader: (9)
Join Date: Mar 2007
Location: SAN DIEGO, CALI.
Posts: 879
Likes: 0
Received 0 Likes
on
0 Posts
Yes! Updates please! How are all the brackets holding up? I have a 97 hatchback and I'd like info on the mounting brackets. I've read that 96-00 Civics (with the exception of the CTR) have weak/flimsy rear sub frames. Which, can cause tear out. Is this true (directed to anyone with experience on their own 96-00 civic)? I understand that a rear sub frame brace can be used (ASR) but, I'm really not big on the "Bling" factor. I hope you can chime in Libertariat.
Damn! The last time he was on here was over a month ago.
Damn! The last time he was on here was over a month ago.
Last edited by artiecubz; 01-26-2014 at 10:17 AM.
01-26-2014, 09:34 AM
#19
Honda-Tech Member

Join Date: Jun 2010
Posts: 203
Likes: 0
Received 0 Likes
on
0 Posts
i am currently running this bar on my 93 eg8...all the hardware is super sturdy, and the design of the brackets is great! Running a 22mm bar on a nearly stock suspension minus full coilovers and no compliants from my car... I didint have a stock bar, but from what ive read the difference in one of the mounting points at the lca makes a big difference. This change over the stock bracket is supposed to prevent tearout at the subframe...The brackets that hold the endlinks to the shocks are awesome too since you dont have to change lca's... This is a straight bolt on kit that will make a huge difference in the handling of your car...only thing is i had to get my exhaust clearanced for the sway bar...
 01-26-2014, 11:29 AM
#21
Honda-Tech Member
Join Date: Jun 2010
Posts: 203
Likes: 0
Received 0 Likes
on
0 Posts
its been about 6 months now... ive randomly checked under my car and i see no signs of fatigue... i dont track, or race my car so i cant confirm that track use will cause tear out, but on my daily driver with some "spirited" driving its great! ill post a pic later of my set up
01-26-2014, 02:56 PM
#22
Honda-Tech Member
Join Date: Oct 2011
Location: New York
Posts: 258
Likes: 0
Received 0 Likes
on
0 Posts
Didn't quite get the flip the lower shock bolt part. Does it mean put the welded nut on the shock facing the rear?
01-27-2014, 12:14 PM
#23
Honda-Tech Member
Join Date: Jun 2010
Posts: 203
Likes: 0
Received 0 Likes
on
0 Posts

Thread
Thread Starter
Forum
Replies
Last Post
kchungb17a
Acura Integra
0
09-22-2012 08:38 PM
Raocorp
Honda Civic / Del Sol (1992 - 2000)
6
06-18-2003 02:23 PM

