
DIY: 96-00 Camber Kit/ New Upper Control Arm Install
 08-18-2011, 08:53 AM
#1
Honda-Tech Member
Thread Starter
Comments with any information I missed is always appreciated.
I'm sure there is a DIY out there for installing the camber kit, but can't hurt to have another one and specifically have one for 96-00 Civics. This is my first write up (I realize it's an easy one) so let me know how it is and hopefully it can help someone get mental images of what goes on before they jump into it.
Front Camber Kit Install (30-45 Minutes)
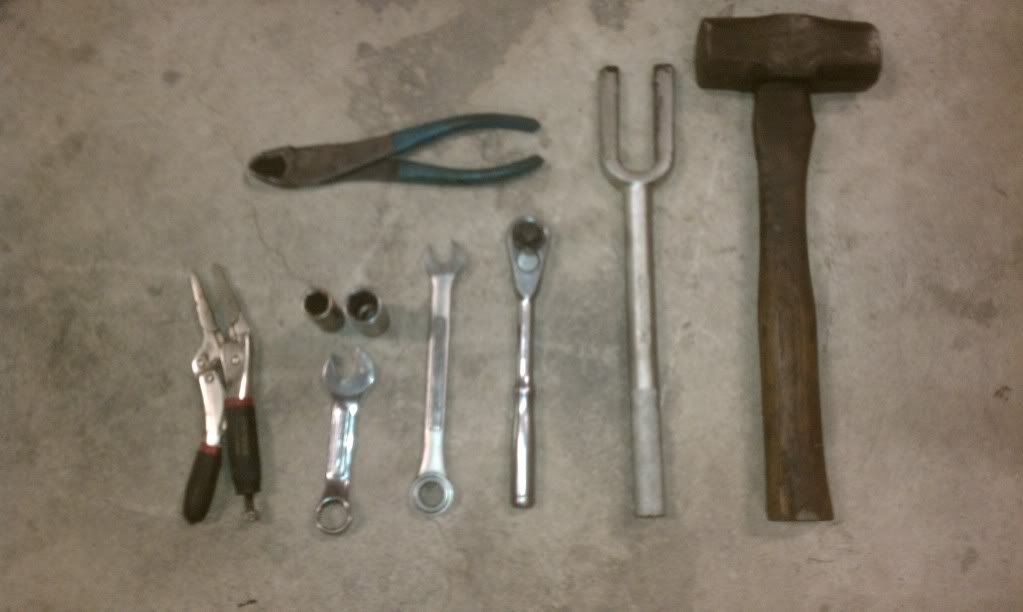
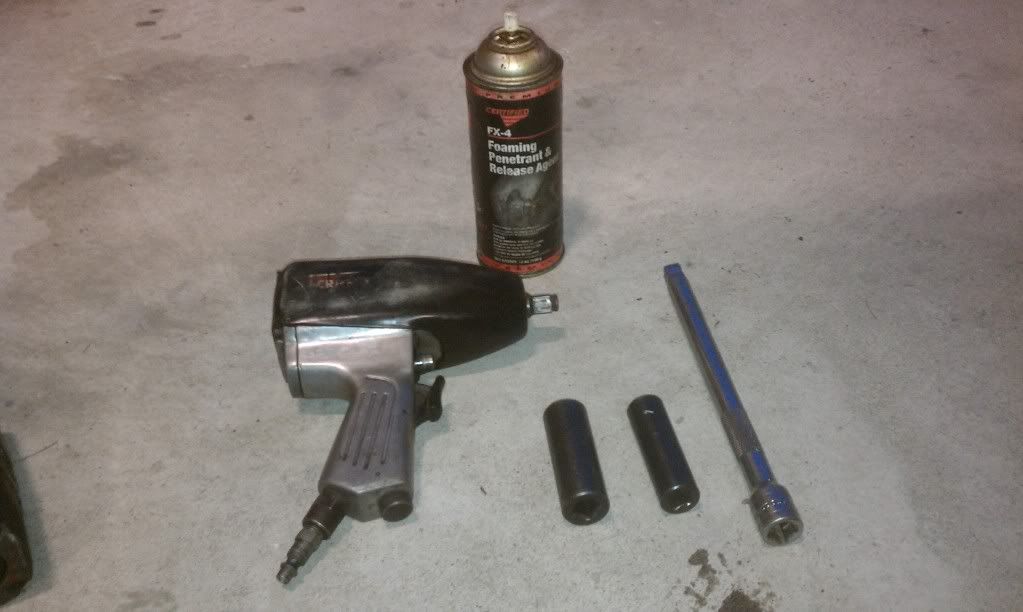
Tool List: (Not all these will be needed, but the extras may come in handy):
Jack
Jack Stands
Air Gun and 19mm or Tire Iron
14 mm Wrench
17 mm Wrench
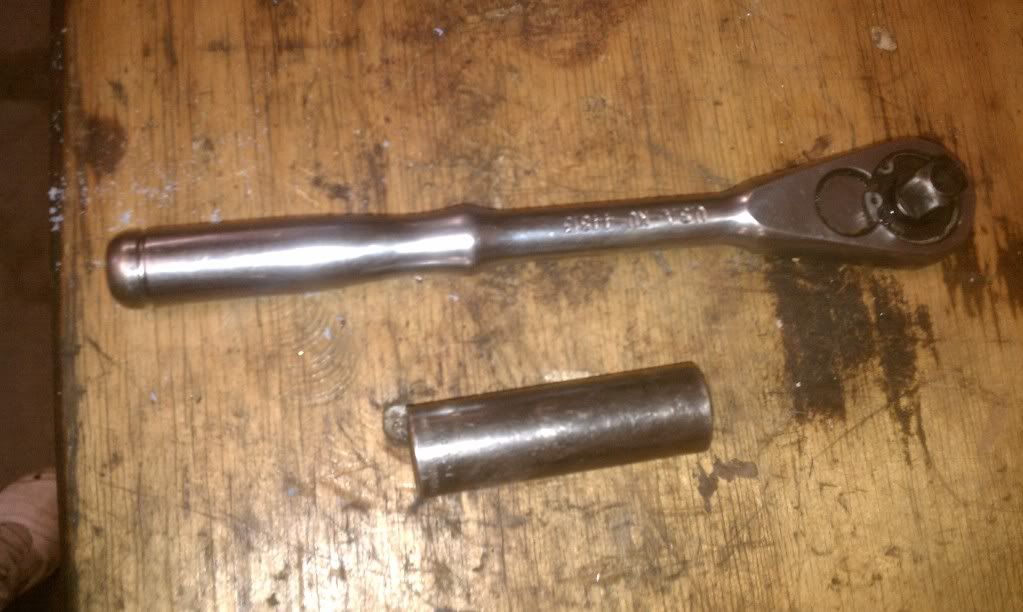
Ratchett
14 mm Socket
Hammer
Dikes
Pliers
Ball Joint Separator (Pickle Fork)
This is all done from the PASSENGER side of the car.
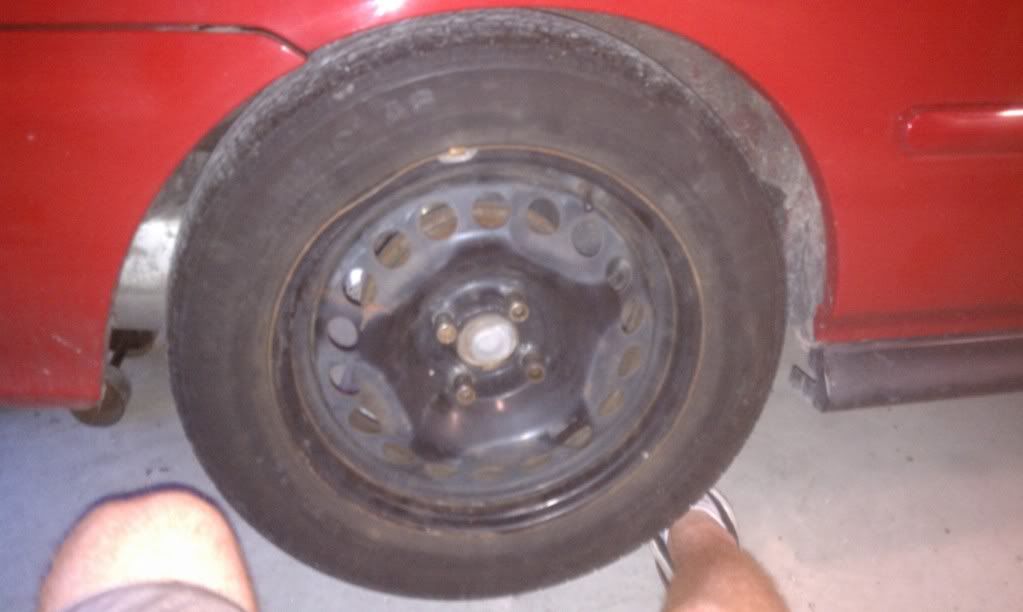
Step 1(Wheels):
While the car is on the ground loosen the lug nuts with your air gun orr tire iron. Jack the car up place stands in your preferred place and remove the wheels.
You can do the next two steps in whatever order you feel comfortable.
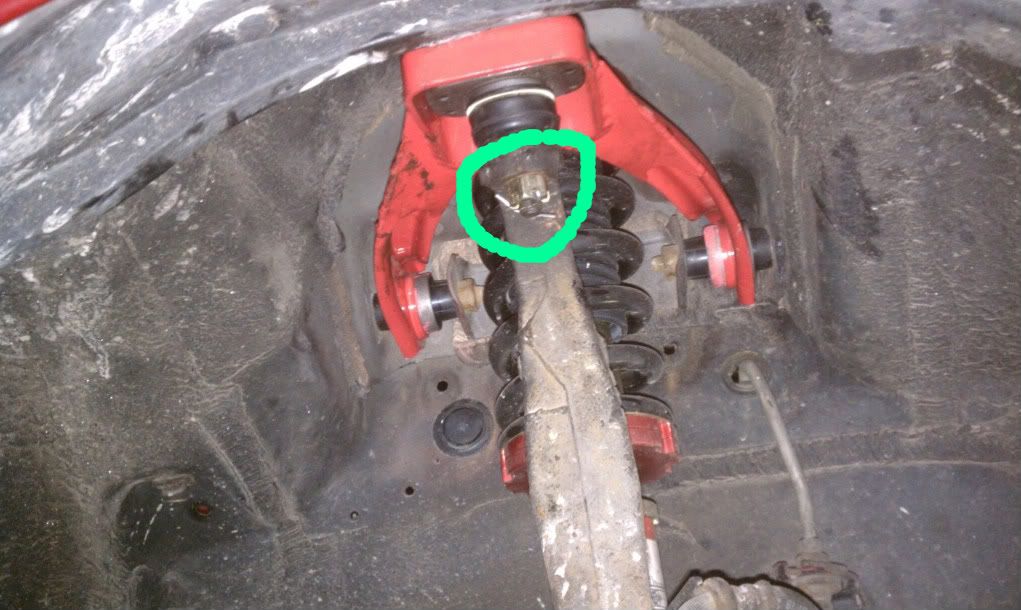
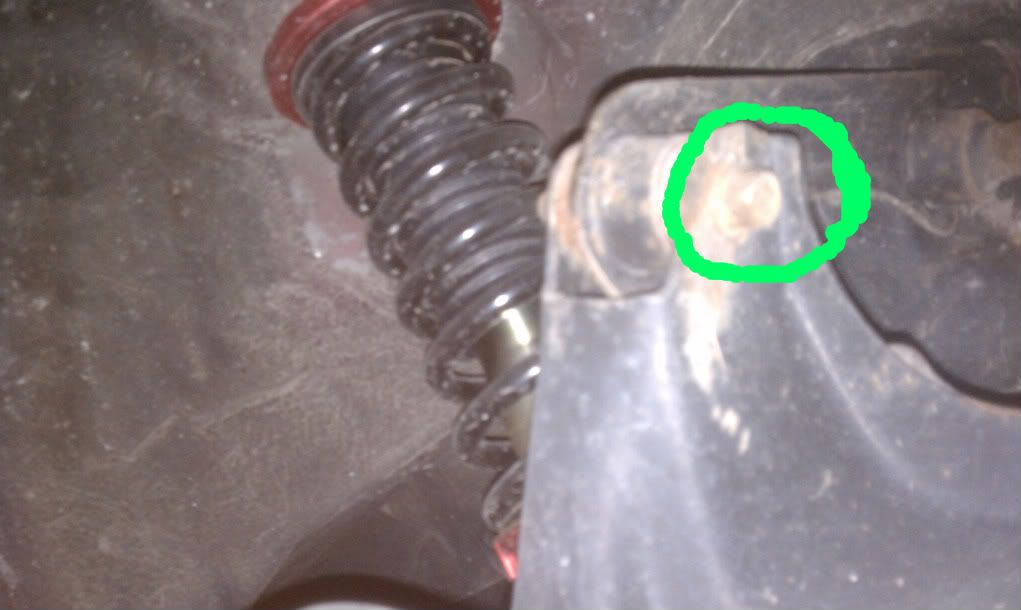
Step 2 (Cotter Pin):
Remove the cotter pin from the castle nut on the upper ball joint.
The cotter pin is located here:
Step 3 (Castle Nut):
Take your 17mm wrench and begine to loosen your castle nut. You can either take the castle nut off and use the pickle fork to get the ball joint separated or can leave the castle night at the end of the bolt and hit it with a hammer. I was able to loosen my castle nut most the way down without the bolt spinning. The bolt started to spin when the castle nut was close to the end, so I took my pliers and grabbed ahold of the bolt and this allowed me to remove the castle nut the rest of the way.
The castle nut is located here:
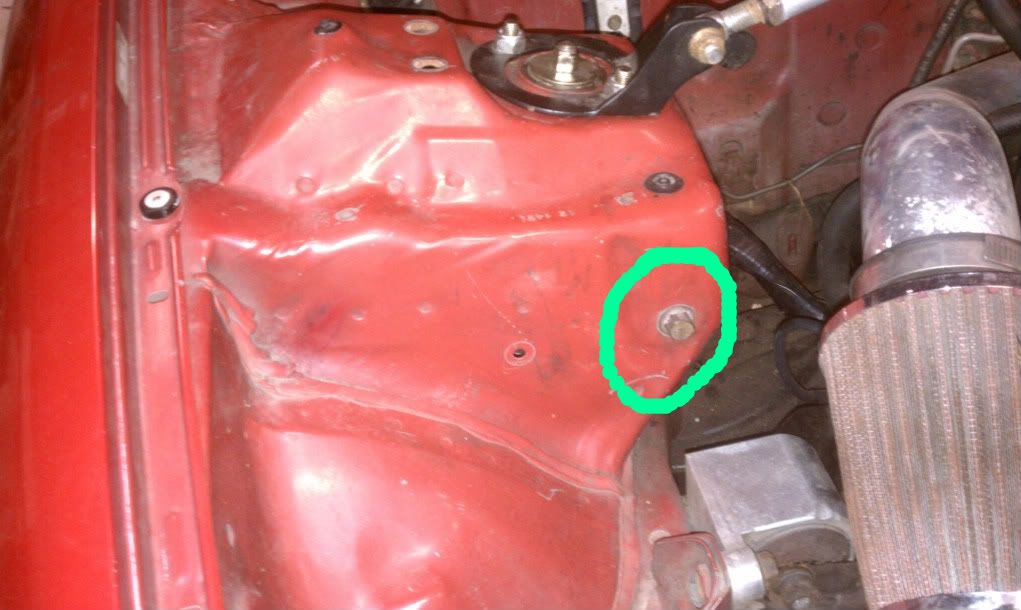
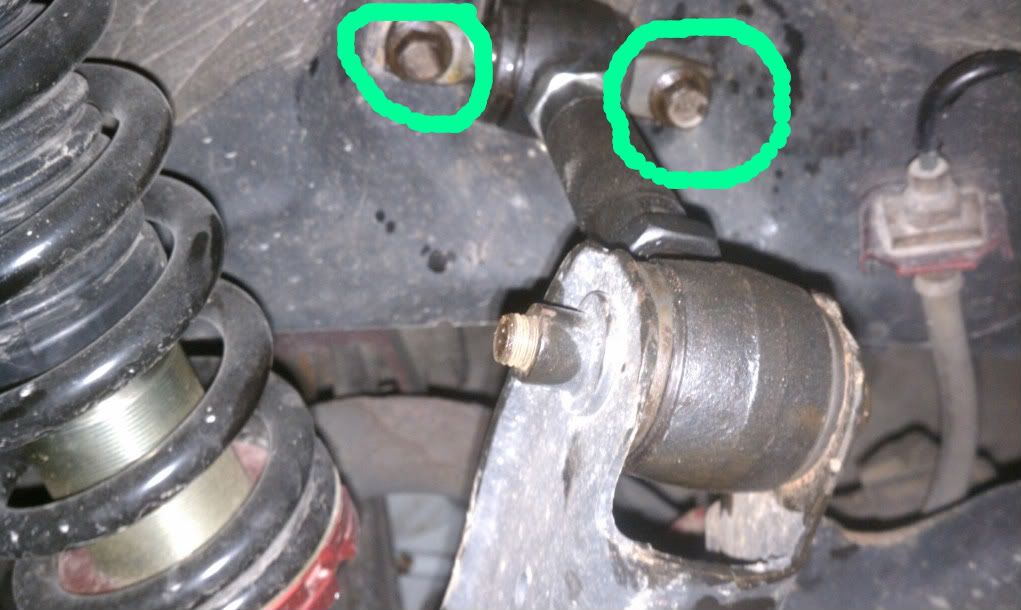
Step 4 (Engine Bay Bolts):
You have TWO bolts located inside the engine bay. You have a choice to use your 14mm wrench or your ratchett with the 14mm socket. I used the ratchett on the front side and a ratchett wrench on the back side.
One on the front side of the tower:
And one on the backside of the tower:

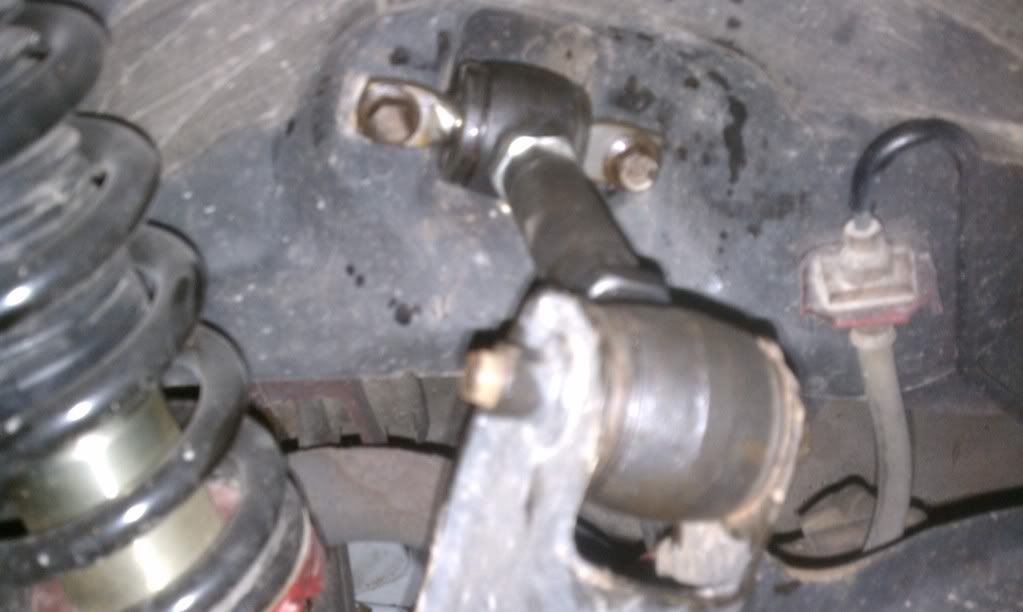
Step 5 (Remove Upper Control Arm):
Push the upper ball joint bolt up and out and pull the upper control arm out. It should slide right out, but if it doesn't just give it a few whacks with a hammer.
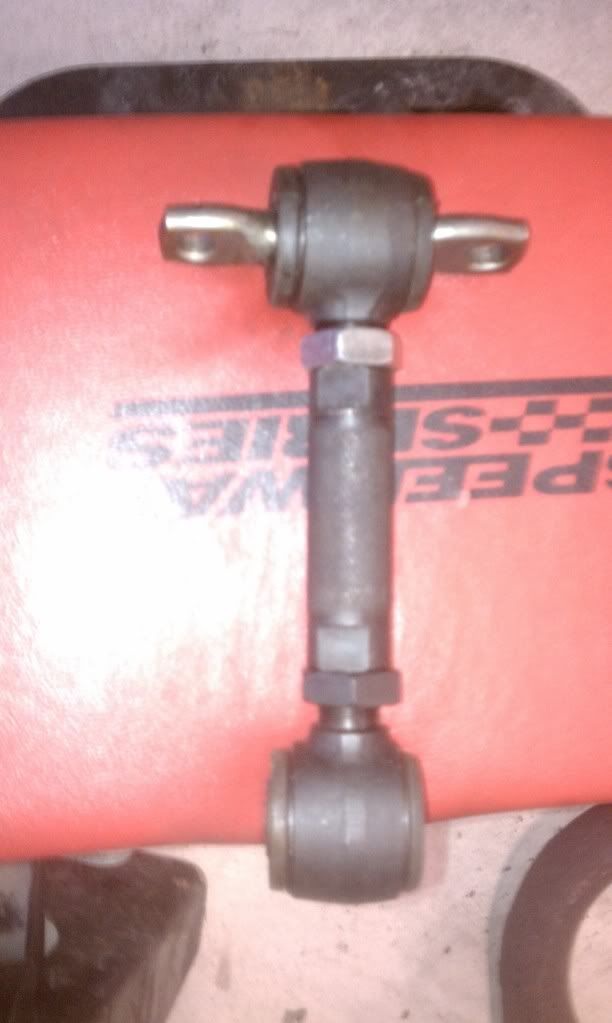
Step 6 (Adjust Camber Kit):
You have your four allen wrench bolts located on the top of your camber kit. You can either tighten them down before hand or wrestle around and tighten them down after (I did the wrestling, but not by choice). Once they are installed it's a little more difficult to tighten these down, but not to bad.
Step 7 (Put in Camber Kit Upper Control Arm):
Once you have tightened down your four allen wrench bolts install the new upper control arm. I had to give mine a couple whacks with a hammer to get them in.
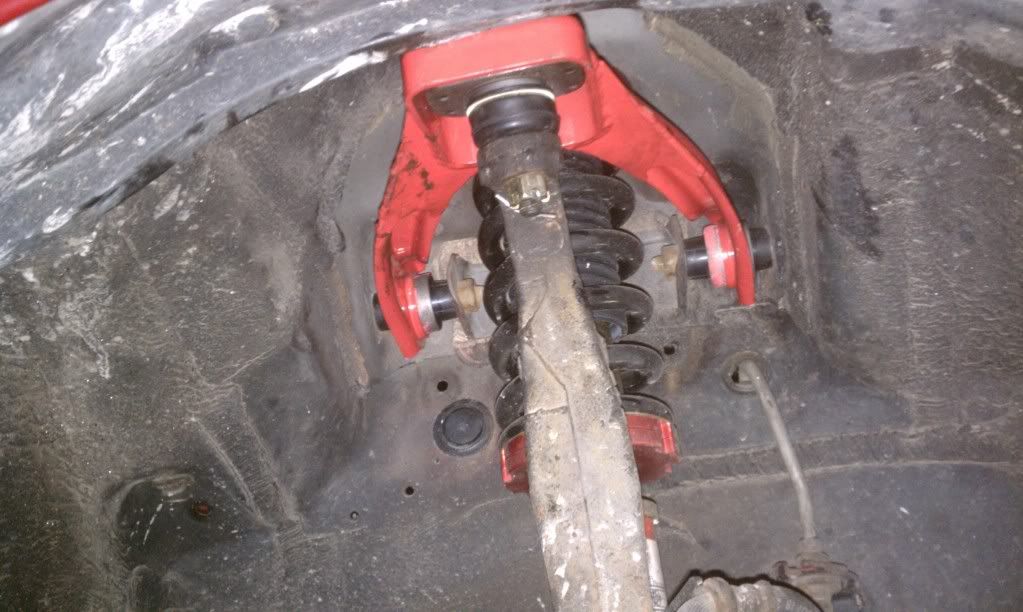
Step 8 (Tighten Nuts and Bolts):
I put the two 14mm bolts in the engine bay back first. I just tightened them as good as I could get them without stripping or breaking the bolts. After these were installed I tightened down my castle nut on the upper ball joint bolt and slid the new cotter pin through.
Ended up with a finished product of this:
Step 9 (Wheels):
Put your wheels back on and lower the car back to the ground. Once you are finished drive to the nearest shop and get an alignment!!
Rear Camber Kit Install (20-40 Minutes)
Tool List
If you have air tools you will need the following:
Jack
Jack Stands
Impact Gun
19mm Socket
14mm Socket
LONG extension
Hammer
Lubricant
If you don't have air tools:
Jack
Jack Stands
Tire Iron
Ratchett
14mm Socket
Hammer
Lubricant
Step 1 (Wheels):
If you do not have air tools break loose your lug nuts before jacking up the car. After breaking the lug nuts jack the car up and place stands in your preferred location and pull the wheel off.
Starting out:
This is what you will be looking at:

Step 2 (3 Bolts):
You have THREE 14mm bolts to pop off. There are two to up against the inside of the wheel well. After removing the bolts I soaked them in lubricant because they were super rusty.
Here they are:
And the third is right here (A little difficult to get a bulky impact to, but if you wiggle around a bit you can get it on there. A shorter socket may do the trick too.):
Step 3 (Place in Camber Kit):
Adjust your camber kit to where you will need it and install it. You may need a hammer here to get it to where you want (I did not). When you get it in place put the two short bolts back to the inside of the wheel well and place the long one back in its location.
Final Product:
Step 4 (Wheels):
Place your wheels back on the car and GO GET an ALIGNMENT!!
Hope this helps someone out!!
Thanks
Billy
I'm sure there is a DIY out there for installing the camber kit, but can't hurt to have another one and specifically have one for 96-00 Civics. This is my first write up (I realize it's an easy one) so let me know how it is and hopefully it can help someone get mental images of what goes on before they jump into it.
Front Camber Kit Install (30-45 Minutes)
Tool List: (Not all these will be needed, but the extras may come in handy):
Jack
Jack Stands
Air Gun and 19mm or Tire Iron
14 mm Wrench
17 mm Wrench
Ratchett
14 mm Socket
Hammer
Dikes
Pliers
Ball Joint Separator (Pickle Fork)
This is all done from the PASSENGER side of the car.
Step 1(Wheels):
While the car is on the ground loosen the lug nuts with your air gun orr tire iron. Jack the car up place stands in your preferred place and remove the wheels.
You can do the next two steps in whatever order you feel comfortable.
Step 2 (Cotter Pin):
Remove the cotter pin from the castle nut on the upper ball joint.
The cotter pin is located here:
Step 3 (Castle Nut):
Take your 17mm wrench and begine to loosen your castle nut. You can either take the castle nut off and use the pickle fork to get the ball joint separated or can leave the castle night at the end of the bolt and hit it with a hammer. I was able to loosen my castle nut most the way down without the bolt spinning. The bolt started to spin when the castle nut was close to the end, so I took my pliers and grabbed ahold of the bolt and this allowed me to remove the castle nut the rest of the way.
The castle nut is located here:
Step 4 (Engine Bay Bolts):
You have TWO bolts located inside the engine bay. You have a choice to use your 14mm wrench or your ratchett with the 14mm socket. I used the ratchett on the front side and a ratchett wrench on the back side.
One on the front side of the tower:
And one on the backside of the tower:
Step 5 (Remove Upper Control Arm):
Push the upper ball joint bolt up and out and pull the upper control arm out. It should slide right out, but if it doesn't just give it a few whacks with a hammer.
Step 6 (Adjust Camber Kit):
You have your four allen wrench bolts located on the top of your camber kit. You can either tighten them down before hand or wrestle around and tighten them down after (I did the wrestling, but not by choice). Once they are installed it's a little more difficult to tighten these down, but not to bad.
Step 7 (Put in Camber Kit Upper Control Arm):
Once you have tightened down your four allen wrench bolts install the new upper control arm. I had to give mine a couple whacks with a hammer to get them in.
Step 8 (Tighten Nuts and Bolts):
I put the two 14mm bolts in the engine bay back first. I just tightened them as good as I could get them without stripping or breaking the bolts. After these were installed I tightened down my castle nut on the upper ball joint bolt and slid the new cotter pin through.
Ended up with a finished product of this:
Step 9 (Wheels):
Put your wheels back on and lower the car back to the ground. Once you are finished drive to the nearest shop and get an alignment!!
Rear Camber Kit Install (20-40 Minutes)
Tool List
If you have air tools you will need the following:
Jack
Jack Stands
Impact Gun
19mm Socket
14mm Socket
LONG extension
Hammer
Lubricant
If you don't have air tools:
Jack
Jack Stands
Tire Iron
Ratchett
14mm Socket
Hammer
Lubricant
Step 1 (Wheels):
If you do not have air tools break loose your lug nuts before jacking up the car. After breaking the lug nuts jack the car up and place stands in your preferred location and pull the wheel off.
Starting out:
This is what you will be looking at:
Step 2 (3 Bolts):
You have THREE 14mm bolts to pop off. There are two to up against the inside of the wheel well. After removing the bolts I soaked them in lubricant because they were super rusty.
Here they are:
And the third is right here (A little difficult to get a bulky impact to, but if you wiggle around a bit you can get it on there. A shorter socket may do the trick too.):
Step 3 (Place in Camber Kit):
Adjust your camber kit to where you will need it and install it. You may need a hammer here to get it to where you want (I did not). When you get it in place put the two short bolts back to the inside of the wheel well and place the long one back in its location.
Final Product:
Step 4 (Wheels):
Place your wheels back on the car and GO GET an ALIGNMENT!!
Hope this helps someone out!!
Thanks
Billy
Last edited by Bwhit12; 08-19-2011 at 07:19 AM.
 08-19-2011, 07:09 AM
#3
Honda-Tech Member

Join Date: Sep 2008
Location: nowhere ville.
Posts: 2,039
Likes: 0
Received 0 Likes
on
0 Posts
fact. getting the correct alignment the first time could have saved you an hour and half and whatever the cost of useless camber kits are. unless you needed it to add camber for racing. on a DD useless.
ps. theres a reason this is a 92-00. they are exactly the same. save for OBD.
ps. theres a reason this is a 92-00. they are exactly the same. save for OBD.
08-19-2011, 07:19 AM
#4
Honda-Tech Member
Thread Starter
fact. the camber kit was free. the guy i bought it from had no use for them so he just threw them in for free.
p.s. k
p.s. k
08-19-2011, 08:31 AM
#5
Honda-Tech Member
Join Date: Sep 2008
Location: nowhere ville.
Posts: 2,039
Likes: 0
Received 0 Likes
on
0 Posts
if i got blox stuff for free i wouldn't put it on my car. just because you can doesn't mean you should.
 08-22-2011, 06:13 AM
#7
Honda-Tech Member
Thread Starter
Up for anyone who wants to know this. A lot of people say front camber kits are useless, but I can't take the chance of my tires wearing out on me. Like most everyone else on here I have no moneys.
Like I said these came with my suspension for free. I am going to keep an eye on the bolts to see if they loosen up and when the ball joints wear out. So far I am satisfied.
Like I said these came with my suspension for free. I am going to keep an eye on the bolts to see if they loosen up and when the ball joints wear out. So far I am satisfied.
Trending Topics
12-26-2012, 02:18 PM
#9
With the front, camber kits are taller then factory control arms, which can start to introduce clearance issues on low cars.
The lesser quality front kits are prone to the ball joint slipping. Meaning, your camber will change with 0 warning.
Rears: garbage bushings, and they seize.
12-31-2012, 06:49 AM
#10
Honda-Tech Member
Join Date: Sep 2012
Location: TEX
Posts: 34
Likes: 0
Received 0 Likes
on
0 Posts
Interesting.
I replaced my front control arms with Skunk 2 camber arms over the weekend. I put an OEM ball joint boot instead of the one that came with the kit. Hopefully there aren't any issues...
I replaced my front control arms with Skunk 2 camber arms over the weekend. I put an OEM ball joint boot instead of the one that came with the kit. Hopefully there aren't any issues...
12-31-2012, 07:12 AM
#12
Honda-Tech Member
Join Date: Mar 2005
Location: Seattle, WA
Posts: 1,260
Likes: 0
Received 0 Likes
on
0 Posts
HardRace makes a kit that is quality, ball joint and bushings.
12-31-2012, 10:23 AM
#13

Thread
Thread Starter
Forum
Replies
Last Post
Spence
Honda Civic / Del Sol (1992 - 2000)
3
03-07-2004 11:53 AM
Steve90HB
Honda CRX / EF Civic (1988 - 1991)
6
09-04-2003 12:47 PM