
96-00 civic (Middle east) Distributor rebuild with pics
 08-16-2012, 06:13 AM
#1
Honda-Tech Member
Thread Starter
Join Date: Nov 2011
Posts: 438
Likes: 0
Received 0 Likes
on
0 Posts
This distributor was taken from a 1996 civic lx, 5speed MT, OBD1.It has a 7 wire pin. It might be the same dizzy in some areas but other areas have their distributors a little bit different. Basically the procedures will be the same for other models and year. There is a write up about distributor on FAQ but it was somewhat different from the dizzy that I have so I took the courage to post it anyway.
Start by removing the 3 screws holding the cap. One screw is not in view
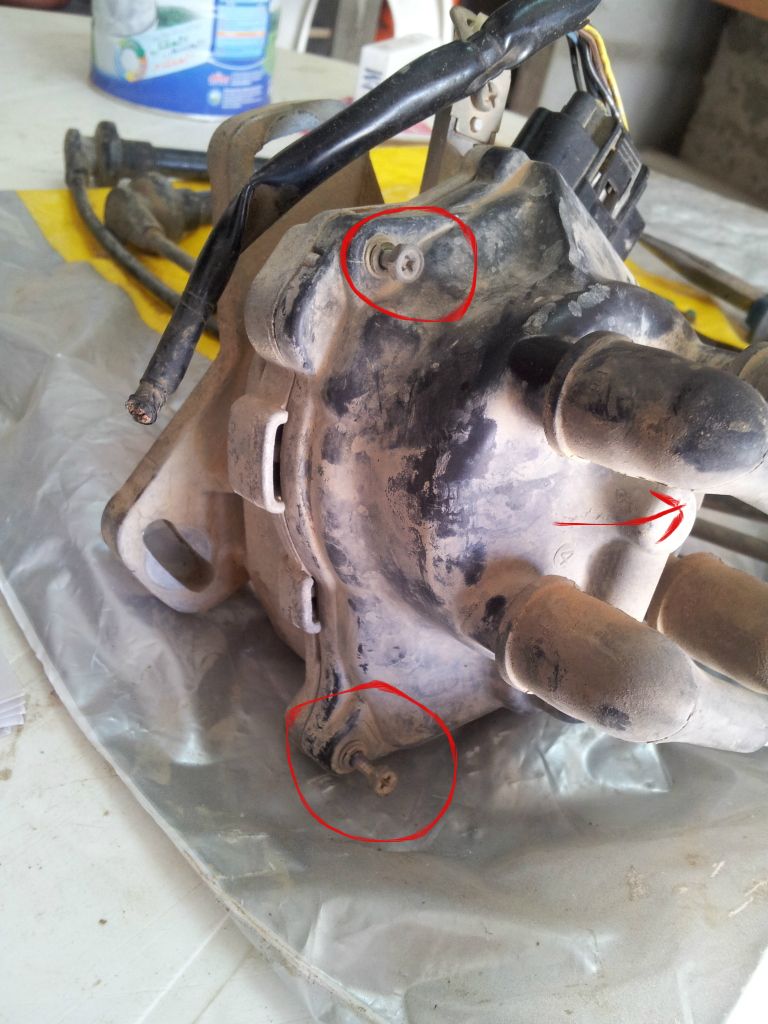
Remove the screw so you can pull the rotor out.
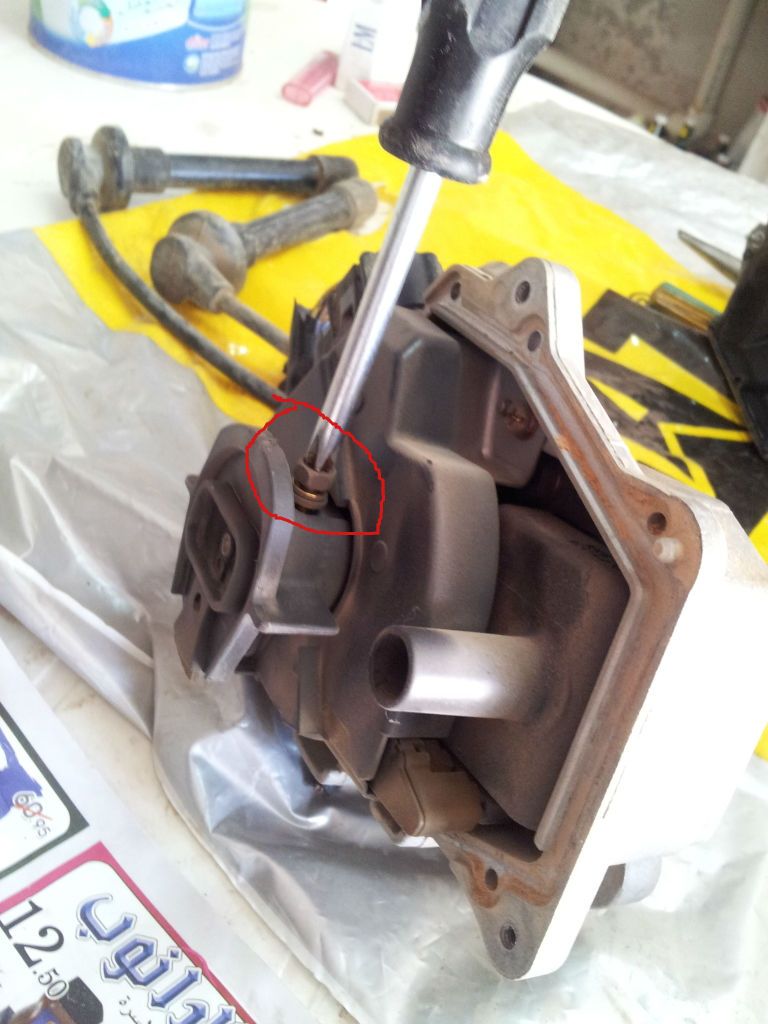
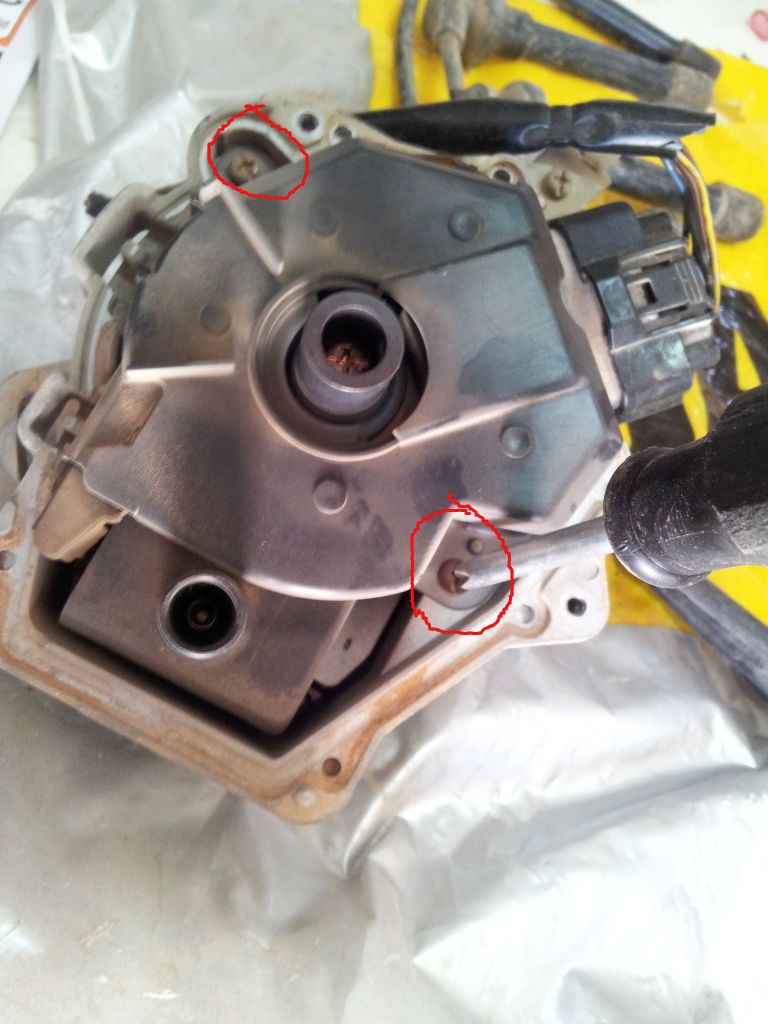
Remove the 2 screws holding the shield and pull it out.
[IMG]http://i1106.photobucket.com/albums/h368/axis111/Untitled-
7.jpg[/IMG]
Carefully remove the wires connecting the ICM to the coil. Those plastics holding the wires are so old and became brittle.
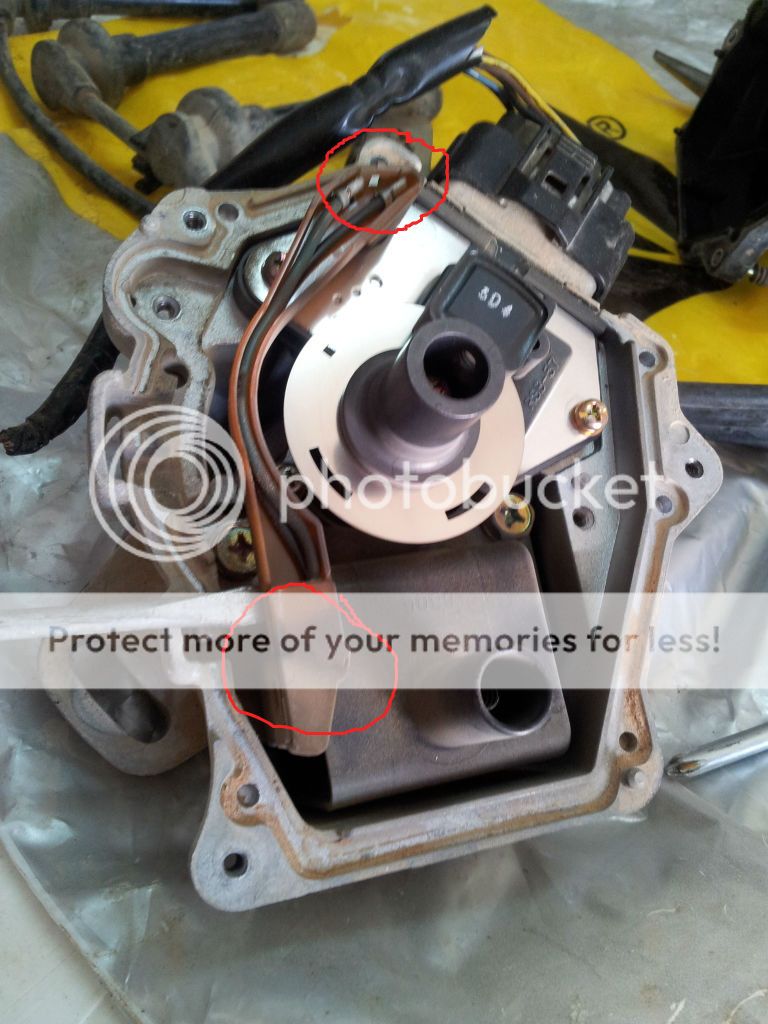
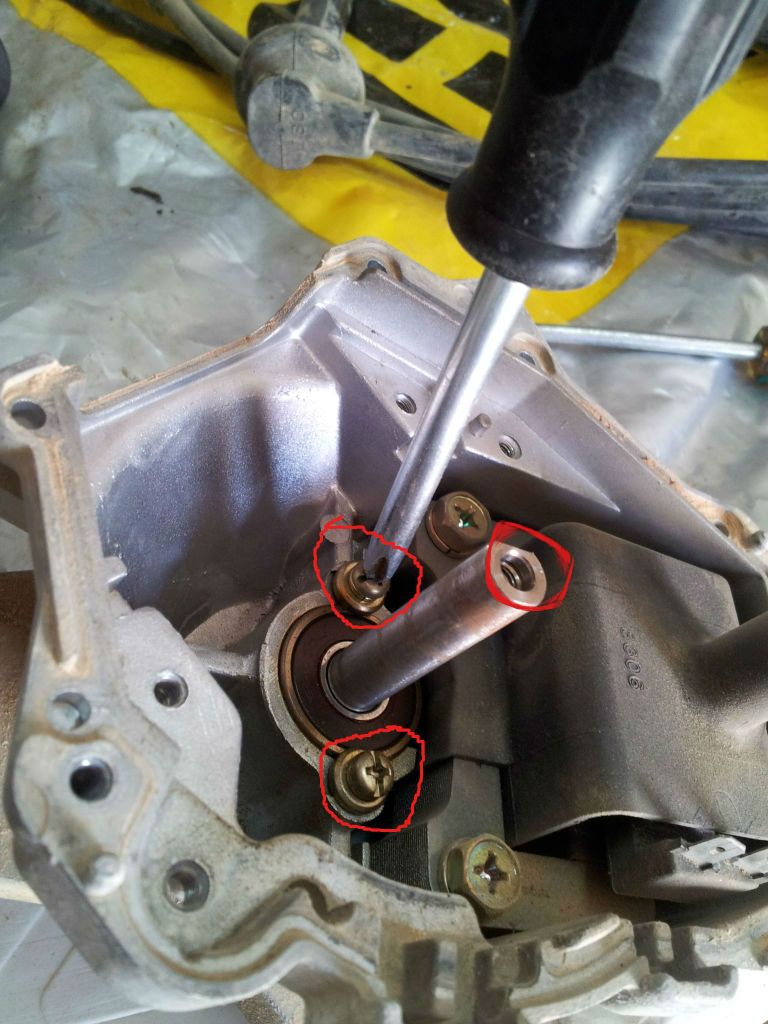
Remove the 2 screws holding the ignition control module ( its the part where the connectors plugs-in). Remove the screw on the shaft end. Pull up those parts at the same time. One cannot go without the other.

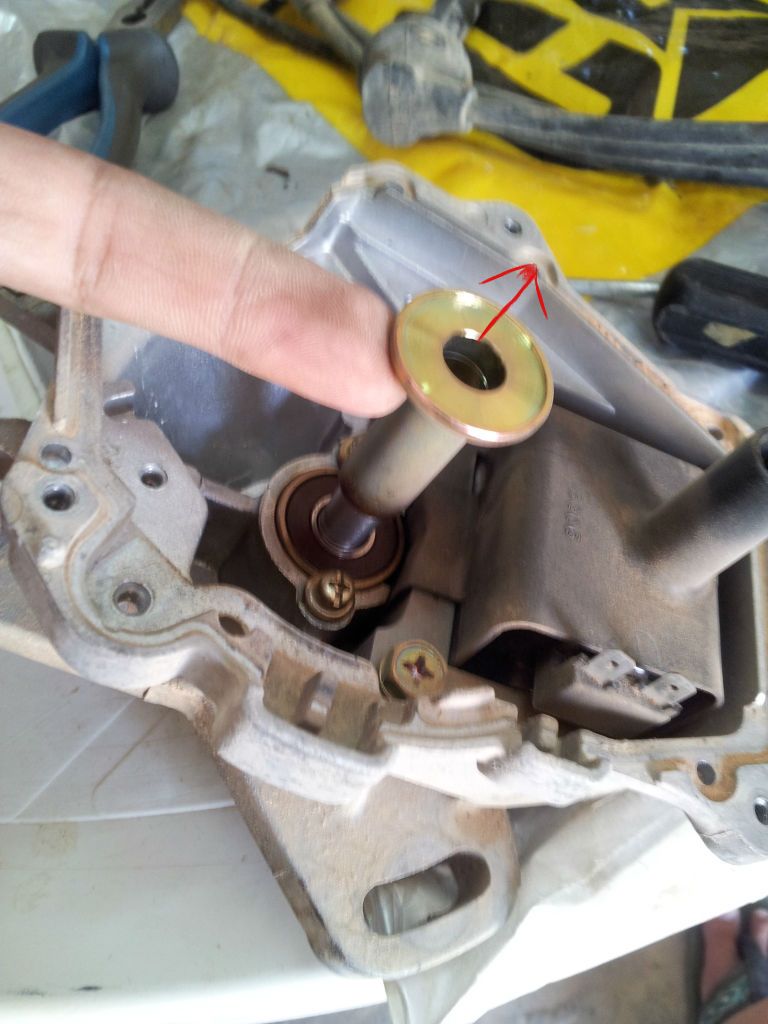
Remove the 2 screws holding the bearing. Return the screw that was taken from the rotor shaft before you hammer the shaft. You don't want even a tiny deformation on the shaft end because you cannot return the disc. Remove and replace a bad bearing. Bearing # is 6000 DU. The ending letters can be different depending on what seal you want on the bearing. Other distributor models might have a different #. Just read whats stamped on the bearing seals.
After some soft hammering, you can now pull the shaft out and remove the bearing as well.
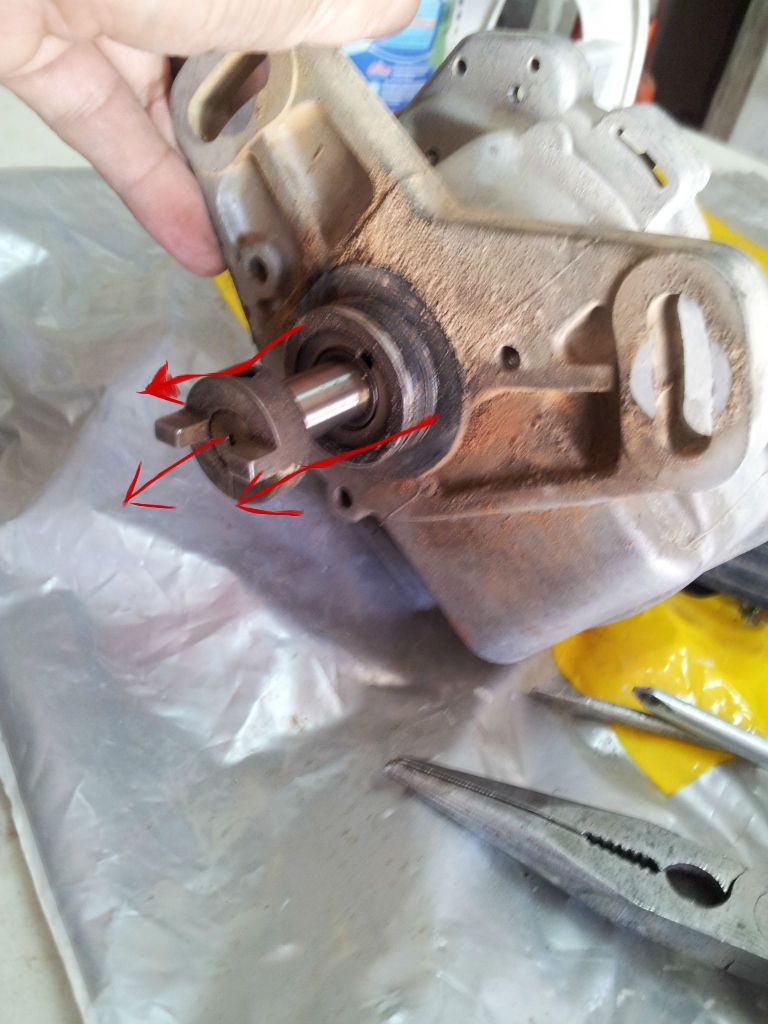
Now that the internal oil seal is clear, you can pry it out or push from the other end. Once you remove seal, most probably it will be torn apart. Honda oem sells it for 6$. If they don't have them in stock, just read the # and you can buy them from the local bearing and seals supplier at a cheaper price.
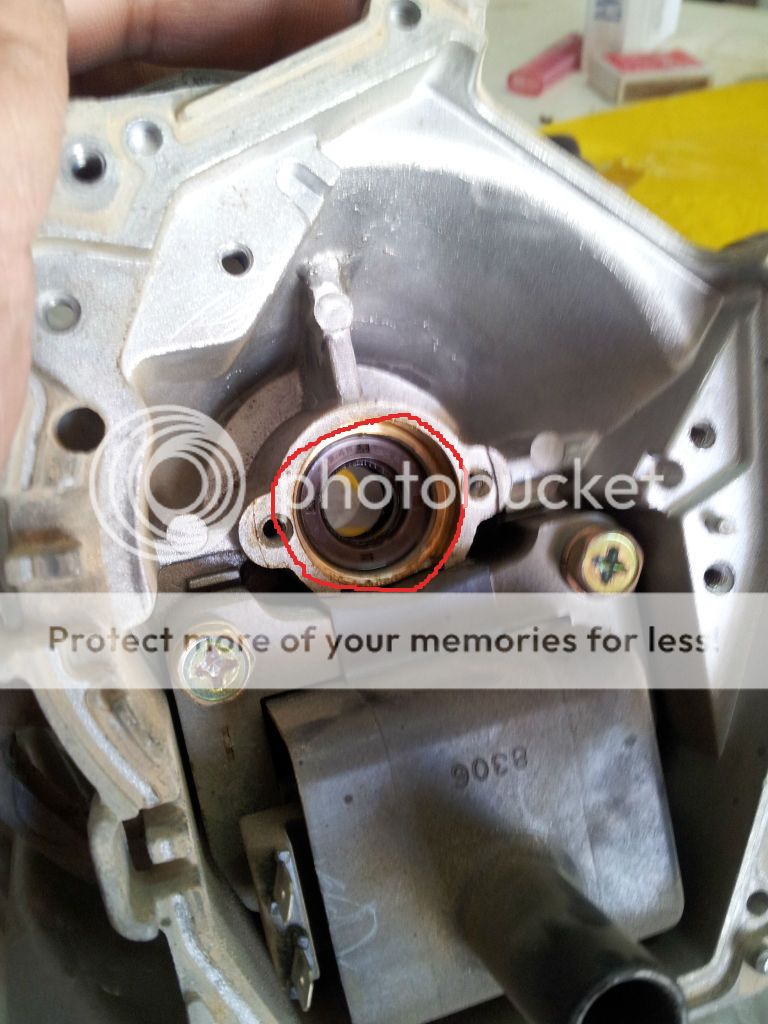
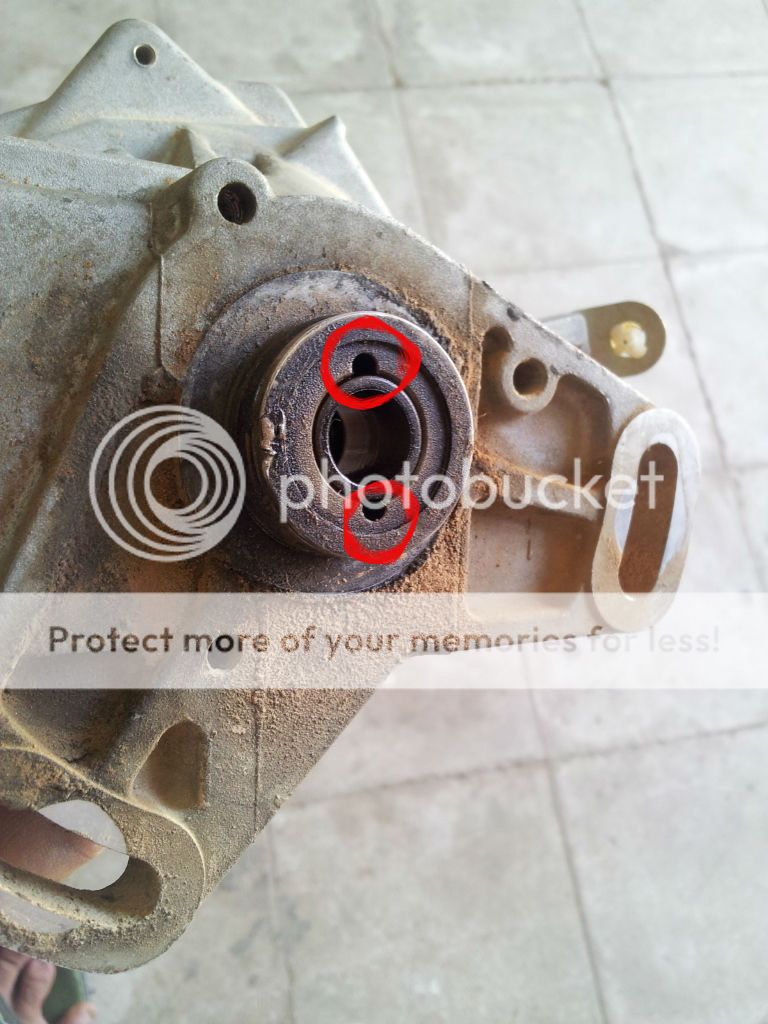
Clean everything including these 2 little holes. They are the inlet and outlet holes for the rotor shaft and seal. A clog in them would cause your dizzy to wear out prematurely.
Dont forget the O-ring. You could get them cheap together with the bearing and oil seal.
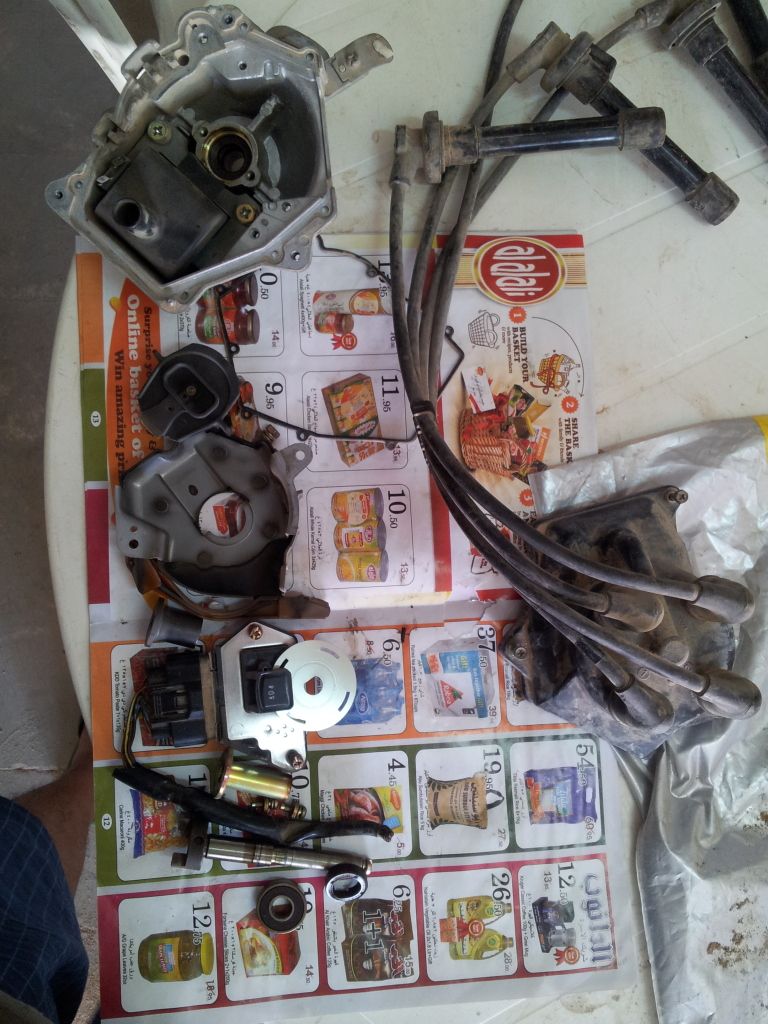
Now re-assemble those parts. I usually line them up in order of dis-assembly for easier assembly and avoid missing screws or parts. Now for the test. You can do the test part by part or you can slap into the car and fire it up.
Coil test http://i639.photobucket.com/albums/u...cture_3684.jpg
ICM test http://i267.photobucket.com/albums/i...cture_3323.jpg
If you have a bad distributor lying around, dont throw it away. Rip it apart and change only the parts that are bad or salvage the other working parts and keep it as spare for your other dizzy.
Start by removing the 3 screws holding the cap. One screw is not in view
Remove the screw so you can pull the rotor out.
Remove the 2 screws holding the shield and pull it out.
[IMG]http://i1106.photobucket.com/albums/h368/axis111/Untitled-
7.jpg[/IMG]
Carefully remove the wires connecting the ICM to the coil. Those plastics holding the wires are so old and became brittle.
Remove the 2 screws holding the ignition control module ( its the part where the connectors plugs-in). Remove the screw on the shaft end. Pull up those parts at the same time. One cannot go without the other.
Remove the 2 screws holding the bearing. Return the screw that was taken from the rotor shaft before you hammer the shaft. You don't want even a tiny deformation on the shaft end because you cannot return the disc. Remove and replace a bad bearing. Bearing # is 6000 DU. The ending letters can be different depending on what seal you want on the bearing. Other distributor models might have a different #. Just read whats stamped on the bearing seals.
After some soft hammering, you can now pull the shaft out and remove the bearing as well.
Now that the internal oil seal is clear, you can pry it out or push from the other end. Once you remove seal, most probably it will be torn apart. Honda oem sells it for 6$. If they don't have them in stock, just read the # and you can buy them from the local bearing and seals supplier at a cheaper price.
Clean everything including these 2 little holes. They are the inlet and outlet holes for the rotor shaft and seal. A clog in them would cause your dizzy to wear out prematurely.
Dont forget the O-ring. You could get them cheap together with the bearing and oil seal.
Now re-assemble those parts. I usually line them up in order of dis-assembly for easier assembly and avoid missing screws or parts. Now for the test. You can do the test part by part or you can slap into the car and fire it up.
Coil test http://i639.photobucket.com/albums/u...cture_3684.jpg
ICM test http://i267.photobucket.com/albums/i...cture_3323.jpg
If you have a bad distributor lying around, dont throw it away. Rip it apart and change only the parts that are bad or salvage the other working parts and keep it as spare for your other dizzy.
 08-16-2012, 10:46 AM
#5
Honda-Tech Member
Thread Starter
Join Date: Nov 2011
Posts: 438
Likes: 0
Received 0 Likes
on
0 Posts
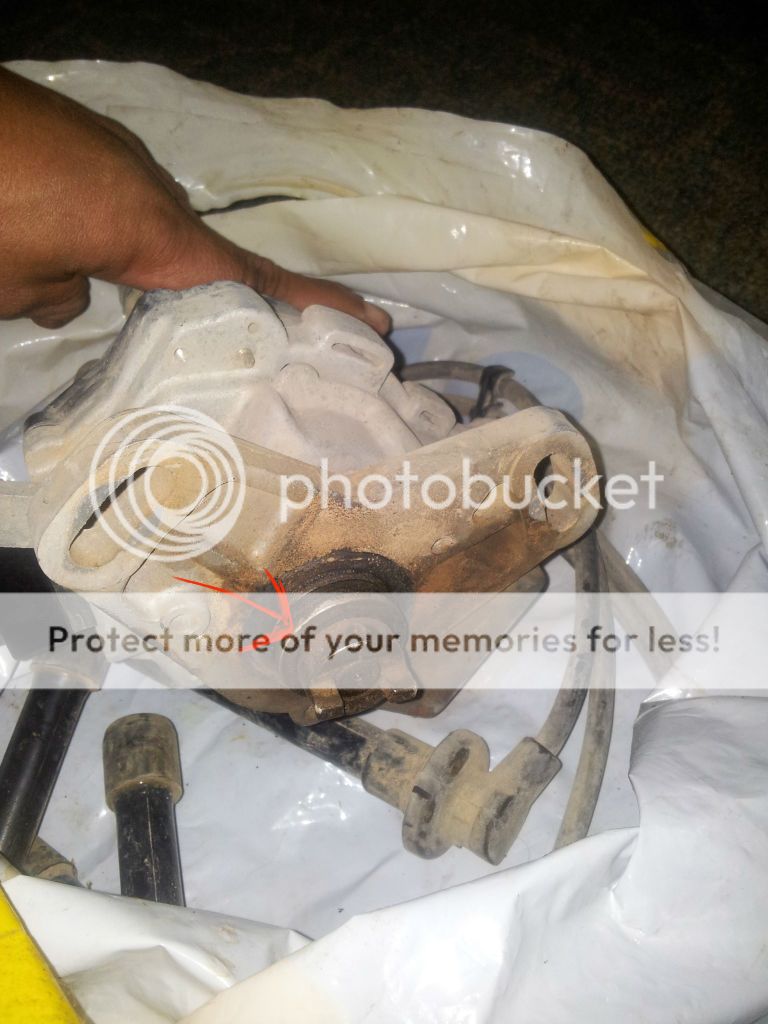
I bought it from the salvage yard like that. It must have been there for years enduring the rain and sand storms.Internals was better than the one installed on my car. For 22 US$, well worth it.
08-12-2016, 07:41 AM
#6
Premium Member
This distributor was taken from a 1996 civic lx, 5speed MT, OBD1.It has a 7 wire pin. It might be the same dizzy in some areas but other areas have their distributors a little bit different. Basically the procedures will be the same for other models and year. There is a write up about distributor on FAQ but it was somewhat different from the dizzy that I have so I took the courage to post it anyway.
Start by removing the 3 screws holding the cap. One screw is not in view

Remove the screw so you can pull the rotor out.


Remove the 2 screws holding the shield and pull it out.

Carefully remove the wires connecting the ICM to the coil. Those plastics holding the wires are so old and became brittle.

Remove the 2 screws holding the ignition control module ( its the part where the connectors plugs-in). Remove the screw on the shaft end. Pull up those parts at the same time. One cannot go without the other.


Remove the 2 screws holding the bearing. Return the screw that was taken from the rotor shaft before you hammer the shaft. You don't want even a tiny deformation on the shaft end because you cannot return the disc. Remove and replace a bad bearing. Bearing # is 6000 DU. The ending letters can be different depending on what seal you want on the bearing. Other distributor models might have a different #. Just read whats stamped on the bearing seals.

After some soft hammering, you can now pull the shaft out and remove the bearing as well.

Now that the internal oil seal is clear, you can pry it out or push from the other end. Once you remove seal, most probably it will be torn apart. Honda oem sells it for 6$. If they don't have them in stock, just read the # and you can buy them from the local bearing and seals supplier at a cheaper price.

Clean everything including these 2 little holes. They are the inlet and outlet holes for the rotor shaft and seal. A clog in them would cause your dizzy to wear out prematurely.

Dont forget the O-ring. You could get them cheap together with the bearing and oil seal.

Now re-assemble those parts. I usually line them up in order of dis-assembly for easier assembly and avoid missing screws or parts. Now for the test. You can do the test part by part or you can slap into the car and fire it up.
Coil test http://i639.photobucket.com/albums/u...cture_3684.jpg
ICM test http://i267.photobucket.com/albums/i...cture_3323.jpg

If you have a bad distributor lying around, dont throw it away. Rip it apart and change only the parts that are bad or salvage the other working parts and keep it as spare for your other dizzy.
Start by removing the 3 screws holding the cap. One screw is not in view
Remove the screw so you can pull the rotor out.
Remove the 2 screws holding the shield and pull it out.
Carefully remove the wires connecting the ICM to the coil. Those plastics holding the wires are so old and became brittle.
Remove the 2 screws holding the ignition control module ( its the part where the connectors plugs-in). Remove the screw on the shaft end. Pull up those parts at the same time. One cannot go without the other.
Remove the 2 screws holding the bearing. Return the screw that was taken from the rotor shaft before you hammer the shaft. You don't want even a tiny deformation on the shaft end because you cannot return the disc. Remove and replace a bad bearing. Bearing # is 6000 DU. The ending letters can be different depending on what seal you want on the bearing. Other distributor models might have a different #. Just read whats stamped on the bearing seals.
After some soft hammering, you can now pull the shaft out and remove the bearing as well.
Now that the internal oil seal is clear, you can pry it out or push from the other end. Once you remove seal, most probably it will be torn apart. Honda oem sells it for 6$. If they don't have them in stock, just read the # and you can buy them from the local bearing and seals supplier at a cheaper price.
Clean everything including these 2 little holes. They are the inlet and outlet holes for the rotor shaft and seal. A clog in them would cause your dizzy to wear out prematurely.
Dont forget the O-ring. You could get them cheap together with the bearing and oil seal.
Now re-assemble those parts. I usually line them up in order of dis-assembly for easier assembly and avoid missing screws or parts. Now for the test. You can do the test part by part or you can slap into the car and fire it up.
Coil test http://i639.photobucket.com/albums/u...cture_3684.jpg
ICM test http://i267.photobucket.com/albums/i...cture_3323.jpg
If you have a bad distributor lying around, dont throw it away. Rip it apart and change only the parts that are bad or salvage the other working parts and keep it as spare for your other dizzy.
Trending Topics
 08-12-2016, 08:35 AM
#9
Premium Member
Is there a listing that breaks down what the stamping on the distributor housing for what vehicle?
Also, I don't find the parts listing for rebuilding distributors at the online vendors. I find the outer o-ring, but not the inner bearings and seals. Where to find these?
Also, I don't find the parts listing for rebuilding distributors at the online vendors. I find the outer o-ring, but not the inner bearings and seals. Where to find these?

Thread
Thread Starter
Forum
Replies
Last Post