
How to repaint your rims the right way and get a super clean new shine !!
 05-07-2007, 08:04 PM
#1
Honda-Tech Member
Thread Starter
Join Date: Aug 2005
Location: Chicago, Il, US
Posts: 1,191
Likes: 0
Received 0 Likes
on
0 Posts
Hey guys, So I thought i would take the time to take some pics and do a little write-up along with my last project. I took the initiative to fix the infamous rota paint and refinish them them the RIGHT way. As you will see in the following pics and descriptions I'll take you from A-Z with pics to show you how i did it, also, If you ever have any questions dealing with my project feel free to PM me or Email me at webs103086@yahoo.com. On with the write up!!
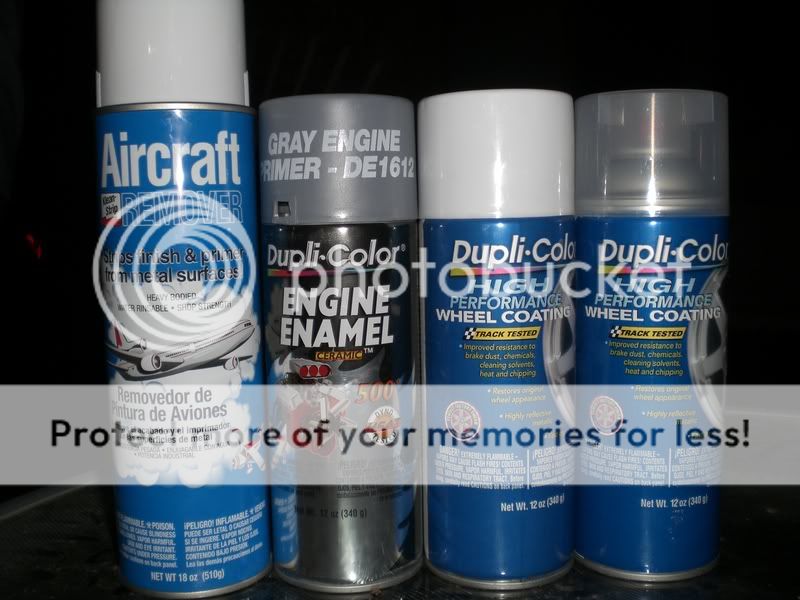
To start lets get the good stuff you are gonna need. Pictured below is the Aircraft Remover i used to strip the old paint off of the rims (Works perfect). Also pictured is the High heat engine primer that i used as my rims (gives a very durable base that will withstand heat, chipping, and flaking. Then pictured is the base coat (you will use whatever color you want) The dupli-color paint is well known for its extreme durability and adhering qualities, And along with the Dupli-color clear coat the finish you will get an extremely durable, shiny, and appealing finish that will outlast even the toughest daily driving.
**clean your rims very good, inside and out. Super strength Mean Green works perfect**
Next you will need to Mask off your tires if you are doing this job as I did with the tires already mounted on the rim. IF you don't have your tires mounted no worries! I used duck tape to tuck behind the lip of the rim ( sticks better to clean rubber than masking tape). Then use masking tape to tape either plastic or paper around your wheel onto the ducktape. Now you will be at the stage pictured below.
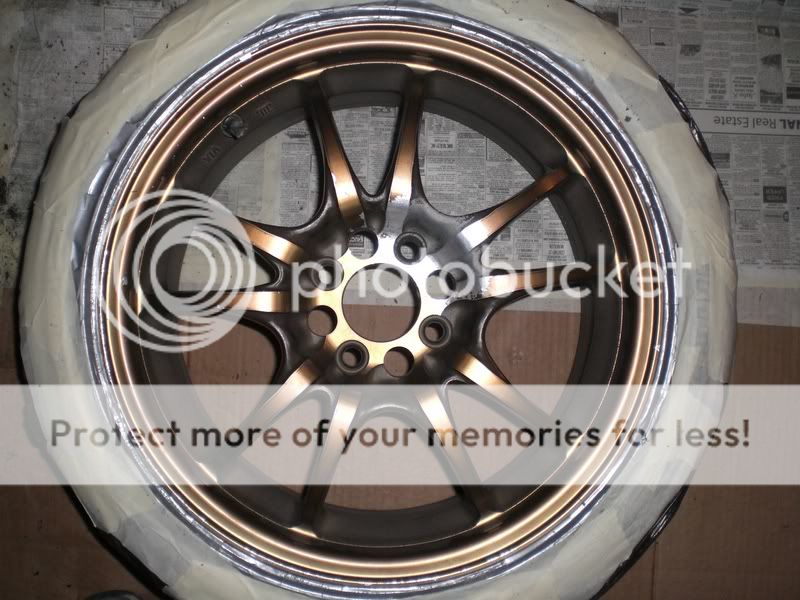
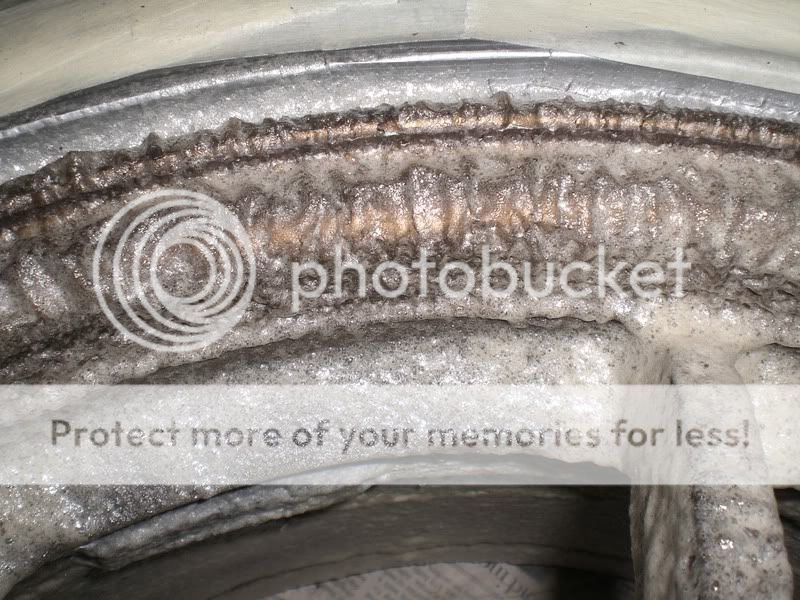
Now you will coat down all the rims, inside and out with the aircraft remover. I used a can per rim, more is better!! Spray the remover covering the entire surface, including all the nooks and crannies. Then let them sit for about 10-15 min. Once the aircraft remover goes to work you will begin to see what is pictured below. This tells you that the remover is working as you can see the enamle bubbling up. **Works best in mild heat conditions. (55-75 degrees) w/ humidity below 60%**
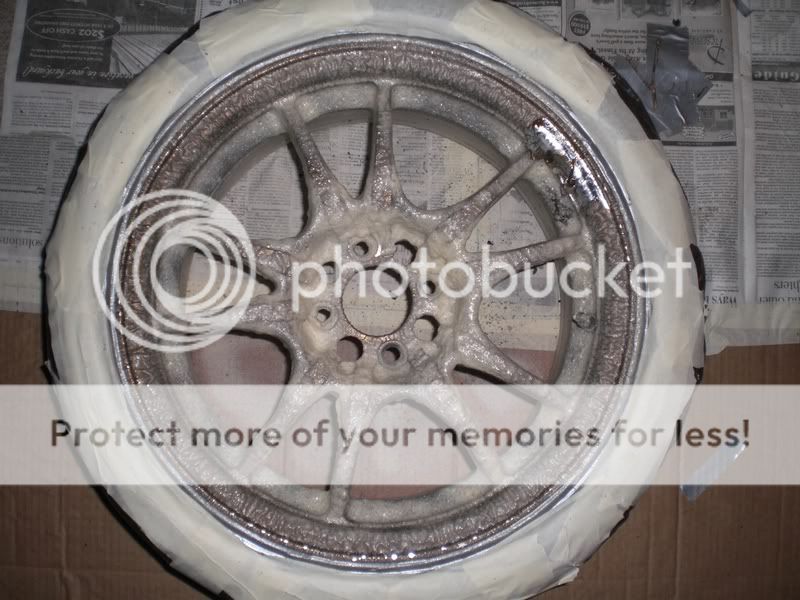
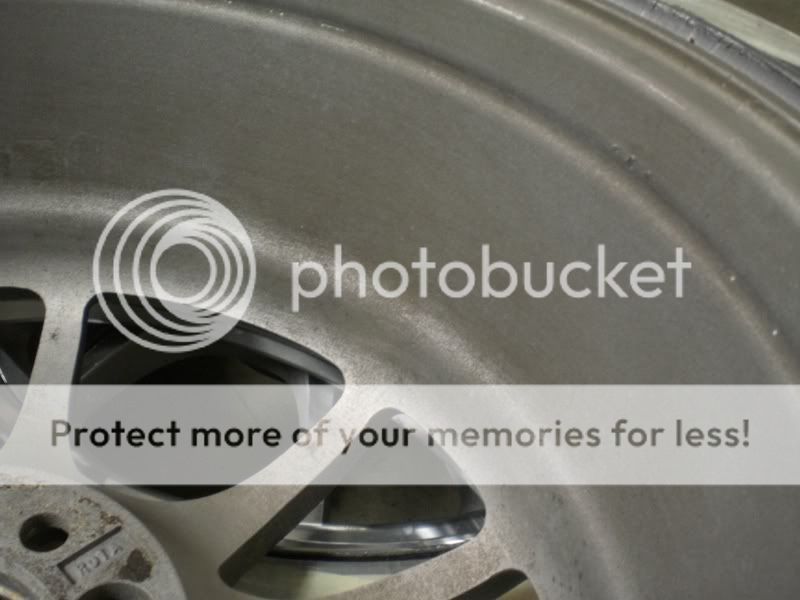
Once you have waited 10-15min and the enamel has bubbled or softened, use either a pressure washer, or a hose with the harshest direct stream possible to blast all the aircraft remover and softened enamel off the rims. If all the enamel comes off, great, if not, repeat with the aircraft remover and spraying. Once you get 99% of the enamle off they should appear as the ones below.

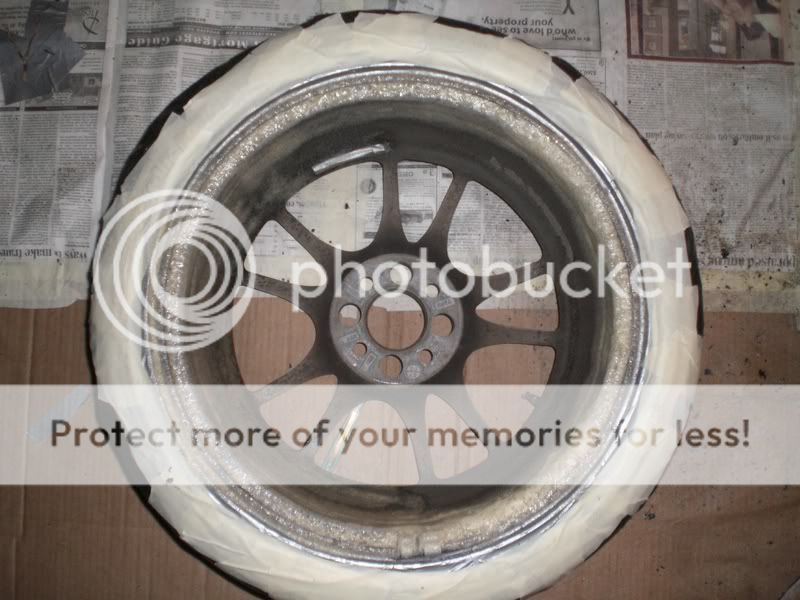
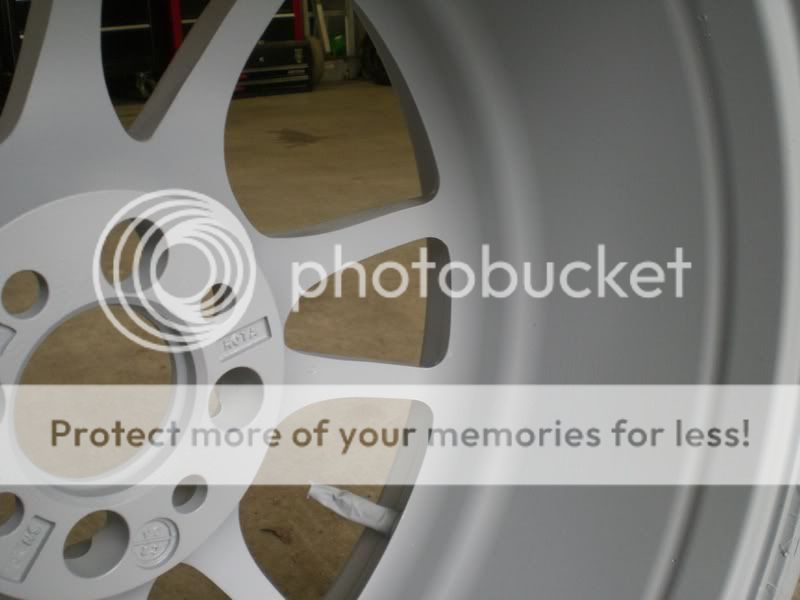
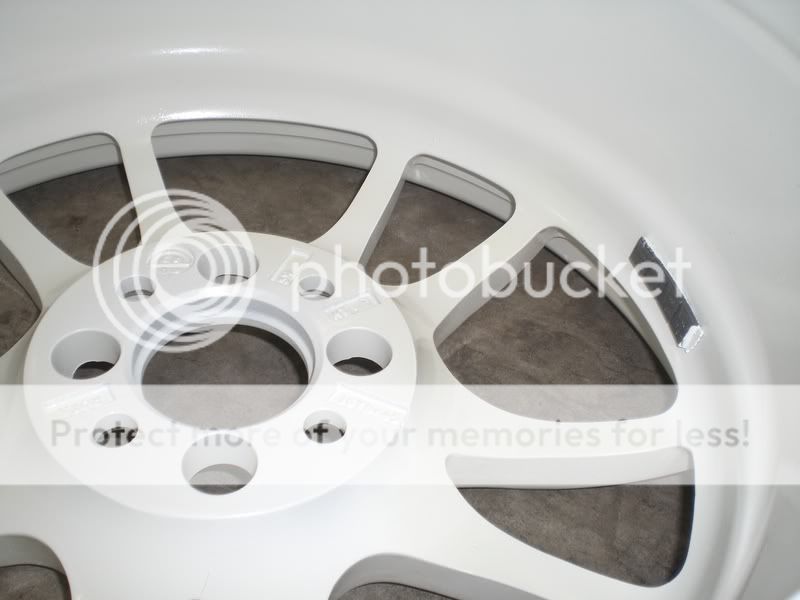
Next you will need to scuff and prepare your rims for the primer. You can use the Red and/or Green 3M scuff pads (available at most auto part and/or paint supply stores). Along with the scuff pads you will need to use a little bit of elbow grease. Once you have them scuffed it is time to wipe them down, use some type of cleaner like Naptha or Acetone to clean the rims down and then thouroughly wipe them with a dry rag afterwards. Spen time and make sure they are thoroughly clean and wiped. If all goes well and you are careful with applying the primer, your outcome should look something like what is pictured below.
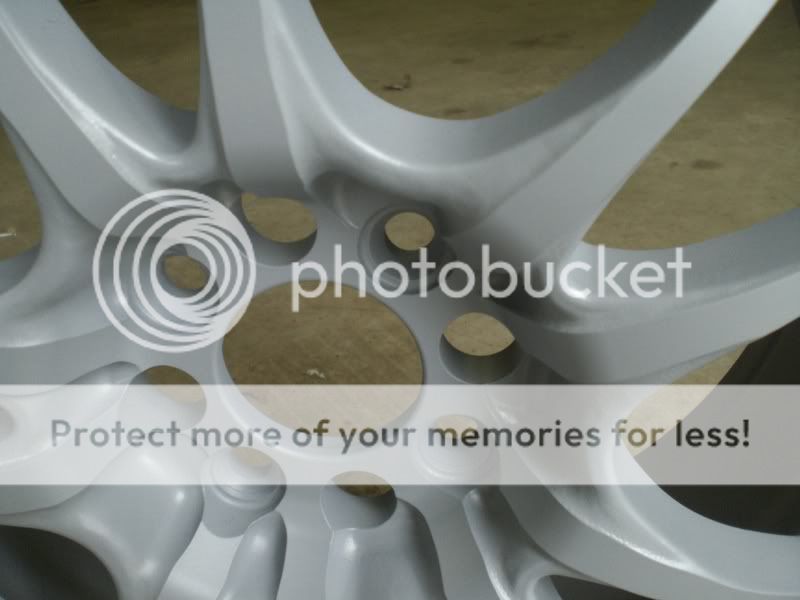
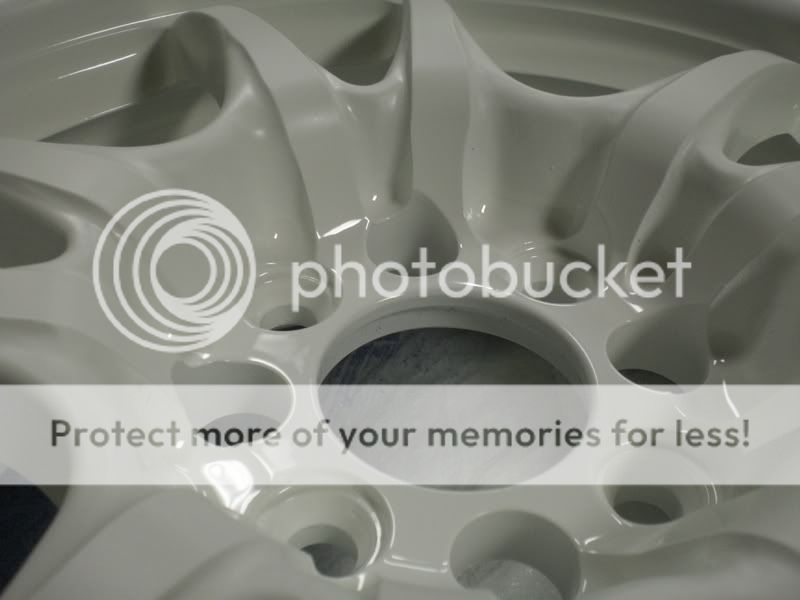
After you spray the primer you will want to let it sit for about 2hrs to dry thouroughly. Once it is dry it is time to spray your base coat (color coat) after applying 2light coats and 1medium-wet coat, you will need to let it dry for about an hour before applying the clear. before the clear your rims will be shiny and clean looking inside and out as pictured below.
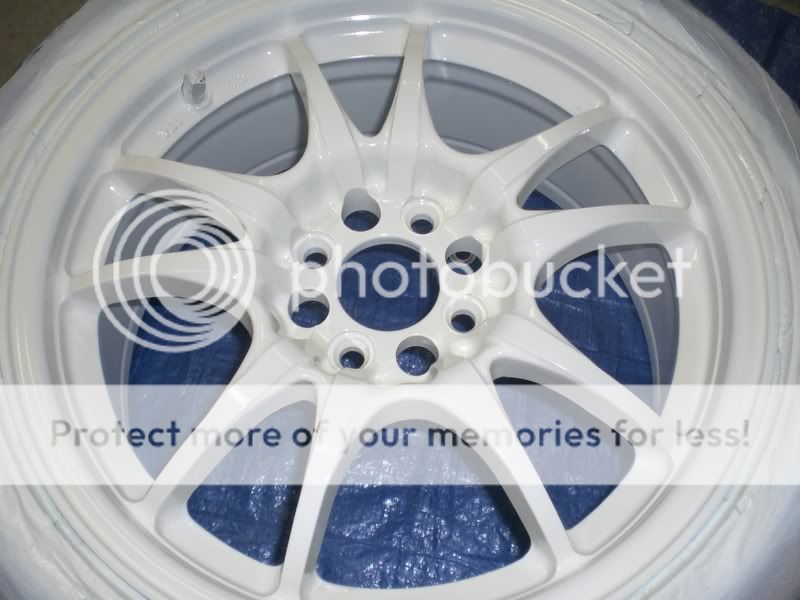
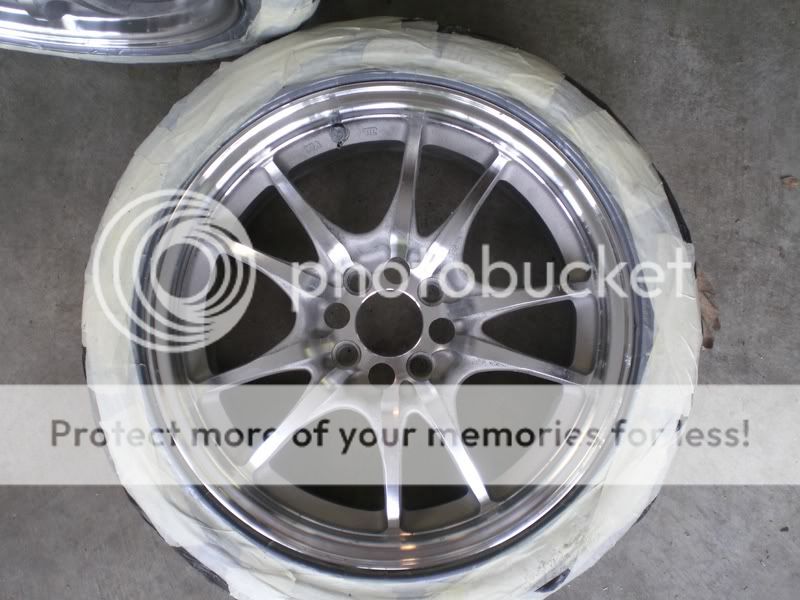
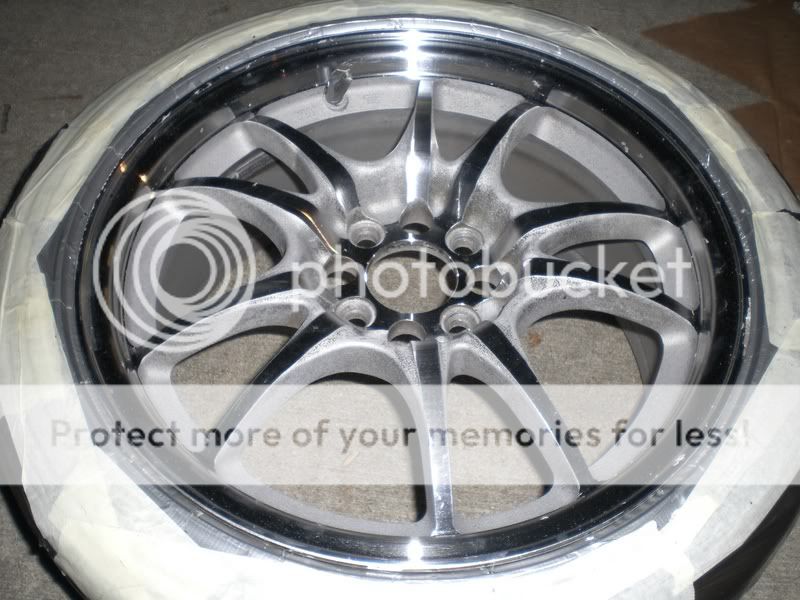
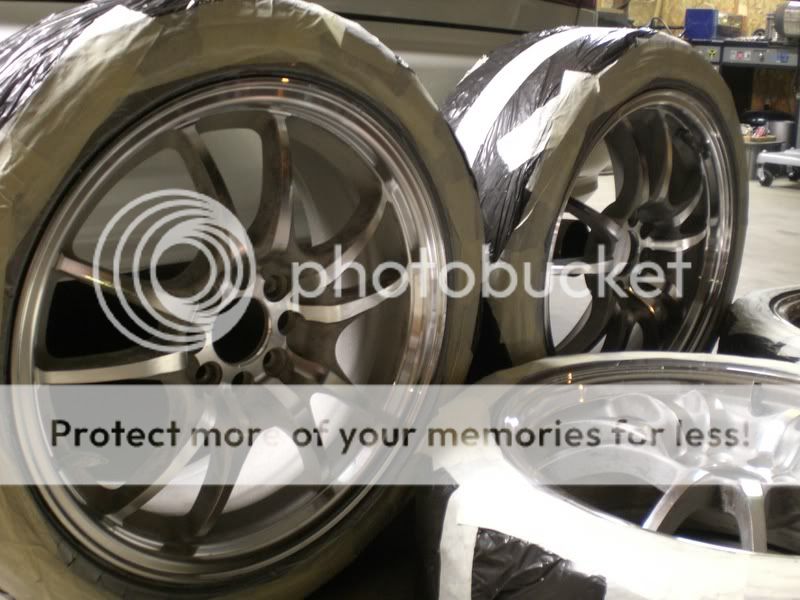
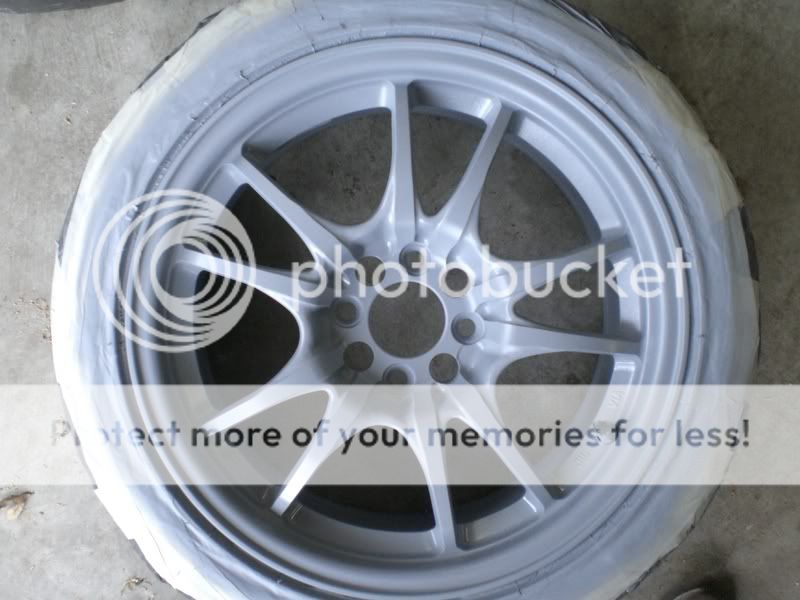
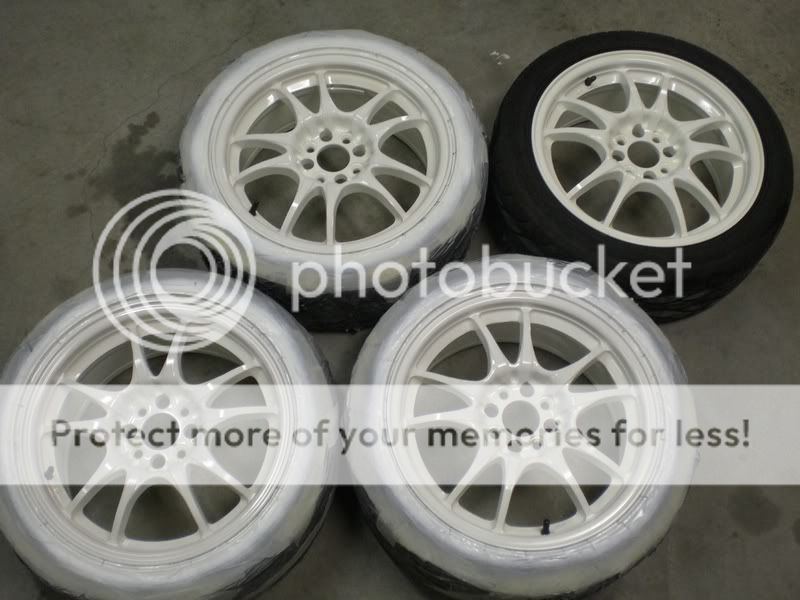
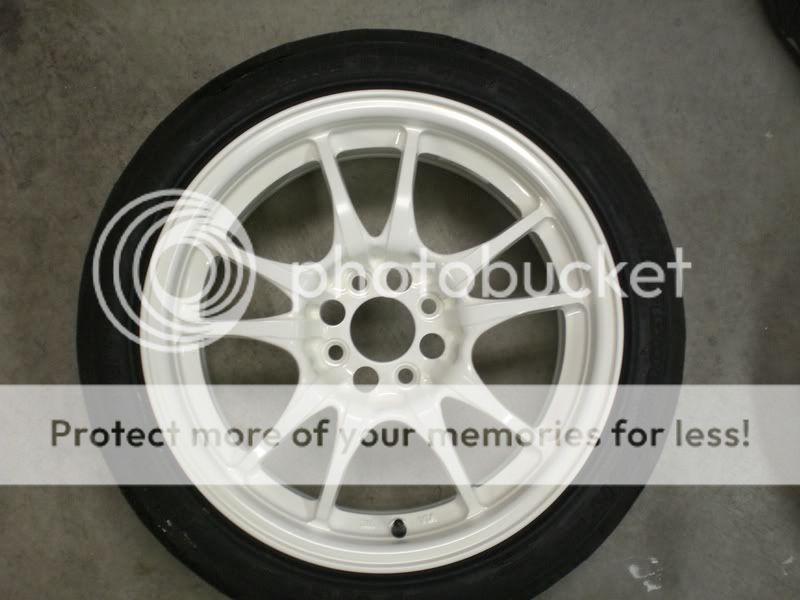
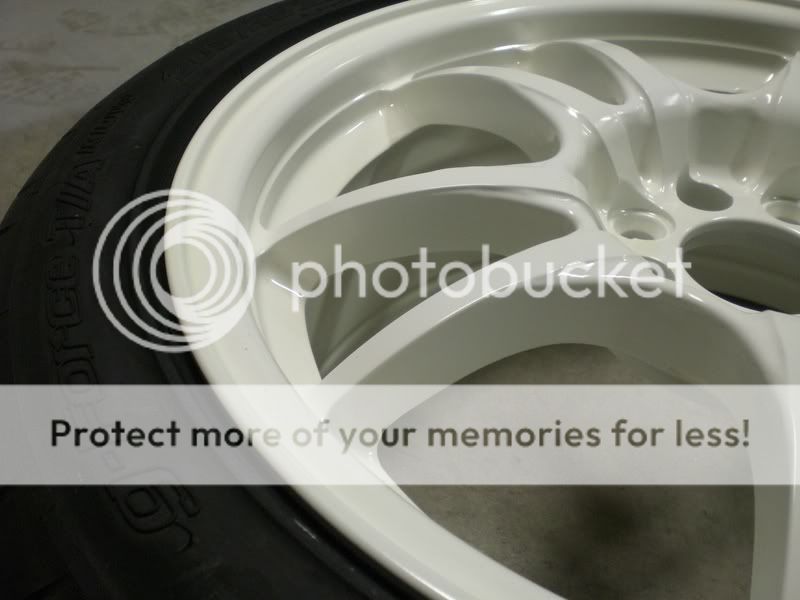
Once you have waited an hour after your last base coat, it is time for clear, the clear will be applied in a manner different than that of the base coat. As you spray it, you will spray in a parallel manner, meaning do not spray directly at the rim, spray parallel to it and allow it to "fall" onto the surface. This technique will give you a more uniform or "glass like" appearance. Apply about 2-3 coats of clear and WA-LA you are done painting. Now you just wait about 3hrs or possibly the next day and unmask them. **Keep in mind that alothough the paint is dry to touch and handle in 3hrs. it takes nearly 7 days to fully harden and cure, which will protect against damage from tightening lug nuts and chips while driving. That being said. Here are the pics of the findal outcome.

Well, I hope some of you will enjoy this write-up and find it informative and/or usefull. Good luck to you DIY'ers out there and have fun with your shiny new shoes. Again, If you have any question and or comments please leave a post, PM me, or email me.
Modified by JDM TR Civic at 12:01 AM 5/8/2007
To start lets get the good stuff you are gonna need. Pictured below is the Aircraft Remover i used to strip the old paint off of the rims (Works perfect). Also pictured is the High heat engine primer that i used as my rims (gives a very durable base that will withstand heat, chipping, and flaking. Then pictured is the base coat (you will use whatever color you want) The dupli-color paint is well known for its extreme durability and adhering qualities, And along with the Dupli-color clear coat the finish you will get an extremely durable, shiny, and appealing finish that will outlast even the toughest daily driving.
**clean your rims very good, inside and out. Super strength Mean Green works perfect**
Next you will need to Mask off your tires if you are doing this job as I did with the tires already mounted on the rim. IF you don't have your tires mounted no worries! I used duck tape to tuck behind the lip of the rim ( sticks better to clean rubber than masking tape). Then use masking tape to tape either plastic or paper around your wheel onto the ducktape. Now you will be at the stage pictured below.
Now you will coat down all the rims, inside and out with the aircraft remover. I used a can per rim, more is better!! Spray the remover covering the entire surface, including all the nooks and crannies. Then let them sit for about 10-15 min. Once the aircraft remover goes to work you will begin to see what is pictured below. This tells you that the remover is working as you can see the enamle bubbling up. **Works best in mild heat conditions. (55-75 degrees) w/ humidity below 60%**
Once you have waited 10-15min and the enamel has bubbled or softened, use either a pressure washer, or a hose with the harshest direct stream possible to blast all the aircraft remover and softened enamel off the rims. If all the enamel comes off, great, if not, repeat with the aircraft remover and spraying. Once you get 99% of the enamle off they should appear as the ones below.
Next you will need to scuff and prepare your rims for the primer. You can use the Red and/or Green 3M scuff pads (available at most auto part and/or paint supply stores). Along with the scuff pads you will need to use a little bit of elbow grease. Once you have them scuffed it is time to wipe them down, use some type of cleaner like Naptha or Acetone to clean the rims down and then thouroughly wipe them with a dry rag afterwards. Spen time and make sure they are thoroughly clean and wiped. If all goes well and you are careful with applying the primer, your outcome should look something like what is pictured below.
After you spray the primer you will want to let it sit for about 2hrs to dry thouroughly. Once it is dry it is time to spray your base coat (color coat) after applying 2light coats and 1medium-wet coat, you will need to let it dry for about an hour before applying the clear. before the clear your rims will be shiny and clean looking inside and out as pictured below.
Once you have waited an hour after your last base coat, it is time for clear, the clear will be applied in a manner different than that of the base coat. As you spray it, you will spray in a parallel manner, meaning do not spray directly at the rim, spray parallel to it and allow it to "fall" onto the surface. This technique will give you a more uniform or "glass like" appearance. Apply about 2-3 coats of clear and WA-LA you are done painting. Now you just wait about 3hrs or possibly the next day and unmask them. **Keep in mind that alothough the paint is dry to touch and handle in 3hrs. it takes nearly 7 days to fully harden and cure, which will protect against damage from tightening lug nuts and chips while driving. That being said. Here are the pics of the findal outcome.
Well, I hope some of you will enjoy this write-up and find it informative and/or usefull. Good luck to you DIY'ers out there and have fun with your shiny new shoes. Again, If you have any question and or comments please leave a post, PM me, or email me.
Modified by JDM TR Civic at 12:01 AM 5/8/2007

 05-07-2007, 08:25 PM
#3
Honda-Tech Member
Join Date: Apr 2004
Location: Staples Center, CA
Posts: 2,273
Likes: 0
Received 0 Likes
on
0 Posts
nice write up...looks like you did a good job on your wheels 
Modified by faster Type R at 10:25 PM 5/7/2007
Modified by faster Type R at 10:25 PM 5/7/2007

 05-07-2007, 08:35 PM
#5
Tuna-Killer
Join Date: Feb 2005
Location: Tuna time, pacific ocean, usa
Posts: 611
Likes: 0
Received 0 Likes
on
0 Posts
i think he wants people to im him or email him , no ?
Trending Topics
 05-07-2007, 09:23 PM
#12
<TABLE WIDTH="90%" CELLSPACING=0 CELLPADDING=0 ALIGN=CENTER><TR><TD>Quote, originally posted by hpi247 »</TD></TR><TR><TD CLASS="quote"> how much did it all cost you? </TD></TR></TABLE>
05-07-2007, 09:23 PM
#13
Honda-Tech Member
Thread Starter
Join Date: Aug 2005
Location: Chicago, Il, US
Posts: 1,191
Likes: 0
Received 0 Likes
on
0 Posts
I don't have any pics of the car yet, cause i just finished the job on Sun 5/6/07 and i want them to be totally cured before i bolt them on and drive them. to having a daily driver besides my hatch. They will be goin on my hatch in my sig.
to having a daily driver besides my hatch. They will be goin on my hatch in my sig.
05-07-2007, 09:26 PM
#15
Honda-Tech Member
Thread Starter
Join Date: Aug 2005
Location: Chicago, Il, US
Posts: 1,191
Likes: 0
Received 0 Likes
on
0 Posts
<TABLE WIDTH="90%" CELLSPACING=0 CELLPADDING=0 ALIGN=CENTER><TR><TD>Quote, originally posted by hpi247 »</TD></TR><TR><TD CLASS="quote">wow they look really good, nice job . how much did it all cost you? any pics on the car yet?</TD></TR></TABLE>
I would say all in all it costed me some where around $60 for all the supplies needed for the entire project.
I would say all in all it costed me some where around $60 for all the supplies needed for the entire project.
05-07-2007, 09:28 PM
#17
Honda-Tech Member
Thread Starter
Join Date: Aug 2005
Location: Chicago, Il, US
Posts: 1,191
Likes: 0
Received 0 Likes
on
0 Posts
<TABLE WIDTH="90%" CELLSPACING=0 CELLPADDING=0 ALIGN=CENTER><TR><TD>Quote, originally posted by NMZ »</TD></TR><TR><TD CLASS="quote">what a waste of those bronze wheels  </TD></TR></TABLE>
You didn't get to see how the paint was peeling off of them, otherwise I agree. It would be a waste of perfect bronze rotas.
</TD></TR></TABLE>You didn't get to see how the paint was peeling off of them, otherwise I agree. It would be a waste of perfect bronze rotas.
05-07-2007, 09:40 PM
#20
Honda-Tech Member
Join Date: Aug 2004
Location: 015, UT, USA
Posts: 1,132
Likes: 0
Received 0 Likes
on
0 Posts
Sweet man, those rims look lots better! Think it will work on my circuit 8's?
haha j/k but I think I'll give it a try... once my 50 other projects are done. =]
Nice write up man.
haha j/k but I think I'll give it a try... once my 50 other projects are done. =]
Nice write up man.