
diy HID retrofit DC2/DB8
 01-18-2006, 01:15 PM
#1
Honda-Tech Member
Thread Starter
Join Date: Jun 2005
Location: HOT AS HELL, az, usa
Posts: 687
Likes: 0
Received 0 Likes
on
0 Posts
i'm doing the HID retro fit on my my 94 4dr GSR-T
i got the parts from http://www.hidplanet.com it was under 400 including shipping
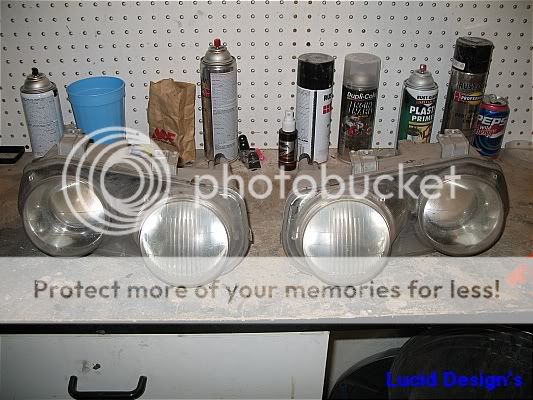
extra stuff i got....2 relay's, 10ga wire "red & black", sandpaper "1000,1200,1500", polishing compound
i"m not keeping this front end for very long ...going with the jdm ITR front end....i will be doing the retrofit to the type-r headlights....i have never done this before so i wanted a little pratice....i don't wanna screw up $700 lights...so i decieded to pratice on my usdm front end
here we go
First thing to do is to get the headlights out of this car....if you do not know how to do that walk away right now
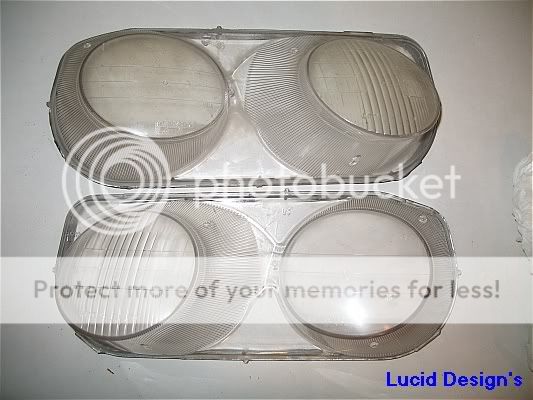
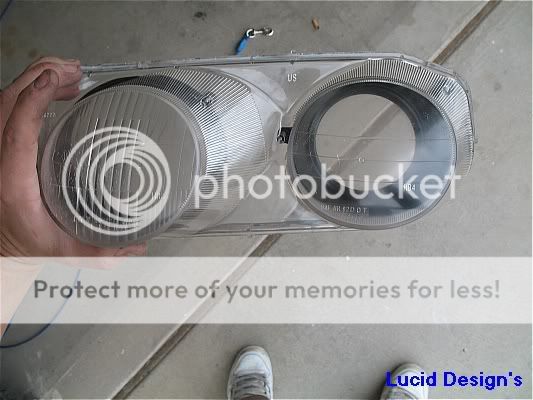
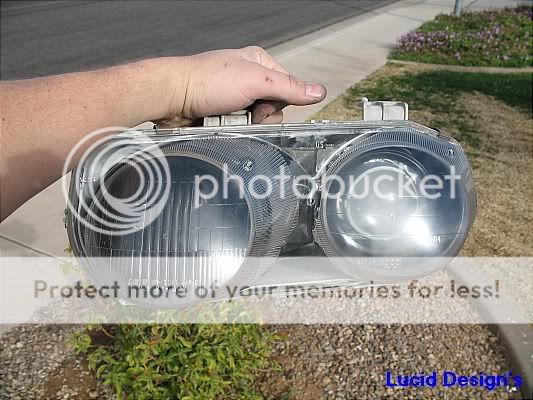
here is a pic of the lights out of the car
and the emtpy car

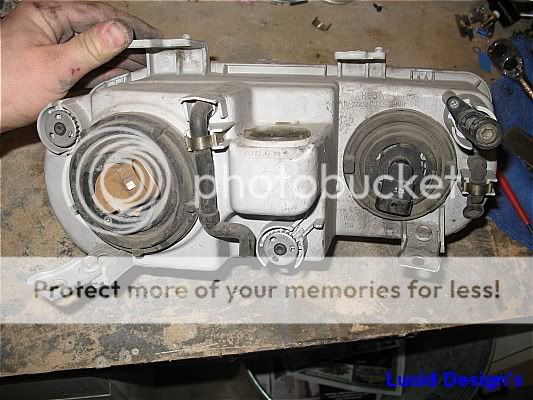
the next step is to strip down the HL as best as possible
NOW IT'S OVEN TIME.....i preheated my oven to 350degrees
i put in each light 1 at a time for a couple of minutes....BE VERY CAREFUL...IT'S REALLY EASY TO MELT THRU A HEADLIGHT
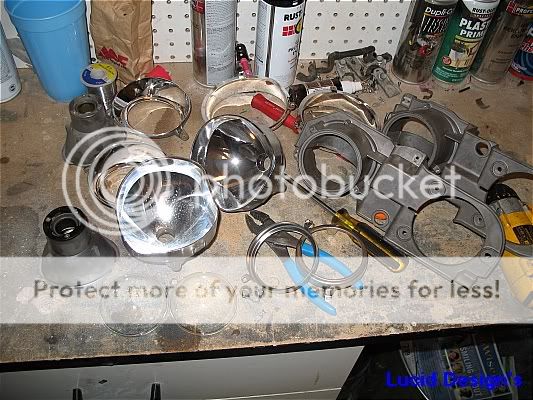
now you can fully take apart the headlight..
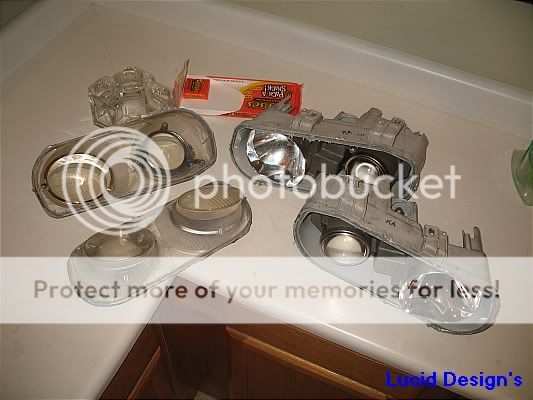
now i wanted to clean up the HL a little...comes time to wet sand like a ****....i wanted mainly to get rid of all the yellow on the HL....here is a side by side shot...it made a difference.....if i was going to keep the frontend..i would have finished them
now i used a dremel cut-off wheel to cut off the factory projectors...when ur done it should look like this....BE CAREFUL NOT TO BREAK THE PLATE
 nice safety glasses huH?
now it was time to mount the HID projector.....the new one was alot smaller so it fit in the area very nice...without to much trimming....i used loctite on all the screws....now here it is rdy to go
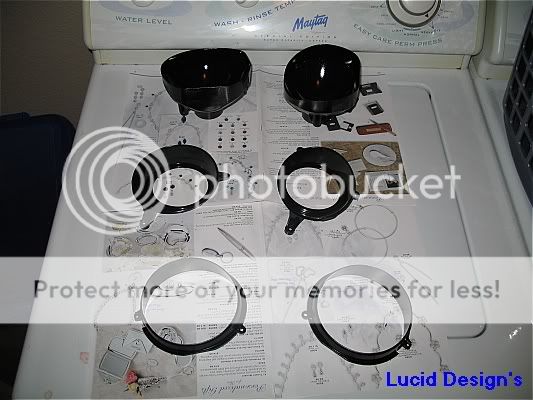
next i sanded/prepped painted all the HL shrouds and even the Highbeam reflector....it came out really nice in the end
the shrouds mounted.....
now i used a heat gun to put backtogether the HL's i also ran a new bead of high temp silicone
lookin good
now its time for wiring....the ballast that the kit comes with is suppost to fit the 9006 plug but it had to be trimmed.....
after looking at the factory plug...i was scared...18ga wire...for HL's....so i decieded to fully rewire the system..plugs and all
i modded the factory plugs with 12ga wire just to be safe.....plus i'm **** about wiring
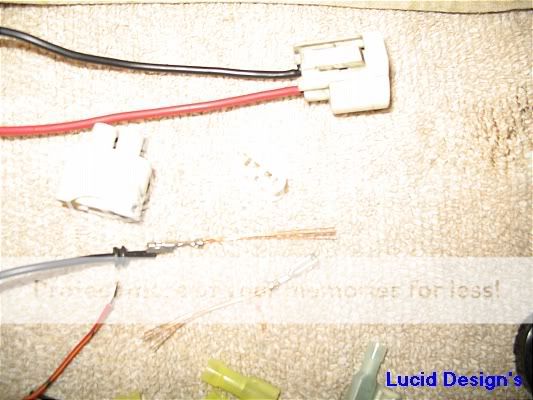
side by side with the stock connector....BIG DIFFERENCE
now i made my relay harness......solder and heatshrink....looks damn sexy if u ask me....NOT TO MENTION IT'S SAFE

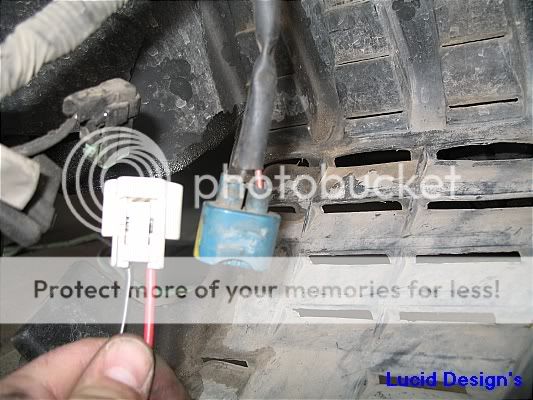
now....my motor bay was cramped anyways...now i had to put this HID b's and relays somewhere......i found this spot ...on each side of the car....the cable reaches the headlight very easy and when the bumper is on...the ballest is really hard to steal...and protected from heat and the elements
'"BE SURE TO HAVE CLEAN GROUNDS"
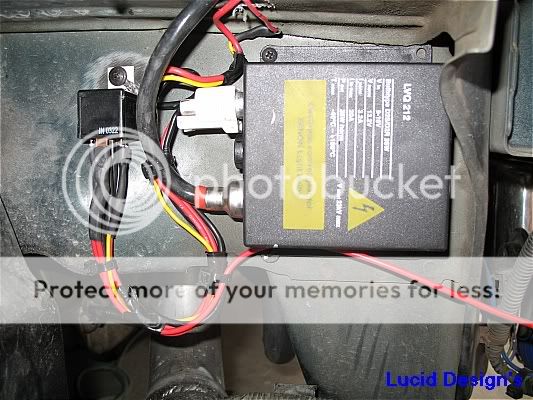
looking good....now finish the wiring up to the battery....MAKE SURE TO USE FUSES....I CANNOT STRESS THIS ENOUGH
NOW SOME PICTURES OF THE FINISHED PRODUCT
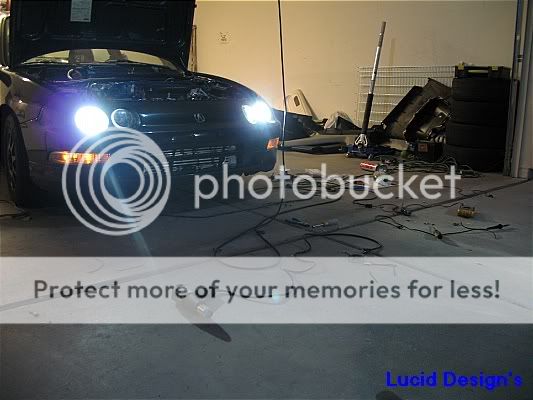

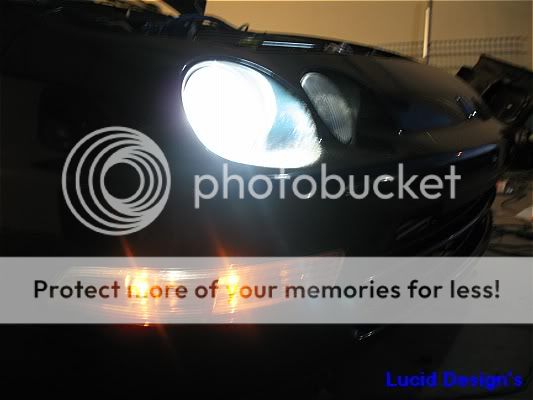
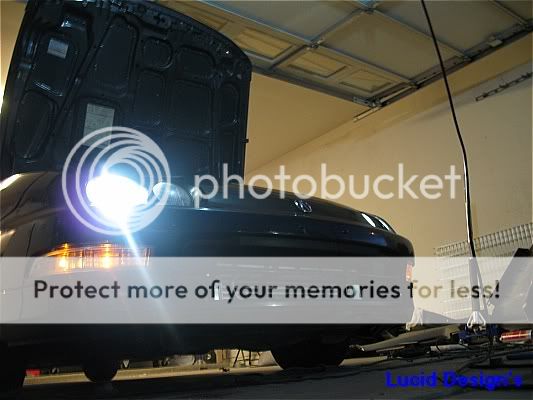

I'M VERY HAPPY WITH THE OUTPUT AND THE COLOR....IT WORKS GOOD....EVEN RAINED THE NEXT DAY...I HAVE NO MOSITURE YET..I'M HAPPY ABOUT THAT
feel free to leave ur comments....or ask me questions

Modified by lucidvtec at 3:27 PM 1/18/2006
Modified by lucidvtec at 3:41 PM 1/18/2006
Modified by lucidvtec at 3:43 PM 1/18/2006
Modified by lucidvtec at 3:49 PM 1/18/2006
i got the parts from http://www.hidplanet.com it was under 400 including shipping
extra stuff i got....2 relay's, 10ga wire "red & black", sandpaper "1000,1200,1500", polishing compound
i"m not keeping this front end for very long ...going with the jdm ITR front end....i will be doing the retrofit to the type-r headlights....i have never done this before so i wanted a little pratice....i don't wanna screw up $700 lights...so i decieded to pratice on my usdm front end
here we go
First thing to do is to get the headlights out of this car....if you do not know how to do that walk away right now
here is a pic of the lights out of the car
and the emtpy car
the next step is to strip down the HL as best as possible
NOW IT'S OVEN TIME.....i preheated my oven to 350degrees
i put in each light 1 at a time for a couple of minutes....BE VERY CAREFUL...IT'S REALLY EASY TO MELT THRU A HEADLIGHT
now you can fully take apart the headlight..
now i wanted to clean up the HL a little...comes time to wet sand like a ****....i wanted mainly to get rid of all the yellow on the HL....here is a side by side shot...it made a difference.....if i was going to keep the frontend..i would have finished them
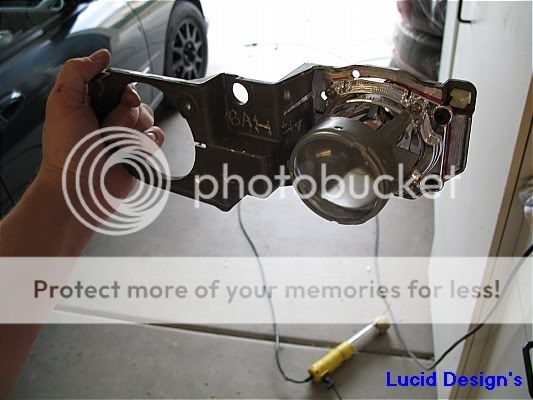
now i used a dremel cut-off wheel to cut off the factory projectors...when ur done it should look like this....BE CAREFUL NOT TO BREAK THE PLATE
nice safety glasses huH?now it was time to mount the HID projector.....the new one was alot smaller so it fit in the area very nice...without to much trimming....i used loctite on all the screws....now here it is rdy to go
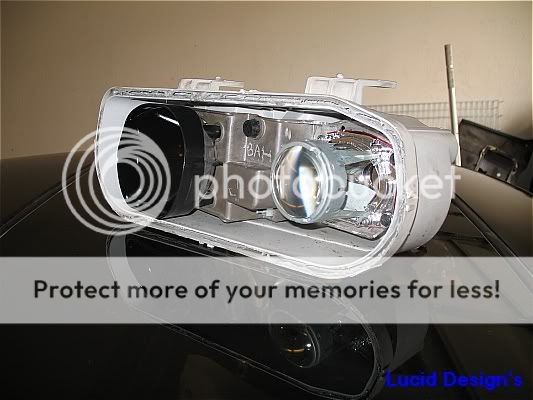
next i sanded/prepped painted all the HL shrouds and even the Highbeam reflector....it came out really nice in the end
the shrouds mounted.....
now i used a heat gun to put backtogether the HL's i also ran a new bead of high temp silicone
lookin good
now its time for wiring....the ballast that the kit comes with is suppost to fit the 9006 plug but it had to be trimmed.....
after looking at the factory plug...i was scared...18ga wire...for HL's....so i decieded to fully rewire the system..plugs and all
i modded the factory plugs with 12ga wire just to be safe.....plus i'm **** about wiring
side by side with the stock connector....BIG DIFFERENCE
now i made my relay harness......solder and heatshrink....looks damn sexy if u ask me....NOT TO MENTION IT'S SAFE
now....my motor bay was cramped anyways...now i had to put this HID b's and relays somewhere......i found this spot ...on each side of the car....the cable reaches the headlight very easy and when the bumper is on...the ballest is really hard to steal...and protected from heat and the elements
'"BE SURE TO HAVE CLEAN GROUNDS"
looking good....now finish the wiring up to the battery....MAKE SURE TO USE FUSES....I CANNOT STRESS THIS ENOUGH
NOW SOME PICTURES OF THE FINISHED PRODUCT
I'M VERY HAPPY WITH THE OUTPUT AND THE COLOR....IT WORKS GOOD....EVEN RAINED THE NEXT DAY...I HAVE NO MOSITURE YET..I'M HAPPY ABOUT THAT
feel free to leave ur comments....or ask me questions
Modified by lucidvtec at 3:27 PM 1/18/2006
Modified by lucidvtec at 3:41 PM 1/18/2006
Modified by lucidvtec at 3:43 PM 1/18/2006
Modified by lucidvtec at 3:49 PM 1/18/2006
 01-18-2006, 01:54 PM
#6
Honda-Tech Member
Thread Starter
Join Date: Jun 2005
Location: HOT AS HELL, az, usa
Posts: 687
Likes: 0
Received 0 Likes
on
0 Posts
i just centered the HID projectors aswell as possible...and then used the adj...screws to do the rest....i will try to post pix soon of the cut off lines
the relays are easy man.
here u go
30 is the posive output to the hid ballest
87 is the constant input "positive" from the battery ...must fuse this
86 is the reg...headlight wire...i think its like red/grn...or something like that
85 is ground
anything else just let me know........also doing the relays like that...is good for ur ballest...it can help with voltage drops and such....i actually have done this mod...and it brightens up the stock halogen lights

Trending Topics
 01-18-2006, 02:54 PM
#10
Honda-Tech Member
iTrader: (2)
Join Date: Dec 2001
Location: Phoenix
Posts: 6,494
Likes: 0
Received 0 Likes
on
0 Posts
<TABLE WIDTH="90%" CELLSPACING=0 CELLPADDING=0 ALIGN=CENTER><TR><TD>Quote, originally posted by -Gambit- »</TD></TR><TR><TD CLASS="quote">damn looks good and damn nice write up</TD></TR></TABLE>
01-18-2006, 04:24 PM
#12
Honda-Tech Member
Join Date: Jun 2005
Location: Anchorage, AK, USA
Posts: 445
Likes: 0
Received 0 Likes
on
0 Posts
Nice write up and good job with the retro-fit. I'll definetly be refuring to this when I retro-fit my lights. I'll have to check out hidplanet more and start getting some info.
01-18-2006, 08:05 PM
#16
Member
Join Date: Jun 2002
Location: US
Posts: 4,448
Likes: 0
Received 0 Likes
on
0 Posts
<TABLE WIDTH="90%" CELLSPACING=0 CELLPADDING=0 ALIGN=CENTER><TR><TD>Quote, originally posted by Hybrid93Hatch »</TD></TR><TR><TD CLASS="quote">Very nice write-up </TD></TR></TABLE>
</TD></TR></TABLE>
 01-19-2006, 01:22 AM
#23
Honda-Tech Member
Join Date: Apr 2004
Location: Toronto, On, Canada
Posts: 2,996
Likes: 0
Received 0 Likes
on
0 Posts
<TABLE WIDTH="90%" CELLSPACING=0 CELLPADDING=0 ALIGN=CENTER><TR><TD>Quote, originally posted by vietjdmboi »</TD></TR><TR><TD CLASS="quote">very nice. i will use this in aid when doing mine. thanks</TD></TR></TABLE>