
P20/A000 Repair (ISB replacement)
 08-11-2013, 03:02 PM
#1
Hysterically Calm
Thread Starter
Hi everyone,
I have been visiting the forums for awhile and my car has forced me into a learning experience sooner instead of later.
I have a 95 Canadian Civic 3 door CX (D15B7 coupled with a P20/A000 CX final drive tranny). It's falling just shy of 300,000 kilometers and my ISB is starting to get louder and other weird sounds are coming from the tranny here and there.
My Honda mechanic told me in the beginning (when I bought the car) that what I could hear under the hood was the ISB and that maybe I could get a couple of years from it if I changed the fluid. So that's what I did except I didn't know how weak Honda MTF has become in it's latest form. So I put in Honda MTF and half a tube of Molyslip for added anti friction as recommended by Molyslip for fresh fluid change.
The only mods I've run on the car is an AEM short ram intake with a dry flow filter and I swapped the exhaust with an aftermarket 4-2-1 header (2.25" piping), a true high flow catalytic converter (2.75" in to 2.5" out) and 2.5" piping from cat back to a beautiful sounding N1 style muffler with removable silencer. I personally keep my silencer in being it's waaaay to loud with it out. This set of mods seems to give me close to the full 102 HP output that my engine is bench marked for. And has kept my fuel economy up in the 35-41 MPG range (averaging 38.9 MPG currently with mixed driving).
Anyways, I am digressing a bit. Getting back to point. I have been driving this car on the fun side with Honda MTF and Molyslip for about 8 months now and the ISB on the original near 300K CX Tranny is really starting to complain. So I went out and bought a used DX tranny (was told it was an SI and I forgot the numbers to look for on the case and sticker), that supposedly only had a bad ISB as well. In my haste I paid the dude 150 bucks and took the 100 pound weight home.
I have done quite a bit of reading on here about cracking these trannies open and have the Helm's manual for my wimpy but great sounding beast.
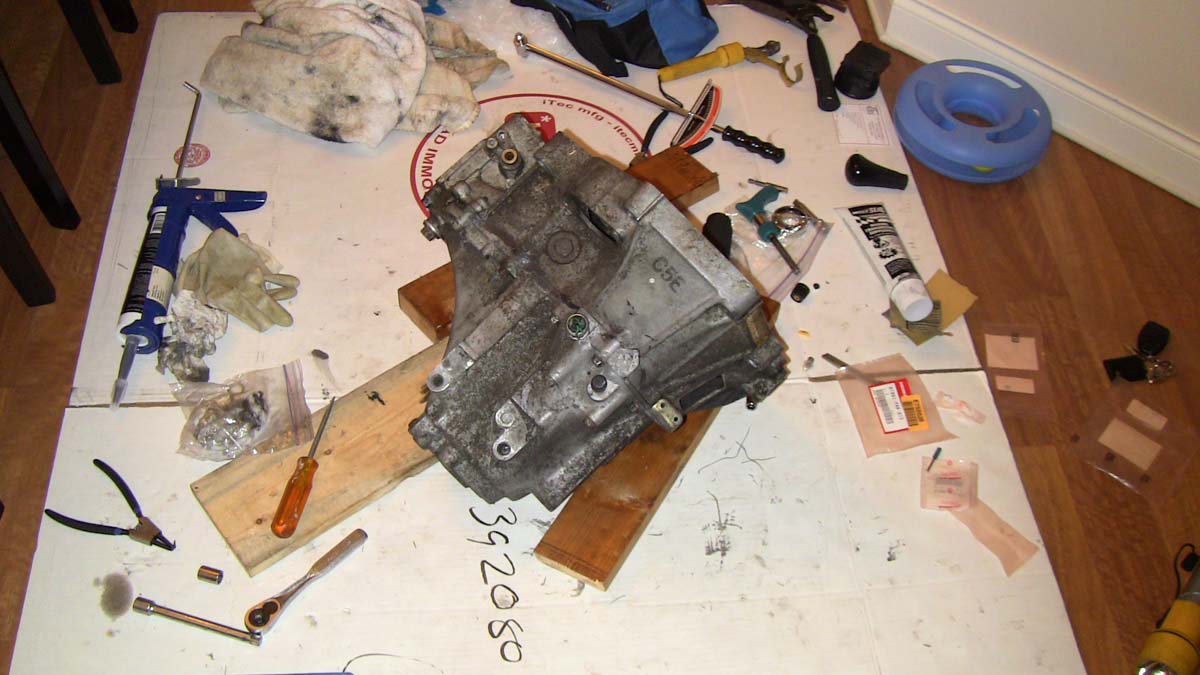
First off, let me tell you my situation. I live in a condo with a single parking stall with no basement storage or work space. So here is my work space in the dining room:
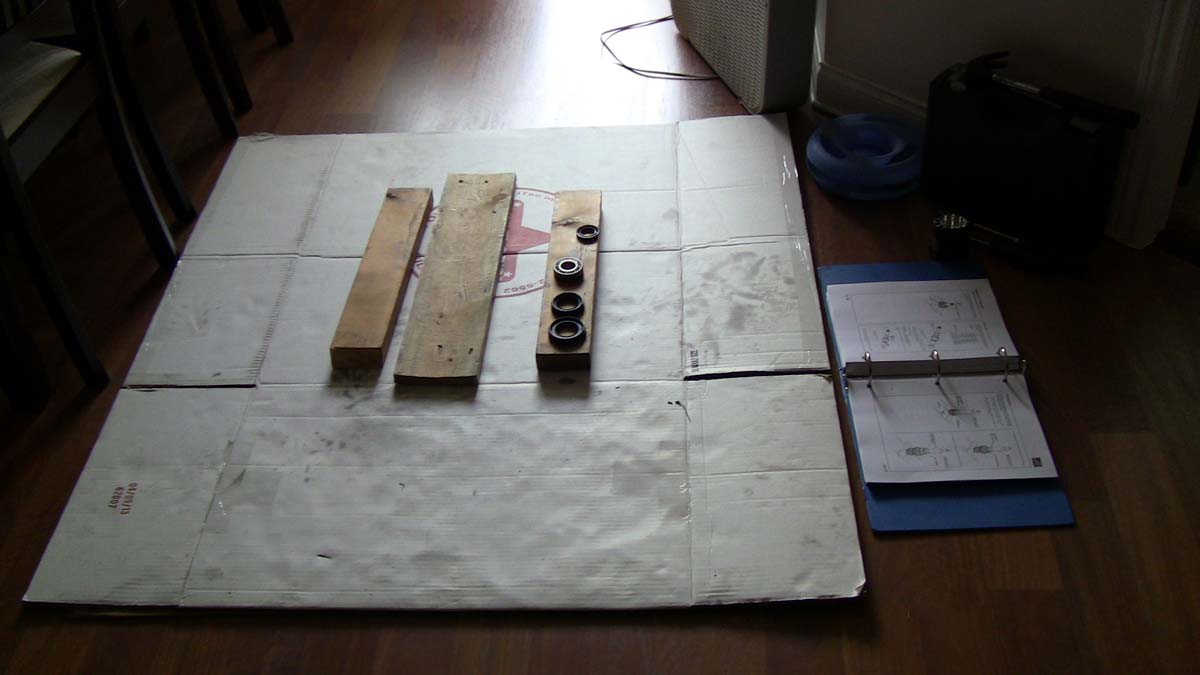
So I take this tranny to one of my jobs (I have 3) and I pressure wash the outside casing to get as much dirt and grease off of it. Bring it home, pull bolts in the same sequence you use to put them in and use my thin snap ring pliers to open the snap ring to crack the case.
I followed the manual to pull the gear stacks out. In the future I will pull the hex head interlocking bolt before I break the seal of the case or at least break the bolt free. I was not a fan of tilting the bell housing with the gear stacks in but not secured on the back side by the case and snap ring to break free that hex bolt. Once the bolt is broken free you won't need need to use any major force getting the bolt out with the backside casing off.
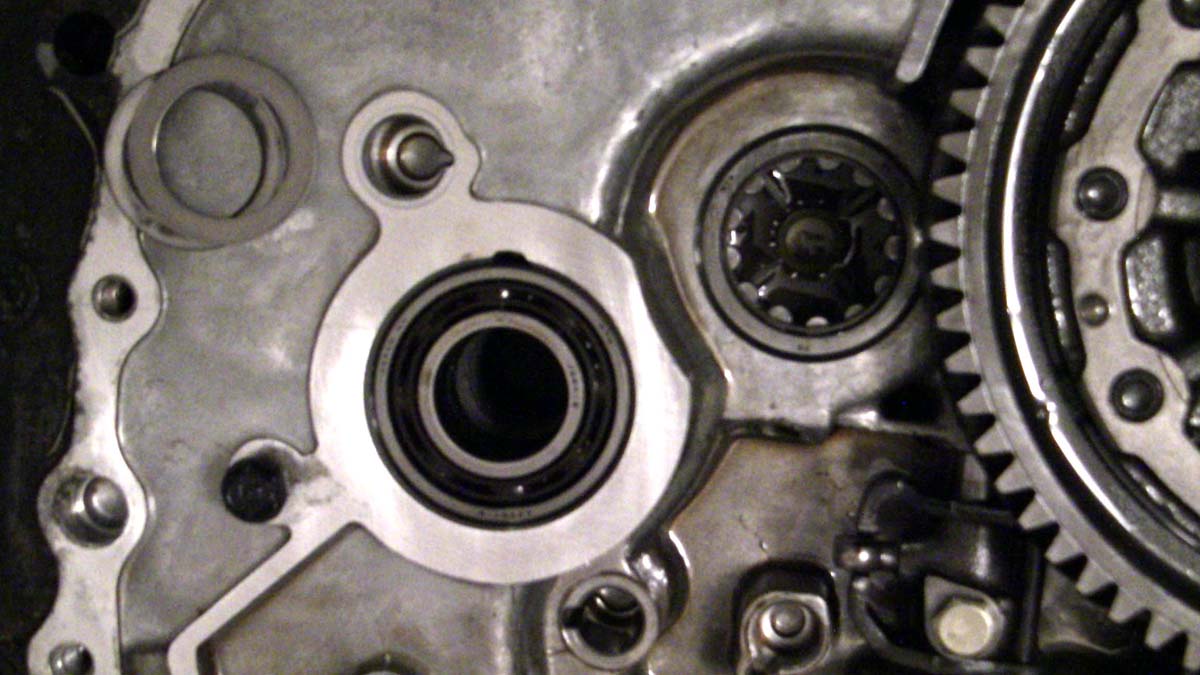
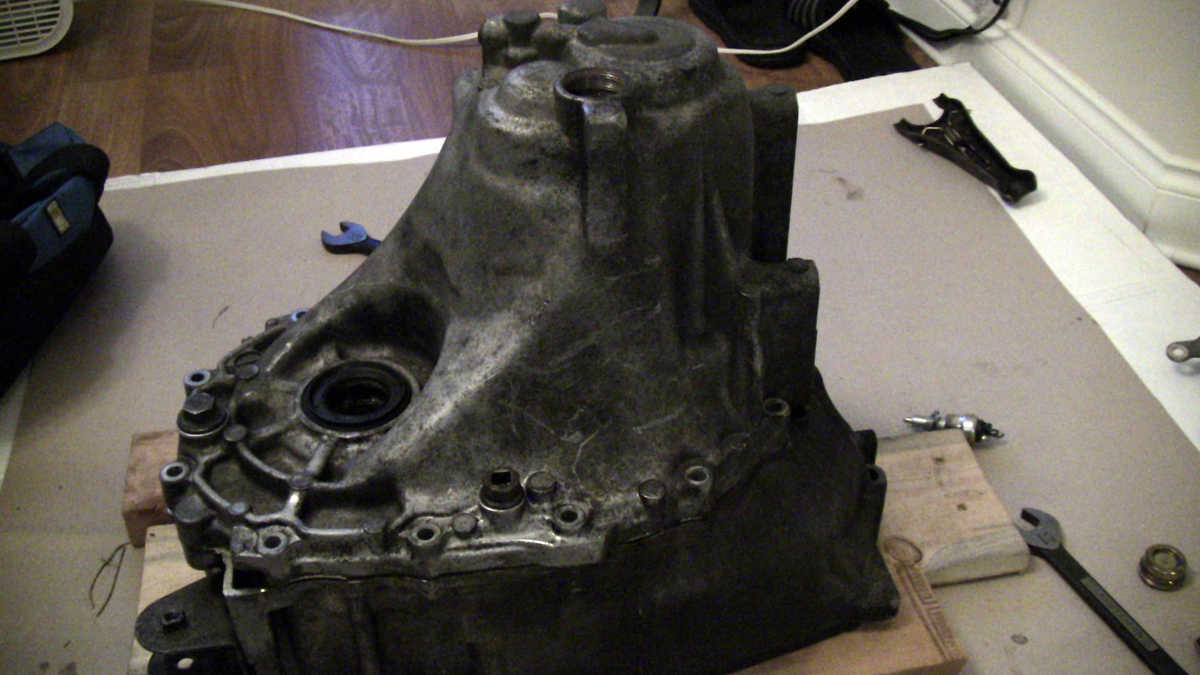
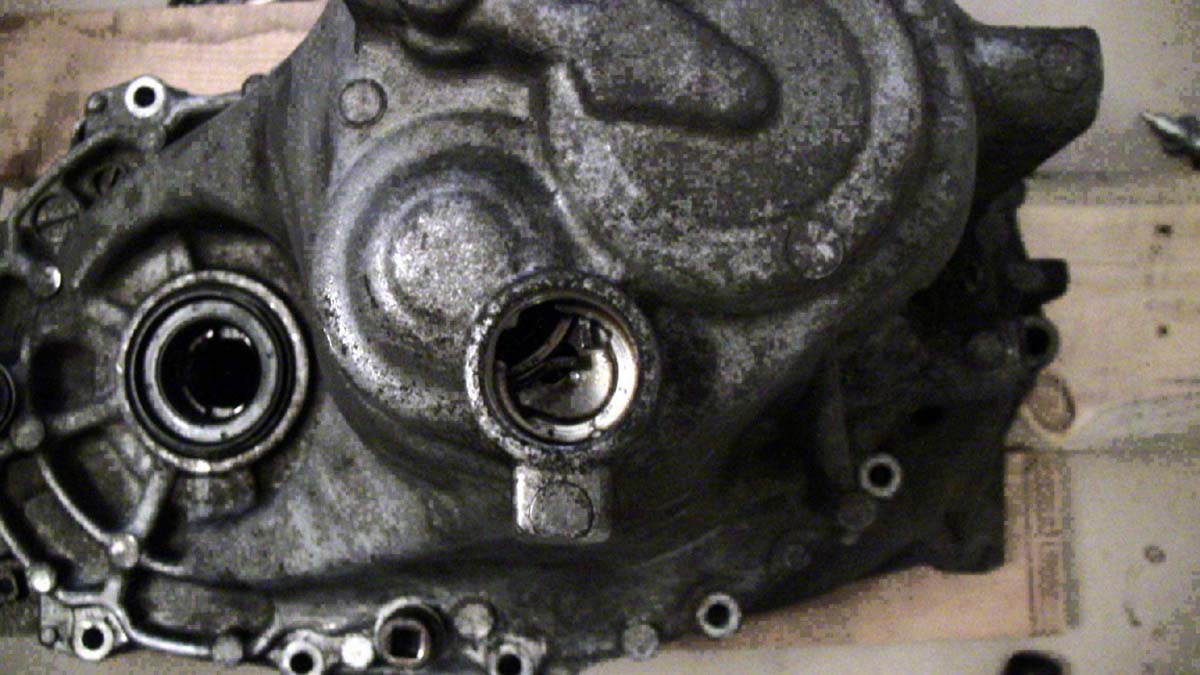
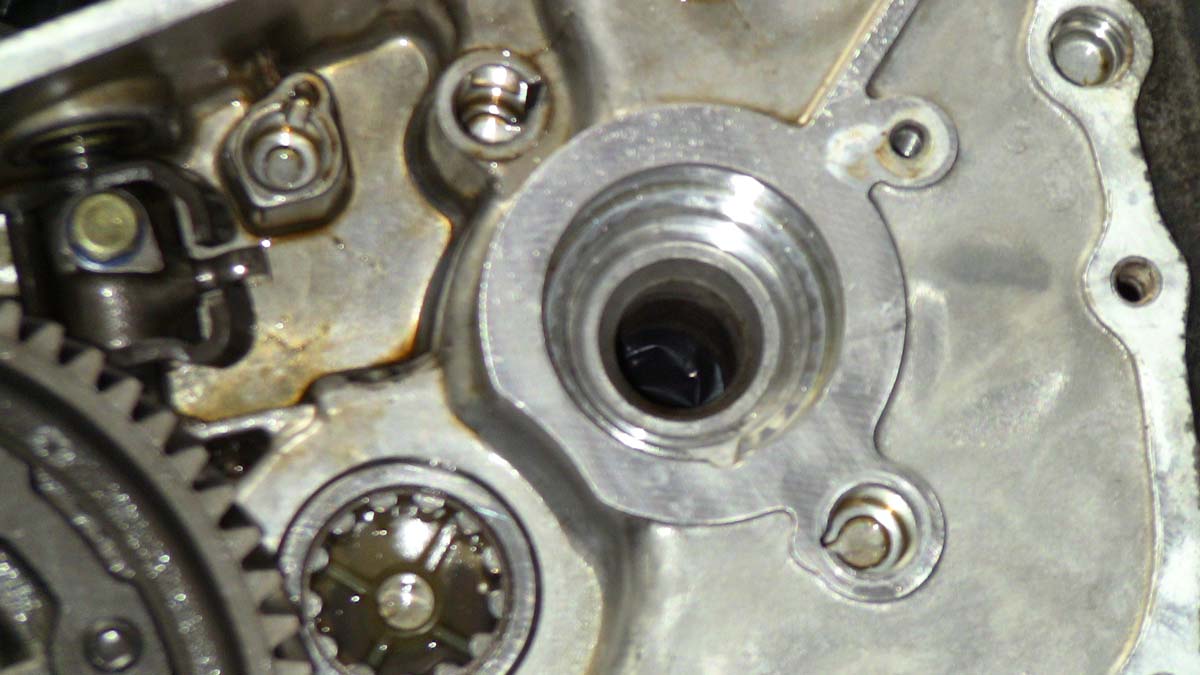
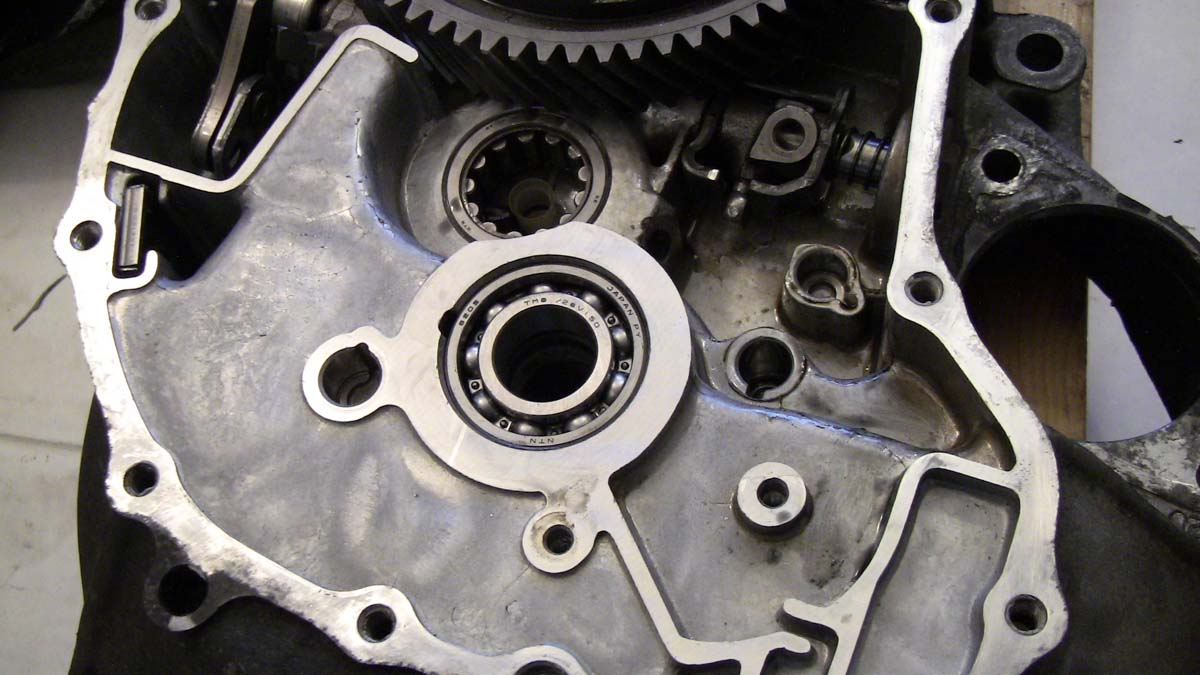
As you can see in the above picture, I put the interlocking bolt back in loosely but the washer was missing. I later found the washer when I took the differential out and flipped the bell housing so that I could tap the ISB bearing out. Which I might add, I wasn't able to do with the instructions given in another thread on D-Series foums labelled DYI: Tranny Removal and Input Shaft Bearing Change. The guy there said he tapped it out with a 3/8" extension and a 5/8" socked. I found the socket fit through the input shaft hole but would not catch on the bearing. I ended up using the extension with my 12mm socket and was able to catch the inner race with the smaller socket. I tapped it out in tiny increments doing the 4 point star technique like you do with the 4 bolt lugs on a tire. One side, opposite side, 90 degrees to the left or right, then opposite of that. Wash rinse repeat but make sure you are ever so gentle so as not to wedge the bearing at all. I highly recommend getting a proper bearing pull for inside bearing pulling. Which I will have for my next tranny job (full rebuild of the CX tranny). So here is the bell housing without the ISB or seal.
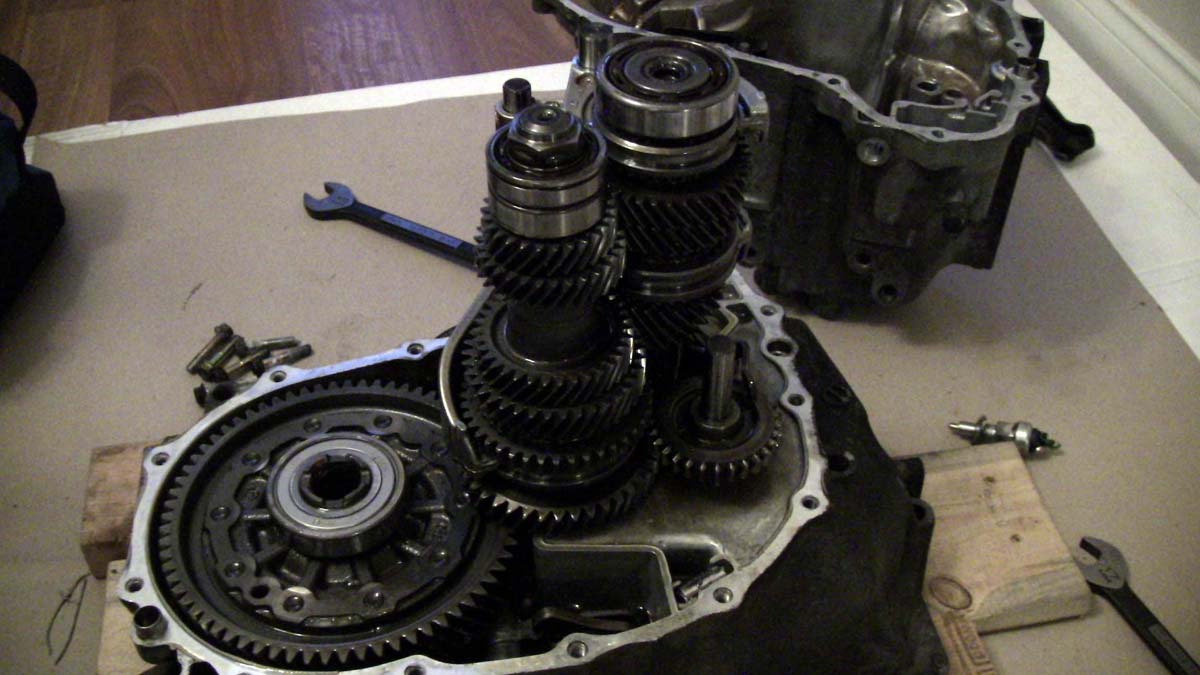
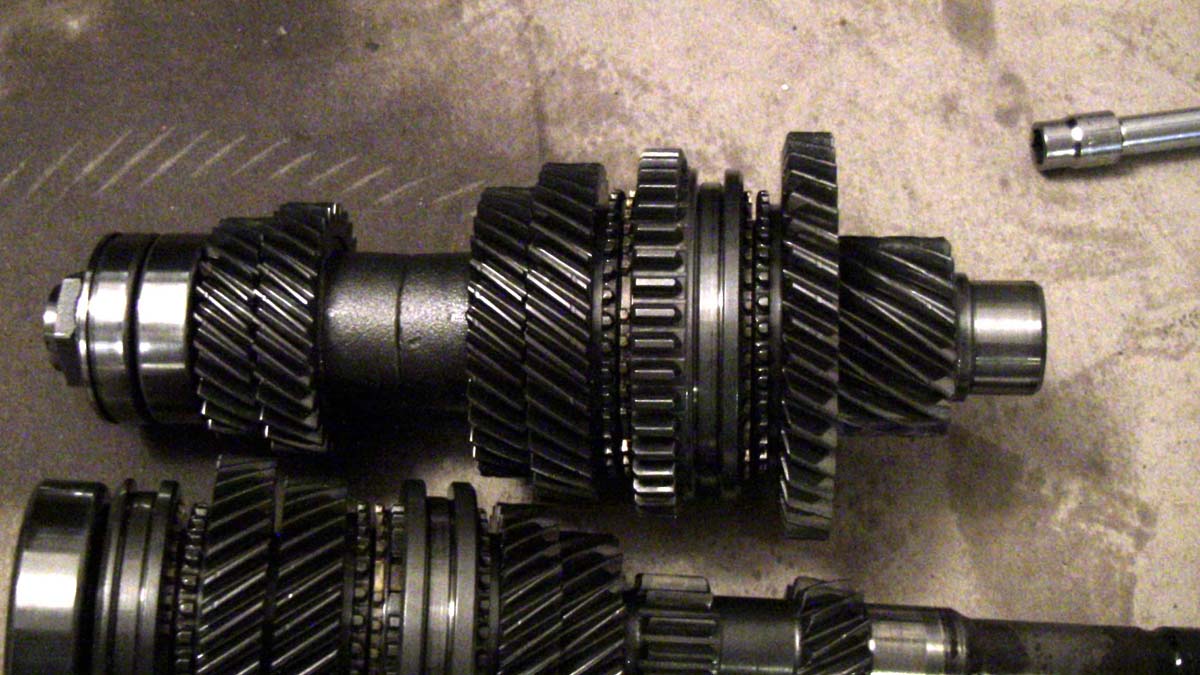
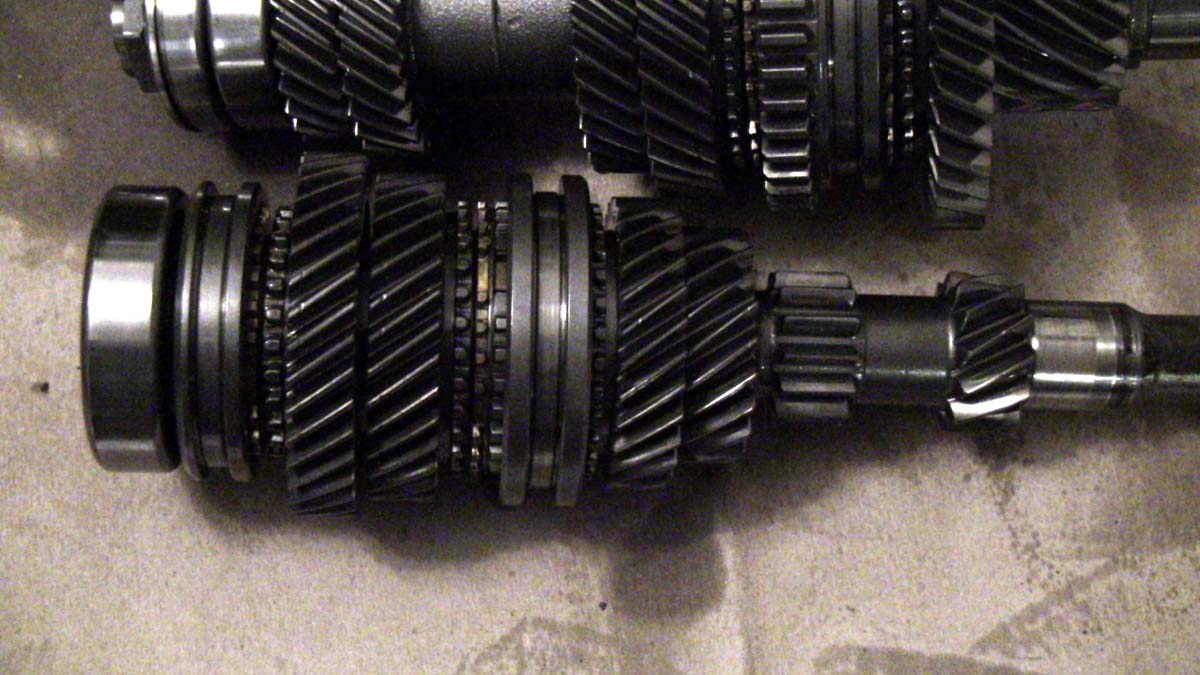
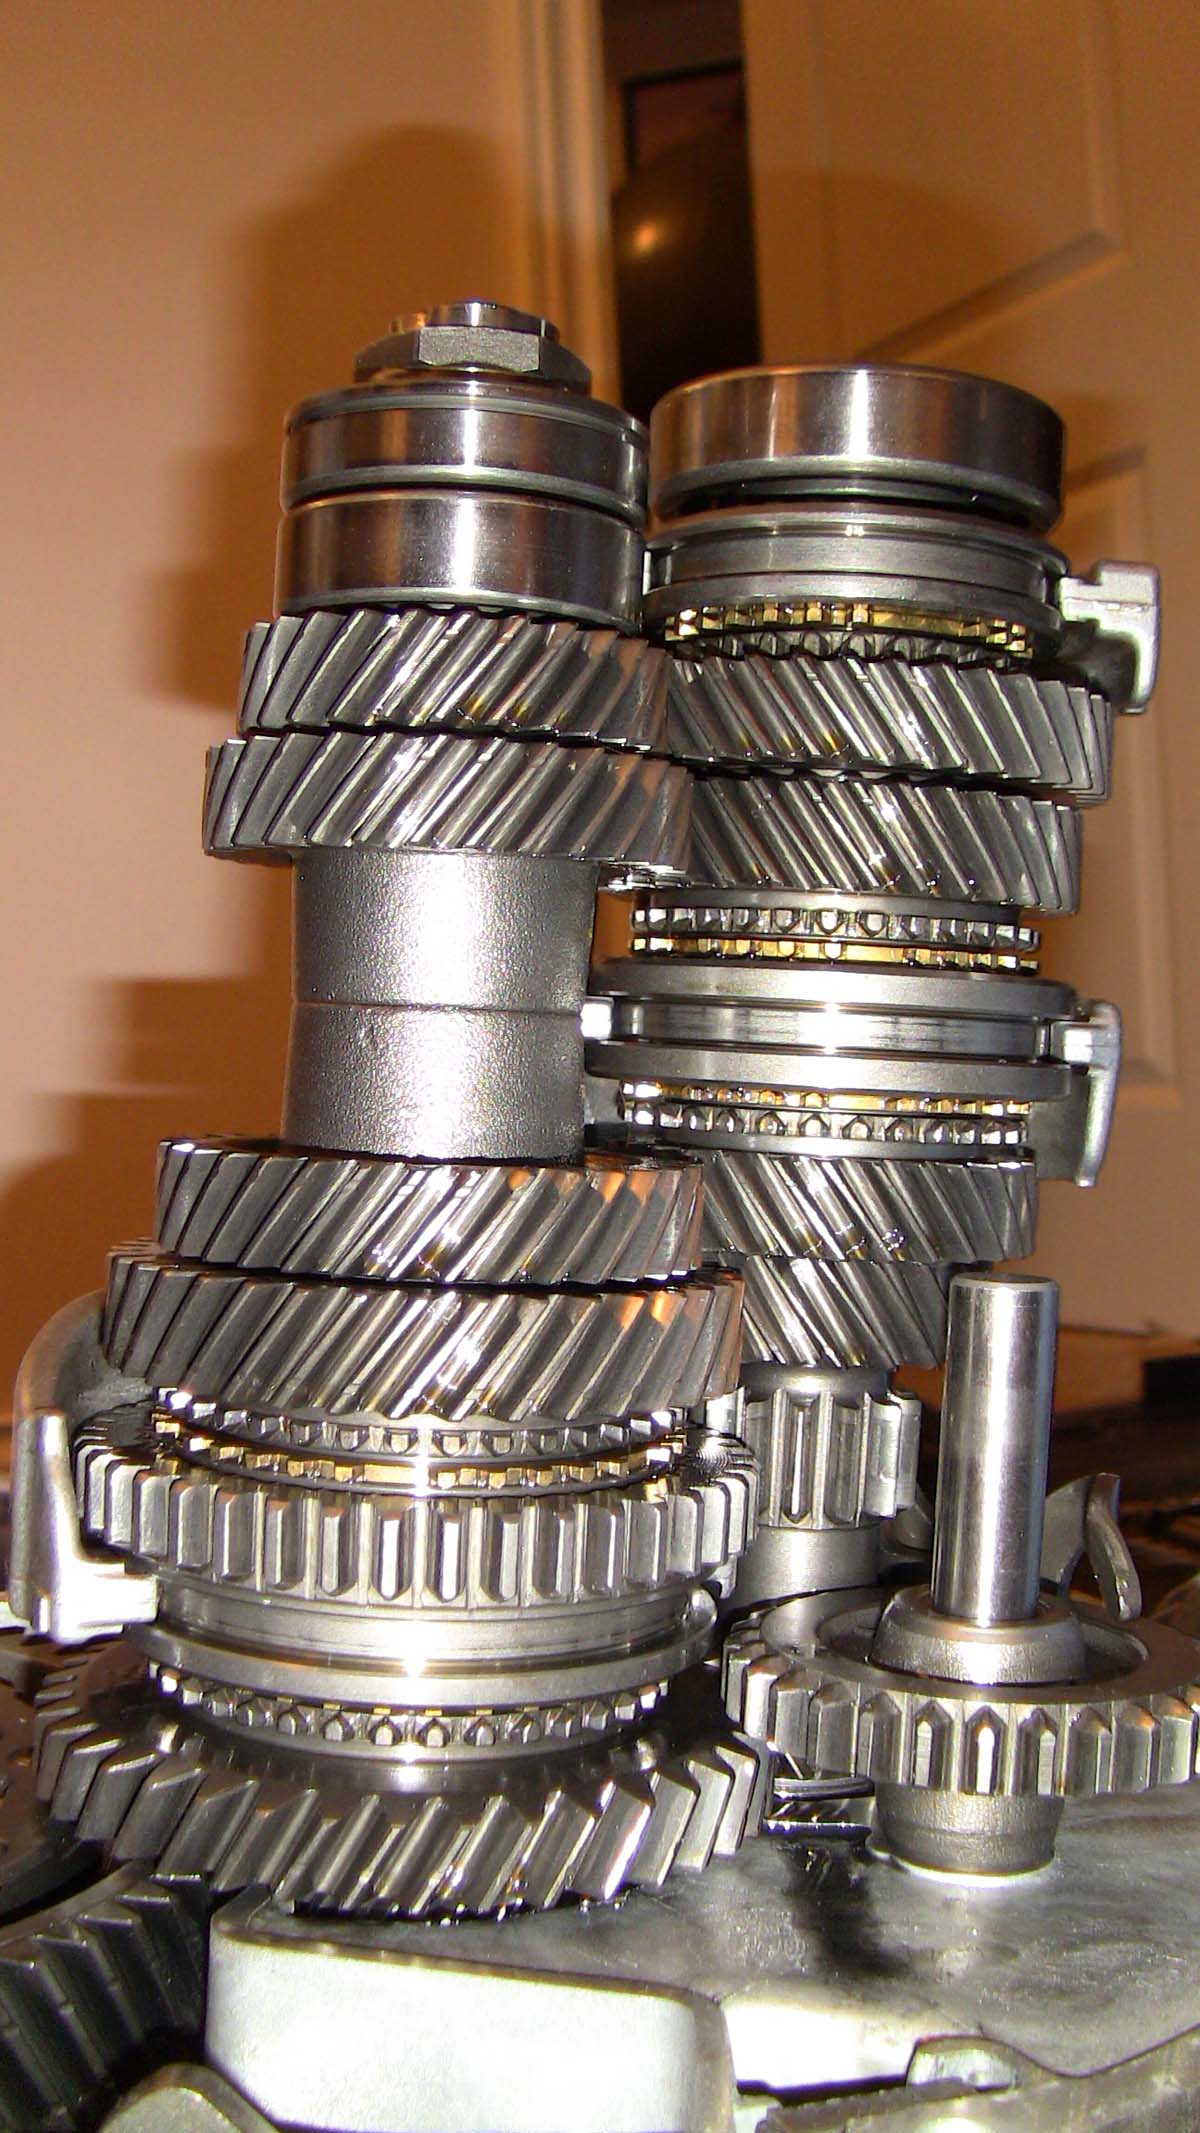
And here are picks of the gear stacks. The dog teeth and syncros don't seem to look too bad. One set of dog teeth looked like it had a touch of wear but not enough for me to be concerned.

So my plan is to swap the ISB, ISB seal and the axle seals on the DX tranny I bought so that I can swap it in and do a full rebuild on my CX tranny.
To bee continued:
I have been visiting the forums for awhile and my car has forced me into a learning experience sooner instead of later.
I have a 95 Canadian Civic 3 door CX (D15B7 coupled with a P20/A000 CX final drive tranny). It's falling just shy of 300,000 kilometers and my ISB is starting to get louder and other weird sounds are coming from the tranny here and there.
My Honda mechanic told me in the beginning (when I bought the car) that what I could hear under the hood was the ISB and that maybe I could get a couple of years from it if I changed the fluid. So that's what I did except I didn't know how weak Honda MTF has become in it's latest form. So I put in Honda MTF and half a tube of Molyslip for added anti friction as recommended by Molyslip for fresh fluid change.
The only mods I've run on the car is an AEM short ram intake with a dry flow filter and I swapped the exhaust with an aftermarket 4-2-1 header (2.25" piping), a true high flow catalytic converter (2.75" in to 2.5" out) and 2.5" piping from cat back to a beautiful sounding N1 style muffler with removable silencer. I personally keep my silencer in being it's waaaay to loud with it out. This set of mods seems to give me close to the full 102 HP output that my engine is bench marked for. And has kept my fuel economy up in the 35-41 MPG range (averaging 38.9 MPG currently with mixed driving).
Anyways, I am digressing a bit. Getting back to point. I have been driving this car on the fun side with Honda MTF and Molyslip for about 8 months now and the ISB on the original near 300K CX Tranny is really starting to complain. So I went out and bought a used DX tranny (was told it was an SI and I forgot the numbers to look for on the case and sticker), that supposedly only had a bad ISB as well. In my haste I paid the dude 150 bucks and took the 100 pound weight home.
I have done quite a bit of reading on here about cracking these trannies open and have the Helm's manual for my wimpy but great sounding beast.
First off, let me tell you my situation. I live in a condo with a single parking stall with no basement storage or work space. So here is my work space in the dining room:
So I take this tranny to one of my jobs (I have 3) and I pressure wash the outside casing to get as much dirt and grease off of it. Bring it home, pull bolts in the same sequence you use to put them in and use my thin snap ring pliers to open the snap ring to crack the case.
I followed the manual to pull the gear stacks out. In the future I will pull the hex head interlocking bolt before I break the seal of the case or at least break the bolt free. I was not a fan of tilting the bell housing with the gear stacks in but not secured on the back side by the case and snap ring to break free that hex bolt. Once the bolt is broken free you won't need need to use any major force getting the bolt out with the backside casing off.
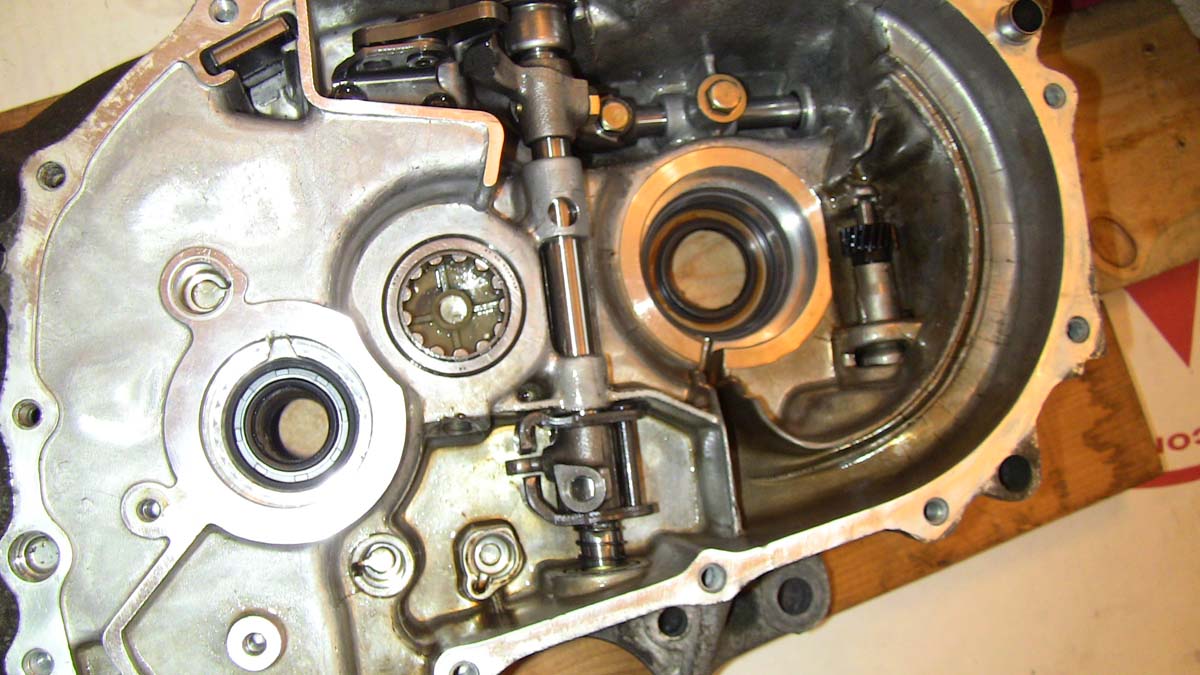
As you can see in the above picture, I put the interlocking bolt back in loosely but the washer was missing. I later found the washer when I took the differential out and flipped the bell housing so that I could tap the ISB bearing out. Which I might add, I wasn't able to do with the instructions given in another thread on D-Series foums labelled DYI: Tranny Removal and Input Shaft Bearing Change. The guy there said he tapped it out with a 3/8" extension and a 5/8" socked. I found the socket fit through the input shaft hole but would not catch on the bearing. I ended up using the extension with my 12mm socket and was able to catch the inner race with the smaller socket. I tapped it out in tiny increments doing the 4 point star technique like you do with the 4 bolt lugs on a tire. One side, opposite side, 90 degrees to the left or right, then opposite of that. Wash rinse repeat but make sure you are ever so gentle so as not to wedge the bearing at all. I highly recommend getting a proper bearing pull for inside bearing pulling. Which I will have for my next tranny job (full rebuild of the CX tranny). So here is the bell housing without the ISB or seal.
And here are picks of the gear stacks. The dog teeth and syncros don't seem to look too bad. One set of dog teeth looked like it had a touch of wear but not enough for me to be concerned.
So my plan is to swap the ISB, ISB seal and the axle seals on the DX tranny I bought so that I can swap it in and do a full rebuild on my CX tranny.
To bee continued:
 08-12-2013, 10:29 PM
#2
Hysterically Calm
Thread Starter
Part 3
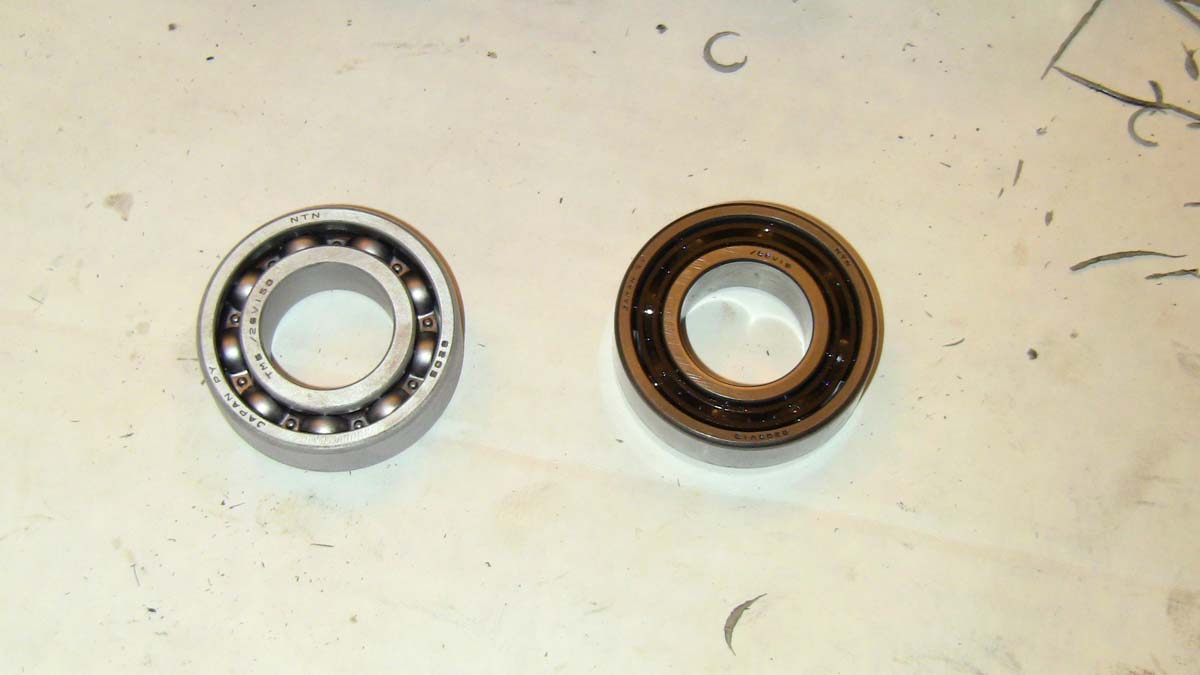
So I got the parts from Honda today for the most basic repairs of the replacement tranny. The Input Shaft Bearing (ISB), the ISB seal and both Axle seals. To my surprise, Honda has upgrade the old DX/CX ISB to a metal cage over the old plastic cages I always read people complained about. New on the left, old on the right.
So I get to work by finishing the case edge clean up, then I pull out my custom seal/bearing drivers to piece this baby back together.
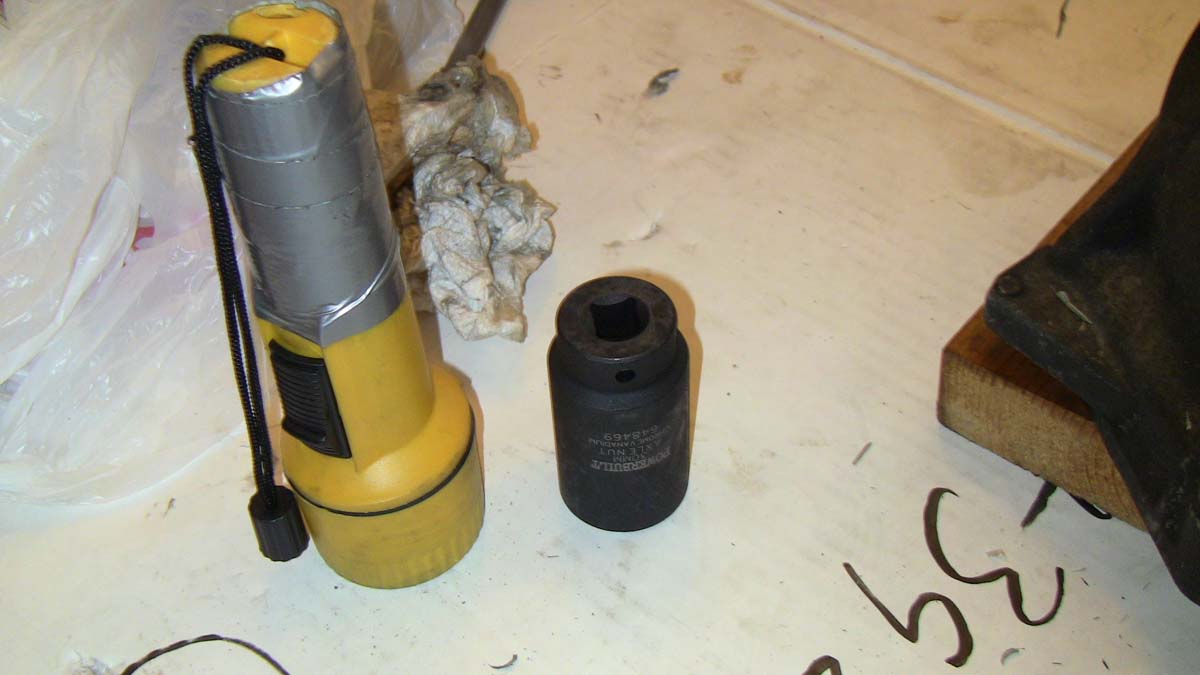
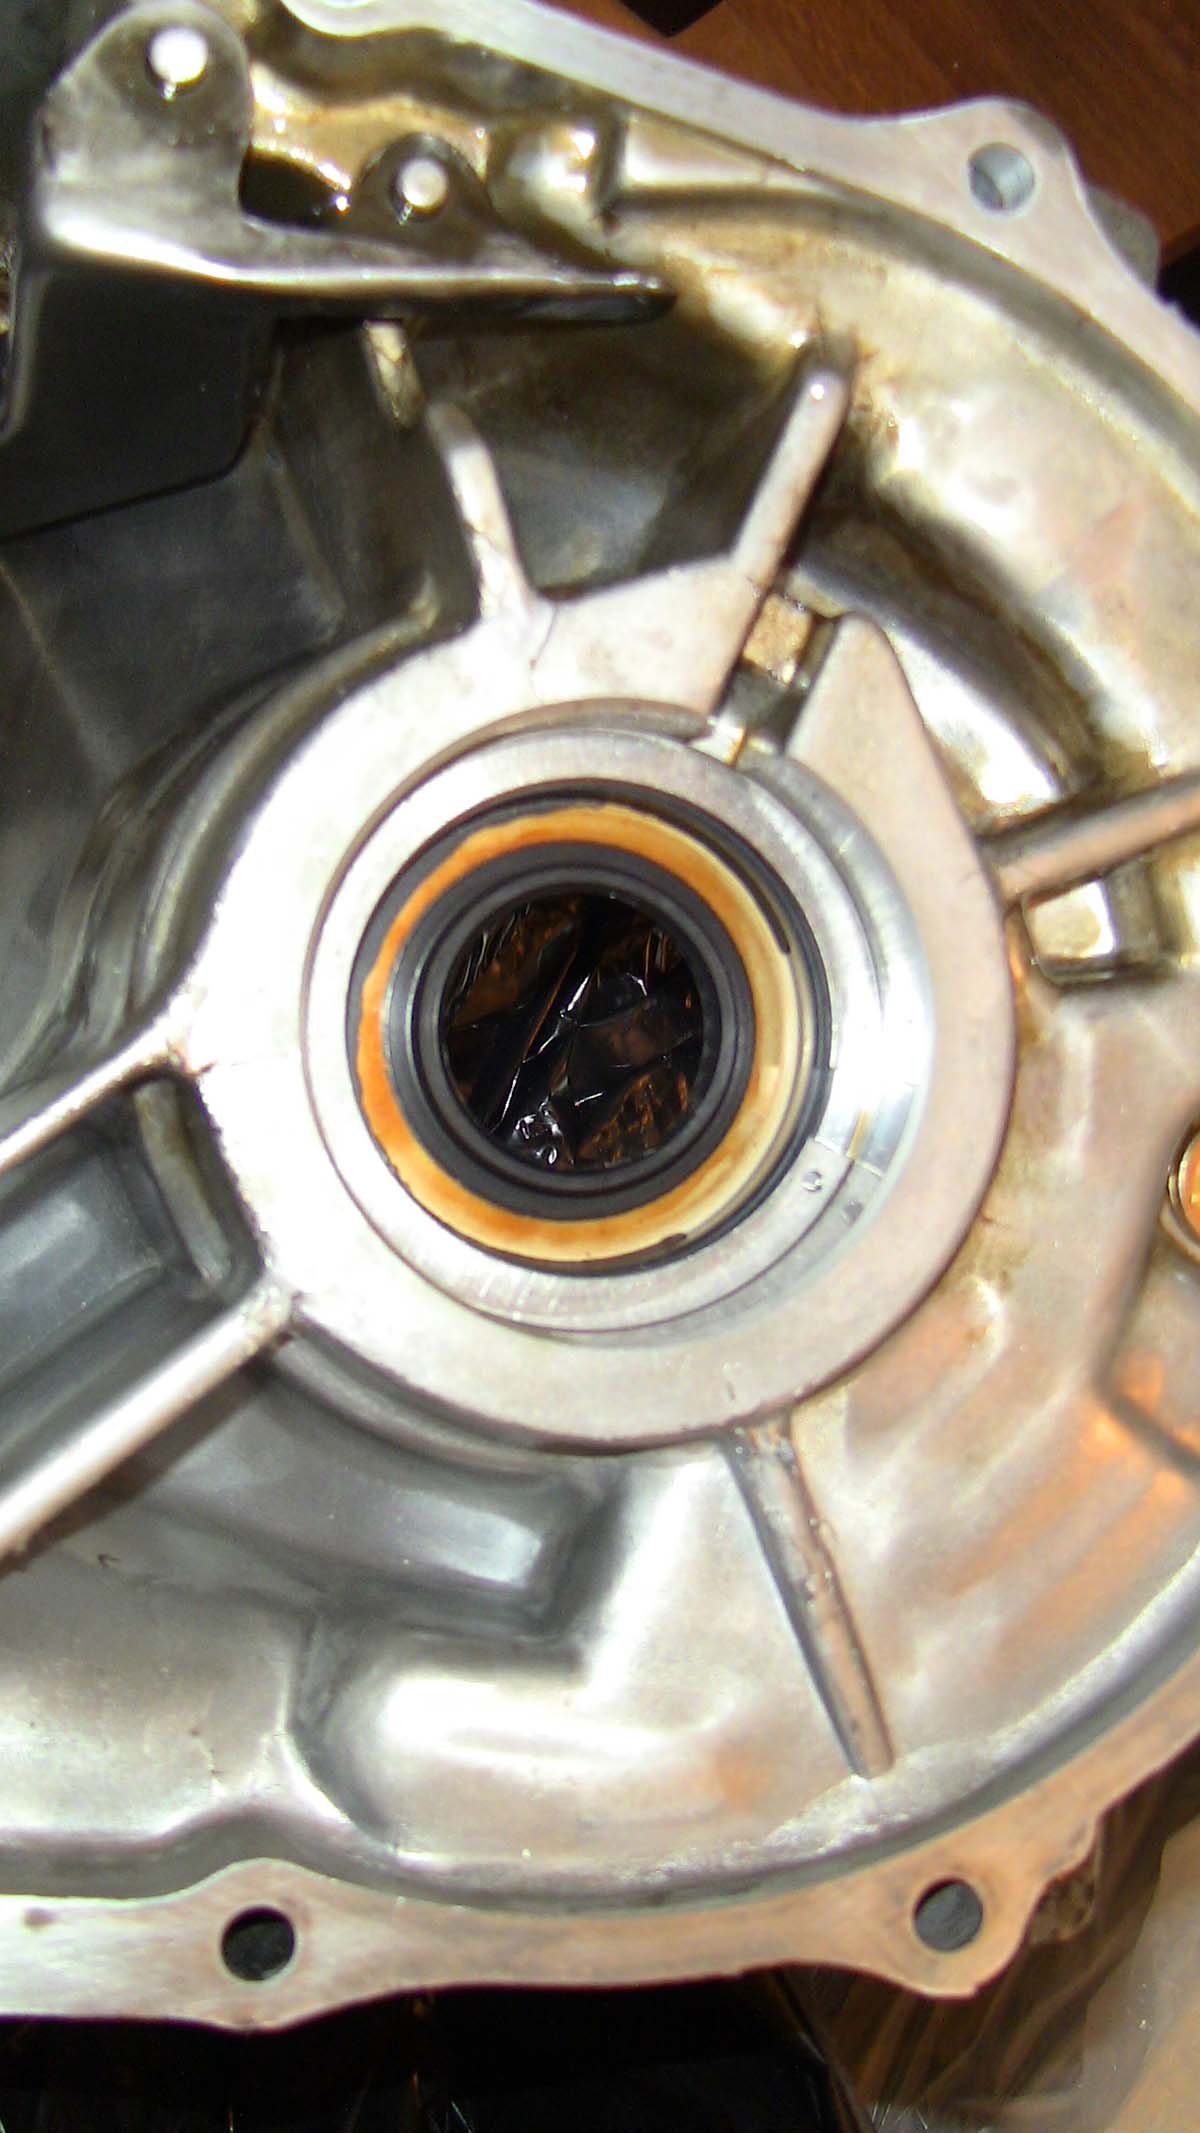
New Axle seals and ISB seal installed. Used the old beater flashlight for the axle seals and a 30mm axle nut socket I bought specifically for the ISB seal.
Then the new bearing installed. I threw it in the freezer for about an hour. When I pulled it out it frosted up so I kept wiping it down to get the majority of the water off of it, then I used Molyslip Manual tranny additive to treat the inside and outside of the bearing, tapped her in and drooled some more moly inside the bearing, spun it a few times and called it good for re-assemble. The rest of the parts sill had a decent coating of redline MTL the previous owner ran in it so slid together pretty good and easily.

Then I put the thrust shim and thrust washer on top of the ISB just like I found them on disassembly before putting the gear stacks back together. I never did remove the 28mm plug bolt to put the gear stacks back in. It was pretty easy to put the Guide Lock bolts back in just by manually pushing the interlock up to align with the internal bolt hole. Toqued the internal bolt down to 23 ft-lbs +/-2. After that I made sure all the sleeves on the stack were in the neutral position and all synchros could be seen being I had left the shift rod in the neutral position. I then did up the external interlock bolt. The interlock was already perfectly aligned so it went in smoothly. I put "The right stuff" on those threads and tightened it down. I will torque it down to 29 ft-lbs tomorrow before the tranny swap. Took another look at the gear stacks and ran it through the gears, reverse being the one that needed help to get into by lifting up on the reverse arm as I pushed in on the shift rod.
After I was satisfied I had put everything back together properly and torqued properly I laid a 1/8th inch to 1/4 inch bead of "The Right Stuff" around the bell housing case and wiggled the back side casing down over the gear stacks getting the bearings to seat into home and the shift fork rods etc. I had 5 minutes at this point to get that snap ring open and around the bearing. A flat tip screw driver and narrow snap ring pliers allowed me to open it up enough to slide around the bearing. At this point I put most of the case bolts in hand tight being the case had slid down enough to start pushing out the gasket maker. I then tilted the case over and lightly dropped it on my dining room floor and heard the glorious snap of the ring seating. Flipped it back over and was happy to see everying in place as it should be. At this point I starting torquing all the case bolts down in the star sequence provided by the Helms manual. Did it in two stages of partially torqued all the way around then then when for the actual clicks on the wrench the second time around, clicking each bolt a good 5-10 times. After that I finally put in the last 32mm sealing bolt with some gasket maker put into the threads. Torque it down to 18 ft-lbs and said break time to start writing this post. After my break I ran her through the gears and turned the input shaft to observe the rotation speed differences in the differential for each gear and the change of direction in reverse. Reverse is so much easier to get into with the case put back together than when it's cracked. Everything worked like a charm so tomorrow night is D-Day and we're doing the tranny swap so I can driver my car without worry of catastrophic failure. Spun and tried wiggling the input shaft every which way, had zero noticable play and all I could hear was the gears inside meshing with each other.
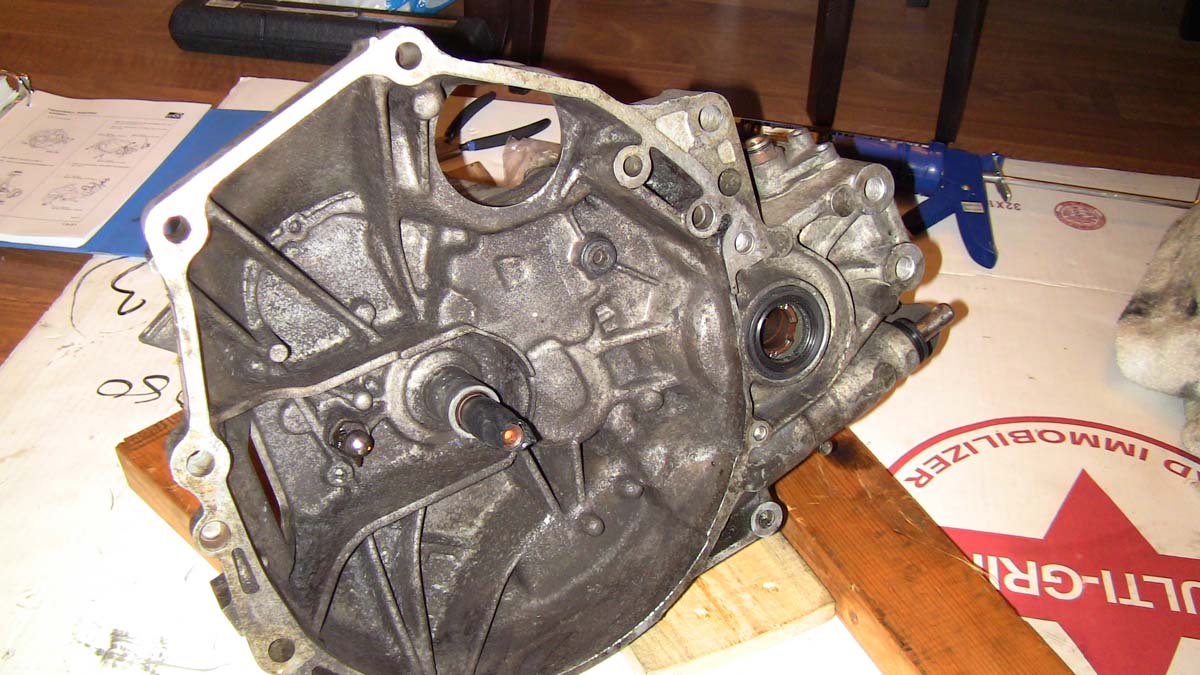
Here is the finished tranny with my mess after finishing the assembly:
So I got the parts from Honda today for the most basic repairs of the replacement tranny. The Input Shaft Bearing (ISB), the ISB seal and both Axle seals. To my surprise, Honda has upgrade the old DX/CX ISB to a metal cage over the old plastic cages I always read people complained about. New on the left, old on the right.
So I get to work by finishing the case edge clean up, then I pull out my custom seal/bearing drivers to piece this baby back together.
New Axle seals and ISB seal installed. Used the old beater flashlight for the axle seals and a 30mm axle nut socket I bought specifically for the ISB seal.
Then the new bearing installed. I threw it in the freezer for about an hour. When I pulled it out it frosted up so I kept wiping it down to get the majority of the water off of it, then I used Molyslip Manual tranny additive to treat the inside and outside of the bearing, tapped her in and drooled some more moly inside the bearing, spun it a few times and called it good for re-assemble. The rest of the parts sill had a decent coating of redline MTL the previous owner ran in it so slid together pretty good and easily.
Then I put the thrust shim and thrust washer on top of the ISB just like I found them on disassembly before putting the gear stacks back together. I never did remove the 28mm plug bolt to put the gear stacks back in. It was pretty easy to put the Guide Lock bolts back in just by manually pushing the interlock up to align with the internal bolt hole. Toqued the internal bolt down to 23 ft-lbs +/-2. After that I made sure all the sleeves on the stack were in the neutral position and all synchros could be seen being I had left the shift rod in the neutral position. I then did up the external interlock bolt. The interlock was already perfectly aligned so it went in smoothly. I put "The right stuff" on those threads and tightened it down. I will torque it down to 29 ft-lbs tomorrow before the tranny swap. Took another look at the gear stacks and ran it through the gears, reverse being the one that needed help to get into by lifting up on the reverse arm as I pushed in on the shift rod.
After I was satisfied I had put everything back together properly and torqued properly I laid a 1/8th inch to 1/4 inch bead of "The Right Stuff" around the bell housing case and wiggled the back side casing down over the gear stacks getting the bearings to seat into home and the shift fork rods etc. I had 5 minutes at this point to get that snap ring open and around the bearing. A flat tip screw driver and narrow snap ring pliers allowed me to open it up enough to slide around the bearing. At this point I put most of the case bolts in hand tight being the case had slid down enough to start pushing out the gasket maker. I then tilted the case over and lightly dropped it on my dining room floor and heard the glorious snap of the ring seating. Flipped it back over and was happy to see everying in place as it should be. At this point I starting torquing all the case bolts down in the star sequence provided by the Helms manual. Did it in two stages of partially torqued all the way around then then when for the actual clicks on the wrench the second time around, clicking each bolt a good 5-10 times. After that I finally put in the last 32mm sealing bolt with some gasket maker put into the threads. Torque it down to 18 ft-lbs and said break time to start writing this post. After my break I ran her through the gears and turned the input shaft to observe the rotation speed differences in the differential for each gear and the change of direction in reverse. Reverse is so much easier to get into with the case put back together than when it's cracked. Everything worked like a charm so tomorrow night is D-Day and we're doing the tranny swap so I can driver my car without worry of catastrophic failure. Spun and tried wiggling the input shaft every which way, had zero noticable play and all I could hear was the gears inside meshing with each other.
Here is the finished tranny with my mess after finishing the assembly:
08-13-2013, 08:29 AM
#3
Hysterically Calm
Thread Starter
I just wanted to say, this is not a rebuild. Officially this is a hack job Input Shaft Bearing replacement to make a used tranny usable. Shift forks were not measured, Syncro gaps were not measured, and Mainshaft shim clearance was not measured. This is just to get the tranny operational as a used tranny so a full rebuild can be done on the swapped out tranny.
I'm sure what I'm doing is not recommended by any professional or even most serious hobbiests.
Cheers.
I'm sure what I'm doing is not recommended by any professional or even most serious hobbiests.
Cheers.
08-13-2013, 05:57 PM
#4
Seagull Management
Join Date: Jun 2008
Location: Miramichi, NB, Canada
Posts: 15,150
Likes: 0
Received 24 Likes
on
22 Posts
If you live in Canada, or have a true Canadian CX (which it sounds like you have) the CX/DX transmissions are the same. The USDM CX/VX is the same as the Canadian VX and hard to find in most parts of Canada.
The new bearings have a metal cage, but to be honest that was never the main problem (other than redline apparently dissolves the plastic cage) I've still seen the steel cages fly apart as well. Those bearings tend to last longer with plain old 10W30 in them, then with Honda MTF. If you want to spend the money Torco MTF is nicer again, but you may have to hunt for it in Canada (it is definitely available though)
The new bearings have a metal cage, but to be honest that was never the main problem (other than redline apparently dissolves the plastic cage) I've still seen the steel cages fly apart as well. Those bearings tend to last longer with plain old 10W30 in them, then with Honda MTF. If you want to spend the money Torco MTF is nicer again, but you may have to hunt for it in Canada (it is definitely available though)
08-14-2013, 06:31 AM
#5
Hysterically Calm
Thread Starter
Thanks for that, didn't realize the USDM CX situation to be VX only.
It is a true Canadian CX, the USDM Helms has the MAP sensor elsewhere and not on the throttle body of the D15B7 like mine is and it has the Manufactured in Canada plate on the frame rails.
We got the Tranny in last night, A painful 6 hours of my life but one hell of a learning experience. The tranny seems to be fine. Drove home last night without a hitch. Might have even solved my wobble problem but I'll see about that today on the freeway. Think the Differential may be quite worn in my CX tranny.
Didn't solve my bearing running sound when clutch pedal is out (clutch engaged) in Neutral nor the slight screech sound I am getting upon initial clutch engagemnt. So now that I know it's not the ISB, that only leaves the throw out bearing. Which I was questioning last night but my buddy who has more experience than I said it seems fine.
So now my question is, what would cause a hydro tranny to not let the throw out bearing release all the way? Would that be a bad slave cylinder? I noticed that the push pin on the slave cylinder still has quite a bit of pressure when pushing it back in and still likes to push or travel out after you push it back in. It actually popped out a few times when were were putting it back together so we had to bleed the clutch line.
I'm thinking the pin pushes out just enough to keep the throw out bearing riding on the clutch softly. Not enough to disengage the clutch but enough to keep the bearing spinning at all times.
I'm not looking forward to ripping that tranny off just for a throwout bearing anytime soon so I'm going to drive with it until it's unbearably loud. Maybe another 6 months? LoL.
Anyways, would it be the slave cylinder or the master cylinder thats not releasing the pressure fully when the pedal is not being pushed to the floor?
08-14-2013, 09:12 AM
#6
Hysterically Calm
Thread Starter
Scratch the idea of the Slave cylinder, spoke with my Honda Mechanic this morning and he showed me how to check for a sticky Slave. Said there is play on the release fork so all is well.
So now I figure it's just a cheap bearing that came with the Exedy kit. I've read you buy the kit, toss the pilot and throw out bearings and go OEM for those two bearings and yer good. Will be my method of practice in the future with clutch changes.
As for my wobble, still have the wobble at 110 Kph but I still haven't ruled out bent rims issue, I know the two rims on the rear are bent. Once I get my alloys on the car I'll know if it's suspension related.
The replacement tranny is working well. Used Synchromesh with Molyslip Manual Tranny additive and seems to do well so far. I had fun ripping it this morning on my way to work.
Was a lot of work but nice having piece of mind that a common problem with Manual Hondas isn't going to be an issue for me now.
Cheers and thanks for reading. Till next we meet.
08-14-2013, 02:47 PM
#7
Seagull Management
Join Date: Jun 2008
Location: Miramichi, NB, Canada
Posts: 15,150
Likes: 0
Received 24 Likes
on
22 Posts
Didn't solve my bearing running sound when clutch pedal is out (clutch engaged) in Neutral nor the slight screech sound I am getting upon initial clutch engagemnt. So now that I know it's not the ISB, that only leaves the throw out bearing. Which I was questioning last night but my buddy who has more experience than I said it seems fine.
Trending Topics
08-15-2013, 07:18 AM
#8
Hysterically Calm
Thread Starter
The made in Canada sticker means nothing in terms of where the vehicle was intended to be sold, only where they were assembled. Some of the sedans were built in Japan and shipped over. A lot of Canadian built hatches were sold in the US. The big thing is the Canadian models have daytime running lights, D15B7, no airbags, and no upshift light. Btw, the firewall mounted MAP sensor was only on '92 - '93 models (any '92 - '93 Civic with a D15B7)
If the transmission bearings are good (there are 4 others besides the ISB that can make noise like that, usually the CSB 2nd from the top is the next most common to fail) look at the pilot bearing in the flywheel for your noise in neutral, the screech upon initial clutch engagement sounds more like a throwout bearing issue.
So I'm with you on this and think I got a junky throw out bearing with my Exedy Clutch kit which was put in around 6 months ago. Granted I've put on probably close to 35,000 Kilometers in that time maybe more but still a little premature for a quality throwout bearing to die.

At least with that I don't have to worry about it wiping out a transmission. I can just let it get more and more annoying and eventually have to replace it and maybe the pressure plate if it takes that out in the process.

Oh and I think I may have found a Torco fluid distributor in Canada so I will be looking into that too.
Last edited by TomCat39; 08-15-2013 at 08:16 AM.
08-15-2013, 03:36 PM
#9
Seagull Management
Join Date: Jun 2008
Location: Miramichi, NB, Canada
Posts: 15,150
Likes: 0
Received 24 Likes
on
22 Posts
The only thing I'll tell you about the throwout bearing is it wont/can't make noise with the clutch out. It only turns when you begin to depress the clutch pedal. The only way it could be making noise all the time is if the clutch pedal is adjusted in such a way that you have no freeplay.
08-15-2013, 07:40 PM
#10
Hysterically Calm
Thread Starter
Yeah, I understand that. And that's what I was thinking about the slave cylinder. I was thinking it wasn't retracting completely having the throw out bearing lightly resting on the setup thus never stops spinning and wears it out prematurely.
My mechanic says the fork has play so the slave should be fine and being a hydraulic tranny, it's self adjusting. But I also know that absolutely nothing changed in the sound and behavior even though the tranny has changed. With that I'm pretty confident it's not an internal transmission problem so I feel a bit better driving it as much as I do.
Then again, both the pilot bearing and the throw out bearing was part of the kit. Could be the bearings are crap while the clutch and pressure plate are of quality. I have read that some people believe you buy the Exedy kit, toss the bearings, order OEM bearings and install the clutch kit with the OEM bearings. Maybe both the pilot bearing and the throw out bearings are making noise?
09-05-2013, 10:00 AM
#11
Hysterically Calm
Thread Starter
I will definitely be switching to Mobile 1 10w30 synthetic until I can locate some Torco. Whomever told me the Synchromesh and Moly was a dream combo was definitely mistaken.
No grinds or issues, just doesn't shift quite as easily especially once hot.
Thanks for the info.

Thread
Thread Starter
Forum
Replies
Last Post