
My road racing crx.
 12-12-2008, 11:04 PM
#1
Honda-Tech Member
Thread Starter
Join Date: Jul 2007
Location: st petersburg, fl, 33716
Posts: 33
Likes: 0
Received 0 Likes
on
0 Posts
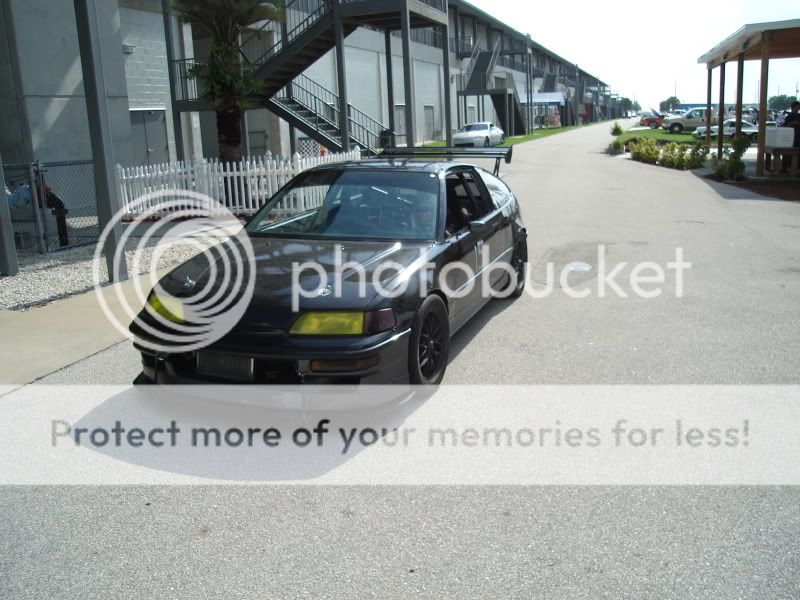
Hello, this is my 1990 CRX SI track car. I'm getting this car ready to take it to SEBRING RACEWAY to learn how to properly race on track. By signing up with events like CHIN MOTORSPORTS and SAFE, i'm able to have an instructor whom is very experienced, teach me all the things i should know to be a great driver. From turn in points to hitting the apex and exiting as well, braking, shifthing, and accelarating. I've built this car mainly betwen me and my friend Patrick, on a very strict budget.
The body harness is a 20 circuit painless harness which is not really painless. lol. :D
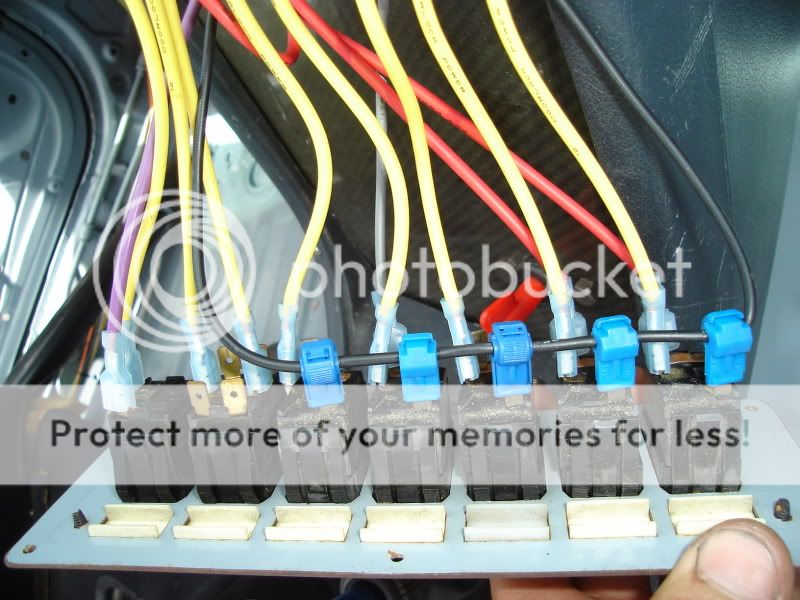
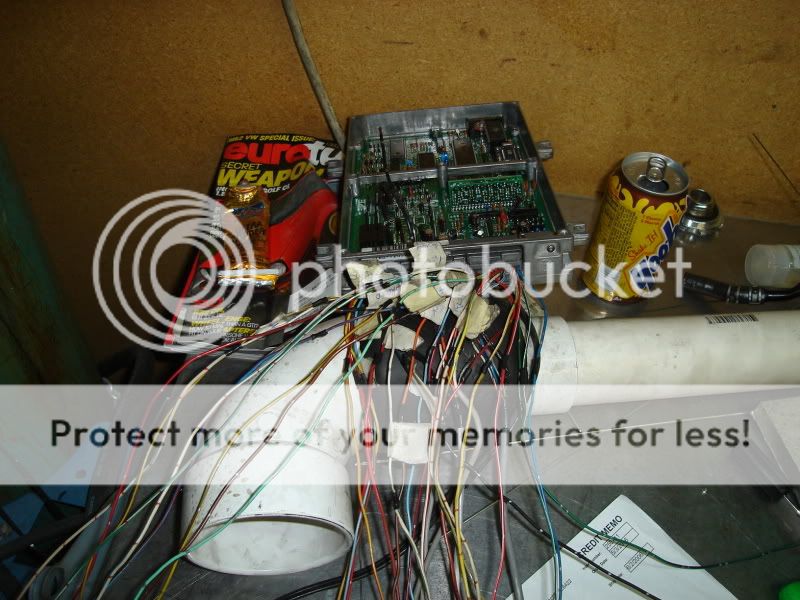
I completly removed any bit of wiring from the factory harness, even the engine harness. Then I cut all the pigtails to the body harness and engine harness that I needed for the car to run. I purchased an OBD1 ECU and had Hondata installed (S100) is what i needed but with boost, since next year I'm supercharging. After all that I went to the junkyard and purchased an OBD1 dizzy, Injectors, TB, IAC, IAT, VSS, ALT, and engine harness. Cut all the pigtails of the OBD1 Harness and I started making a one-piece engine harness. If you look at the pic with the switches, the one to the right is my self diagnostics switch, If I have a code,there's a yellow check engine light at the cluster, if it turns on, I press the yellow switch and it starts blinking the engine codes. .
.
The Body harness took me 8 hours to finish, blinkers, hazards, headligths and tailights, brake lighs, cooling fan, fuel pump, gauges, ignition coil, ecu, and sterter.
The Engine harness took me 17 hours to complete and lots of headakes :crazy: yes, crazy work. I happened to have had all the wiring diagrams. It's a task that requires lots of understanding on how electrics and electronics work.
Here's a listing of its mods.
ENGINE:
B16A STOCK
ARC INTAKE
DC HEADERS
ALUMINUM EXAHUST
HASSPORT MOUNTS
NEW OEM TIMING BELT
NEW LMA
NGK PLUGS AND WIRES
OBD2 INTAKE MANIFOLD
OBD2 FUEL RAIL
OBD2 INJECTORS
OBD2 T BODY
OBD2 DIZZY
DRIVETRAIN:
ACT STAGE II CLUTCH
6 LBS ALUMINUM FLYWHEEL
B16A TRANNY
SKUNK2 SHORT SHIFTER AND ****
POLY LINKAGE BUSHINGS
NEW OEM AXLES
NEW AXLE SEALS
SYNCROMESH
BRAKES:
OVERSIZED MASTER CYLINDER
RUSSELL SS BRAKE LINES
BREMBO BLANK ROTORS
MOTUL RBF FLUID
HAWK BLUE PADS
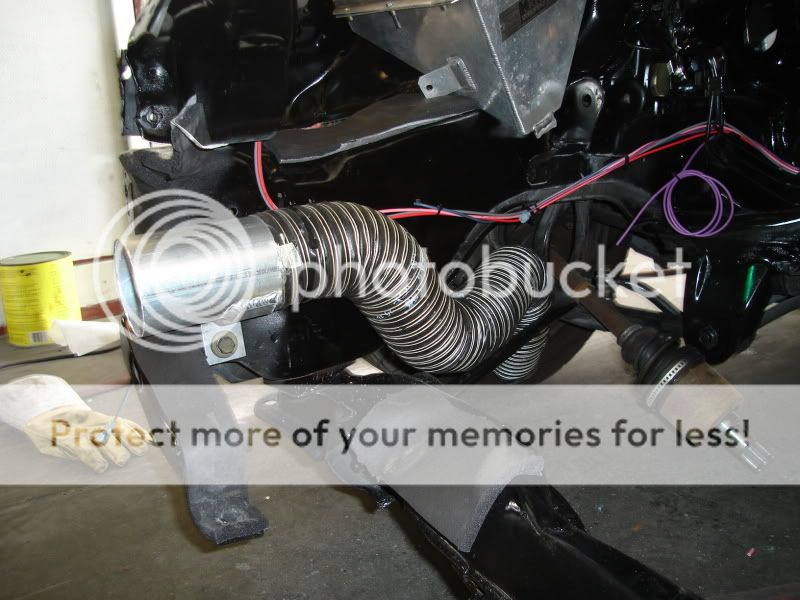
CUSTOM BRAKE DUCKTS
SUSPENTION:
FULL BODIED COILOVERS 32 WAY ADJ
ST FULL SUSPENTION BUSHINGS
FRONT AND REAR INGALLS CAMBER ARMS
SWAY BAR BUSHINGS
FRONT STRUT BAR
BODY:
JDM FRONT END
FRONT LIP 3 INCH
FRONT SPLITER
SPORTS BIKE MIRRORS
LEXAN WINDOWS
SPARCO FIBER GLASS DRIVER SEAT
SPARCO STEAL FRAMED SEAT
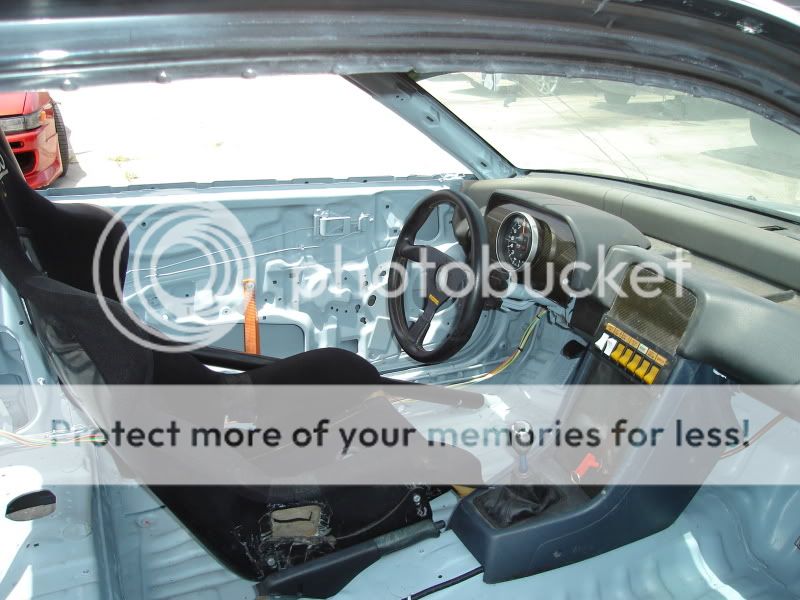
CUSTOM MADE DASH
FLARED REAR FENDERS
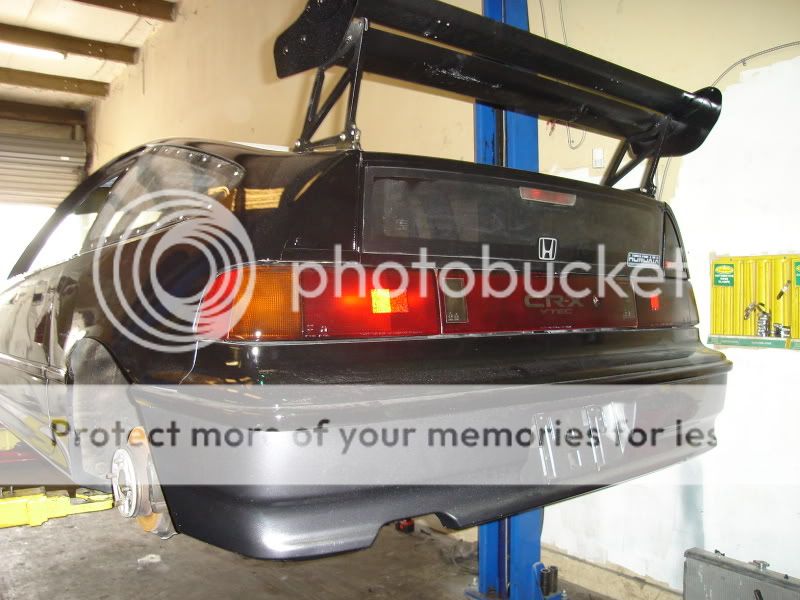
CUSTOM REAR WING
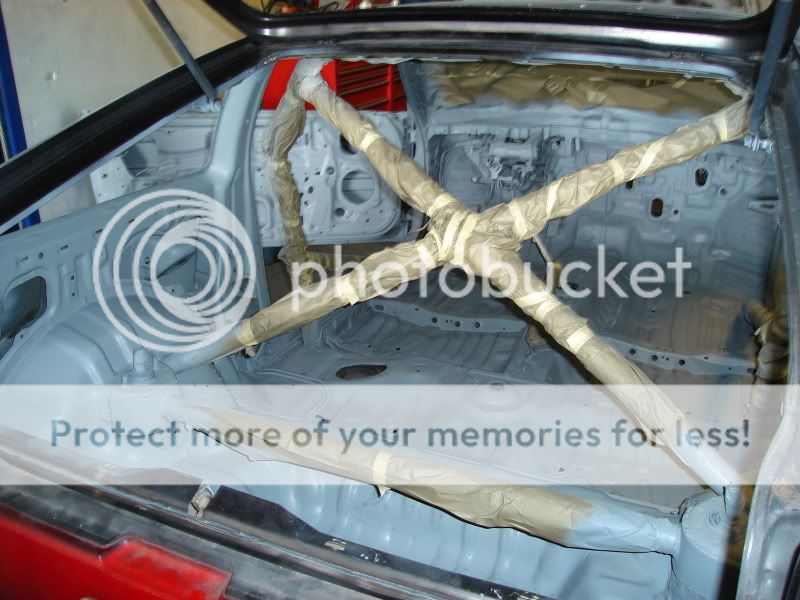
SIX POINT ROLL CAGE
RJS HARNESSES
HOOD PINS
UNDER BODY PANEL
REAR DIFFUSER
ELECTRONICS:
HONDATA S100
CUSTOM MADE ONE PIECE ENGINE HARNESS
AUTOMETER GAUGES, OIL PRESS, WATER TEMP, EGT, VACUUM
AEM UEGO WIDEBAND
PAINLESS 20 CIRCUIT BODY HARNESS
KILL SWITCH
TAYLOR BATTERY BOX
ODDESSY 10LBS BATTERY
FUEL SYSTEM:
WALBRO IN LINE FUEL PUMP 255 LPH
8 GALLON FUEL CELL
AUTOMETER FUEL PRESS GAUGE
B&M FUEL PRESS REGULATOR
SS FUEL LINES
-8 AN FITTINGS AND HOSES
WHEELS AND TIRES:
DRY:
JDM BLACK RACING WHEELS 15X7 +35 OFFSET, 11 LBS EACH
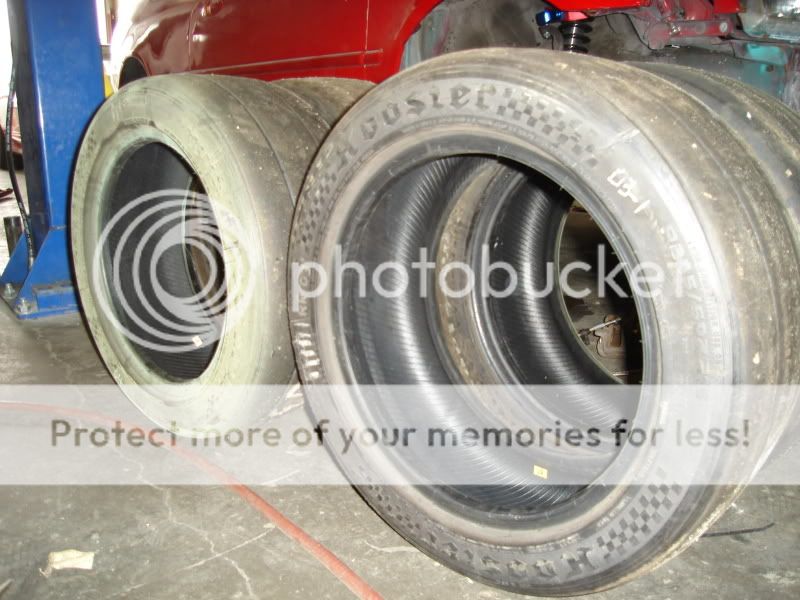
HOOSIER R6 FULL SLICK RACE TIRES 205/50R15
RAIN:
USDM ROTA WHEEL 16X7 +38 OFFSET 16 LBS EACH
BF-GOORICH RAIN TIRES 205/55R16
THANKS TO EVERYBODY FOR ANY HELP OR PARTS PROVIDED FOR THIS PROJECT.
Most recent pic of the front end, and engine bay.

ART 6 point rollbar, Taylor aluminium battery box, badass camera mount. RJS CAM-LOCK 5 point harness.

Driver (SPARCO EVO) Passenger (SPARCO ROAD)

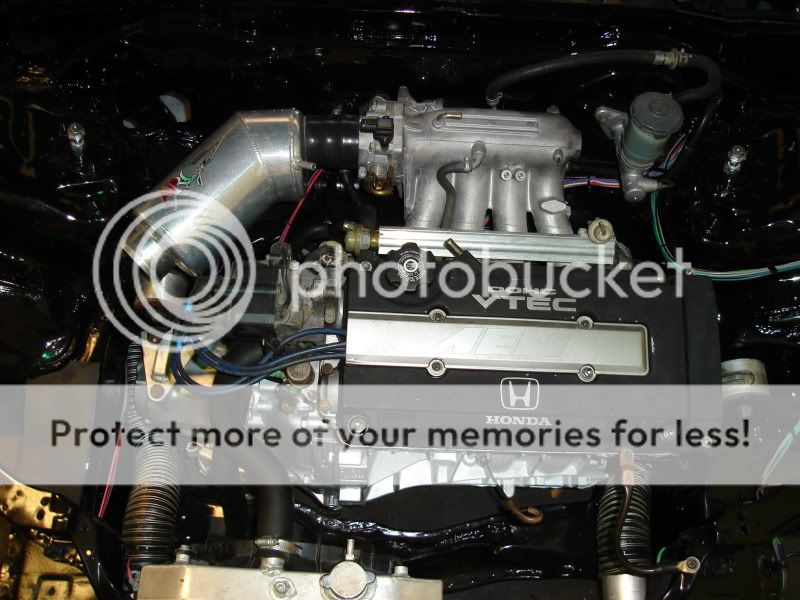
Just picked up the valve cover. $30 bucks. :mrgreen:

Interior cabin. all panels are real CARBON FIBER.

This was at SEBRING RACEWAY for first test drive of the day, at CHIN MOTORSPORTS event.
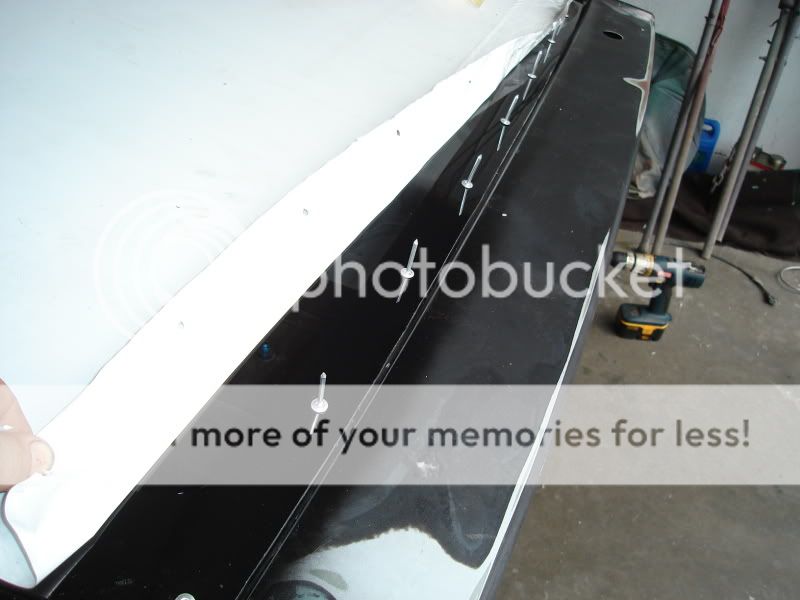
Lexan side and rear windows plus making rear aero.

About to start drilling the Lexan.

Back window almost done, looking good.
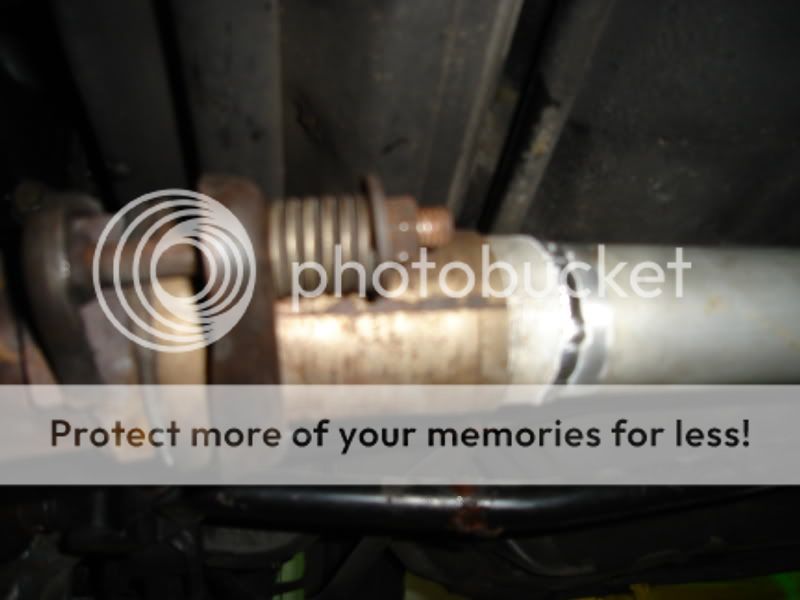
Full custom made aluminum exahust and Kawasaki muffler.
Even the hangers are made of aluminium.

Not the cleanests welds but it'll work.
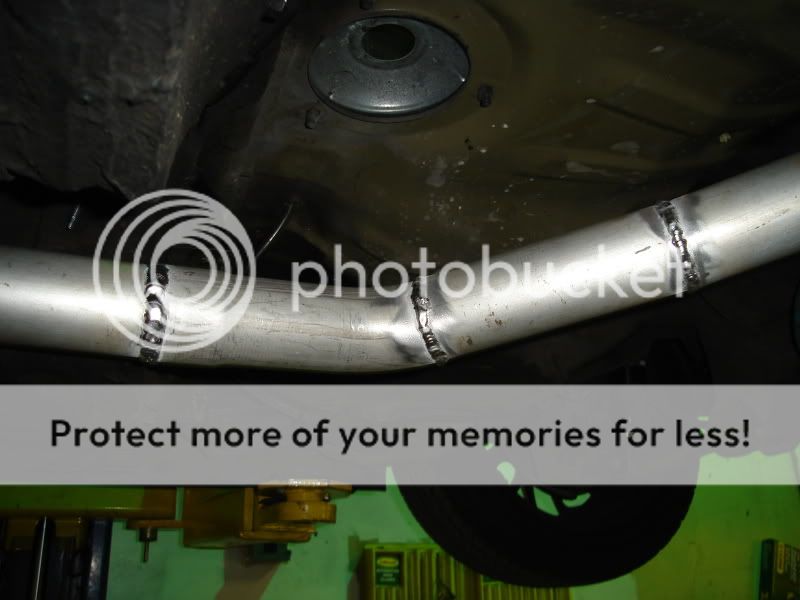
Transition from Steel to Aluminum for the exhaust.
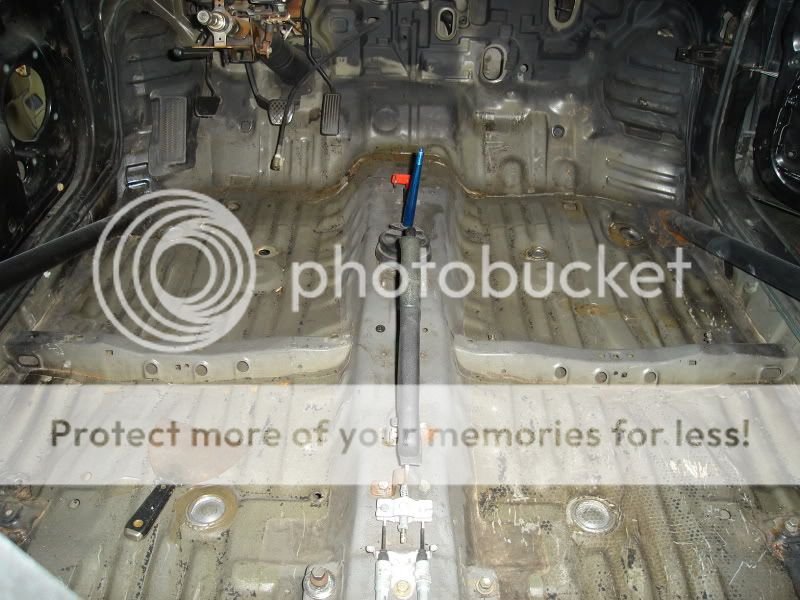
Dry ice to remove sound deadning material.

Dry ice job finished. Much cleaner and lighter.
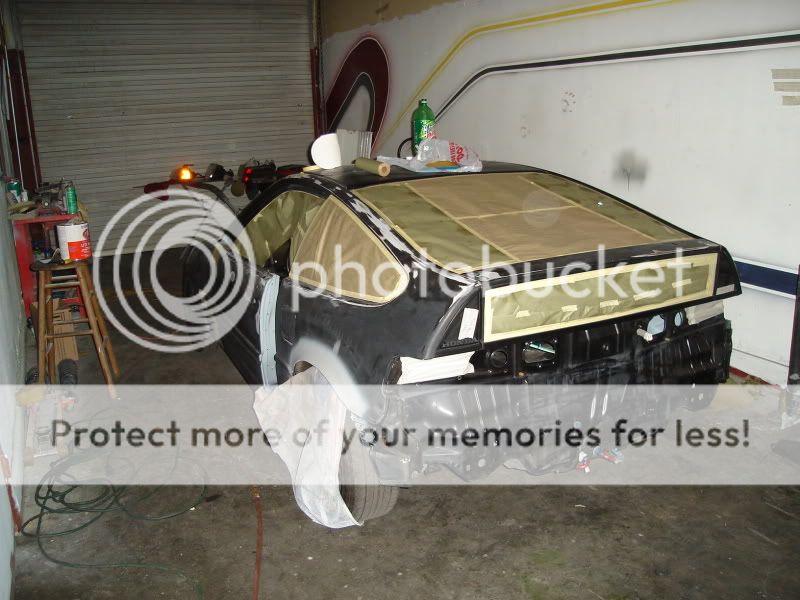
Getting ready to paint.
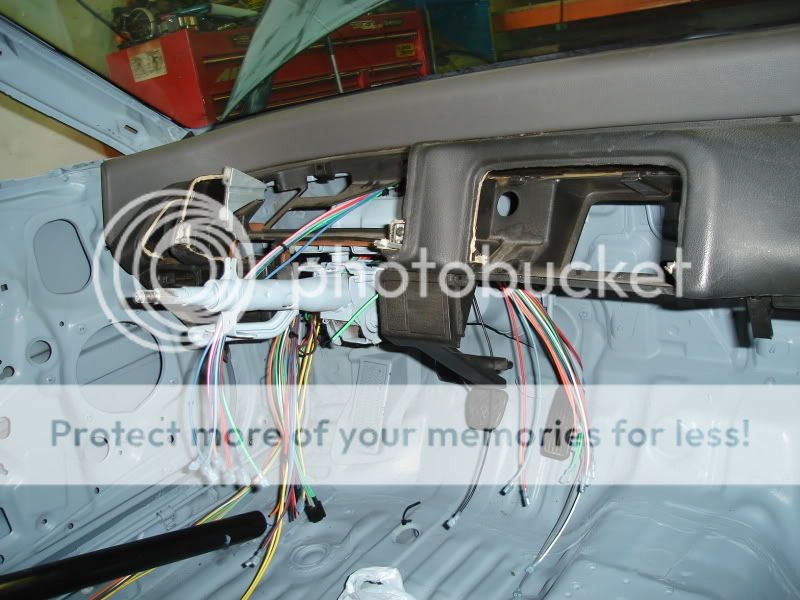
Custom wiring and interior got fresh paint job.
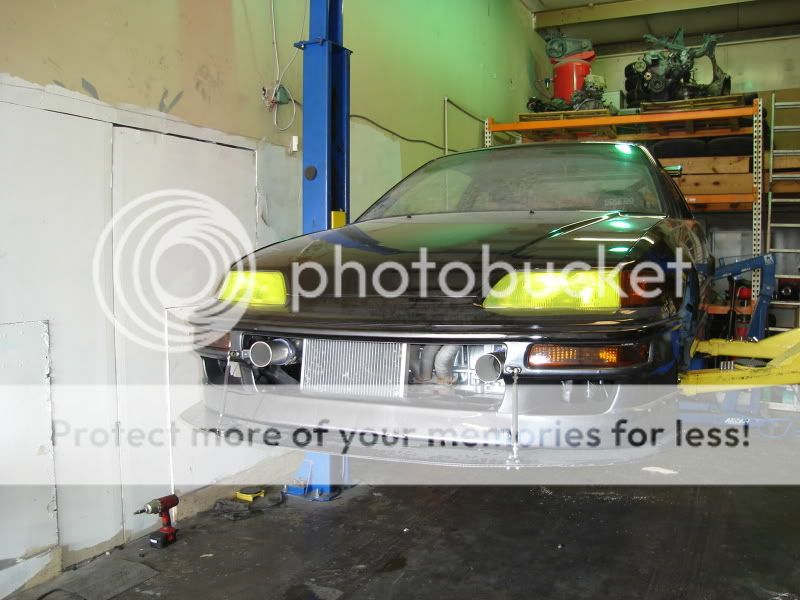
Front spliter plus brake duckts.
Full JDM front end convertion.
Some downforce at the back, also smoked taillights.
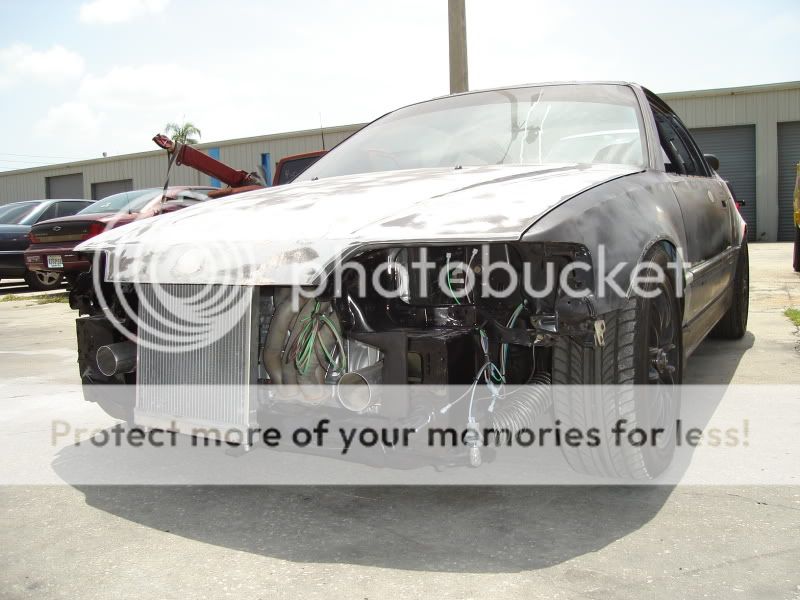
installing front end and preping for paint.
Interior almost done.
Clean engine bay, stock B16A with some mods.
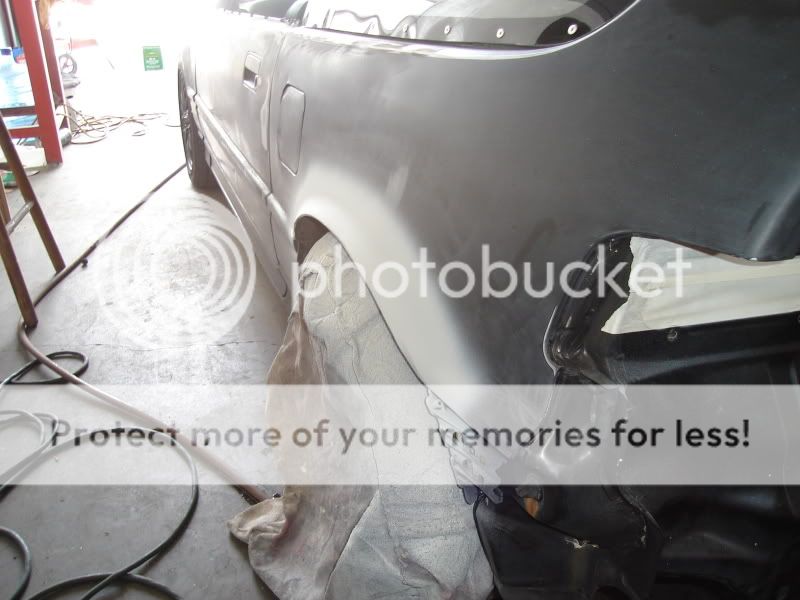
Flaring rear fenders to fit new HOOSIER R6 Tires, 205/50/15.

A little bondo and we're done.
New HOOSIERS R^.
Painting interior.
Side view.

Some wiring.

Brake fluid, Motul RBF 600 and Russell brake lines (stainless steel)

Wiring (cleanliness)

Tail light harness.

Back of switches
Removed the sunroof, replace with thin sheetmetal.

At the track, SEBRING.

Brake ducting
17 hor engine harness.
Hawk blue pads on brand new Calipers.

One more.

Getting ready to pressure wash the engine.

Front spliter before paint

Kawasaki 1400cc muffler

Prep work.

Taylor box

Wet sanding engine bay.

More brake duckting and engine bay finished painting.

Getting ready for engine to go in.

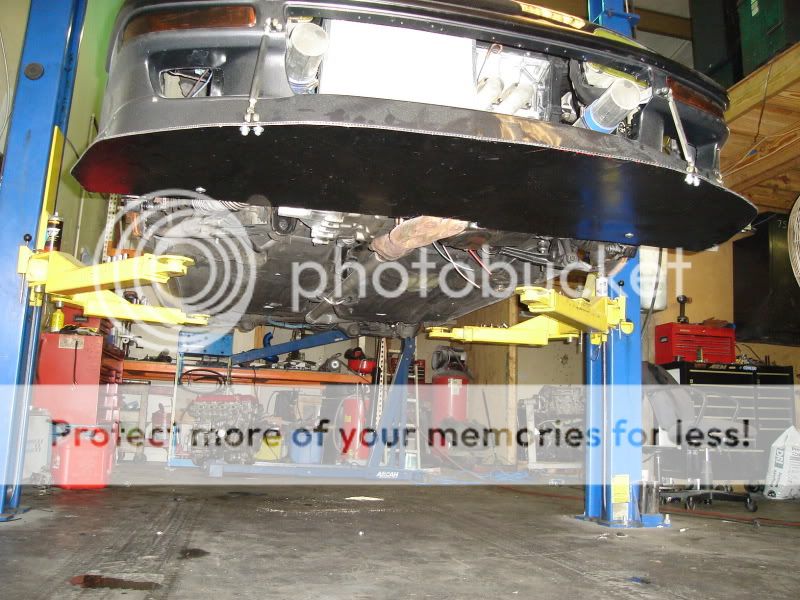
I'm now working on the under body panel and rear diffuser which is connected to the front spliter. I'm making it from the same material as the Spliter, (Alumalite)
By building this panels, I'll lower my (drag coefficient) turning my car into a more aerodynamic platform. Thus making it faster and more stable, as well as increasing its handling. Although the prototype of the diffuser looks like is at 15 degrees, I'm going to be runing about 10.
Total cost so far- $50.00
Total time so far- 4 hours.
Here's what it should look like. Bottom view.

Here is the view from the back. Rear diffuser.

First glance at the prototype


The body harness is a 20 circuit painless harness which is not really painless. lol. :D
I completly removed any bit of wiring from the factory harness, even the engine harness. Then I cut all the pigtails to the body harness and engine harness that I needed for the car to run. I purchased an OBD1 ECU and had Hondata installed (S100) is what i needed but with boost, since next year I'm supercharging. After all that I went to the junkyard and purchased an OBD1 dizzy, Injectors, TB, IAC, IAT, VSS, ALT, and engine harness. Cut all the pigtails of the OBD1 Harness and I started making a one-piece engine harness. If you look at the pic with the switches, the one to the right is my self diagnostics switch, If I have a code,there's a yellow check engine light at the cluster, if it turns on, I press the yellow switch and it starts blinking the engine codes.
The Body harness took me 8 hours to finish, blinkers, hazards, headligths and tailights, brake lighs, cooling fan, fuel pump, gauges, ignition coil, ecu, and sterter.
The Engine harness took me 17 hours to complete and lots of headakes :crazy: yes, crazy work. I happened to have had all the wiring diagrams. It's a task that requires lots of understanding on how electrics and electronics work.
Here's a listing of its mods.
ENGINE:
B16A STOCK
ARC INTAKE
DC HEADERS
ALUMINUM EXAHUST
HASSPORT MOUNTS
NEW OEM TIMING BELT
NEW LMA
NGK PLUGS AND WIRES
OBD2 INTAKE MANIFOLD
OBD2 FUEL RAIL
OBD2 INJECTORS
OBD2 T BODY
OBD2 DIZZY
DRIVETRAIN:
ACT STAGE II CLUTCH
6 LBS ALUMINUM FLYWHEEL
B16A TRANNY
SKUNK2 SHORT SHIFTER AND ****
POLY LINKAGE BUSHINGS
NEW OEM AXLES
NEW AXLE SEALS
SYNCROMESH
BRAKES:
OVERSIZED MASTER CYLINDER
RUSSELL SS BRAKE LINES
BREMBO BLANK ROTORS
MOTUL RBF FLUID
HAWK BLUE PADS
CUSTOM BRAKE DUCKTS
SUSPENTION:
FULL BODIED COILOVERS 32 WAY ADJ
ST FULL SUSPENTION BUSHINGS
FRONT AND REAR INGALLS CAMBER ARMS
SWAY BAR BUSHINGS
FRONT STRUT BAR
BODY:
JDM FRONT END
FRONT LIP 3 INCH
FRONT SPLITER
SPORTS BIKE MIRRORS
LEXAN WINDOWS
SPARCO FIBER GLASS DRIVER SEAT
SPARCO STEAL FRAMED SEAT
CUSTOM MADE DASH
FLARED REAR FENDERS
CUSTOM REAR WING
SIX POINT ROLL CAGE
RJS HARNESSES
HOOD PINS
UNDER BODY PANEL
REAR DIFFUSER
ELECTRONICS:
HONDATA S100
CUSTOM MADE ONE PIECE ENGINE HARNESS
AUTOMETER GAUGES, OIL PRESS, WATER TEMP, EGT, VACUUM
AEM UEGO WIDEBAND
PAINLESS 20 CIRCUIT BODY HARNESS
KILL SWITCH
TAYLOR BATTERY BOX
ODDESSY 10LBS BATTERY
FUEL SYSTEM:
WALBRO IN LINE FUEL PUMP 255 LPH
8 GALLON FUEL CELL
AUTOMETER FUEL PRESS GAUGE
B&M FUEL PRESS REGULATOR
SS FUEL LINES
-8 AN FITTINGS AND HOSES
WHEELS AND TIRES:
DRY:
JDM BLACK RACING WHEELS 15X7 +35 OFFSET, 11 LBS EACH
HOOSIER R6 FULL SLICK RACE TIRES 205/50R15
RAIN:
USDM ROTA WHEEL 16X7 +38 OFFSET 16 LBS EACH
BF-GOORICH RAIN TIRES 205/55R16
THANKS TO EVERYBODY FOR ANY HELP OR PARTS PROVIDED FOR THIS PROJECT.
Most recent pic of the front end, and engine bay.
ART 6 point rollbar, Taylor aluminium battery box, badass camera mount. RJS CAM-LOCK 5 point harness.
Driver (SPARCO EVO) Passenger (SPARCO ROAD)
Just picked up the valve cover. $30 bucks. :mrgreen:
Interior cabin. all panels are real CARBON FIBER.
This was at SEBRING RACEWAY for first test drive of the day, at CHIN MOTORSPORTS event.
Lexan side and rear windows plus making rear aero.
About to start drilling the Lexan.
Back window almost done, looking good.
Full custom made aluminum exahust and Kawasaki muffler.
Even the hangers are made of aluminium.
Not the cleanests welds but it'll work.
Transition from Steel to Aluminum for the exhaust.
Dry ice to remove sound deadning material.
Dry ice job finished. Much cleaner and lighter.
Getting ready to paint.
Custom wiring and interior got fresh paint job.
Front spliter plus brake duckts.
Full JDM front end convertion.
Some downforce at the back, also smoked taillights.
installing front end and preping for paint.
Interior almost done.
Clean engine bay, stock B16A with some mods.
Flaring rear fenders to fit new HOOSIER R6 Tires, 205/50/15.
A little bondo and we're done.
New HOOSIERS R^.
Painting interior.
Side view.
Some wiring.
Brake fluid, Motul RBF 600 and Russell brake lines (stainless steel)
Wiring (cleanliness)
Tail light harness.
Back of switches
Removed the sunroof, replace with thin sheetmetal.
At the track, SEBRING.
Brake ducting
17 hor engine harness.
Hawk blue pads on brand new Calipers.
One more.
Getting ready to pressure wash the engine.
Front spliter before paint
Kawasaki 1400cc muffler
Prep work.
Taylor box
Wet sanding engine bay.
More brake duckting and engine bay finished painting.
Getting ready for engine to go in.
I'm now working on the under body panel and rear diffuser which is connected to the front spliter. I'm making it from the same material as the Spliter, (Alumalite)
By building this panels, I'll lower my (drag coefficient) turning my car into a more aerodynamic platform. Thus making it faster and more stable, as well as increasing its handling. Although the prototype of the diffuser looks like is at 15 degrees, I'm going to be runing about 10.
Total cost so far- $50.00
Total time so far- 4 hours.
Here's what it should look like. Bottom view.
Here is the view from the back. Rear diffuser.
First glance at the prototype
Last edited by CFP_IVAN; 10-30-2009 at 11:52 AM.


Trending Topics
12-13-2008, 12:16 PM
#10
Junior Member
Join Date: Dec 2008
Location: Fort Lauderdale, FL
Posts: 377
Likes: 0
Received 0 Likes
on
0 Posts
cool man! I bet that'll be a lot of fun at the track  I was looking into going to a NASA event at Sebring with my CRX. just didn't work out but next time they're there I'll be going in my S2000
I was looking into going to a NASA event at Sebring with my CRX. just didn't work out but next time they're there I'll be going in my S2000
12-13-2008, 12:21 PM
#11
Your whole rollbar is totally unsafe dude . At least add the rear down tubes to some 1/8th plate because now its just welded to the sheet metal corner
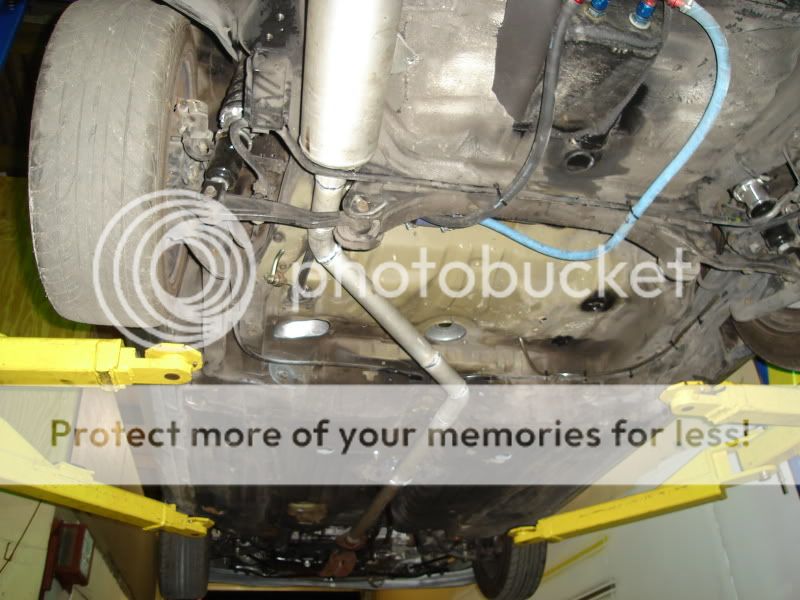
And I don't understand the fuel lines are just hanging off with some zip ties....off the swaybar
But otherwise It looks pretty awesome
Oh ya you can buy the slipfit so it slips inside the aluminum tube then clamp the aluminum around it coming off the collector then it won't leak like it will now. I made mine for $10
Last edited by 89civicdx; 12-13-2008 at 04:26 PM.
12-13-2008, 01:07 PM
#13
Honda-Tech Member
I think you got ripped off if you're calling those things in your engine bay hasport mounts.
or maybe thats why you said "hassport."
Looks good overall though. More pics of the brake ducts
or maybe thats why you said "hassport."
Looks good overall though. More pics of the brake ducts
12-13-2008, 06:50 PM
#14
Honda-Tech Member
Thread Starter
Join Date: Jul 2007
Location: st petersburg, fl, 33716
Posts: 33
Likes: 0
Received 0 Likes
on
0 Posts
Your whole rollbar is totally unsafe dude . At least add the rear down tubes to some 1/8th plate because now its just welded to the sheet metal corner
And I don't understand the fuel lines are just hanging off with some zip ties....off the swaybar
But otherwise It looks pretty awesome
Oh ya you can buy the slipfit so it slips inside the aluminum tube then clamp the aluminum around it coming off the collector then it won't leak like it will now. I made mine for $10
Thanks for looking out, and appreciate the nice comments.
12-13-2008, 06:54 PM
#15
Honda-Tech Member
Thread Starter
Join Date: Jul 2007
Location: st petersburg, fl, 33716
Posts: 33
Likes: 0
Received 0 Likes
on
0 Posts
12-13-2008, 06:56 PM
#16
Honda-Tech Member
Thread Starter
Join Date: Jul 2007
Location: st petersburg, fl, 33716
Posts: 33
Likes: 0
Received 0 Likes
on
0 Posts
I checked and those are actually their first mounts the put out. but we replaced the inserts with good ones, the B16 in my car was swapped almost ten years ago. And no i din't get ripped off they where free to me.
 12-13-2008, 09:10 PM
#22
Honda-Tech Member
12-13-2008, 10:15 PM
#23
12-14-2008, 12:11 PM
#24
something different
Join Date: Sep 2002
Location: grand rapids/chicago, usa
Posts: 6,995
Likes: 0
Received 1 Like
on
1 Post
i love how just because its not the "norm" they sometimes think a cage is "totally unsafe"
that cage would stand up rather well i'd guess. good triangulation, etc.
one more bar from the top corner by the drivers head down to the lower pass-side of the hoop would really help.
cool car. i wanna build a low-powered dedicated track car so badly it hurts.
those mounts look just like the OLD hasports we've got in a crx. the poly in our bushings was bleeding out so hasport sent us brand new inserts for free. THUMBS UP for hasport.
12-14-2008, 12:33 PM
#25
i love how just because its not the "norm" they sometimes think a cage is "totally unsafe"
that cage would stand up rather well i'd guess. good triangulation, etc.
one more bar from the top corner by the drivers head down to the lower pass-side of the hoop would really help.
that cage would stand up rather well i'd guess. good triangulation, etc.
one more bar from the top corner by the drivers head down to the lower pass-side of the hoop would really help.
What do you mean not the norm? lol you mean the safe way?
1st its not a cage its a rollbar
2nd the rear down tubes don't attach to anything but sheet metal there is no plate under it....you think that corner is going to stop those tubes from shooting out?
3rd , how do you figure that having 2 triangles meeting at a point is safe at all? The main hoop is just going to spread the top of the X open, just look at the picture it it's not that difficult to picture.