
My first wire-tuck EG Coupe
 02-16-2011, 02:43 PM
#1
Honda-Tech Member
Thread Starter
My first wire-tuck EG Coupe
So this is just another boring old wire-tuck that I started after getting this Coupe in such a sh**** condition. The previous owner that rigged and gettohfied everything you can name in the car including the engine and cabin harness. Anyways I got my work cut out let us get started.
Tools Needed:
10MM socket
12MM socket
12 inch extension and smaller
Ratchet �
Flat tip screwdriver
Philips screw driver
Small Pick (I filed mine flatter to use)
Prying tool (to remove clips)
Small bucket
Towel
Tooth brush or brush
1. Start with the Engine bay and free all the harness from the body and remove the fuse box. My car is all stripped out already so it was pretty much done.
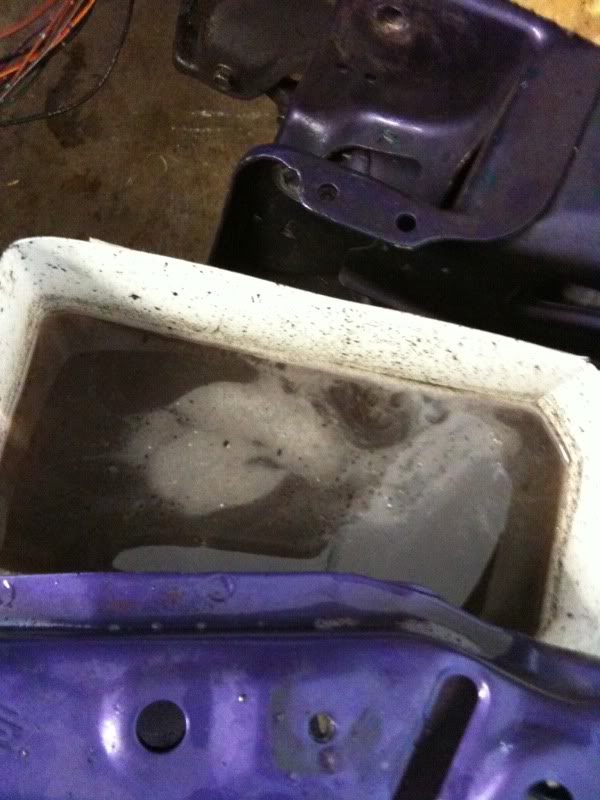
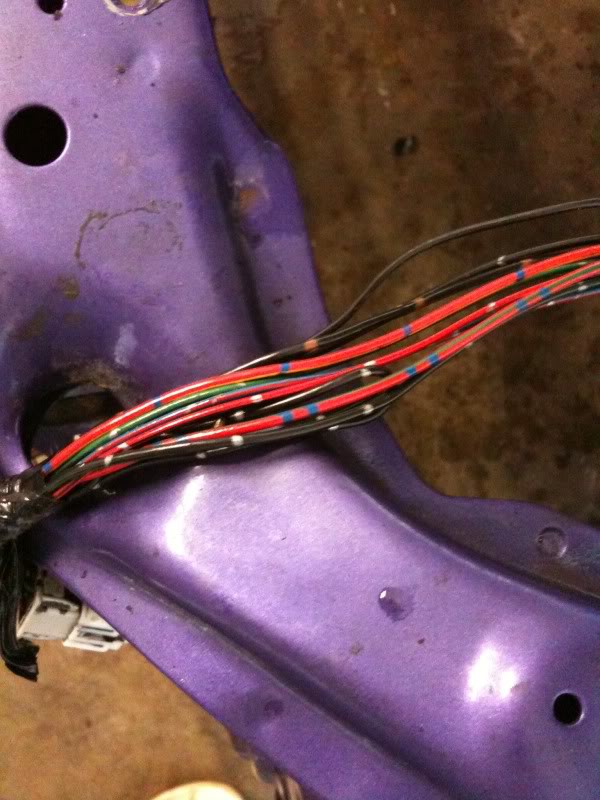
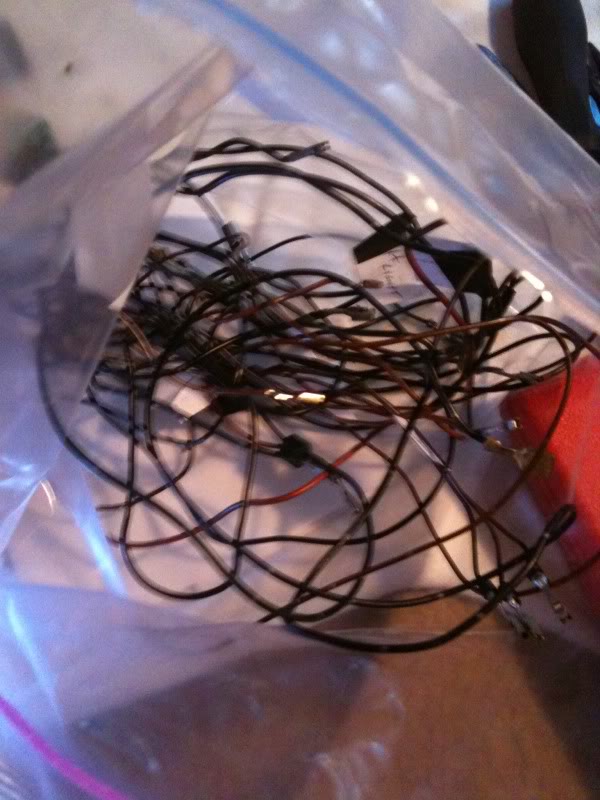
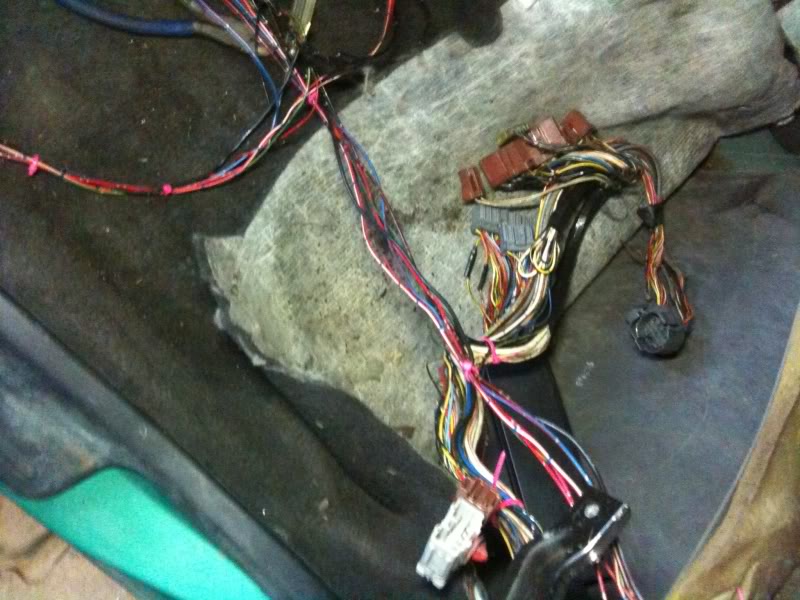
2. I am OCD about cleanliness. I cut a half 5qt oil jug and got some dishwasher soap and degreaser and started to wash the harness and engine bay using the brush and towel. Also I removed all the jacked up wire protector and cut off any broken connectors. This is pretty much what it looked like after I scrubbed it cleaned the harness. Then you’re ready for the inside.
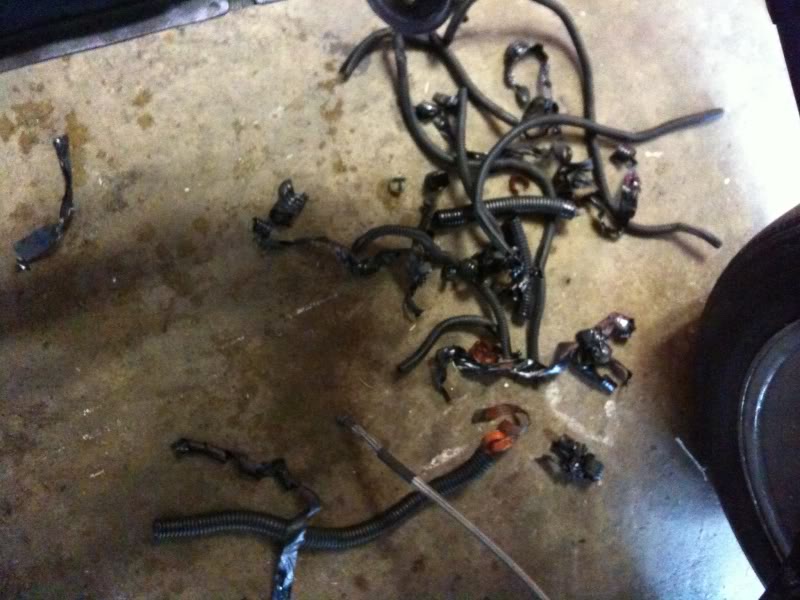
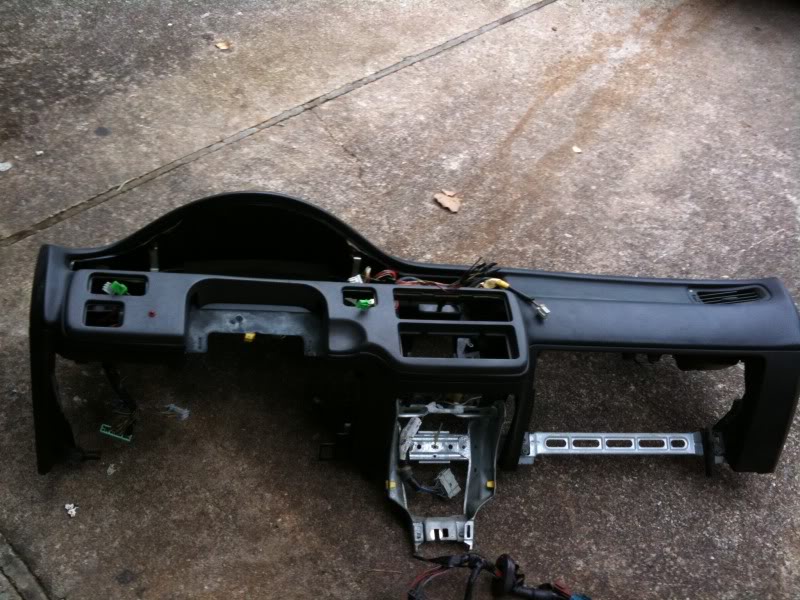
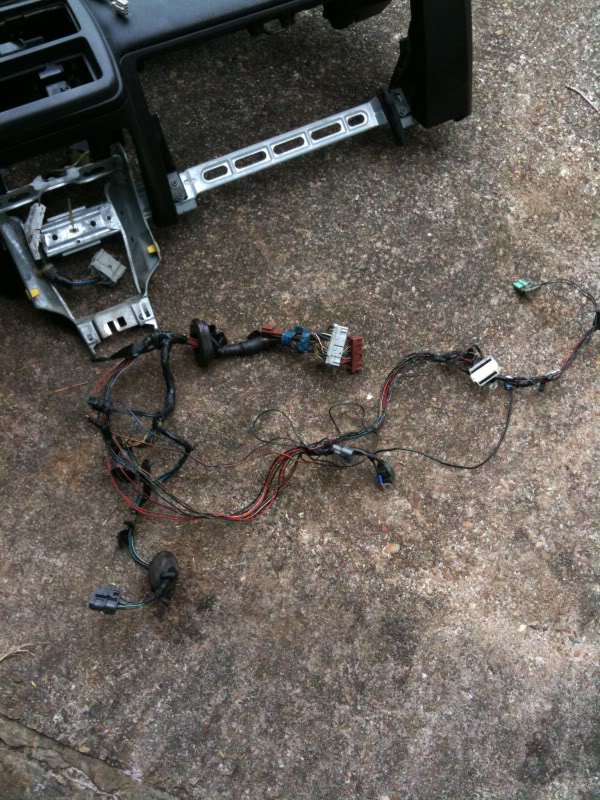
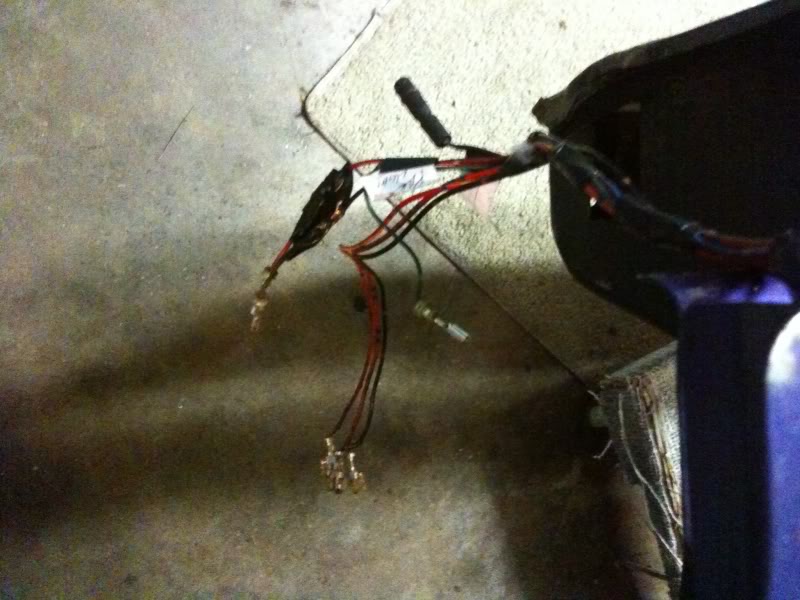
3. Next you have to remove your dash board I am not going to show it because I was by myself and had to struggle to get it out so no pictures. Regardless take out the lower console, radio, then the ac control stuff make sure you unhook it from the heater core so you don’t damage it. Then remove the glove box and passenger air bag. Then go for the top vent. After this get your 12mm and extension and lower the 4 nuts under the steering column (Be sure to open the hole on the lower steering wheel and put that red connector on the air bag so you don’t blow your face up while doing this, also do the same for the passenger air bag after you remove it). Then you’ll have to take the bolt from behind the top vent behind the center console, on both sides of the dash, and the one behind the glove box. Then disconnect the harness behind the center console and the harness from the left side under dash fuse box. And the dash should jump out at you. Here it is outside, you can see I have to fix the wires where the guy chopped it for a radio, what is wrong with people and gettohfing things you can buy a harness at Autozone for like 10 bucks!
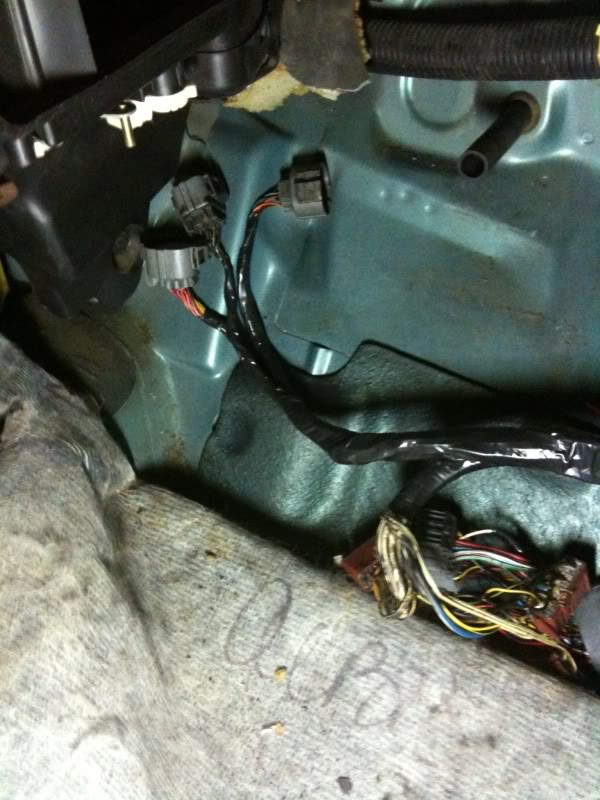
4. The EX coupe has a sweet sub harness on the driver’s side where that goes to the engine bay you can unplug this and then push and pull the harness through the fire wall and down past the pedals here. You cannot miss this connector it is fat, grey, and brown right behind the hole. Use your flat tip to pry the connector mount off the fire wall and then use the flat tip to help you pop it out and then bam your driver’s side harness is off the car.
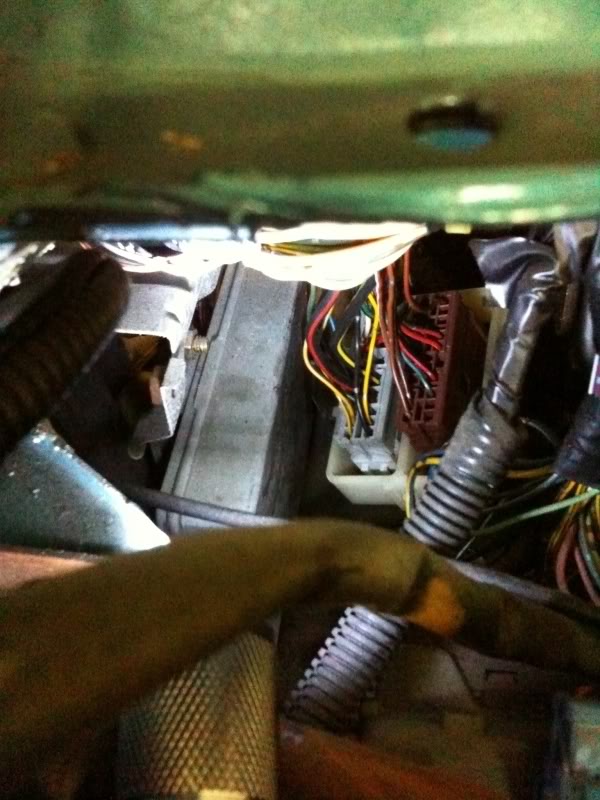
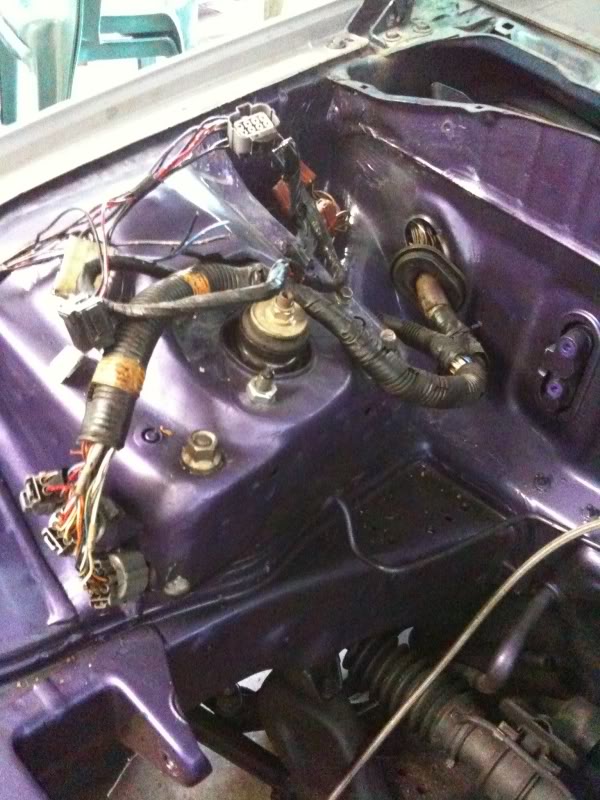
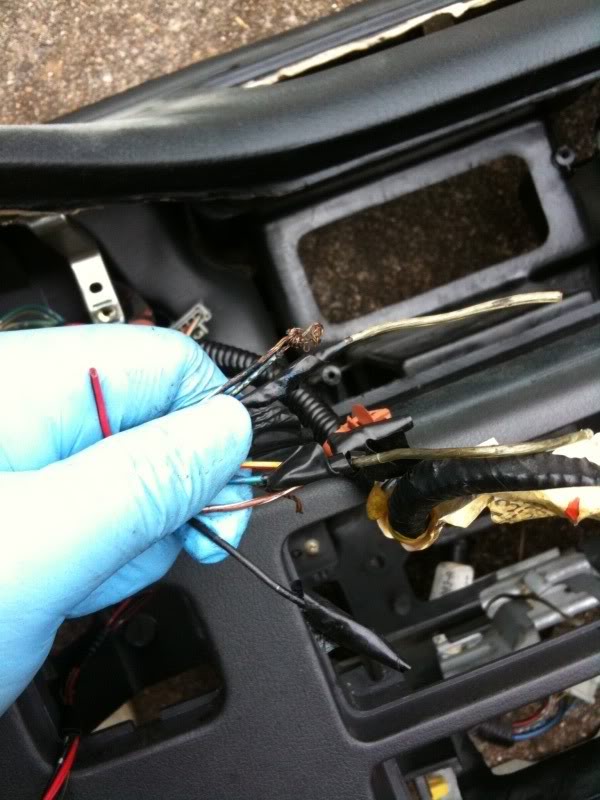
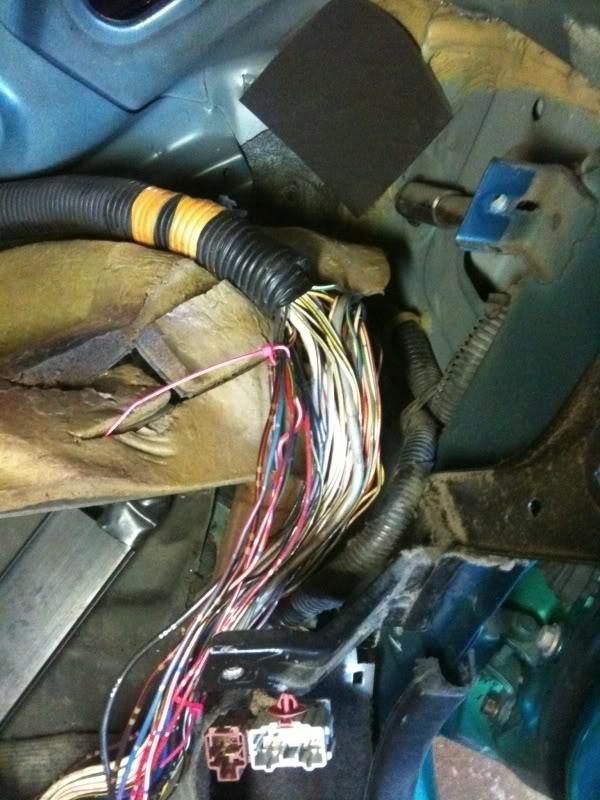
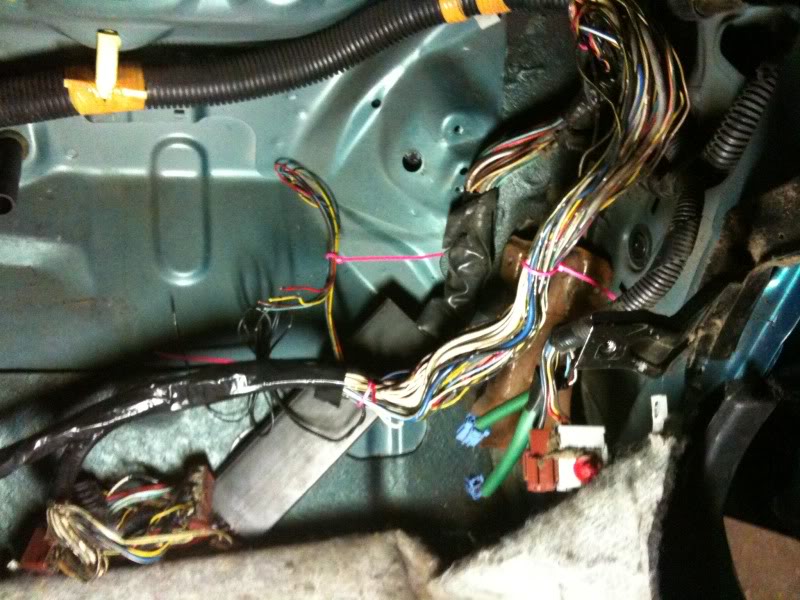
5. On the Passenger side it’s a little harder you will have to remove the blower and evap core to get to the holes and pull the harness through. This is easy just unplug all the connectors from those two and then there is like 8, 10mm nuts and bolts around them and they come right out. For some dumb *** reason Honda did not put a sub harness to the engine bay here so you will have to sort the wires out inside the car lame. Same like the driver's side push and pull the harness gently through the holes once all the stuff is removed and it will look like this.
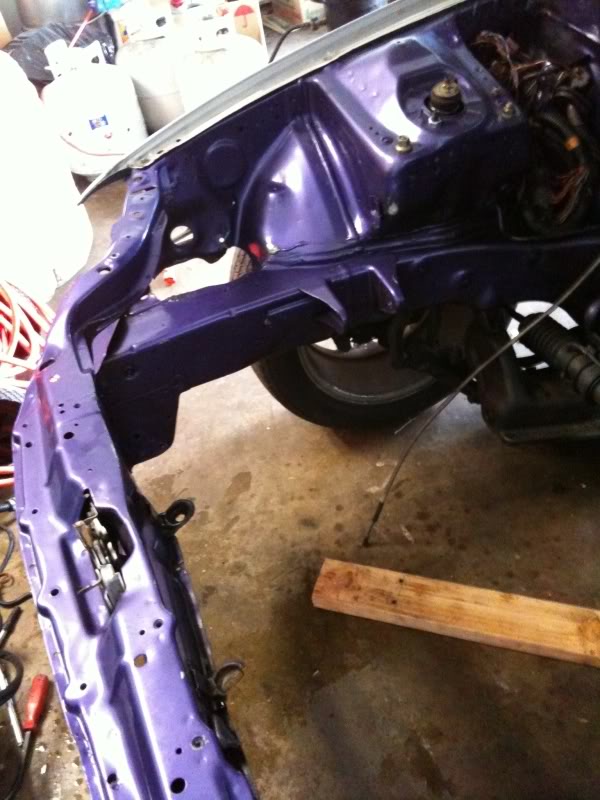
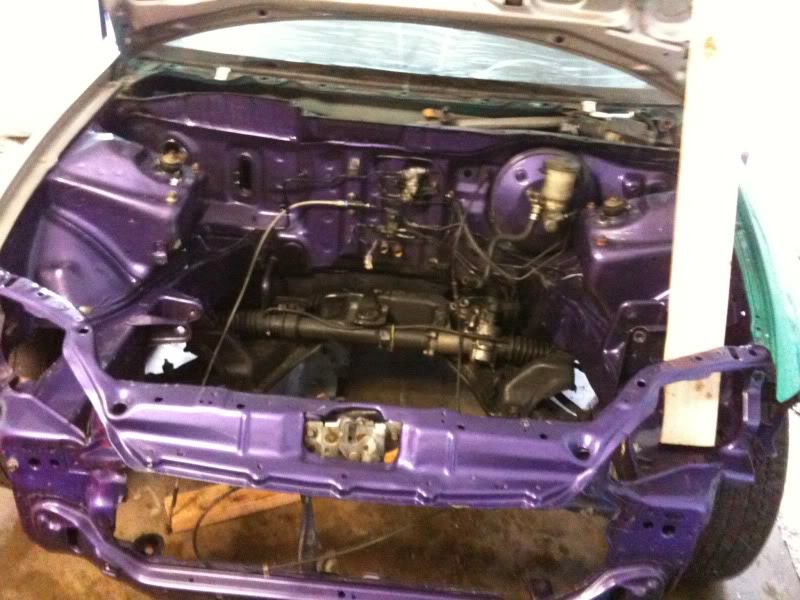
6. After this and a little more cleaning (always clean, clean, clean) this is what my final engine bay looks like.
7. Now it looks fresh and stuff you can start to do the tuck. I have yet to purchase supplies to do that for the harness. I don’t plan on doing a Chasebay tuck (mad props to him and Rywire) but I am going to reuse the old harness and solder and shrink wrap and use the OEM connectors. I think going overboard with the mil-spec and all that is useless.
After this weekend (when I work and get paid) Ill order some heat shrink, loom, wire and solder and continue my tuck next week or the following (damn school test coming up in the next 2 weeks). Stay tuned because I will show some work of the wire management. Oh and if anyone has any suggestions where to bring the wires through the fire wall let me know I still in debate over that. Also about rear trunk battery tuck.
Oh and Yeah the guy painted the car crazy plump purple in the engine bay and tropical green metalic outside. I call her my Ninja Turtle !!!! I am also going to redo the paint and body on the car and engine bay. I do not plan on going crazy on a shave engine bay just clean up sand and respray but try to do it legit.
So this is just another boring old wire-tuck that I started after getting this Coupe in such a sh**** condition. The previous owner that rigged and gettohfied everything you can name in the car including the engine and cabin harness. Anyways I got my work cut out let us get started.
Tools Needed:
10MM socket
12MM socket
12 inch extension and smaller
Ratchet �
Flat tip screwdriver
Philips screw driver
Small Pick (I filed mine flatter to use)
Prying tool (to remove clips)
Small bucket
Towel
Tooth brush or brush
1. Start with the Engine bay and free all the harness from the body and remove the fuse box. My car is all stripped out already so it was pretty much done.
2. I am OCD about cleanliness. I cut a half 5qt oil jug and got some dishwasher soap and degreaser and started to wash the harness and engine bay using the brush and towel. Also I removed all the jacked up wire protector and cut off any broken connectors. This is pretty much what it looked like after I scrubbed it cleaned the harness. Then you’re ready for the inside.
3. Next you have to remove your dash board I am not going to show it because I was by myself and had to struggle to get it out so no pictures. Regardless take out the lower console, radio, then the ac control stuff make sure you unhook it from the heater core so you don’t damage it. Then remove the glove box and passenger air bag. Then go for the top vent. After this get your 12mm and extension and lower the 4 nuts under the steering column (Be sure to open the hole on the lower steering wheel and put that red connector on the air bag so you don’t blow your face up while doing this, also do the same for the passenger air bag after you remove it). Then you’ll have to take the bolt from behind the top vent behind the center console, on both sides of the dash, and the one behind the glove box. Then disconnect the harness behind the center console and the harness from the left side under dash fuse box. And the dash should jump out at you. Here it is outside, you can see I have to fix the wires where the guy chopped it for a radio, what is wrong with people and gettohfing things you can buy a harness at Autozone for like 10 bucks!
4. The EX coupe has a sweet sub harness on the driver’s side where that goes to the engine bay you can unplug this and then push and pull the harness through the fire wall and down past the pedals here. You cannot miss this connector it is fat, grey, and brown right behind the hole. Use your flat tip to pry the connector mount off the fire wall and then use the flat tip to help you pop it out and then bam your driver’s side harness is off the car.
5. On the Passenger side it’s a little harder you will have to remove the blower and evap core to get to the holes and pull the harness through. This is easy just unplug all the connectors from those two and then there is like 8, 10mm nuts and bolts around them and they come right out. For some dumb *** reason Honda did not put a sub harness to the engine bay here so you will have to sort the wires out inside the car lame. Same like the driver's side push and pull the harness gently through the holes once all the stuff is removed and it will look like this.
6. After this and a little more cleaning (always clean, clean, clean) this is what my final engine bay looks like.
7. Now it looks fresh and stuff you can start to do the tuck. I have yet to purchase supplies to do that for the harness. I don’t plan on doing a Chasebay tuck (mad props to him and Rywire) but I am going to reuse the old harness and solder and shrink wrap and use the OEM connectors. I think going overboard with the mil-spec and all that is useless.
After this weekend (when I work and get paid) Ill order some heat shrink, loom, wire and solder and continue my tuck next week or the following (damn school test coming up in the next 2 weeks). Stay tuned because I will show some work of the wire management. Oh and if anyone has any suggestions where to bring the wires through the fire wall let me know I still in debate over that. Also about rear trunk battery tuck.
Oh and Yeah the guy painted the car crazy plump purple in the engine bay and tropical green metalic outside. I call her my Ninja Turtle !!!! I am also going to redo the paint and body on the car and engine bay. I do not plan on going crazy on a shave engine bay just clean up sand and respray but try to do it legit.
Last edited by VinhTEC; 02-16-2011 at 06:27 PM.

 02-17-2011, 09:47 AM
#3
Honda-Tech Member
Join Date: Jan 2011
Location: SD
Posts: 19
Likes: 0
Received 0 Likes
on
0 Posts
Looks good.. I just picked up a 99 coupe with the same problems you have.. For some reason, these idiots think they know what they are doing and cut and splice and tap every fricken wire in the engine bay.
Dont even get me started on the alarm install!
It took me 3 days to shrink and wrap my harness. Its not quite as nice as the MIL spec kits, but its fine for me.
Good luck!
Dont even get me started on the alarm install!
It took me 3 days to shrink and wrap my harness. Its not quite as nice as the MIL spec kits, but its fine for me.
Good luck!
 02-17-2011, 10:13 AM
#5
Honda-Tech Member
Join Date: Aug 2005
Location: SD Thief KiLLER, ca, thief killer
Posts: 2,182
Likes: 0
Received 0 Likes
on
0 Posts
Was that car like 3 different colors. Looks to be some red in the front radiator support section on the passenger side, engine bay is purple, and the outside is some funky green color. Good luck on the build. I hate having to fixing a bunch of mickey mouse wiring that someone failed to do correct the first time around.
02-17-2011, 04:22 PM
#6
Honda-Tech Member
Thread Starter
Thanks for the support Honda-tec guys. And yeah the car is like 3 different colors. The guy was trying to do a themed engine bay and did not turn out that good. The outside was i think that Aztec Teal color then he went and home painted a Tropical Green Metalic on the outside. Yes he painted in the back yard, from far away it looks okay up close there's like millions of trash stuff in the paint. I think the car has some red body parts on it too and I had to replace the some front end pieces with silver car. Still debating if I should redo it the same color or go with something else? Any suggestions? I want clean and cost effective.
Trending Topics
 02-17-2011, 06:13 PM
#9
Honda-Tech Member
Join Date: Aug 2005
Location: SD Thief KiLLER, ca, thief killer
Posts: 2,182
Likes: 0
Received 0 Likes
on
0 Posts
Thanks for the support Honda-tec guys. And yeah the car is like 3 different colors. The guy was trying to do a themed engine bay and did not turn out that good. The outside was i think that Aztec Teal color then he went and home painted a Tropical Green Metalic on the outside. Yes he painted in the back yard, from far away it looks okay up close there's like millions of trash stuff in the paint. I think the car has some red body parts on it too and I had to replace the some front end pieces with silver car. Still debating if I should redo it the same color or go with something else? Any suggestions? I want clean and cost effective.
How funny, well keep up the good work and try to keep the cost down.
02-17-2011, 09:51 PM
#11
Honda-Tech Member
Thread Starter
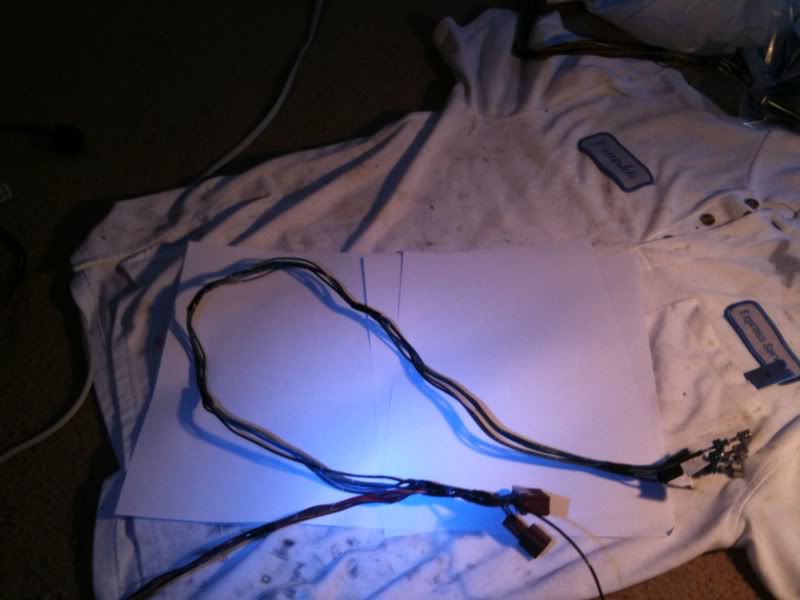
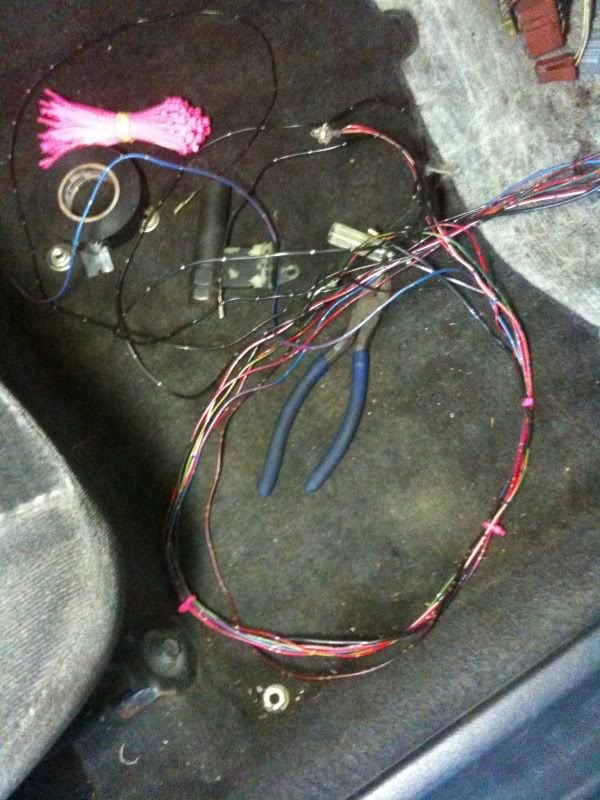
So tonight after class I didn�t want to just go to sleep at like 8 pm (I was beat tired). So I jumped the gun and ran into the garage and grabbed the driver�s side harness and brought it in my room. I wanted to organize and the wires and delete all the unnecessary crap. The loom and shrink wraps are on their way to my house and should be here next week. Anyway here is it mocked up in my room and then I�ll need to measure the necessary distance to go from the cabin to the front of the car (do that this weekend). The driver�s side is super easy to do.
I apologize for the horrible pictures. My room is about as lit-up as a bat cave and all I have is a crapy iphone and a ghetto LED flash light and a lamp. If anyone wants any other pictures I can take new ones in the day time.
Tools needed:
3M Electrical tape
Razor blade
Small Needle �nose pliers
Flat tip screw driver
Cutting Pliers
Gloves (the wires are sticky from tape and grease)
Flash light (if your room is not well lit, might as well be doing this by candle light -__-)
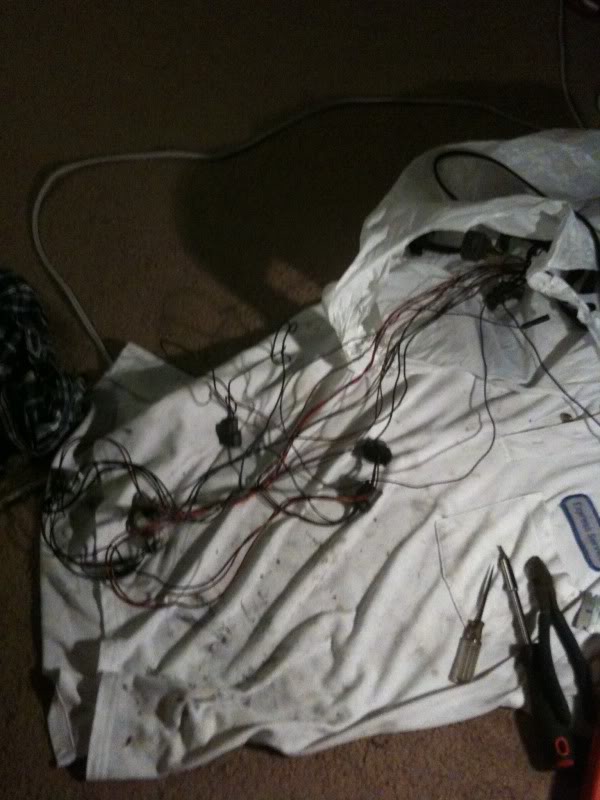
Work Mat (I use this douch bags guy�s shirt I used to work with)

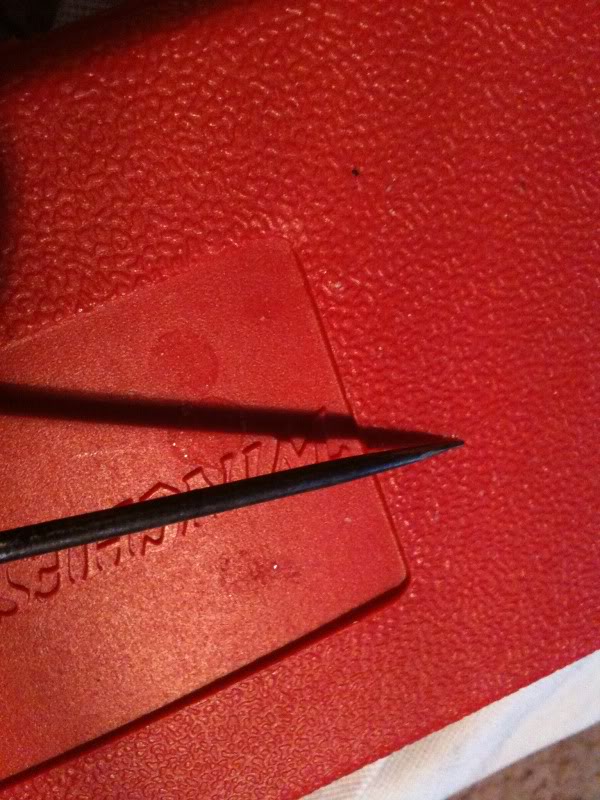

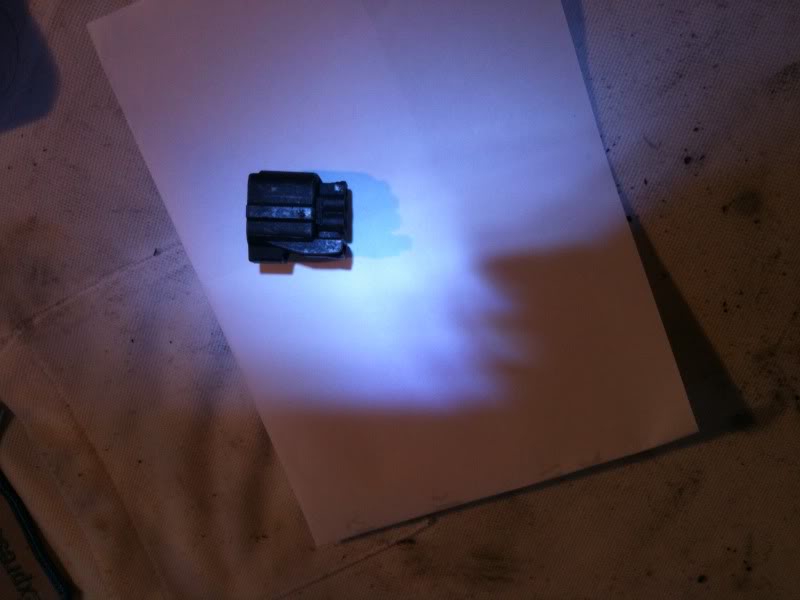
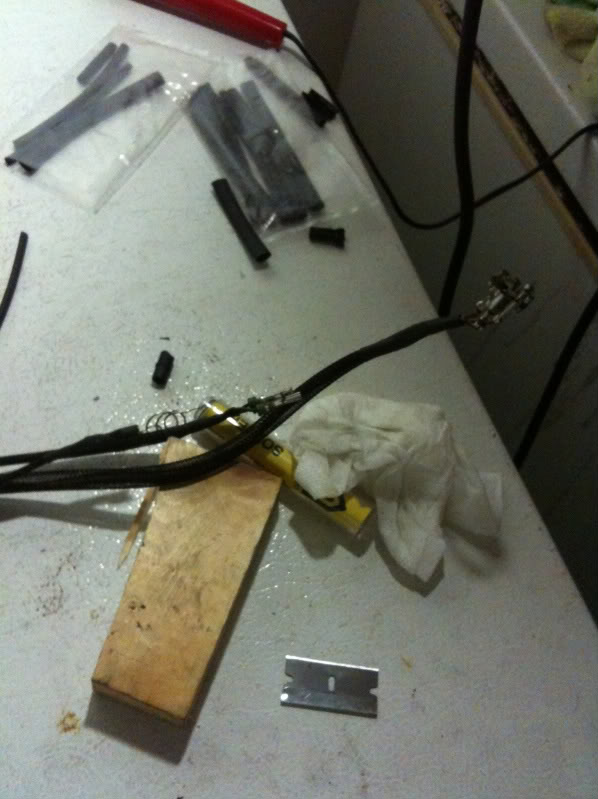
Here are pictures of my pick. I just filed it down a little flat, not sure if you guys can see this in the picture. This is used to de-pin the connectors, don�t cut them please. The pins are around 1.00 each at Honda and come with a wire pre-attached to them. You might reuse them later or a buddy might need them.
1.) First take the harness and start cutting all the tape, collie black things, and protectors off. Start with the headlights and parking lights and cut back from there. Stop when your reach the fat connectors for the engine harness. Were working with the lights first.
2.) I did not have carpenters tape to write on so I used paper and electrical tape. This is to keep track of stuff to take off and stuff to leave on. Label all your major connectors to keep on.
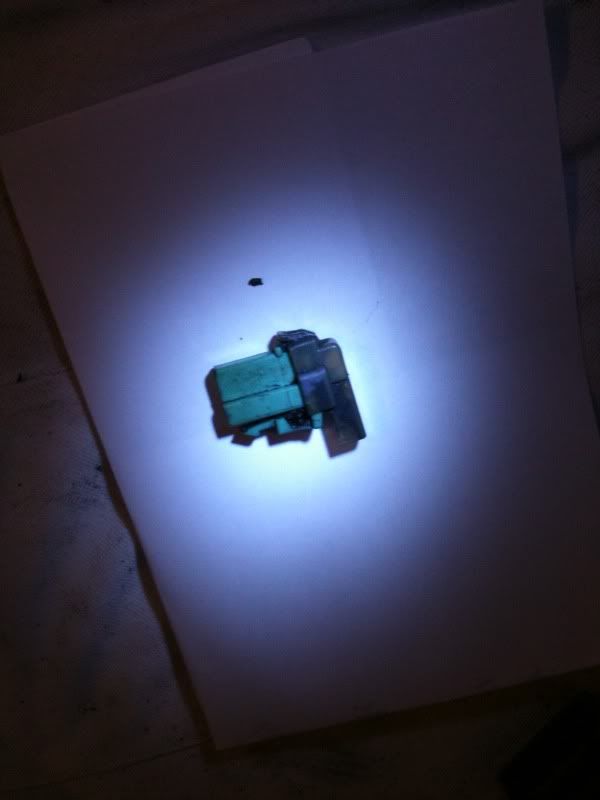
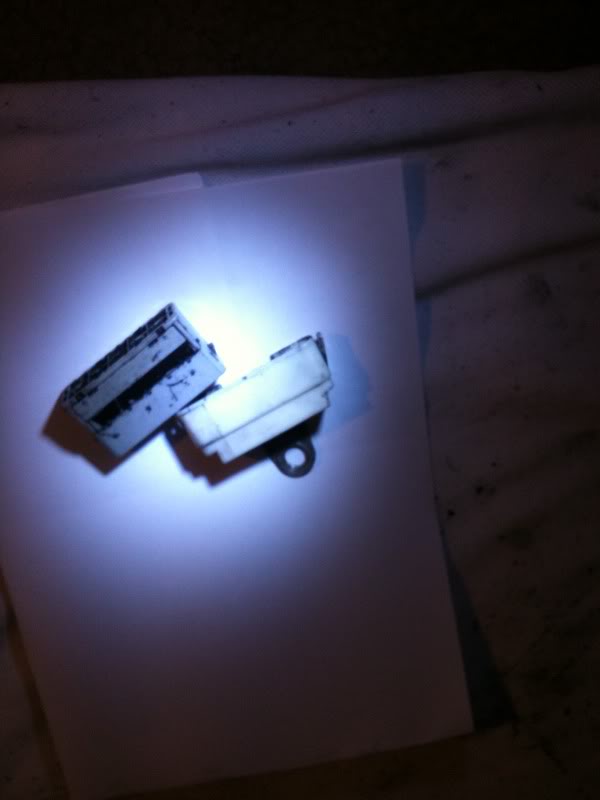
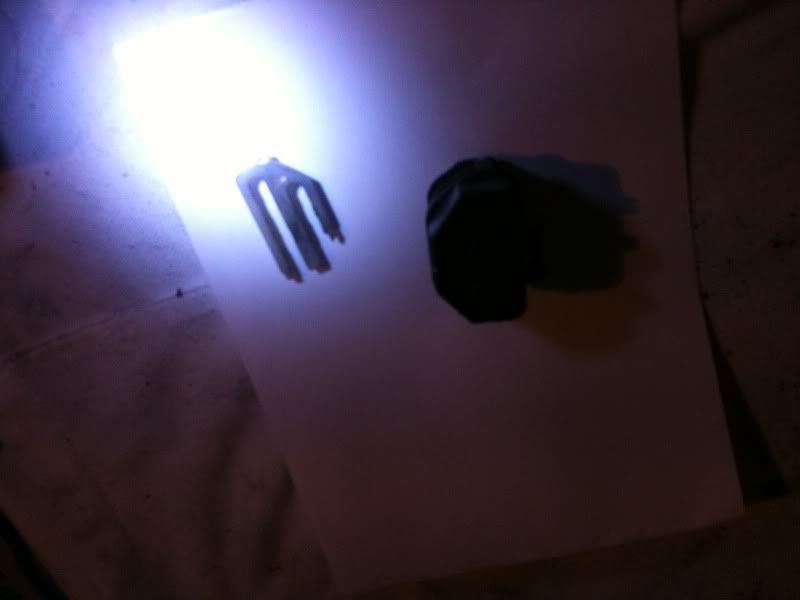
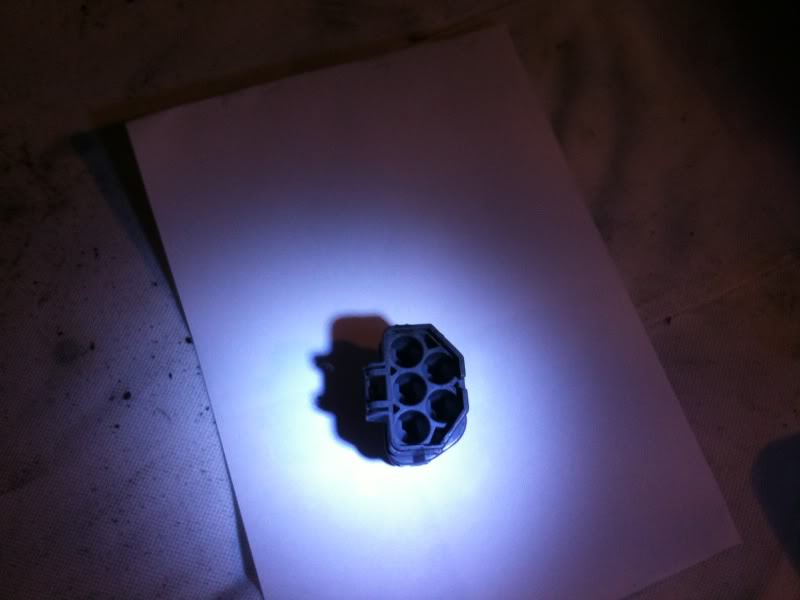
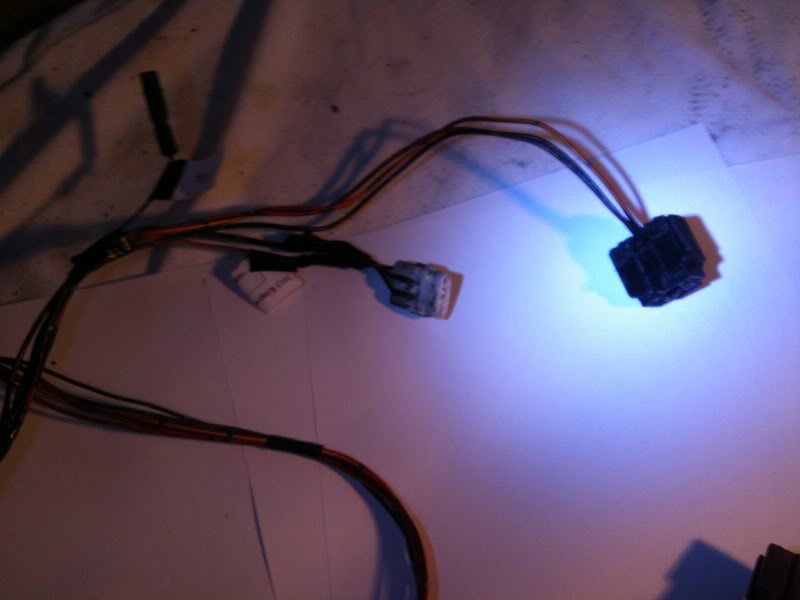
3.) The main connectors you should keep are headlights, fog lights, parking lights and wiper motor. The wiper is the fat triangular 5 pin connector. I am sure you will know what it is since you took it off. Things to delete are : Power steering switch (gray 2 pin wires), cruise control (gray 4 pin brown wires) , tachometer test plug (white 1 pin connector with black cap one blue wire), window washer (green 2 pin connector), and lastly I opted to delete the OEM ground location (white funky looking connector). I deleted this because the window wiper ground went from one side of the harness to the other side to get to the body ground. I thought that this would be an issue when I go to loom and heat shrink the harness. It makes a weird u-turn to the other side of the harness. I am going to build a ground for inside the chassis.
Power steering: make sure you use the needle nose pliers to pull out the pig tail first (the white thing). Then to get the wires out I use the LED flash light to look through the front, there will be a small tab to press up on and then they pop out. Slow down if you are not getting it out, try to get a good bite on the tabs. They should come out easy if not your might have already broken it!

Cruise control: This also has a pig tail. Get that first then the tabs are in front.
Tachometer test plug: For this one you will probably want to wait until you get back further on the harness and just de-pin it from the main harness connector.

Window washer: You need to snap that brown cap off the back first, and then get the tabs from the front. If it is dirty clean it out, to see what you are doing. Hatches will have 2 of these coupes have one only.
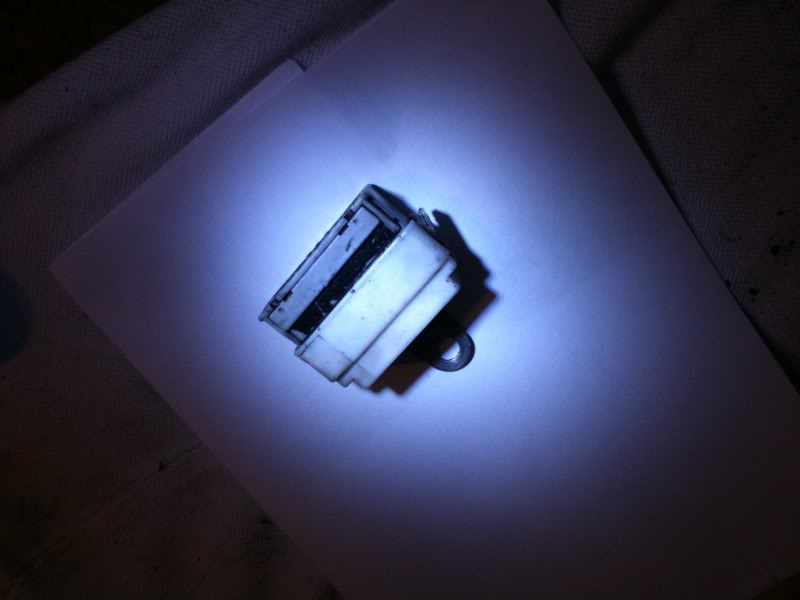
Ground: There is a top cap on this connector. It has tabs on the sides, pry them up and massage the cap up and off. Then de-pin from the front. Like I said I deleted the whole set up for easy of looming the harness later.
Wiper motor: Make sure you take off that white clip on the back first with the pick and screw driver or the wires won�t come out. You have to de-pin this one now because the wires need to be pushed through the fire wall later and extend. I labeled them all so I remember where to put them back in the connector.
(You will need to de-pin the parking and the head light as well to pass it though the fire wall but I�ll do that when I am there I got tired and its late now)
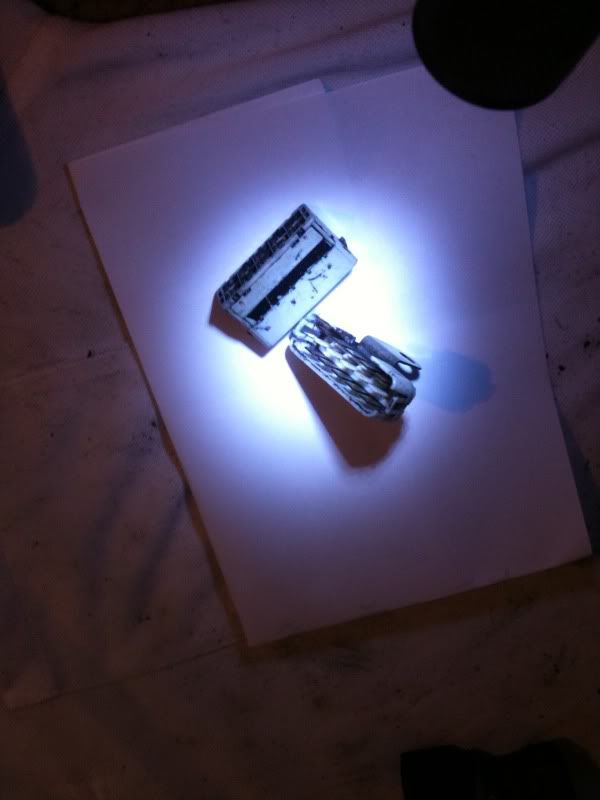
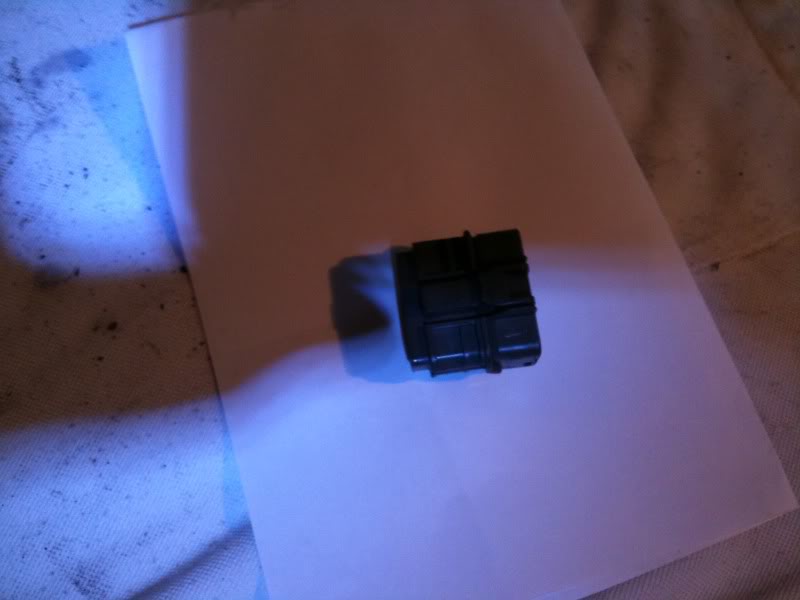
4.) Now you have de-pinned all these connectors. I hope you labeled them and or kept them neat. Now cut away the rest of the harness and you will see it is two completely separate pieces. One for the engine (fat one grey one) and one for the body (long brown one). Follow all the deleted wires back to these connectors and de-pin from these connectors. If you�re having trouble with these connectors there is probably a tab you did not flip up that is on the top and bottom of the connectors. These must be flipped up before you can pull the pins out. Then de-pin from the front.
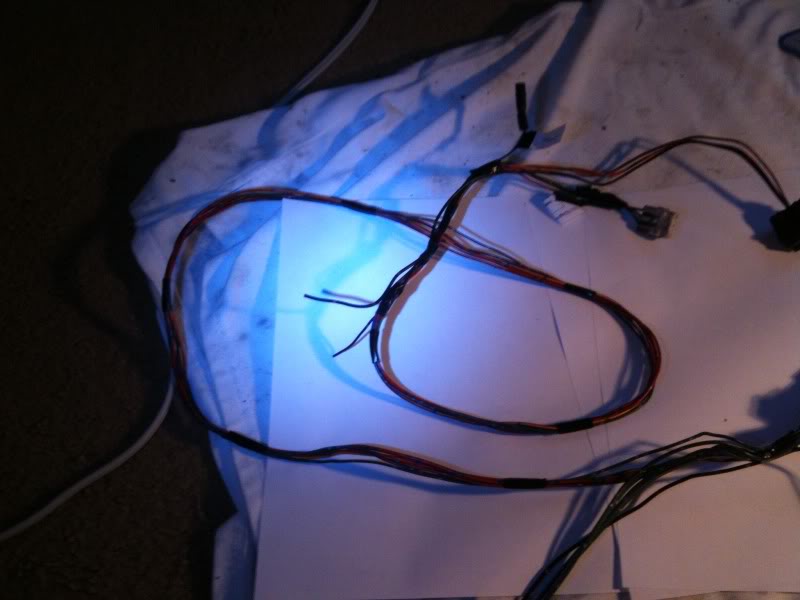
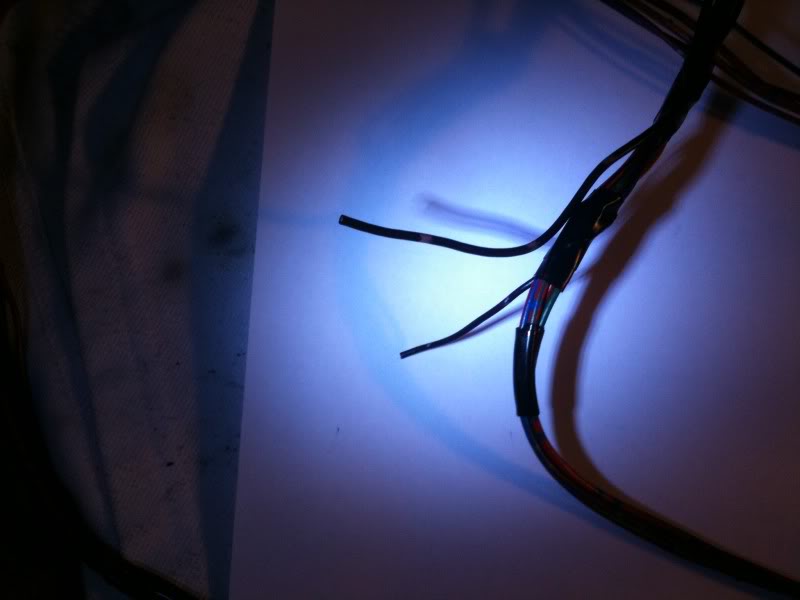
5.) After this is done, all I did was manage the wires by taping from the big connectors forward and tiring to keep it nice and tight. I am going to leave this black tape on while doing the looming to help it from getting all crazy. I taped intermittently and spaced it out accordingly. And your done, make sure you leave yourself some space to cut and extend and solder the wires later.
You should save all the rubber seals and de-pins ,you never know when you could possibly reuse this stuff.
Trash everything else!
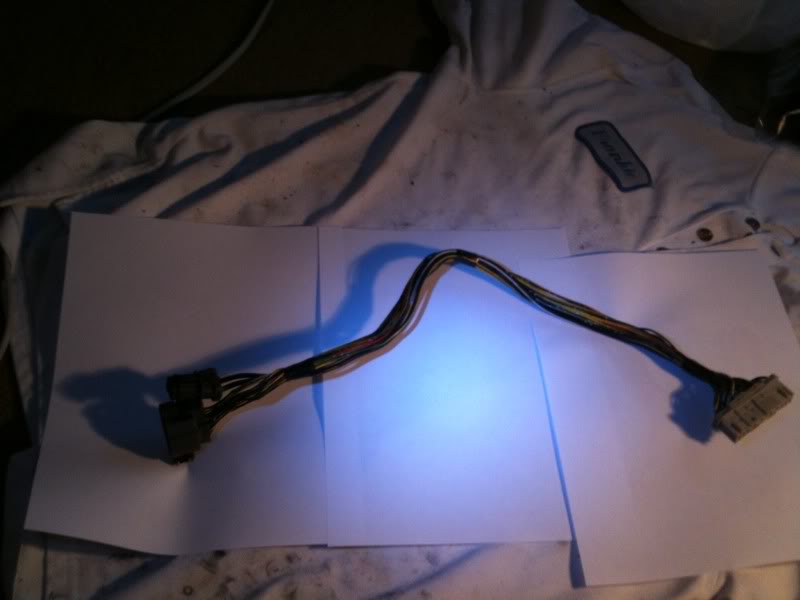
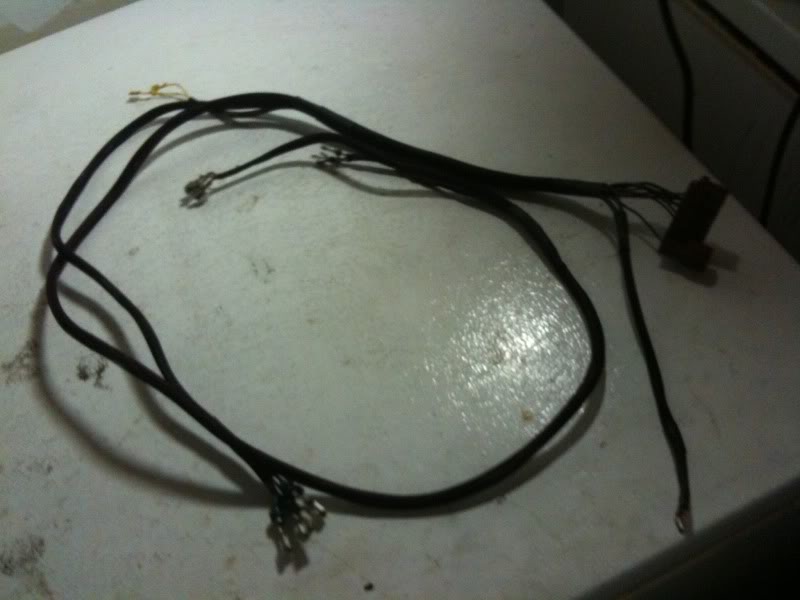
6.) Finally done. Now for all the people that do not want to waste money on looming and shrink wrapping, you can just use the harness the way it is. Just extend the wires through the fire wall sides and solder and tape. Some people used a rubber hose or something to pass it along the frame rail. I believe in doing it right the first time. So I am going to loom the harness when the parts come in. Here are the pictures.
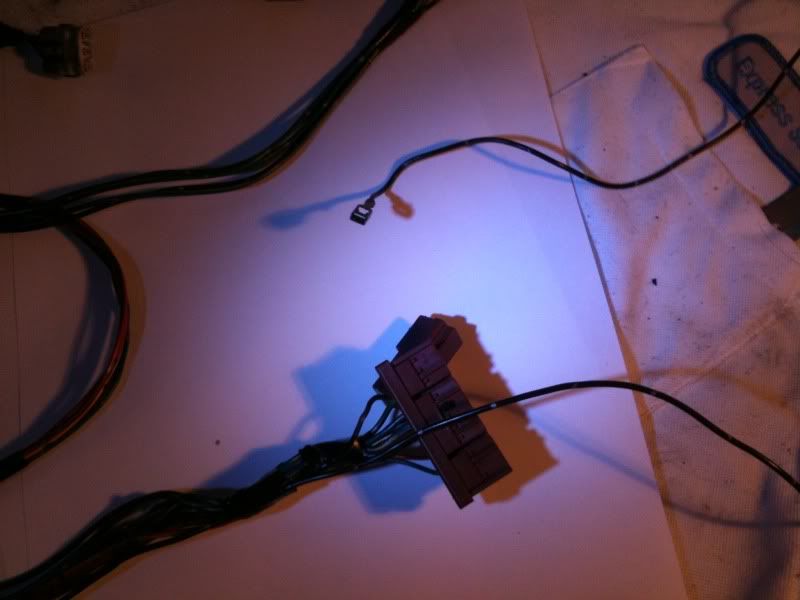
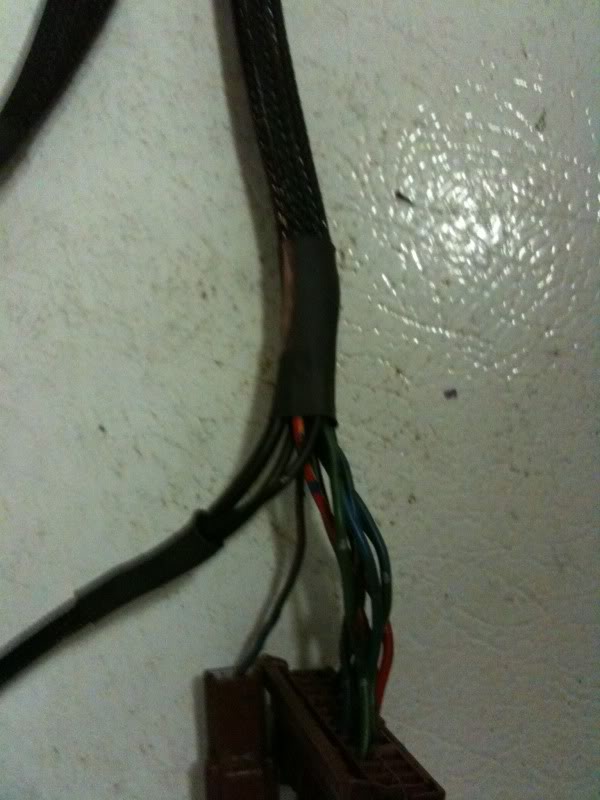
Engine Harness Side all cleaned up and taped. This one will stay inside so I do not plan on looming it. You would have to memorize and de-ping 14 wires to loom it (not excited about it). I plan on just taping since it won�t be exposed outside and one can see it.

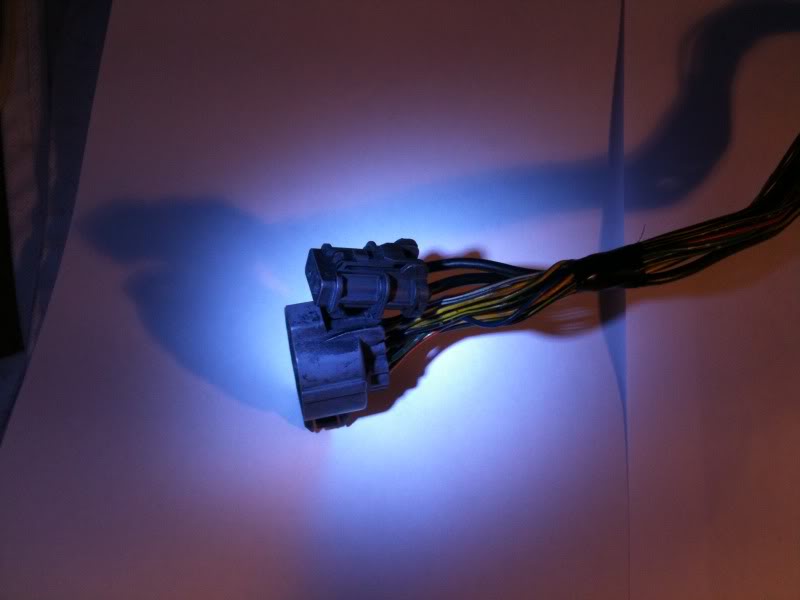
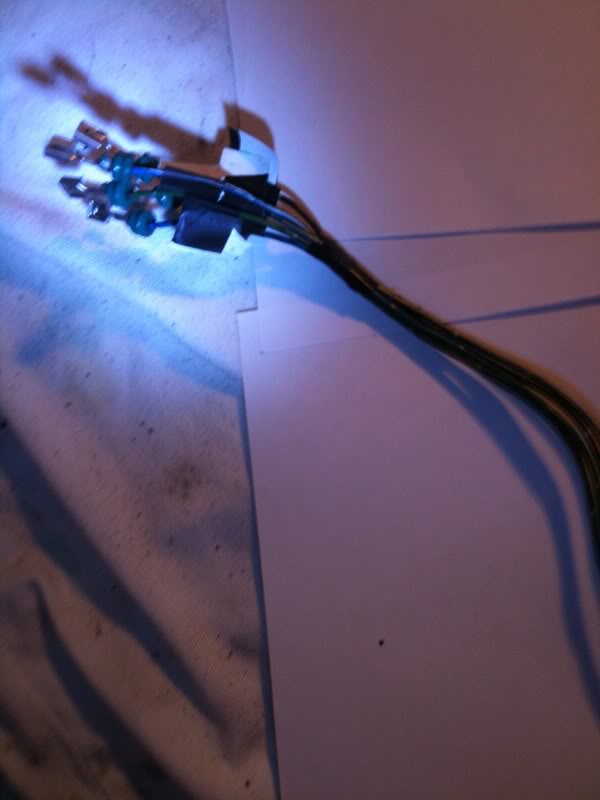
Lights, wiper and body harness cleaned and taped. I also have pictures of my grounds cut off. I will be extending them to the inside of the harness (needs to be soldered didn�t feel like getting it out) all three of them (parking, headlights, and wiper grounds).
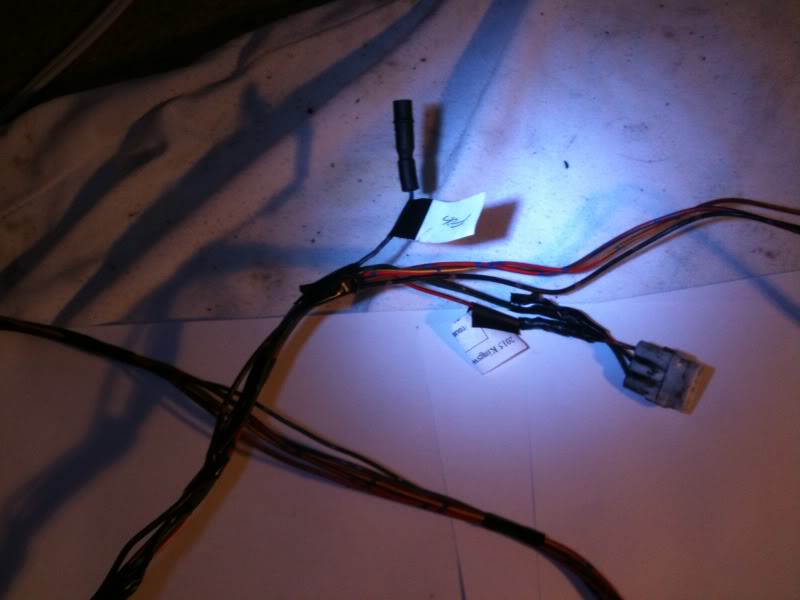
The Parking light was damaged by the previous owner and was taped all nasty already. I will solder this before I finish the harness of course just not tonight.
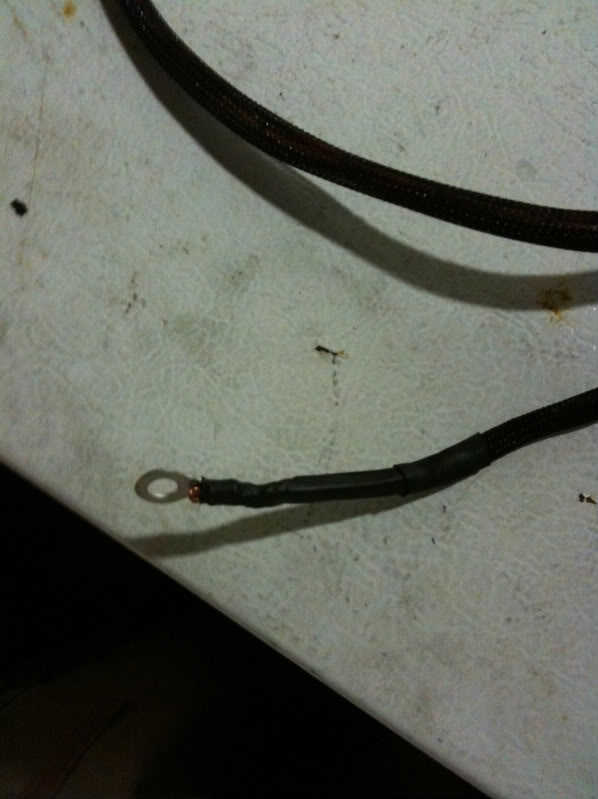
Grounds for the lights cut off and they need soldering and extending.
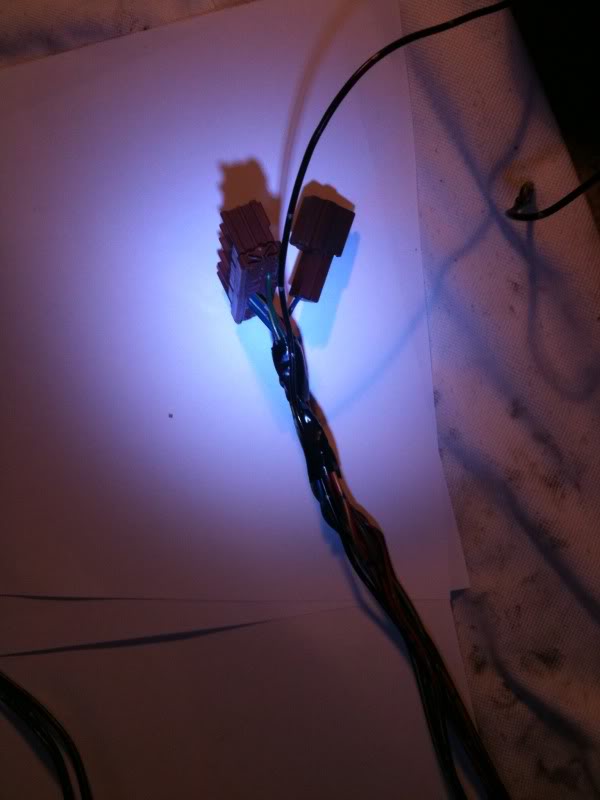
Wiper ground is that wire dangling. I left it long to cut to length for the inside chassis ground.
Wiper pins
Oh yeah brown one pin connector is fog lights keep this if you want it. I left it as an OEM option for me you can delete it if you want to.
And that is it guys, drivers harness is a cinch. Just a little time and patience is all that is needed. Now all you need to do the passenger side. That is going to be a little bit more demanding since it is inside the car, if only Honda made a sub harness here too. But it won�t be that bad same as this one. I will keep posting more pictures of what I do and the stuff that comes in.
I apologize for the horrible pictures. My room is about as lit-up as a bat cave and all I have is a crapy iphone and a ghetto LED flash light and a lamp. If anyone wants any other pictures I can take new ones in the day time.
Tools needed:
3M Electrical tape
Razor blade
Small Needle �nose pliers
Flat tip screw driver
Cutting Pliers
Gloves (the wires are sticky from tape and grease)
Flash light (if your room is not well lit, might as well be doing this by candle light -__-)
Work Mat (I use this douch bags guy�s shirt I used to work with)
Here are pictures of my pick. I just filed it down a little flat, not sure if you guys can see this in the picture. This is used to de-pin the connectors, don�t cut them please. The pins are around 1.00 each at Honda and come with a wire pre-attached to them. You might reuse them later or a buddy might need them.
1.) First take the harness and start cutting all the tape, collie black things, and protectors off. Start with the headlights and parking lights and cut back from there. Stop when your reach the fat connectors for the engine harness. Were working with the lights first.
2.) I did not have carpenters tape to write on so I used paper and electrical tape. This is to keep track of stuff to take off and stuff to leave on. Label all your major connectors to keep on.
3.) The main connectors you should keep are headlights, fog lights, parking lights and wiper motor. The wiper is the fat triangular 5 pin connector. I am sure you will know what it is since you took it off. Things to delete are : Power steering switch (gray 2 pin wires), cruise control (gray 4 pin brown wires) , tachometer test plug (white 1 pin connector with black cap one blue wire), window washer (green 2 pin connector), and lastly I opted to delete the OEM ground location (white funky looking connector). I deleted this because the window wiper ground went from one side of the harness to the other side to get to the body ground. I thought that this would be an issue when I go to loom and heat shrink the harness. It makes a weird u-turn to the other side of the harness. I am going to build a ground for inside the chassis.
Power steering: make sure you use the needle nose pliers to pull out the pig tail first (the white thing). Then to get the wires out I use the LED flash light to look through the front, there will be a small tab to press up on and then they pop out. Slow down if you are not getting it out, try to get a good bite on the tabs. They should come out easy if not your might have already broken it!
Cruise control: This also has a pig tail. Get that first then the tabs are in front.
Tachometer test plug: For this one you will probably want to wait until you get back further on the harness and just de-pin it from the main harness connector.
Window washer: You need to snap that brown cap off the back first, and then get the tabs from the front. If it is dirty clean it out, to see what you are doing. Hatches will have 2 of these coupes have one only.
Ground: There is a top cap on this connector. It has tabs on the sides, pry them up and massage the cap up and off. Then de-pin from the front. Like I said I deleted the whole set up for easy of looming the harness later.
Wiper motor: Make sure you take off that white clip on the back first with the pick and screw driver or the wires won�t come out. You have to de-pin this one now because the wires need to be pushed through the fire wall later and extend. I labeled them all so I remember where to put them back in the connector.
(You will need to de-pin the parking and the head light as well to pass it though the fire wall but I�ll do that when I am there I got tired and its late now)
4.) Now you have de-pinned all these connectors. I hope you labeled them and or kept them neat. Now cut away the rest of the harness and you will see it is two completely separate pieces. One for the engine (fat one grey one) and one for the body (long brown one). Follow all the deleted wires back to these connectors and de-pin from these connectors. If you�re having trouble with these connectors there is probably a tab you did not flip up that is on the top and bottom of the connectors. These must be flipped up before you can pull the pins out. Then de-pin from the front.
5.) After this is done, all I did was manage the wires by taping from the big connectors forward and tiring to keep it nice and tight. I am going to leave this black tape on while doing the looming to help it from getting all crazy. I taped intermittently and spaced it out accordingly. And your done, make sure you leave yourself some space to cut and extend and solder the wires later.
You should save all the rubber seals and de-pins ,you never know when you could possibly reuse this stuff.
Trash everything else!
6.) Finally done. Now for all the people that do not want to waste money on looming and shrink wrapping, you can just use the harness the way it is. Just extend the wires through the fire wall sides and solder and tape. Some people used a rubber hose or something to pass it along the frame rail. I believe in doing it right the first time. So I am going to loom the harness when the parts come in. Here are the pictures.
Engine Harness Side all cleaned up and taped. This one will stay inside so I do not plan on looming it. You would have to memorize and de-ping 14 wires to loom it (not excited about it). I plan on just taping since it won�t be exposed outside and one can see it.
Lights, wiper and body harness cleaned and taped. I also have pictures of my grounds cut off. I will be extending them to the inside of the harness (needs to be soldered didn�t feel like getting it out) all three of them (parking, headlights, and wiper grounds).
The Parking light was damaged by the previous owner and was taped all nasty already. I will solder this before I finish the harness of course just not tonight.
Grounds for the lights cut off and they need soldering and extending.
Wiper ground is that wire dangling. I left it long to cut to length for the inside chassis ground.
Wiper pins
Oh yeah brown one pin connector is fog lights keep this if you want it. I left it as an OEM option for me you can delete it if you want to.
And that is it guys, drivers harness is a cinch. Just a little time and patience is all that is needed. Now all you need to do the passenger side. That is going to be a little bit more demanding since it is inside the car, if only Honda made a sub harness here too. But it won�t be that bad same as this one. I will keep posting more pictures of what I do and the stuff that comes in.
02-17-2011, 09:54 PM
#12
Honda-Tech Member
Thread Starter
Yeah that guy was funny you should have meet him lol. Cost is down way down I am a college student! So far I have just spent 60 bucks on wire-tucking looms and shrink wrapping and loom cutting tool. Ill make it a budget builder. Thanks for the support bro!
Thanks subscribe bro!
Thanks to everyone else I couldn't quote ! Honda-Tec for life !
Thanks subscribe bro!
Thanks to everyone else I couldn't quote ! Honda-Tec for life !
 02-20-2011, 11:53 PM
#14
Honda-Tech Member
Thread Starter
I am thinking this is going to be my color choice or something similar its called
Magens Bay Blue

I really like those pastel colors, but I want to stand out as something different not like a cookie cutter color. Lets just hope this color wont break the bank and its available or mixable. The flat color feels comfortable to me and its catchy too. I am thinking of shooting the whole car that way and screw the dumb-*** themed engine bay thing. I will accent the engine bay with accessories the same color but two tone just doesn't sit well with me.
Magens Bay Blue
I really like those pastel colors, but I want to stand out as something different not like a cookie cutter color. Lets just hope this color wont break the bank and its available or mixable. The flat color feels comfortable to me and its catchy too. I am thinking of shooting the whole car that way and screw the dumb-*** themed engine bay thing. I will accent the engine bay with accessories the same color but two tone just doesn't sit well with me.
02-21-2011, 06:29 AM
#16
Honda-Tech Member
Thread Starter
Yeah the flat colors stand out compared to all the normal everyday metallic colors. Look at some other colors before you do white. I think it is kind of plain but its a nice color overall.
03-13-2011, 11:45 PM
#17
Honda-Tech Member
Thread Starter
Sorry guys about the delay in work on the car. I have been busy with school and studying. Engineering is not as easy as it seems to be. Anyways I finally got around to tucking the driver side harness. I loomed it and shrink wrapped the harness. I thought it was going to be a cinch but.............. it was a big b****.
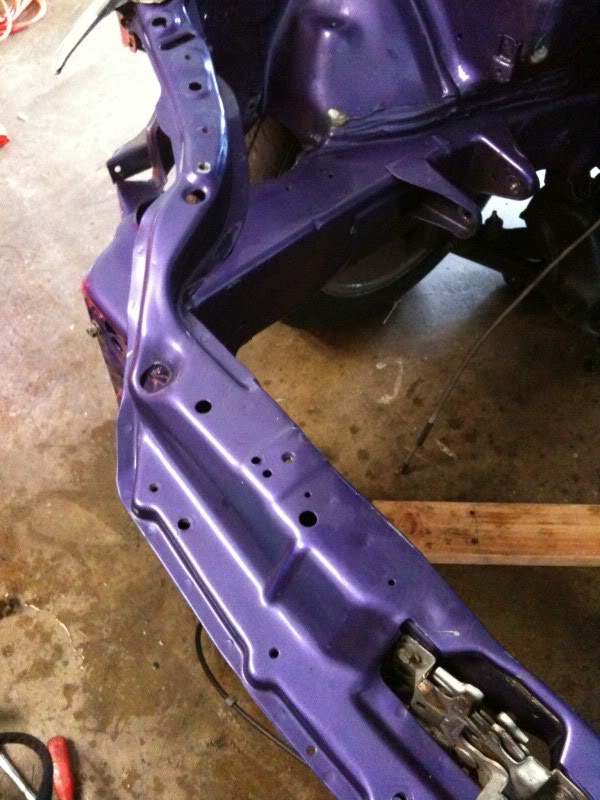
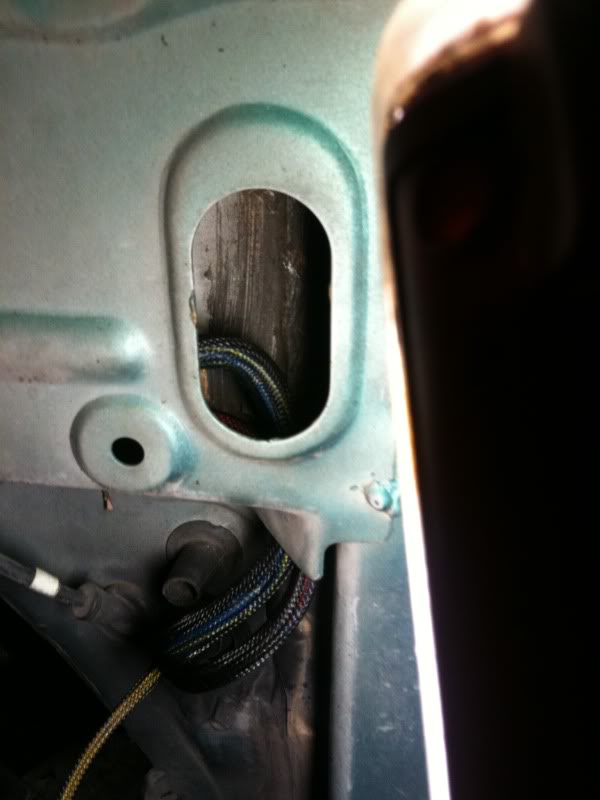
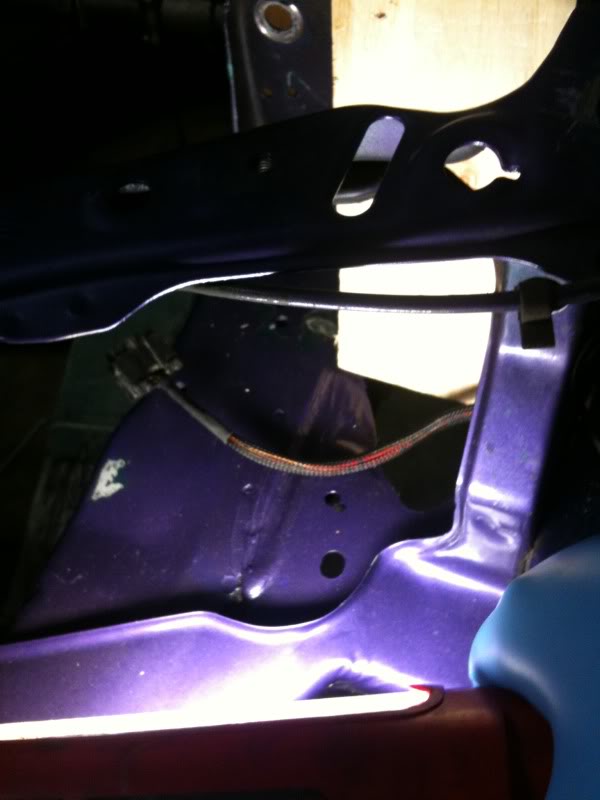
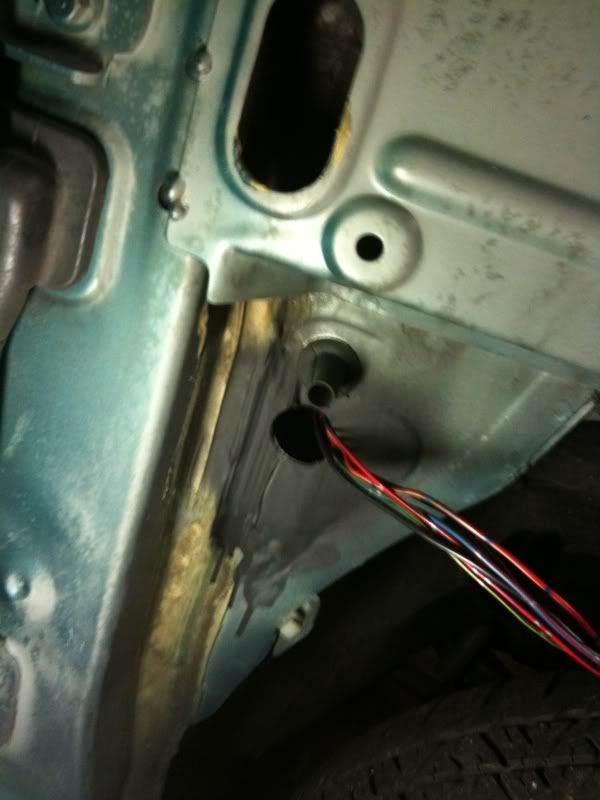
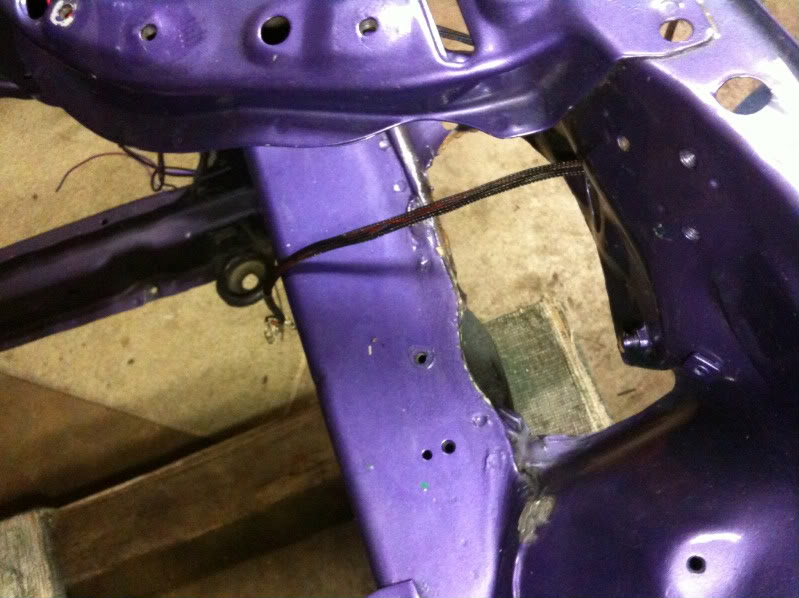
First off I got the harness out and tried to tuck it through this hole were this drain was and guess what...... you can�t use this because the car is a coupe. Well it is a drain for the sunroof and if you block the hole then your car will become a swimming pool. So I had to resort to getting a hole cutter and putting a hole in the car.
Tools needed:
7/8 or 3/4 hole cutter Milwaukee Tools (worked great)
Special grommet for the hole
Drill (preferably a wall socket one for more power)
Primer
Tube silicone
Piece
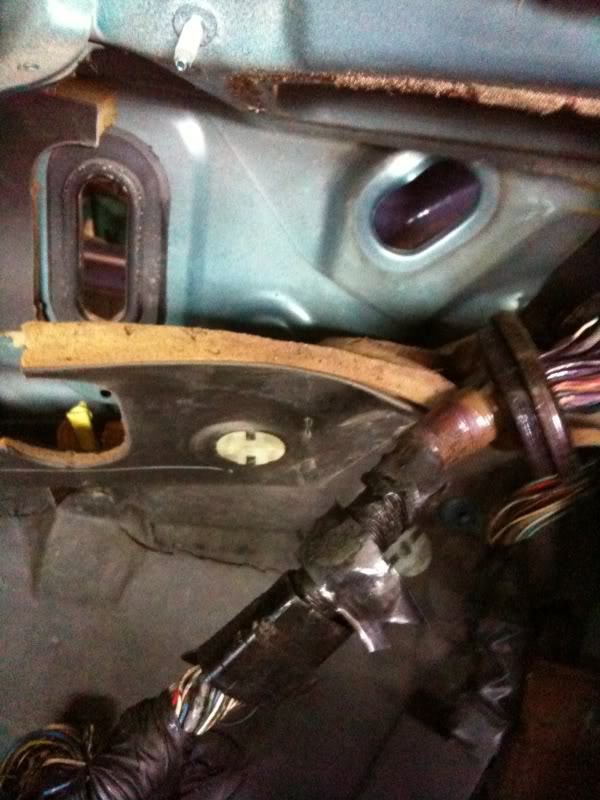
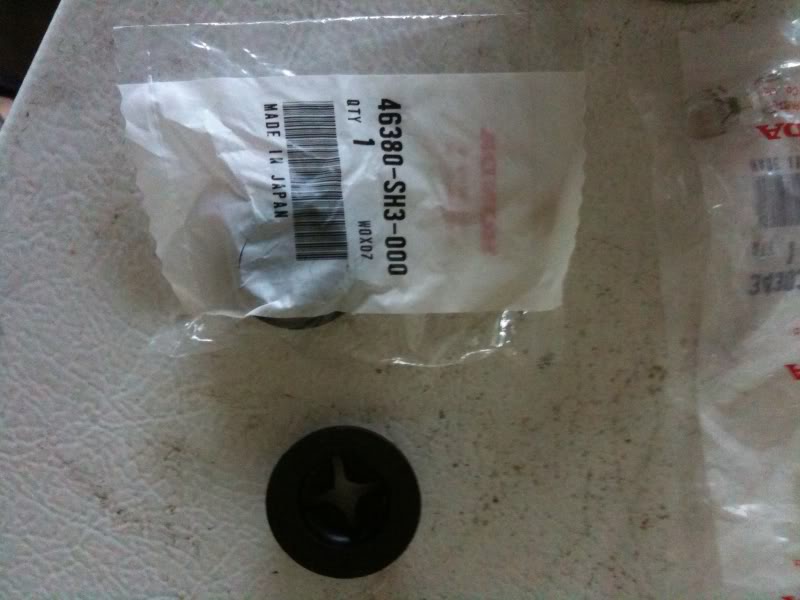
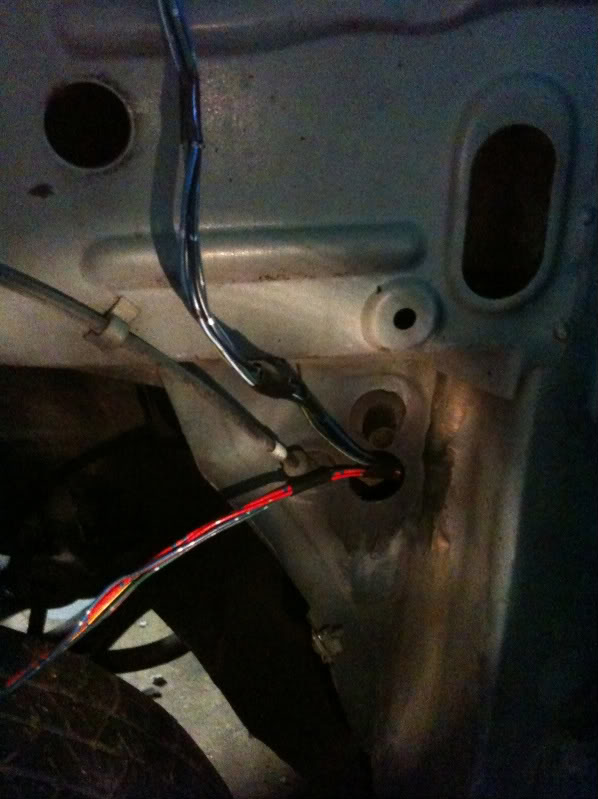
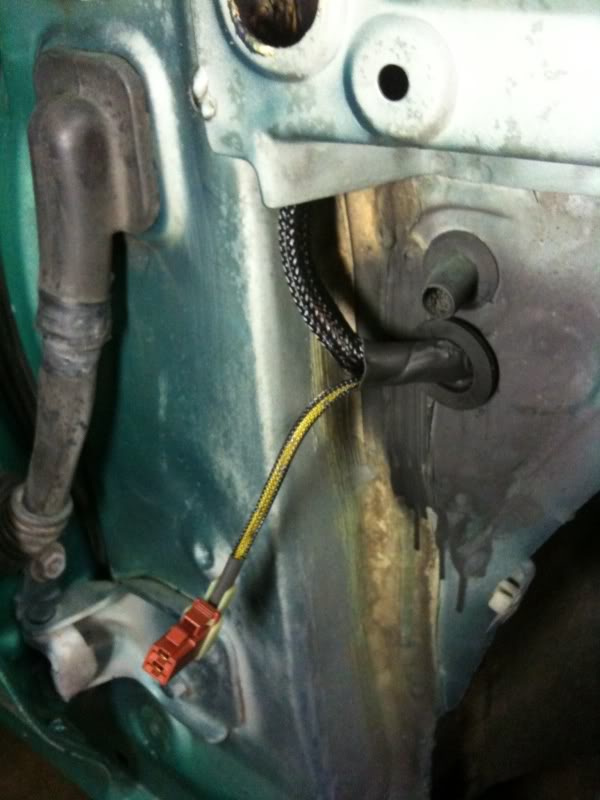
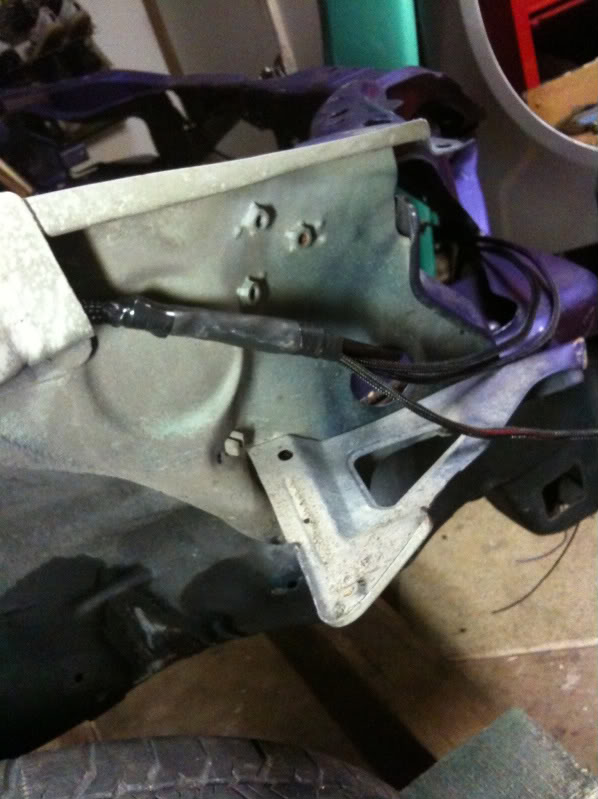
This is the grommet I used; it is the brake line grommet. I think it is good because it has a gaping hole in the front. I�ll use silicone after I finish, blocking out any leftover gap and putting some on the back to make a solid and firm fit.
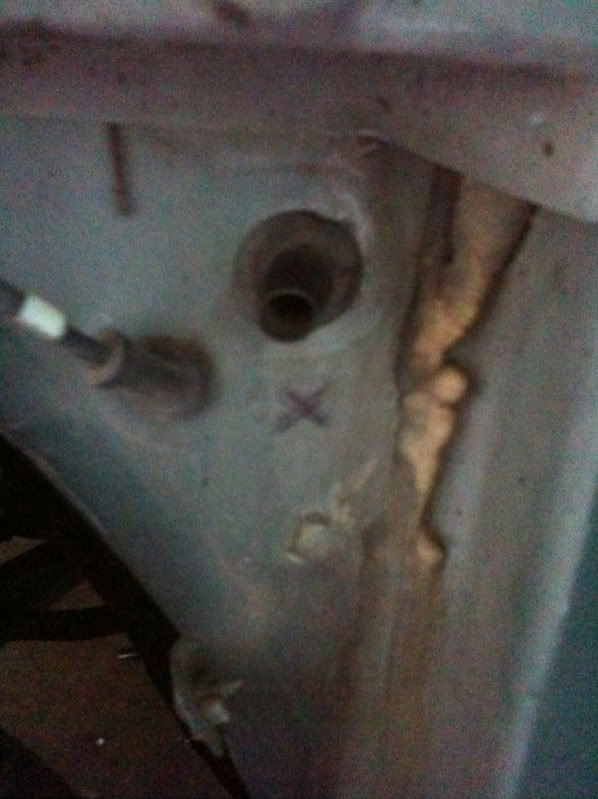
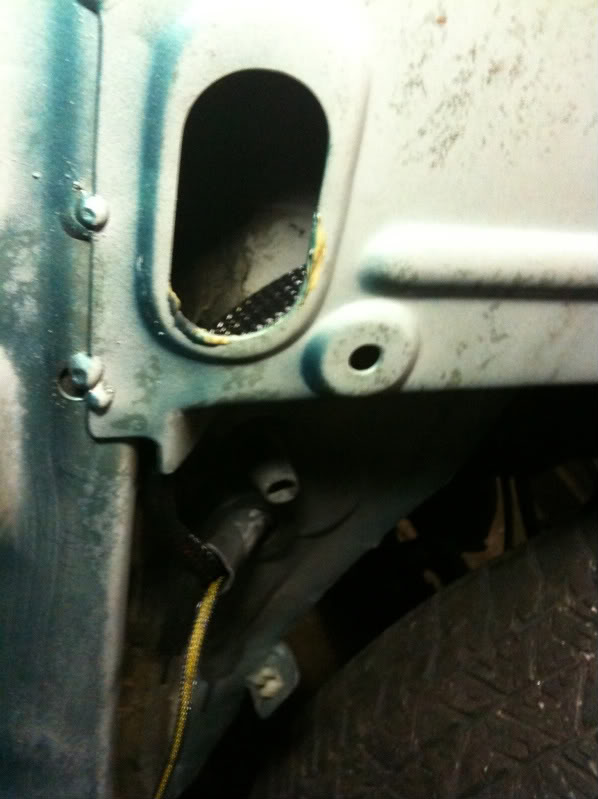
See the black thing on the top it is the sunroof drain. You cannot use that so the hole I drilled is marked with an x. On the inside of the cabin make sure you free up the wires and a ground back there or when you drill it will be disaster for the harness. I put a piece of wood back there to absorb the drill and the hole-cutter when it goes through; it worked well. Take your time and drill in make sure it�s the bi-metallic one or you'll find out real fast it won�t cut.
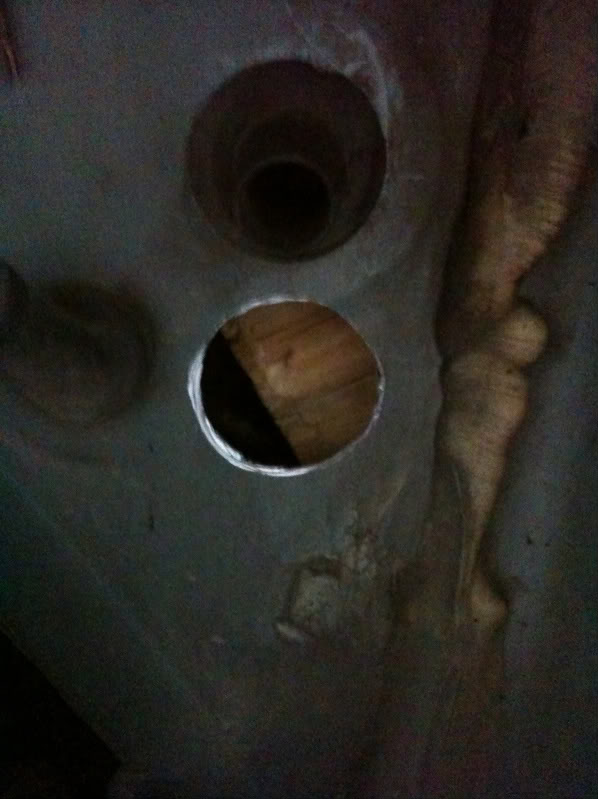
Then you primer the bare metal this way it will not rust. I put some newspaper behind it. Picture is hard to see I am sure you cannot mess this up.
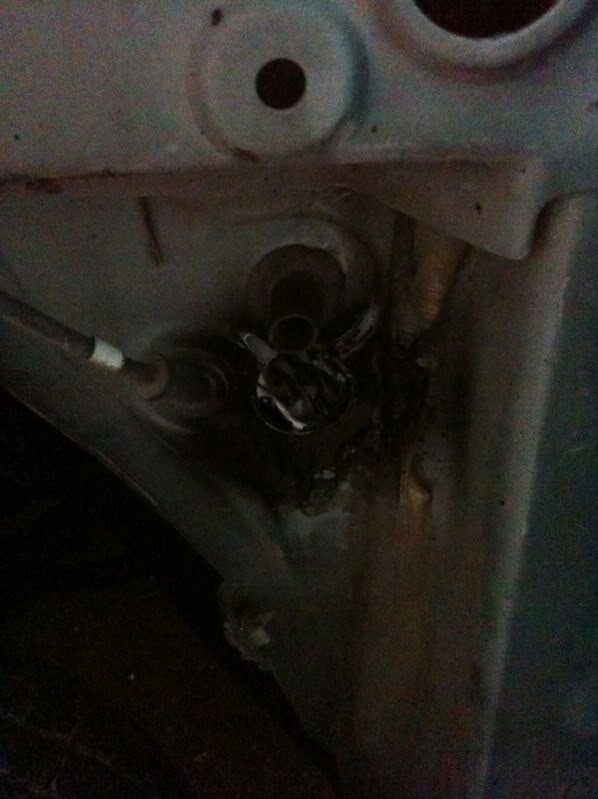
I am test fitting my brake grommet on the hole. It fit kind of loose because that 7/8 hole cutter goes kind of wide as you start to cut. So it�s better to use a smaller one and jam it in there. Next time I do this I�ll use a 3/4 hole cutter.

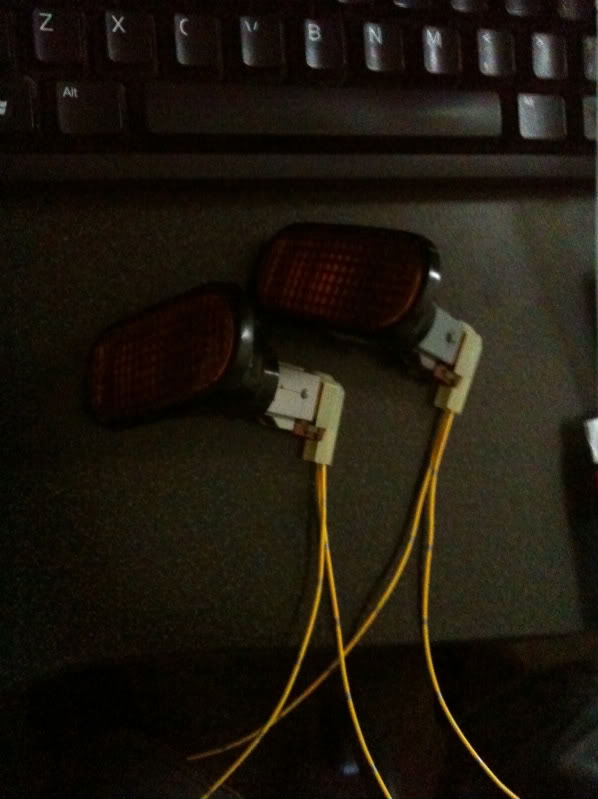
Oh I forgot one dumb thing. I had some of these JDM side markers and I was trying to get the darn connectors and pins for them forever. I needed to wire this in before I finish the harness and that was one of the things that delayed me. Here is the picture of them. If you�re smart you can figure out how to make USDM stuff look like JDM crap and impress your most pompous JDM homies!
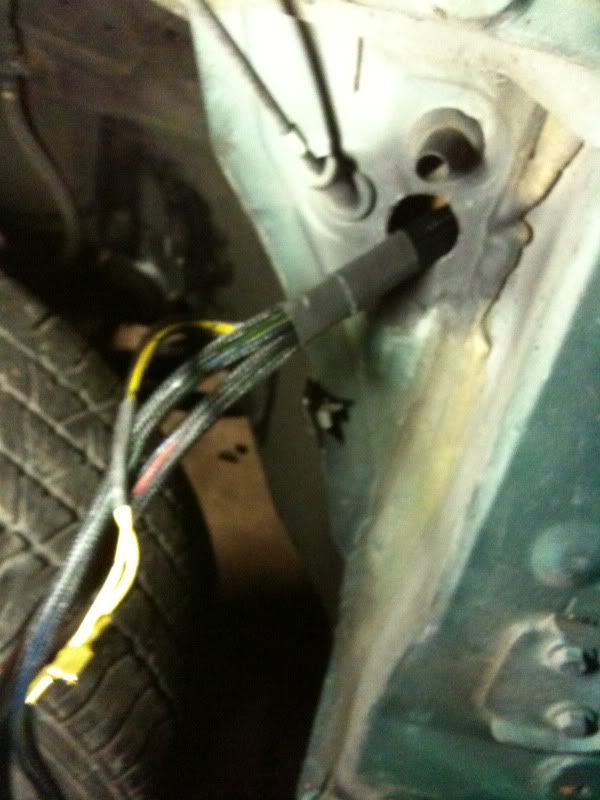
Anyways back to the harness. I am test fitting it here. On The driver�s side the harness is actually longer or exactly long enough to go from the brown connector inside the car C307 to the front of the headlights and to the wipers; it actually is too long for the wipers. Anyways here it is after I figured that out from the test fit. The test fit also shows your where your break outs or splits are where the harness takes 2 different directions. You will need to make marks or zip ties on where you want these to be. I�ll leave that for you to decide.
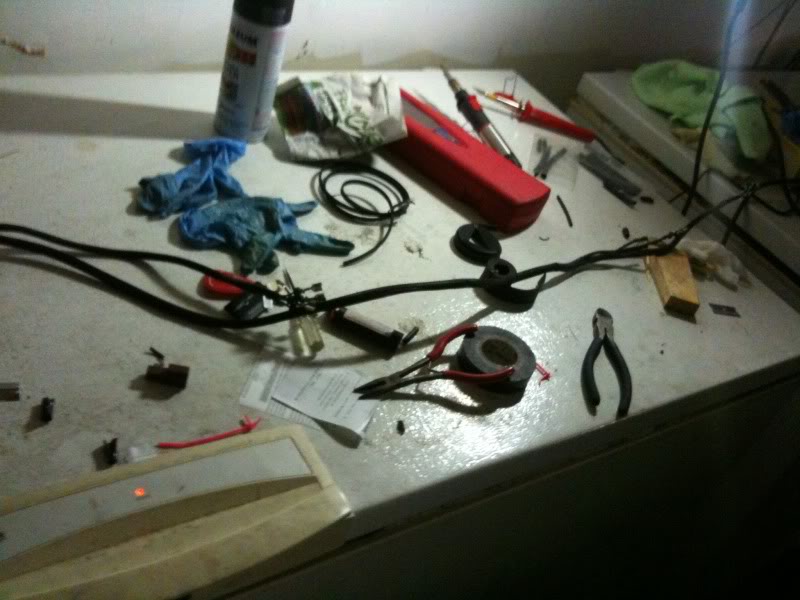
I apologize in advance, that I did not take more pictures of me actually looming the harness. It is not hard ............ it was freaking difficult (if you are at any point not willing to work hard just tape it and pass it through the body). The looms are like those Chinese finger traps the more you pull the wires the freaking tighter it got, so tight that you could not move the harness. So you have to push and pull and etc. It took me forever about 2 hours to figure it out. The trick is to put something round in the loom like a piece of hose to guide the wires through. That crap is amazing, the loom, it can stretch like 3 times its original size. So with some determination you can make some tight looking looms. I was so engulfed in my work I took one picture. Sorry doodes you can figure this out from my notes. It took me 6 freaking HOURS!!!
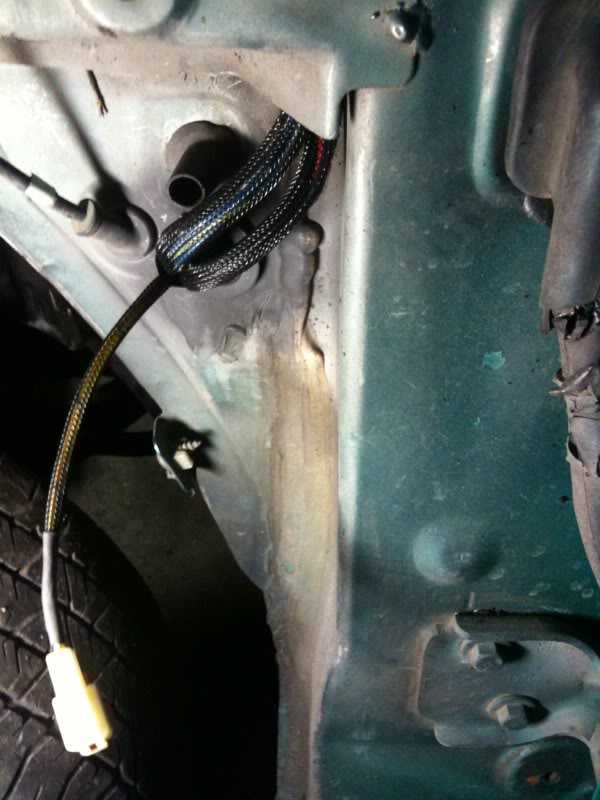
Pretty much completed harness.
Ground here.
You have to start from the ends and figure out where your break outs are. Then mark it, loom it and shrink wrap the ends. Then you work from the other side and feed up a larger loom to cover those 2 break outs. Heats shrink the looms together and repeat first step. You will be working from the front to back and etc. You will need to finally de-pin all the harness and mark it or you�ll get lost in your entire work. Write yourself a connector view and wires and number and label colors. It makes it a lot easier.
Finally when you�re satisfied and have your grounds hooked up you can go ahead and feed the wires through the hole. Then feed the grommet through the wires. Plug your connector in and ground the harness. Then you can manage your wires to the front however you want. I wanted the ultra stealth look and fed them through the frame rail. The wiper harness was a b****. Use a coat hanger and cut it and start fighting it up there. It took me 1 hour to get the harness situated. You can the re-pin all your harness and stuff. Make sure you labeled everything or get your Chilton's out. And you�re pretty much done on the external harness side. I still need to extend the wires for the gray plug on the inside that will be tomorrow and tucking the passenger side of the car (not really excited).
I was so tired after finishing I did not take any more pictures it was 1 am. So ill take some more tomorrow and show you what it looks like done on the outside. It�s really clean I am happy I did this; it makes the car so much more pleasing to do it the right way.
You can get all the loom stuff from www.wirecare.com that is what I did.
You'll have to learn on your own what works, order whatever size looms and shrink wraps and experiment it�s more fun that way!!!
Stay tuned guys there is much much more to come!!!!
First off I got the harness out and tried to tuck it through this hole were this drain was and guess what...... you can�t use this because the car is a coupe. Well it is a drain for the sunroof and if you block the hole then your car will become a swimming pool. So I had to resort to getting a hole cutter and putting a hole in the car.
Tools needed:
7/8 or 3/4 hole cutter Milwaukee Tools (worked great)
Special grommet for the hole
Drill (preferably a wall socket one for more power)
Primer
Tube silicone
Piece
This is the grommet I used; it is the brake line grommet. I think it is good because it has a gaping hole in the front. I�ll use silicone after I finish, blocking out any leftover gap and putting some on the back to make a solid and firm fit.
See the black thing on the top it is the sunroof drain. You cannot use that so the hole I drilled is marked with an x. On the inside of the cabin make sure you free up the wires and a ground back there or when you drill it will be disaster for the harness. I put a piece of wood back there to absorb the drill and the hole-cutter when it goes through; it worked well. Take your time and drill in make sure it�s the bi-metallic one or you'll find out real fast it won�t cut.
Then you primer the bare metal this way it will not rust. I put some newspaper behind it. Picture is hard to see I am sure you cannot mess this up.
I am test fitting my brake grommet on the hole. It fit kind of loose because that 7/8 hole cutter goes kind of wide as you start to cut. So it�s better to use a smaller one and jam it in there. Next time I do this I�ll use a 3/4 hole cutter.
Oh I forgot one dumb thing. I had some of these JDM side markers and I was trying to get the darn connectors and pins for them forever. I needed to wire this in before I finish the harness and that was one of the things that delayed me. Here is the picture of them. If you�re smart you can figure out how to make USDM stuff look like JDM crap and impress your most pompous JDM homies!
Anyways back to the harness. I am test fitting it here. On The driver�s side the harness is actually longer or exactly long enough to go from the brown connector inside the car C307 to the front of the headlights and to the wipers; it actually is too long for the wipers. Anyways here it is after I figured that out from the test fit. The test fit also shows your where your break outs or splits are where the harness takes 2 different directions. You will need to make marks or zip ties on where you want these to be. I�ll leave that for you to decide.
I apologize in advance, that I did not take more pictures of me actually looming the harness. It is not hard ............ it was freaking difficult (if you are at any point not willing to work hard just tape it and pass it through the body). The looms are like those Chinese finger traps the more you pull the wires the freaking tighter it got, so tight that you could not move the harness. So you have to push and pull and etc. It took me forever about 2 hours to figure it out. The trick is to put something round in the loom like a piece of hose to guide the wires through. That crap is amazing, the loom, it can stretch like 3 times its original size. So with some determination you can make some tight looking looms. I was so engulfed in my work I took one picture. Sorry doodes you can figure this out from my notes. It took me 6 freaking HOURS!!!
Pretty much completed harness.
Ground here.
You have to start from the ends and figure out where your break outs are. Then mark it, loom it and shrink wrap the ends. Then you work from the other side and feed up a larger loom to cover those 2 break outs. Heats shrink the looms together and repeat first step. You will be working from the front to back and etc. You will need to finally de-pin all the harness and mark it or you�ll get lost in your entire work. Write yourself a connector view and wires and number and label colors. It makes it a lot easier.
Finally when you�re satisfied and have your grounds hooked up you can go ahead and feed the wires through the hole. Then feed the grommet through the wires. Plug your connector in and ground the harness. Then you can manage your wires to the front however you want. I wanted the ultra stealth look and fed them through the frame rail. The wiper harness was a b****. Use a coat hanger and cut it and start fighting it up there. It took me 1 hour to get the harness situated. You can the re-pin all your harness and stuff. Make sure you labeled everything or get your Chilton's out. And you�re pretty much done on the external harness side. I still need to extend the wires for the gray plug on the inside that will be tomorrow and tucking the passenger side of the car (not really excited).
I was so tired after finishing I did not take any more pictures it was 1 am. So ill take some more tomorrow and show you what it looks like done on the outside. It�s really clean I am happy I did this; it makes the car so much more pleasing to do it the right way.
You can get all the loom stuff from www.wirecare.com that is what I did.
You'll have to learn on your own what works, order whatever size looms and shrink wraps and experiment it�s more fun that way!!!
Stay tuned guys there is much much more to come!!!!
Last edited by VinhTEC; 03-14-2011 at 08:25 AM.
03-15-2011, 10:04 PM
#18
Honda-Tech Member
Thread Starter
Holy Crap finally done with the body harness tucking. That took an enormous amount of freaking time. I did the passenger side and the drives side in about 12 hours. That took forever. At least now I can go a whole lot faster.
Tools needed:
The usual stuff from above
Start off by de-pinning and sorting out just the wires that come from the front of the car. Then organize everything else if you can. This will help when you find a location for the fuse box and stuff.
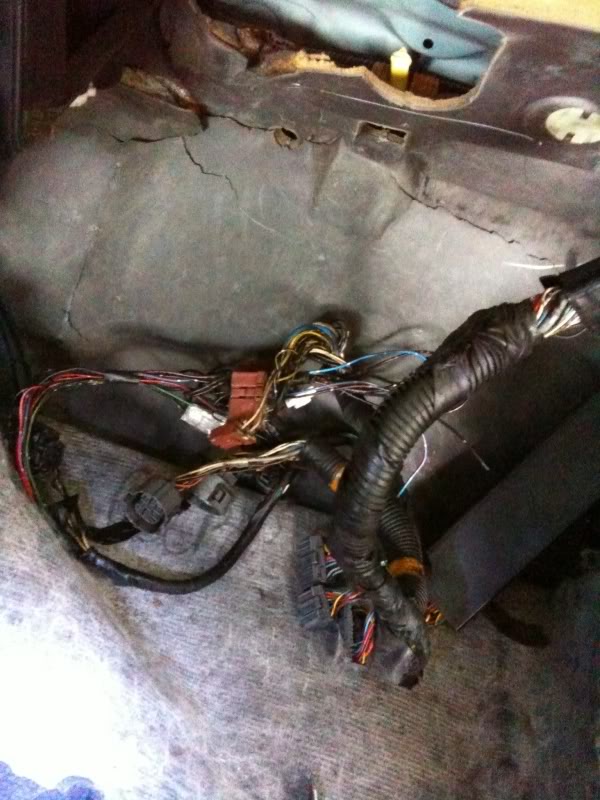
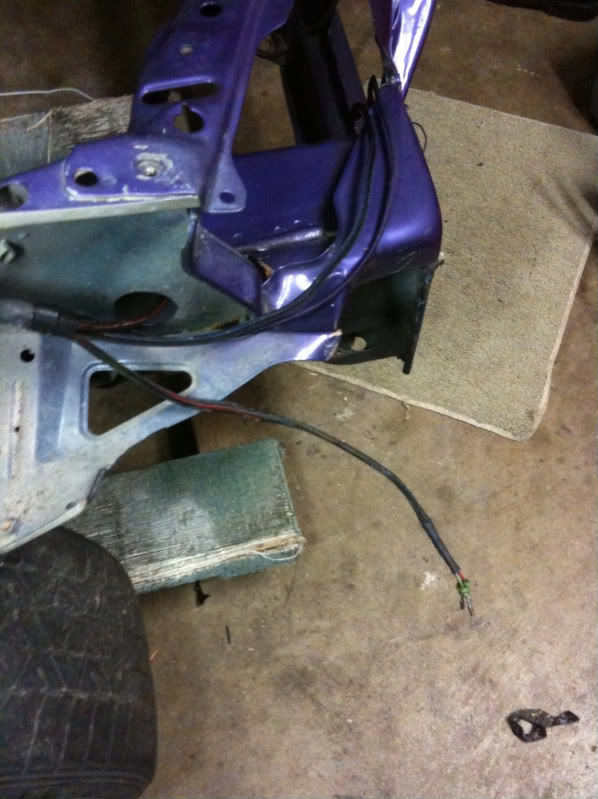
First cut the hole like before underneath the sunroof drain and test fit the harness. It should be more than long enough even if you go up through the frame rail. My harness had a bunch of missing stuff, radiator connector was hacked off and the horn connector. Ill need those things for the car to run and pass state inspection. So I spent a majority of the time sorting this mess out and wiring all of the harness grounds.

The bad thing about this side is there is no sub harness. So it is hard as hell to loom the harness. Next time I do this Ill spend a little more money on a Deutsch connector with like 16 pins to make a sub harness that would make things so much easier. Anyways do your usual looms and heat shrink. I extended my horn and radiator wires super long because I dot know where they will go exactly so ill fix that this week by getting some terminals and connectors. Tape the wire to a clothes hanger and guide it through the frame rail and your done.
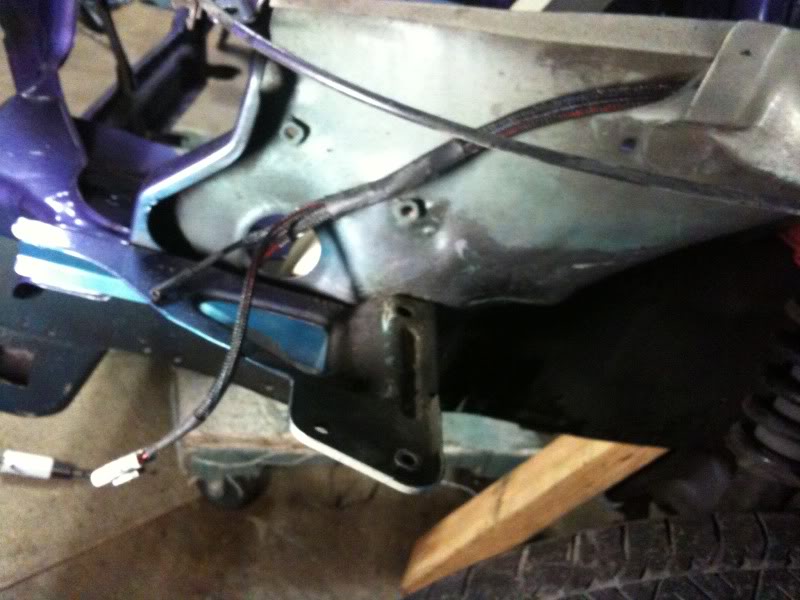
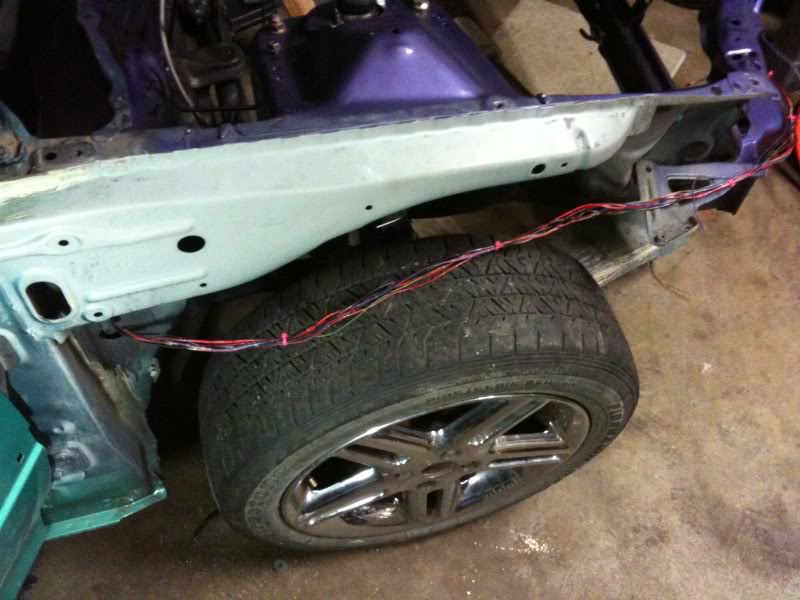
Here is the final product.
Tomorrow going to pull the engine and suspension out of my other civic. Then Ill swap the suspension on to this one. I probably wont do a post on that since its clock work. Ill come back to doing the engine harness tucking. I still need advice on where to drill the hole for the main harness and where I can find the pins for the Honda harness and Mil-spec wires. If I cant find them I might just go and use OEM wires for this time around and do my next one extreme Mil-spec. After this Ill move on to brake tucking and fuel lines but damn is the stuff expensive looks like I need to pick up like 10 more shifts at work !!!
!!!
Tools needed:
The usual stuff from above
Start off by de-pinning and sorting out just the wires that come from the front of the car. Then organize everything else if you can. This will help when you find a location for the fuse box and stuff.
First cut the hole like before underneath the sunroof drain and test fit the harness. It should be more than long enough even if you go up through the frame rail. My harness had a bunch of missing stuff, radiator connector was hacked off and the horn connector. Ill need those things for the car to run and pass state inspection. So I spent a majority of the time sorting this mess out and wiring all of the harness grounds.
The bad thing about this side is there is no sub harness. So it is hard as hell to loom the harness. Next time I do this Ill spend a little more money on a Deutsch connector with like 16 pins to make a sub harness that would make things so much easier. Anyways do your usual looms and heat shrink. I extended my horn and radiator wires super long because I dot know where they will go exactly so ill fix that this week by getting some terminals and connectors. Tape the wire to a clothes hanger and guide it through the frame rail and your done.
Here is the final product.
Tomorrow going to pull the engine and suspension out of my other civic. Then Ill swap the suspension on to this one. I probably wont do a post on that since its clock work. Ill come back to doing the engine harness tucking. I still need advice on where to drill the hole for the main harness and where I can find the pins for the Honda harness and Mil-spec wires. If I cant find them I might just go and use OEM wires for this time around and do my next one extreme Mil-spec. After this Ill move on to brake tucking and fuel lines but damn is the stuff expensive looks like I need to pick up like 10 more shifts at work
!!!
04-11-2011, 06:01 AM
#19
Honda-Tech Member

Join Date: Oct 2009
Posts: 941
Likes: 0
Received 0 Likes
on
0 Posts
I'm starting my tuck soon. What size and types of loom and heatshrink did you use?? I'm having a hard time cause there is so much to choose from!!!
 06-11-2011, 05:33 PM
#22
Honda-Tech Member
Thread Starter
 . I want to go one solid color later I am not a big fan of 2 tone cars but thanks !
06-11-2011, 05:33 PM
. I want to go one solid color later I am not a big fan of 2 tone cars but thanks !
06-11-2011, 05:33 PM
#23
Honda-Tech Member
Thread Starter
06-11-2011, 06:03 PM
#25
Honda-Tech Member
Thread Starter
Sorry guys for the long awaited updates on my car�s progress. I been through hell at Mechanical Engineering school last semester and had to focus on that and I quit my part-time job so no funds = no more mods on the civic. Anyways sob story short I am back on the grind with the car and have more updates. I finally got my engine and Integra disc brake conversion off the other civic. That was a pain in the *** and now putting that stuff on this civic.
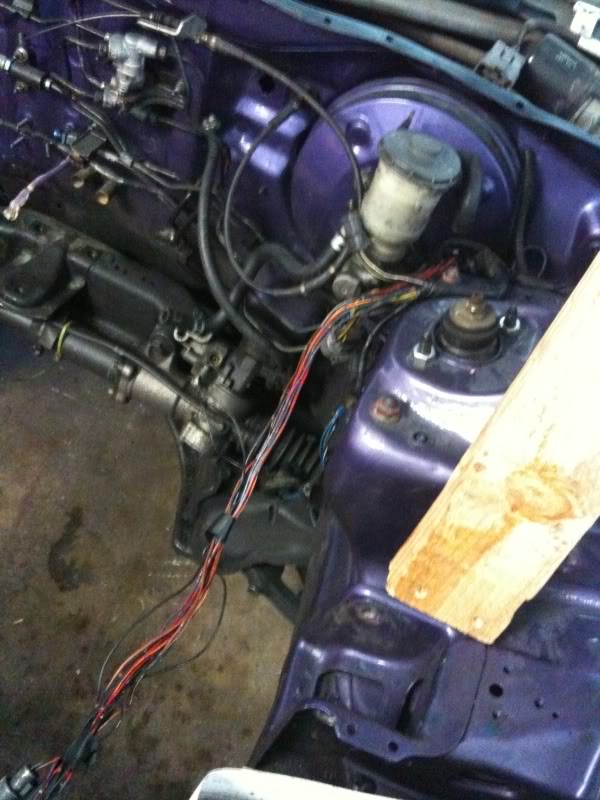
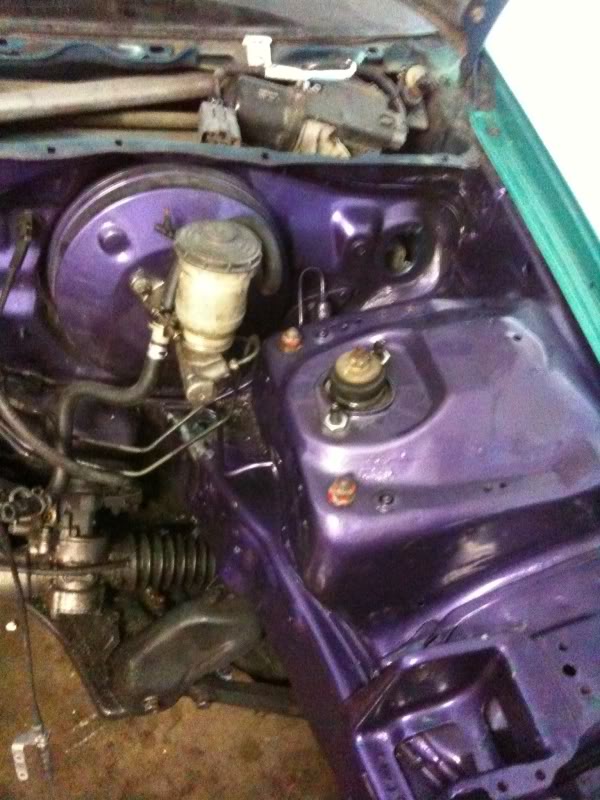
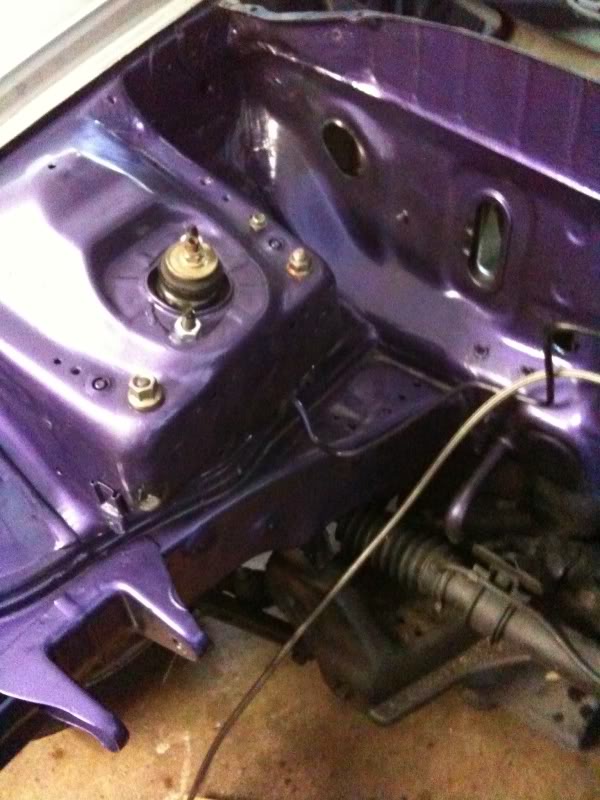
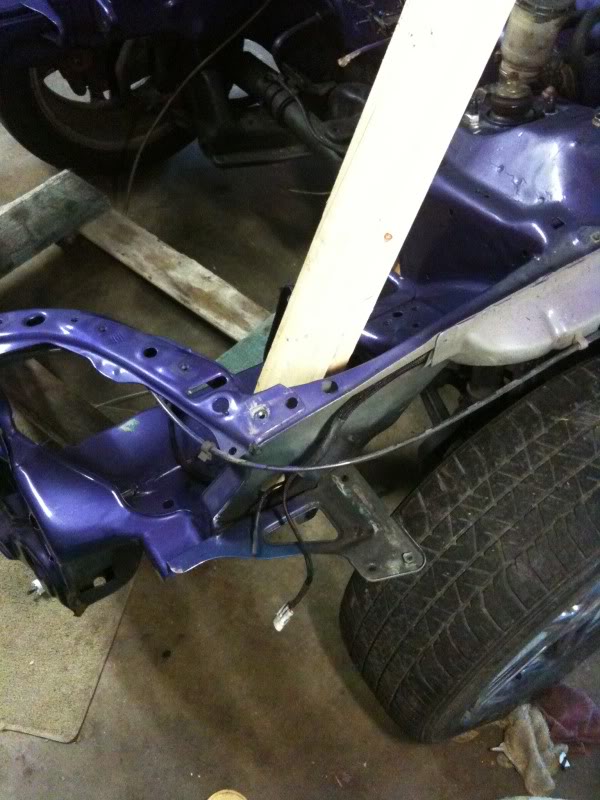
Here is a new pic of the bay I stripped all the brake lines and master cylinder and proportioning valve off since I am going all Wilwood MC and Proportioning valve which are in the mail is I write this. I am going to do all the lines in stainless and AN plumbed.
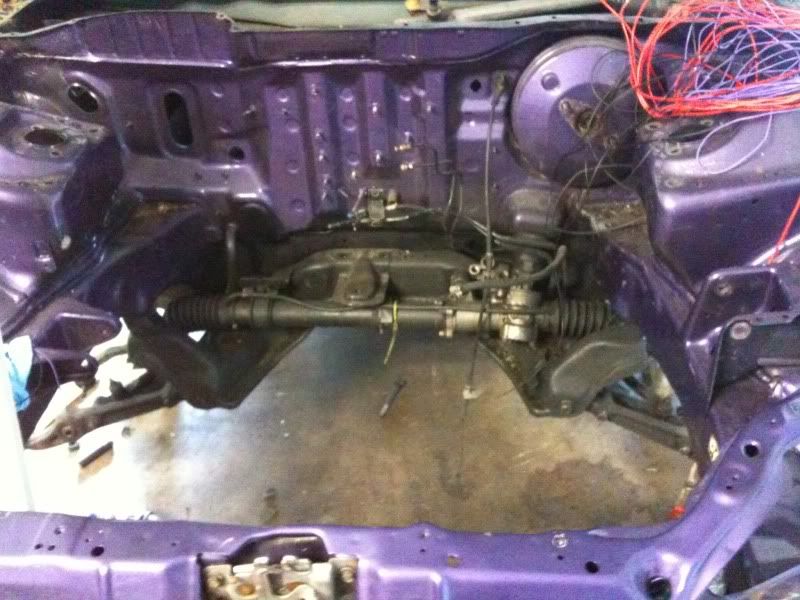
Suspension is going to be old school Tanabe Sustec coilovers I scored off a buddy years ago and now I am going to use them finally. If they end up being bad I�ll go the extra mile and rebuild them and powder coat the whole thing over again. Also got some Skunk 2 cambers and probably going to do poly bushings on the car soon and some Whiteline racing suspension later!

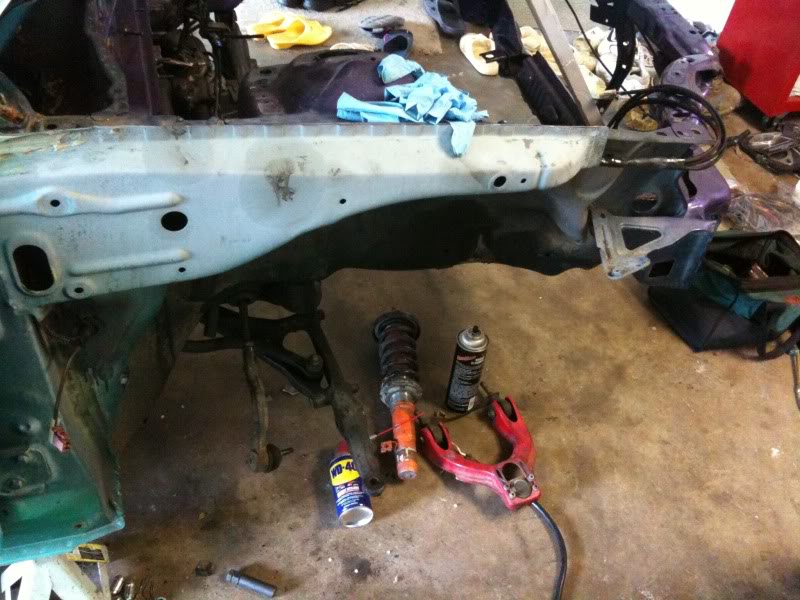
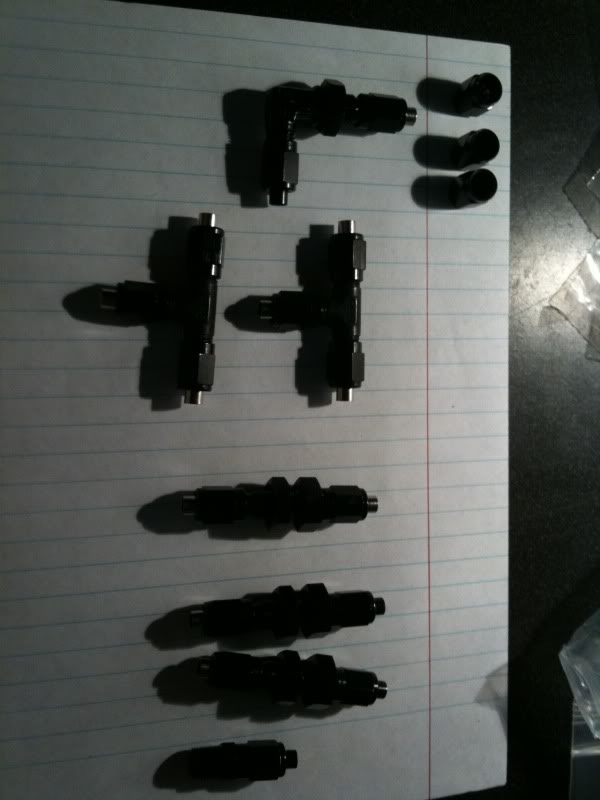
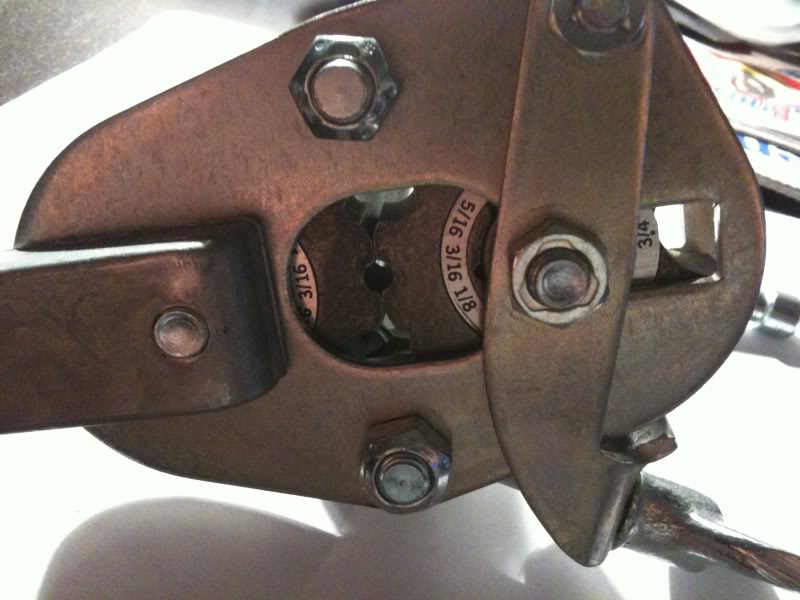
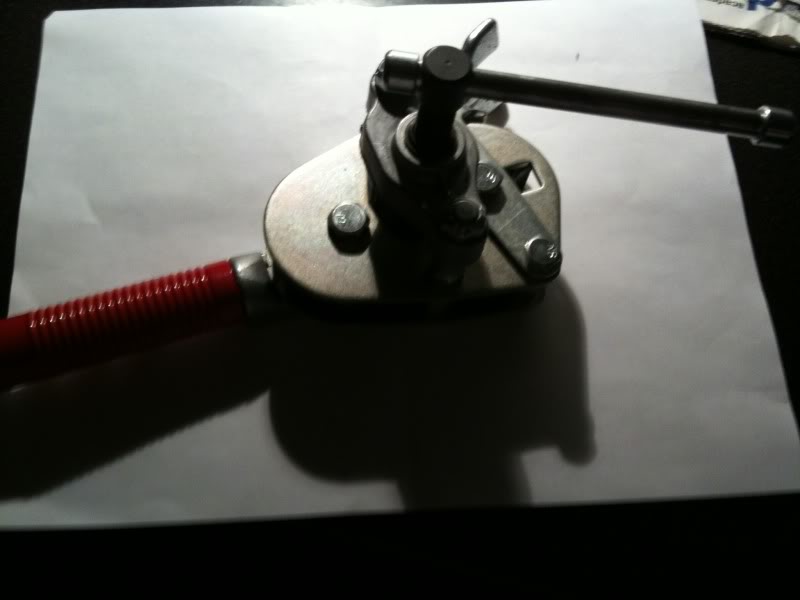
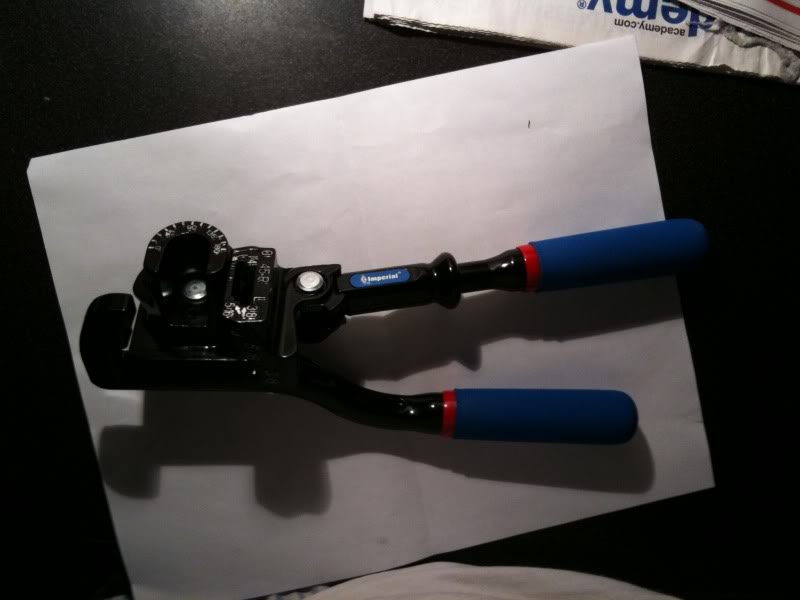
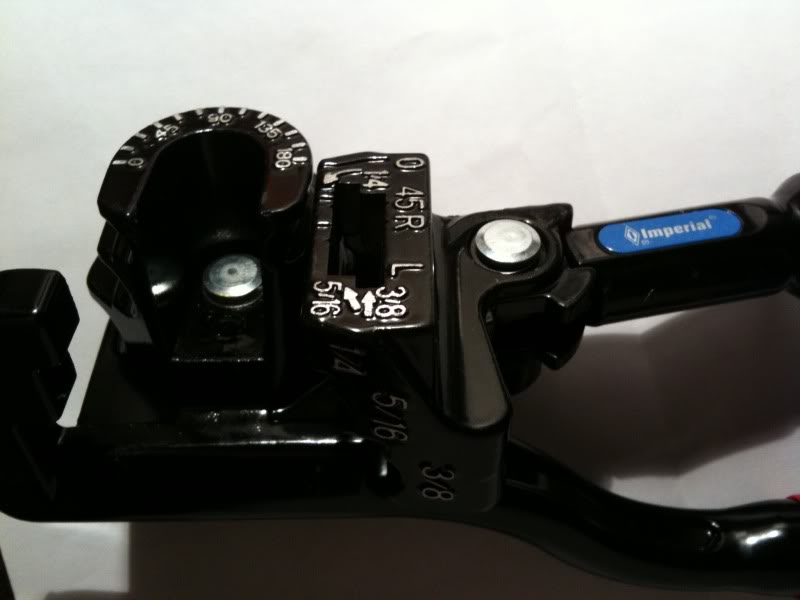
Almost forgot to tell you guys I am doing a sick brake tuck too! I already bought the Rywire Wilwood MC conversion plate and the -3 AN fittings for the and the tools that cost a *** load too. The Parker Hand held flare tool was almost 100 bucks I got a good deal and the Imperial triple bending tool with a ratcheting handle for easy bends (sick) was like 50+ bucks. If you are not serious about doing this thing and cannot invest tons in tools; I would not recommend a brake tuck with AN flares. The quality of your work always shows up with the quality of the tools you use I�d rather have my flares and bends be perfect than leak on me when I need my brakes to work in an emergency that�s not something I want to chance on.

Here is a new pic of the bay I stripped all the brake lines and master cylinder and proportioning valve off since I am going all Wilwood MC and Proportioning valve which are in the mail is I write this. I am going to do all the lines in stainless and AN plumbed.
Suspension is going to be old school Tanabe Sustec coilovers I scored off a buddy years ago and now I am going to use them finally. If they end up being bad I�ll go the extra mile and rebuild them and powder coat the whole thing over again. Also got some Skunk 2 cambers and probably going to do poly bushings on the car soon and some Whiteline racing suspension later!
Almost forgot to tell you guys I am doing a sick brake tuck too! I already bought the Rywire Wilwood MC conversion plate and the -3 AN fittings for the and the tools that cost a *** load too. The Parker Hand held flare tool was almost 100 bucks I got a good deal and the Imperial triple bending tool with a ratcheting handle for easy bends (sick) was like 50+ bucks. If you are not serious about doing this thing and cannot invest tons in tools; I would not recommend a brake tuck with AN flares. The quality of your work always shows up with the quality of the tools you use I�d rather have my flares and bends be perfect than leak on me when I need my brakes to work in an emergency that�s not something I want to chance on.