
My alarm build thread
 08-18-2008, 06:21 PM
#1
Honda-Tech Member
Thread Starter
(I'm copying and pasting this from another local import forum so, some of the references may seem a tad off, please pay them no mind. Thanks.)
I've done alot of installs for members on this site, and I've posted most of them (some have chosen not to have write-ups). I'm constantly asked "What's in your hatch?"
I've always cringed and said......"nothing".
That's right, my car really did'nt have an alarm. It had a VERY VERY VERY basic alarm with keyless entry, but that was about it. The car never saw more than 500 miles a year (I'm serious), it sleeps in my garage, and is always in sight. So why bother?
I decided I want to start driving this thing more ofter so I got off my ***, put AC in it (I'm old and need the cool breeze) and decided to put a respectable alarm in this hooptie.
I'm going to do this write up as I install it. It's gonna take more time as I post pics, answer questions, defend myself (lol), and so on.
Before I even begin, I'm going to copy and paste some info from the "Whitey" thread. The "Whitey" thread can be found here: https://honda-tech.com/zerothread?id=2108744.
1. All a theif has to do is pop the hood and cut the siren wire to kill the alarm.
Wrong. By cutting the siren, the noise will stop, but the alarm will continue to protect the vehicle. If the siren wire is grounded out, the circuit may be damaged on the brain, but the alarm will continue to function.
2. Taking a car battery to the car and shorting it out will kill the alarm.
Wrong. It would be a HUGE fireworks show, but 99% of the time, the alarm would simply blow a fuse. Along with doing so, the electrical system could be damaged. The computers and modules in the car could be heavily damaged. Doing so could possibly make the vehicle undrivable, and certainly alot more difficult to "hotwire".
3. By knowing what brand alarm is in a car a theif can bypass it.
Wrong. Just think about this.....
4. Alarms are worthless and a kill switch does the same job.
An alarm is only as good as the install. You could have the best alarm made, but if there are poor connections it won't work. Kill switches are good for someone on a budget, but, a $10 kill switch won't alert me a mile away when my hood is popped.
5. Showing this install makes your car an easy target.
Wrong. You may know where everything is on THIS car, and you may even see this car on the street. But, once this install is complete, you will simply not even think about it. There are much easier and more valuable targets.
6. People ignore alarms
True. This is why a 2 way style keypad is being used. I'm using the factory horn because it's louder and more people take notice.
During this thread, I ask a few simple things:
1. Please no **** talking. If you have something negative to say, please PM me. I will respond, but only if it is a valid concern.
2. Read the whole thread. More than likely I will have answered your question somewhere along the way. I will respond to ALL questions, just have patience.
3. Sit back and enjoy. Not many people disclose their security setup, especially as in depth as I'm going to do. Just kick back and learn.
4. If you have anything to ask, add, or point out that is NOT negative please feel free to post or ask. I will answer, I promise, just be patient.
Now, ladies and gentlemen, on with the show........
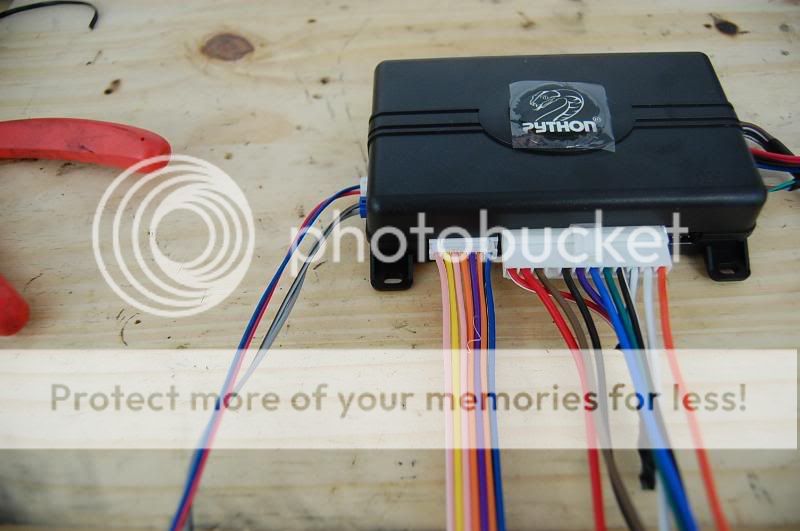
The alarm of choice is the Python 990.
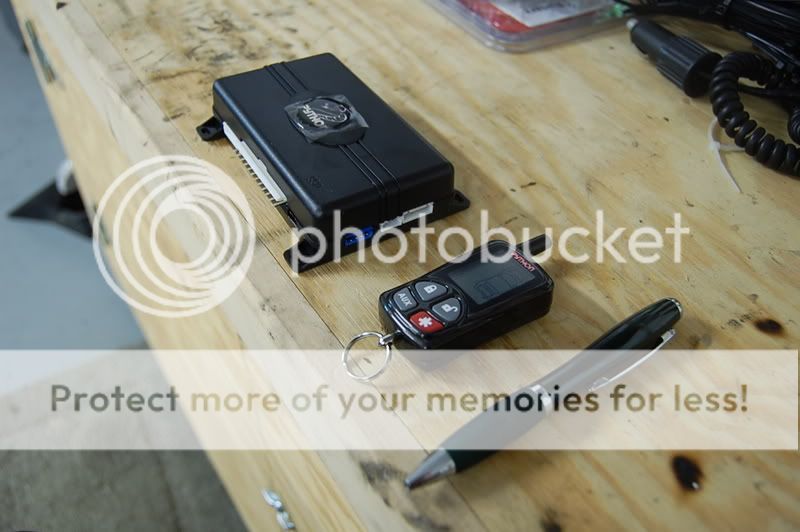
It gives me an alarm, keyless entry (if I had power locks from the factory), remote start, and 1 mile paging to the keypad. It's a great alarm that I've used countless times. The Viper 5900 and Clifford 50.5x are the EXACT same alarm, just different color keypads.
Check http://www.dei.com for all the info. on this unit.
I'm also adding a few other things such as:
The DEI 507m tilt sensor:
This is one of my favorite sensors. It detects the jacking or lifting of the car. It's sensitive to 3 degrees. Kickass sensor that protects wheels and if a towtruck tries to lift the car.
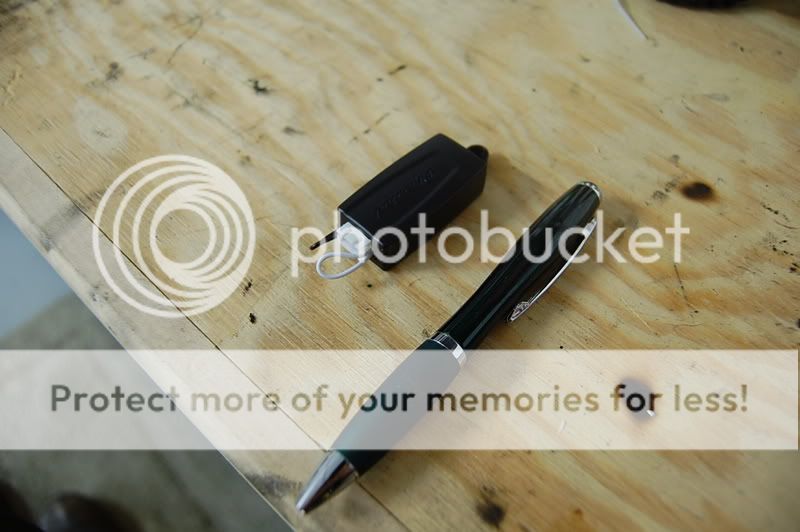
Another fav is the DEI 520t backup battery:
If a theif pops the hood and cuts the battery, this takes over and continues to protect the vehicle. This works for those with relocated batteries as well.
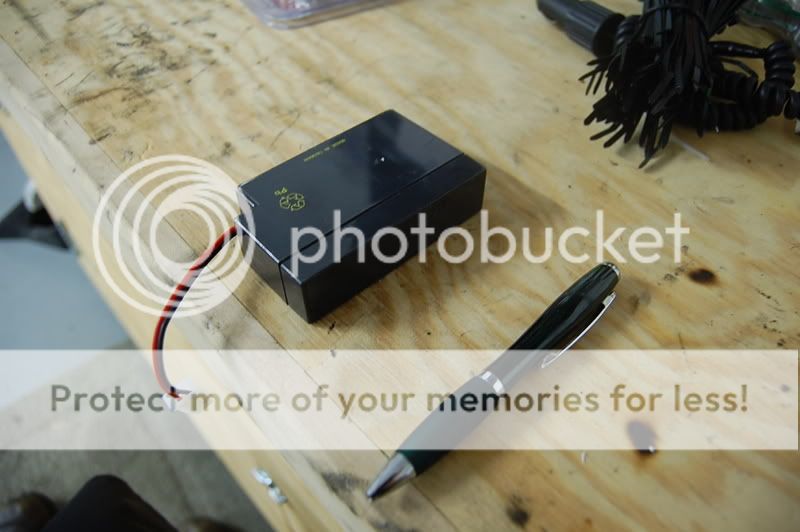
This is one I have'nt shown before but it's the DEI 513t piezo siren:
This is a beast. Put this in each air vent (I'll be using two) and it emits a very high pitch warble that will drive Helen Keller out the car. It's brutal how loud and screechy these things get.
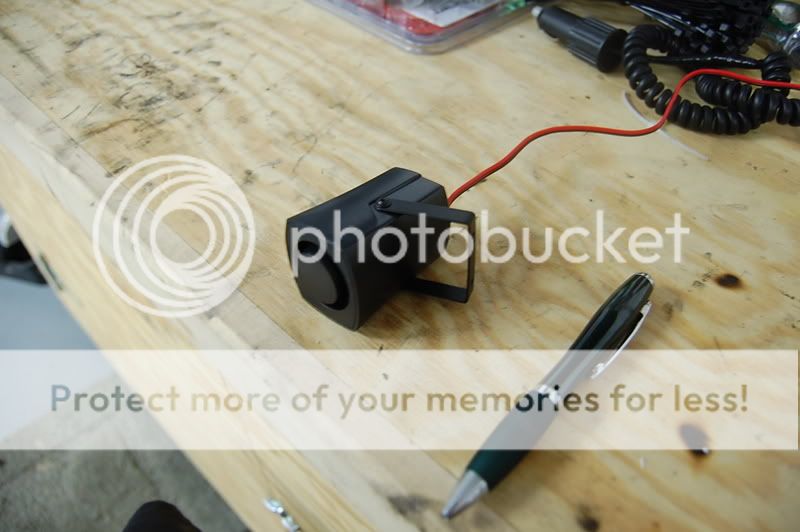
Another new item to the write ups is the DEI 506t audio sensor:
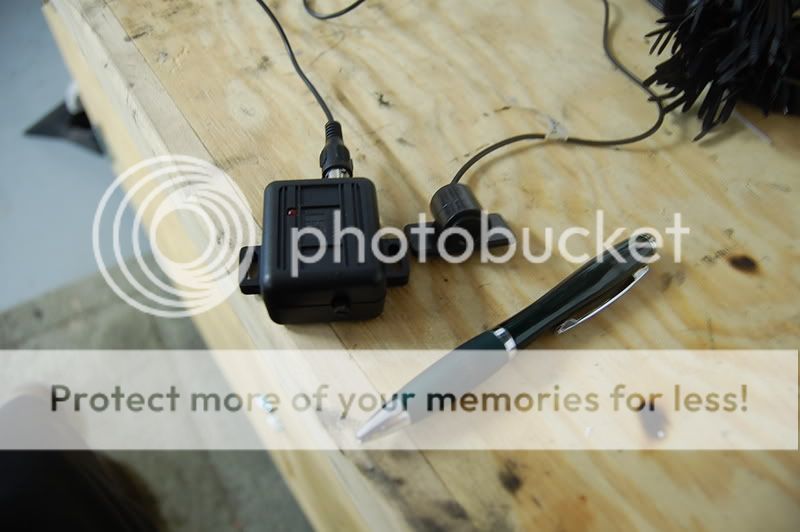
This is a microphone tuned to detect the sound of glass breaking. If a theif smashes a window to gain access, this thing picks it up and triggers the alarm. A shock sensor would not detect this if they use a small pellet gun or punch to break the glass.
I'm also going to be adding the usual ecu kill, fuel pump kill, headlight flash and horn honk to this. I have'nt prepped the relays yet, thats why there is no pics, but tommorow I'll get some up.
This is it for tonight, kind of like a small teaser. I will be starting the install tommorow, adding pics, answering questions, etc, along the way.
Thanks...
Relay wiring:
For headlight flash:
- Pole 85 hooks up to the black/white dome light supervision FROM the alarm
- Pole 87 goes to constant 12 volts
- Pole 86 goes to constant 12 volts
- Pole 30 goes to the headlight wire in the car. I use the high beam wire. You may not want to use if you have HIDs
For horn honk
- Pole 85 goes to the horn wire FROM the alarm
- Pole 87 goes to ground
- Pole 86 goes to constant 12 volts
- Pole 30 goes to the horn wire IN the car.
For additional sirens
- Pole 87 goes to constant 12 volts
- Pole 86 goes to siren wire FROM the alarm
- Pole 86 goes to ground
- Pole 30 goes to the all the sirens positive wire. You must ground each siren individually.
Modified by VegaS10 at 1:45 PM 10/4/2008
I've done alot of installs for members on this site, and I've posted most of them (some have chosen not to have write-ups). I'm constantly asked "What's in your hatch?"
I've always cringed and said......"nothing".
That's right, my car really did'nt have an alarm. It had a VERY VERY VERY basic alarm with keyless entry, but that was about it. The car never saw more than 500 miles a year (I'm serious), it sleeps in my garage, and is always in sight. So why bother?
I decided I want to start driving this thing more ofter so I got off my ***, put AC in it (I'm old and need the cool breeze) and decided to put a respectable alarm in this hooptie.
I'm going to do this write up as I install it. It's gonna take more time as I post pics, answer questions, defend myself (lol), and so on.
Before I even begin, I'm going to copy and paste some info from the "Whitey" thread. The "Whitey" thread can be found here: https://honda-tech.com/zerothread?id=2108744.
1. All a theif has to do is pop the hood and cut the siren wire to kill the alarm.
Wrong. By cutting the siren, the noise will stop, but the alarm will continue to protect the vehicle. If the siren wire is grounded out, the circuit may be damaged on the brain, but the alarm will continue to function.
2. Taking a car battery to the car and shorting it out will kill the alarm.
Wrong. It would be a HUGE fireworks show, but 99% of the time, the alarm would simply blow a fuse. Along with doing so, the electrical system could be damaged. The computers and modules in the car could be heavily damaged. Doing so could possibly make the vehicle undrivable, and certainly alot more difficult to "hotwire".
3. By knowing what brand alarm is in a car a theif can bypass it.
Wrong. Just think about this.....
4. Alarms are worthless and a kill switch does the same job.
An alarm is only as good as the install. You could have the best alarm made, but if there are poor connections it won't work. Kill switches are good for someone on a budget, but, a $10 kill switch won't alert me a mile away when my hood is popped.
5. Showing this install makes your car an easy target.
Wrong. You may know where everything is on THIS car, and you may even see this car on the street. But, once this install is complete, you will simply not even think about it. There are much easier and more valuable targets.
6. People ignore alarms
True. This is why a 2 way style keypad is being used. I'm using the factory horn because it's louder and more people take notice.
During this thread, I ask a few simple things:
1. Please no **** talking. If you have something negative to say, please PM me. I will respond, but only if it is a valid concern.
2. Read the whole thread. More than likely I will have answered your question somewhere along the way. I will respond to ALL questions, just have patience.
3. Sit back and enjoy. Not many people disclose their security setup, especially as in depth as I'm going to do. Just kick back and learn.
4. If you have anything to ask, add, or point out that is NOT negative please feel free to post or ask. I will answer, I promise, just be patient.
Now, ladies and gentlemen, on with the show........
The alarm of choice is the Python 990.
It gives me an alarm, keyless entry (if I had power locks from the factory), remote start, and 1 mile paging to the keypad. It's a great alarm that I've used countless times. The Viper 5900 and Clifford 50.5x are the EXACT same alarm, just different color keypads.
Check http://www.dei.com for all the info. on this unit.
I'm also adding a few other things such as:
The DEI 507m tilt sensor:
This is one of my favorite sensors. It detects the jacking or lifting of the car. It's sensitive to 3 degrees. Kickass sensor that protects wheels and if a towtruck tries to lift the car.
Another fav is the DEI 520t backup battery:
If a theif pops the hood and cuts the battery, this takes over and continues to protect the vehicle. This works for those with relocated batteries as well.
This is one I have'nt shown before but it's the DEI 513t piezo siren:
This is a beast. Put this in each air vent (I'll be using two) and it emits a very high pitch warble that will drive Helen Keller out the car. It's brutal how loud and screechy these things get.
Another new item to the write ups is the DEI 506t audio sensor:
This is a microphone tuned to detect the sound of glass breaking. If a theif smashes a window to gain access, this thing picks it up and triggers the alarm. A shock sensor would not detect this if they use a small pellet gun or punch to break the glass.
I'm also going to be adding the usual ecu kill, fuel pump kill, headlight flash and horn honk to this. I have'nt prepped the relays yet, thats why there is no pics, but tommorow I'll get some up.
This is it for tonight, kind of like a small teaser. I will be starting the install tommorow, adding pics, answering questions, etc, along the way.
Thanks...
Relay wiring:
For headlight flash:
- Pole 85 hooks up to the black/white dome light supervision FROM the alarm
- Pole 87 goes to constant 12 volts
- Pole 86 goes to constant 12 volts
- Pole 30 goes to the headlight wire in the car. I use the high beam wire. You may not want to use if you have HIDs
For horn honk
- Pole 85 goes to the horn wire FROM the alarm
- Pole 87 goes to ground
- Pole 86 goes to constant 12 volts
- Pole 30 goes to the horn wire IN the car.
For additional sirens
- Pole 87 goes to constant 12 volts
- Pole 86 goes to siren wire FROM the alarm
- Pole 86 goes to ground
- Pole 30 goes to the all the sirens positive wire. You must ground each siren individually.
Modified by VegaS10 at 1:45 PM 10/4/2008

 08-18-2008, 06:40 PM
#5
Honda-Tech Member
Join Date: Aug 2006
Location: Linden, N.J., USA
Posts: 751
Likes: 0
Received 0 Likes
on
0 Posts
I do have a question these are all great but in total how much have you spent ? The reason I ask because someone in H-T offer me a similar alarm but with GPS for 875 shipped. Wouldn't the gps have the same effect that if they did take and or tow it you can track the car?
Trending Topics
08-19-2008, 02:26 AM
#8
Honda-Tech Member
Thread Starter
<TABLE WIDTH="90%" CELLSPACING=0 CELLPADDING=0 ALIGN=CENTER><TR><TD>Quote, originally posted by slvrcvc93 »</TD></TR><TR><TD CLASS="quote">I do have a question these are all great but in total how much have you spent ? The reason I ask because someone in H-T offer me a similar alarm but with GPS for 875 shipped. Wouldn't the gps have the same effect that if they did take and or tow it you can track the car?</TD></TR></TABLE>
I'm going to give you ebay pricing for new items.
Python 990 is roughly 250 shipped
Tilt sensor is about 30 shipped
Battery is about 20 shipped
glass break sensor is about 25 shipped
piezo siren is about 15 each shipped
I'm going to give you ebay pricing for new items.
Python 990 is roughly 250 shipped
Tilt sensor is about 30 shipped
Battery is about 20 shipped
glass break sensor is about 25 shipped
piezo siren is about 15 each shipped
08-19-2008, 04:50 AM
#9
Honda-Tech Member
Thread Starter
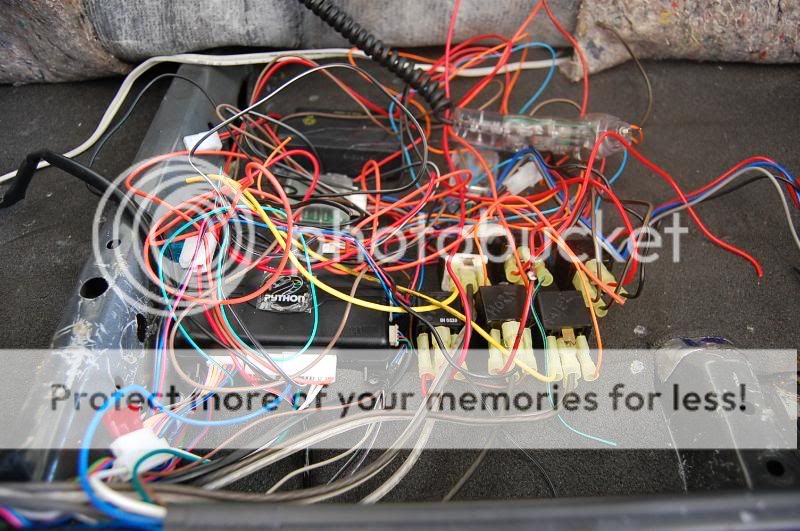
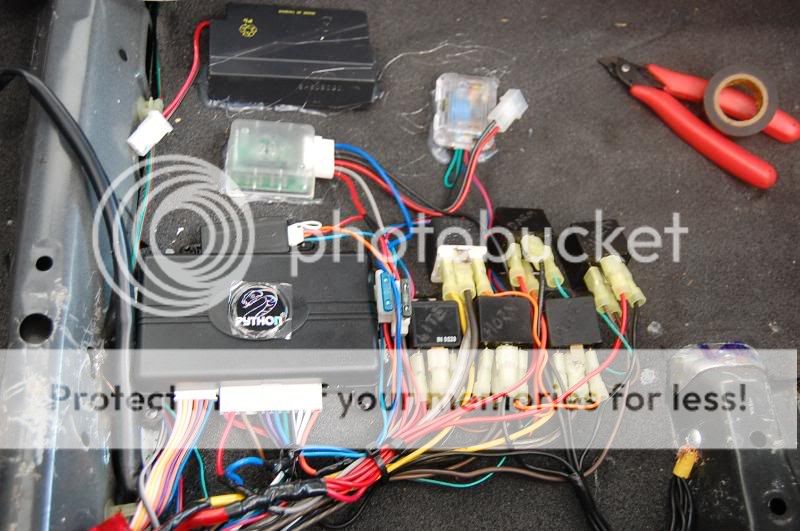
These are the relays for all the additional stuff I'm doing. I burned each one's function on top of it incase I have to go back and troubleshoot something.
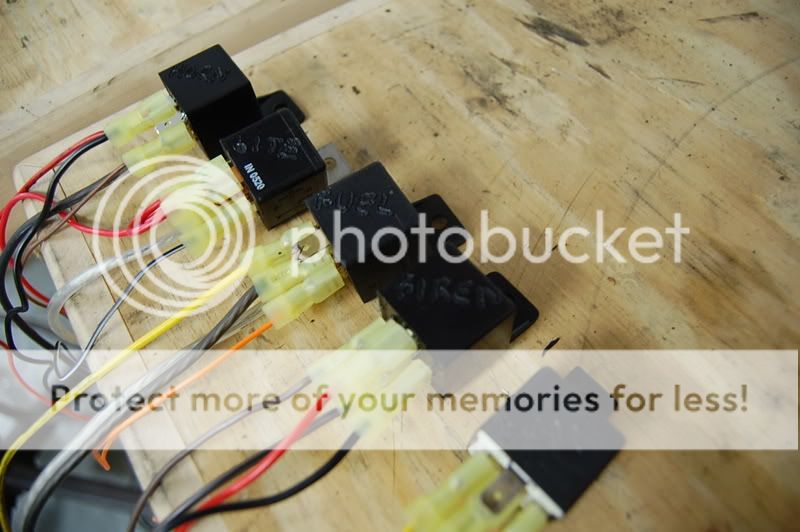
One is for killing the fuel pump. If the alarm is triggered, the fuel pump will not recieve power.
There is one for the ecu as well.
One relay is for the headlights. When the alarm is triggered, it will flash the headlights. This is not to be used for those with HIDs. It will also turn on the headlights for 30 seconds when the alarm is disarmed. This is a cool feature at night as it illuminates the parking lot pretty well.
There is a relay for the sirens. This boosts the output of the alarm and allows me to add as many sirens as I desire.
There is one last relay for the horn. The horn will honk when the alarm is triggered. Not really needed on Hondas, but I still prefer to use it.
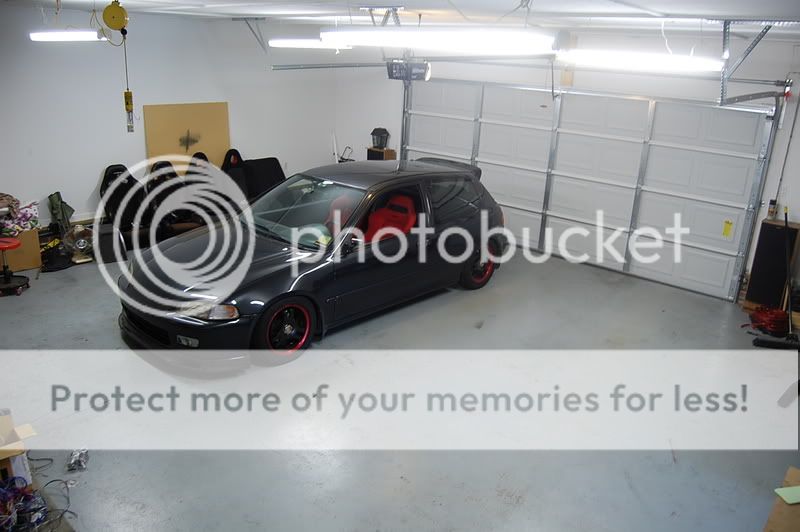
This is the hatch all this is going in, along with my garage:
I have to grab some breakfast and coffee and run some errands. When I get back I'll start on it and take some pics.
One is for killing the fuel pump. If the alarm is triggered, the fuel pump will not recieve power.
There is one for the ecu as well.
One relay is for the headlights. When the alarm is triggered, it will flash the headlights. This is not to be used for those with HIDs. It will also turn on the headlights for 30 seconds when the alarm is disarmed. This is a cool feature at night as it illuminates the parking lot pretty well.
There is a relay for the sirens. This boosts the output of the alarm and allows me to add as many sirens as I desire.
There is one last relay for the horn. The horn will honk when the alarm is triggered. Not really needed on Hondas, but I still prefer to use it.
This is the hatch all this is going in, along with my garage:
I have to grab some breakfast and coffee and run some errands. When I get back I'll start on it and take some pics.
08-19-2008, 06:00 AM
#12
Honda-Tech Member
Thread Starter
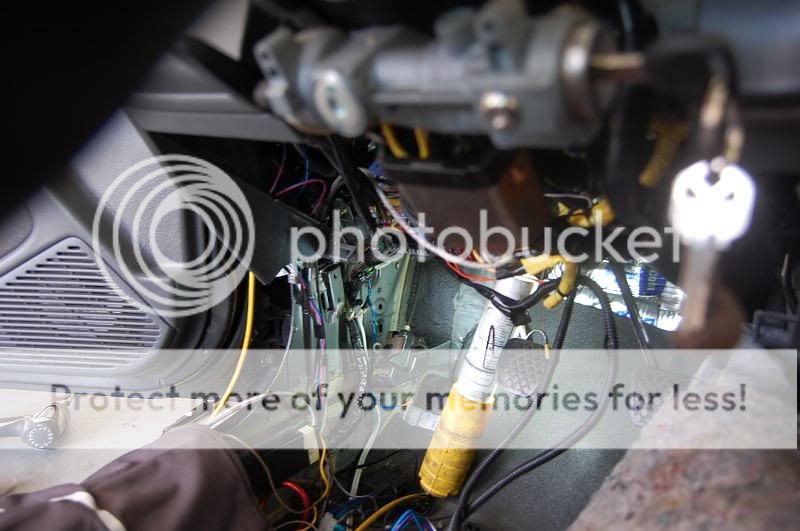
Whenever I do an alarm this size I always pull the seat out and vacuum up any crap that may be in the way.

Once that's done, it's time to get into the dash. Remove the 3 screws holding the plastic in place.
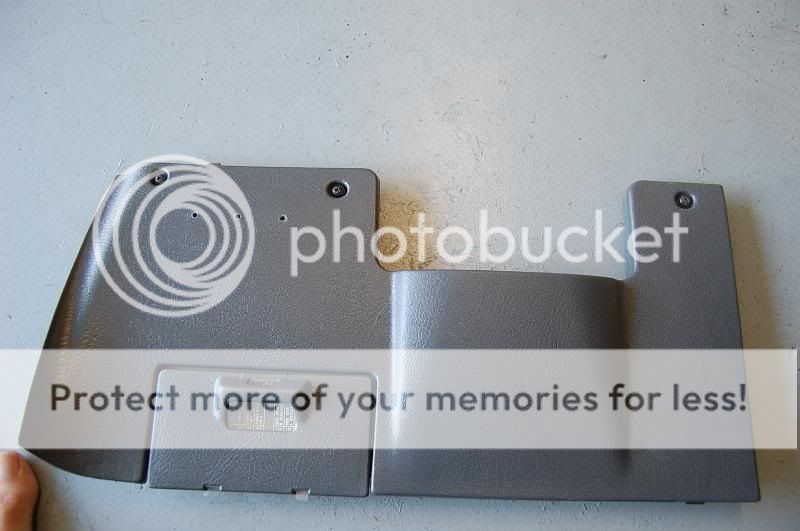
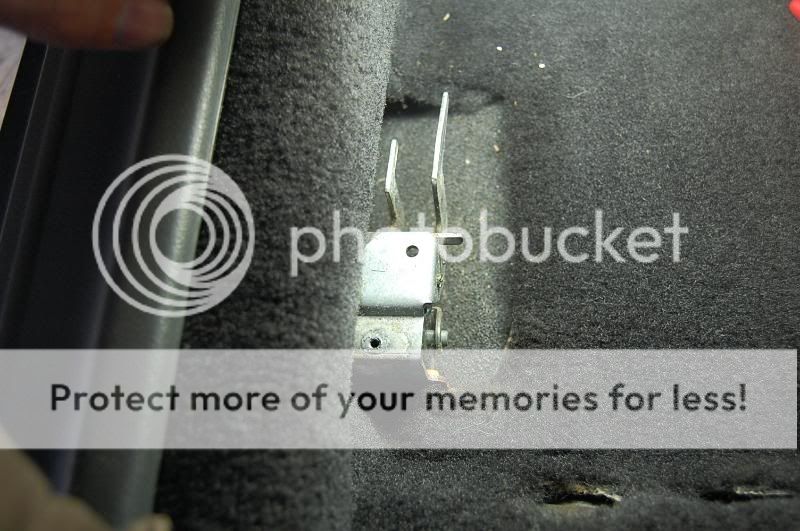
Then the 2 10mm bolts from the security plate.
Pull the 3 screws holding the steering column shroud in place.
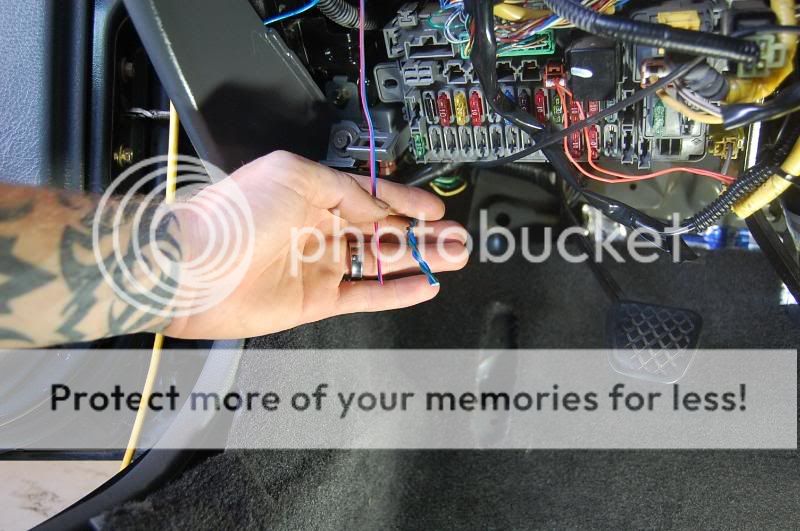
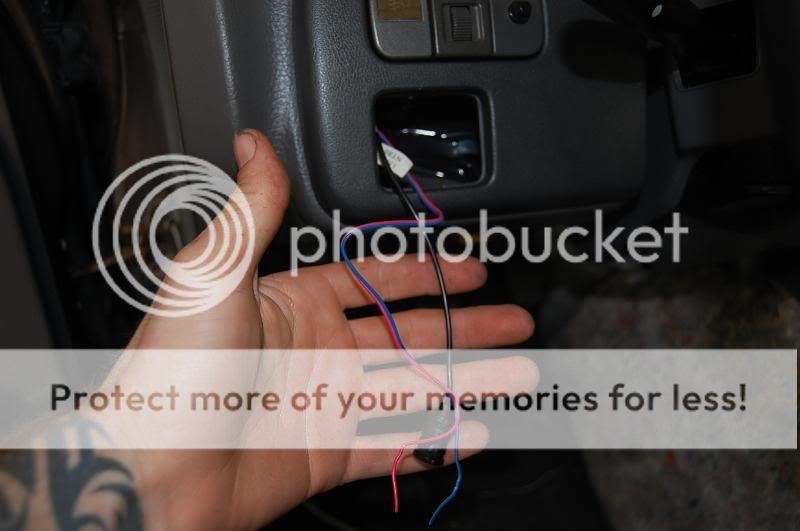
And remove the old alarm.....
This is what it looks like when it's all done. I'm using the old LED location. The 2 green/blue twisted wires are for my door lock actuator.

Once that's done, it's time to get into the dash. Remove the 3 screws holding the plastic in place.
Then the 2 10mm bolts from the security plate.
Pull the 3 screws holding the steering column shroud in place.
And remove the old alarm.....
This is what it looks like when it's all done. I'm using the old LED location. The 2 green/blue twisted wires are for my door lock actuator.
08-19-2008, 06:36 AM
#14
Honda-Tech Member
Thread Starter
All my previous connections were soldered, so I'm just going to reuse them.
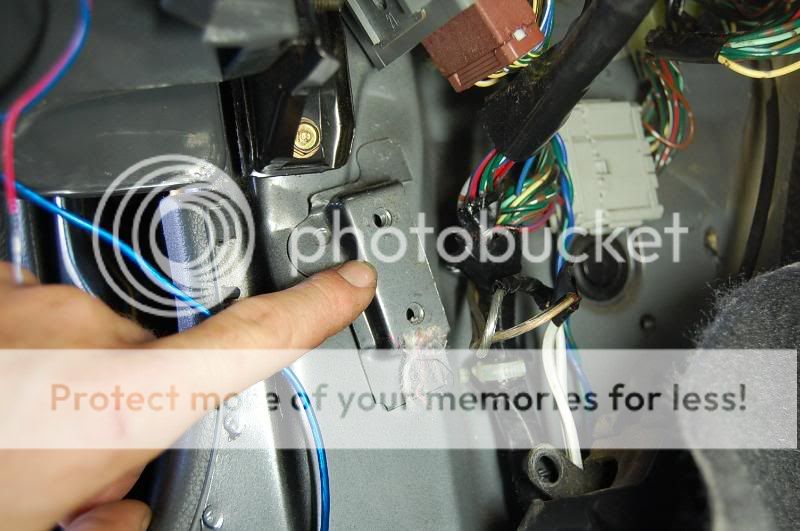
This is where the headlight wire is.

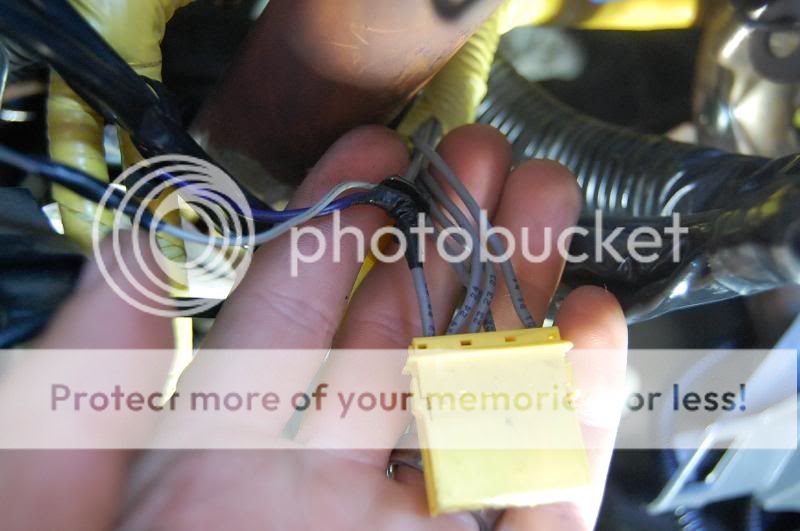
In the ABS bundle is the horn. All the wires here are grey. Use a multimeter to test this. DO NOT USE A TESTLIGHT!!!!
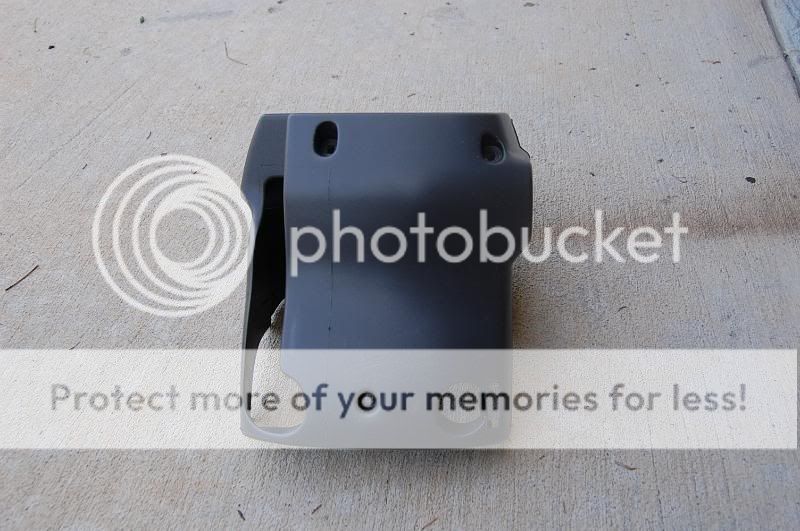
Remove the grey cover, hatch release and gas door release ***** (they simply slide forward. Take out the small Phillips head screw.
Remove the 2 10mm bolts for the hood release.
I forgot if it's a 15 or 17mm, but either way, take out the seat belt bolt.
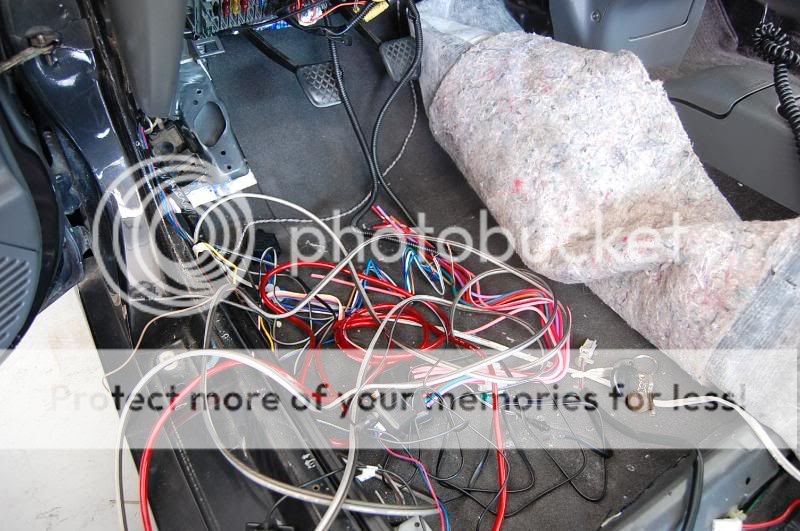
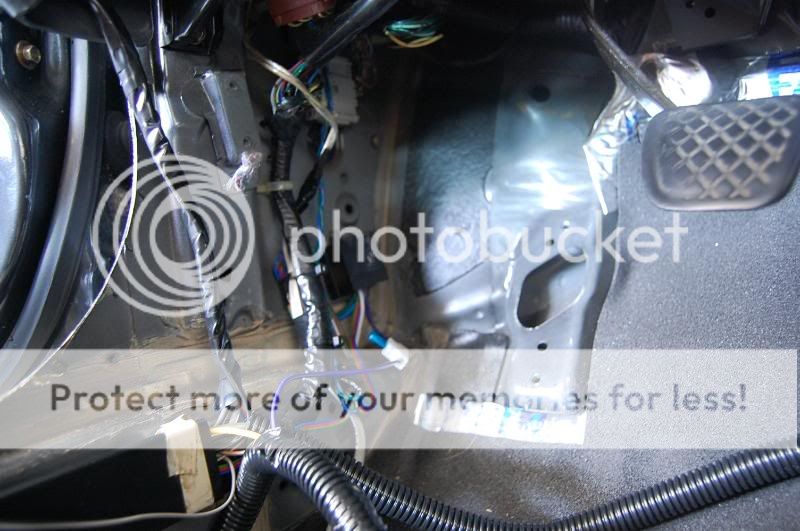
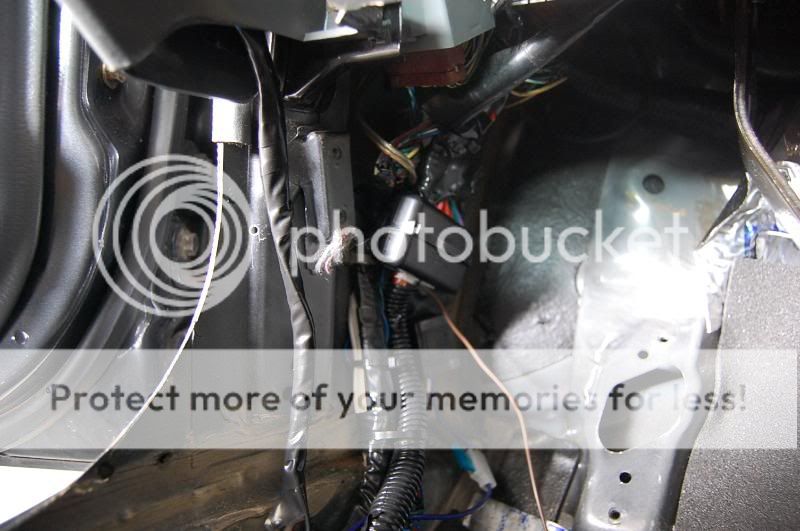
Folding the carpet back, the floorpan is exposed.
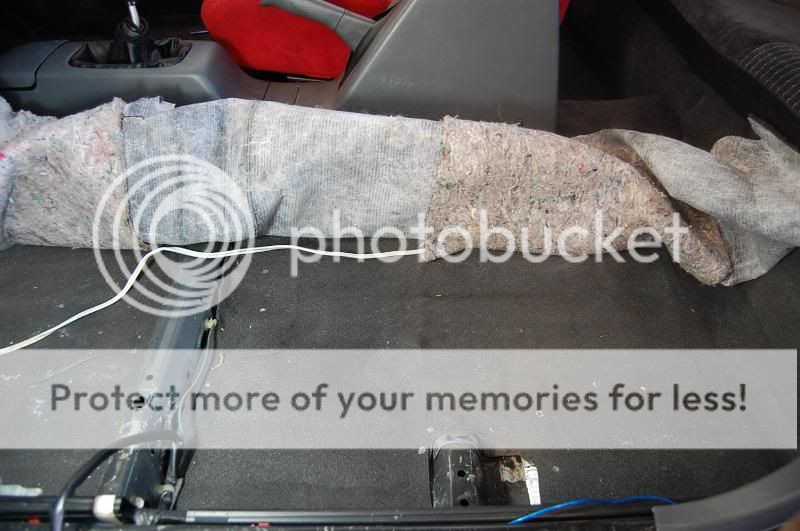
Now, mine looks different from everyone else's. I used Fatmat throughout my interior about 2 years ago. There is 3 layers on the floor and 1 layer of 1/8 inch thick acoustic closed cell foam. This keeps the interior DEAD quiet and the padding is a nice cushiony (is that a real word?) touch.
The white wire is a speaker wire which will be moved/tucked into the install as well.
This is where the headlight wire is.
In the ABS bundle is the horn. All the wires here are grey. Use a multimeter to test this. DO NOT USE A TESTLIGHT!!!!
Remove the grey cover, hatch release and gas door release ***** (they simply slide forward. Take out the small Phillips head screw.
Remove the 2 10mm bolts for the hood release.
I forgot if it's a 15 or 17mm, but either way, take out the seat belt bolt.
Folding the carpet back, the floorpan is exposed.
Now, mine looks different from everyone else's. I used Fatmat throughout my interior about 2 years ago. There is 3 layers on the floor and 1 layer of 1/8 inch thick acoustic closed cell foam. This keeps the interior DEAD quiet and the padding is a nice cushiony (is that a real word?) touch.
The white wire is a speaker wire which will be moved/tucked into the install as well.
08-19-2008, 07:10 AM
#15
Honda-Tech Member
Thread Starter
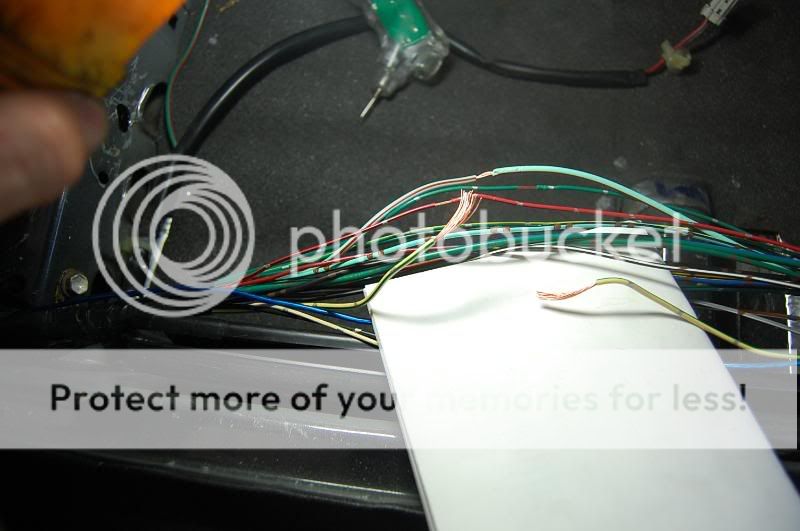
More jank:
Red/black is for the parking lights:
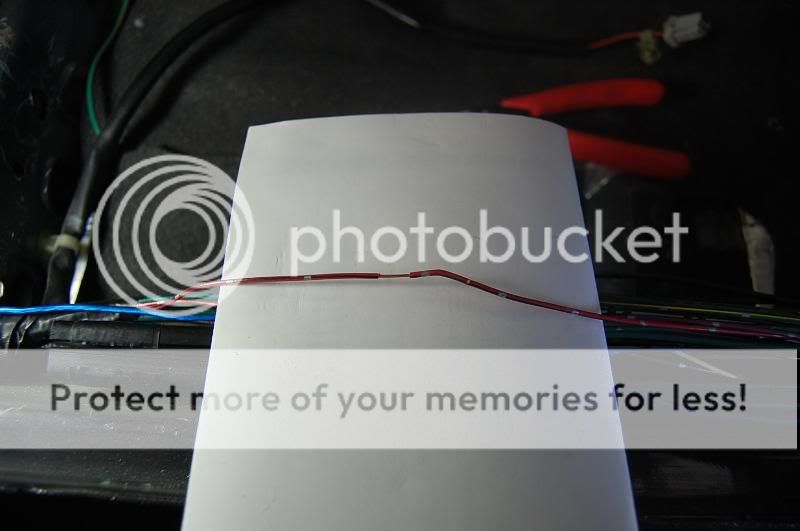
The THICK lime green/red wire is for the doors. It looks fat, but it is still just 18 gauge wire underneath:
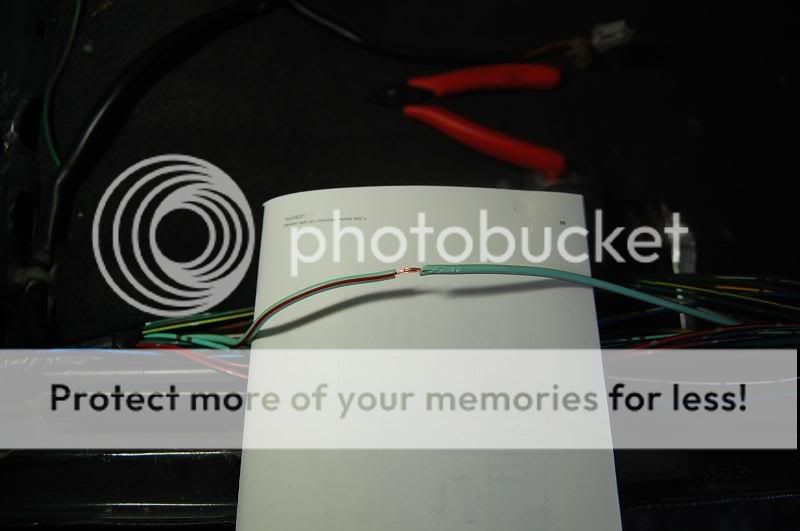
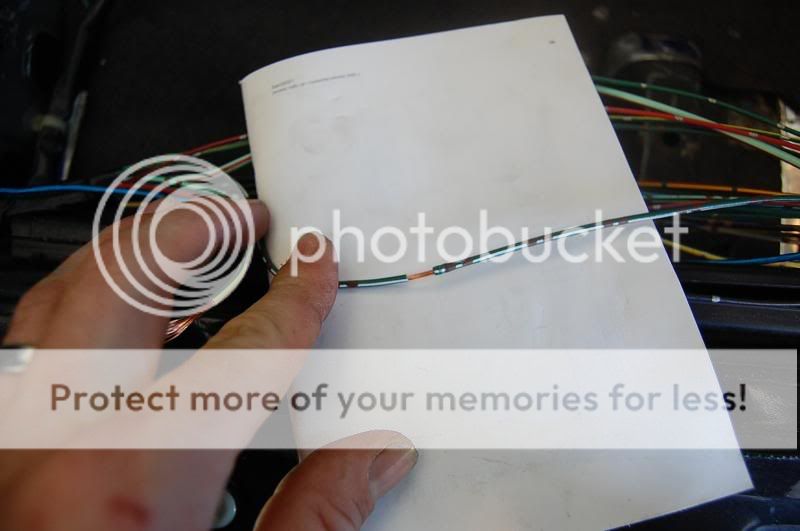
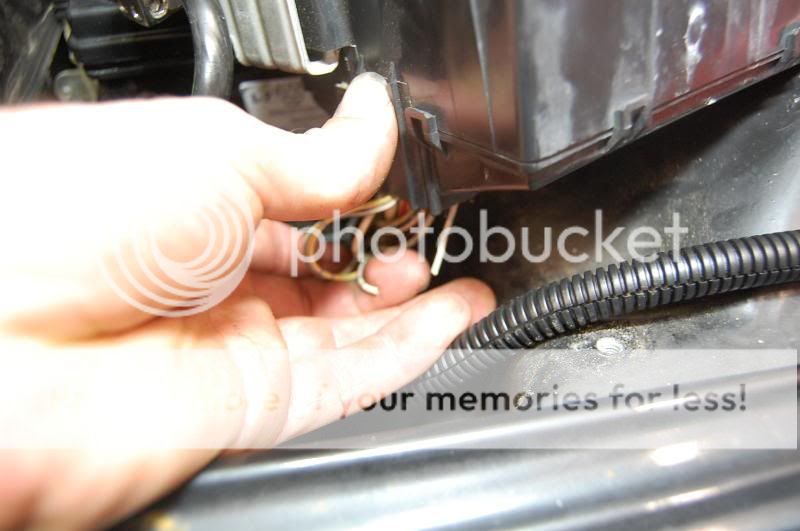
Green with silver dots is for the hatch. There were a few of these, so you have to test each one.:

Yellow/green is for the fuel pump. I cut and stripped this for the kill relay. The other wires are just stripped.
Red/black is for the parking lights:
The THICK lime green/red wire is for the doors. It looks fat, but it is still just 18 gauge wire underneath:
Green with silver dots is for the hatch. There were a few of these, so you have to test each one.:
Yellow/green is for the fuel pump. I cut and stripped this for the kill relay. The other wires are just stripped.
08-19-2008, 11:21 AM
#18
Honda-Tech Member
Thread Starter
ItrSteez came over and hung out and snapped some pics.
Green/White is the brake wire.
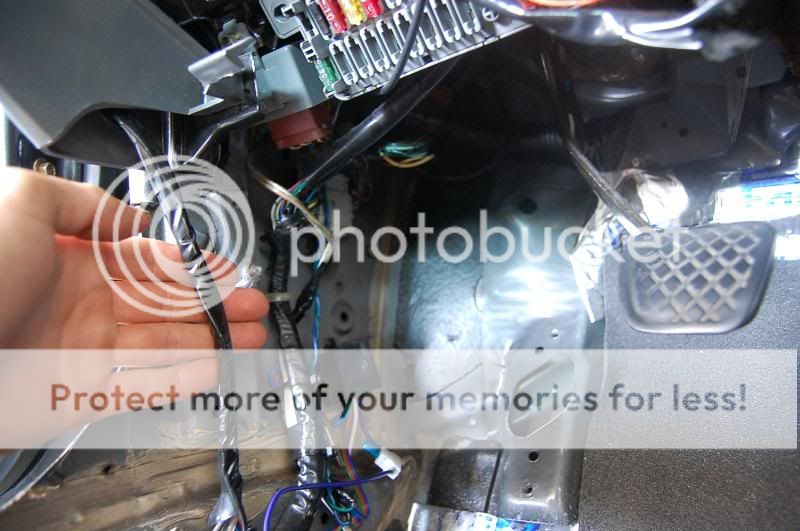
On to the alarm. It's best to remove wires you won't be using. Doing this cleans up the install and reduces clutter.
What I usually do is snip off the unused wires, but leave enough so I can use it later if need be.
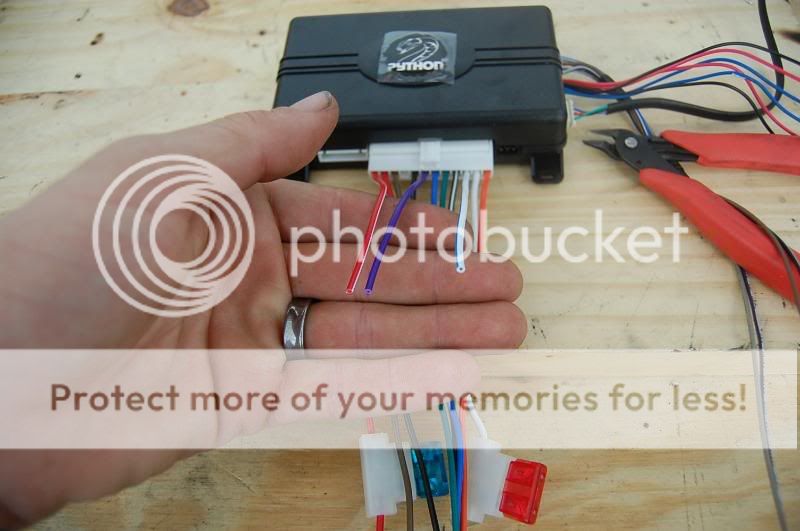
Once it's snipped, flip the wires back,
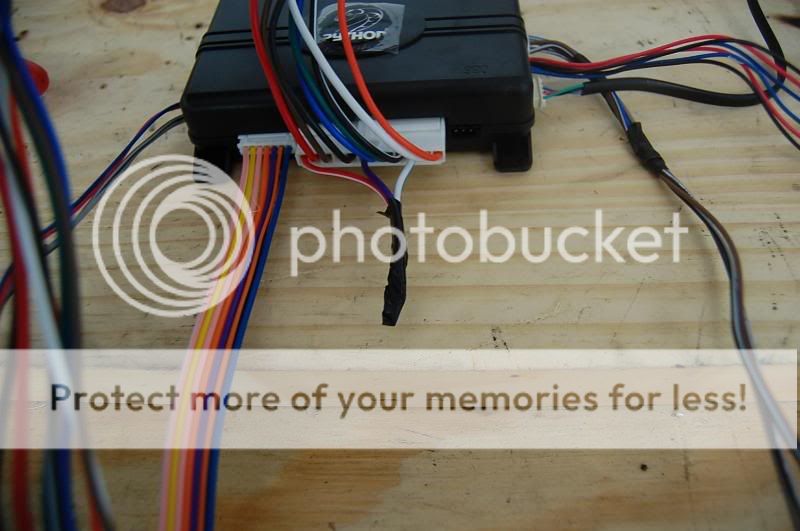
and tape up the unused wires.
One trick is to cut them off at different lengths so they don't touch.

Do this to each harness and it really shrinks down the wires.
I next set everything in the car to get an idea of placement and hooked up all the wires that I have so far explianed. I also wired all the relays up.
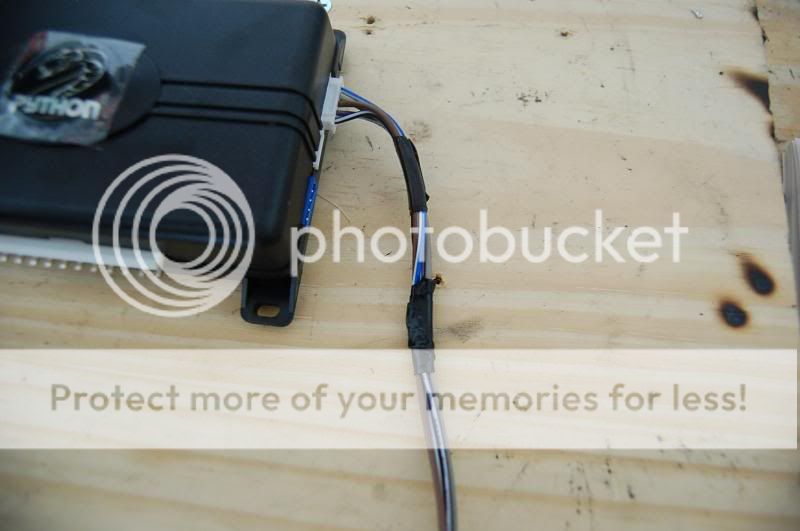
The other end:
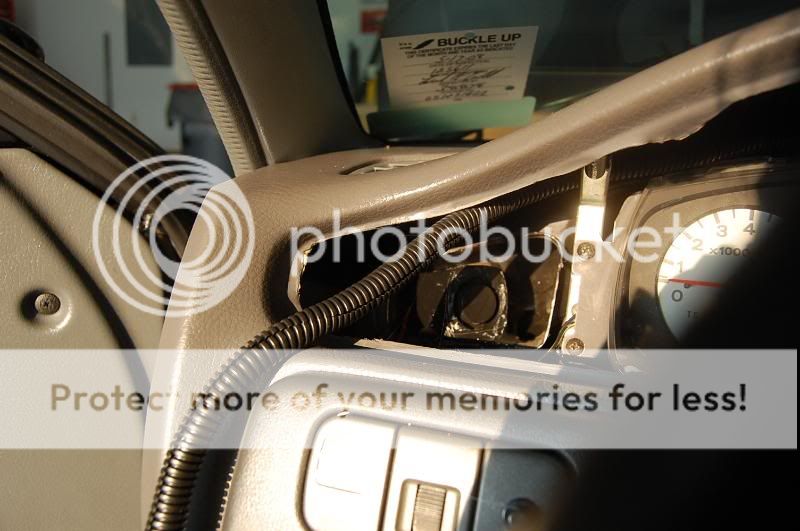
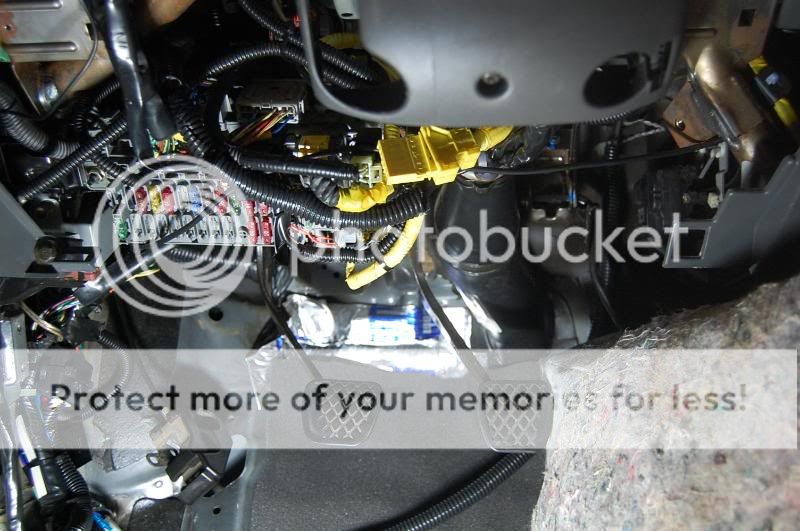
This is where I grabbed for tach sense. This little plug is right near the driver shock tower.
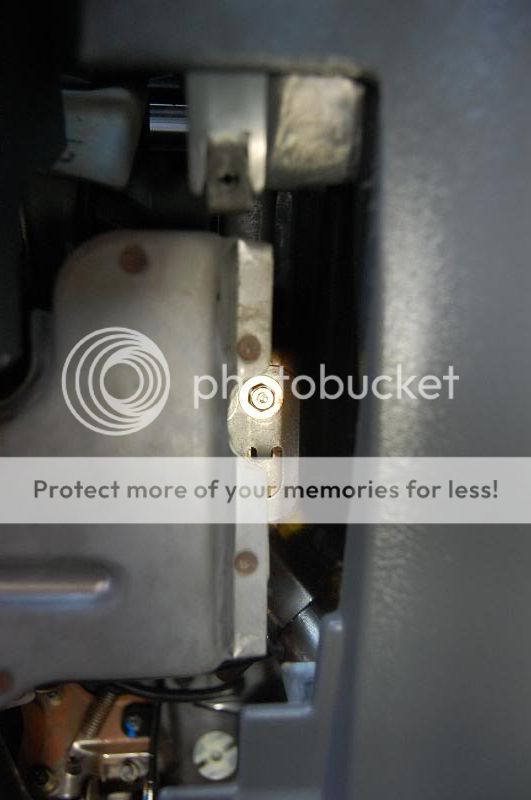
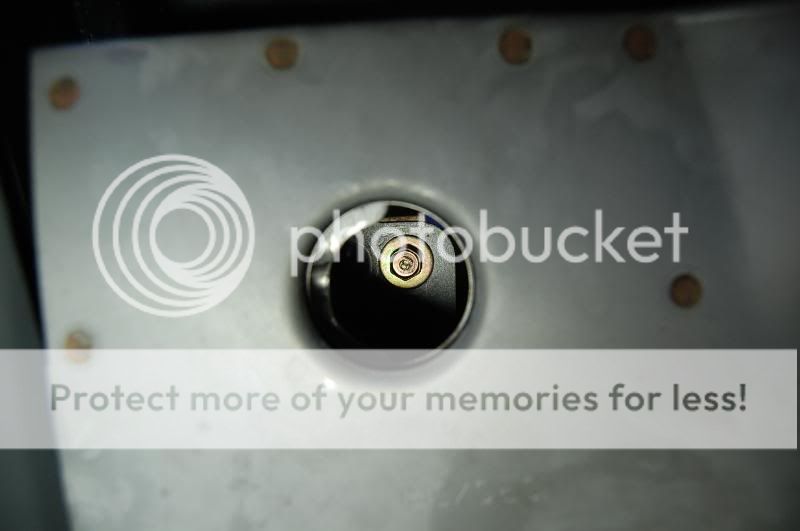
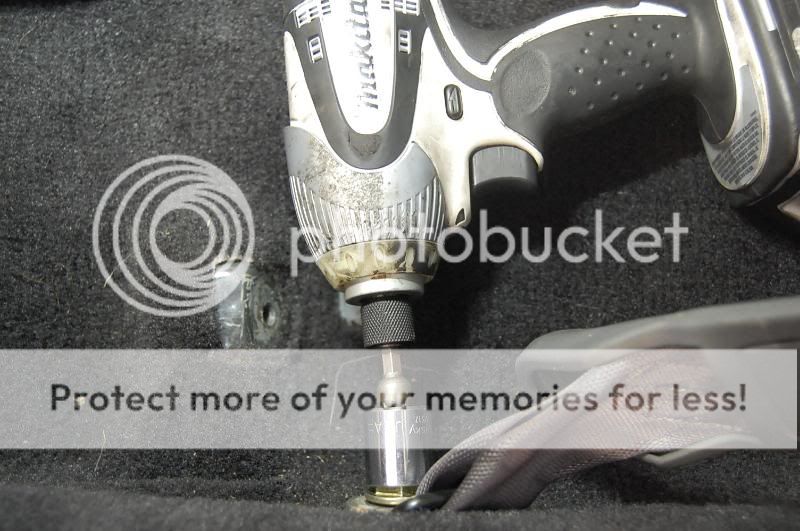
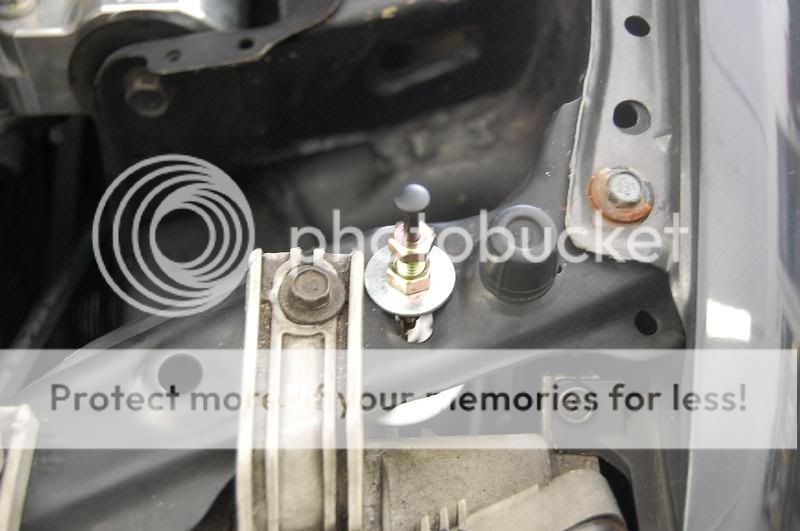
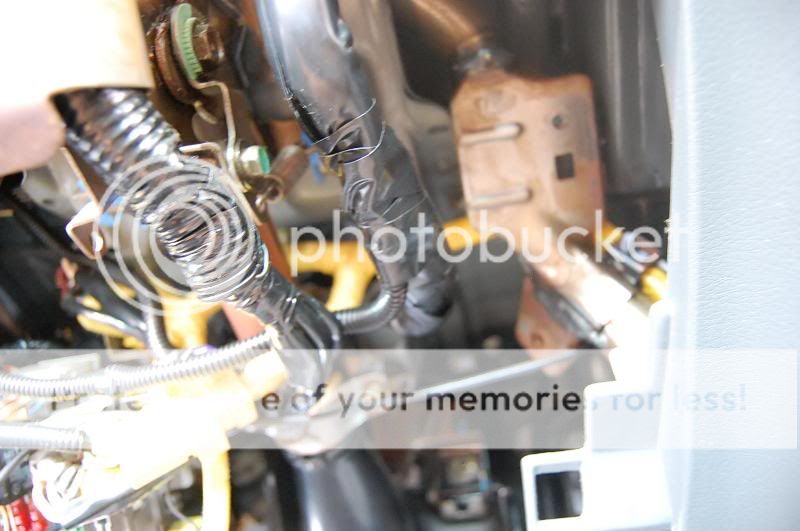
And this is the hood pin. I scraped the paint off underneath for a clean connection and tightened everything up with a wrench. This cannot be accessed from under the vehicle. It is important to occasionaly check the condition of this, as it is prone to weather exposure and may need cleaning.
And two randoms shots courtesy of Steve:


Green/White is the brake wire.
On to the alarm. It's best to remove wires you won't be using. Doing this cleans up the install and reduces clutter.
What I usually do is snip off the unused wires, but leave enough so I can use it later if need be.
Once it's snipped, flip the wires back,
and tape up the unused wires.
One trick is to cut them off at different lengths so they don't touch.
Do this to each harness and it really shrinks down the wires.
I next set everything in the car to get an idea of placement and hooked up all the wires that I have so far explianed. I also wired all the relays up.
The other end:
This is where I grabbed for tach sense. This little plug is right near the driver shock tower.
And this is the hood pin. I scraped the paint off underneath for a clean connection and tightened everything up with a wrench. This cannot be accessed from under the vehicle. It is important to occasionaly check the condition of this, as it is prone to weather exposure and may need cleaning.
And two randoms shots courtesy of Steve:
08-19-2008, 11:28 AM
#19
Junior Member
Join Date: May 2006
Location: brownsburg, in, usa
Posts: 435
Likes: 0
Received 0 Likes
on
0 Posts
python paging alarm. i got this thing on my 99 and it works great! and tilt sensor definatly a huge plus!!!!! worth the money for that little gem! helps alert you if someones trying to steal your rims or even tow your car. as long as your within distance to catch the guy that is. .... still alot better than nothing tho!!!!!!!
i like the alarm BUT for a manual vehicle a alarm can not save your ride. most alarms are just starter kills well they work good for automatic vehicles but for a manual a simple push start will bypass the starter completly. thats why i have a simple custom killswitch on my fuel pump on my 96 civic.
i like the alarm BUT for a manual vehicle a alarm can not save your ride. most alarms are just starter kills well they work good for automatic vehicles but for a manual a simple push start will bypass the starter completly.
thats why i have a simple custom killswitch on my fuel pump on my 96 civic.
08-19-2008, 01:43 PM
#20
Honda-Tech Member
Thread Starter
<TABLE WIDTH="90%" CELLSPACING=0 CELLPADDING=0 ALIGN=CENTER><TR><TD>Quote, originally posted by addiction2bass »</TD></TR><TR><TD CLASS="quote">i like the alarm BUT for a manual vehicle a alarm can not save your ride. most alarms are just starter kills well they work good for automatic vehicles but for a manual a simple push start will bypass the starter completly.</TD></TR></TABLE>
This install has an ecu and fuel pump kill as well.
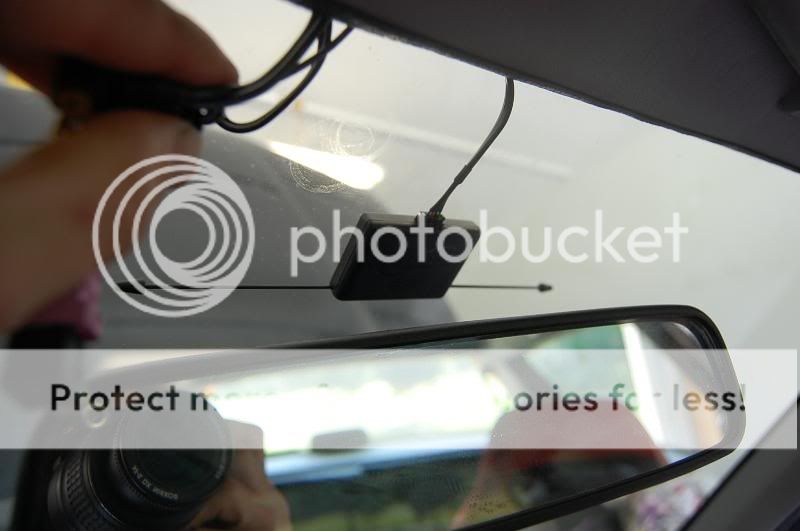
This is the antenna. This has to be on a tint free surface for best results. Metallic tints greatly reduce range.
This is the DEI 451m. It's the door lock relay that is needed for running lock actuators. Nothing really special.
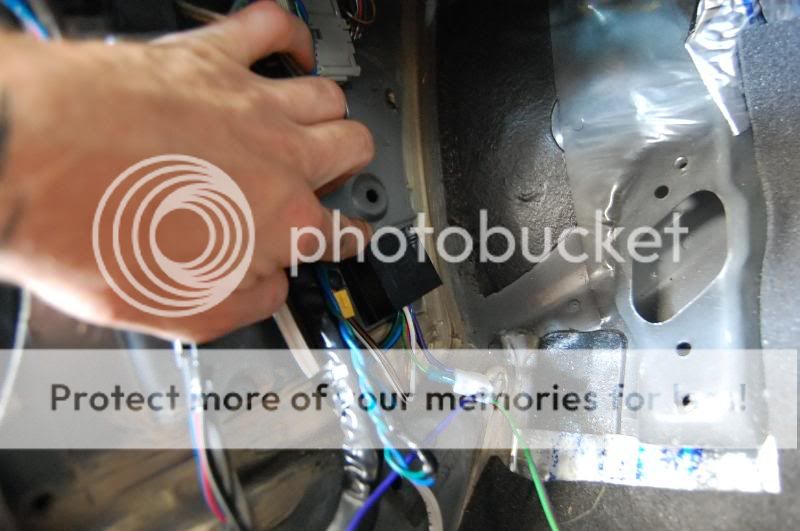
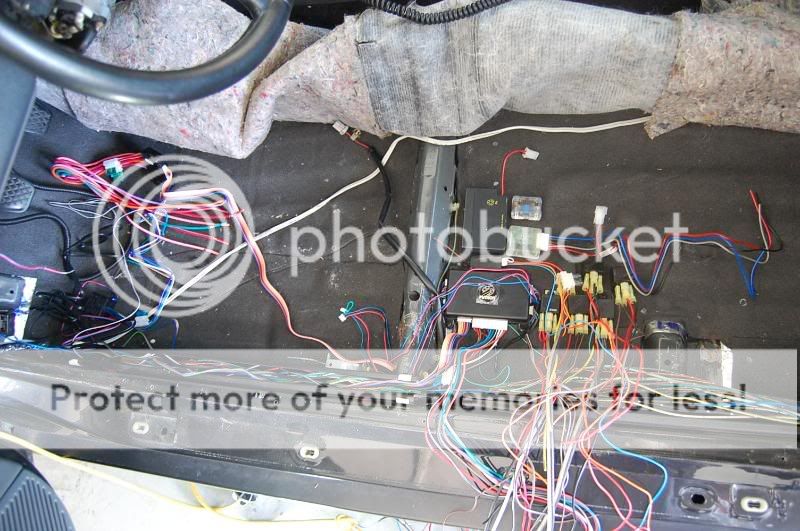
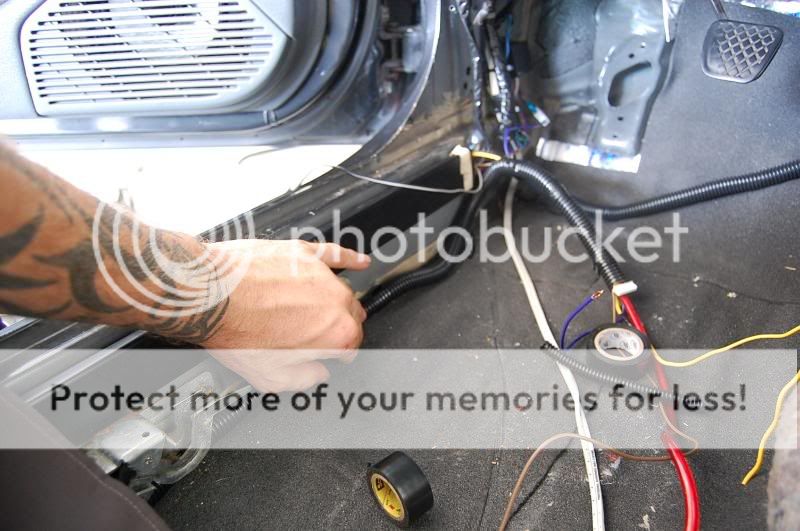
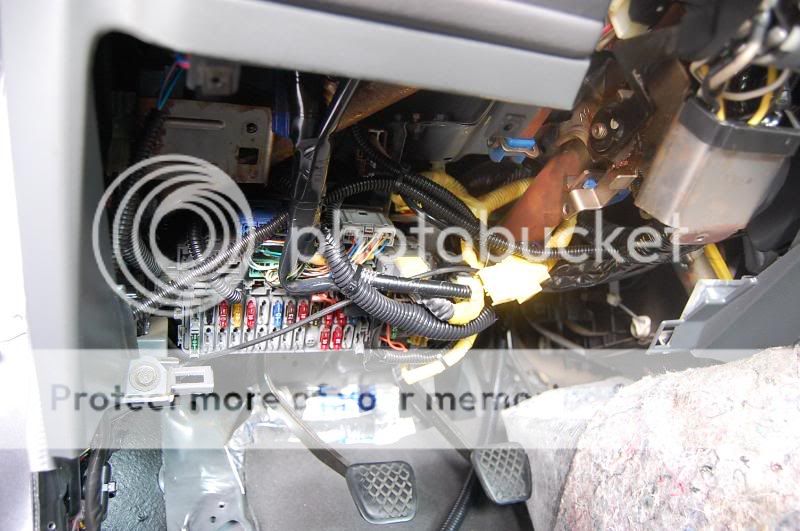
These pics here show where stuff gets loomed, taped, tucked and wire tied away. No particular order. These are pretty much final underdash shots. I'm not showing where the starter kill or main power connections are....but you are looking right at them.

I fired everything up. Remote start works, locks work, all sensors and relays work on the first try. I'm so thankful...lol.
Anyways, I still have to do the ecu kill, mount the glass break sensor, and adjust the shock and glass sensor. I'm trying to get this done sometime tonight. I'm being lazy...
This install has an ecu and fuel pump kill as well.
This is the antenna. This has to be on a tint free surface for best results. Metallic tints greatly reduce range.
This is the DEI 451m. It's the door lock relay that is needed for running lock actuators. Nothing really special.
These pics here show where stuff gets loomed, taped, tucked and wire tied away. No particular order. These are pretty much final underdash shots. I'm not showing where the starter kill or main power connections are....but you are looking right at them.
I fired everything up. Remote start works, locks work, all sensors and relays work on the first try. I'm so thankful...lol.
Anyways, I still have to do the ecu kill, mount the glass break sensor, and adjust the shock and glass sensor. I'm trying to get this done sometime tonight. I'm being lazy...
08-19-2008, 04:29 PM
#21
Honda-Tech Member
Thread Starter
It's done. Thank God.
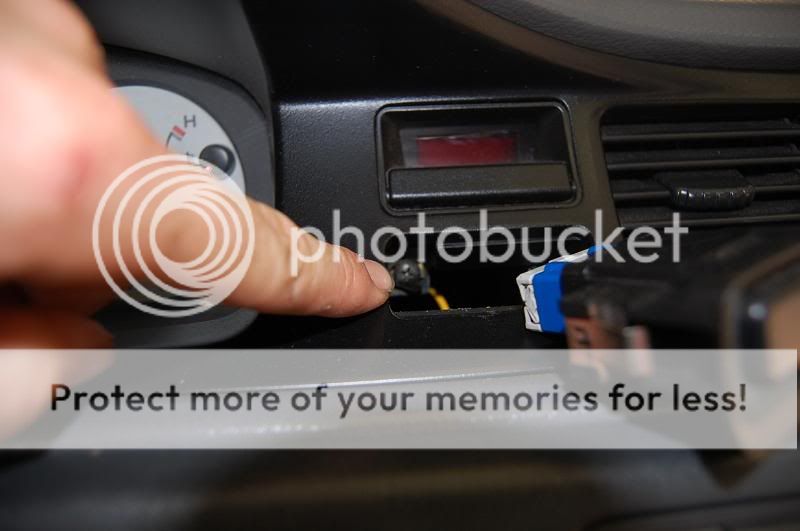
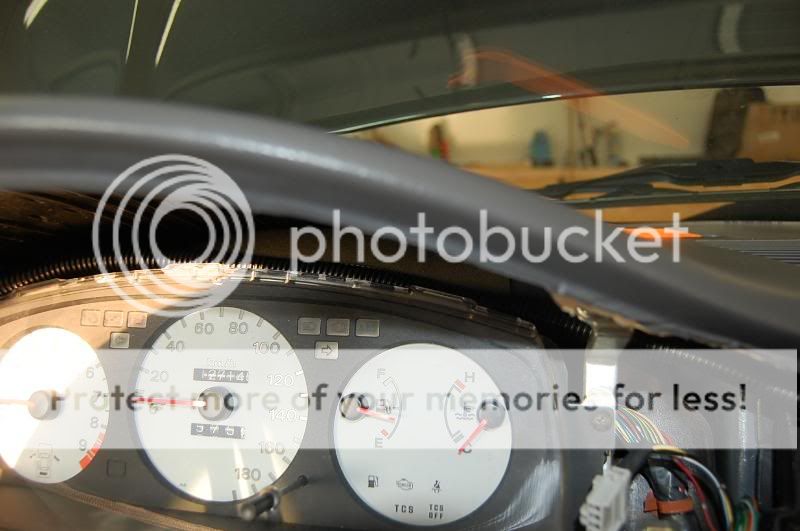
Ok, first I went and did the piezo sirens. I popped the hazard switch and took out the phillips screw along with the 2 above the gauge cluster.
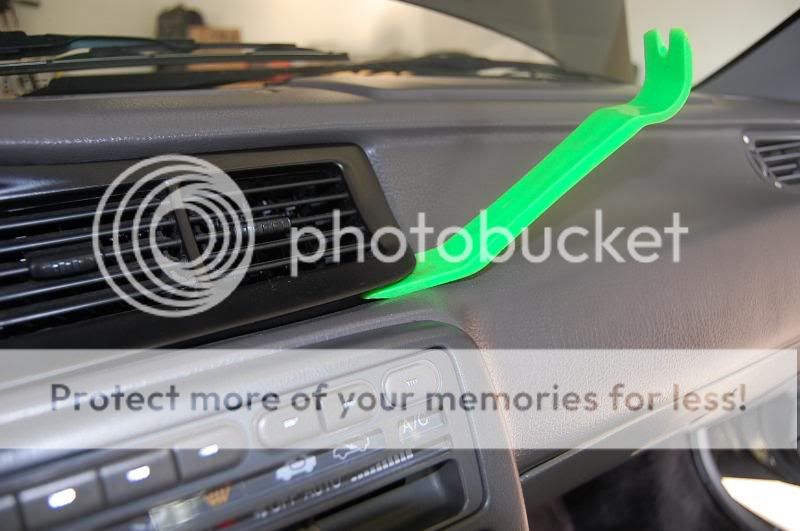
Using a plastic pry tool to not damage the dash I pop the dash bezel loose.
I set the sirens where I wanted them and used hot glue to hold them in place. I tested the ac to make sure the sirens were'nt blocking the vent too bad. Everything flows pretty smooth.
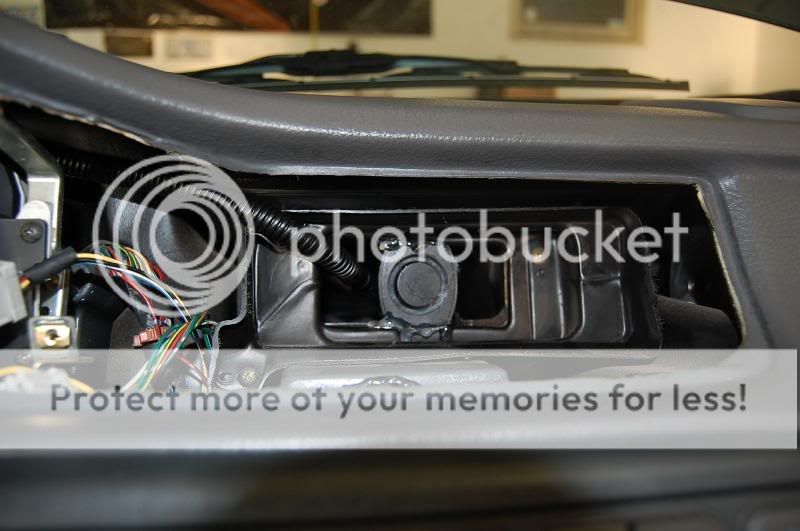
Popping the knockout out, I get to the LED and glass break sensor mic.
I drill both holes and mount them from behind. This gives a nice smooth look.

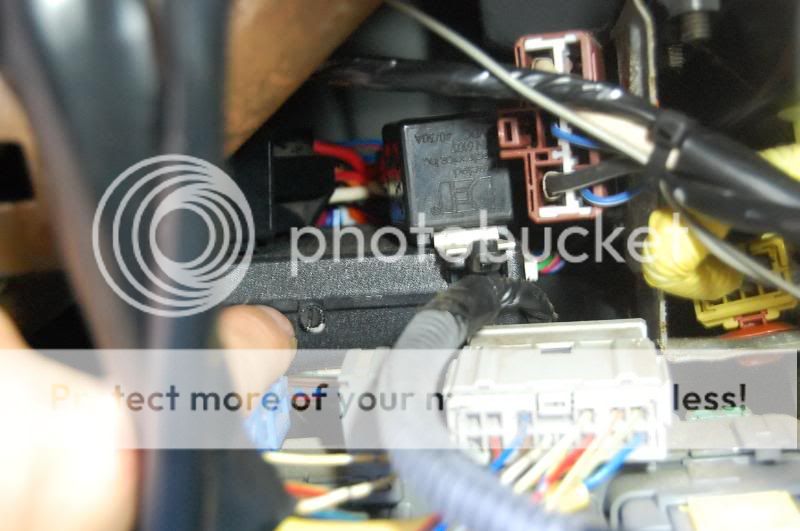
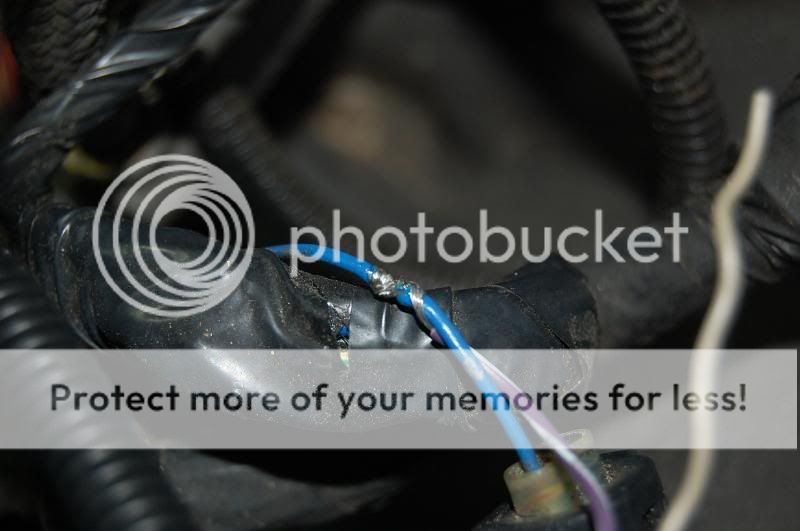
On to the ecu kill. Under the hood, the first 15 amp fuse controls the ecu. Removing power from this kills the ecu.
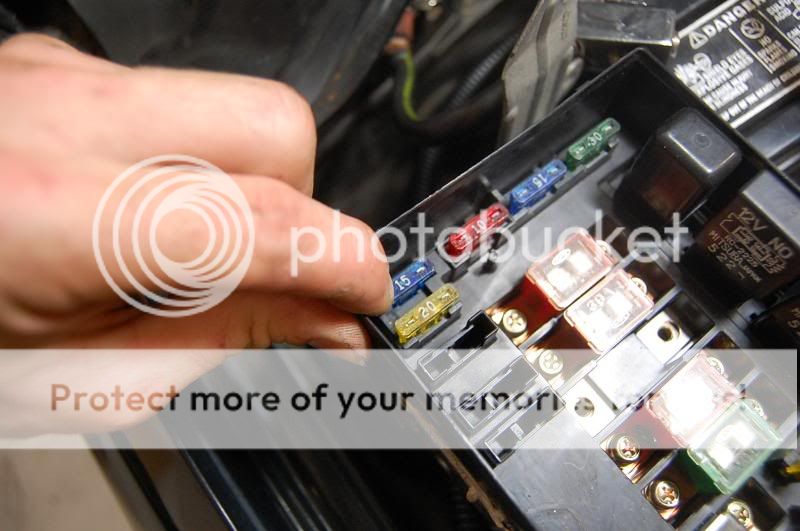
I trace the wire to a small white/black wire. Cut it, and wire up the relay to disable it during the alarm trigger.
I loomed everything up, tied it down and tookone last underhood shot.
The siren will be moved shortly. I plan on doing airhorns in the fenders sometime next week and will move the siren then.

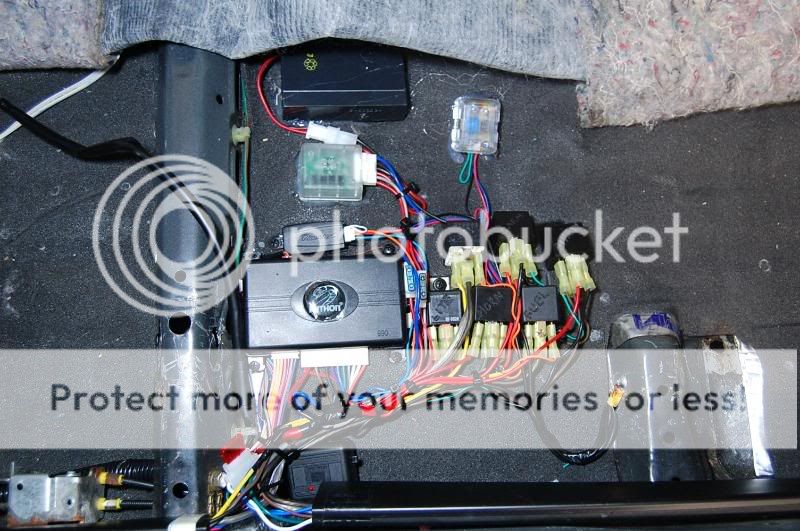
Final underseat shot:
And final underdash shot:
All that's left is to set the sensitivity of the shock and glass break and put the car back together.
Bleh....
Ok, first I went and did the piezo sirens. I popped the hazard switch and took out the phillips screw along with the 2 above the gauge cluster.
Using a plastic pry tool to not damage the dash I pop the dash bezel loose.
I set the sirens where I wanted them and used hot glue to hold them in place. I tested the ac to make sure the sirens were'nt blocking the vent too bad. Everything flows pretty smooth.
Popping the knockout out, I get to the LED and glass break sensor mic.
I drill both holes and mount them from behind. This gives a nice smooth look.
On to the ecu kill. Under the hood, the first 15 amp fuse controls the ecu. Removing power from this kills the ecu.
I trace the wire to a small white/black wire. Cut it, and wire up the relay to disable it during the alarm trigger.
I loomed everything up, tied it down and tookone last underhood shot.
The siren will be moved shortly. I plan on doing airhorns in the fenders sometime next week and will move the siren then.
Final underseat shot:
And final underdash shot:
All that's left is to set the sensitivity of the shock and glass break and put the car back together.
Bleh....
08-19-2008, 06:20 PM
#22
Honda-Tech Member
Join Date: Jan 2002
Location: Arizona
Posts: 942
Likes: 0
Received 0 Likes
on
0 Posts
Is your system functional yet? I want to know if your glass sensor triggers a bypass notification when you arm your alarm. I did my own install as well with the same sensors, when I arm my alarm I always get a 2nd beep after the arming beep (bypass notification). I narrowed it down to being the glass sensor so just curious if yours does the same.
Good info...and btw almost everything you did has already been written up in the exact same fashion here:
https://honda-tech.com/zerothread?id=1794938
and here:
http://causeforalarm.thecarthing.com/index.html
Can never have enough car security info though...
Justin
Good info...and btw almost everything you did has already been written up in the exact same fashion here:
https://honda-tech.com/zerothread?id=1794938
and here:
http://causeforalarm.thecarthing.com/index.html
Can never have enough car security info though...
Justin
08-19-2008, 06:24 PM
#23
Honda-Tech Member
Thread Starter
Those are two very good links. I wish everyone would take them to heart.
As for the alarm, it's functional and does not have the issue your's does.
As for the alarm, it's functional and does not have the issue your's does.
08-19-2008, 06:29 PM
#24
Honda-Tech Member
Join Date: Jan 2002
Location: Arizona
Posts: 942
Likes: 0
Received 0 Likes
on
0 Posts
<TABLE WIDTH="90%" CELLSPACING=0 CELLPADDING=0 ALIGN=CENTER><TR><TD>Quote, originally posted by VegaS10 »</TD></TR><TR><TD CLASS="quote">...
As for the alarm, it's functional and does not have the issue your's does.</TD></TR></TABLE>
Damn...wonder if I have a bad glass sensor...Oh and good work on the install, more people need to take this kinda time and detail on their car security. Cut down on the absurd amount of Honda thefts
Justin
As for the alarm, it's functional and does not have the issue your's does.</TD></TR></TABLE>
Damn...wonder if I have a bad glass sensor...Oh and good work on the install, more people need to take this kinda time and detail on their car security. Cut down on the absurd amount of Honda thefts
Justin