
OG's VX Build: HyperMile Driving with some JDM Styling!
 10-03-2014, 01:43 AM
#1
Honda-Tech Member
Thread Starter
Hello all,
I've had this thread going on EcoModder for a couple of months now. I figured I would post here as well. Not sure if any of you are interested in an "eco" build, but here goes. A quick "catch-up" cut/paste from my thread on EcoModder
------------------------
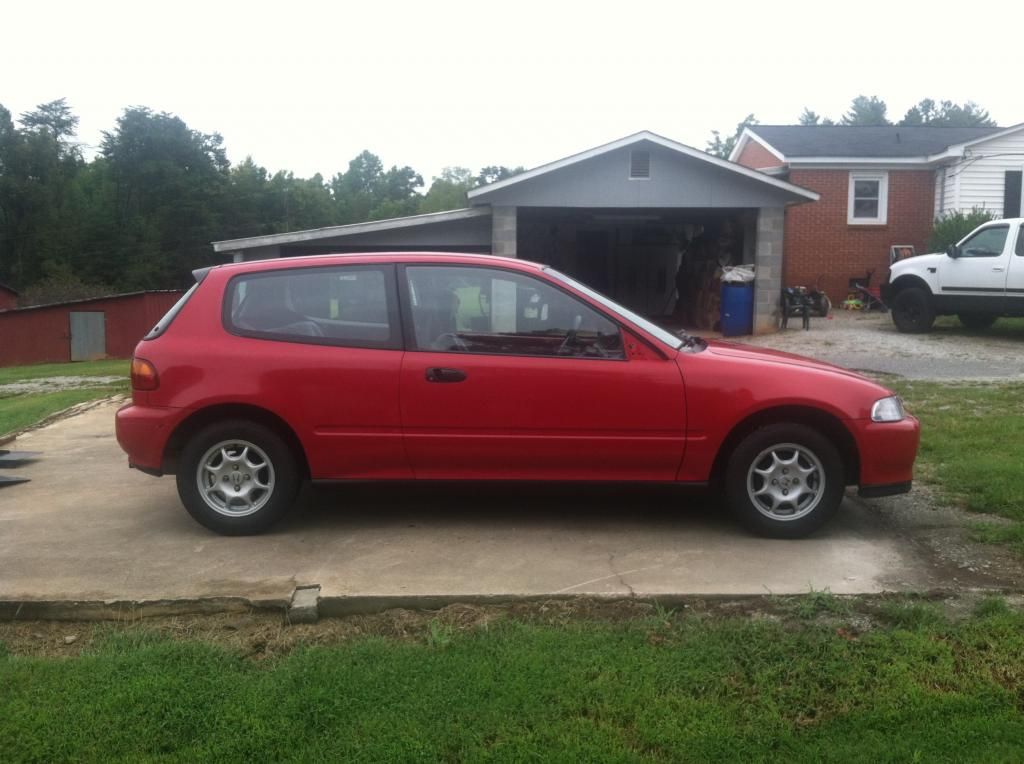
I've been around Honda's for years. I've built up plenty of them for looks/performance solely, but now that I'm a bit older, I've found my taste and priorities have changed. I have a 80 mile round trip to work in Charlotte each day, and I wanted to buy a Honda with the best mileage possible. Last week, after some google research on EPA mileage ratings, I narrowed down my list to either the 84-85 CRX HF or a 92-95 Civic VX. It was about this time that I stumbled upon the term "Hypermiling". I thought that the estimated EPA ratings for the VX were already amazing, but after seeing some more extreme stats from postings on this forum and others, the possibilities for driving and modding a car for higher FE really began to intrigued me. The VX was the obvious choice for me over the CRX, since I have two young children and would need a back seat for them when they (very) occasionally ride along with me. I've also always wanted an EG Civic, as I love the looks of these cars. Lastly, I've already completed an '86 CRX SI build in the past, and just finding un-cracked door/nose/fender/rocker plastics was a continual nightmare with those cars. I quickly found a very clean VX in South Carolina on my local CL. That was on Wednesday two weeks ago. The previous owner/seller was a great guy all-around, and I had the car back in my garage the following Saturday.
I'm really excited about this "build", as it will be geared with a different set of performance goals from that of any projects I've done in the past. The learning curve will be high for me since I know little about driving/modding for extreme mileage. A primary goal is that my work on this car should actually put money BACK in my pocket. I'm also hoping this will keep my wife a good bit happier than she has been while enduring past projects
Project Goal: Eventually hit 65-mpg average, stout/healthy/reliable motor, on-board FE monitoring electronics, decent comfort, moderate FE aero modifications but w/ a hint of JDM styling throughout the build.
I do plan to lower the vehicle, but nothing extreme, and with traditional camber. I try to be conscious of drive-ability when planning suspension height. I need to keep a healthy distance of space to allot for wheel travel, as well as guard the oil pan and sub-frame from any damage during daily commutes. I�ll likely look on CL to purchase used, yet quality, lowering springs that allow use of the OEM shocks, and do not compromise ride comfort (that much). My goal would be a 2 to 2.5 �finger gap� at all corners. I can bridge the rest of the floor gap with custom side-skirts/lips, should I ever choose to build those for aero-function.
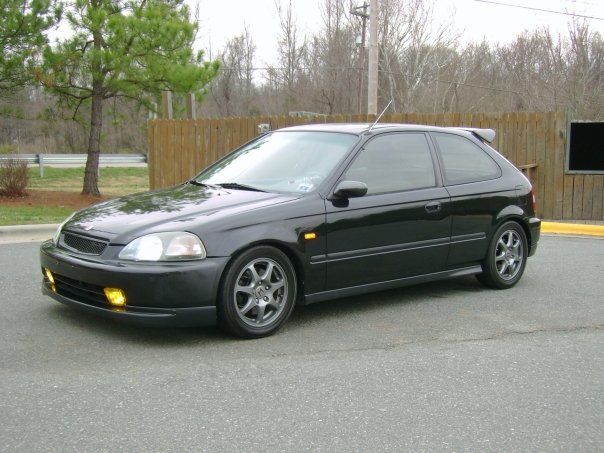
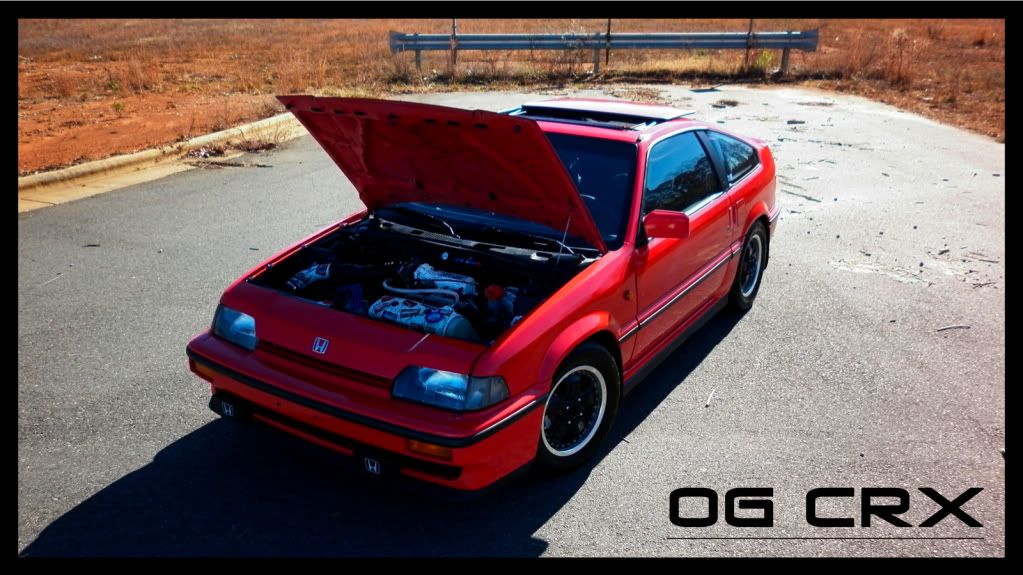
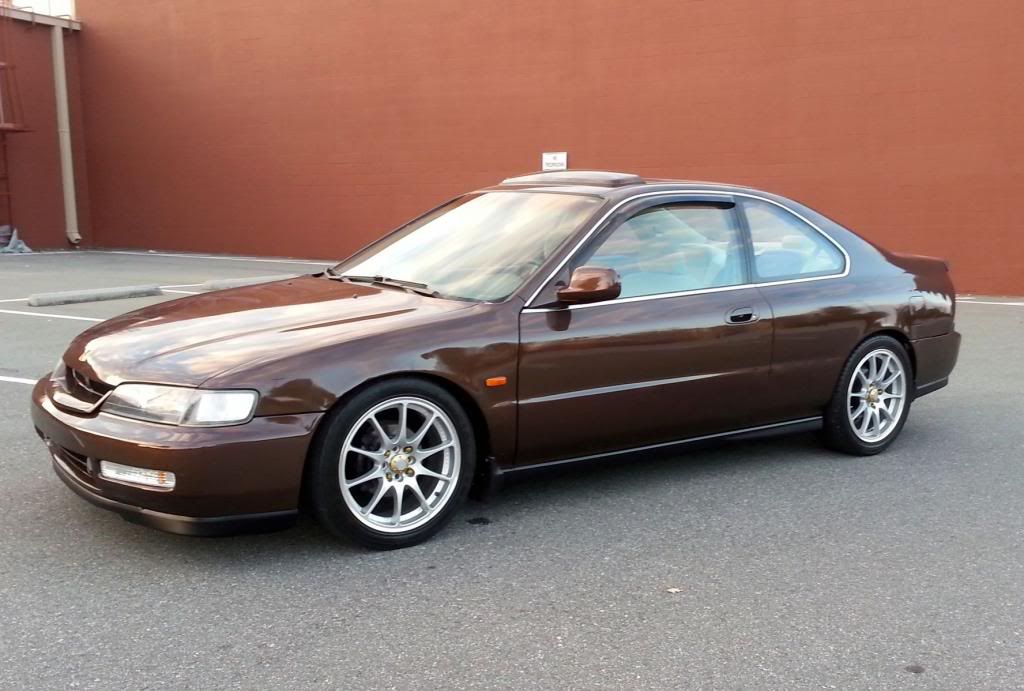
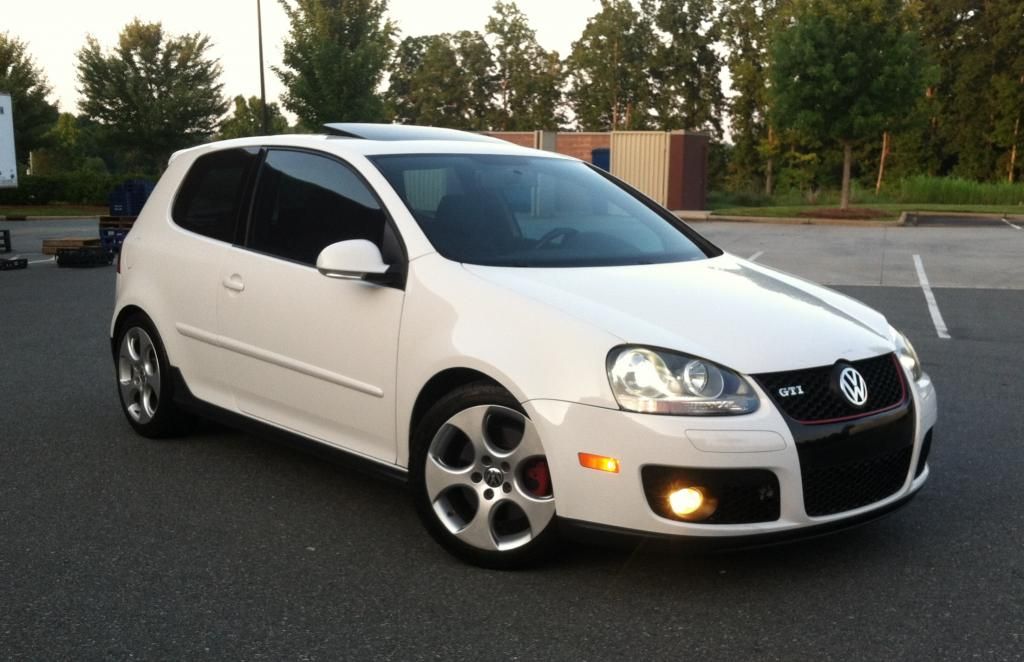
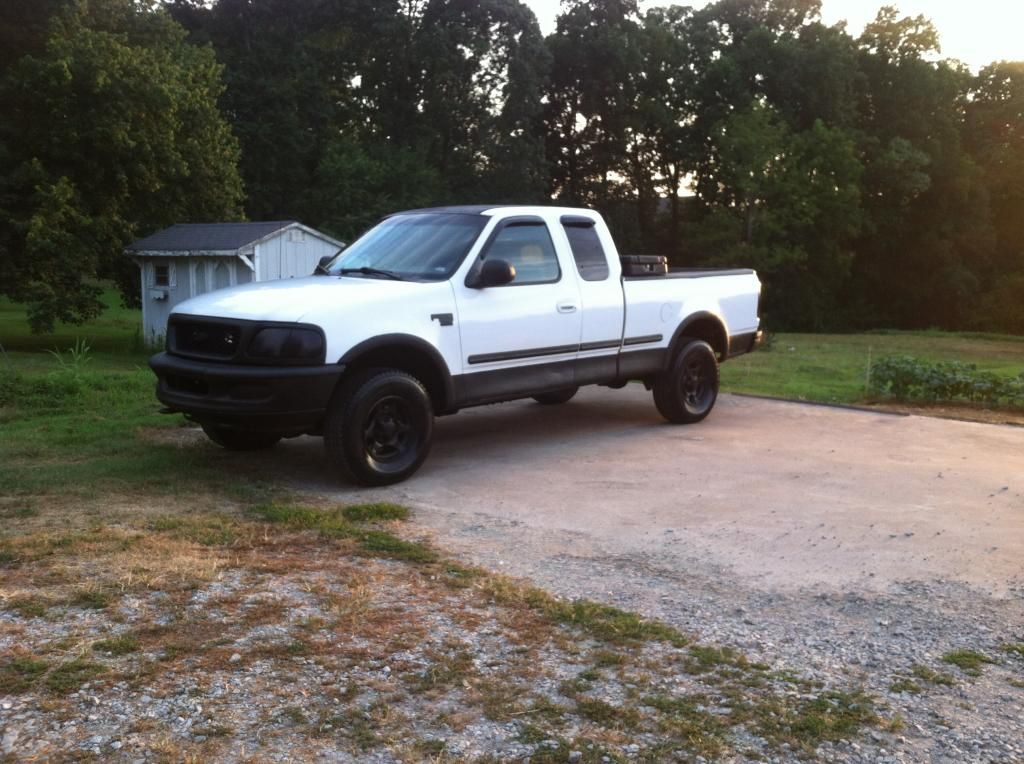
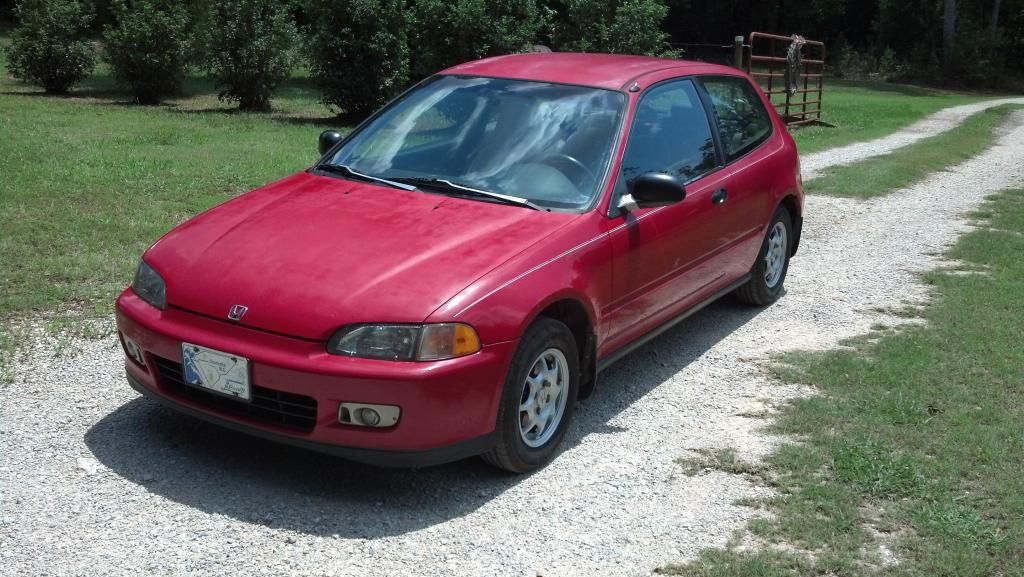
Here�s some pics of all of my past projects. They give a snapshot to my build style and history.
2006
2008
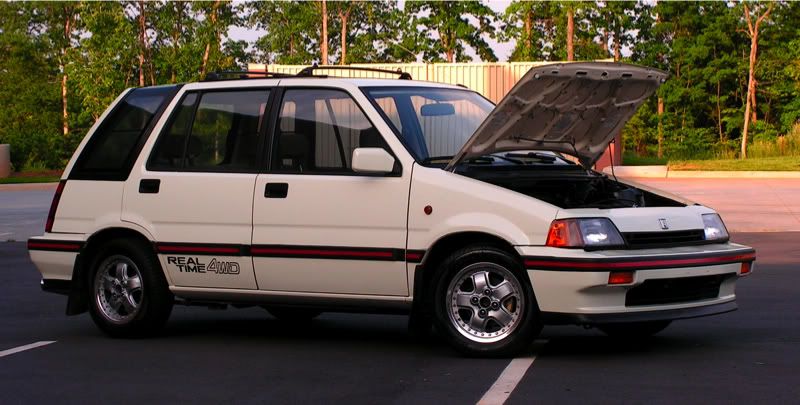
2010
2012
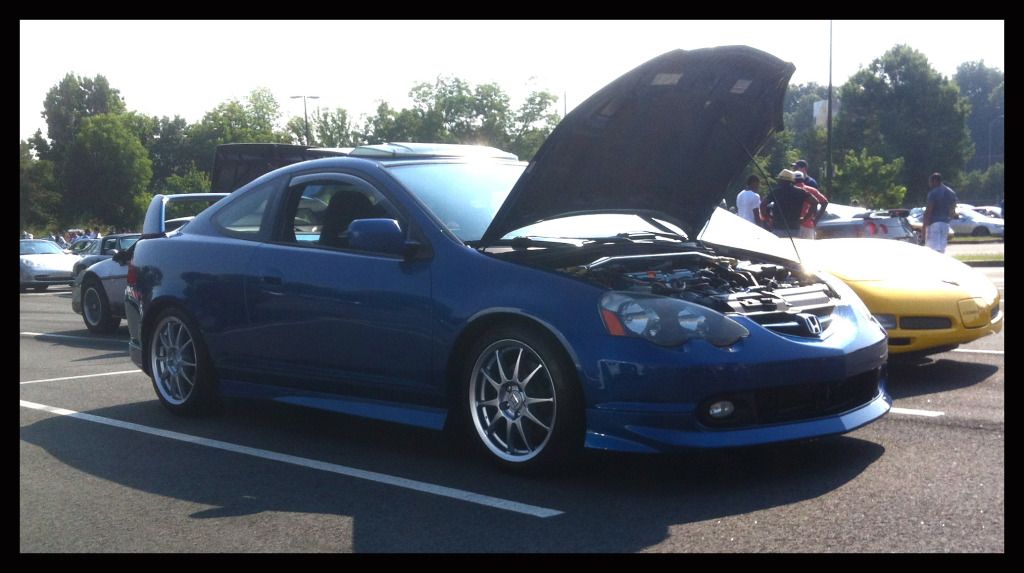
2013 (A)
2013 (B)
2014
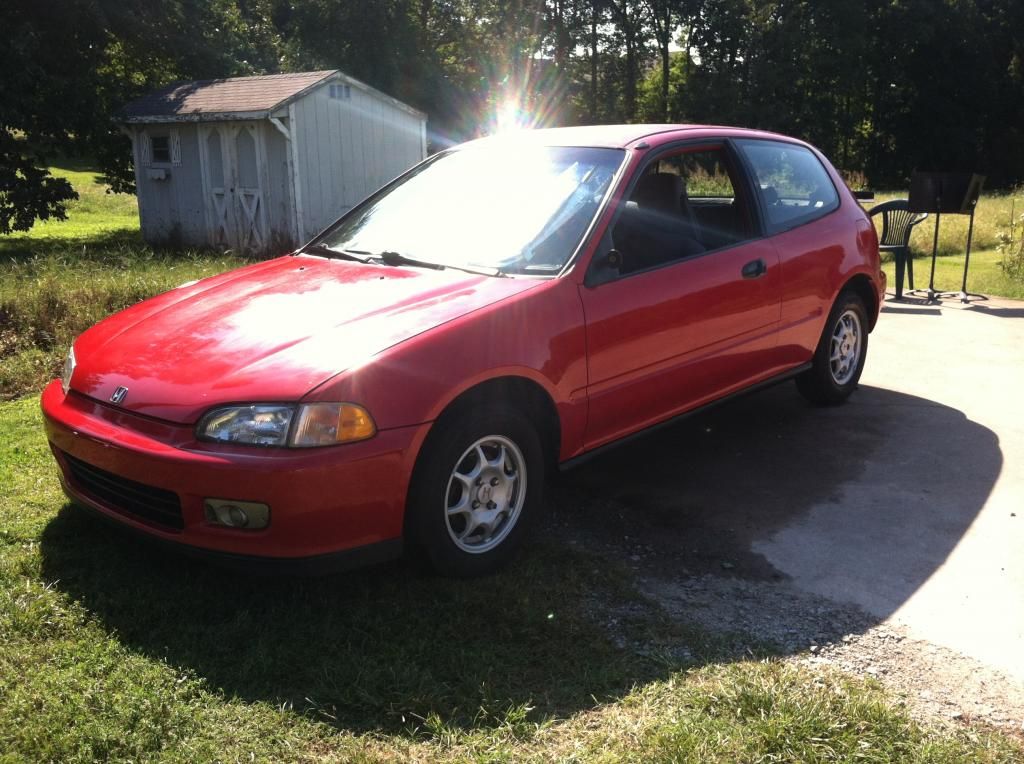
As I stated earlier, I�m really excited about this project, as it differs from anything I�ve done previously. I love grassroots-style movements, and it�s neat to see what FE-minded enthusiasts are doing about current gas prices and leaving a lower carbon footprint on mother earth. I pose that one can have a safe and reliable car that is: (1) paid for ; (2) looks good; (3) has excellent fuel economy. It�s certainly going against the grain, but I�m happy to do so, as car payments stink, and so does trips to the gas station.
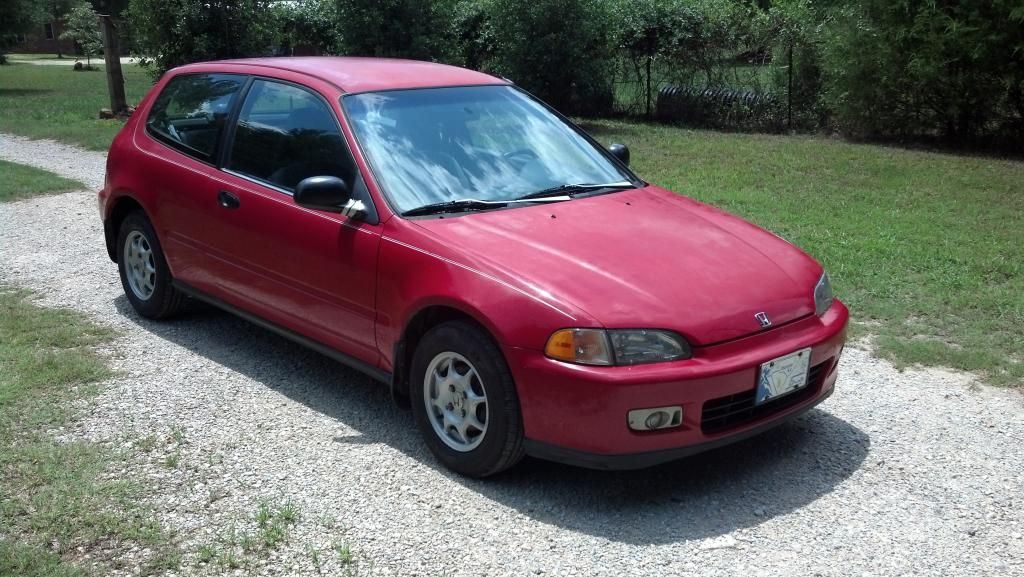
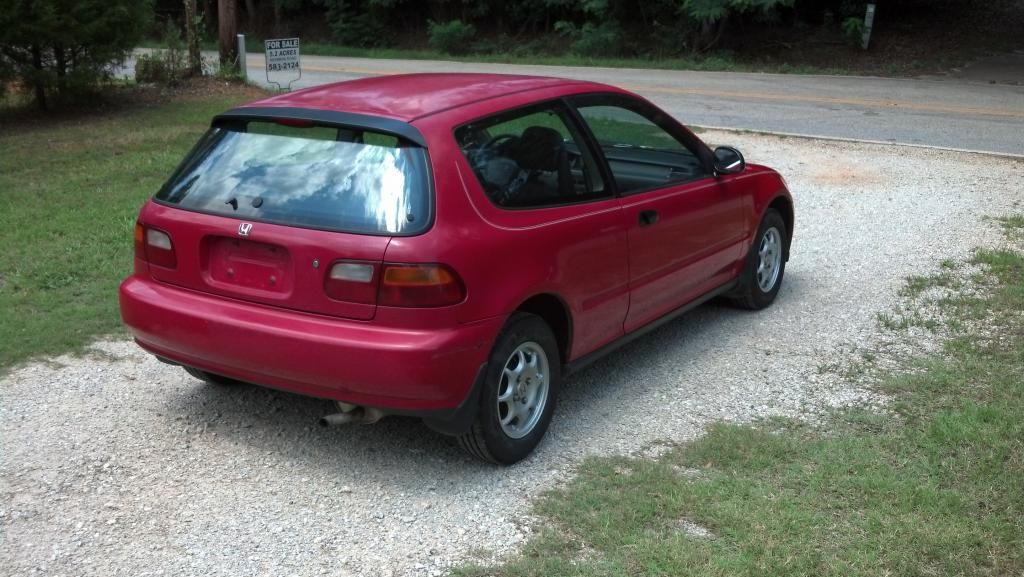
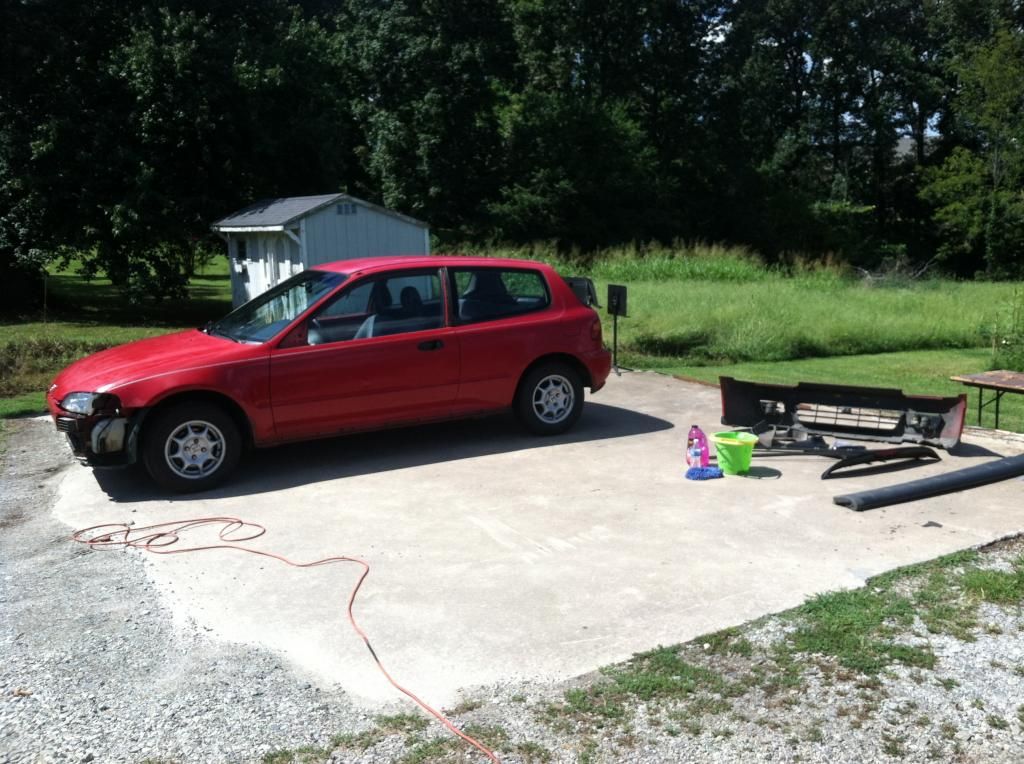
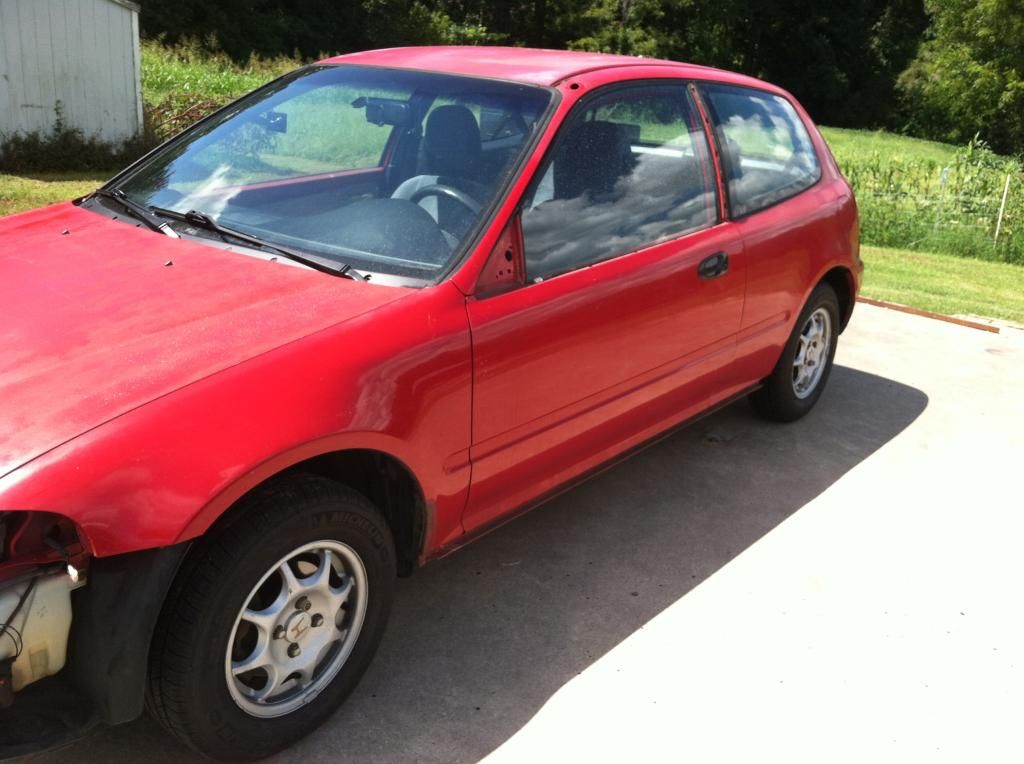
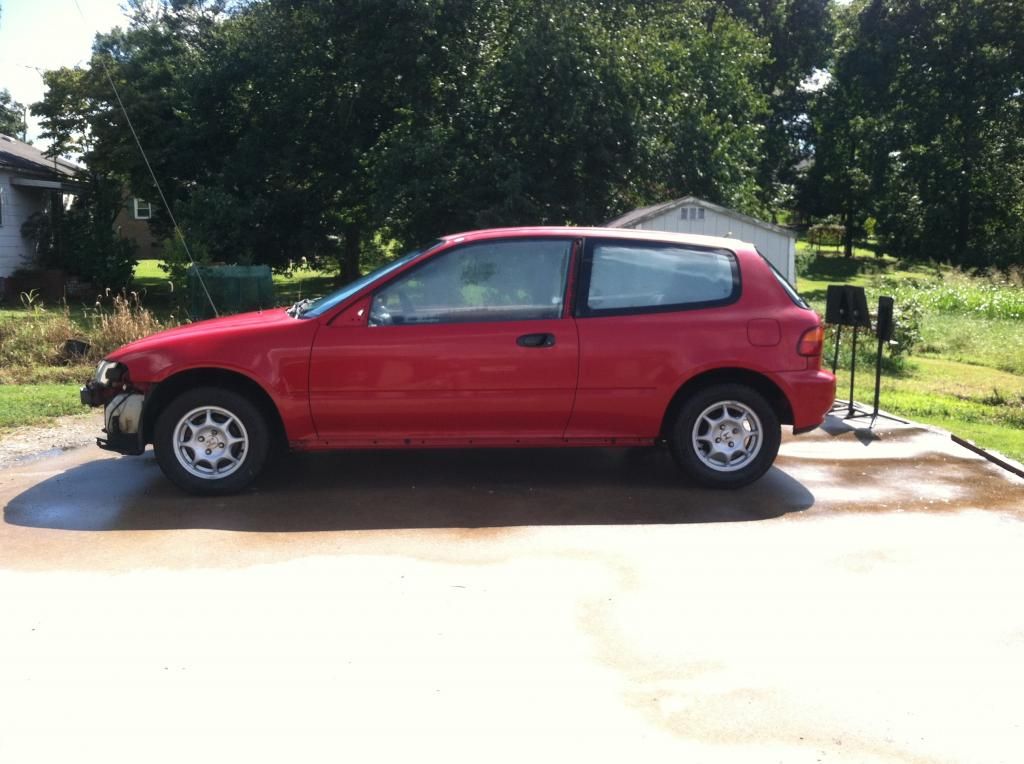
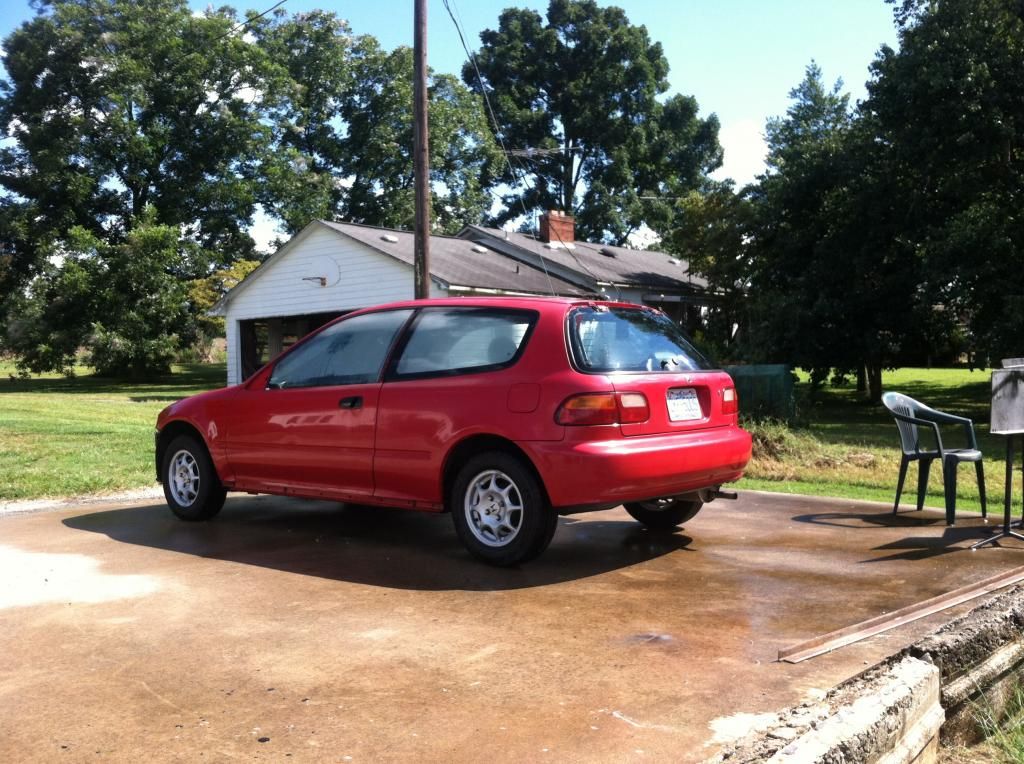
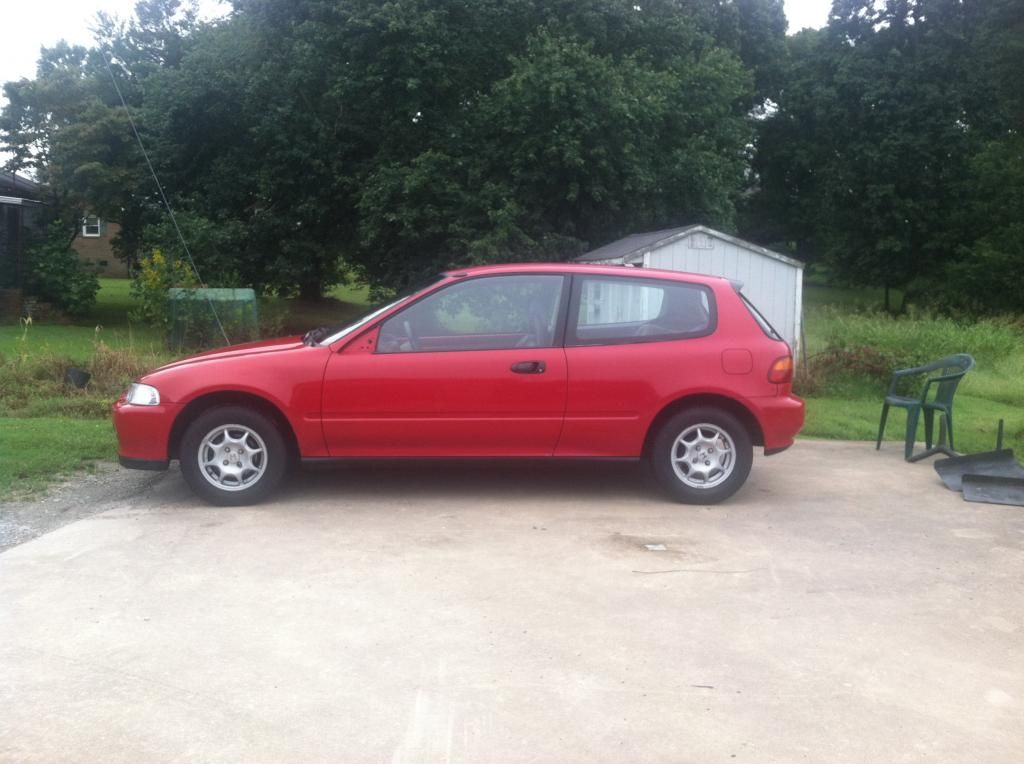
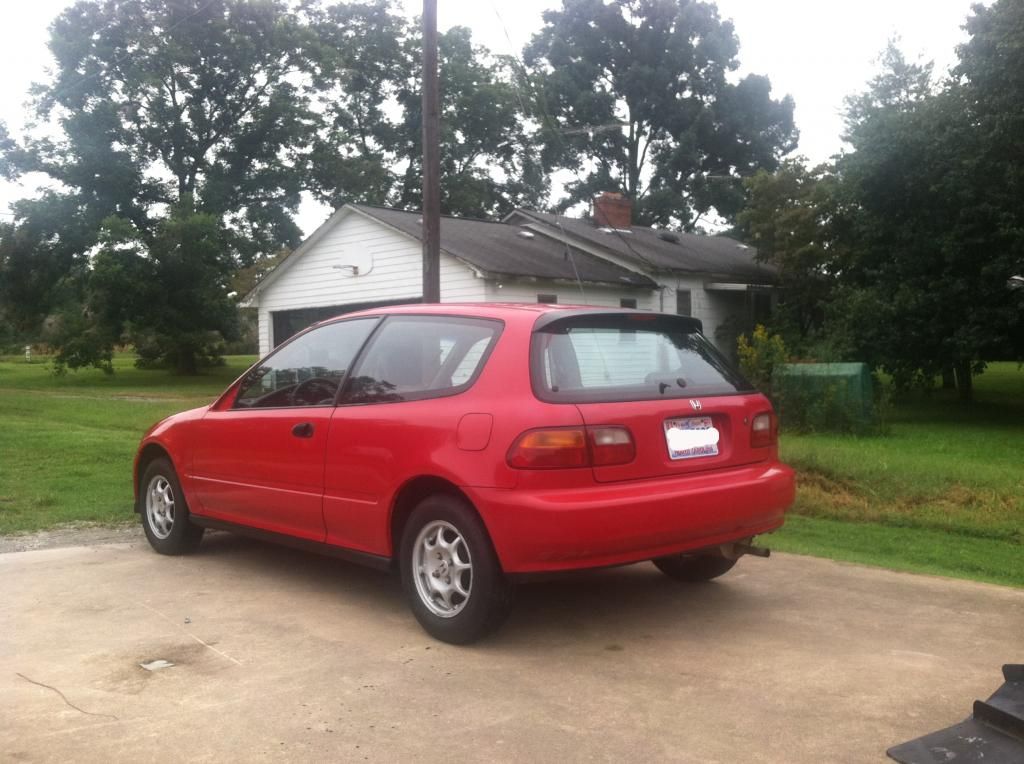
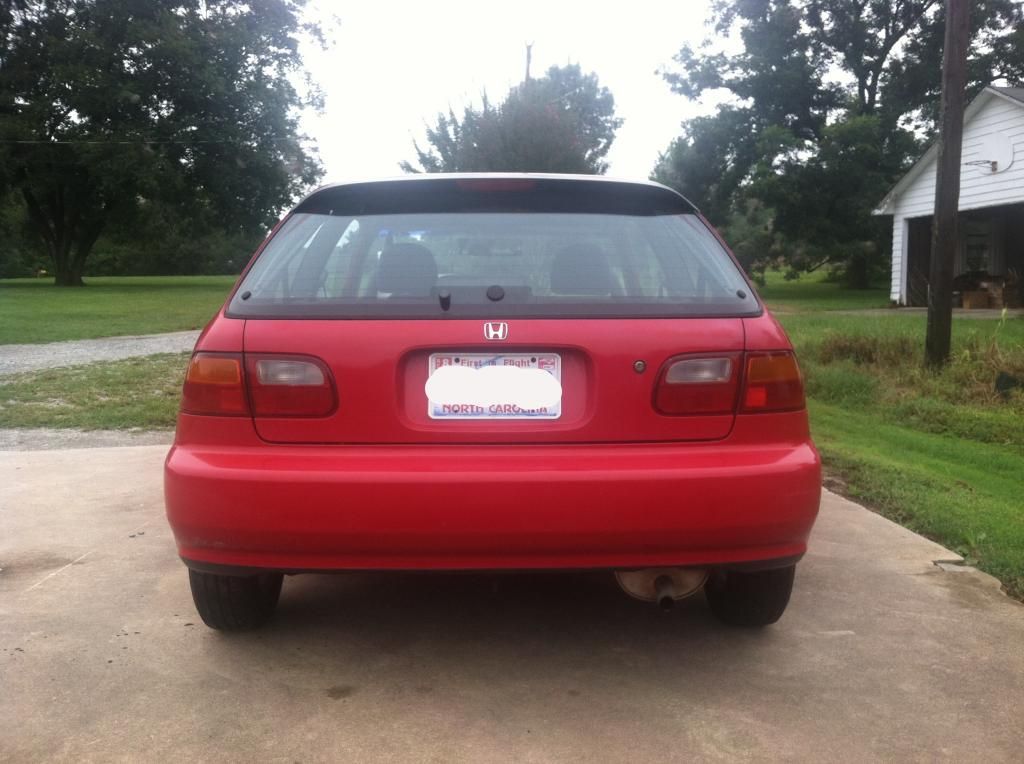
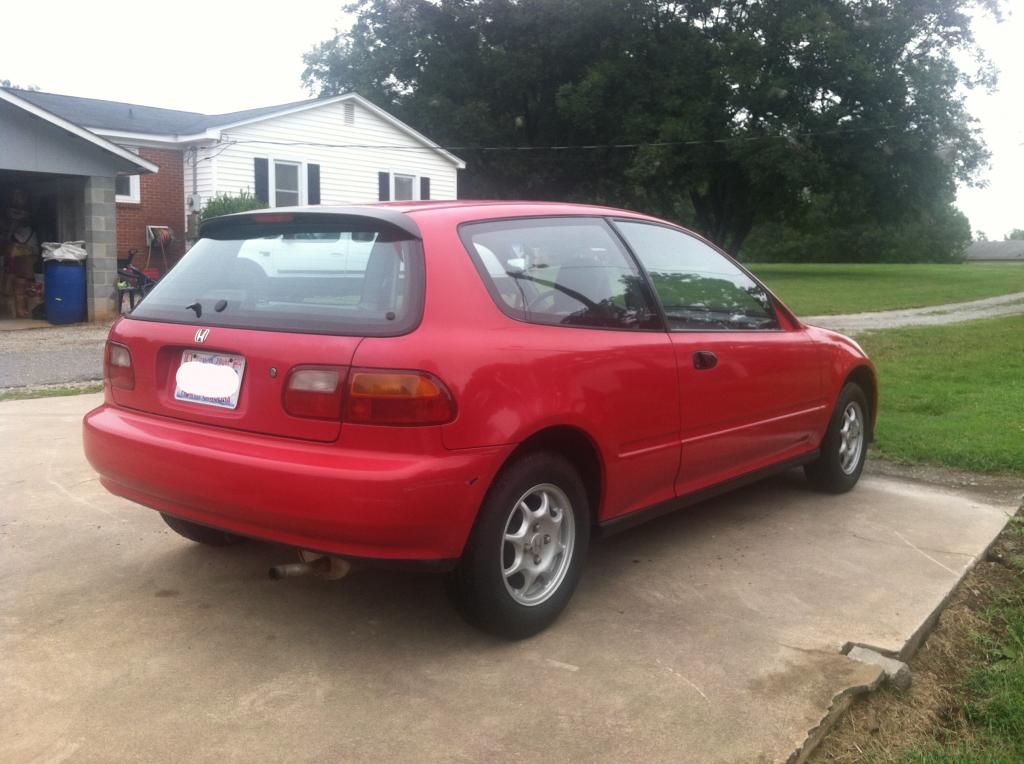
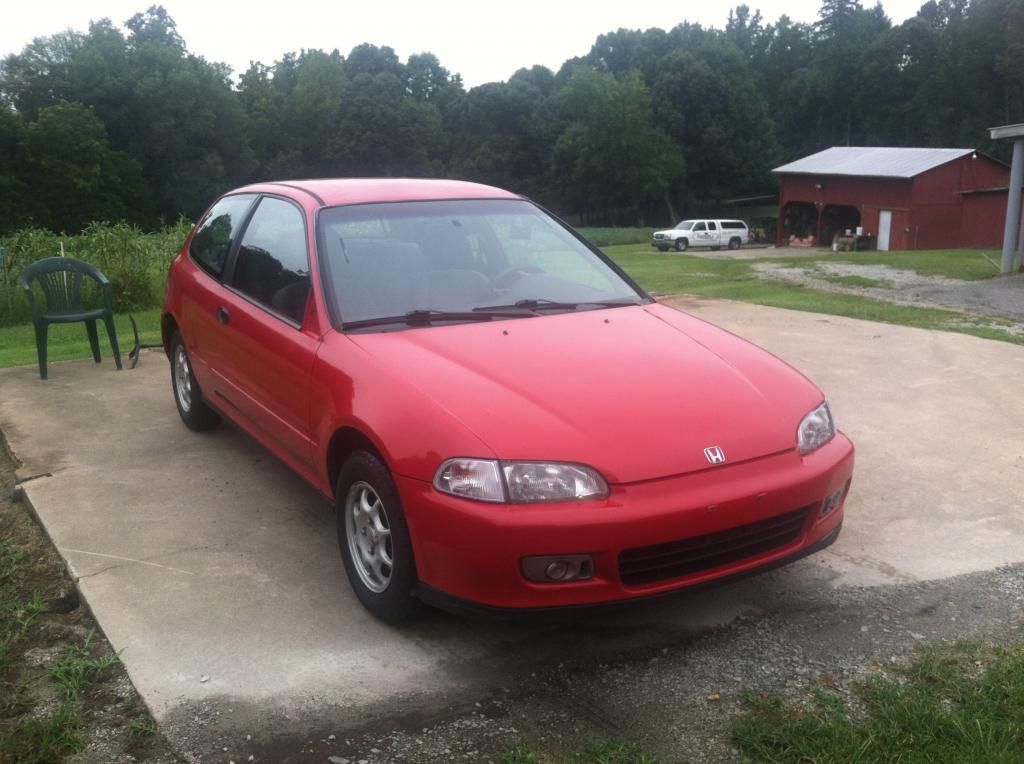
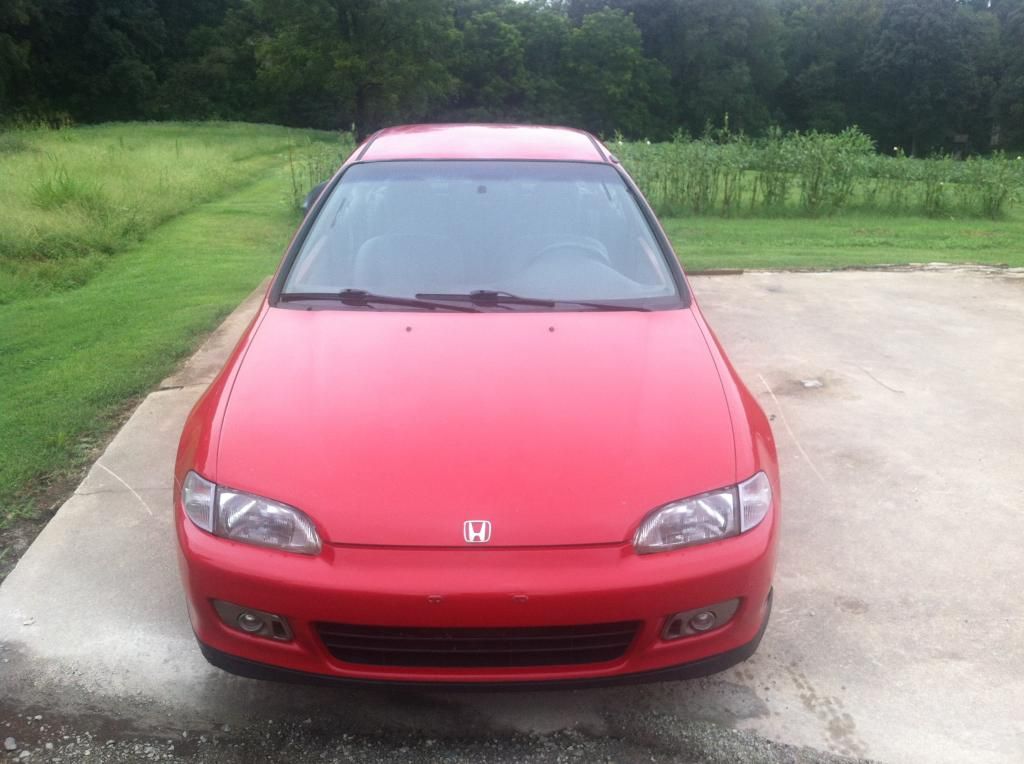
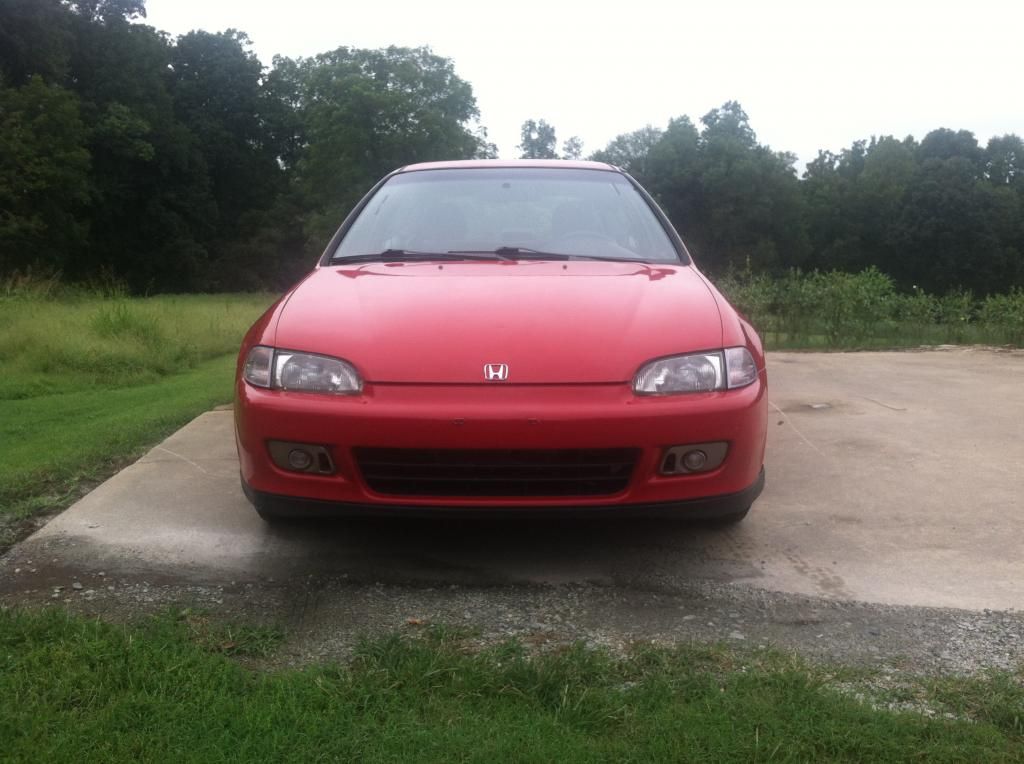
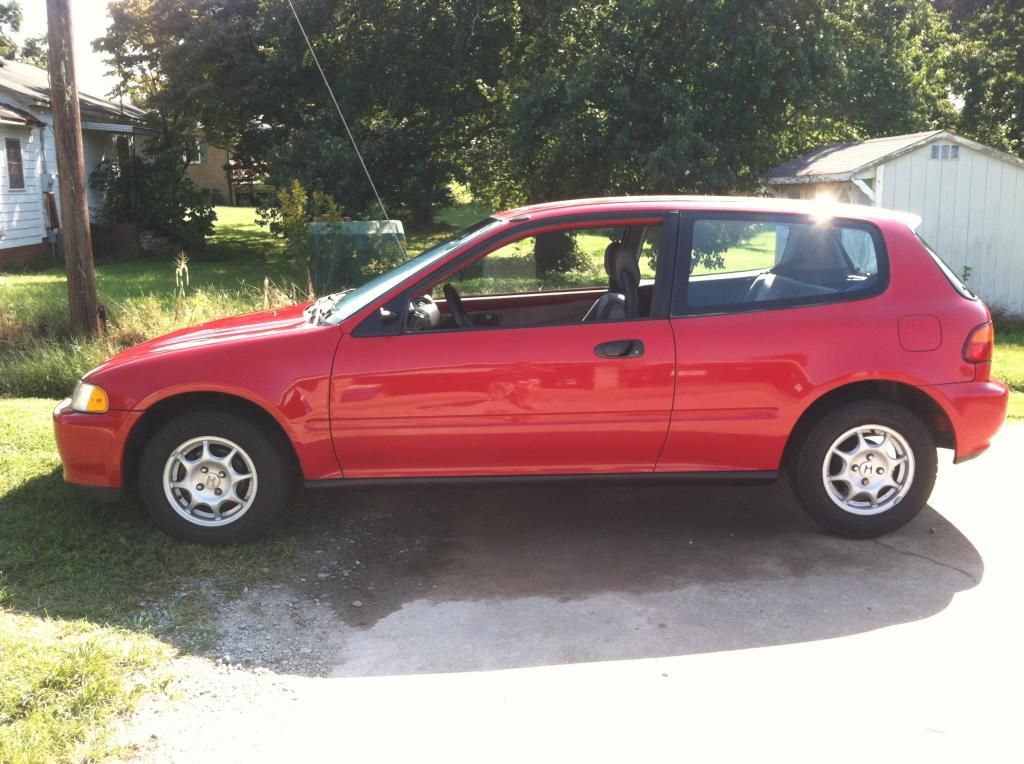
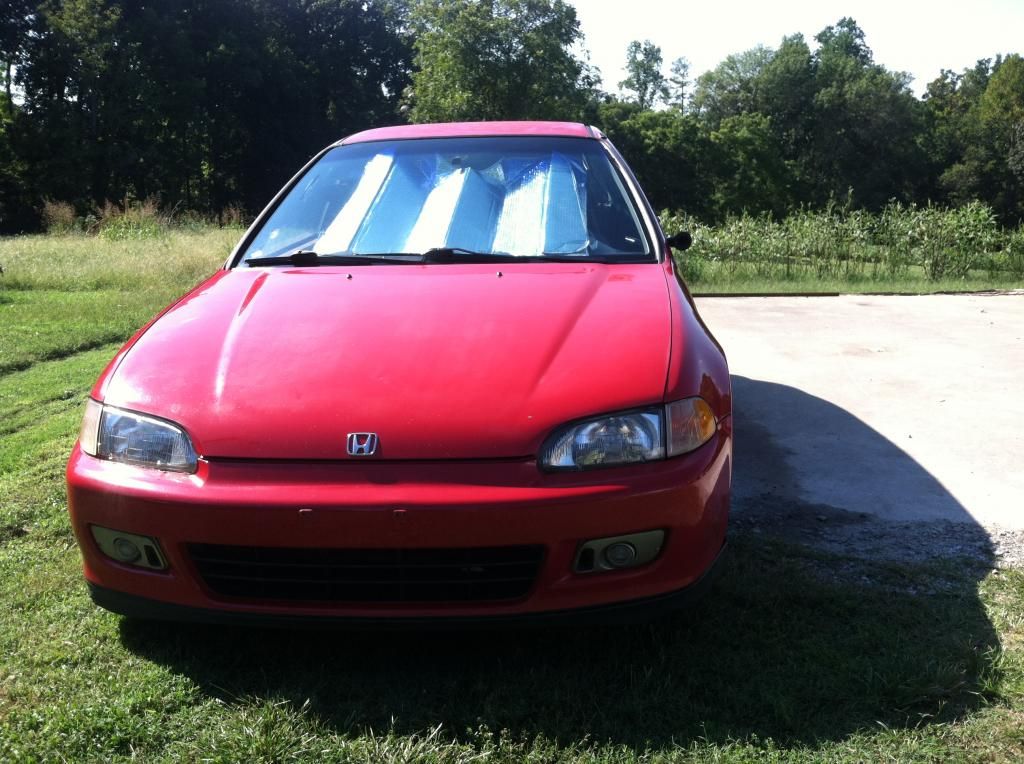
Below are the some pics and overview info. of my 1992 Civic VX, as received. My next post will then outline build plans, followed by my first set of updates.
VEHICLE HISTORY:
CarFax reveals this one to be a Carolina-only car. A bought the car for a gentlemen in SC who did a great deal of maintenance (timing belt, battery, radiator, tranny oil changes, cleaning here/there) during his short tenure owning the vehicle. The original alternator died on my while driving the car back to NC at 12:30 in the morning on the interstate. I limped the car to a gas station and we all rode back in my wife�s Accord. The seller was very kind, he drove an hour north to where the Civic was parked, diagnosed the alternator as being the issue, fixed the car (on his own dime) and parked it at a WalMart. I picked it up that night. LIkely, appears that him washing the engine a few hours before my test drive short-circuited the alternator. Cool of him to fix it, even though there was no way of proving this is what caused the issue.
EXTERIOR/CHASSIS:
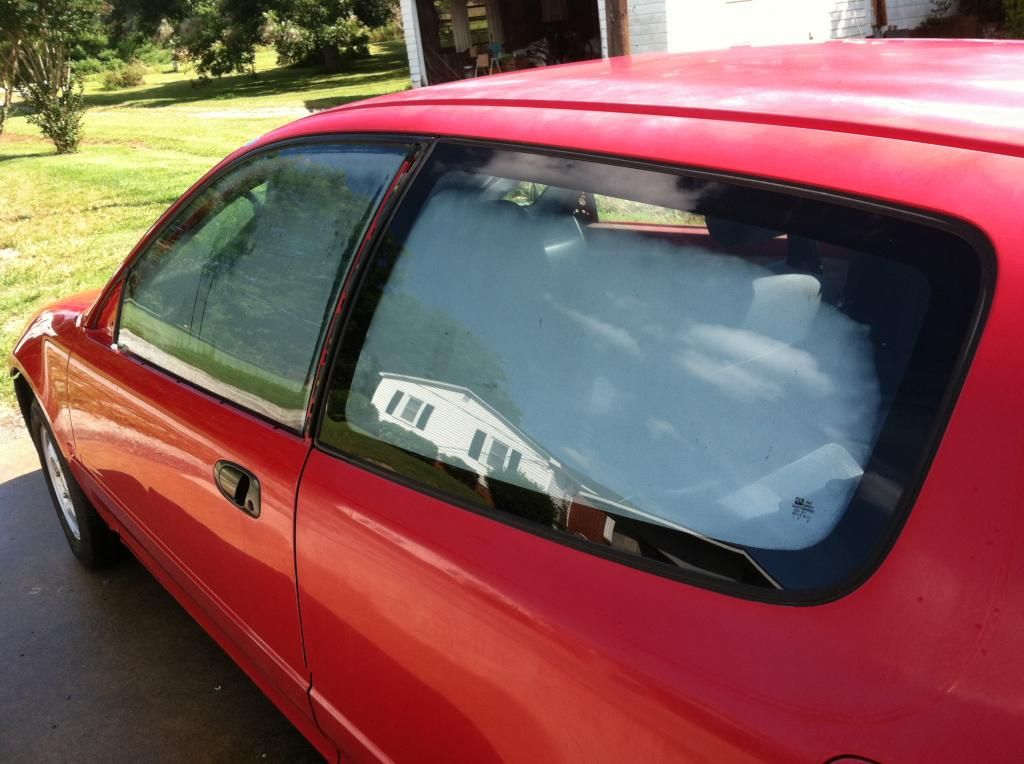
The underside is very clean/rust-free. The �Milano Pink� paint is a bit past it�s glory days, but I do believe/hope that the troubled spots are salvageable with some cut/polish work. A pinstripe removal tool will also do wonders for the aesthetics.
INTERIOR:
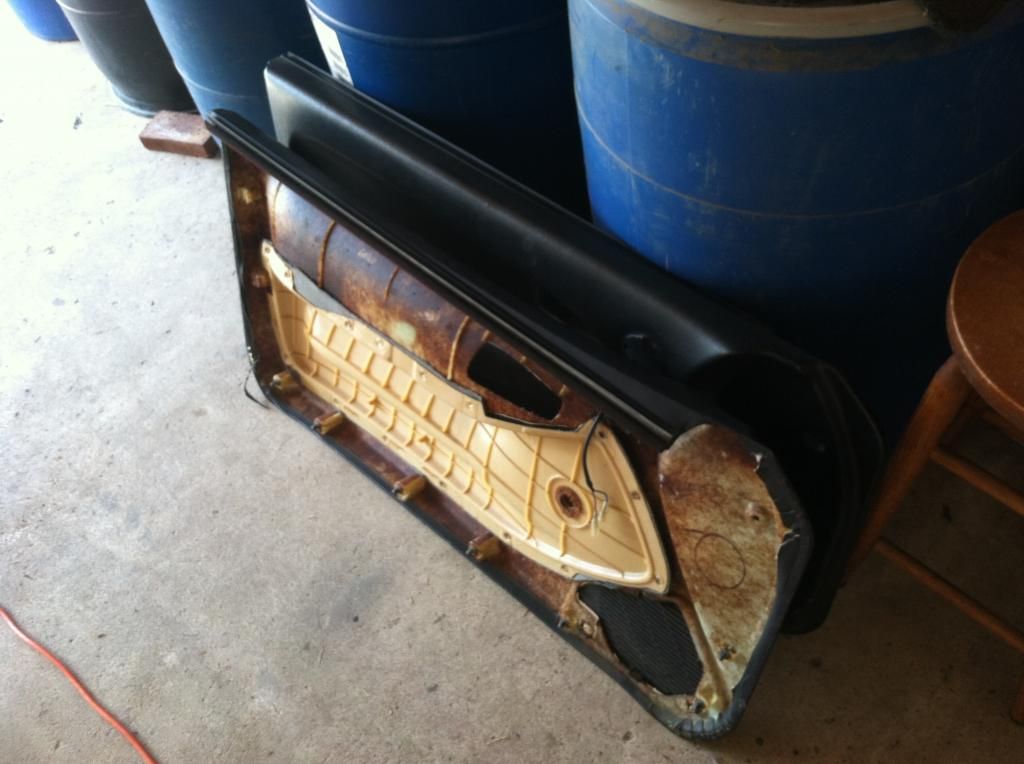
The interior is black/gray, which is rare and desirable choice amongst Honda enthusiasts. An armrest is also present, which I understand was a dealer option/upgrade. Smoke-free vehicle history. Restoration work needed on the door cards and the drivers seat cover. Upgrades are needed in the audio department, in general.
MECHANICAL/DRIVETRAIN:
Mechanically, I�d say I inherited the car at....hmmm...7.5 out of 10. I was hoping it would be in a bit better condition, but things certainly could have been worse. Car felt a bit under-powered on the way home, even despite the economy engineering of the VX. Tires are very new, Michelin Green X LRR. Clutch feels a little worn, slow to engage. Also, the shifter feels...crunchy. Power is good. A few hiccups in the fuel delivery, at times, only happens when in low RPMS. Grounding cables need replacement/upgrading.
I was fortunate to have found this VX in such great condition. The wagovan was my a beast of a project. Everything was tough on that one, but it was certainly a cool car once finished.
Def funny to see the F&F generation coming around full circle with the Eco mods. Basically, we are getting older and appreciate FE. Plus, IMHO, things are getting out of hand with the Honda scene. Dudes obsessing over bolt kits for the engine. Mil-spec firewall connections for tucked harnesses. Weird stuff. You used to could "hang" with the rest of the top by spending circa $3K on a build/parts and some good ol' fashion elbow grease. Now, that's just enough $$ to get you in-line with the ricers down at the local Sonic. Thanks to companies like Hybrid Racing, Chase Bays, and Bolt Boys, show-quality Honda builds take three times as long to complete and are $15K affairs once all the dust settles. Then your left with a....Honda. So, you have to part-out the build to make your money back (since no one wants to pay $15K for a used Honda, no matter how nice/"perfect" it is).
I'm excited to begin what I think is the "new frontier" for Honda-heads. Clean built Eco cars. We'll, it's really not new for Honda, as I think being eco-minded is what put them on the map in the first place
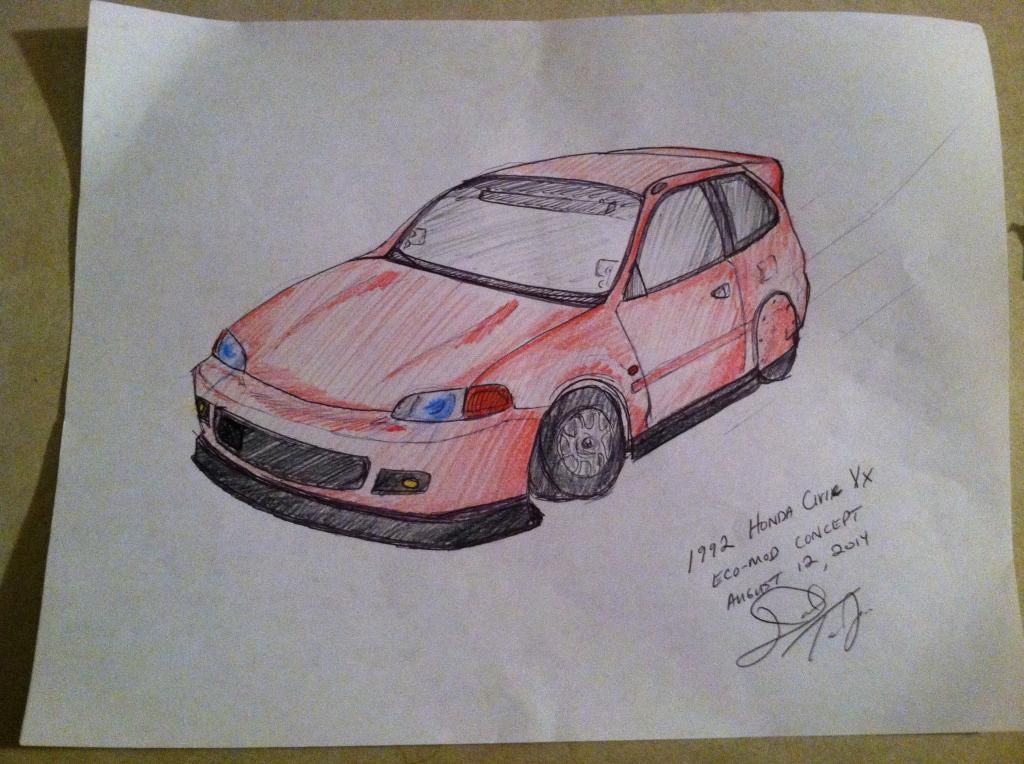
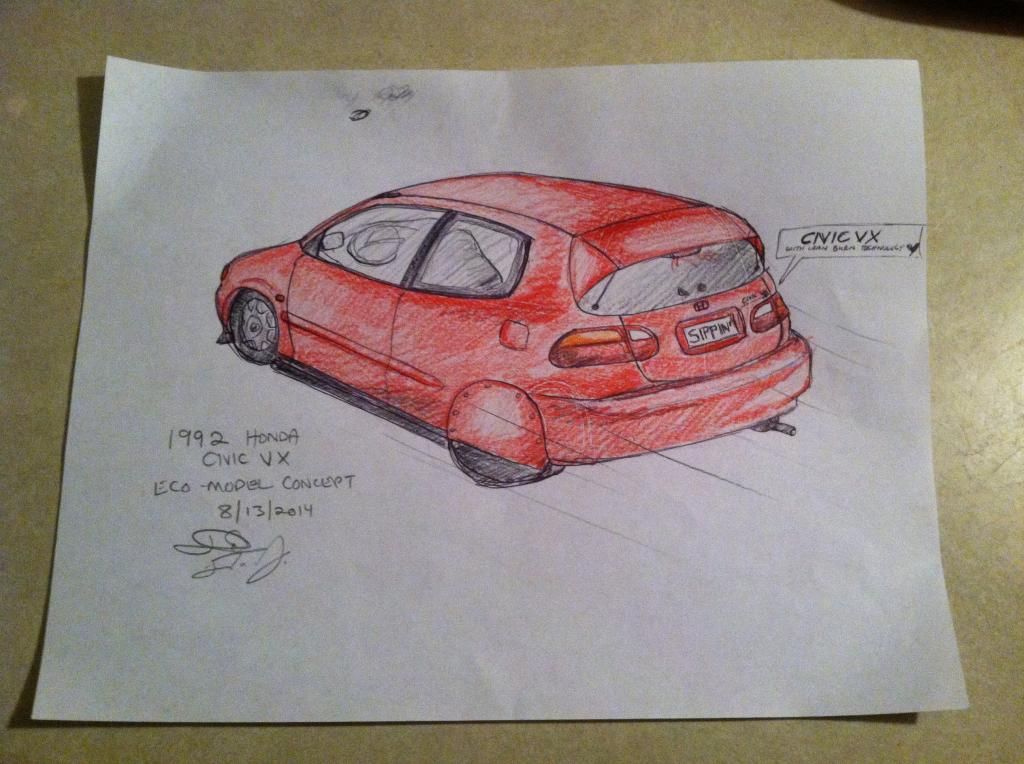
Here's some conceptual sketches I put together for the aesthetics. Should be a fun build!

Here�s an overview of my plans for this build. I�m sure they will evolve somewhat as my knowledge base in eco-tuning increases...I know it�s a long/laborious list to read through, but this list is for my own records/planning as well, so please bear with me.
PLANS FOR THE BUILD:
Exterior
- Complete cleaning of all grease/dirt (including door/hatch jambs, engine bay, and wheel wells)
- Clean wheel-wells and spray with fresh black paint. Clean and paint calipers silver. Clean backside/inner part of OEM wheels. Paint OEM drums black.
- Attempt to restore original OEM Milano Red paint w/ cutting & buffing work.
- ABS grill block; small opening on left side (with black gutter-guard mesh) for flow to radiator
- ABS flush-mount fog light covers
- ABS extended front lip (fabricated to attach to, and lower, profile of existing OEM VX lip)
- ABS extended side skirts (fabricated to attach to, and lower, profile of existing OEM side skirts)
- OEM mirror delete on RH; DIY fiber-glass delete from old mirror on LH
- convex interior-mounted side mirrors; suction-mounted to windshield on both sides of vehicle
- upgraded rear view mirror (larger convex, or Wink)
- JDM-style thin side moldings
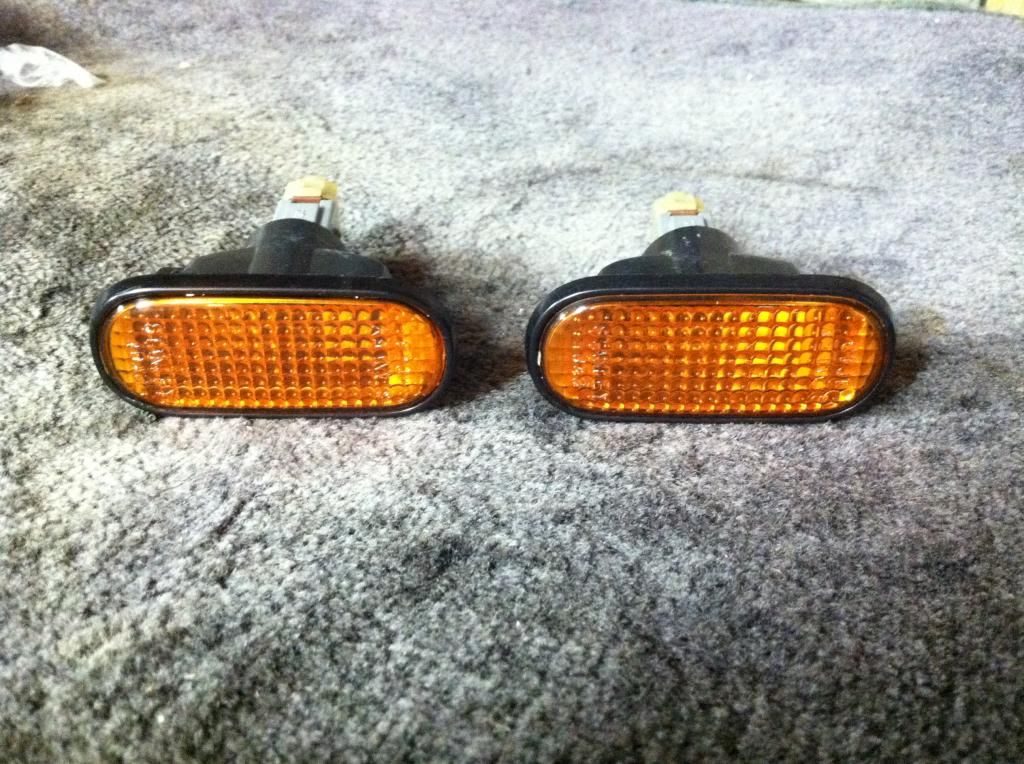
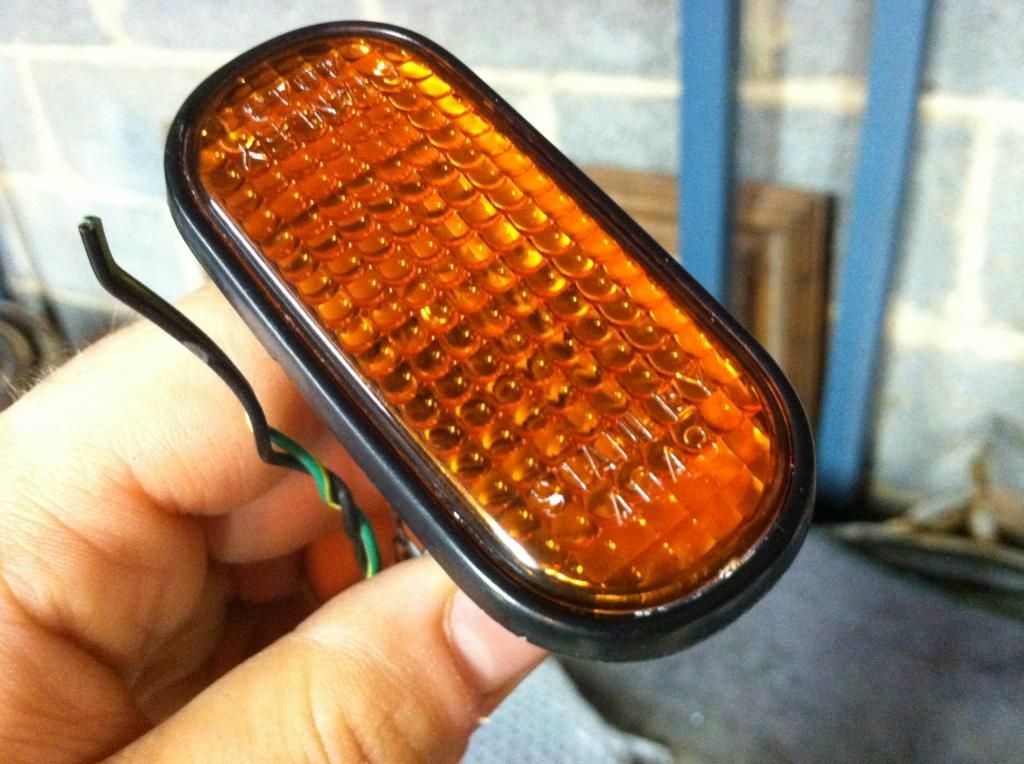
- JDM Stanley side-marker lights on fenders
- SiR-style clear corner lights w/ 1157NA bulbs
- OEM headlights with H4 LED bulb conversion
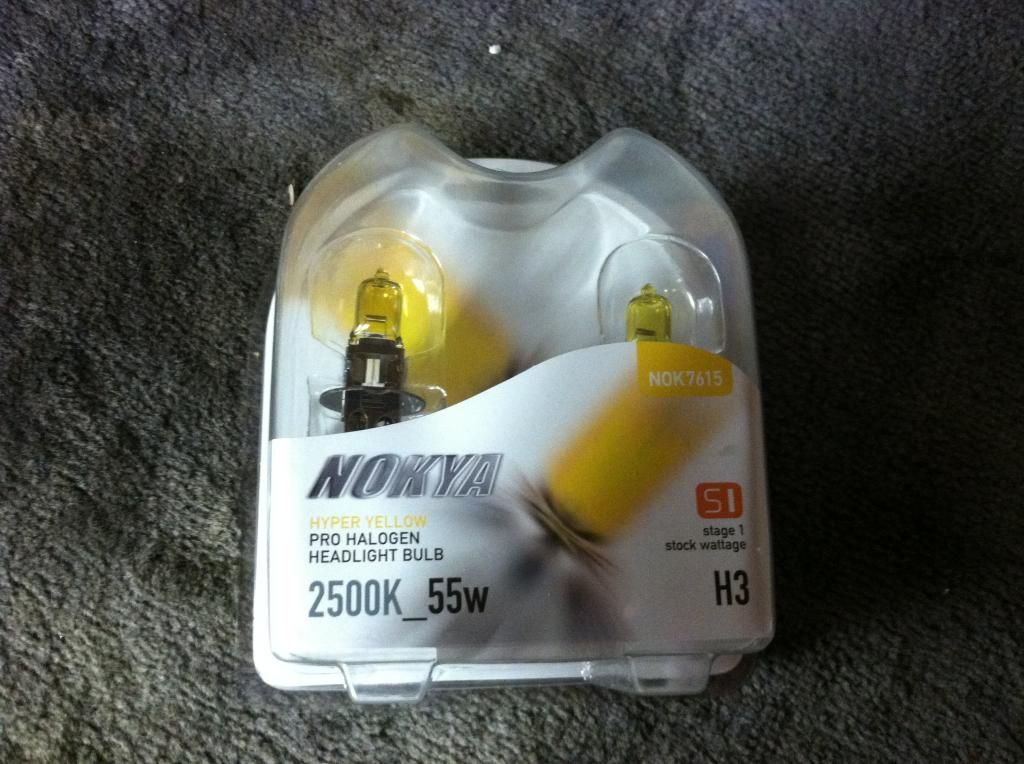
- Nokya Hyper Yellow H3 fog bulbs
- DIY windshield wiper air deflector (made of ABS, fiberglassed onto wiper cowl)
- OEM antenna delete panel
- Rear wheel skirts with hidden-type cabinet hinge incorporated. Use of red-anodized dress washers and allen-key flush bolts to attach (clean look).
- All black trim pieces and body lips/moldings restored to �like new� appearance with Duplicolor Bumper Paint and/or Forever Black die.
- Bosch Icon wiper blades
- Front wheel deflectors valance connected to extended front lip
- Metal Kammback spoiler fabricated to mount to existing OEM wing and hatch shock hole locations. Painted to match body.
- Some sort of rear decal or sign added to inform that I�m a hypermiler, or that I�m currently hypermiling. May incorporate some amber lights into this as well.
- Corrugated plastic added to entire under-carraige
- Rear under-carraige, chassis, and exhaust all painted with black paint for rust protection and good looks.
- Rear exit-splitter added to rear bumper
- Light (20%) tint applied to hatch and rear windows.
- Deep Scrub applied to all exterior windows
- Design and install custom Civic VX reproduced decal with addition of �With Lean Burn Technology� below; inc. green leaves into design.
INTERIOR
- Install Alarm System
- Remove front seats and center console.
- Complete cleaning of all dirt/dust/etc; wash and clean windows
- Clean and vacuum carpets and mats
- Swap passenger seat to driver�s side (if possible); disassemble and take drivers upper-seat to upholstery shop for repair and restoration. Swap back seats when drivers seat is repaired.
- Remove door cards. Troubleshoot and repair internal issue on LH side causing slow cranking for window. Grease and clean all window tracks.
- Troubleshoot speaker issue on front two (main and tweeters) speakers; check connections
- Remove and clean cloth panels on door cards and arm rest. Let dry. Fiberglass re-inforce cracked arm rest lid. Re-install/Glue fabric.
- Repair tweeter mounts on both sides.
- Install iPod goose-mount on passenger side seat bolt.
- Steering column single gauge mount w/ vacuum gauge installed.
- Find/purchase used MPGuino for VX, create custom fiberglass mount and fiberglass into existing steering column pod gauge plastic piece, on side adjacent to vacuum gauge.
- Install �Lean Burn� green LED in-between vacuum gauge and MPGuino
- Paint �5� from shift **** with green paint to match Eco theme in cluster.
- Complete amber conversion to climate control and all applicable interior buttons
- LED bulb conversion for dome light.
- Upgrade head-unit to an amber-lit model, with SD/USB/Aux connections, SiriusXM, Pandora, and Bluetooth hands-free audio & calling
- Install traditional radio antenna and XM antenna on top of windshield
- Mount custom �A/C� system from bolts that hold sun visor. (Basically, a cigarette lighter-powered mini-fan, with a small siphon pump to mist water through fan. Very high tech!)
MECHANICAL
- Replace Fuel Filter
- Remove intake manifiold; Clean: TB, IACV, FIV, EGR and EGR ports; install new PCV valve
- While intake removed, replaced coolant o-rings for coolant pipe on back of block.
- Flush coolant system, check and ensure thermostat is operating properly. Check all hoses for cracks.
- Brush paint bare spots on valve cover with wrinkle black paint.
- Install o-ring for Dizzy cap
- Install NGK spark plug wires and correct �4� heat-model NGK plugs
- Check compression (again) to see if any gains have happened from running better oil and Engine Restorer for a couple thousand miles
- Troubleshoot and repair RH washer spray nozzle, not spraying currently.
- Replace broken washer line clip with proper junk yard unit.
- Marvels Mystery Oil for Gas Tank
- Replace front brake pads and rotors
I've had this thread going on EcoModder for a couple of months now. I figured I would post here as well. Not sure if any of you are interested in an "eco" build, but here goes. A quick "catch-up" cut/paste from my thread on EcoModder
------------------------
I've been around Honda's for years. I've built up plenty of them for looks/performance solely, but now that I'm a bit older, I've found my taste and priorities have changed. I have a 80 mile round trip to work in Charlotte each day, and I wanted to buy a Honda with the best mileage possible. Last week, after some google research on EPA mileage ratings, I narrowed down my list to either the 84-85 CRX HF or a 92-95 Civic VX. It was about this time that I stumbled upon the term "Hypermiling". I thought that the estimated EPA ratings for the VX were already amazing, but after seeing some more extreme stats from postings on this forum and others, the possibilities for driving and modding a car for higher FE really began to intrigued me. The VX was the obvious choice for me over the CRX, since I have two young children and would need a back seat for them when they (very) occasionally ride along with me. I've also always wanted an EG Civic, as I love the looks of these cars. Lastly, I've already completed an '86 CRX SI build in the past, and just finding un-cracked door/nose/fender/rocker plastics was a continual nightmare with those cars. I quickly found a very clean VX in South Carolina on my local CL. That was on Wednesday two weeks ago. The previous owner/seller was a great guy all-around, and I had the car back in my garage the following Saturday.
I'm really excited about this "build", as it will be geared with a different set of performance goals from that of any projects I've done in the past. The learning curve will be high for me since I know little about driving/modding for extreme mileage. A primary goal is that my work on this car should actually put money BACK in my pocket. I'm also hoping this will keep my wife a good bit happier than she has been while enduring past projects
Project Goal: Eventually hit 65-mpg average, stout/healthy/reliable motor, on-board FE monitoring electronics, decent comfort, moderate FE aero modifications but w/ a hint of JDM styling throughout the build.
I do plan to lower the vehicle, but nothing extreme, and with traditional camber. I try to be conscious of drive-ability when planning suspension height. I need to keep a healthy distance of space to allot for wheel travel, as well as guard the oil pan and sub-frame from any damage during daily commutes. I�ll likely look on CL to purchase used, yet quality, lowering springs that allow use of the OEM shocks, and do not compromise ride comfort (that much). My goal would be a 2 to 2.5 �finger gap� at all corners. I can bridge the rest of the floor gap with custom side-skirts/lips, should I ever choose to build those for aero-function.
Here�s some pics of all of my past projects. They give a snapshot to my build style and history.
2006

2008

2010

2012

2013 (A)

2013 (B)

2014

As I stated earlier, I�m really excited about this project, as it differs from anything I�ve done previously. I love grassroots-style movements, and it�s neat to see what FE-minded enthusiasts are doing about current gas prices and leaving a lower carbon footprint on mother earth. I pose that one can have a safe and reliable car that is: (1) paid for ; (2) looks good; (3) has excellent fuel economy. It�s certainly going against the grain, but I�m happy to do so, as car payments stink, and so does trips to the gas station.
Below are the some pics and overview info. of my 1992 Civic VX, as received. My next post will then outline build plans, followed by my first set of updates.


VEHICLE HISTORY:
CarFax reveals this one to be a Carolina-only car. A bought the car for a gentlemen in SC who did a great deal of maintenance (timing belt, battery, radiator, tranny oil changes, cleaning here/there) during his short tenure owning the vehicle. The original alternator died on my while driving the car back to NC at 12:30 in the morning on the interstate. I limped the car to a gas station and we all rode back in my wife�s Accord. The seller was very kind, he drove an hour north to where the Civic was parked, diagnosed the alternator as being the issue, fixed the car (on his own dime) and parked it at a WalMart. I picked it up that night. LIkely, appears that him washing the engine a few hours before my test drive short-circuited the alternator. Cool of him to fix it, even though there was no way of proving this is what caused the issue.
EXTERIOR/CHASSIS:
The underside is very clean/rust-free. The �Milano Pink� paint is a bit past it�s glory days, but I do believe/hope that the troubled spots are salvageable with some cut/polish work. A pinstripe removal tool will also do wonders for the aesthetics.
INTERIOR:
The interior is black/gray, which is rare and desirable choice amongst Honda enthusiasts. An armrest is also present, which I understand was a dealer option/upgrade. Smoke-free vehicle history. Restoration work needed on the door cards and the drivers seat cover. Upgrades are needed in the audio department, in general.
MECHANICAL/DRIVETRAIN:
Mechanically, I�d say I inherited the car at....hmmm...7.5 out of 10. I was hoping it would be in a bit better condition, but things certainly could have been worse. Car felt a bit under-powered on the way home, even despite the economy engineering of the VX. Tires are very new, Michelin Green X LRR. Clutch feels a little worn, slow to engage. Also, the shifter feels...crunchy. Power is good. A few hiccups in the fuel delivery, at times, only happens when in low RPMS. Grounding cables need replacement/upgrading.
I was fortunate to have found this VX in such great condition. The wagovan was my a beast of a project. Everything was tough on that one, but it was certainly a cool car once finished.
Def funny to see the F&F generation coming around full circle with the Eco mods. Basically, we are getting older and appreciate FE. Plus, IMHO, things are getting out of hand with the Honda scene. Dudes obsessing over bolt kits for the engine. Mil-spec firewall connections for tucked harnesses. Weird stuff. You used to could "hang" with the rest of the top by spending circa $3K on a build/parts and some good ol' fashion elbow grease. Now, that's just enough $$ to get you in-line with the ricers down at the local Sonic. Thanks to companies like Hybrid Racing, Chase Bays, and Bolt Boys, show-quality Honda builds take three times as long to complete and are $15K affairs once all the dust settles. Then your left with a....Honda. So, you have to part-out the build to make your money back (since no one wants to pay $15K for a used Honda, no matter how nice/"perfect" it is).
I'm excited to begin what I think is the "new frontier" for Honda-heads. Clean built Eco cars. We'll, it's really not new for Honda, as I think being eco-minded is what put them on the map in the first place
Here's some conceptual sketches I put together for the aesthetics. Should be a fun build!


Here�s an overview of my plans for this build. I�m sure they will evolve somewhat as my knowledge base in eco-tuning increases...I know it�s a long/laborious list to read through, but this list is for my own records/planning as well, so please bear with me.
PLANS FOR THE BUILD:
Exterior
- Complete cleaning of all grease/dirt (including door/hatch jambs, engine bay, and wheel wells)
- Clean wheel-wells and spray with fresh black paint. Clean and paint calipers silver. Clean backside/inner part of OEM wheels. Paint OEM drums black.
- Attempt to restore original OEM Milano Red paint w/ cutting & buffing work.
- ABS grill block; small opening on left side (with black gutter-guard mesh) for flow to radiator
- ABS flush-mount fog light covers
- ABS extended front lip (fabricated to attach to, and lower, profile of existing OEM VX lip)
- ABS extended side skirts (fabricated to attach to, and lower, profile of existing OEM side skirts)
- OEM mirror delete on RH; DIY fiber-glass delete from old mirror on LH
- convex interior-mounted side mirrors; suction-mounted to windshield on both sides of vehicle
- upgraded rear view mirror (larger convex, or Wink)
- JDM-style thin side moldings
- JDM Stanley side-marker lights on fenders
- SiR-style clear corner lights w/ 1157NA bulbs
- OEM headlights with H4 LED bulb conversion
- Nokya Hyper Yellow H3 fog bulbs
- DIY windshield wiper air deflector (made of ABS, fiberglassed onto wiper cowl)
- OEM antenna delete panel
- Rear wheel skirts with hidden-type cabinet hinge incorporated. Use of red-anodized dress washers and allen-key flush bolts to attach (clean look).
- All black trim pieces and body lips/moldings restored to �like new� appearance with Duplicolor Bumper Paint and/or Forever Black die.
- Bosch Icon wiper blades
- Front wheel deflectors valance connected to extended front lip
- Metal Kammback spoiler fabricated to mount to existing OEM wing and hatch shock hole locations. Painted to match body.
- Some sort of rear decal or sign added to inform that I�m a hypermiler, or that I�m currently hypermiling. May incorporate some amber lights into this as well.
- Corrugated plastic added to entire under-carraige
- Rear under-carraige, chassis, and exhaust all painted with black paint for rust protection and good looks.
- Rear exit-splitter added to rear bumper
- Light (20%) tint applied to hatch and rear windows.
- Deep Scrub applied to all exterior windows
- Design and install custom Civic VX reproduced decal with addition of �With Lean Burn Technology� below; inc. green leaves into design.
INTERIOR
- Install Alarm System
- Remove front seats and center console.
- Complete cleaning of all dirt/dust/etc; wash and clean windows
- Clean and vacuum carpets and mats
- Swap passenger seat to driver�s side (if possible); disassemble and take drivers upper-seat to upholstery shop for repair and restoration. Swap back seats when drivers seat is repaired.
- Remove door cards. Troubleshoot and repair internal issue on LH side causing slow cranking for window. Grease and clean all window tracks.
- Troubleshoot speaker issue on front two (main and tweeters) speakers; check connections
- Remove and clean cloth panels on door cards and arm rest. Let dry. Fiberglass re-inforce cracked arm rest lid. Re-install/Glue fabric.
- Repair tweeter mounts on both sides.
- Install iPod goose-mount on passenger side seat bolt.
- Steering column single gauge mount w/ vacuum gauge installed.
- Find/purchase used MPGuino for VX, create custom fiberglass mount and fiberglass into existing steering column pod gauge plastic piece, on side adjacent to vacuum gauge.
- Install �Lean Burn� green LED in-between vacuum gauge and MPGuino
- Paint �5� from shift **** with green paint to match Eco theme in cluster.
- Complete amber conversion to climate control and all applicable interior buttons
- LED bulb conversion for dome light.
- Upgrade head-unit to an amber-lit model, with SD/USB/Aux connections, SiriusXM, Pandora, and Bluetooth hands-free audio & calling
- Install traditional radio antenna and XM antenna on top of windshield
- Mount custom �A/C� system from bolts that hold sun visor. (Basically, a cigarette lighter-powered mini-fan, with a small siphon pump to mist water through fan. Very high tech!)
MECHANICAL
- Replace Fuel Filter
- Remove intake manifiold; Clean: TB, IACV, FIV, EGR and EGR ports; install new PCV valve
- While intake removed, replaced coolant o-rings for coolant pipe on back of block.
- Flush coolant system, check and ensure thermostat is operating properly. Check all hoses for cracks.
- Brush paint bare spots on valve cover with wrinkle black paint.
- Install o-ring for Dizzy cap
- Install NGK spark plug wires and correct �4� heat-model NGK plugs
- Check compression (again) to see if any gains have happened from running better oil and Engine Restorer for a couple thousand miles
- Troubleshoot and repair RH washer spray nozzle, not spraying currently.
- Replace broken washer line clip with proper junk yard unit.
- Marvels Mystery Oil for Gas Tank
- Replace front brake pads and rotors
 10-03-2014, 01:46 AM
#2
Honda-Tech Member
Thread Starter
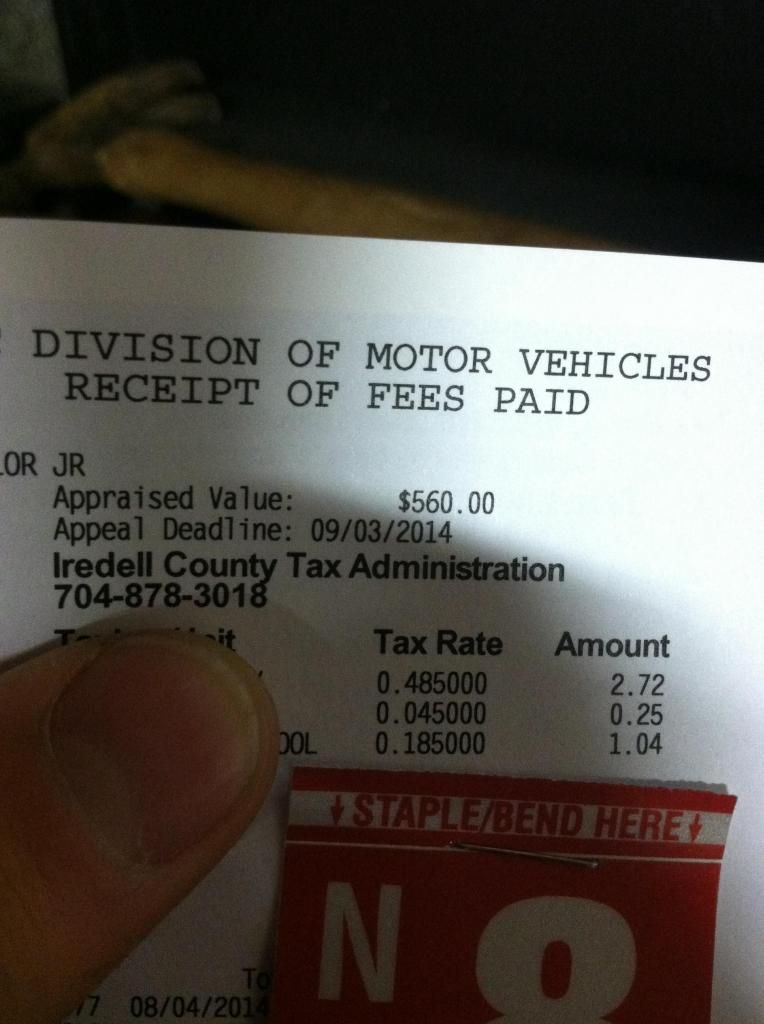
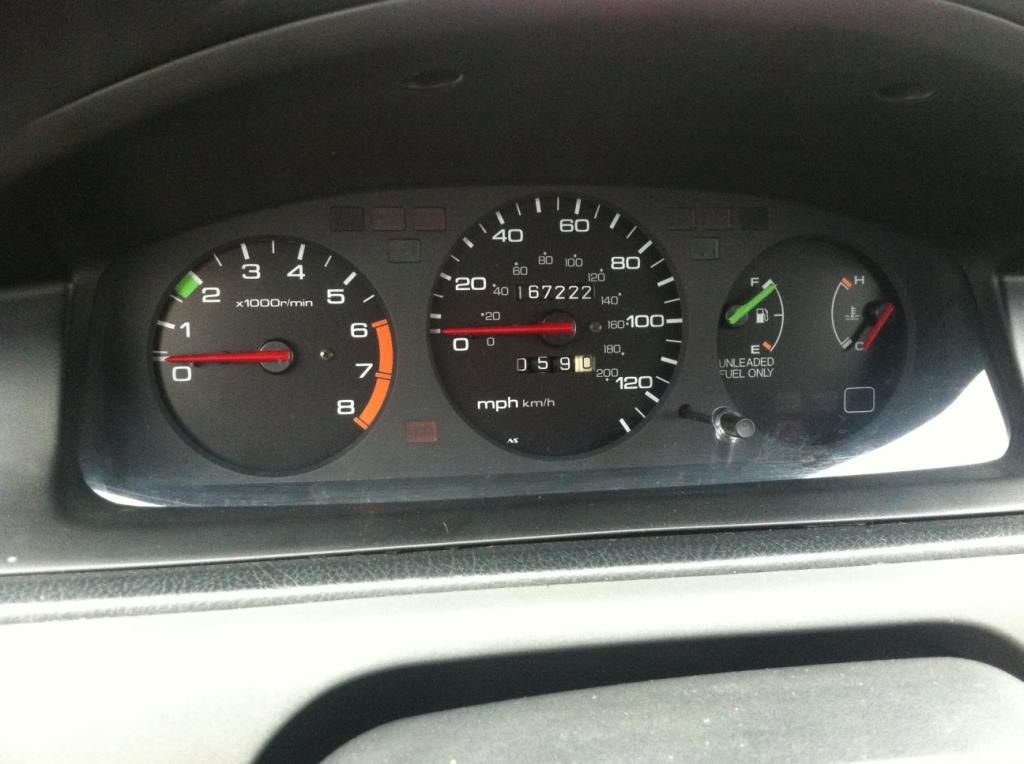
Update 8/14/14: Registration/First Maintenance/Gauge Cluster Modifactions
We'll, finally folks, after all my talk, here's some "walk".
First up was registration. I'll post a pic because of the appraised value. HA!
Moving on...Maintenance work commenced as soon as I got the car back to the house.
I wanted to know exactly what I was "working with", so I ran a compression test. I'd like to think EricTheCarGuy, my favorite dude for Honda tutorials on YouTube, for the excellent advice on how to properly do compression testing.
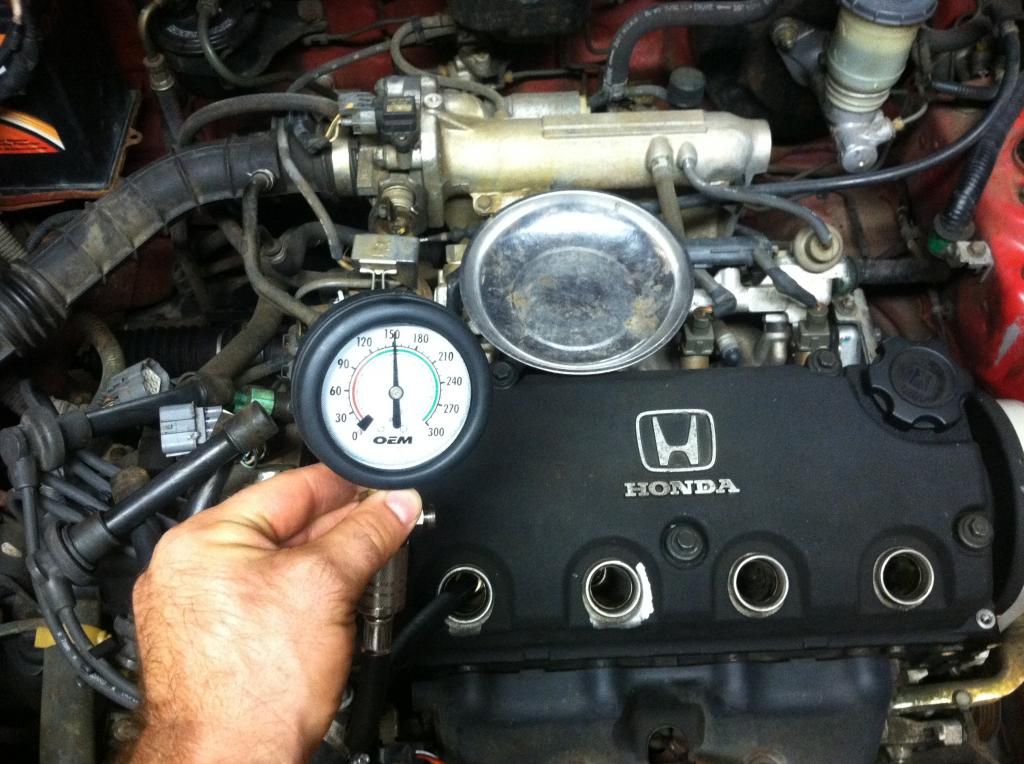
First, I ran the tests on a cold engine ("dry" cylinders); then again with "wet" cylinders. Then, I drove the car for a couple of days with fresh oil and Engine Restorer additive. I then did the compression test once more, and achieved a bit more favorable numbers.
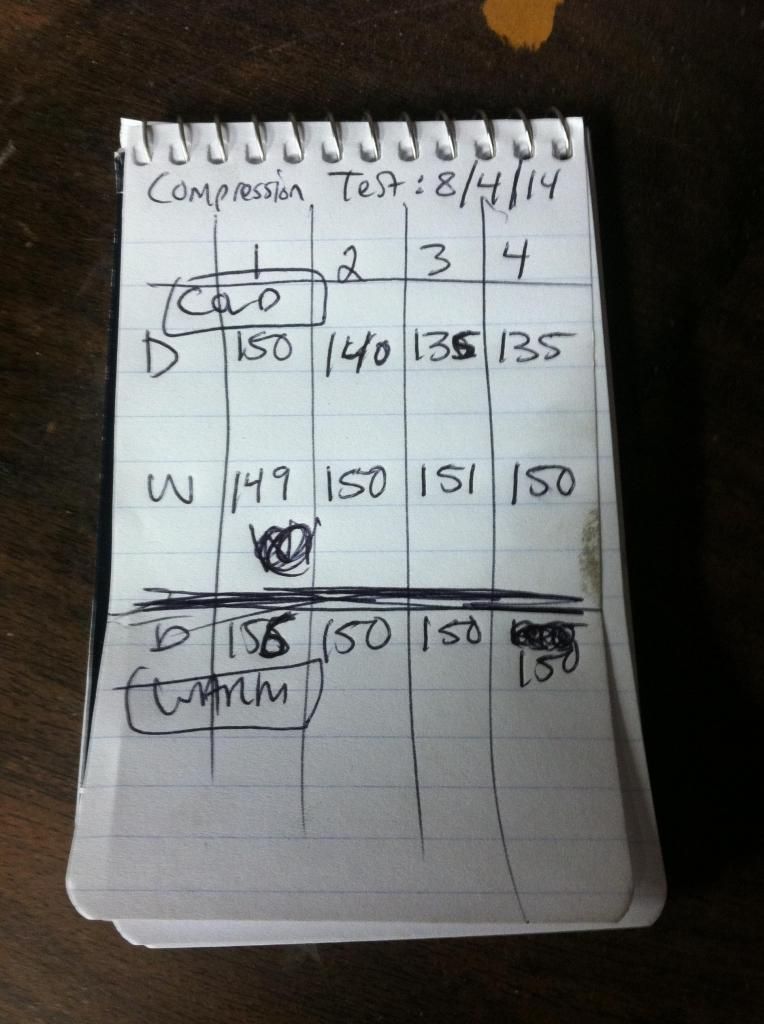
Overall, certainly not stats good enough to slap your momma about. However, they are within the working limits from Honda (135 psi, I understand, is the service limit). And most importantly, they are even. So, OK, now I don't feel too bad putting some time and money into this car.
The transmission got fresh Honda MTF. However, after a week of driving with it in, things still felt "crunchy". After some research, I decided to try Penzoil Syncromesh. Man, glad I did! Transmission is shifting much better now. I highly recommend it vs. the Honda stuff. The "crunch" is almost gone entirely. The syncros are worn, but I'm hoping that using this stuff in regular intervals will help prevent a tranny re-build....or at least, drastically delay it.
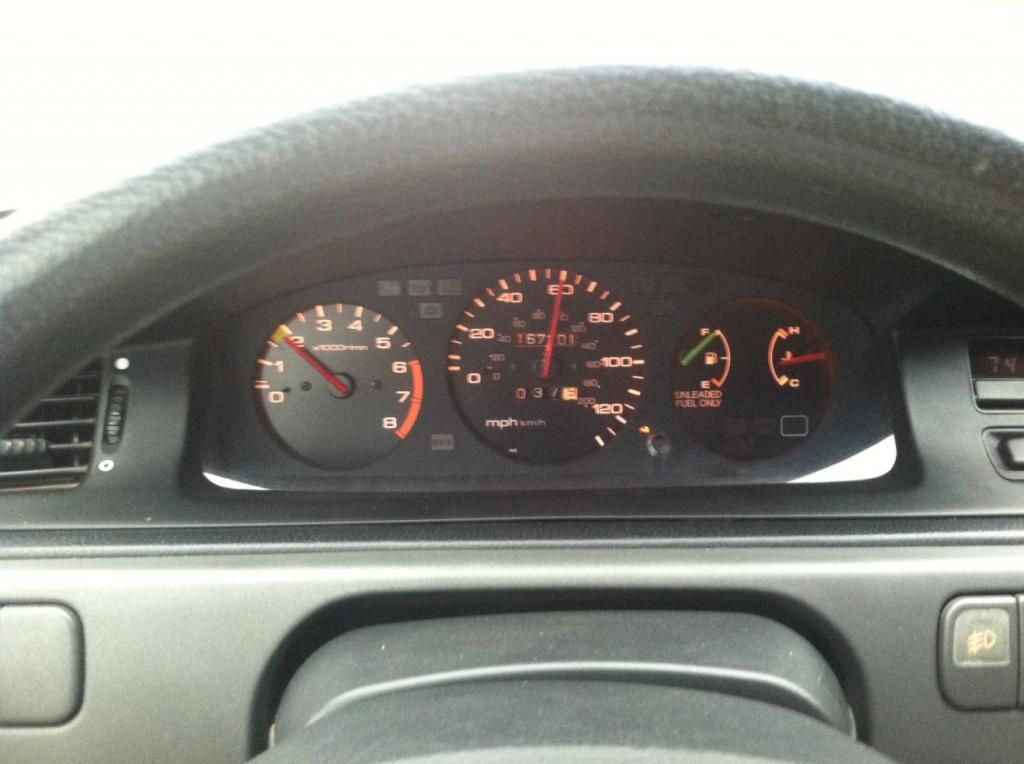
Lastly for this first update, I did some research into the dash lighting. My cluster was rather dull, even with the illumination **** turned all the way up. I did an LED swap on my truck and liked the brightness of it, but do have some "hot spots" on the truck cluster. After some research, I found and decided to follow this awesome DIY linked below from a Honda-Tech user; amber halogen bulb swap. I'll be following his council for the climate control and remainder of the dash buttons + clock as well.
My EG speedo cluster & climate control in amber - done right - Honda-Tech
And so, off I set removing the cluster and setting up for the bulb swap.
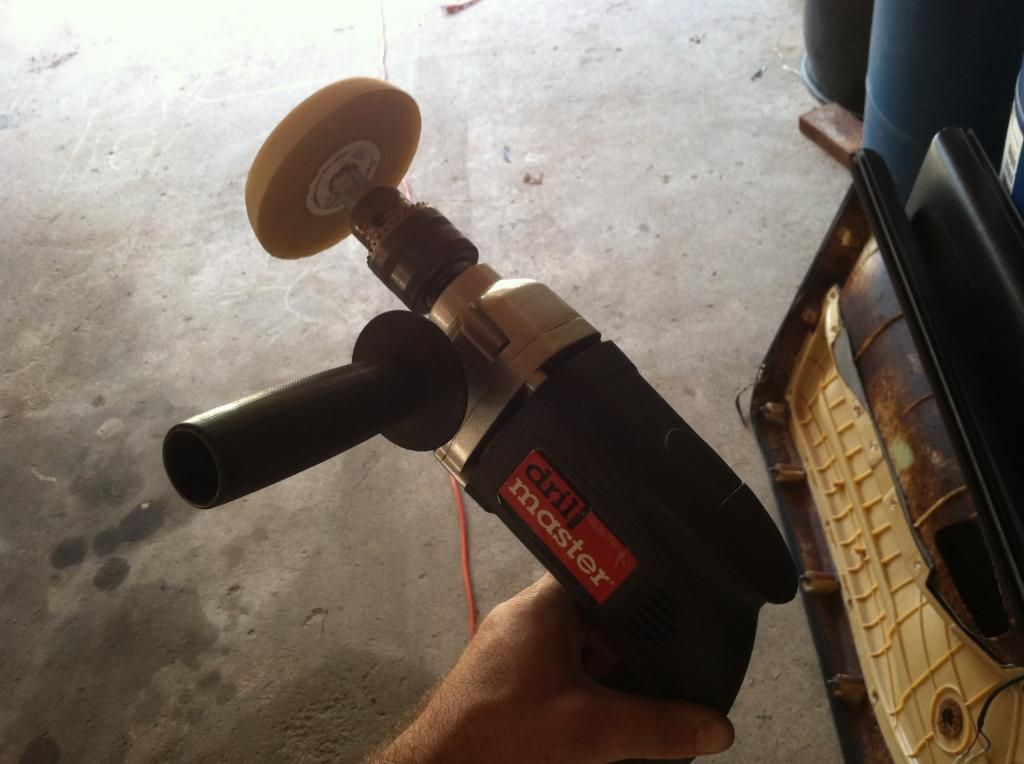
But while I was in there, I decided to do some custom paint work as well. Time to break out an old friend for my model car days...
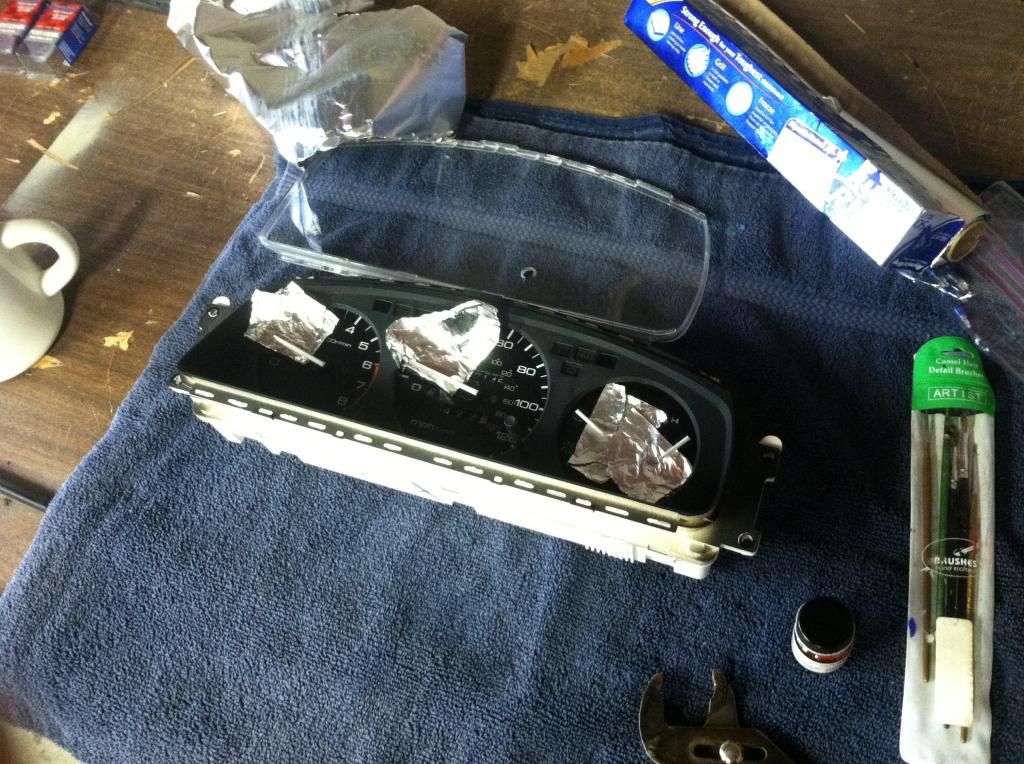
All sealed up and drying post-paint.
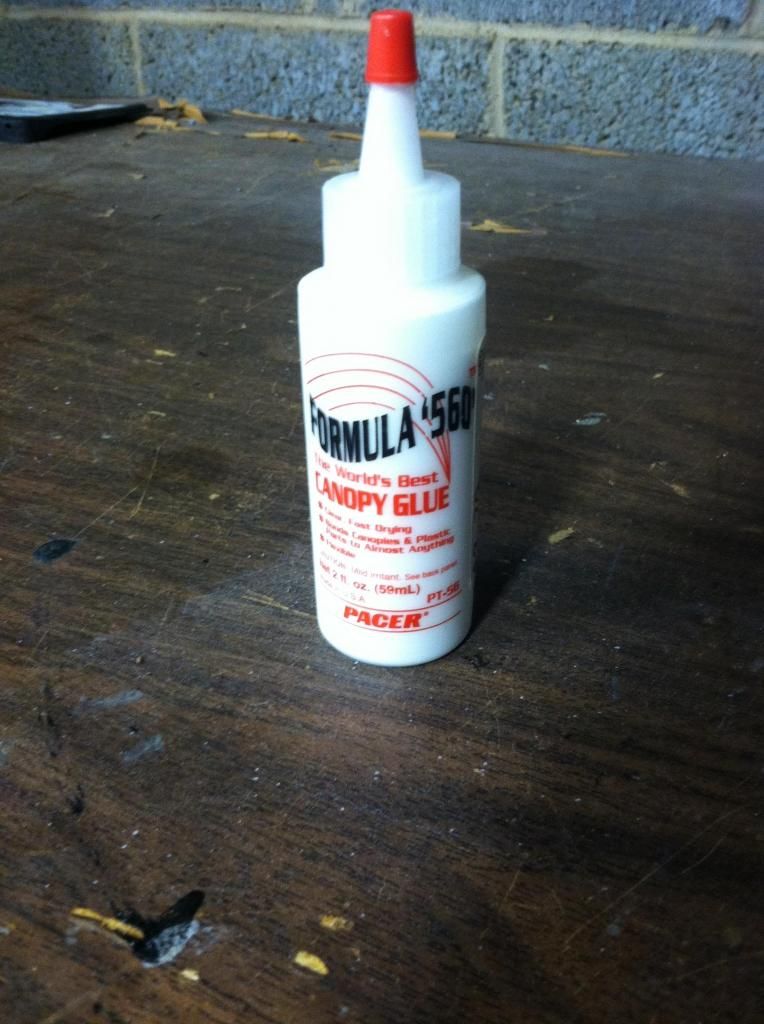
Used this stuff. Dries clear. Great stuff. Called "Canopy Glue". Used to glue plastic canopy's on model airplanes.
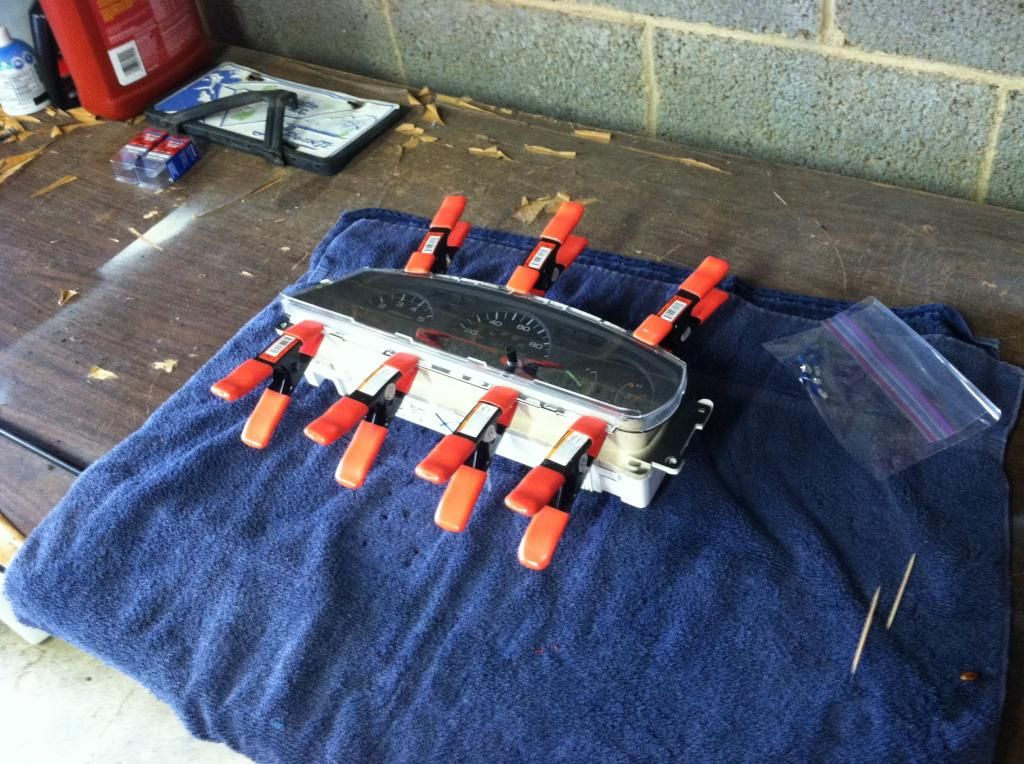
V.1 all done and in the car the next day:
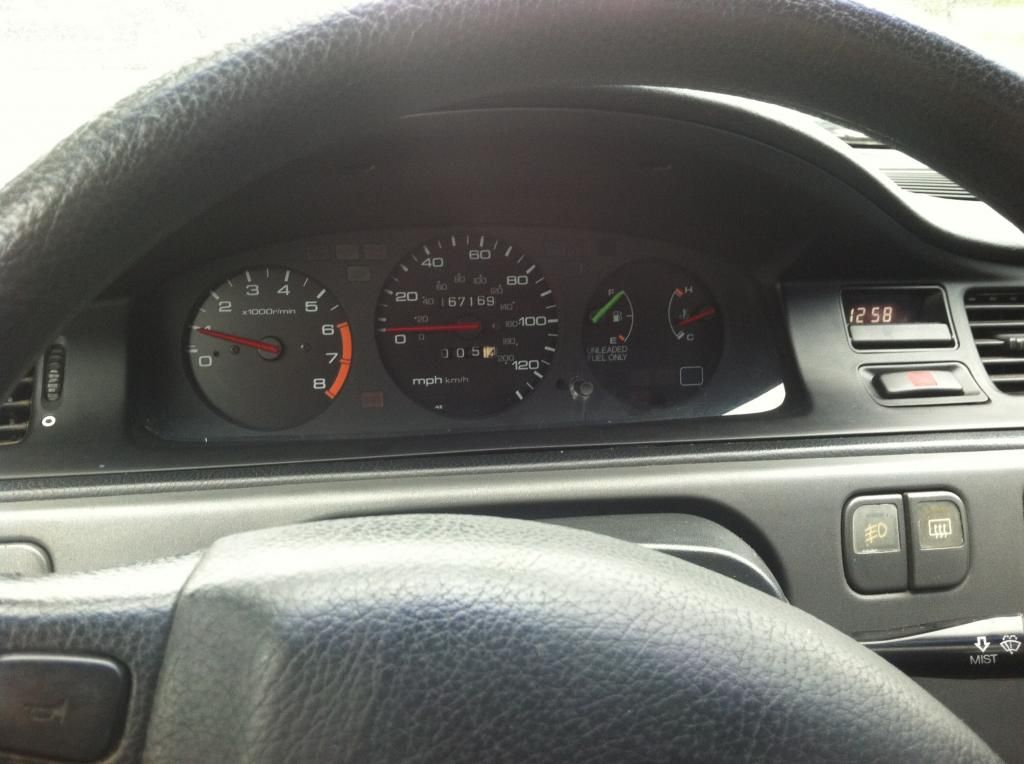
Night-time pic w/ the amber effect (whole dash will be this color soon)
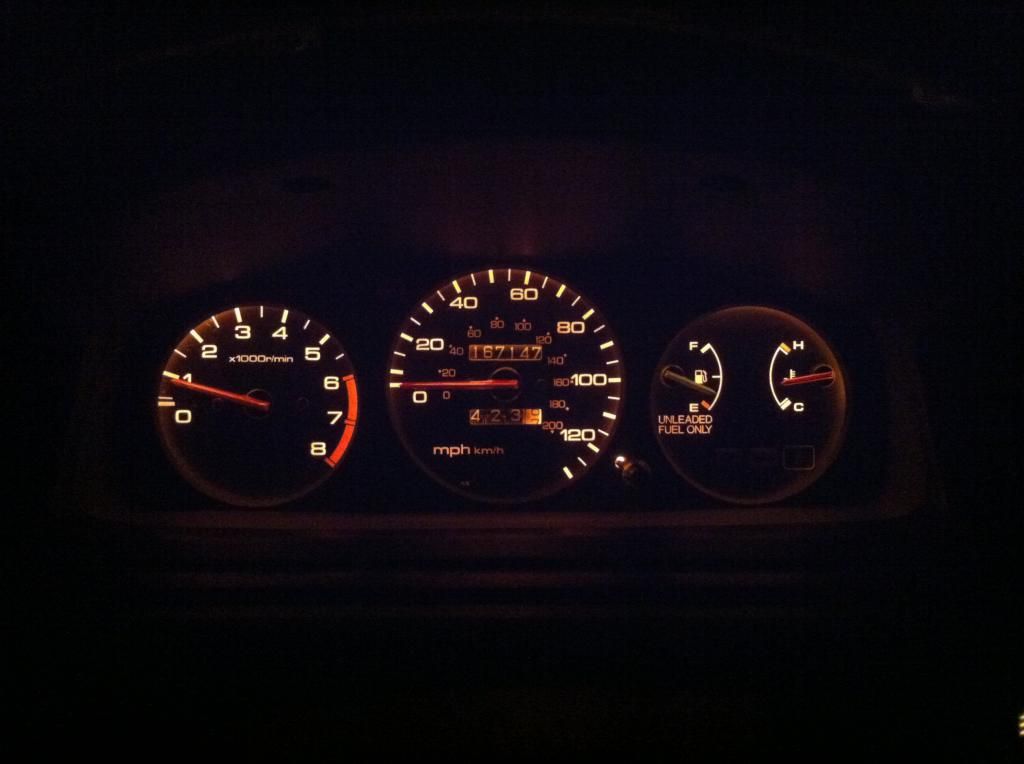
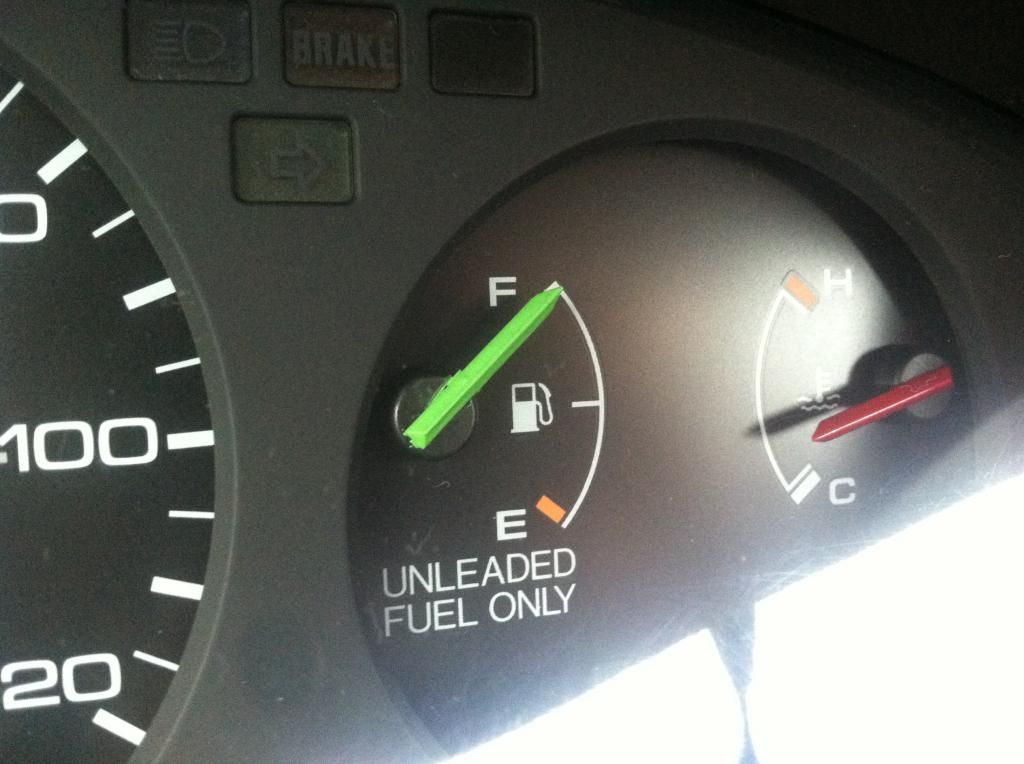
Later that evening, I had another idea/addition to add. Woke up the next day and added it. SO glad that I did. Feel like it really makes the cluster and ties everything together with the "green" mods for the dash. Added a "sweet spot" of green.
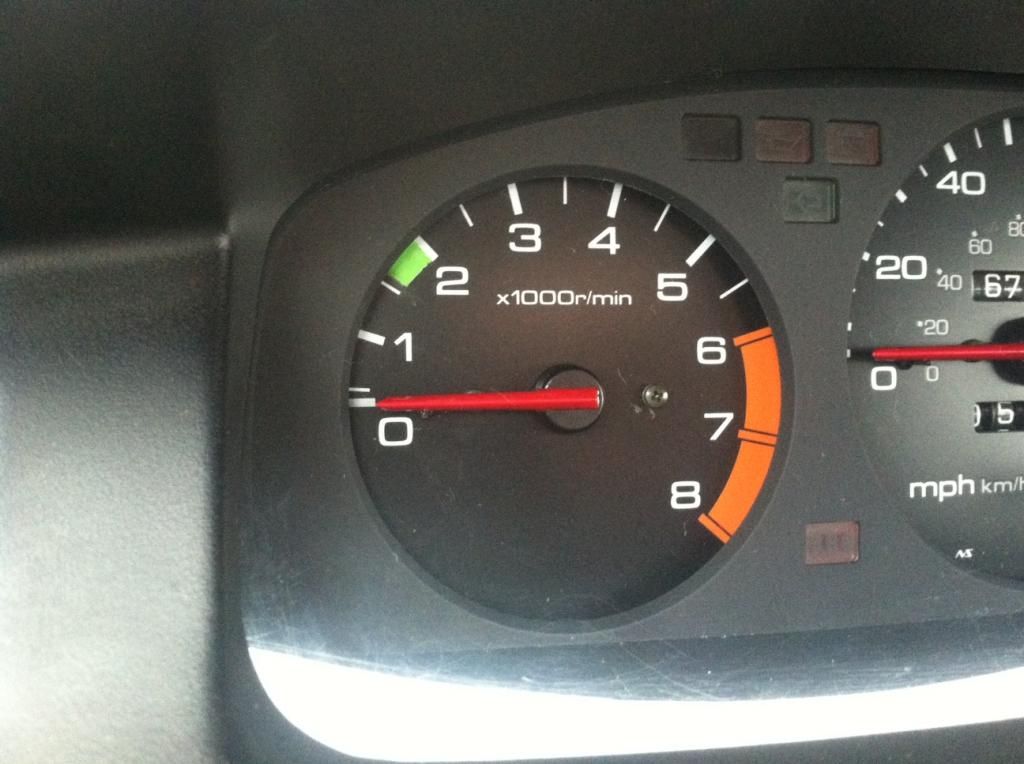
Here's the "sweet spot" in action, right near the area I shoot to lean burn within while highway cruising.
That's it for now. More to come.
Thanks for eco-tuning in!
We'll, finally folks, after all my talk, here's some "walk".
First up was registration. I'll post a pic because of the appraised value. HA!

Moving on...Maintenance work commenced as soon as I got the car back to the house.

I wanted to know exactly what I was "working with", so I ran a compression test. I'd like to think EricTheCarGuy, my favorite dude for Honda tutorials on YouTube, for the excellent advice on how to properly do compression testing.

First, I ran the tests on a cold engine ("dry" cylinders); then again with "wet" cylinders. Then, I drove the car for a couple of days with fresh oil and Engine Restorer additive. I then did the compression test once more, and achieved a bit more favorable numbers.

Overall, certainly not stats good enough to slap your momma about. However, they are within the working limits from Honda (135 psi, I understand, is the service limit). And most importantly, they are even. So, OK, now I don't feel too bad putting some time and money into this car.

The transmission got fresh Honda MTF. However, after a week of driving with it in, things still felt "crunchy". After some research, I decided to try Penzoil Syncromesh. Man, glad I did! Transmission is shifting much better now. I highly recommend it vs. the Honda stuff. The "crunch" is almost gone entirely. The syncros are worn, but I'm hoping that using this stuff in regular intervals will help prevent a tranny re-build....or at least, drastically delay it.
Lastly for this first update, I did some research into the dash lighting. My cluster was rather dull, even with the illumination **** turned all the way up. I did an LED swap on my truck and liked the brightness of it, but do have some "hot spots" on the truck cluster. After some research, I found and decided to follow this awesome DIY linked below from a Honda-Tech user; amber halogen bulb swap. I'll be following his council for the climate control and remainder of the dash buttons + clock as well.
My EG speedo cluster & climate control in amber - done right - Honda-Tech
And so, off I set removing the cluster and setting up for the bulb swap.

But while I was in there, I decided to do some custom paint work as well. Time to break out an old friend for my model car days...


All sealed up and drying post-paint.

Used this stuff. Dries clear. Great stuff. Called "Canopy Glue". Used to glue plastic canopy's on model airplanes.

V.1 all done and in the car the next day:


Night-time pic w/ the amber effect (whole dash will be this color soon)

Later that evening, I had another idea/addition to add. Woke up the next day and added it. SO glad that I did. Feel like it really makes the cluster and ties everything together with the "green" mods for the dash. Added a "sweet spot" of green.


Here's the "sweet spot" in action, right near the area I shoot to lean burn within while highway cruising.

That's it for now. More to come.
Thanks for eco-tuning in!
10-03-2014, 01:48 AM
#3
Honda-Tech Member
Thread Starter
Update 9/3/14: No-Start Issue + Complete Intake Manifold + Heater Hose Overhaul
I hope everyone’s well. I’ve been away for a bit, due to a crashed HD on our Mac. I went out to start my car this past Wed morning (the morning after the Mac crashed) and the car would not turn over. When the key was turned to position III, lights on the dash came on, but no sounds, no action, nothing, nada... I was def scratching my head at that point. After much troubleshooting (battery, fuses, connections, etc...) I finally made a call to just remove the starter and take it to get it tested. The starter was the original OEM unit, and tested "fail" at Autozone. Seemed simple enough to just replace the starter at that point.
Since I missed work that day due to the issue, while I was removing the starter, I pretty much just decided to "go to town" on the car, moving forward with all the remaining mechanical/engine work I had planned to (eventually) do, but wasn't sure when I would have the time to get around to it. A list below outlines the work performed over the past week:
- Replaced gaskets for: Intake Manifold, EGR, Throttle Body, VTEC solenoid, Thermostat, IACV
- Replaced all heater hoses (around 9 total; including radiator and lines running to/from oil filter housing)
- Replaced thermostat
- Replaced starter (w/ lifetime warranty unit from Autozone)
- Coolant system drain and fill
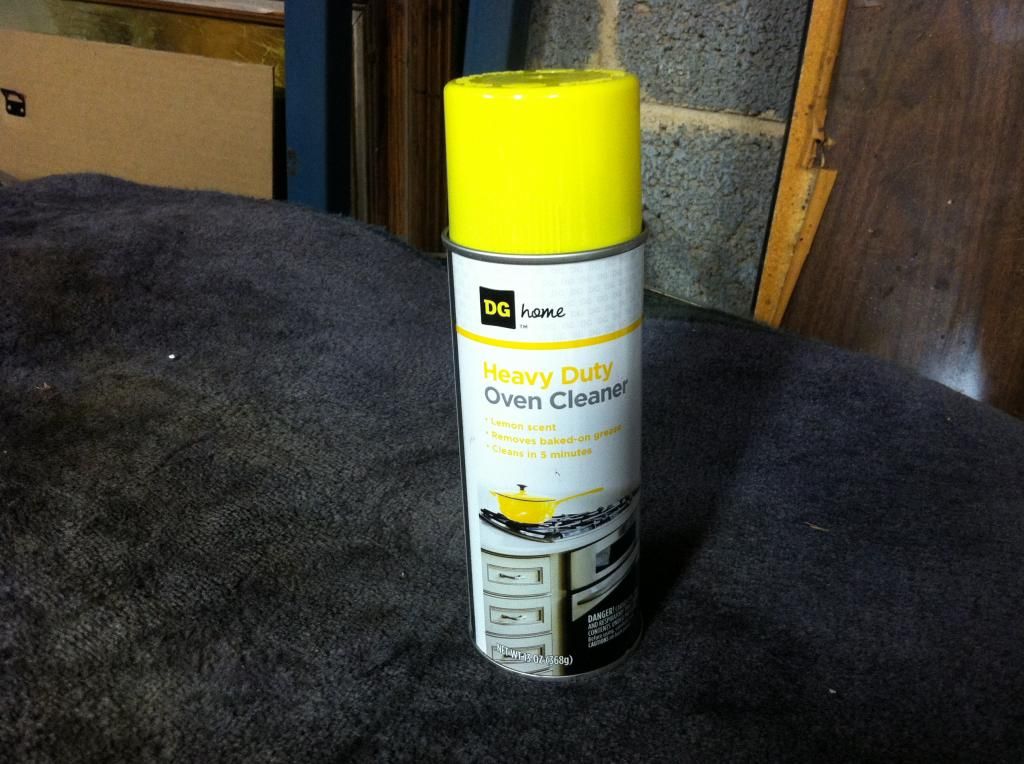
- Tooth-brush cleaned engine block and engine bay (Dollar General oven cleaner worked great for removing the stuck-on grease from the block!)
- Removed decals from battery to clean up look
- Painted exhaust manifold with VHT Flame Proof “Aluminum” Paint
- Painted exhaust mani. heat shield + bumper bracket w/ VHT Blk Brake Caliper Paint (hi-heat).
After all the gasket and fitted-hose chasing-down and installing was completed, I went to fire up the engine. No start...still. No sound upon turning key, nothing...
That was on Saturday evening. By now I was nearly out of ideas. So, I went back to my good old friend, the internet. I found out that there is a SECOND rubber stopper pad on the clutch pedal assembly that can and does go bad. I had previously checked the first (lower; in plain view) stopper pad location, which looked like it was replaced in recent times with the (revised) neoprone pad. Fans of older Honda’s know that these “stopper pads” on the brake and clutch pedals go bad over time, causing all sorts of annoying electrical havic. However, I’ve never had the top (hidden) pad go bad on me before. Apparently when this (fun to get to go) lil’ guy goes to stopper-pad-heaven, the car won’t start, as the pad is designed to sit on the end of a lever that touches and closes the switch circuit that allows power to the starter when the clutch pedal is pressed. No pad, no start. Of course, I came to this internet epiphany on a Saturday evening, and all my local Honda dealers were closed on both Sunday and Monday for the holiday. Thankfully, after several parts store calls, my local Advanced Auto was able to source a Dorman replacement part (#74015) from their Gastonia wearhouse, and I had the part to install on the VX yesterday afternoon. To install the pad, I ended up (lightly) duct taping it to the end of a long flat head screwdriver. I removed the driver’s seat for clearance/comfort, and used a large flood flash light to get some visibility up under the dash. I then halfway duct taped the little pad to a long flat head screwdriver, and use the screwdriver to get the pad in place and leverage it into the mounting hole. It was...fun.
After all that, car started up just fine. Acceleration feels good. I'm getting up tomorrow morning to complete the following:
- Install proper (4 heat range plugs)
- Install new fuel filter
- Begin removing interior trim
I'll come back tomorrow with another post. Late and time for bed.
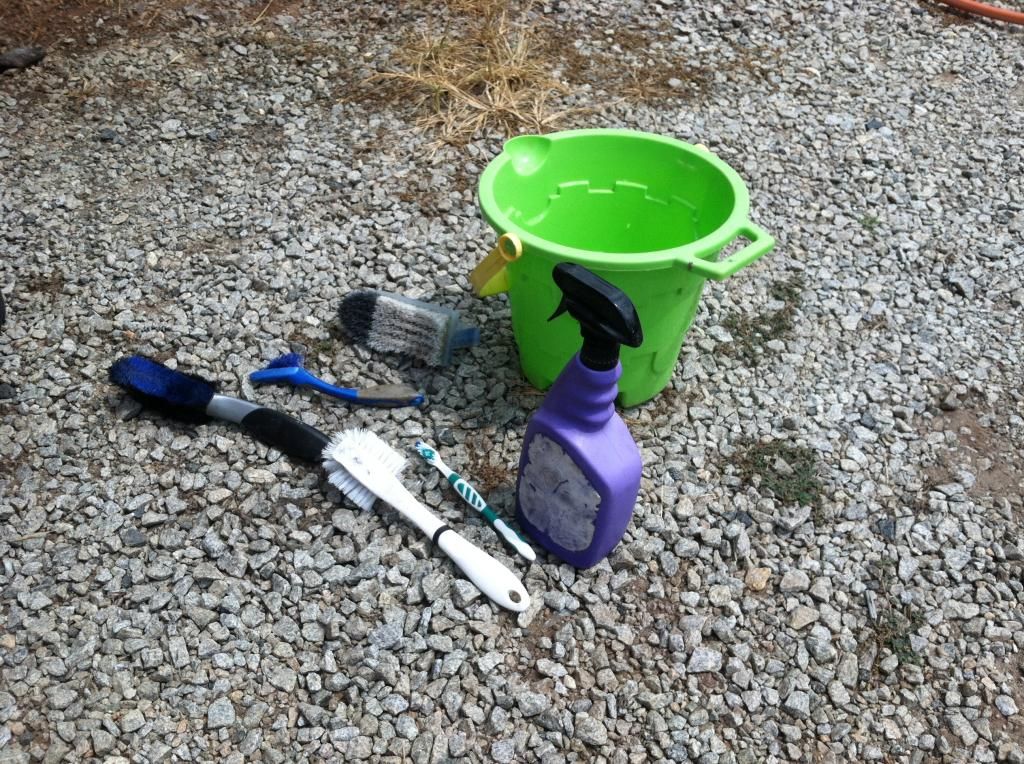
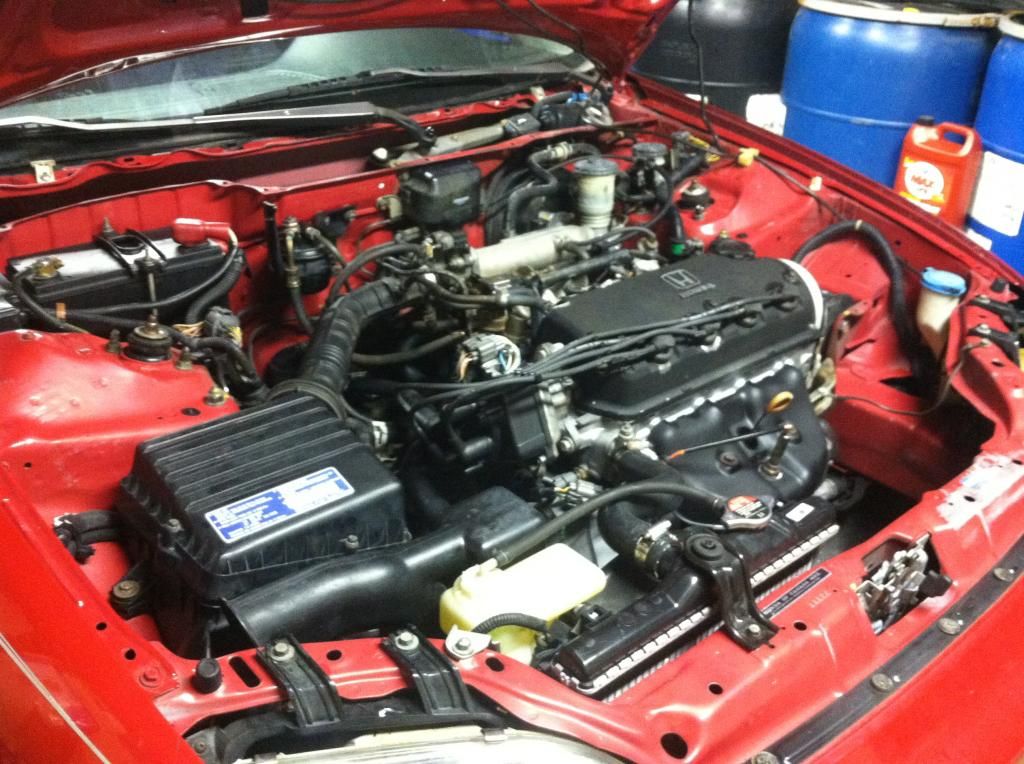
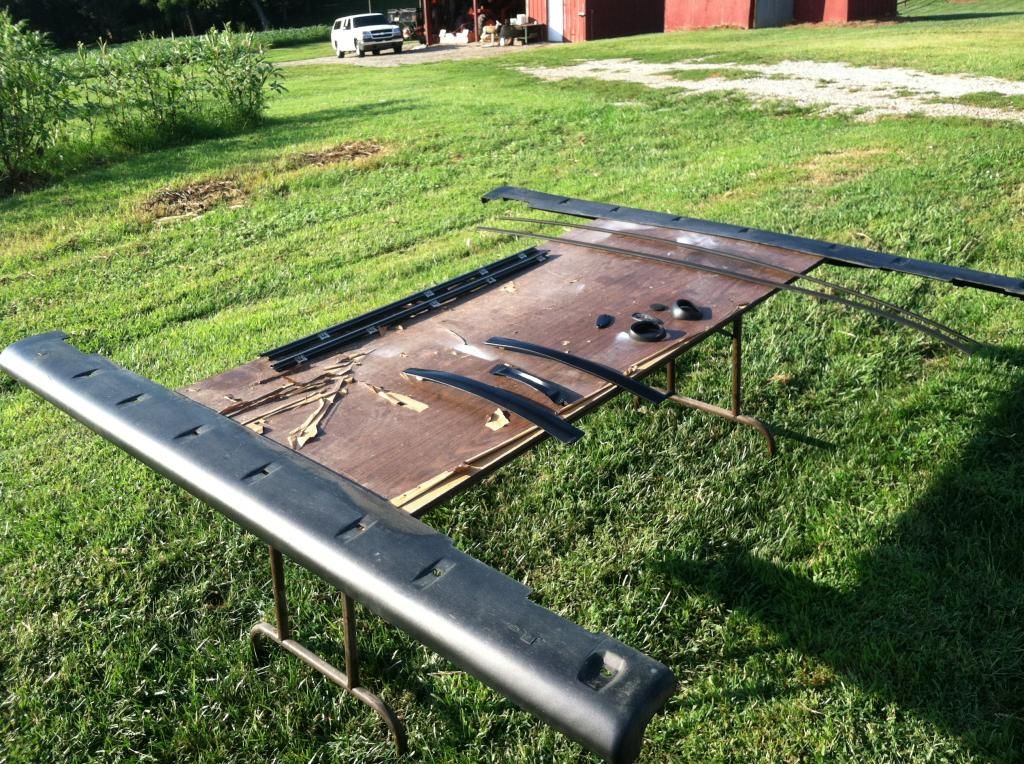
For now, here's some pics from the past week:
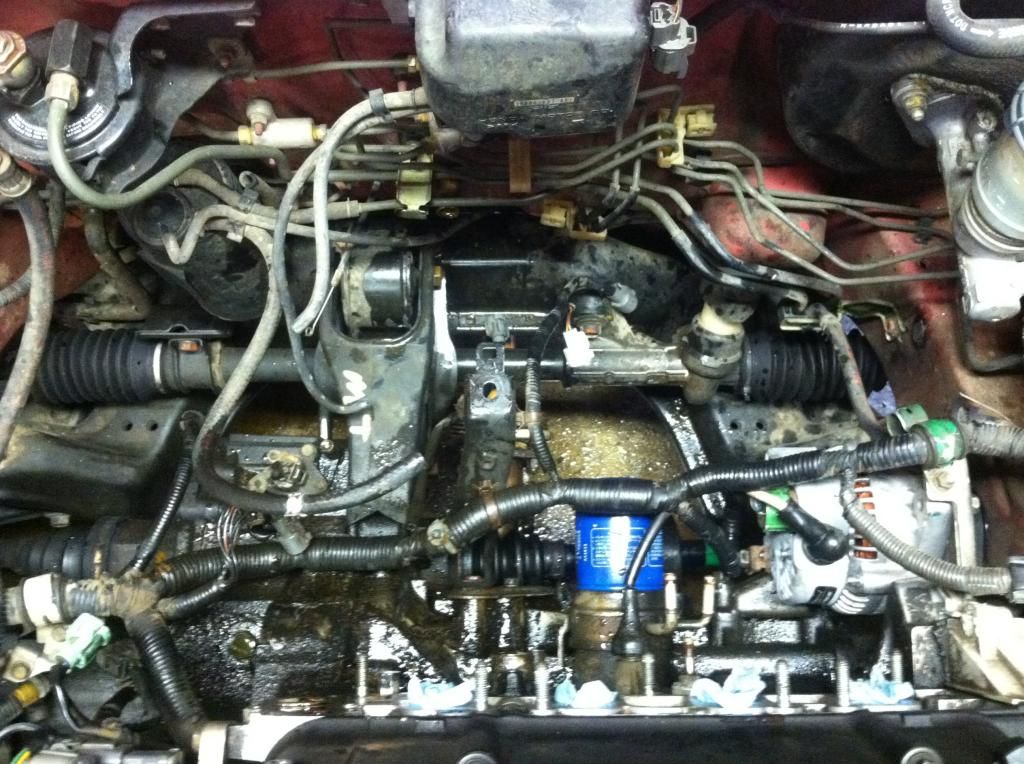
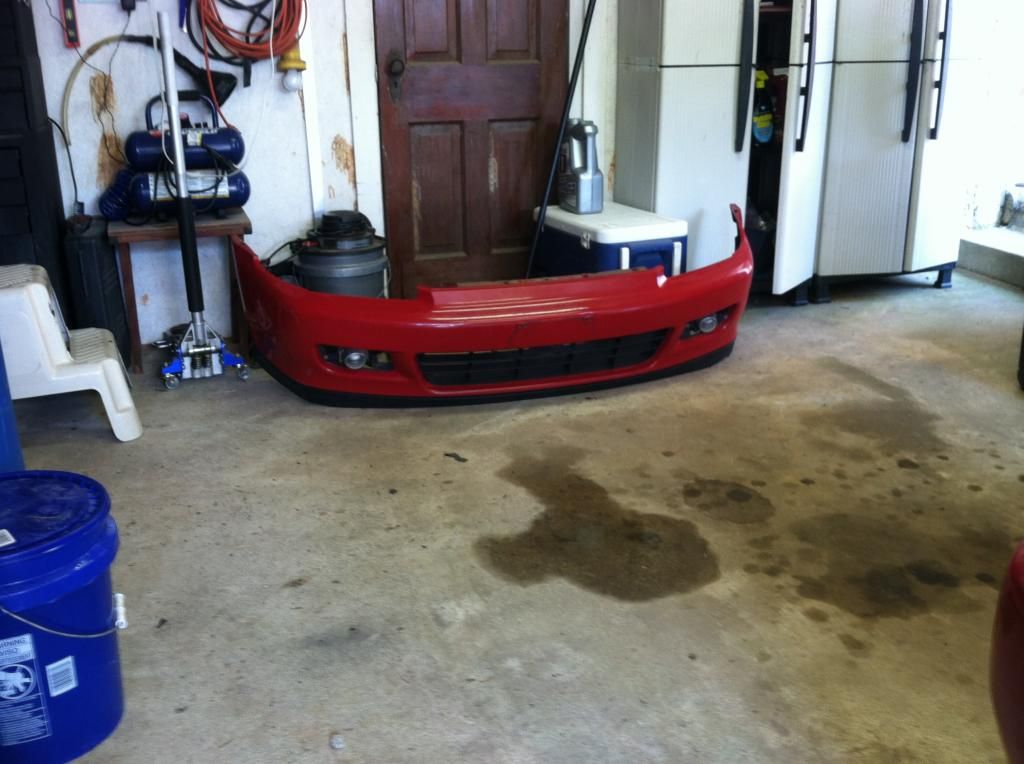
"Before" pic of the engine bay before cleaning:
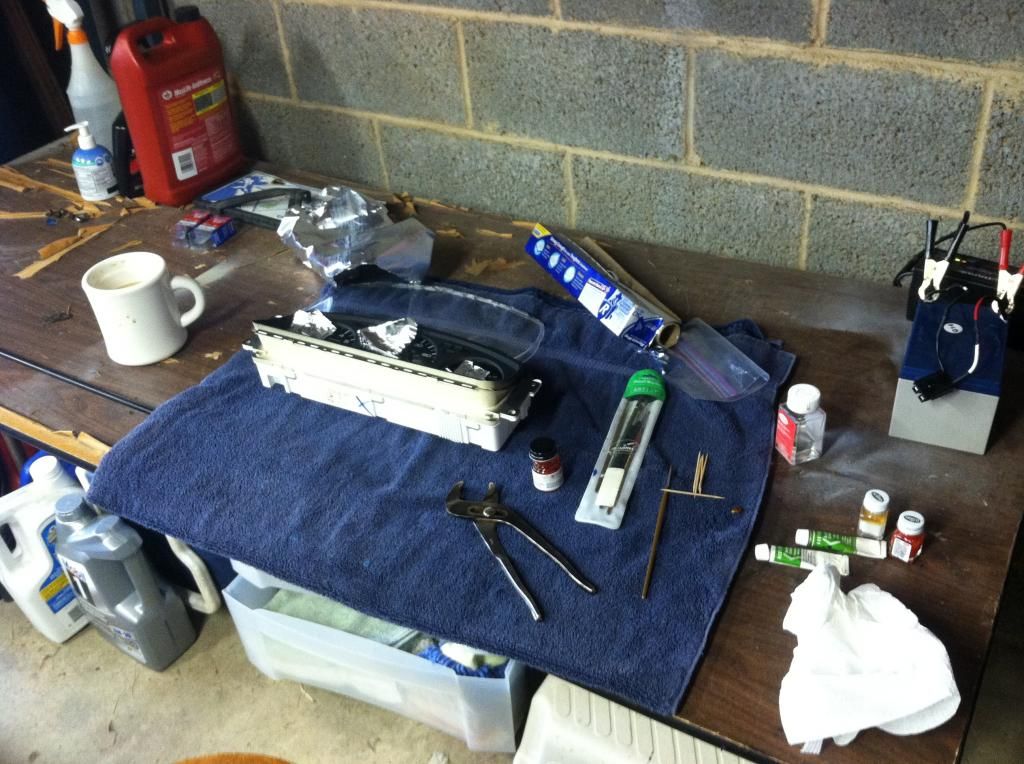
The tools for the job (Dollar General Oven Cleaner not pictured)
Check out that filthy block!
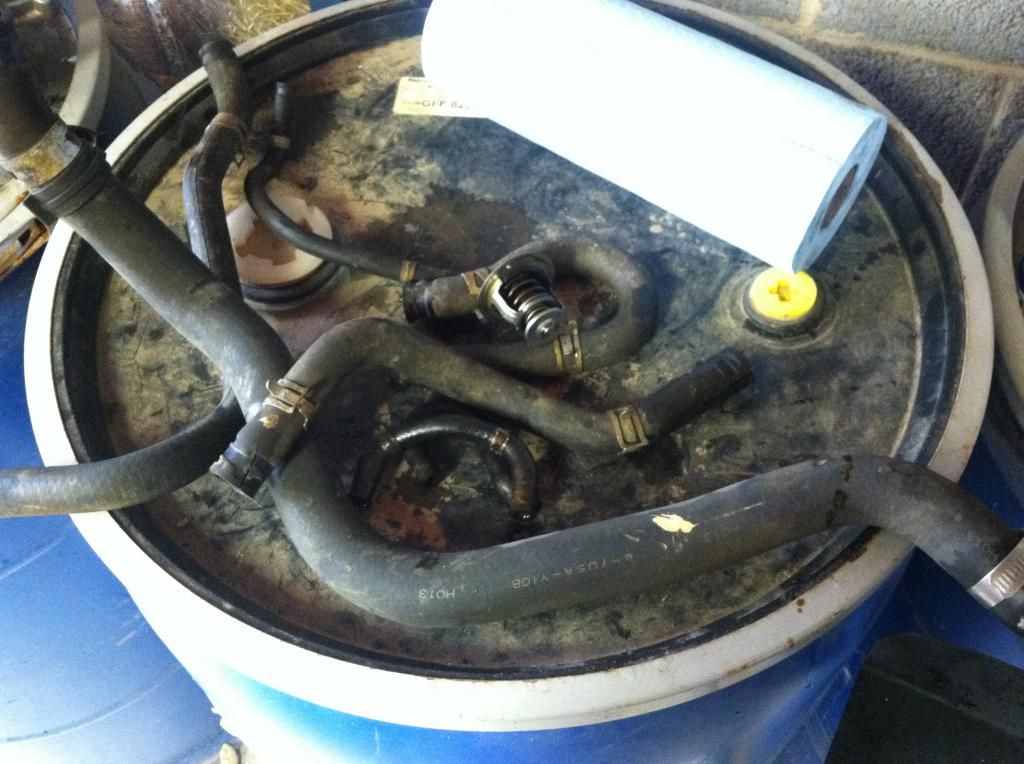
Beat up hoses:
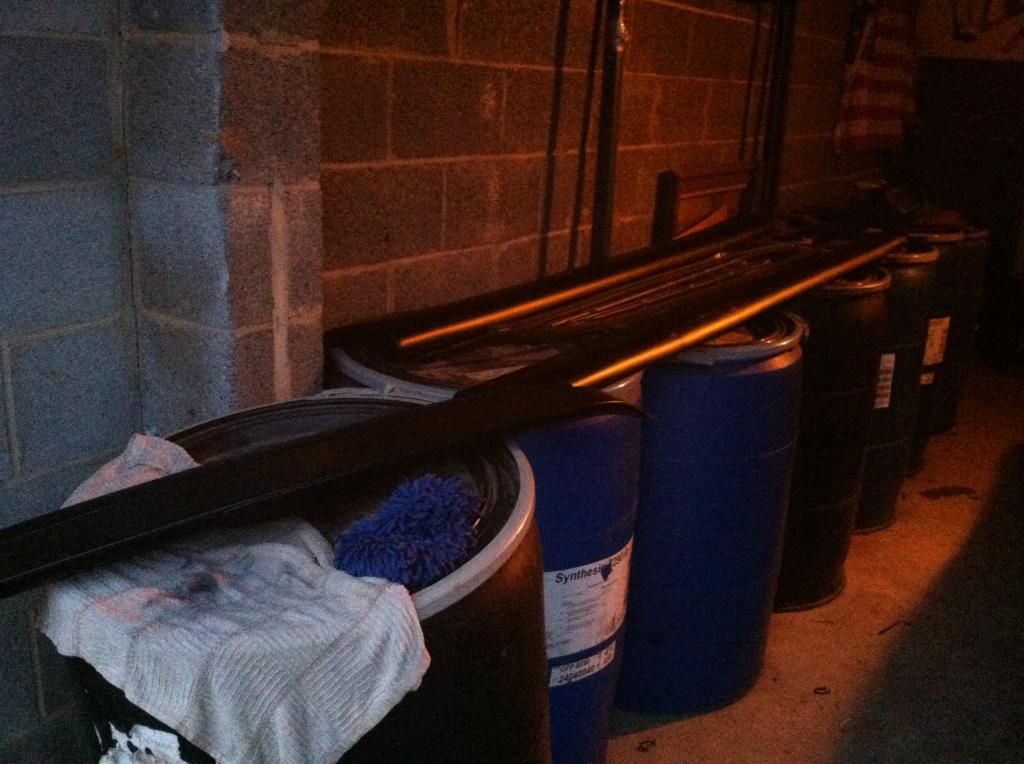
Dirty parts awaiting cleaning:
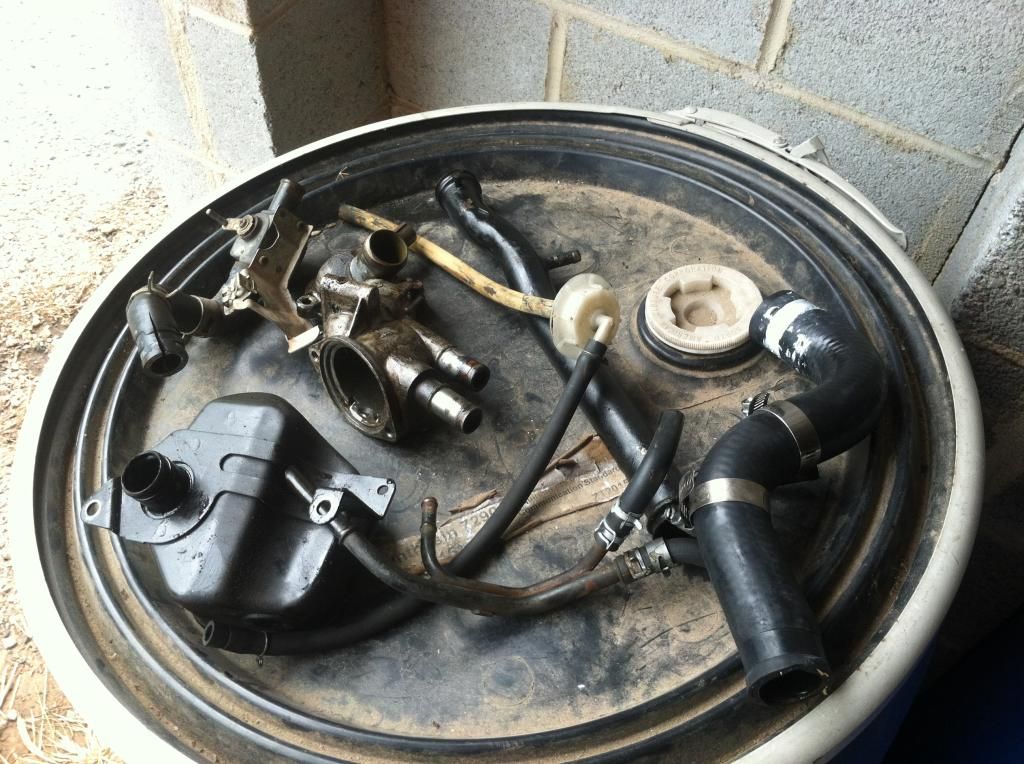
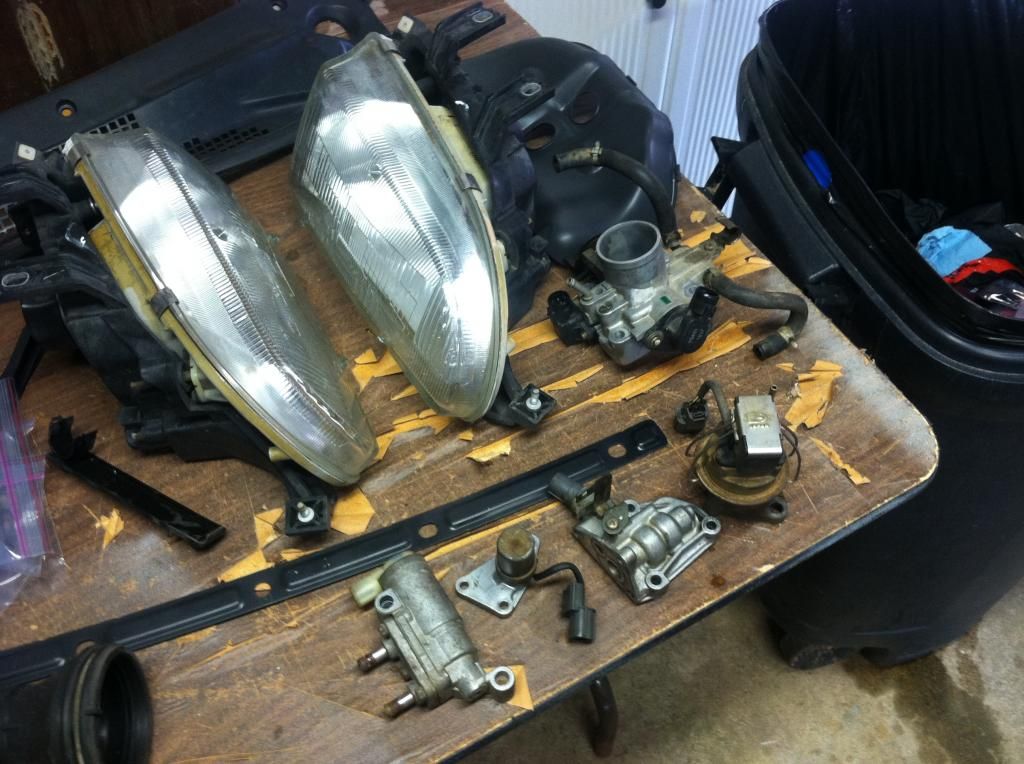
Parts that had been cleaned, awaiting install. Headlights were cleaned inside/out:
My method for staying organized during tear-down sessions:
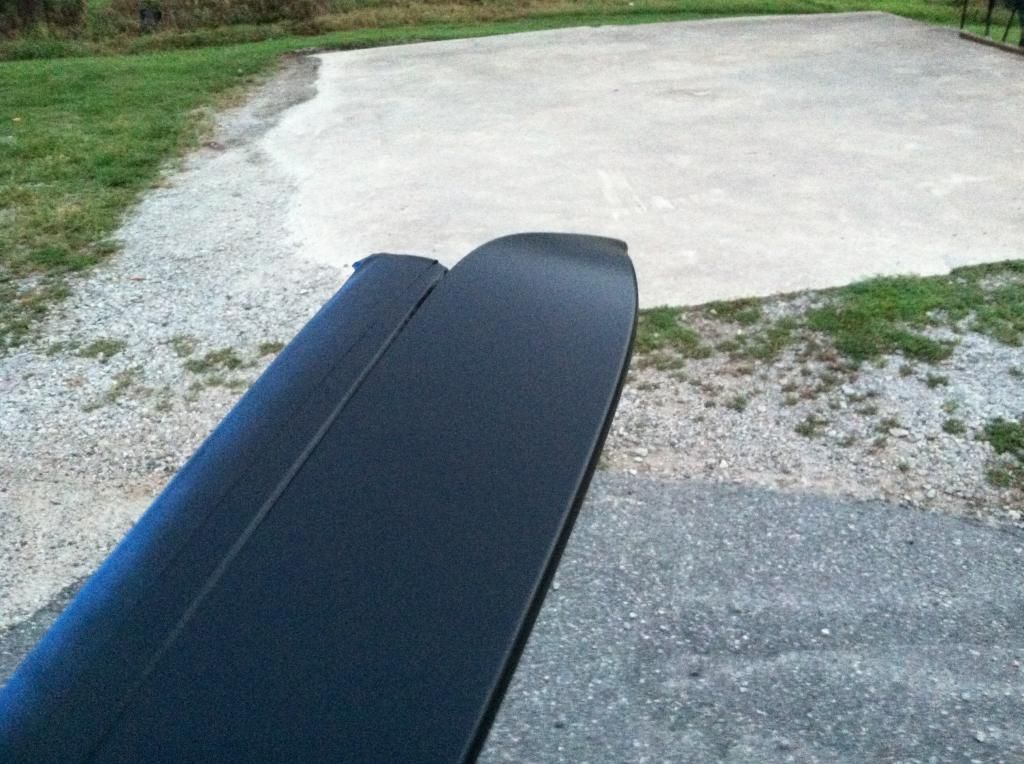
92-95 Civics have one of the best looking Honda bumpers ever, IMHO:
Some parts getting fresh paint:
My lil' buddy (pic not mine; from internets) :
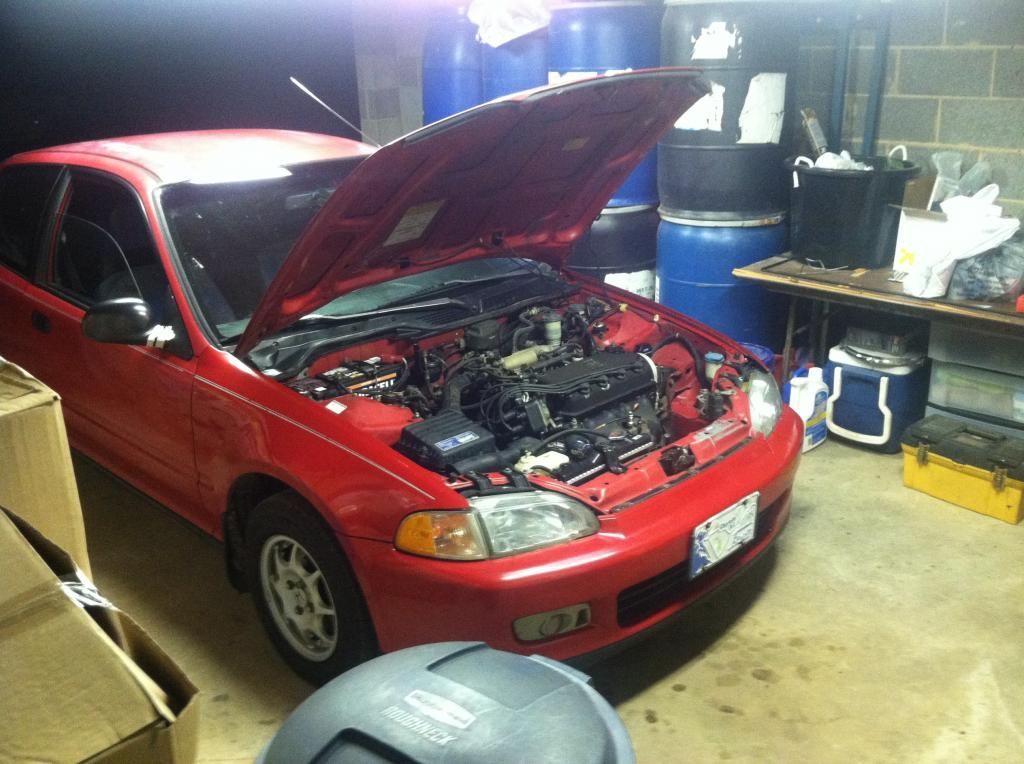
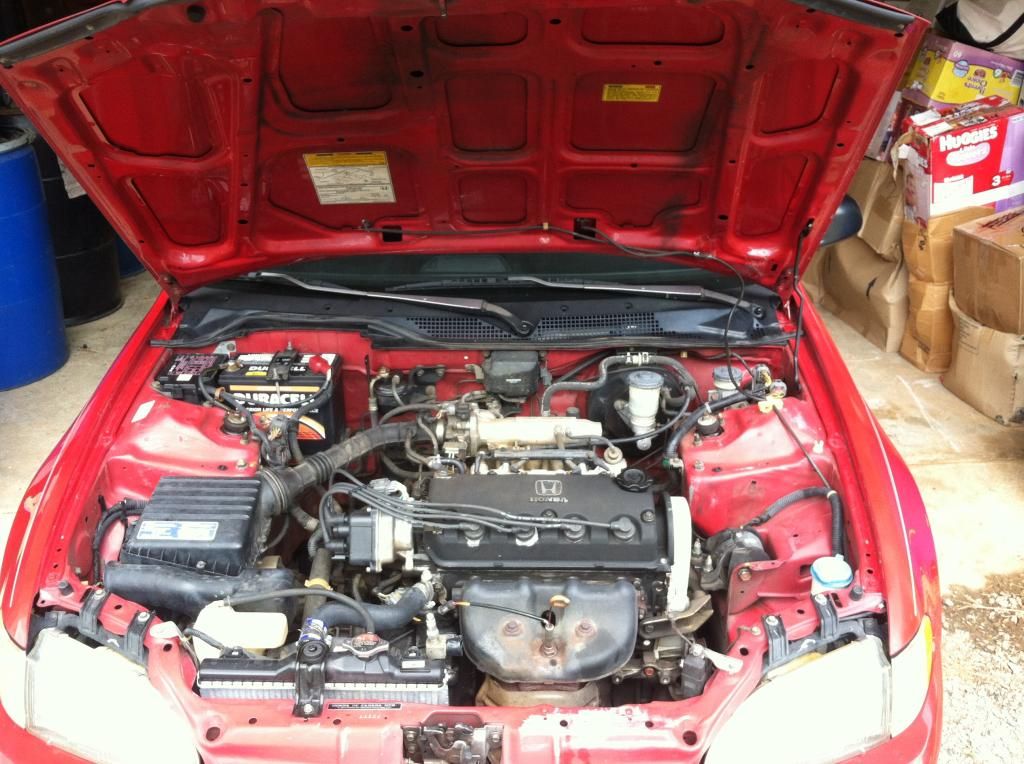
To wrap up this post, here's some "after" pictures of the engine bay. Not show-ready yet, but working in that direction...
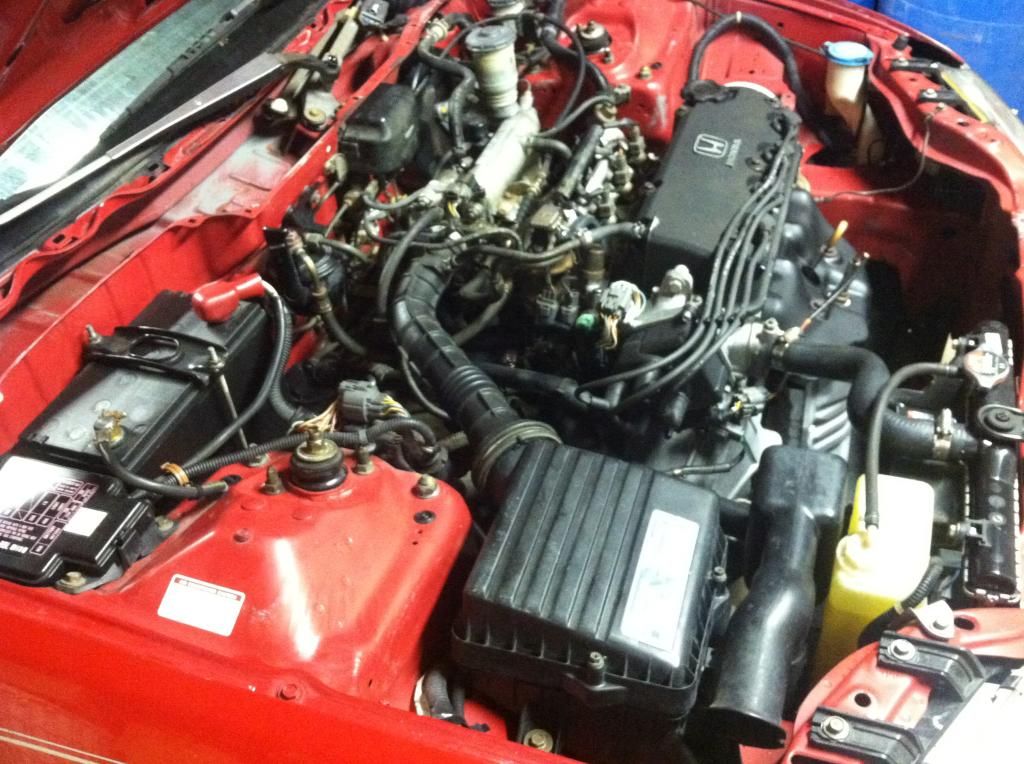
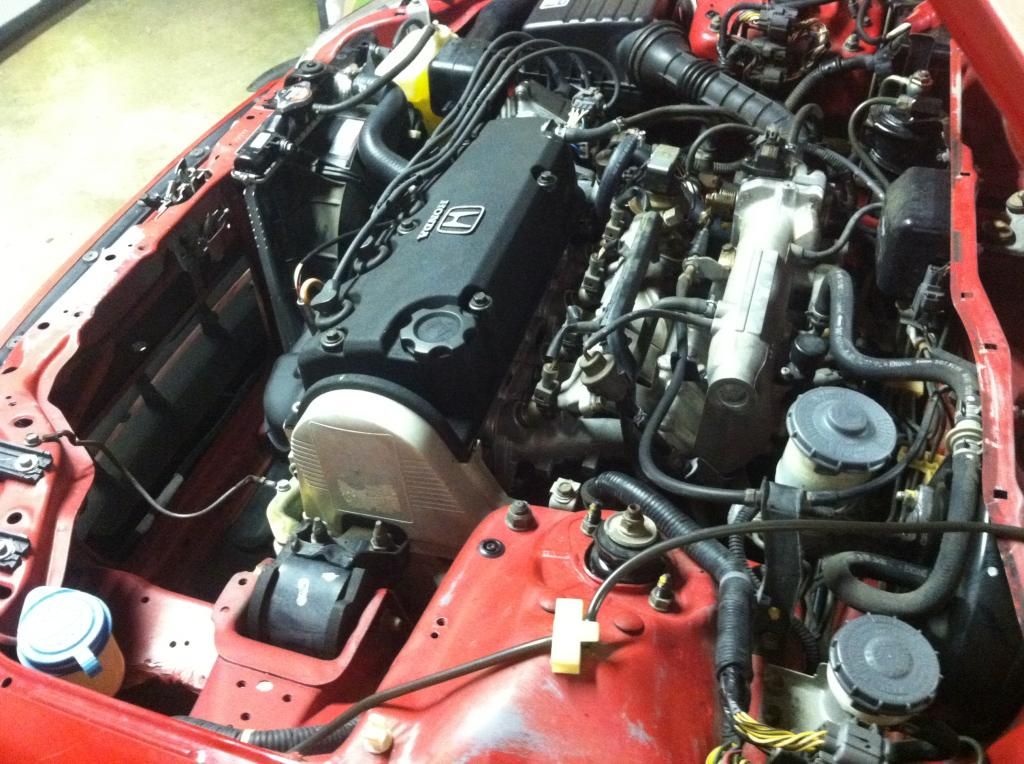

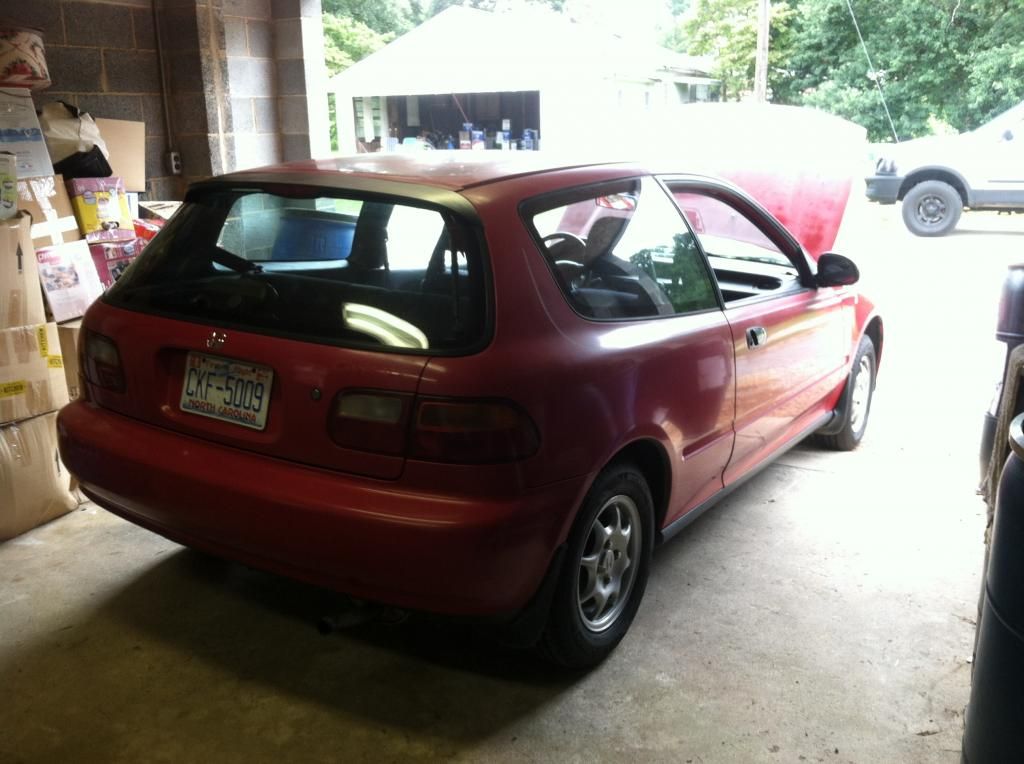
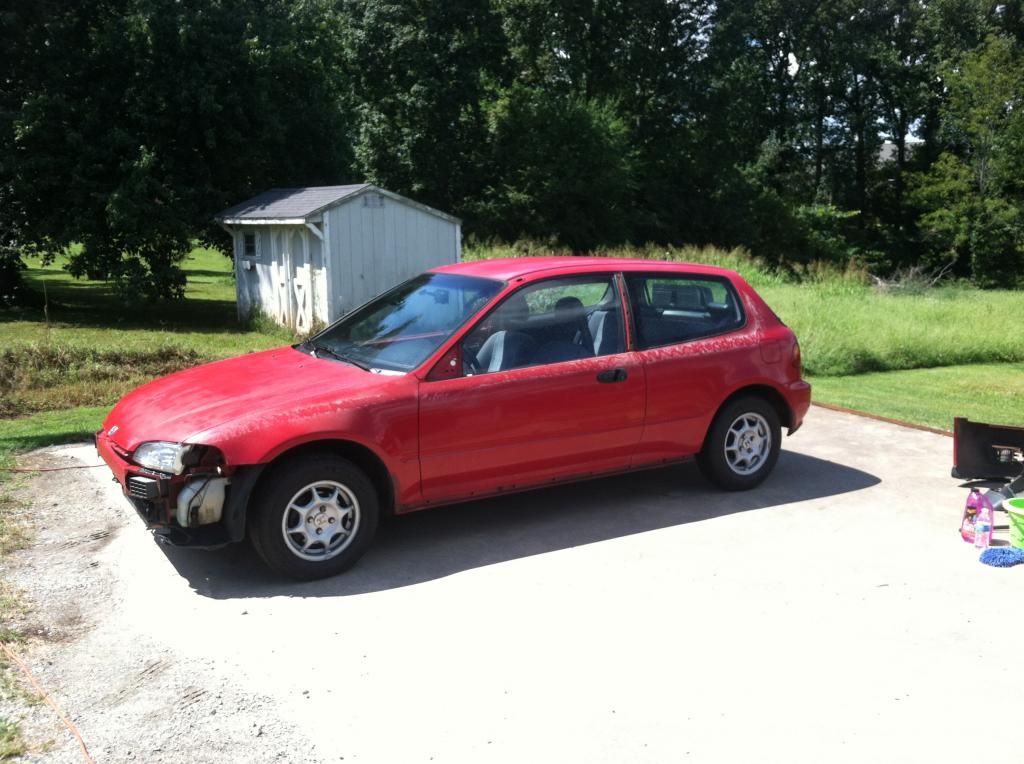
...and an artsy-fartsy final exterior shot before the overhaul on the exterior begins.
That's it for now. More to come.
Thanks for eco-tuning in!
I hope everyone’s well. I’ve been away for a bit, due to a crashed HD on our Mac. I went out to start my car this past Wed morning (the morning after the Mac crashed) and the car would not turn over. When the key was turned to position III, lights on the dash came on, but no sounds, no action, nothing, nada... I was def scratching my head at that point. After much troubleshooting (battery, fuses, connections, etc...) I finally made a call to just remove the starter and take it to get it tested. The starter was the original OEM unit, and tested "fail" at Autozone. Seemed simple enough to just replace the starter at that point.
Since I missed work that day due to the issue, while I was removing the starter, I pretty much just decided to "go to town" on the car, moving forward with all the remaining mechanical/engine work I had planned to (eventually) do, but wasn't sure when I would have the time to get around to it. A list below outlines the work performed over the past week:
- Replaced gaskets for: Intake Manifold, EGR, Throttle Body, VTEC solenoid, Thermostat, IACV
- Replaced all heater hoses (around 9 total; including radiator and lines running to/from oil filter housing)
- Replaced thermostat
- Replaced starter (w/ lifetime warranty unit from Autozone)
- Coolant system drain and fill
- Tooth-brush cleaned engine block and engine bay (Dollar General oven cleaner worked great for removing the stuck-on grease from the block!)
- Removed decals from battery to clean up look
- Painted exhaust manifold with VHT Flame Proof “Aluminum” Paint
- Painted exhaust mani. heat shield + bumper bracket w/ VHT Blk Brake Caliper Paint (hi-heat).
After all the gasket and fitted-hose chasing-down and installing was completed, I went to fire up the engine. No start...still. No sound upon turning key, nothing...
That was on Saturday evening. By now I was nearly out of ideas. So, I went back to my good old friend, the internet. I found out that there is a SECOND rubber stopper pad on the clutch pedal assembly that can and does go bad. I had previously checked the first (lower; in plain view) stopper pad location, which looked like it was replaced in recent times with the (revised) neoprone pad. Fans of older Honda’s know that these “stopper pads” on the brake and clutch pedals go bad over time, causing all sorts of annoying electrical havic. However, I’ve never had the top (hidden) pad go bad on me before. Apparently when this (fun to get to go) lil’ guy goes to stopper-pad-heaven, the car won’t start, as the pad is designed to sit on the end of a lever that touches and closes the switch circuit that allows power to the starter when the clutch pedal is pressed. No pad, no start. Of course, I came to this internet epiphany on a Saturday evening, and all my local Honda dealers were closed on both Sunday and Monday for the holiday. Thankfully, after several parts store calls, my local Advanced Auto was able to source a Dorman replacement part (#74015) from their Gastonia wearhouse, and I had the part to install on the VX yesterday afternoon. To install the pad, I ended up (lightly) duct taping it to the end of a long flat head screwdriver. I removed the driver’s seat for clearance/comfort, and used a large flood flash light to get some visibility up under the dash. I then halfway duct taped the little pad to a long flat head screwdriver, and use the screwdriver to get the pad in place and leverage it into the mounting hole. It was...fun.
After all that, car started up just fine. Acceleration feels good. I'm getting up tomorrow morning to complete the following:
- Install proper (4 heat range plugs)
- Install new fuel filter
- Begin removing interior trim
I'll come back tomorrow with another post. Late and time for bed.
For now, here's some pics from the past week:
"Before" pic of the engine bay before cleaning:

The tools for the job
(Dollar General Oven Cleaner not pictured) 
Check out that filthy block!

Beat up hoses:

Dirty parts awaiting cleaning:

Parts that had been cleaned, awaiting install. Headlights were cleaned inside/out:

My method for staying organized during tear-down sessions:

92-95 Civics have one of the best looking Honda bumpers ever, IMHO:

Some parts getting fresh paint:

My lil' buddy (pic not mine; from internets) :

To wrap up this post, here's some "after" pictures of the engine bay. Not show-ready yet, but working in that direction...


...and an artsy-fartsy final exterior shot before the overhaul on the exterior begins.

That's it for now. More to come.
Thanks for eco-tuning in!
10-03-2014, 01:49 AM
#4
Honda-Tech Member
Thread Starter
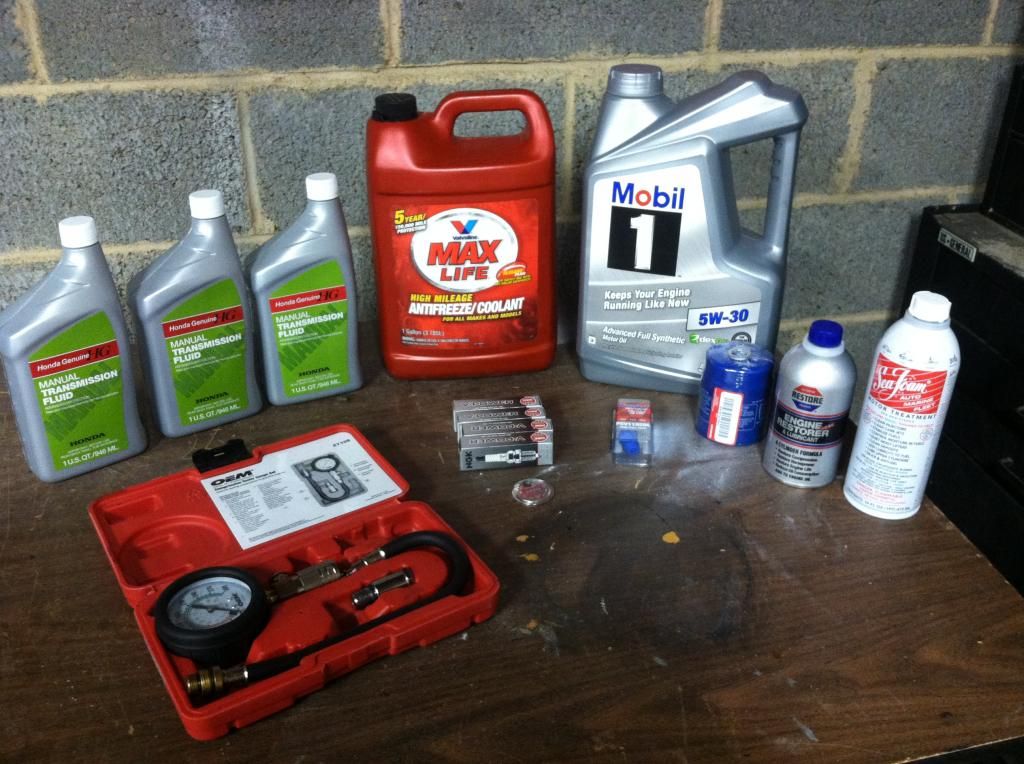
Update 9/6/14: More Parts Acquirement + Pics
I'm anxious to get started on my "special project" as well. I'm sure you can guess what it may be. A hint: I wish I had completed it already, may have helped to avoid a near-death accident yesterday on my commute home...
Here's some pics of all of the parts that have come in over the last week. For the married men, my wife has been making a mental inventory of part arrivals each day. So, I'm glad that everything is finally in, sans the LED headlight kit. It should arrive "overnight from Japan" in about a week.
Here's some pics of everything, since everyone knows build threads suck without them...
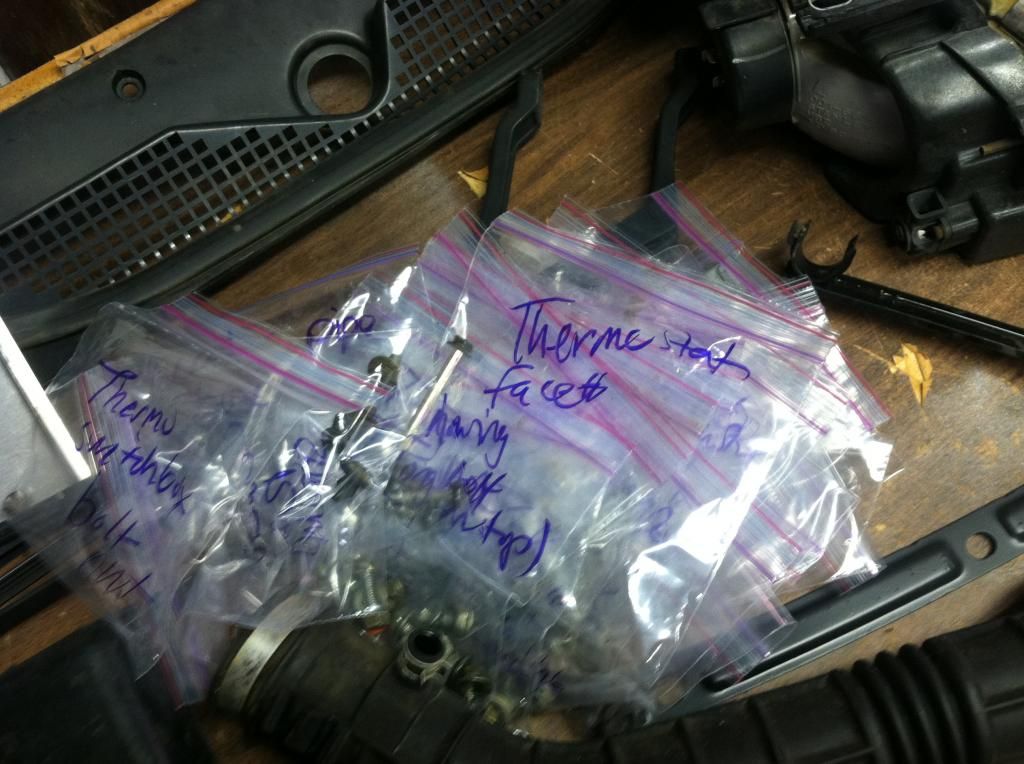
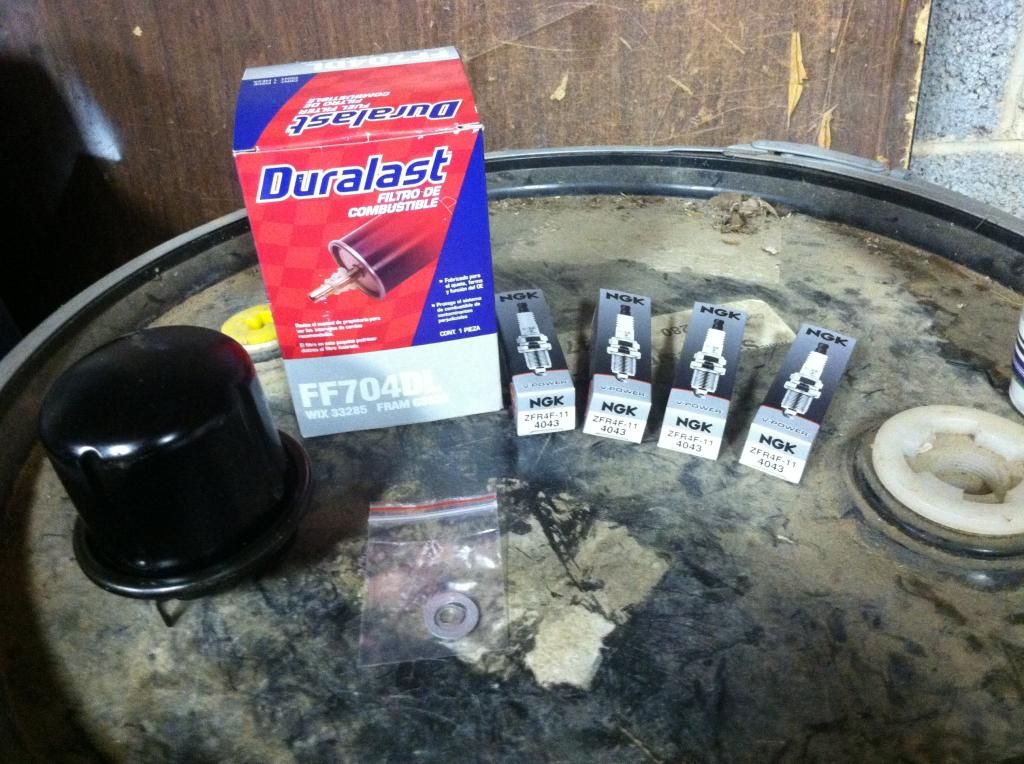
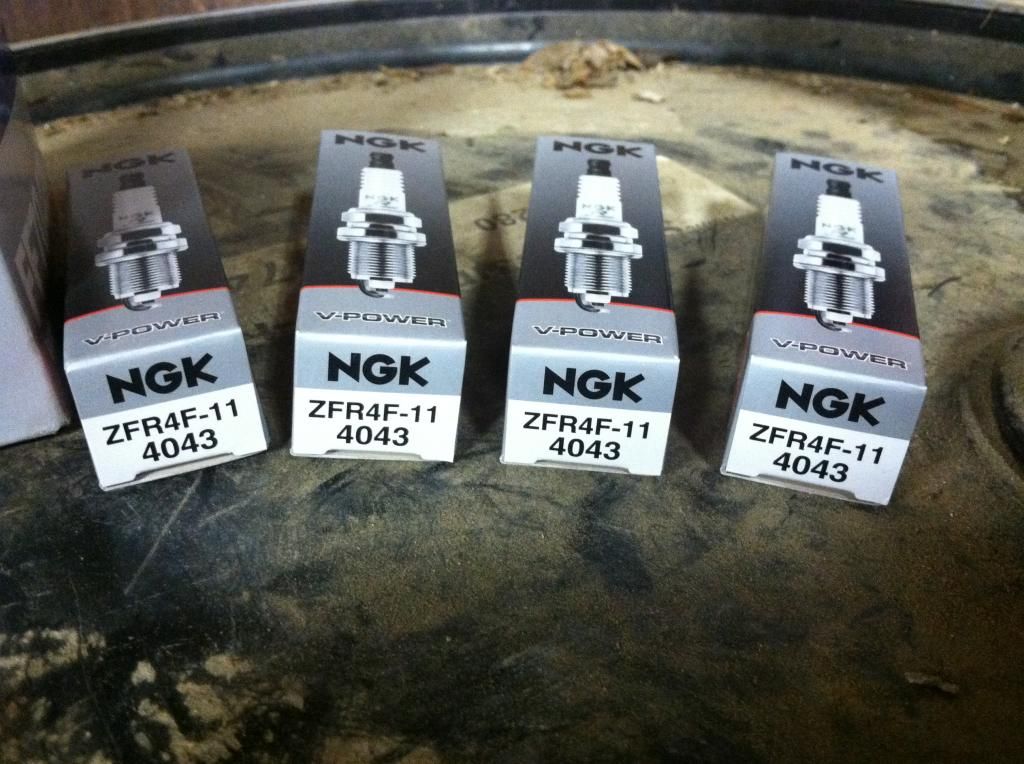
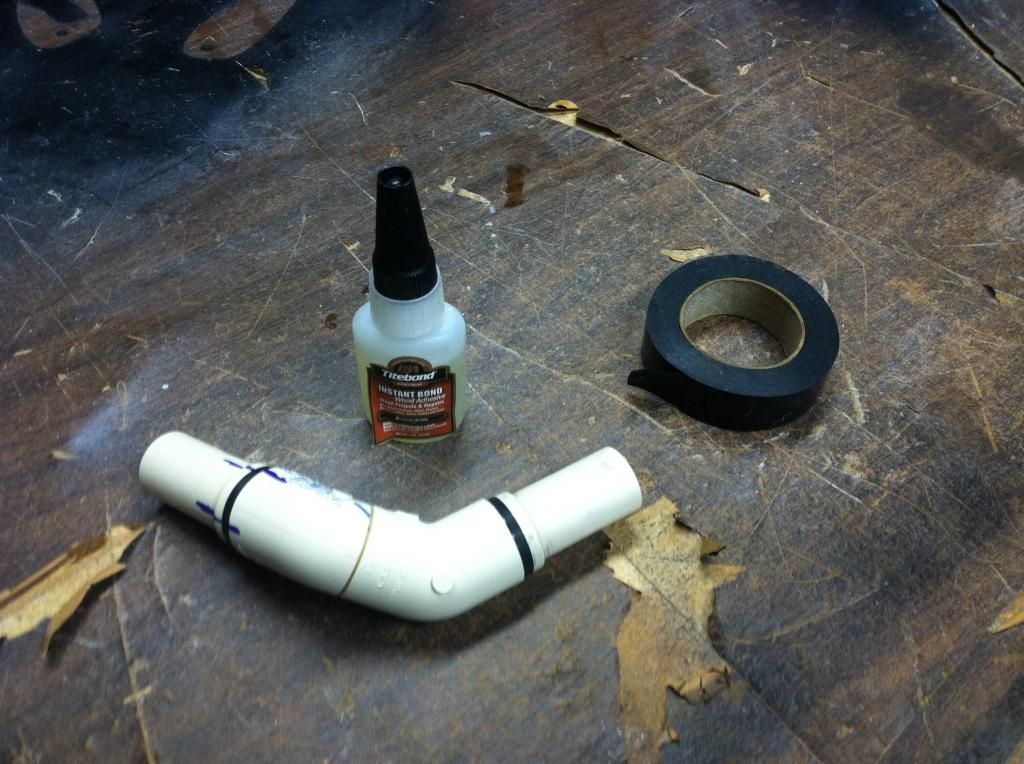
Fuel Filter and proper heat-range plugs (#4 within part number, not #5)
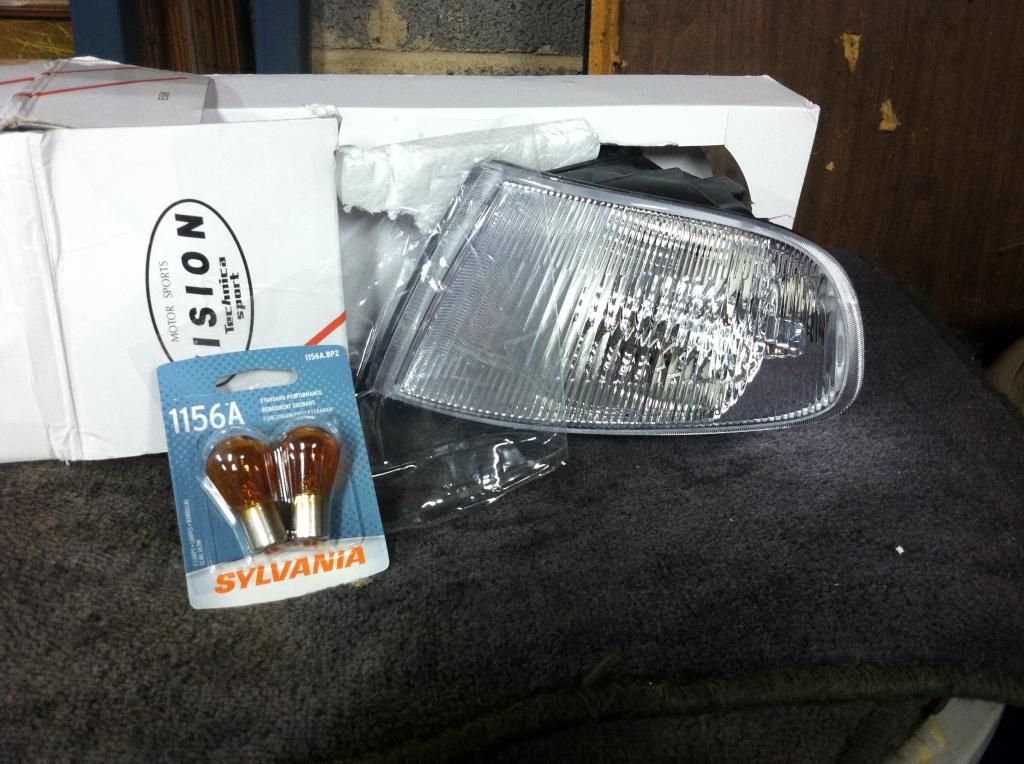
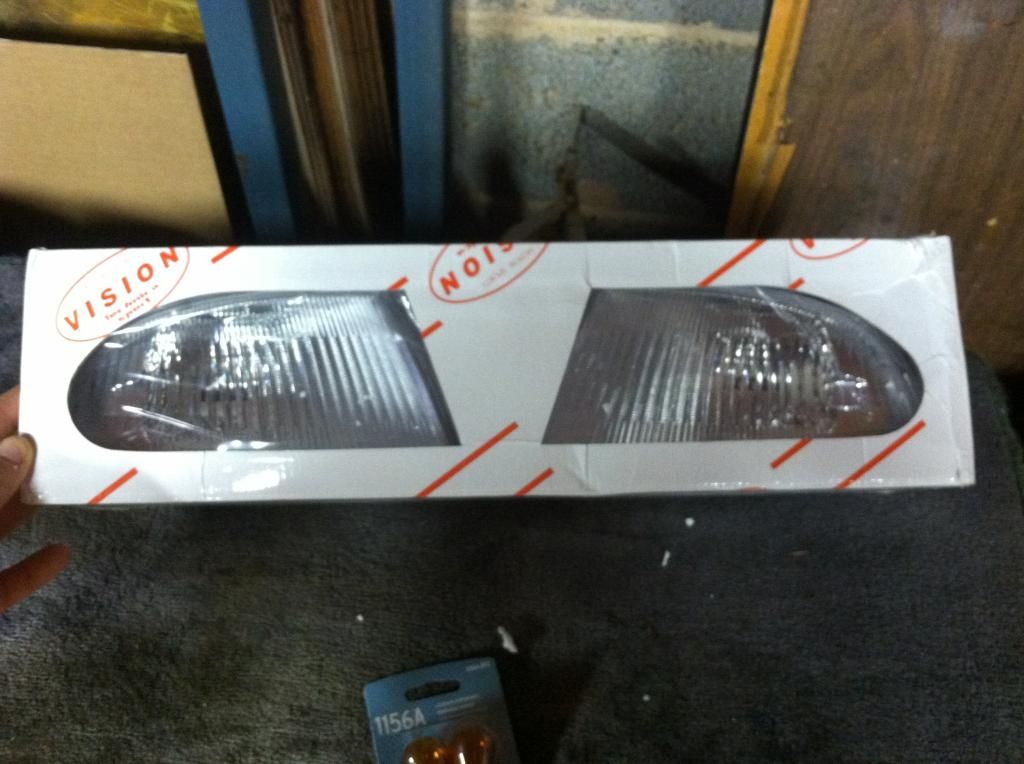
Vision Technica SiR-replica corners; 1156NA bulbs. Seem high quality!
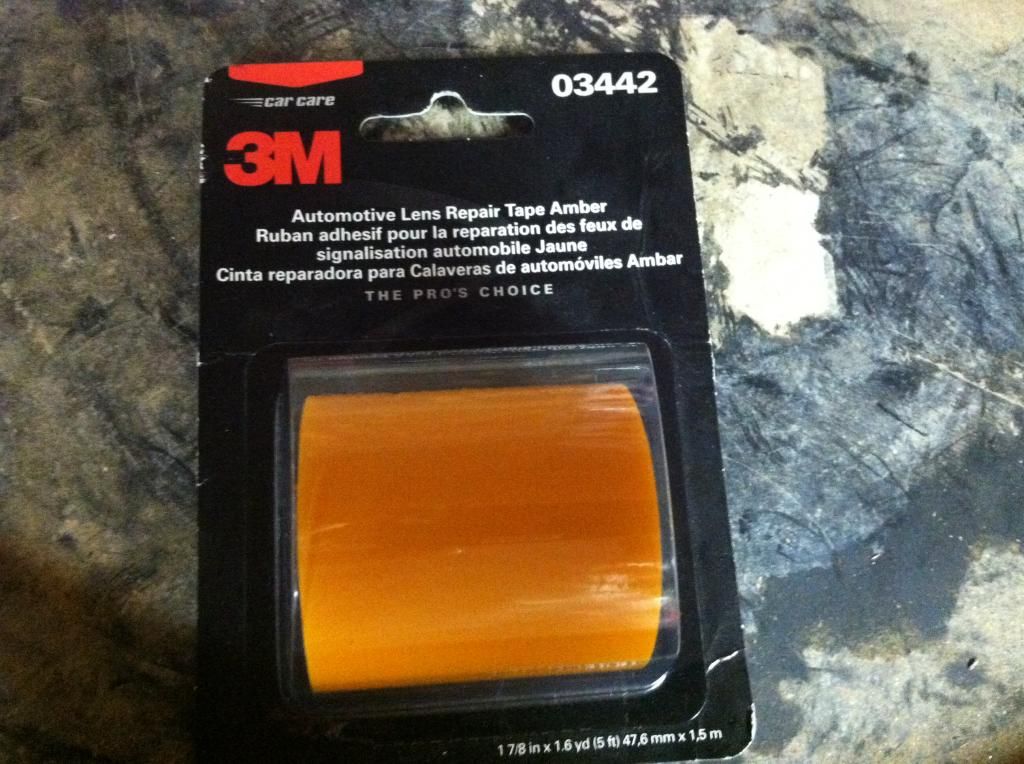
3M Amber repair tape I found at Advanced Auto Parts (for dash lighting)
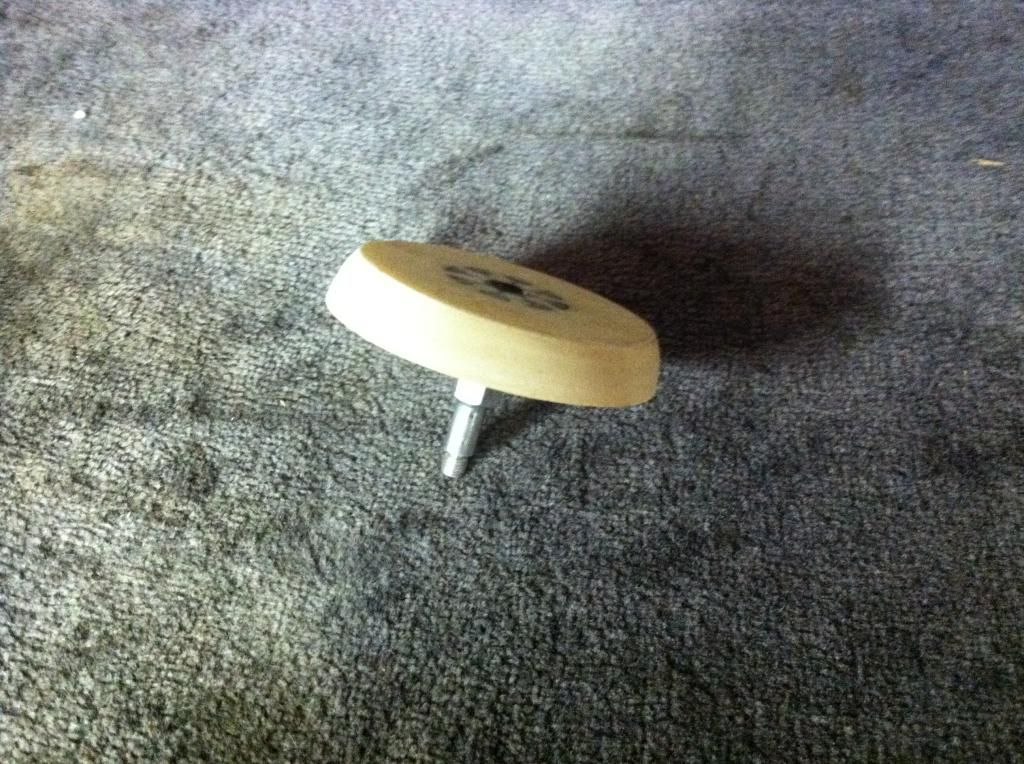
Here's the parts I'll use on the exterior & paint restoration. The first pic is a 3M pinstripe removal tool/wheel. Cost me $35 from my local NAPA 2 years back. Ouch! But: (1) I've used it on 4 cars now; (2) nothing is more hideous than a pinstripe. This little guy is worth it's weight in gold!! Great tool. Very safe on paint as well.
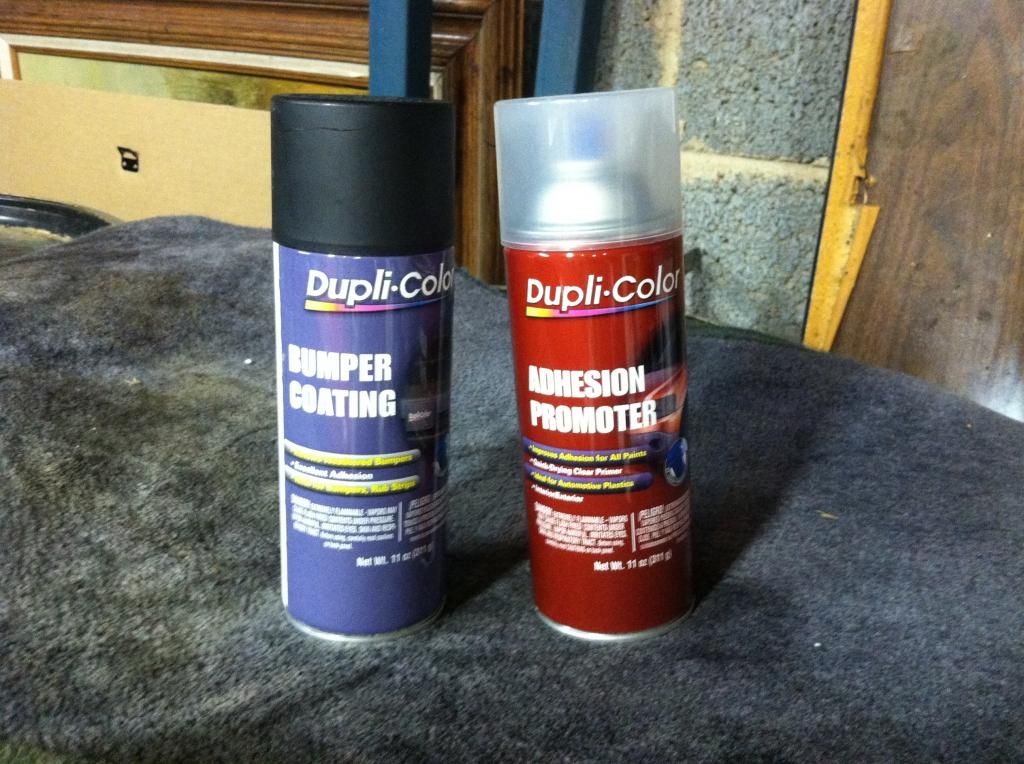
For trim pieces, this combo picture below has served me well for years. They go together like GC's and Koni's! Just degrease/dry your parts, one coat of the AP and 2-3 coats of the bumper paint. I should also note that Duplicolor makes and sells a product in a green can called "Trim Paint". However, from my own personal experience, I have found the "Bumper Paint" to serve a better purpose for all trim (bumper, plastic, and metal). It tends to lay down easier, is more archival, and (most importantly) is more "black". The trim paint starts black, but fades quickly in the sun to more of a dark charcoal. This combo ensures an "OEM like-new" look, while I've seen others use Krylon Fusion for trim pieces, which is just too glossy and ends up looking cheap, IMO. I always treat the trim pieces in my builds with this AP and BP combo, and I never touch a single ounce of Armour All, or "Back to Black" or similar greasy goo to my cars, ever. The trim pieces are always black, wash-to-wash. Now, if anything isn't easily removed for paint or is more of a rubber material (weatherstripping, etc...), I do use a product called "Forever Black". But this is a completely different product from the more common "band-aid" products available at parts stores. It's actually a black die that is permanent. Check it out on Google. Rustoleum has caught on to this product, and now offers this product, which is fairly similar, and it IS available locally. It's pretty good. I used it on my truck and the results were good. It's just a bit harder to work with than Forever Black (dries up too quick when applying, so doesn't go on as smooth; also is too runny, feels more like a water-based paint, where-is the Forever Black applies on more smooth-gliding, with the consistency of a silicone-based gel). It's a pain to have to order it and wait for it, but nothing beats Forever Black when it comes to trim gel. OK, I'll stop now. I just get so tired of seeing these band-aid fixes for trim, and I feel that trim is SO important to the aesthetics of a car, and is often not given the attention it deserves....
I didn't picture this product on a previous post, but did want to post it, as I found this stuff to be very valuable to me. GREAT for cleaning of stuck-on/stubborn grease from the engine block. Saved me much time. Cost about $2 per can at Dollar General. Just sprayed it on the block, waited about 5 minutes, tooth brushed the applied areas, and hosed off. Now, it will leave a bit of hazing to the finish of your block, but this can be wiped off later with WD40 and a rag.
--- (Continued from first part of this post; last part of page 4) ---
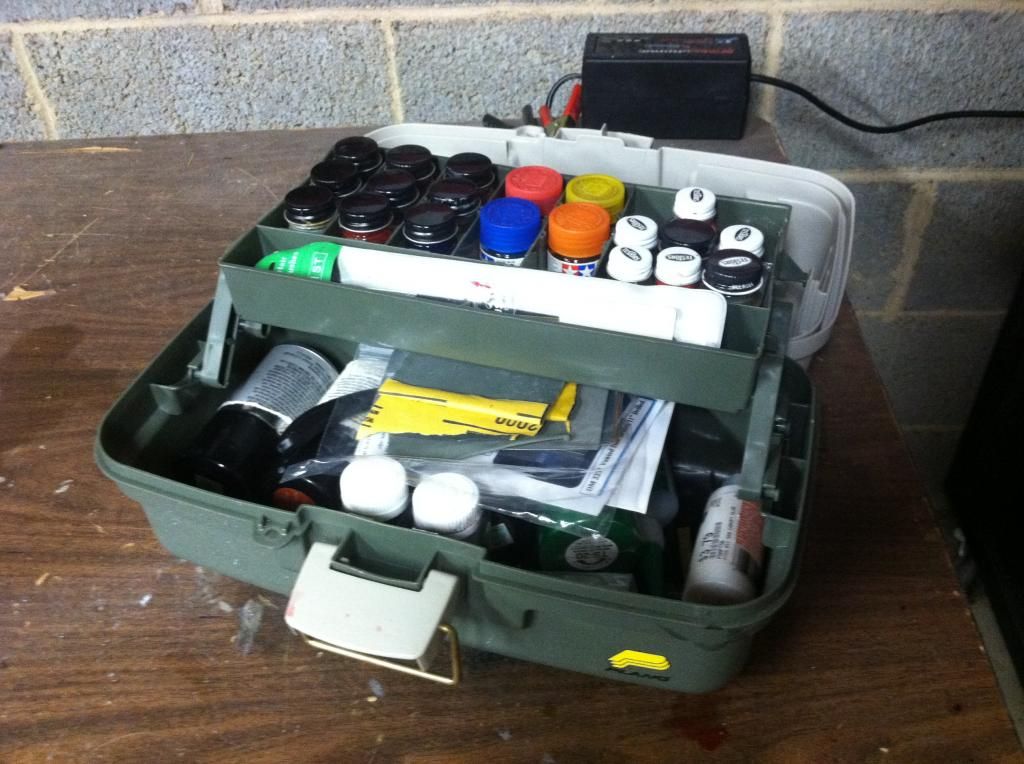
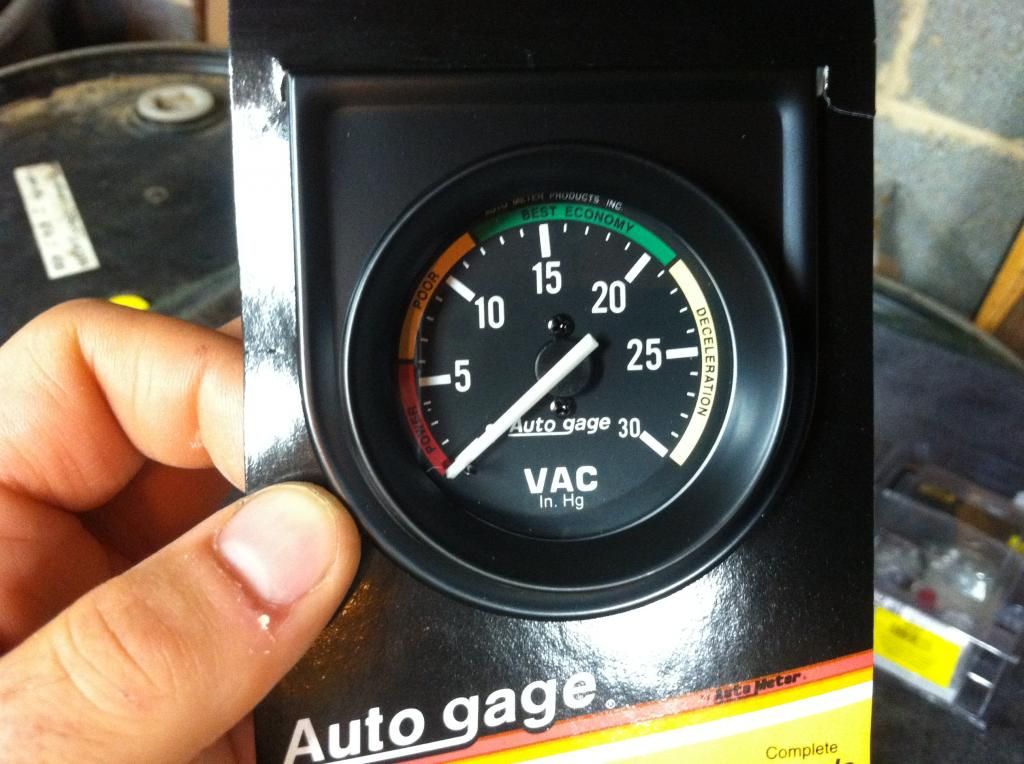
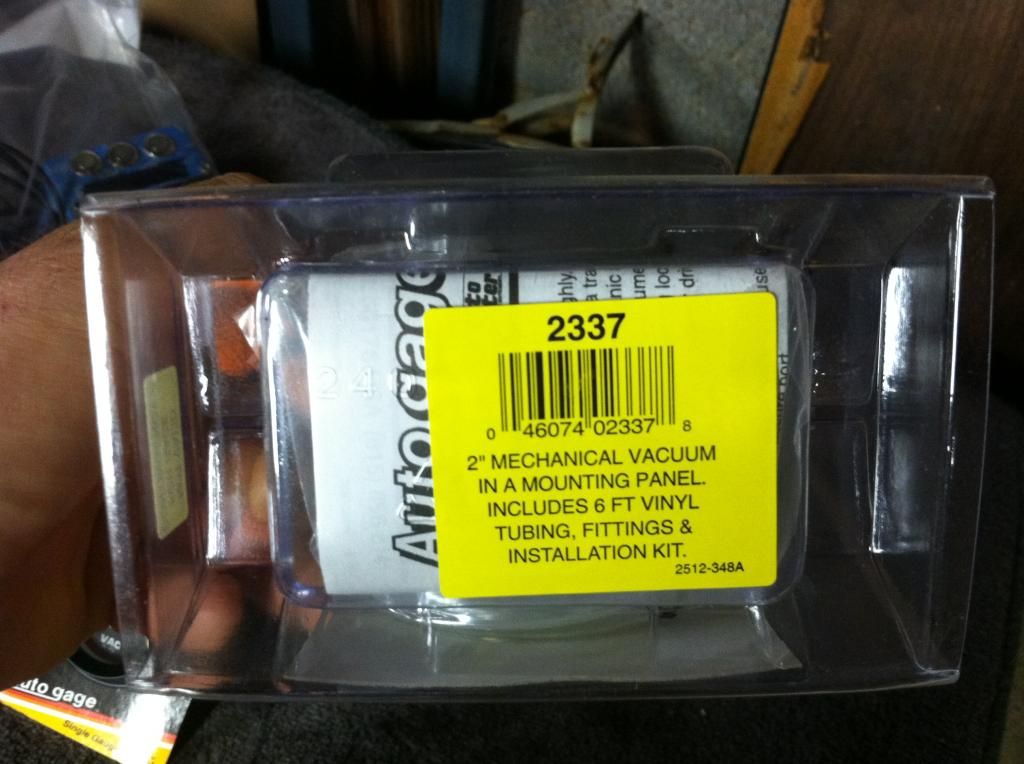
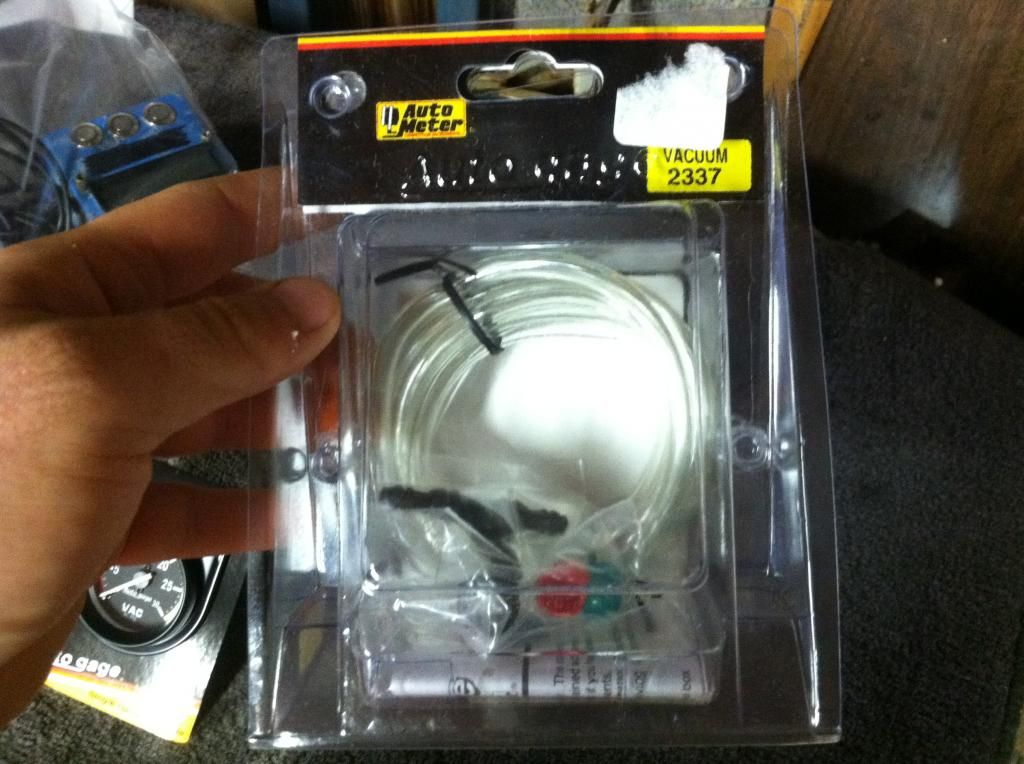
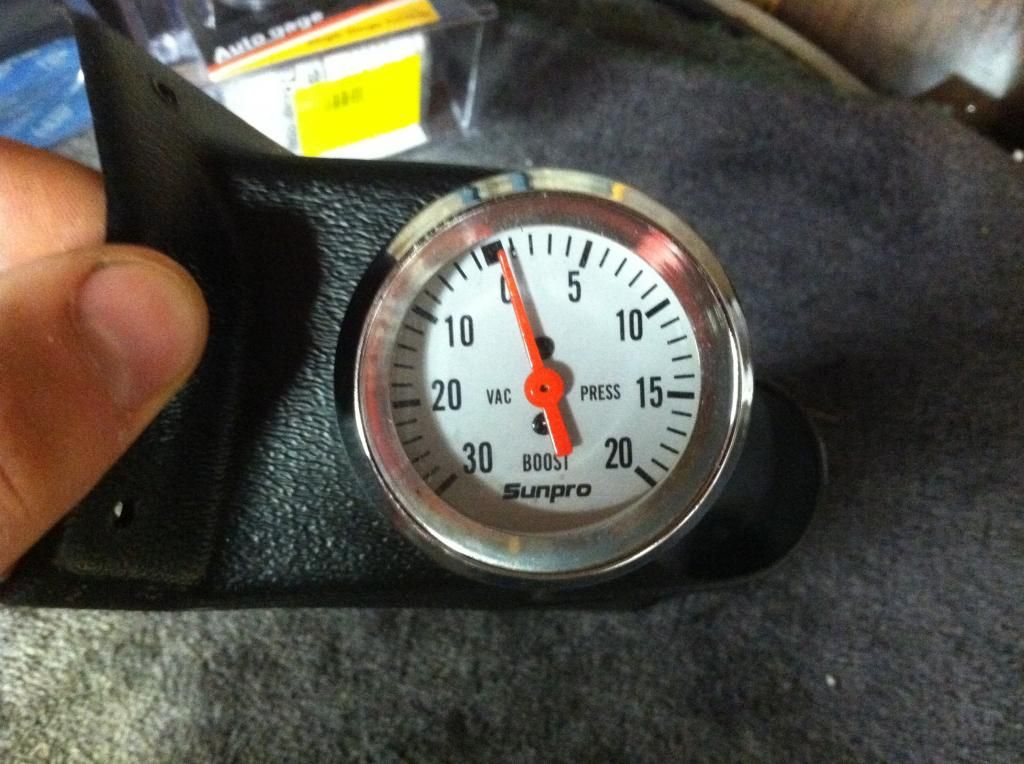
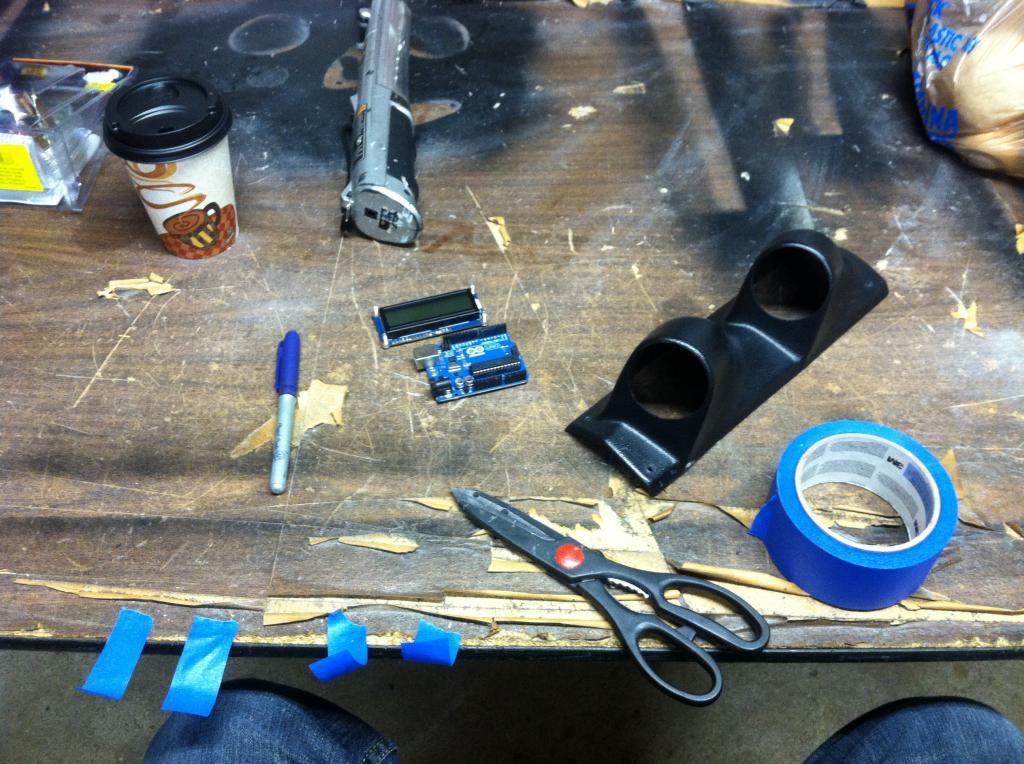
I was very excited to stumble upon this unit on Autozone.com during my search for a vacuum gauge. It's perfect for an "eco"-themed build, I believe.
I picked up this dual pod on CL (with the boost guage) for a great deal. The pod is made for my model car, so I was very fortunate. I suppose the ricer-movement also helped my chances. Anyway, plans are to mount the vacuum gauge on top and mod-up a clean way to mount the MPGuino off of the bottom hole.
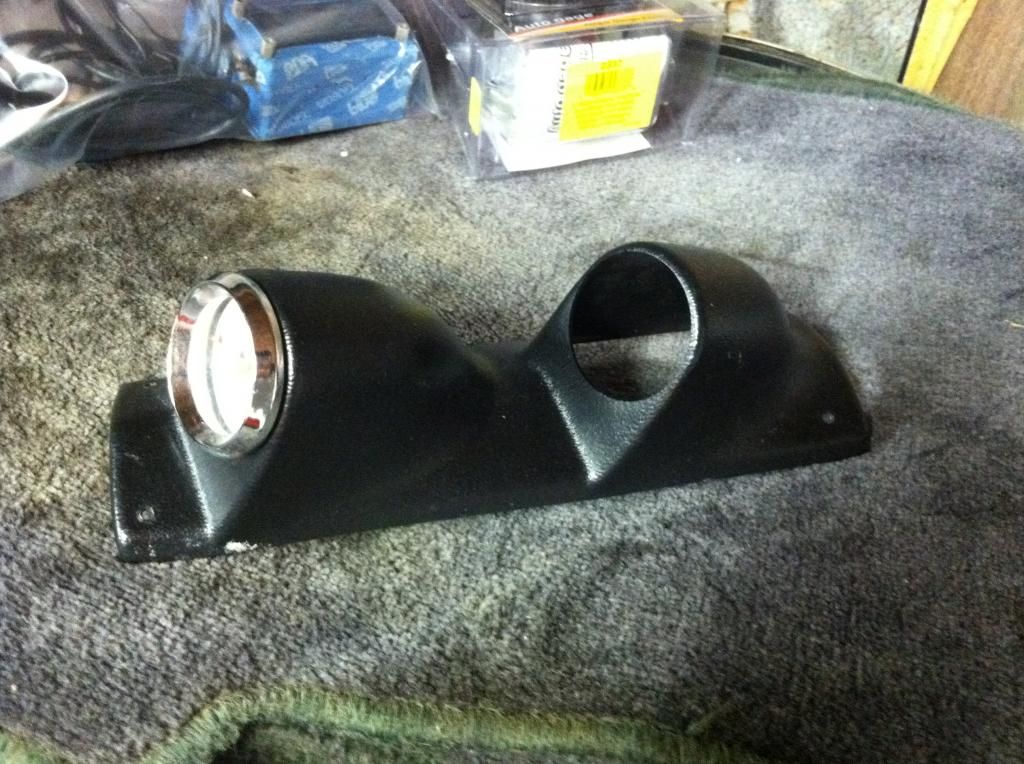
**Boost gauge pictured above is for sale. PM me your offer! **
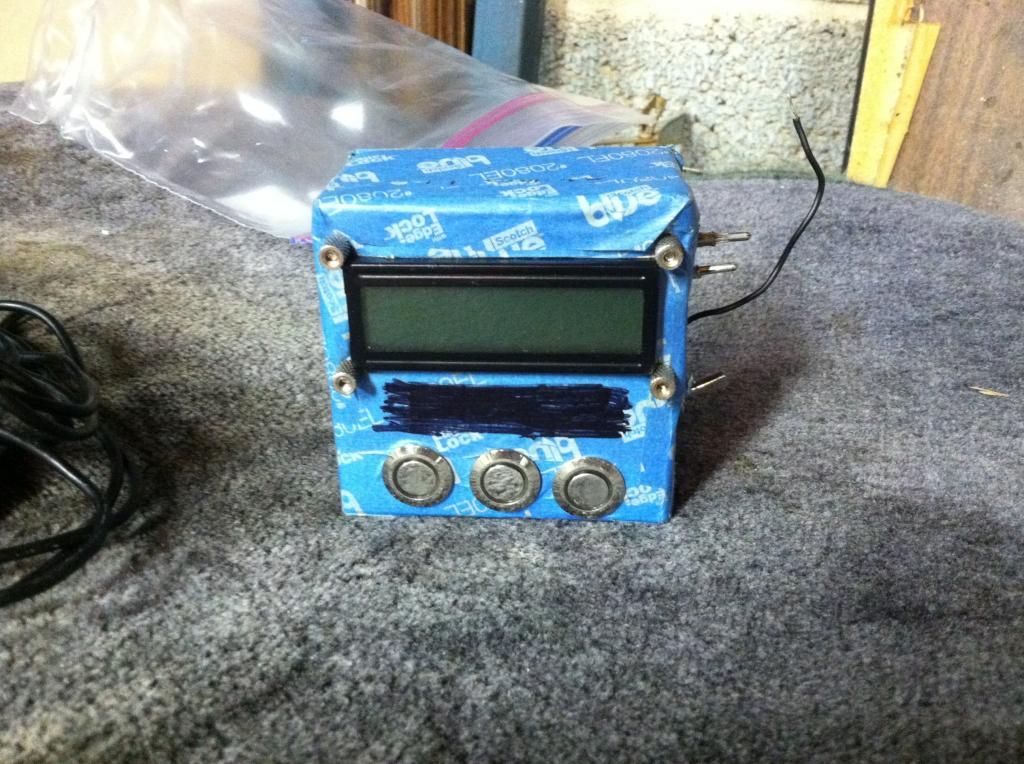
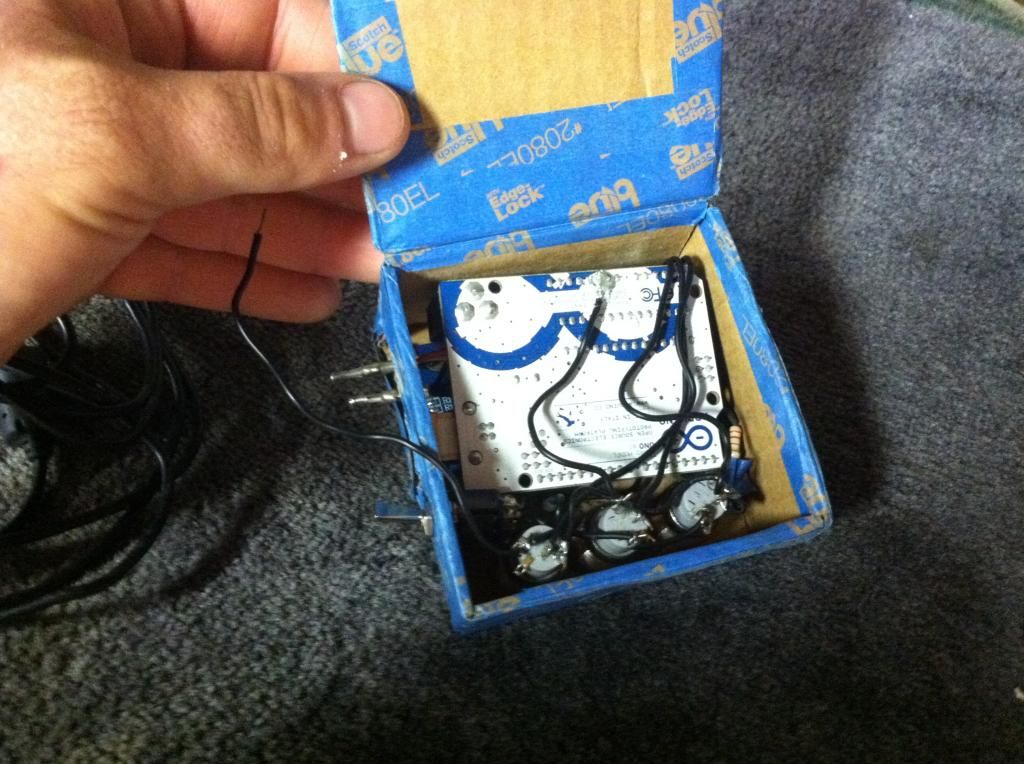
Here's the homemade MPGuino that I sourced from a user of the EcoModder forums for a great deal! I'll likely fab up another housing, as things aren't really (aesthetically) as "clean" as I'd like them to be as-is. Going to try and use some of the 3M amber tape for the screen as well. My goal is for all interior lighting/switches/radio to glow amber.
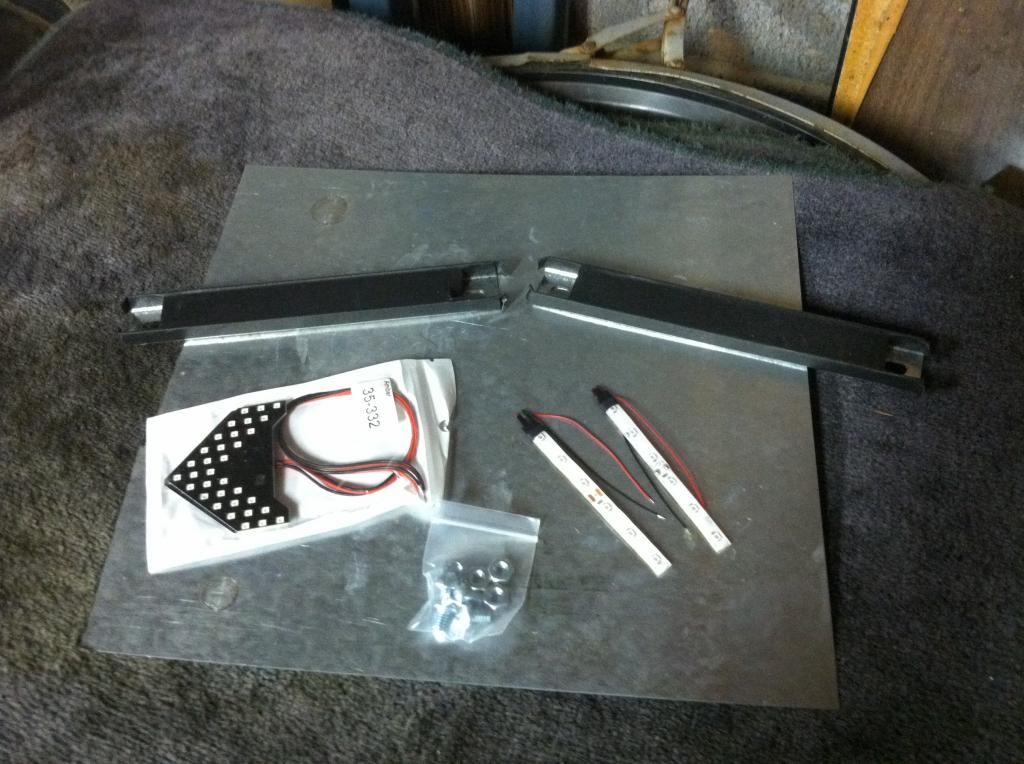
Stanley side-markers. Not looking forward to cutting the holes out. Never fun!
OEM radio delete:
Nokya bulbs replacements for my OEM fogs:
Here's all the collected parts for my "special project" for the rear hatch area
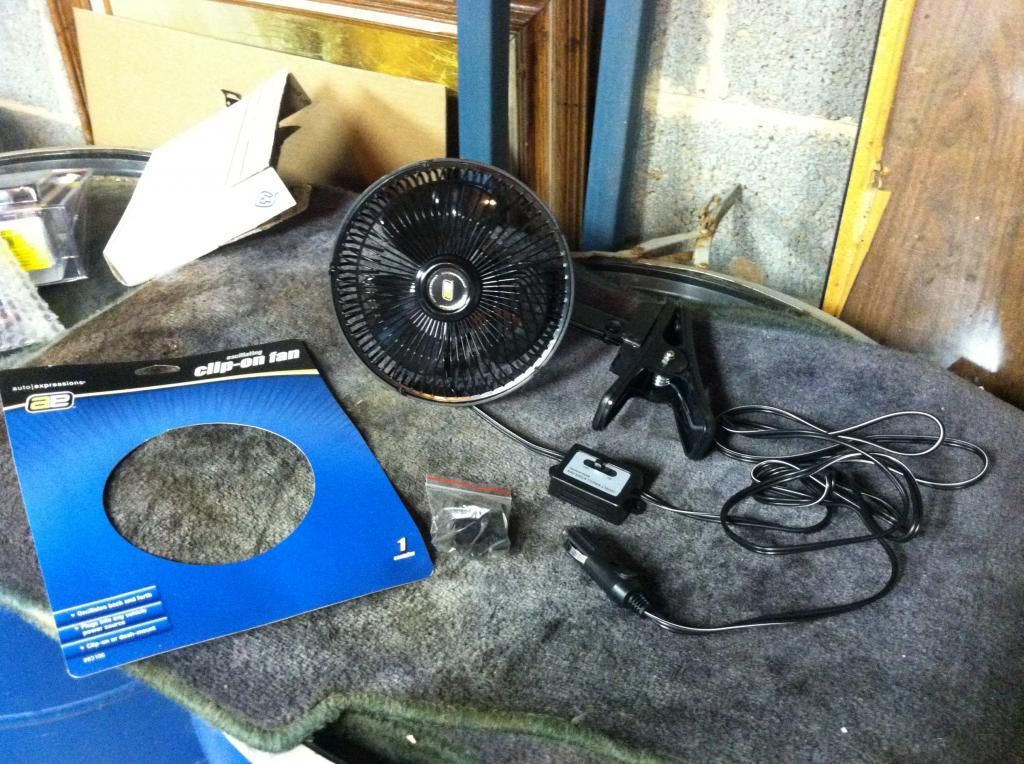
Here's a clip-on fan that I sourced at WalMart for about $12. I tested it out last week, and it works great! Love that it has an integrated switch and that it is screw-mountable (large clip assembly can be removed). I plan to fab up a custom mount for it, mounting it to a metal bar, and using some metal spacers and screws to mount the bar off of the existing mount holes for the passenger sun visor. The switch will get screwed into the same bar, and the cord will run (hidden) down the passenger A-pillar and underneath the dash to the cigarette lighter. Result (I hope) will be a clean OEM-like look, as well as a functional fan mounted right by my face.
Last, but not least, here's my mirror set-up. Panoramic rear-view mirror is GREAT and was sourced from Walmart for about $11. I love it, and think it's a nice alternative to the popular Wink mirrors, which are a bit of an overkill to install, and often mean removal of the sun visors. The side guys are from Autozone, and run about $13 each. Suprisingly, the double-sided tape mounts are VERY strong, holding up through 90 degree days very well this past week.
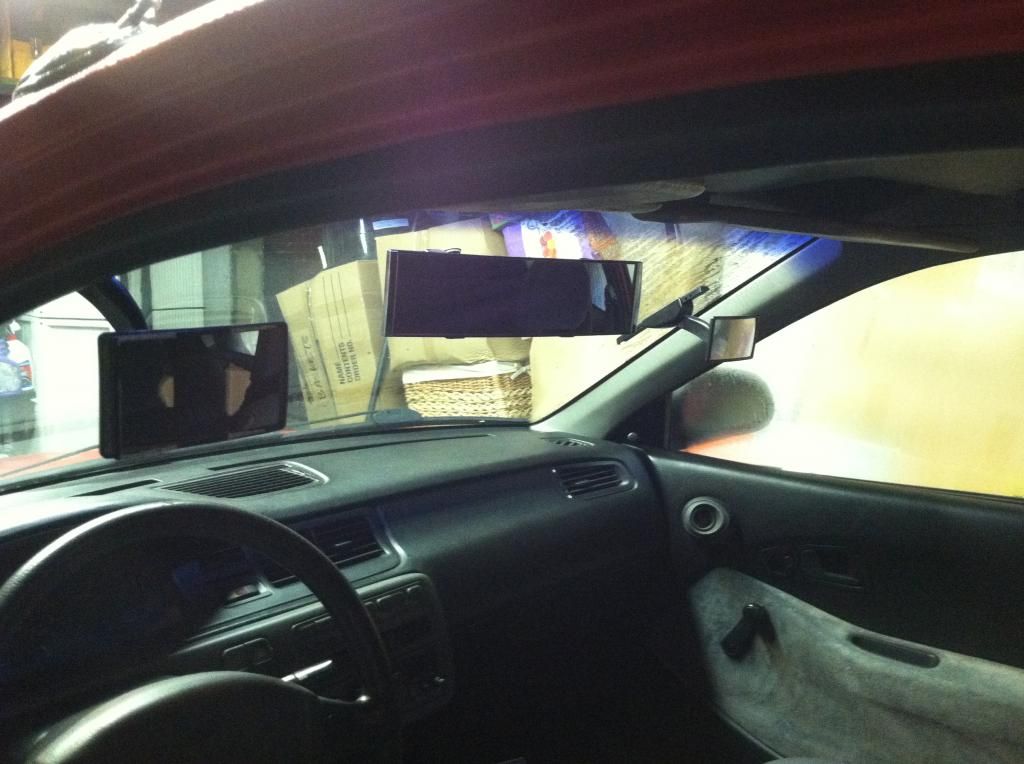
Now, as you may notice, there is a bunch of crud on the little side mirror faces. That's b/c I thought it would be a good idea to tape a larger mirror to the (fairly small) side mirrors. We'll, that didn't work out to well, unfortunately, b/c the added weight was too much for the design of the little side mirrors to support. Just need to use some goo-gone to get off the tape residue. Now that I've removed the larger mirrors (pictured below), I've found that the drivers side is great as-is (as a small mirror) . However, the passenger side is lacking in visibility. I may need to find a way to re-add the larger mirror to the passenger side, maybe using some tape to hold the mirror joint in place/strong on the back side of the mirror.

We'll, that's all I have for now. I'm sorry if some may find my posts to be a bit verbose at times. I just like to share the info. that I have acquired, in the hopes of helping others along the way. That's one of the core reasons I come to these forums in the first place. Besides the feedback/encouragement and comradery, it's great for me to acquire knowledge from others that are sharing from their own experiences and knowledge base.
I'll be back soon with some exterior progress and pics.
Thanks for eco-tuning in!
I'm anxious to get started on my "special project" as well. I'm sure you can guess what it may be. A hint: I wish I had completed it already, may have helped to avoid a near-death accident yesterday on my commute home...
Here's some pics of all of the parts that have come in over the last week. For the married men, my wife has been making a mental inventory of part arrivals each day.
So, I'm glad that everything is finally in, sans the LED headlight kit. It should arrive "overnight from Japan" in about a week.Here's some pics of everything, since everyone knows build threads suck without them...
Fuel Filter and proper heat-range plugs (#4 within part number, not #5)


Vision Technica SiR-replica corners; 1156NA bulbs. Seem high quality!


3M Amber repair tape I found at Advanced Auto Parts (for dash lighting)

Here's the parts I'll use on the exterior & paint restoration. The first pic is a 3M pinstripe removal tool/wheel. Cost me $35 from my local NAPA 2 years back. Ouch! But: (1) I've used it on 4 cars now; (2) nothing is more hideous than a pinstripe. This little guy is worth it's weight in gold!! Great tool. Very safe on paint as well.


For trim pieces, this combo picture below has served me well for years. They go together like GC's and Koni's! Just degrease/dry your parts, one coat of the AP and 2-3 coats of the bumper paint. I should also note that Duplicolor makes and sells a product in a green can called "Trim Paint". However, from my own personal experience, I have found the "Bumper Paint" to serve a better purpose for all trim (bumper, plastic, and metal). It tends to lay down easier, is more archival, and (most importantly) is more "black". The trim paint starts black, but fades quickly in the sun to more of a dark charcoal. This combo ensures an "OEM like-new" look, while I've seen others use Krylon Fusion for trim pieces, which is just too glossy and ends up looking cheap, IMO. I always treat the trim pieces in my builds with this AP and BP combo, and I never touch a single ounce of Armour All, or "Back to Black" or similar greasy goo to my cars, ever. The trim pieces are always black, wash-to-wash. Now, if anything isn't easily removed for paint or is more of a rubber material (weatherstripping, etc...), I do use a product called "Forever Black". But this is a completely different product from the more common "band-aid" products available at parts stores. It's actually a black die that is permanent. Check it out on Google. Rustoleum has caught on to this product, and now offers this product, which is fairly similar, and it IS available locally. It's pretty good. I used it on my truck and the results were good. It's just a bit harder to work with than Forever Black (dries up too quick when applying, so doesn't go on as smooth; also is too runny, feels more like a water-based paint, where-is the Forever Black applies on more smooth-gliding, with the consistency of a silicone-based gel). It's a pain to have to order it and wait for it, but nothing beats Forever Black when it comes to trim gel. OK, I'll stop now. I just get so tired of seeing these band-aid fixes for trim, and I feel that trim is SO important to the aesthetics of a car, and is often not given the attention it deserves....

I didn't picture this product on a previous post, but did want to post it, as I found this stuff to be very valuable to me. GREAT for cleaning of stuck-on/stubborn grease from the engine block. Saved me much time. Cost about $2 per can at Dollar General. Just sprayed it on the block, waited about 5 minutes, tooth brushed the applied areas, and hosed off. Now, it will leave a bit of hazing to the finish of your block, but this can be wiped off later with WD40 and a rag.

--- (Continued from first part of this post; last part of page 4) ---
I was very excited to stumble upon this unit on Autozone.com during my search for a vacuum gauge. It's perfect for an "eco"-themed build, I believe.


I picked up this dual pod on CL (with the boost guage) for a great deal. The pod is made for my model car, so I was very fortunate. I suppose the ricer-movement also helped my chances. Anyway, plans are to mount the vacuum gauge on top and mod-up a clean way to mount the MPGuino off of the bottom hole.


**Boost gauge pictured above is for sale. PM me your offer! **
Here's the homemade MPGuino that I sourced from a user of the EcoModder forums for a great deal! I'll likely fab up another housing, as things aren't really (aesthetically) as "clean" as I'd like them to be as-is. Going to try and use some of the 3M amber tape for the screen as well. My goal is for all interior lighting/switches/radio to glow amber.


Stanley side-markers. Not looking forward to cutting the holes out. Never fun!


OEM radio delete:

Nokya bulbs replacements for my OEM fogs:

Here's all the collected parts for my "special project" for the rear hatch area

Here's a clip-on fan that I sourced at WalMart for about $12. I tested it out last week, and it works great! Love that it has an integrated switch and that it is screw-mountable (large clip assembly can be removed). I plan to fab up a custom mount for it, mounting it to a metal bar, and using some metal spacers and screws to mount the bar off of the existing mount holes for the passenger sun visor. The switch will get screwed into the same bar, and the cord will run (hidden) down the passenger A-pillar and underneath the dash to the cigarette lighter. Result (I hope) will be a clean OEM-like look, as well as a functional fan mounted right by my face.

Last, but not least, here's my mirror set-up. Panoramic rear-view mirror is GREAT and was sourced from Walmart for about $11. I love it, and think it's a nice alternative to the popular Wink mirrors, which are a bit of an overkill to install, and often mean removal of the sun visors. The side guys are from Autozone, and run about $13 each. Suprisingly, the double-sided tape mounts are VERY strong, holding up through 90 degree days very well this past week.

Now, as you may notice, there is a bunch of crud on the little side mirror faces. That's b/c I thought it would be a good idea to tape a larger mirror to the (fairly small) side mirrors. We'll, that didn't work out to well, unfortunately, b/c the added weight was too much for the design of the little side mirrors to support. Just need to use some goo-gone to get off the tape residue. Now that I've removed the larger mirrors (pictured below), I've found that the drivers side is great as-is (as a small mirror) . However, the passenger side is lacking in visibility. I may need to find a way to re-add the larger mirror to the passenger side, maybe using some tape to hold the mirror joint in place/strong on the back side of the mirror.

We'll, that's all I have for now. I'm sorry if some may find my posts to be a bit verbose at times. I just like to share the info. that I have acquired, in the hopes of helping others along the way. That's one of the core reasons I come to these forums in the first place. Besides the feedback/encouragement and comradery, it's great for me to acquire knowledge from others that are sharing from their own experiences and knowledge base.
I'll be back soon with some exterior progress and pics.
Thanks for eco-tuning in!
10-03-2014, 01:51 AM
#5
Honda-Tech Member
Thread Starter
Update 9/7/14: Exterior Restoration Part 1A- Pinstripe Removal + General Cleaning
Well, the post subject says it all. Been a lot of fun today. Here's some pics.
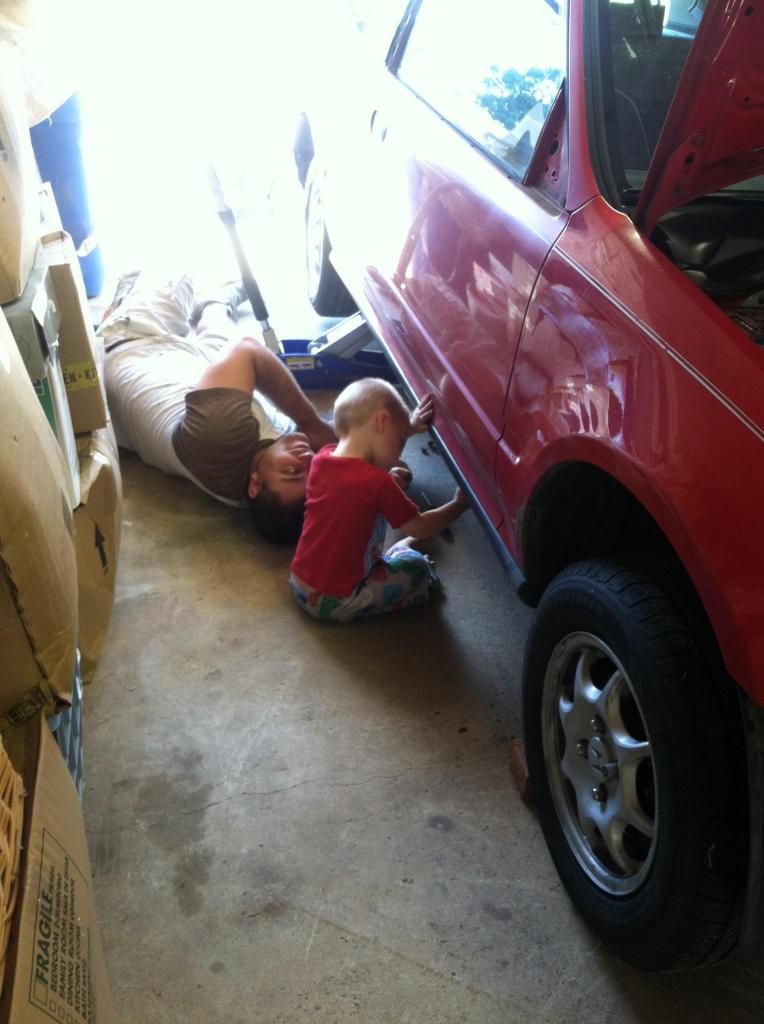
My 2-year old putting in work! Helping remove the side-skirts...
Here's a last "before". Everything removed, antenna hole taped up. Time to do a good general wash/degrease.
But first, broke out the pinstripe removal tool and got the stripe off.
20 minutes later, all that was left was a bunch of eraser goo and dust.
Some Goo Gone wipes made quick work of the leftover residue.
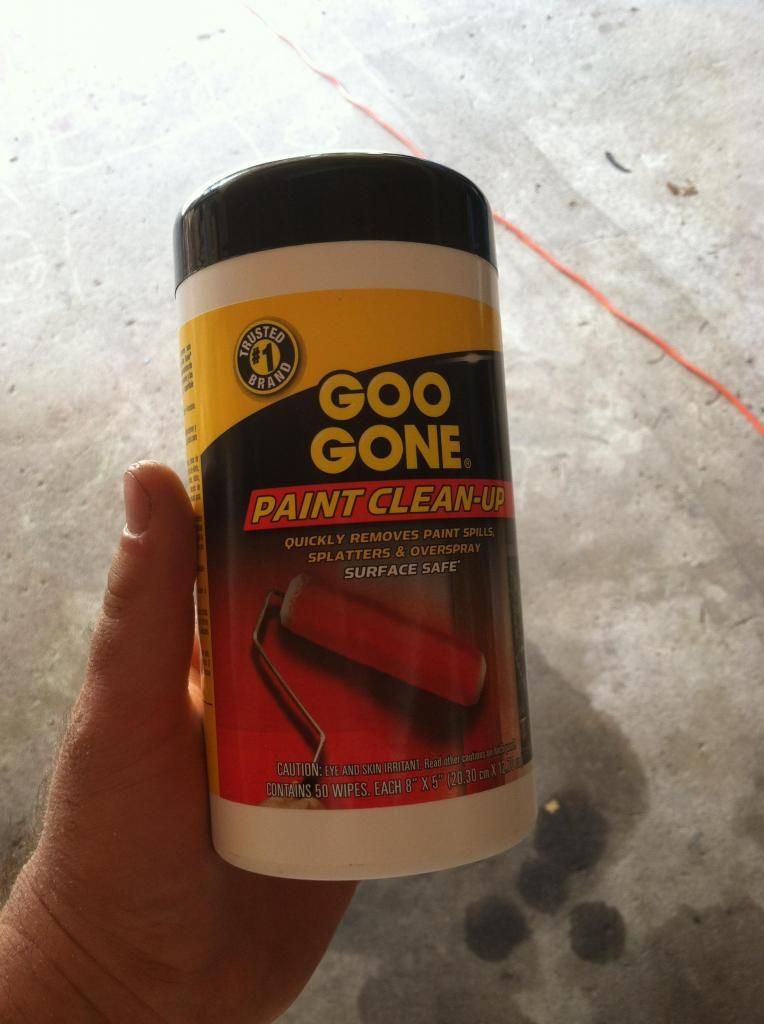
Here's after the Goo Gone wipes.
And after a bath, here she is, ready for Part Two work.
Used some "Glass Scrub" to clean the water stains & crud off of all the glass surfaces. Love that stuff.
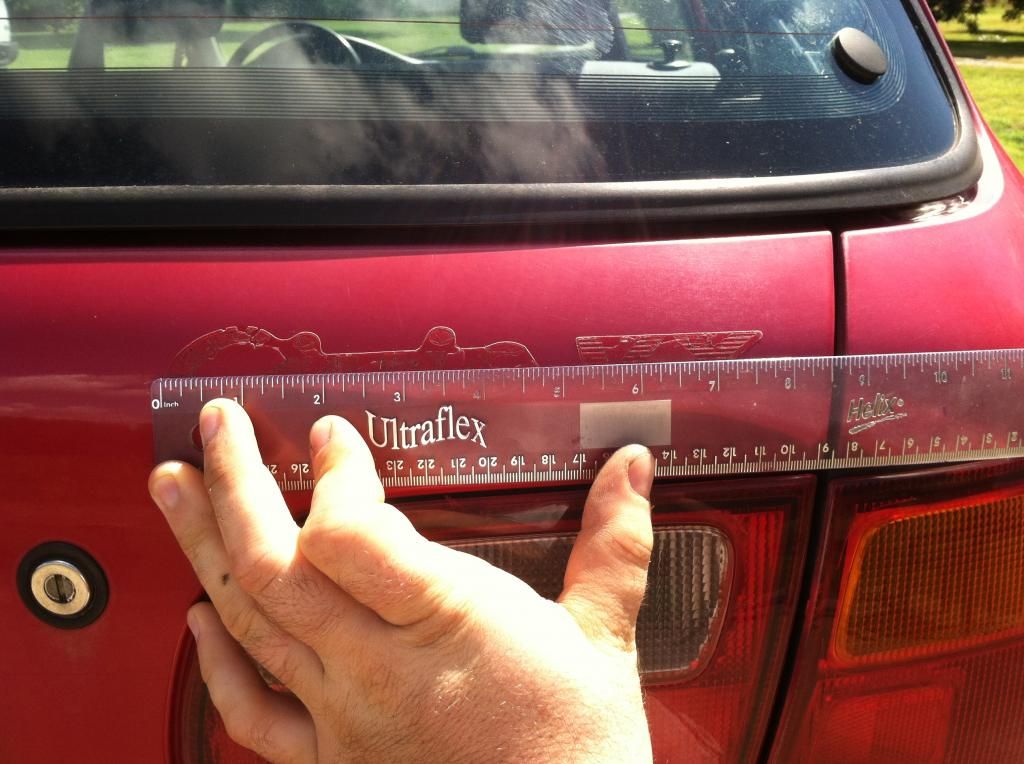
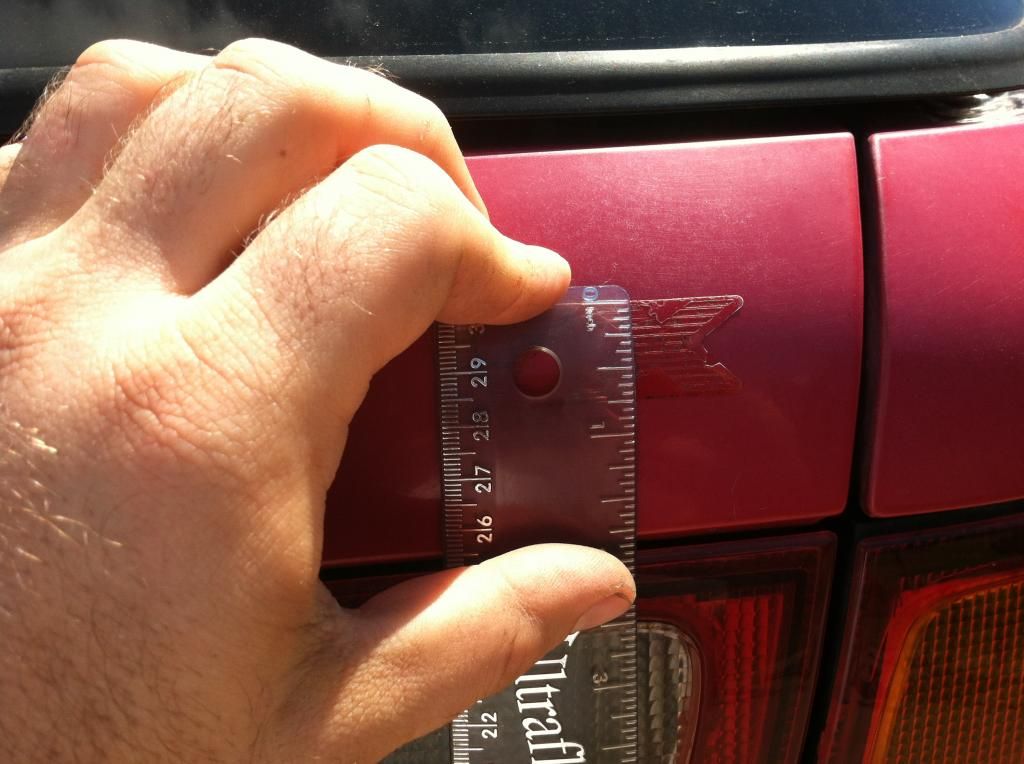
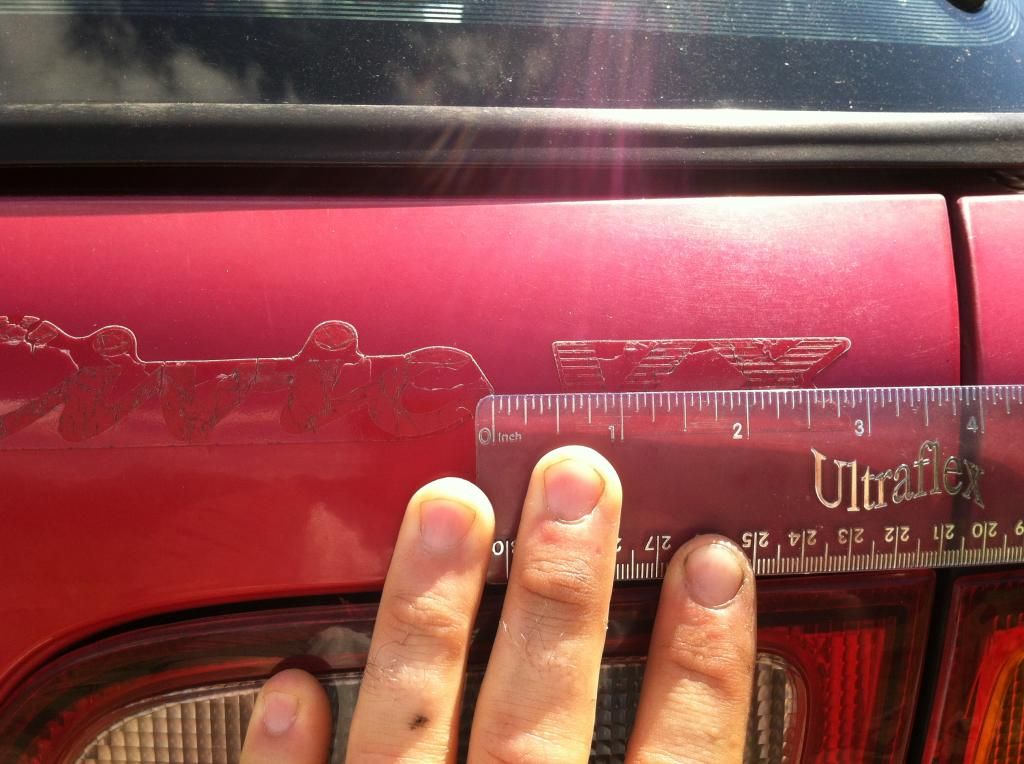
Also, for my own records later in the project, here's some detailed pics of the old Civic VX decals, with measurements. I plan to re-create this later, with some special additions added.
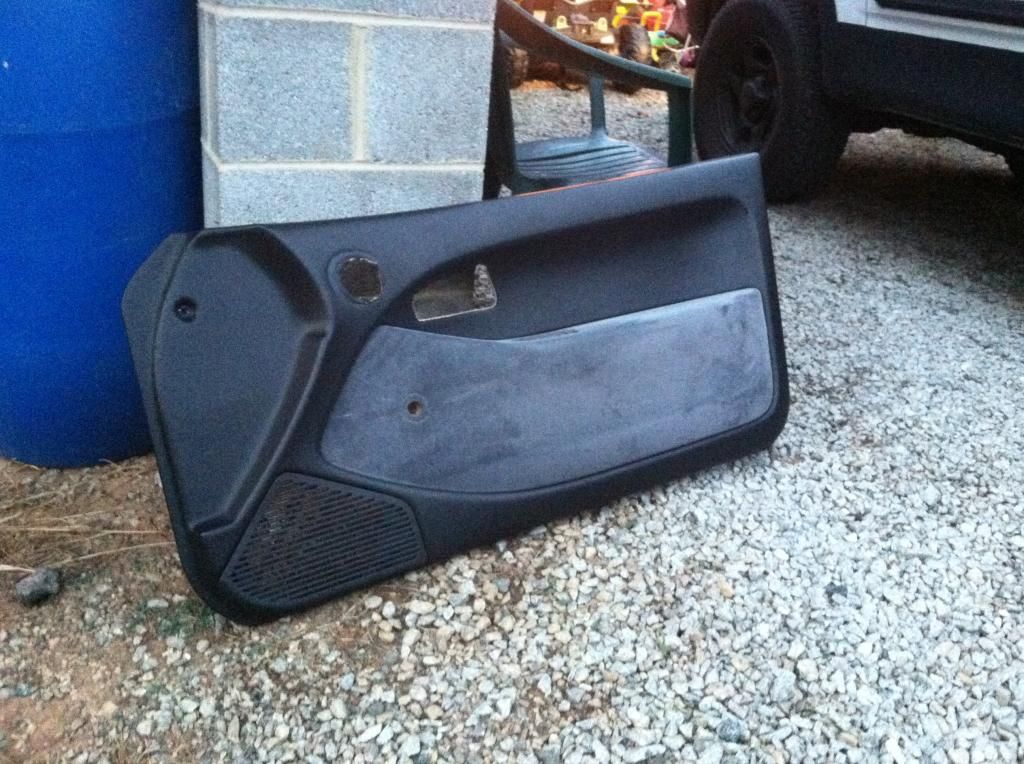
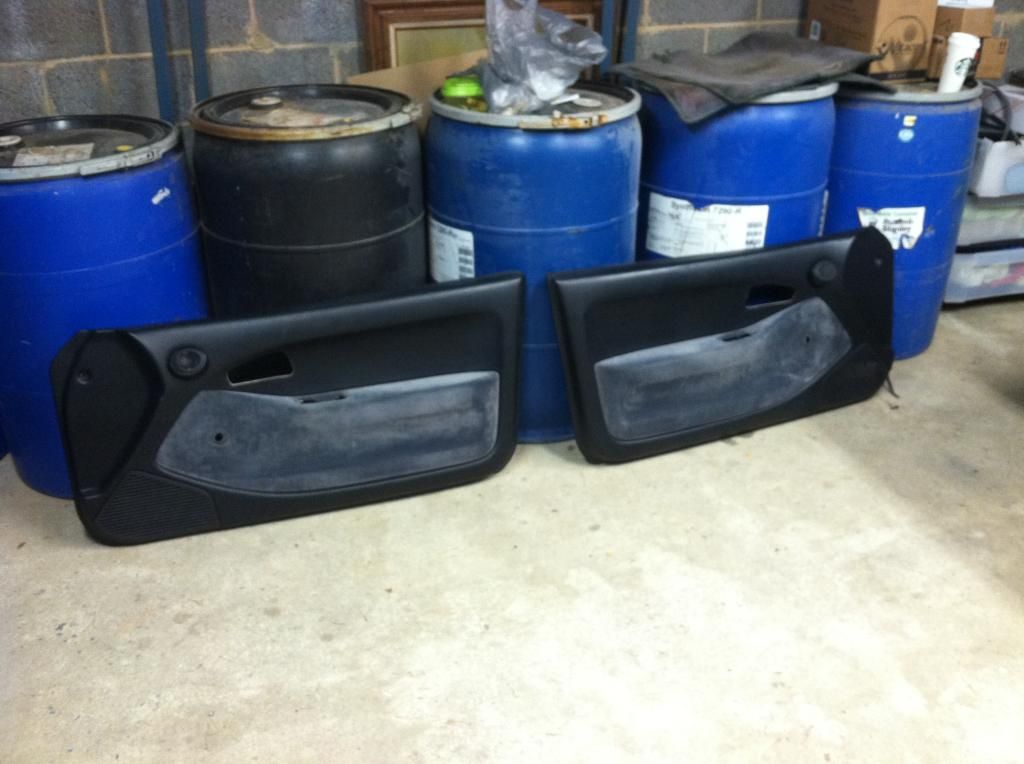
...and the door cards are off for restoration work and audio corrections.
...and here's the new Duralast Flex Blades with the recently painted/restored wiper cowl. It got the Duplicolor treatment that I mentioned in my previous post.
Thanks for eco-tuning in!
The next major updates will be Exterior Part 1B: Trip Painting, and then Exterior Part 2: clay bar, wet sand, cutting, polishing, glazing.
Well, the post subject says it all. Been a lot of fun today. Here's some pics.
My 2-year old putting in work! Helping remove the side-skirts...

Here's a last "before". Everything removed, antenna hole taped up. Time to do a good general wash/degrease.

But first, broke out the pinstripe removal tool and got the stripe off.


20 minutes later, all that was left was a bunch of eraser goo and dust.
Some Goo Gone wipes made quick work of the leftover residue.

Here's after the Goo Gone wipes.

And after a bath, here she is, ready for Part Two work.


Used some "Glass Scrub" to clean the water stains & crud off of all the glass surfaces. Love that stuff.

Also, for my own records later in the project, here's some detailed pics of the old Civic VX decals, with measurements. I plan to re-create this later, with some special additions added.


...and the door cards are off for restoration work and audio corrections.

...and here's the new Duralast Flex Blades with the recently painted/restored wiper cowl. It got the Duplicolor treatment that I mentioned in my previous post.

Thanks for eco-tuning in!
The next major updates will be Exterior Part 1B: Trip Painting, and then Exterior Part 2: clay bar, wet sand, cutting, polishing, glazing.
10-03-2014, 01:52 AM
#6
Honda-Tech Member
Thread Starter
Update 9/10/14: Exterior Work Part 1B- Trim Painting
Hello all, here's some updates to keep the thread rolling along.
Installed Vision SiR-replica corners. Also installed 1157A bulbs inside.
I removed and painted all of the remaining trim pieces. Here's some pics/progress:

Here's the nice OEM-like sheen the Duplicolor Bumper Paint leaves. FAR superior to a Krylon Satin finish for auto parts, IMHO... You can also see in the same pic that the windshield molding trim is faded. This trim will be treated with Forever Black, since I've found it hard to remove these without damaging the clips and/or molding.
The same paint was applied to the antenna delete and accompanying rubber gasket.
Also, pictured above, you can see that I *tried* to polish/save the paint on the roof. Didn't work. Looks like I'll have to spot paint it in the near future...
When removing parts from the paint table, found this. HILARIOUS!
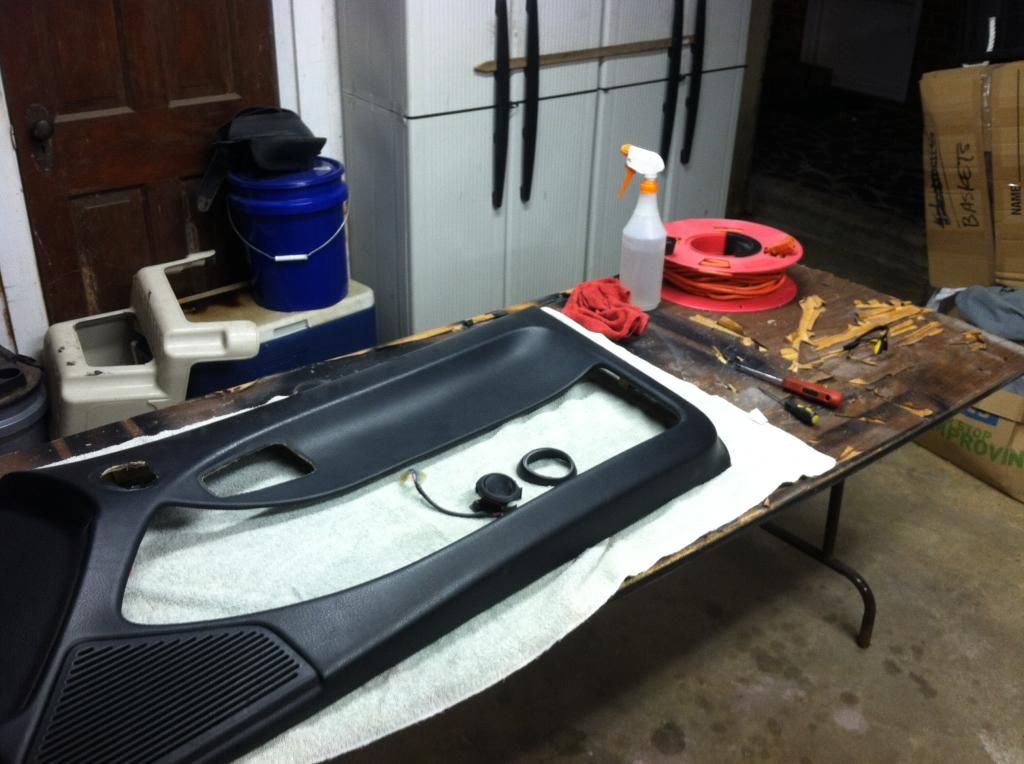
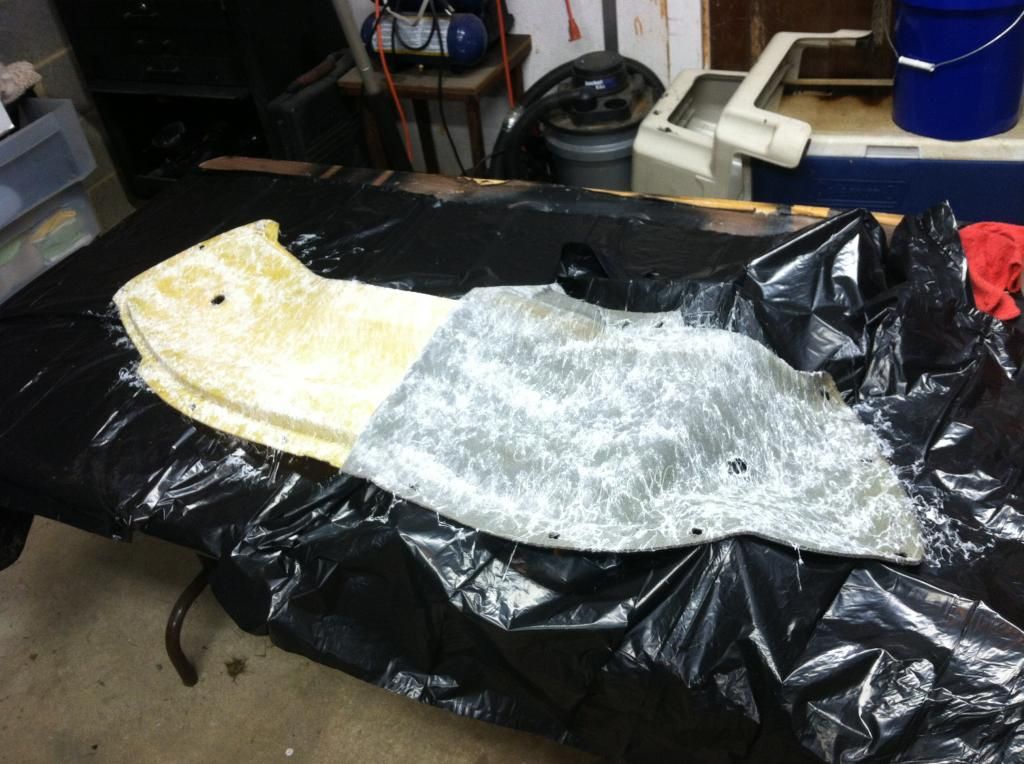
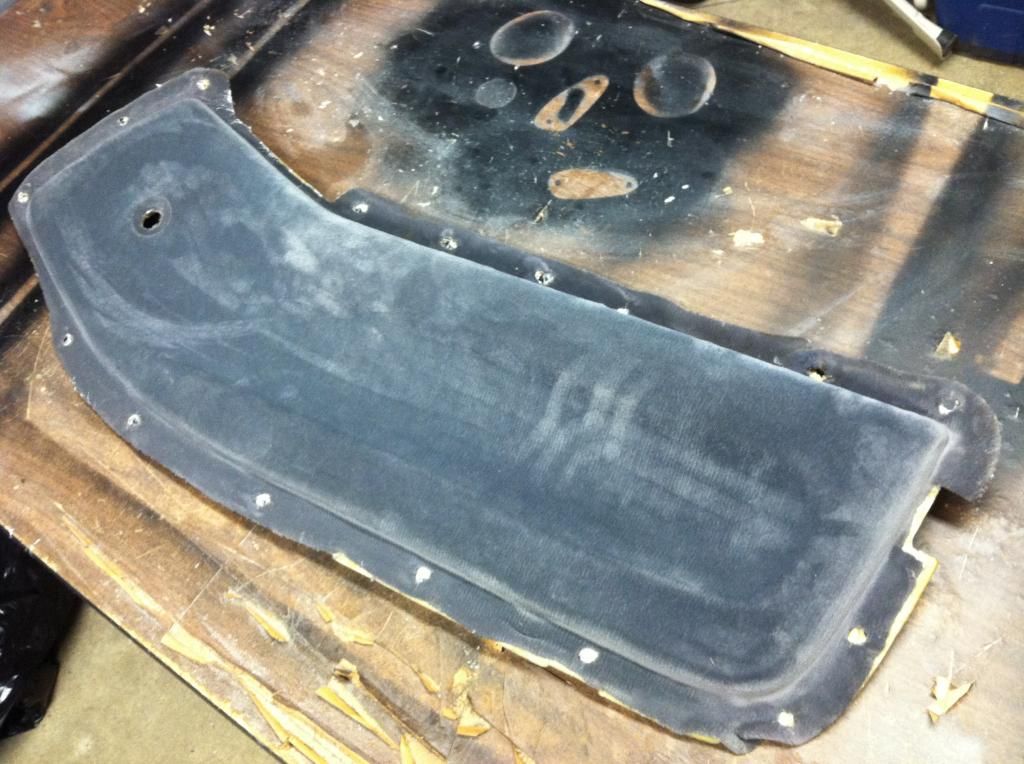
I also cleaned/degreased the fabric panels on the door cards, and left them to dry. Now that these have been drying out in the sun, I will soon remove the fabric so that I can glue them back in place. They were loose and hanging off when I acquired the vehicle.
My next update I'm MOST excited about. I've been wanting to try out the newest headlight lighting conversion craze: CREE LED bulbs. My kit came in on Tuesday from China. I am BLOWN AWAY with the quality. These belong in a museum, not my civic. They are NASA-impressive in construction/materials, and the box/presentation they came in was nicer than the box that held my wife's engagement ring 8 years ago...
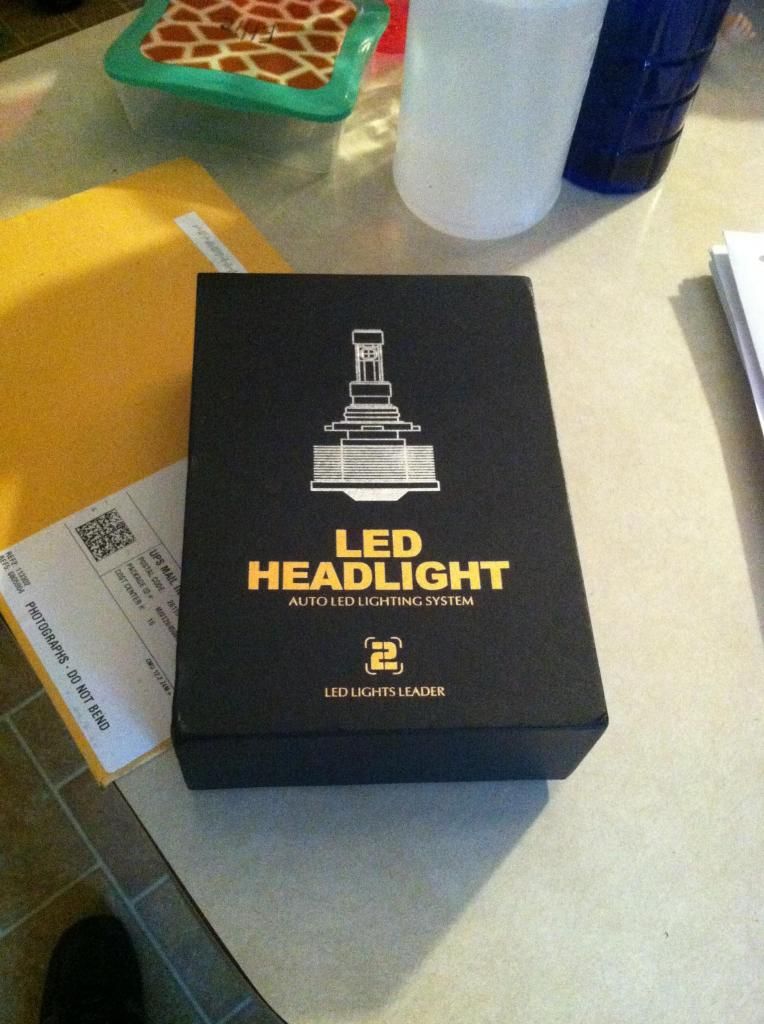
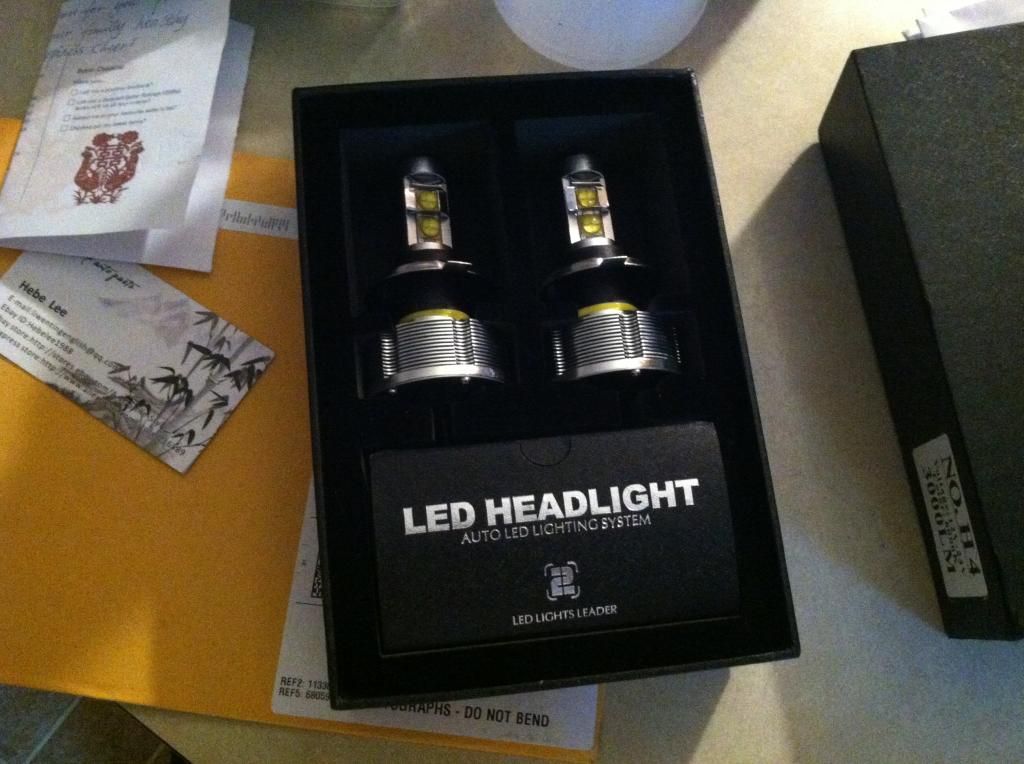
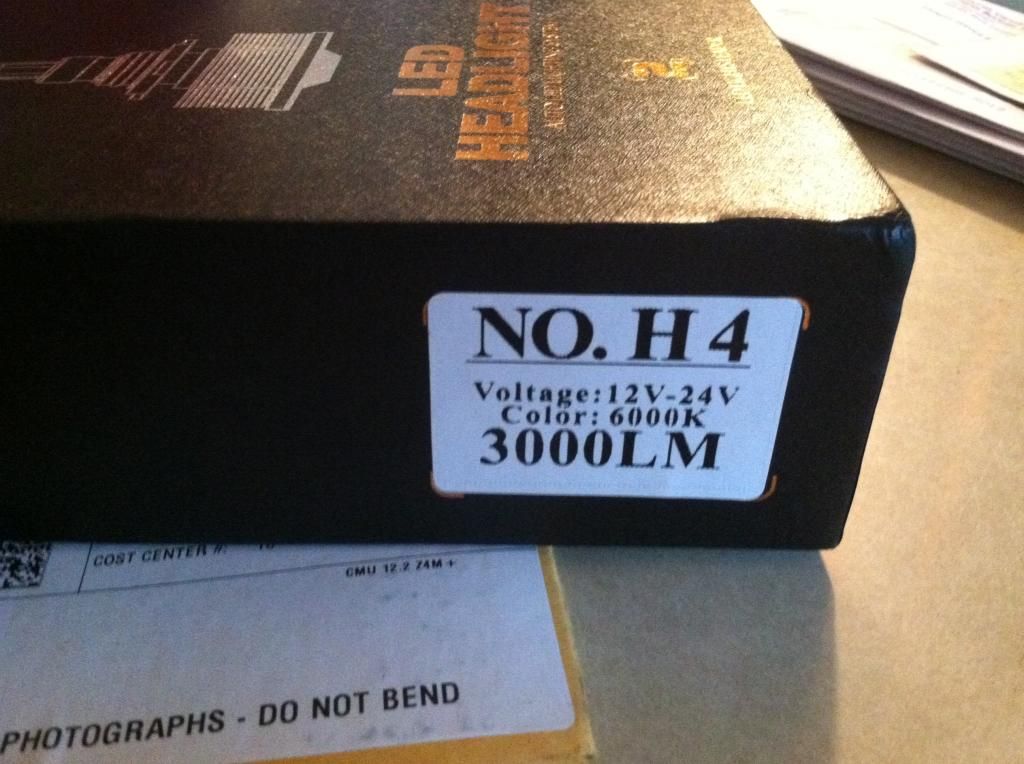
Installation was a complete breeze, and the connections are so much better designed/tighter than any Zentec HID kit I've ever bought off of Ebay. Only snag was that I discovered I needed to upgrade my high and low fuses from 10A units to 20A. Once I did that, butter! I'll take a pic of the output soon. I was also able to install the Nokya Hyper Yellow bulbs, and I love the color combo and light output.
Last, but certainly not least, an actual ECO update to the thread.
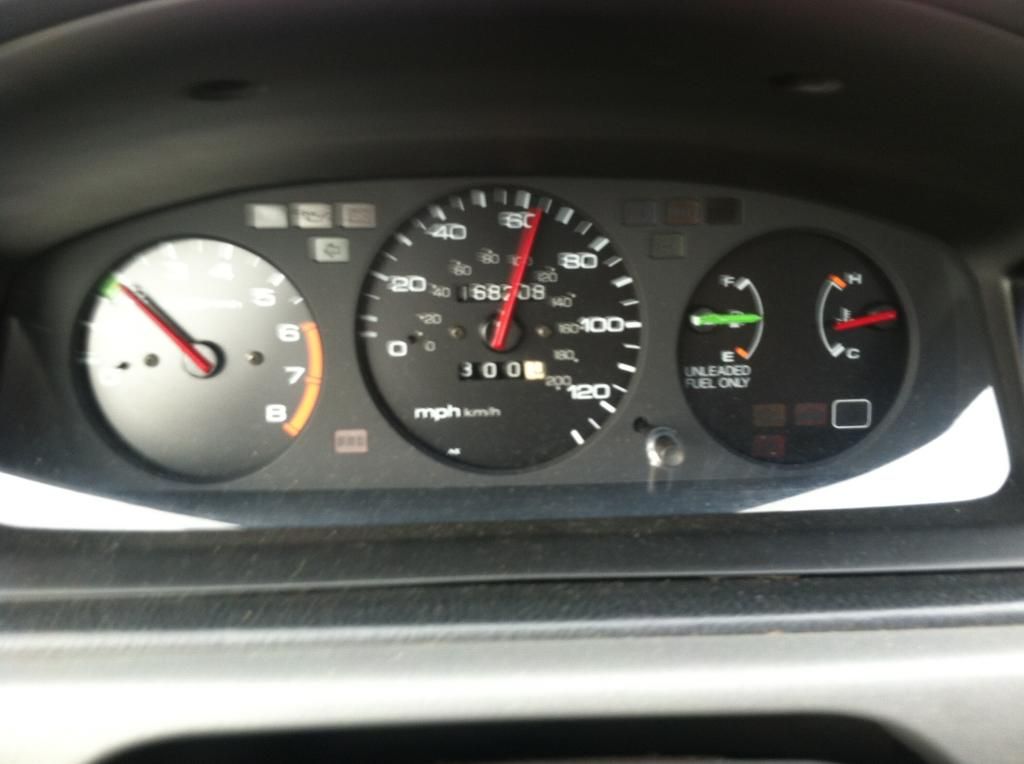
I've been shooting to get to 500 miles out of a tank asap (to get over 60 mpg). I think I'm on track. Yesterday, I eclipsed 300 miles before the tank needle dropped below half. Now, the needle drops more aggressively once it passes the halfway mark, for whatever reason. But still, I think I'm on track! I'll know by weeks end. :nails biting:
That's all for now. Back with Exterior-Part 2 work soon...
Thanks for eco-tuning in!
Hello all, here's some updates to keep the thread rolling along.
Installed Vision SiR-replica corners. Also installed 1157A bulbs inside.


I removed and painted all of the remaining trim pieces. Here's some pics/progress:


Here's the nice OEM-like sheen the Duplicolor Bumper Paint leaves. FAR superior to a Krylon Satin finish for auto parts, IMHO... You can also see in the same pic that the windshield molding trim is faded. This trim will be treated with Forever Black, since I've found it hard to remove these without damaging the clips and/or molding.

The same paint was applied to the antenna delete and accompanying rubber gasket.

Also, pictured above, you can see that I *tried* to polish/save the paint on the roof. Didn't work. Looks like I'll have to spot paint it in the near future...
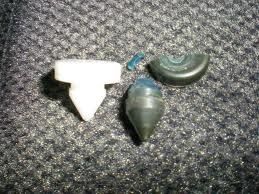
When removing parts from the paint table, found this. HILARIOUS!

I also cleaned/degreased the fabric panels on the door cards, and left them to dry. Now that these have been drying out in the sun, I will soon remove the fabric so that I can glue them back in place. They were loose and hanging off when I acquired the vehicle.

My next update I'm MOST excited about. I've been wanting to try out the newest headlight lighting conversion craze: CREE LED bulbs. My kit came in on Tuesday from China. I am BLOWN AWAY with the quality. These belong in a museum, not my civic. They are NASA-impressive in construction/materials, and the box/presentation they came in was nicer than the box that held my wife's engagement ring 8 years ago...


Installation was a complete breeze, and the connections are so much better designed/tighter than any Zentec HID kit I've ever bought off of Ebay. Only snag was that I discovered I needed to upgrade my high and low fuses from 10A units to 20A. Once I did that, butter! I'll take a pic of the output soon. I was also able to install the Nokya Hyper Yellow bulbs, and I love the color combo and light output.
Last, but certainly not least, an actual ECO update to the thread.
I've been shooting to get to 500 miles out of a tank asap (to get over 60 mpg). I think I'm on track. Yesterday, I eclipsed 300 miles before the tank needle dropped below half. Now, the needle drops more aggressively once it passes the halfway mark, for whatever reason. But still, I think I'm on track! I'll know by weeks end. :nails biting:

That's all for now. Back with Exterior-Part 2 work soon...
Thanks for eco-tuning in!
10-03-2014, 01:53 AM
#7
Honda-Tech Member
Thread Starter
Update 9/11/14: Important Fuel Log/Performance Achievement
Just a quick note to share: posted to my fuel log. Ran 58 mpg this past tank!
Looks like the recent tune-up/gaskets/plugs/fuel filter/etc... is really paying off. My first tank was 53 mpg. Then, I ran 47mpg on my second tank. Likely, this was due to having to idle a bunch during engine repair (and running a bit late for work a few mornings didn't help either). Also, I suspect that the old fuel filter became clogged up from running SeaFoam for the first time on the previous tank. Probably stirred up a bunch of rust/crud in the tank and clogged the filter. There was some fuel/throttle hesitation prior to switching out to the new filter. It is now gone. I'm sure that was effecting performance.
Anyway, I'm almost to my goal of 65mpg w/o any major aero mods. . I think that running E0 gas will put me above 60, and after installing the MPGuino and vacuum gauge, I'll be able to push to my goal of 65mpg.
Once I'm at 65, I'll start aiming to complete some major aero mods: kammback, air dam, lower side skirts, grille block, wheel skirts, wheel covers etc...
Just wanted to share the good news that all of the mods and driving tech's learned on this site are really paying off. Thanks dudes (and dudettes)!
Trending Topics
10-03-2014, 01:54 AM
#8
Honda-Tech Member
Thread Starter
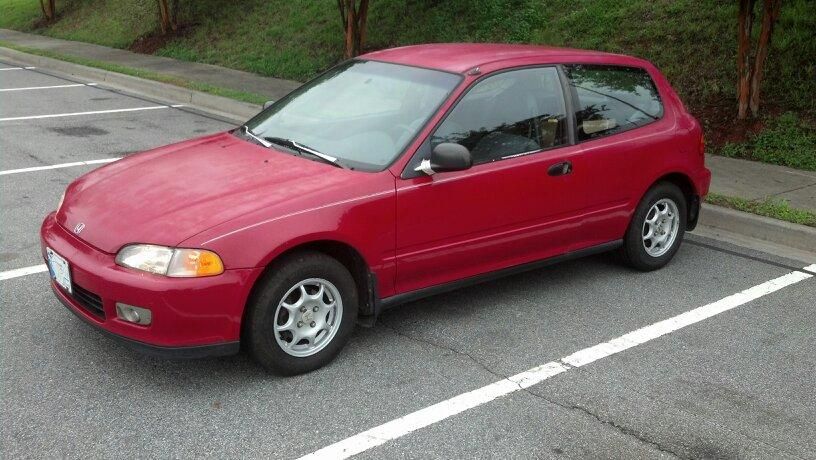
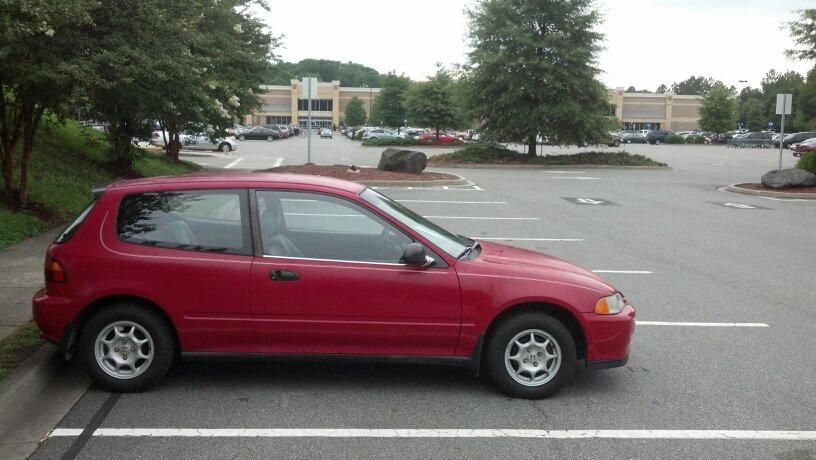
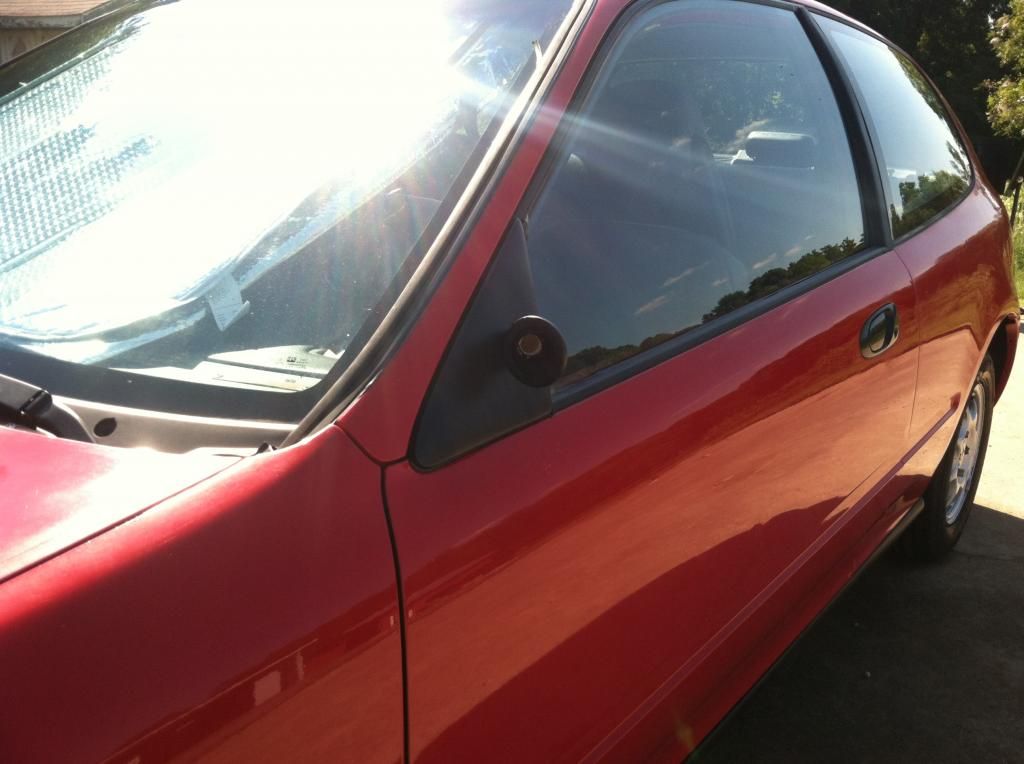
Update 9/13/14: Exterior Part Two- Paint Correction; Cut & Polish
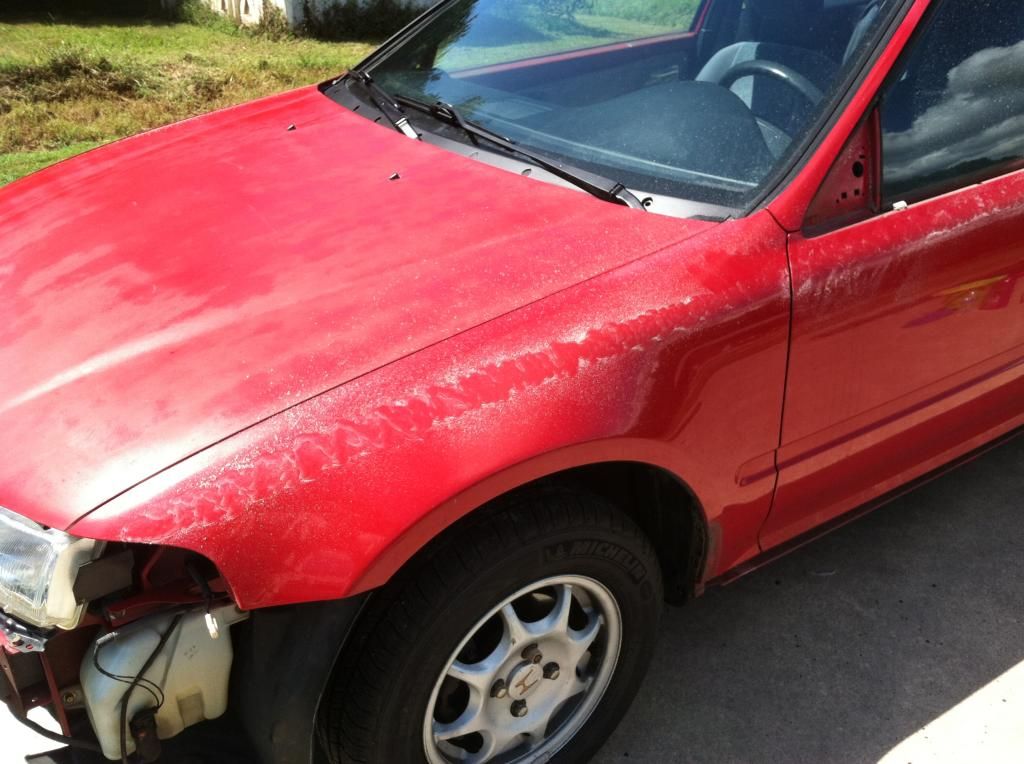
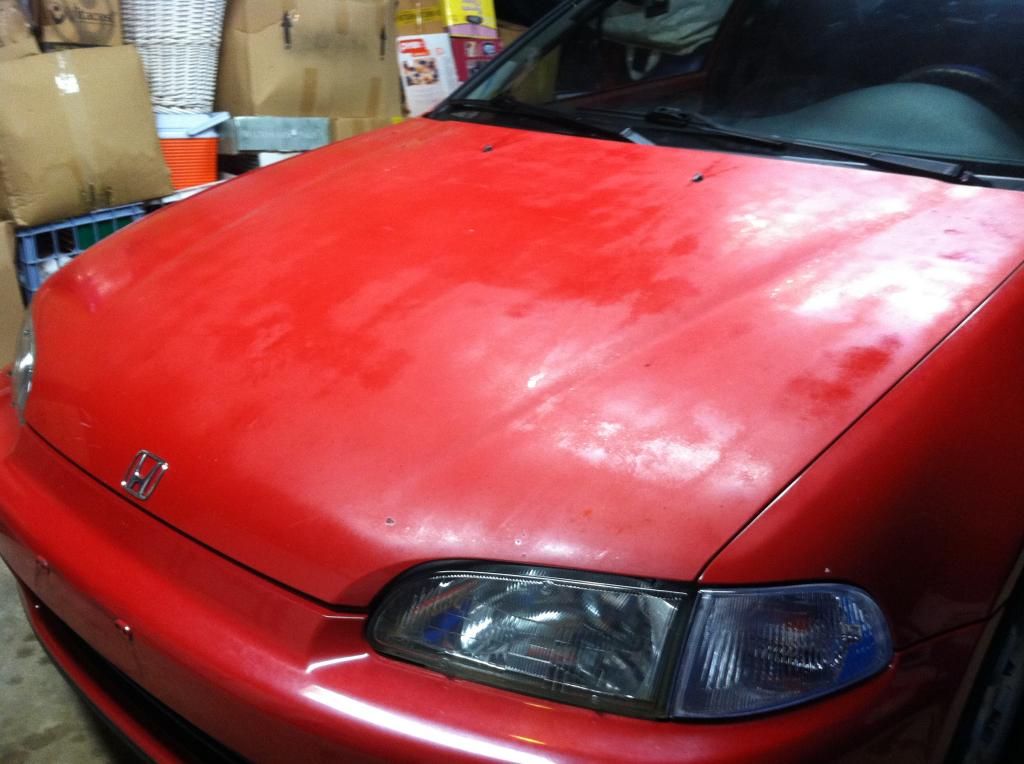
The paint on the hood was saved!
Before:
After 2000 grit wet sanding:
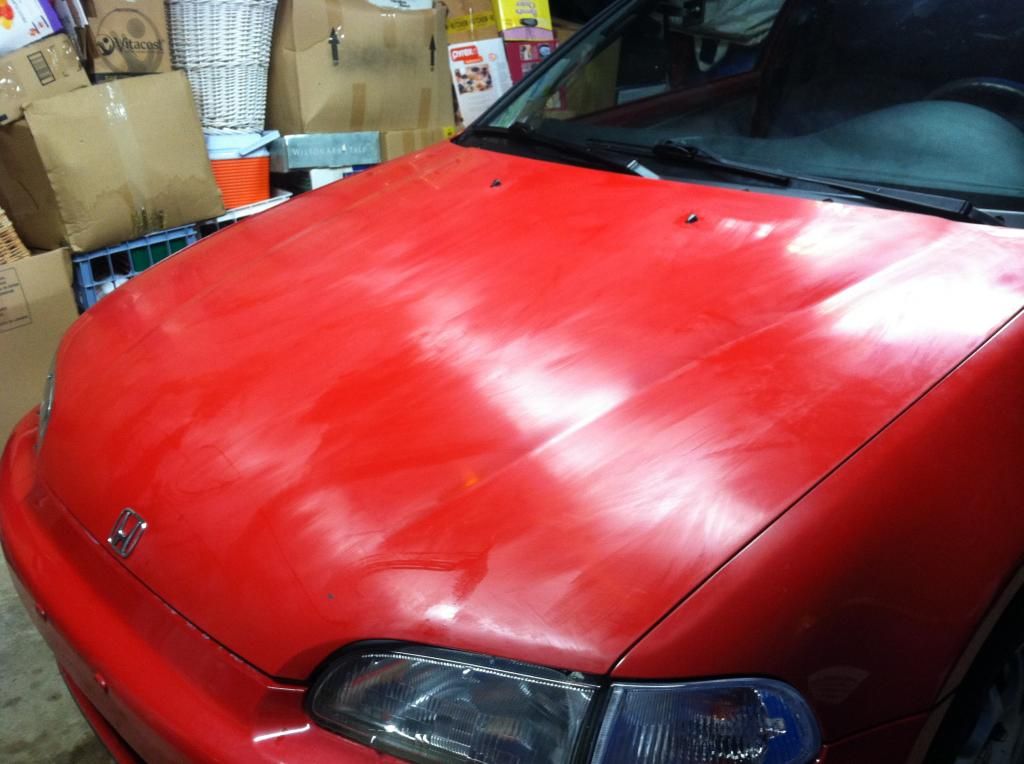
After Cut/Polish & Re-Assembled Shots:

The polish job came out very nice. I used Chemical Guys cutting polishes, finished with Meguires glaze, all on a 6" WalMart buffer with micro-fiber polish pads.
For the bulk of the body, the original Milano Red paint only looks "pink" in a few spots on the sides near the roof-line. The roof of the car was not saveable, though, unfortunately. I had O'Riley's in Salisbury, NC mix up a can of Omni-Pak formula in R81-4 red. It's a spray can, single-stage, base+clear. I'll spot paint it asap to match the rest of the body.
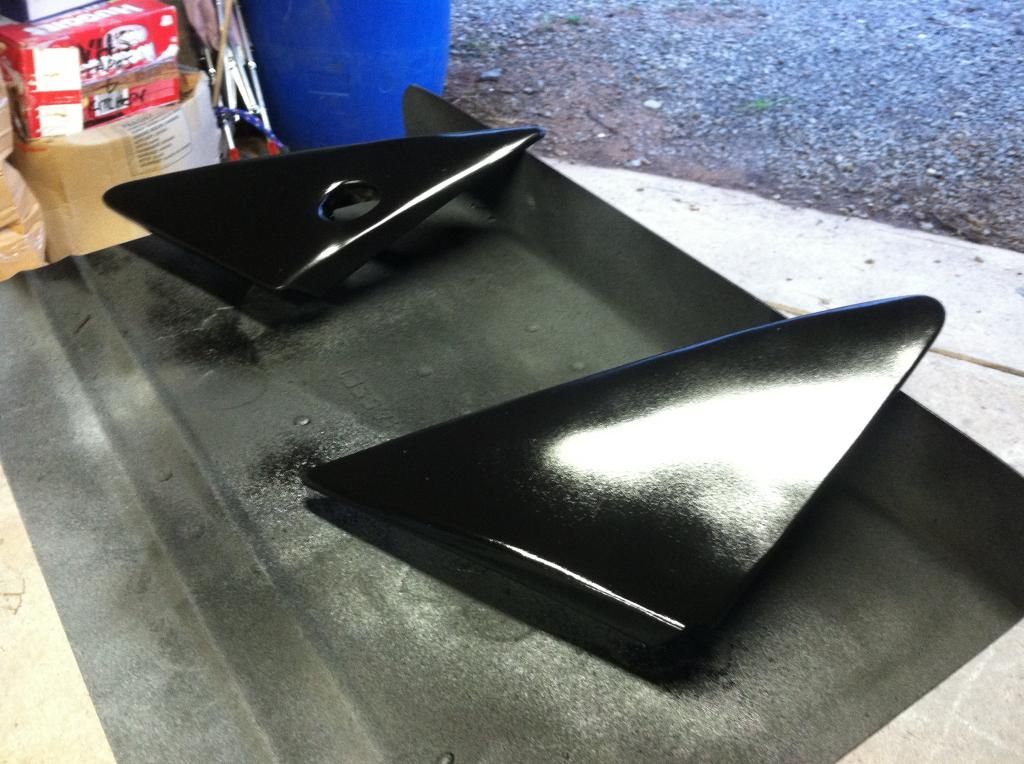
Also, got started on this project...
More to come soon.
Thanks for eco-tuning in!
The paint on the hood was saved!
Before:

After 2000 grit wet sanding:

After Cut/Polish & Re-Assembled Shots:


The polish job came out very nice. I used Chemical Guys cutting polishes, finished with Meguires glaze, all on a 6" WalMart buffer with micro-fiber polish pads.
For the bulk of the body, the original Milano Red paint only looks "pink" in a few spots on the sides near the roof-line. The roof of the car was not saveable, though, unfortunately. I had O'Riley's in Salisbury, NC mix up a can of Omni-Pak formula in R81-4 red. It's a spray can, single-stage, base+clear. I'll spot paint it asap to match the rest of the body.
Also, got started on this project...

More to come soon.
Thanks for eco-tuning in!
10-03-2014, 01:55 AM
#9
Honda-Tech Member
Thread Starter
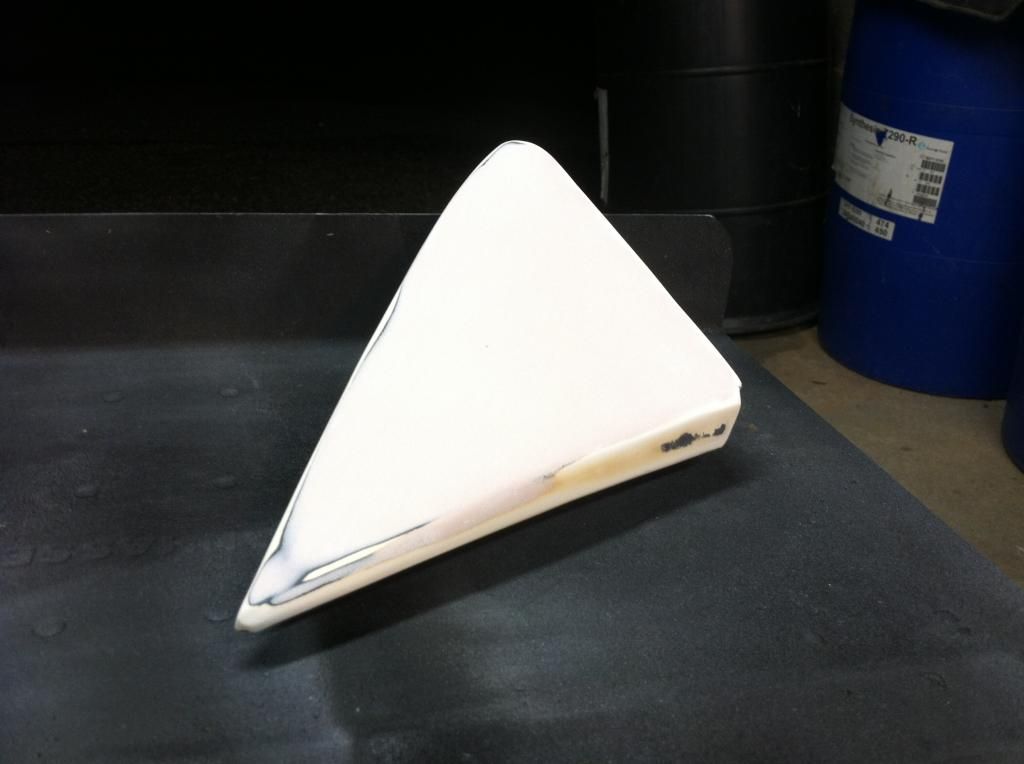
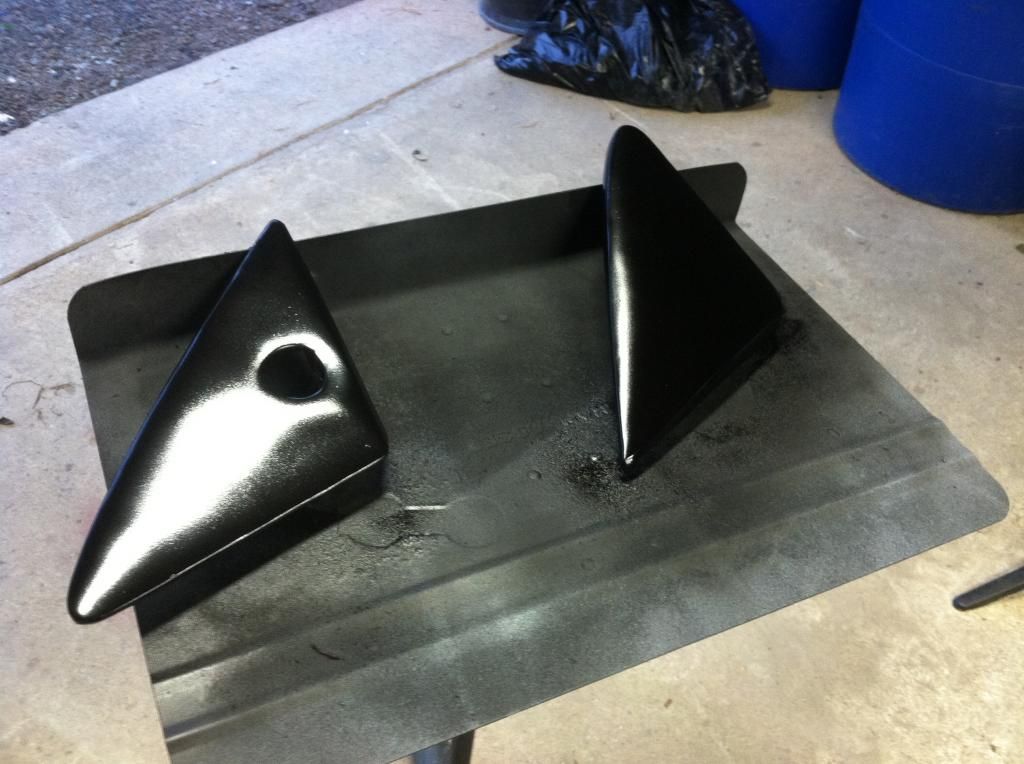
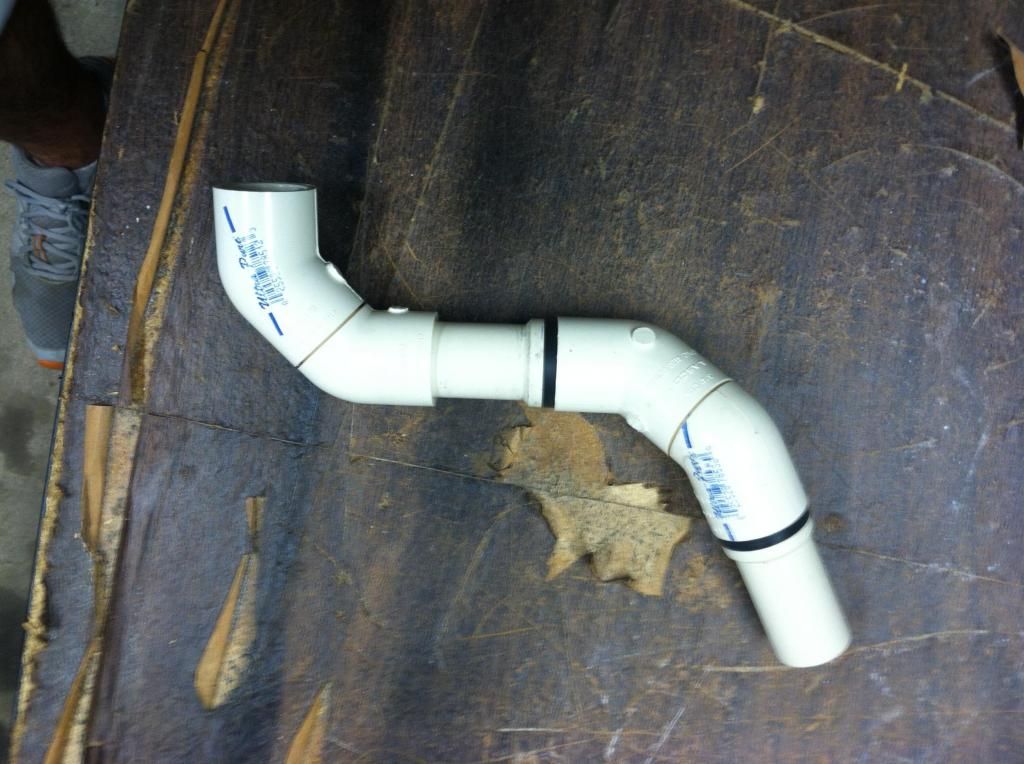
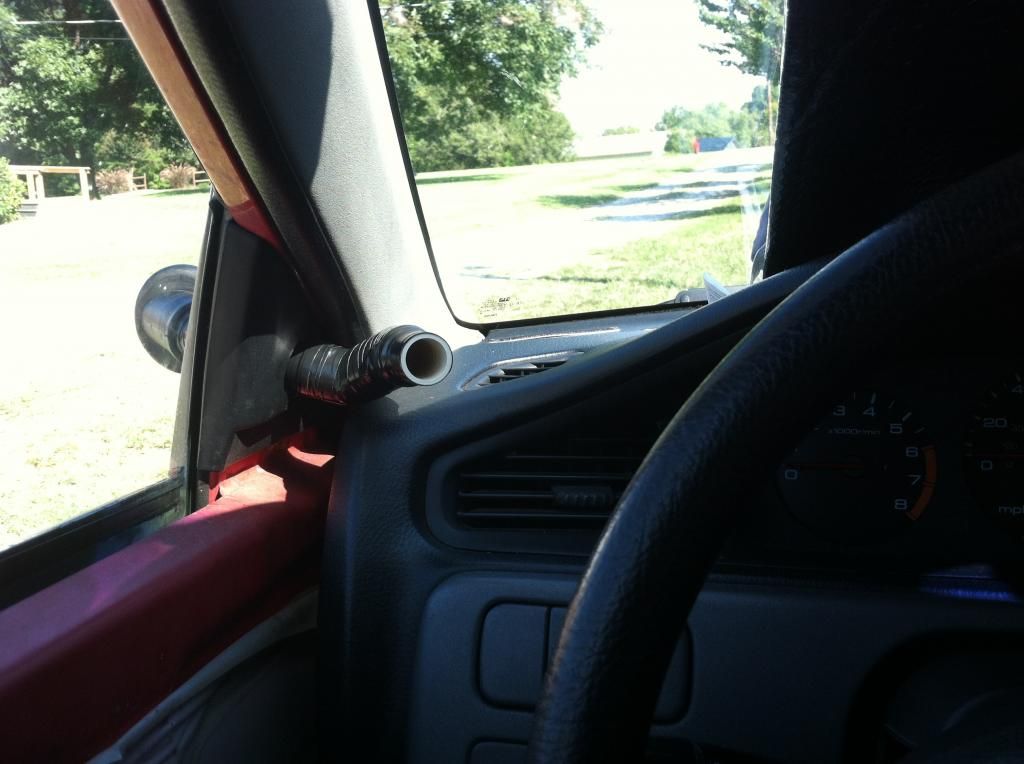
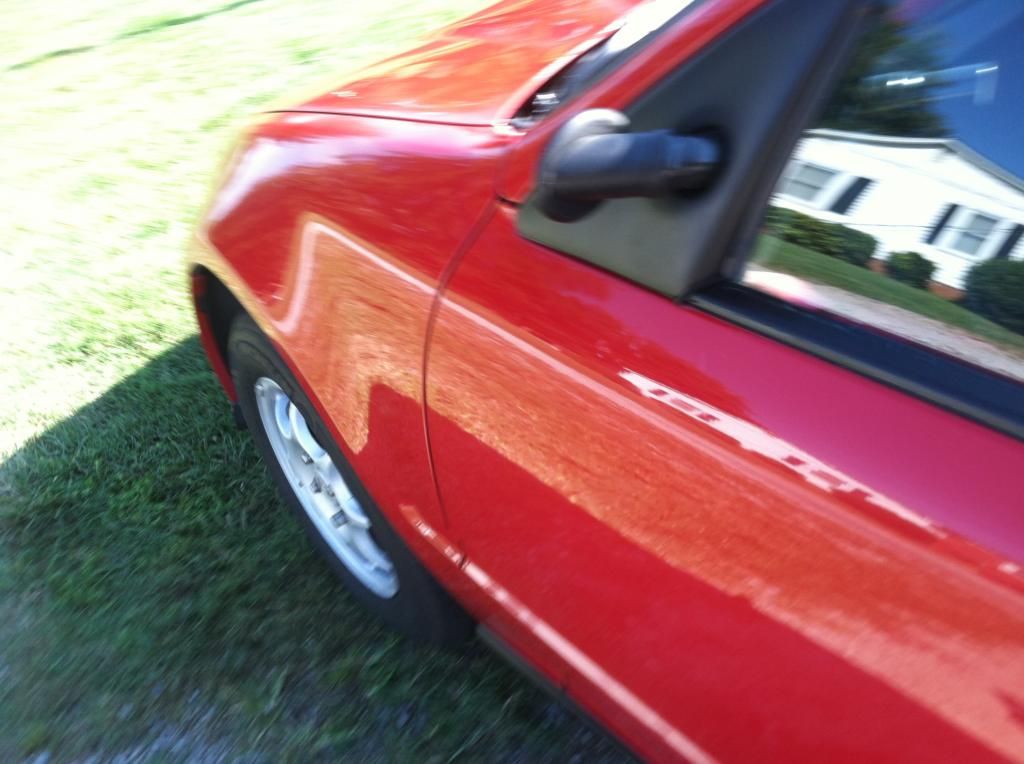
UPDATE 9/24/14: “Ram Air Mirror” (aka “R.A.M.”)
Hello all, thanks for following along. Been pretty excited about this update. The other day I removed my side mirrors and other trim. I had planned to complete this mod HERE
After removing everything, I had to get to work the next morning. So, I rode in to Charlotte with the car as-is. During my commute that day, I notice a great deal of air coming through the holes where the mirror was once mounted. However, it was scattered air that wasn’t channelled. It didn’t cool me in any way, and came with plenty of wind noise. One of those holes was larger, about the size of a quarter, and was once the place where the manual mirror adjustment shaft went through the door frame to the mirror (or where electrical connections for cars with powered mirrors would pass through). I got to thinking about what it would look like to channel that cooler passing air into the car, with the hopes of creating an outcome of “free” A/C, similar to the channel vents incorporated into Nascar windows . So, I set out to build upon my ideas, and I think the result came out great. I’ll call this a “Ram Air Mirror” or “R.A.M”.
Supplies list:
Grinder with grinding wheel
Hand saw (fine toothed)
Drill
Dremel tool w/ various attachments
Fiberglass Resin
Bondo
Sanding paper (120, 220, and 400)
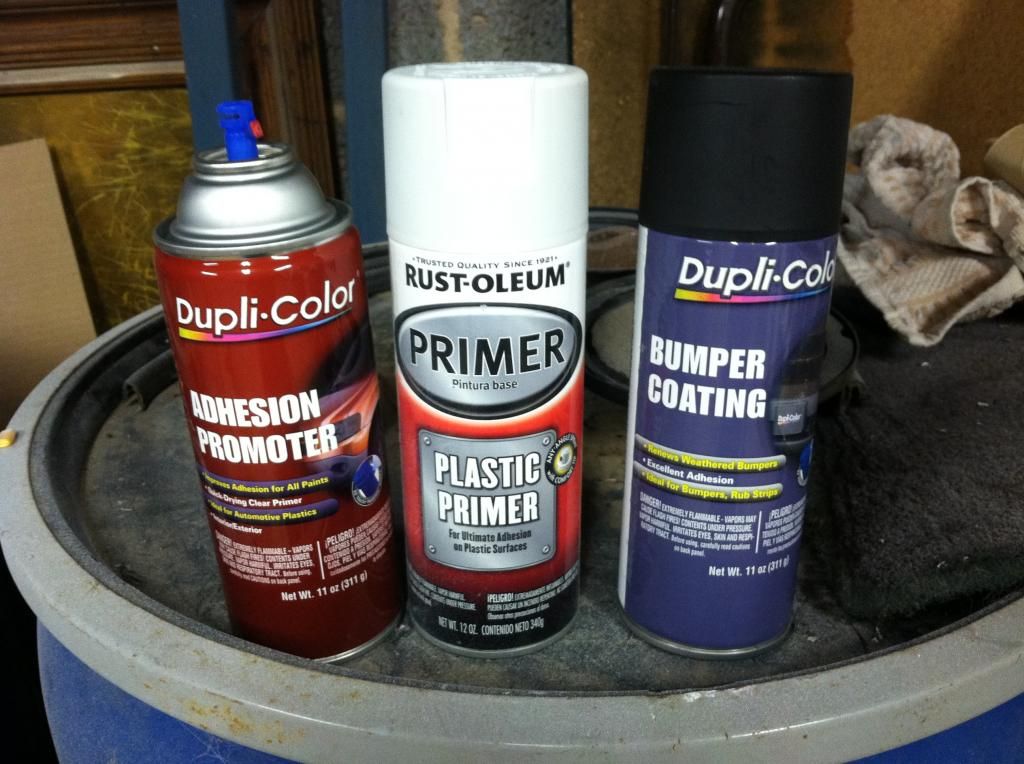
Adhesion Promoter and your choice of paint for the mirror bases.
(4) 45-degree 3/4” PVC connecting joints
(2) 3/4” straight compression fittings
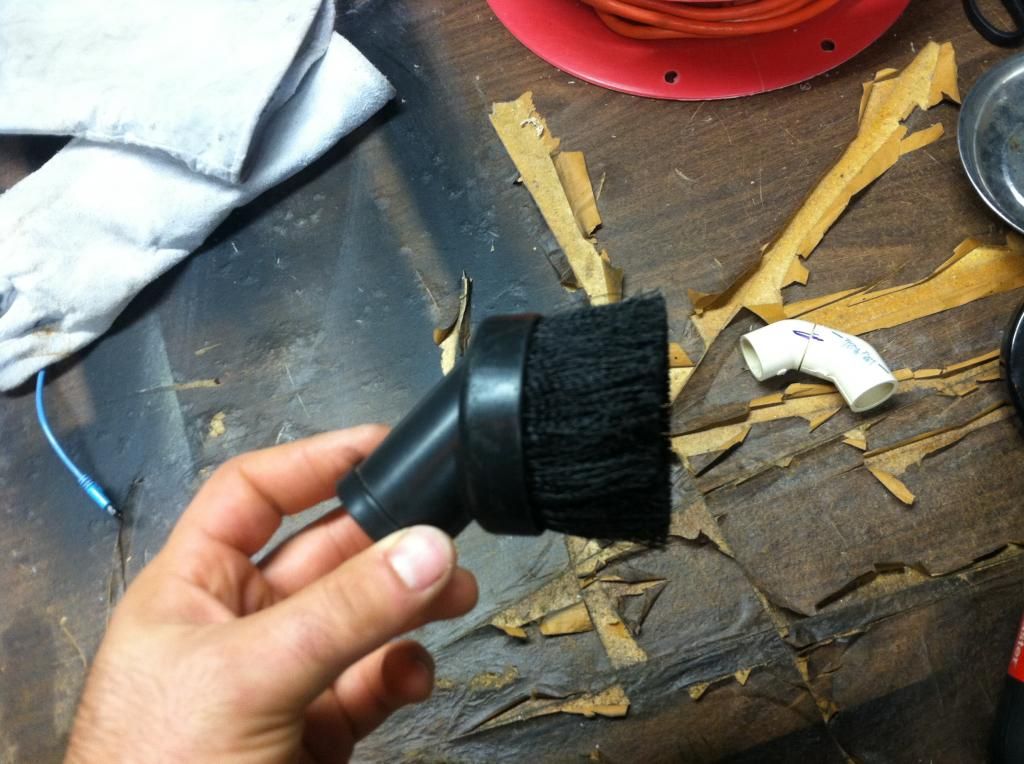
An old vacuum attachment
Electrical Tape
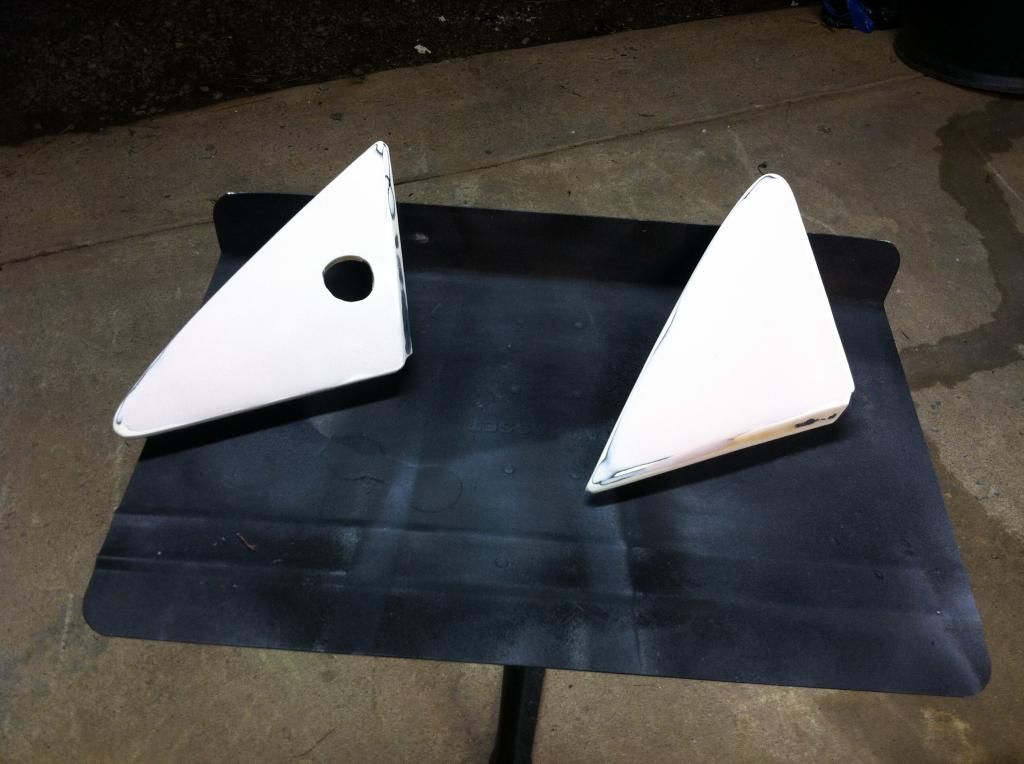
Pics always tell the story:
Fiberglass resin drying
Drilling and Dremeling the hole out larger on the mirror base to match the hole in the body.

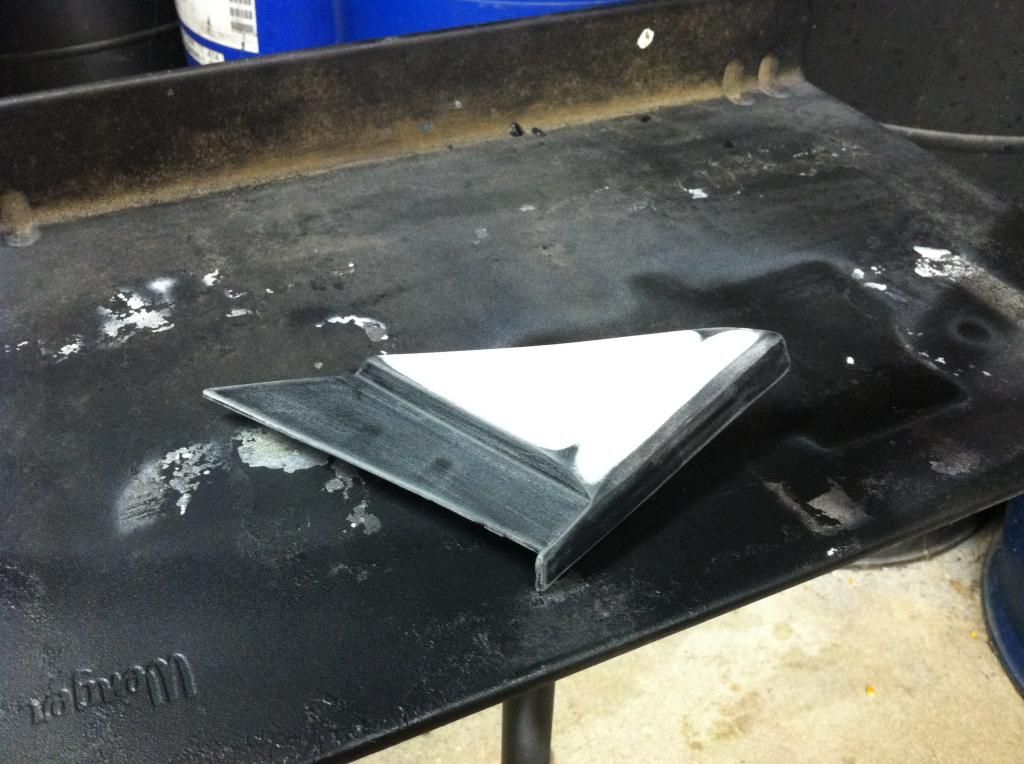
Test Fit
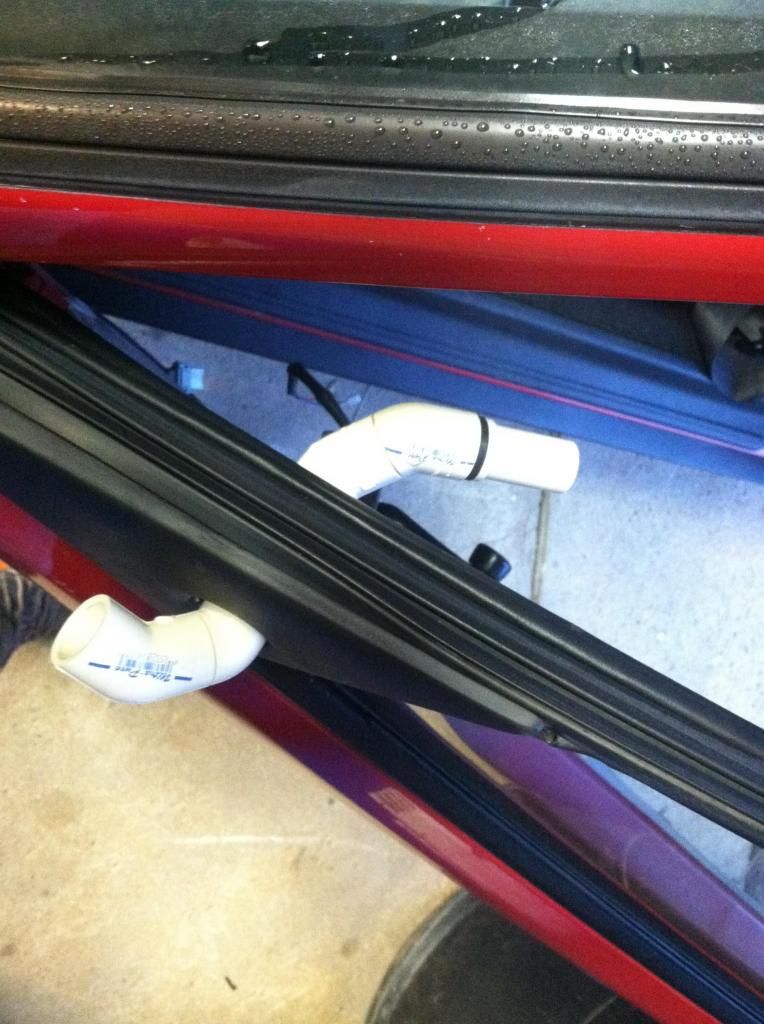
Glued and wrapped everything in place.
Some paint
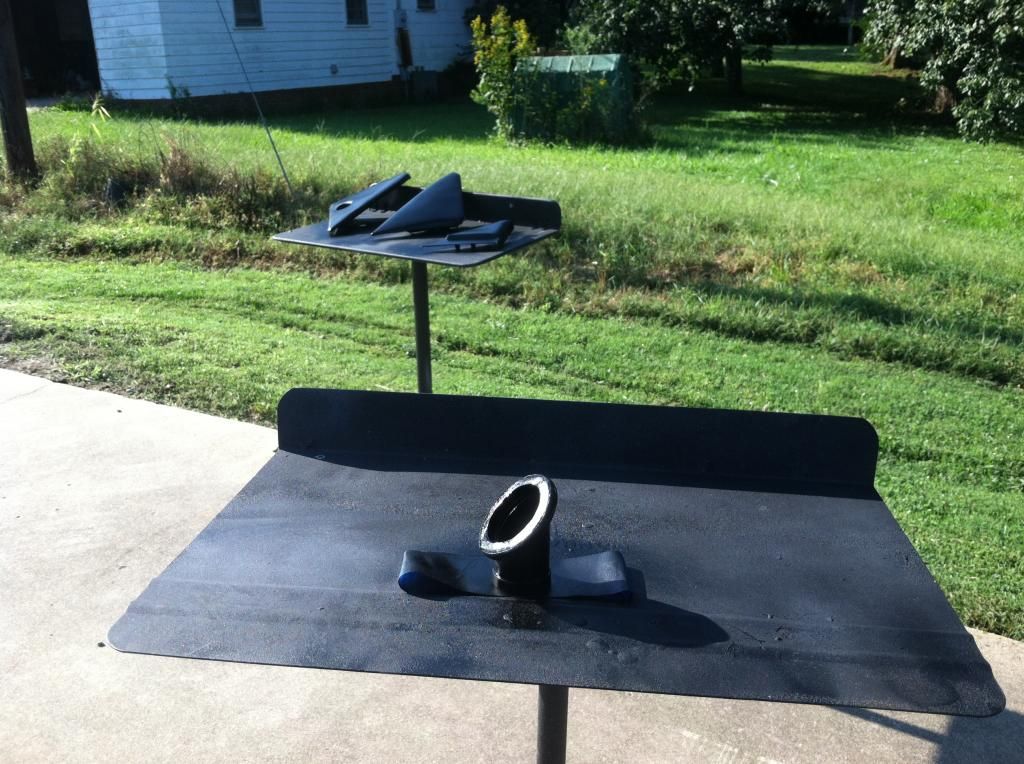
Finished/Installed:
Results/Driving Impressions:
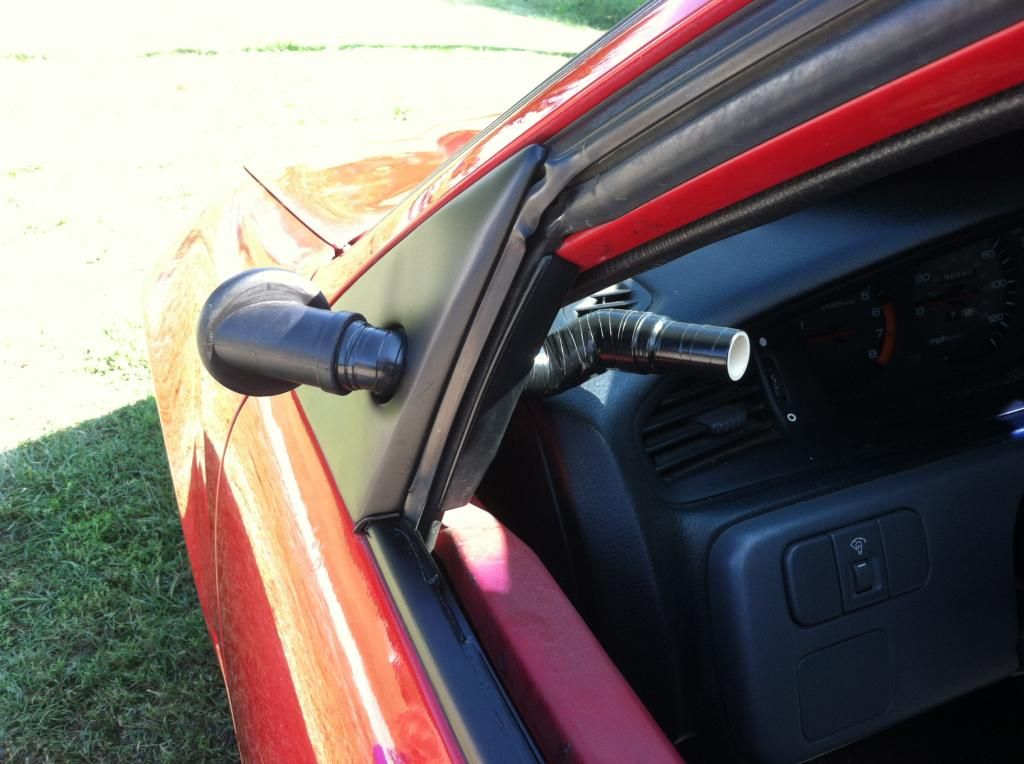
The Ram Air Mirror supplements all of the air that used to come out of the left vent on the dash, and is actually much stronger that what I was previously getting there from the electric fan when it would run at full speed. In the cooler mornings, no electric (dash) fan is needed at all. I ride windows up, and there is enough air coming through the Ram Air Mirror to cool me and the inside of the vehicle...i’m actually quite cold 15 minutes into the trip. In the (warmer) afternoon commute home, I still ride with both windows up completely. However, since I have the R.A.M supplementing the air that would have come from the LH dash pod, I have closed the LH vent’s shutters, which now force-channels more air to the center dash vents, which in turn: allows me to use a dash fan speed of setting # 2 versus setting # 4, essentially using less energy. I’m very happy with the performance of the R.A.M. So far, I do endorse the mod to others here on the site.
Up next, I will be making a mount for an electric oscillating fan for the right side of the car. Between the R.A.M. on my left side, and the oscillating aftermarket fan on my right side, I hope to be able to void using the dash fan completely for any cooling duties (except on scorcher days). My hope is that the oscillating fan (when used) will draw less power than the dash fan would have used at full blast. Could be wrong on that though...
More to come on this project soon.
As always, thanks for eco-tuning in!
Hello all, thanks for following along. Been pretty excited about this update. The other day I removed my side mirrors and other trim. I had planned to complete this mod HERE
After removing everything, I had to get to work the next morning. So, I rode in to Charlotte with the car as-is. During my commute that day, I notice a great deal of air coming through the holes where the mirror was once mounted. However, it was scattered air that wasn’t channelled. It didn’t cool me in any way, and came with plenty of wind noise. One of those holes was larger, about the size of a quarter, and was once the place where the manual mirror adjustment shaft went through the door frame to the mirror (or where electrical connections for cars with powered mirrors would pass through). I got to thinking about what it would look like to channel that cooler passing air into the car, with the hopes of creating an outcome of “free” A/C, similar to the channel vents incorporated into Nascar windows . So, I set out to build upon my ideas, and I think the result came out great. I’ll call this a “Ram Air Mirror” or “R.A.M”.
Supplies list:
Grinder with grinding wheel
Hand saw (fine toothed)
Drill
Dremel tool w/ various attachments
Fiberglass Resin
Bondo
Sanding paper (120, 220, and 400)
Adhesion Promoter and your choice of paint for the mirror bases.
(4) 45-degree 3/4” PVC connecting joints
(2) 3/4” straight compression fittings
An old vacuum attachment
Electrical Tape
Pics always tell the story:
Fiberglass resin drying

Drilling and Dremeling the hole out larger on the mirror base to match the hole in the body.


Test Fit


Glued and wrapped everything in place.


Some paint

Finished/Installed:


Results/Driving Impressions:
The Ram Air Mirror supplements all of the air that used to come out of the left vent on the dash, and is actually much stronger that what I was previously getting there from the electric fan when it would run at full speed. In the cooler mornings, no electric (dash) fan is needed at all. I ride windows up, and there is enough air coming through the Ram Air Mirror to cool me and the inside of the vehicle...i’m actually quite cold 15 minutes into the trip. In the (warmer) afternoon commute home, I still ride with both windows up completely. However, since I have the R.A.M supplementing the air that would have come from the LH dash pod, I have closed the LH vent’s shutters, which now force-channels more air to the center dash vents, which in turn: allows me to use a dash fan speed of setting # 2 versus setting # 4, essentially using less energy. I’m very happy with the performance of the R.A.M. So far, I do endorse the mod to others here on the site.
Up next, I will be making a mount for an electric oscillating fan for the right side of the car. Between the R.A.M. on my left side, and the oscillating aftermarket fan on my right side, I hope to be able to void using the dash fan completely for any cooling duties (except on scorcher days). My hope is that the oscillating fan (when used) will draw less power than the dash fan would have used at full blast. Could be wrong on that though...
More to come on this project soon.
As always, thanks for eco-tuning in!
10-03-2014, 01:55 AM
#10
Honda-Tech Member
Thread Starter
Update 9/25/14: Door Card Refurbishing
Earlier, I posted that the door cards needed work. The (I believe) OEM optional tweeters had parts that had fallen off, and the bracket holding one had become loose behind the panel. The previous owner saved all the parts (speaker grille, etc...). Most people would have tossed the parts in the McDonald's drive thru trash can... Thankfully, this car had a really cool previous owner. I lucked out. However, time had gotten the best of the fabric coverings, as the glue holding them in place had loosened, and the fabric was just flapping/sagging in the wind...
So, the following was completed:
-remounted tweeters
- cleaned panel
- cleaned/de-greased fabric; let it dry completely.
- dremel'd out panel that holds fabric.
- essentially, removed and re-glued fabric
As always, pics tell the story.
Finally, another very important update.
Drum roll please....
Up Next:
Weekend plans:
Interior Work:
- Strip car of rear and passenger seats
- Clean carpets and all panels
- Armour All and shine up stuff
- Begin work on custom mount for MPGuino
- Order MPGuino pin jumper/connector wires
- Pix up SEM gray interior paint (for completed pod)
Exterior
- Have O'Riley's Salisbury mix up another can of R 81-4
- Drill out and install JDM sidemarkers (no wiring, yet)
Performance
- Hook up Vac Guage (mechanical only); no wiring (yet)
Until next time, thanks for eco-tuning in!
Earlier, I posted that the door cards needed work. The (I believe) OEM optional tweeters had parts that had fallen off, and the bracket holding one had become loose behind the panel. The previous owner saved all the parts (speaker grille, etc...). Most people would have tossed the parts in the McDonald's drive thru trash can... Thankfully, this car had a really cool previous owner. I lucked out. However, time had gotten the best of the fabric coverings, as the glue holding them in place had loosened, and the fabric was just flapping/sagging in the wind...
So, the following was completed:
-remounted tweeters
- cleaned panel
- cleaned/de-greased fabric; let it dry completely.
- dremel'd out panel that holds fabric.
- essentially, removed and re-glued fabric
As always, pics tell the story.


Finally, another very important update.
Drum roll please....

Up Next:
Weekend plans:
Interior Work:
- Strip car of rear and passenger seats
- Clean carpets and all panels
- Armour All and shine up stuff
- Begin work on custom mount for MPGuino
- Order MPGuino pin jumper/connector wires
- Pix up SEM gray interior paint (for completed pod)
Exterior
- Have O'Riley's Salisbury mix up another can of R 81-4
- Drill out and install JDM sidemarkers (no wiring, yet)
Performance
- Hook up Vac Guage (mechanical only); no wiring (yet)
Until next time, thanks for eco-tuning in!
10-03-2014, 01:56 AM
#11
Honda-Tech Member
Thread Starter
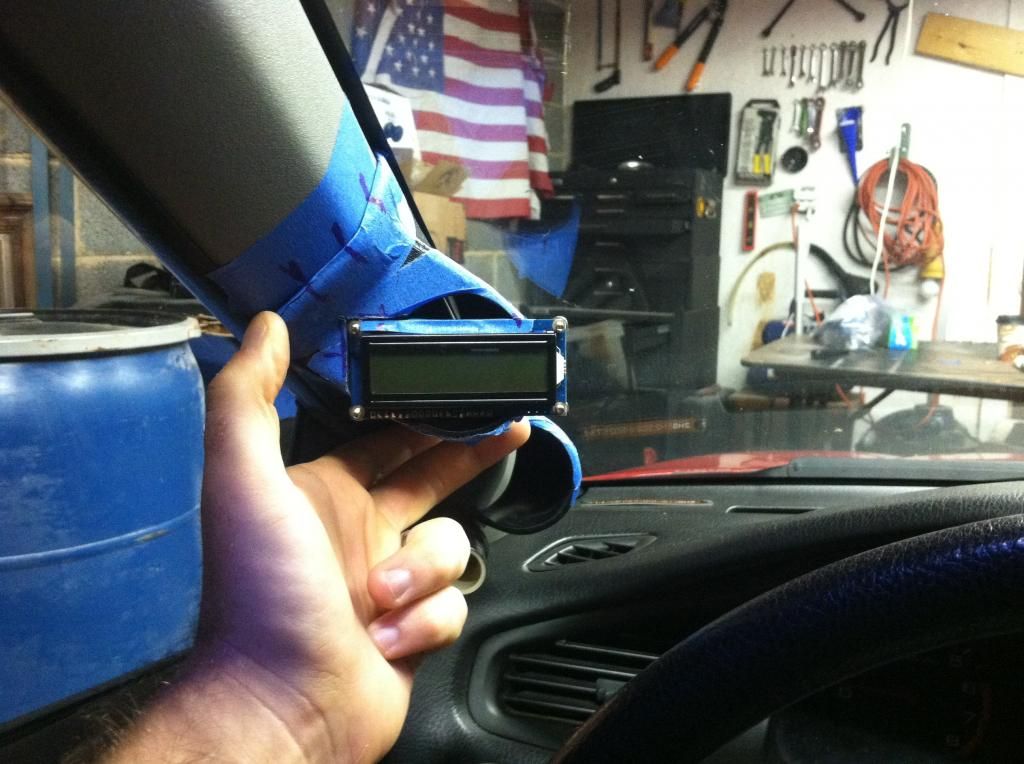
Update 9/26/14: MPGuino Custom Mounting - A Pillar Pod - Part One
So far, things are going well with this. I'll let the pictures do most of the talking. Got to rush to work. Looking forward to continuing on this over the weekend!
Wiring work (as received). Will be redone with Arduino jumper pins, heat shrink'd wires, etc..

Disassembled and ready to work.
Taping/Mocking/Marking everything up

Notch cutting (done with dremel and diamond cut disk)
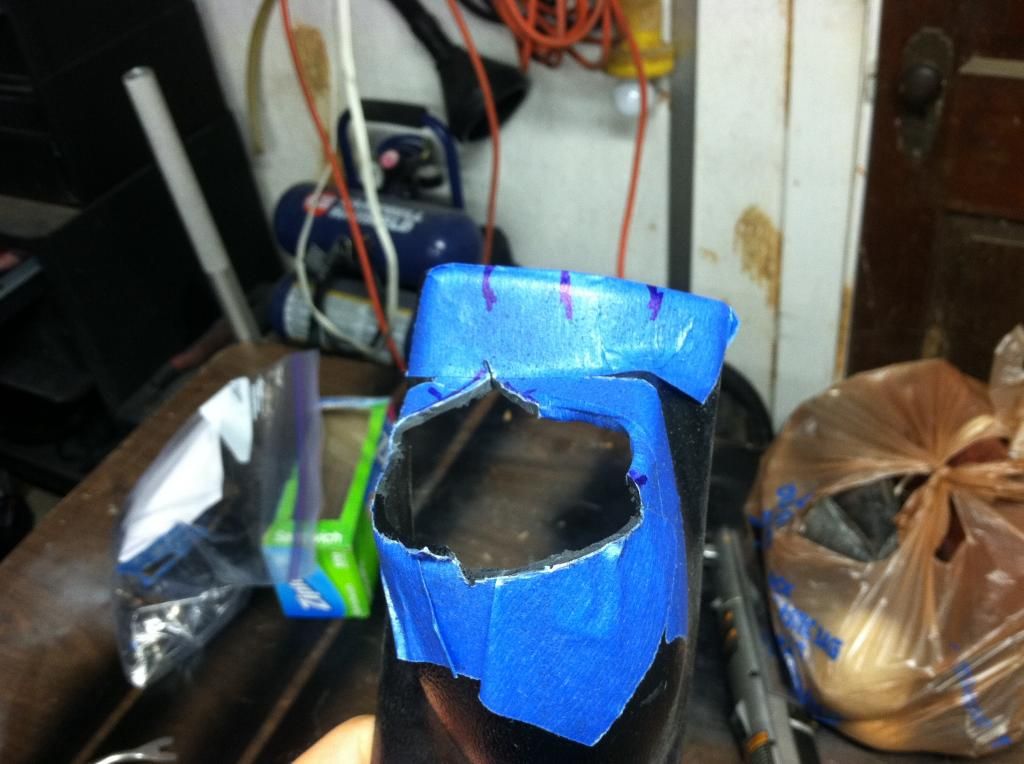
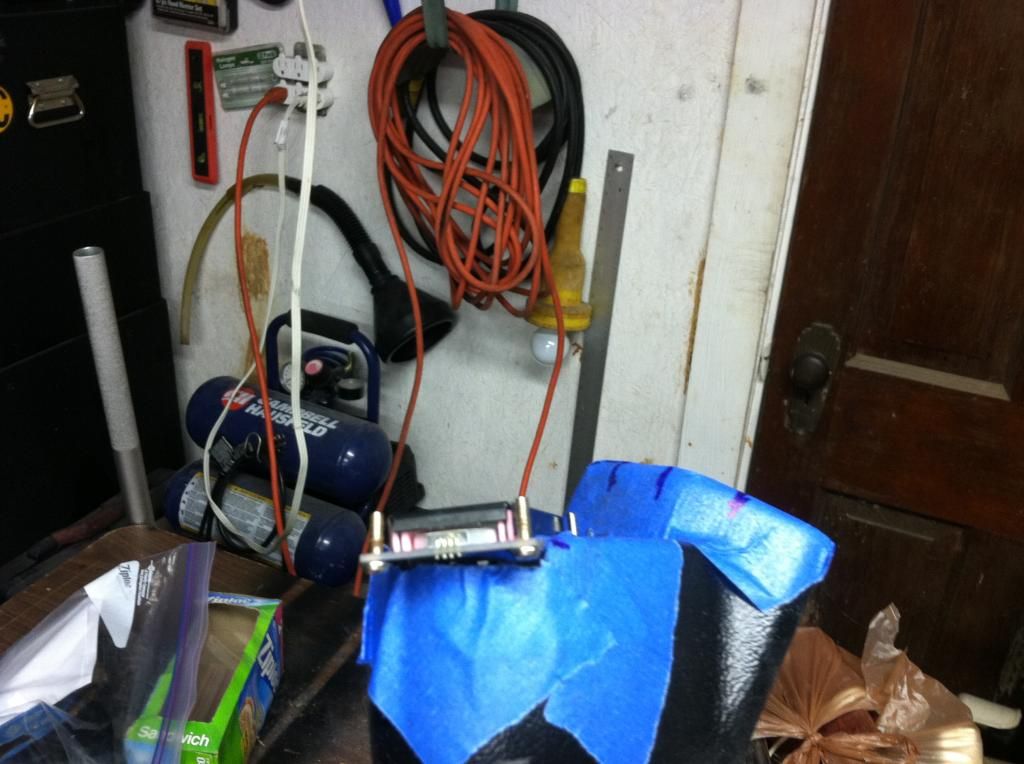
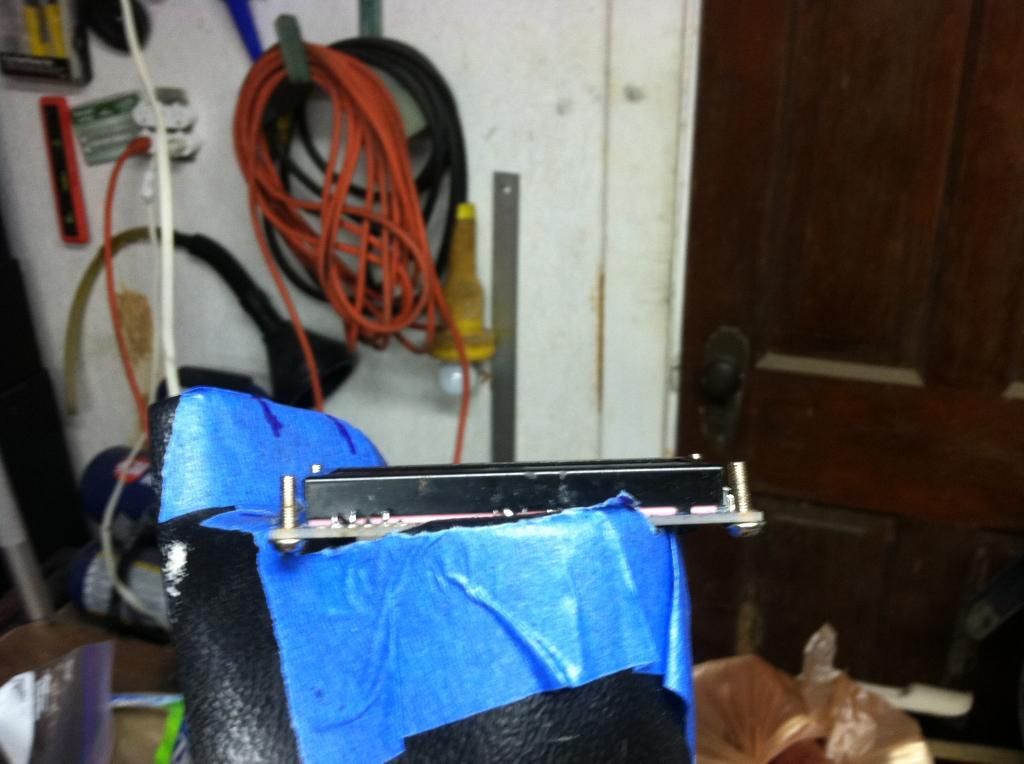
How it sits in the car.
Front panel/facia will be made out of this stuff. Then glued in; then fabric layed down and stretched to shape; then fiberglass laid on top (similar process to building custom abstract shaped speaker boxes, idea being the all the edges to the new panel are "smoothed" out across the shape of the existing pod form); then bondo; then SEM paint to mach the OEM pillar color (light gray).
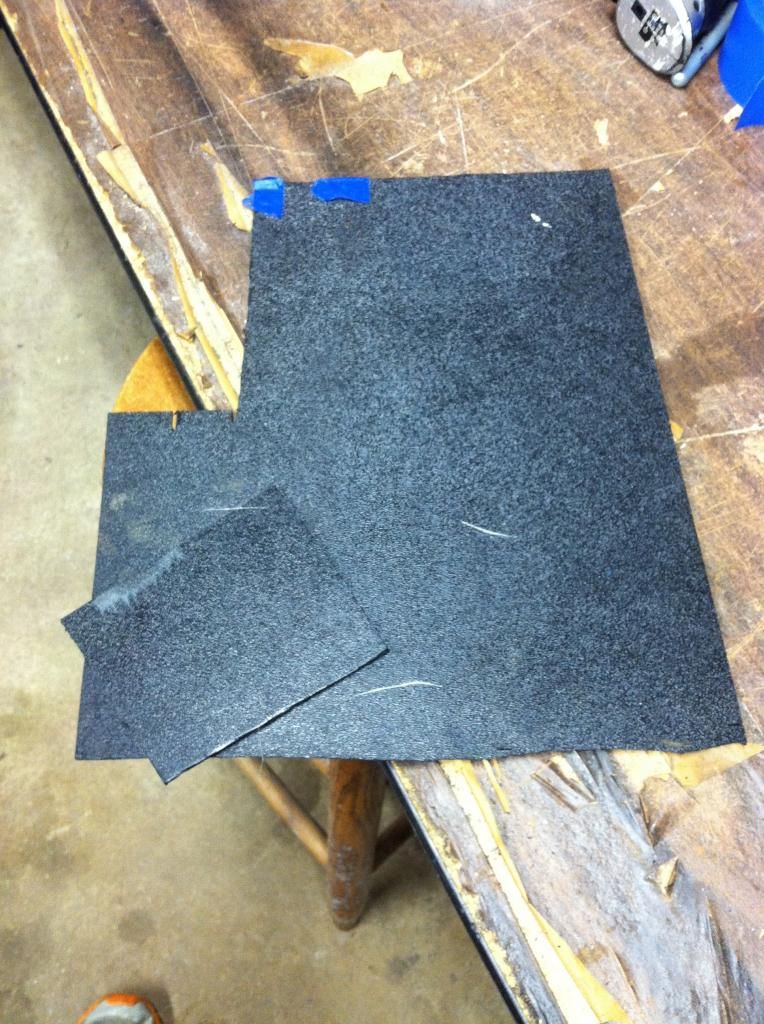
Here you can see how the front facia will sit flush (hopefully) with the existing pod mold/shape.
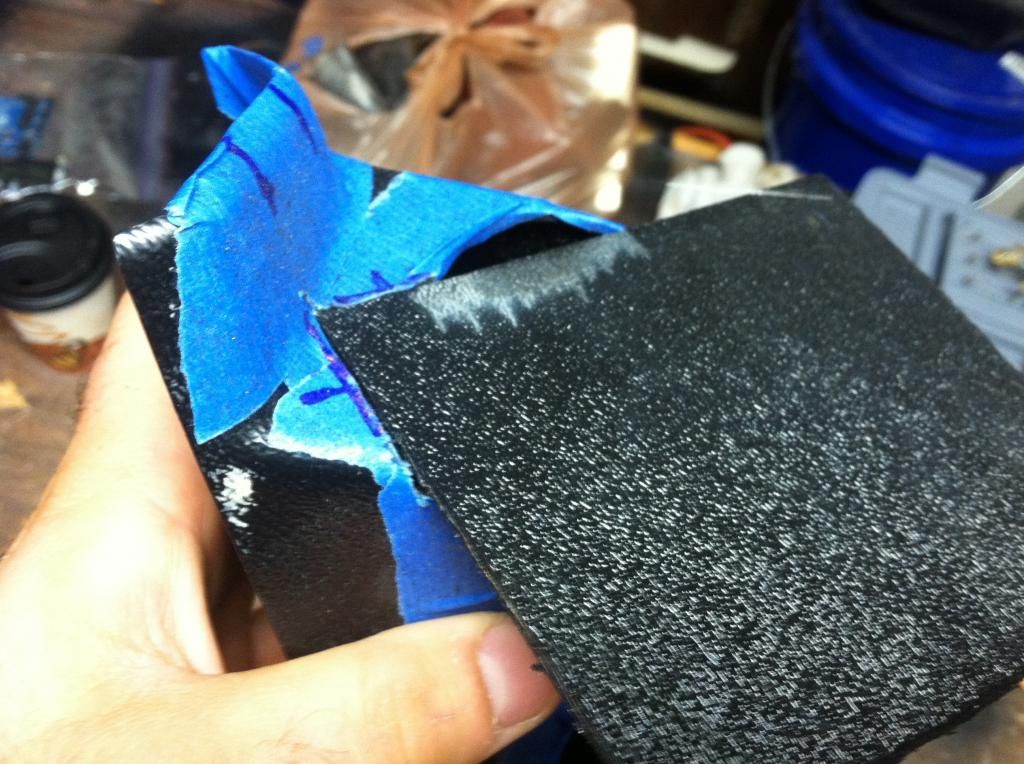
More to come. Thanks for eco-tuning in!
So far, things are going well with this. I'll let the pictures do most of the talking. Got to rush to work. Looking forward to continuing on this over the weekend!
Wiring work (as received). Will be redone with Arduino jumper pins, heat shrink'd wires, etc..

Disassembled and ready to work.

Taping/Mocking/Marking everything up

Notch cutting (done with dremel and diamond cut disk)


How it sits in the car.

Front panel/facia will be made out of this stuff. Then glued in; then fabric layed down and stretched to shape; then fiberglass laid on top (similar process to building custom abstract shaped speaker boxes, idea being the all the edges to the new panel are "smoothed" out across the shape of the existing pod form); then bondo; then SEM paint to mach the OEM pillar color (light gray).

Here you can see how the front facia will sit flush (hopefully) with the existing pod mold/shape.

More to come. Thanks for eco-tuning in!
10-03-2014, 01:57 AM
#12
Honda-Tech Member
Thread Starter
Update 9/27/14: MPGuino Custom Mounting - A Pillar Pod - Part Deux
We'll, fought like heck with this today. Still have a ways to go, but shaping out. Here's some pics and details.
Traced out the borders of the LCD onto painters tape.

Put that on the already cut panel
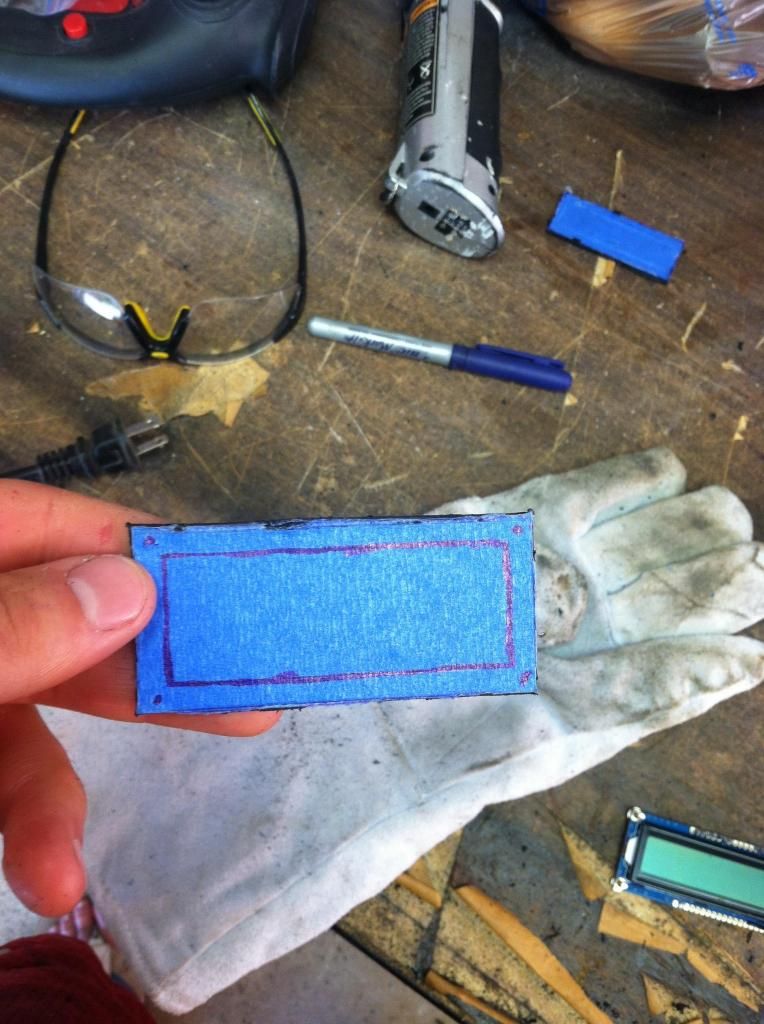
Cut that out, then went inside to chill a bit and check the fitment. As you can see, had to cut a couple more deep notches in the pillar. I realized, after my last post, that I would not be able to actually get the panel into position behind the pillar once it was completed unless I added these additional recessions.
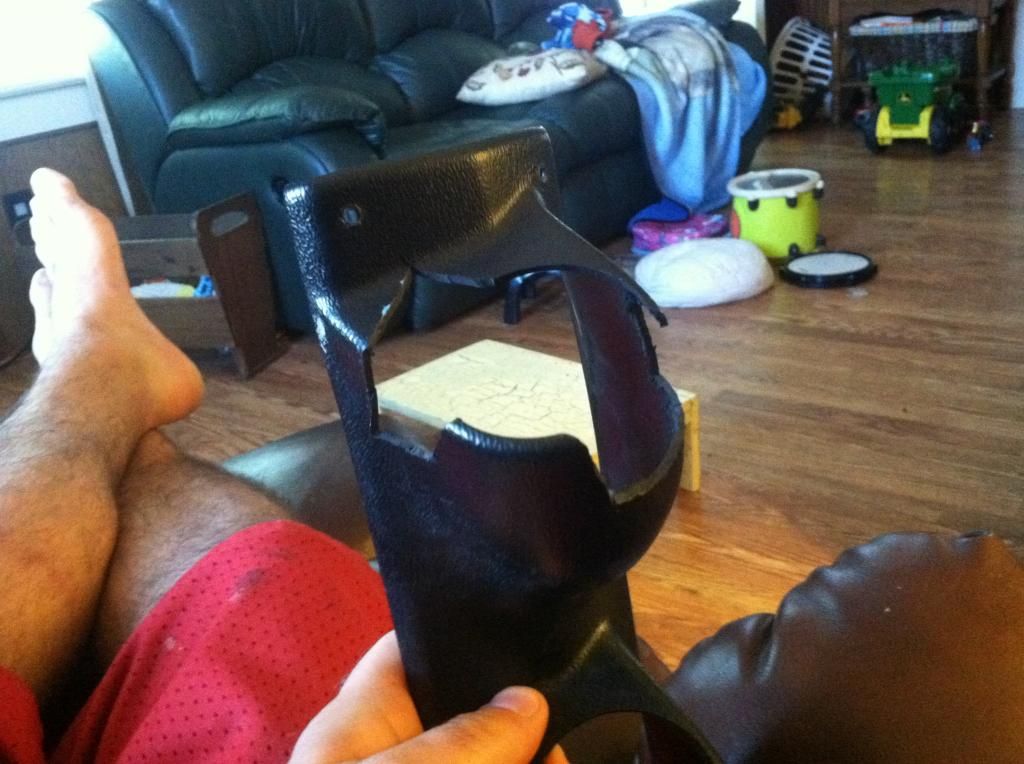
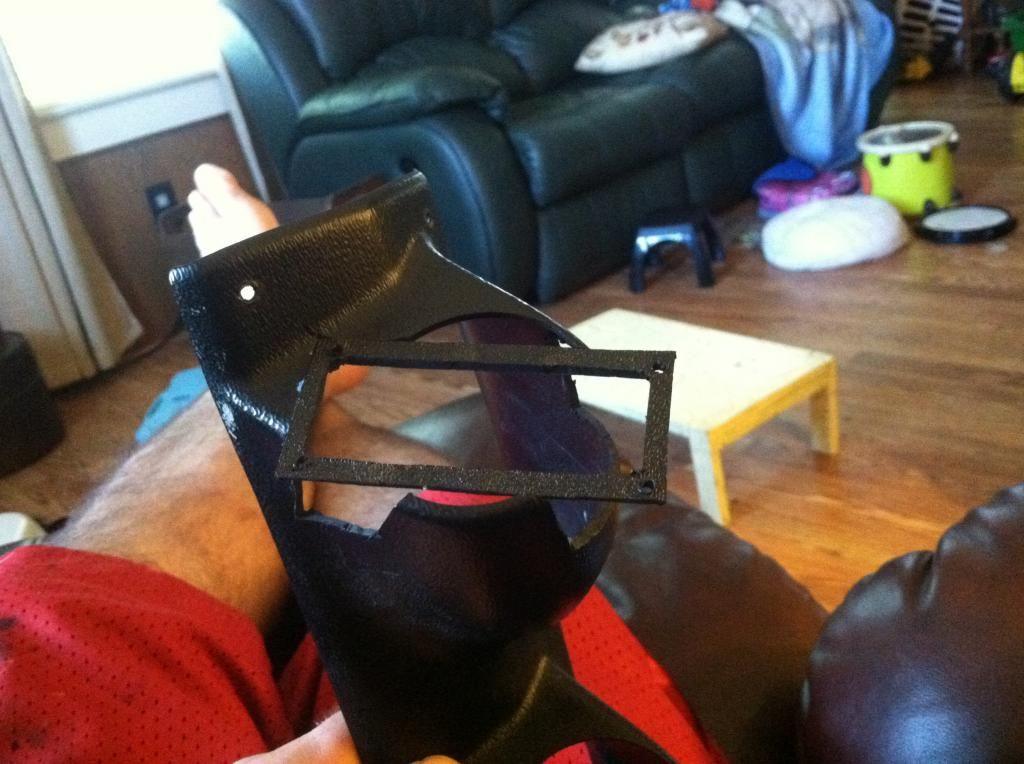
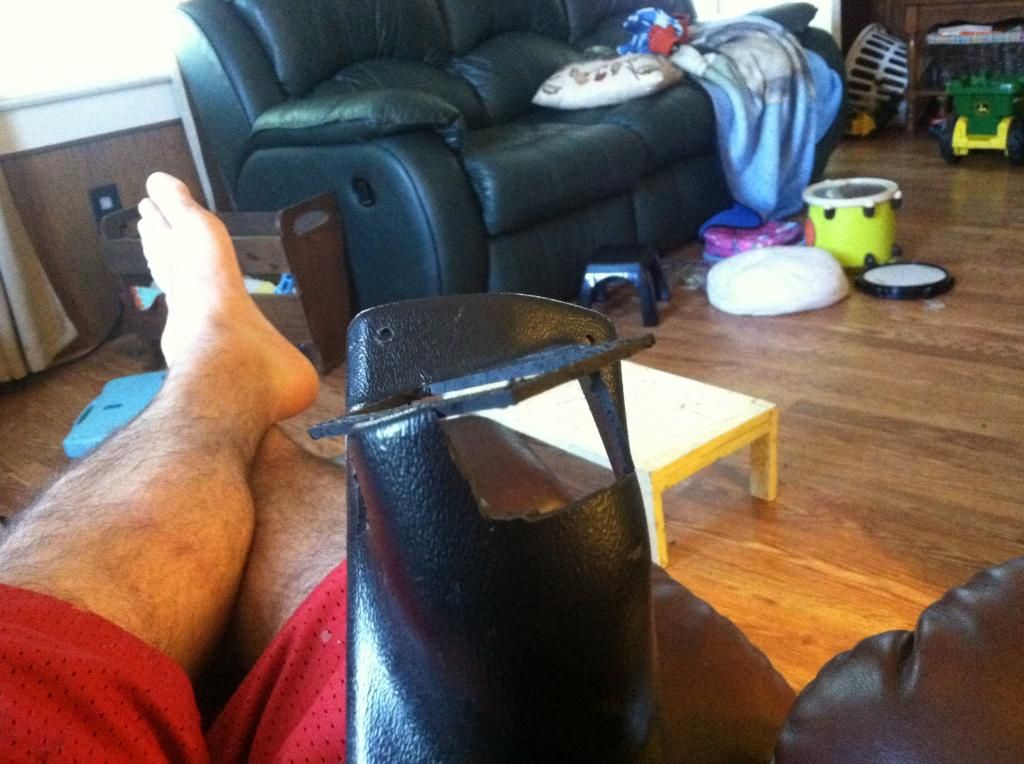
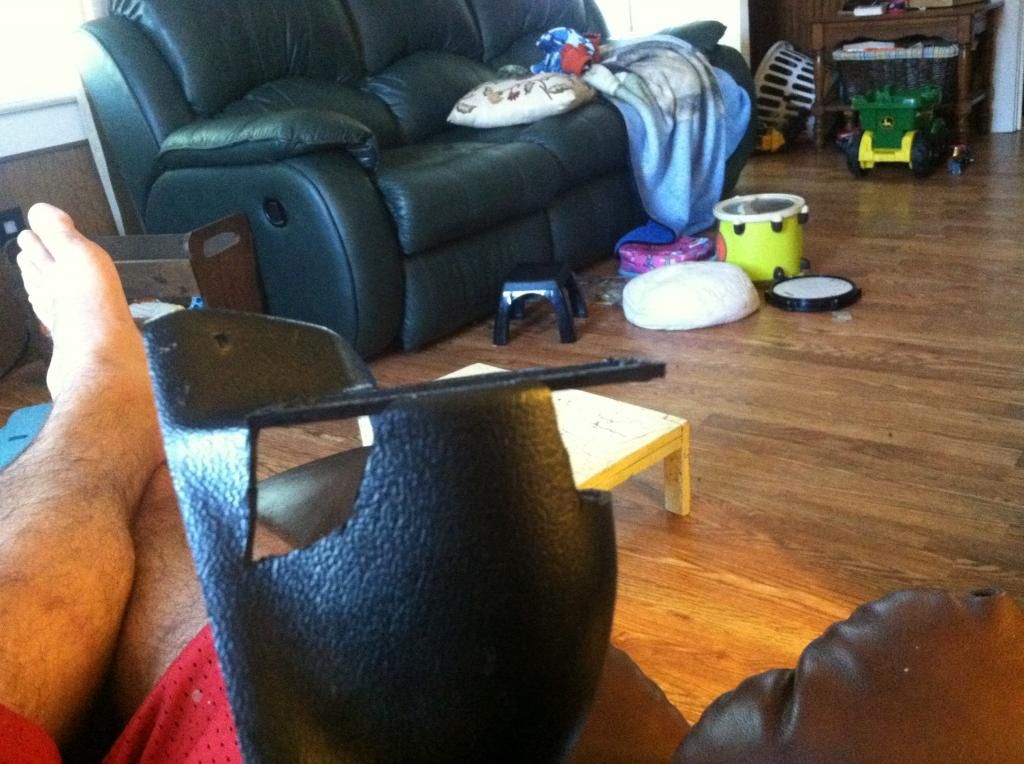
"Smoothed out" the design with the help of my son's old Oscar the Grouch shirt and some painters tape. Looks like trash, I know, but I LOVE TRASH!!! (baddoom-passshhh!)

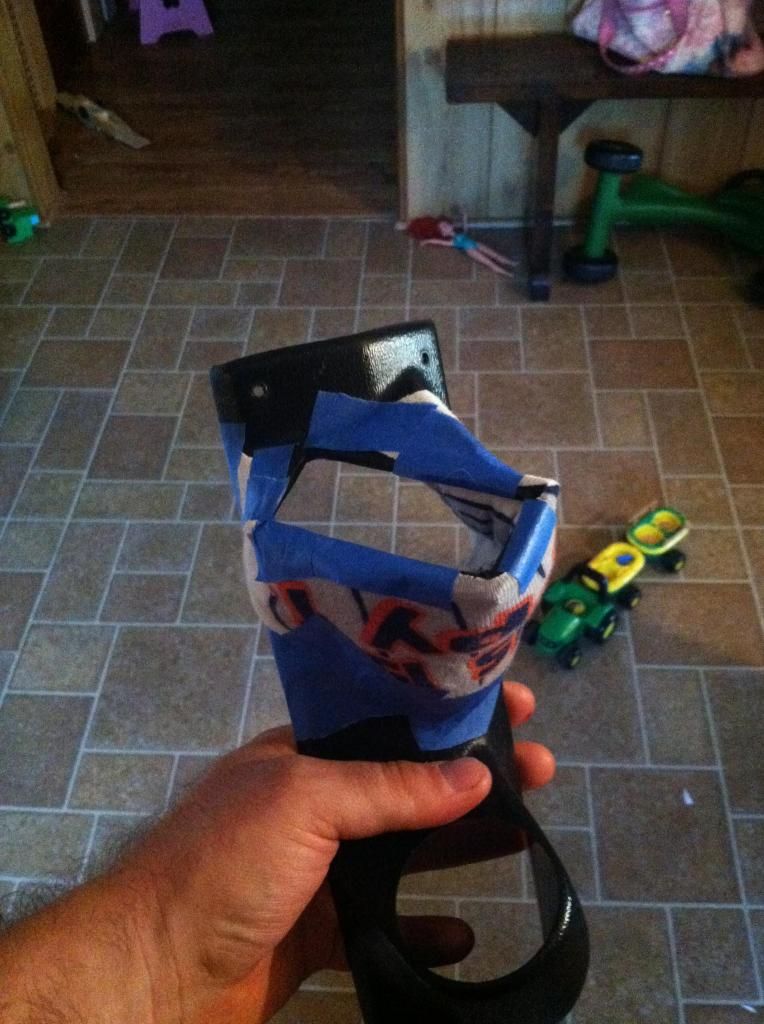
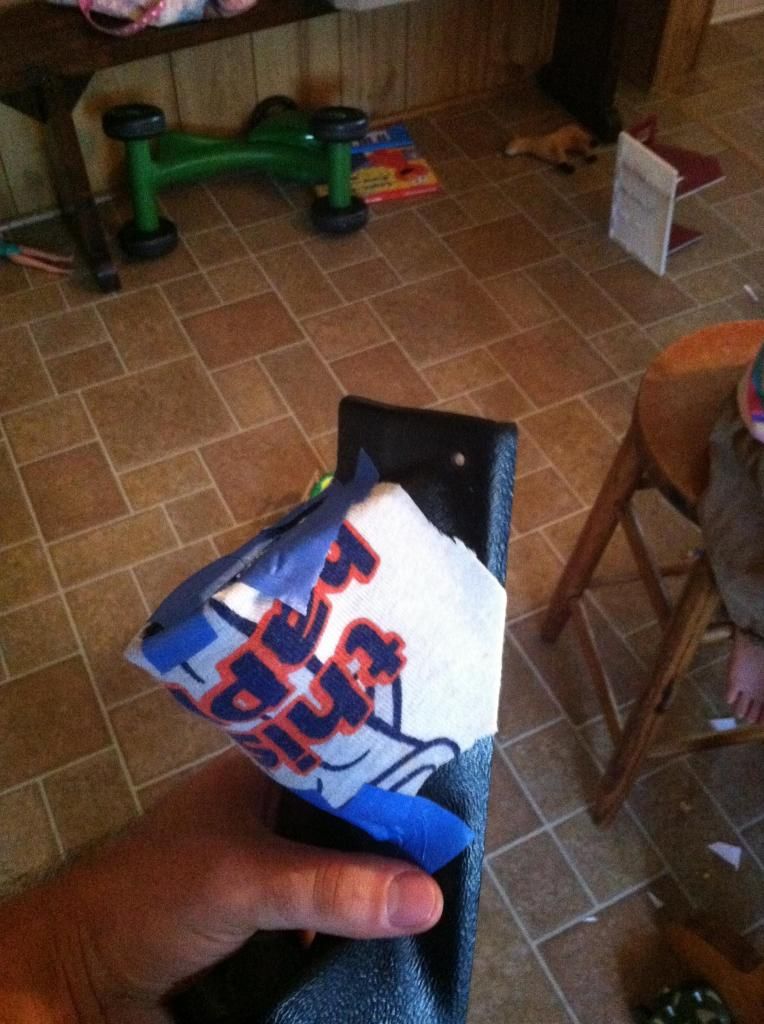
Then, laid down two layers of fiberglass.
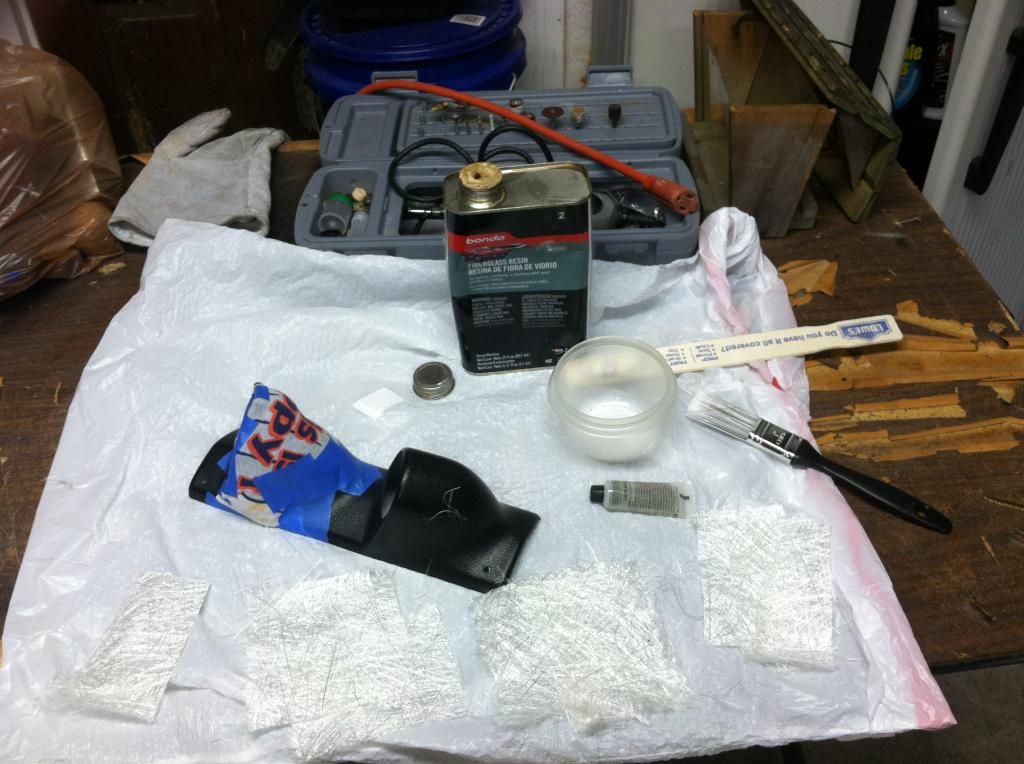
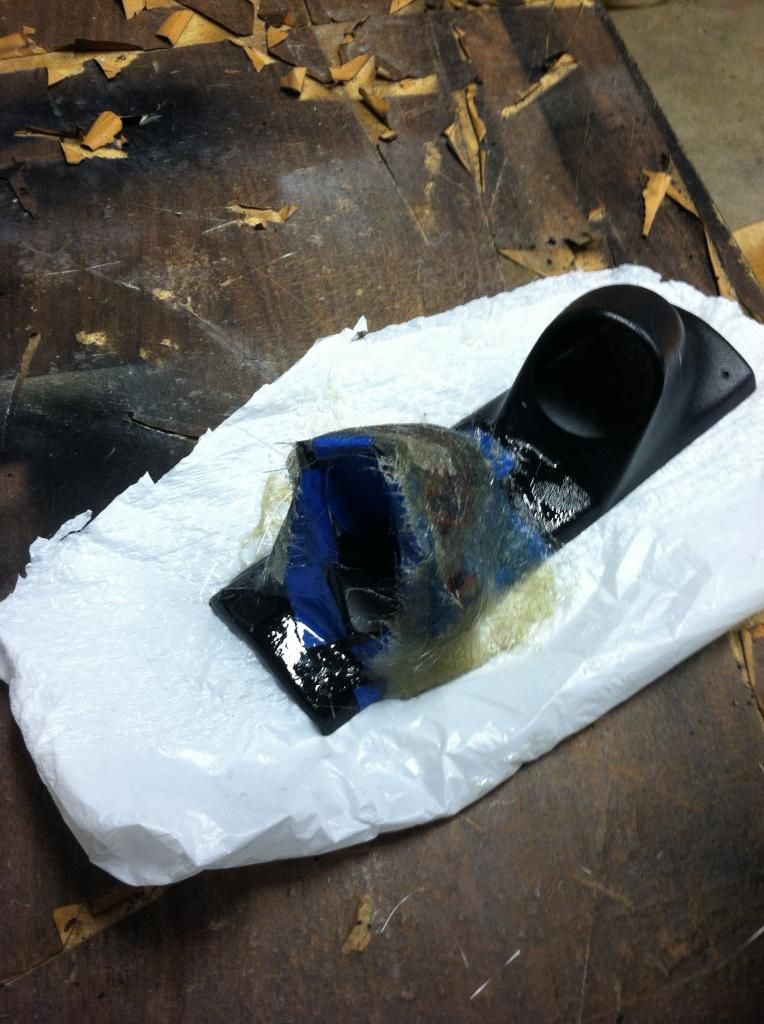
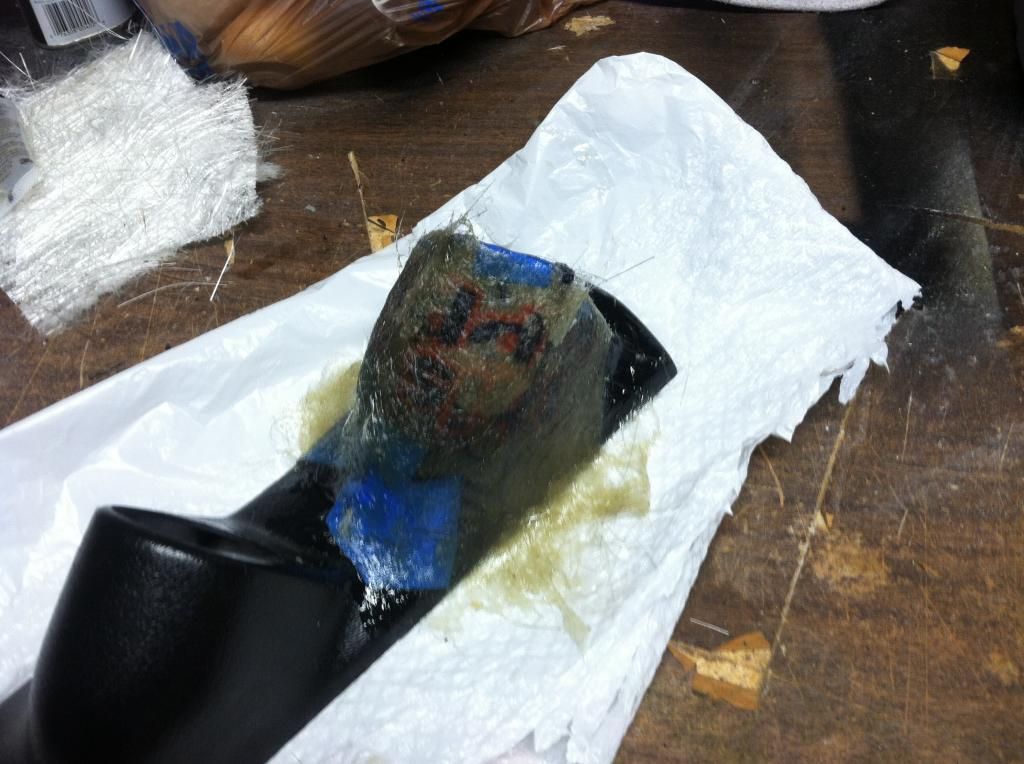
I will place another couple layers on top tomorrow, once this dries. I'll also enforce the underside with a couple of layers, for good measure.
I ordered the breadboard wiring connectors/pins to do the wiring from the Arduino Uno to the display. So, that will be next week/weekend's project. Hoping to get this custom pillar/mount done and ready before I begin that stage.
I also painted my roof today. Turned out like dog doo-doo, so I'll spare you the pics. Just imagine...the peel of an orange. I'll be block sanding/polishing the roof to see if I can bring out a better result. The color looks good though. If all else fails, I have a friend named PlastiDip that will look better than the current outcome.
More to come on the project. As always, thanks for eco-tuning in.
We'll, fought like heck with this today. Still have a ways to go, but shaping out. Here's some pics and details.
Traced out the borders of the LCD onto painters tape.

Put that on the already cut panel

Cut that out, then went inside to chill a bit and check the fitment. As you can see, had to cut a couple more deep notches in the pillar. I realized, after my last post, that I would not be able to actually get the panel into position behind the pillar once it was completed unless I added these additional recessions.


"Smoothed out" the design with the help of my son's old Oscar the Grouch shirt and some painters tape. Looks like trash, I know, but I LOVE TRASH!!! (baddoom-passshhh!)


Then, laid down two layers of fiberglass.


I will place another couple layers on top tomorrow, once this dries. I'll also enforce the underside with a couple of layers, for good measure.
I ordered the breadboard wiring connectors/pins to do the wiring from the Arduino Uno to the display. So, that will be next week/weekend's project. Hoping to get this custom pillar/mount done and ready before I begin that stage.
I also painted my roof today. Turned out like dog doo-doo, so I'll spare you the pics. Just imagine...the peel of an orange. I'll be block sanding/polishing the roof to see if I can bring out a better result. The color looks good though. If all else fails, I have a friend named PlastiDip that will look better than the current outcome.
More to come on the project. As always, thanks for eco-tuning in.
10-03-2014, 02:01 AM
#13
Honda-Tech Member
Thread Starter
Update 10/3/14: Important Fuel Log/Performance Achievement
Finally eclipsed over 60MPG! Looks like I ran 62.88mpg for the last 134 miles.
I also shared my thread over at Honda-Tech this morning as well, in case those guys are interested.
Link to my fuel log is here.
Thanks for eco-tuning in!
Finally eclipsed over 60MPG! Looks like I ran 62.88mpg for the last 134 miles.
I also shared my thread over at Honda-Tech this morning as well, in case those guys are interested.
Link to my fuel log is here.
Thanks for eco-tuning in!
10-03-2014, 12:46 PM
#17
Honda-Tech Member

Join Date: Sep 2012
Posts: 40
Likes: 0
Received 0 Likes
on
0 Posts
Awesome! This thread trips me out. I have a red '92 VX that I've owned for several years and I've taken a similar route. I've basically cleaned/restored the car while looking for ways to improve gas mileage and improve performance without having a negative affect on the mileage.
I've replaced every bushing with Energy Suspension stuff, Tokico springs and shocks, short shifter, strut bars, and a full EG Si interior. I also picked up a 5th VX wheel to use as the spare. I didn't weigh it, but I think the VX wheel w/tire may actually weigh less than the stock steel spare.
Your little mod to the tach is an awesome idea!
I have a similar mindset as you. I figure why go broke trying to turn a Honda into an all out performance car with tons of expensive JDM tidbits when all it does is make me paranoid about thieves to the point that I end up selling it. But of course, selling it outright would be stupid so I have to undo all my work and resell everything a piece at a time. At the end of the day I start to wonder what possessed me to build it in the first place.
A VX is the Ferrari of efficiency. Why ruin it by swapping in a B or K and making it just like a million other Civic hatchbacks when you can enhance what it is already great at?
10-06-2014, 08:00 AM
#19
Honda-Tech Member
Join Date: Jan 2008
Location: PA
Posts: 745
Likes: 0
Received 0 Likes
on
0 Posts
nice build, its rare that people still drive a VX in "stock" form without doing mods to destroy the VX.
here my MPG *****
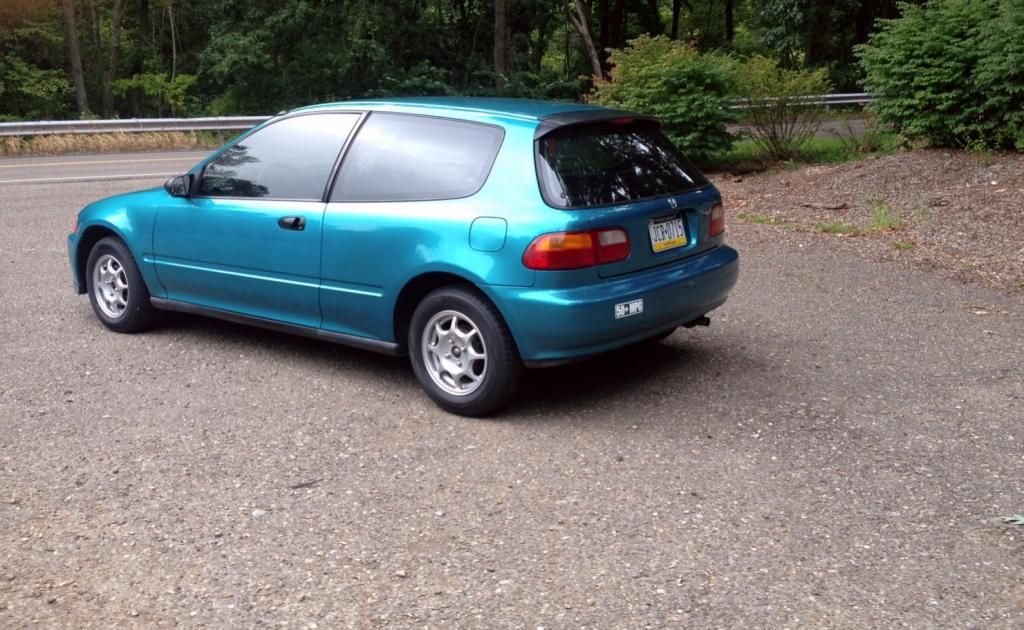
here my MPG *****
 10-07-2014, 07:15 AM
#21
Honda-Tech Member
Thread Starter
BILLBOARD! Thanks for stopping by, as always. When it comes to building Honda's, I think your my "brother from another mother"! I see you just updated the wagon thread. Heading over to check it out in a sec. I'm sure the updates there are, as always: intuitive, originally, OCD-meticulous, sweet photography to document things...
Thanks bro. Looking forward to doing the aero mods. I'm trying hard to save the bulk of them until I hit 65 mpg with "driving" and engine monitoring mods. It will then be a push to break the 70's by lowering the vehicles cD stats. This is hard for me to hold off on, as the "artist" in me wants to start all the "fun stuff" (Kammback, wheelskirts, etc...)
Me too bro. So far, it's been very tough to get to 60. Tougher than I thought it might be!
Amen and AMEN! The enamel paint on the tach and fuel needle has started peeling. Has to come off. Got a neon green painters pen from Wally. Hoping to re-work those areas while I'm in the instrument cluster next...hoping to ad an LED-light there for when vehicle is in Lean Burn
Seen it, and it's awesome! Very clean. I remember when you started your thread. Any updates? Did you cut your exhaust pipe shorter? I may do that. Any negative recourse on performance? Almost want to cut mine down to like 1" long, then paint the whole thing flat-black. Mine is hideous as is. Just want to stealth it out.
Also, what effects did you notice by adding the "50MPG+" decal to the back? Did you find that this helped you in traffic, people not getting as pissed at you as before, riding your tail, etc..., as when you didn't have it?
Thanks dude!
Me too bro. So far, it's been very tough to get to 60. Tougher than I thought it might be!
Awesome! This thread trips me out. I have a red '92 VX that I've owned for several years and I've taken a similar route. I've basically cleaned/restored the car while looking for ways to improve gas mileage and improve performance without having a negative affect on the mileage.
I've replaced every bushing with Energy Suspension stuff, Tokico springs and shocks, short shifter, strut bars, and a full EG Si interior. I also picked up a 5th VX wheel to use as the spare. I didn't weigh it, but I think the VX wheel w/tire may actually weigh less than the stock steel spare.
Your little mod to the tach is an awesome idea!
I have a similar mindset as you. I figure why go broke trying to turn a Honda into an all out performance car with tons of expensive JDM tidbits when all it does is make me paranoid about thieves to the point that I end up selling it. But of course, selling it outright would be stupid so I have to undo all my work and resell everything a piece at a time. At the end of the day I start to wonder what possessed me to build it in the first place.
A VX is the Ferrari of efficiency. Why ruin it by swapping in a B or K and making it just like a million other Civic hatchbacks when you can enhance what it is already great at?
I've replaced every bushing with Energy Suspension stuff, Tokico springs and shocks, short shifter, strut bars, and a full EG Si interior. I also picked up a 5th VX wheel to use as the spare. I didn't weigh it, but I think the VX wheel w/tire may actually weigh less than the stock steel spare.
Your little mod to the tach is an awesome idea!
I have a similar mindset as you. I figure why go broke trying to turn a Honda into an all out performance car with tons of expensive JDM tidbits when all it does is make me paranoid about thieves to the point that I end up selling it. But of course, selling it outright would be stupid so I have to undo all my work and resell everything a piece at a time. At the end of the day I start to wonder what possessed me to build it in the first place.
A VX is the Ferrari of efficiency. Why ruin it by swapping in a B or K and making it just like a million other Civic hatchbacks when you can enhance what it is already great at?
Also, what effects did you notice by adding the "50MPG+" decal to the back? Did you find that this helped you in traffic, people not getting as pissed at you as before, riding your tail, etc..., as when you didn't have it?
Thanks dude!
Last edited by OG Wagon; 10-07-2014 at 07:32 AM.
10-07-2014, 08:35 AM
#23
Careful with the Kammback, some states have laws prohibiting too much rear window coverage. I know a guy who got stopped after extensively lengthening his. Just check your local laws, that's all.
I wouldn't worry about doing anything in order too much. Breaking 65 MPG with driving style could be possible, depends on how you drive now. Just some advice that I've seen work really well. A radiator block may really help you out. I'm not sure if your car can handle a full block without overheating issues, but even a partial will help. Lowering the car helps a ton and is something you should definitely consider. Flat 'disc' hub caps are known to be good for a few MPGs alone. They don't look as cool as rims, but they are effective.
I see a possible block off plate in the sketch and some lowering along with a lip/side skirt aero. I definitely see rims, so that may be something you could consider if you are really itching for a few more increases.
10-07-2014, 11:08 AM
#24
Honda-Tech Member
Thread Starter
Thanks bro. The roof is killing me! I've tried re-painting with R81 mixed paint twice now, came out splotchy. Tried wet sanding and polishing. It was a disastrous outcome as well. I'm considering Plasti-Dipping it black. Once the aero parts are all done/installed, she'll go to Maaco. Until then, the PlastiDip will likely work. She's still "Milano Pink" in a few spots (C-pillars, namely). Sucks. If someone would have just polished her up every now and then...
Yes, I have considered all of those mods. Thank you for your insight. Ditto on lowering the car and the air dam. Windy morning, and the wind currents were KILLING my mpg's this morning, keeping me at about 1.2 "s of vacuum for most of my trip to work. I do have plans for a grill block install within the next few weeks likely. Kammback will follow, with rear view visibility being an important consideration. I'd love to keep the VX rims, and find some 13" moon disc hubcaps that I can modify to fit. I plan to mod the lug nuts to include a nutsert, and that way the moon discs could screw right in to the lug nuts, over the existing (light) VX rims. Prior to install, I will hydrodip the discs with a CF pattern and add some green vinyl lettering on top. Something along the lines of "Civic VX: Special Eco Project" or something 80's sounding like that. I figure those would look way cooler than slapping some pizza pans on the wheels and saying "eco>looks"!
The whole crux of what I'm trying to do here is a clean eco-build. There are plenty of UBER clean Honda builds, and plenty of "tear Fido's old dog house roof off and screw it to the underbelly of the car" Eco builds.
I'd like to blend the best of both worlds on this one. Clean; Functional; Economical.
No duct tape. No chase bays wire harness. Just clean and functional and putting money back in my pocket daily.
Careful with the Kammback, some states have laws prohibiting too much rear window coverage. I know a guy who got stopped after extensively lengthening his. Just check your local laws, that's all.
I wouldn't worry about doing anything in order too much. Breaking 65 MPG with driving style could be possible, depends on how you drive now. Just some advice that I've seen work really well. A radiator block may really help you out. I'm not sure if your car can handle a full block without overheating issues, but even a partial will help. Lowering the car helps a ton and is something you should definitely consider. Flat 'disc' hub caps are known to be good for a few MPGs alone. They don't look as cool as rims, but they are effective.
I see a possible block off plate in the sketch and some lowering along with a lip/side skirt aero. I definitely see rims, so that may be something you could consider if you are really itching for a few more increases.
I wouldn't worry about doing anything in order too much. Breaking 65 MPG with driving style could be possible, depends on how you drive now. Just some advice that I've seen work really well. A radiator block may really help you out. I'm not sure if your car can handle a full block without overheating issues, but even a partial will help. Lowering the car helps a ton and is something you should definitely consider. Flat 'disc' hub caps are known to be good for a few MPGs alone. They don't look as cool as rims, but they are effective.
I see a possible block off plate in the sketch and some lowering along with a lip/side skirt aero. I definitely see rims, so that may be something you could consider if you are really itching for a few more increases.
The whole crux of what I'm trying to do here is a clean eco-build. There are plenty of UBER clean Honda builds, and plenty of "tear Fido's old dog house roof off and screw it to the underbelly of the car" Eco builds.
I'd like to blend the best of both worlds on this one. Clean; Functional; Economical.
No duct tape. No chase bays wire harness. Just clean and functional and putting money back in my pocket daily.
Last edited by OG Wagon; 10-07-2014 at 11:26 AM.
10-08-2014, 03:00 AM
#25
I understand that 100%. I have recently gotten into ecomodding as a read only hobby. I bought a Geo Metro and that's all those guys do! The rims are nice, but 2 MPG or so for the moon discs is hard to argue! I like your removable idea.
Keep it up, you're already leaps and bounds beyond most vehicle's MPG.
Keep it up, you're already leaps and bounds beyond most vehicle's MPG.