
EK hatch project: My first teardown ever. Advice and comments more than welcomed.
 11-25-2010, 08:50 PM
#1
Honda-Tech Member
Thread Starter
Greetings. My names Mirza, a lot of people call me "Mirz" for short. I'm 20 years of age and I own a 97 Civic hatchback DX, and I have owned plenty of Hondas in the past since
2007. At that year I got into cars, not knowing jack ****, and I got into the Honda game "seriously" at about 2008 when I started getting a little serious about it, multiple
engine swaps, etc. I never went beyond the level where I would do wire tucks or start painting the engine bay myself and have time and time for a project like this because I
had no storage, nor did I have a garage to keep the project. I work at a Honda dealership as a lube tech right now, and I am pretty decent at being mechanically
inclined on turning wrenches, as far as body work, painting, applying the different fillers and stuff .. God Help me. I have never tried anything like smoothing out an
engine bay as I have read most people on Honda-tech do, but I am willing to give it a shot since I am planning on keeping this car, because the EK hatchback is my favorite
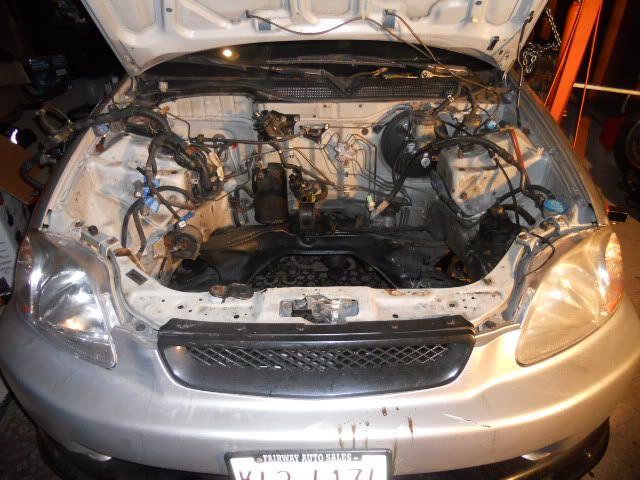
hatch. Here are the pictures of what I've got so far on my build, starting with the info of the vehicle, and the motor it'self.
Vehicle: 1997 Honda Civic Hatchback DX
Motor: Rebuilt b16a2 from scratch with OEM parts, instead I am using P30 pistons.
Transmission: S4C
OBD2a so far, will convert to OBD1 via P28, and chip alter for boost.
Future Plans for this Car after engine bay prep/wire tuck: Boost. :] First time going boost as well.
Problems with body work:
Both inner fenders have rust on the inside
The front bumper support has rust
The Hood latch cable is broken - Will order new one from honda
I will post pics up tomorrow of the rust problems, and I want H-T to chime in on this one, because I am trying to develop a new skill: Bodywork, or atleast start on it. :]
This is why I came to H-T for assistance on prepping an engine bay. My view on prepping the Engine bay was to first take everything off, and sketch things out.
I am going to be keeping the brake lines and clutch lines in their original place, just going to relocate the charcoal canister because that thing is seriously in the way
and it's really pissing me off. Before I started taking off the clutch lines brackets, and brake line brackets, accessories, etc. I went and blue printed out a sketch on how the
wire tuck formation is going to sit. I got done with the Drivers side tonight, and I am pretty impressed on how easy it is compared to how hard I thought it was going to be.
Once I have everything blueprinted with the wire tuck, and taking off the brackets to let the proportioning valve, fuel filter, and everything else hang, I am going to start
de-greasing the whole bay down with Simple green, and wash it. Let it dry for a couple of minutes under a shop light, and now here is the real deal where I am most worried
about. Prepping the engine bay. I read through the shaved, tucked, customized engine bay thread, pretty much the whole page and decided to go with 220 wet sanding the
whole entire bay, but before that I want to remove all the rust such as the rust shown on the inside fenders liners, and bumper support. What is the best bet ?
Sorry for the long talk, let me get down to the pictures, and motor. Lol.
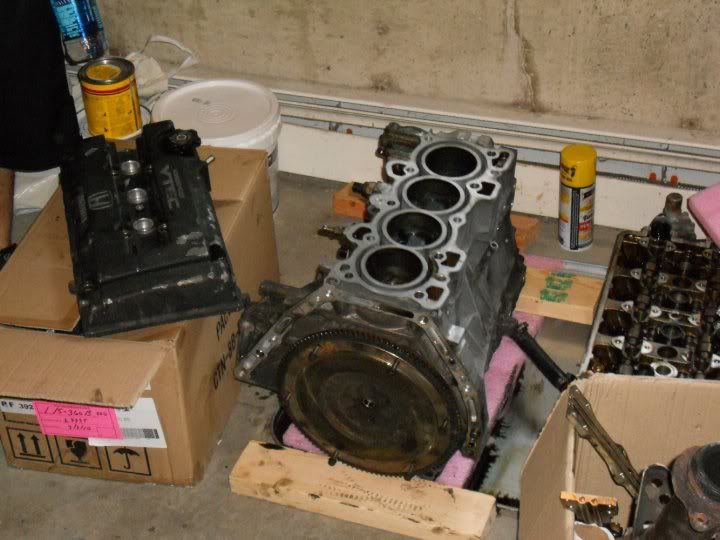
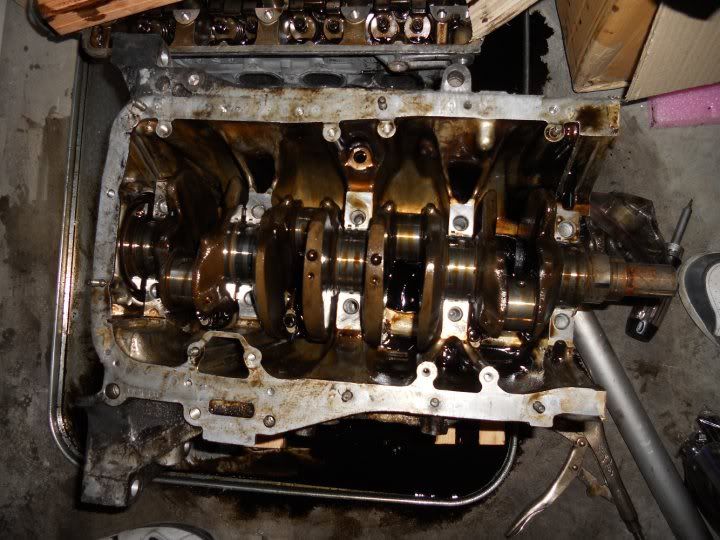
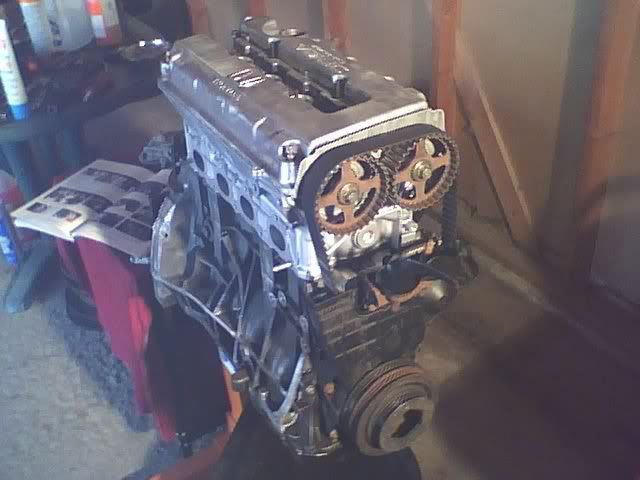
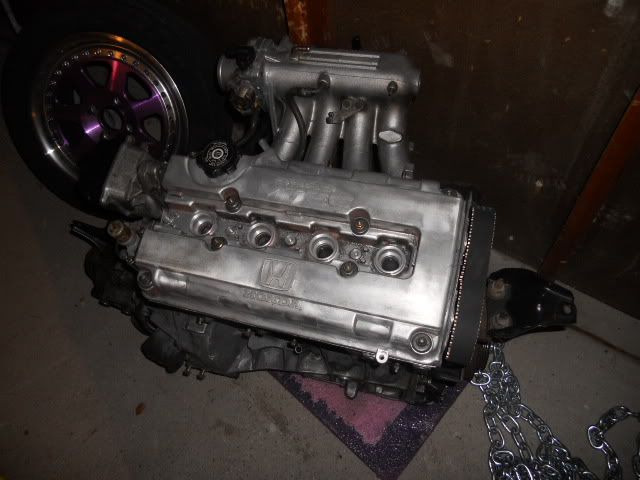
rebuilt from scratch. ground up, pretty much just OEM parts.
This guy was a bit*h to take off the bracket.
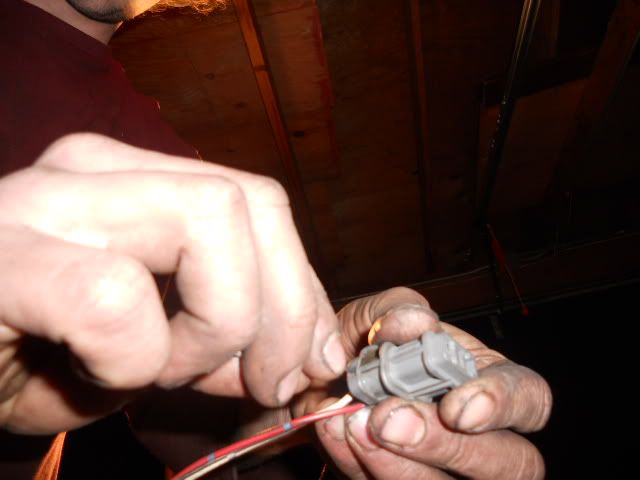
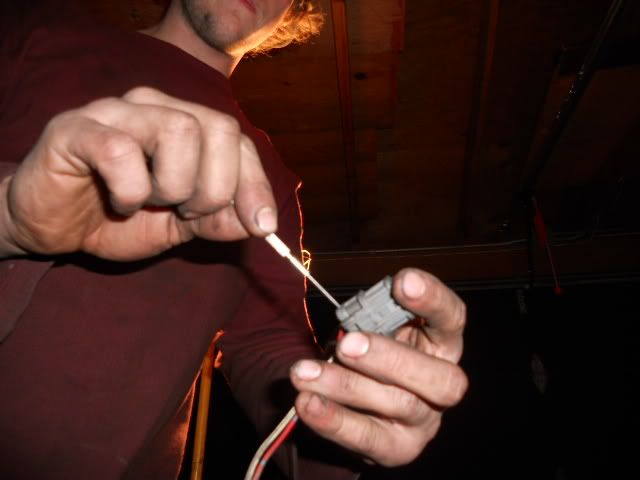
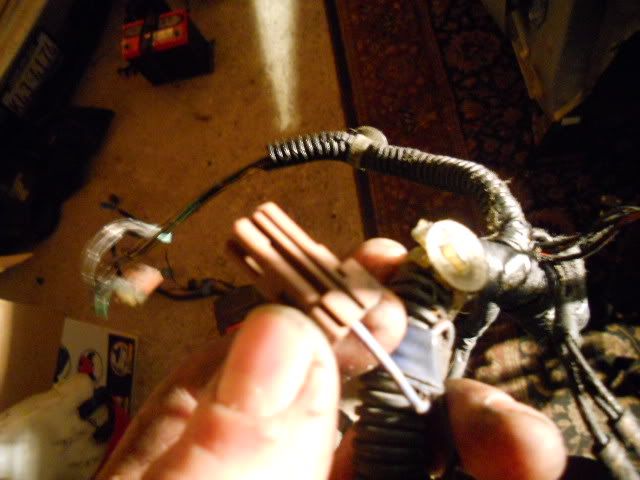
De-Pinning some wires is fun. :]
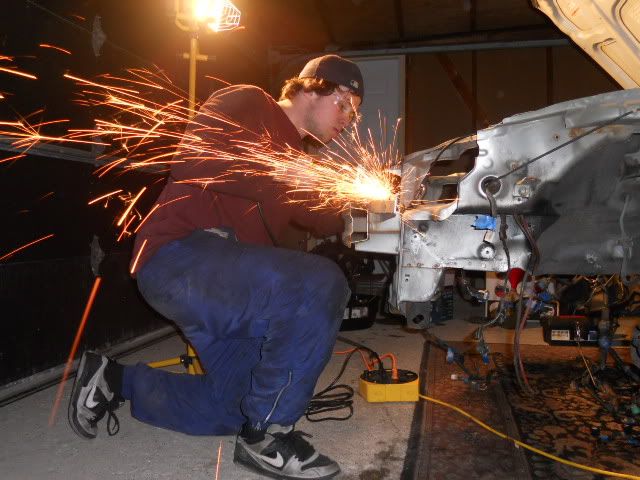
Had to cut this one bolt that was pissing me off. >:[
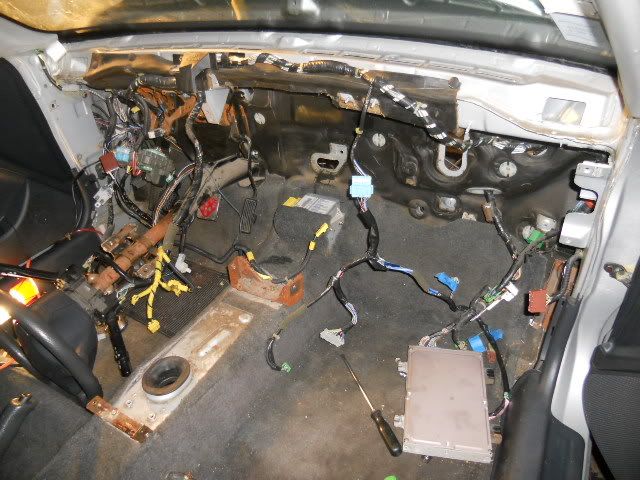
Thinking about running the drivers side main harness somewhere around here.

Not done here, just wanted to see how it will look like since it's my first tuck ever. :] loom, and sleeve it up.
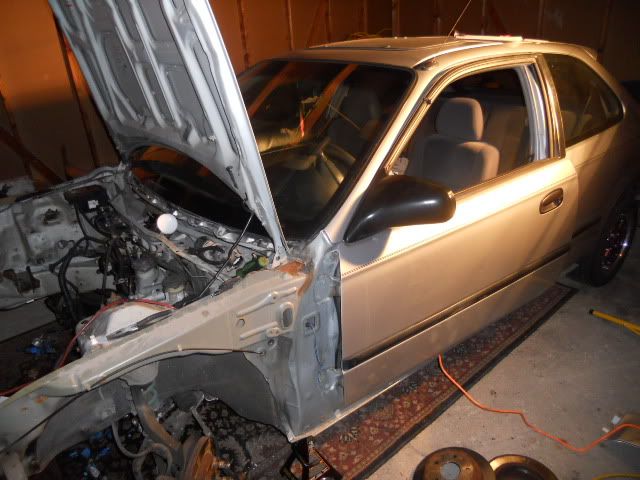
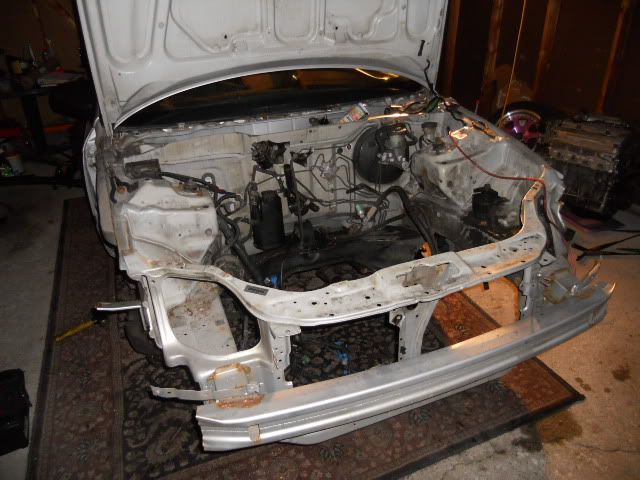
What I have done so far in 2 days...
Pulled motor out, and took off most of the stuff via blueprinting on Wire Tuck, Engine bay Prep, etc.. Hope you guys enjoy, and please chime in if you want to help a Honda tech brotha' out. :]
though this is my first project in which I am sharing quality time with, I want to develop my skills further beyond. Any comments would be helpful on the prep work for the bay.
Thanks! Cheers.
2007. At that year I got into cars, not knowing jack ****, and I got into the Honda game "seriously" at about 2008 when I started getting a little serious about it, multiple
engine swaps, etc. I never went beyond the level where I would do wire tucks or start painting the engine bay myself and have time and time for a project like this because I
had no storage, nor did I have a garage to keep the project. I work at a Honda dealership as a lube tech right now, and I am pretty decent at being mechanically
inclined on turning wrenches, as far as body work, painting, applying the different fillers and stuff .. God Help me. I have never tried anything like smoothing out an
engine bay as I have read most people on Honda-tech do, but I am willing to give it a shot since I am planning on keeping this car, because the EK hatchback is my favorite
hatch. Here are the pictures of what I've got so far on my build, starting with the info of the vehicle, and the motor it'self.
Vehicle: 1997 Honda Civic Hatchback DX
Motor: Rebuilt b16a2 from scratch with OEM parts, instead I am using P30 pistons.
Transmission: S4C
OBD2a so far, will convert to OBD1 via P28, and chip alter for boost.
Future Plans for this Car after engine bay prep/wire tuck: Boost. :] First time going boost as well.
Problems with body work:
Both inner fenders have rust on the inside
The front bumper support has rust
The Hood latch cable is broken - Will order new one from honda
I will post pics up tomorrow of the rust problems, and I want H-T to chime in on this one, because I am trying to develop a new skill: Bodywork, or atleast start on it. :]
This is why I came to H-T for assistance on prepping an engine bay. My view on prepping the Engine bay was to first take everything off, and sketch things out.
I am going to be keeping the brake lines and clutch lines in their original place, just going to relocate the charcoal canister because that thing is seriously in the way
and it's really pissing me off. Before I started taking off the clutch lines brackets, and brake line brackets, accessories, etc. I went and blue printed out a sketch on how the
wire tuck formation is going to sit. I got done with the Drivers side tonight, and I am pretty impressed on how easy it is compared to how hard I thought it was going to be.
Once I have everything blueprinted with the wire tuck, and taking off the brackets to let the proportioning valve, fuel filter, and everything else hang, I am going to start
de-greasing the whole bay down with Simple green, and wash it. Let it dry for a couple of minutes under a shop light, and now here is the real deal where I am most worried
about. Prepping the engine bay. I read through the shaved, tucked, customized engine bay thread, pretty much the whole page and decided to go with 220 wet sanding the
whole entire bay, but before that I want to remove all the rust such as the rust shown on the inside fenders liners, and bumper support. What is the best bet ?
Sorry for the long talk, let me get down to the pictures, and motor. Lol.
rebuilt from scratch. ground up, pretty much just OEM parts.
This guy was a bit*h to take off the bracket.
De-Pinning some wires is fun. :]
Had to cut this one bolt that was pissing me off. >:[
Thinking about running the drivers side main harness somewhere around here.
Not done here, just wanted to see how it will look like since it's my first tuck ever. :] loom, and sleeve it up.
What I have done so far in 2 days...
Pulled motor out, and took off most of the stuff via blueprinting on Wire Tuck, Engine bay Prep, etc.. Hope you guys enjoy, and please chime in if you want to help a Honda tech brotha' out. :]
though this is my first project in which I am sharing quality time with, I want to develop my skills further beyond. Any comments would be helpful on the prep work for the bay.
Thanks! Cheers.
Last edited by EF9_TryMe; 11-26-2010 at 07:09 AM.
 11-25-2010, 10:55 PM
#2
Honda-Tech Member
Thread Starter
My question here is for the small little pink holes like around the strut tower, can I use seam sealer or rage extreme evercoat to cover that up or do I have to weld those shut ?
11-27-2010, 09:25 PM
#5
Honda-Tech Member
Join Date: Aug 2009
Location: Delaware
Posts: 778
Likes: 0
Received 0 Likes
on
0 Posts
Sounds like you got a good plan for the build, just don't skimp out on anything, you'll be alot happier with it in the end
11-27-2010, 10:05 PM
#6
Honda-Tech Member
Join Date: May 2009
Location: huntsville
Posts: 1,169
Likes: 0
Received 0 Likes
on
0 Posts
Trending Topics
11-28-2010, 06:48 PM
#8
Honda-Tech Member
Thread Starter
Thanks for the comments guys. It's my first build and I am taking my time with it I have all winter for this project to come along pretty good I guess, not aiming for perfect .. just want something nice and pretty quick.
Didn't get a chance to go to the Garage today, will take a fews pics of it tomorrow though.
Didn't get a chance to go to the Garage today, will take a fews pics of it tomorrow though.
11-28-2010, 07:11 PM
#9
glad to see you're taking you're time and making diagrams/pin-out maps of your plugs, I wish I would have done that on my engine harness... for some reason I did it on my car... but not engine harness... lol. Live and learn I guess, right?
Good luck w/your build man!
Good luck w/your build man!
11-29-2010, 03:35 AM
#10
Honda-Tech Member
Thread Starter
glad to see you're taking you're time and making diagrams/pin-out maps of your plugs, I wish I would have done that on my engine harness... for some reason I did it on my car... but not engine harness... lol. Live and learn I guess, right?
Good luck w/your build man!
Good luck w/your build man!
11-29-2010, 06:13 AM
#11
Honda-Tech Member
I personally would never use filler of any type for holes. Weld or nothing. Grind it flat after welding, and then use Epoxy primer on bare metal.
 11-29-2010, 07:14 AM
#13
Honda-Tech Member
I wouldn't close the garage door when grinding or cutting.. Seriously..
11-29-2010, 08:24 AM
#14
Honda-Tech Member
Join Date: Mar 2009
Location: Dirty Jersey 973
Posts: 1,212
Likes: 0
Received 0 Likes
on
0 Posts
let me know if you have any questions about the tuck.
I have done a lot of tucks and I can give you some pointers but so far its looks really good.
I am glad to see you did the diagrams cause working without them really sucks.
I have done a lot of tucks and I can give you some pointers but so far its looks really good.
I am glad to see you did the diagrams cause working without them really sucks.
12-03-2010, 10:40 PM
#15
Honda-Tech Member
Thread Starter
Update: December 04, 2010.
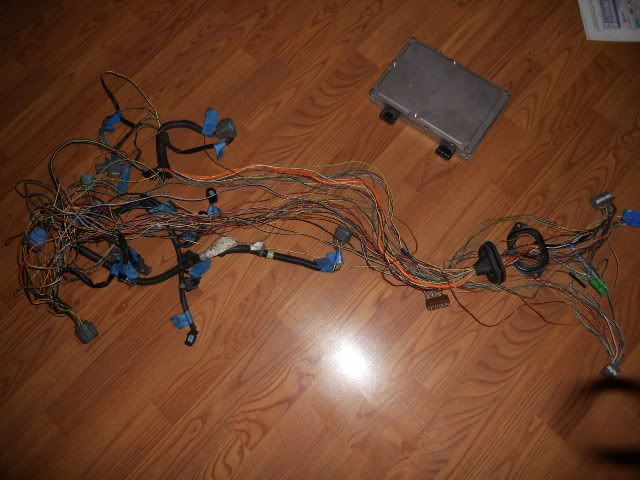
What I wanted to do here is eliminate all the crap that I don't need for this project, PS, AC, Heater core, exempt all the extra wires and drag them out of the harnesses, plugs,
sockets, etc. The reason why I want to exempt all these extra wires is that the tuck will be much easier to do and I will know what to sketch out on my upcoming wire tuck diagram.
Heater Core:Here I was debating on if I should run the heater core or not. I decided to take the heater core out and I was doing some research that you can reroute a heater hose
from the head to the thermostat housing so that it bypasses itself by safely. A guy from work told me about this, and sure why not give it a try.
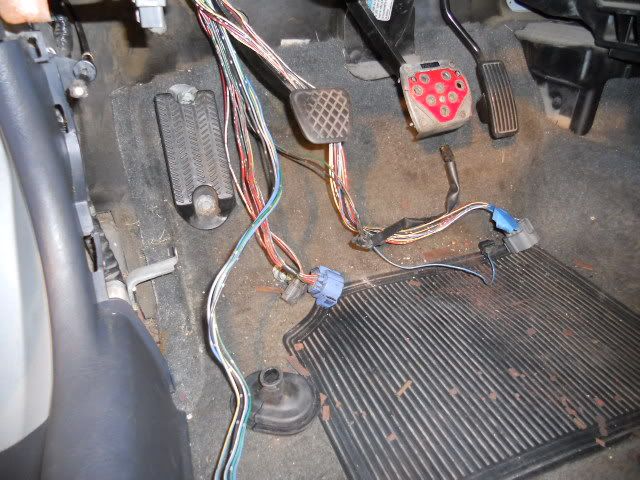
Identifying A few wires/plugs:
For the most part I didn't have trouble labeling the plugs and which sensors they connect to from the engine harness, interior harness, etc. I did forget to label some of them when
I wasn't paying any attention at first when I had the harness disconnected from the motor. I'd be more than happy if you guys can chime in on this one as well.
Brown Plug: Red/Blue Wires (came off of the headlight harness I believe.)
Another brown Plug: (Came off of the headlight harness. )
1 Black/Green Wire
1 Black Wire
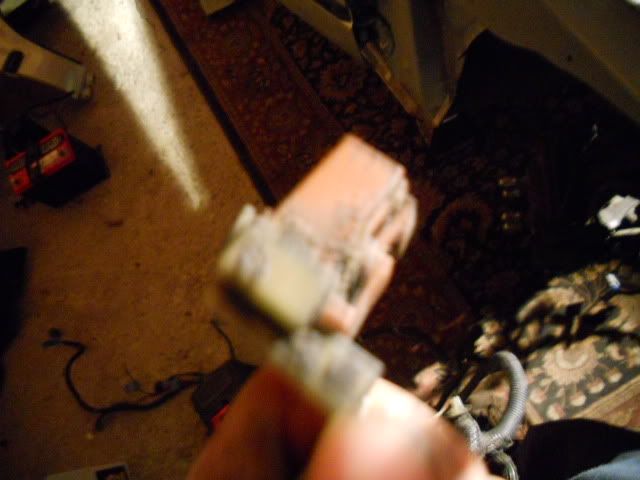
Green Plug: (Came off of the headlight harness. )
1 Black/White Wire
2 Black Wires
These two I believe are the Map Sensor and IAT, I just want to figure out which one is exactly which. They both obviously came off of the engine harness.
Silver plug 1:
red/blue
brown/black
white/red
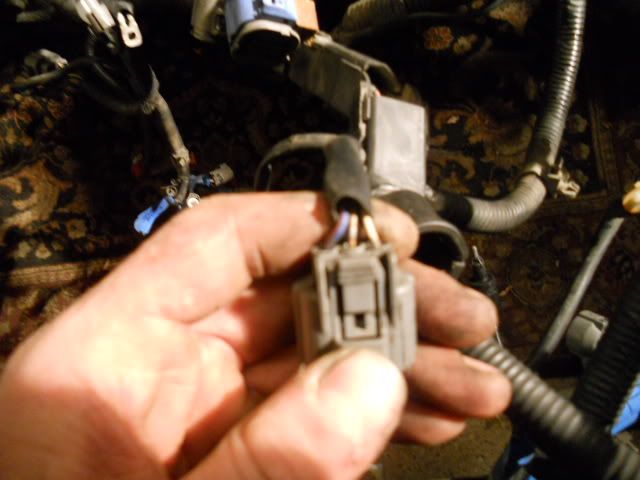
Silver plug 2:
Same except plug as the above picture except wires are
Blue/White
Yellow/Black
Black
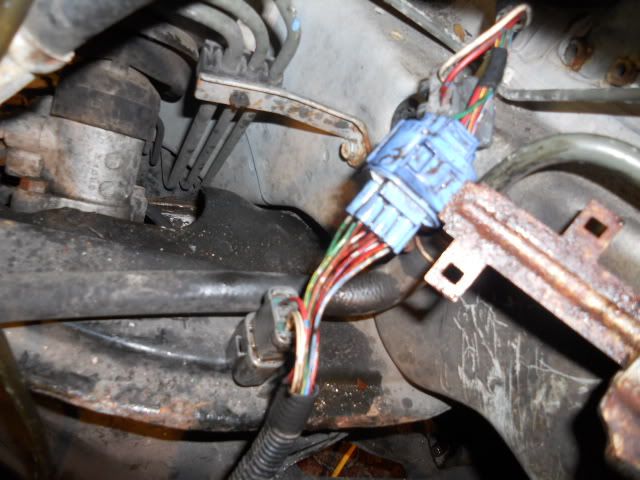
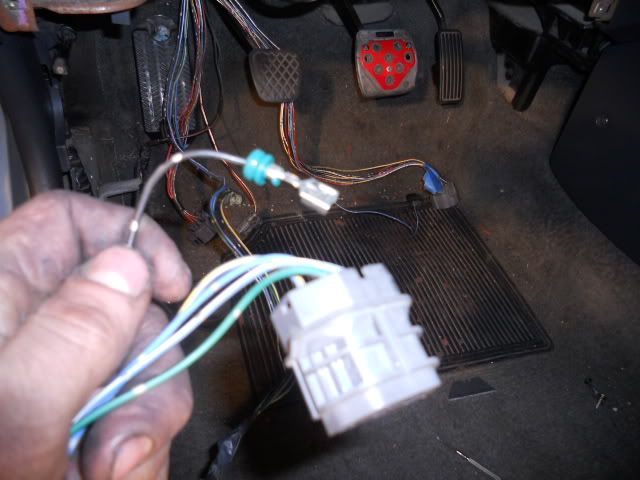
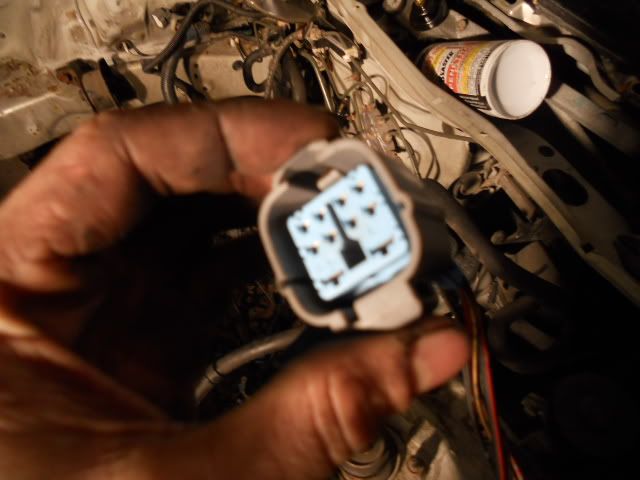
My main concern here was this guy:
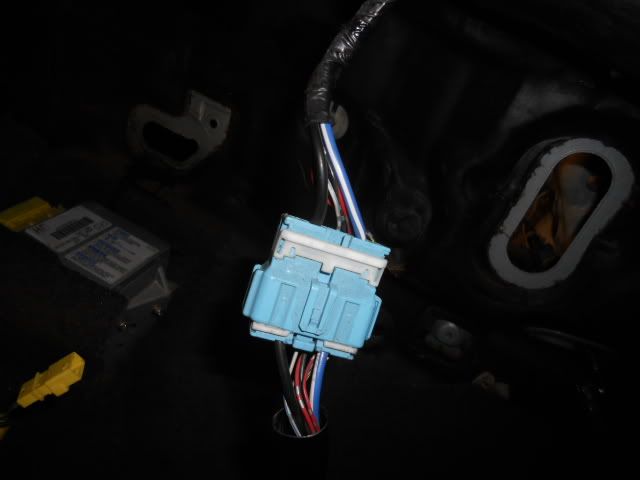
Since it was blue my guess was that this mostly controlled anything AC related on the interior and exterior of the vehicle. Compressor, Receiver, Blower Motor, Fans, etc. Is it
okay if I disconnected this guy or are there several other things running into this harness that I have to leave for the motor to operate properly. I wanted to just take
out all the miscellaneous accessory related stuff that was in there and throw that to the side. Any suggestions ?
What I wanted to do here is eliminate all the crap that I don't need for this project, PS, AC, Heater core, exempt all the extra wires and drag them out of the harnesses, plugs,
sockets, etc. The reason why I want to exempt all these extra wires is that the tuck will be much easier to do and I will know what to sketch out on my upcoming wire tuck diagram.
Heater Core:Here I was debating on if I should run the heater core or not. I decided to take the heater core out and I was doing some research that you can reroute a heater hose
from the head to the thermostat housing so that it bypasses itself by safely. A guy from work told me about this, and sure why not give it a try.
Identifying A few wires/plugs:
For the most part I didn't have trouble labeling the plugs and which sensors they connect to from the engine harness, interior harness, etc. I did forget to label some of them when
I wasn't paying any attention at first when I had the harness disconnected from the motor. I'd be more than happy if you guys can chime in on this one as well.
Brown Plug: Red/Blue Wires (came off of the headlight harness I believe.)
Another brown Plug: (Came off of the headlight harness. )
1 Black/Green Wire
1 Black Wire
Green Plug: (Came off of the headlight harness. )
1 Black/White Wire
2 Black Wires
These two I believe are the Map Sensor and IAT, I just want to figure out which one is exactly which. They both obviously came off of the engine harness.
Silver plug 1:
red/blue
brown/black
white/red
Silver plug 2:
Same except plug as the above picture except wires are
Blue/White
Yellow/Black
Black
My main concern here was this guy:
Since it was blue my guess was that this mostly controlled anything AC related on the interior and exterior of the vehicle. Compressor, Receiver, Blower Motor, Fans, etc. Is it
okay if I disconnected this guy or are there several other things running into this harness that I have to leave for the motor to operate properly. I wanted to just take
out all the miscellaneous accessory related stuff that was in there and throw that to the side. Any suggestions ?
12-13-2010, 12:26 PM
#17
Honda-Tech Member
Join Date: Mar 2009
Location: Dirty Jersey 973
Posts: 1,212
Likes: 0
Received 0 Likes
on
0 Posts
Update: December 04, 2010.
What I wanted to do here is eliminate all the crap that I don't need for this project, PS, AC, Heater core, exempt all the extra wires and drag them out of the harnesses, plugs,
sockets, etc. The reason why I want to exempt all these extra wires is that the tuck will be much easier to do and I will know what to sketch out on my upcoming wire tuck diagram.
Heater Core:Here I was debating on if I should run the heater core or not. I decided to take the heater core out and I was doing some research that you can reroute a heater hose
from the head to the thermostat housing so that it bypasses itself by safely. A guy from work told me about this, and sure why not give it a try.
Identifying A few wires/plugs:
For the most part I didn't have trouble labeling the plugs and which sensors they connect to from the engine harness, interior harness, etc. I did forget to label some of them when
I wasn't paying any attention at first when I had the harness disconnected from the motor. I'd be more than happy if you guys can chime in on this one as well.
Brown Plug: Red/Blue Wires (came off of the headlight harness I believe.)
Another brown Plug: (Came off of the headlight harness. )
1 Black/Green Wire
1 Black Wire
Green Plug: (Came off of the headlight harness. )
1 Black/White Wire
2 Black Wires
These two I believe are the Map Sensor and IAT, I just want to figure out which one is exactly which. They both obviously came off of the engine harness.
Silver plug 1:
red/blue
brown/black
white/red
Silver plug 2:
Same except plug as the above picture except wires are
Blue/White
Yellow/Black
Black
My main concern here was this guy:
Since it was blue my guess was that this mostly controlled anything AC related on the interior and exterior of the vehicle. Compressor, Receiver, Blower Motor, Fans, etc. Is it
okay if I disconnected this guy or are there several other things running into this harness that I have to leave for the motor to operate properly. I wanted to just take
out all the miscellaneous accessory related stuff that was in there and throw that to the side. Any suggestions ?
well the single wire plug if you trace it back it should be an identical plug on the other end and that is there for the fog light hook up.
the other two look like they would be the windshield washer control plugs
one for the pump and one for the low level warning light.
that 3 wire plug looks like either the map or the tps and none of the plugs pictured would be IAT... the IAT it a red/white wire and a green wire in a round plug that looks like the same plug that would go to the vtec solenoid. and if you have not started stripping your engine harness then the plug would be up by the injectors or under the manifold by the ho2s depends on the manifold the car had.
now that blue plug I am not 100% on but I would just trace the wires and see where they go... If you can't do this for some reason I will find an interior wiring diagram for you... or just check my brother's ek
and btw I dont work with you lmao
but its good to see that you are making progress
12-15-2010, 03:17 PM
#19
Honda-Tech Member
Thread Starter
Updated
Here's a previous update on my project. Degreased down the engine bay today, Simple Green ftw. Today wasn't such a bad day with the sun so I decided to take her outside and clean the hell out of the entire bay with the help of some wire brushes and such.

Meanwhile, I've been working on this bs.
Here's a previous update on my project. Degreased down the engine bay today, Simple Green ftw. Today wasn't such a bad day with the sun so I decided to take her outside and clean the hell out of the entire bay with the help of some wire brushes and such.
Meanwhile, I've been working on this bs.
12-15-2010, 07:56 PM
#20
Honda-Tech Member
Join Date: Sep 2008
Location: Elmwood Park, NJ
Posts: 21
Likes: 0
Received 0 Likes
on
0 Posts
wires, wires, wires and more wires... After 4 days cutting and soldering I'm tired of them. I think that's the worst part of any build
12-19-2010, 06:39 PM
#21
Honda-Tech Member
Thread Starter
Updated.
I put about 3-4 decent hours into the car today, since today was my off day. Felt really lazy since I was a little tipsy from last night: p.
Really motivated to get this thing done though.
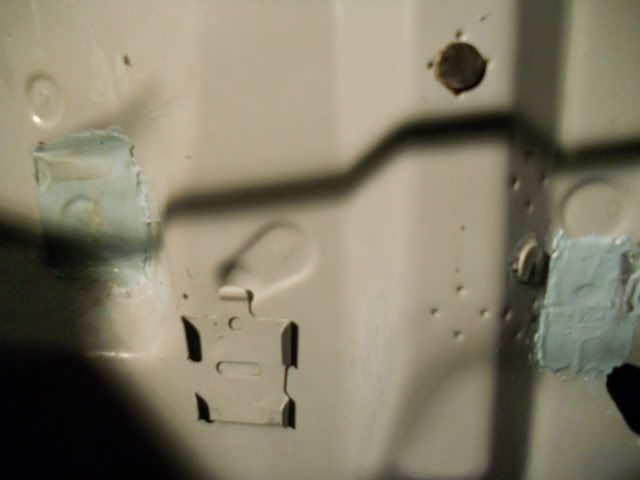
I started sanding down the two holes I wanted to weld shut located in the firewall, and shave with 80 grit with the help of paint thinner, and moved up to 220. I wanted to stop at 220 because I had a feeling the evercoat rage
product wasn't going to stick as well to a surface that's shiny. Once I completed both interior and exterior(firewall view) I began applying acetone to take away all the grime and nasty sh*t grit left from the sand paper.
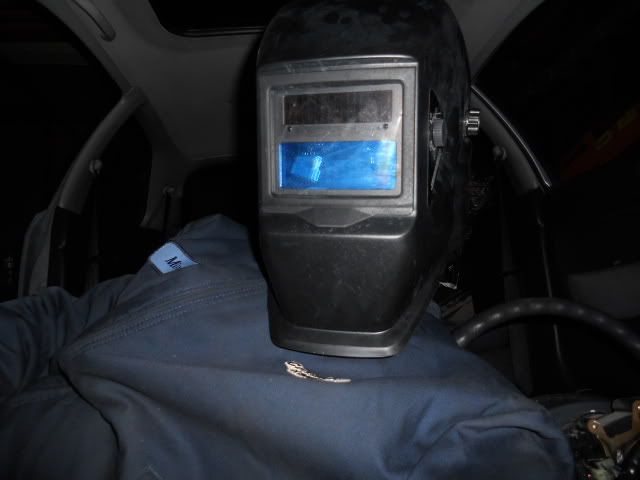
Auto Dark Helmet ftw!
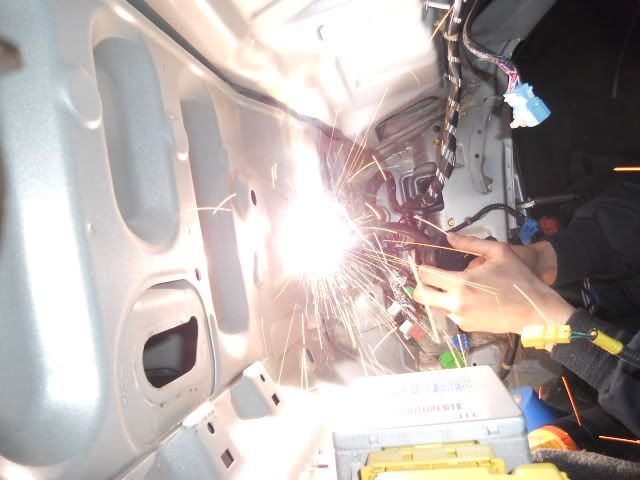
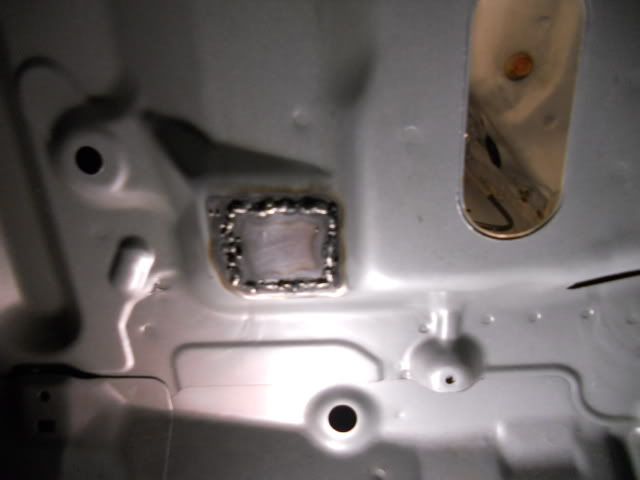
I couldn't pivot my fat *** inside that tiny little hatch so my weld on the firewall(interior side) didn't come out that good, but **** it. once the Dash is installed no one can tell.
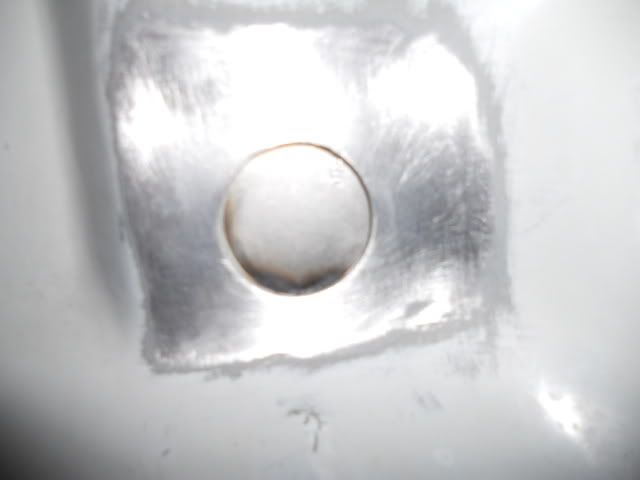
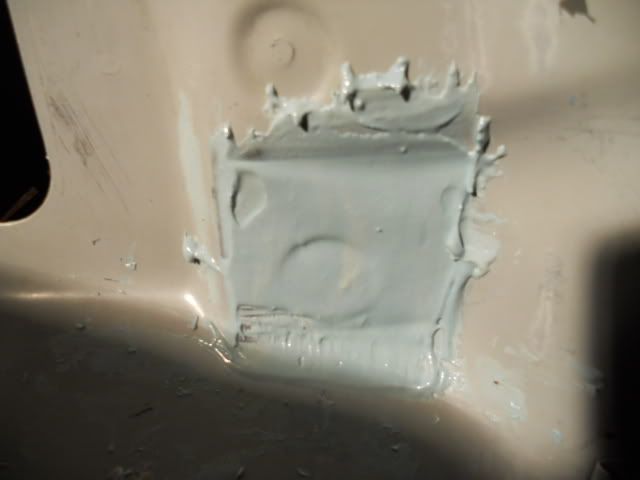
Evercoat Rage > Bondo All day.
Gonna let it dry over night before I start sanding down and applying 3 Coats of primer tomorrow morning maybe. Depends on my mood.
I put about 3-4 decent hours into the car today, since today was my off day. Felt really lazy since I was a little tipsy from last night: p.
Really motivated to get this thing done though.
I started sanding down the two holes I wanted to weld shut located in the firewall, and shave with 80 grit with the help of paint thinner, and moved up to 220. I wanted to stop at 220 because I had a feeling the evercoat rage
product wasn't going to stick as well to a surface that's shiny. Once I completed both interior and exterior(firewall view) I began applying acetone to take away all the grime and nasty sh*t grit left from the sand paper.
Auto Dark Helmet ftw!
I couldn't pivot my fat *** inside that tiny little hatch so my weld on the firewall(interior side) didn't come out that good, but **** it. once the Dash is installed no one can tell.
Evercoat Rage > Bondo All day.
Gonna let it dry over night before I start sanding down and applying 3 Coats of primer tomorrow morning maybe. Depends on my mood.
 12-19-2010, 08:08 PM
#25
Honda-Tech Member
Join Date: Jan 2008
Location: big flats, new york, united states
Posts: 935
Likes: 0
Received 1 Like
on
1 Post
best tip i can give you buy some platic zip lock bag for nuts bolts and get rolls of masking tape to label...i wish i thought of that when i ripped into my first car lol it was such a black to get it all back together
looks great already
looks great already