When you click on links to various merchants on this site and make a purchase, this can result in this site earning a commission. Affiliate programs and affiliations include, but are not limited to, the eBay Partner Network.
Hello all,
first let me start off by saying i've always owned VW's and Audi's.
Been working on them since high school, and as everyone im sure has... learned a lot through trial and error.
Over the years i had two builds i dug into, and became addicted to working on my cars!
I've never done a build thread before so i figure i'd give it a shot.
This car will be a learning experience for me so expect some mistakes! So be easy on me :p
My old Jetta:
My old A4 (Never ended up installing my coilovers before i sold it):
Since these cars i've been leasing new cars, and haven't had a project in a few years.
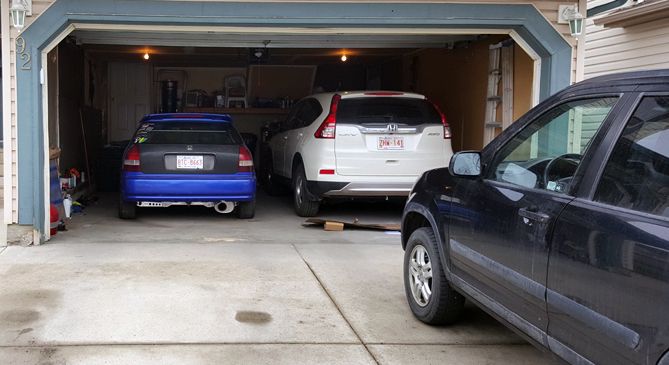
I finally bought my first house and decided to get a super cheap project to have fun with since i had a garage now!
I always wanted a 90's Honda and finally pulled the trigger on a 97 EK hatch.
Took a bit of a risk and drove 2 hours to get it, ended up getting it.
Car has a D16Y8 swapped into it, with 72,000km's.
Things the car had upon purchase:
-Unknown Adjustable Coilovers
-Two way starter
-Generic Strut bars everywhere
-CTR Spoiler (Rep im sure)
-Lovely Ebay Coffee Can Exhaust
-Ebay Racing Wheel
-CF Whale intake? Didnt know this was a thing lol
Im sure you get the idea...
As for the condition of the car, lets just say it needs a load of work to get it up to par.
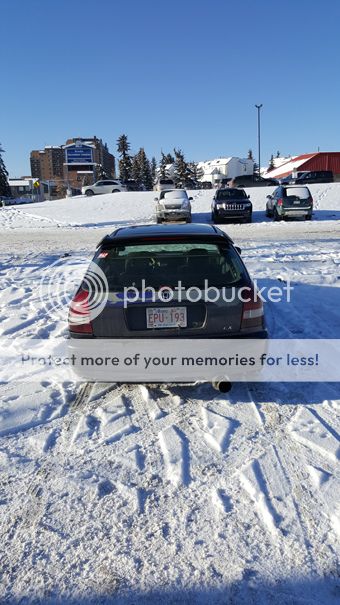
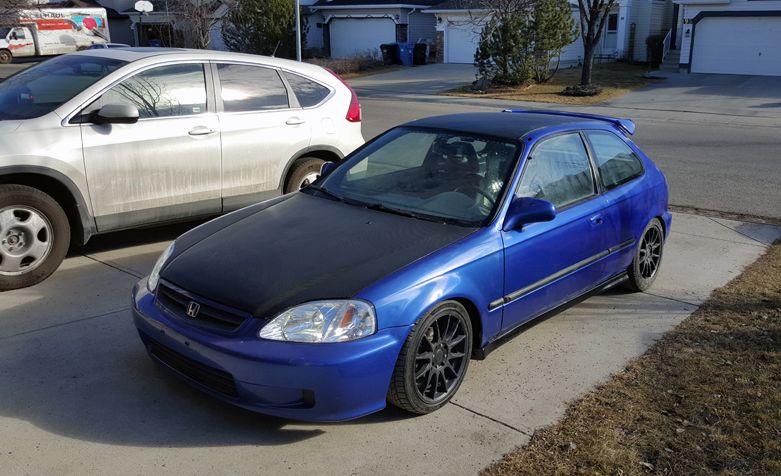
First pic's i got of it when i purchased it:
I started off by getting a full inspection done to see what i needed to address first in order to get it to pass the insurance inspection. The list was quite long.
-Fix all causes of CEL
-Fix leaking caliper
-Fix Airbag light
-Fix headlights (High beams wouldn't stay on)
-Fix Wipers (only worked on highest speed)
-Figure out why there was no 02 sensors
First i fixed the leaking caliper to get that out of the way.
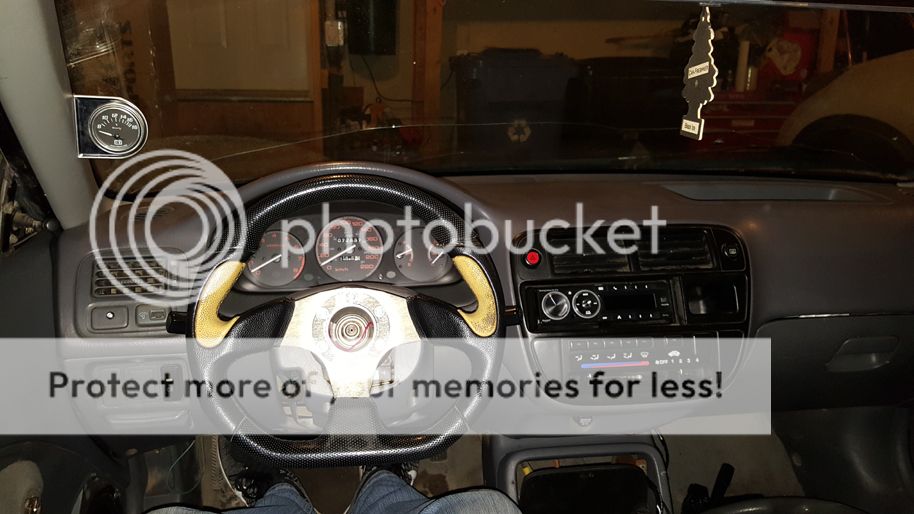
Next I needed to replace the gross steering wheel, this was the cause of the Airbag light and the high beam issue.
I found a mint OEM wheel + Reel with airbag at Pick n Pull for cheap, threw it in and cleared the SRS light. This also allowed the headlight switch to pull back all the way, fixing the high beam issue.
Next on the list was to fix the wipers. I ended up swapping the switch first, as i got one cheap at Pick n Pull. Didn't fix the issue so i replaced the motor (PnP) and all was good!
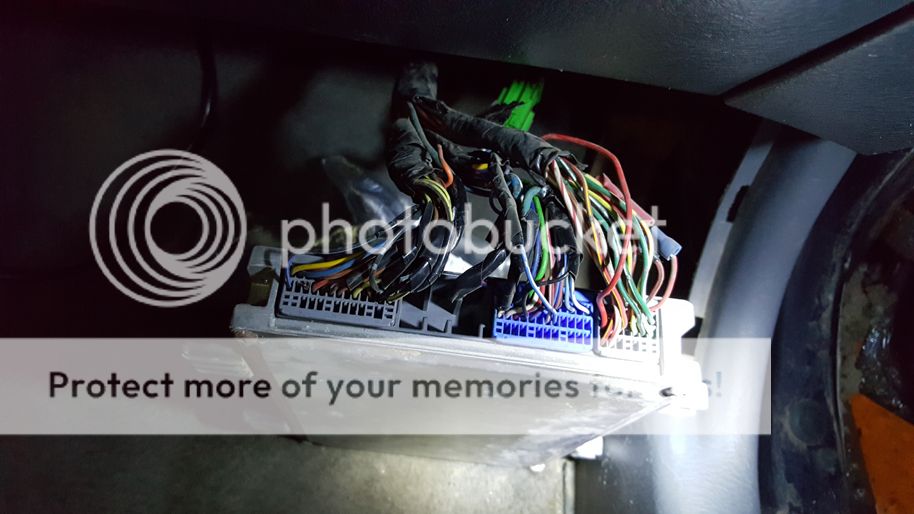
At this point all i had left was the CEL. What i thought was going to be an easy fix ended up being quite the challenge for me. The major issue i was running into was how the previous owner wired everything on the engine swap. What should have been a easy modification of a few wires ended up being a wiring nightmare. The only picture i can find was this, you can see how many wires had been stripped and taped *facepalm*.
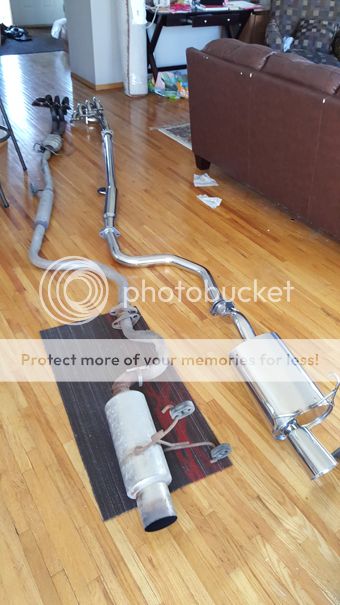
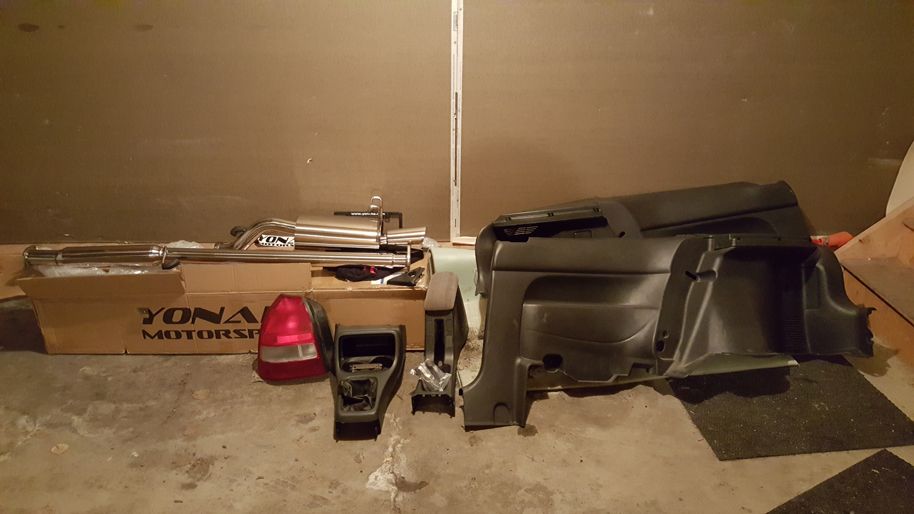
After days of multimeter testing and investigating i ended up cutting a wiring harness out of a car at pick n pull and wired everything that was giving problems with the new plugs and wires. Pinned them directly to the proper locations on the ecu plugs and eventually got everything figured out. This included adding plugs for both O2 sensors. For some reason the previous owner had very poorly welded the primary O2 bung closed on the ebay header. At this point i decided to just replace the entire exhaust, this would allow me to install two new O2 sensors and not have to listen to the terrible sound of the existing exhaust any more.
Ended up going with a new Yonaka catback with a header i found locally for cheap. Sounds great however did end up having the 3000-3500rpm honda bee in a can sound. I might add a resonator in the future.
Once i had everything needed for the inspection done, i got it cleared and insured!
Last edited by Verkmiester; 08-16-2016 at 08:24 AM.
At this point i wanted to fix the things that bothered me the most.
-Mismatched seats
-Terrible headlights
-Dirty and worn interior
-Engine tune up
This called for another trip to pick n pull! Scored some great parts for cheap.
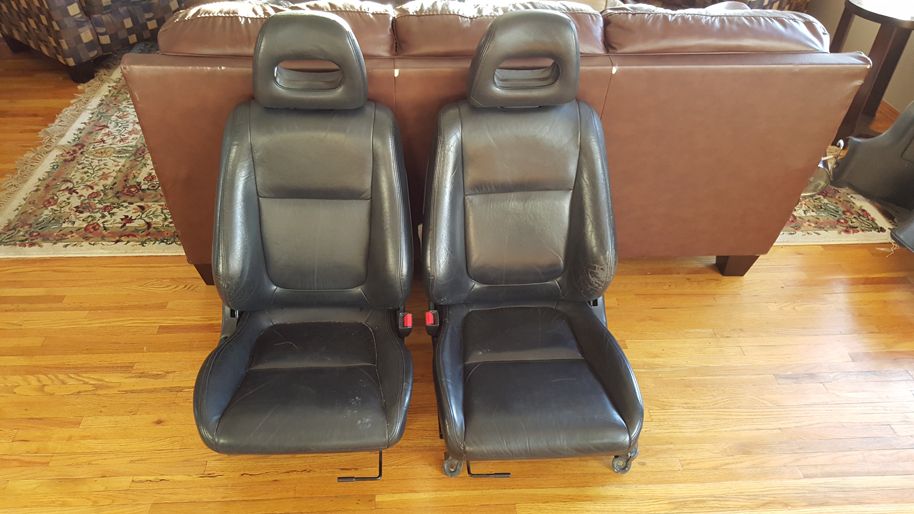
Leather seats out of a SI i found
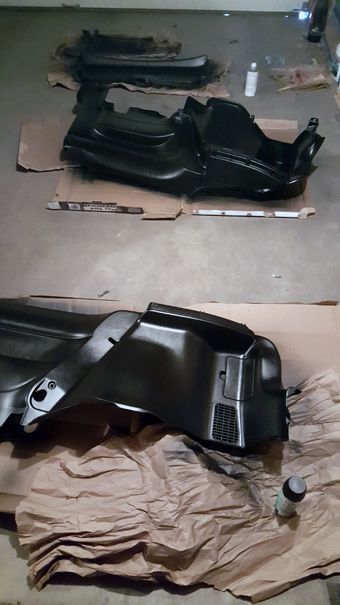
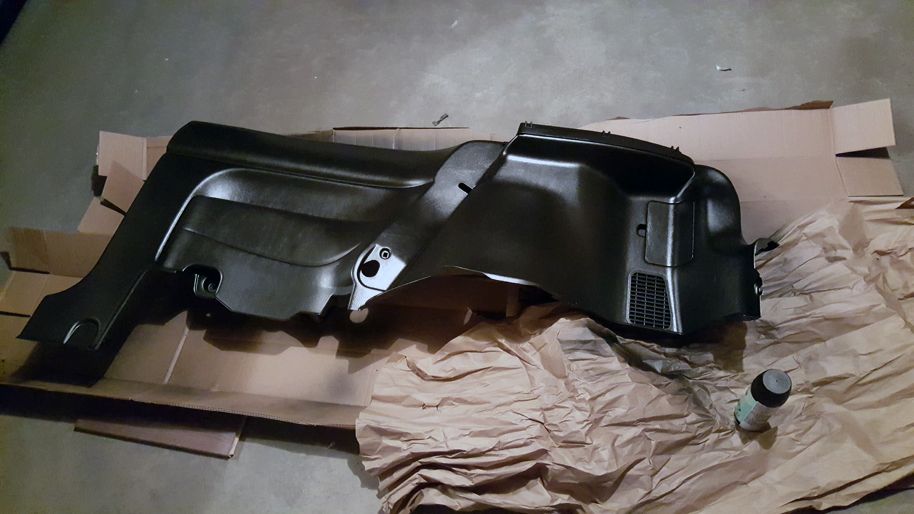
Found a Acura el with a armrest and cupholder trim, and another ek with mint rear interior panels.
Don't have a picture yet but i painted the interior trim black and installed them with the new seats! Everything went in perfect and looked great!
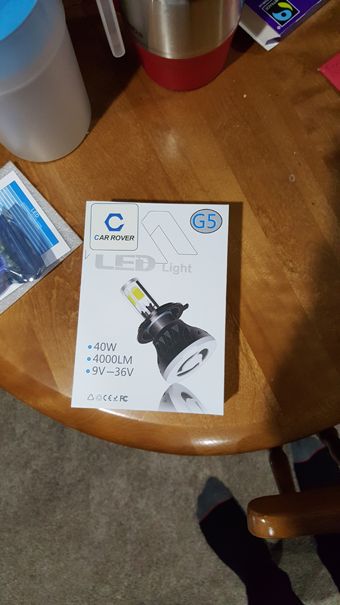
Next was to deal with the headlights, they were very hazy so i restored them with the 3m kit. Then once they were nice and clear installed LED bulbs! Never tried them before and figured this was the perfect time to give em a shot. Also installed fog lights and wired them up to a switch in the console.
The color and output on the LED's is way better than i expected, and for reflector housings they do not seem to be as blinding as HID's. I drive a lot in the countryside and these are great at night, save me from hitting a deer one day!
Lastly i picked up a set of wheels for $275! there 16x7's and will tie me over till i get some real wheels I believe they are plasti dipped right now, i will most likely strip em down and change the color. Will figure it out once i've decided on the paint color i want to do the car in.
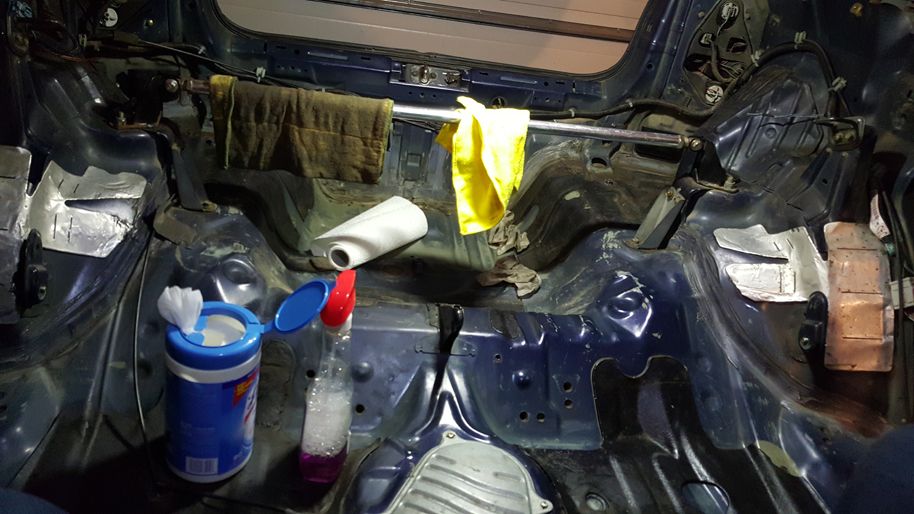
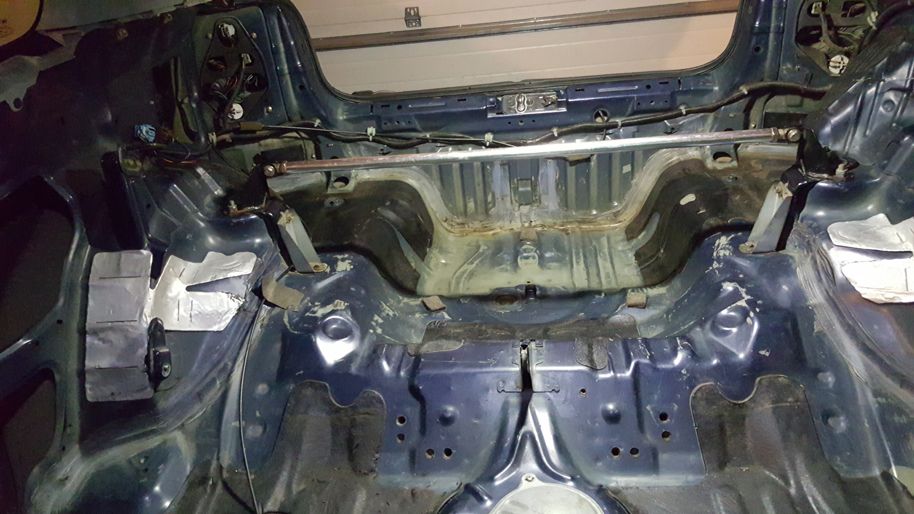
Next i went through the whole car and cleaned everything with a brush and various chemicals! Pulled the rear seats and cleaned the rear out for sound deadening.
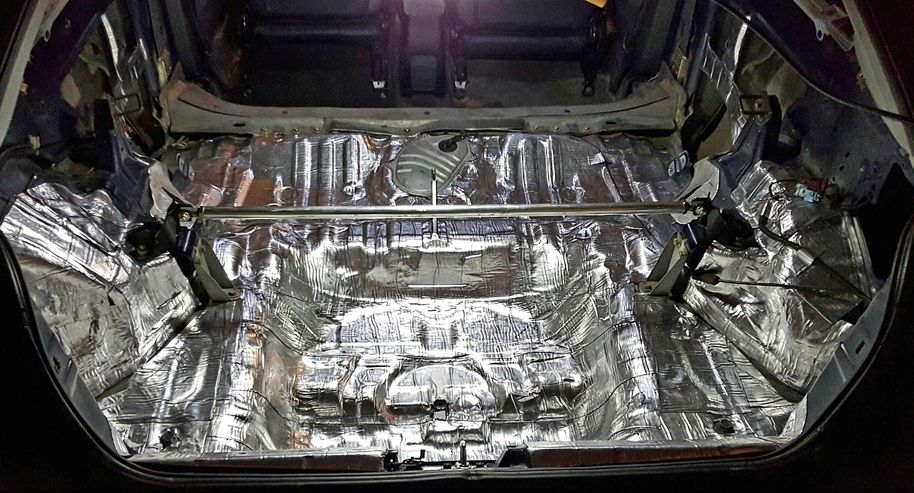
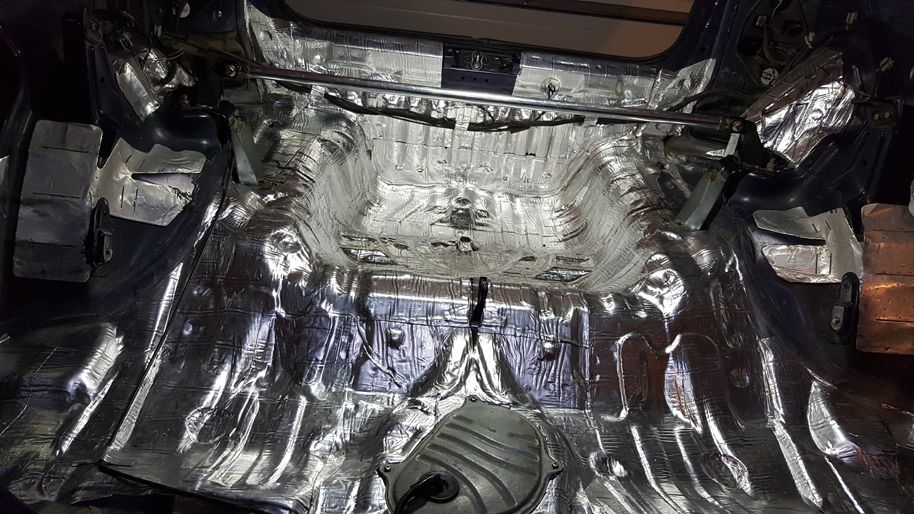
At this point i was ready to start the knock off Dynamat from China!
Got it all done in one day, lets just say my back hurt... Being 6'3" sucks sometimes haha.
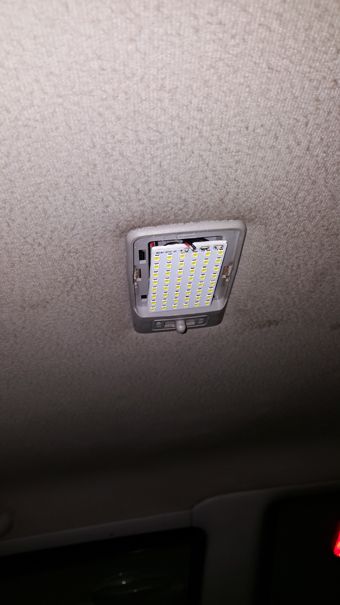
Also threw in a led overhead light as there was a terrible blue painted bulb in it.
Once i got this all done, the interior was finally acceptable for the time being. It was clean and looking better!
I then changed both accessory belts, spark plugs, fluids and replaced the washer fluid motor/lines/nozzles.
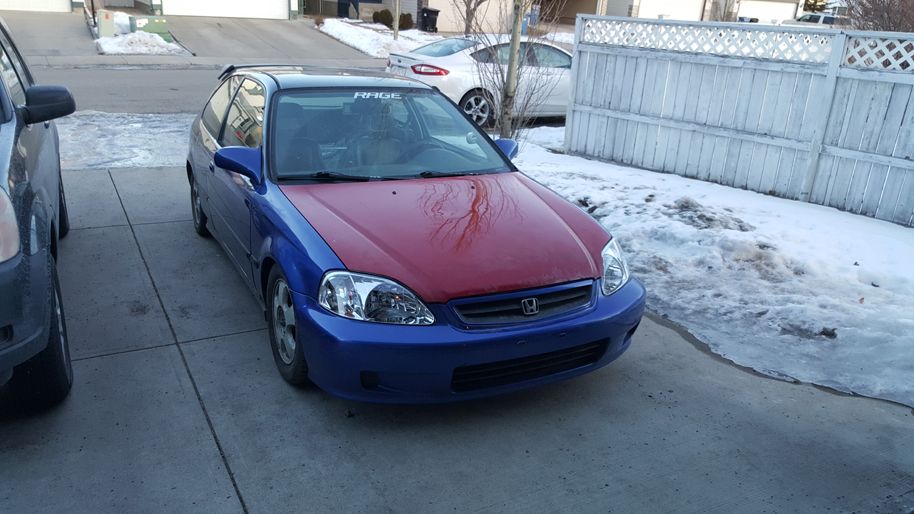
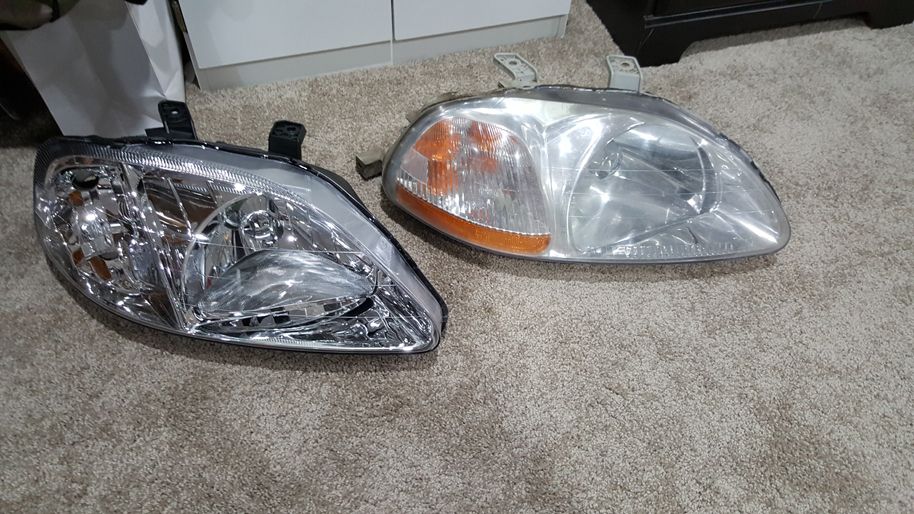
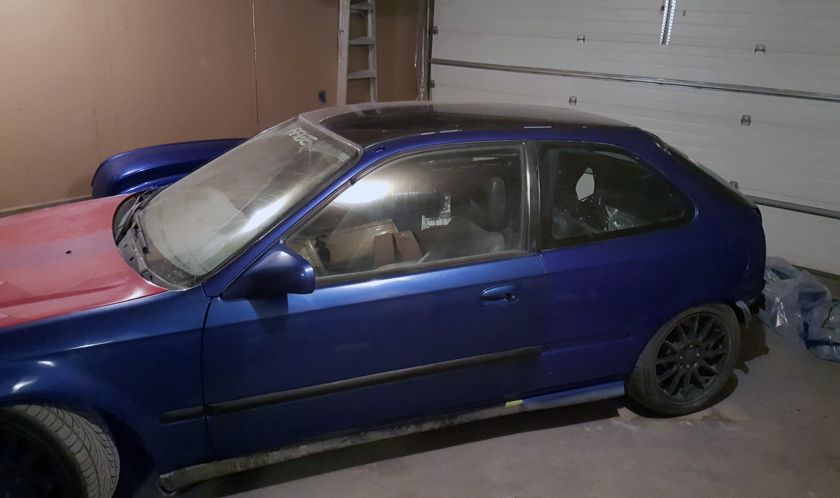
This is pretty much where i am at today, I did end up picking up a 99 si front bumper/fenders and doors. Also ordered new 99 headlights for the conversion, just need the hood now.
The doors i got were fully electric so i will be going to pick n pull this weekend to hopefully find the plug/switch i need to wire them up.
Also will be looking for a 99-00 hood to complete the front end!
Will post an update once i get to working on the body and doors. Going to be grinding and treating all the rust i run into as well.
should leave the 96-98 front end.
not a bad start, and gsr leather fronts at pick and pull, hell yeah.
Yea i didn't really want to do the conversion but found the mint bumper/fenders/doors for $200. Couldn't pass it up as it will save me a lot of body work.
The gsr seats were a great find, when I opened the civics door and saw them i was shocked. $80 later they were mine!
Finally got around to installing the new doors with new OEM hinges. Also put on the bumper/fenders/hood. Also wired the doors all up for the power windows / locks.
Also put on the new headlights and transferred the LED headlights into them.
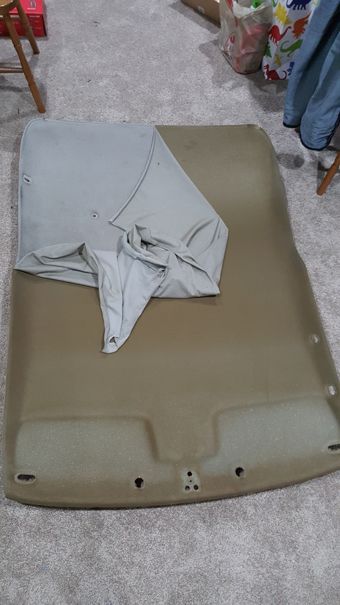
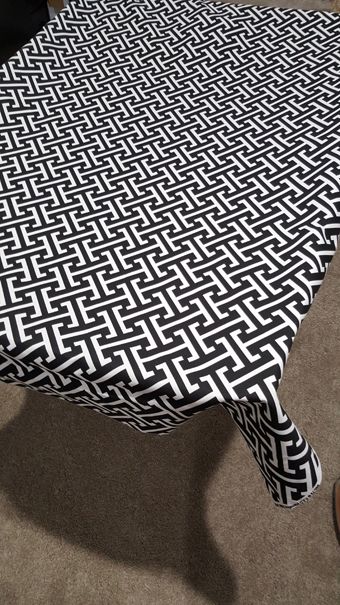
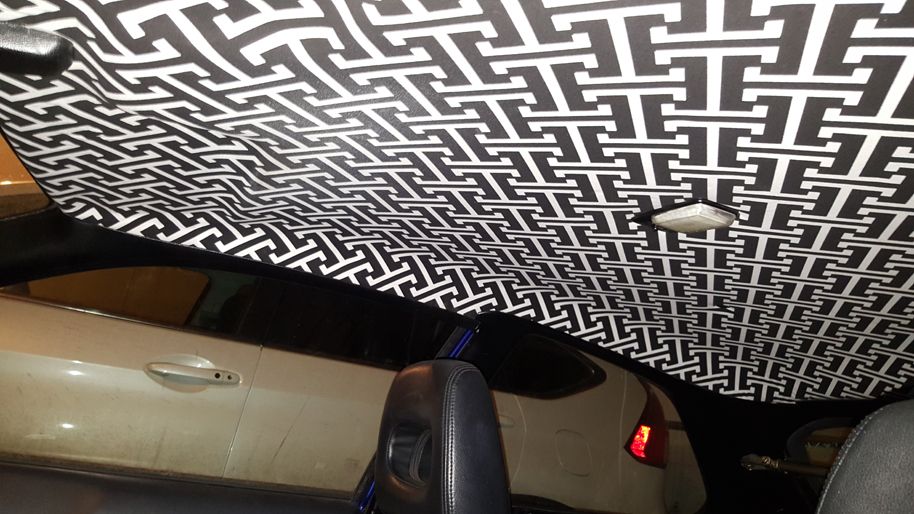
I then ripped out the headliner as it had burn marks and stains everywhere. Being a VW guy i couldn't resist putting in something flashy. Will also be doing the door inserts and armrest in the same material.
Lastly i threw on the Unknown rims i got for cheap.
I'm getting very close now to the bodywork phase of the build.
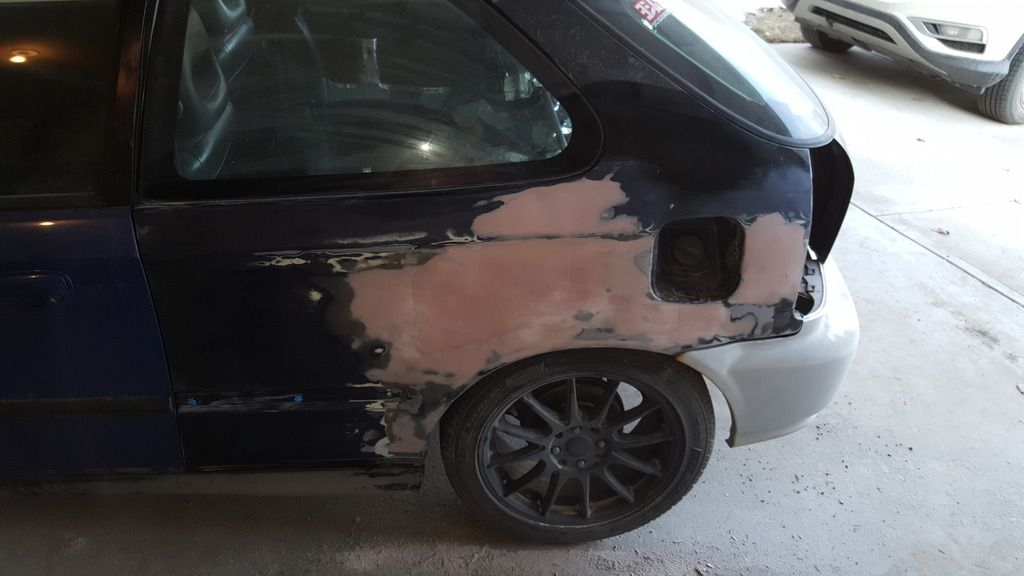
I've never done any body work before so I am reading up as much as i can on everything before i dig in. As you can see the rear needs quite a bit of dent pulling and filling.
Going to get everything as nice as I can within my budget. I will be trying to do all the bodywork and paint myself for under $1000.
From the research i've done so far im thinking a Single Stage Urethane is my best bet. This seems the easiest/most forgiving for a rookie like me.
Looks great! Hatches are super fun! How did the Chinese dynamat work out for you? I've been wanting to put some in my coupe but didn't know if it was worth it. Did you notice a big difference?
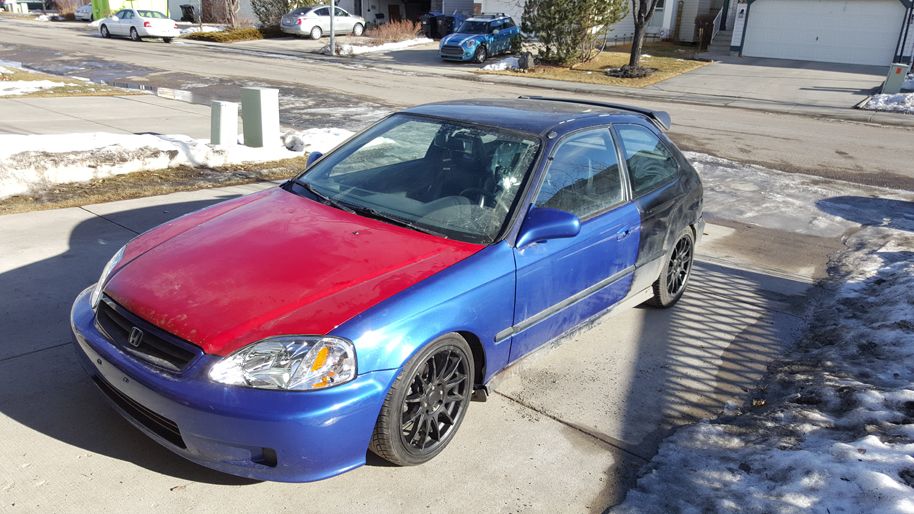
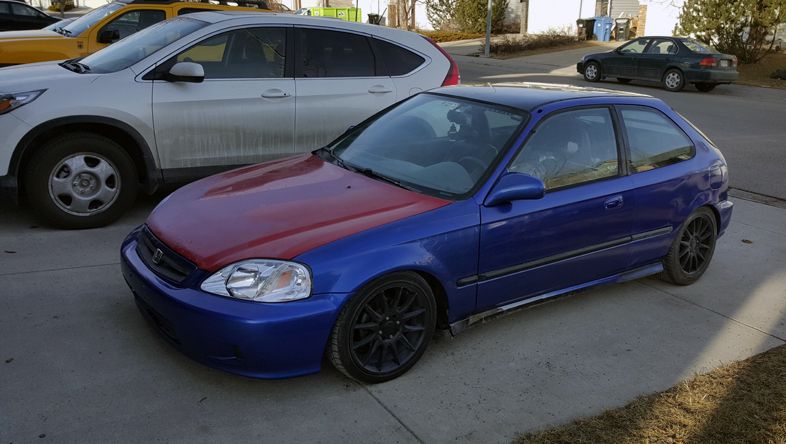
Yea i'm either keeping it Dark Amethyst Pearl or doing the Electron Blue Pearl the front end is. I was even debating Electron Blue Pearl with a gloss black roof and CF hood wrap to reduce the amount i have to paint. This would just leave the rear quarters and the hatch/rear bumper. But if i'm investing in a gun/paint etc i should prolly just do the whole car.
In regards to the Chinese Dynamat, i installed stereo's/starters etc for 4 years. This stuff was identical to the real stuff. I wanted there to be no advertising all over it, just the simple polished look, was $70 Canadian for all of it as well so why not!
Haven't had a chance to update the thread in a while and figured id get this going again. This update is everything i did to finish the exterior. Originally i planned on buying a spray gun and doing everything as close to how a body shop would myself. Because the car costed me $800 and its just a fun project to tie me over until i can get something nice, i decided to go the cheap route and spray can the best i could. I did try to get the best cans i could, including 2k primer and 2k clear.
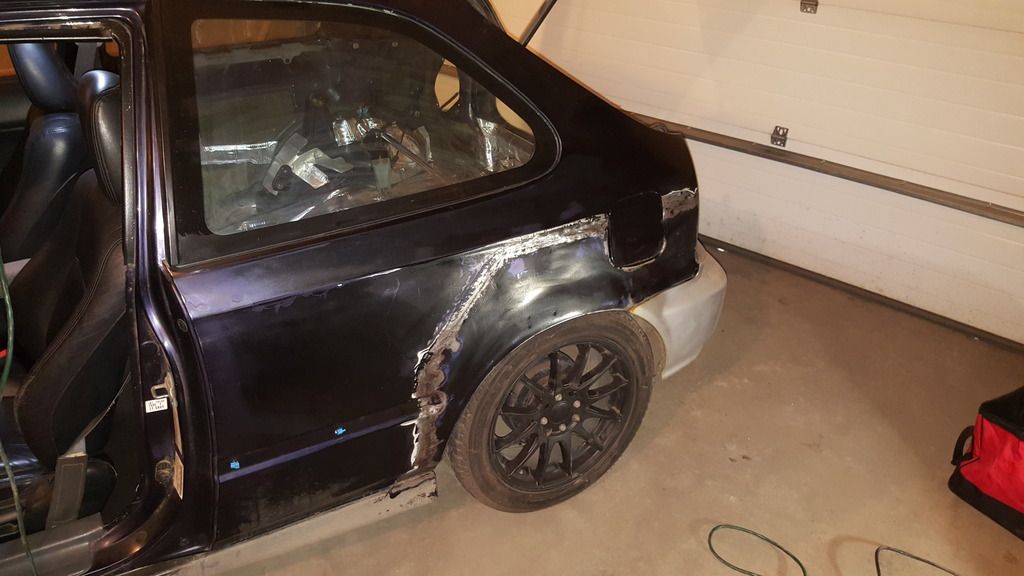
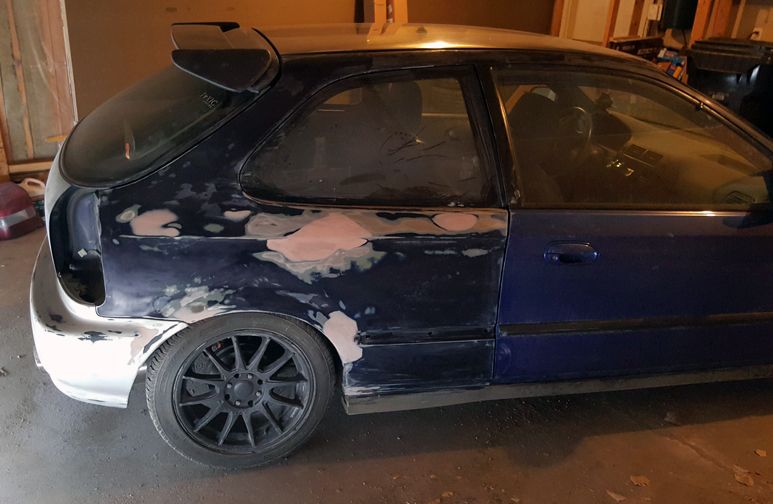
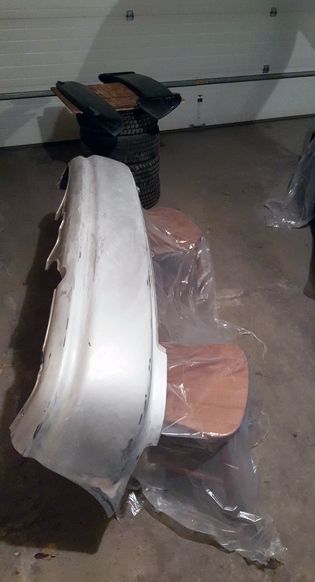
First i body filled and prepped the passenger side of the car.
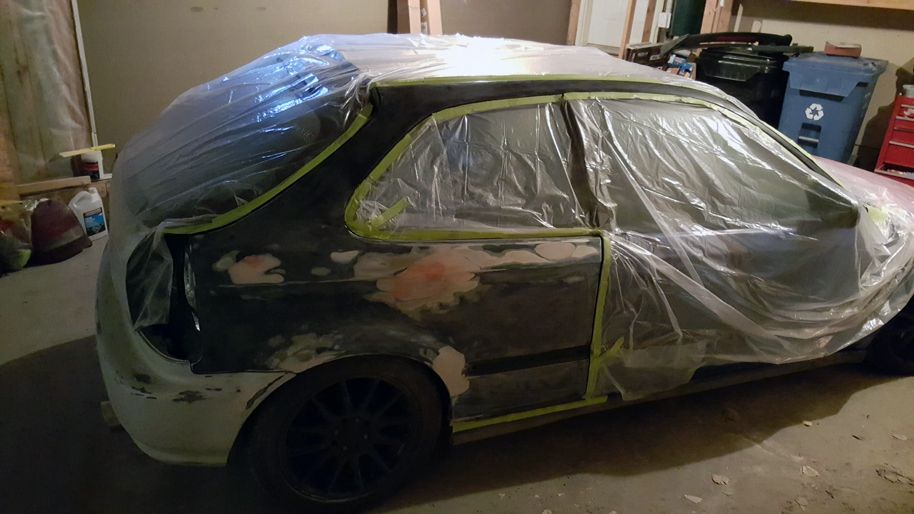
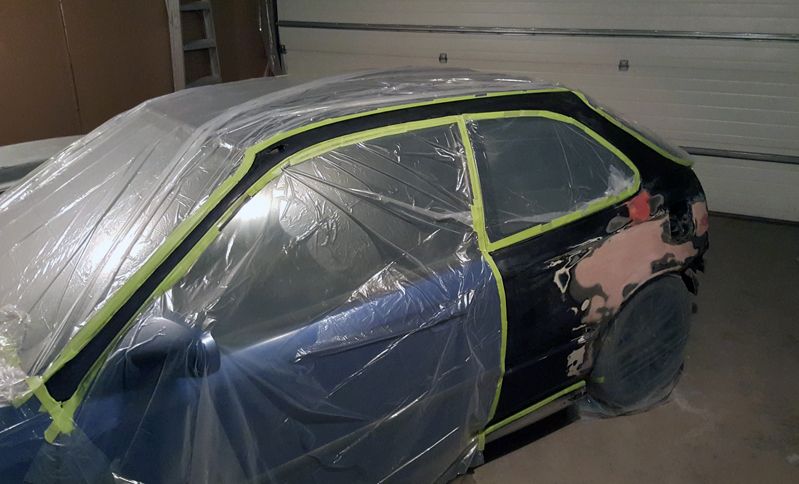
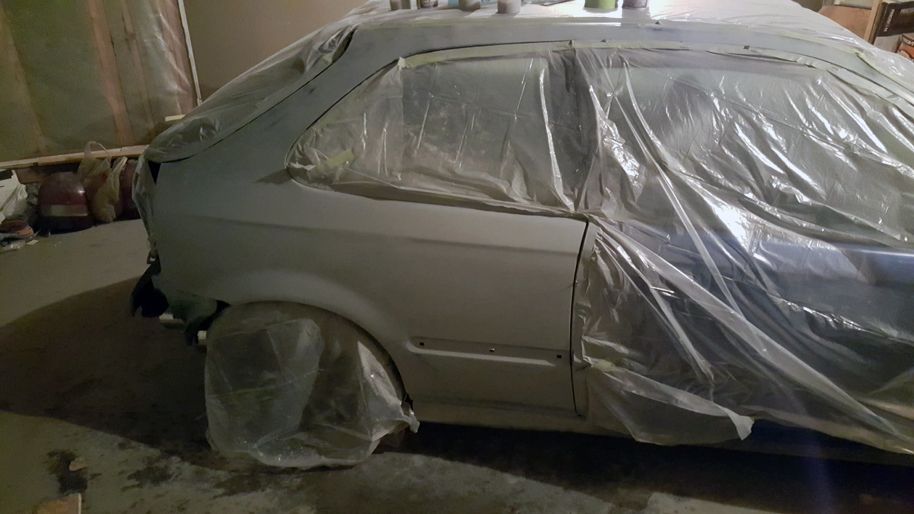
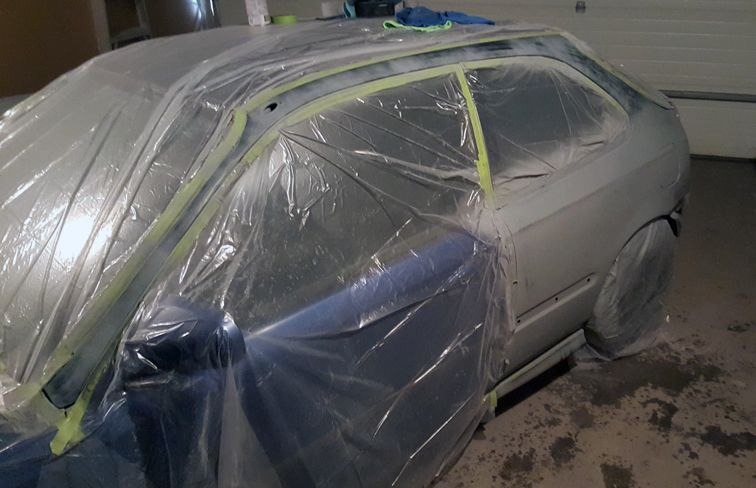
Then sanded everything up to 600 grit and started tape and draping.
Removed the bumper and the CTR Wing.
Then i self etching primered any spots that had bare metal exposed, and 2k primed everything else after. Only took pics after 1st coat, went with three or four before wet sanding.
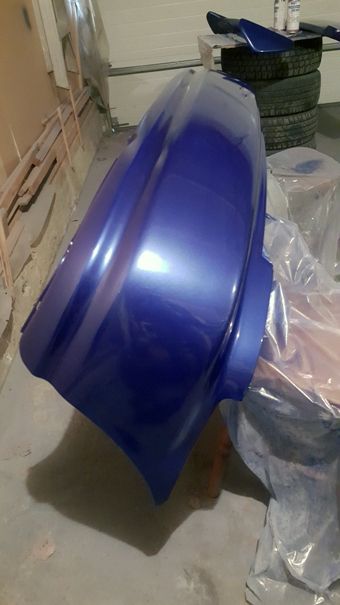
After wet sanding was done i got to painting, did about 3-4 coats of base, then another 3-4 of a 2k clearcoat.
Came out pretty good for the time/money i put in, considering it was all done in a garage with spray cans. I must say the 2k products in spray cans are amazing! Especially the clear coat, it hardened up real nice, and gives a gun sprayed look and feel.
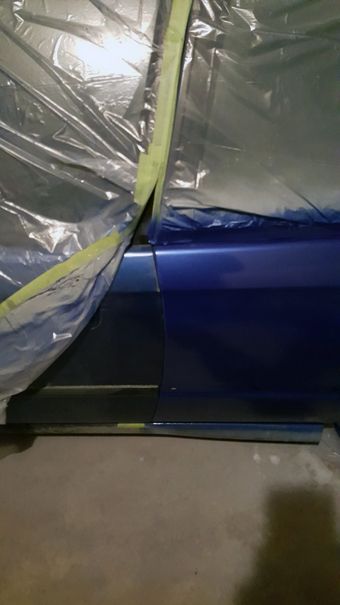
The color was off quite a bit so i figured id try my hand at blending the doors. I first scuffed the doors with a grey scotch pad and scuffing paste. cleaned and taped everything off.
Before:
After:
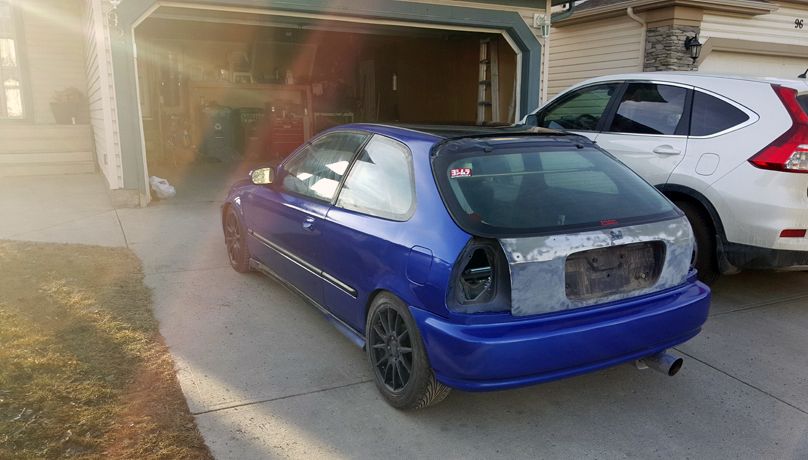
The blending came out better than i had expected. Now because im lazy and didn't wanna paint any more i vinyl wrapped the hood/roof/hatch in VViViD Semi-Gloss Black True R Carbon Fiber. Hood and roof went great, wasn't that hard once you get the hang of it. The hatch was another story, tried twice and just couldn't get the top section done without creases/wrinkles. I ended up just finishing it off with some wrinkles for now, most likely going to rip it off and paint the hatch.
I also painted the side skirts so they looked fresh!
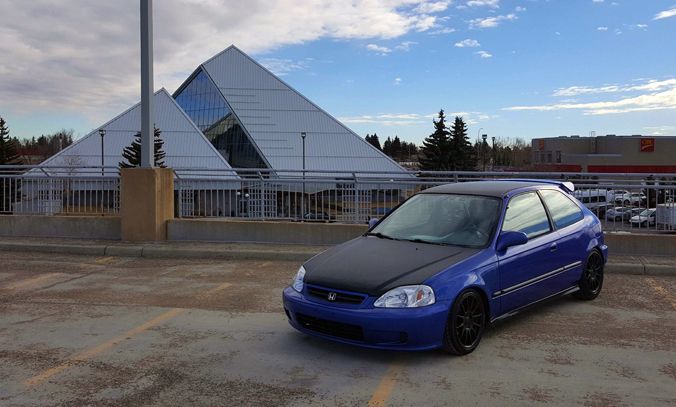
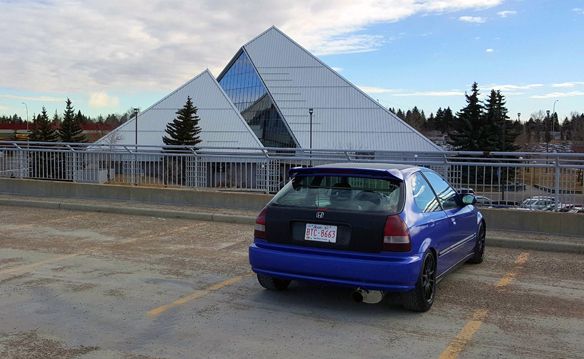
Lastley went and took some decent pictures of everything finished.
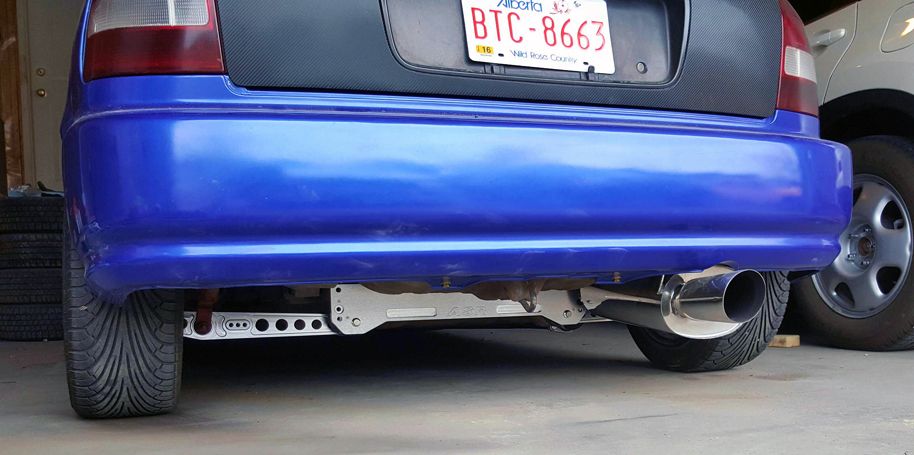
Side Note* The Yonaka exhaust sags way too low not a lot of room to pull it up either, just the shape of the muffler i guess. Might at least paint the muffler black and leave "just the tip" :p
It is smooth however does have some orange peel. The plus side to the 2k clear is that you can wet sand cut and polish it like any professional clear. Im sure i can get most of the imperfections out with some work. One thing i learned through all this is to not rush any of the prep, just keep working at it until everything is nice flat and smooth. If the prep is done well, the spray cans can work. The second thing i learned is you need ALOT of cans if your doing large areas. For the two rear quarter panels, the bumper and doors i used 7 spray cans of base coat and 5 cans of clear. This was a total of $300 (Canadian), so this option would still cost a decent amount if you were to do a whole car. The big thing for me was my compressor couldn't handle a proper HVLP gun, plus the cans were a lot easier. In the end with body filler, sand paper, primer, paint and clear the job costed maybe $450. Which i was pretty happy with at the end of the day.
Wheels i haven't really decided on yet but i know i want something 16x8 maybe slightly stretched. Ill most likely keep my eye out locally for a good deal to pop up.
My next project is the interior lighting, i have purchased new led's for the cluster, climate control etc. Im still on the fence whether i want to buy a ek9 red carpet or just dye the existing black. I feel like the red might end up looking cheesy. It would be OEM though so its tempting. Im also doing the door inserts and arm rest in the same fabric as the headliner.
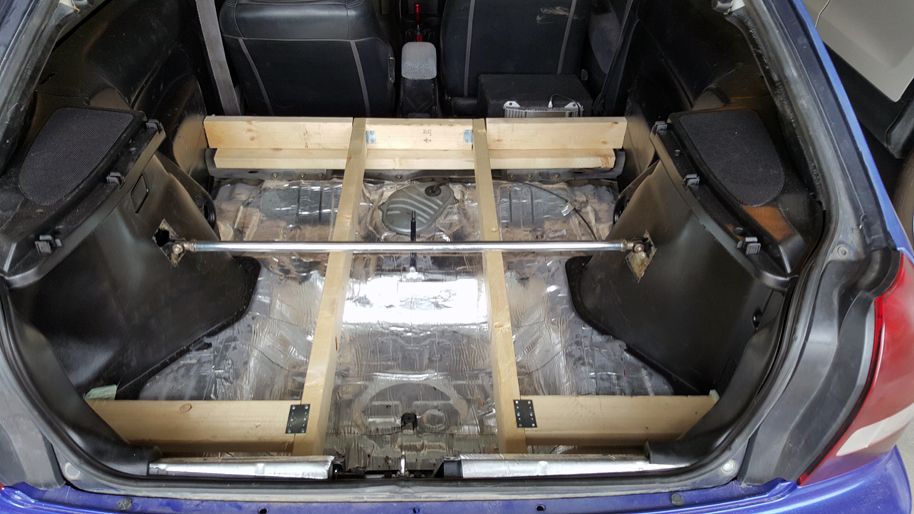
Then moving on to the rear interior, i have the side panels i got from Pick n pull i need to paint black and install with new insulation. Then im going to build a platform for behind the front seats right to the very back.
Lastly i'll address all the audio, most likely speakers/deck/4 chan/mono/sub. I installed car audio/starters for 4 years so that should be the easy part :p
The engine will depend on my plans for keeping the car. My lease on my fusion is up in 2 years and i might buy a Subaru BRZ, sell the civic and get a winter beater. But well see haha
Quite a list there. I'll be keeping an eye on your progress. Once I get done with being overseas I'm picking up on my projects. Got a '96 hatch myself, but not gonna steal your thread here. I'll have my own soon enough. Your car is looking great though man, keep it up.
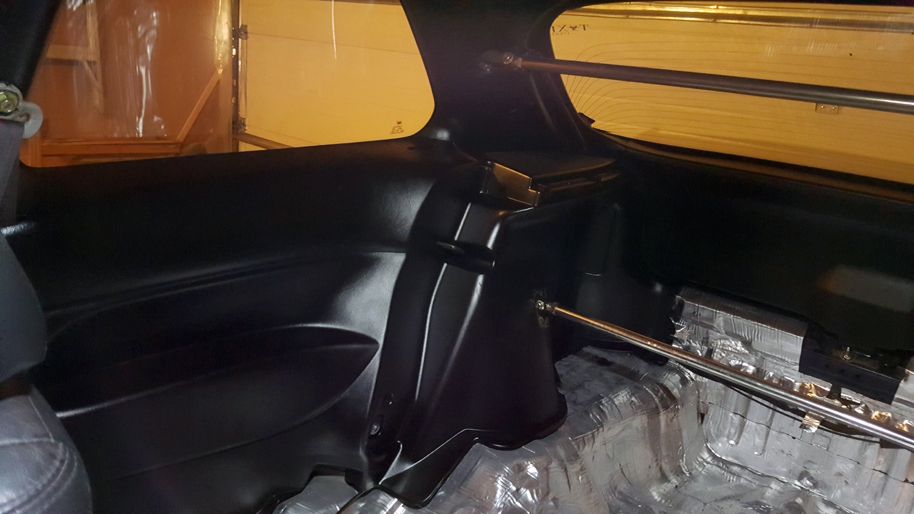
Started on the interior again yesterday, needed to get the new pieces from pick n pull painted black.
Once painted i threw em in and used a dremel to cut out a hole for the strut bar. Wired in some MTX 6x9's i had from an old car.
Also found a good deal locally on a JVC Bluetooth deck and alpine 6.5's for the front, threw them in as well. I also bought a jbl sub in a sealed box with an amp for $60 off a guy in one of the car groups here in Calgary. I plan on building the rear seat delete platform this weekend and running all the wiring for the amp. Just need to find a place that sells carpeting for the platform.
Finally got in the skunk 2 LCA's and the ASR subframe brace, so i decided to start pulling things apart.
Got every bolt out easy except the very last of course... The bolt going through the trailing arm beside the strut fork was frozen/seized.
I Tried everything i could and after a few hours ended up trying a breaker bar that was way too long and rounded off the bolt.
I then tried my bolt extractor sockets, but still wouldn't budge.
Long story short after 4 days of trying to get the bolt out i had to cut it twice with a sawzall and once with my dremel.
I then drilled out the rest of the bolt.
End result:
The sway bar was rusted and needs some TLC so i haven't installed it back on yet. Also waiting on the beaks bar still to arrive.
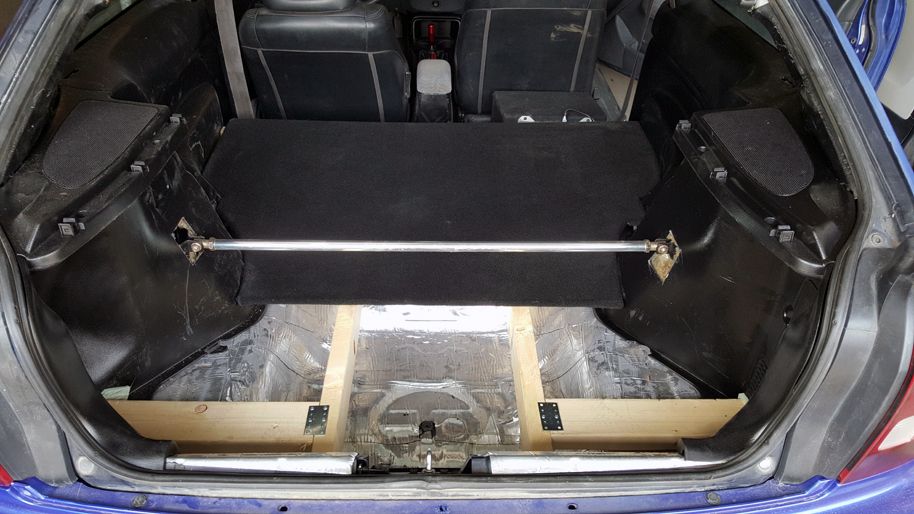
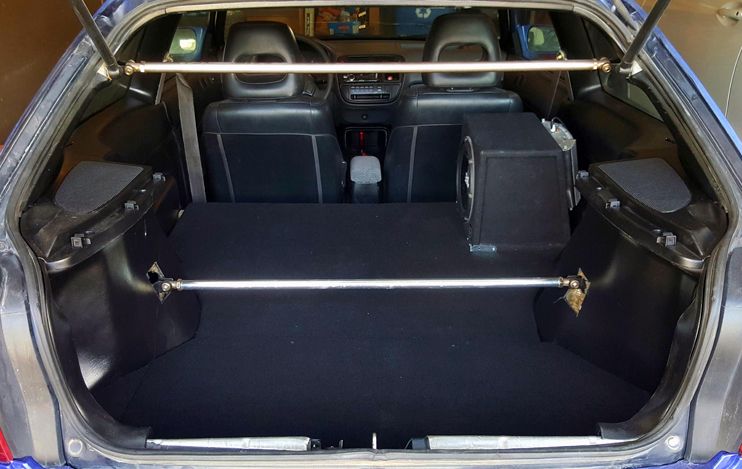
I then moved on to the interior and finished up the rear seat delete platform and installed a small 10" sealed sub/amp.
I think it ended up coming out pretty good! Reduced a ton of road noise as well, sub is the perfect amount of bass for the car too!
Im going to cut bigger holes so i can access the rear top hats without having to take everything apart, then figure out custom covers of some sort so its not ugly!
As of yesterday i ordered Progress CS-2 coilovers, as well as OEM top hats and upper camber arms.
Picked up some trailing arm bushings as well i'm dreading throwing in (Unless i can find the tool to rent)

 01-30-2016, 08:50 AM


 I believe they are plasti dipped right now, i will most likely strip em down and change the color. Will figure it out once i've decided on the paint color i want to do the car in.
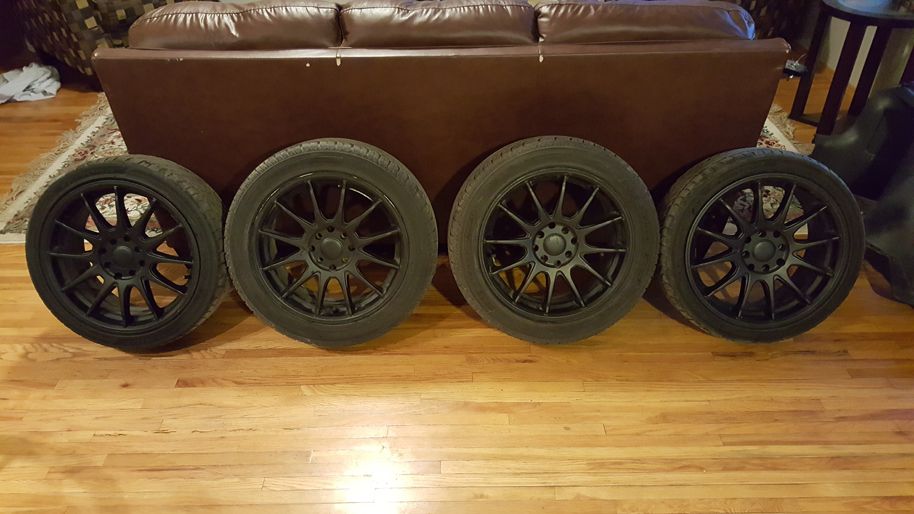


 not a lot of room to pull it up either, just the shape of the muffler i guess. Might at least paint the muffler black and leave "just the tip" :p