
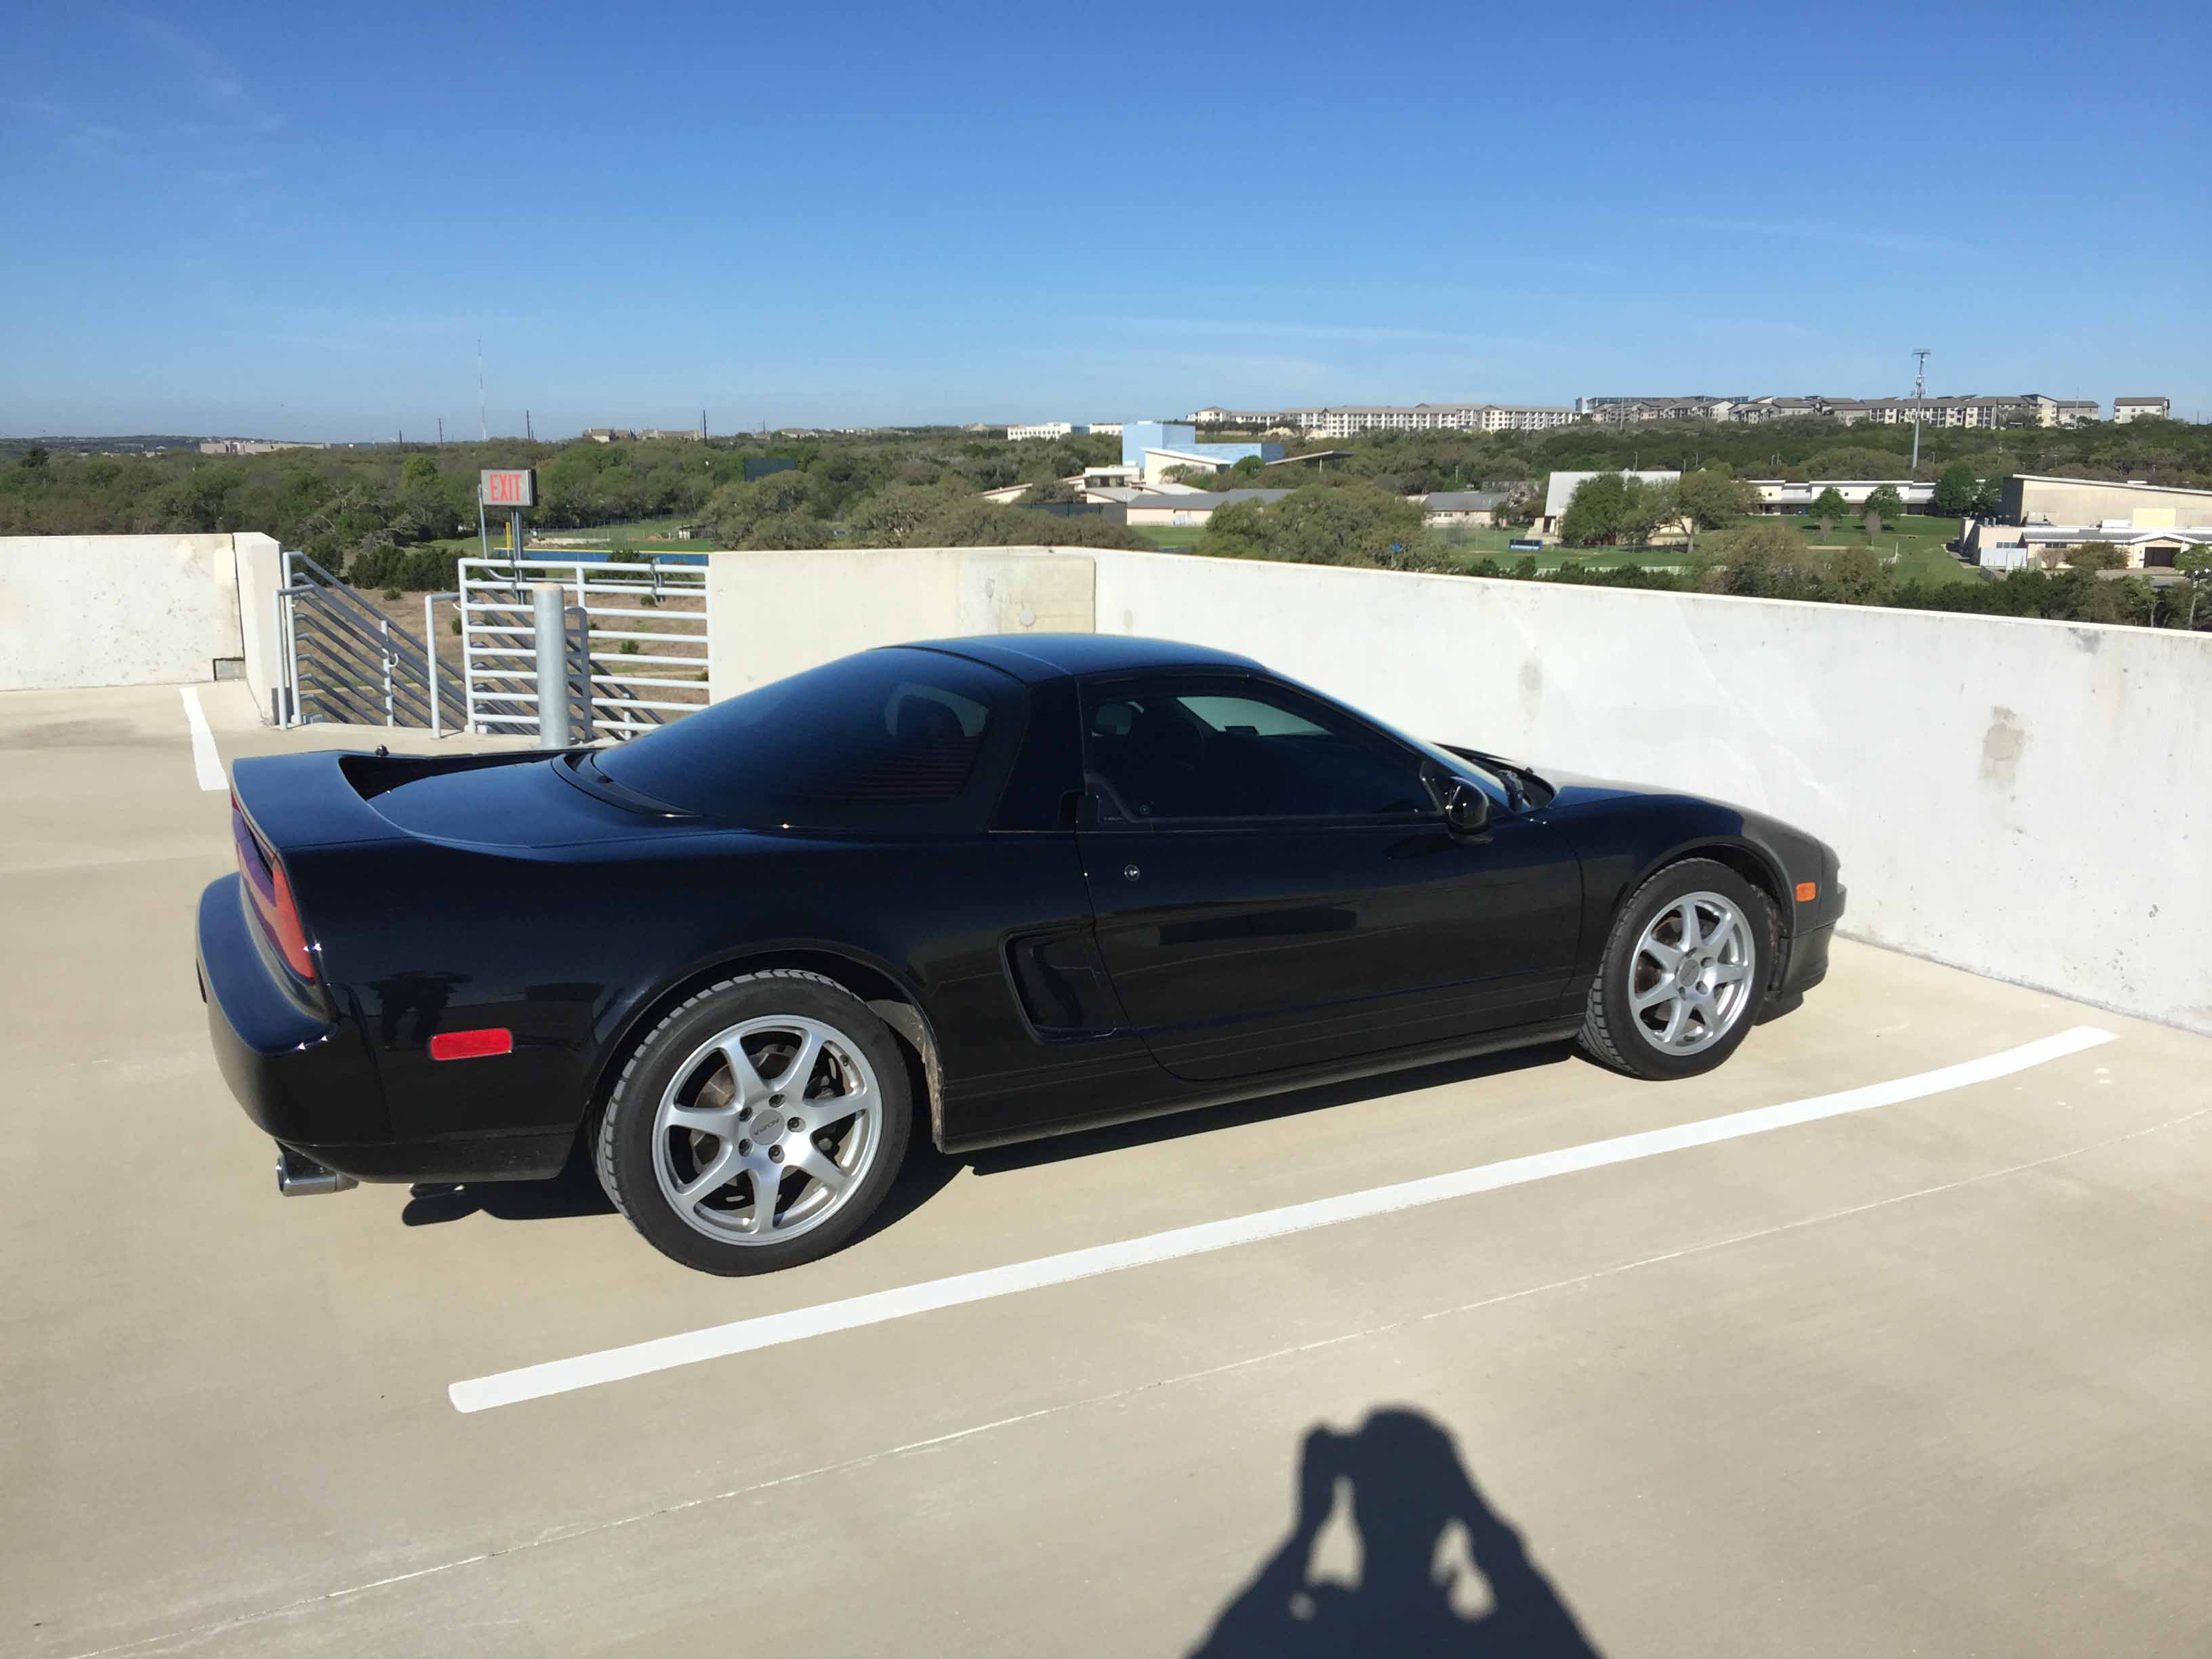
1994 NSX #41

 12-07-2016, 10:48 PM
#28

Thanks! it does seem to be coming along quite nicely so far. I should have another update this weekend when I finally get everything put back together and get it back on the road. 
I paid $45,000 total, $42,000 to the dealership and roughly $3000 in taxes and other crap, and I financed a little over half of it through Lightstream. It is without a doubt the worst financial decision I've ever made and I love it.
Then there's the extra $2000 or so worth of new OEM parts to get it to a condition I deem acceptable.
Then there's the extra $2000 or so worth of new OEM parts to get it to a condition I deem acceptable.
12-08-2016, 11:34 AM
#29
I'm honestly impressed/surprised there are lenders willing to finance these cars still lol. I guess their values are up there so it makes sense. Solid price for a solid car.
I think you meant best worst financial decision. Yolo.
I think you meant best worst financial decision. Yolo.
Last edited by Prudz_lude; 12-08-2016 at 01:17 PM.
12-08-2016, 11:03 PM
#30
Was going to ask/comment on the gold plating on the badges but then saw it was you on prime asking about them.
After your pics and whatnot about the timing belt I'll probably end up doing mine myself now. Seems fairly "easy".
Also pmd.
After your pics and whatnot about the timing belt I'll probably end up doing mine myself now. Seems fairly "easy".
Also pmd.
12-08-2016, 11:47 PM
#31
I've been trying to work on the car an hour or so a day so I've made some progress this week.
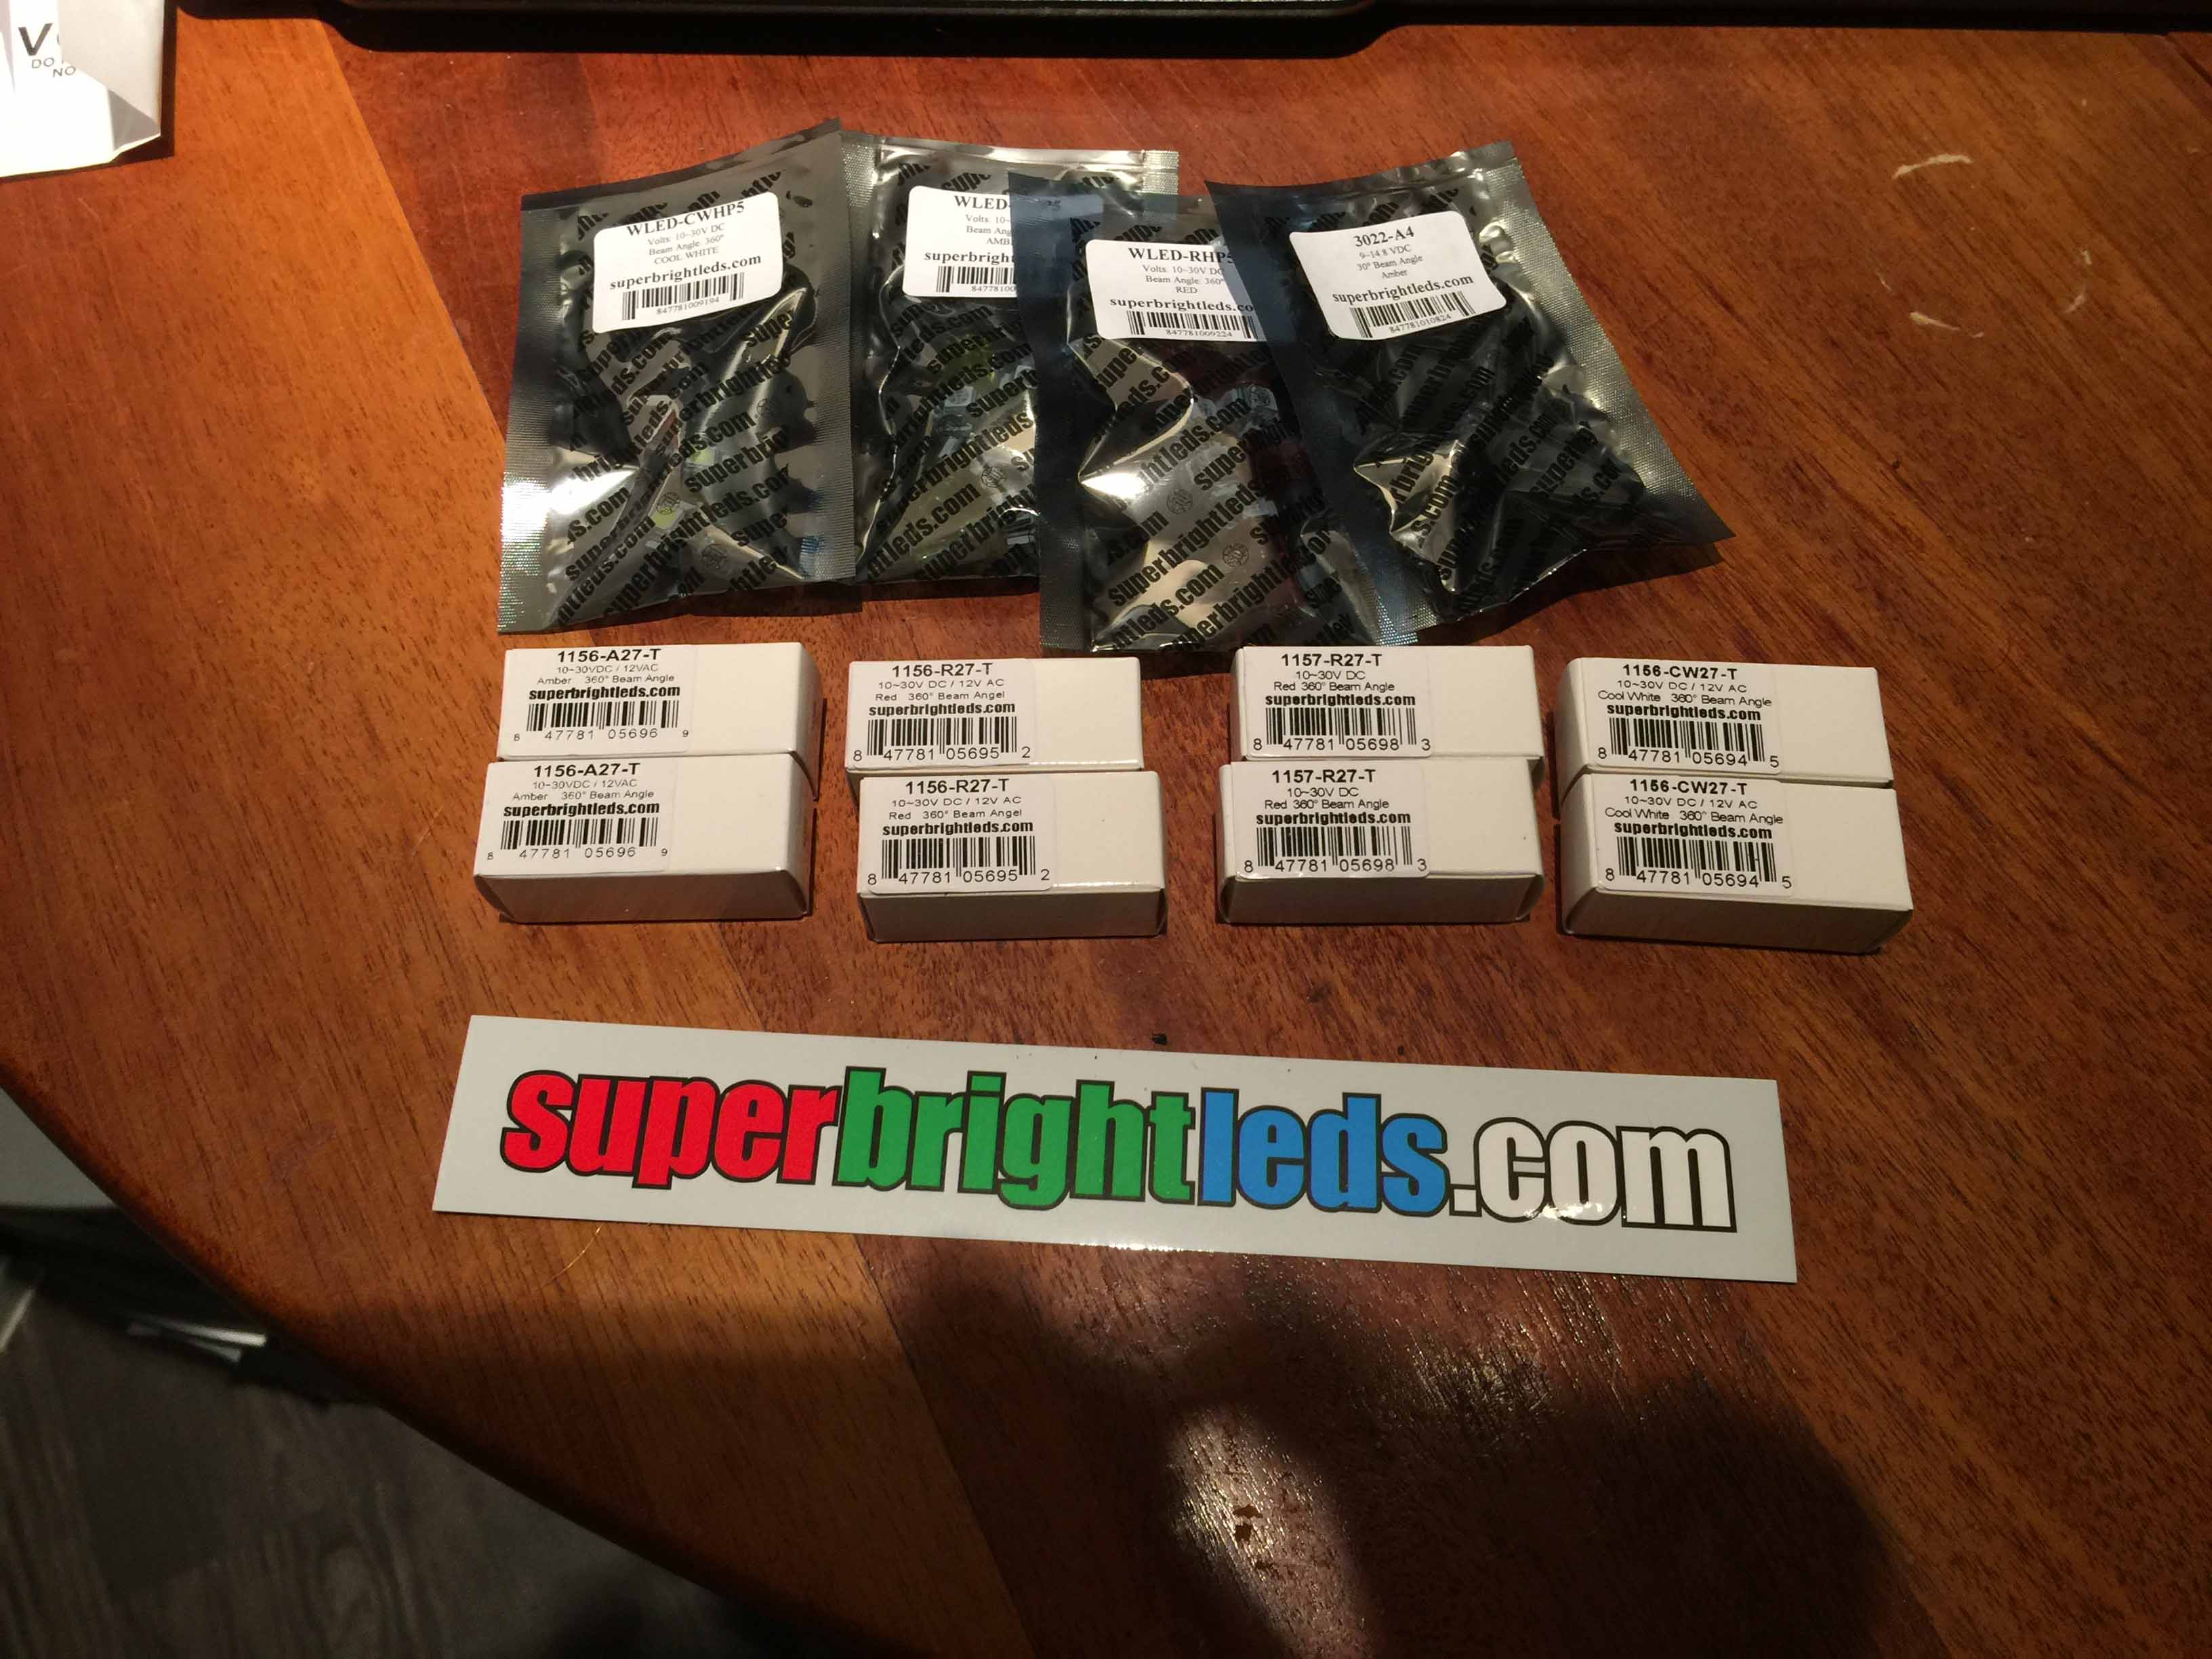
I ordered LED bulbs to replace pretty much every single lightbulb on the car because the fade in/out of incandescent bulbs annoys me, but I was two red 1157 LEDs short so I had to place another order that should be here Friday. SuperBrightLeds is a great company to deal with, the one time I had an issue (that was mostly my fault) they sent a replacement bulb and a prepaid box to send the old one back.
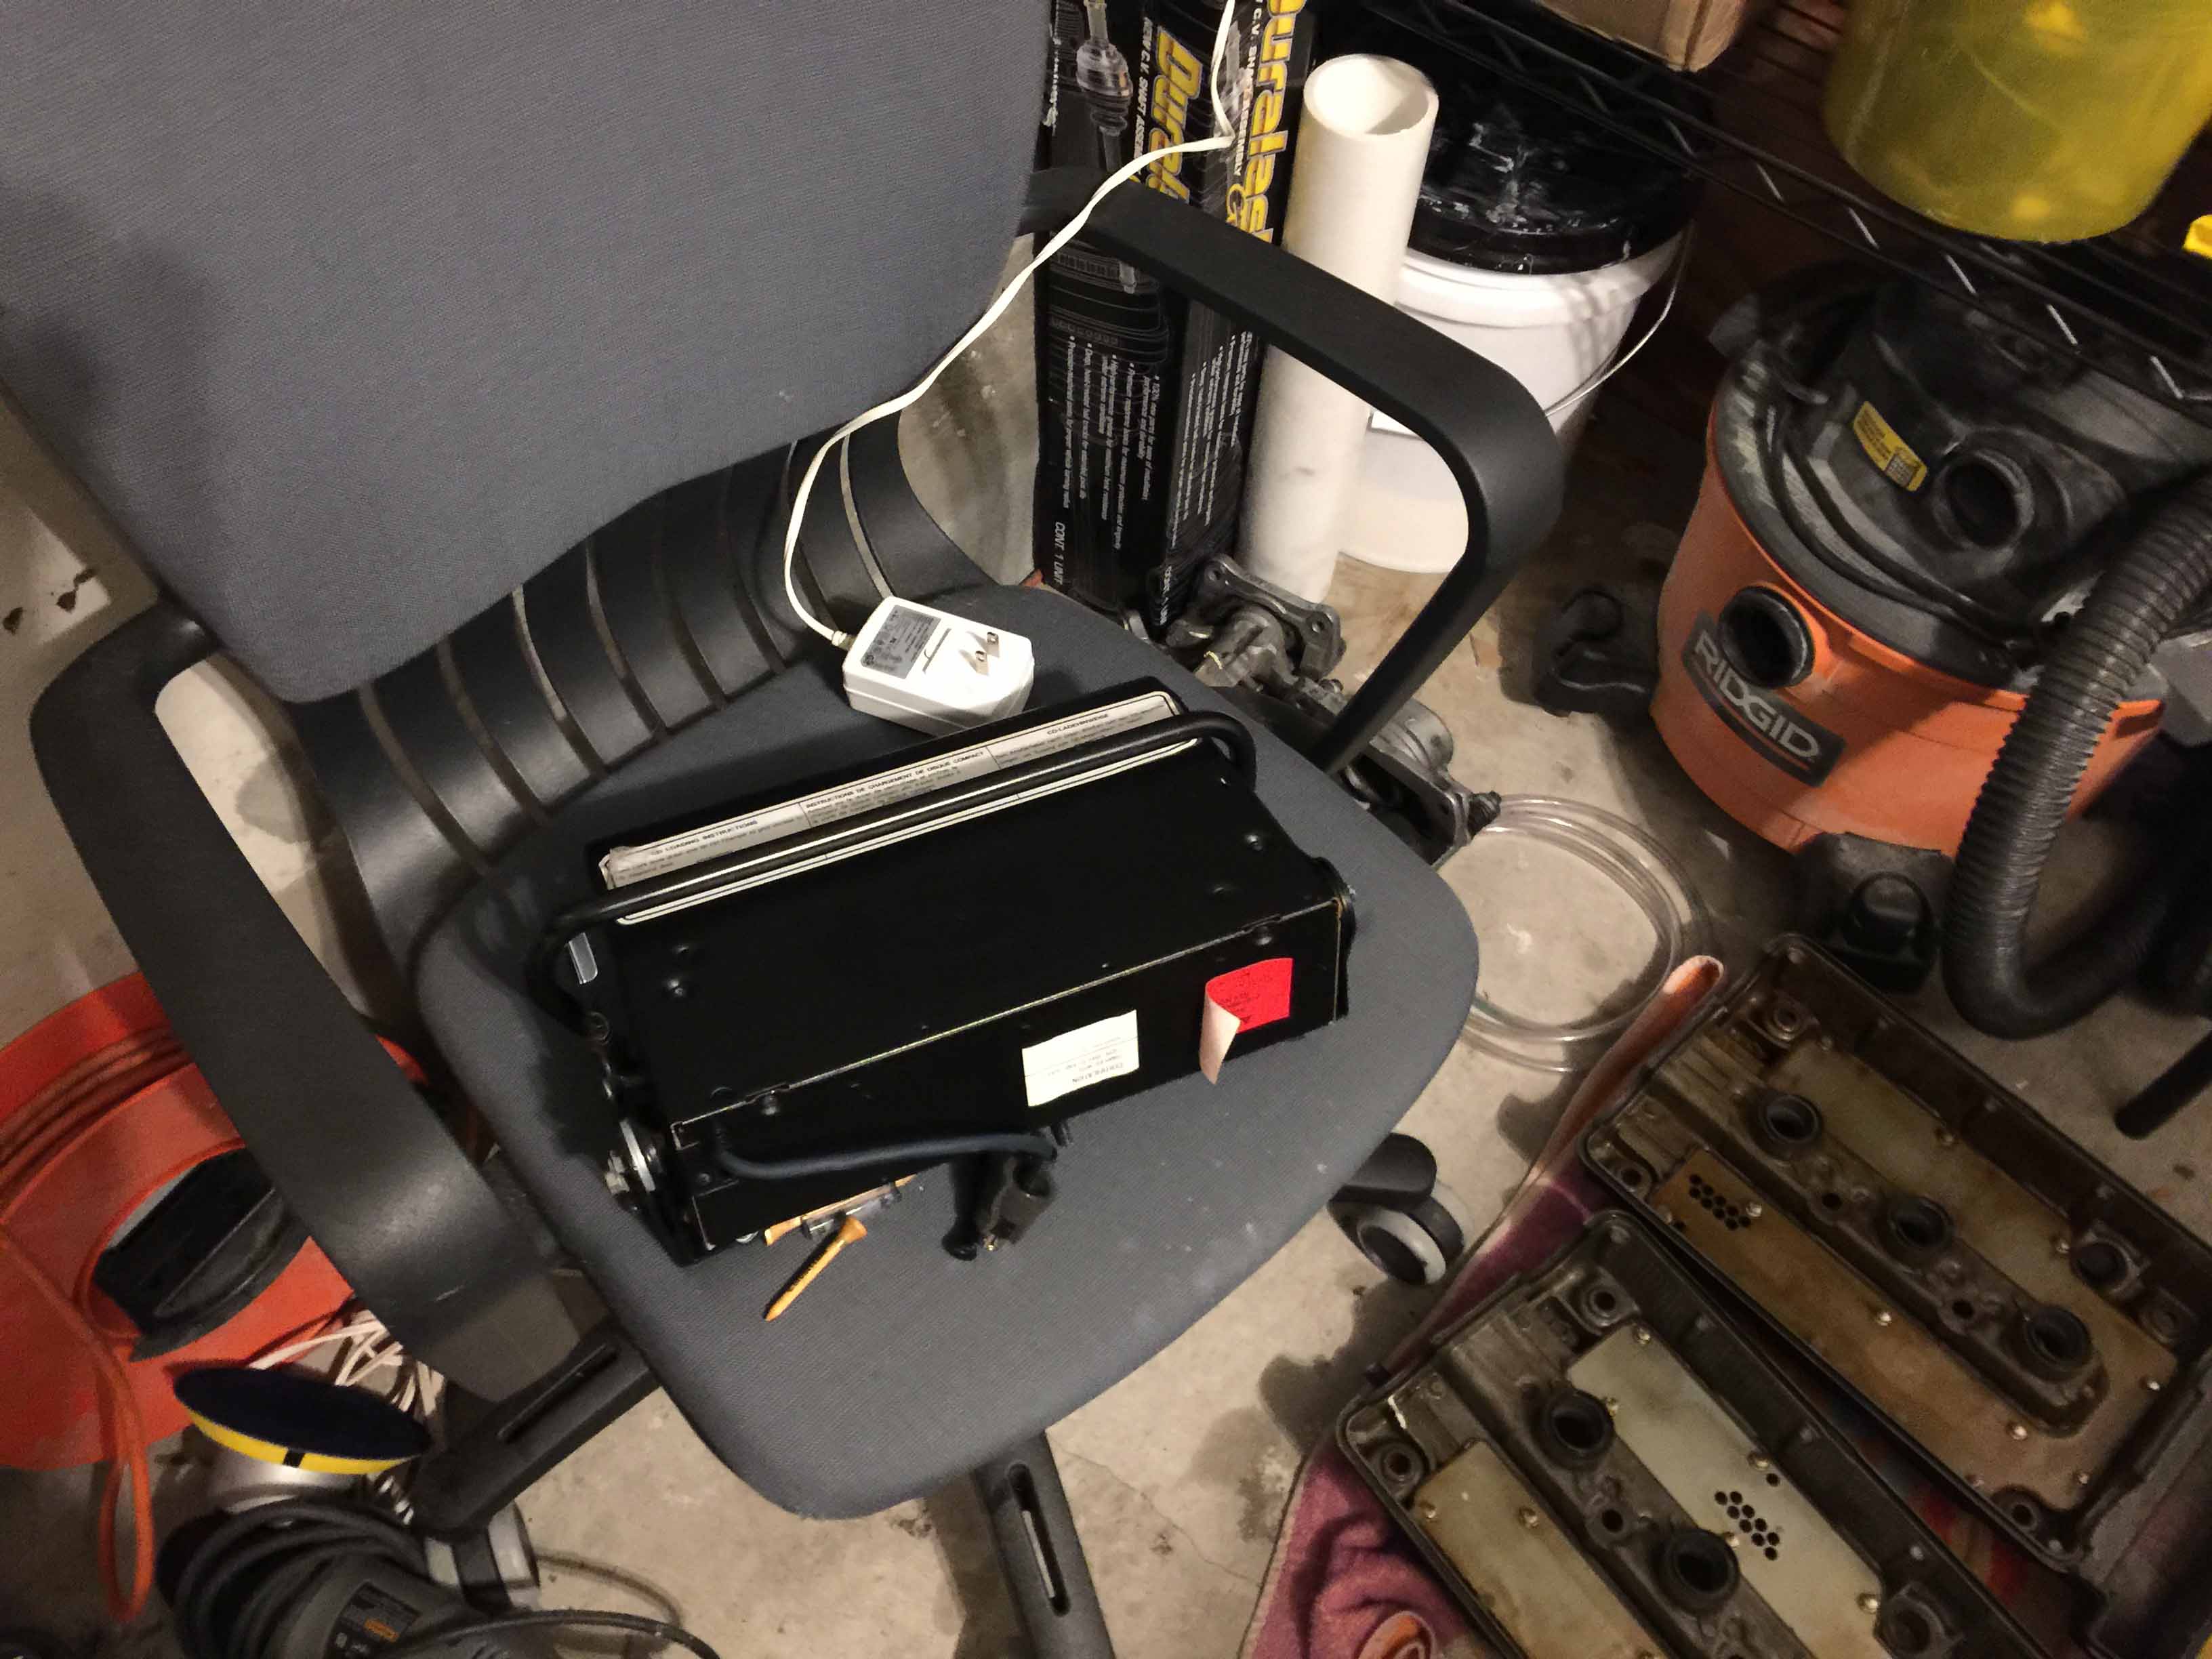
I also removed the factory CD changer to free up a bit of trunk space and make it look cleaner. I'm planning on holding onto it for when/if I sell the car but I'll never use it.
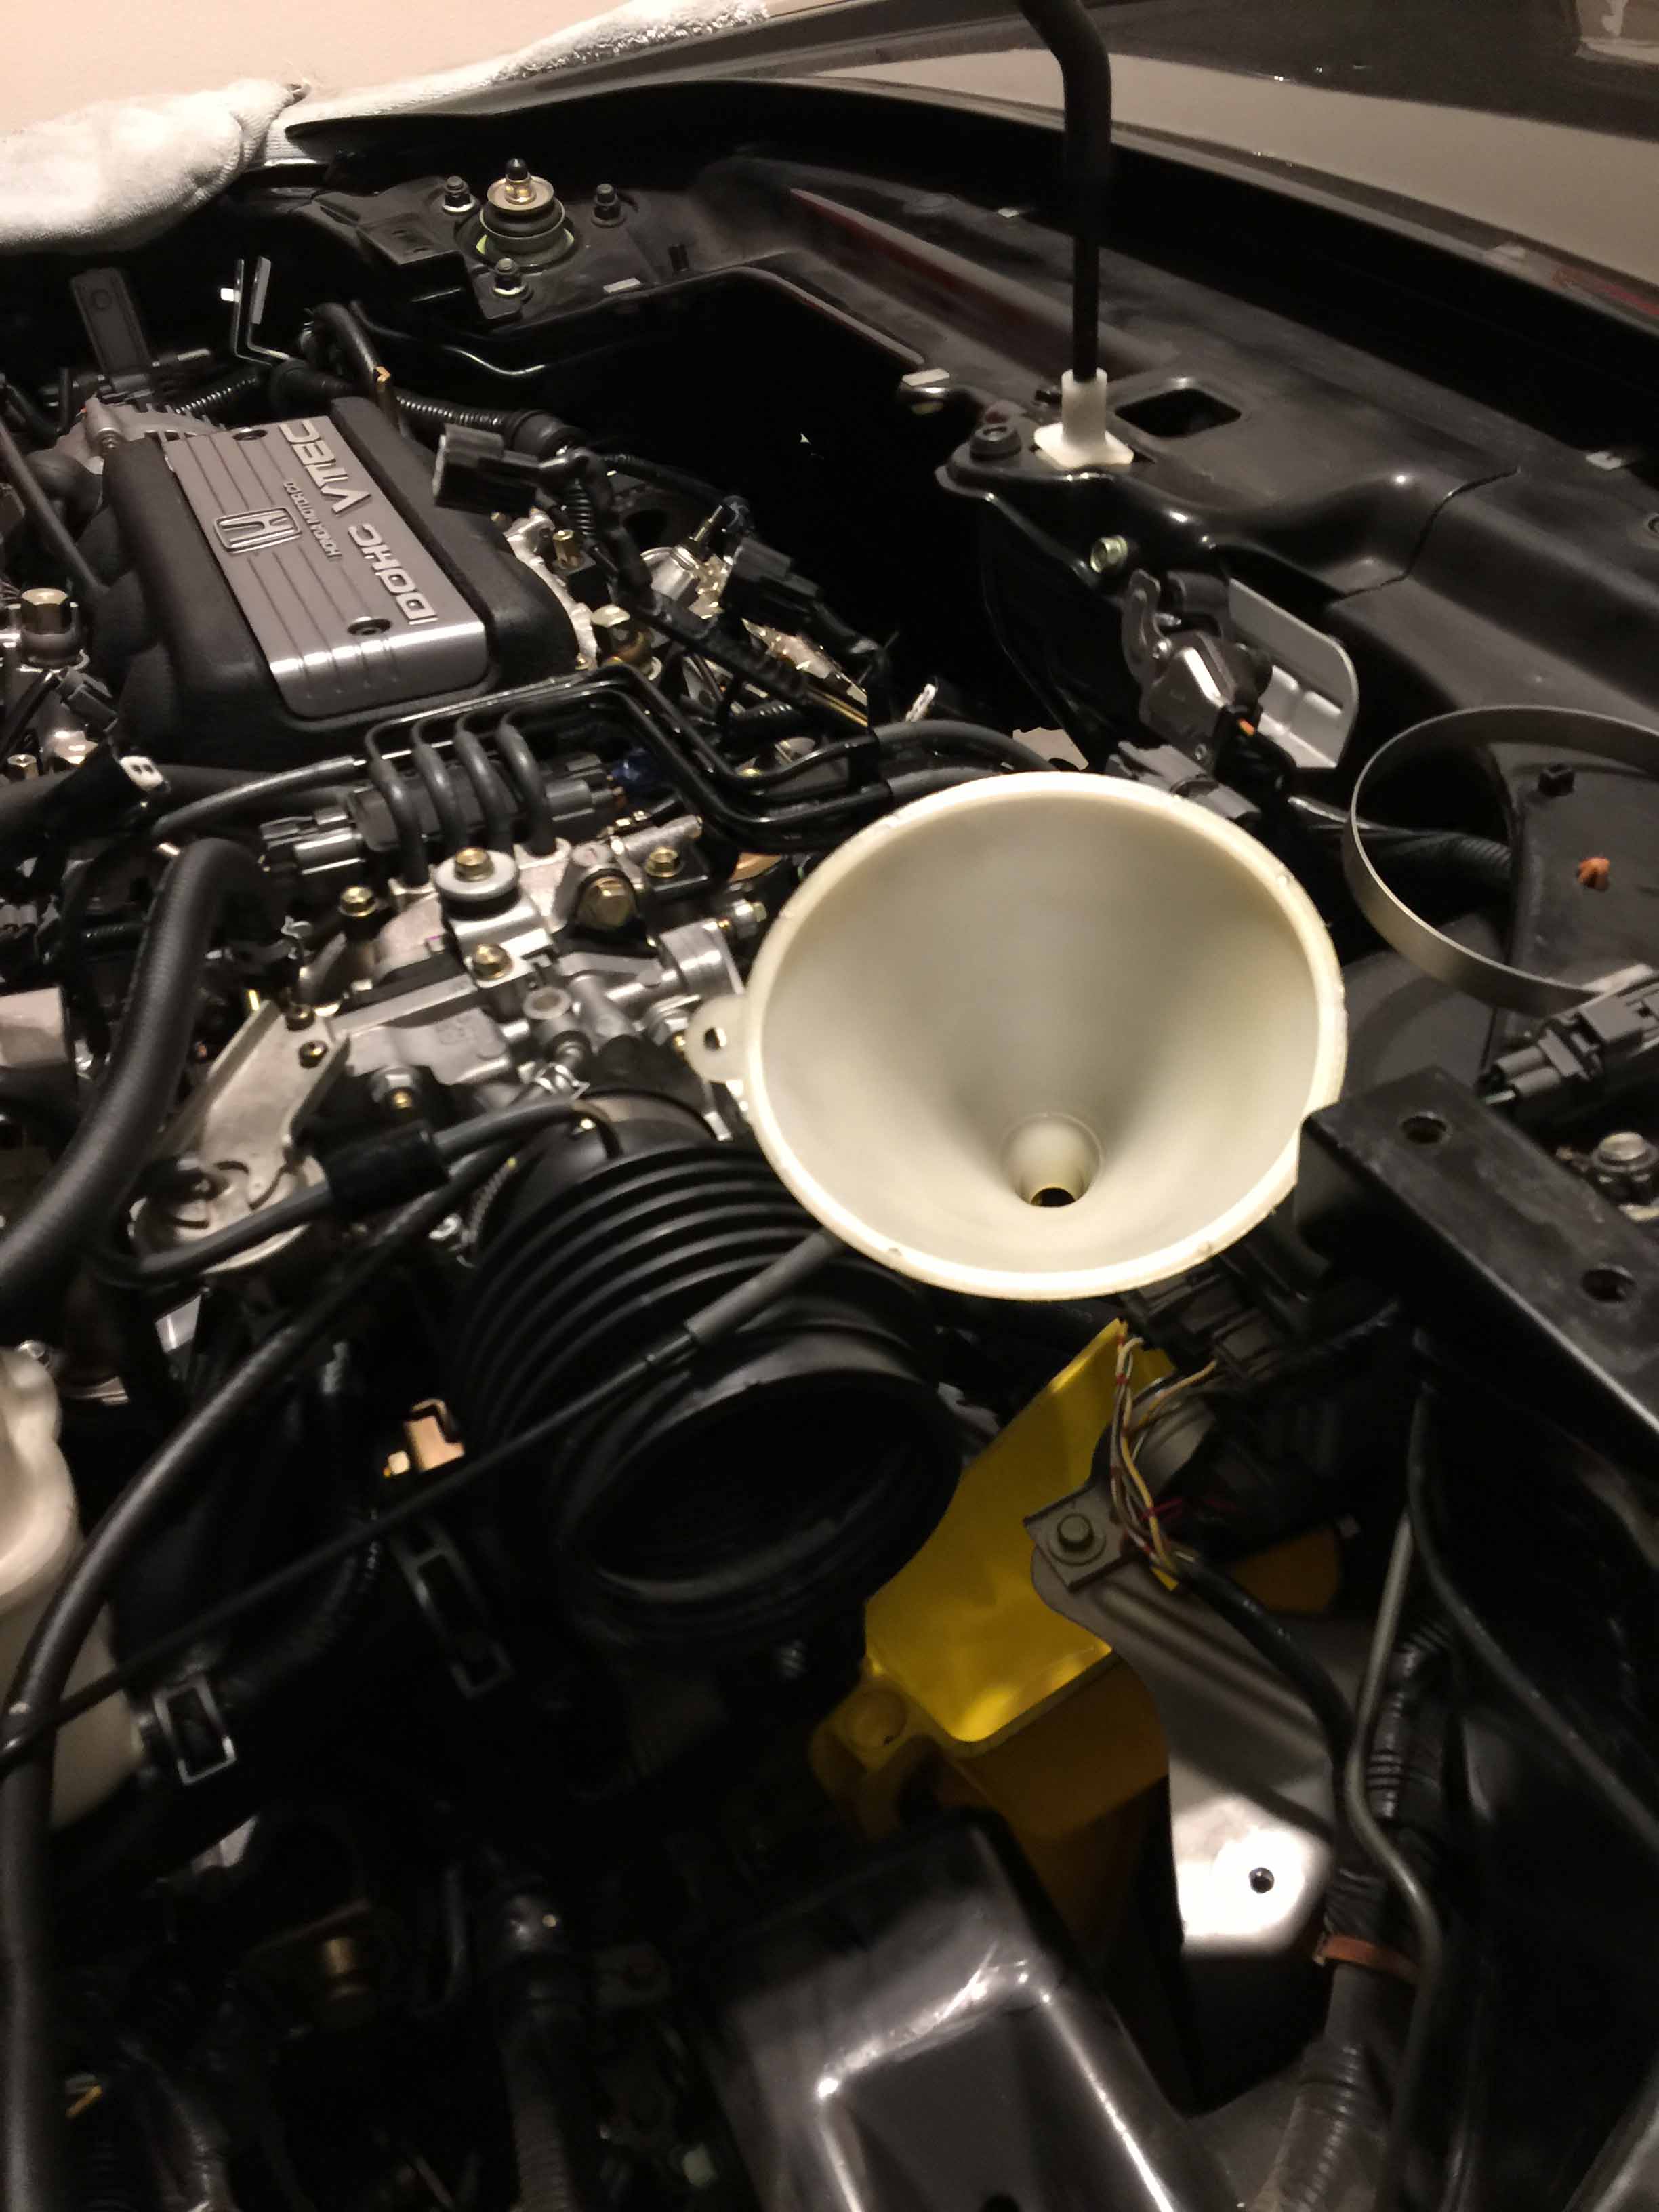
Transmission fluid replaced. Getting the new fluid in the transmission required a waterfall of funnels.
Finally reinstalling the valve covers along with all the other plastic covers and clips on top of the engine that i had forgotten existed.

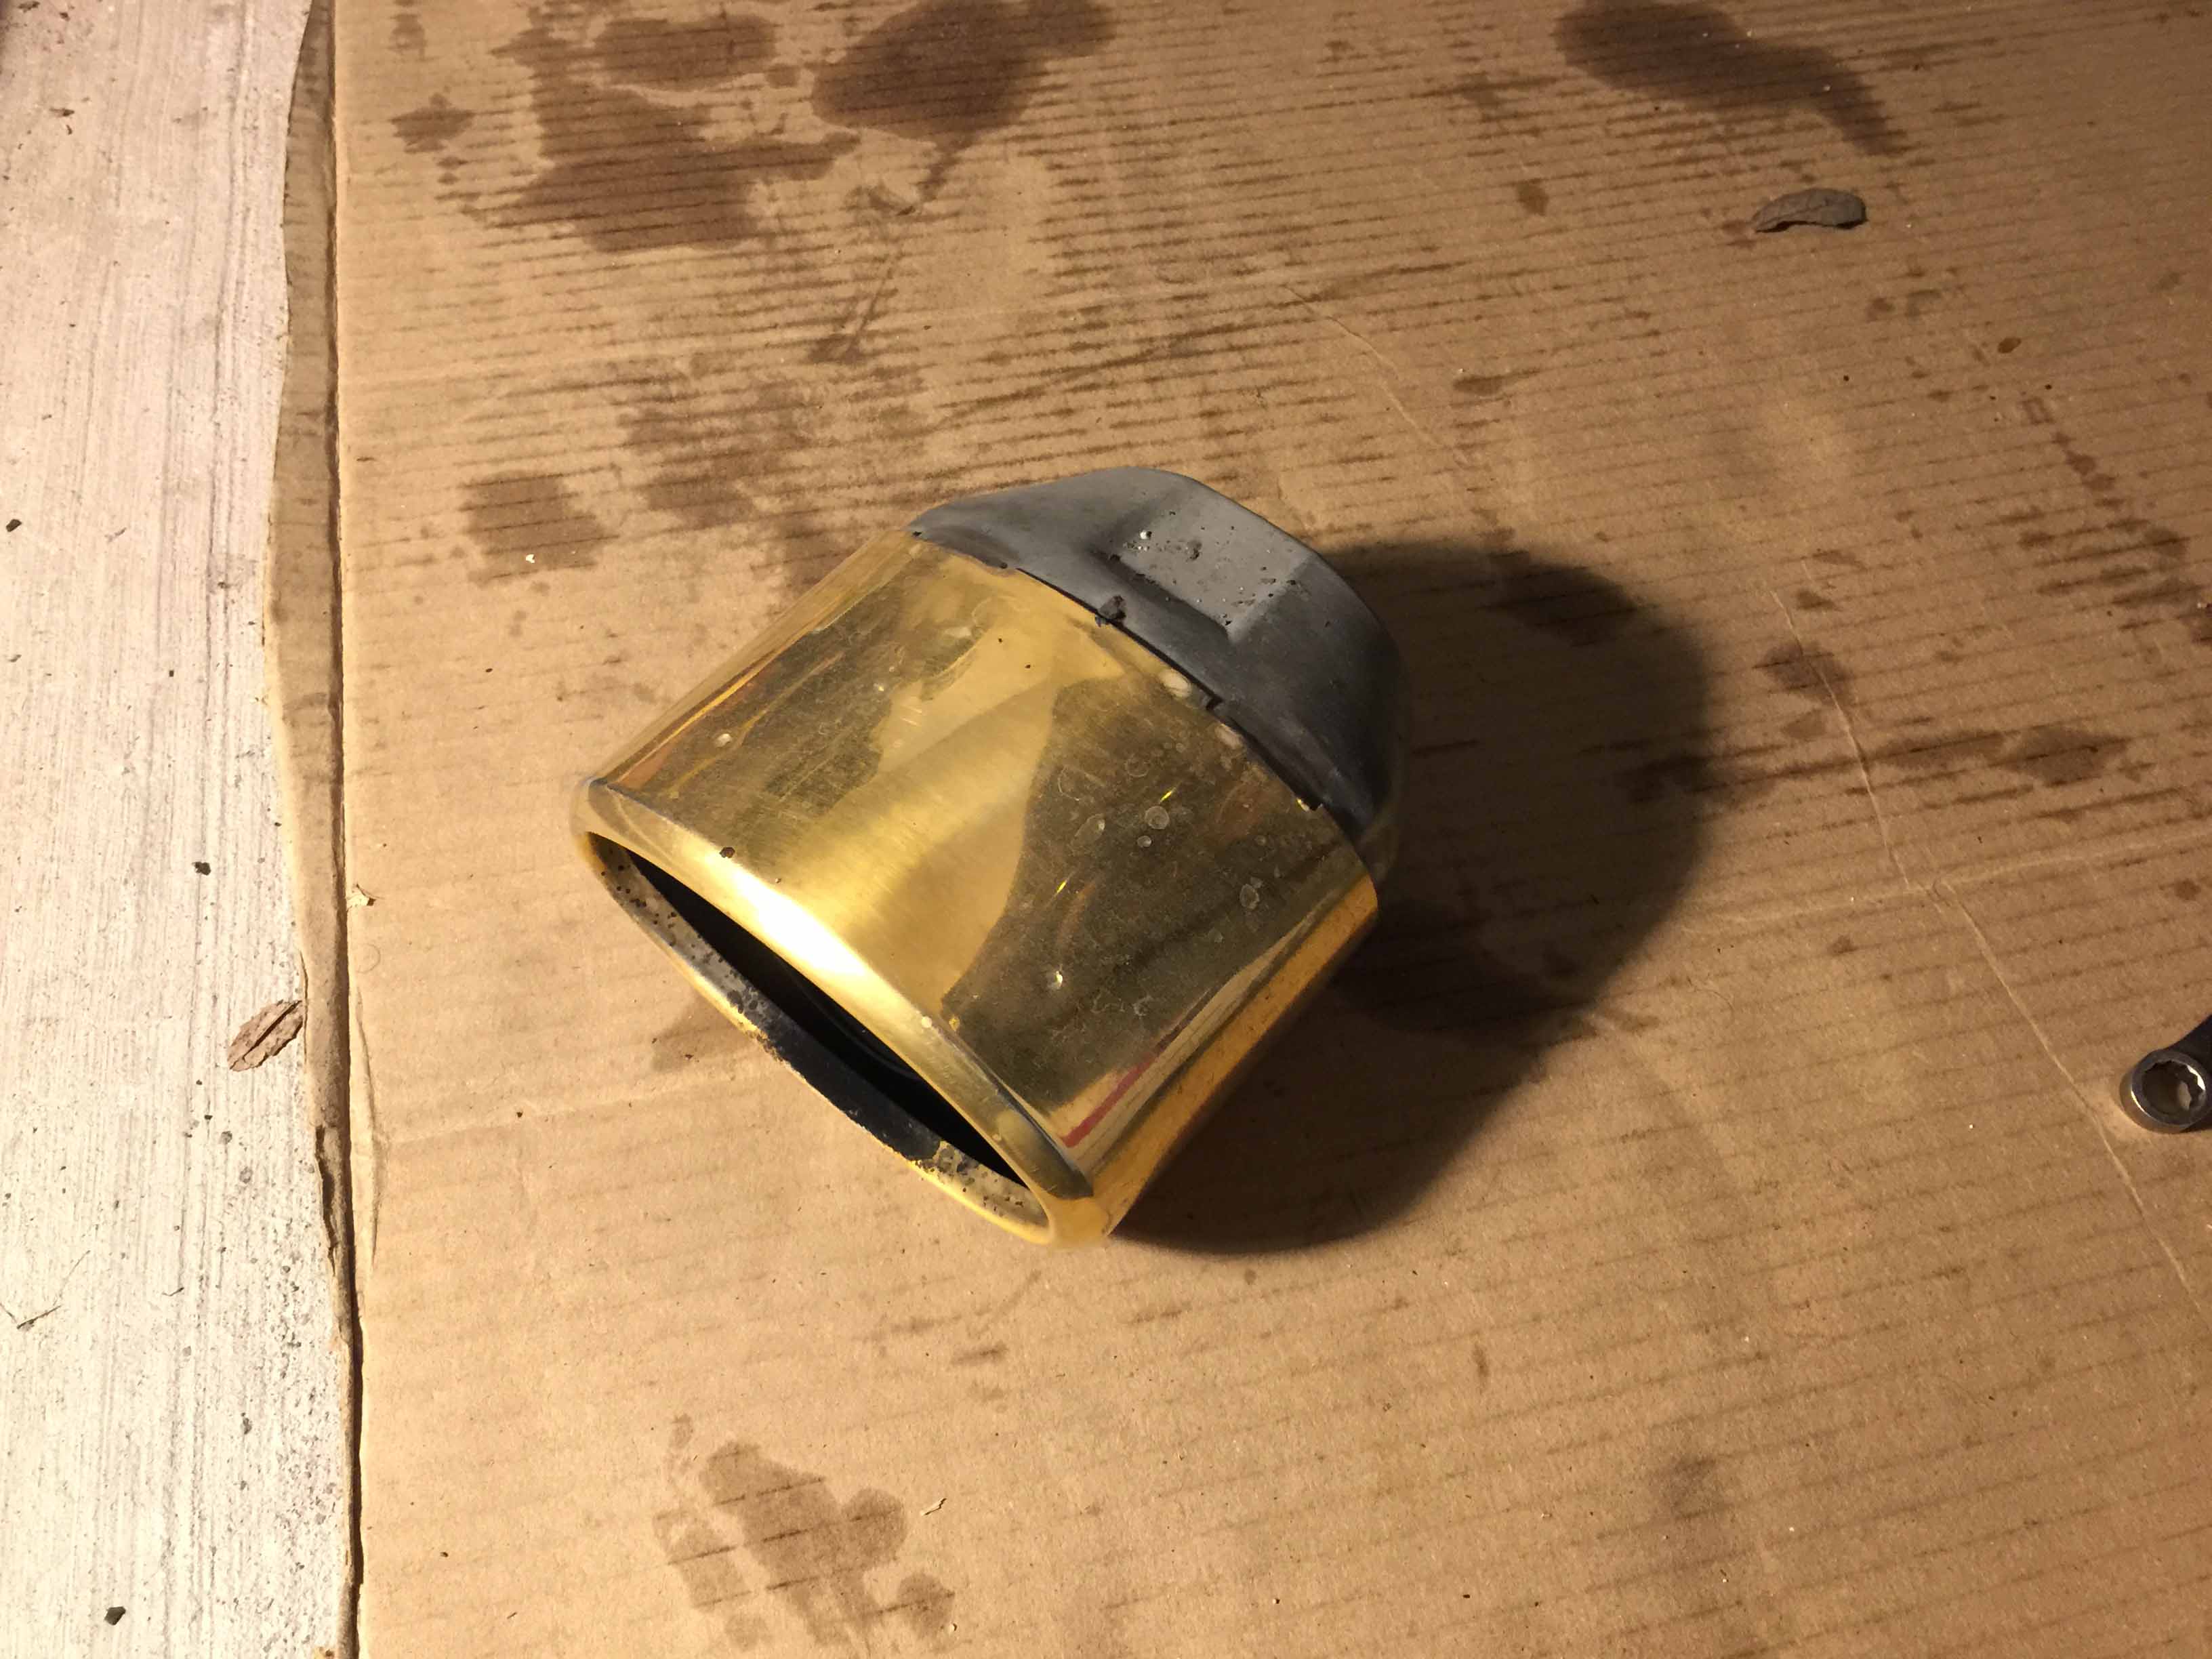
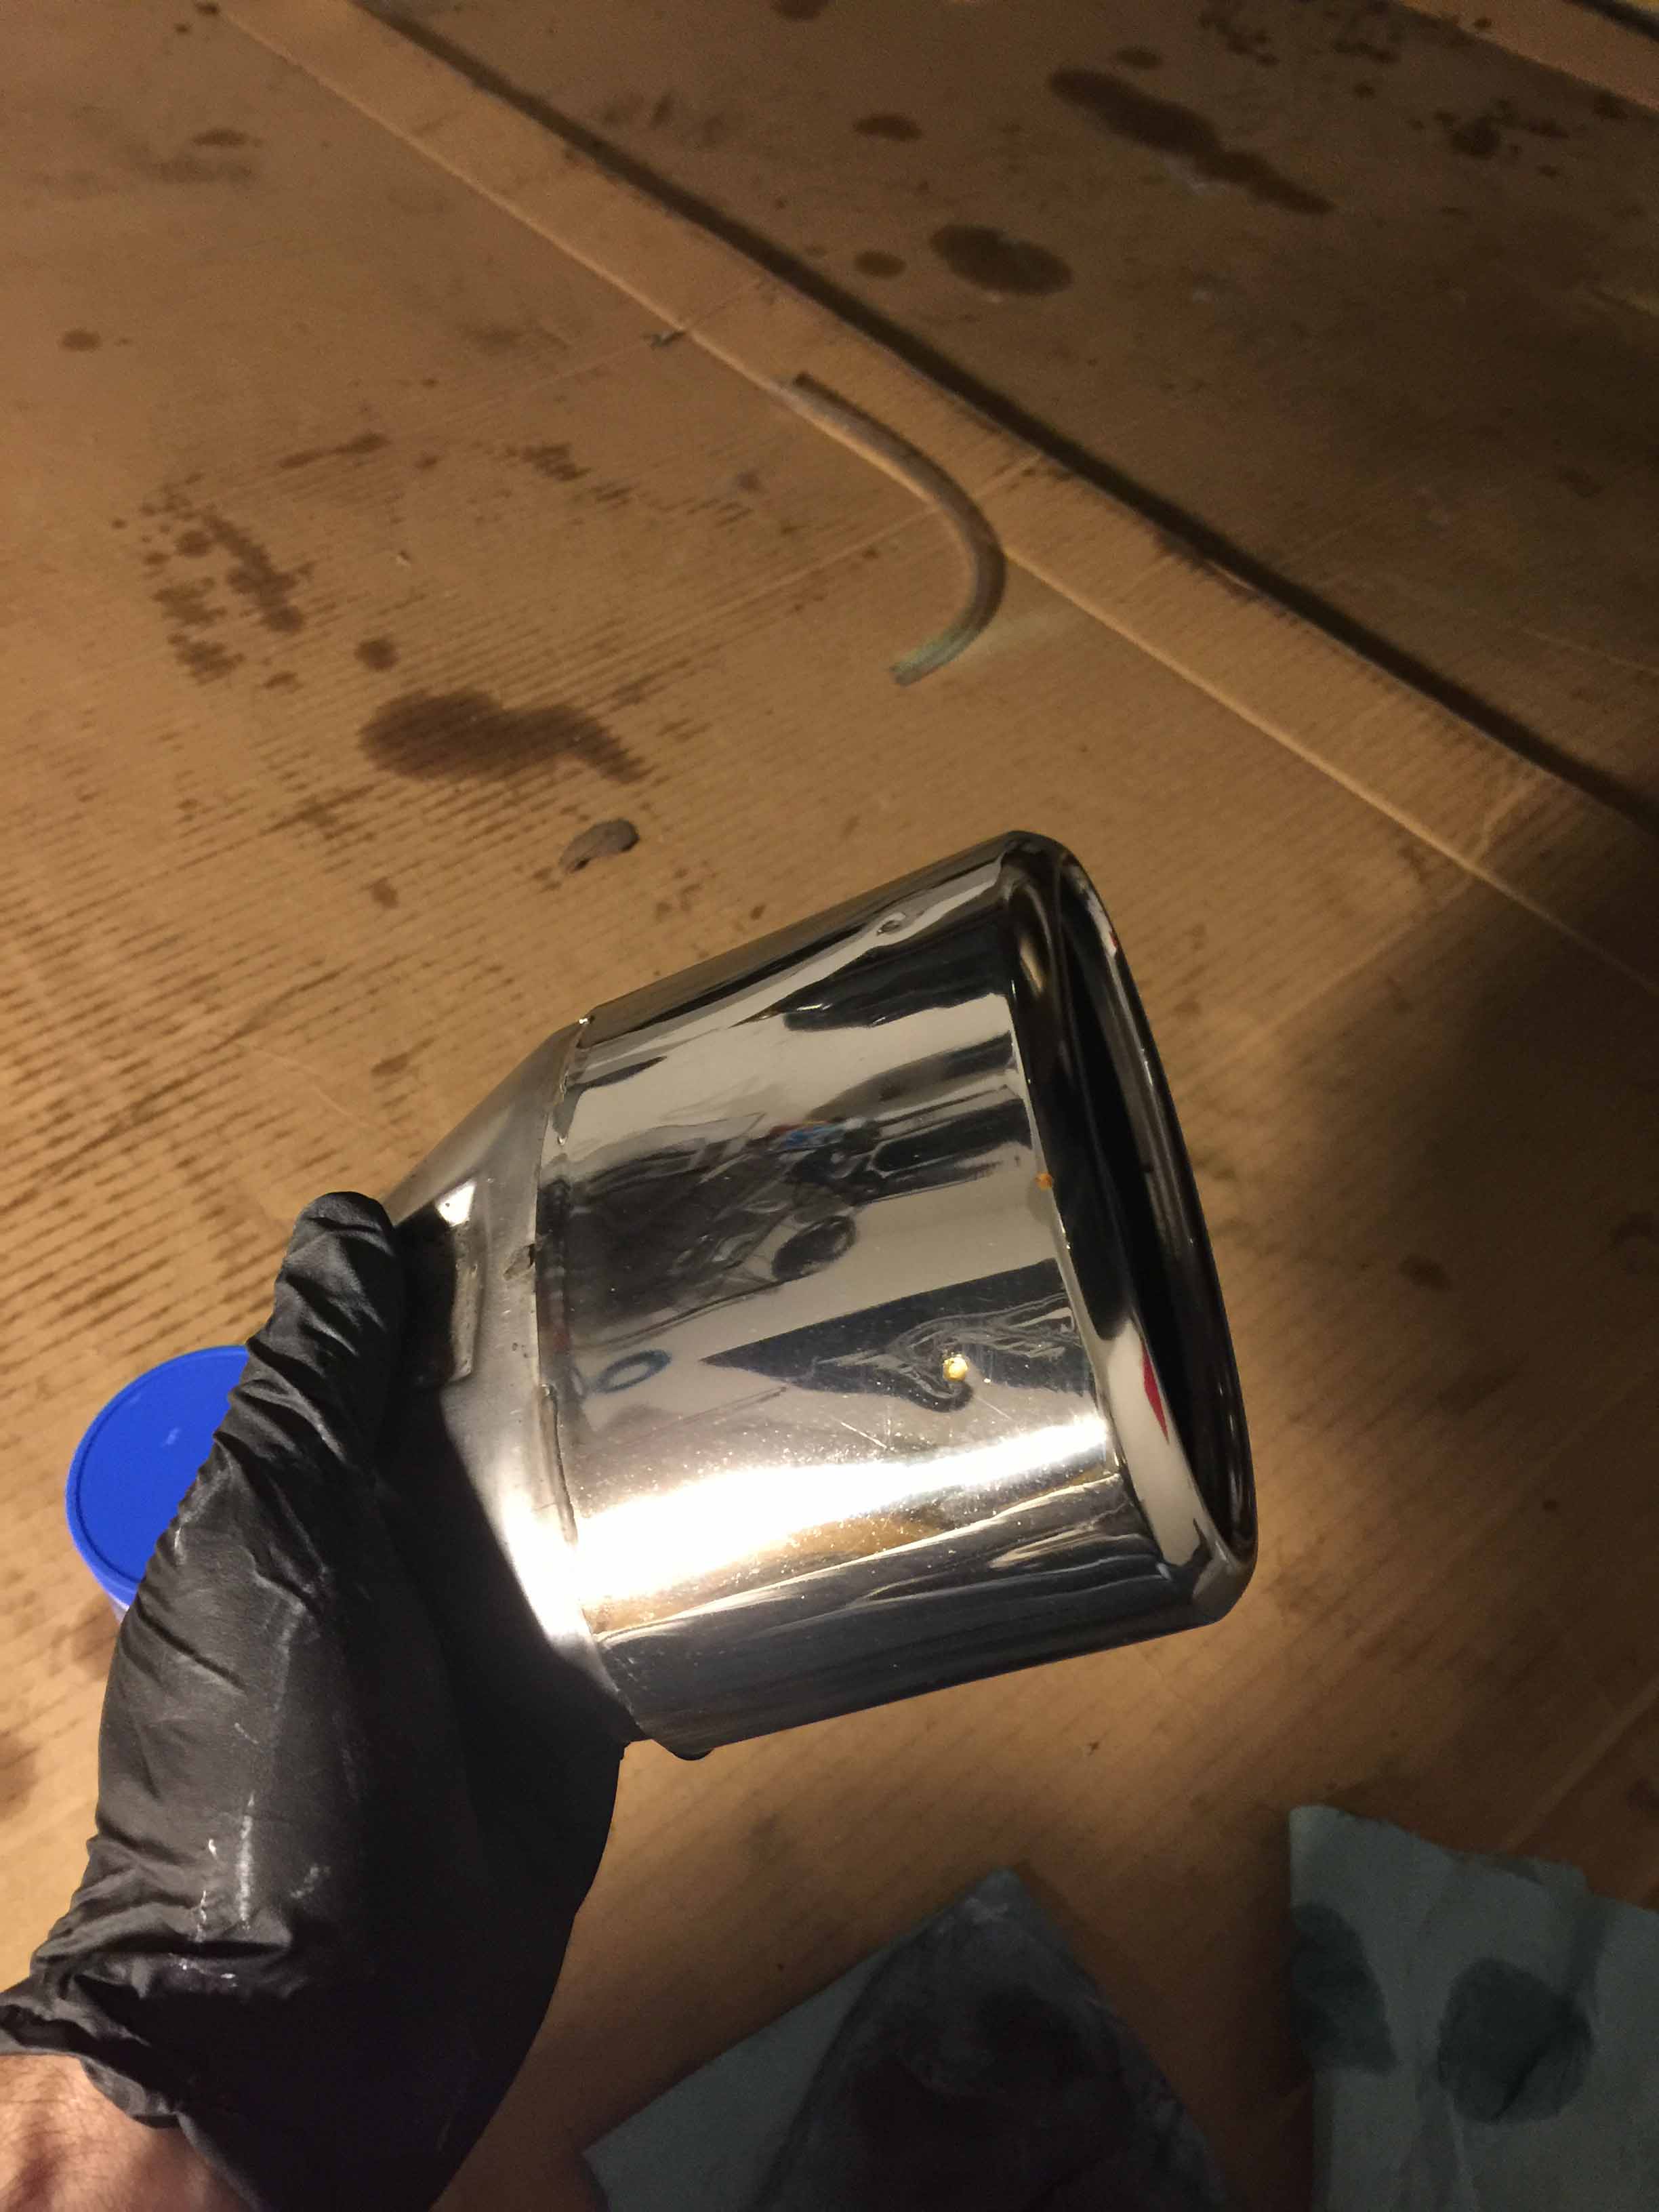
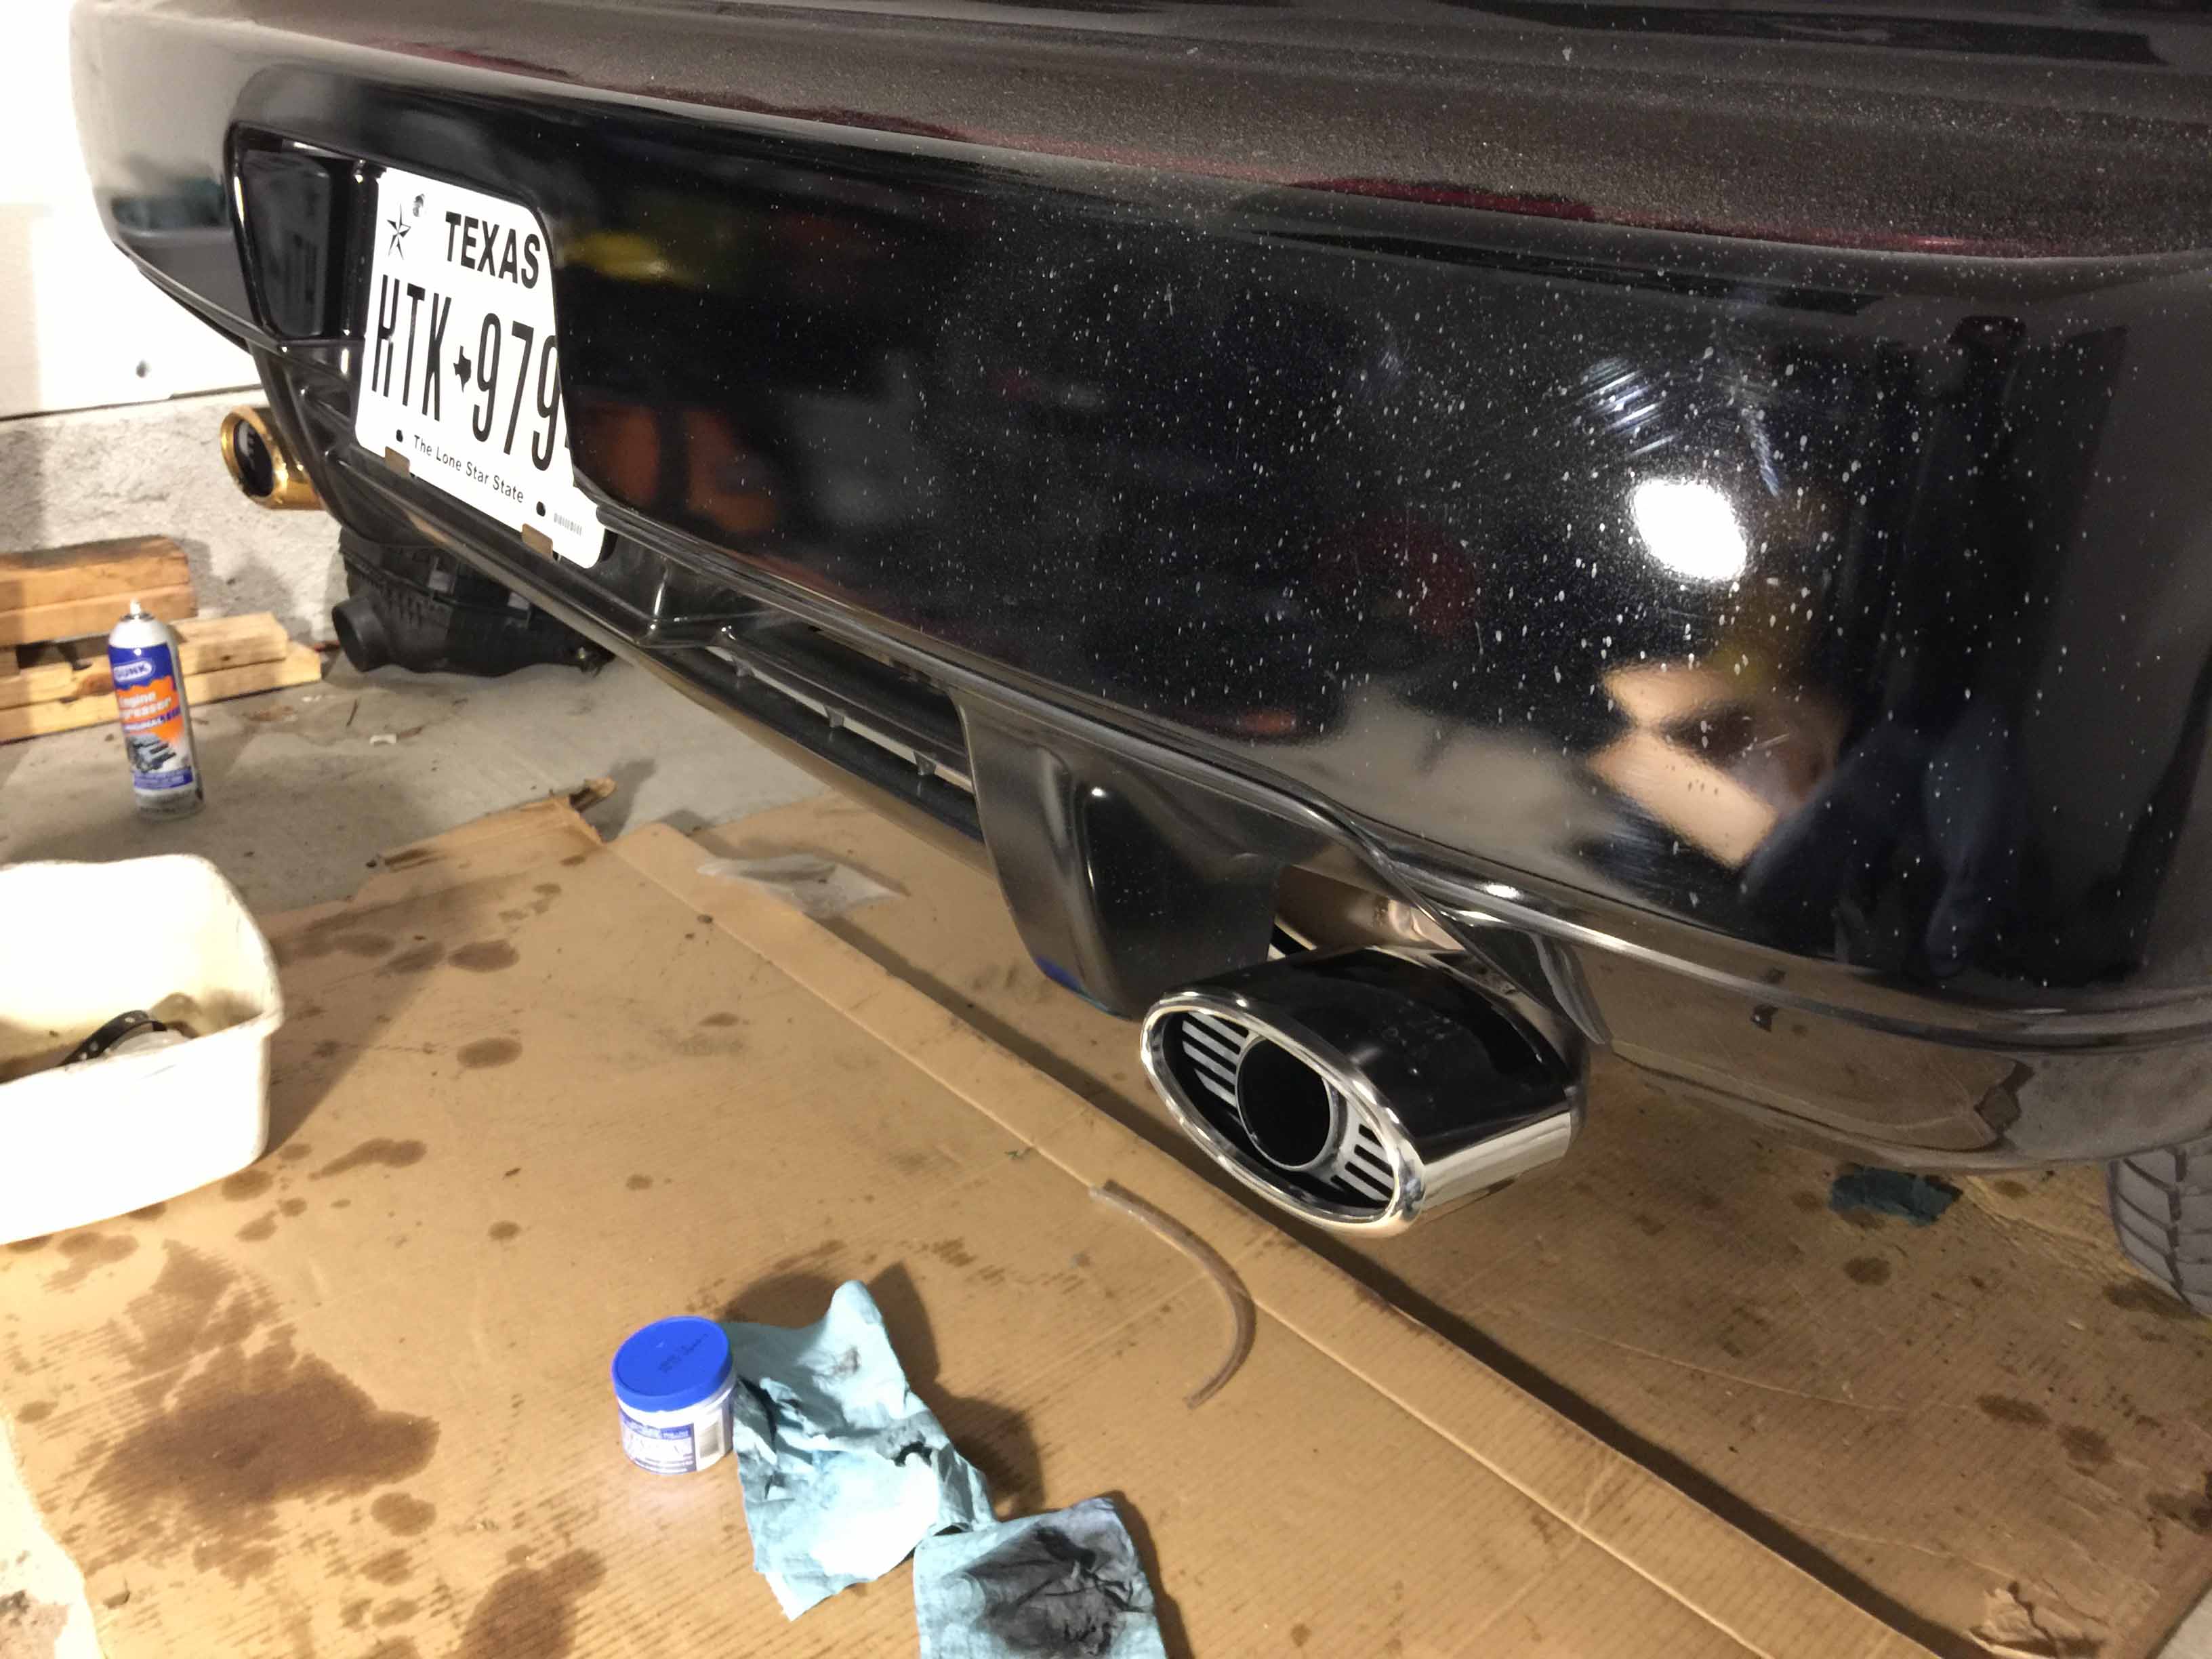
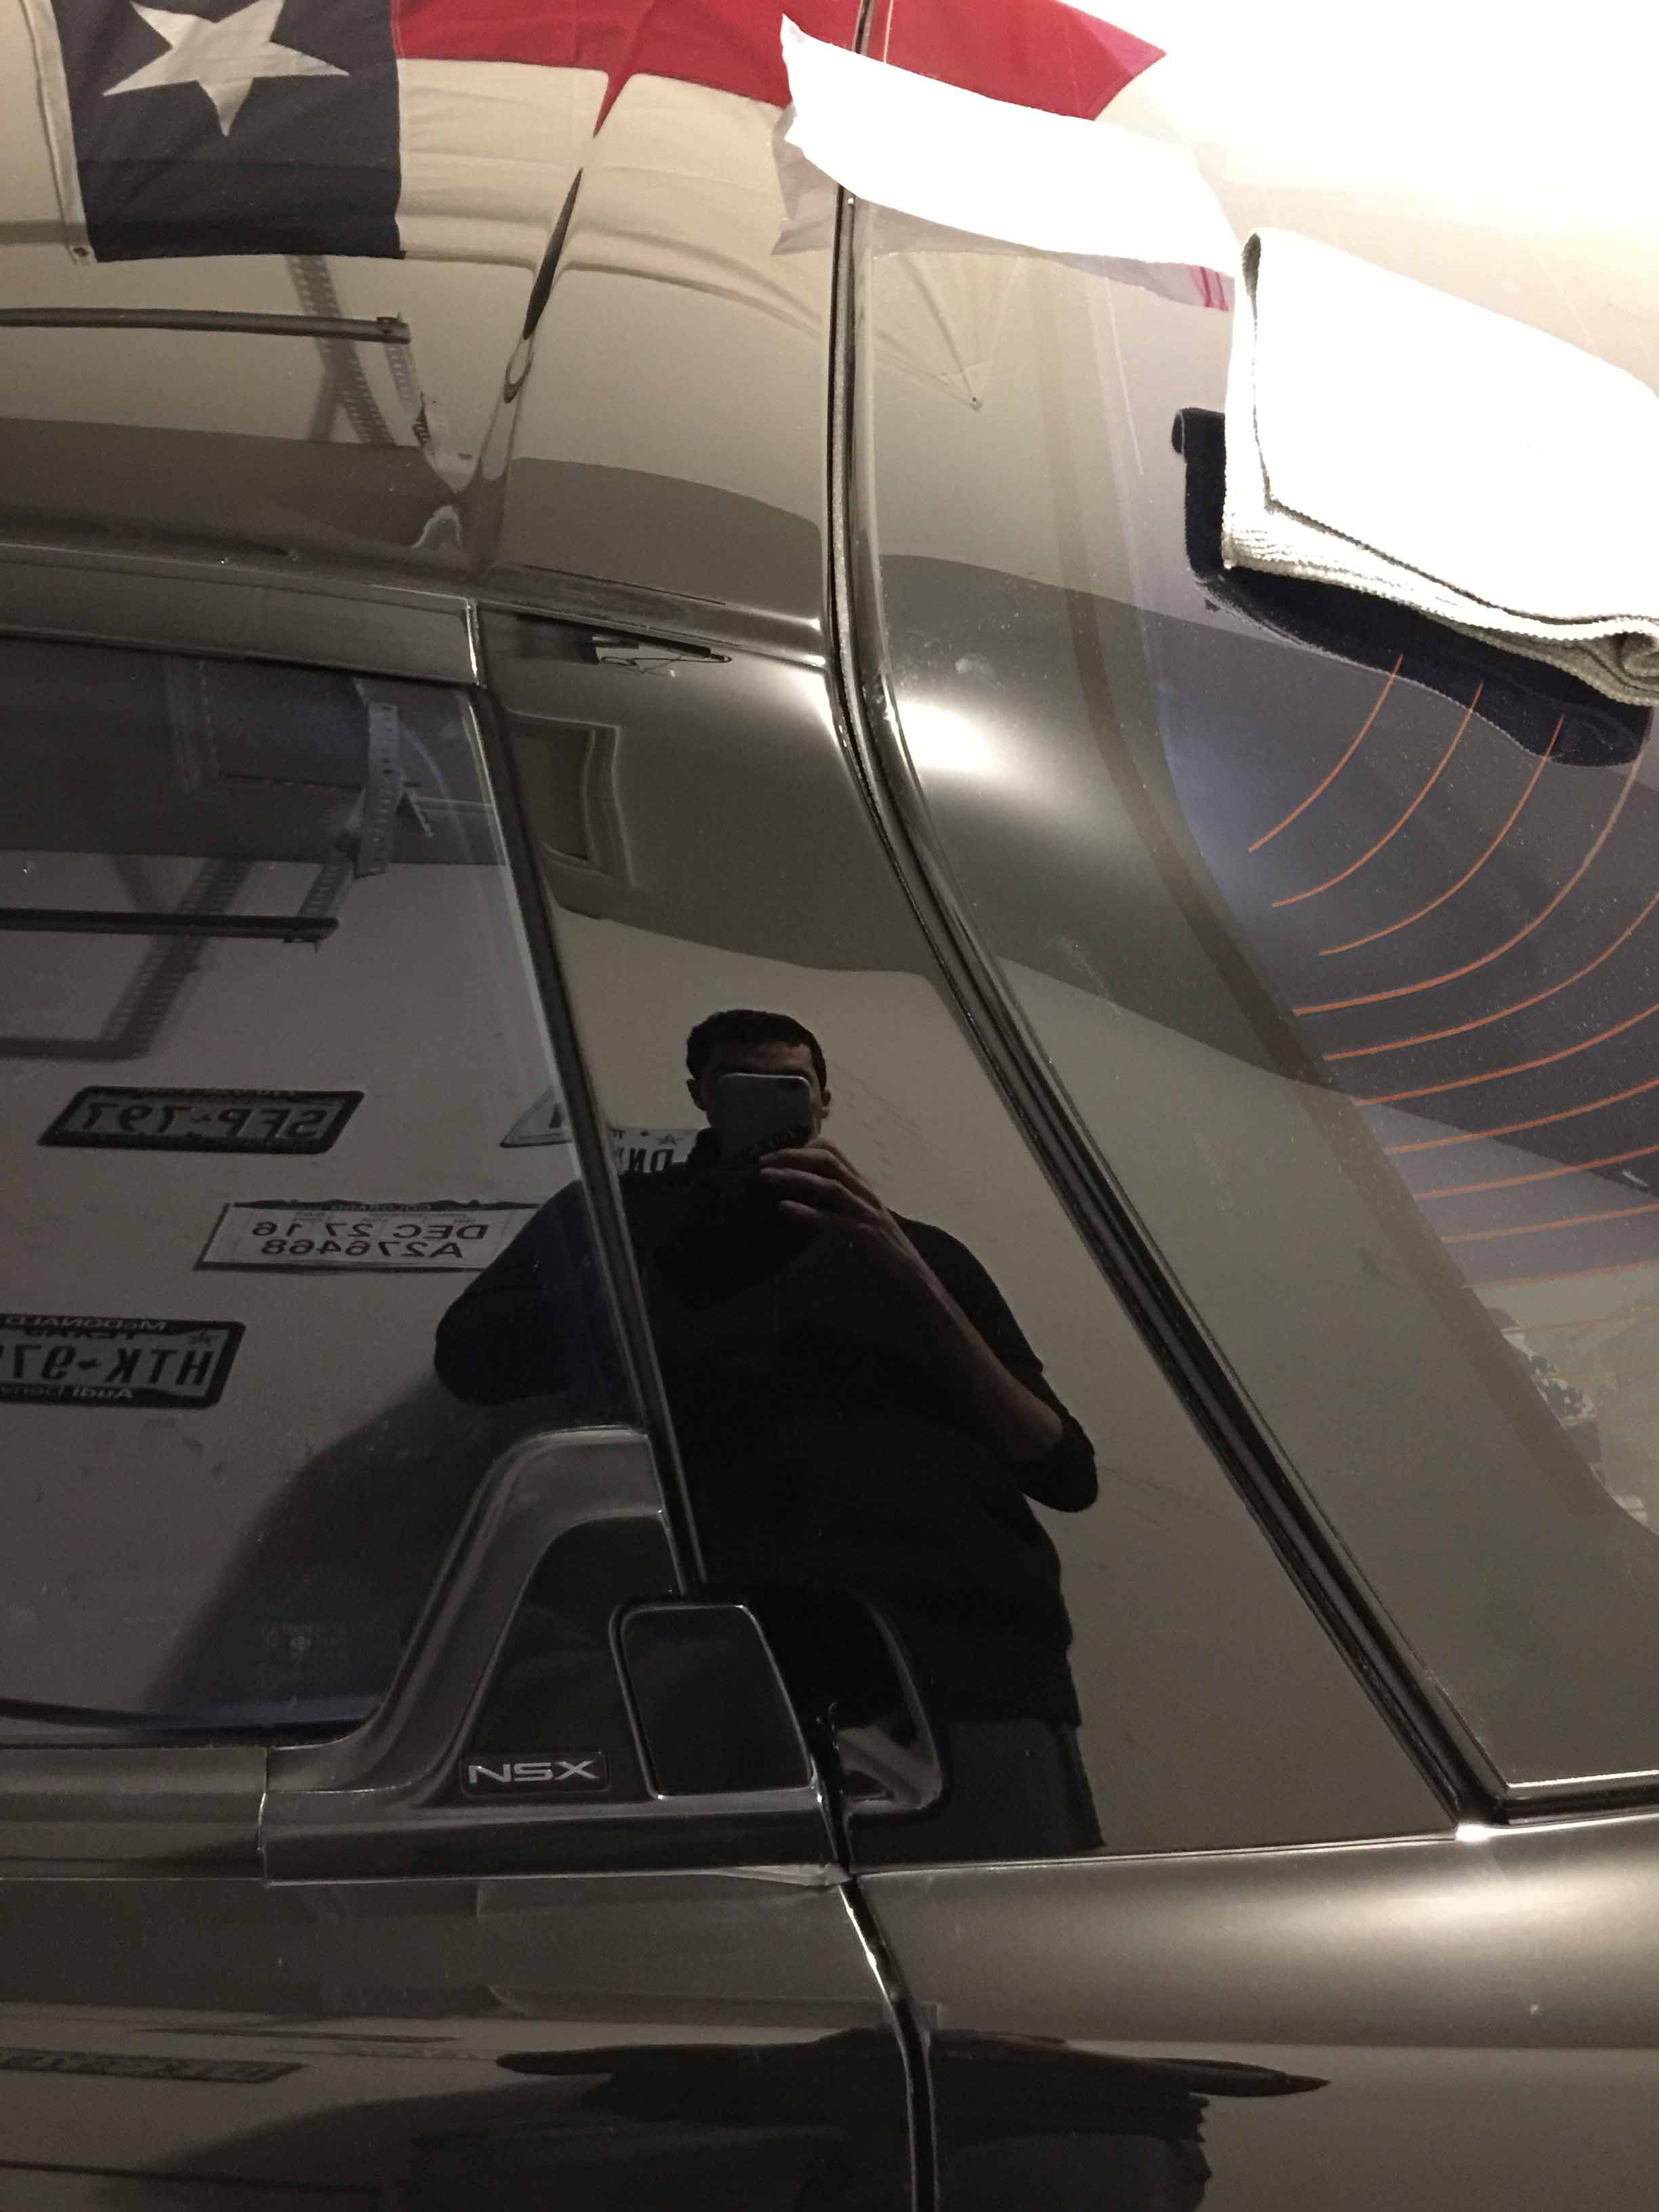
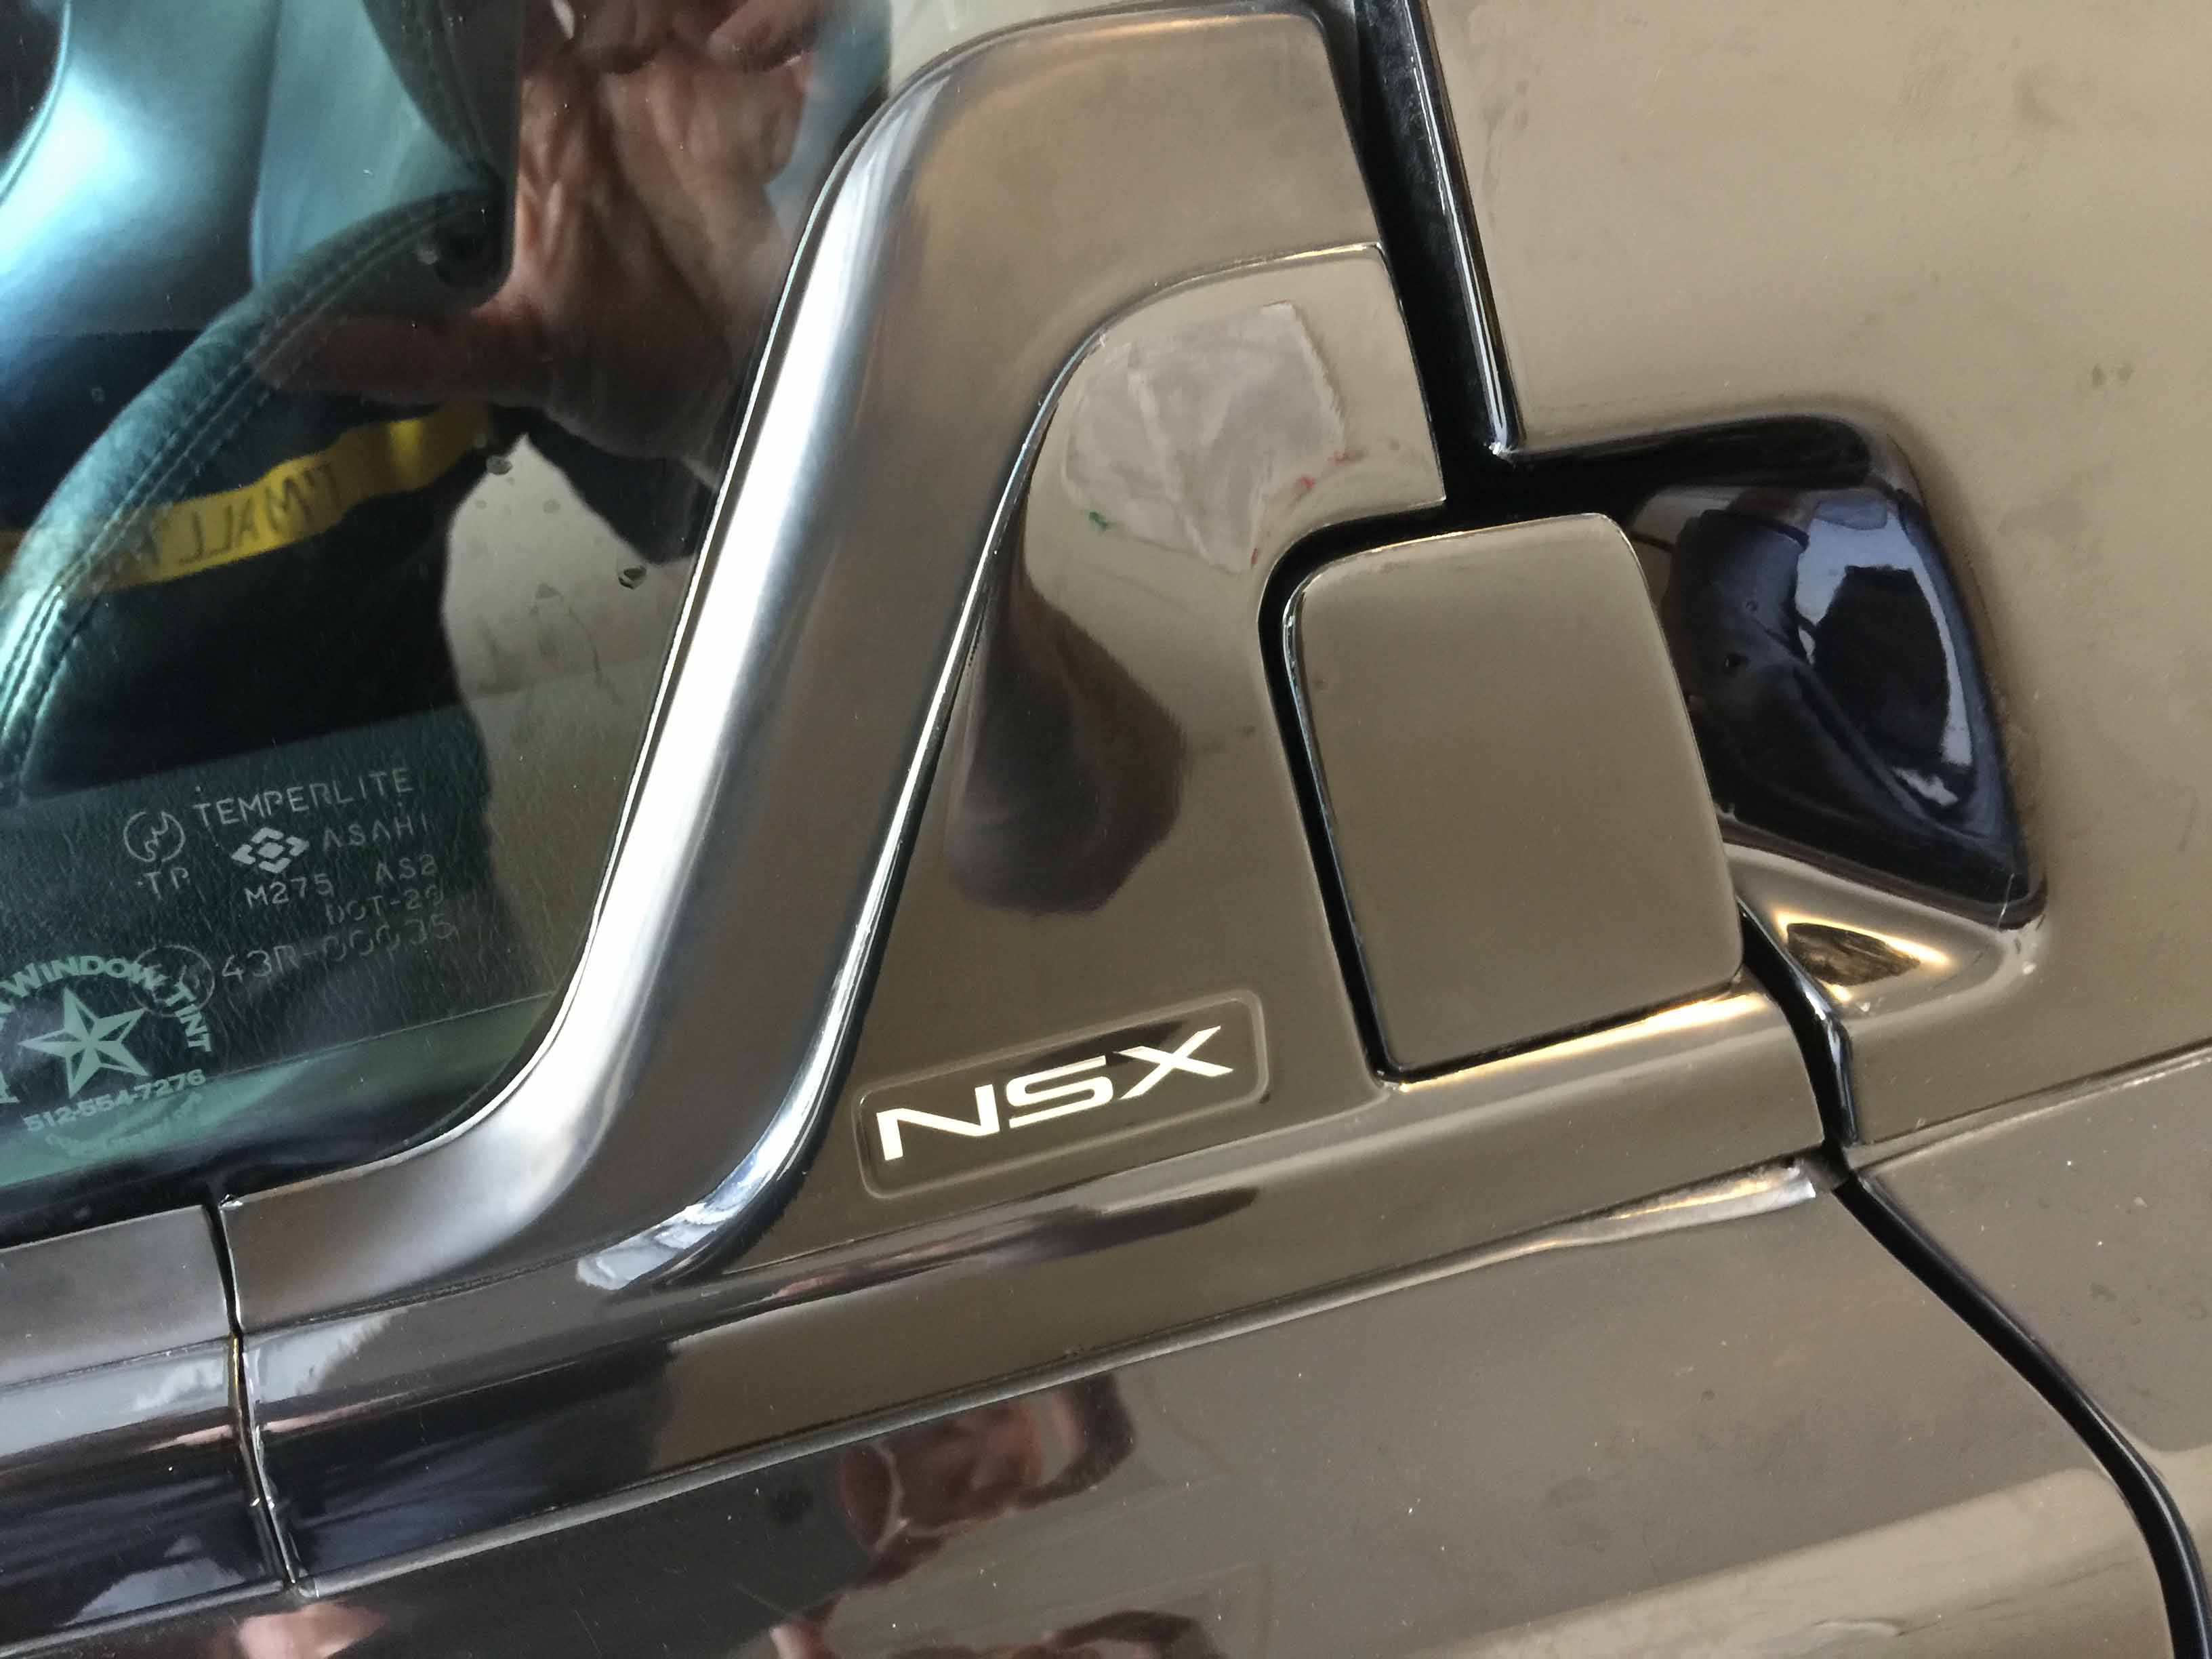
Funny thing about the gold badges, I didn't realize the gold wasn't normal until my new badge showed up in the mail and prompted my post on NSXPrime. Turns out the front badge, both exhaust tips, and the antenna nut were gold plated at some point.
I picked up some metal polish at AutoZone and went to work on one of the exhaust tips to see how difficult it would be. Turns out not very, in 15 minutes or so I was able to completely remove all the gold plating by hand on one of the exhaust tips.
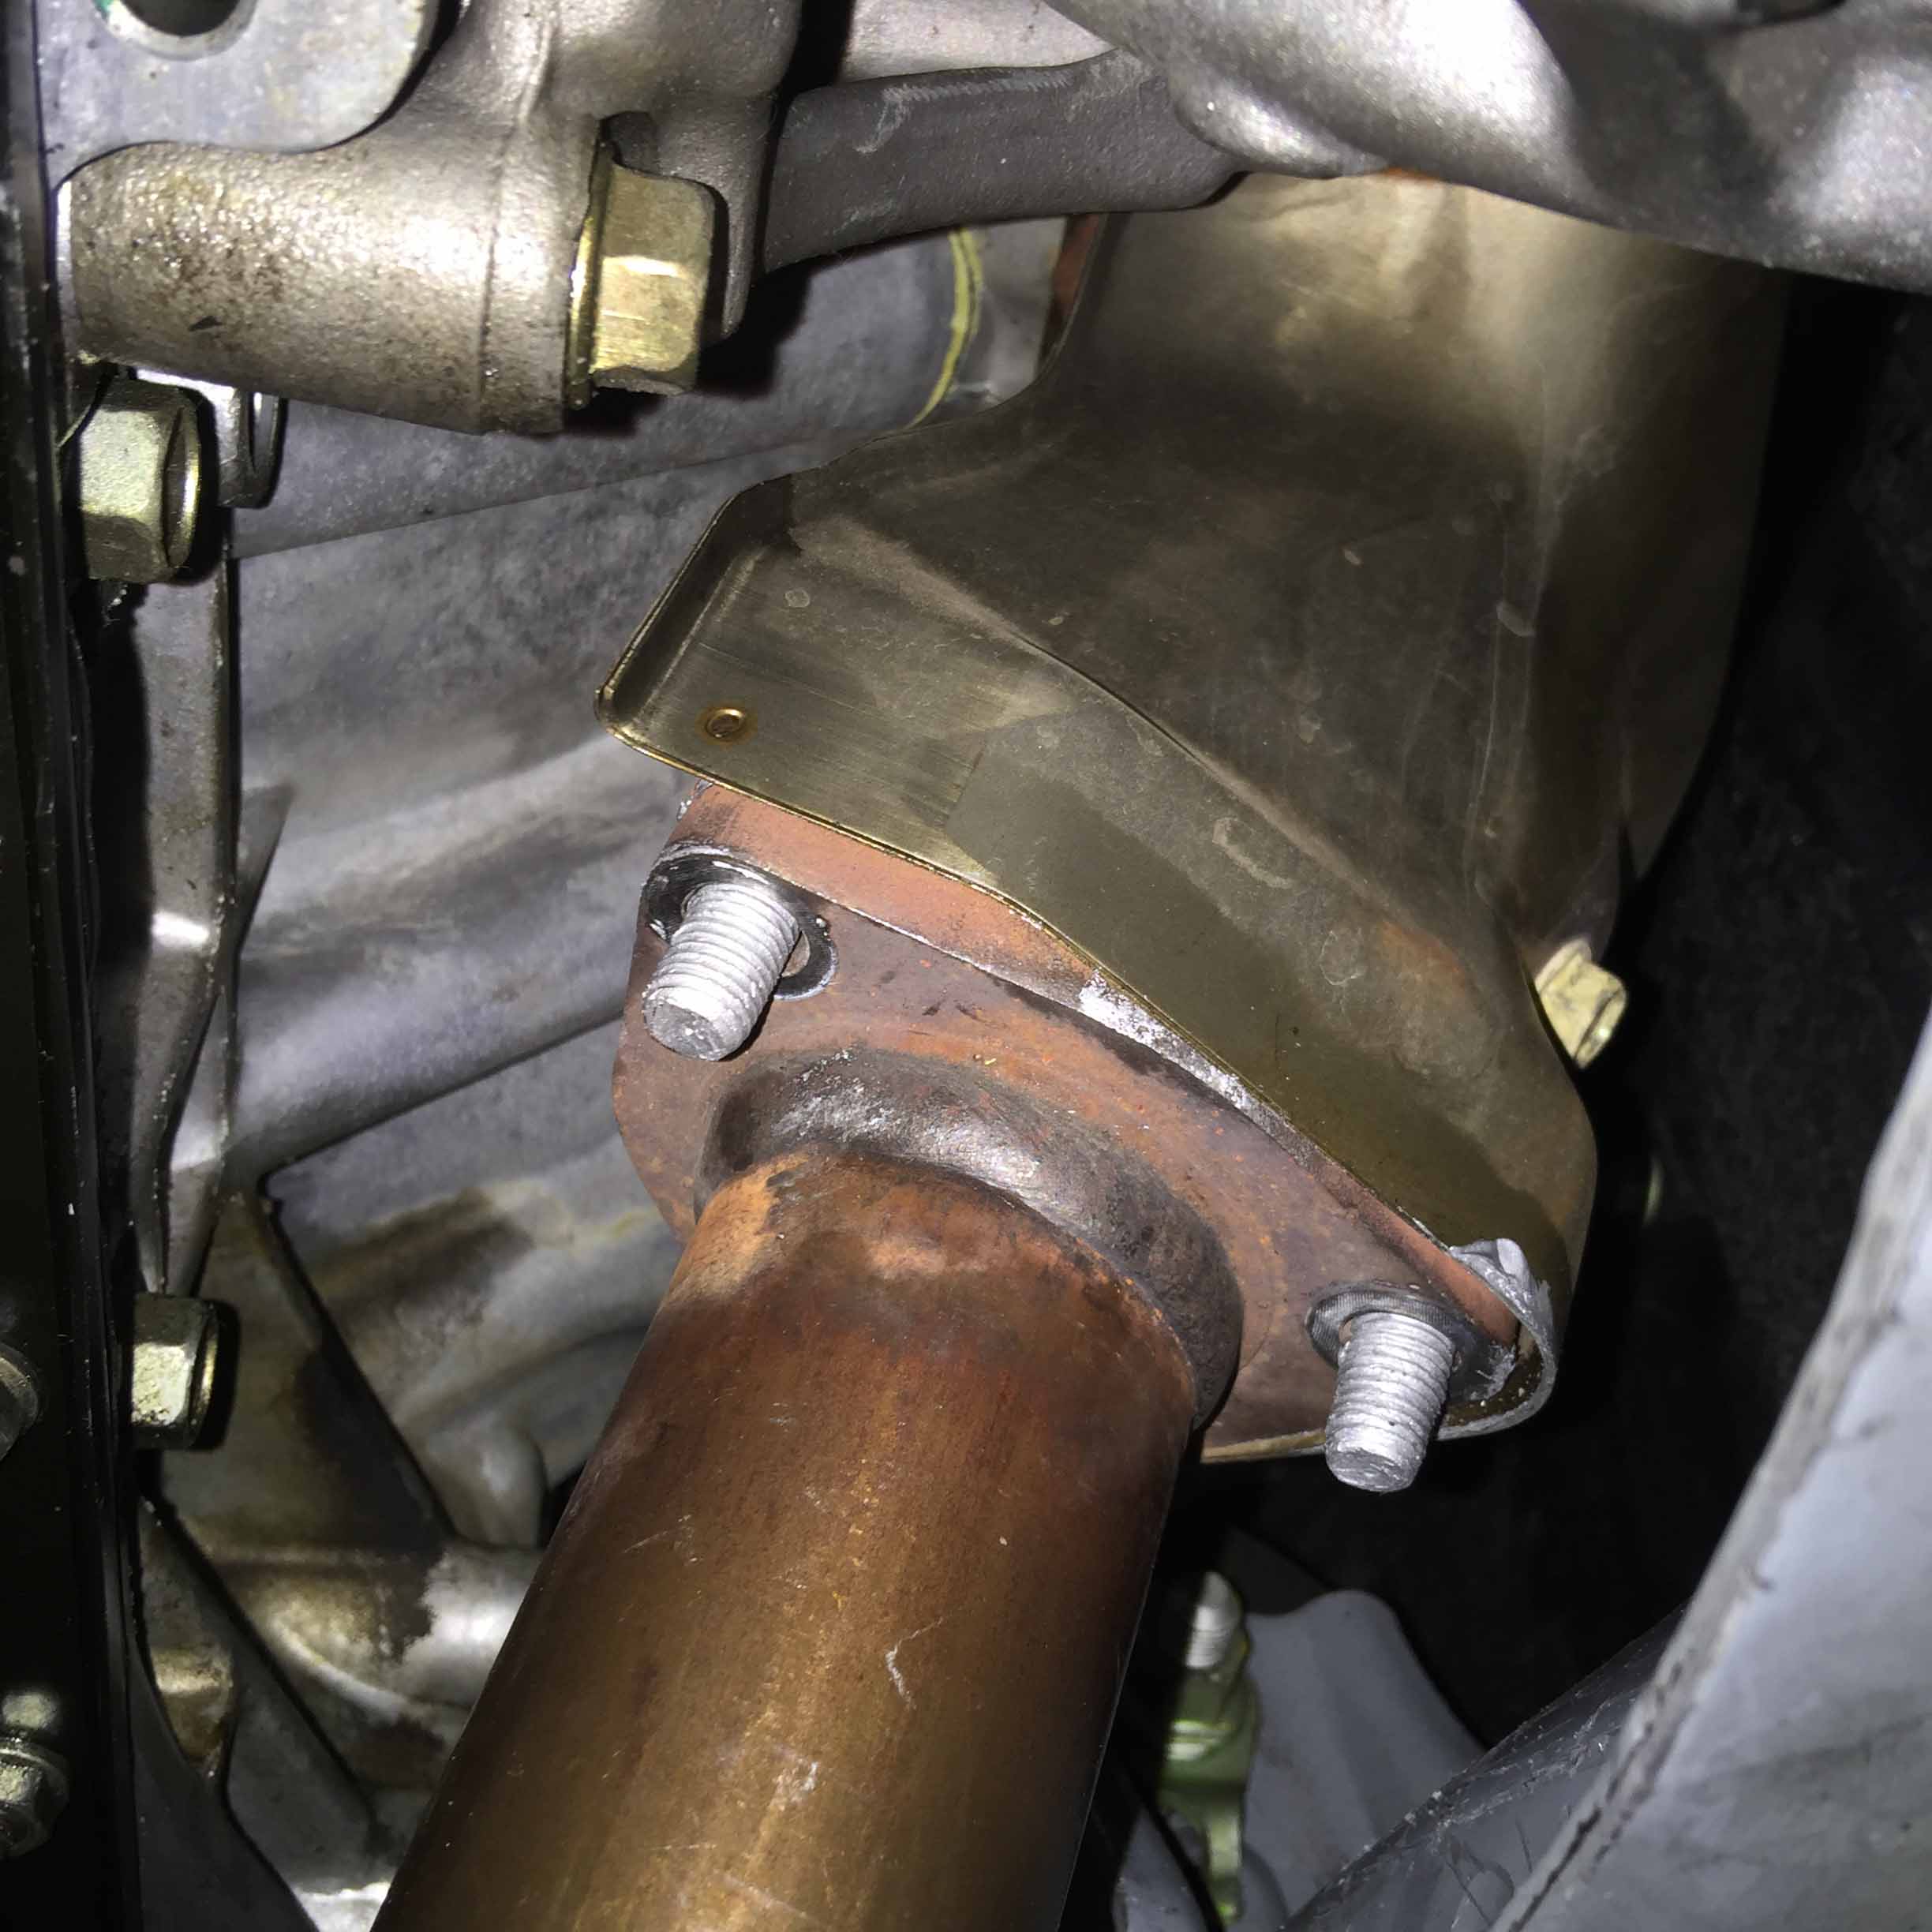
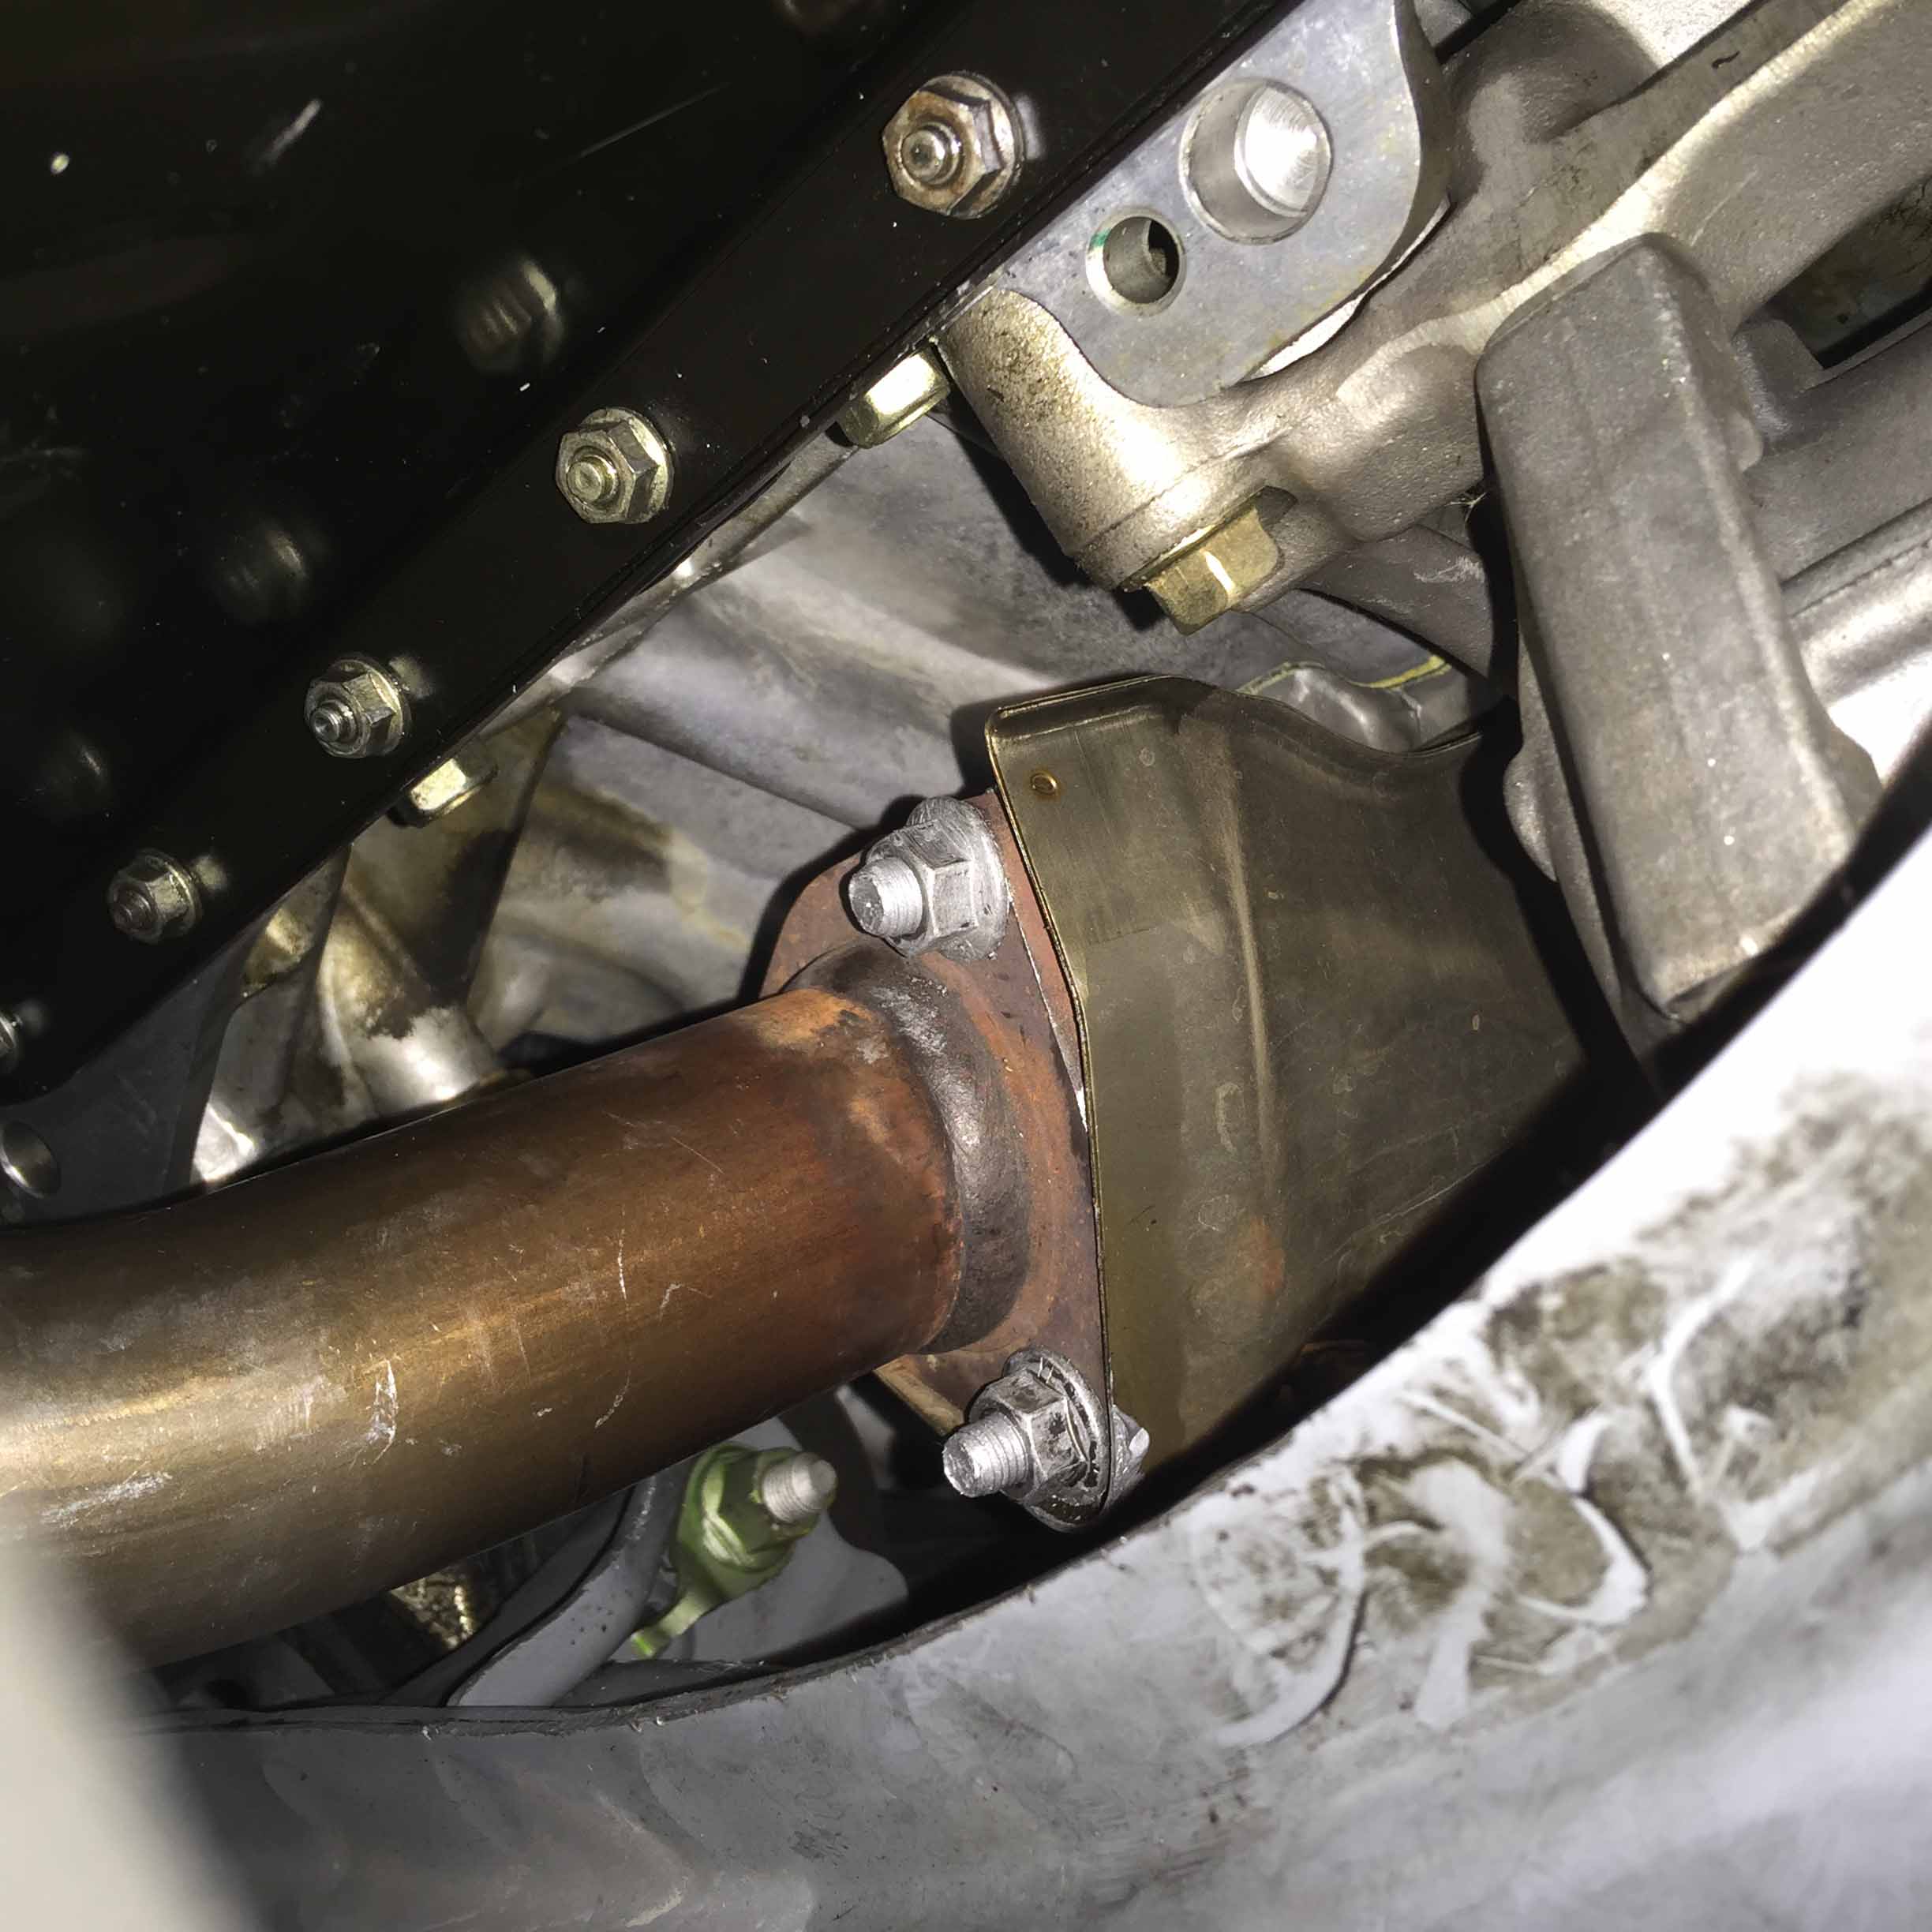
I don't remember if I mentioned this earlier, but when I was removing the nuts holding the A-pipe to the front exhaust header one of them had fused and ruined the thread as I backed it off. Rather than deal with trying to remove the also very stuck stud, I opted to repair the threads with an M10x1.25 die and just replace the factory nuts with aftermarket stainless nuts. Threading the new nut on and feeling it go on perfectly smooth was a great feeling after laying on my back for an hour messing with it.
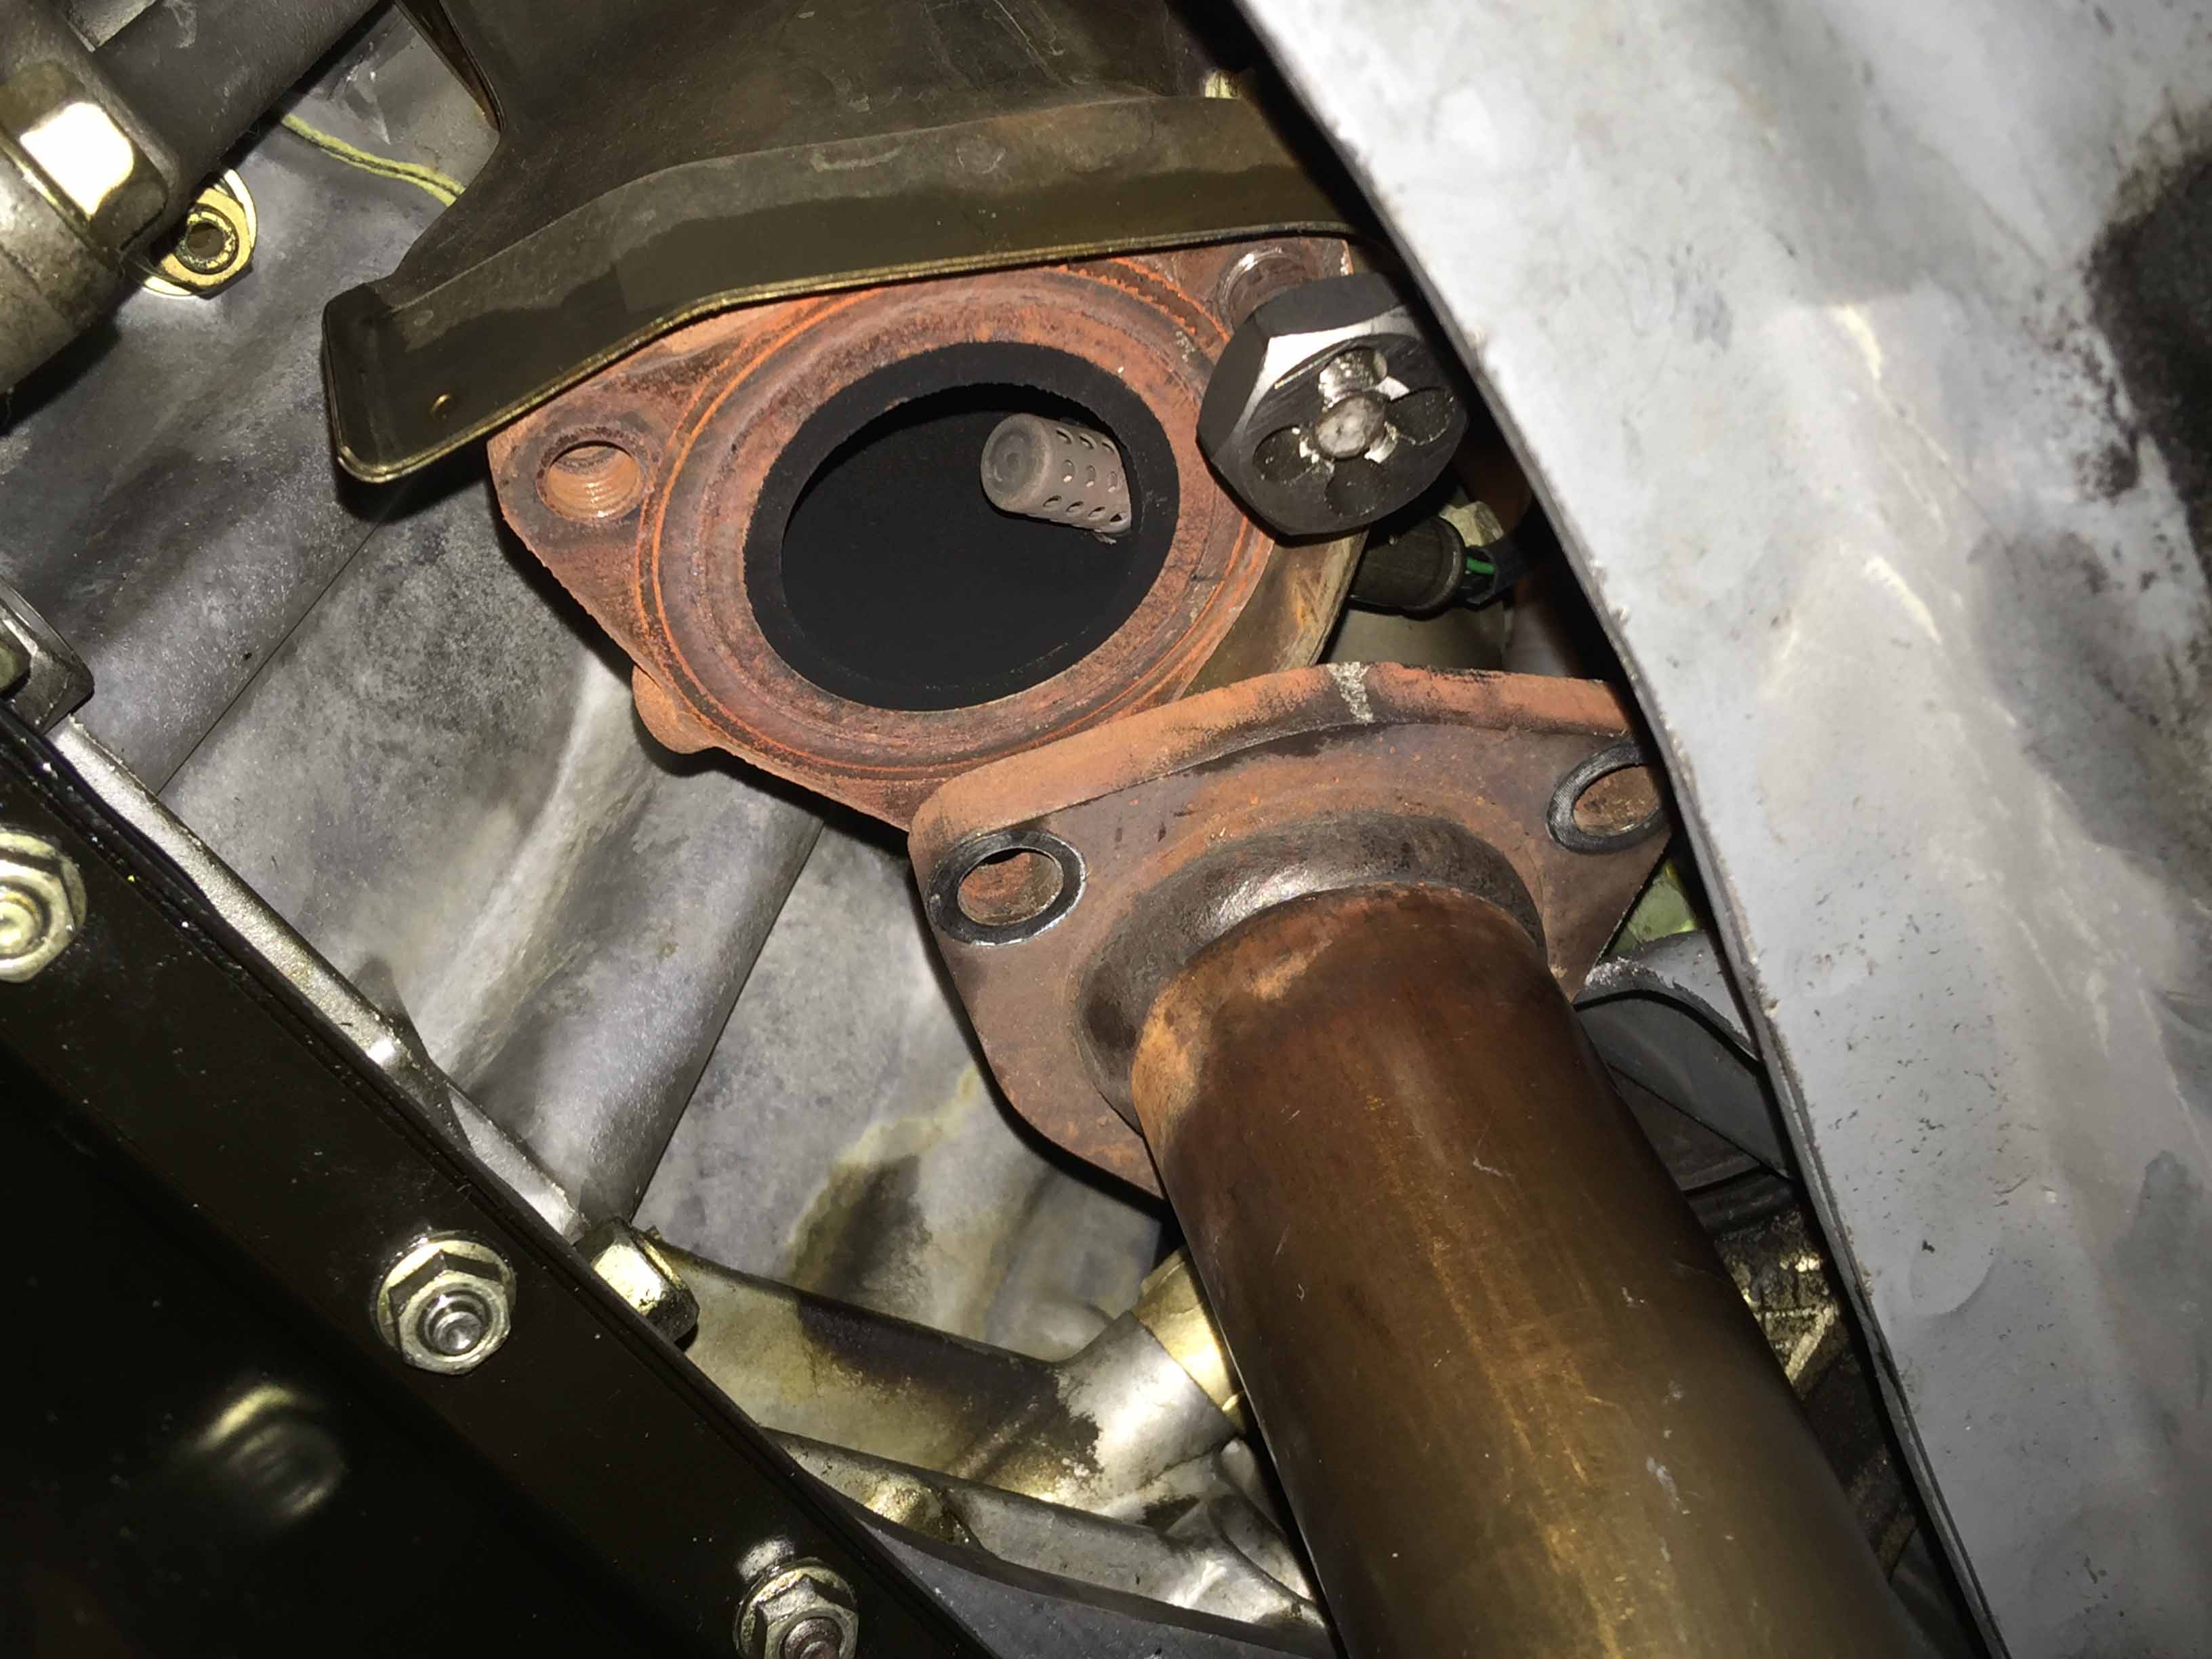
I got lucky and was able to thread the die on perfectly to what was left of the existing studs and it all worked out quite nicely. So then I loaded up the studs with anti-seize compound and put it all back together.
Last edited by MotorMouth93; 08-05-2017 at 09:24 PM.
12-09-2016, 08:38 AM
#32
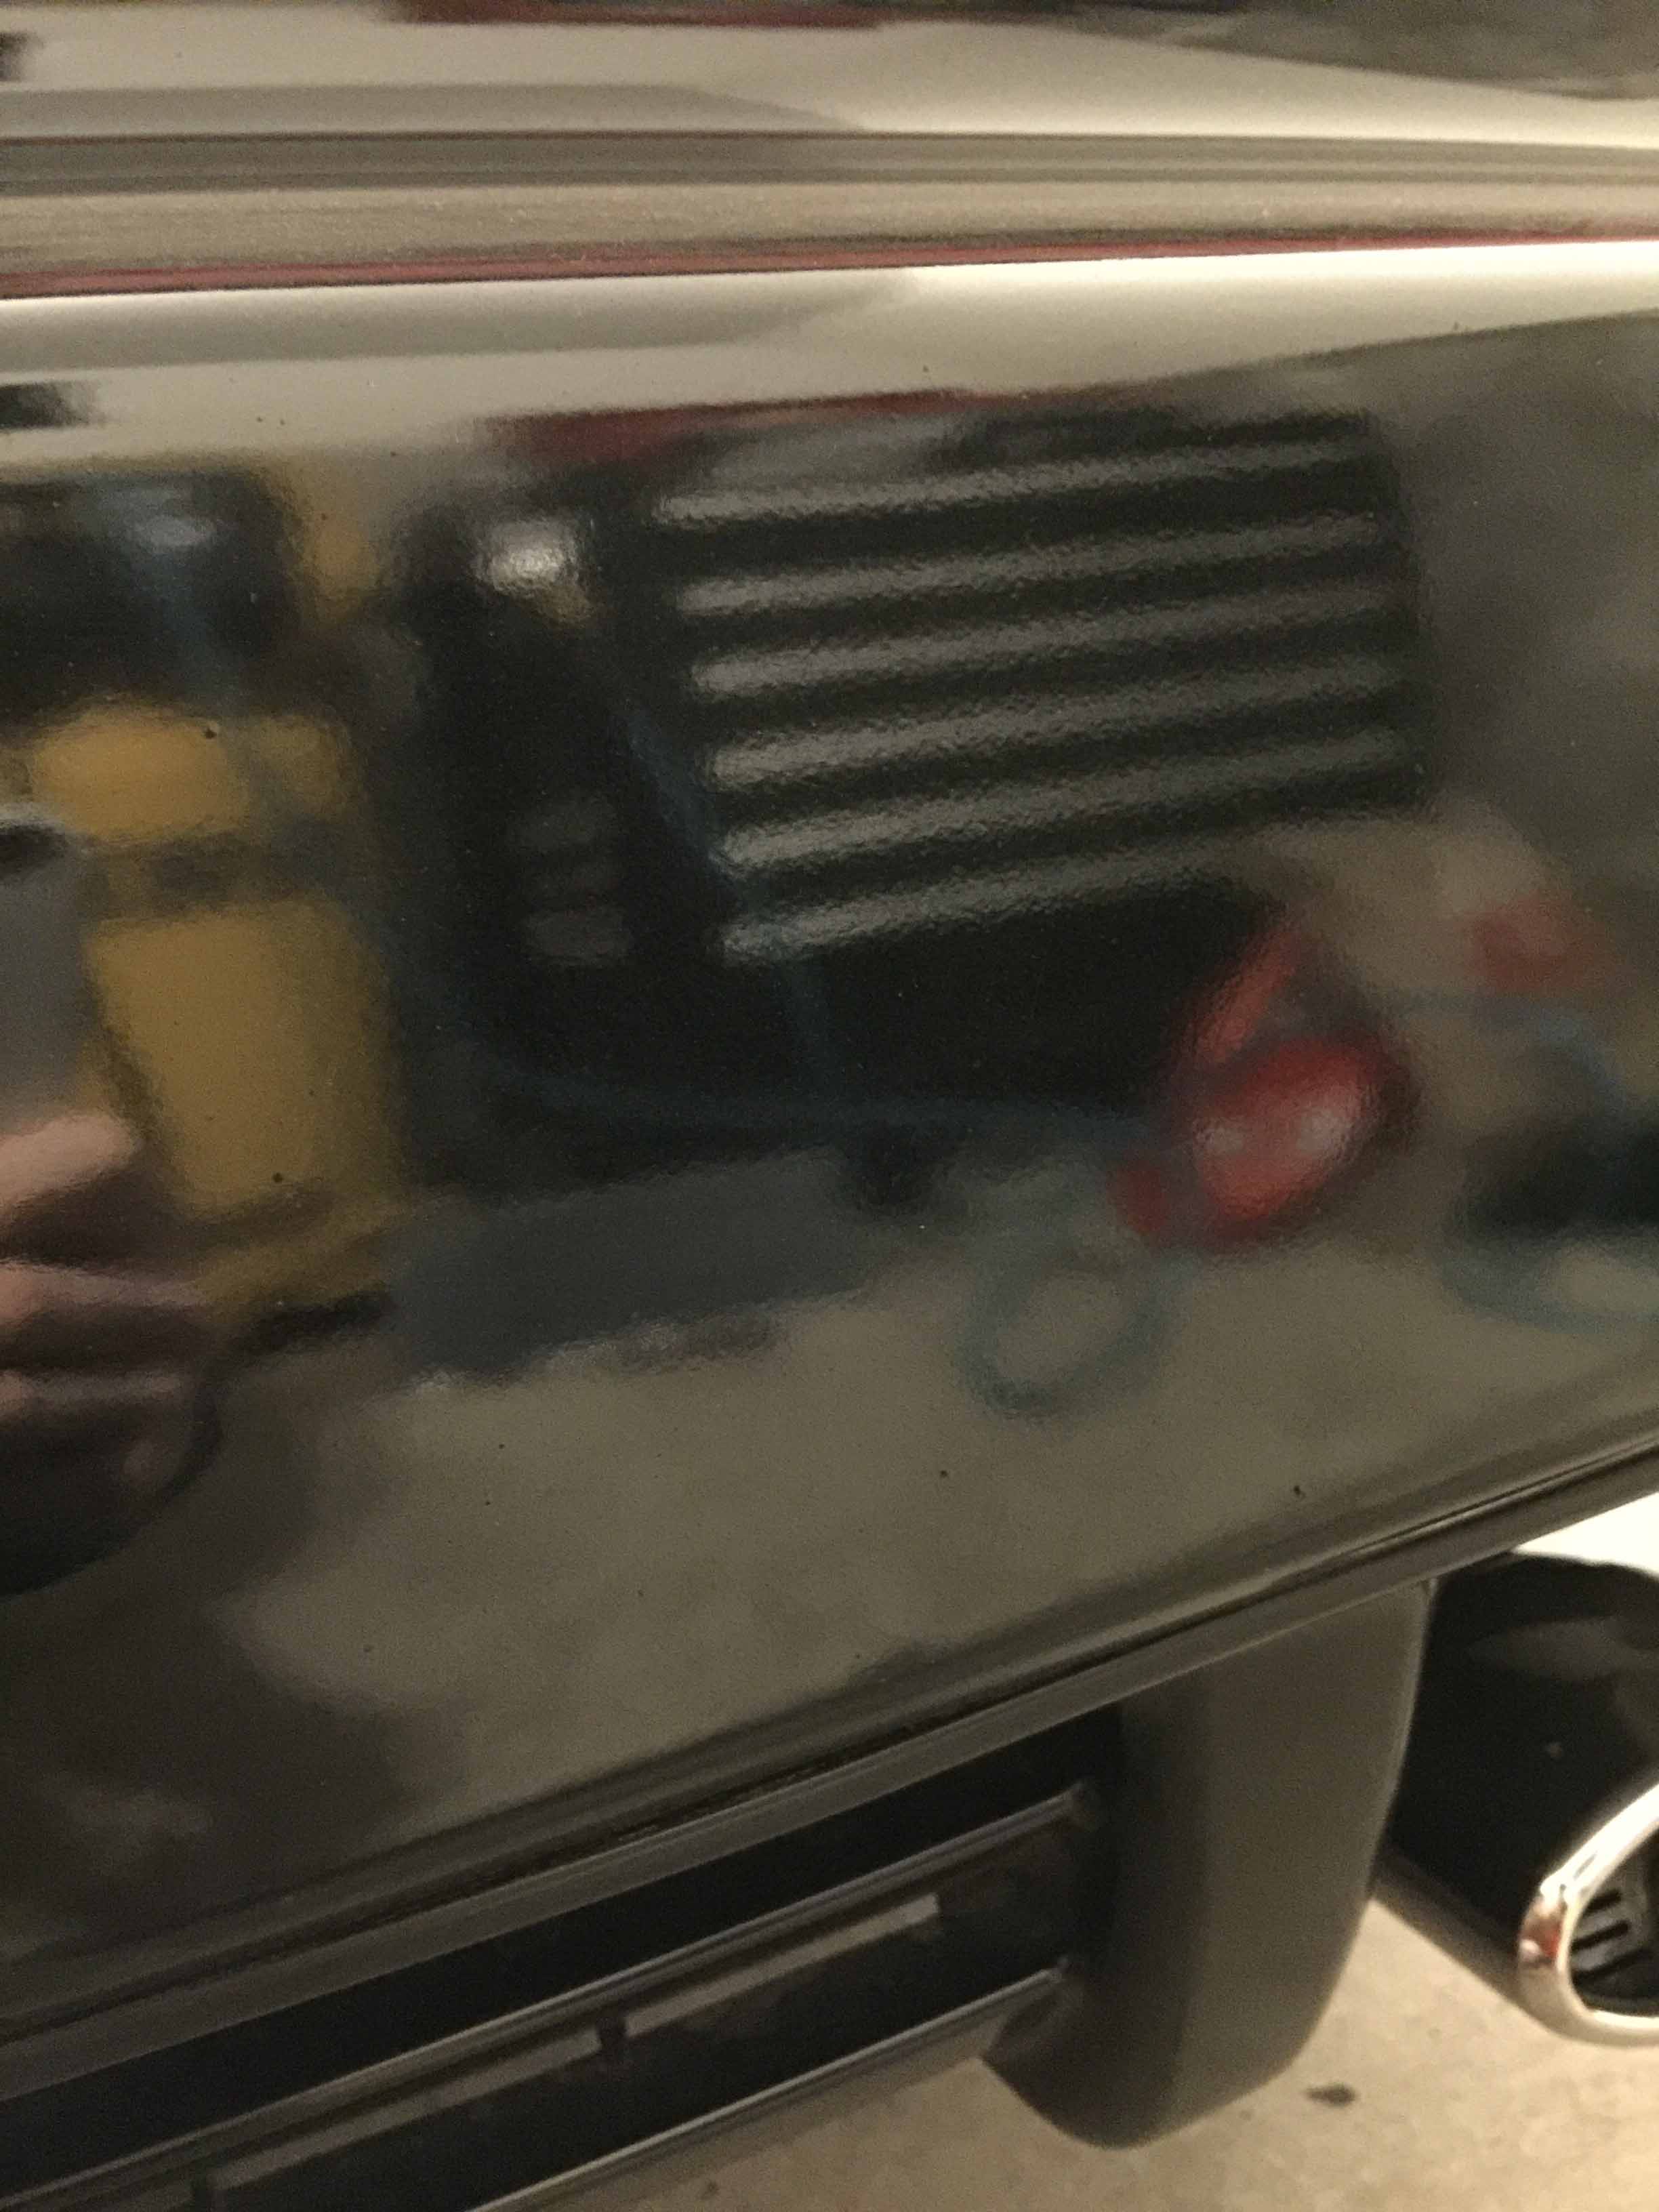
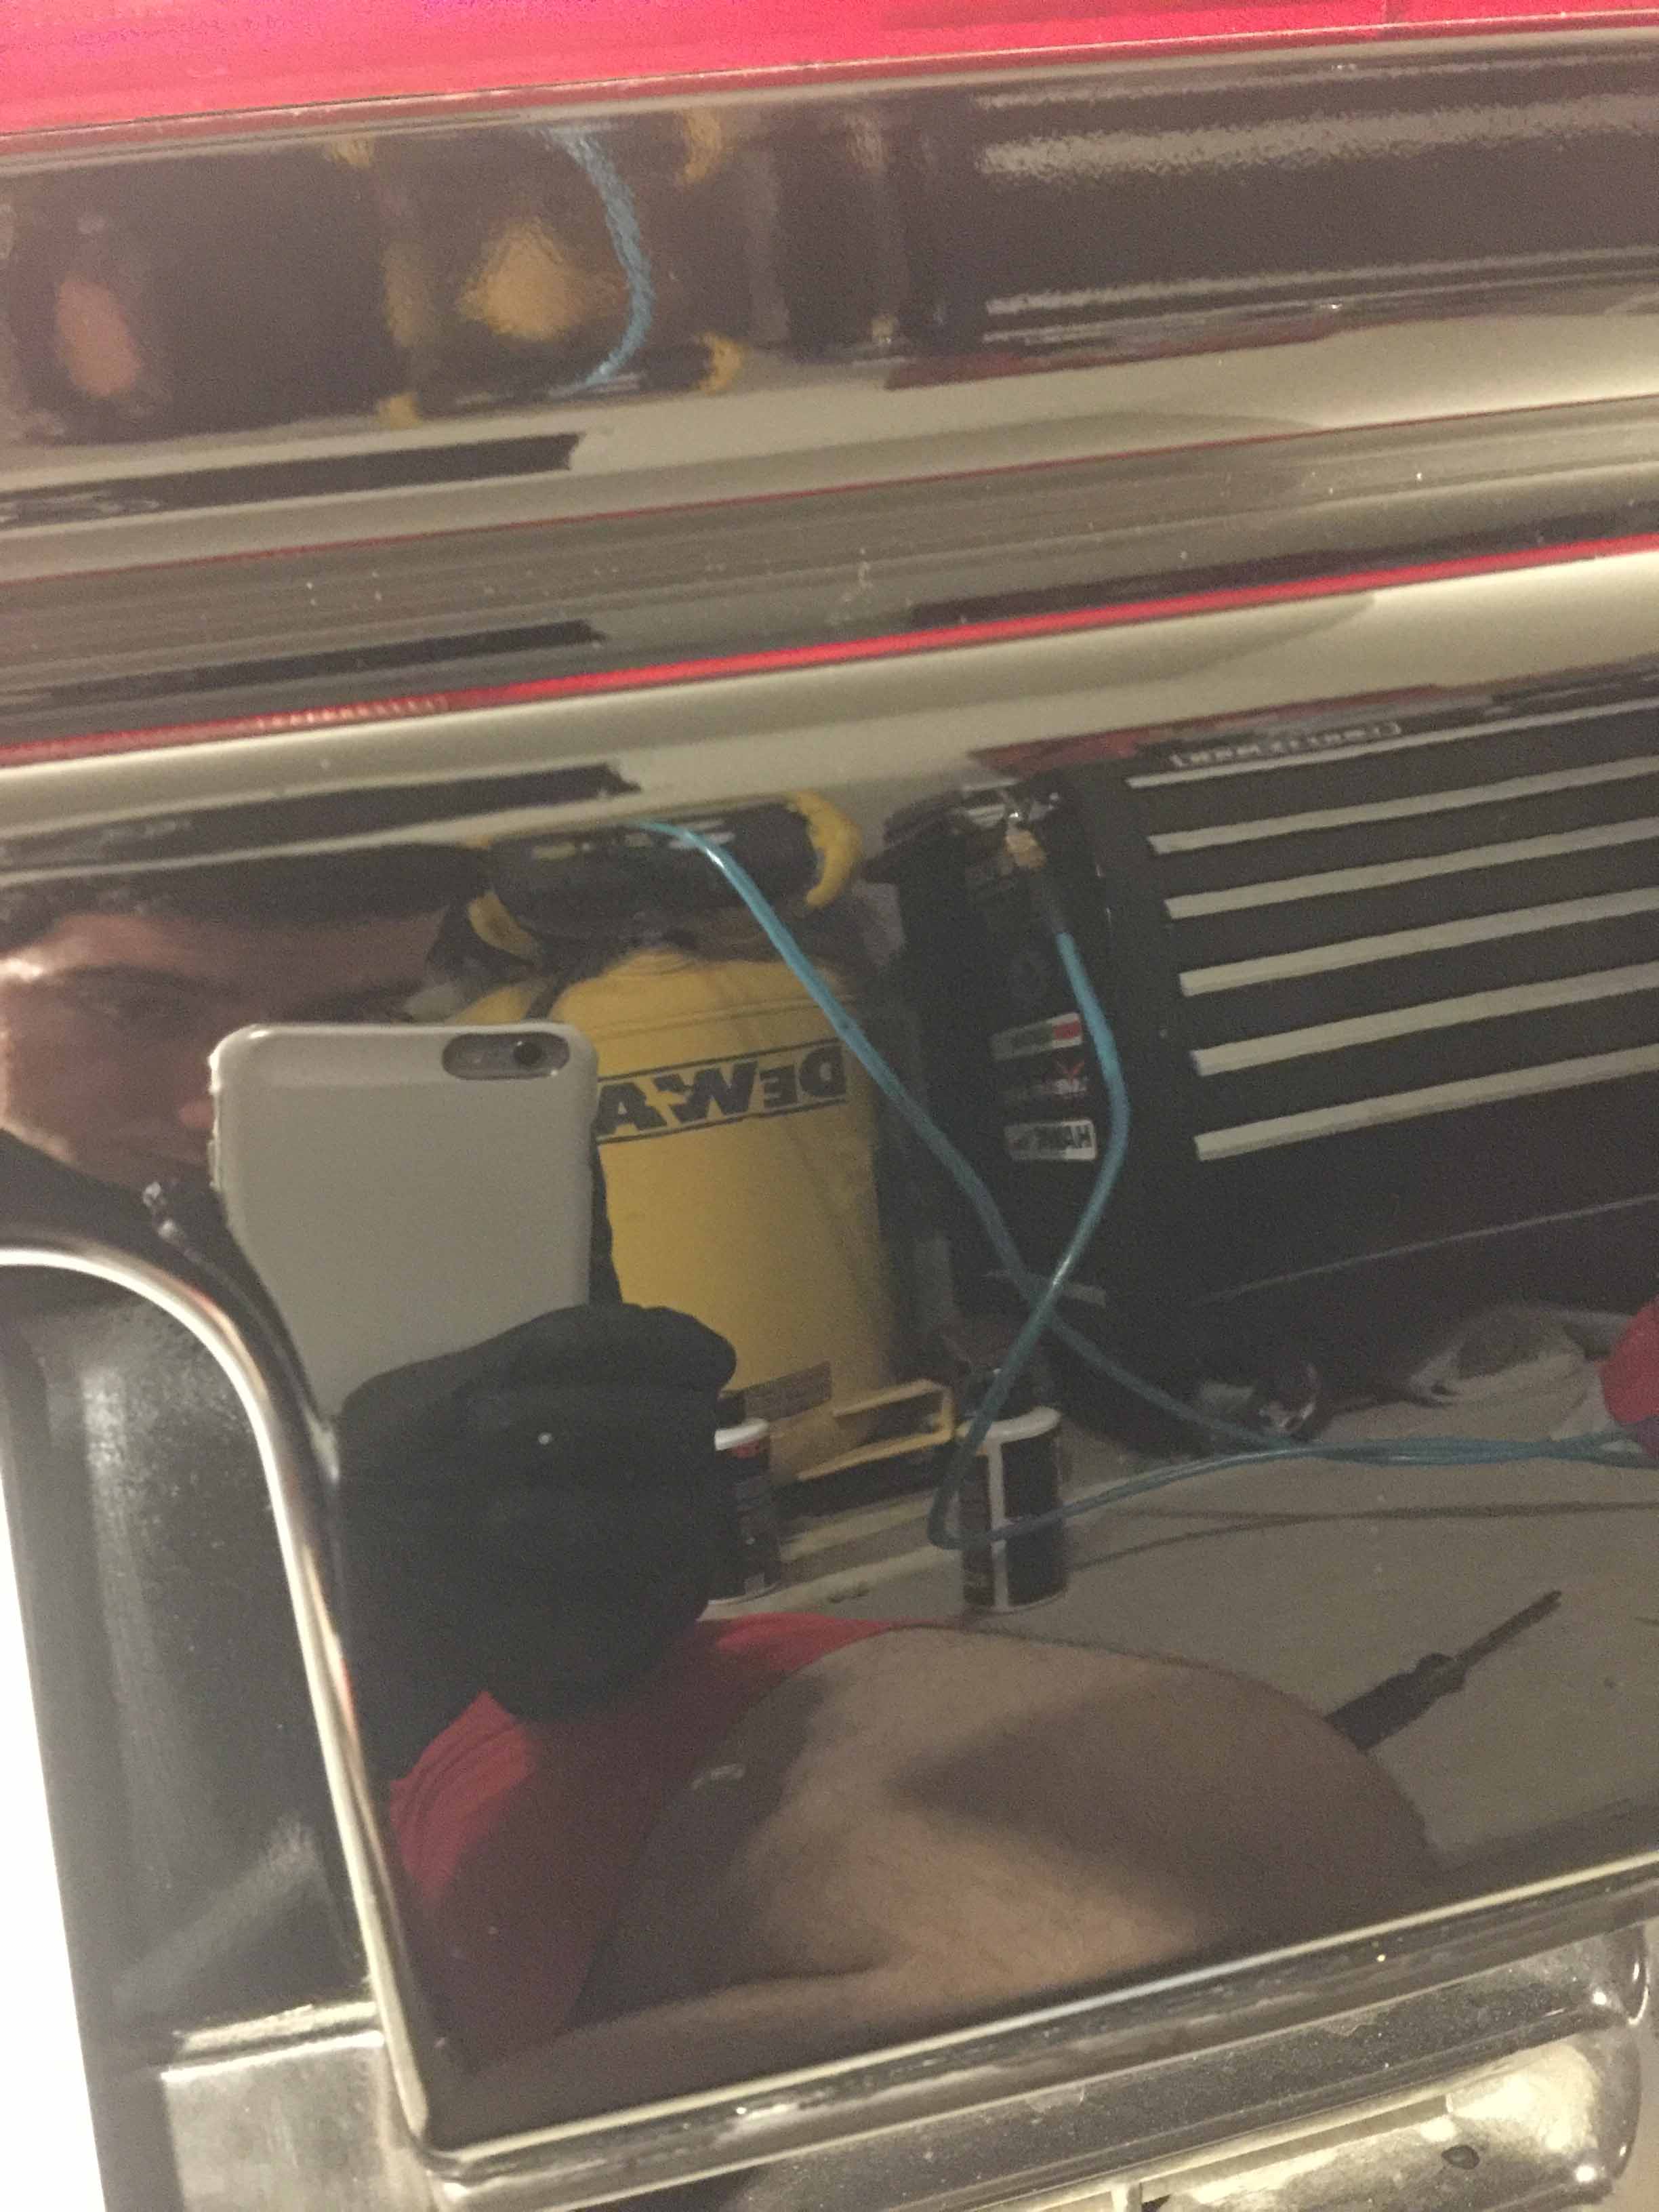
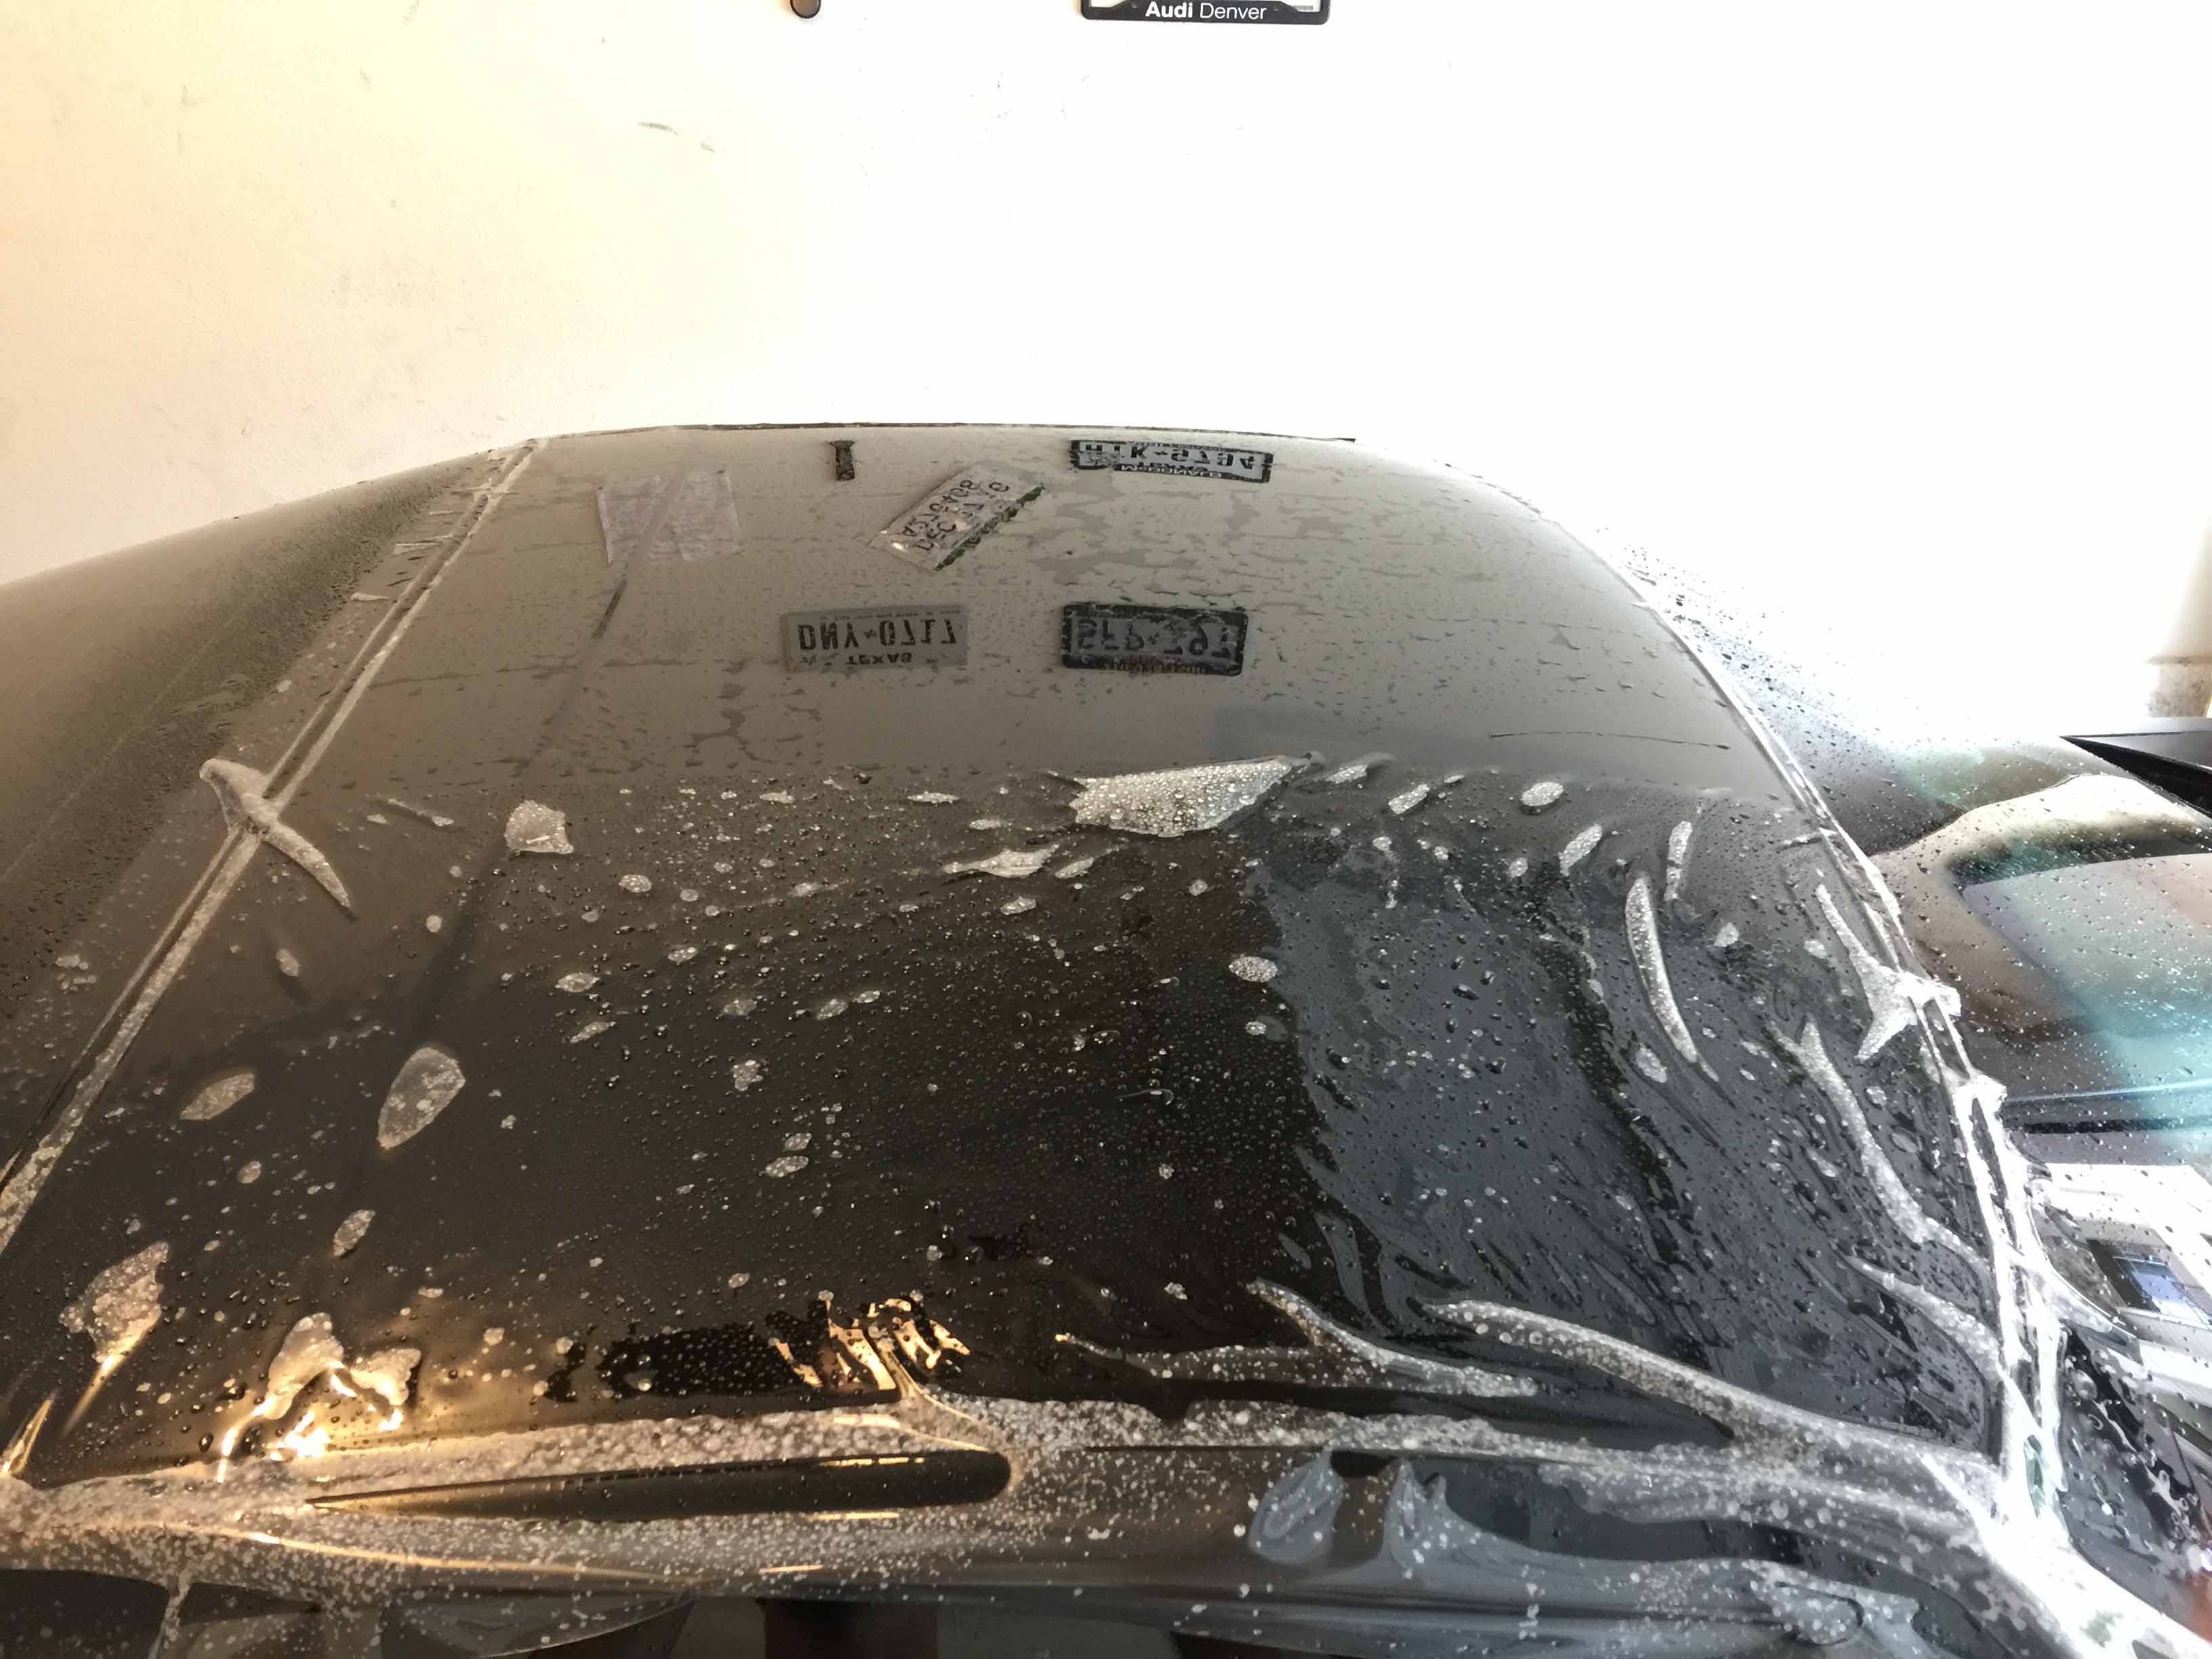
Dunno how much you care about this, but your entire name and home address is showing in the piece of mail on the emblem photo. What I find crazier is your camera picked up the image so well that if I tilt my head and move it around I can see all the stuff that looks like it is blocked by glare.
12-09-2016, 08:52 AM
#33
Dunno how much you care about this, but your entire name and home address is showing in the piece of mail on the emblem photo. What I find crazier is your camera picked up the image so well that if I tilt my head and move it around I can see all the stuff that looks like it is blocked by glare.
12-13-2016, 06:32 AM
#34
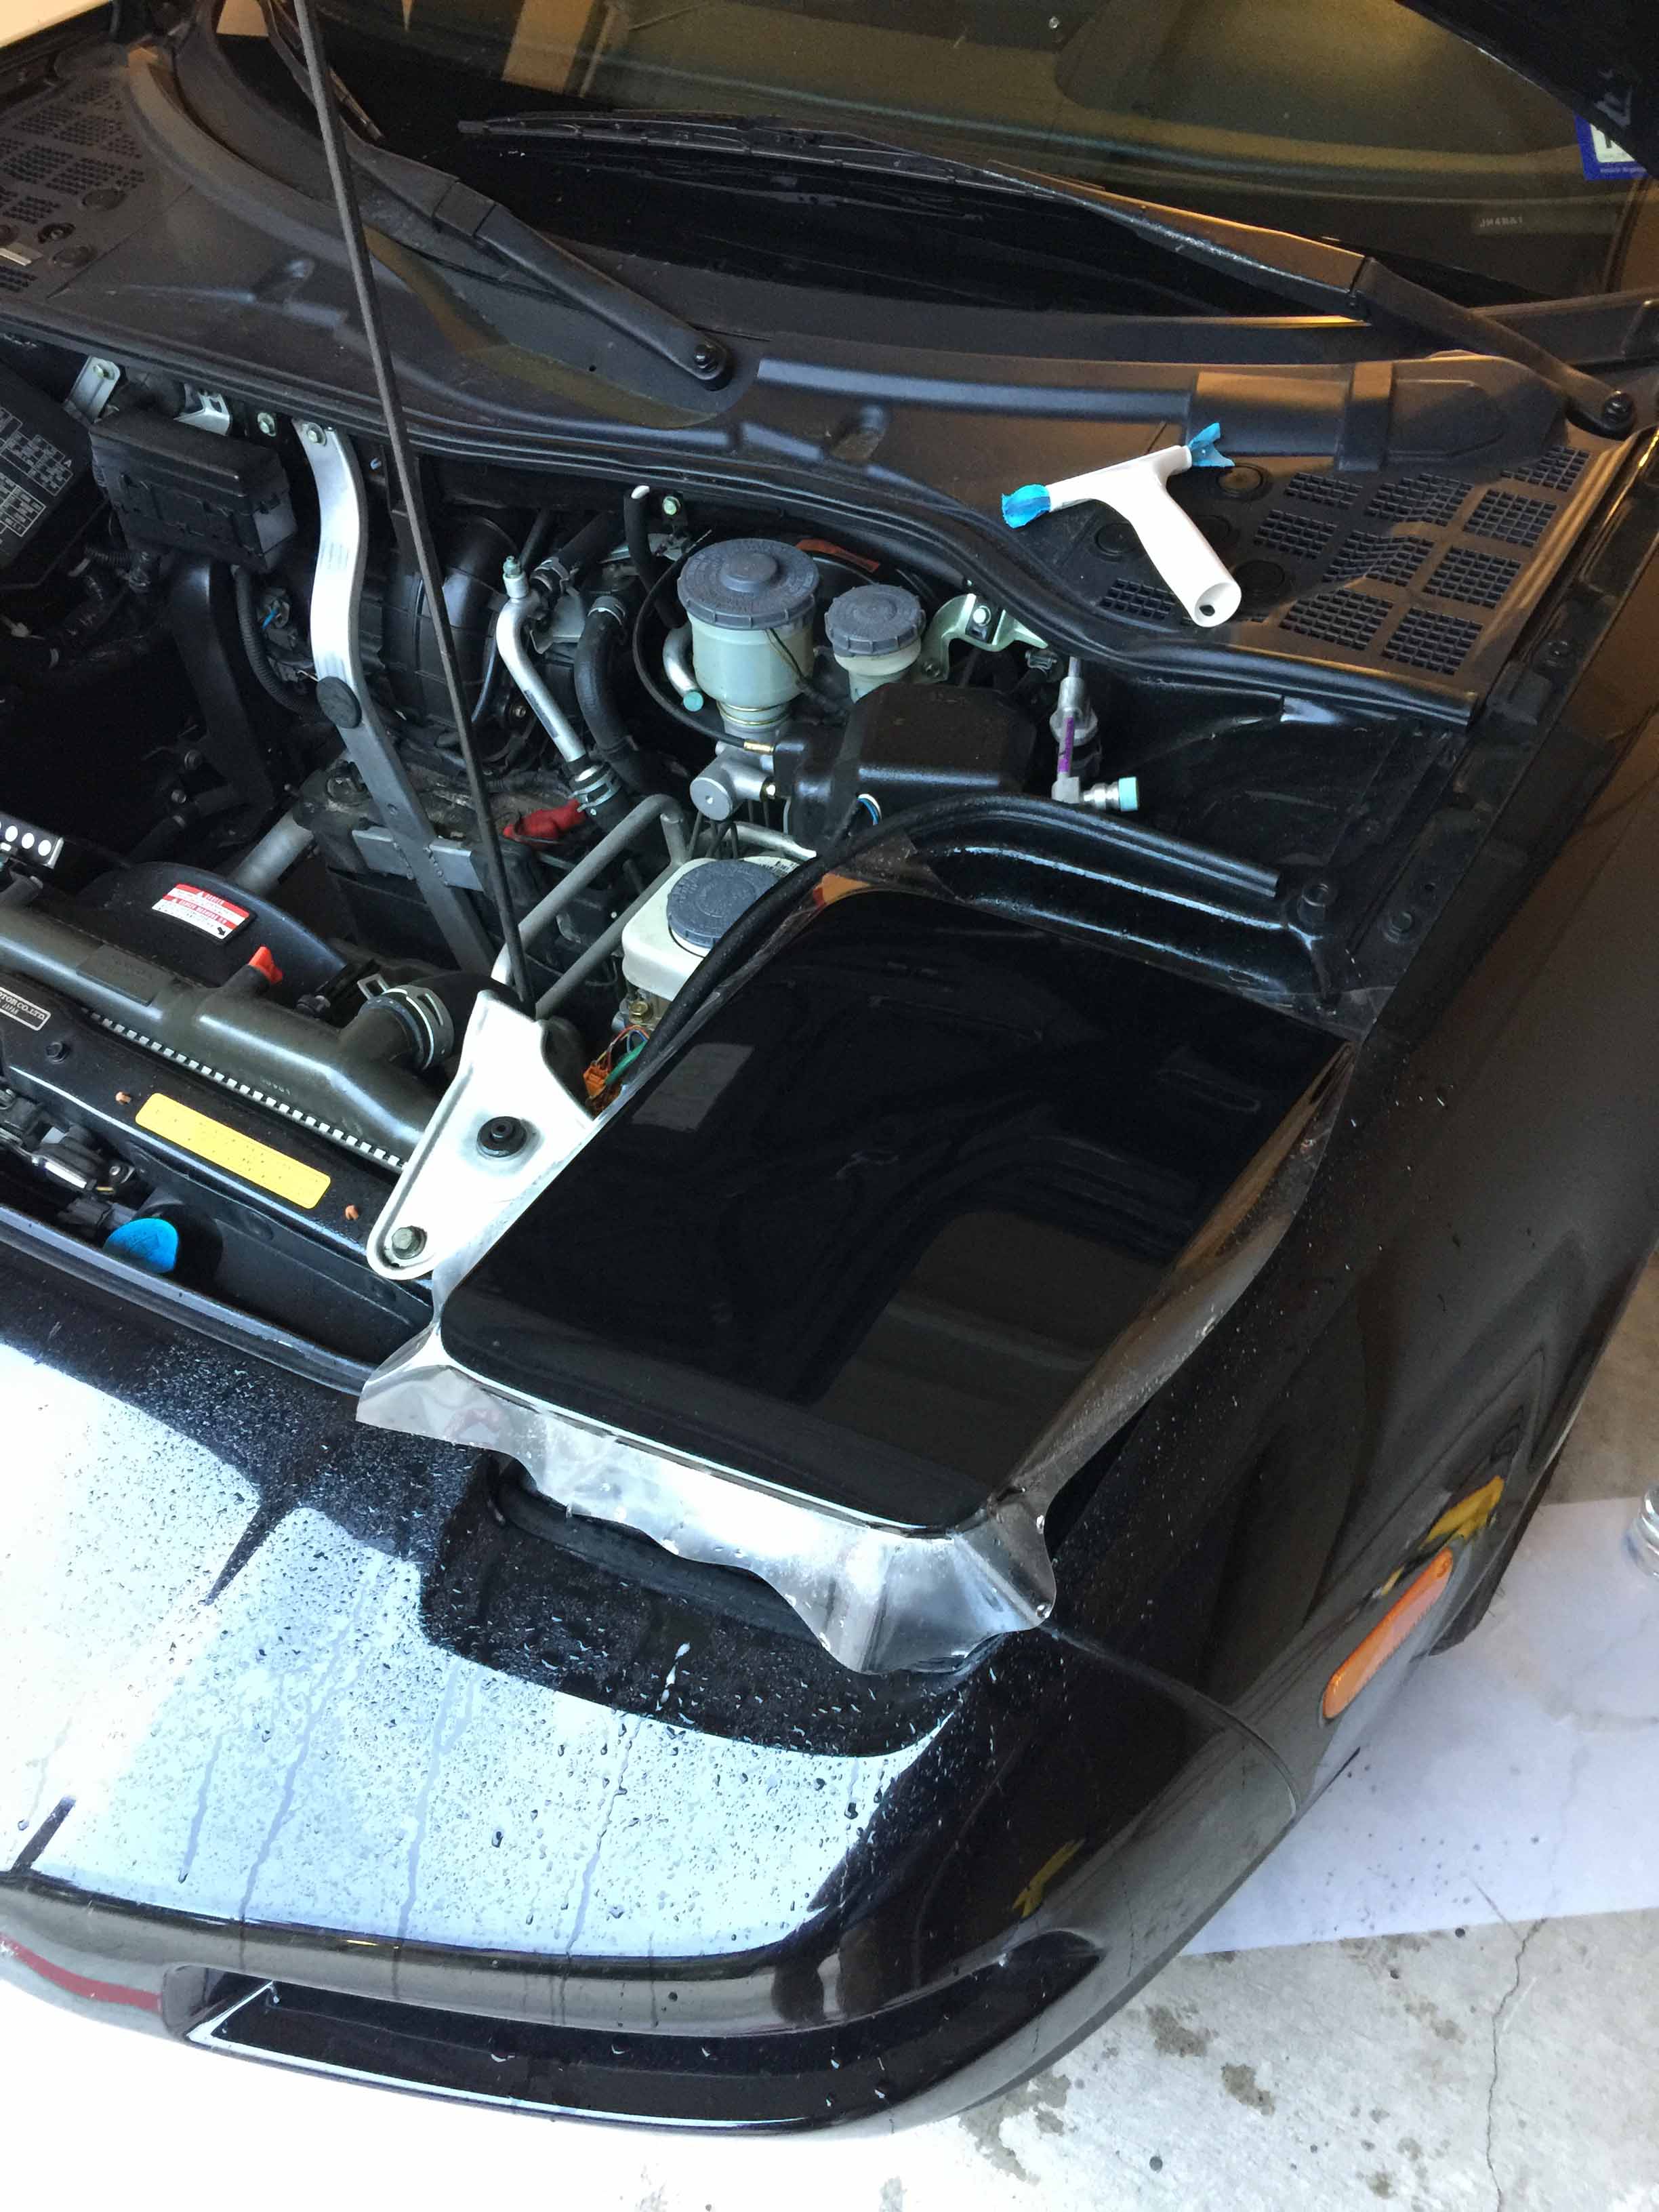
Rather minor update. The car is all back together now and is driving great. No leaks so far, but I didn't tighten one of the accessory belts enough so it squeaks a bit on startup, I'll address that this weekend.
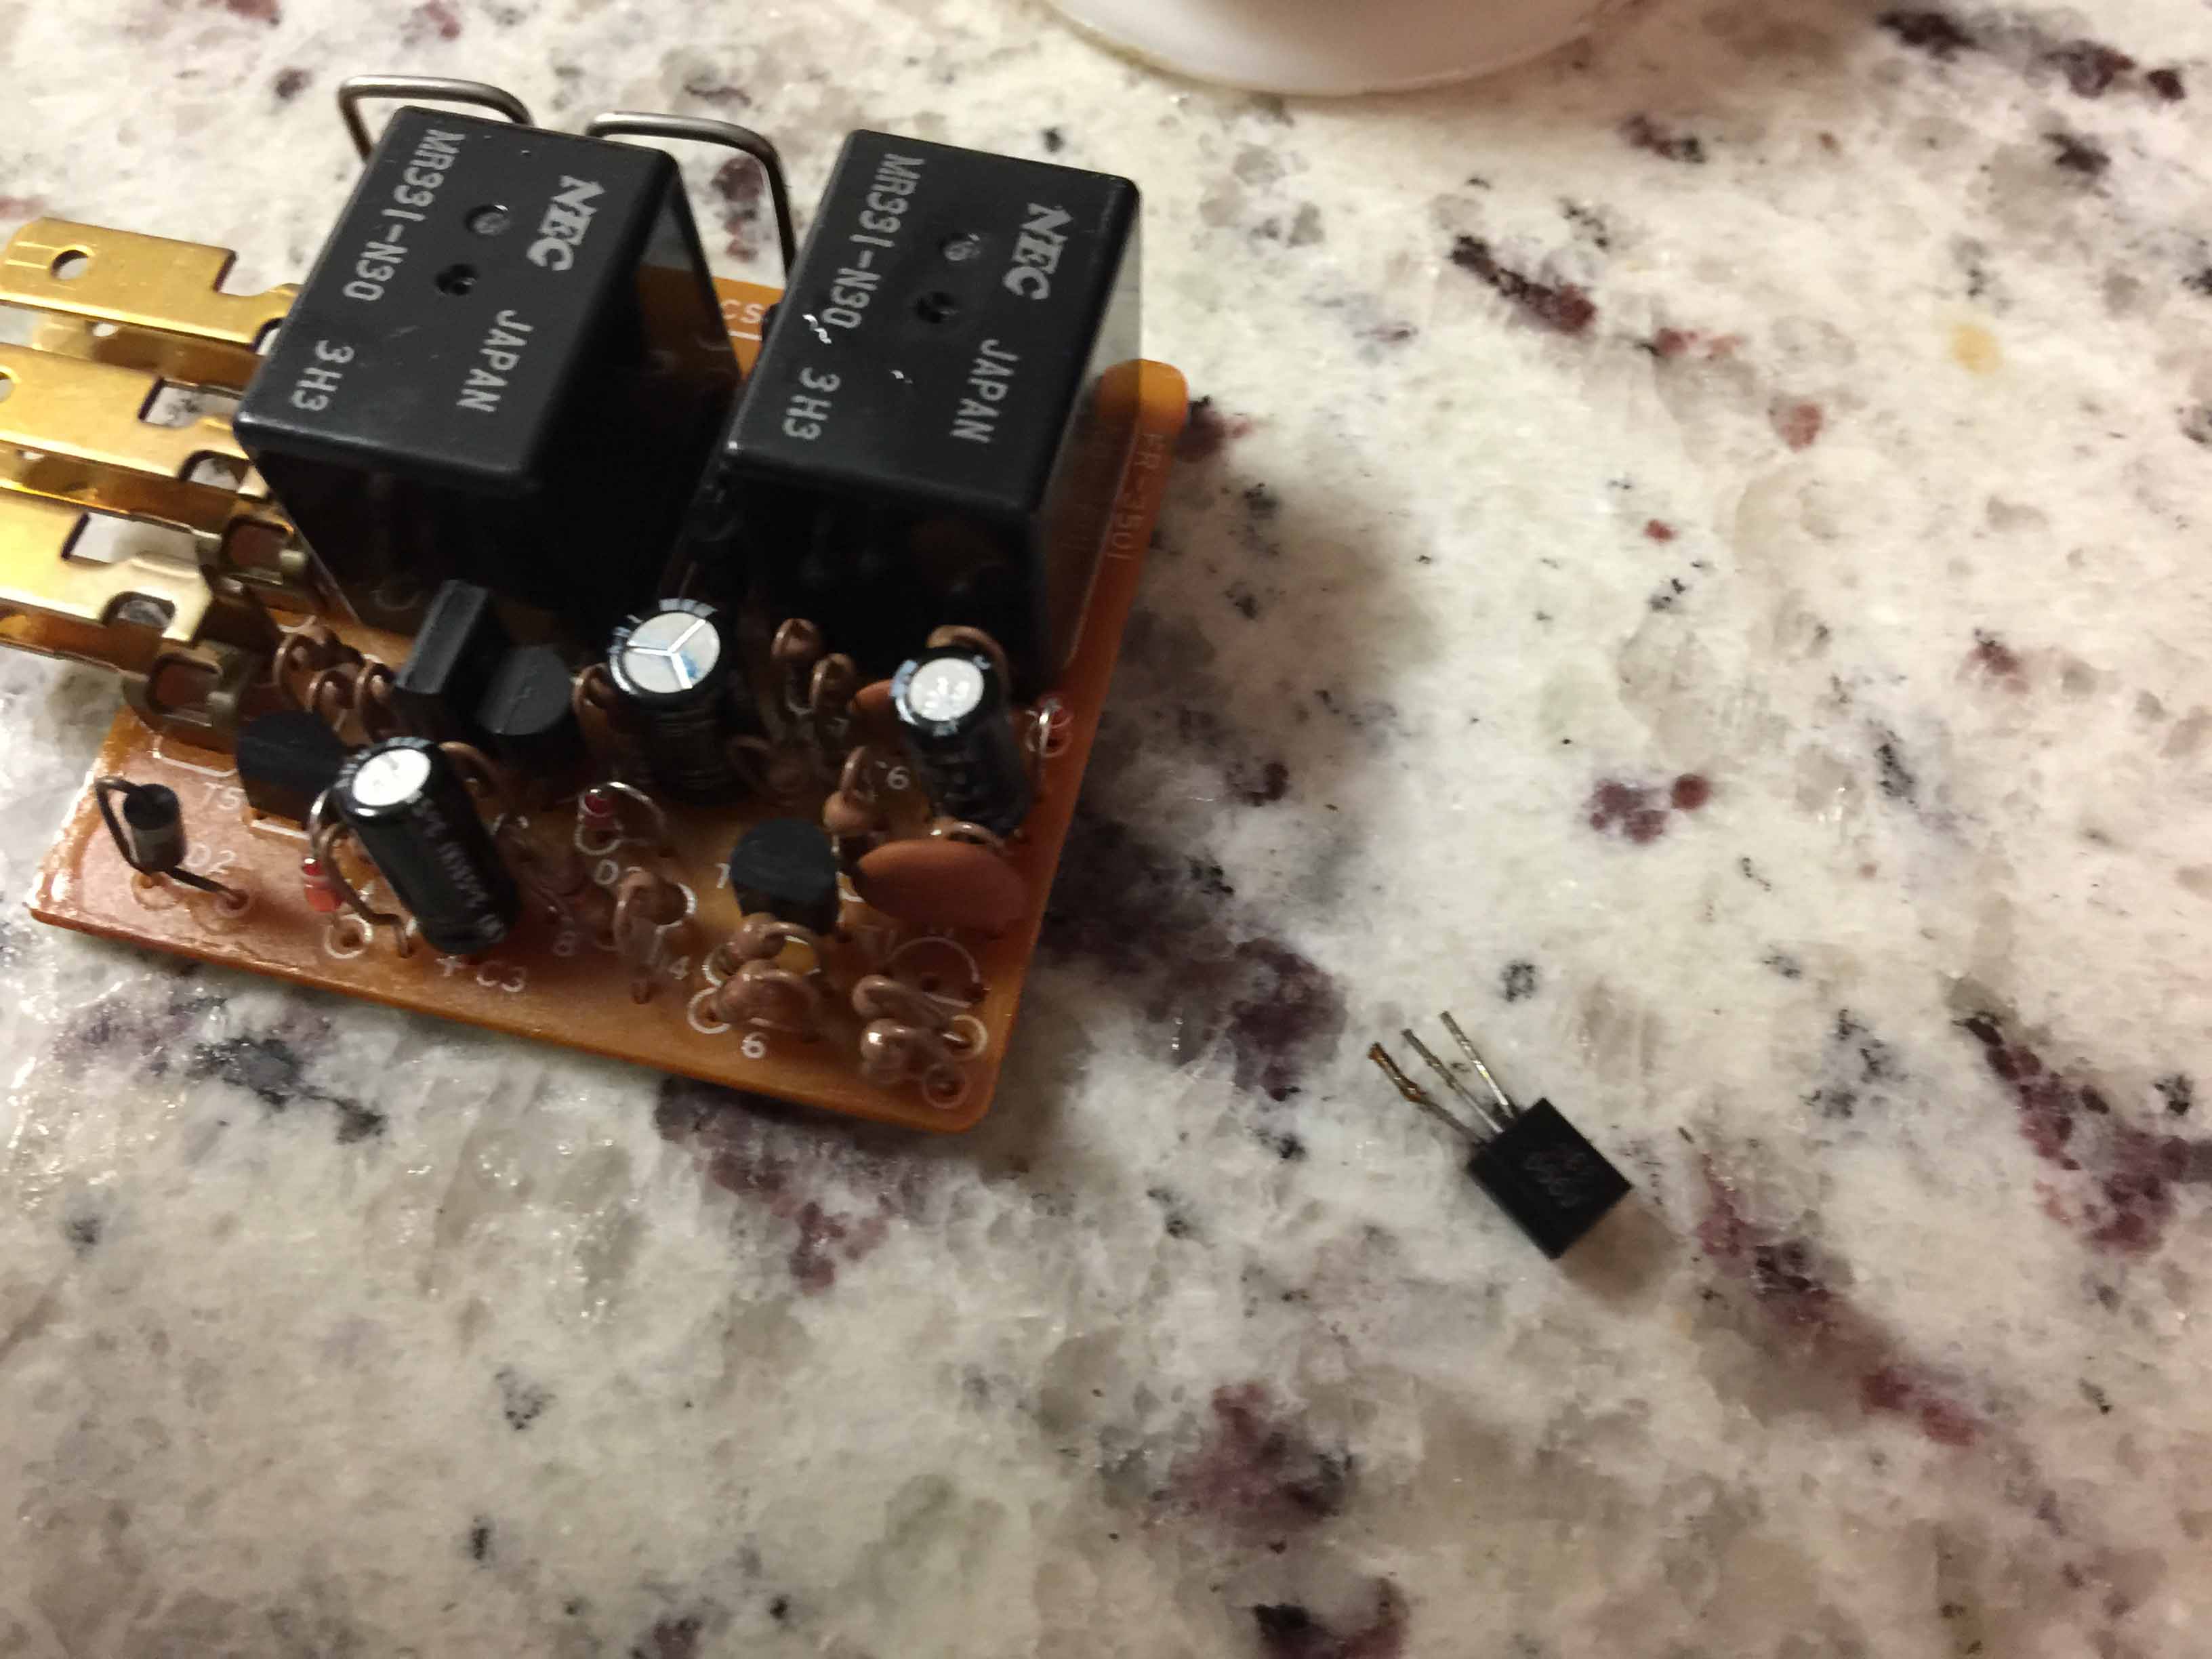
Since installing LED bulbs in all the external fixtures the turn signals have been hyperflashing due to the much lower current draw of the LEDs. And of course, the flasher relay that AutoZone's website listed as compatible was most definitely not compatible, so I went ahead and modified the OEM flasher according to WB9RKNs post here. It was very straightforward, removing the transistor took far less time that getting the relay out of the car to begin with and it seems to work perfectly!
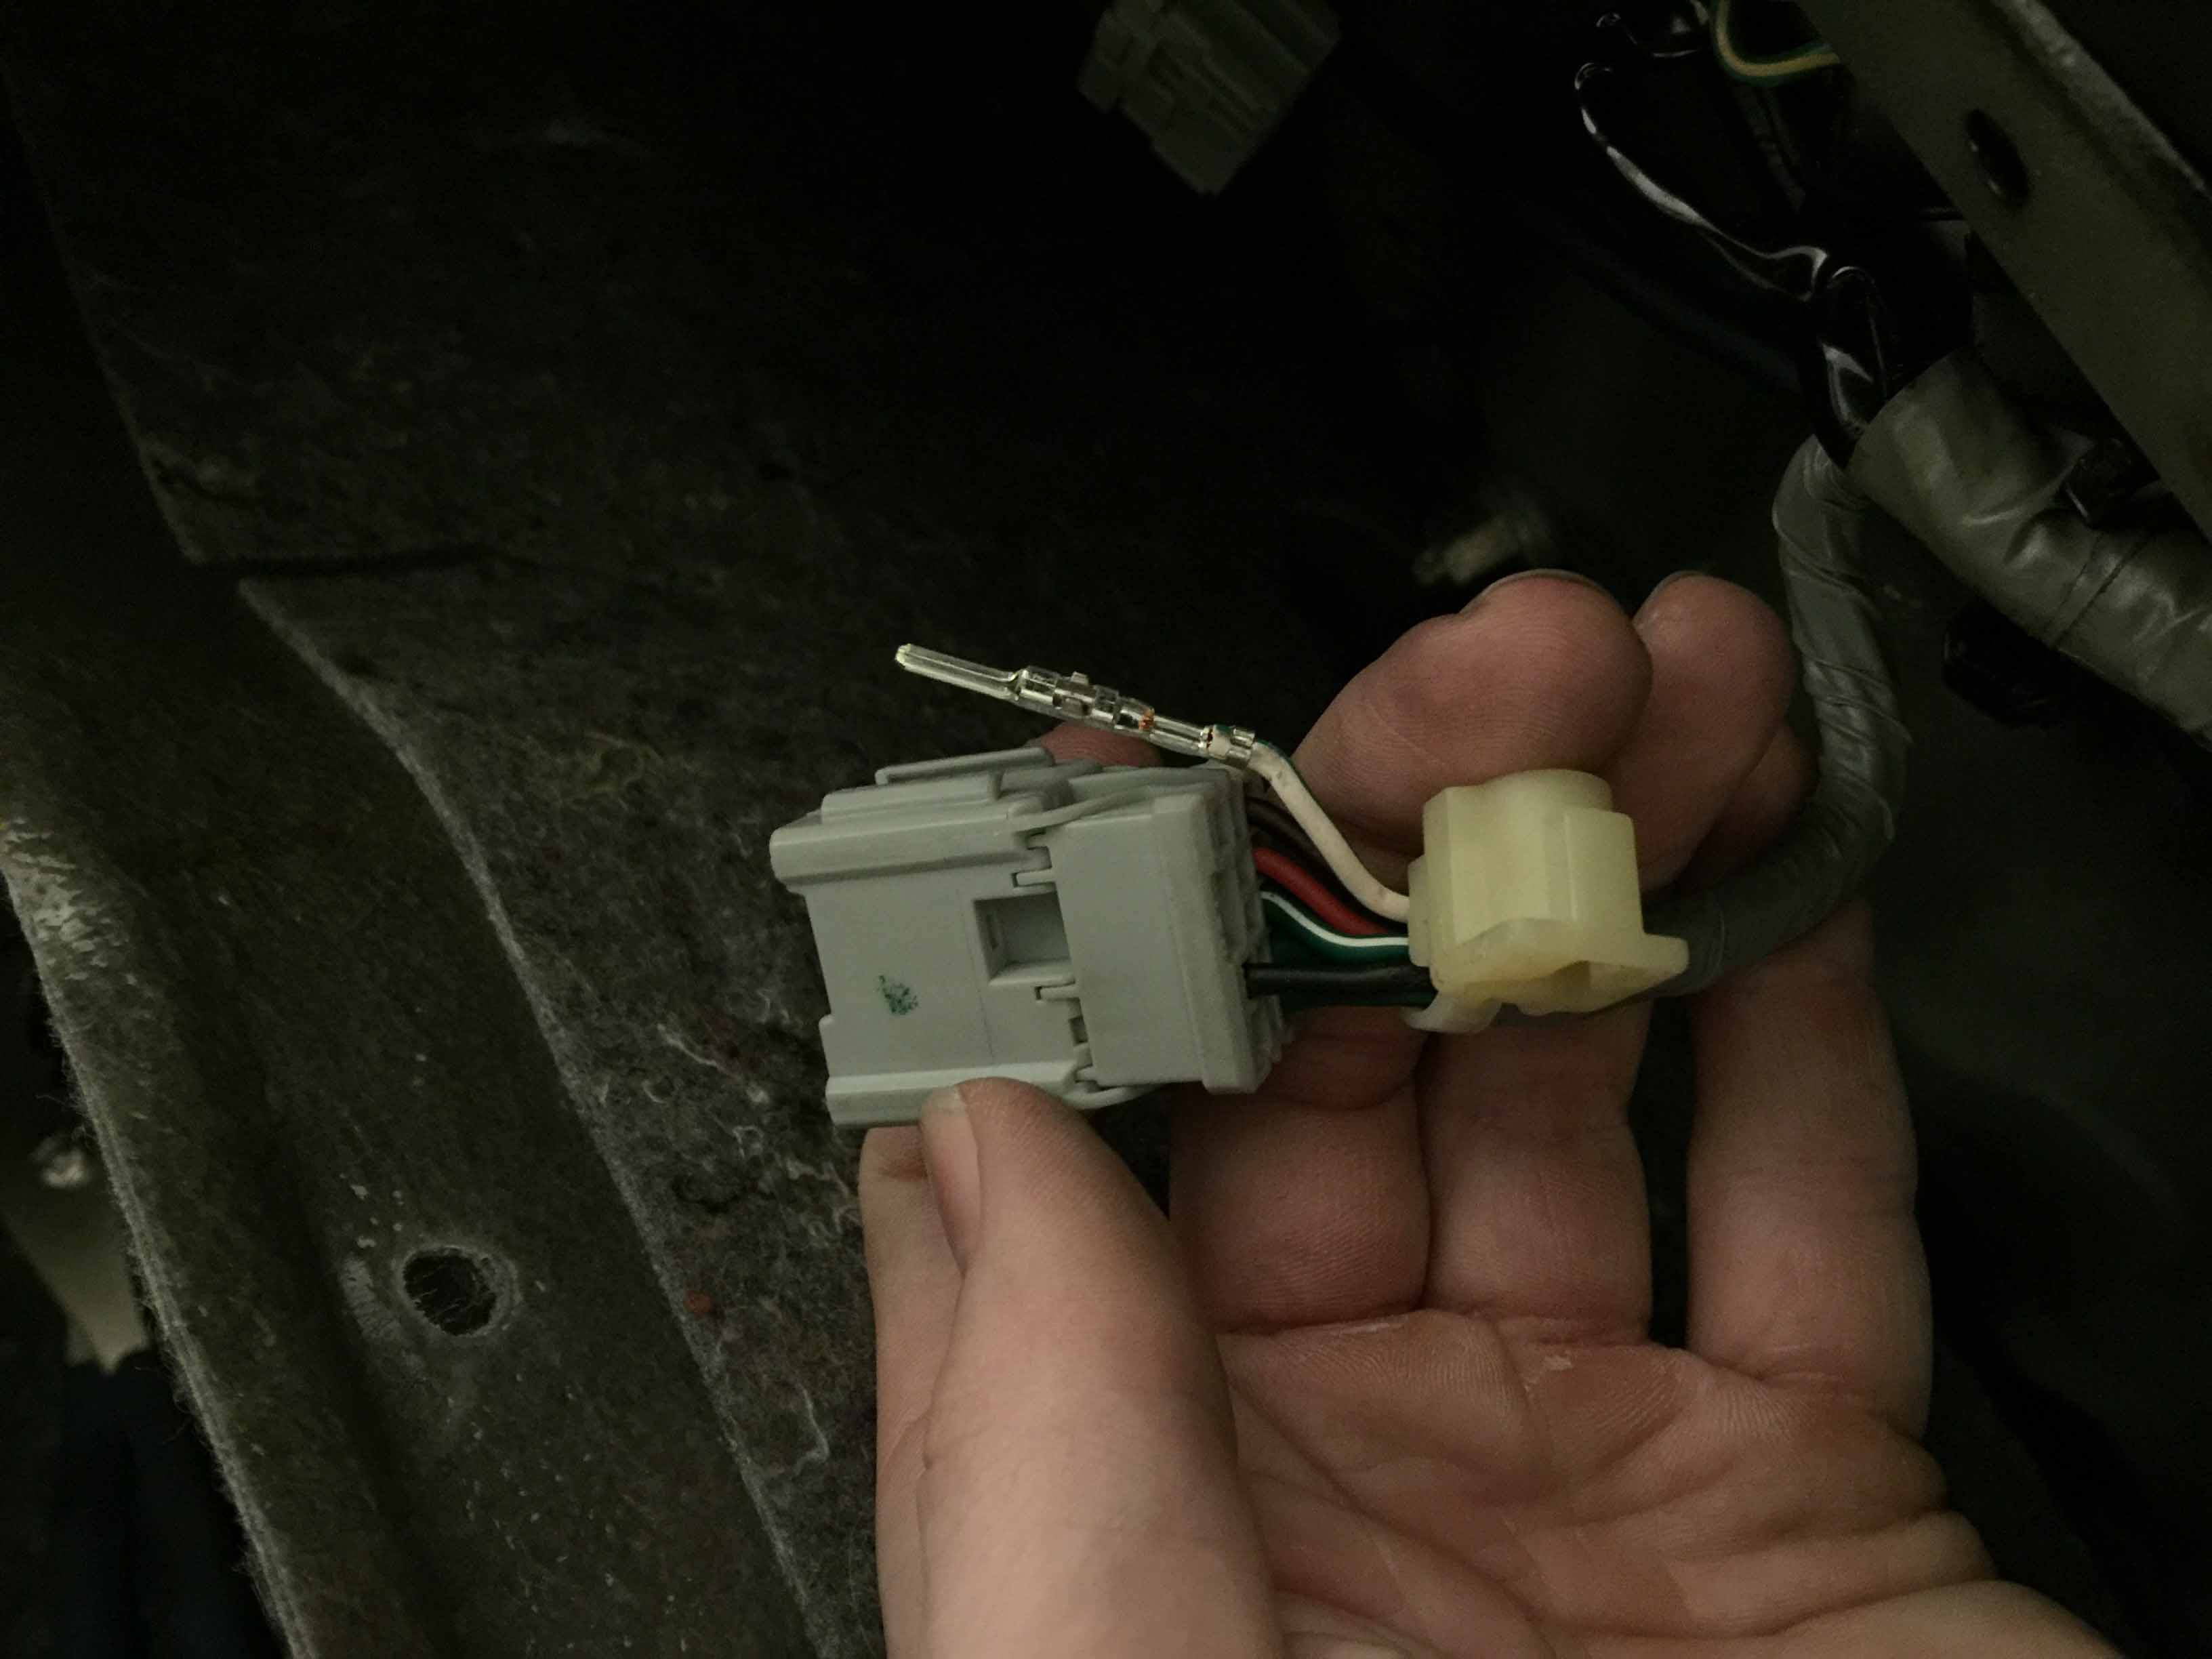
Then the brake light indicator was also on due to the low current draw of the LEDs, so I used the method outlined by mcrider here. On this one I made some slight changes, in the PDF file it only says to ground the white/green wire, but since we don't know exactly what's inside the brake light sensor, that is absolutely awful practice. You should never tie a signal wire straight to ground or power if you don't know what's driving it, so I depinned the sensor side of the plug and shorted just the wire that goes to the cluster to ground, then heat-shrinked the loose end and taped it to the side of the connector for if I ever need to revert back to stock.
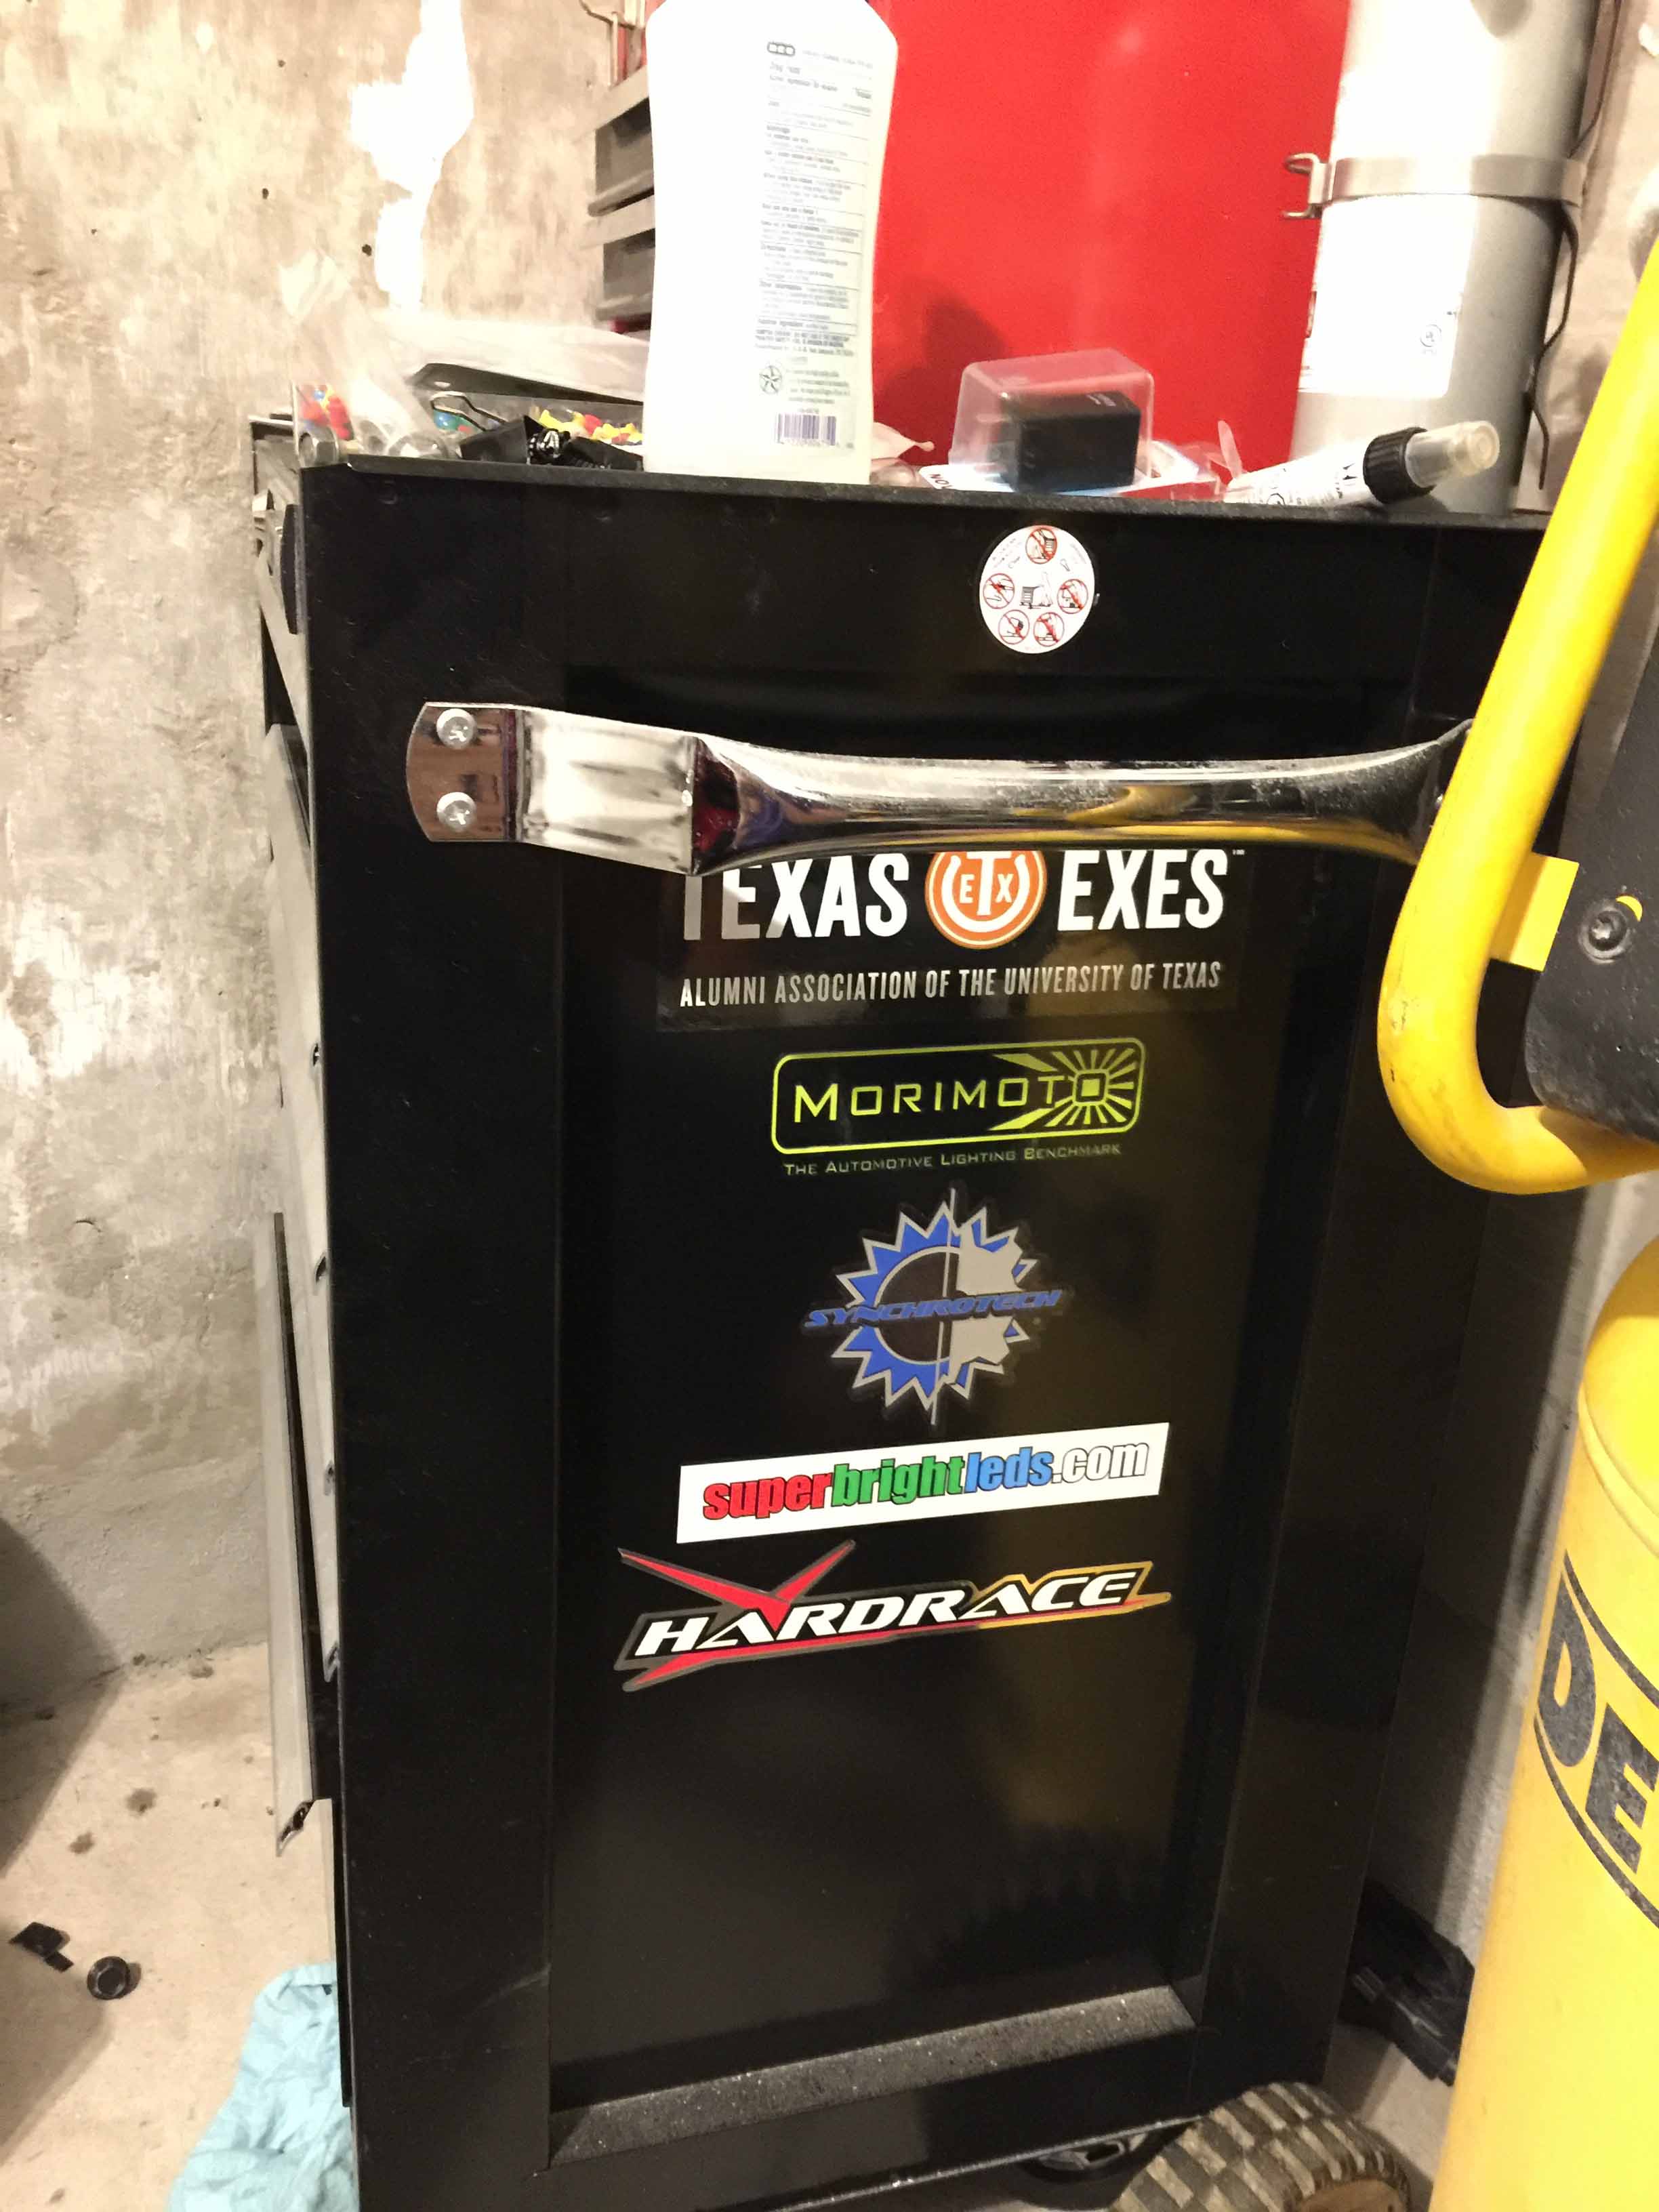
And I also put some stickers I had laying around on my toolbox. If it was a Snap-On box I'd be waxing it instead but mine is just a Craftsman.")
Since installing LED bulbs in all the external fixtures the turn signals have been hyperflashing due to the much lower current draw of the LEDs. And of course, the flasher relay that AutoZone's website listed as compatible was most definitely not compatible, so I went ahead and modified the OEM flasher according to WB9RKNs post here. It was very straightforward, removing the transistor took far less time that getting the relay out of the car to begin with and it seems to work perfectly!
Then the brake light indicator was also on due to the low current draw of the LEDs, so I used the method outlined by mcrider here. On this one I made some slight changes, in the PDF file it only says to ground the white/green wire, but since we don't know exactly what's inside the brake light sensor, that is absolutely awful practice. You should never tie a signal wire straight to ground or power if you don't know what's driving it, so I depinned the sensor side of the plug and shorted just the wire that goes to the cluster to ground, then heat-shrinked the loose end and taped it to the side of the connector for if I ever need to revert back to stock.
And I also put some stickers I had laying around on my toolbox. If it was a Snap-On box I'd be waxing it instead but mine is just a Craftsman.
Last edited by MotorMouth93; 08-05-2017 at 09:27 PM.
 01-11-2017, 06:17 AM
#36
Minor stuff, I've mainly just been driving the car lately since the high-priority maintenance is out of the way.<br /><br />I made a steel bracket to mount a fire extinguisher where the CD changer used to be. I'll probably remake it since I don't like having the holes that close to the edge but for now it works fine. The small holes are drilled and tapped for M6x1.0 so the extinguisher just screws straight to it.<br /><br /><img src="http://johnwalterpowell.com/projects/1994_nsx/IMG_1400.jpg"/><br /><br /><img src="http://johnwalterpowell.com/projects/1994_nsx/IMG_1402.jpg"/><br /><br /><img src="http://johnwalterpowell.com/projects/1994_nsx/IMG_1403.jpg"/><br /><br />Then I wetsanded and polished the front corner lights. They were in pretty rough shape but they came out pretty well I think.<br /><br /><img src="http://johnwalterpowell.com/projects/1994_nsx/IMG_1405.jpg"/><br /><br /><img src="http://johnwalterpowell.com/projects/1994_nsx/IMG_1406.jpg"/><br /><br />I ordered one of Hugabuga's window regulator fix kits a few days ago so hopefully the windows will be nice and smooth after installing it.
Last edited by MotorMouth93; 08-05-2017 at 09:28 PM.
02-28-2017, 08:25 PM
#39
Hugabuga shipped out the window kit faster than I expected, it took 8-10 days from the time I sent the payment to receiving it. But then I let it sit on my kitchen counter for another three weeks while I drove the car and enjoyed it.
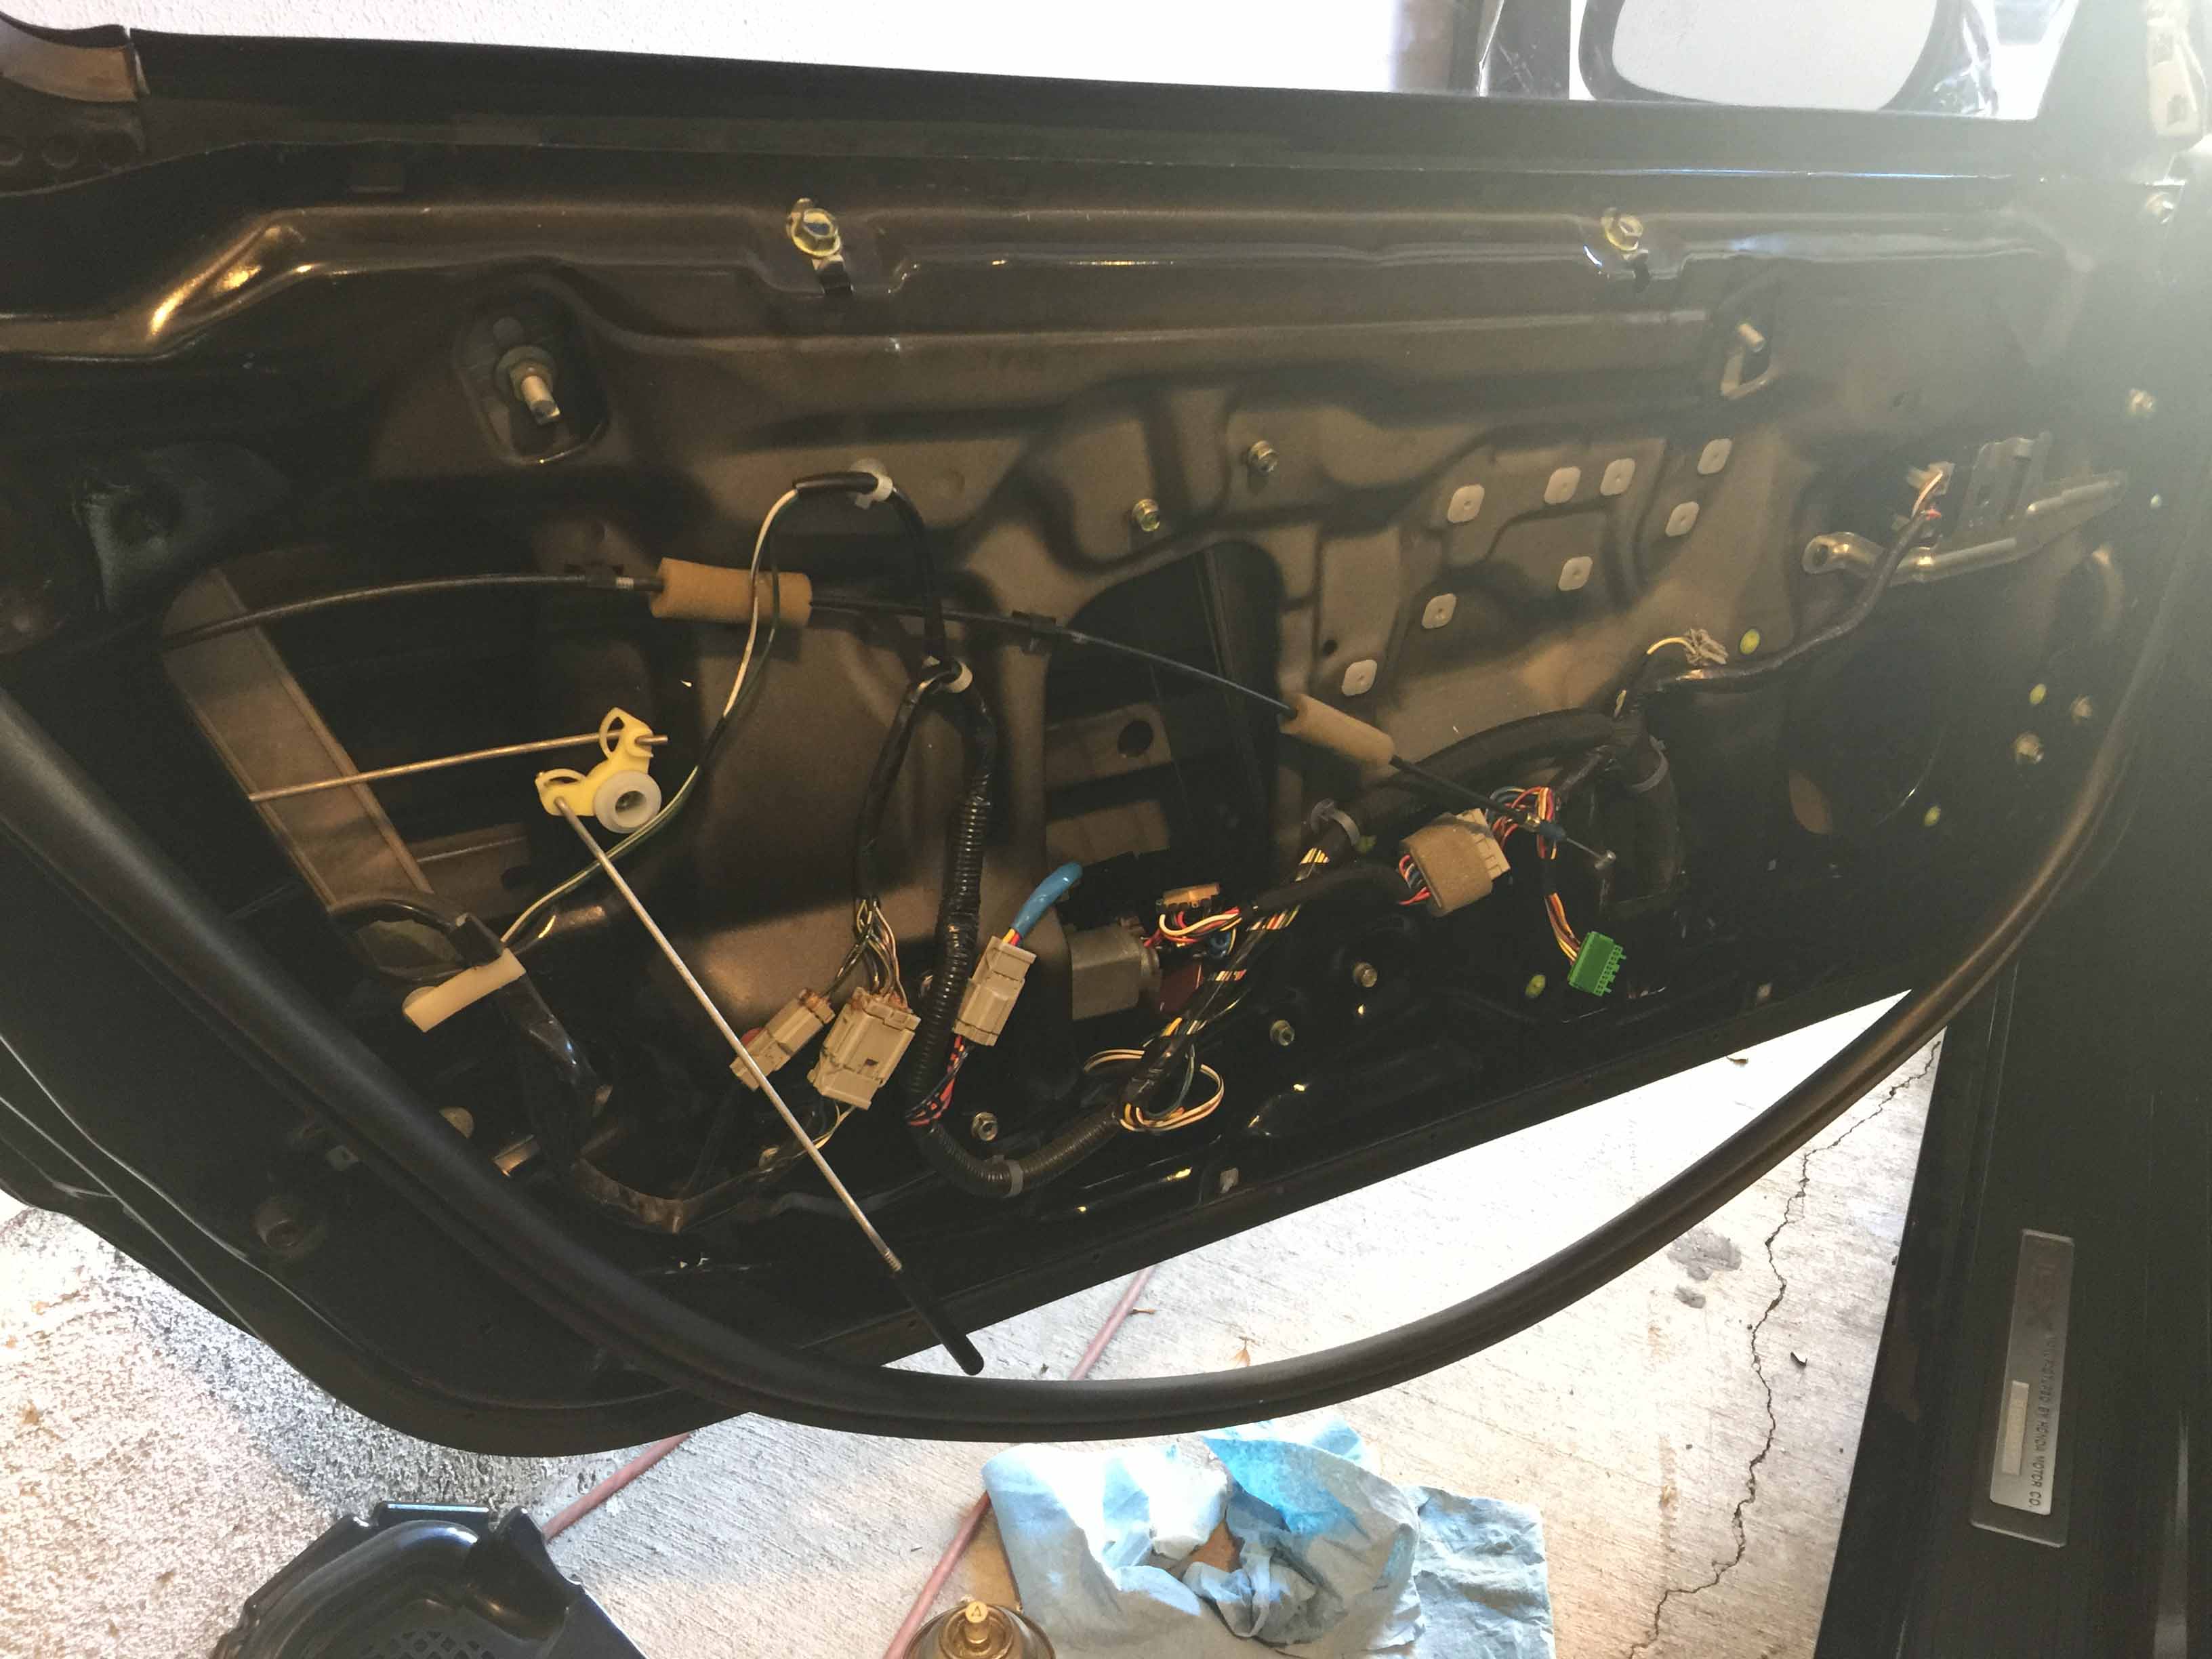
Anyways, at the beginning of this week I decided that it was finally time to pull the door panels and knock out everything there at once. I dropped the car off at a very highly reviewed PDR shop here in Austin to have the three door dings and one fender dent fixed since I thought not having door panels might make it easier for them to do the work. Only the fender dent and the passenger door ding were able to be fixed though, the driver side dings were too sharp to do anything about, and they even pointed out the subtle marks left by the previous owners attempts to PDR it as well, so I guess I'll just have to live with them.
Anyways, onto the window regulators. After installing the pulley from the kit and sanding the teflon feet a bit to slide smoothly with my warped slider part, I decided that I wanted more. More pulleys, to be exact. So I went on Amazon and found some nice little sealed bearing pulleys (I paid about $10 for a set of 5 and $7 for hardware at Home Depot) and went to work with the dremel. Here is the result: the first 6 pulley NSX window regulator retrofit that I've seen.
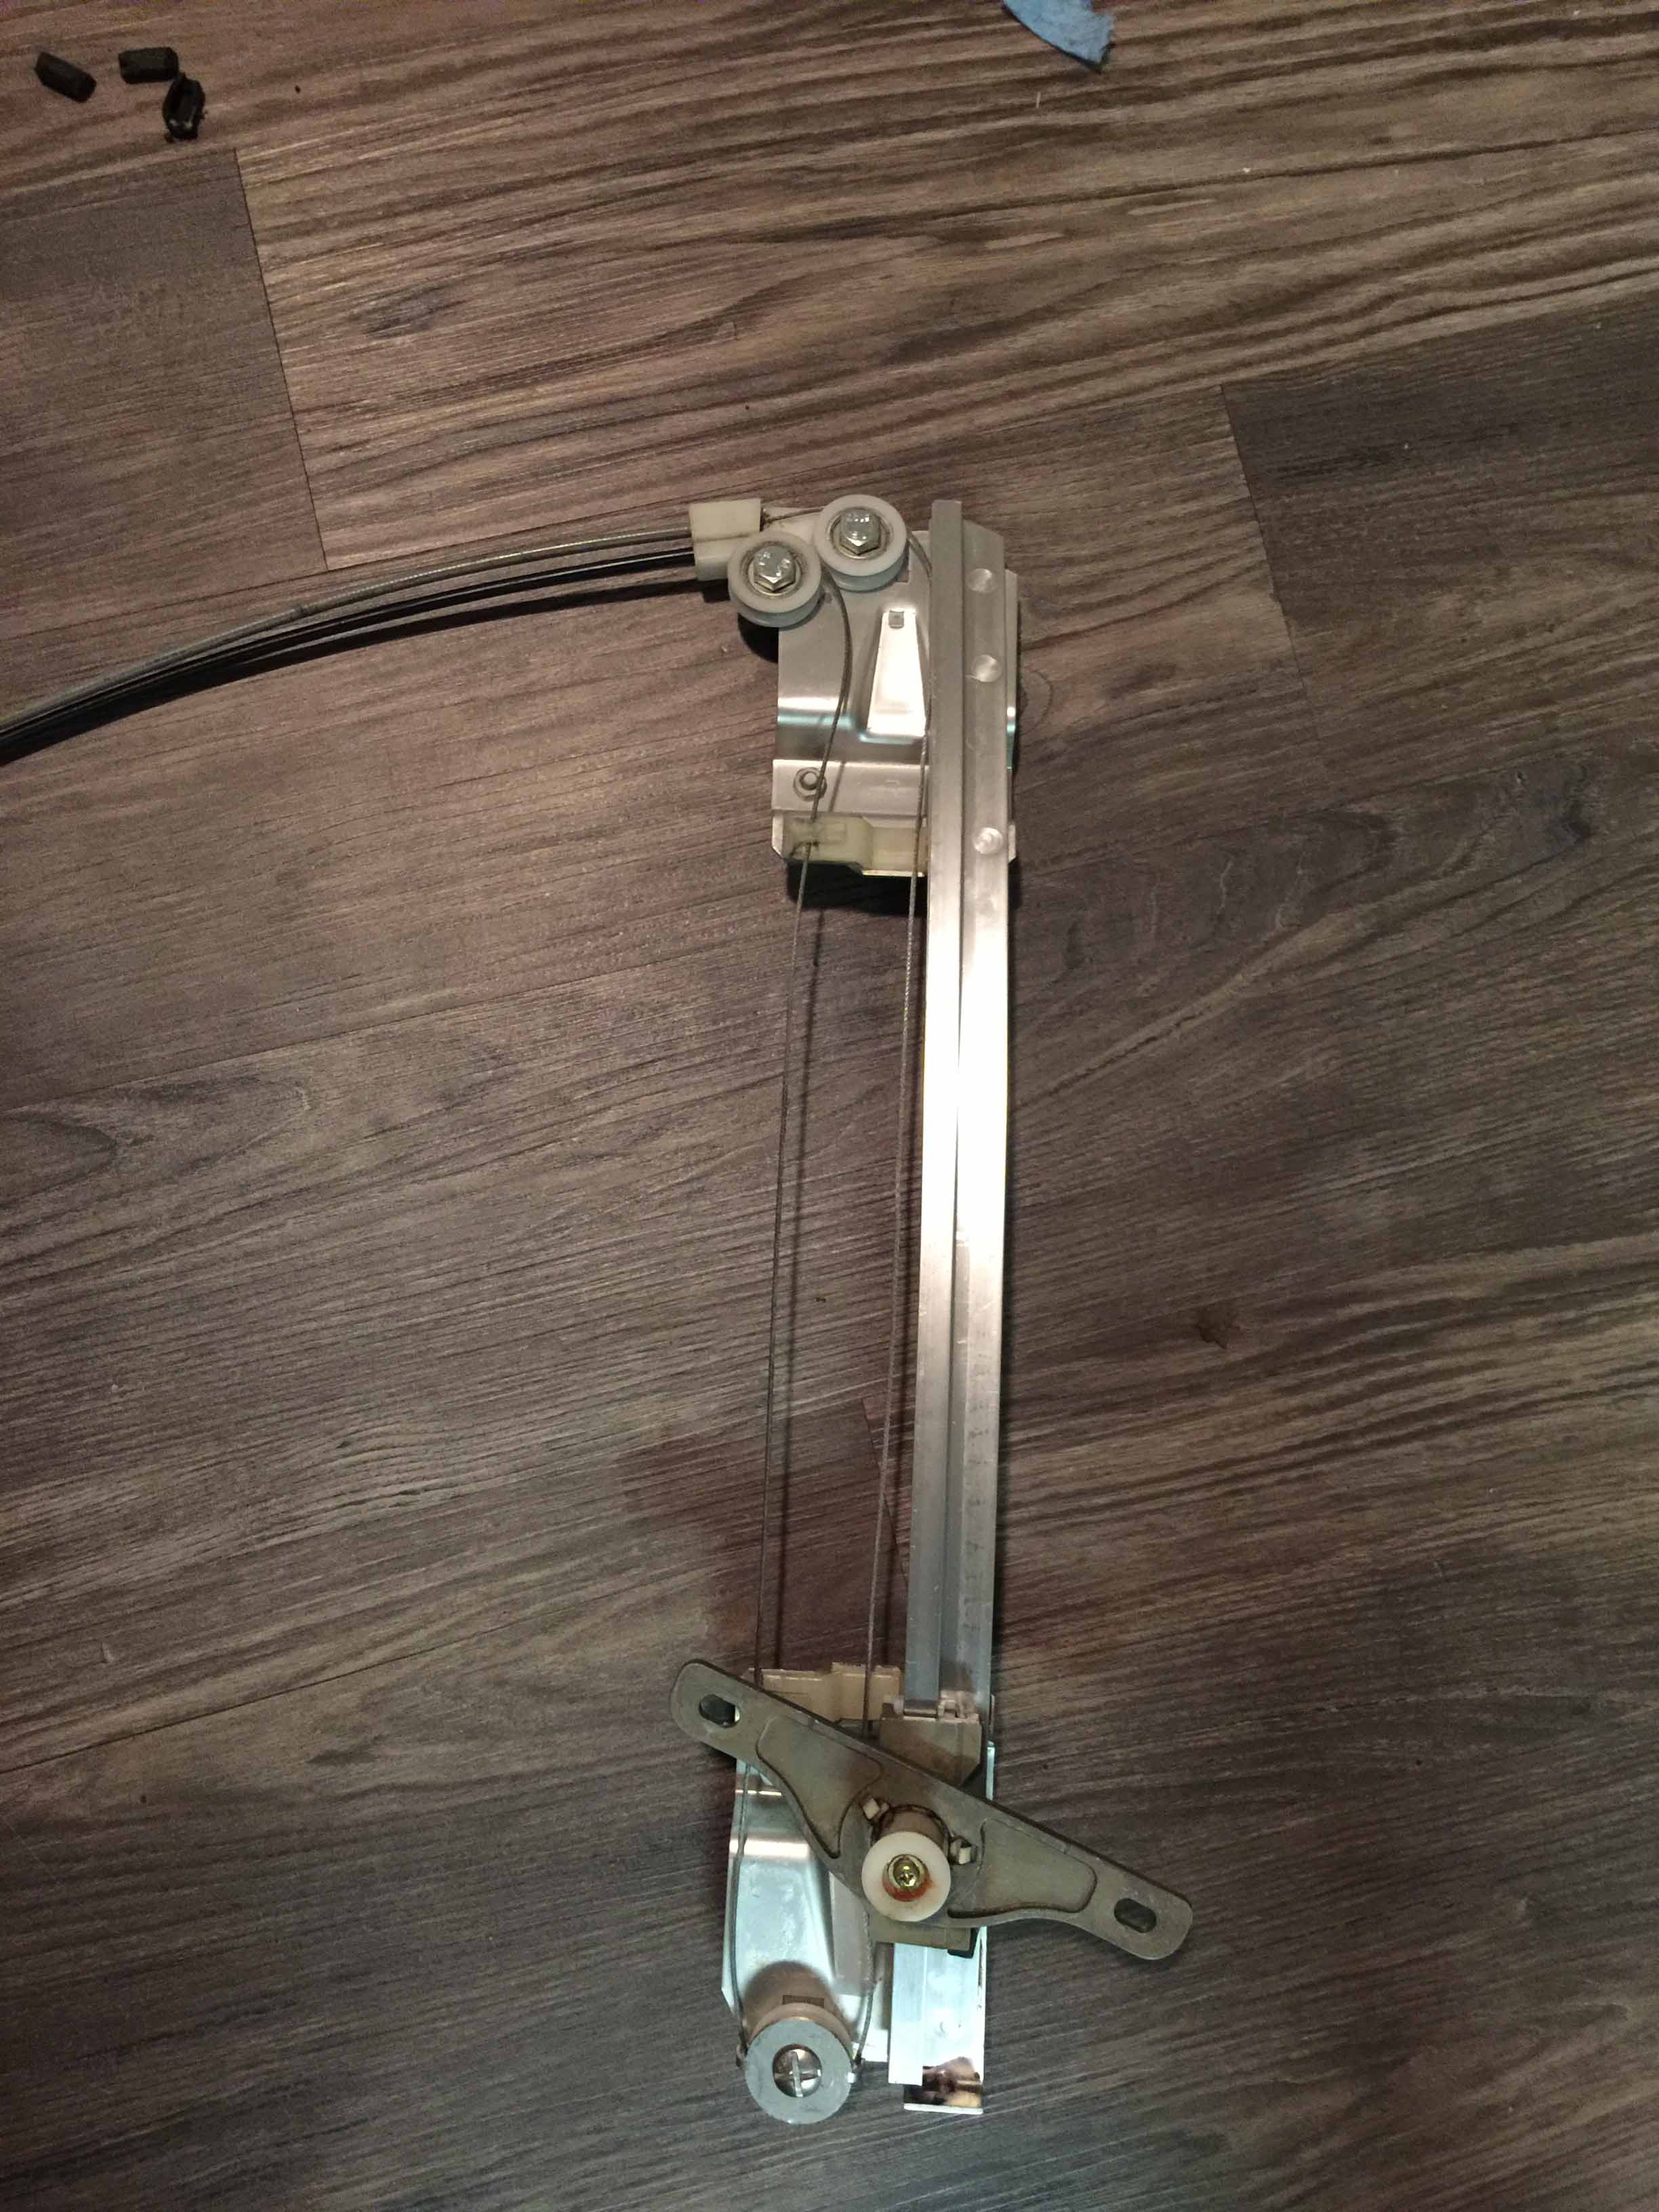
I had to grind away quite a bit of the plastic part at the top so I ran the bolts holding the pulleys on through the backside of the plastic for extra support. I haven't reassembled the motor portion yet but with the cables pulled tight it seems to work perfectly!
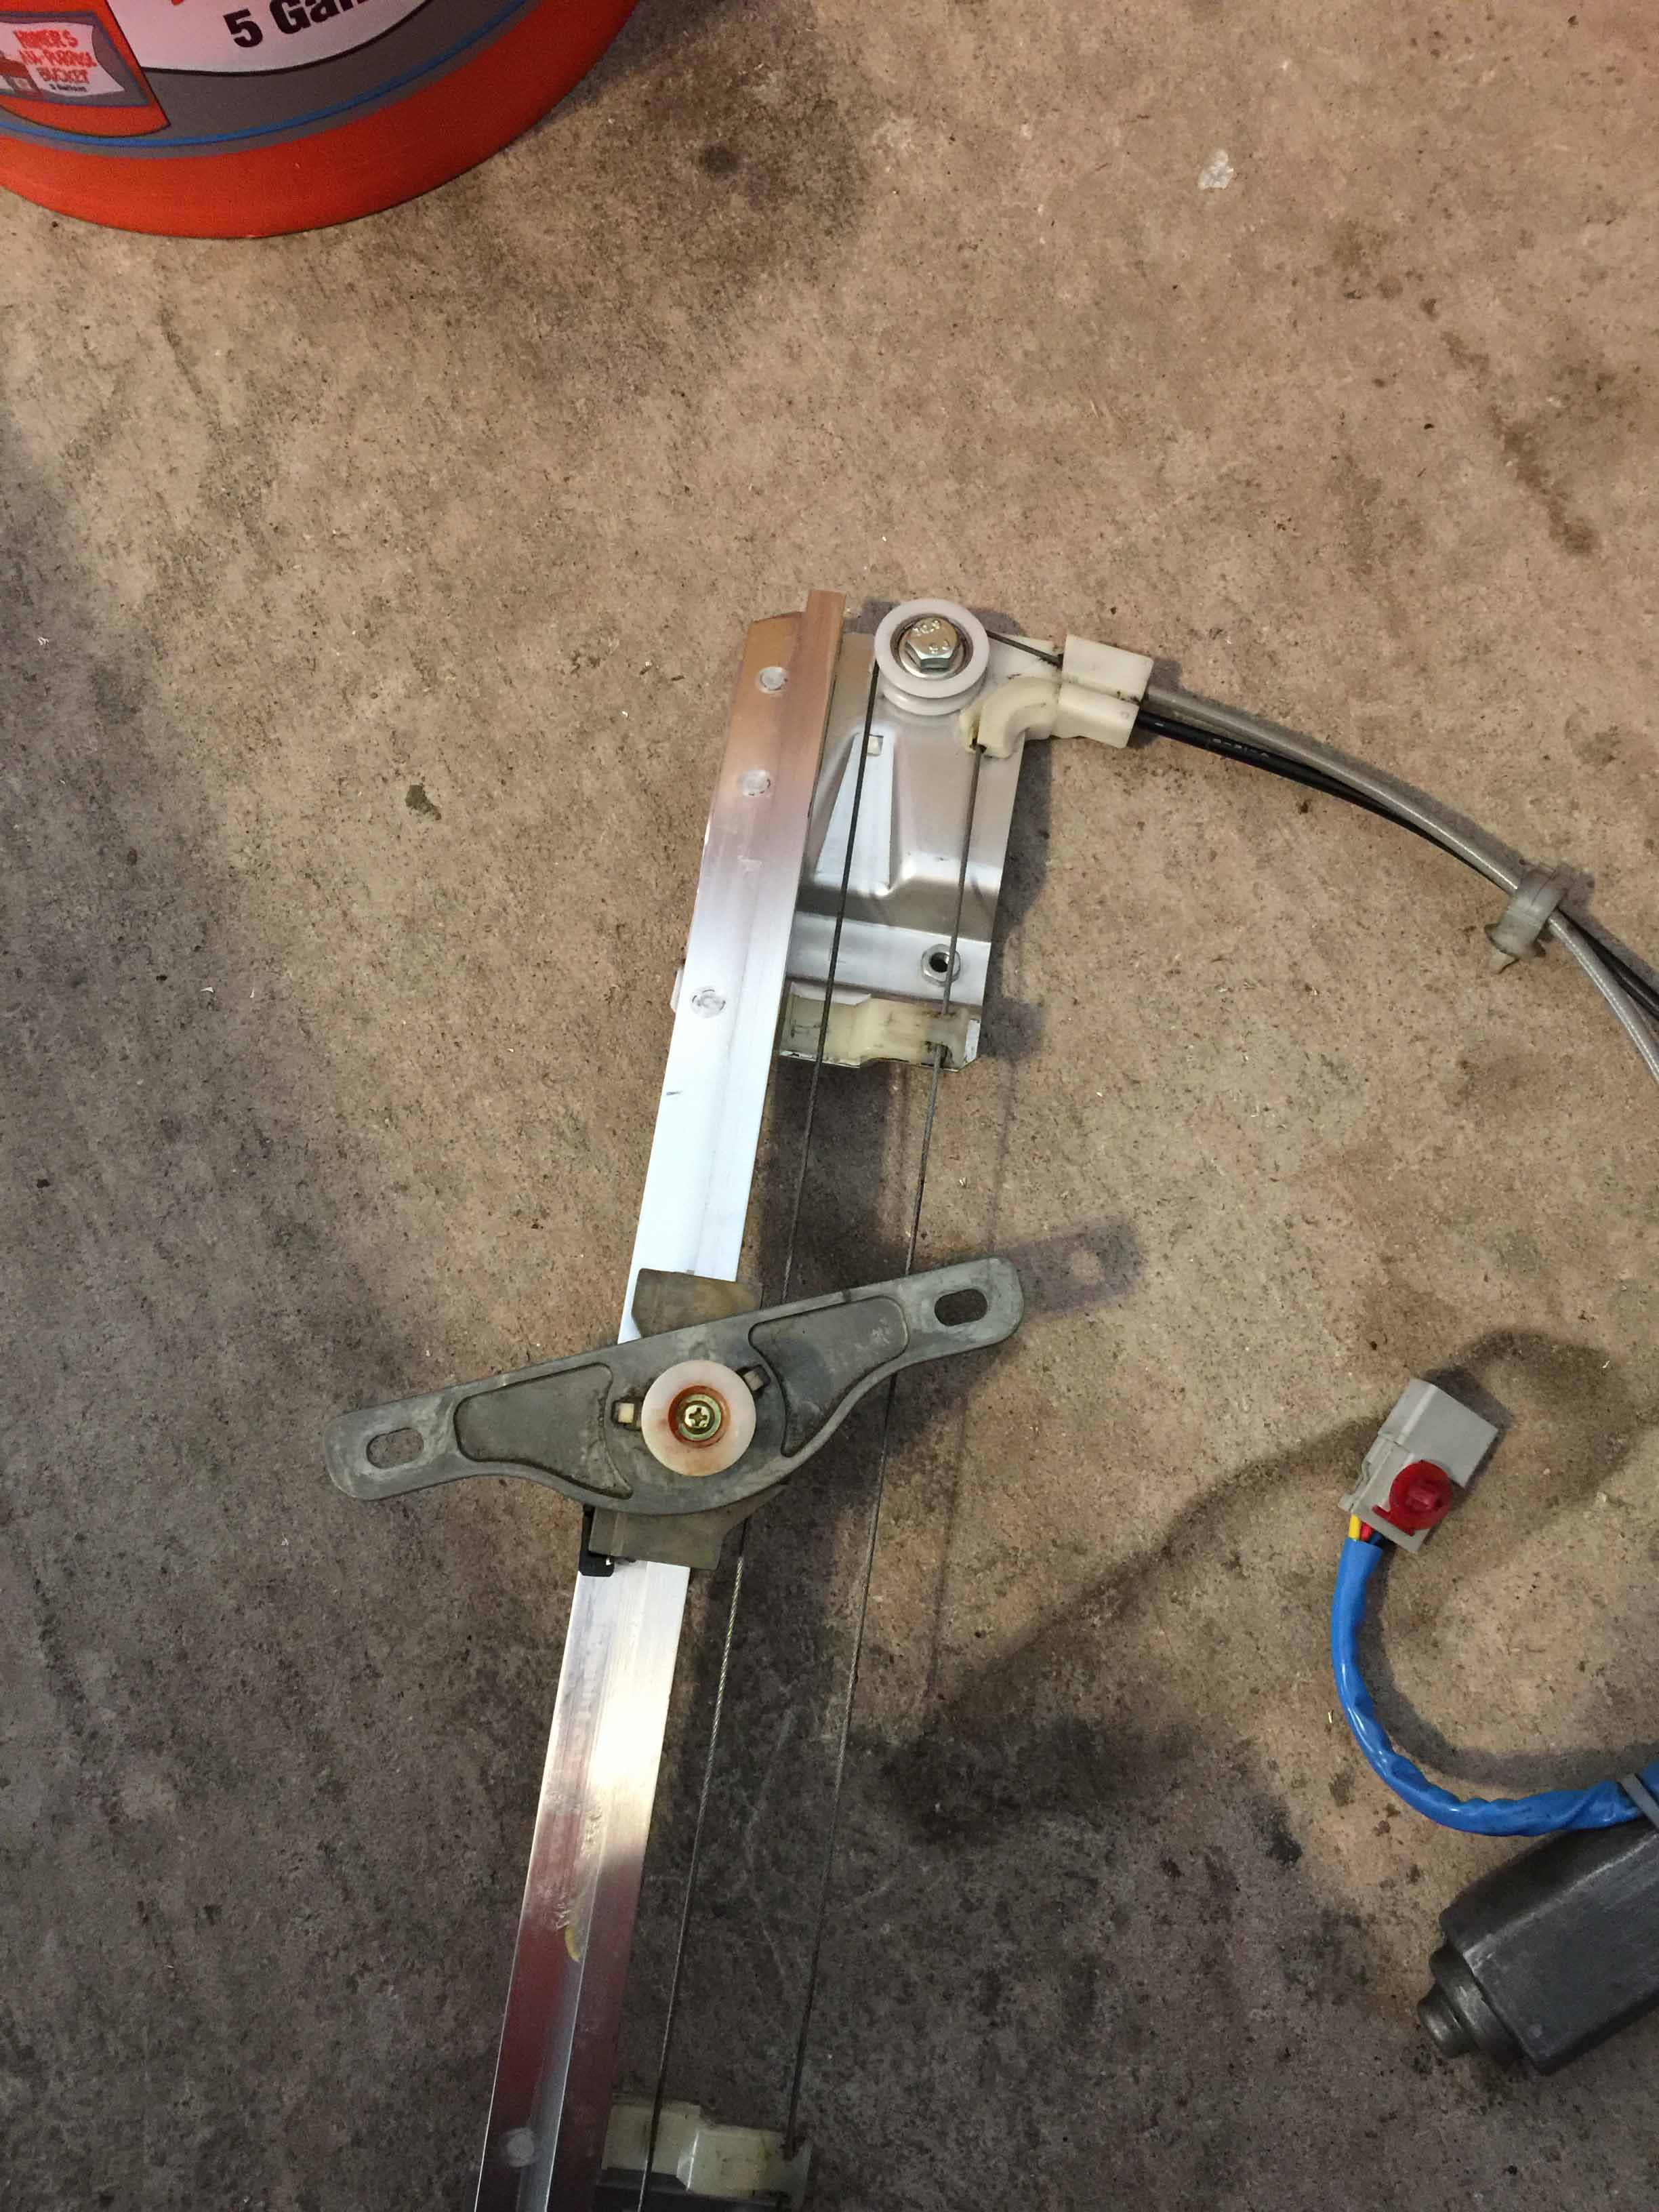
After installing the passenger side regulator which I posted above, I had to reinforce it since drilling out the plastic bracket to install the leftmost pulley caused it to flex and creak. It's fixed now but for the driver side I added the topmost pulley since the other one really doesn't have that much stress on it.
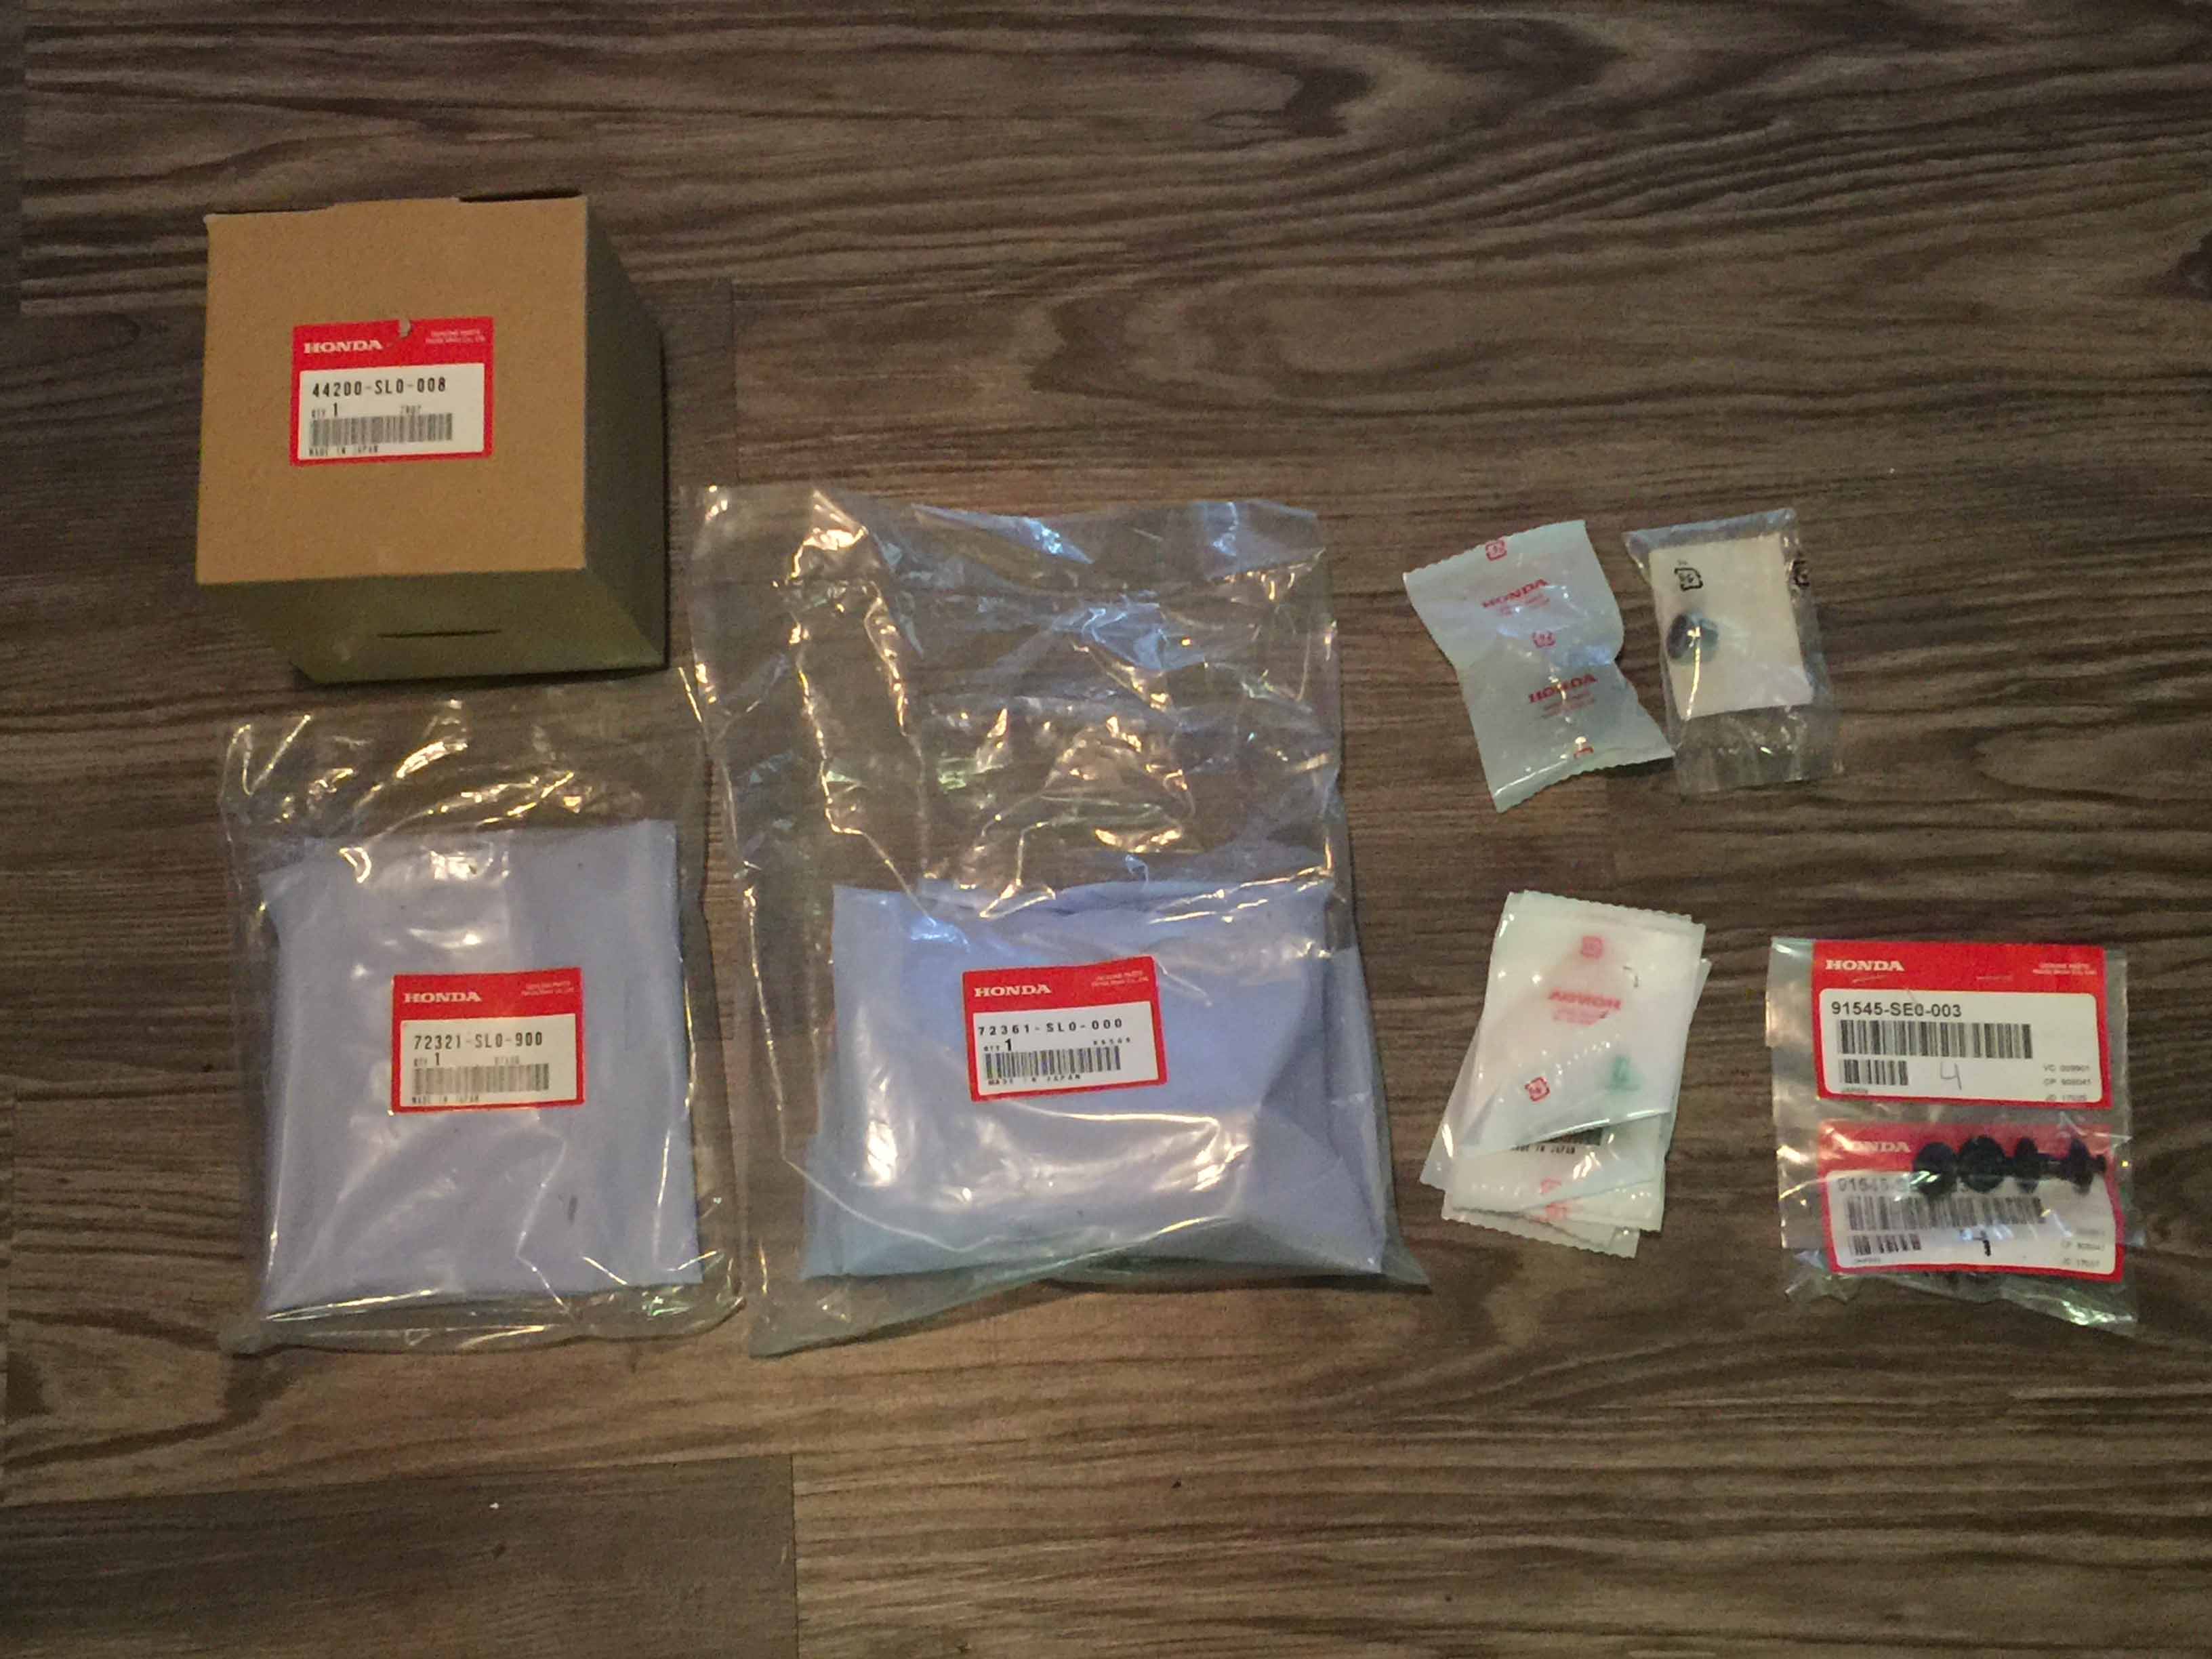
And the other parts I need to put the doors back together showed up after a couple of weeks on back order.
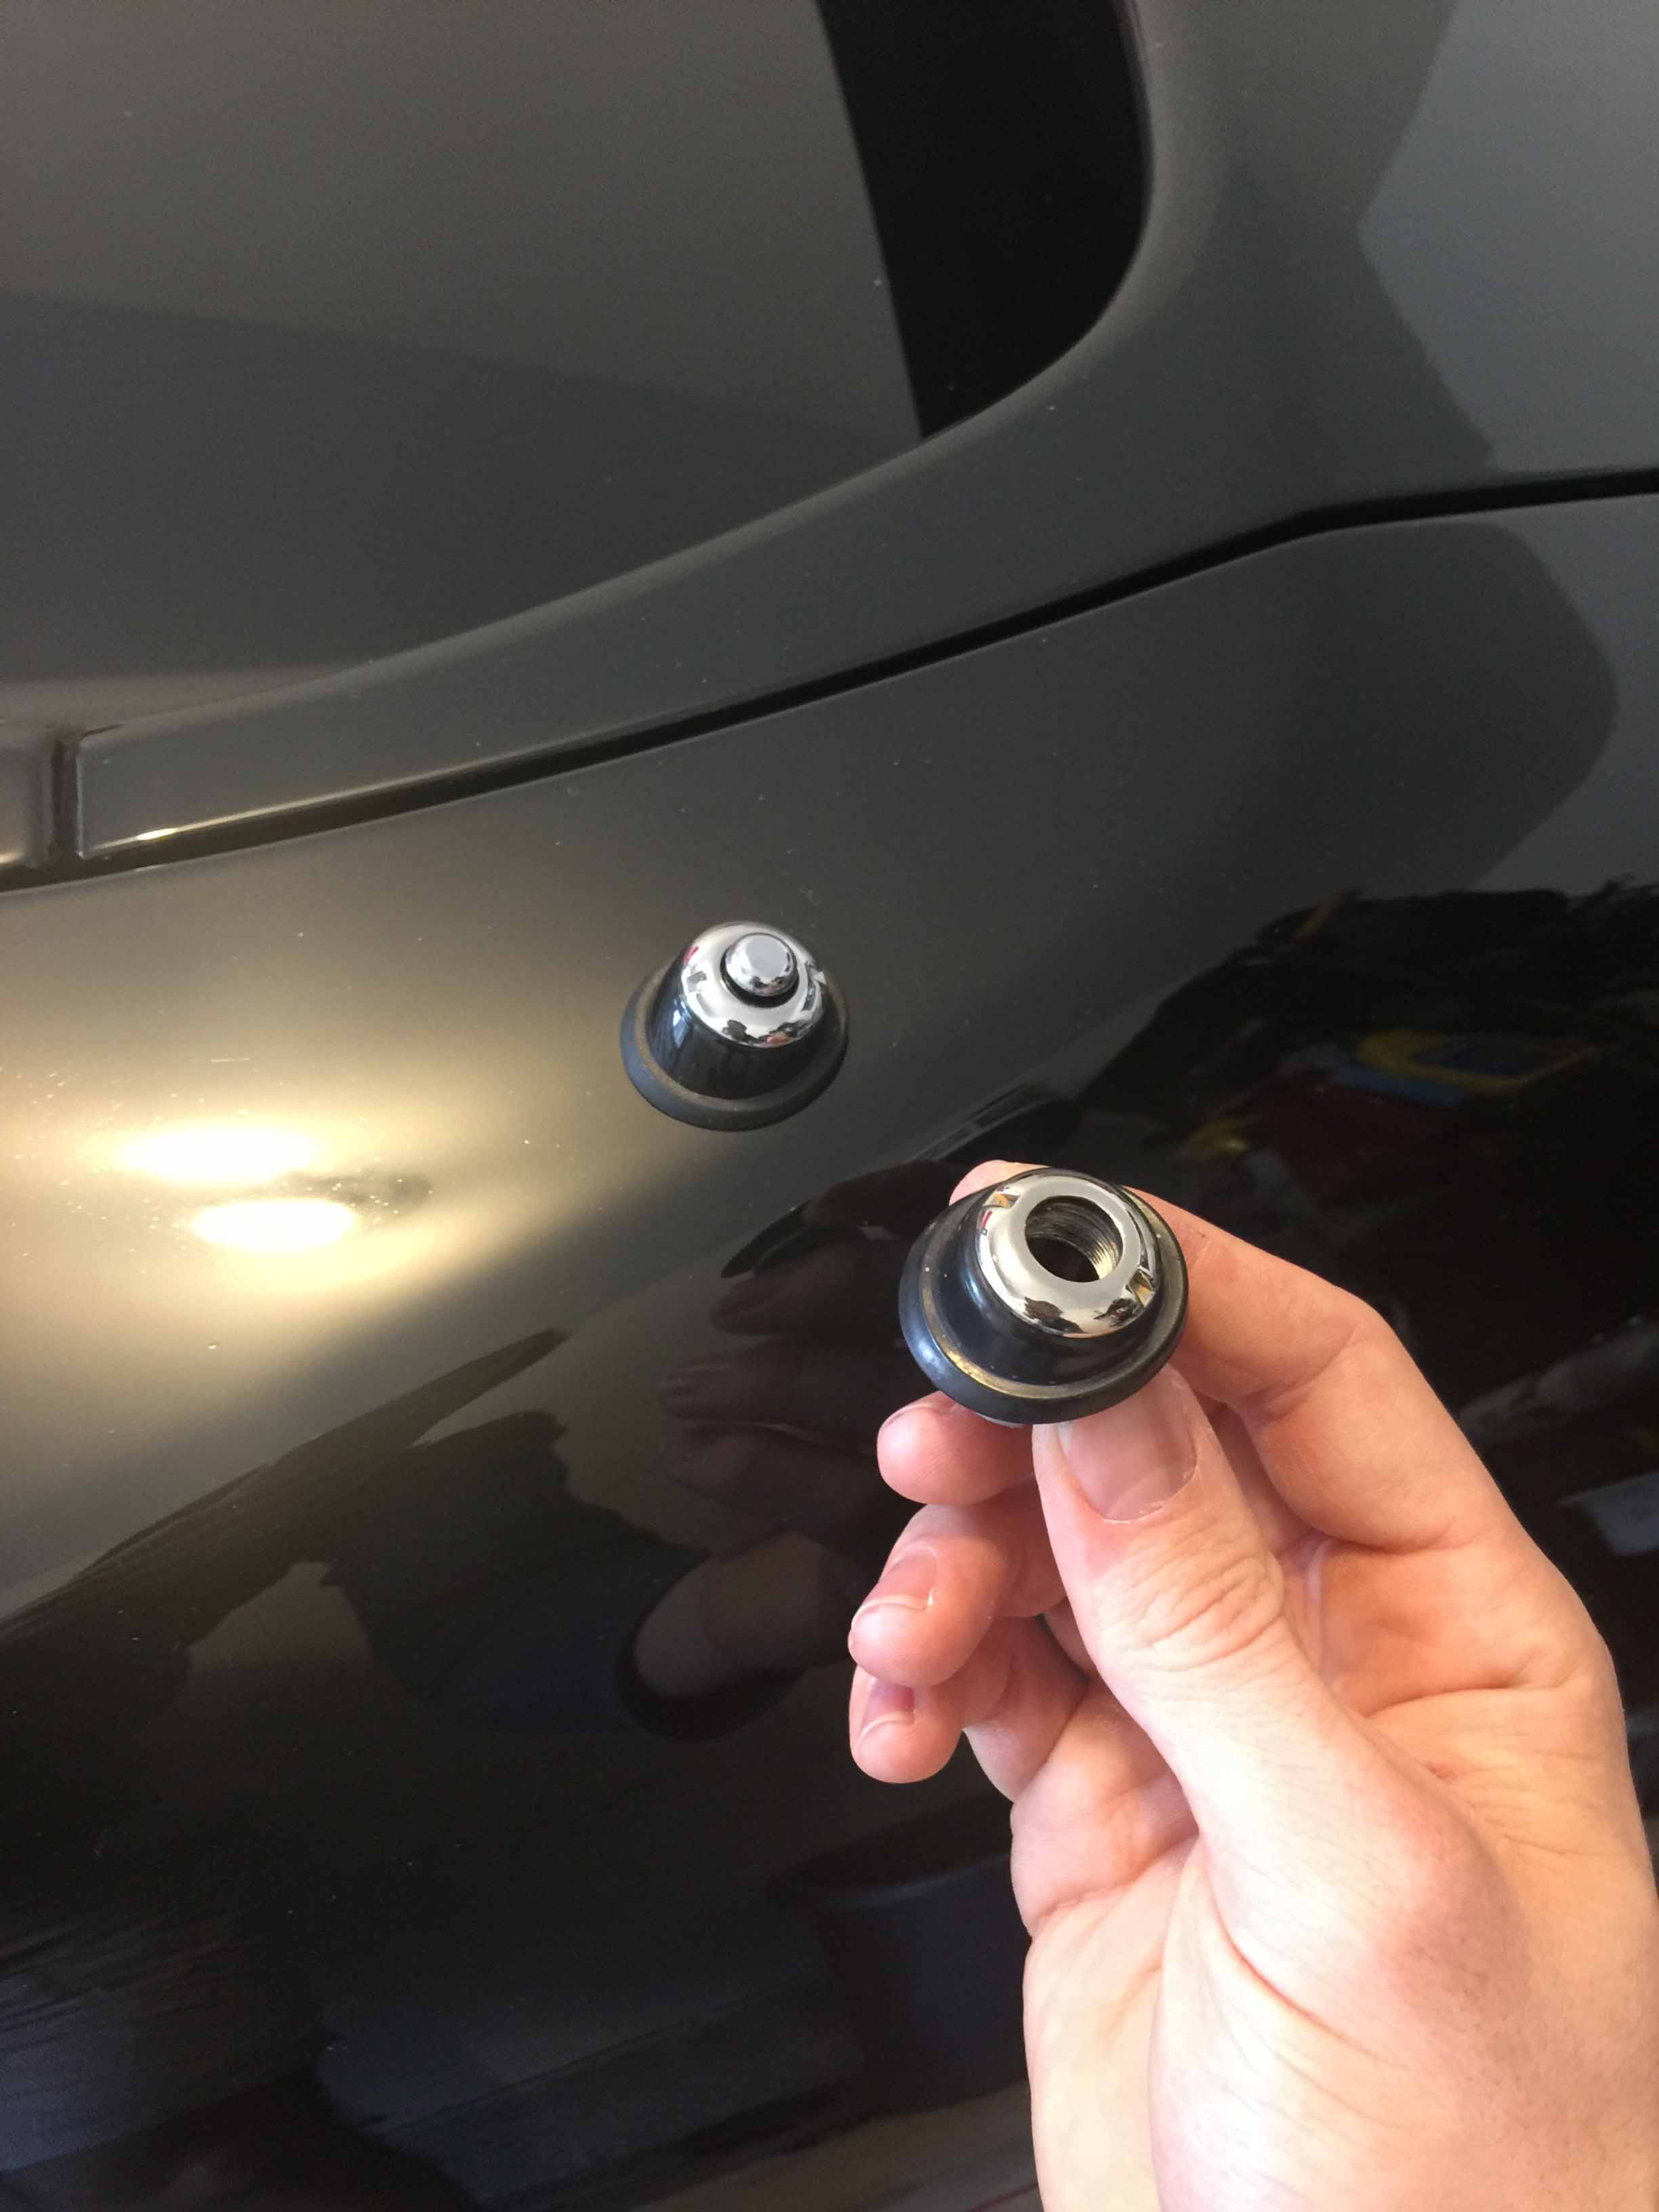
I bought a new antenna nut and grommet since my original had been gold plated and I couldn't get the gold out of the dimples.
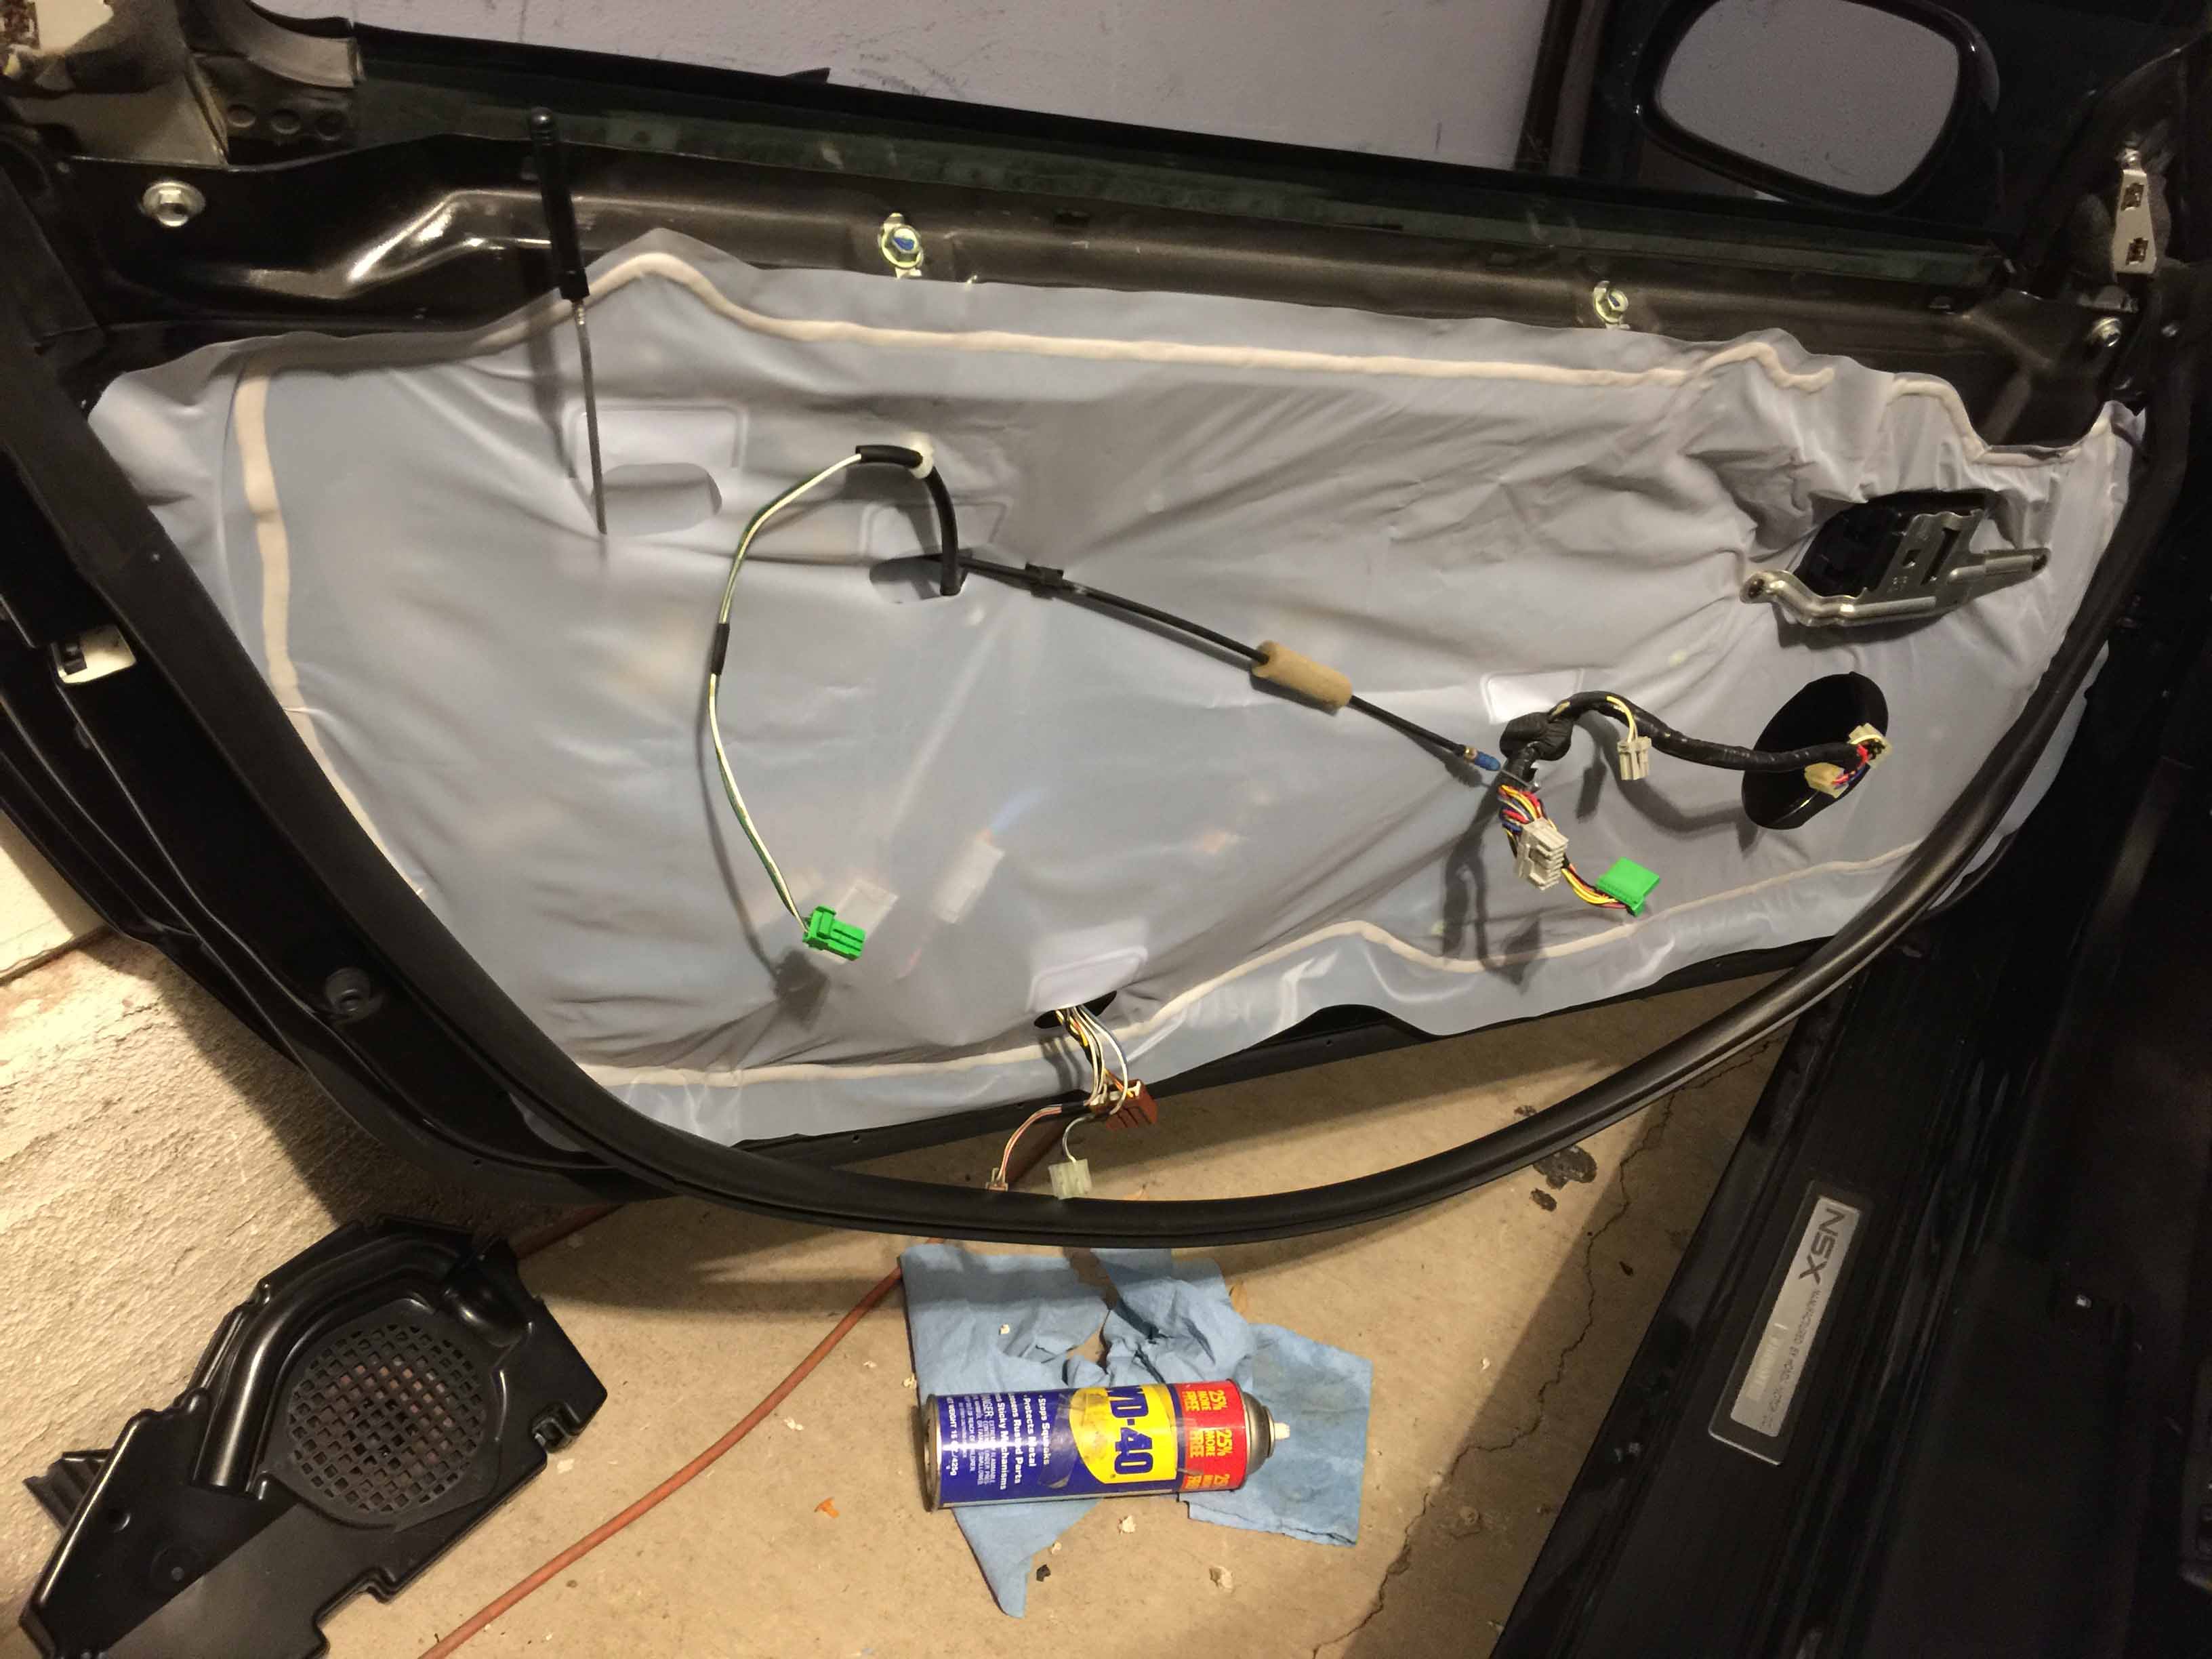
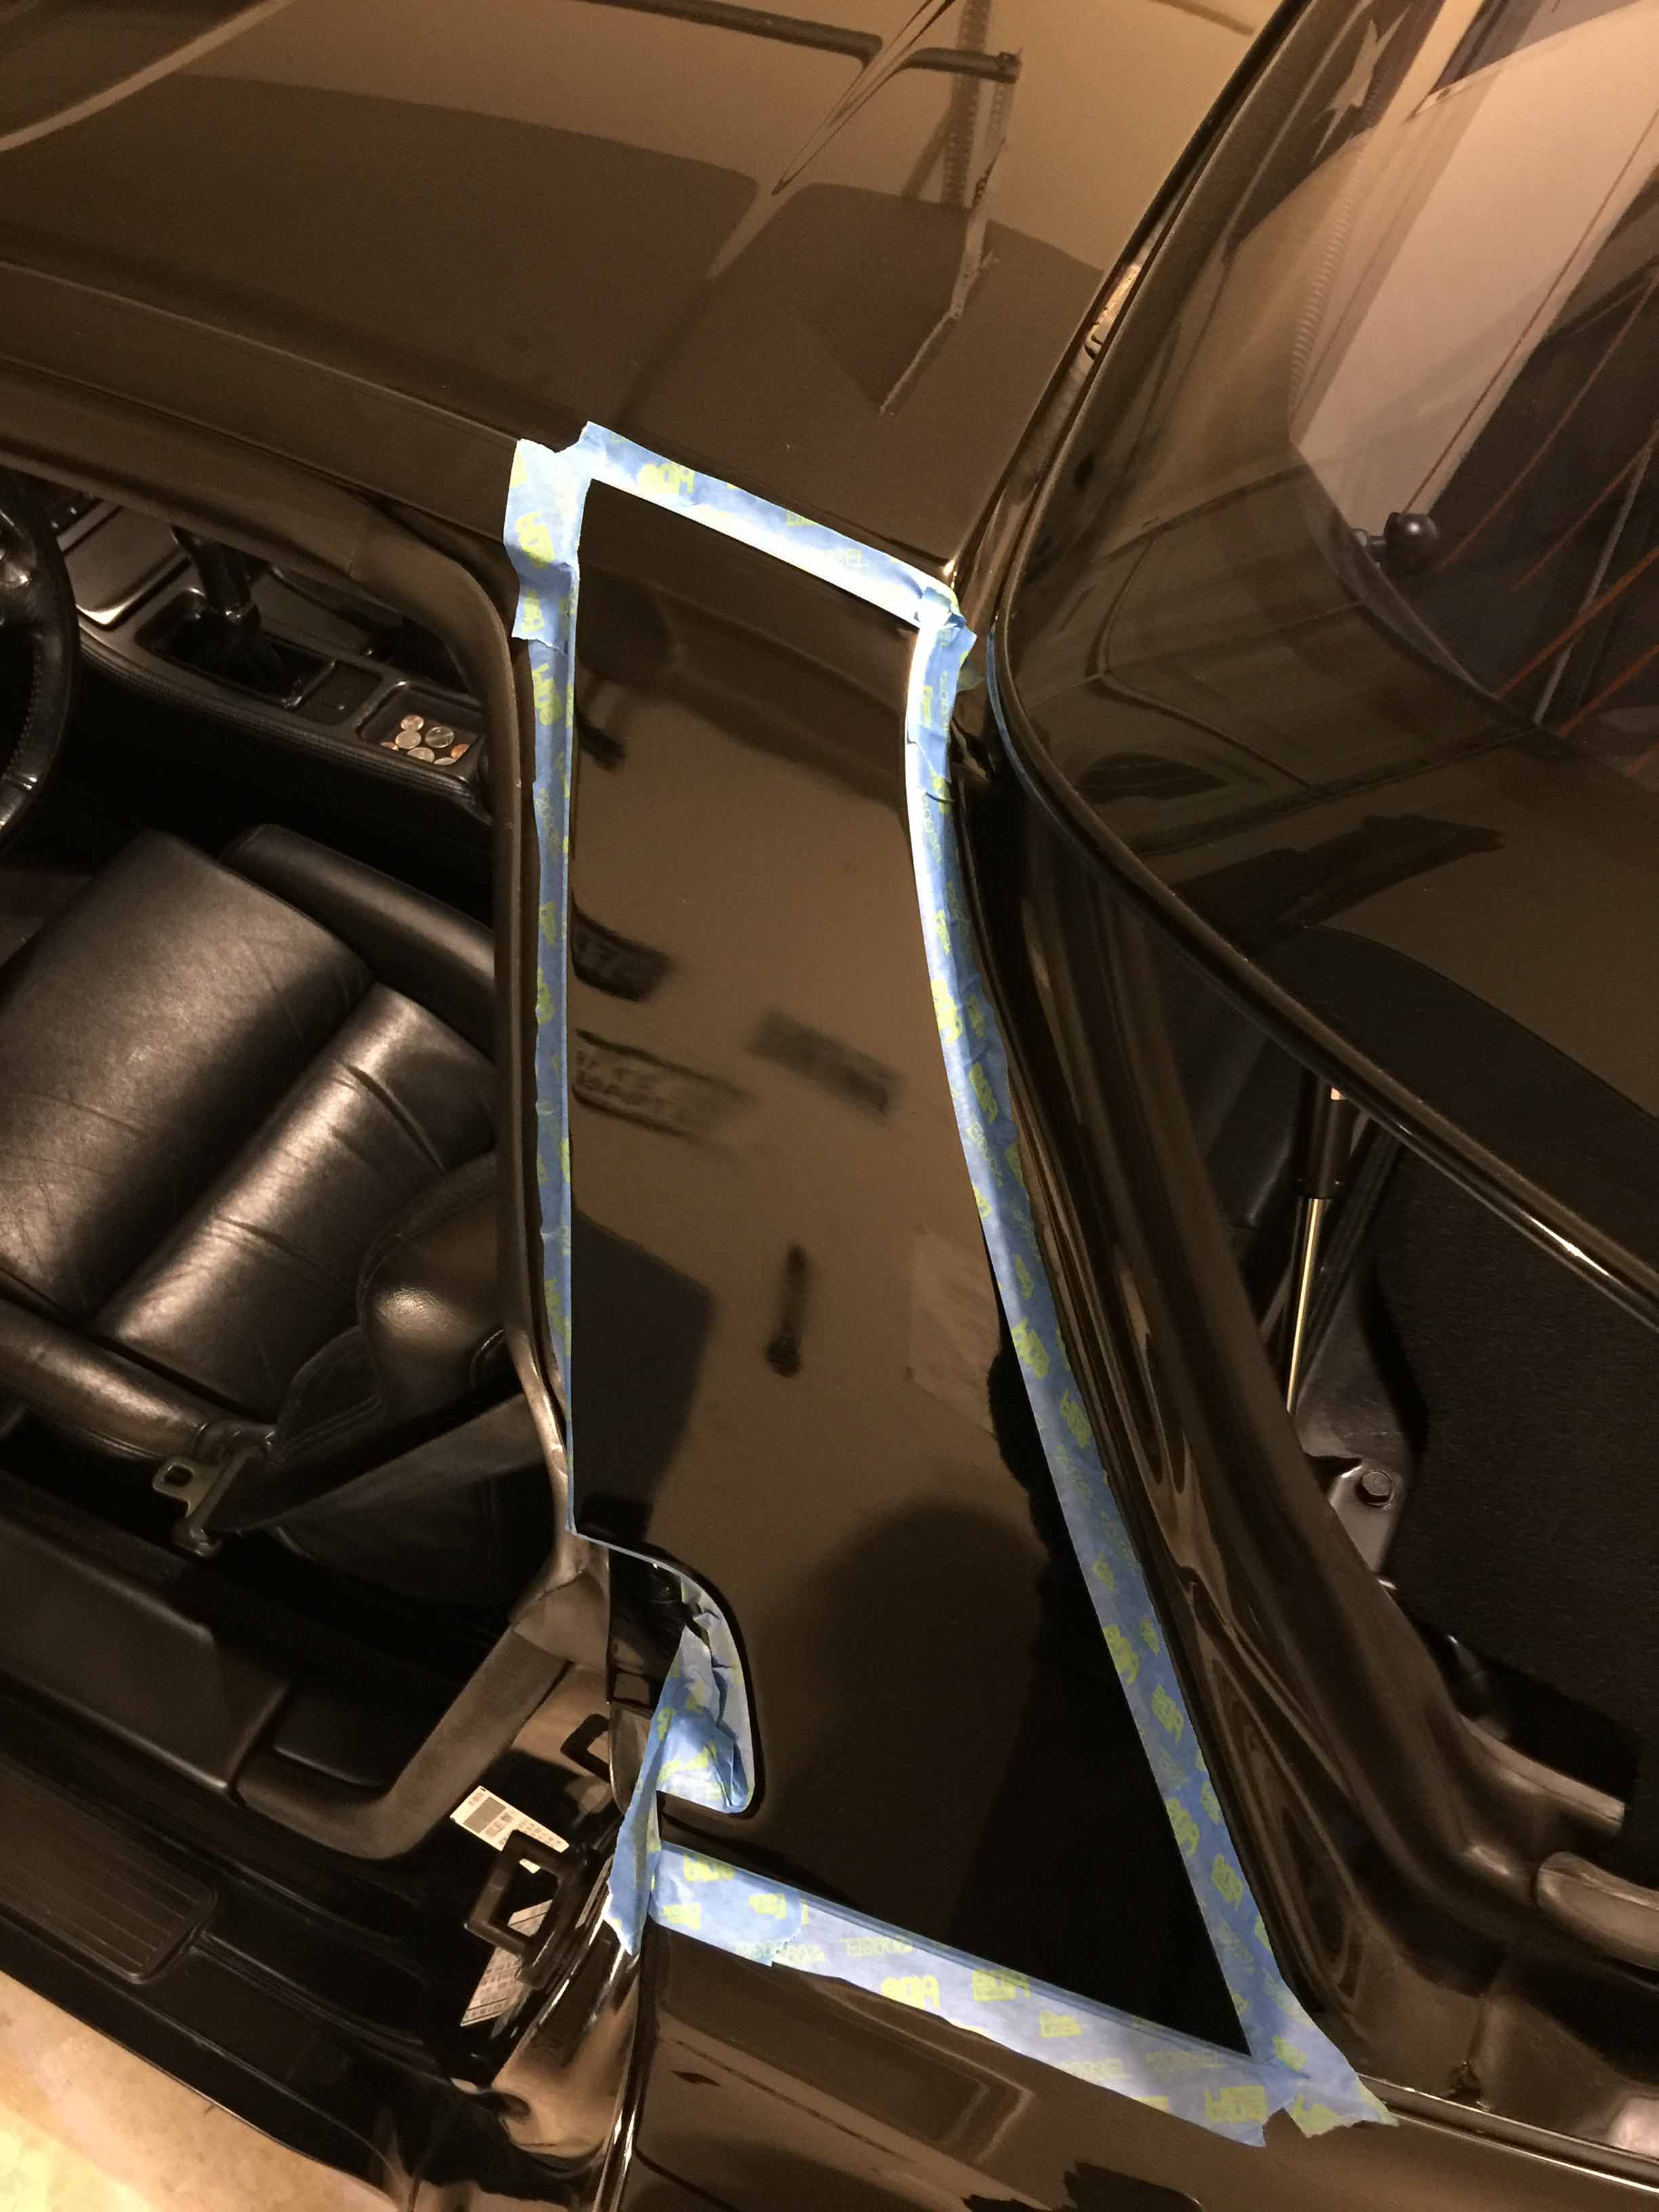
To remove the factory godzilla jizz sealant that was left over from the original shredded moisture barriers, I scraped as much as I could off with a plastic scraper, then put WD40 on a cloth and rubbed the rest off, then finished off by wiping it down with rubbing alcohol to remove the WD40 residue. It took a while but worked well and didn't damage the paint.
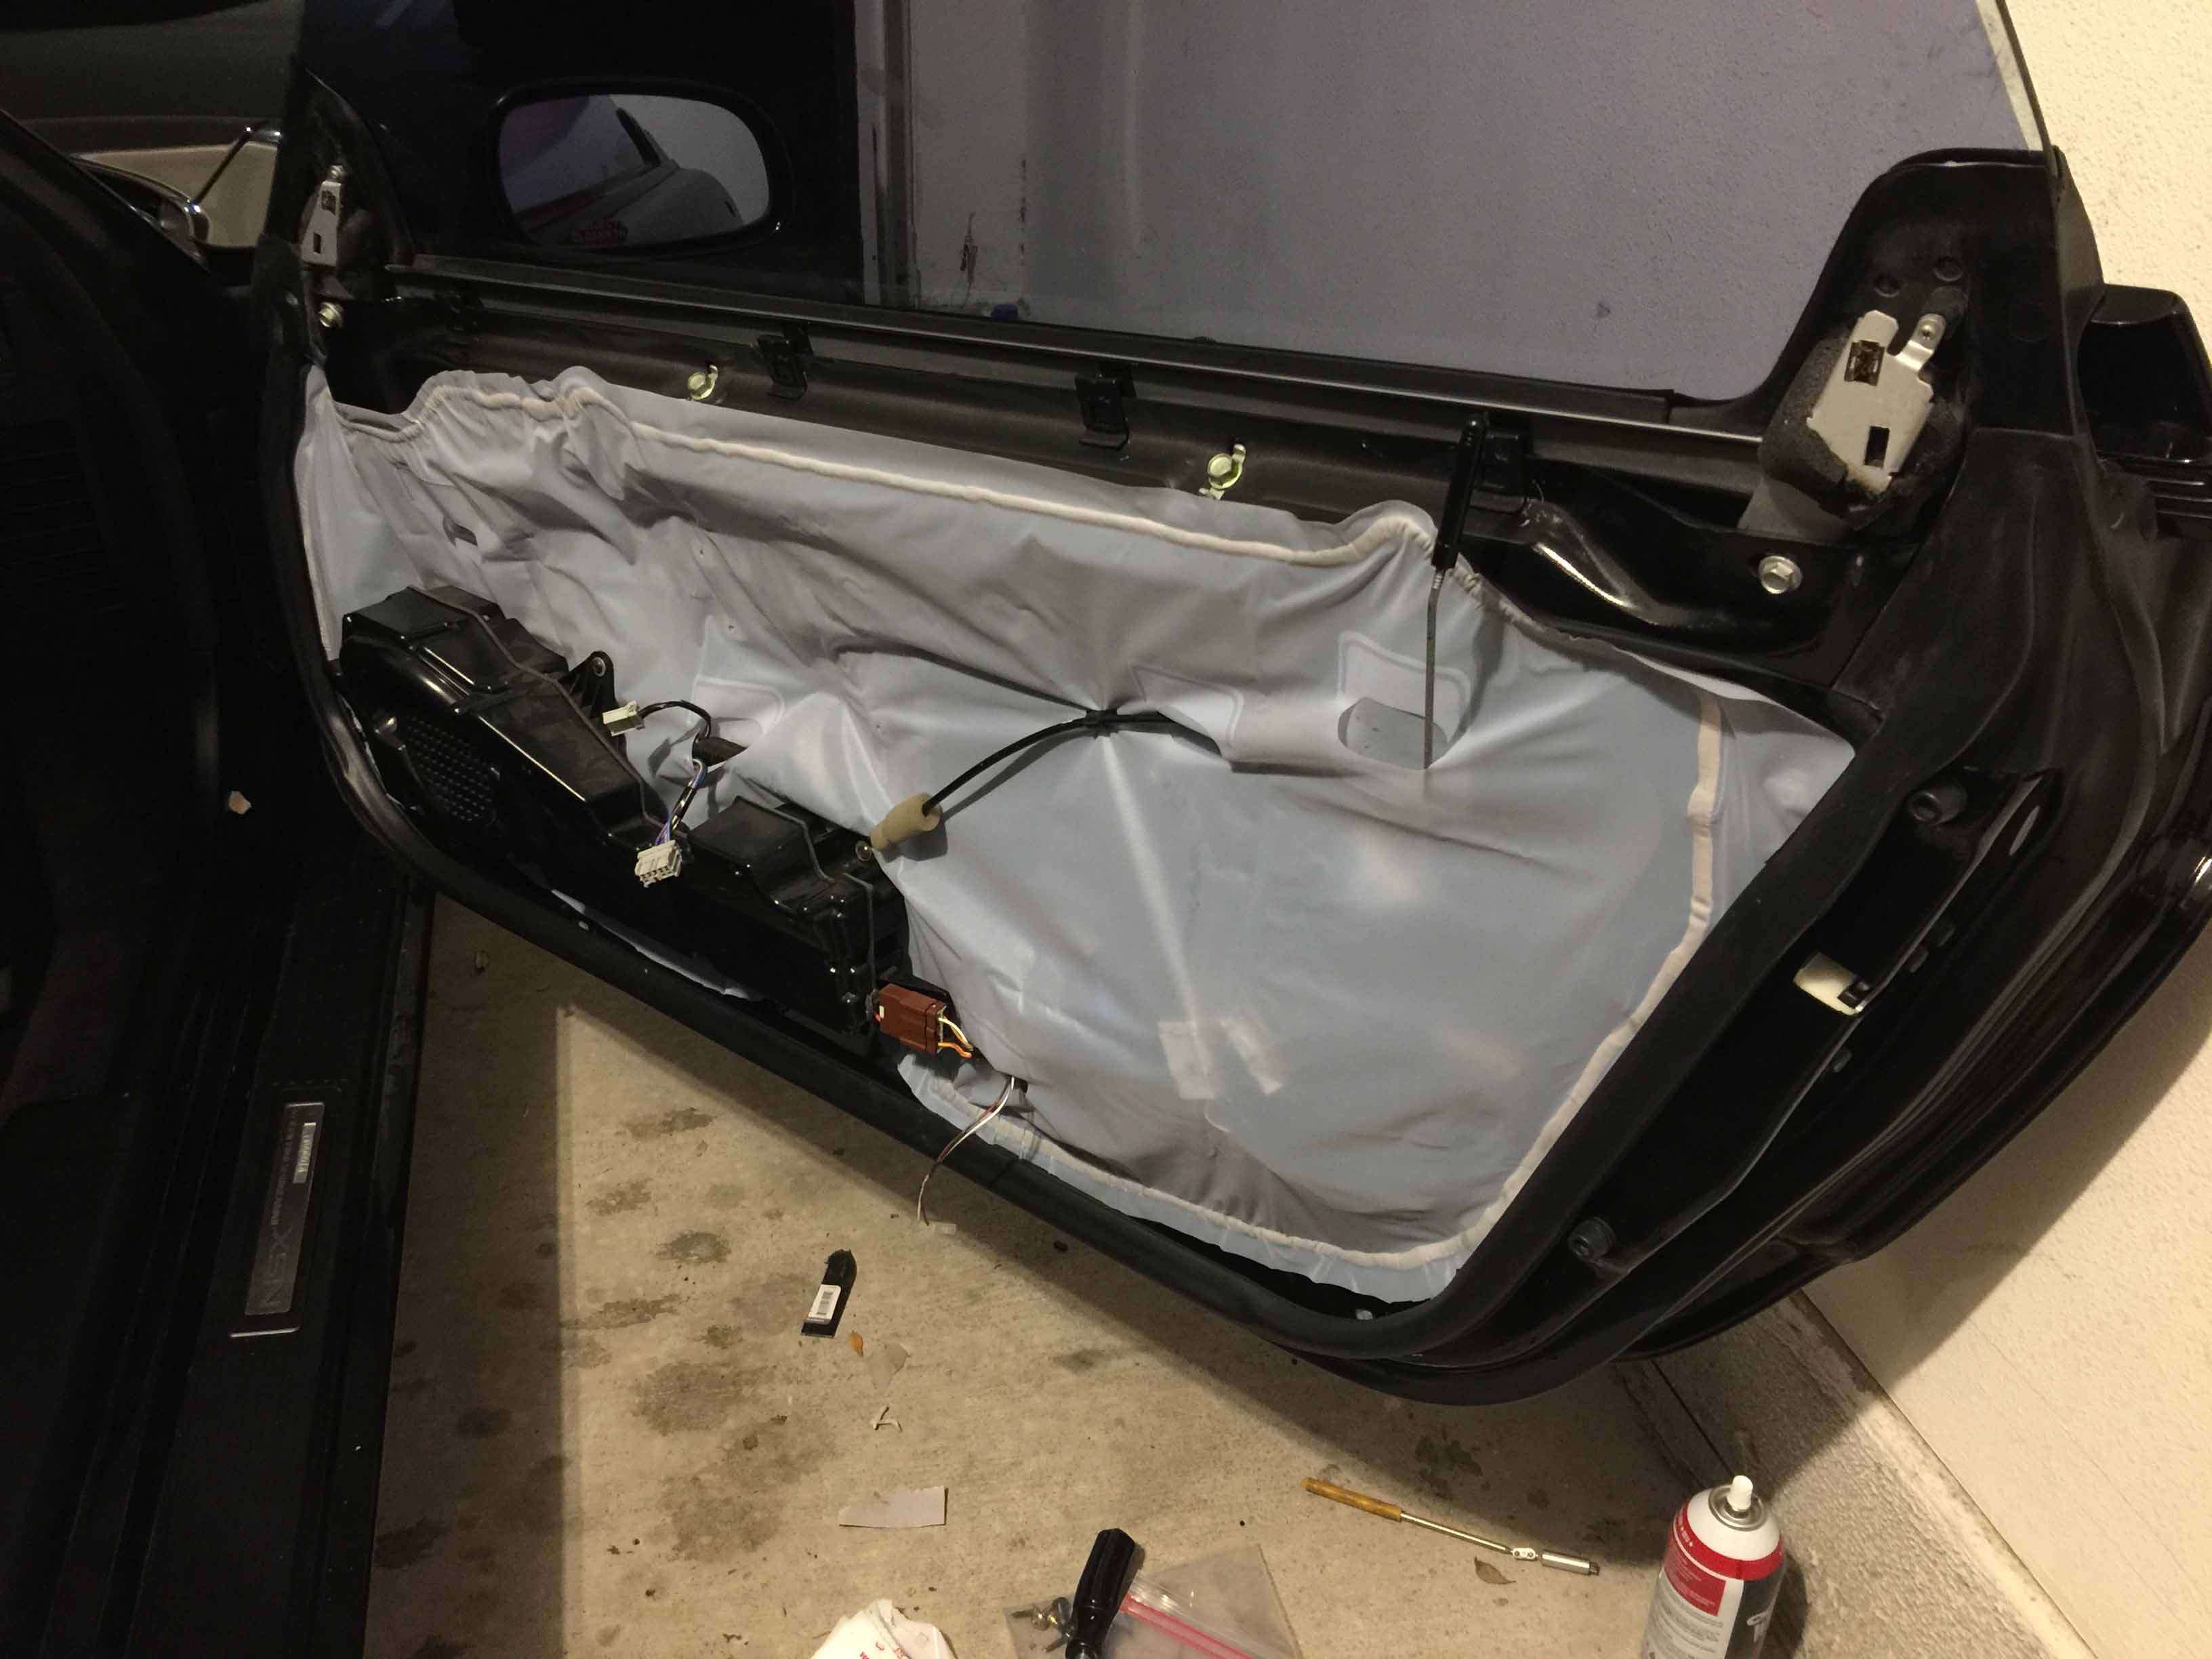
I did some searching to find a way to install the new moisture barriers that would be waterproof, reliable, and removable without too much effort, and the BMW guys use butyl rope to do this. So, I bought 90 feet of 1/8" butyl rope at Lowes for about $6 and went to work. I did the driver side door first and it went on well but I think I put too much tension on the plastic when I installed the speaker box and the door handle so I think I'll order another one and redo it.
Using what I learned on the driver side, the passenger side went on near perfectly.
1) Make sure the door is clean and free of leftover glue/oil/etc.
2) Hold up the moisture barrier and poke the wires through the holes in it, wherever possible make sure the flaps on the back go over the wire harness to keep water from running in.
3) The MB has a hole for the top left and top right door panel screws, put these screws in to loosely hold the MB in place while you install the butyl rope. I find it easiest to apply the rope in 6-8" sections, there is no increased risk of leaking doing this since it mashes together easily if you overlap it a bit.
4) The door shell has small grooves where sealant was applied, lay butyl rope along the top edge of the door in this groove and lightly press the door liner onto it so that it sticks, but can still be easily removed.
5) Install the door handle, central locking box, and speaker box in that order. You do this so the door liner is pulled along the contour of the door panel and won't be stretched out.
6) At this point, around the edges in some places the MB will want to bunch up since you're trying to cover a 3-dimensional surface with a 2-dimensional sheet of plastic. To make these areas seal against the butyl rope, you press the MB into the butyl using your fingernail/dull plastic scraper/etc to create small ridges, this will let you take up the slack in the plastic.
7) After the MB is stuck on all the way around, get a heat gun and set it on low (~250F) and heat up a portion of the plastic on the rope and then press it on with your fingers until it sticks well. You can also make sure there is no tension on the plastic as it is very easy to stretch when heated a bit.
Anyways, with the doors all put together the windows go up and down much faster and smoother than before. Hugabuga's kit is completely worth the cost.
Bonus checks at work went out this month so in addition to paying off a nice little chunk of what I owe on it I think I'll splurge a bit and get the window tint redone with some nice new ceramic film, the nasty purple stuff needs to go.
Anyways, at the beginning of this week I decided that it was finally time to pull the door panels and knock out everything there at once. I dropped the car off at a very highly reviewed PDR shop here in Austin to have the three door dings and one fender dent fixed since I thought not having door panels might make it easier for them to do the work. Only the fender dent and the passenger door ding were able to be fixed though, the driver side dings were too sharp to do anything about, and they even pointed out the subtle marks left by the previous owners attempts to PDR it as well, so I guess I'll just have to live with them.
Anyways, onto the window regulators. After installing the pulley from the kit and sanding the teflon feet a bit to slide smoothly with my warped slider part, I decided that I wanted more. More pulleys, to be exact. So I went on Amazon and found some nice little sealed bearing pulleys (I paid about $10 for a set of 5 and $7 for hardware at Home Depot) and went to work with the dremel. Here is the result: the first 6 pulley NSX window regulator retrofit that I've seen.
I had to grind away quite a bit of the plastic part at the top so I ran the bolts holding the pulleys on through the backside of the plastic for extra support. I haven't reassembled the motor portion yet but with the cables pulled tight it seems to work perfectly!
After installing the passenger side regulator which I posted above, I had to reinforce it since drilling out the plastic bracket to install the leftmost pulley caused it to flex and creak. It's fixed now but for the driver side I added the topmost pulley since the other one really doesn't have that much stress on it.
And the other parts I need to put the doors back together showed up after a couple of weeks on back order.
I bought a new antenna nut and grommet since my original had been gold plated and I couldn't get the gold out of the dimples.
To remove the factory godzilla jizz sealant that was left over from the original shredded moisture barriers, I scraped as much as I could off with a plastic scraper, then put WD40 on a cloth and rubbed the rest off, then finished off by wiping it down with rubbing alcohol to remove the WD40 residue. It took a while but worked well and didn't damage the paint.
I did some searching to find a way to install the new moisture barriers that would be waterproof, reliable, and removable without too much effort, and the BMW guys use butyl rope to do this. So, I bought 90 feet of 1/8" butyl rope at Lowes for about $6 and went to work. I did the driver side door first and it went on well but I think I put too much tension on the plastic when I installed the speaker box and the door handle so I think I'll order another one and redo it.
Using what I learned on the driver side, the passenger side went on near perfectly.
1) Make sure the door is clean and free of leftover glue/oil/etc.
2) Hold up the moisture barrier and poke the wires through the holes in it, wherever possible make sure the flaps on the back go over the wire harness to keep water from running in.
3) The MB has a hole for the top left and top right door panel screws, put these screws in to loosely hold the MB in place while you install the butyl rope. I find it easiest to apply the rope in 6-8" sections, there is no increased risk of leaking doing this since it mashes together easily if you overlap it a bit.
4) The door shell has small grooves where sealant was applied, lay butyl rope along the top edge of the door in this groove and lightly press the door liner onto it so that it sticks, but can still be easily removed.
5) Install the door handle, central locking box, and speaker box in that order. You do this so the door liner is pulled along the contour of the door panel and won't be stretched out.
6) At this point, around the edges in some places the MB will want to bunch up since you're trying to cover a 3-dimensional surface with a 2-dimensional sheet of plastic. To make these areas seal against the butyl rope, you press the MB into the butyl using your fingernail/dull plastic scraper/etc to create small ridges, this will let you take up the slack in the plastic.
7) After the MB is stuck on all the way around, get a heat gun and set it on low (~250F) and heat up a portion of the plastic on the rope and then press it on with your fingers until it sticks well. You can also make sure there is no tension on the plastic as it is very easy to stretch when heated a bit.
Anyways, with the doors all put together the windows go up and down much faster and smoother than before. Hugabuga's kit is completely worth the cost.
Bonus checks at work went out this month so in addition to paying off a nice little chunk of what I owe on it I think I'll splurge a bit and get the window tint redone with some nice new ceramic film, the nasty purple stuff needs to go.
Last edited by MotorMouth93; 08-05-2017 at 09:29 PM.
 03-03-2017, 10:49 PM
#41

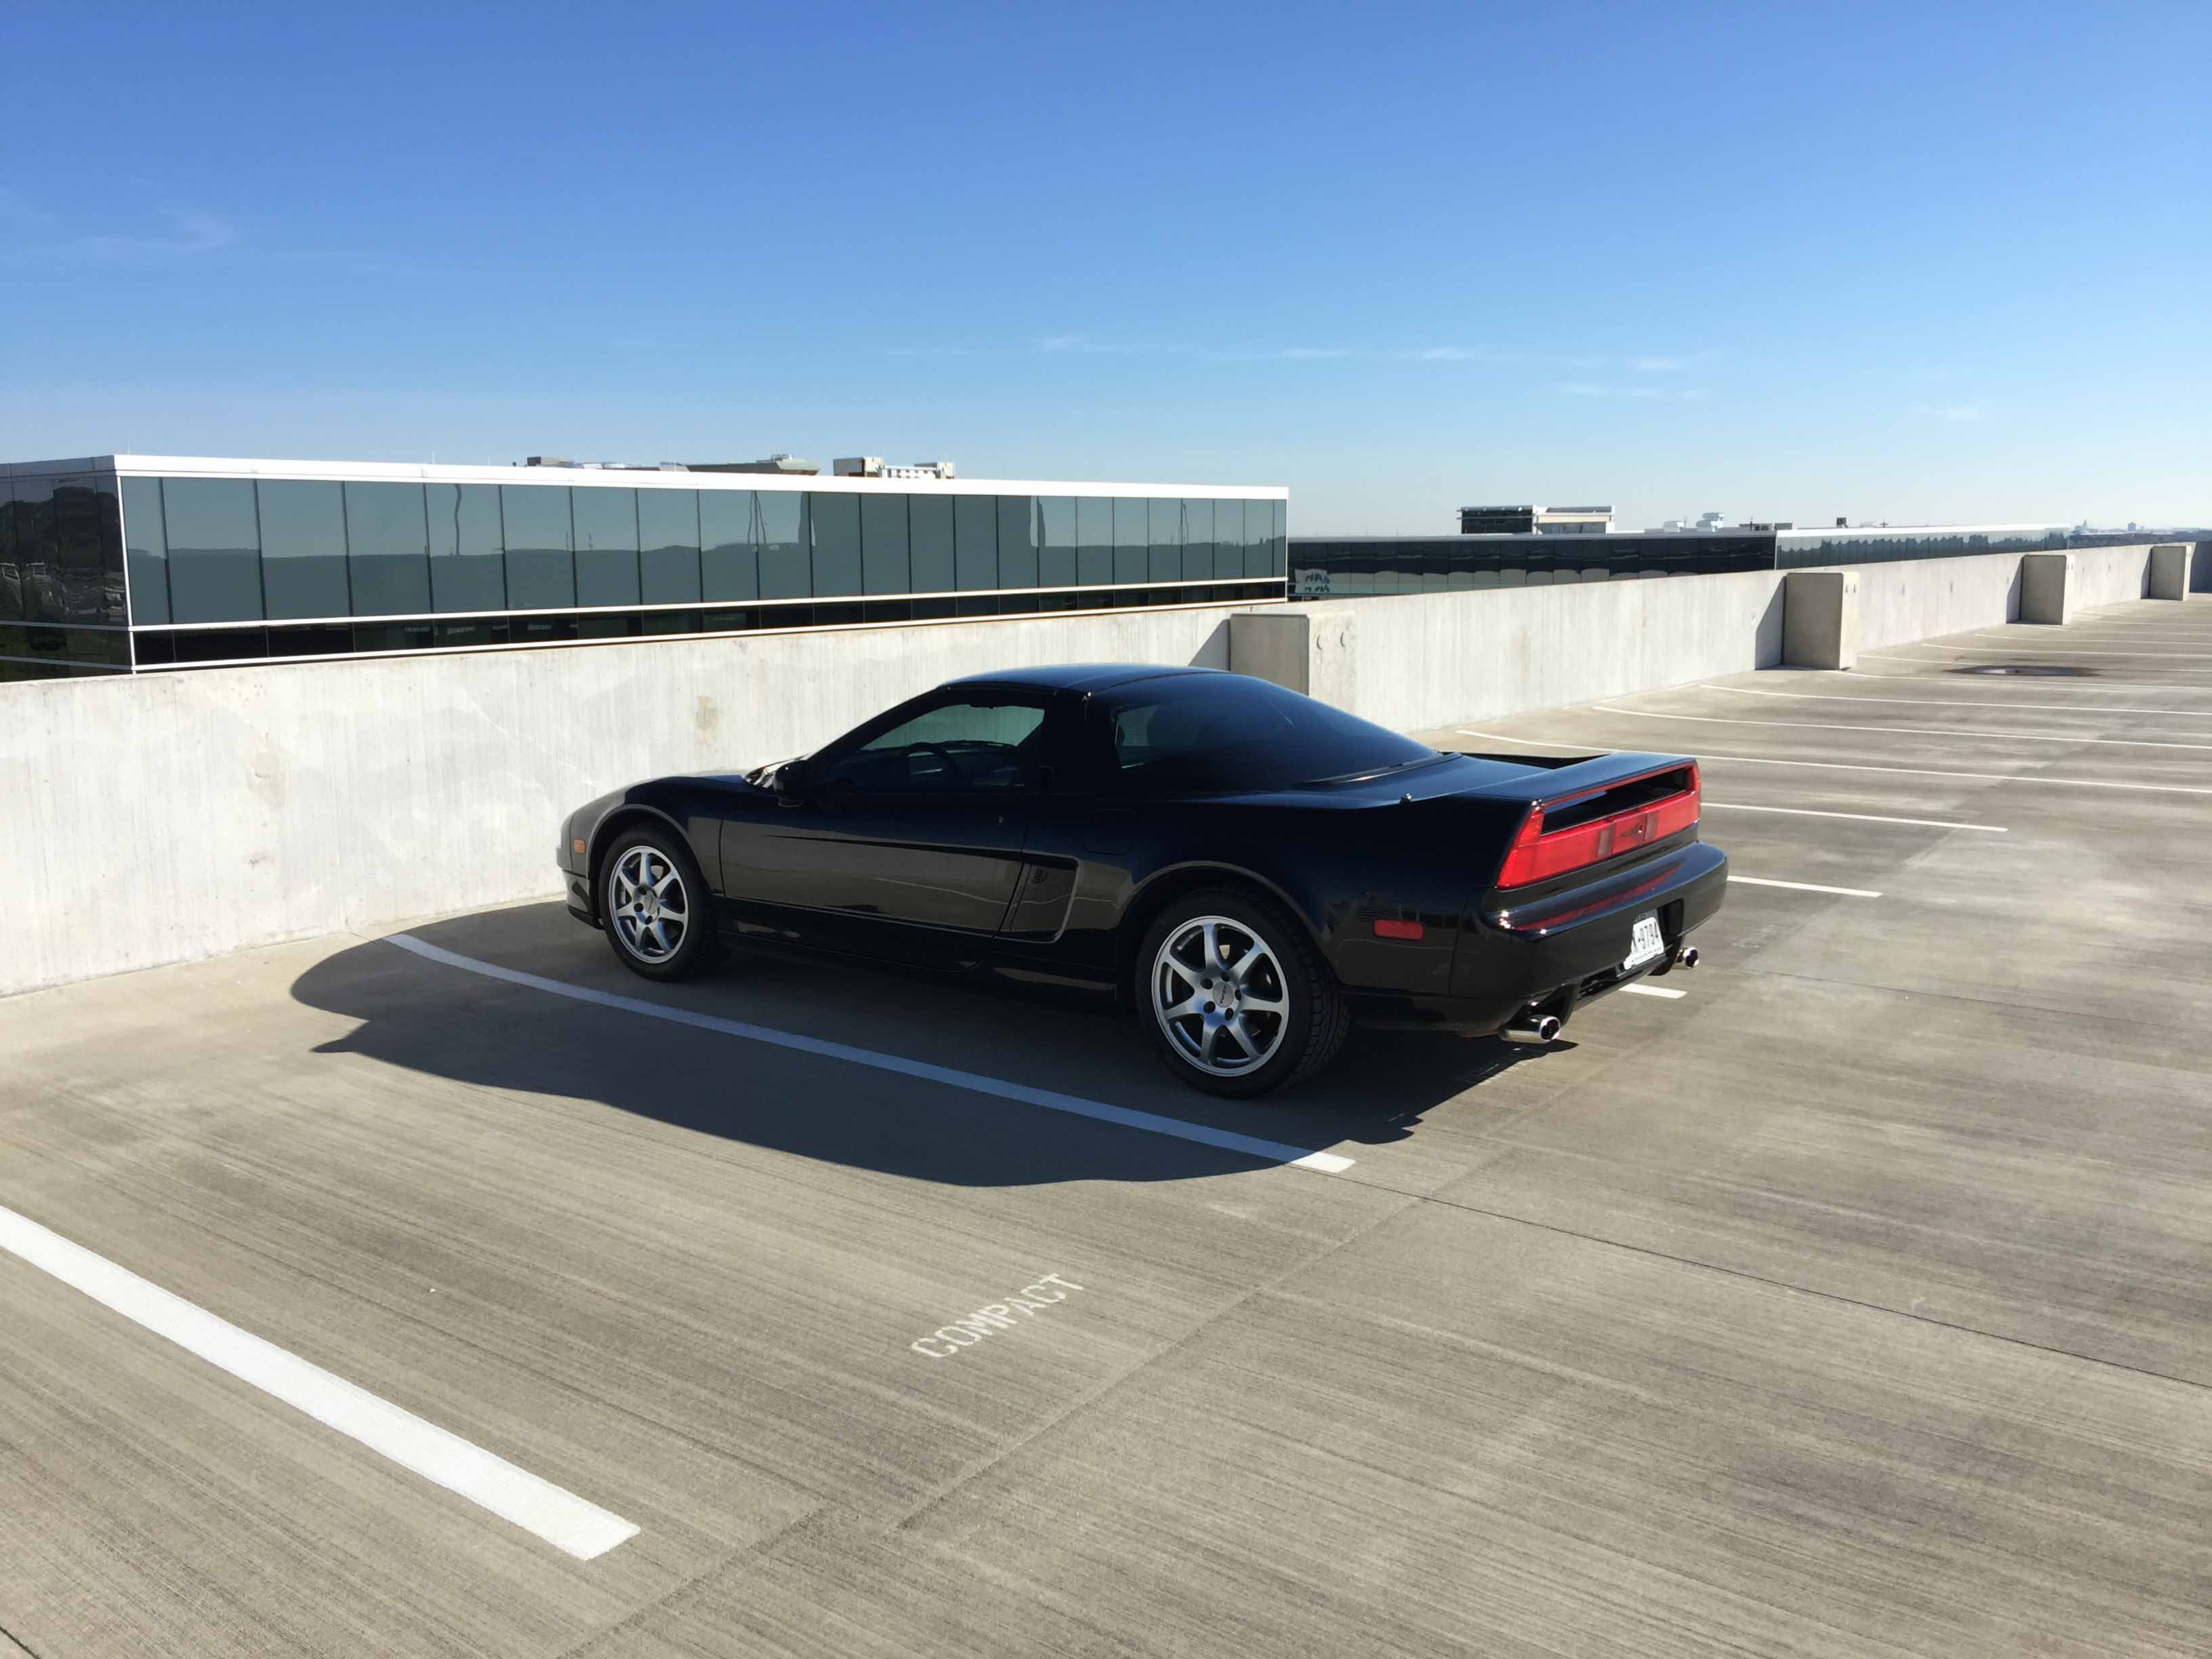
Anyways...The Audi dealership I bought the car from had the B-pillars and back bumper resprayed due to sun damage, and from the looks of things, whoever did it had absolutely no clue what they were doing, I got better results than this when I painted my Integra in my parents back yard and that isn't an exaggeration. Pro tip: Stay away from Audi Denver if you want quality body work.
It wasn't enough to dissuade me from buying the car though so here I am. I got tired of looking at the **** respray so I decided to fix it.
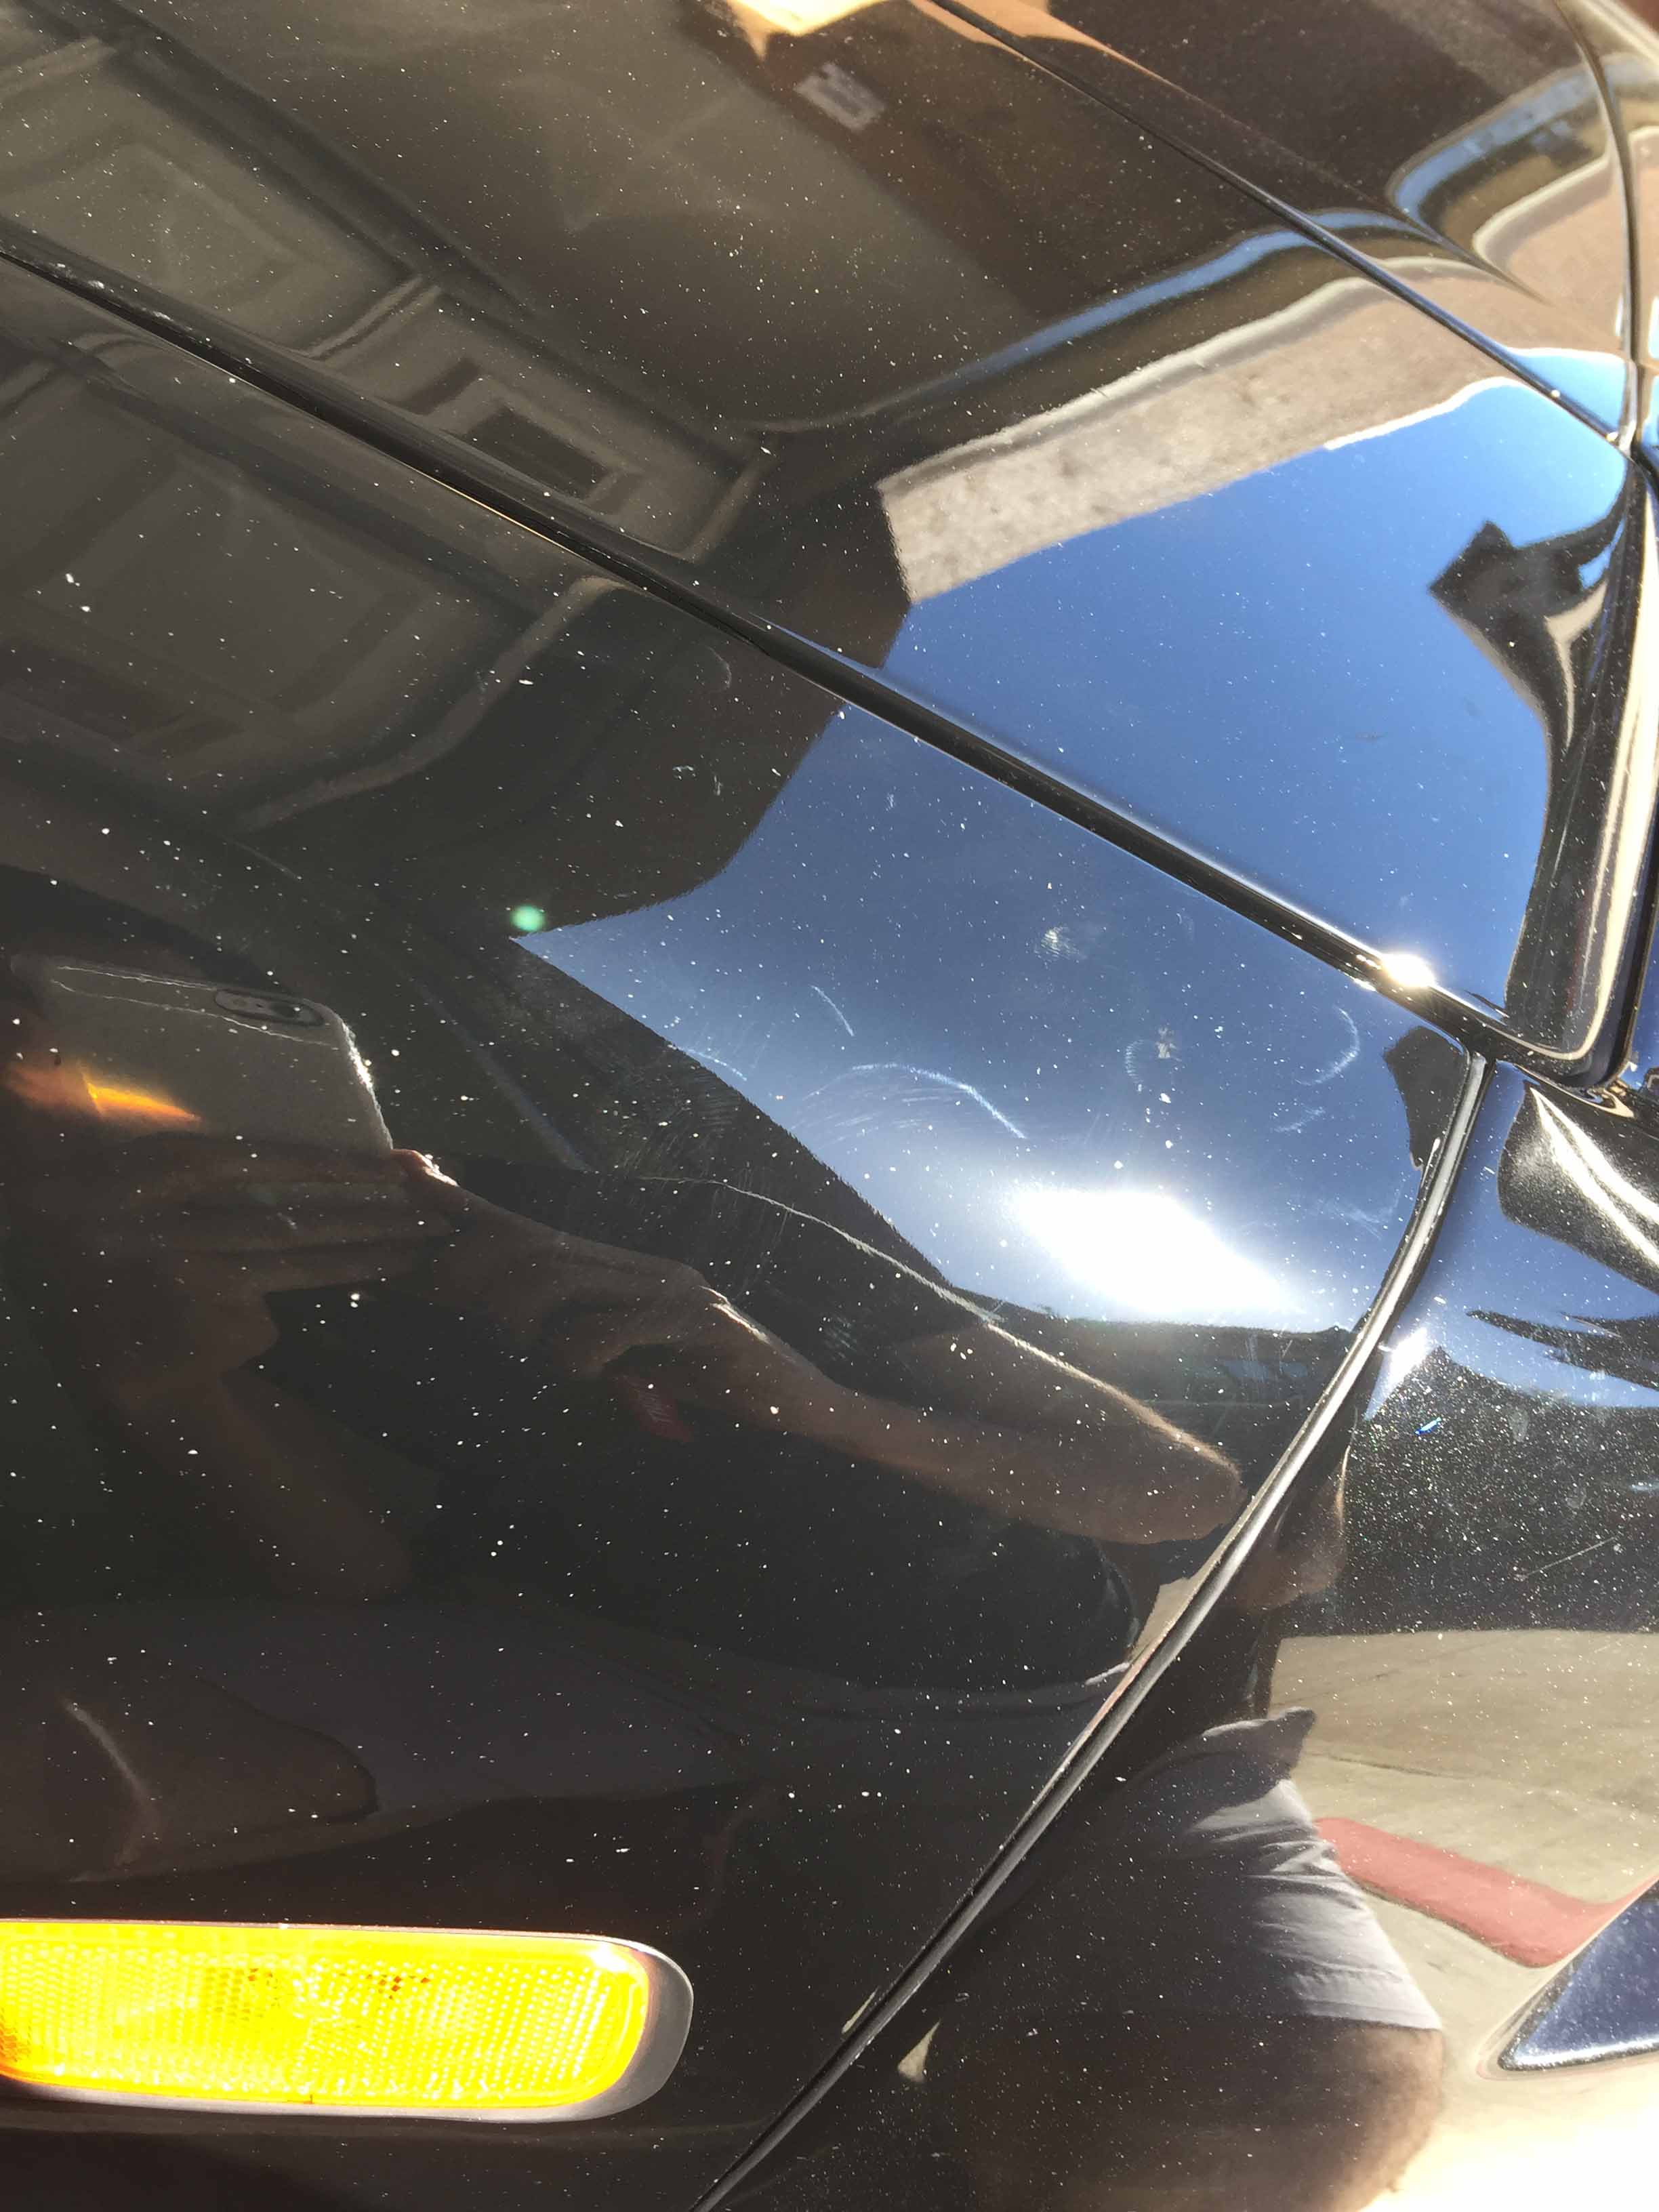
Here you can see why I hate it. The prep work was done with sandpaper that was too course, so there's little sanding marks all over it. Photos taken after I had masked it off to protect the edges where the paint/clear is thinner.
The reflections look like **** compared to the glasslike finish in the factory wetsanded paint.
The process I use is 2000 grit ->3000 grit ->DA polish with increasingly fine pads/compound. Sanding is done with Meguiar's quick detailer as lubricant, the 2000 grit is done with a block to get everything nice and flat, and 3000 grit is just done by hand. If you're going to do this, use very little pressure and wipe everything off every 30-60 seconds to check your work. Some parts flatten out easily, others take a bit more time so you don't want to keep sanding where you don't need to and thin out the clear more than absolutely necessary -- essentially the same as what I did on the front bumper.
Almost done wetsanding with 2000 grit, you can see the sanding marks are almost gone.
After wetsanding again with 3000.
Nice and polished, much better than before. There is a slight difference in the paint color, but it's not really noticeable and I can live with it for now.
Here is an edited photo of the other side showing both the before and after side by side, also a huge improvement, but it wasn't quite as bad as the driver side.
Hopefully I'll have time to do the back bumper this weekend, and possibly install the new front passenger wheel bearing too.
Last edited by MotorMouth93; 08-05-2017 at 09:30 PM.
03-04-2017, 11:26 PM
#42
Quick before/after of the back bumper. You can see that the strip along the top of the bumper still has some orange peel but I could not safely sand that with a block without removing the bumper, which I don't want to do yet.

Last edited by MotorMouth93; 08-05-2017 at 09:32 PM.
03-14-2017, 12:13 PM
#43
I dropped the car off at a window tint shop on Saturday and had the old purple stuff removed and new 35% ceramic tint installed all around. I picked it up yesterday and it came out extremely well, it was worth the several day wait at Austin Window Tint. The gap at the edge of the windows is <1mm all the way around. The car is disgustingly dirty but hopefully I'll have time to wash it either tonight or tomorrow.
Last edited by MotorMouth93; 08-05-2017 at 09:33 PM.
04-03-2017, 11:40 AM
#46
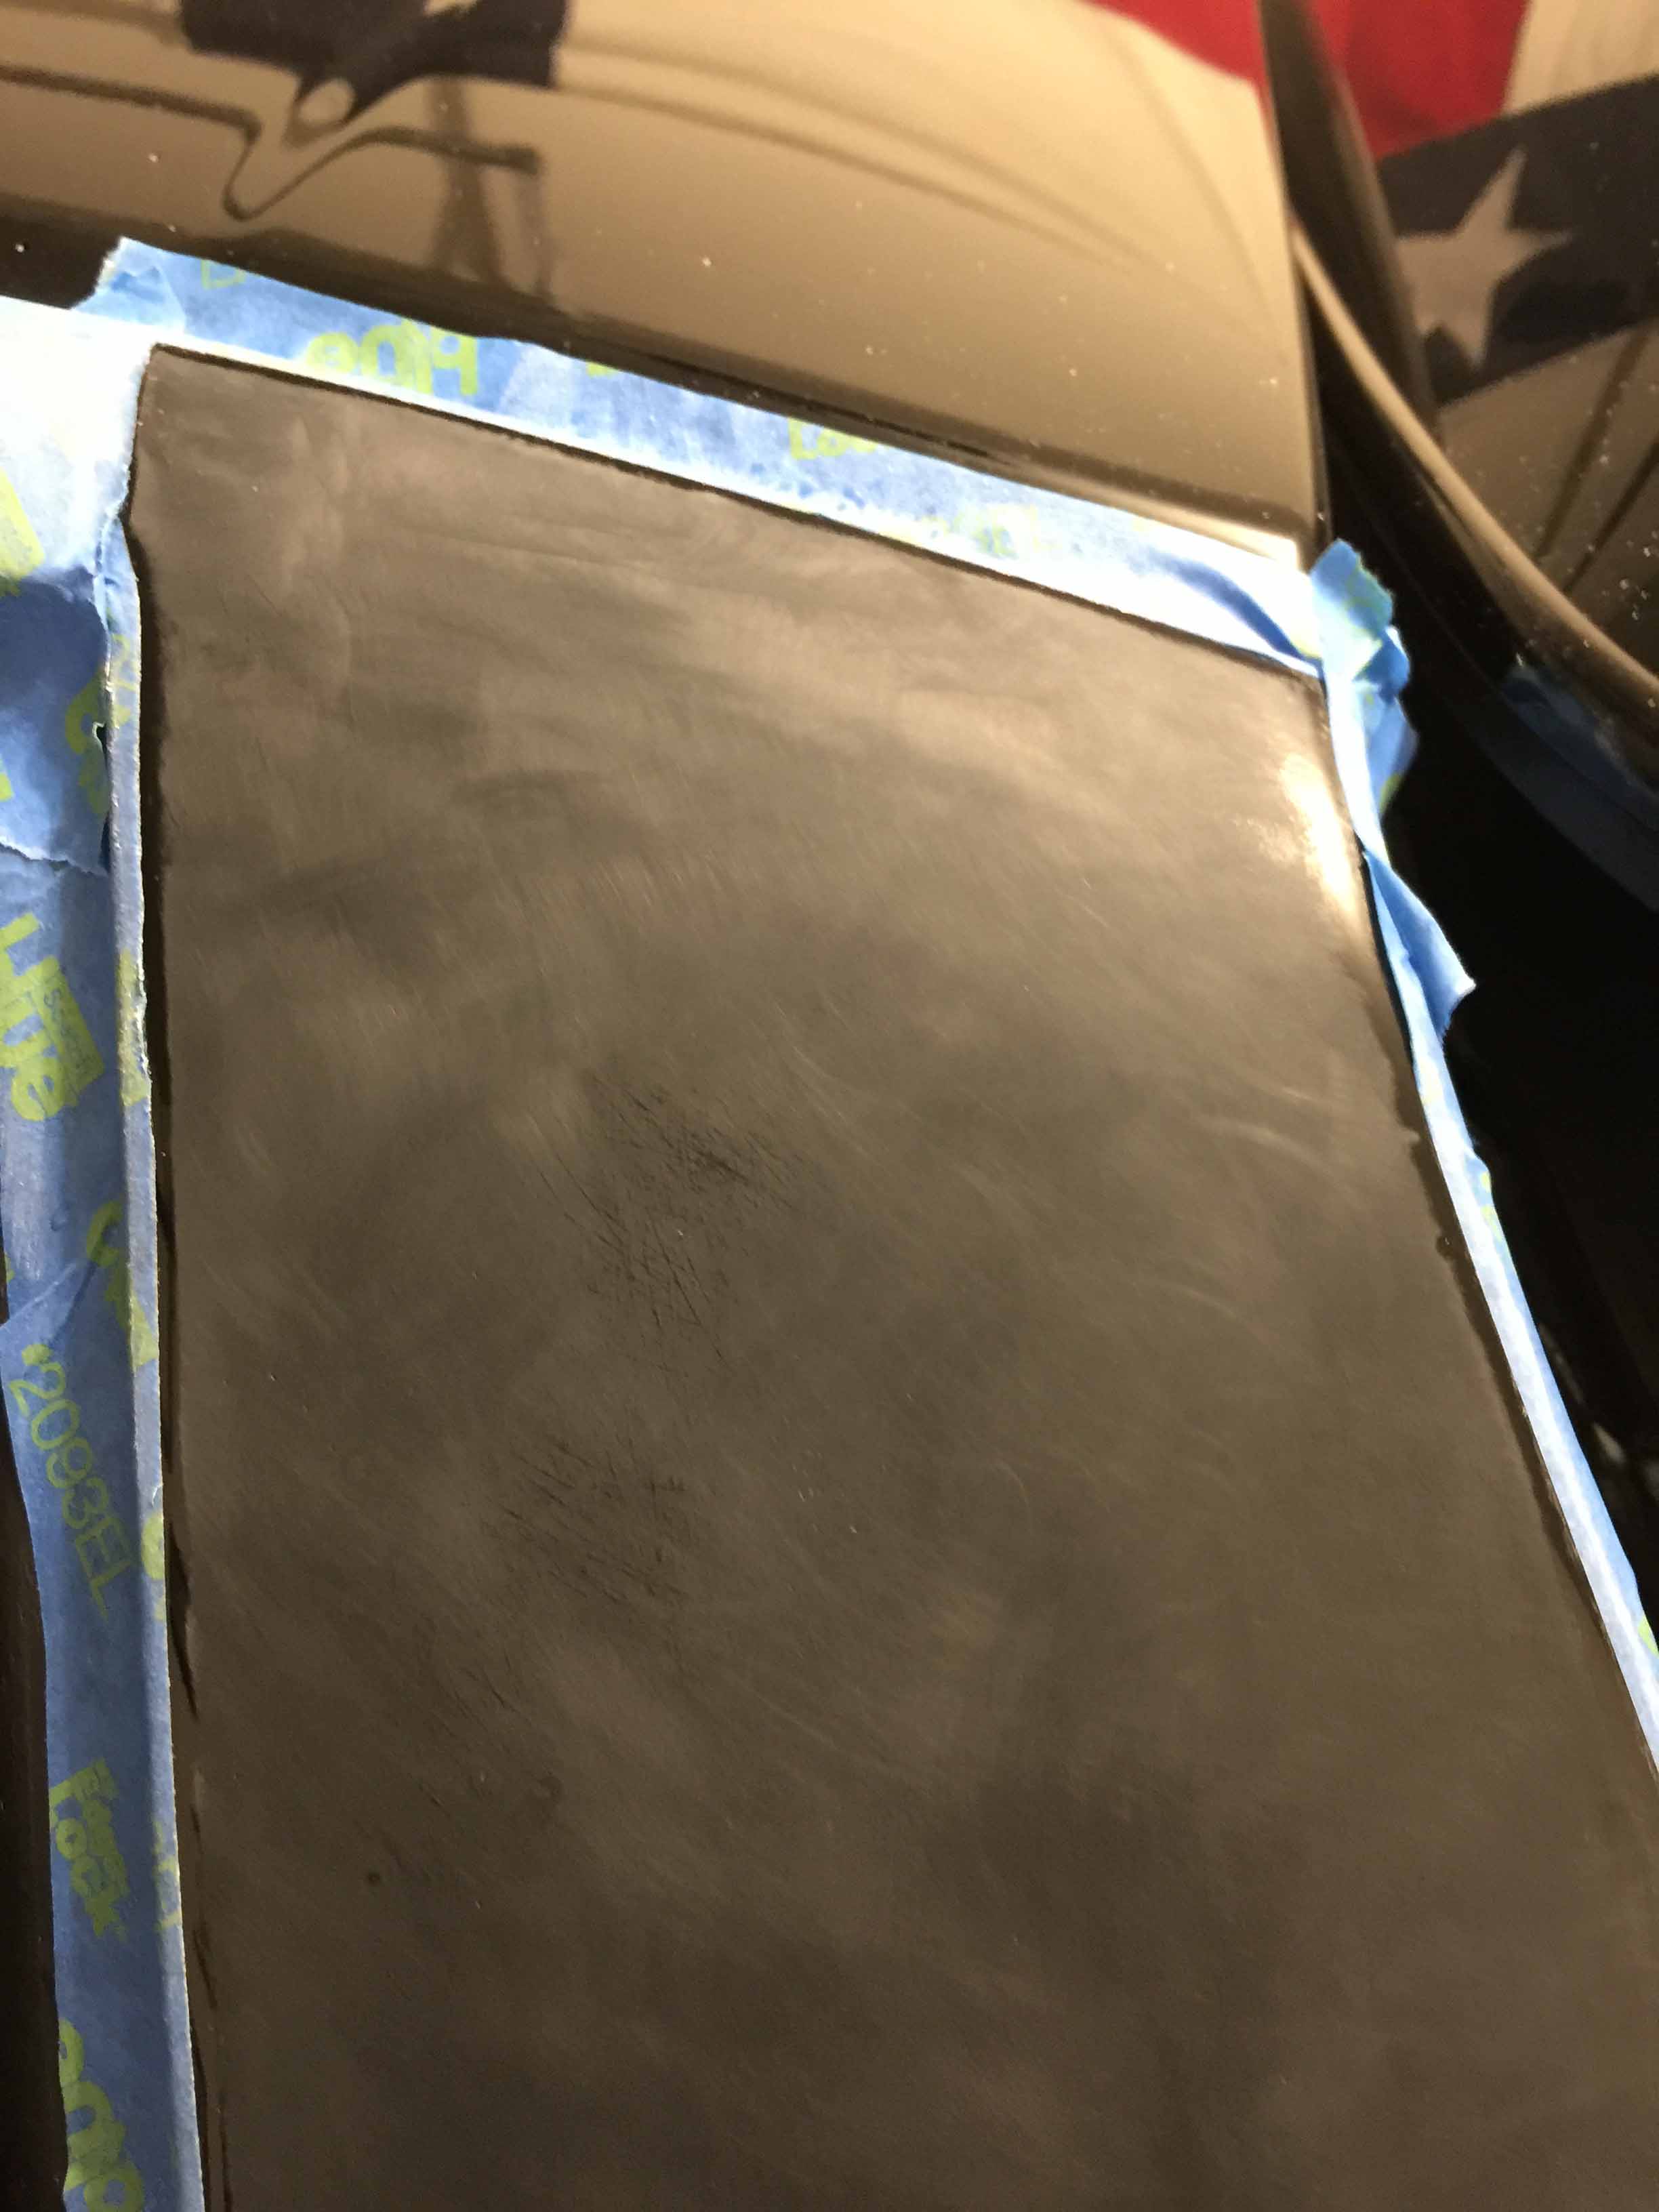
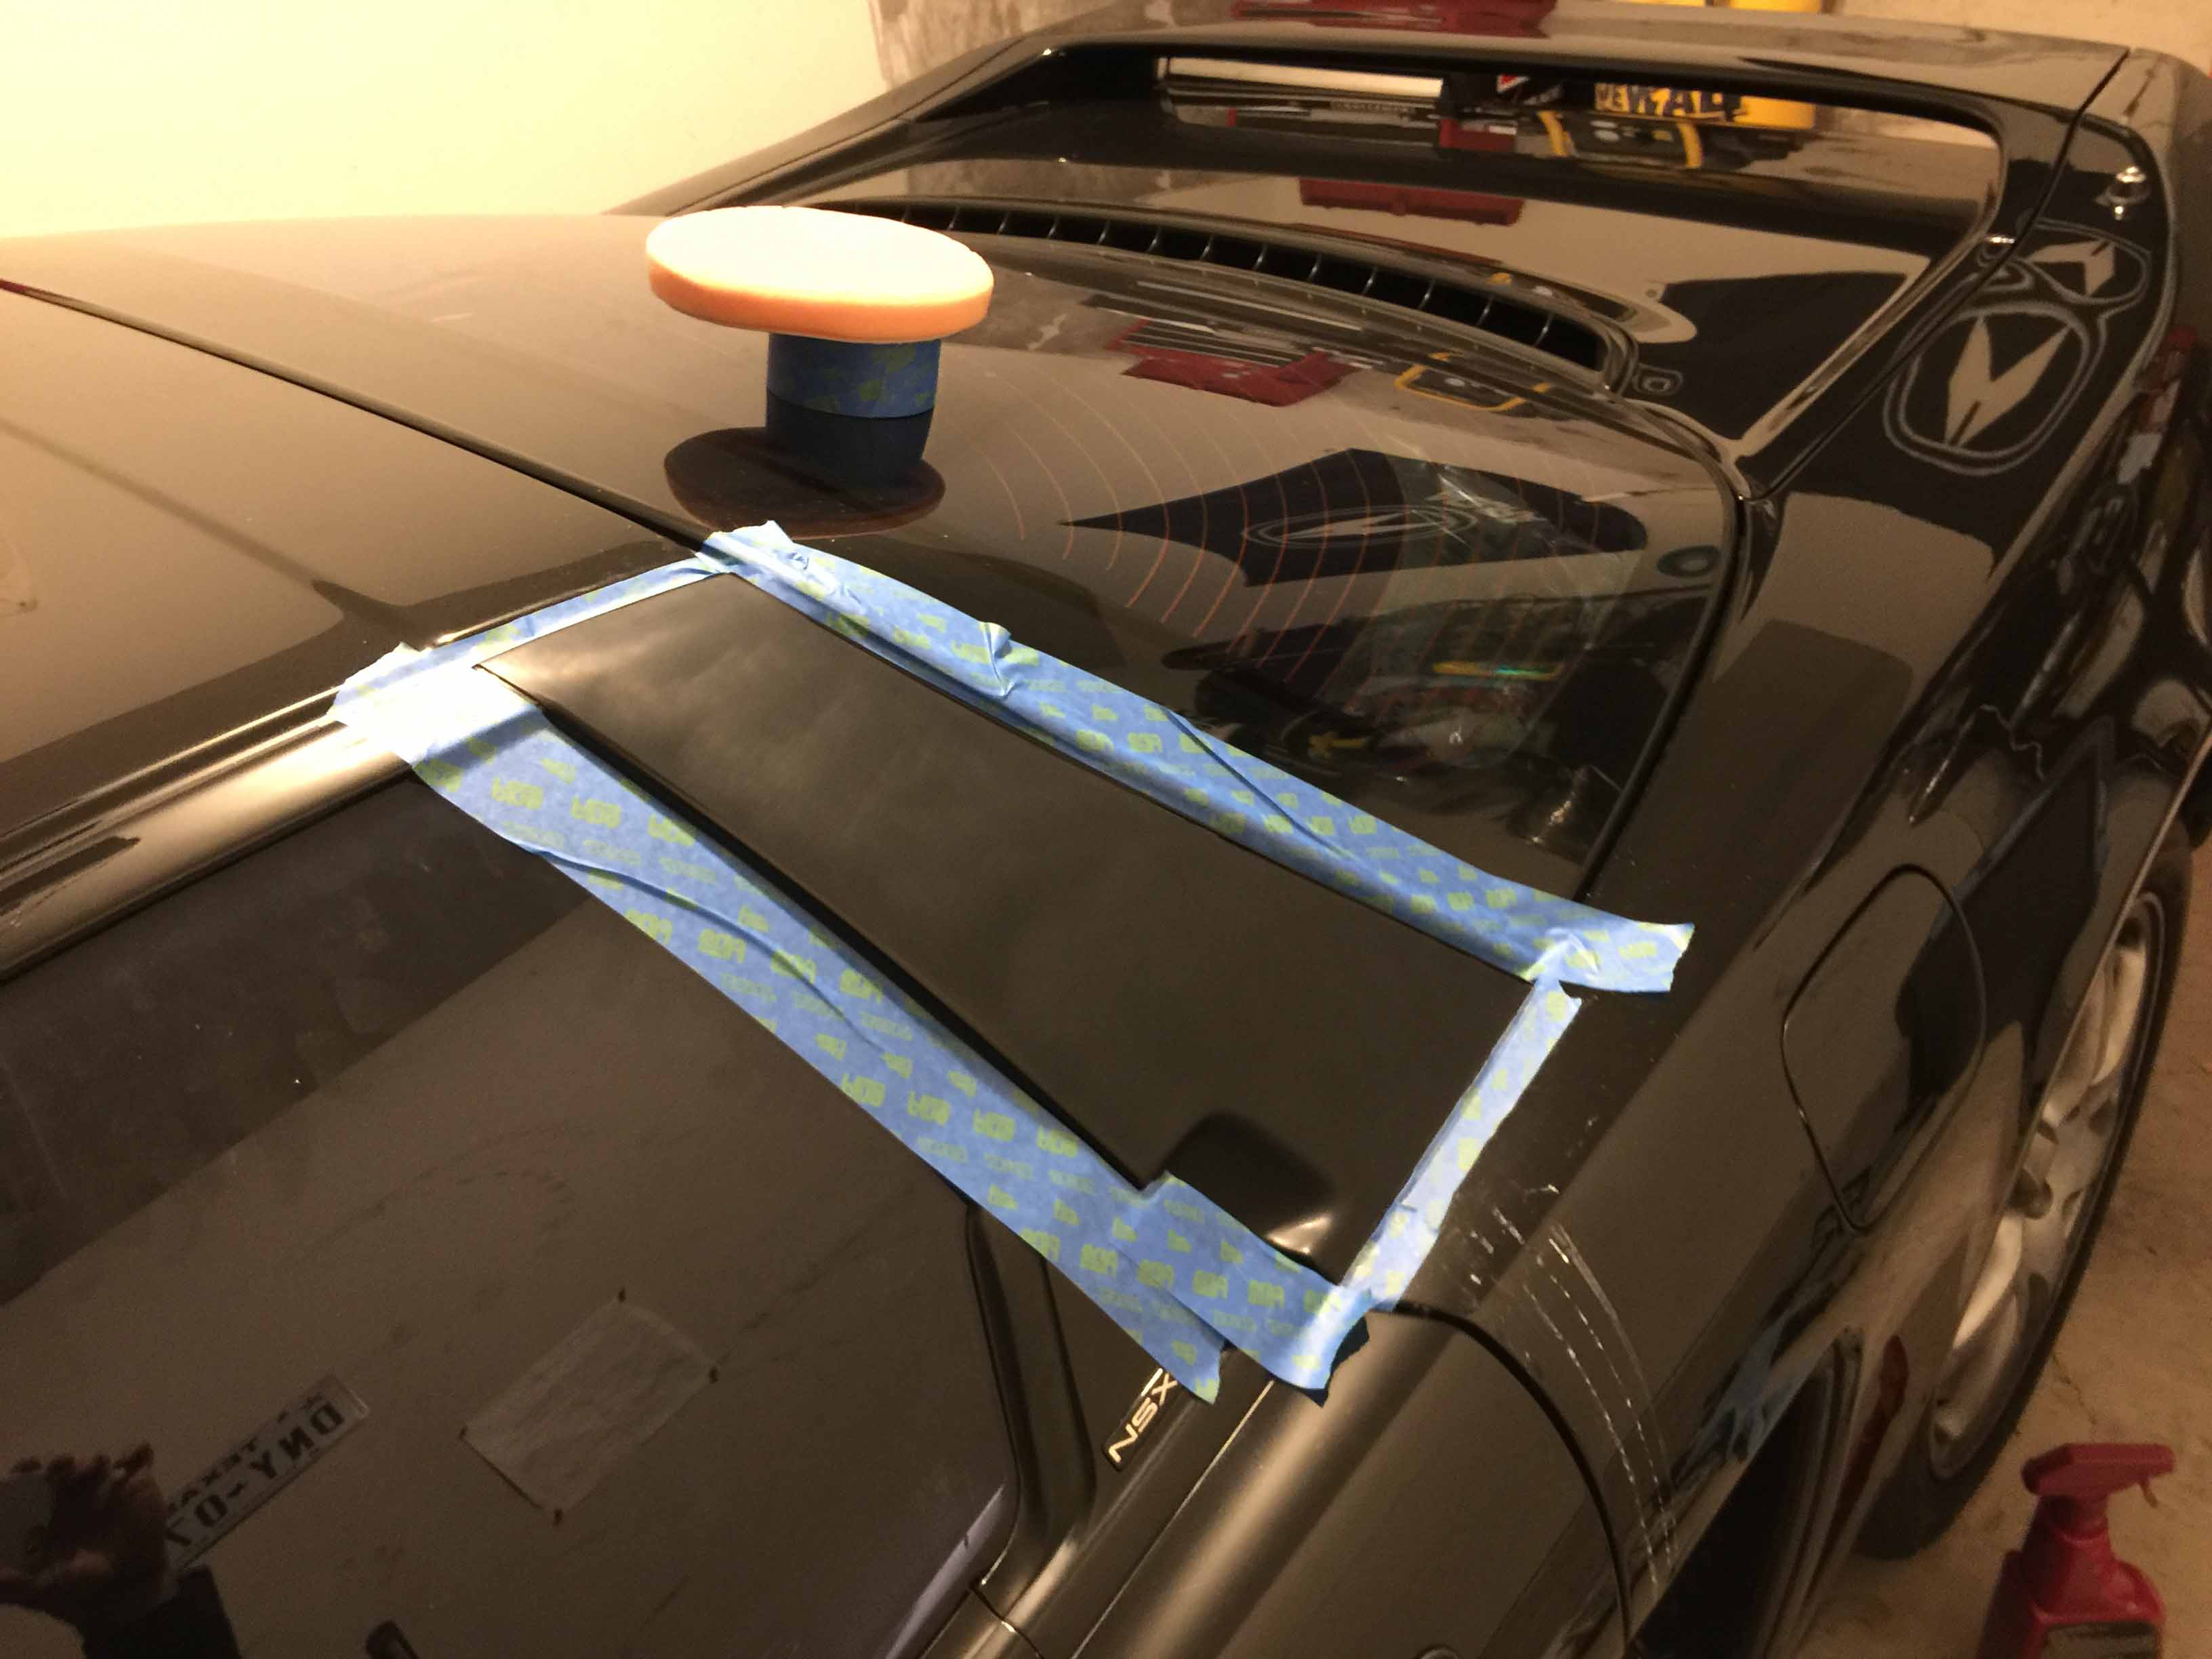
After watching a video put out by a professional detailing shop where they paint corrected a Porsche GT4 and then applied clear paint protection film over the whole car, I decided that's what I need. However, the $3000+ price tag for a professional job just won't do, and while a smarter man than myself would grumble and start pinching pennies, I realized that just the film itself would run me under $1000, so I bought a 60"x60" roll of Suntek PPF to test it out before buying a whole roll.
I did the roof first, but I should have started on the B-pillars or door handles. It came out pretty well but the edges are jagged from my not learning how to cut it properly until I was about halfway through trimming. It's fine for now since the edges aren't visible unless you're 2" away, but if I have leftover film at the end I'll probably redo it. There's a few small bubbles but they should work their wait out over the next week or so.
Then I moved onto the headlight covers, these were easy, just cut a square of film, lay it down, squeegee the slip solution out, trim, and fold the edges over.
B-pillars were next, but I don't have pictures. They came out fairly well, some edges are still a bit jagged but not really noticeable.
Now door handles, if I could do it again, I would do these first as they had the most intricate cuts and material waste is very limited from messing up since they're so small. They came out fairly well but not quite perfect, I might redo them later too. I haven't cut out the NSX logo yet in this picture. Cutting is tricky, you have to use enough pressure to score the film enough to easily rip, but not enough to go all the way through. By erring on the side of caution I've avoided any disasters but it's very time consuming. The paint on my driver side door handle was starting to wear through on the very edge from being grabbed so much so I decided not to risk polishing it and just cleaned the surface with alcohol and applied the film, making sure to leave extra on the back edge to wrap around the back. The film completely hides the rather heavy swirling on the handle! (You can see a slight finger on the B-pillar here, I need to go back with the heat gun and flatten it.)
Finally I did a fender, by this time I had mostly gotten the hang of it so it came out near perfectly, all edges are wrapped nicely with no "finger" bubbles except for one that's covered up by the fender liner. The issue with the front end is all the tiny rock chips. the film hides the smallest of the chips fairly well, but it makes some of the larger chips more visible. You can see here the reflection of the sun off of the unwrapped bumper (rather dirty right now) and off of the wrapped fender (wrapped but covered in fingerprints).
Anyways, I think I'm going to go ahead and order a bulk roll of the film and knock out the rest of the car. This stuff makes detailing the car a complete joke, even if it does show some of the chips more at least I won't have to kill myself over swirls. If anyone has any questions about the process feel free to ask. Overall it's much easier to apply than I had expected, the wet install makes it easy to fix mistakes since you can peel it up and start over many times before the adhesive wears out.
Last edited by MotorMouth93; 08-05-2017 at 09:34 PM.
04-20-2017, 06:54 AM
#49
Trial User
Join Date: Apr 2017
Posts: 4
Likes: 0
Received 0 Likes
on
0 Posts
Damn this thread is awesome. Nice work.
I just picked up my 91 NSX about a month ago, and while it's in great shape I know I'm going to have to do some of this stuff soon.
I just picked up my 91 NSX about a month ago, and while it's in great shape I know I'm going to have to do some of this stuff soon.