
Fixing Up a Turd: A Build Thread


 12-21-2016, 12:57 PM
#155
Honda-Tech Member
I hate to say it but at this point this build is pretty much as done as it will ever be. The Type-R replica wing doesn't fit in the factory holes on the trunk and I'm not willing to make bigger holes so that isn't going to happen, and I just have absolutely no motivation to bother with painting the front lip by itself. And the real killer is that I picked up a 1994 NSX (yes, it's a manual for all you purists) last weekend so most of my interest in working on the Integra is gone beyond routine maintenance and washing it obsessively since I plan on keeping it basically forever given the amount of time I've put into it, and it makes a fun daily driver.
I still might post occasionally if I get around to doing stuff on the Integra, but in the mean time, thanks for all the kind words and advice, it's been a fun few years. <3
I still might post occasionally if I get around to doing stuff on the Integra, but in the mean time, thanks for all the kind words and advice, it's been a fun few years. <3
12-22-2016, 09:36 PM
#156
I finally did the first oil change on the "new" motor, right around 9500 miles, it was overdue but I was dealing with some oil leakage (fixed, it was the crappy aftermarket cam seal) so I had to add a few new quarts along the way. I suspect it's also burning a bit based on the slight oil loss and less than stellar leakdown numbers but at this point it's not worth worrying about.
Anyways while changing the oil I noticed some play in the passenger side wheel indicating a bad wheel bearing. I've had new OEM wheel bearings and lower ball joints for a while now so I called up the dealership and they quoted $720 to install the parts. Since I'm off work this week I decided to just do it myself.
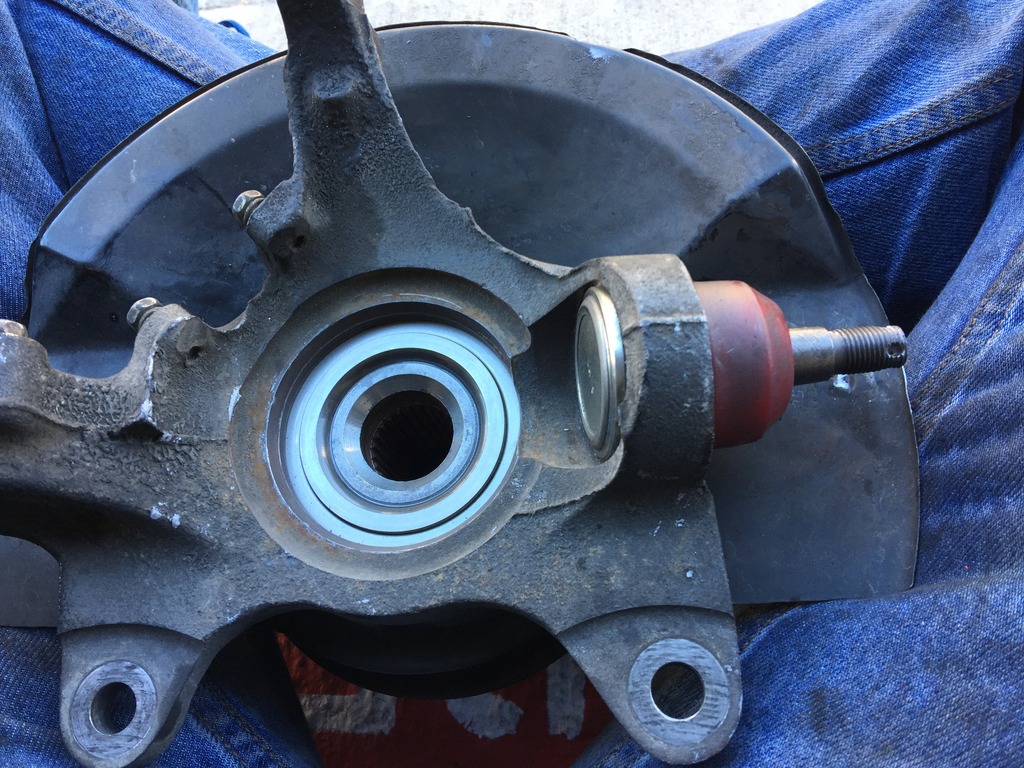
After removing the knuckle I beat out the lower ball joints, they're a relatively loose press fit so it wasn't difficult. Both lower ball joints actually had some life left but since I had the new ones already and the knuckles were out I went ahead and replaced them anyways.

The hubs was substantially more difficult to remove, but the 4lb hammer did it's job.

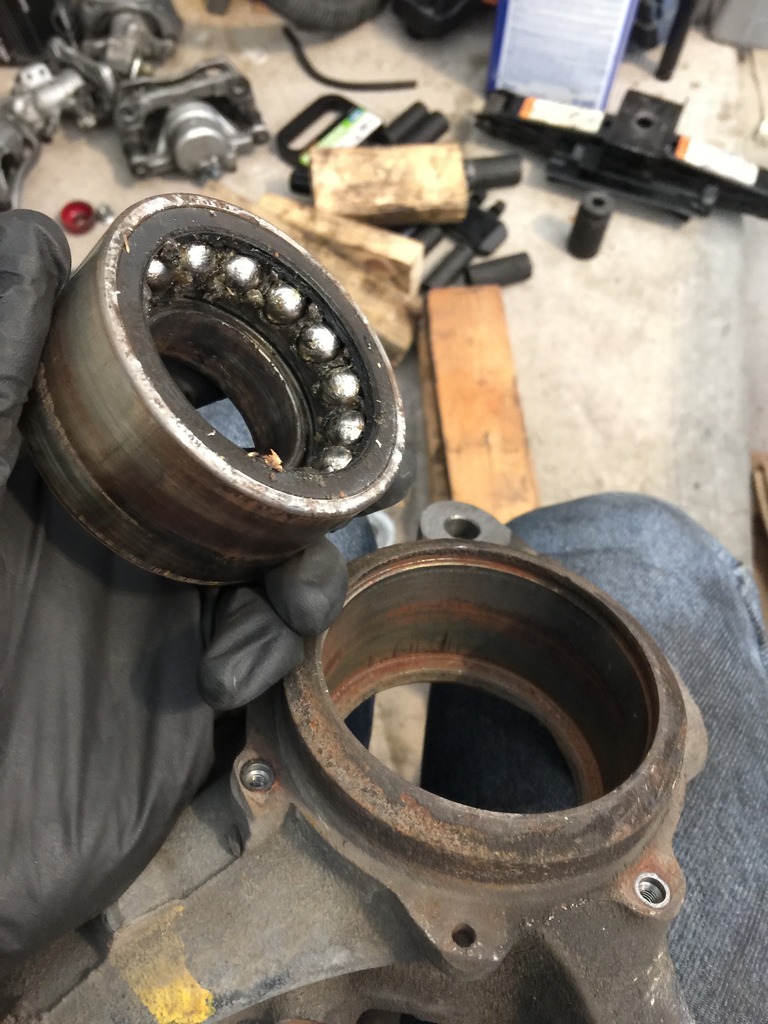
This bearing was actually still usable, but again, had the parts, why not replace them all in one go. The other one was trashed though, it had a large amount of play in it yet wasn't making any unusual noises.
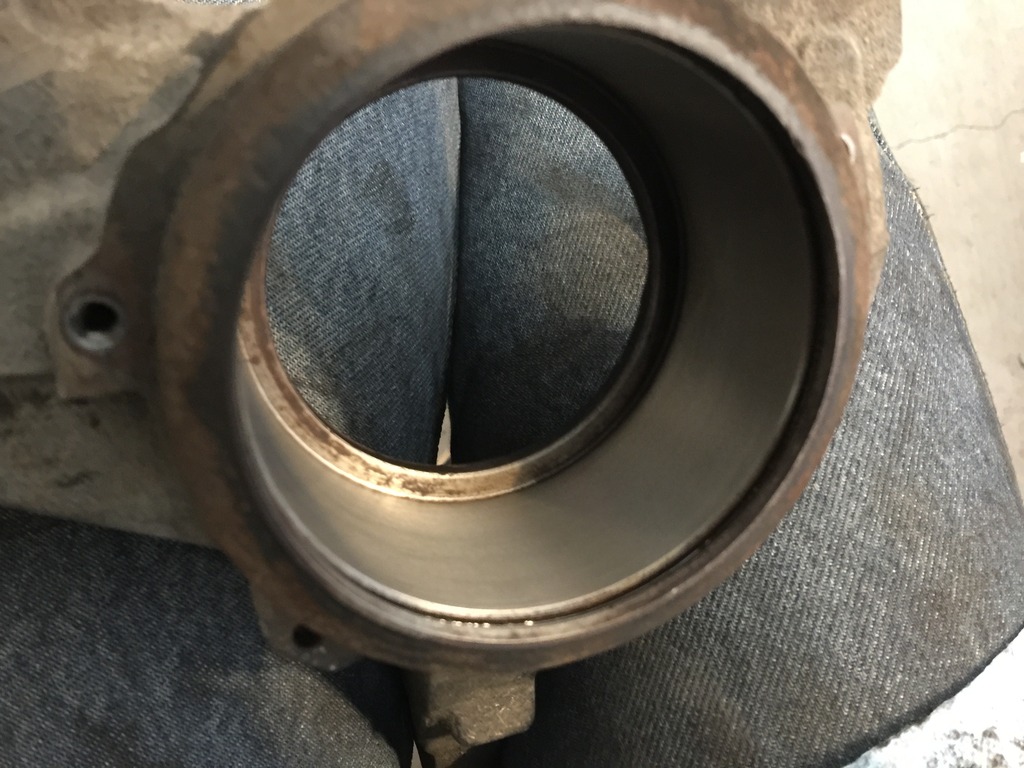
WD-40 and a green scotch brite pad do a good job cleaning up surface rust, it looks almost new.
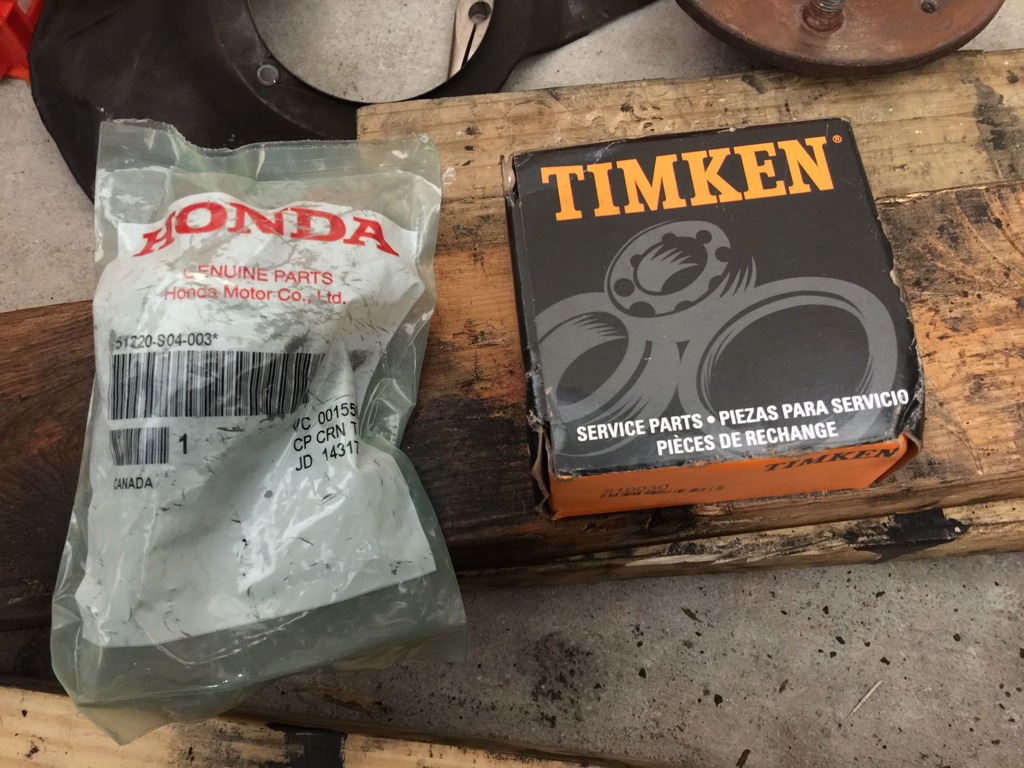
After having a very poor experience with cheap ball joints on autozone tie rods, I only buy OEM now. The Timken branded bearings are the same Koyo part that Honda sells, but less than half the price, same markings stamped in the bearings and made in Japan.
Using my makeshift wheel bearing press as seen in https://honda-tech.com/forums/honda-crx-ef-civic-1988-1991-3/write-up-diy-front-wheel-bearing-replacement-2685054/"]OneBadTurboCRV's thread here[/url], I pressed the new bearing in after loading up both the bearing and the seat with a healthy amount of anti-seize compound to hopefully prevent future rust issues.
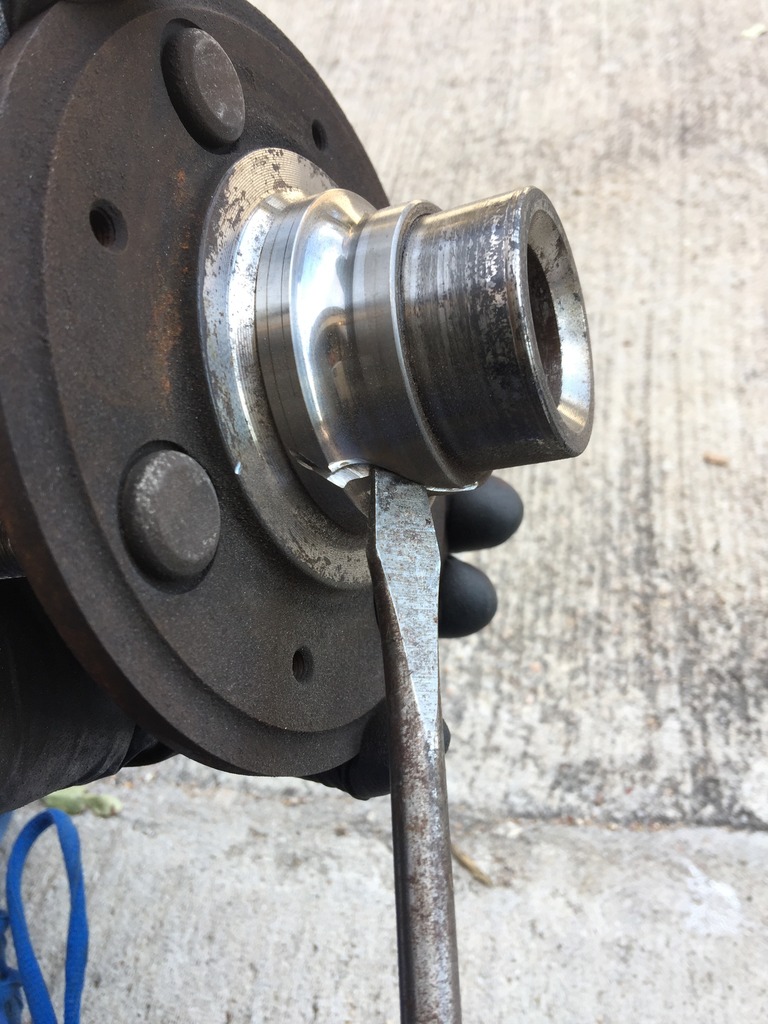
The outer race popped off with the hub so I had to remove it. Rather than cut it off using three grooves as shown in the previously mentioned DIY thread, I made one cut most of the way through then used a large flat-head screwdriver and hammer to crack the race along the cut, which loosened it enough to slide it off.
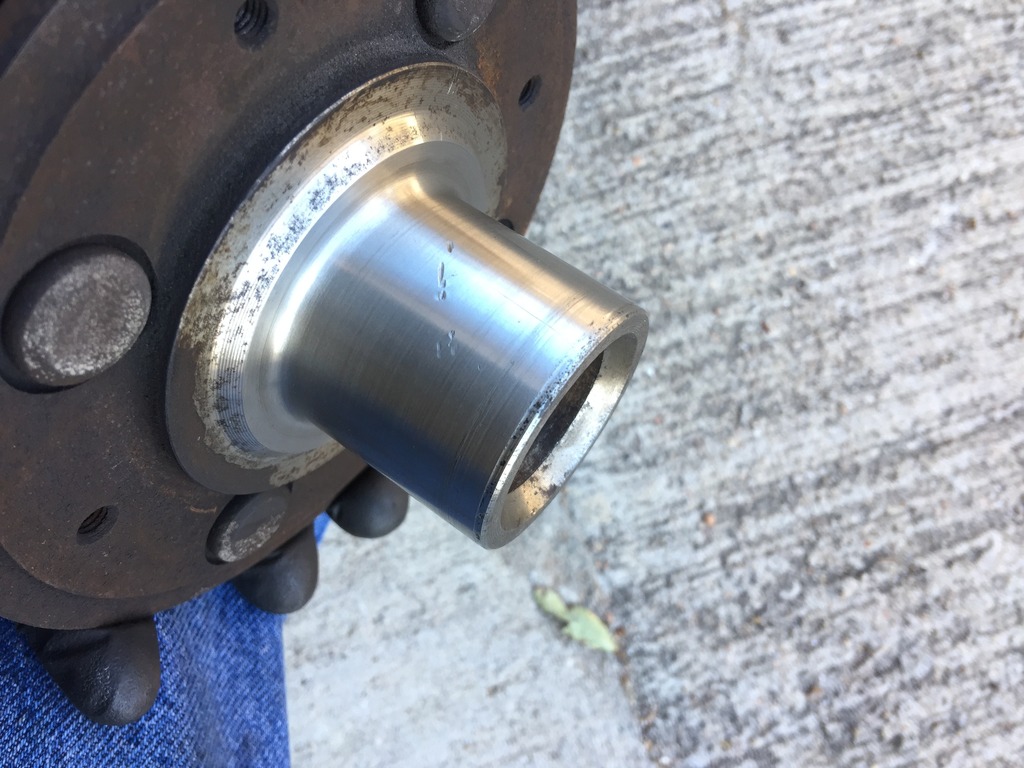
After removing the race and cleaning up the surface with WD40 and a green scotch brite pad again. I knicked the surface with the dremel a bit but it shouldn't cause any issues.
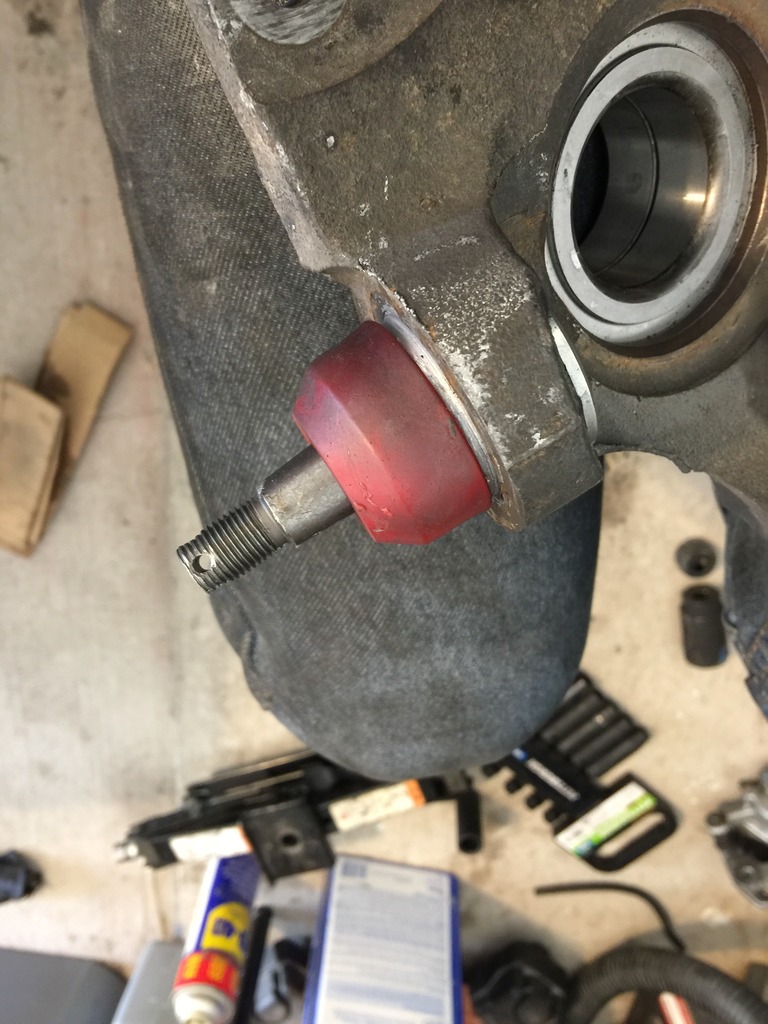
New ball joint pressed back in using the AutoZone ball joint press rental. I have polyurethane boots so I transferred those over from my old ball joints, they are much sturdier than the factory boots which like to tear when jamming the ball joint removal tool around them. I also knocked the old wheel studs out and put new ones in but didn't take a picture of that.
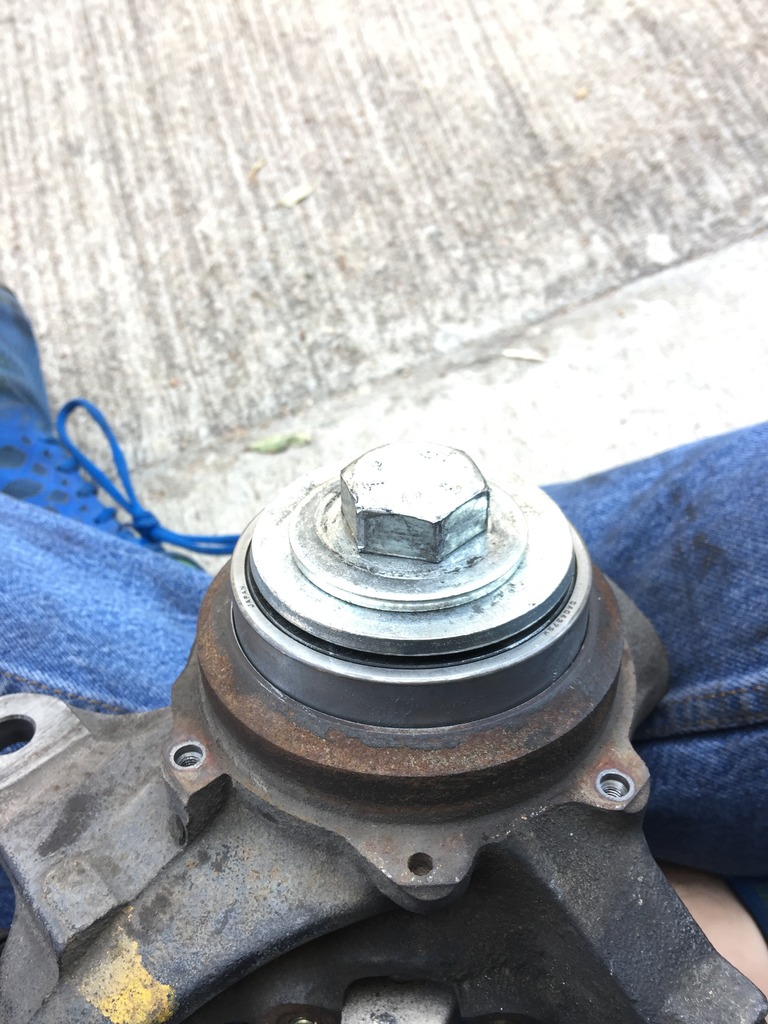
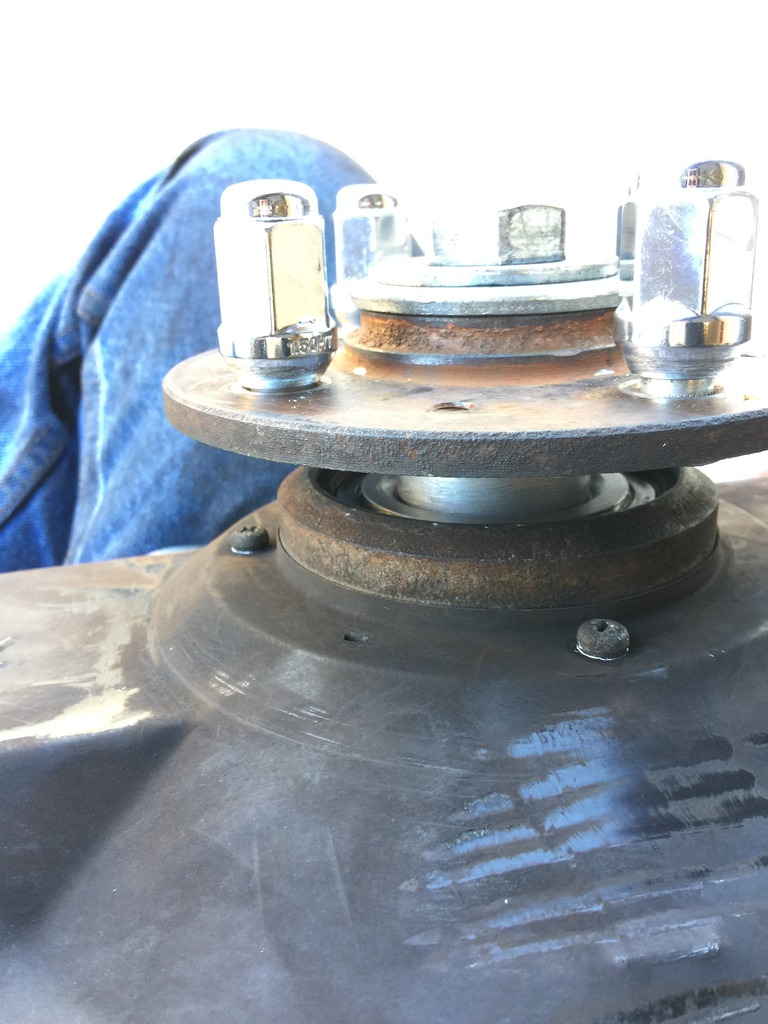
Again using my massive bolt and washers to press the hub back in. Doing it this way is 100% impossible without a strong impact gun.
All done, now just to reinstall it in the car.
Next up, fixing an exhaust leak that happened when someone I mistakenly trusted not to drive like a jackass plowed over a speedbump too fast and the windshield wipers. The wipers gave out when one of those little plastic ball joint/bushing things in the wiper linkage snapped while doing 70mph in the pouring rain a few weeks ago and my inspection is about to expire. Apparently you can't buy the bushings by themselves so I'm going to check the local pick and pull lot tomorrow to see if I can find some in decent shape. If I have to I'll just buy the new linkage parts from Acura.
Anyways while changing the oil I noticed some play in the passenger side wheel indicating a bad wheel bearing. I've had new OEM wheel bearings and lower ball joints for a while now so I called up the dealership and they quoted $720 to install the parts. Since I'm off work this week I decided to just do it myself.
After removing the knuckle I beat out the lower ball joints, they're a relatively loose press fit so it wasn't difficult. Both lower ball joints actually had some life left but since I had the new ones already and the knuckles were out I went ahead and replaced them anyways.
The hubs was substantially more difficult to remove, but the 4lb hammer did it's job.
This bearing was actually still usable, but again, had the parts, why not replace them all in one go. The other one was trashed though, it had a large amount of play in it yet wasn't making any unusual noises.
WD-40 and a green scotch brite pad do a good job cleaning up surface rust, it looks almost new.
After having a very poor experience with cheap ball joints on autozone tie rods, I only buy OEM now. The Timken branded bearings are the same Koyo part that Honda sells, but less than half the price, same markings stamped in the bearings and made in Japan.
Using my makeshift wheel bearing press as seen in https://honda-tech.com/forums/honda-crx-ef-civic-1988-1991-3/write-up-diy-front-wheel-bearing-replacement-2685054/"]OneBadTurboCRV's thread here[/url], I pressed the new bearing in after loading up both the bearing and the seat with a healthy amount of anti-seize compound to hopefully prevent future rust issues.
The outer race popped off with the hub so I had to remove it. Rather than cut it off using three grooves as shown in the previously mentioned DIY thread, I made one cut most of the way through then used a large flat-head screwdriver and hammer to crack the race along the cut, which loosened it enough to slide it off.
After removing the race and cleaning up the surface with WD40 and a green scotch brite pad again. I knicked the surface with the dremel a bit but it shouldn't cause any issues.
New ball joint pressed back in using the AutoZone ball joint press rental. I have polyurethane boots so I transferred those over from my old ball joints, they are much sturdier than the factory boots which like to tear when jamming the ball joint removal tool around them. I also knocked the old wheel studs out and put new ones in but didn't take a picture of that.
Again using my massive bolt and washers to press the hub back in. Doing it this way is 100% impossible without a strong impact gun.
All done, now just to reinstall it in the car.
Next up, fixing an exhaust leak that happened when someone I mistakenly trusted not to drive like a jackass plowed over a speedbump too fast and the windshield wipers. The wipers gave out when one of those little plastic ball joint/bushing things in the wiper linkage snapped while doing 70mph in the pouring rain a few weeks ago and my inspection is about to expire. Apparently you can't buy the bushings by themselves so I'm going to check the local pick and pull lot tomorrow to see if I can find some in decent shape. If I have to I'll just buy the new linkage parts from Acura.
Last edited by MotorMouth93; 12-14-2017 at 09:02 AM.
03-12-2017, 07:32 PM
#158
Now that the Integra no longer lives in the garage I find it much harder to make myself work on it, but this weekend the NSX is in the shop getting new window tint so the garage was empty, and I had nothing better to do today.
I've had new door moisture barriers in a box in the closet for over a year now, and now that I've discovered the magic of butyl rope, I can go ahead and install them. The adhesive I used to attach the makeshift trash bag barriers originally turned out to come off very easily, no joke, in a matter of minutes the plastic and all traces of adhesive were gone.
Ugly trash bag door liners that vibrate and buzz when music is playing.
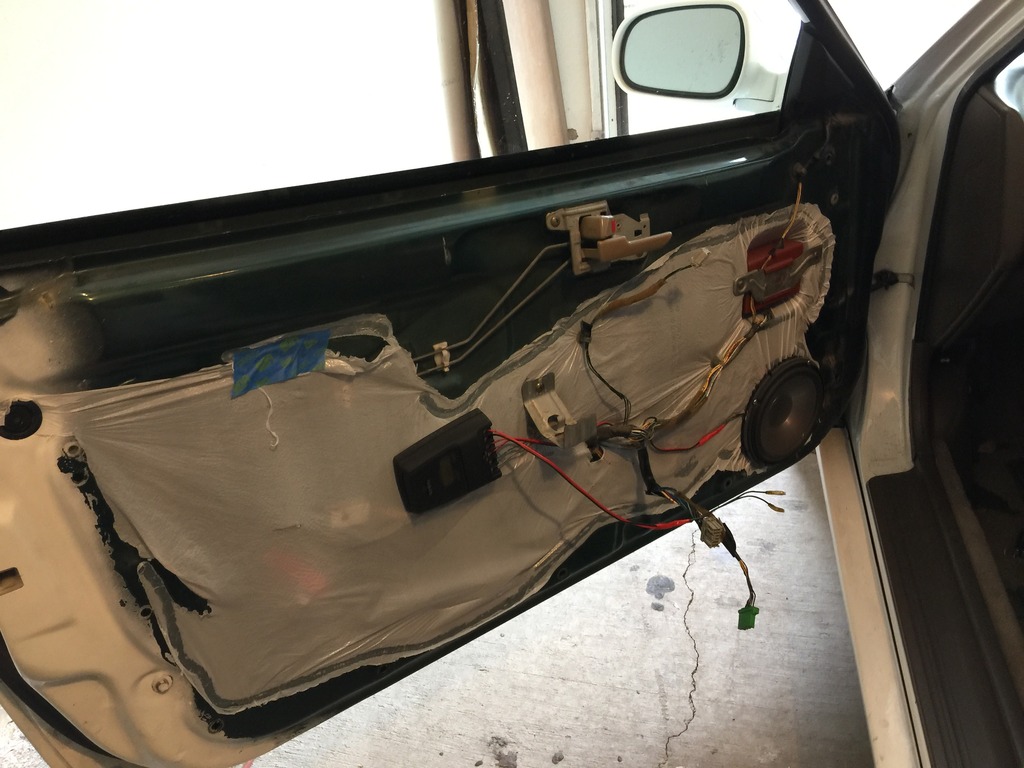
New OEM liners installed. Butyl rope is insanely easy to use, just lay it in the little groove in the door panel where the factory adhesive was, press the plastic onto it quickly to get it all lined up, then go around the edge slowly with a heat gun and press it on firmly, this also lets the liner stretch in tight spots so it doesn't pull away. The results look super clean and it is easy to remove and reinstall as needed too!
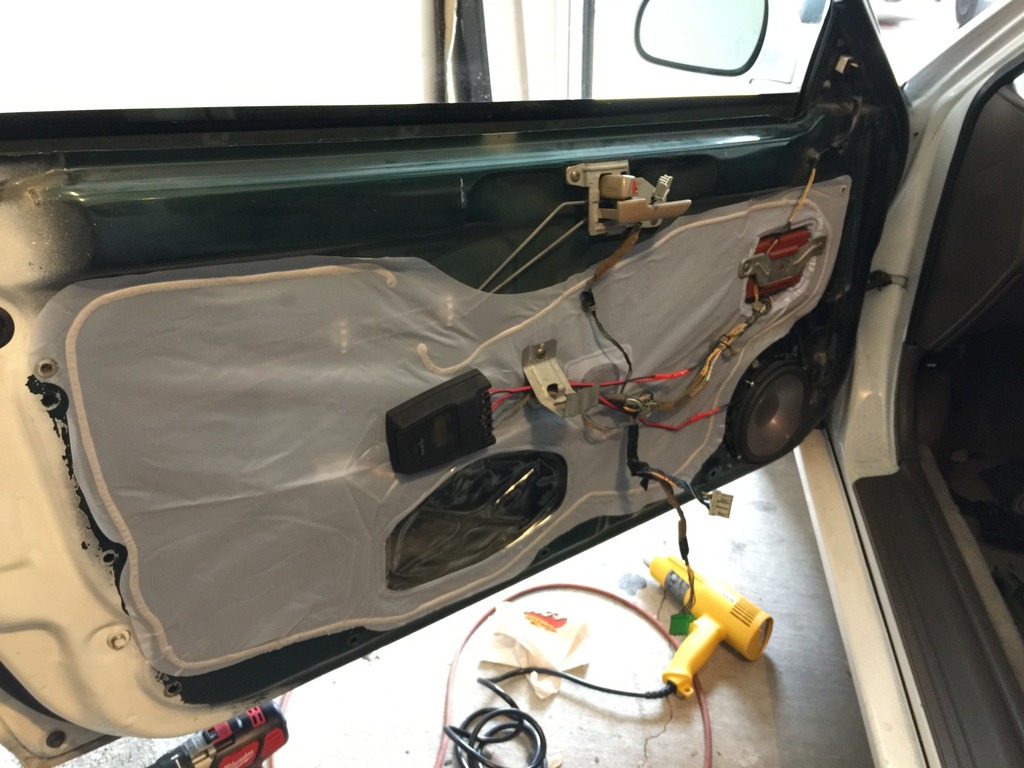
I also installed the foam "boom mat" speaker baffles while I had the doors apart. The shallow 6.5" ones fit nearly perfectly and they protect the speaker from moisture in the door and help reduce reverberation a bit too.
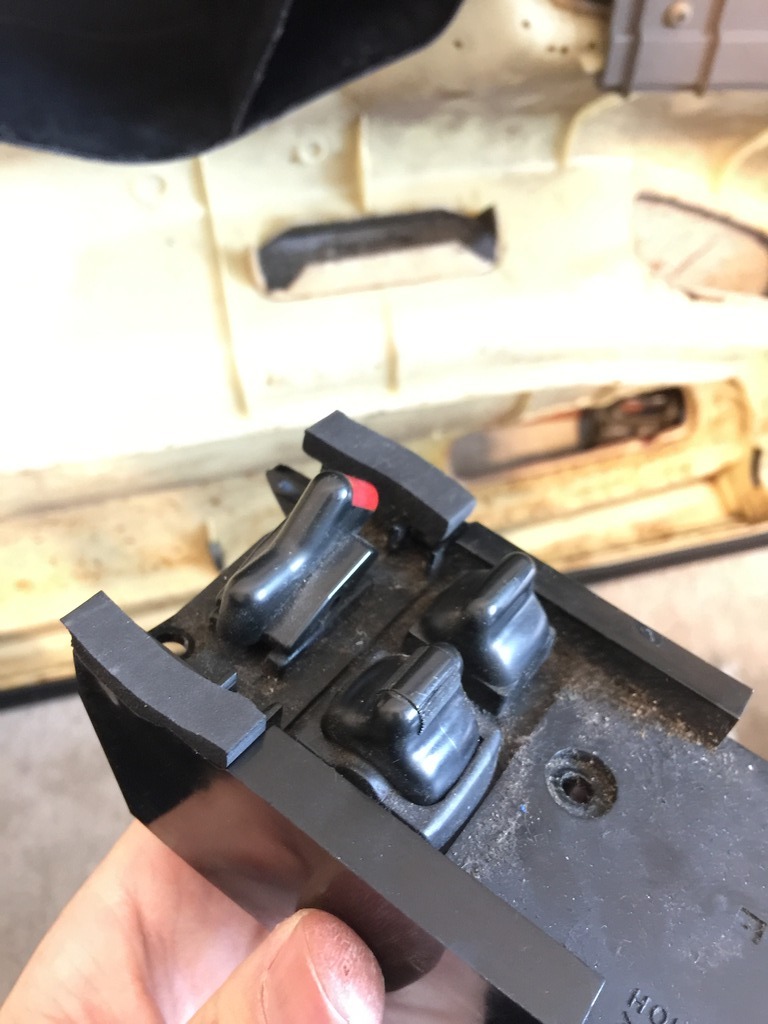
The window/mirror control modules on both door panels had gotten a bit loose over time as well, so I put a small strip of weatherstripping on this plastic part to pull it tight to the door, and it no longer moves around. The same can be done on both sides.
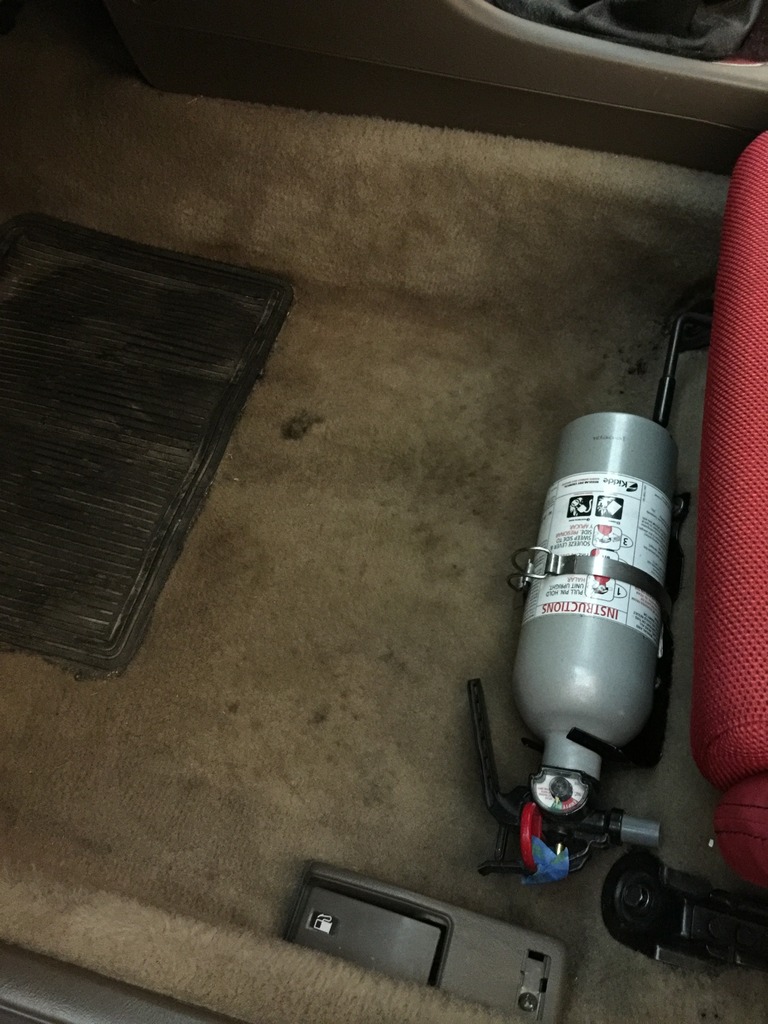
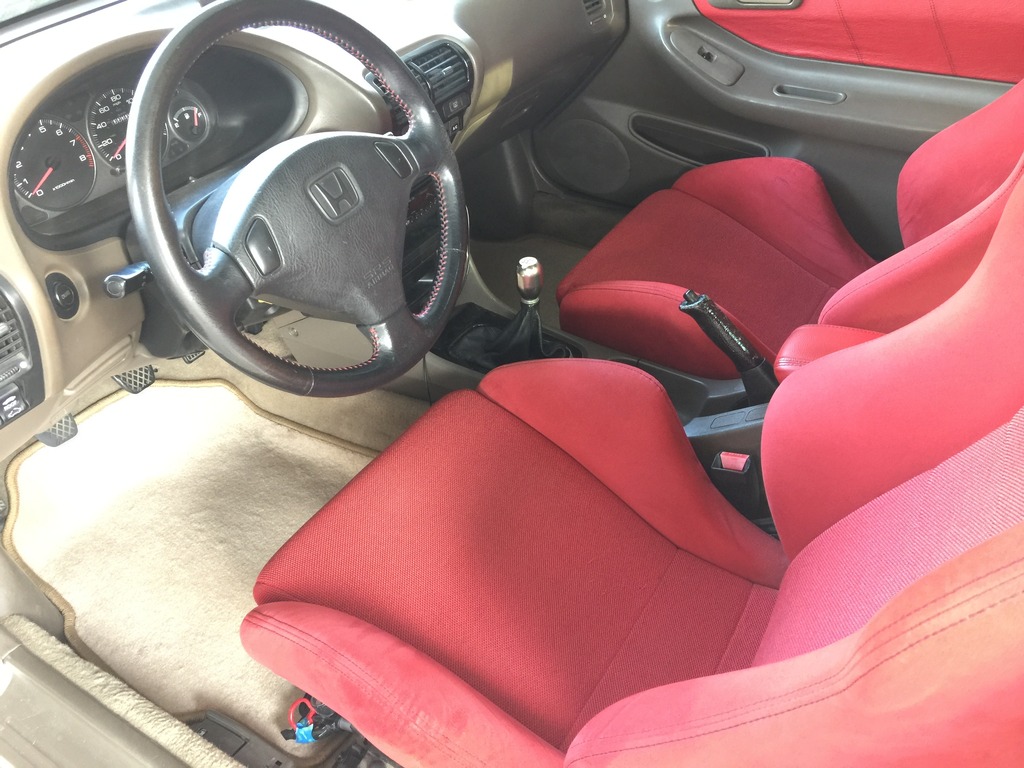
Then lastly reinstalled the fire extinguisher under the seat. The plastic bracket I used originally broke a long time ago so I ordered some nice metal brackets on Amazon and they seem to work very well so far. This is with the seat all the way back, with it in a normal position the extinguisher is completely out of the way and not really noticeable unless you know to look. I also ordered a set of aftermarket floor mats to cover up the stained carpet from StockInteriors.com so we'll see how the quality on those turns out.
I've had new door moisture barriers in a box in the closet for over a year now, and now that I've discovered the magic of butyl rope, I can go ahead and install them. The adhesive I used to attach the makeshift trash bag barriers originally turned out to come off very easily, no joke, in a matter of minutes the plastic and all traces of adhesive were gone.
Ugly trash bag door liners that vibrate and buzz when music is playing.
New OEM liners installed. Butyl rope is insanely easy to use, just lay it in the little groove in the door panel where the factory adhesive was, press the plastic onto it quickly to get it all lined up, then go around the edge slowly with a heat gun and press it on firmly, this also lets the liner stretch in tight spots so it doesn't pull away. The results look super clean and it is easy to remove and reinstall as needed too!
I also installed the foam "boom mat" speaker baffles while I had the doors apart. The shallow 6.5" ones fit nearly perfectly and they protect the speaker from moisture in the door and help reduce reverberation a bit too.
The window/mirror control modules on both door panels had gotten a bit loose over time as well, so I put a small strip of weatherstripping on this plastic part to pull it tight to the door, and it no longer moves around. The same can be done on both sides.
Then lastly reinstalled the fire extinguisher under the seat. The plastic bracket I used originally broke a long time ago so I ordered some nice metal brackets on Amazon and they seem to work very well so far. This is with the seat all the way back, with it in a normal position the extinguisher is completely out of the way and not really noticeable unless you know to look. I also ordered a set of aftermarket floor mats to cover up the stained carpet from StockInteriors.com so we'll see how the quality on those turns out.
Last edited by MotorMouth93; 12-14-2017 at 09:03 AM.
03-13-2017, 07:09 AM
#160
There's two kinds, the slim ones and the regular ones. The slim ones barely brush against the window glass when it's rolled all the way down and are soft and flexible, so no trimming required.
Edit: Also dropped the car off to have the windows tinted today. Going with 35% on the front windows and 15% on the back. I'd normally like to have it matched all the way around but since it's the DD and sits in the sun fairly often I want that big back window pretty dark.
Edit: Also dropped the car off to have the windows tinted today. Going with 35% on the front windows and 15% on the back. I'd normally like to have it matched all the way around but since it's the DD and sits in the sun fairly often I want that big back window pretty dark.
Last edited by MotorMouth93; 03-14-2017 at 01:30 PM.
03-20-2017, 08:08 AM
#161
Window tint is installed, it came out great!
Also I installed a lip a few months ago but never got around to taking pictures. Rather than paint it to match, I just left it black since it gets scraped from time to time. I'm really amazed at how well the $30 Ebay lip fits.
Still waiting on the carpet samples from StockInteriors so I can figure out which color matches best though. And I also need to adjust the hood latch at some point and reinstall the rubber seal at the front of the hood, the gap is a bit unsightly.
Last edited by MotorMouth93; 12-14-2017 at 09:04 AM.
03-20-2017, 01:32 PM
#162
Very nice job, looks a billion times better than when you got it!
About the Eibach/KYB combo, how do you like the ride and handling? Would you do anything different if you had a chance and from an aesthetics point of view, does the car appear level or does the front or back look higher than the other side?
About the Eibach/KYB combo, how do you like the ride and handling? Would you do anything different if you had a chance and from an aesthetics point of view, does the car appear level or does the front or back look higher than the other side?
03-21-2017, 07:50 AM
#163
I like the ride height with the Eibach springs, the front is just a tad higher (like less than 1/4") so for just springs it's pretty darn even.
For just driving around they aren't bad, not floaty but not super stiff either, that said, they get fairly squirrelly when cornering hard on uneven ground. They are non-linear springs so for the first bit of travel they basically ride like stock springs, but as the spring compresses the spring rate increases, so if you hit a bump or something the springs can overpower the dampers enough to bounce a bit and unsettle the car. There's a corner near where I live that has a bump from a badly filled pothole, and if the back wheel hits that bump going fast, it will bounce the back end of the car up enough to lose traction at the rear. The car corners better with them than it did with the worn out stock suspension, but they're definitely more of a visual mod than a performance mod, at least with the stock or stockish dampers. With adjustable dampers I imagine they could be made a lot better.
When I bought them I was in college and sorta poor, if I was doing it with my current finances I'd go with the standard Koni Yellows and GC coilover sleeves I think. Also, they specifically state to not use them with KYB GR2s, so there's that.
03-27-2017, 09:44 PM
#165
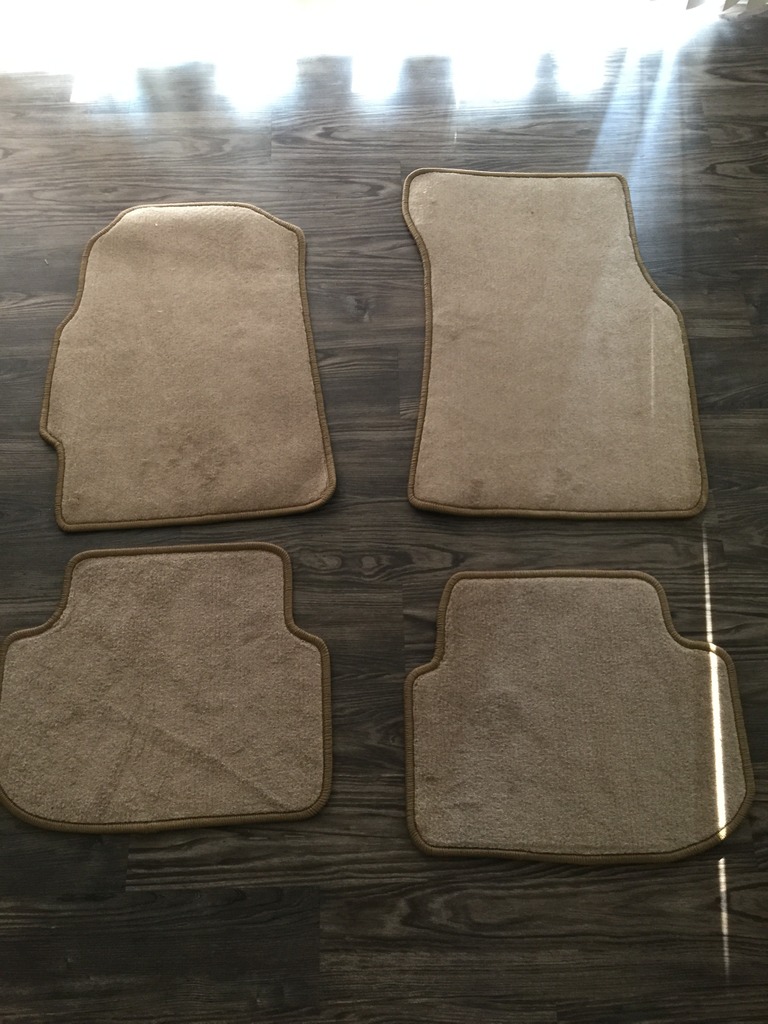
My floor mats came in today. They're a shade lighter than my nasty old carpet, but overall it's still a huge improvement, and I'm actually tempted to go ahead and buy a whole new carpet too. For about $100 the quality seems incredible. StockInteriors has good reviews on other sites as well but I'd never seen any mats for Hondas, but I'm very impressed. The fit is spot on in the back and very very close to perfect in the front, we'll see how they last over time though. I'm thinking maybe I should have gone with red but that might have been a bit much.
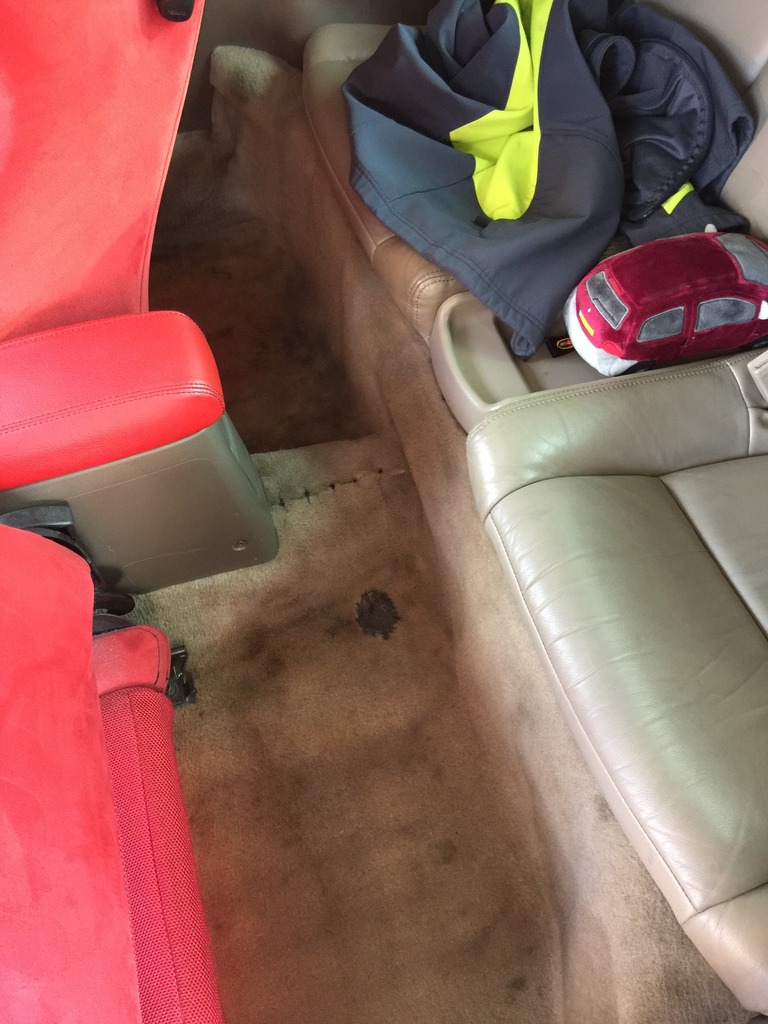
You can see here the nasty staining and my zip-tie stitches.
Back mats fit perfectly.
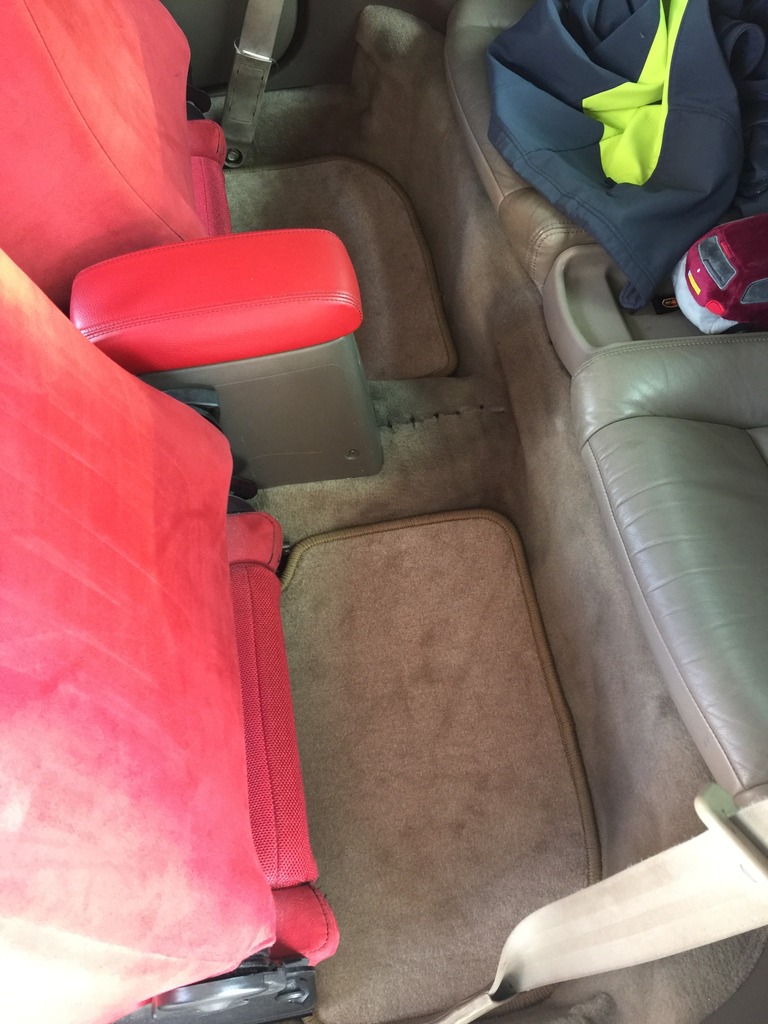
Front mats are pretty dang close.
Like I said, the color is a bit off but that's on me, I ordered the samples but didn't realize how much variation there was in my nasty old carpet so it matched well in some places but wasn't even close in others.
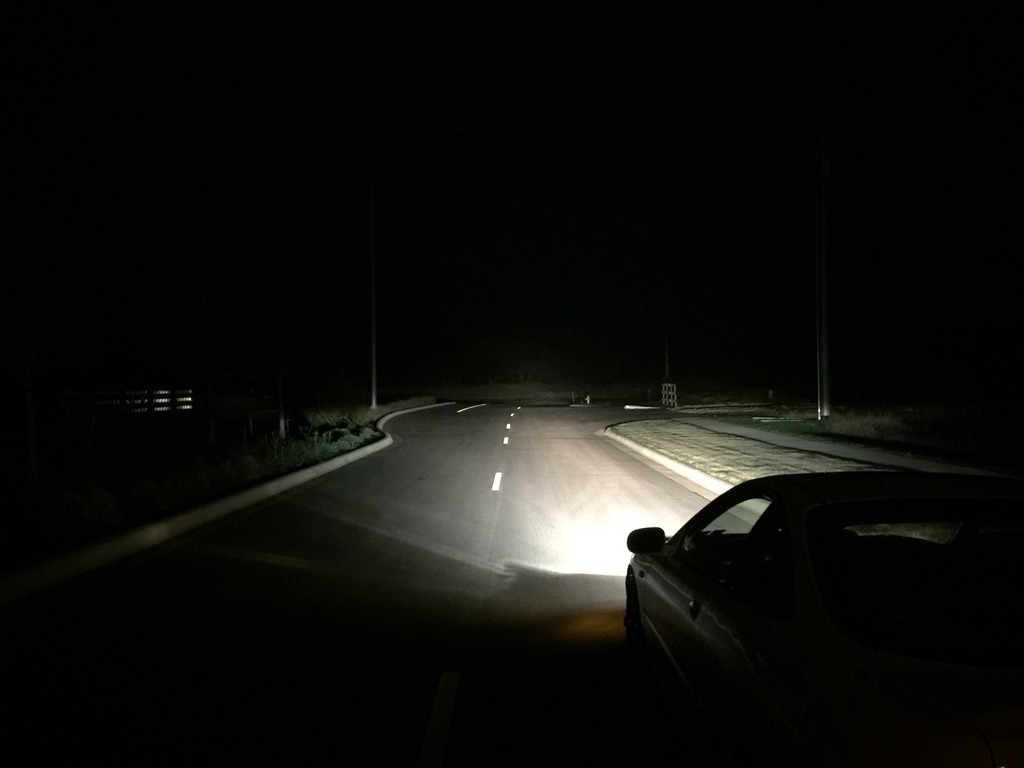
I also took some pictures of the headlight output that shows a bit better than the video.
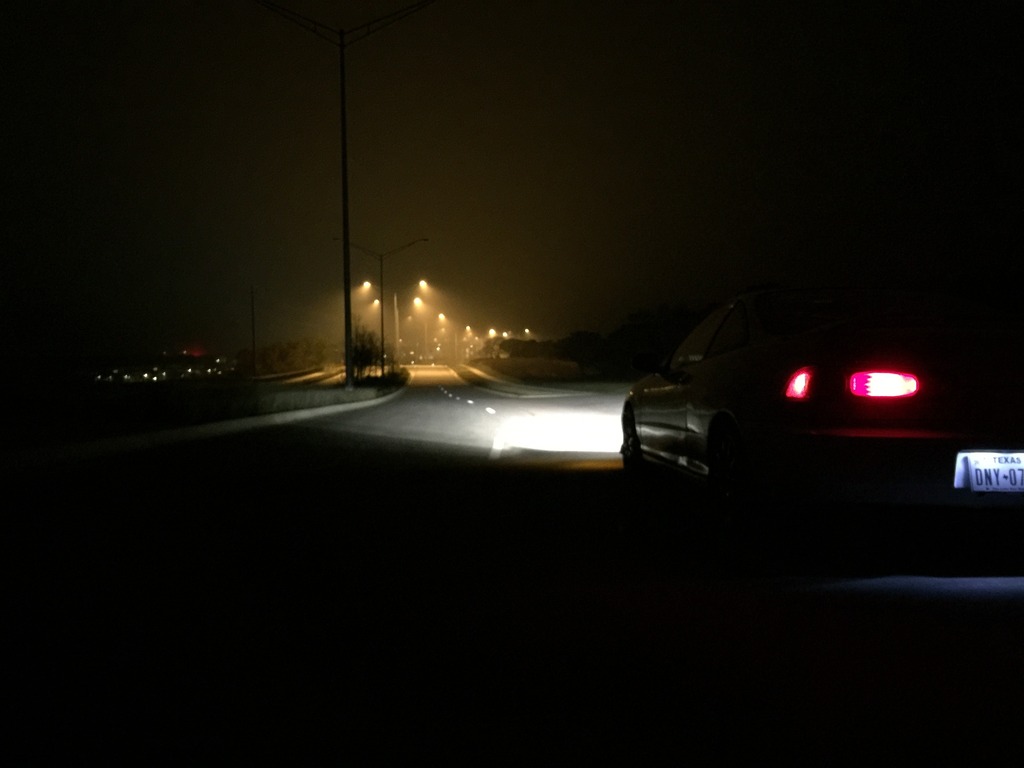

This one is with the high beams on.
You can see here the nasty staining and my zip-tie stitches.
Back mats fit perfectly.
Front mats are pretty dang close.
Like I said, the color is a bit off but that's on me, I ordered the samples but didn't realize how much variation there was in my nasty old carpet so it matched well in some places but wasn't even close in others.
I also took some pictures of the headlight output that shows a bit better than the video.
This one is with the high beams on.
Last edited by MotorMouth93; 12-14-2017 at 09:05 AM.
03-28-2017, 06:24 AM
#166
Honda-Tech Member

Join Date: Mar 2017
Location: Atlanta, GA
Posts: 74
Likes: 0
Received 0 Likes
on
0 Posts
That light output is legit, esp with highs on. Good to see you did it right with projectors and didn't just stick HIDs in there & blind all of oncoming traffic. Very very nice.
Where'd you get those floormats from? I'm missing my driver's side on my DC2, for some reason the PO kept all of the other mats but managed to lose the driver's one.....
Where'd you get those floormats from? I'm missing my driver's side on my DC2, for some reason the PO kept all of the other mats but managed to lose the driver's one.....
03-28-2017, 10:45 PM
#167
StockInteriors.com, shipping was fast, which was a surprise since everything is made to order. I ordered on the 21st and they arrived on the 27th. They won't match factory floor mats perfectly though since they aren't factory, so your best bet might be to see if you can find one used or just buy a whole set, it was about $120 shipped for all 4 for me. If you go this route make sure to order the free samples first so you know what color to get.
08-08-2017, 09:37 AM
#169
I've rehosted them all on my own domain but have only updated the first few posts, it's a slow process when there's 30+ posts to update but I'm trying to do a few a day.
If you have Google Chrome, install an extension called "Photobucket Hotlink Fix", it will fix all the photobucket links that have broken across all websites. Make sure to clear your cached data though, or you'll keep seeing the photobucket thing. (Top right corner->settings->advanced->clear browsing data->uncheck everything but cached image and files")
If you have Google Chrome, install an extension called "Photobucket Hotlink Fix", it will fix all the photobucket links that have broken across all websites. Make sure to clear your cached data though, or you'll keep seeing the photobucket thing. (Top right corner->settings->advanced->clear browsing data->uncheck everything but cached image and files")
08-14-2017, 09:06 AM
#172
I took the Integra to Texas World Speedway near College Station over the weekend for a track driving school event. In total I had 8 24 minute sessions in the car with an instructor over the course of 2 days, and I'm amazed at just how much I learned in that time. Don't get me wrong, I'm still a terrible driver, but nowhere near as bad as I was, I have some video footage of the last few runs that I'll upload if anyone cares. The first few sessions were basically just the instructor yelling the whole time because I wasn't really doing anything right, and that sounds mean but it's really what I needed at the time to get over my inhibitions, and by the end of the 2nd day it was more just comments about things I could improve on and slight adjustments here and there. The instructor had a fully stripped and track prepped Integra that was absolutely insane to ride in.
Overall though I was amazed at just how well the Integra did considering how little thought I'd given the suspension and alignment (KYB GR2 shocks, Eibach Pro Kit springs, default alignment. The handling was pretty neutral and you could easily induce understeer or oversteer. (and catch the car fairly easily when it started to lose grip) It also turned out to be a great beginner car for the track because in this configuration it's ridiculously forgiving of bad driving and doesn't really have enough power to get in serious trouble without doing something monumentally stupid, and the DZ102 tires while not all that grippy compared to high end street tires or slicks, give loads of warning before letting go. If I decide to keep attending track events I want to get a lot more seat time in this car before I attempt to drive the NSX.
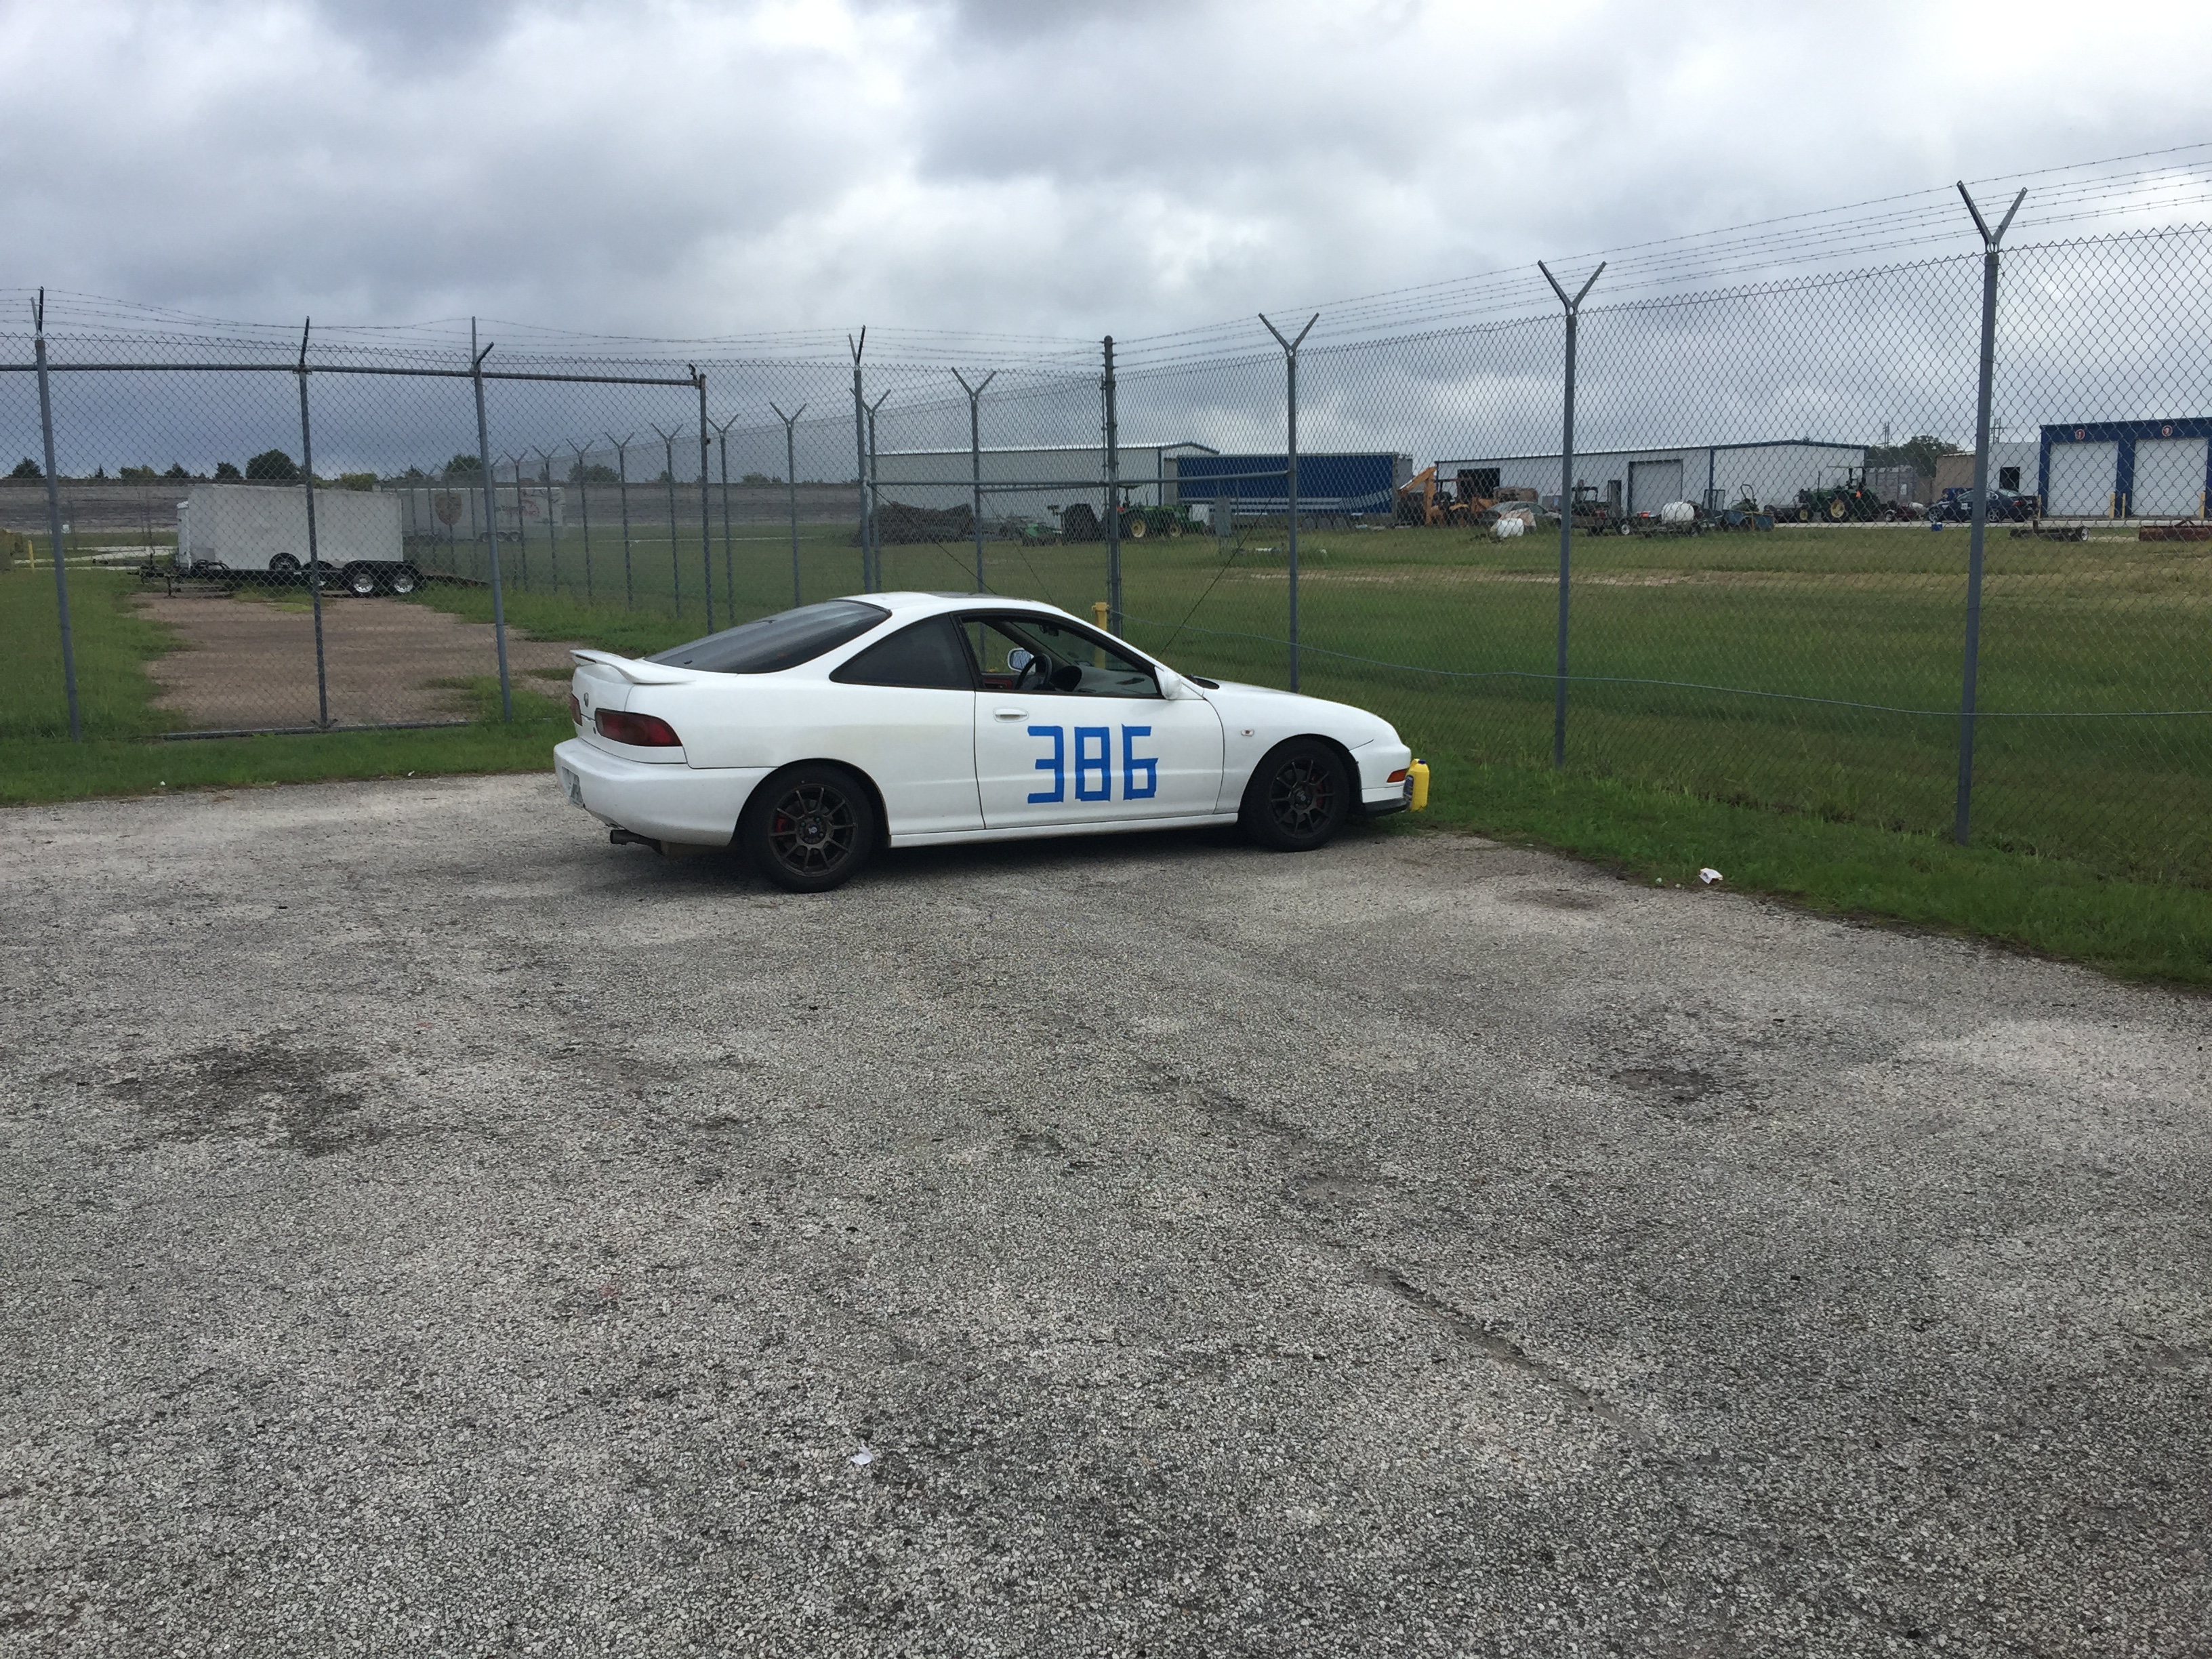
Overall though I was amazed at just how well the Integra did considering how little thought I'd given the suspension and alignment (KYB GR2 shocks, Eibach Pro Kit springs, default alignment. The handling was pretty neutral and you could easily induce understeer or oversteer. (and catch the car fairly easily when it started to lose grip) It also turned out to be a great beginner car for the track because in this configuration it's ridiculously forgiving of bad driving and doesn't really have enough power to get in serious trouble without doing something monumentally stupid, and the DZ102 tires while not all that grippy compared to high end street tires or slicks, give loads of warning before letting go. If I decide to keep attending track events I want to get a lot more seat time in this car before I attempt to drive the NSX.
08-14-2017, 01:48 PM
#174
Hah you replied before I had the chance to fix the image. I recently moved over to Win10 and it has made my go-to method non-functional, so I had to come up with another way of fixing the EXIF rotation tags.