
My -85 HB Civic fixing thread *with photos*
 03-06-2011, 05:21 AM
#1
Honda-Tech Member
Thread Starter
Join Date: Feb 2011
Location: Finland
Posts: 79
Likes: 0
Received 0 Likes
on
0 Posts
This is a poor man's log of my Civic -85's journey to life from the dead.
Make and model: Honda Civic GL hatchback
Year: 1985
Engine: EW2 type AH
Volume: 1488 cm^3
Valves: 12 (1 exhaust, 2 intake per cylinder)
Cam: SOHC
Transmission: 5-speed manual
--------
April 28th 2010
Bought this beast. Pros
+ 450 € ($630)
+ MOT test effective through May 2nd 2011
+ timing belt changed 20 000 km (12400 miles) ago
+ consumption 5.7 l/ 100 km (41.3 mpg)
+ no notes in the MOT test
+ clutch working well
Cons
- timing belt changed 2 years ago
- the chassis has a lot of rust in it
- the gear **** is REALLY sloppy, yet all the gears work OK
- the tachometer is faulty (more on this later)
- the driver seat's lever is broken; only a small stub is left
- aerial broken from its root
- a 30 cm (12 inches) crack in the windshield, but I had it drilled so it has stopped now
--------
May - September 2010
The car gets it real good, I drive 20 500 km (12740 miles) with it. I notice a grease leak in the left outer CV boot.
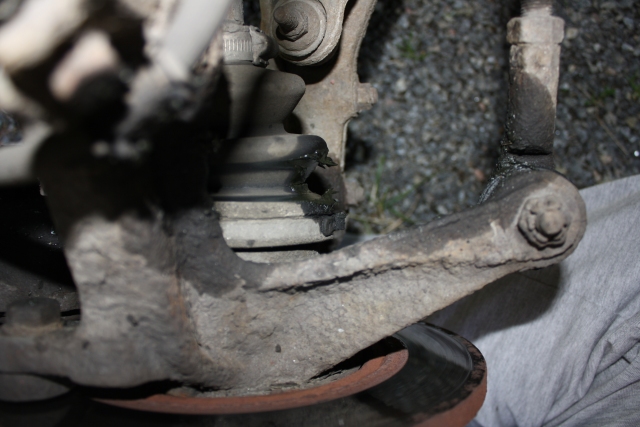
I fill it up with the same MoS2 grease and pack the boot into shreds of plastic bag, sealed with glue and some cable ties. My plan is now to take the axle off and replace the CV boot, but it seems to be a job only for the pros: I had to burn the driveshaft nut for three long hours, and then I managed to get it off by jumping on a 60-cm (24") extension rod connected to the 32mm socket wrench. But my efforts were in vain as the ball joint crown nut didn't move a bit even though the split pin was off. I reassembled the damn thing and settled to drive with the torn boot.
At some point I notice that the tyres are worn. QUITE. BADLY.
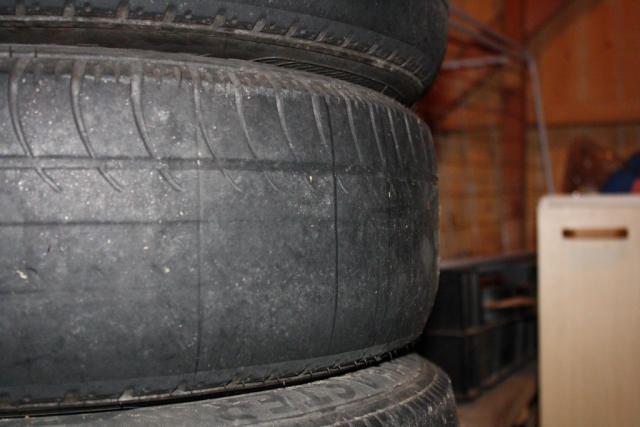
So the casters are off a bit. Well, new tyres and we're ready to roll again! :D I planned to have the angles checked soon, but then...
--------
October 1st 2010
7:24 am: while driving to work, the tachometer began to behave oddly: while it normally doesn't show right (flickers and wavers in the area of probably 2-3 times than the actual reading), now it began to drop to the zero zone.
7:25 am: After driving some hundreds of meters, I heard a weird clonk from the engine, and the car just shut down. I managed to press the clutch and slide the car into the next bus stop, and panicked that I wouldn't make it to the workplace which was 30 km (~20 miles) away from this spot. After clearing up my thoughts I realized I could call a cab, and did so. Locked all Honda's doors and left it there.

Poor little fellow, from here it was all alone in the woods to the next day
--------
October 2nd 2010
Me and my dad towed the car 50 km (~30 miles) to my home, and began to investigate what was going on with the engine. I was positive that the timing belt had snapped, but there was a bad bulge in the belt/ pulley case so it could be something even worse. And sadly it was. But not catastrophic, just something manageable.
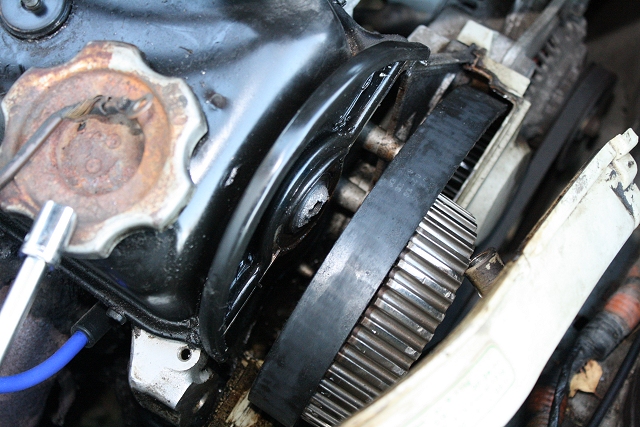
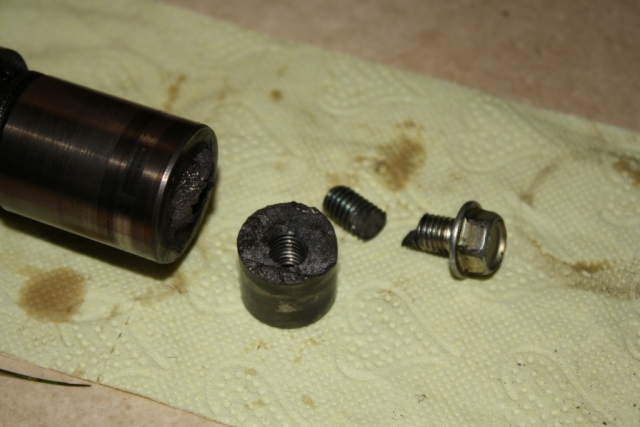
The end of the camshaft, broken in half.
--------
October - November 2010
My first time taking a head off. Or quite frankly, my first time fixing an engine. After taking the camshaft off it was time to check the bent valves, which showed to be a FUN and EASY job to do. After unscrewing all the 25-year-old bolts and nuts off it was time to lift the head off. I had read that taking the head off required some force, but I would've never guessed what I had in front of me.
Me and my mate tried to lift it off with our bare hands, but it proved to be of no effect. The car bounced on its tyres but the head didn't show any signs of giving up. So I tried to pry it with a hammer, and when that didn't work, I took a 2-meter (6.6 feet) long bed support metal. I thought this would be it, but of course it wasn't. I managed to pry the bonnet lock downwards in the process, so now when I pull the opening lever it clicks open but doesn't raise (I have to push my fingers through the small gap between the bonnet and the front frame if I want to open it).
--------
November - December 2010
While trying all sorts of things to the head, I somehow have managed to make a large dent to the upper metallic coolant hose, found under the inlet manifold, but this is the least of my worries. All of this doesn't matter if I don't get the head off.
I buy a plastic mallet and a pry bar and begin hammering the head as hard as I can. I then find two small ledges, and place the bar between them, and now something's happening. There's a wooshing sound, and right after that some coolant emerges from the gap between the head and the block. Now the two are finally apart, and that is the most important thing.
Taking the head is an easy job after all that, but now it seems that the gasket is a mere shadow of its former self. It has burned all over the block and the head. The gasket had become only just a metal frame with hints of composite in it. In the head there was only one bent valve, namely an exhaust one, so it's an inexpensive fix.
I didn't know how to get the burnt composite material off the aluminum without scratching it, so I asked online and somebody told me that an abrasive pad connected to a drilling machine has proved to be an ace for the job. And it was as I got all old gasket off the head, and it didn't seem to scratch the aluminum (at least not very much).
OK, the head was an easy job but now it was time for the block, and that is an unbelievable job because you have to be careful not to scratch it, take care that no debris gets into the cylinders and preferably check that the water trench doesn't get much as well. I got most of the old gasket off the block but Honda engineers decided that the block rods are non-removable, which makes the cleaning hard from their surroundings.
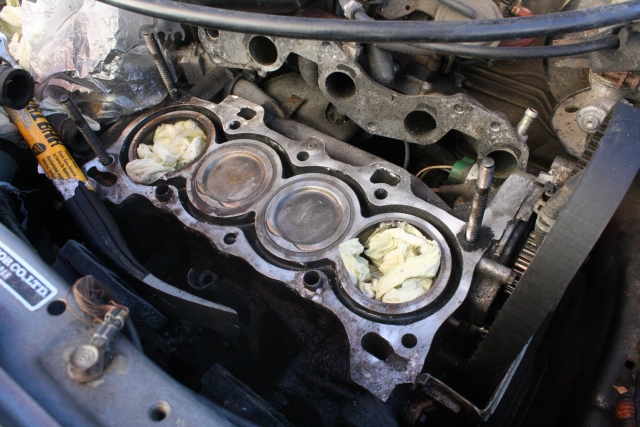
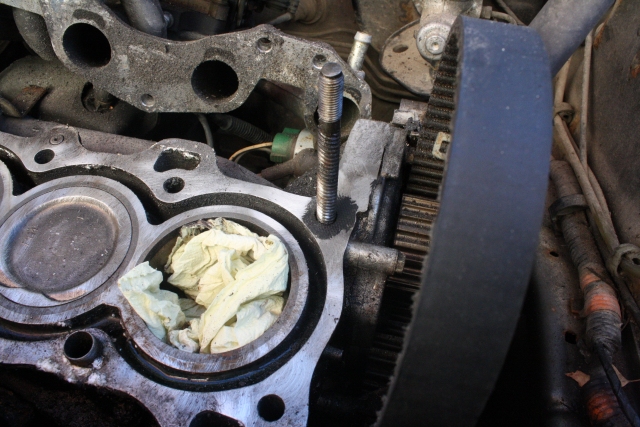
It's bitten onto the block really hard. Sh*t.
Anybody tried those gasket remover liquids, are they any good?
--------
January - February 2011
The car sits quietly in the yard, and temperatures wavering between -30 and -20 C (-22 to -4 F) don't really get me into the fixing mood. The car had also decided not to be repaired at these temps as the door rubbers froze up.
--------
March 5th 2011
After a long search I found a camshaft for this particular engine. It was only 50 € ($70) so I bought it straight away. Now the most difficult part was obtained so there is now only these things things ahead:
- clean up the block
- disassemble the head from all components
- get it resurfaced
- replace the bent exhaust valve and hone it in place
- assemble the head and adjust the valve clearances
- put it in place
- put the ancillary components in place and fill the system with coolant
- try to run the engine
So let's see what the future brings. I'll be updating this thread as I try to repair the car. I'll also try to take lots of photos during the process. I'd kill for a small garage because now all the repairing has to be done in the parking lot of many houses, and there's an irritating old man who always comes to talk to me while I try to work. He just stands there and speaks something that I can't really comprehend most of the time because usually he is either drunk or eats something which blocks his voice quite well.
Make and model: Honda Civic GL hatchback
Year: 1985
Engine: EW2 type AH
Volume: 1488 cm^3
Valves: 12 (1 exhaust, 2 intake per cylinder)
Cam: SOHC
Transmission: 5-speed manual
--------
April 28th 2010
Bought this beast. Pros
+ 450 € ($630)
+ MOT test effective through May 2nd 2011
+ timing belt changed 20 000 km (12400 miles) ago
+ consumption 5.7 l/ 100 km (41.3 mpg)
+ no notes in the MOT test
+ clutch working well
Cons
- timing belt changed 2 years ago
- the chassis has a lot of rust in it
- the gear **** is REALLY sloppy, yet all the gears work OK
- the tachometer is faulty (more on this later)
- the driver seat's lever is broken; only a small stub is left
- aerial broken from its root
- a 30 cm (12 inches) crack in the windshield, but I had it drilled so it has stopped now
--------
May - September 2010
The car gets it real good, I drive 20 500 km (12740 miles) with it. I notice a grease leak in the left outer CV boot.
I fill it up with the same MoS2 grease and pack the boot into shreds of plastic bag, sealed with glue and some cable ties. My plan is now to take the axle off and replace the CV boot, but it seems to be a job only for the pros: I had to burn the driveshaft nut for three long hours, and then I managed to get it off by jumping on a 60-cm (24") extension rod connected to the 32mm socket wrench. But my efforts were in vain as the ball joint crown nut didn't move a bit even though the split pin was off. I reassembled the damn thing and settled to drive with the torn boot.
At some point I notice that the tyres are worn. QUITE. BADLY.
So the casters are off a bit. Well, new tyres and we're ready to roll again! :D I planned to have the angles checked soon, but then...
--------
October 1st 2010
7:24 am: while driving to work, the tachometer began to behave oddly: while it normally doesn't show right (flickers and wavers in the area of probably 2-3 times than the actual reading), now it began to drop to the zero zone.
7:25 am: After driving some hundreds of meters, I heard a weird clonk from the engine, and the car just shut down. I managed to press the clutch and slide the car into the next bus stop, and panicked that I wouldn't make it to the workplace which was 30 km (~20 miles) away from this spot. After clearing up my thoughts I realized I could call a cab, and did so. Locked all Honda's doors and left it there.
Poor little fellow, from here it was all alone in the woods to the next day
--------
October 2nd 2010
Me and my dad towed the car 50 km (~30 miles) to my home, and began to investigate what was going on with the engine. I was positive that the timing belt had snapped, but there was a bad bulge in the belt/ pulley case so it could be something even worse. And sadly it was. But not catastrophic, just something manageable.
The end of the camshaft, broken in half.
--------
October - November 2010
My first time taking a head off. Or quite frankly, my first time fixing an engine. After taking the camshaft off it was time to check the bent valves, which showed to be a FUN and EASY job to do. After unscrewing all the 25-year-old bolts and nuts off it was time to lift the head off. I had read that taking the head off required some force, but I would've never guessed what I had in front of me.
Me and my mate tried to lift it off with our bare hands, but it proved to be of no effect. The car bounced on its tyres but the head didn't show any signs of giving up. So I tried to pry it with a hammer, and when that didn't work, I took a 2-meter (6.6 feet) long bed support metal. I thought this would be it, but of course it wasn't. I managed to pry the bonnet lock downwards in the process, so now when I pull the opening lever it clicks open but doesn't raise (I have to push my fingers through the small gap between the bonnet and the front frame if I want to open it).
--------
November - December 2010
While trying all sorts of things to the head, I somehow have managed to make a large dent to the upper metallic coolant hose, found under the inlet manifold, but this is the least of my worries. All of this doesn't matter if I don't get the head off.
I buy a plastic mallet and a pry bar and begin hammering the head as hard as I can. I then find two small ledges, and place the bar between them, and now something's happening. There's a wooshing sound, and right after that some coolant emerges from the gap between the head and the block. Now the two are finally apart, and that is the most important thing.
Taking the head is an easy job after all that, but now it seems that the gasket is a mere shadow of its former self. It has burned all over the block and the head. The gasket had become only just a metal frame with hints of composite in it. In the head there was only one bent valve, namely an exhaust one, so it's an inexpensive fix.
I didn't know how to get the burnt composite material off the aluminum without scratching it, so I asked online and somebody told me that an abrasive pad connected to a drilling machine has proved to be an ace for the job. And it was as I got all old gasket off the head, and it didn't seem to scratch the aluminum (at least not very much).
OK, the head was an easy job but now it was time for the block, and that is an unbelievable job because you have to be careful not to scratch it, take care that no debris gets into the cylinders and preferably check that the water trench doesn't get much as well. I got most of the old gasket off the block but Honda engineers decided that the block rods are non-removable, which makes the cleaning hard from their surroundings.
It's bitten onto the block really hard. Sh*t.
Anybody tried those gasket remover liquids, are they any good?
--------
January - February 2011
The car sits quietly in the yard, and temperatures wavering between -30 and -20 C (-22 to -4 F) don't really get me into the fixing mood. The car had also decided not to be repaired at these temps as the door rubbers froze up.
--------
March 5th 2011
After a long search I found a camshaft for this particular engine. It was only 50 € ($70) so I bought it straight away. Now the most difficult part was obtained so there is now only these things things ahead:
- clean up the block
- disassemble the head from all components
- get it resurfaced
- replace the bent exhaust valve and hone it in place
- assemble the head and adjust the valve clearances
- put it in place
- put the ancillary components in place and fill the system with coolant
- try to run the engine
So let's see what the future brings. I'll be updating this thread as I try to repair the car. I'll also try to take lots of photos during the process. I'd kill for a small garage because now all the repairing has to be done in the parking lot of many houses, and there's an irritating old man who always comes to talk to me while I try to work. He just stands there and speaks something that I can't really comprehend most of the time because usually he is either drunk or eats something which blocks his voice quite well.
Last edited by Sera_; 03-06-2011 at 06:02 AM.
 03-09-2011, 12:38 PM
#2
Honda-Tech Member

Great job, who wants to work by -20 degrees weather....
Don't forget to time the crank and cam during reassembly..... so the valve(s) do not kiss the piston(s). Cylinder #1 at TDC and camshaft accordingly specs with the timing mark on the timing gear. I have not done it on this specific engine, but as everything is turning, it can easy to forget.
Check the camshaft lobes to make sure that they are specs within acceptable measurements, and use plenty of assembly lube on the camshaft bearings, so they do not run dry upon startup. This is not a new cam, but keep it at 1700 rpm for a few minutes to make sure that oil is being pumped up.
03-10-2011, 07:20 PM
#3
Honda-Tech Member
Thread Starter
Join Date: Feb 2011
Location: Finland
Posts: 79
Likes: 0
Received 0 Likes
on
0 Posts
Good points there letank, gotta keep those things in mind when reassembling the engine. Luckily I have the service manual for this car which has helped quite a lot in the process 
03-10-2011, 09:03 PM
#4
Honda-Tech Member

Join Date: Dec 2010
Posts: 66
Likes: 0
Received 0 Likes
on
0 Posts
Nice car. Looks really clean for its age. To me it sounds as if your doing a full engine rebuild. Is that what your doing? If not then I'd recommend doing that since your already taking the engine apart lol. Cause that'll make your car last forever or atleast a pretty long time lol. Best of luck.
03-11-2011, 06:38 AM
#5
Honda-Tech Member
Thread Starter
Join Date: Feb 2011
Location: Finland
Posts: 79
Likes: 0
Received 0 Likes
on
0 Posts
Nice car. Looks really clean for its age. To me it sounds as if your doing a full engine rebuild. Is that what your doing? If not then I'd recommend doing that since your already taking the engine apart lol. Cause that'll make your car last forever or atleast a pretty long time lol. Best of luck.
If I had a garage then there wouldn't be any problem removing the whole engine and renewing everything in it, but now when the car sits in the parking lot I have to close the bonnet every day and get all the tools and removed parts inside.
03-11-2011, 10:04 PM
#7
Honda-Tech Member
Thread Starter
Join Date: Feb 2011
Location: Finland
Posts: 79
Likes: 0
Received 0 Likes
on
0 Posts
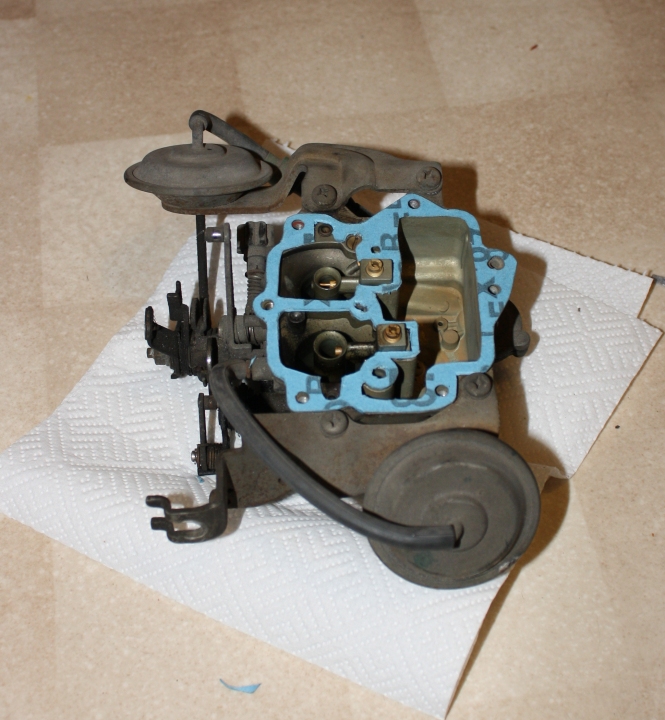
Sure, here's the inlet manifold with the carb on top:
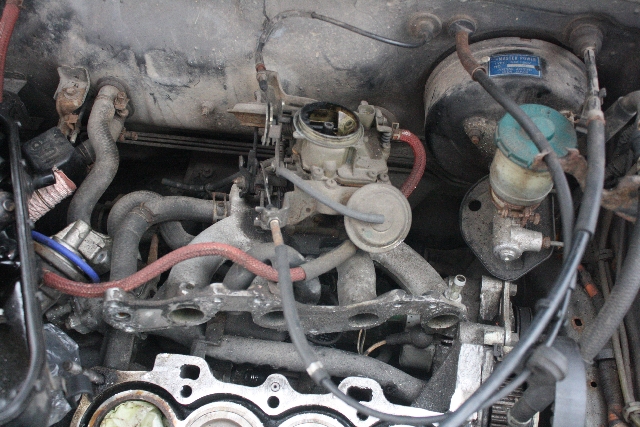
For a bigger version click here.
Here's also the schematics for the carb and the inlet manifold, if you're interested:
Inlet manifold
Carburetor
---
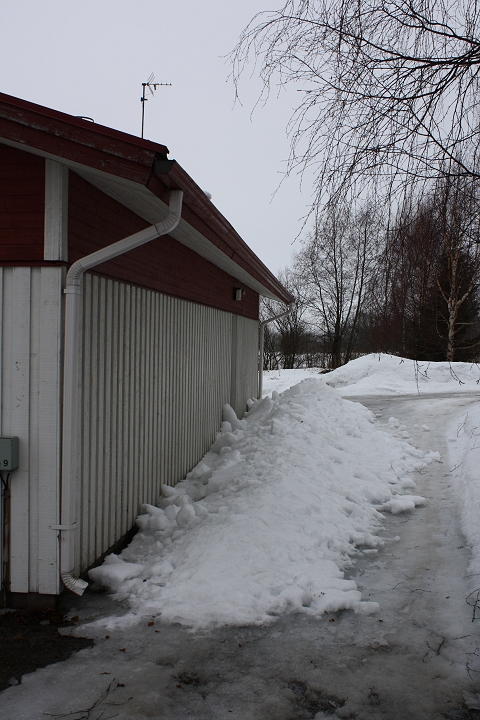
Because I promised to provide photos with this thread, here's some more of the car.
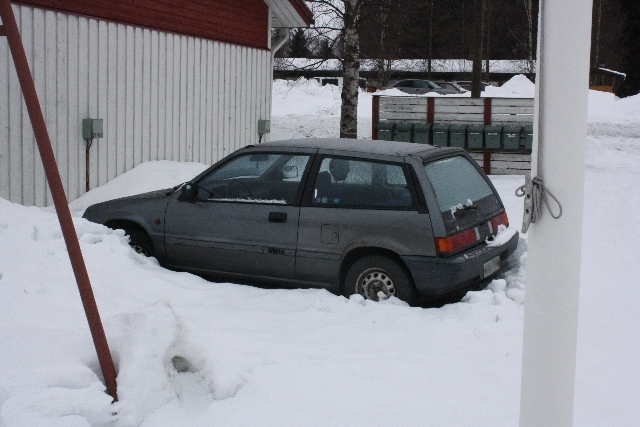
Harsh Scandinavian winter. It's already the middle of March and the doors still needed some force to open.
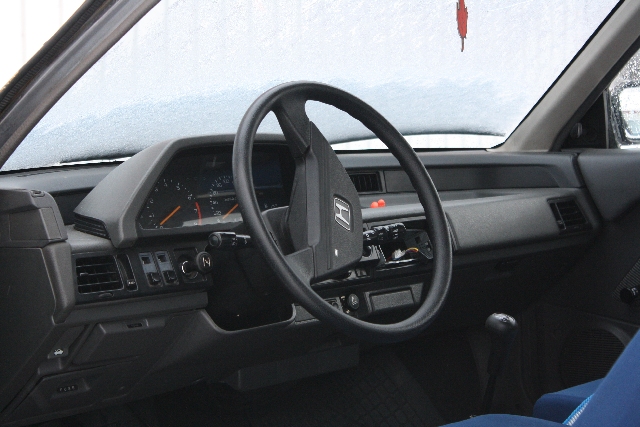
The interior.
For a bigger version click here.
Here's also the schematics for the carb and the inlet manifold, if you're interested:
Inlet manifold
Carburetor
---
Because I promised to provide photos with this thread, here's some more of the car.
Harsh Scandinavian winter. It's already the middle of March and the doors still needed some force to open.
The interior.
Trending Topics
03-21-2011, 11:54 AM
#10
Honda-Tech Member
Thread Starter
Join Date: Feb 2011
Location: Finland
Posts: 79
Likes: 0
Received 0 Likes
on
0 Posts
Well... I received a feeler gauge last Friday
We received a convenient 10 inch snow layer last Saturday, but it should be melting soon as there might be as warm as 7 C (45 F) tomorrow, nice.
I should be getting some money this Friday, and that's when I make a huge order from our parts shop.
- a valve spring compressor
- an exhaust valve
- a torque wrench
- a gasket set containing all needed gaskets
jdmda7, thanks.
03-25-2011, 10:39 AM
#11
Honda-Tech Member
Thread Starter
Join Date: Feb 2011
Location: Finland
Posts: 79
Likes: 0
Received 0 Likes
on
0 Posts
Welcome to Finland.
04-03-2011, 12:21 AM
#12
Honda-Tech Member
Thread Starter
Join Date: Feb 2011
Location: Finland
Posts: 79
Likes: 0
Received 0 Likes
on
0 Posts
The winter is finally giving in.
I took the inlet manifold off and did some cleaning up... here's the result (compare to this)
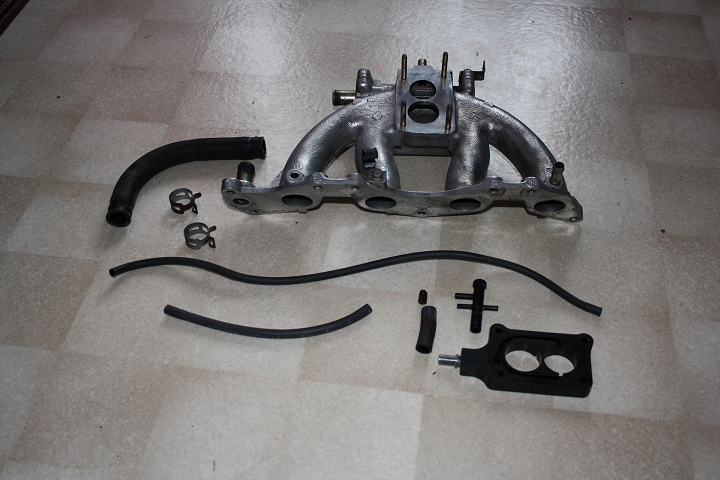
I took the inlet manifold off and did some cleaning up... here's the result (compare to this)
04-03-2011, 07:56 AM
#13
Honda-Tech Member
Thread Starter
Join Date: Feb 2011
Location: Finland
Posts: 79
Likes: 0
Received 0 Likes
on
0 Posts
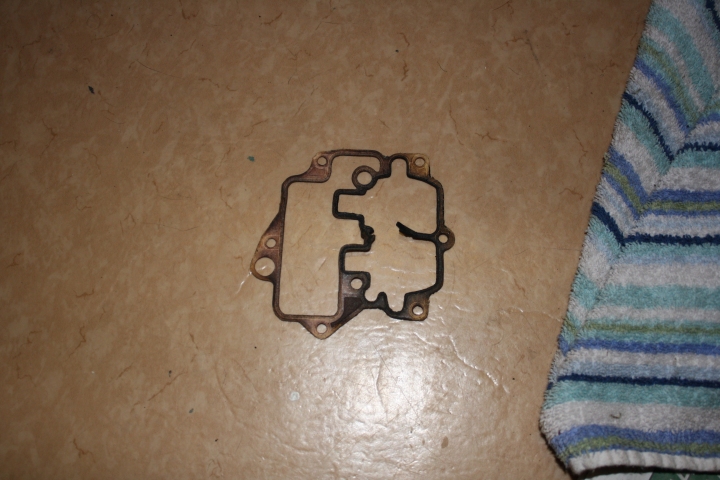
I took the carb off today as well, and removed the top part of it... The gasket is blown, and I don't know where to get another so I'll order some gasket material and cut it myself.
04-04-2011, 10:24 AM
#14
Honda-Tech Member
Thread Starter
Join Date: Feb 2011
Location: Finland
Posts: 79
Likes: 0
Received 0 Likes
on
0 Posts
Today I removed the thermostat housing and the thing itself. Now testing it - begins to open at 82�C (180�F) so it's the winter edition. EDIT: I was too quick - It's still open a little bit when the water has cooled down to 77�C (171�F), so it's the standard thermostat.
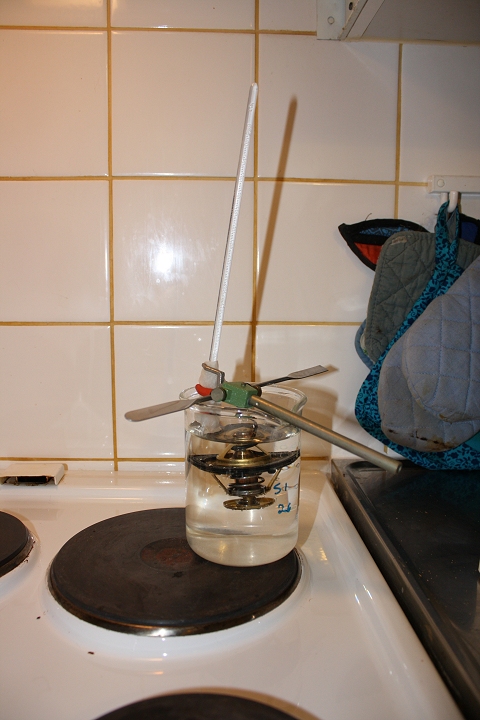
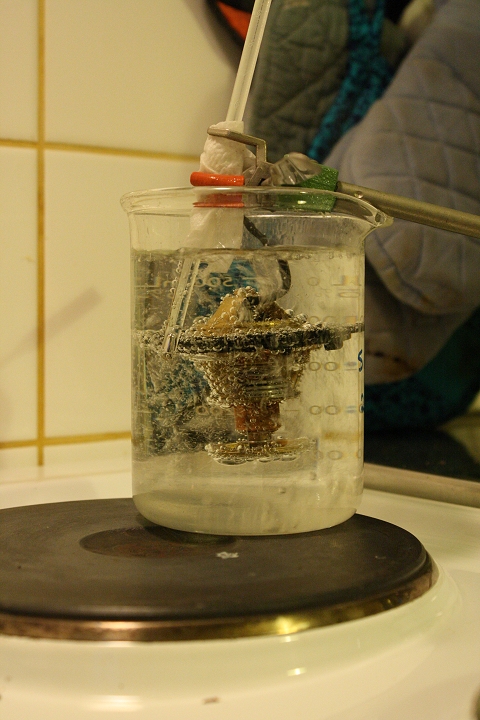
Last edited by Sera_; 04-04-2011 at 10:50 AM.
04-05-2011, 10:08 AM
#15
Honda-Tech Member
Thread Starter
Join Date: Feb 2011
Location: Finland
Posts: 79
Likes: 0
Received 0 Likes
on
0 Posts
Today the order arrived... a valve spring compressor, a valve grinding tool, an exhaust valve, a torque wrench and the gasket set.

04-07-2011, 10:57 AM
#16
Honda-Tech Member
Thread Starter
Join Date: Feb 2011
Location: Finland
Posts: 79
Likes: 0
Received 0 Likes
on
0 Posts
Today I pulled all the valves off the head. In this photo you can see the head at the beginning of the work.
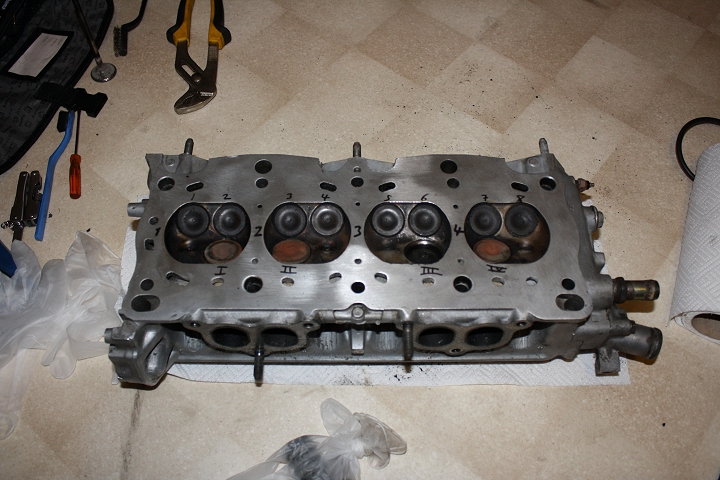
An exhaust valve's shamefully dirty chamber.
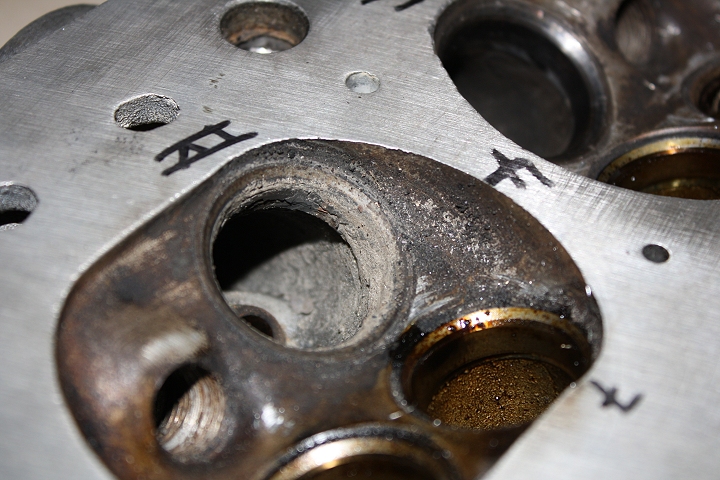
A valve spring gasoline bath.
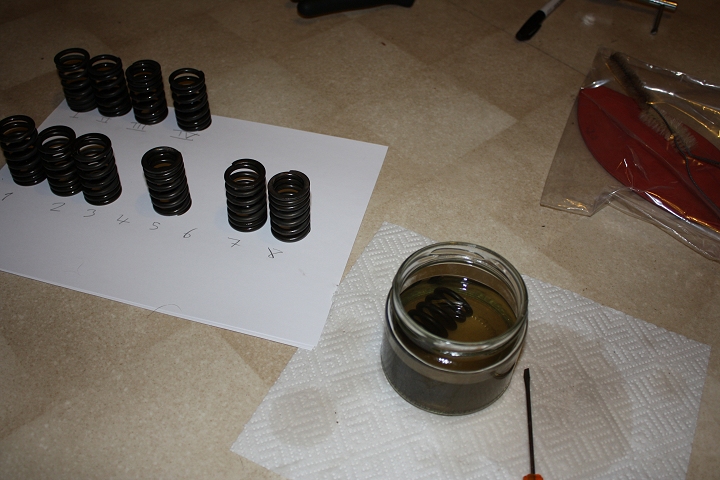
In a few days I'll clean up the chambers and the combustion space and the whole head.
An exhaust valve's shamefully dirty chamber.
A valve spring gasoline bath.
In a few days I'll clean up the chambers and the combustion space and the whole head.
Last edited by Sera_; 04-07-2011 at 07:30 PM.
04-08-2011, 09:10 AM
#17
Honda-Tech Member
Thread Starter
Join Date: Feb 2011
Location: Finland
Posts: 79
Likes: 0
Received 0 Likes
on
0 Posts
Today the gasket material pack arrived, and I cut a nice new gasket for the carb, here it is:
(not the final version, tidied it up a bit later)
(not the final version, tidied it up a bit later)
04-09-2011, 06:23 AM
#19
Honda-Tech Member
Thread Starter
Join Date: Feb 2011
Location: Finland
Posts: 79
Likes: 0
Received 0 Likes
on
0 Posts
Thanks, korax. I hope you find one, it's a good engine
I'm having trouble getting the crankshaft pulley bolt off. I set the gear on 1st, and tried to twist it, but only the pulley moves a bit. I've been spraying CRC (WD-40 equivalent) on the bolt many days now, but it won't budge. Is there any way you can lock the pulley in position so it doesn't move at all? Does it turn counterclockwise, as I've tried?
I'm going to see if my power drill + socket does anything.
04-09-2011, 09:01 AM
#20
Honda-Tech Member
I'm having trouble getting the crankshaft pulley bolt off. I set the gear on 1st, and tried to twist it, but only the pulley moves a bit. I've been spraying CRC (WD-40 equivalent) on the bolt many days now, but it won't budge. Is there any way you can lock the pulley in position so it doesn't move at all? Does it turn counterclockwise, as I've tried?
I'm going to see if my power drill + socket does anything.
I'm going to see if my power drill + socket does anything.
http://www.harborfreight.com/12-elec...nch-68099.html
The better one are brand name like snap on and cordless for 10x the money but 3x the power.
, I used to visit my friendly service station and ask the attendant to loosen the nut, but in you case it is harder to drive. As for the drill, it will twist your arm. You can try a little heat with a torch on the nut, otherwise the longest breaker bar you can fit.
As a side note, with the new cat installed I failed smog for Nox again at twice the value.
04-09-2011, 09:46 AM
#21
Honda-Tech Member
Thread Starter
Join Date: Feb 2011
Location: Finland
Posts: 79
Likes: 0
Received 0 Likes
on
0 Posts
Usually an impact driver such as the example below is needed:
http://www.harborfreight.com/12-elec...nch-68099.html
The better one are brand name like snap on and cordless for 10x the money but 3x the power.
, I used to visit my friendly service station and ask the attendant to loosen the nut, but in you case it is harder to drive. As for the drill, it will twist your arm. You can try a little heat with a torch on the nut, otherwise the longest breaker bar you can fit.
As a side note, with the new cat installed I failed smog for Nox again at twice the value.
Too bad to hear the test failed. Have you tried the trick I wrote some weeks ago via email? I.e put the gear on fourth or third, drive some 50 mph for a while, and take it to the test center steaming hot.
04-11-2011, 08:56 PM
#22
Honda-Tech Member
Today I had an appointment w the smog referee... he looked at all my papers, dismissed some... as I needed to have all the repairs justified.... but as I have over $450 in bills.... I got a waiver.... for 2 years... so until December 2012, no need to rush.
04-12-2011, 06:05 AM
#23
Honda-Tech Member
Thread Starter
Join Date: Feb 2011
Location: Finland
Posts: 79
Likes: 0
Received 0 Likes
on
0 Posts
The engine is running too lean... probably one of the sensor fails and creating some air leak.
Today I had an appointment w the smog referee... he looked at all my papers, dismissed some... as I needed to have all the repairs justified.... but as I have over $450 in bills.... I got a waiver.... for 2 years... so until December 2012, no need to rush.
Today I had an appointment w the smog referee... he looked at all my papers, dismissed some... as I needed to have all the repairs justified.... but as I have over $450 in bills.... I got a waiver.... for 2 years... so until December 2012, no need to rush.
04-21-2011, 08:53 AM
#24
Honda-Tech Member
Thread Starter
Join Date: Feb 2011
Location: Finland
Posts: 79
Likes: 0
Received 0 Likes
on
0 Posts
Time for an update. I have now sanded the head clean, now it has no noticeable scratches and it's super smooth. I also cleaned all the crevices and chambers with some oil remover and a bottle brush. Decarbonized the exhaust chambers as well.
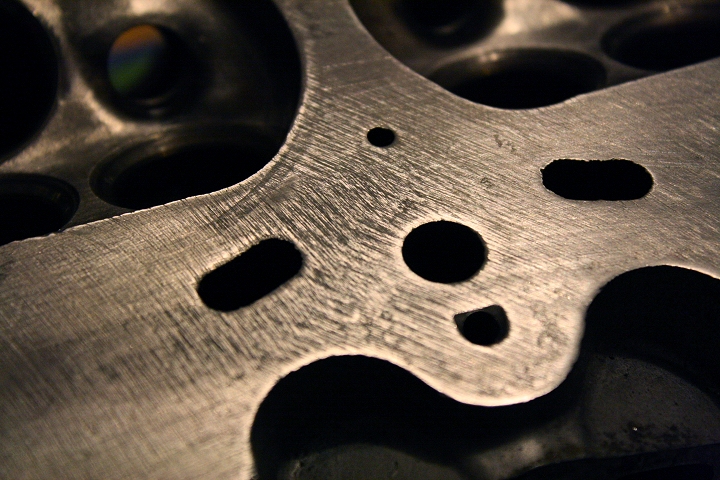
Before.
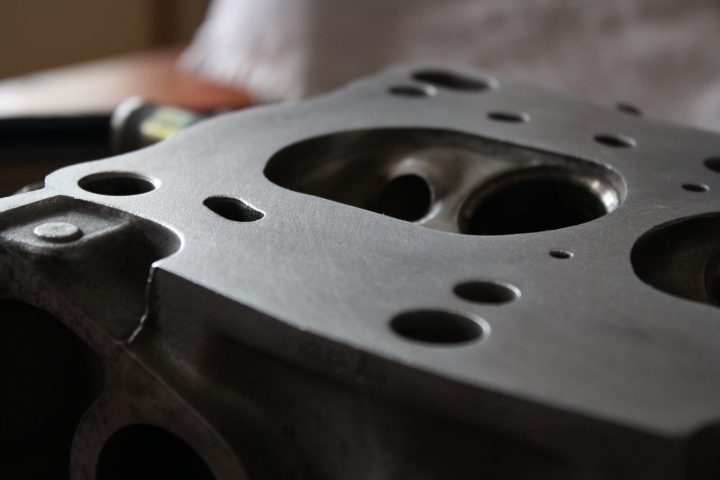
After.
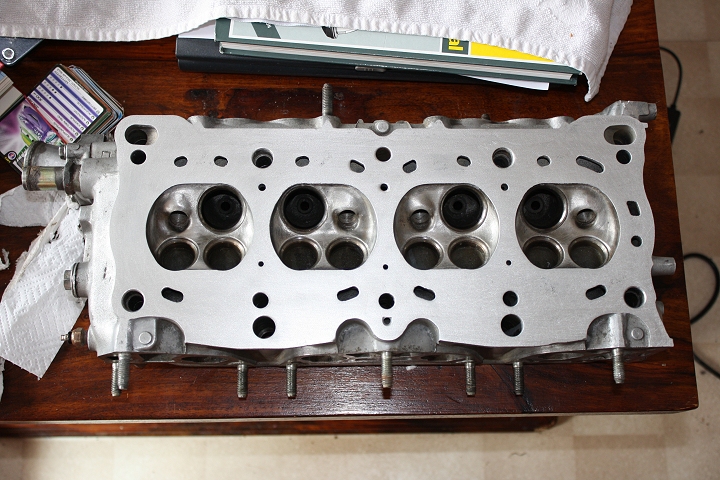
The head. Clean and neat.
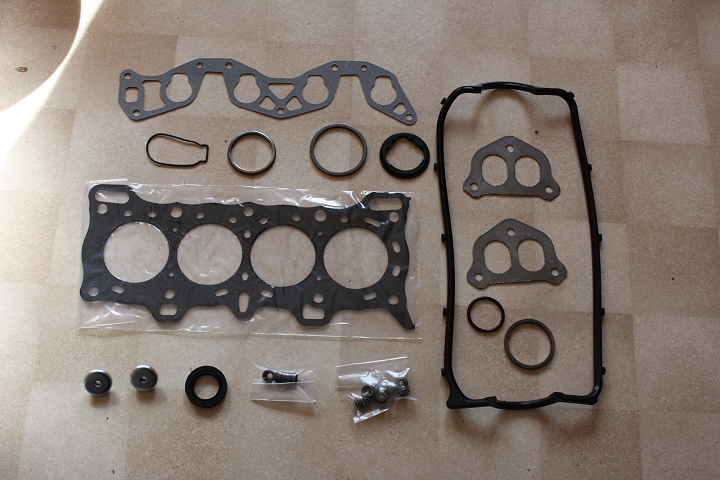
The gasket set. Not sure what those metal rings below the inlet manifold are for, but I'll try to find use for them.
I also removed the fan and the radiator, and the latter is in very bad shape! It has bugs, rust and the metal just decomposes if I even touch it. I gave it a nice long bath and some oven cleaner, maybe it became a little better but who knows.
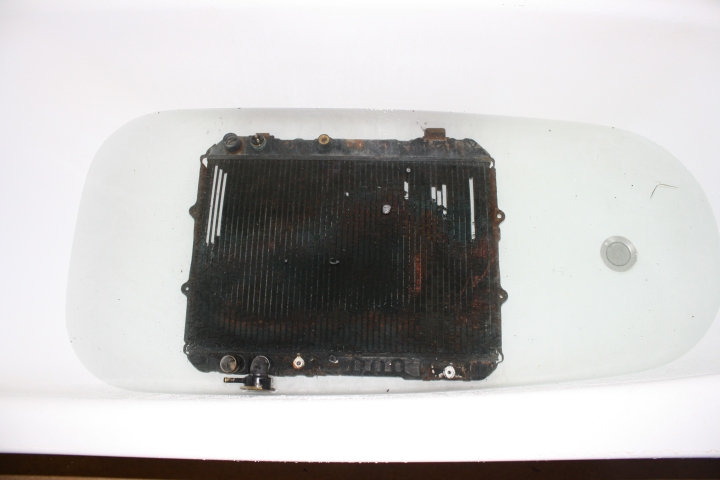
Maybe some rose leaves would've done the trick?
I also grinded the valves in, assembled the whole head and I'm now checking the valve clearances. I also received an electric impact wrench (1010W, 450Nm) for taking the crankshaft pulley bolt off, I'll have to see when I can get to try that.
Before.
After.
The head. Clean and neat.
The gasket set. Not sure what those metal rings below the inlet manifold are for, but I'll try to find use for them.
I also removed the fan and the radiator, and the latter is in very bad shape! It has bugs, rust and the metal just decomposes if I even touch it. I gave it a nice long bath and some oven cleaner, maybe it became a little better but who knows.
Maybe some rose leaves would've done the trick?
I also grinded the valves in, assembled the whole head and I'm now checking the valve clearances. I also received an electric impact wrench (1010W, 450Nm) for taking the crankshaft pulley bolt off, I'll have to see when I can get to try that.