
OG's VX Build: HyperMile Driving with some JDM Styling!
 06-02-2015, 06:35 PM
#201
Honda-Tech Member
Thread Starter
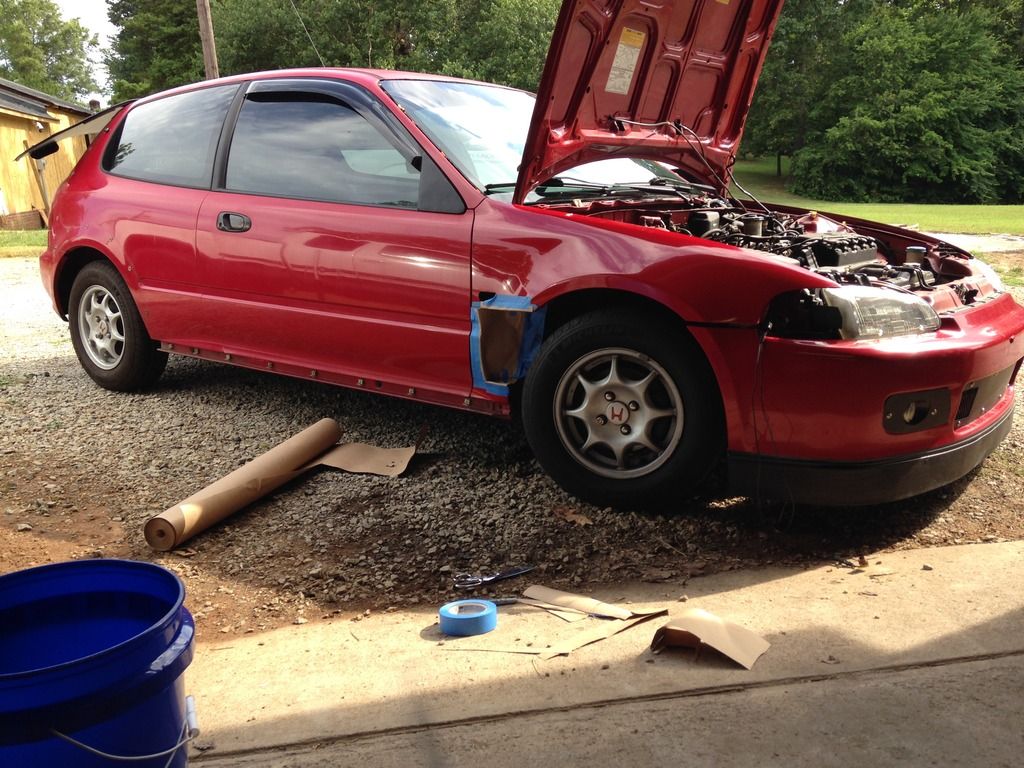
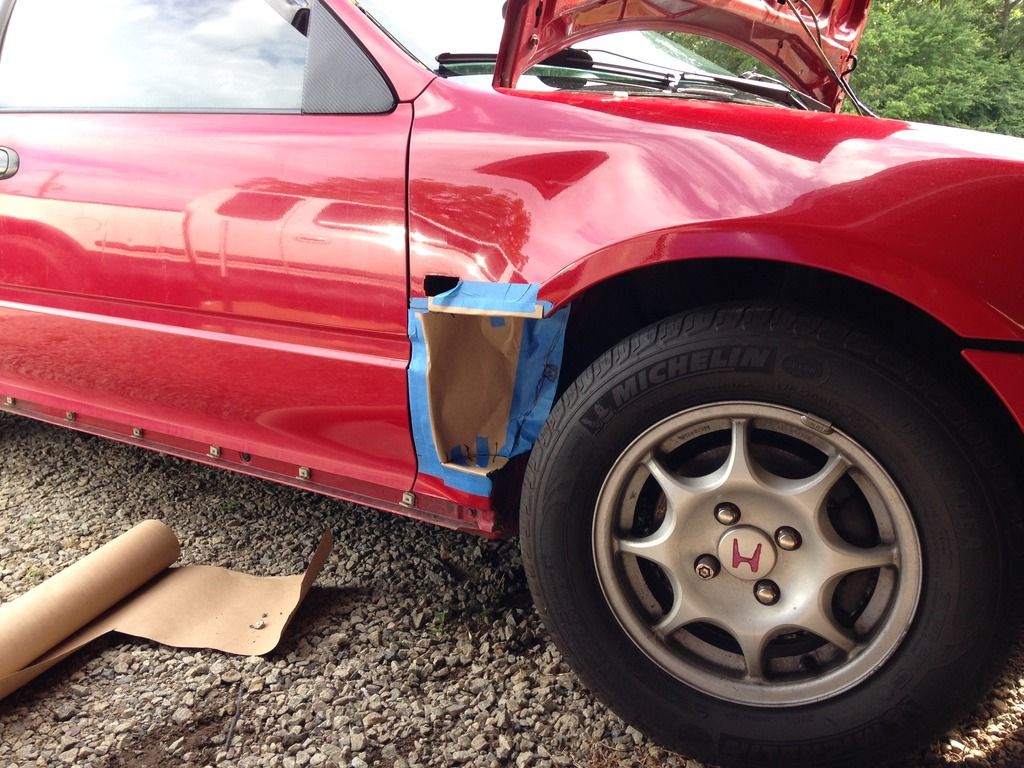
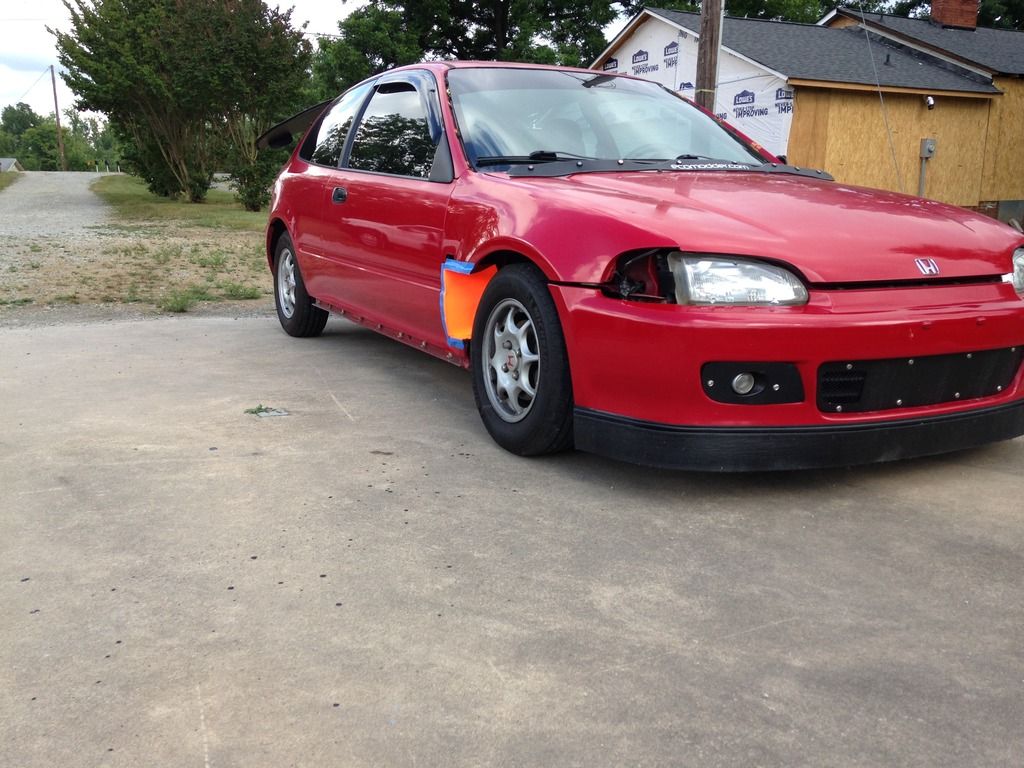
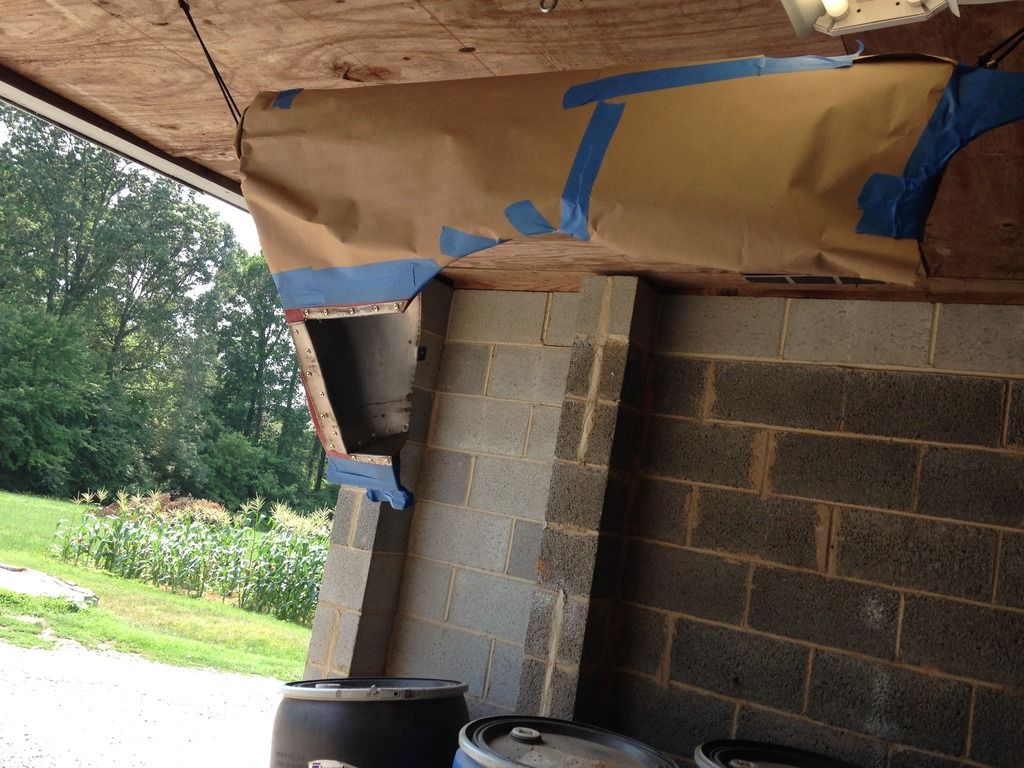
Update 6/2/15: Cut-Away Front Fenders- Part One
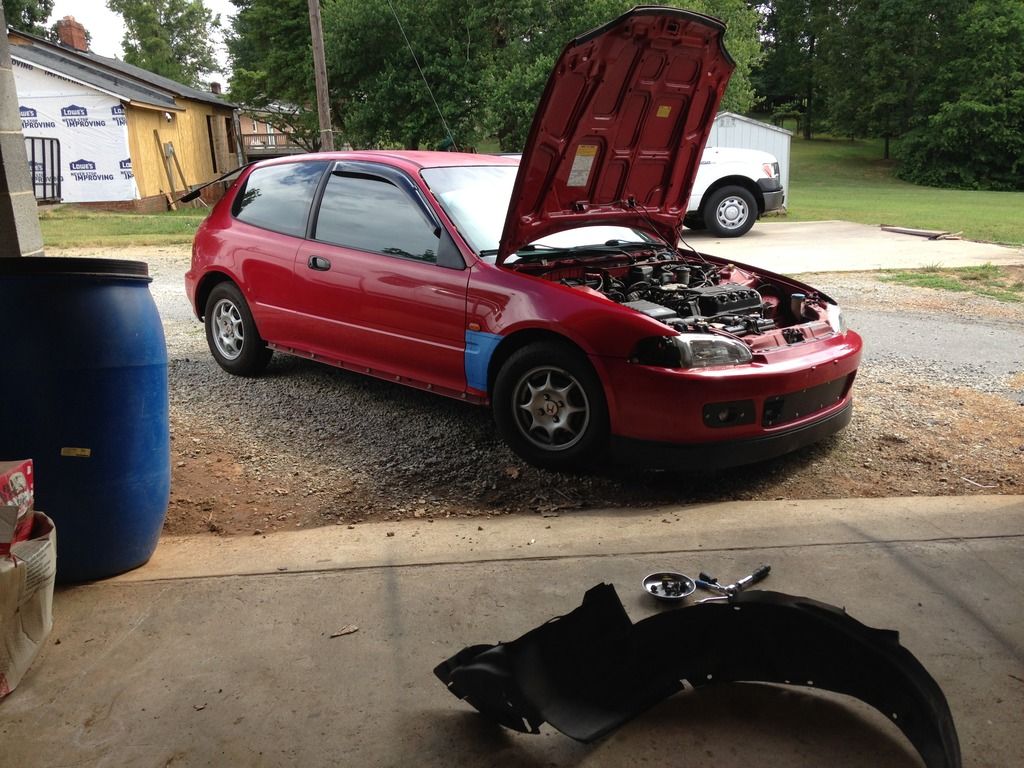
More to come soon. Thank YOU for ecoTuning in!


More to come soon. Thank YOU for ecoTuning in!
 06-07-2015, 10:59 AM
#202
Honda-Tech Member
Thread Starter
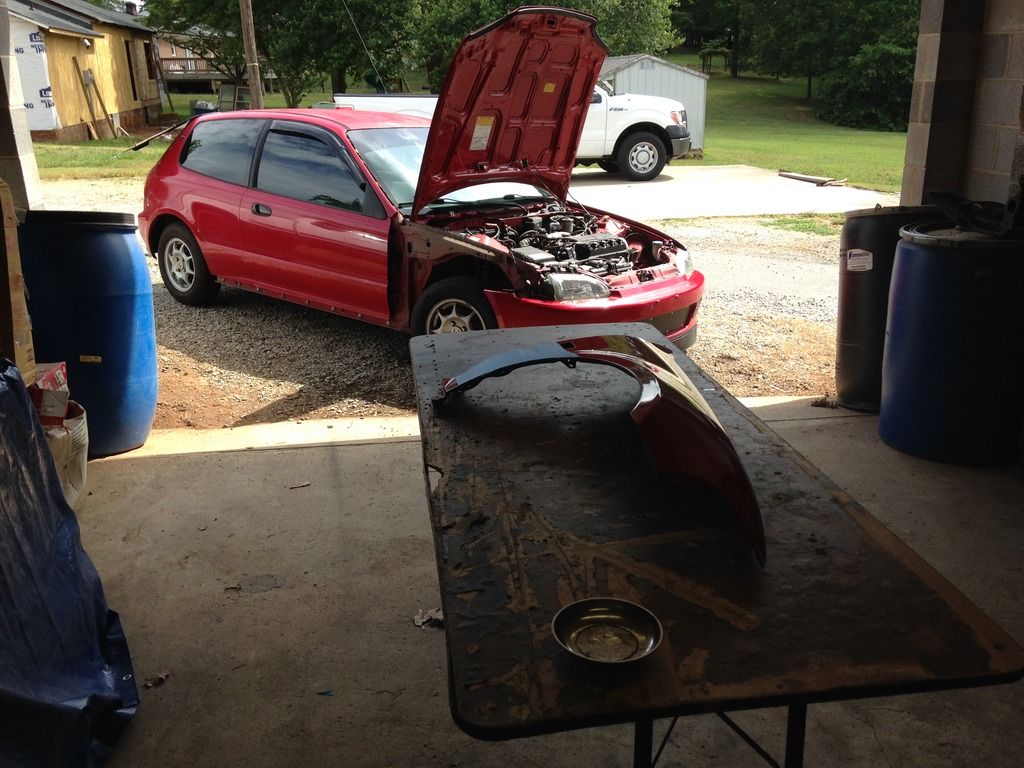
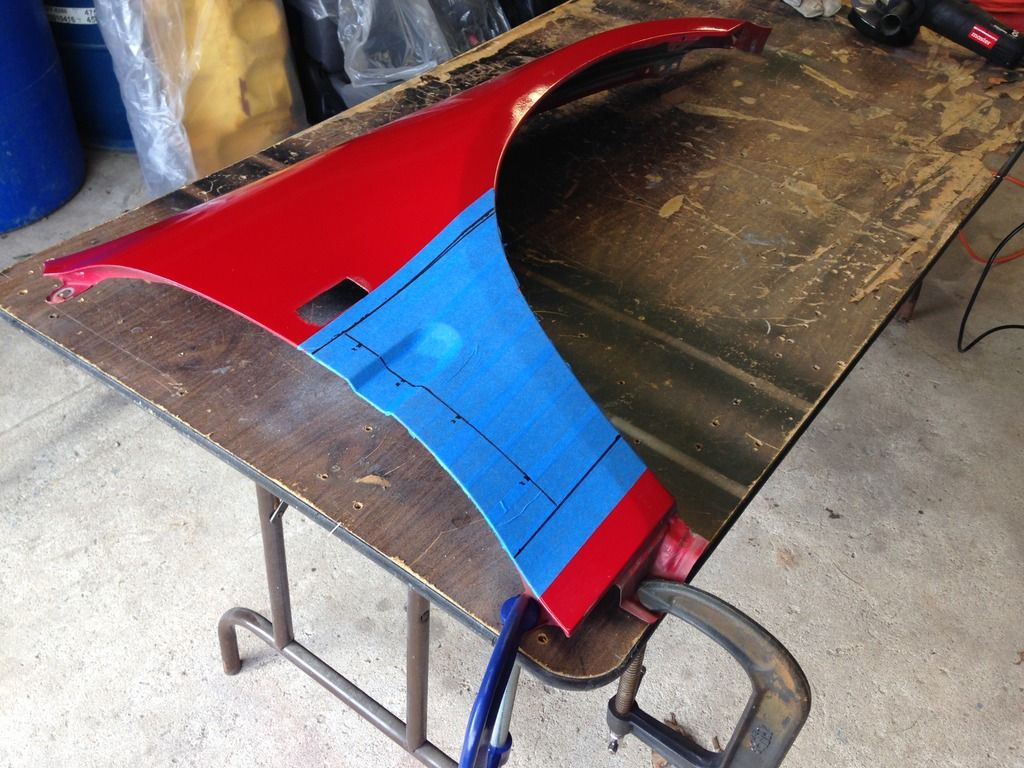
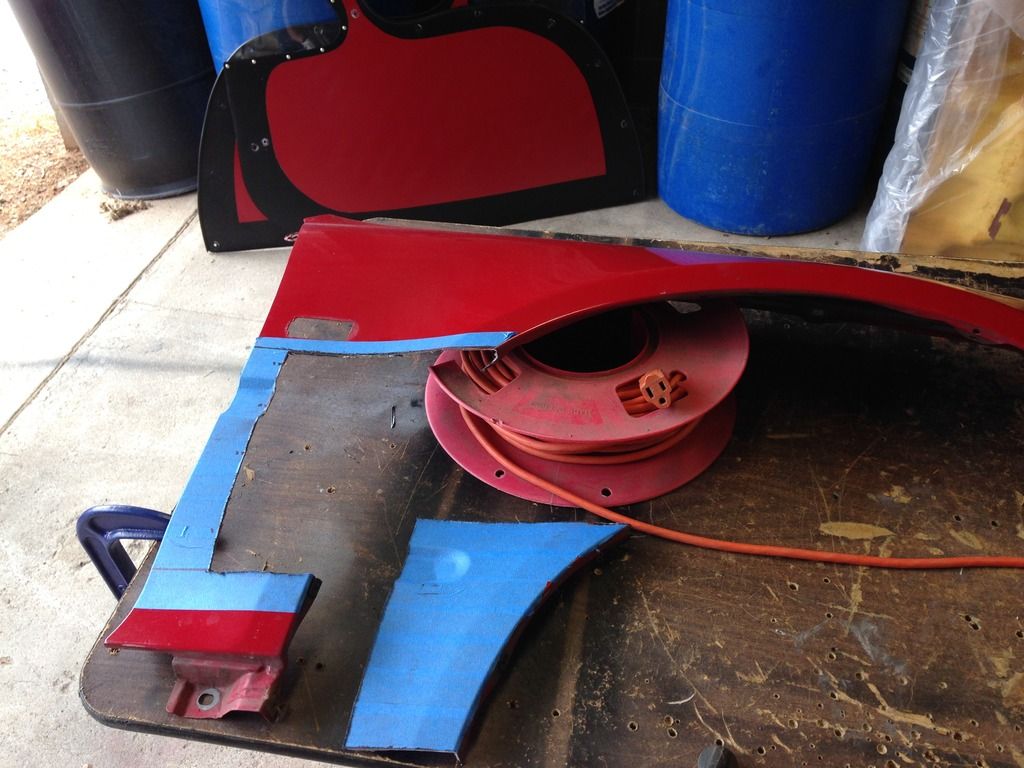
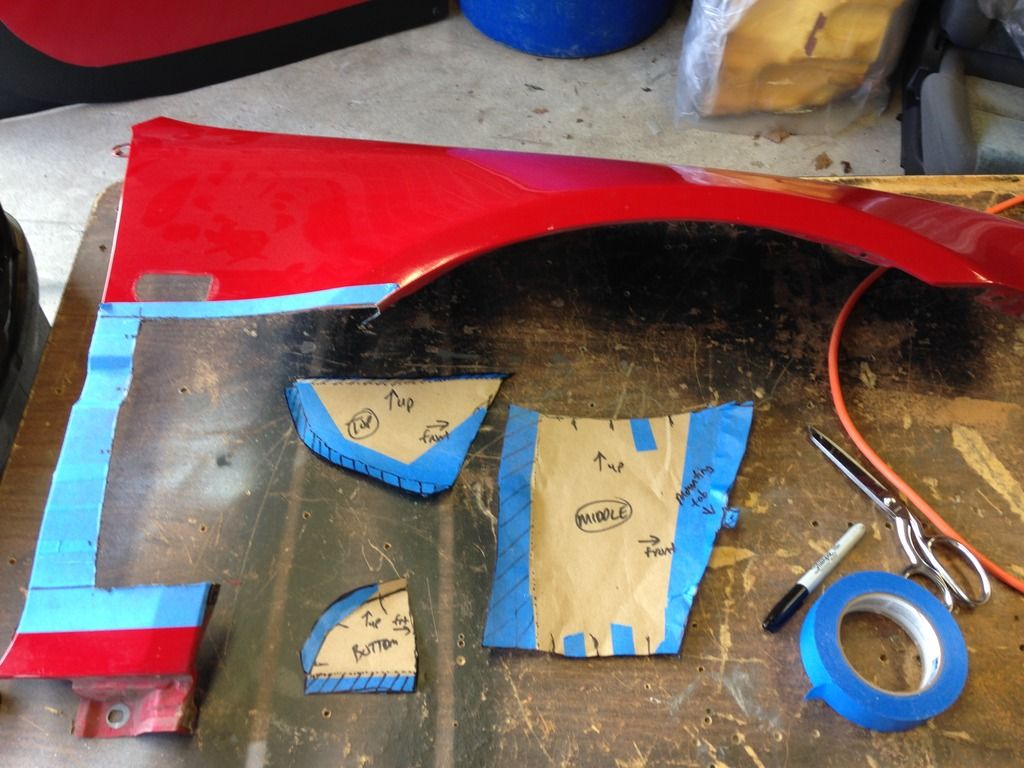
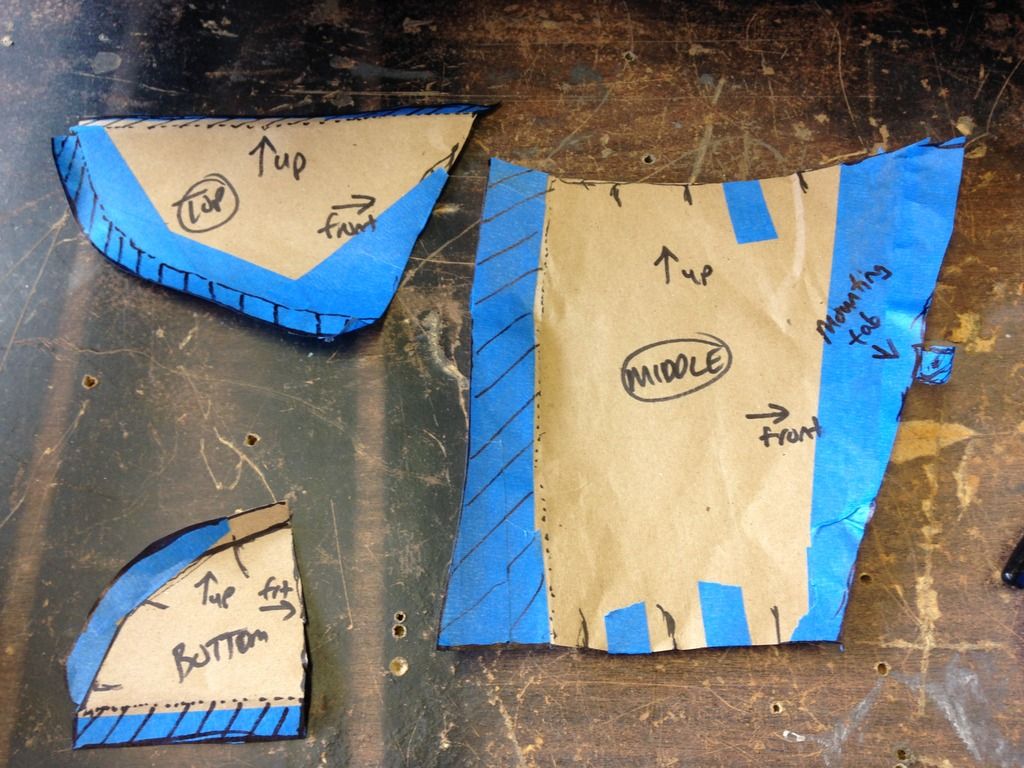
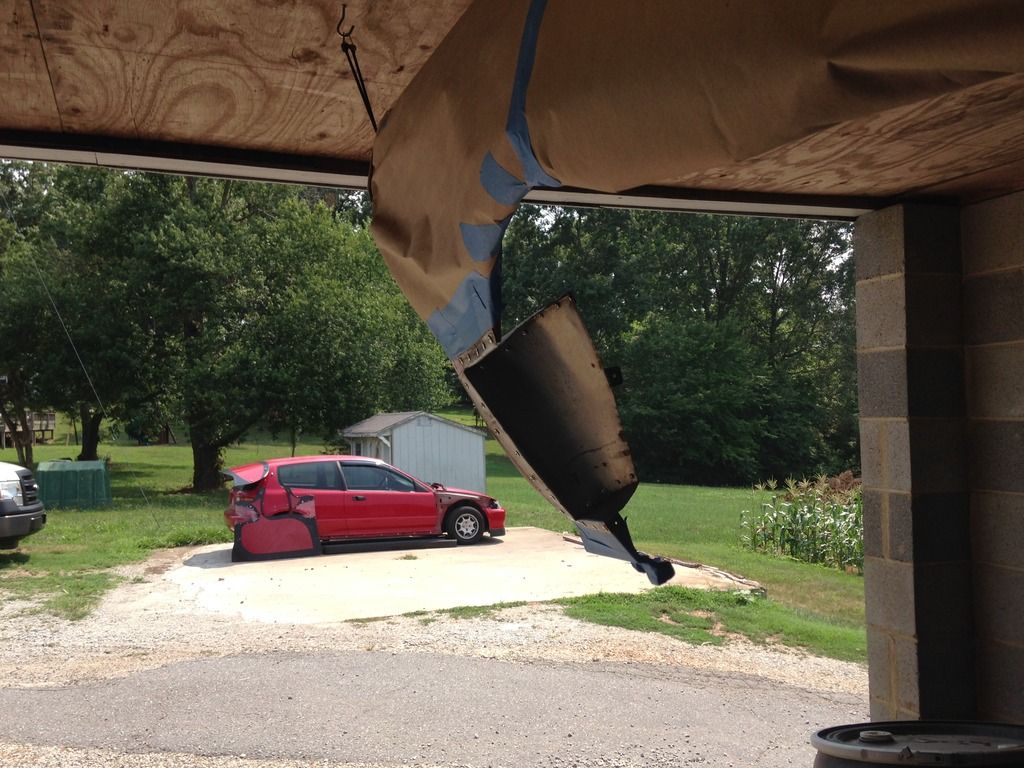
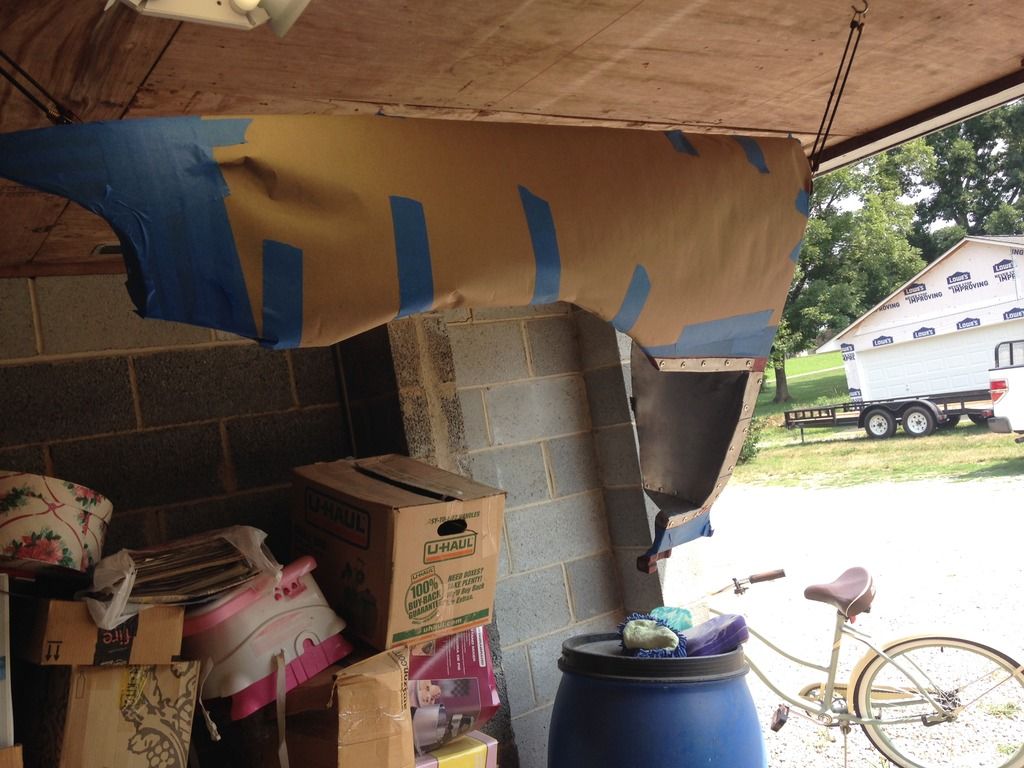
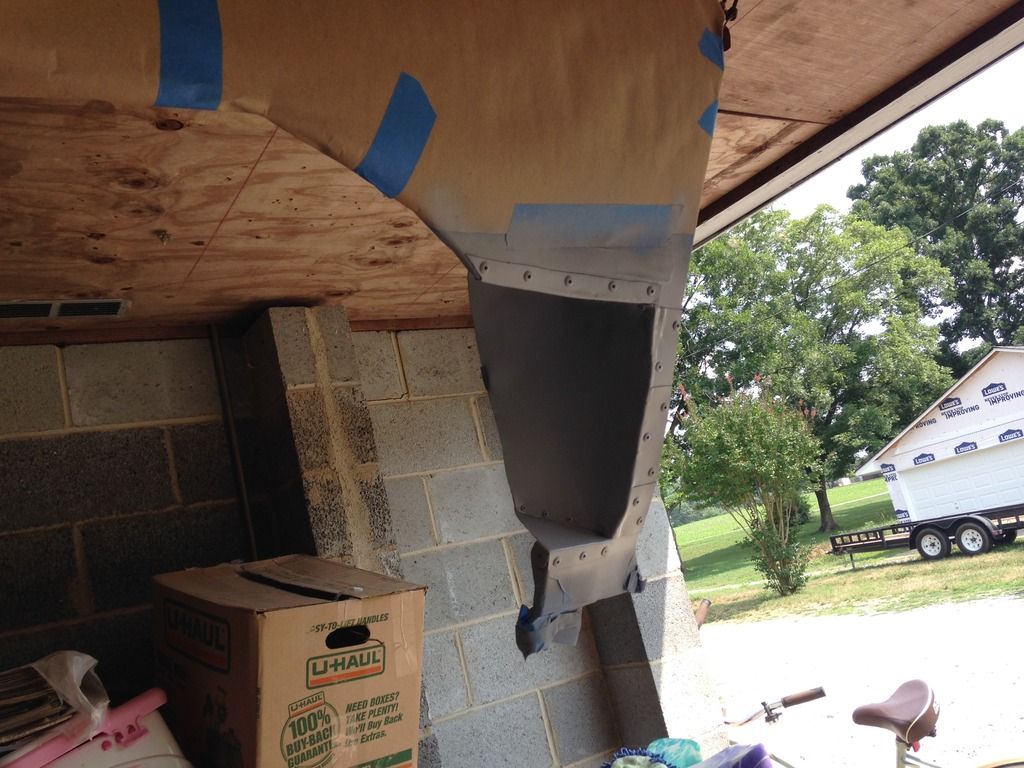
Update 6/7/15: Cut-Away Fenders- Part Two
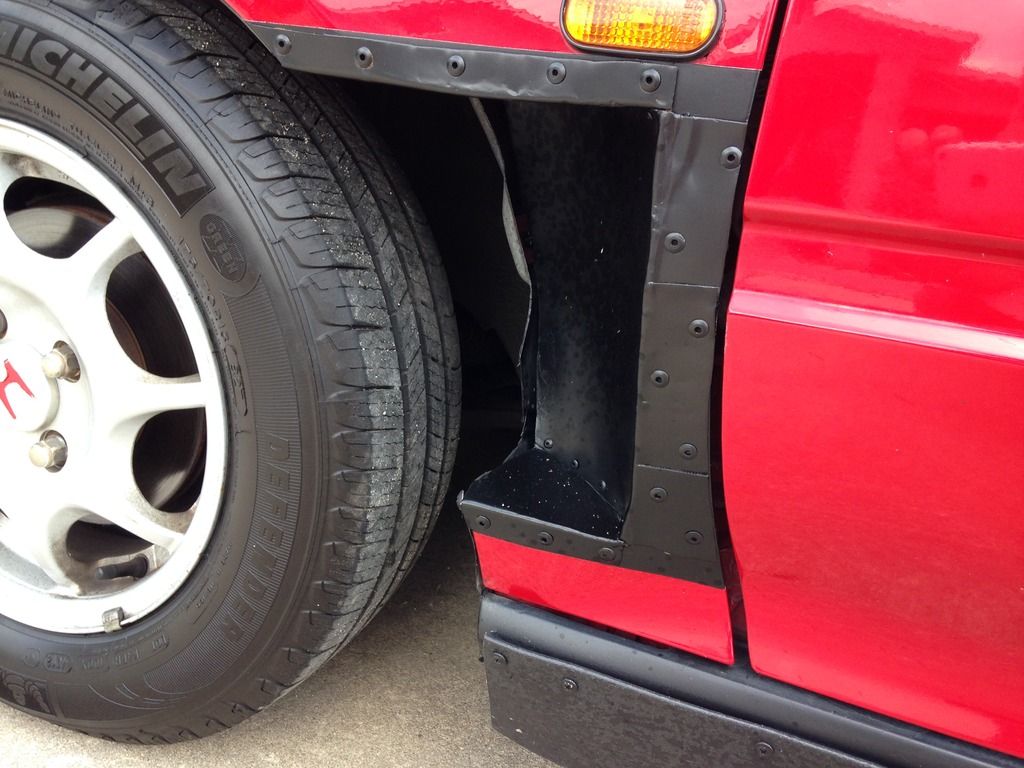
All, here's the update on the fenders. Going well...
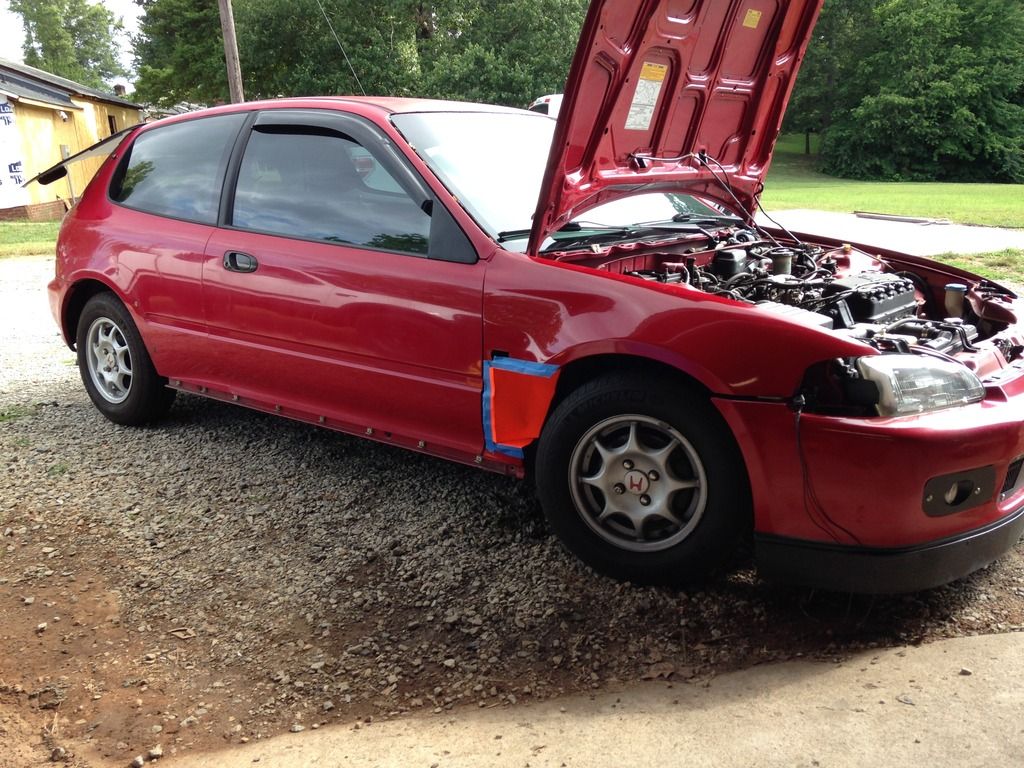
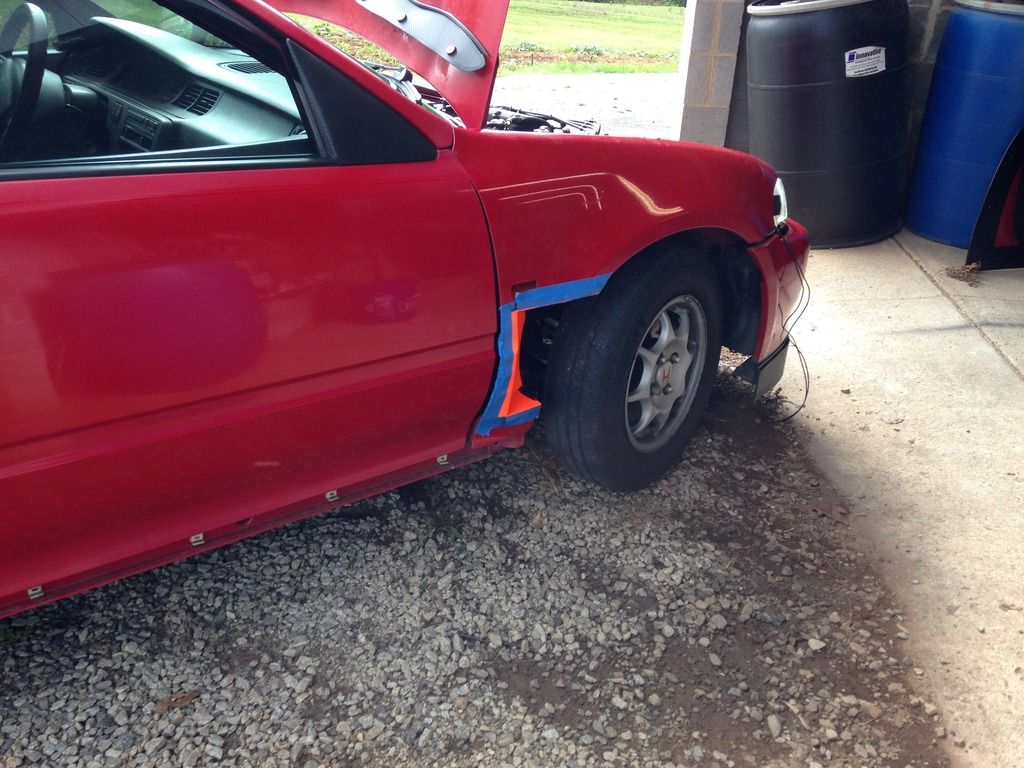
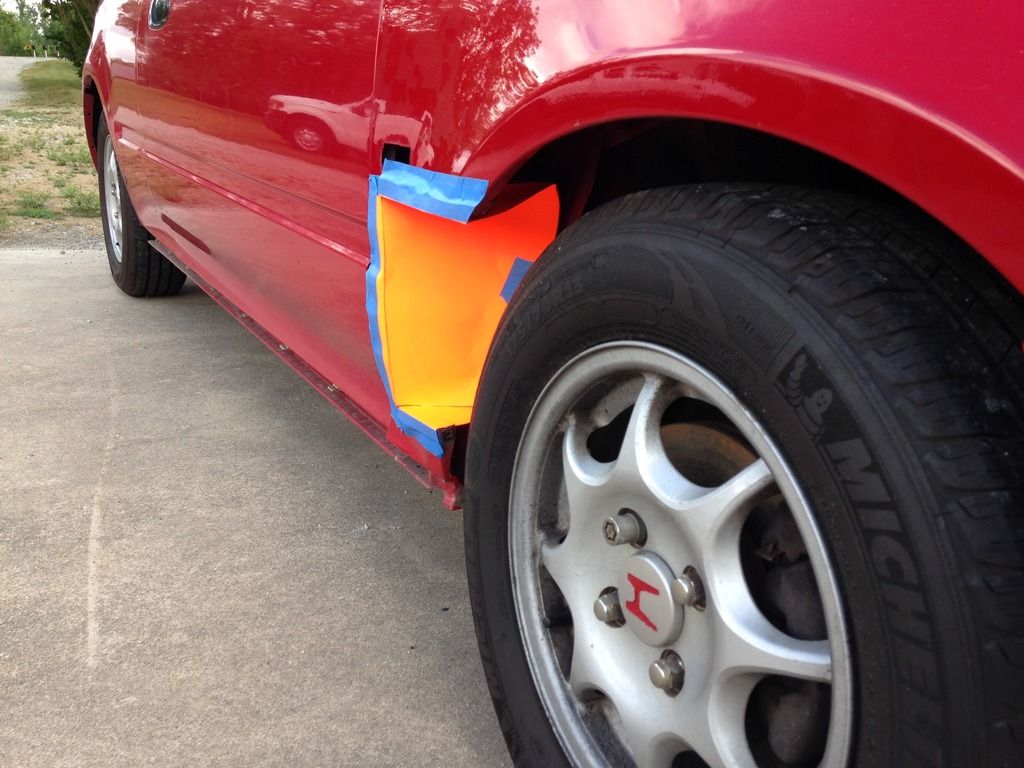
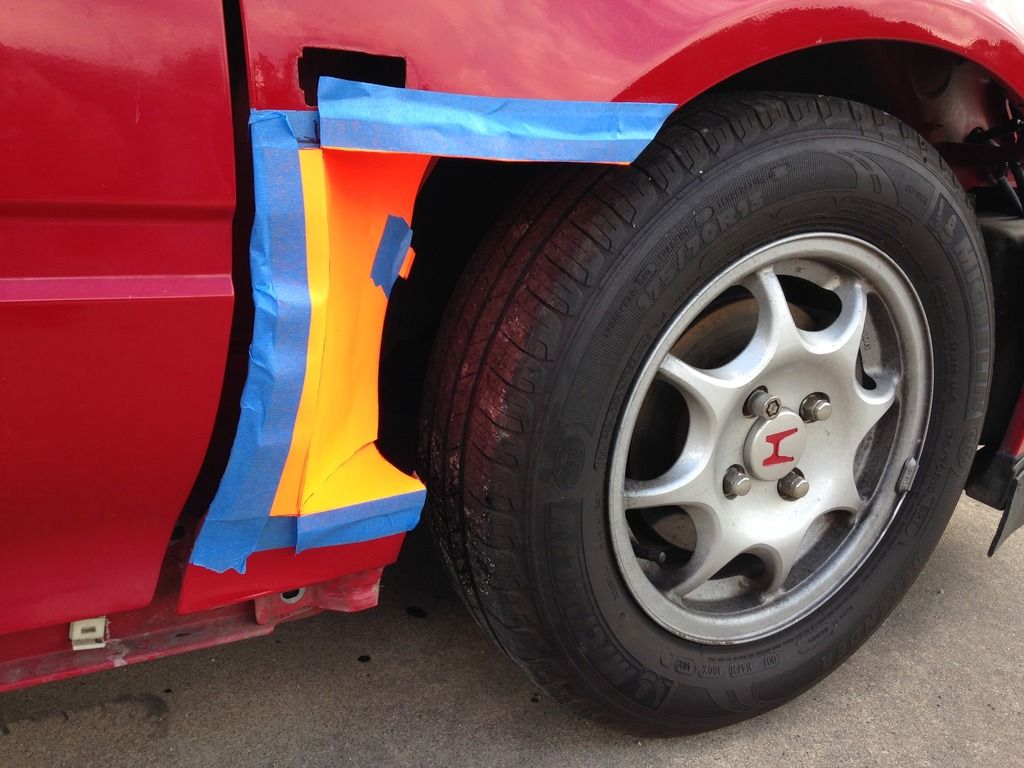
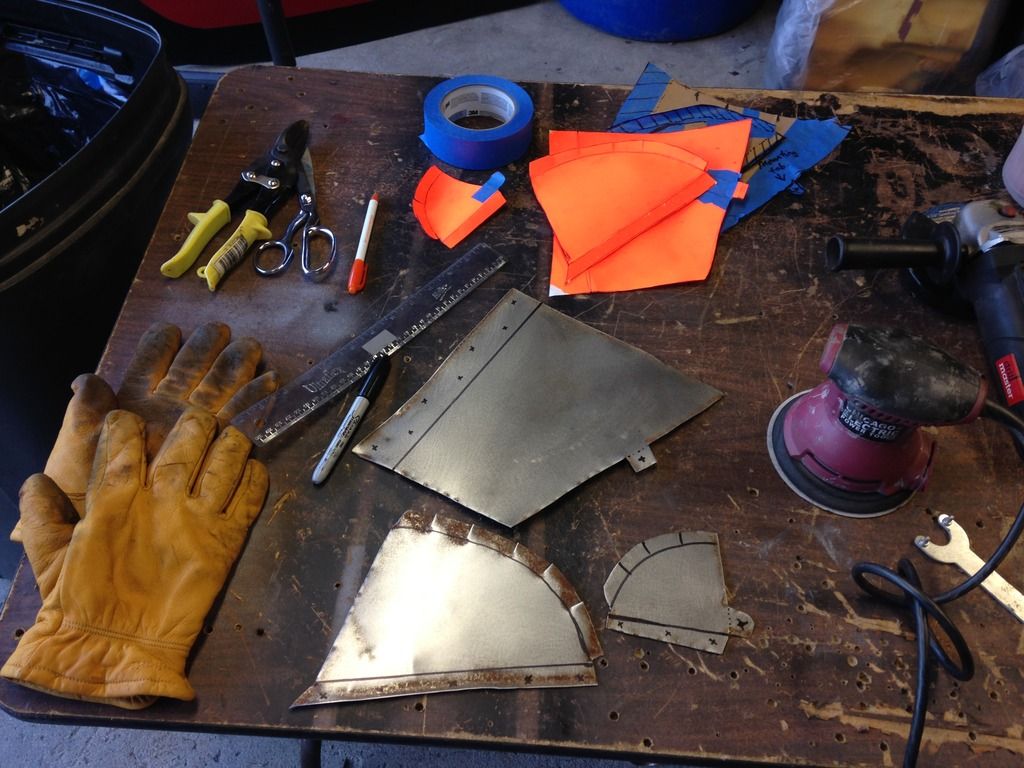
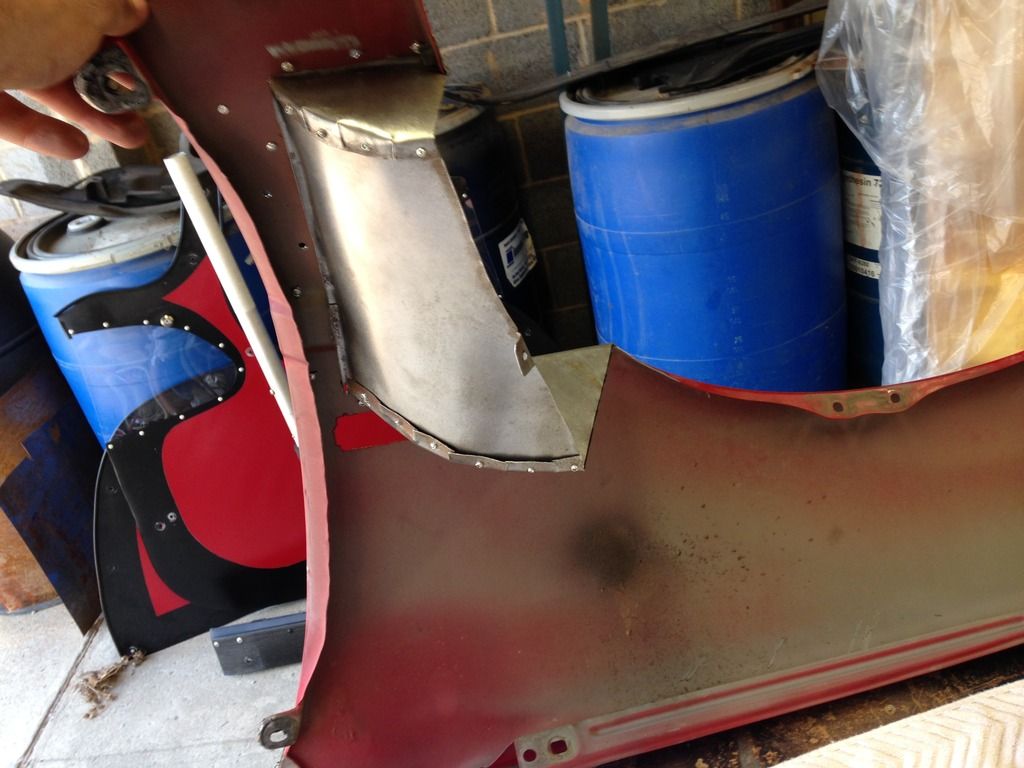
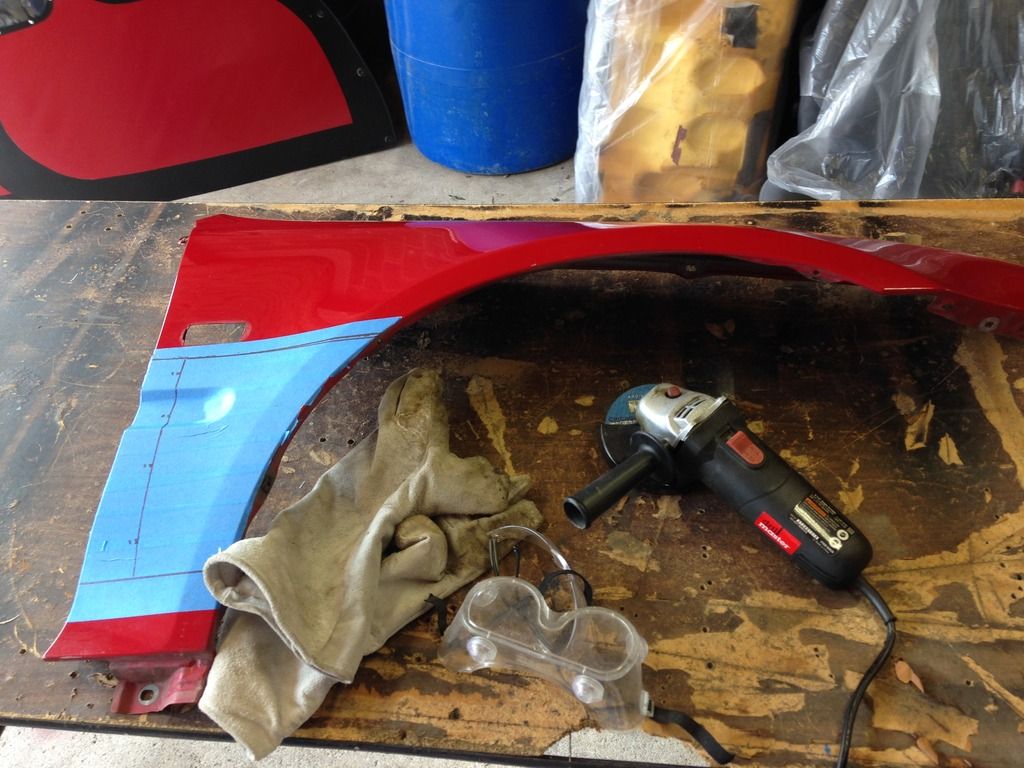
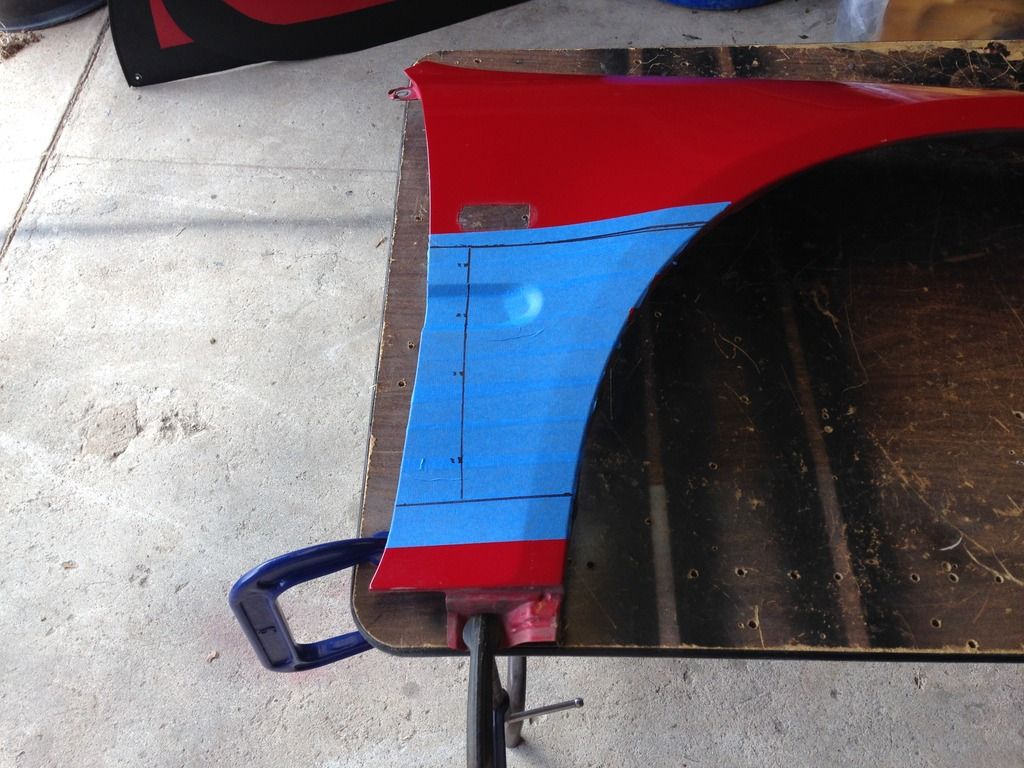
You can see below that I added one small notch piece underneath the panel to fill in the OEM molding recession.
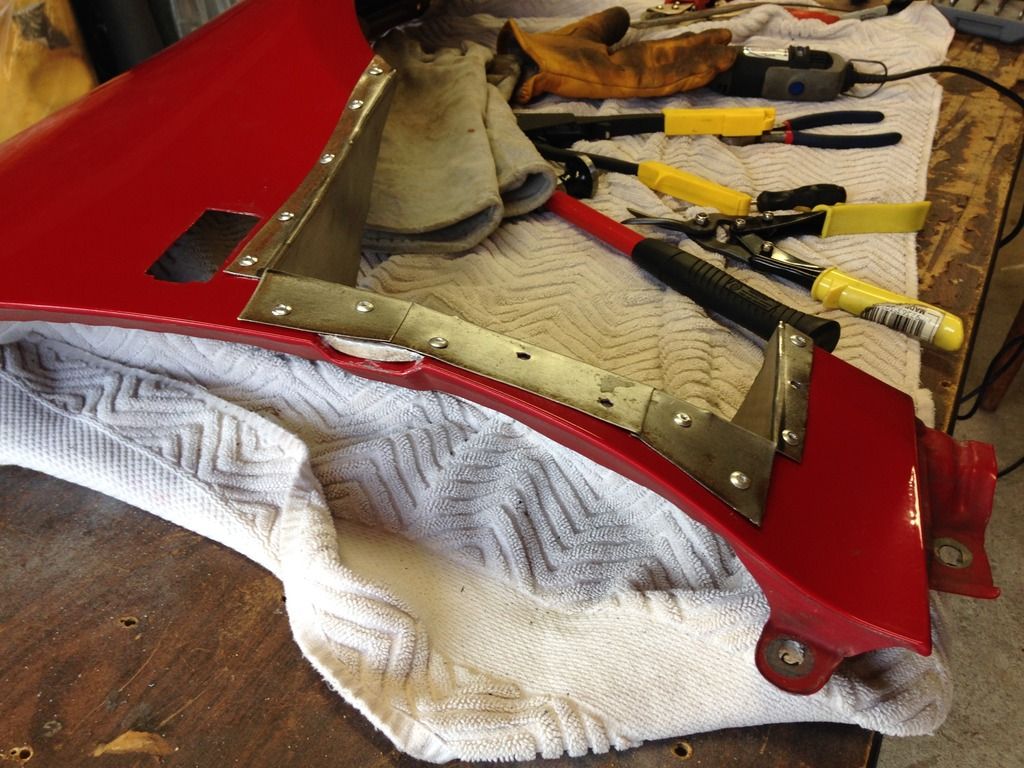
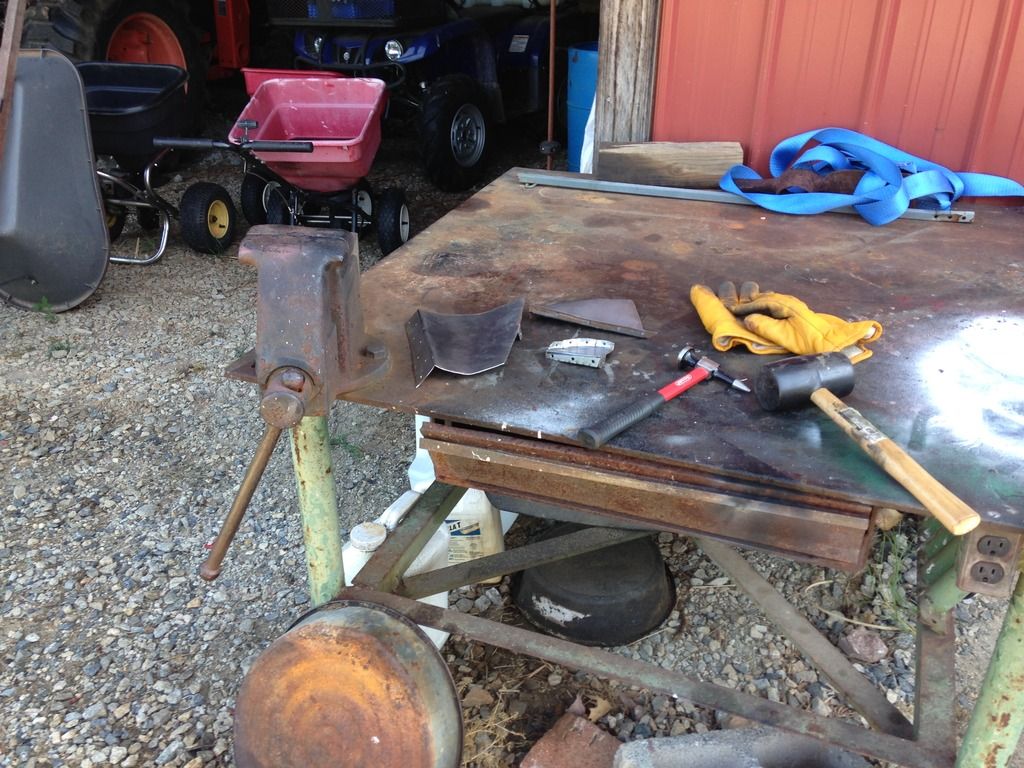
Used just about every tool in my arsenal to make this thing, ha!
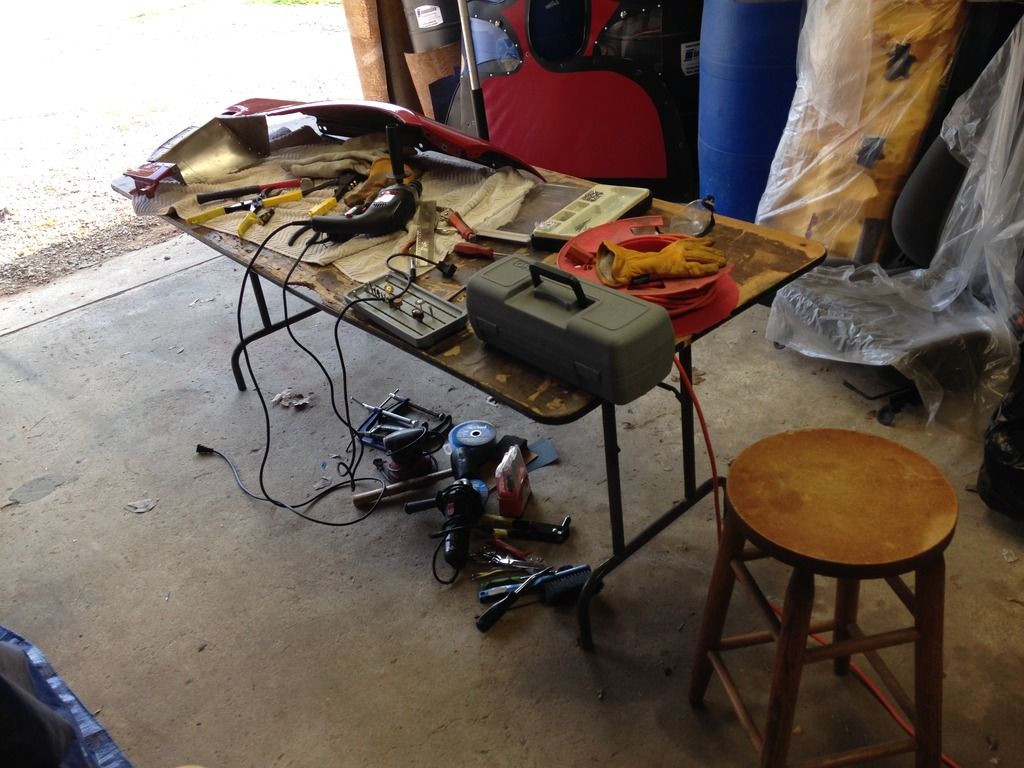
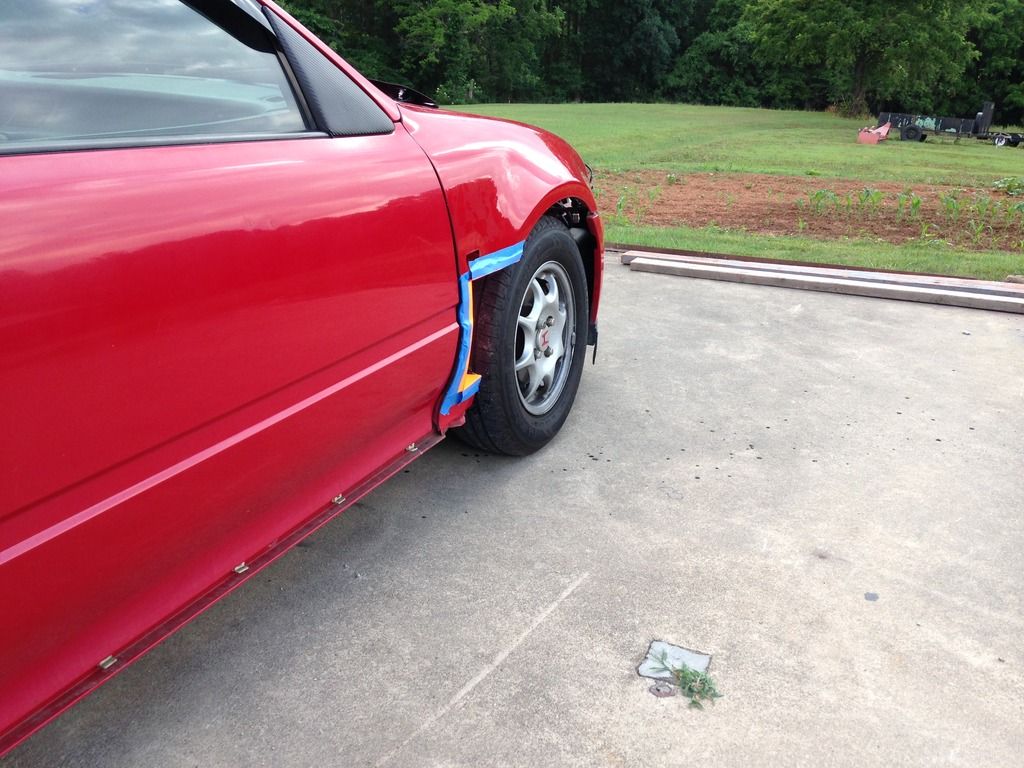
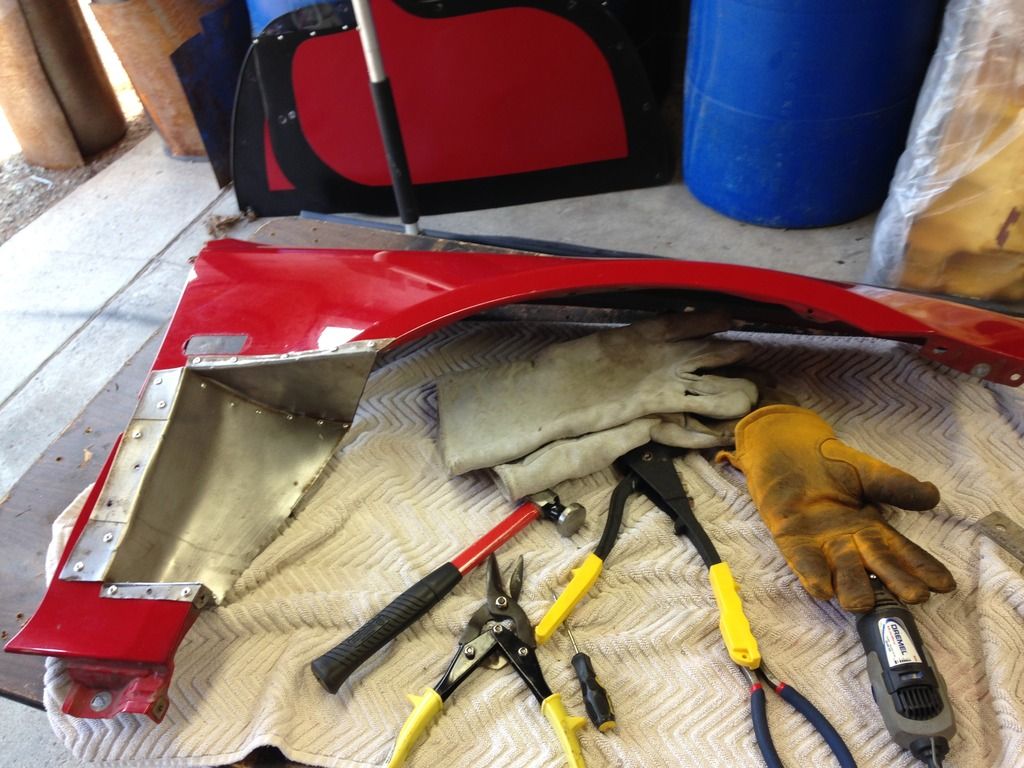
About to go outside and finish up the first one now. Then, I'll remove and start on the driver's side fender.
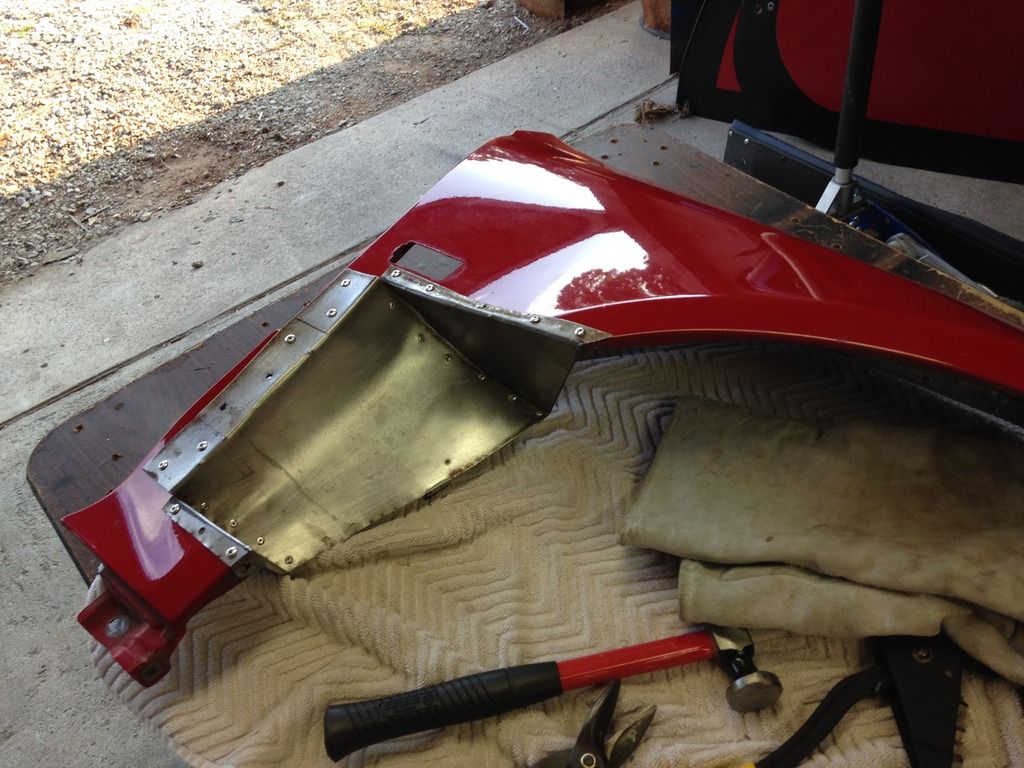
I know it looks a bit like something off of "A Knights Tale". Once both are completed, I will mask off the modified area and paint the entire section with Duplicolor Bumper Paint. Plans are also in place to re-install the fender liners, after a bit of trimming, of course.
As has been mentioned here on the EcoModder thread, the angle is more aggressive than the Gen 1 Insights, yes. However, my sole reason...I like it that way? Ha, wish I had a better or more scientific reasoning for my design. I just wanted to go really aggressive with it. Something similar to the Spoon S2000 fenders, I suppose?
Back with more soon. Thank YOU for ecoTuning in!
All, here's the update on the fenders. Going well...


You can see below that I added one small notch piece underneath the panel to fill in the OEM molding recession.

Used just about every tool in my arsenal to make this thing, ha!

About to go outside and finish up the first one now. Then, I'll remove and start on the driver's side fender.
I know it looks a bit like something off of "A Knights Tale". Once both are completed, I will mask off the modified area and paint the entire section with Duplicolor Bumper Paint. Plans are also in place to re-install the fender liners, after a bit of trimming, of course.
As has been mentioned here on the EcoModder thread, the angle is more aggressive than the Gen 1 Insights, yes. However, my sole reason...I like it that way? Ha, wish I had a better or more scientific reasoning for my design. I just wanted to go really aggressive with it. Something similar to the Spoon S2000 fenders, I suppose?
Back with more soon. Thank YOU for ecoTuning in!
06-17-2015, 03:13 PM
#203
Honda-Tech Member
Thread Starter
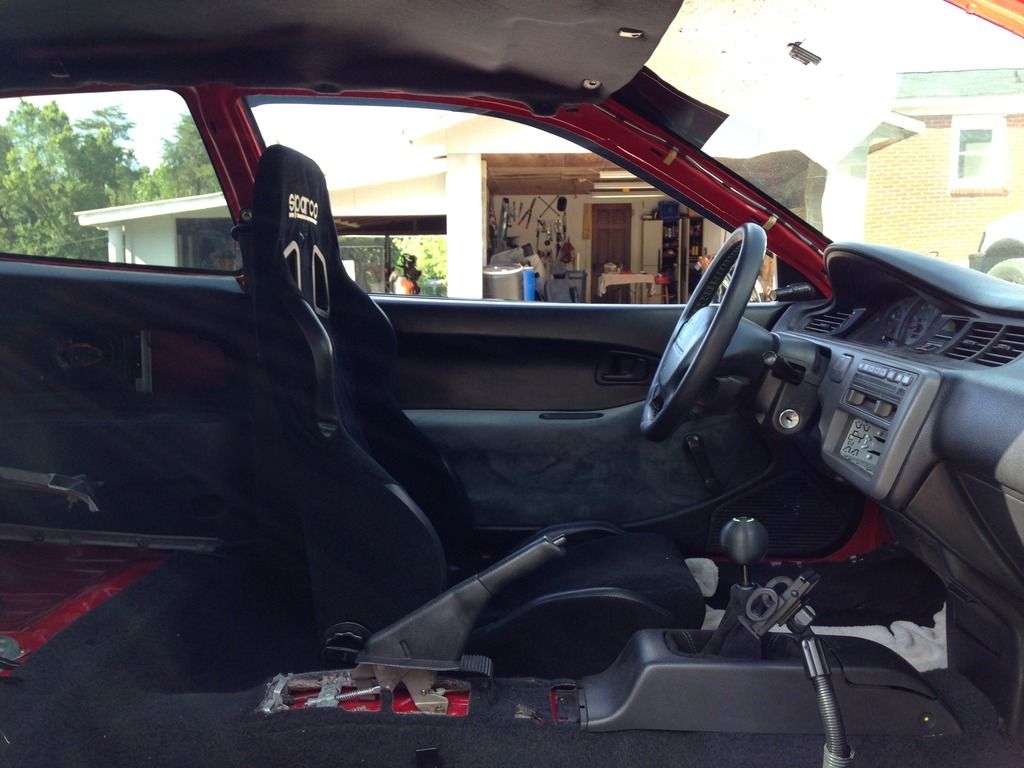
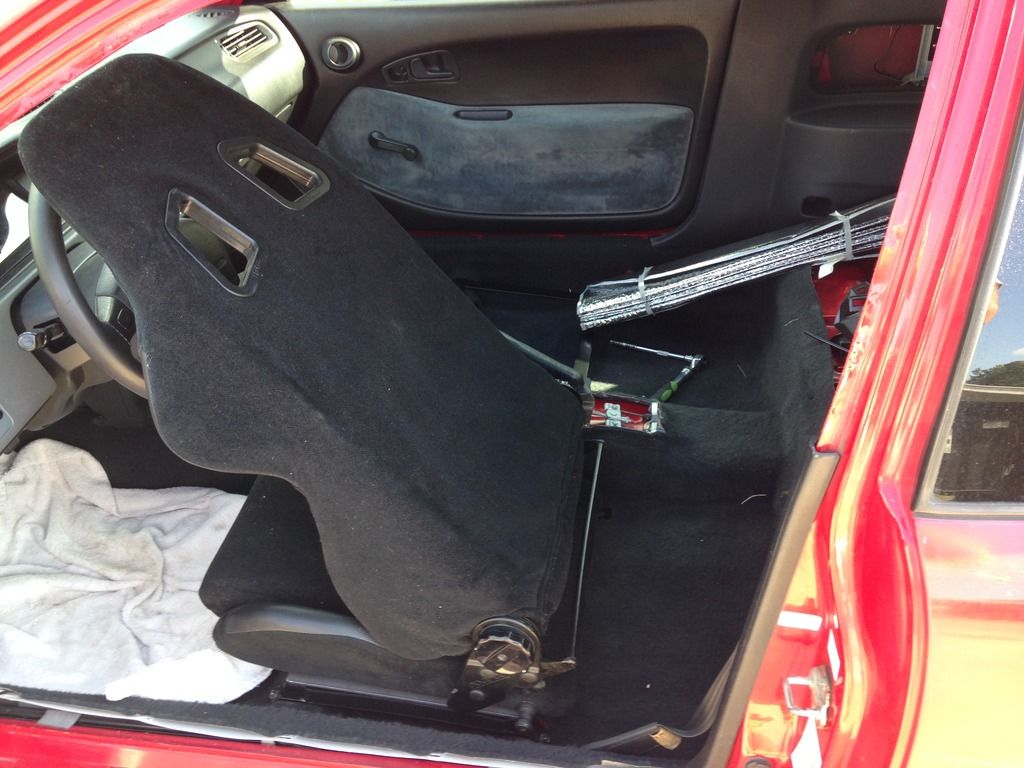
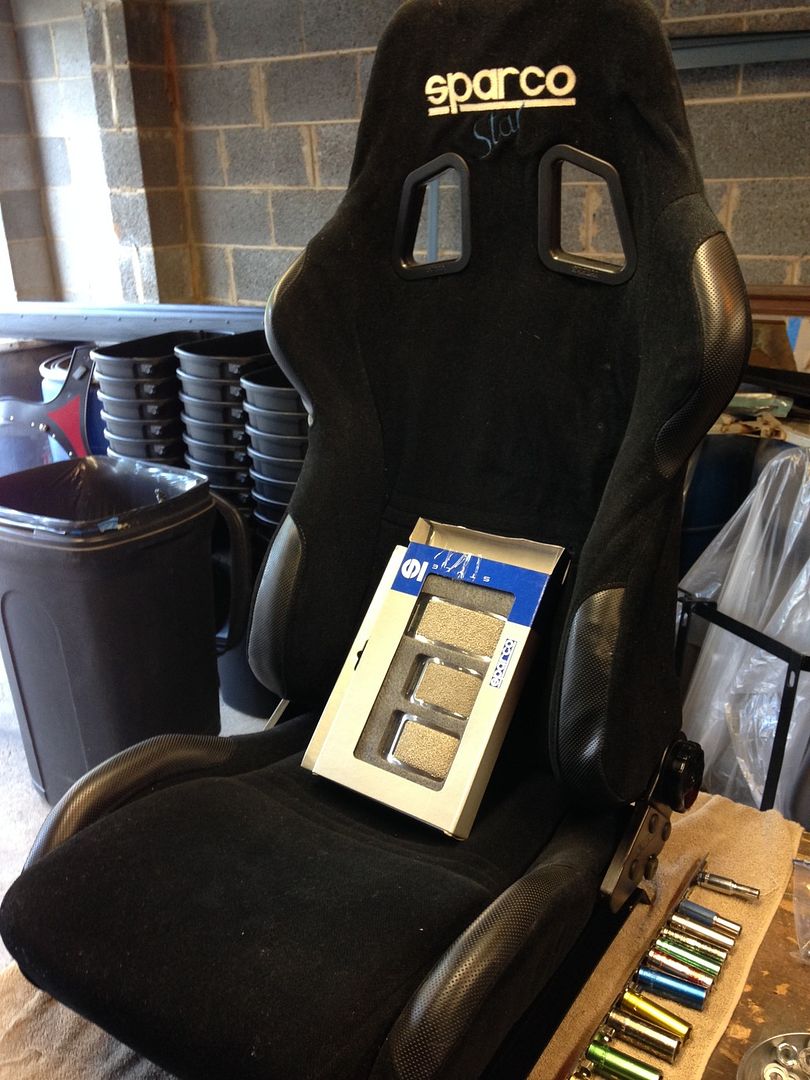
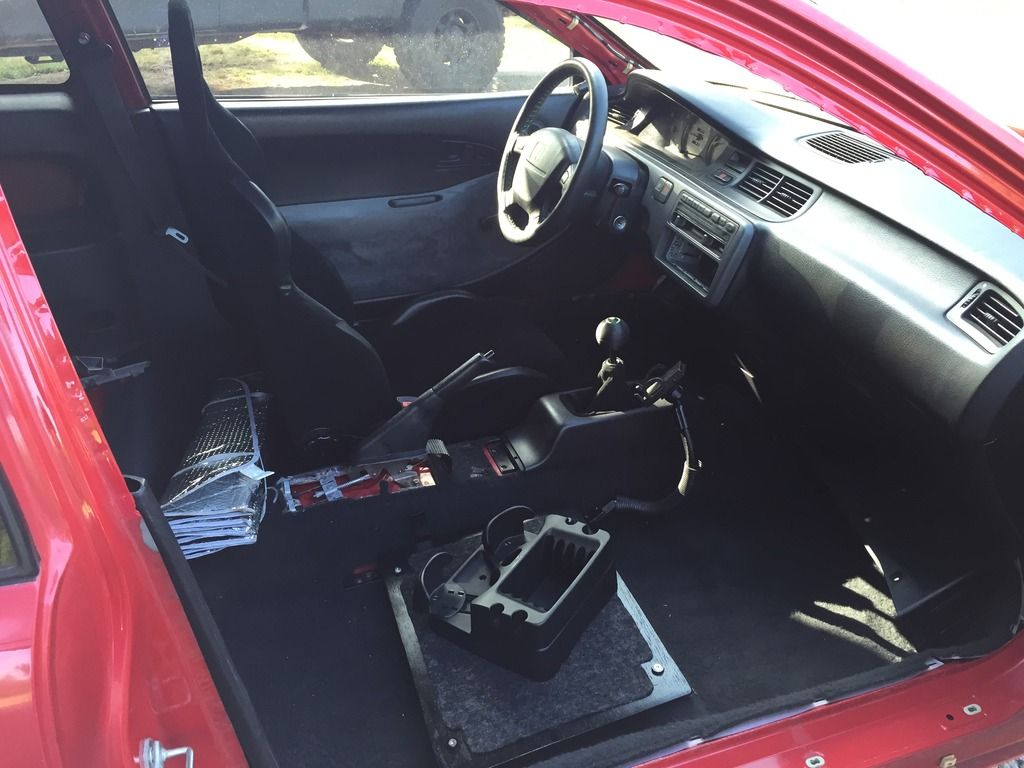
Update 6/17/15: Sparco Seat + "Auxiliary Table" Install (Part One)
Sorry for the lack of updates of late. Life is really screaming by of late...
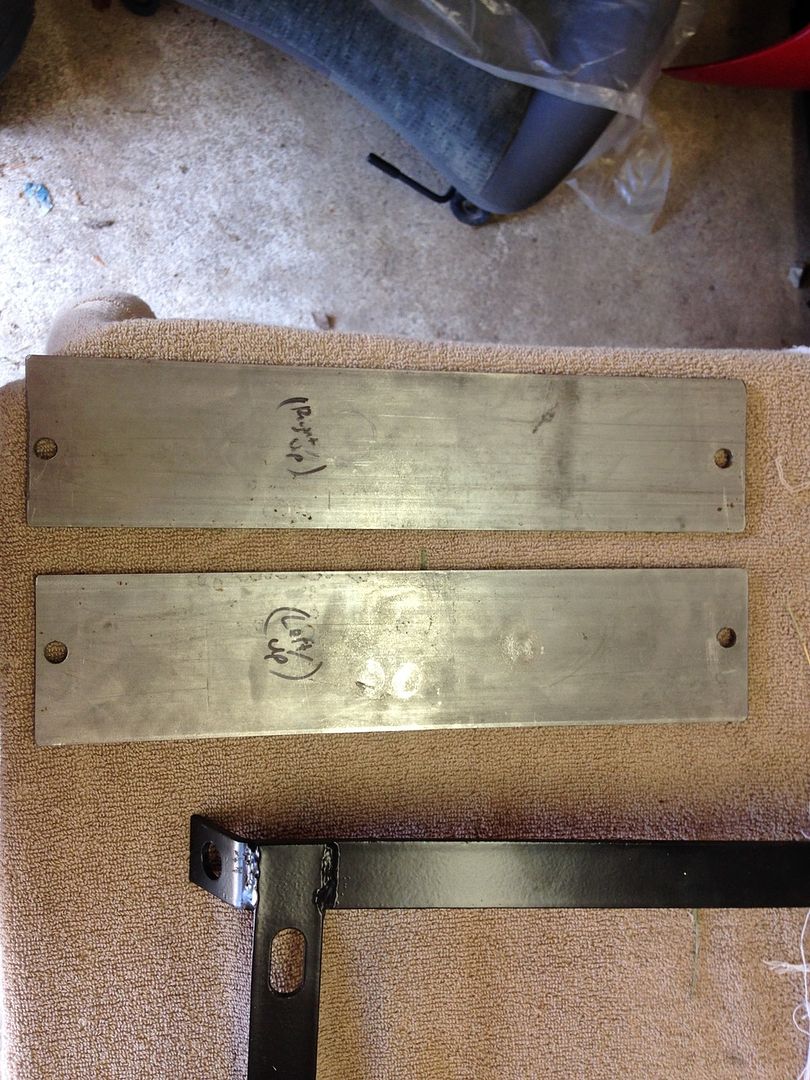
So, I ordered a set of Ebay brackets. They came in, and seem to be (surprisingly) decent quality. For the price, I figured I'd give them a shot. The metal, alone, would have cost me more.
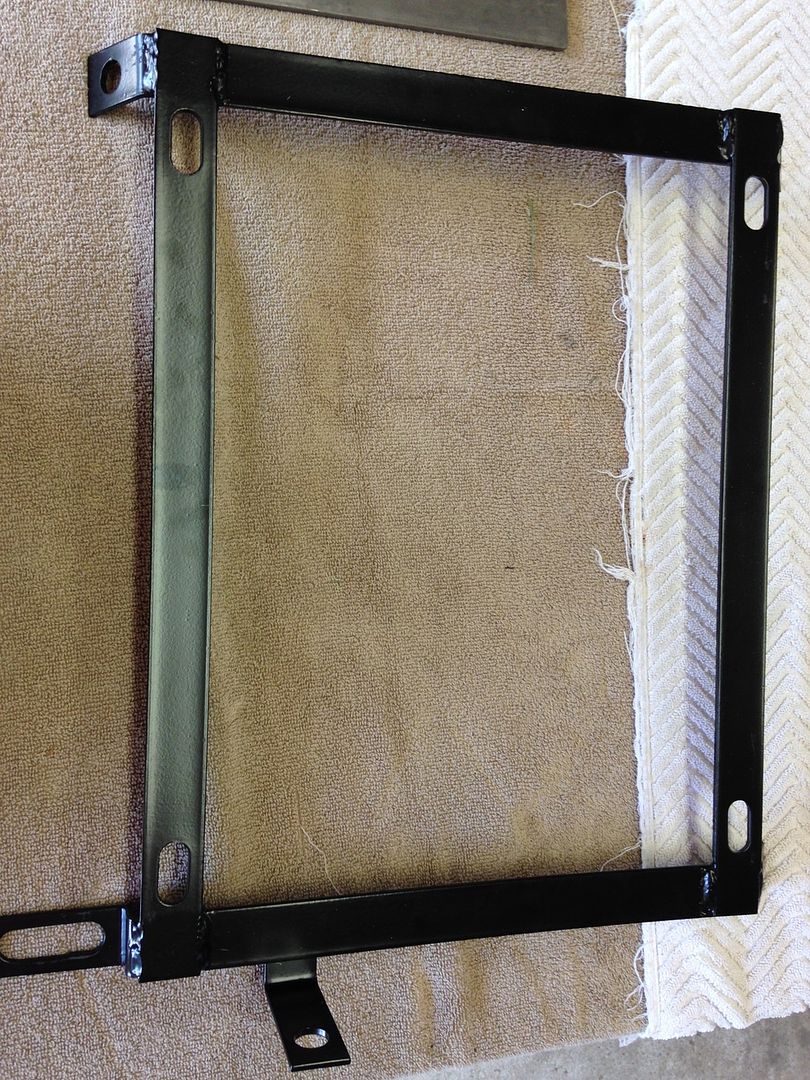
However, they didn't fit the Sparco bolt holes. So, got some thick steel, some Grade 10 (some is actually higher grade) bolts in Troutman, NC, and got to work making a solution. Pics below tell the story.
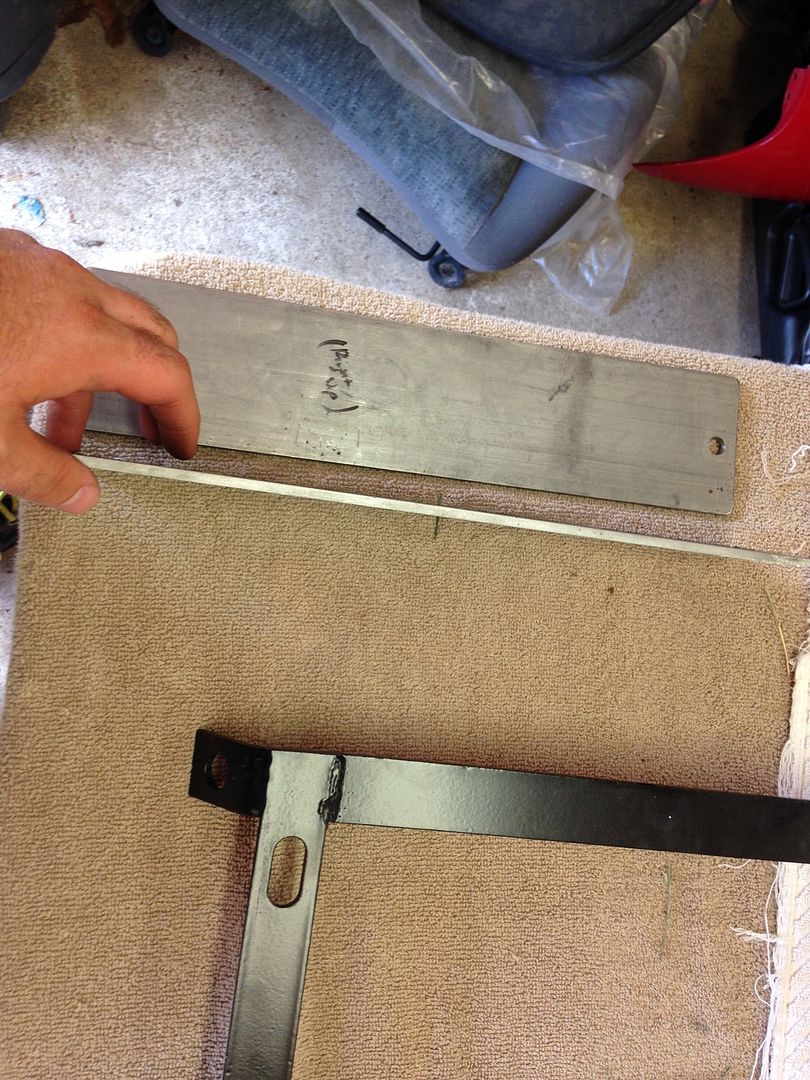
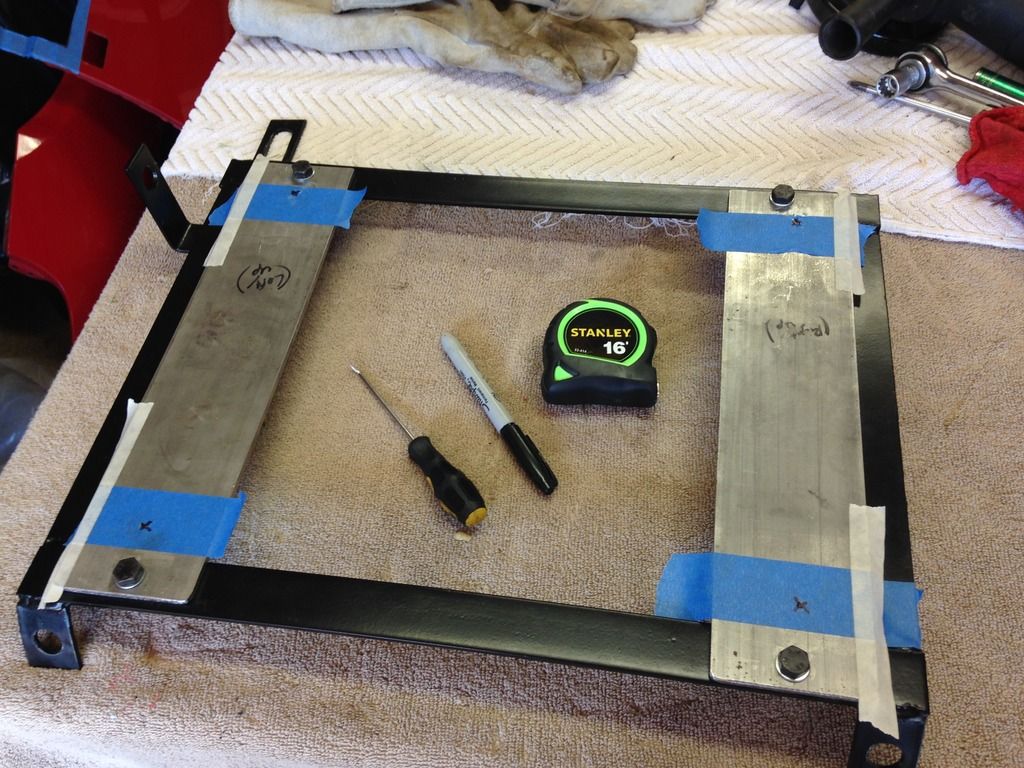
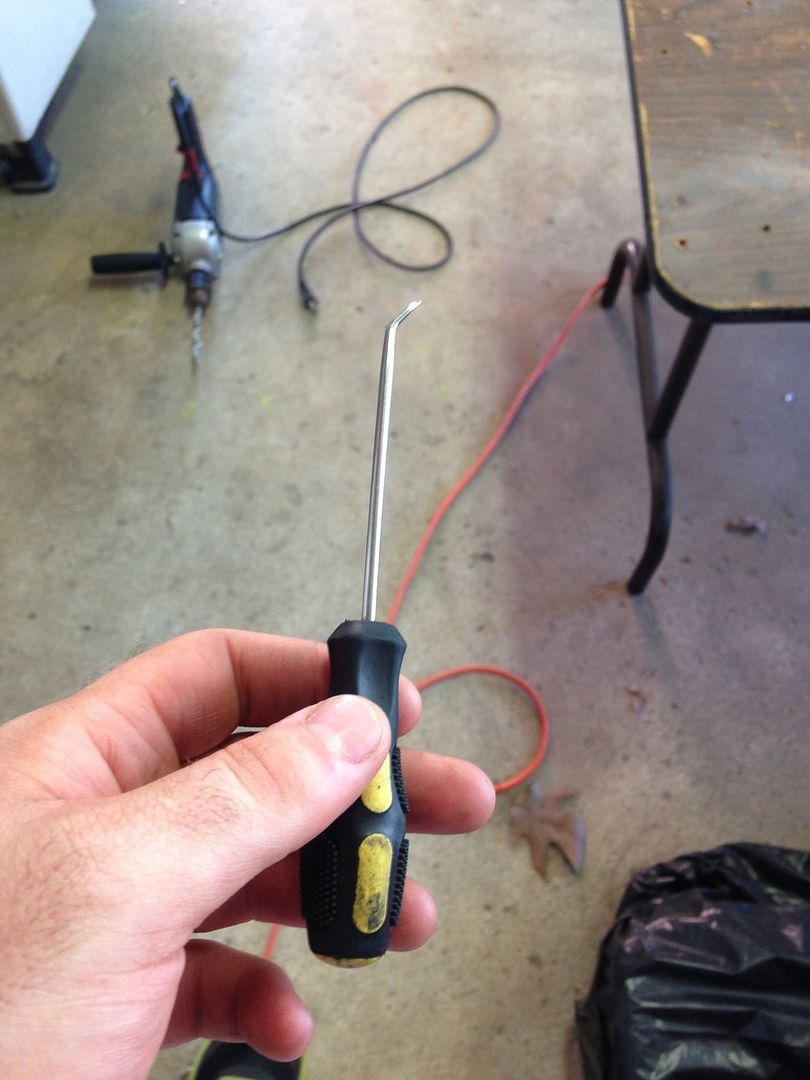
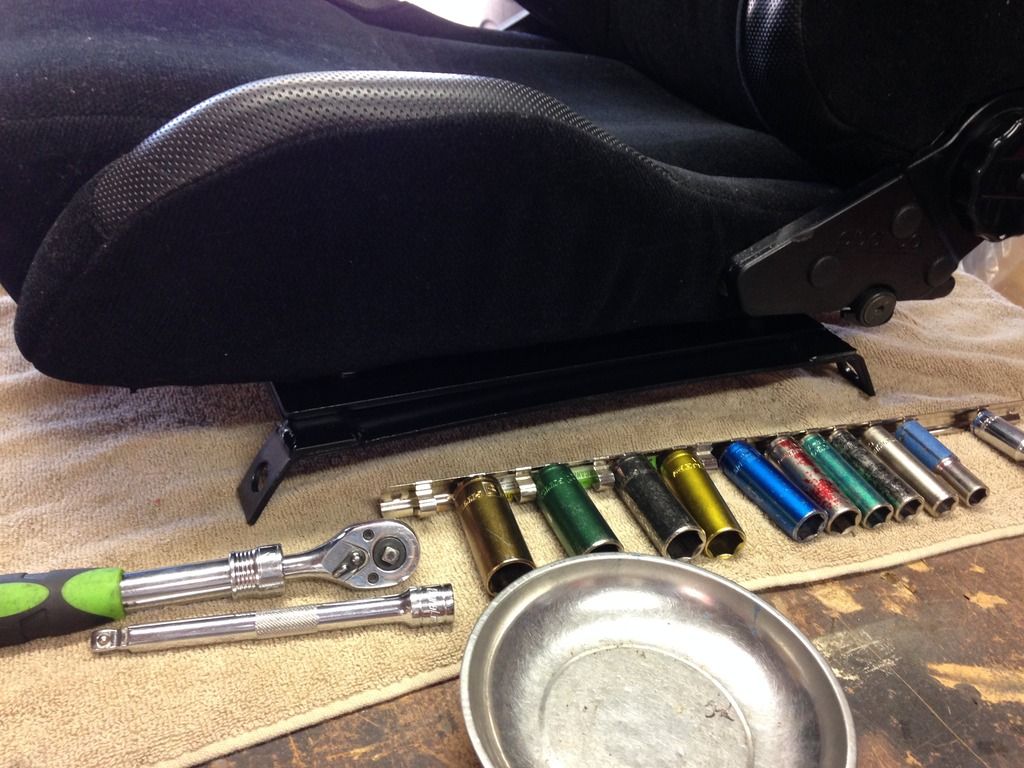
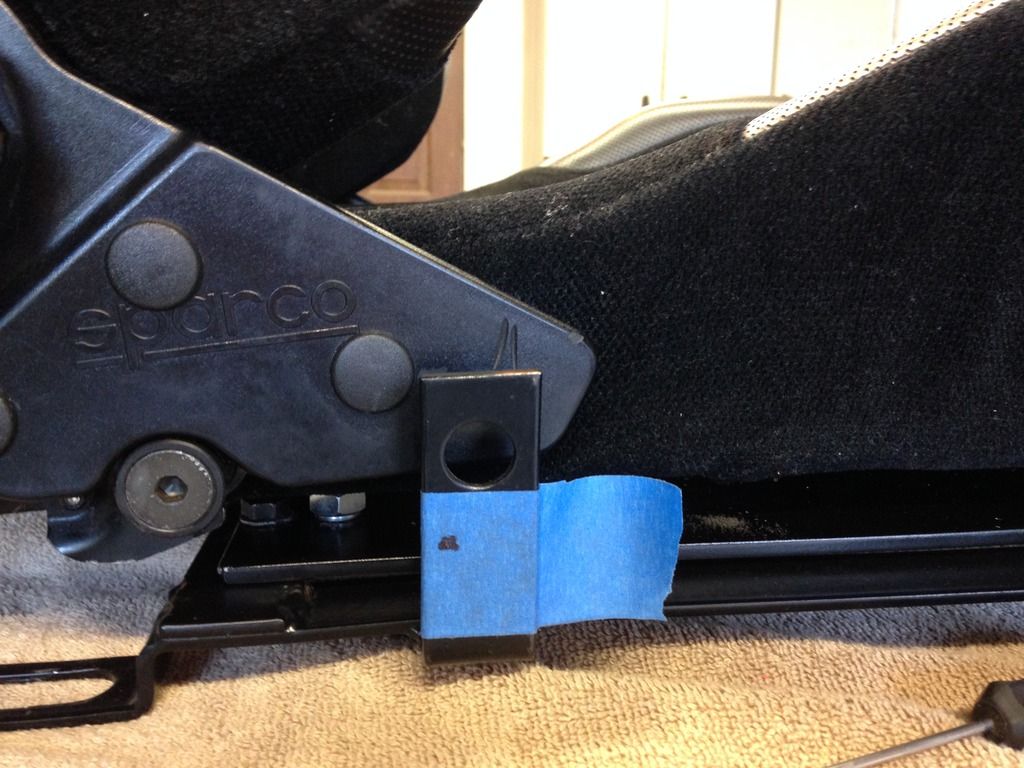
I placed the seat on top of the set-up above, and used a curved-tip pick (pictured below) to carefuly lift off the seat at each corner and make a scratch on the tape where the bolts holes should go. Obviously, I tested to find the best location for the seat before making the scratches. Once I "picked" out the bolt hole locations, I then marked and drilled my holes. Real easy-peasy.
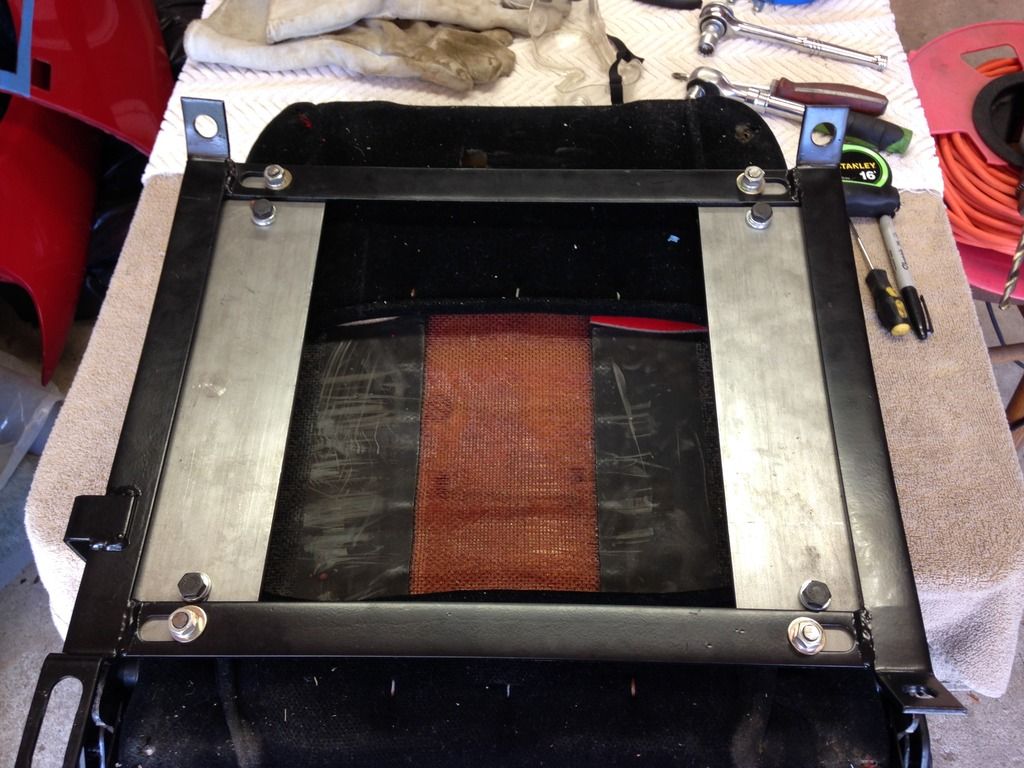
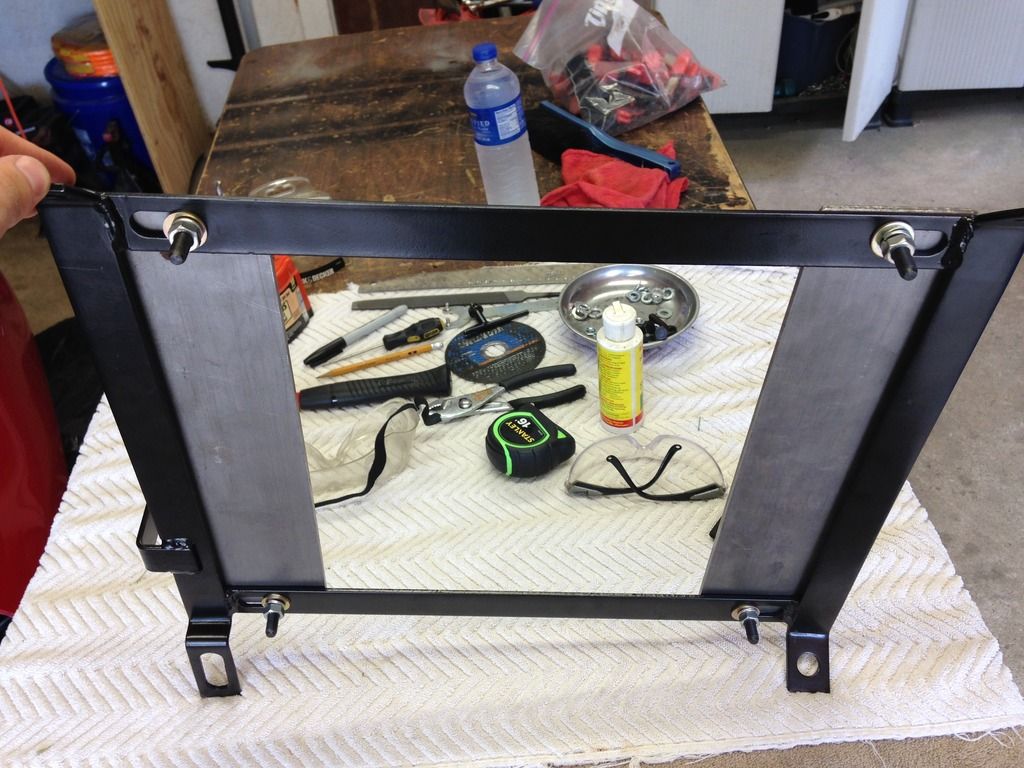
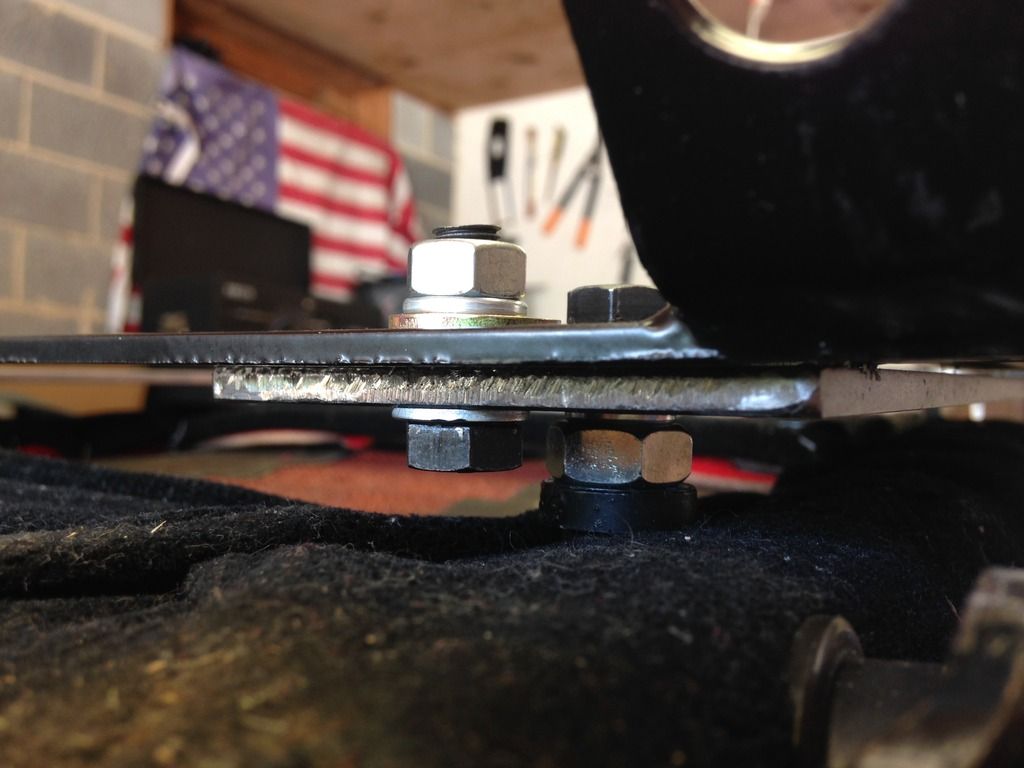
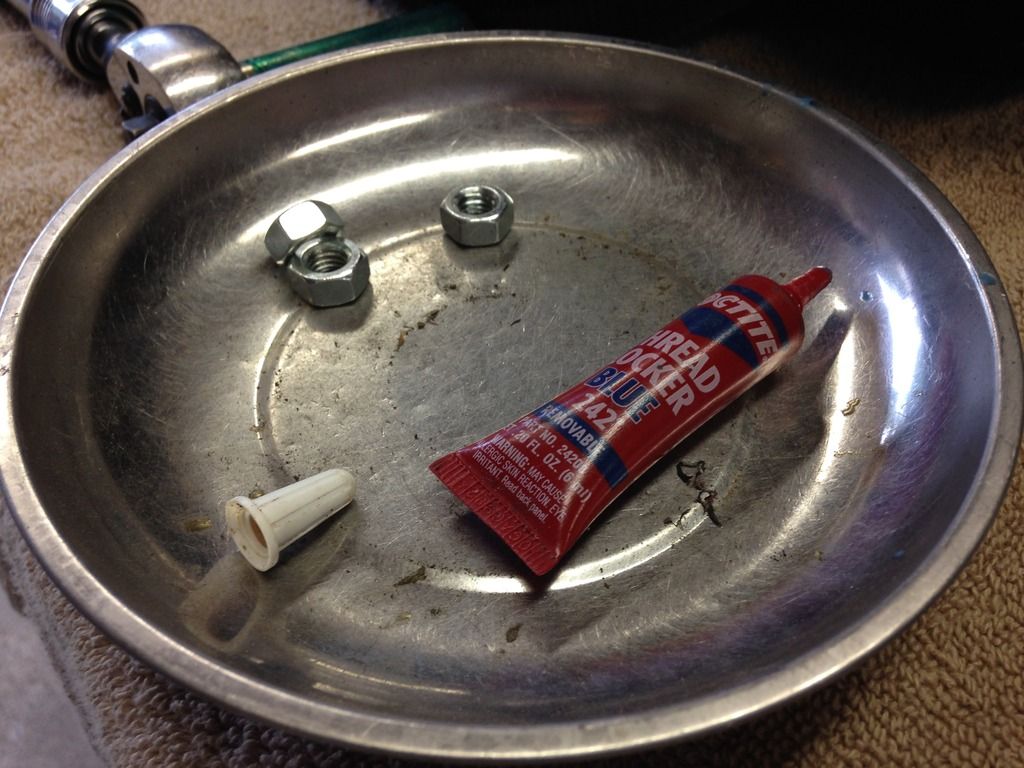
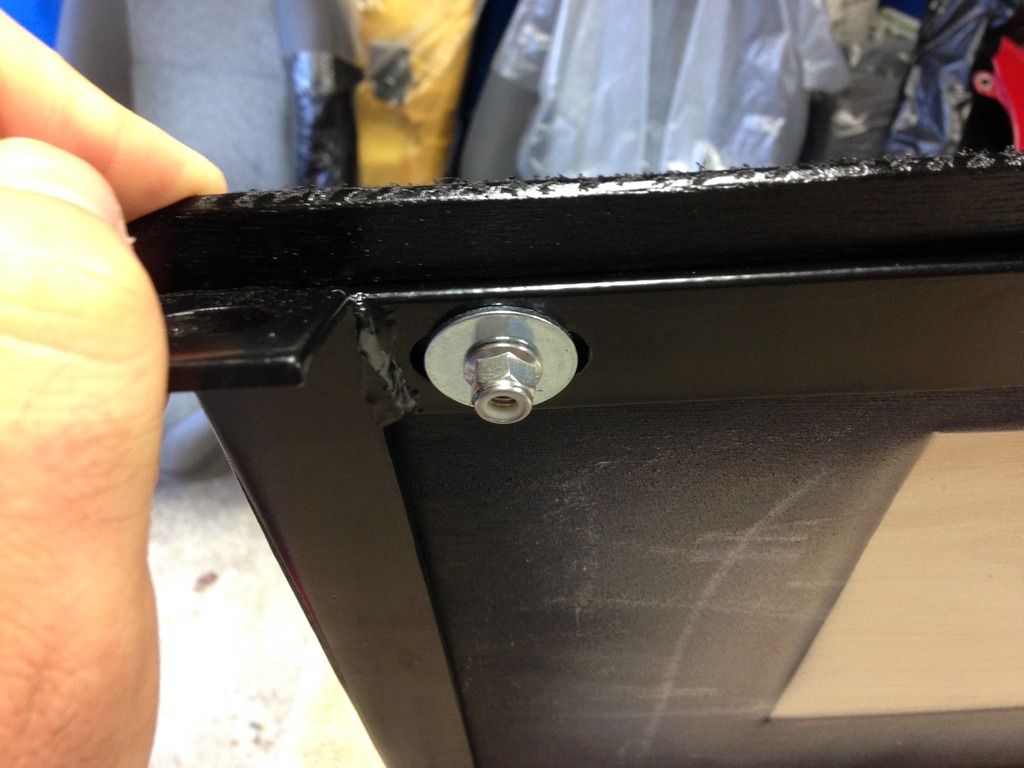
Then added super-strong hardware: bolts, washers, crush washers, and even a super big lug nut was included (solely to serve as a spacer). Final assembly will also include blue Loctite.
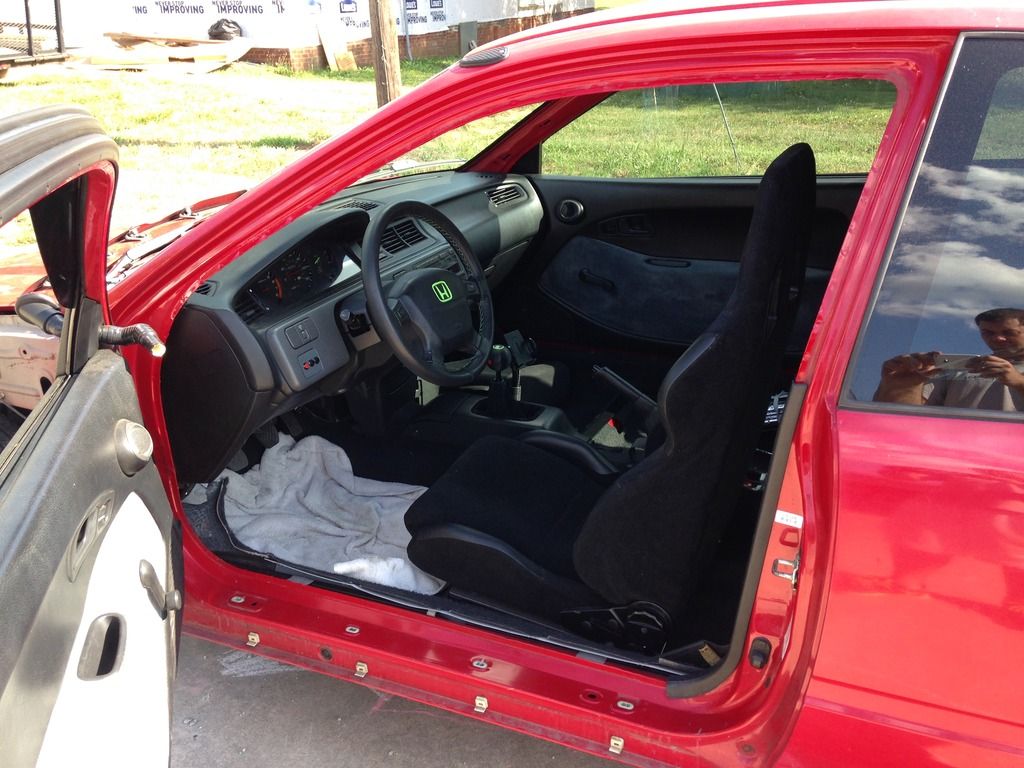
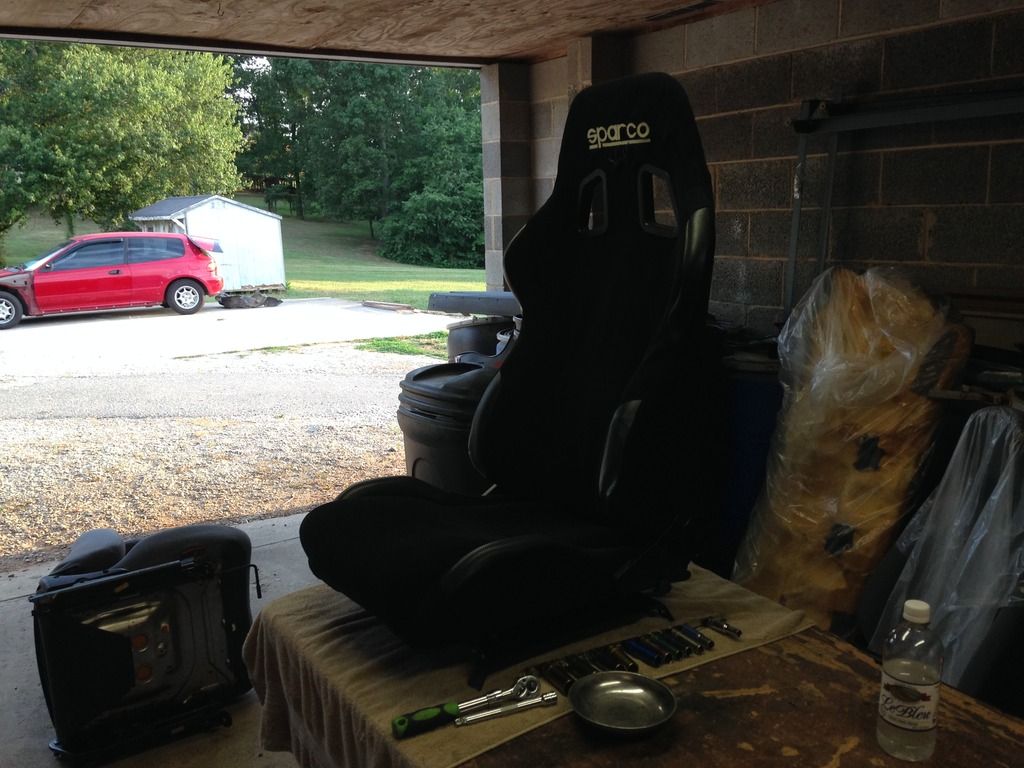
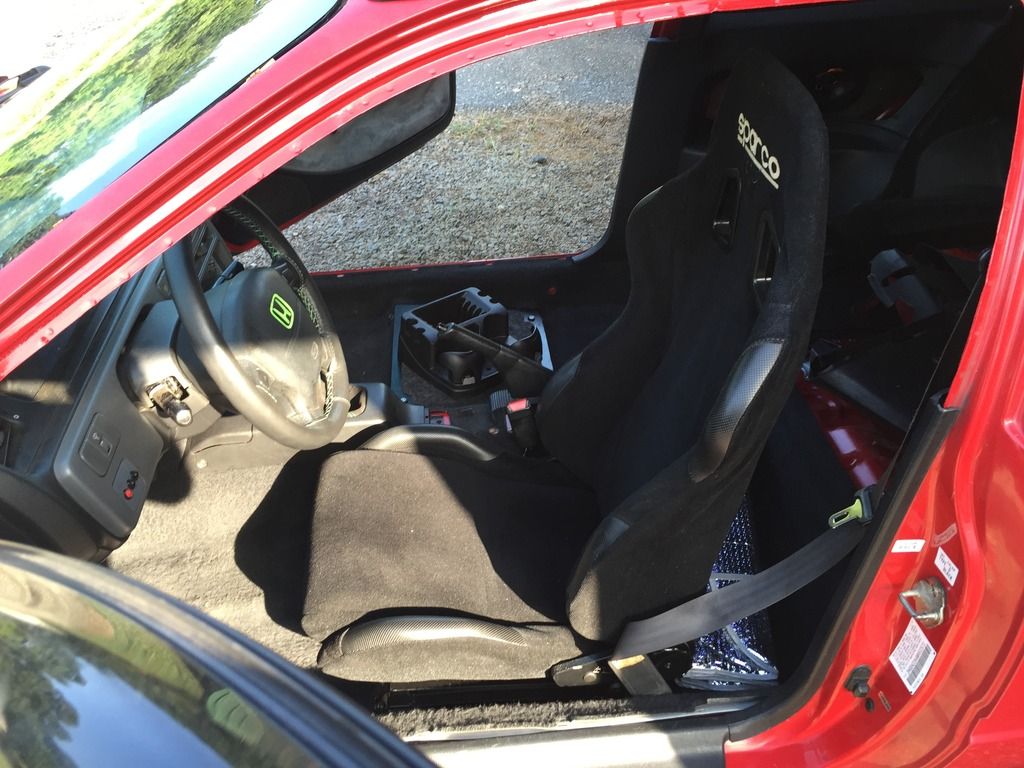
Test fit= Perfecto! Not too far up, just the right distance for me from the steering wheel.
And oh, oh, so perfectly LOW! Very happy with the fitment.

I love the fact that this seat has a quick-collapse bar in the rear. Very cool.
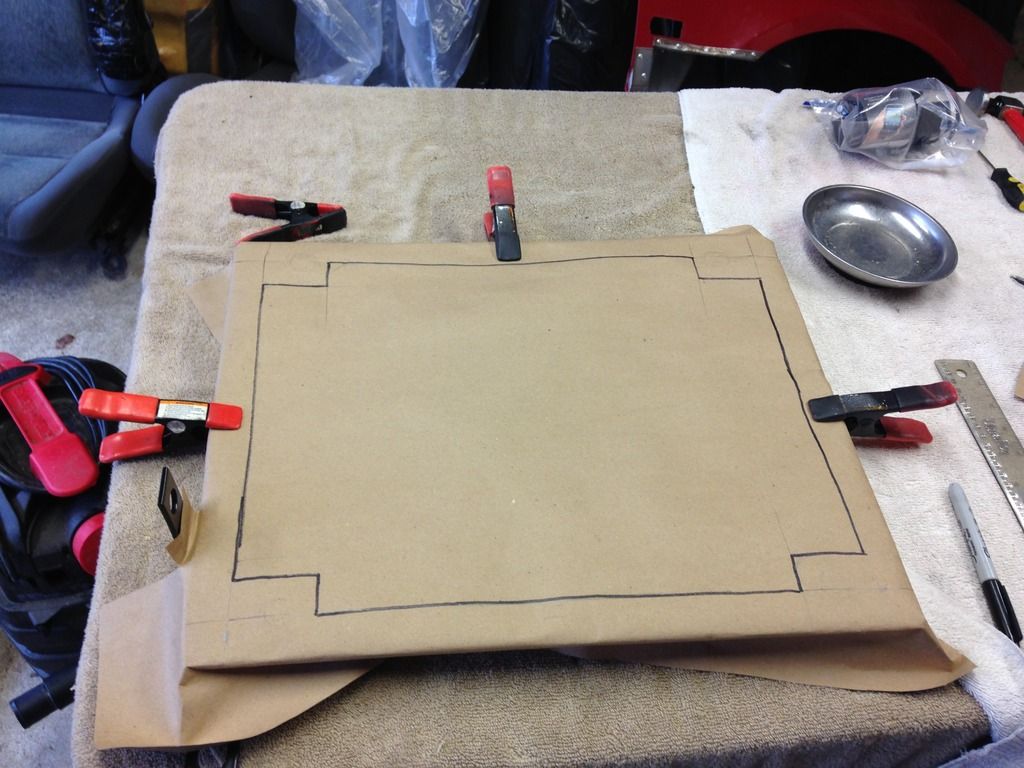
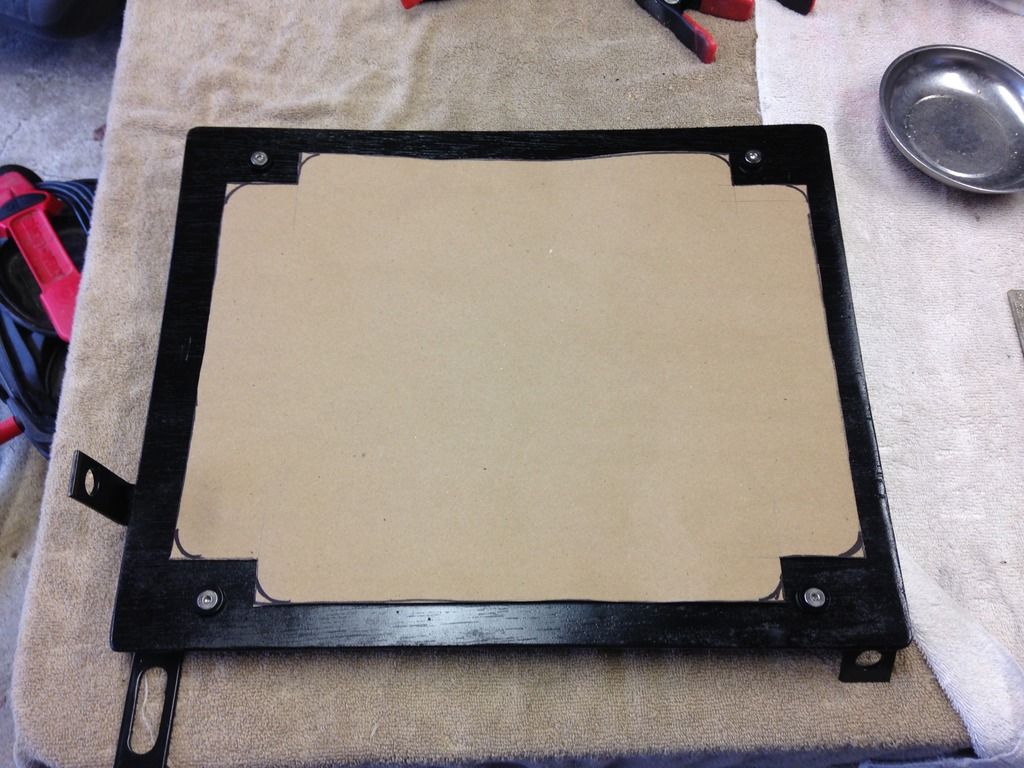
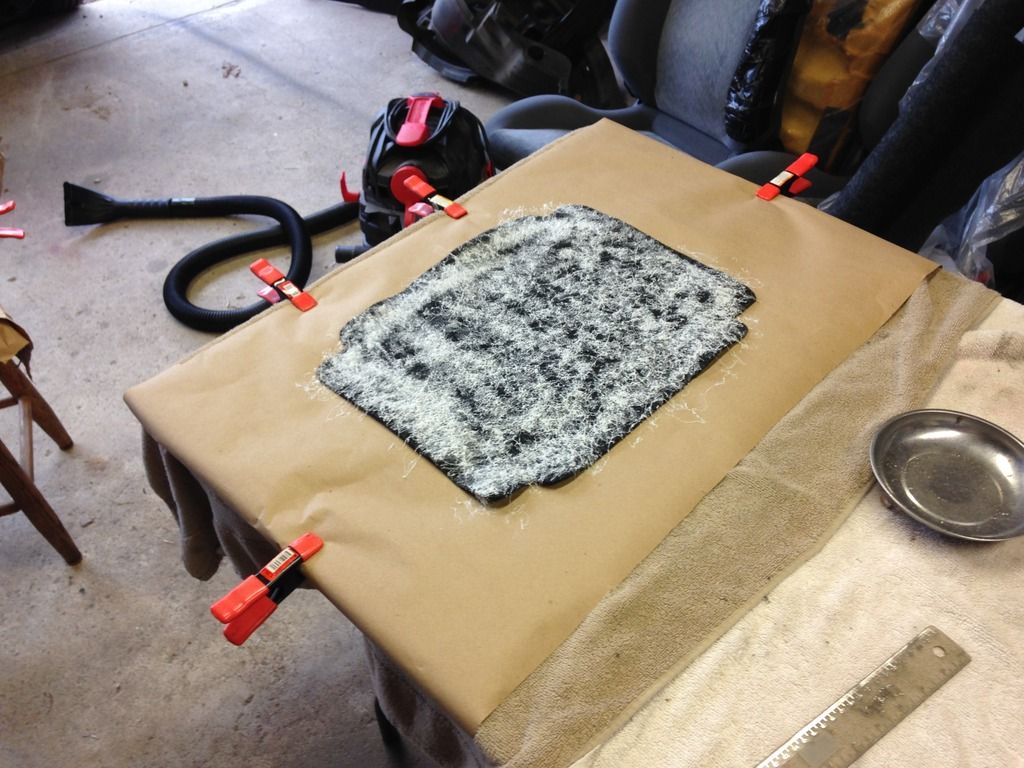
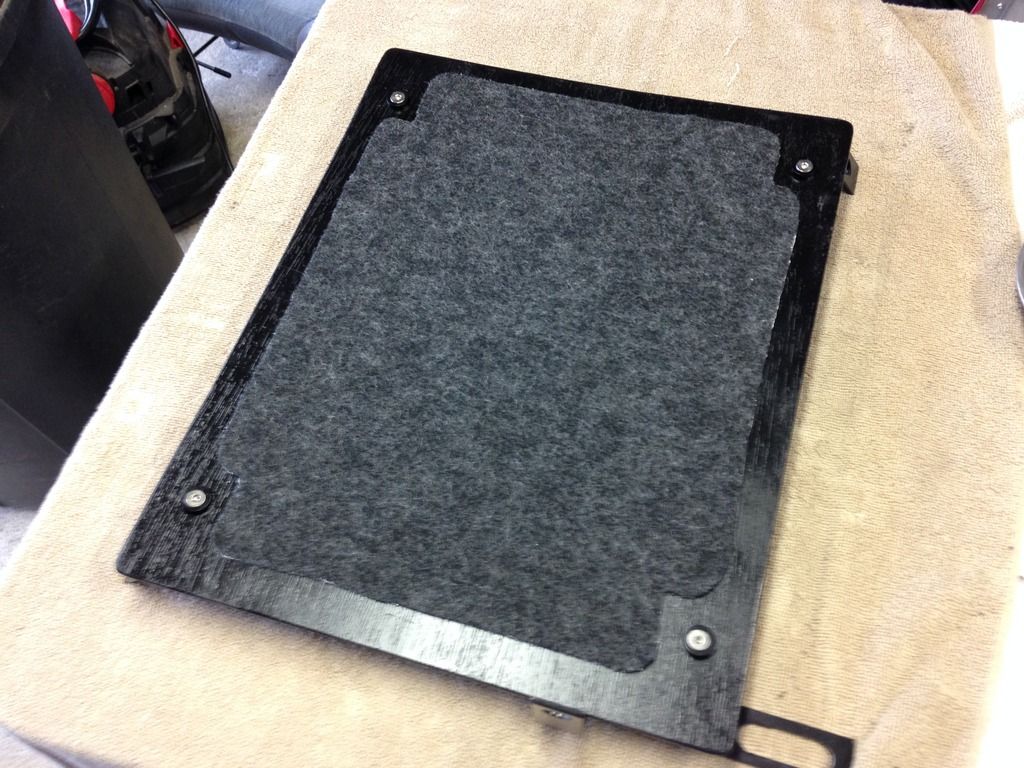
Now, the brackets only came as a pair. Pair was $50. Seller would not just sell the Drivers side bracket. So, I had to do something with the other. I got a little bit creative, and decided to use the Passenger's side bracket to handle an issue I've had with the car since day one. I'm sure any EG owner can resonate!
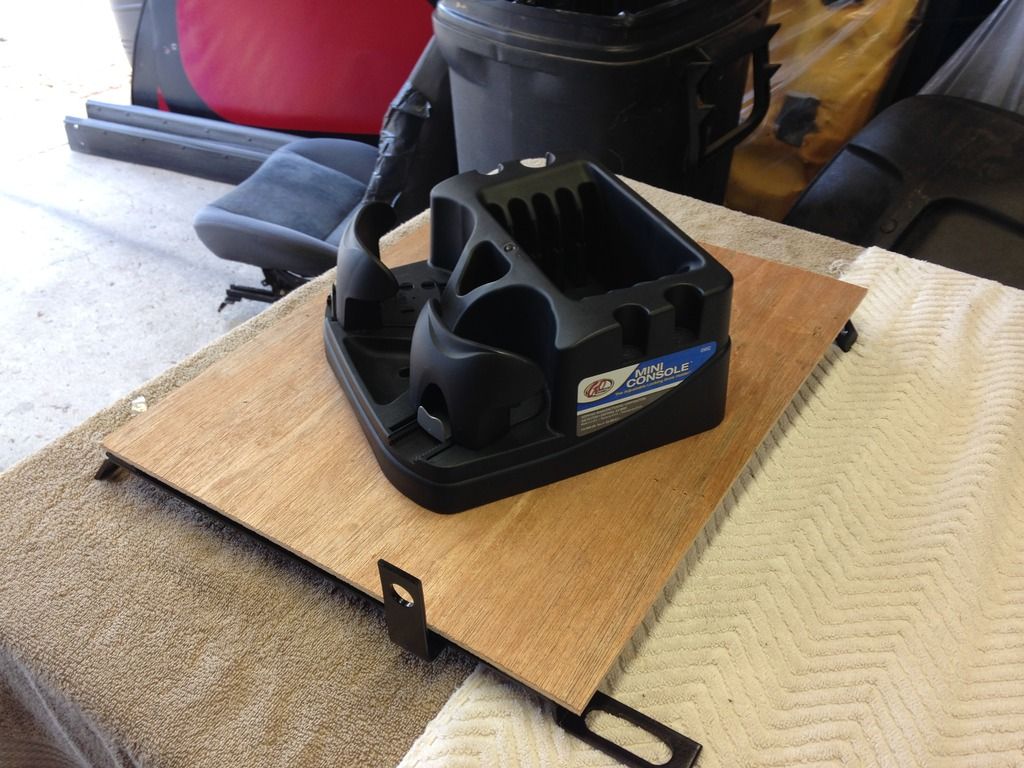
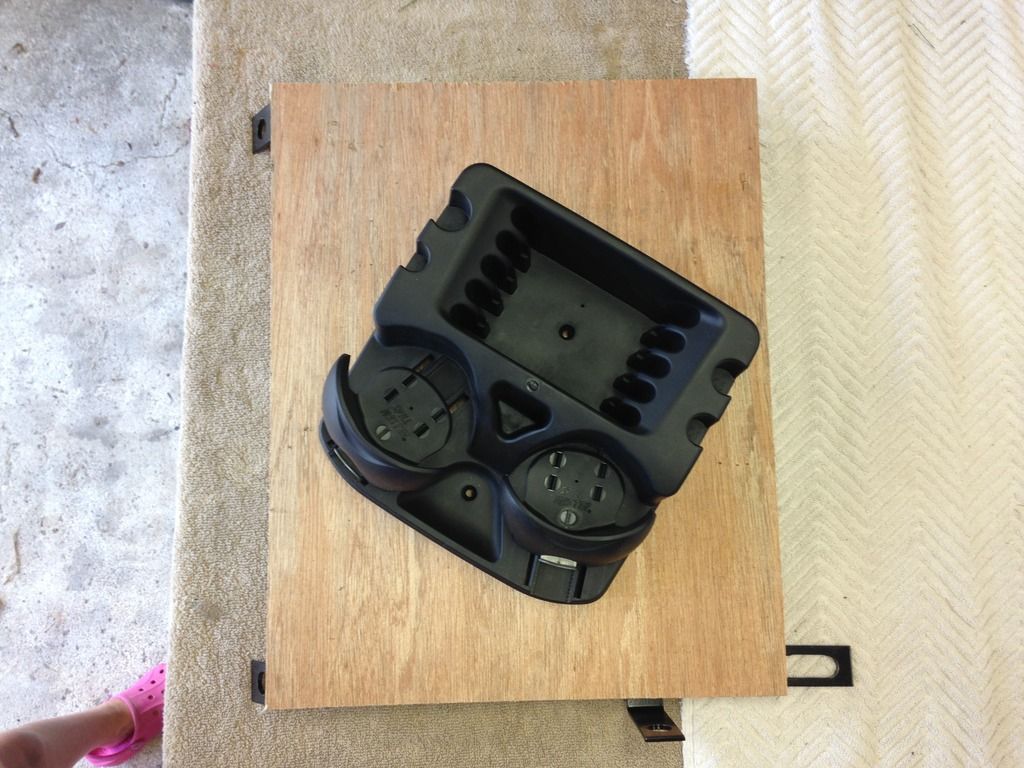
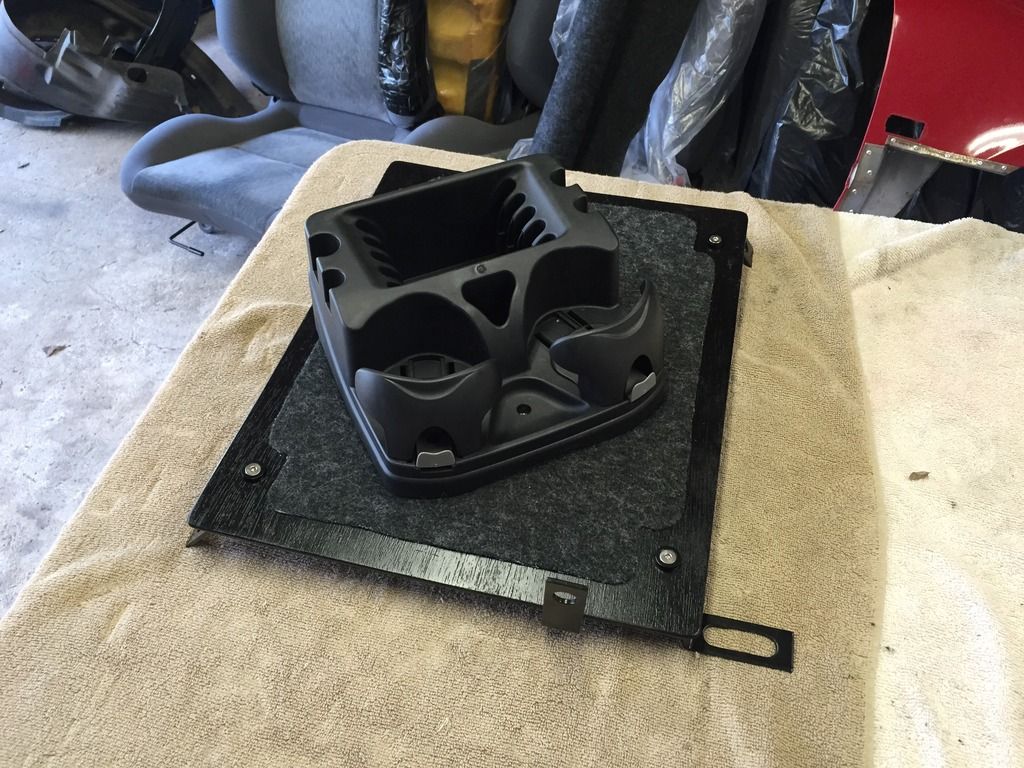
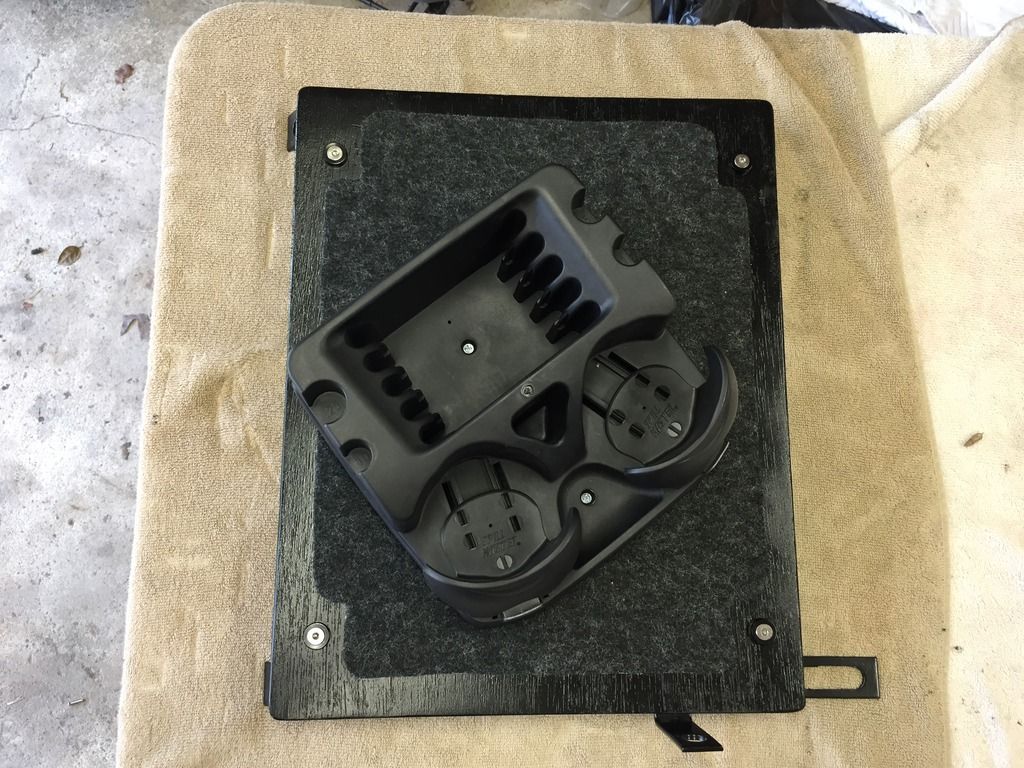
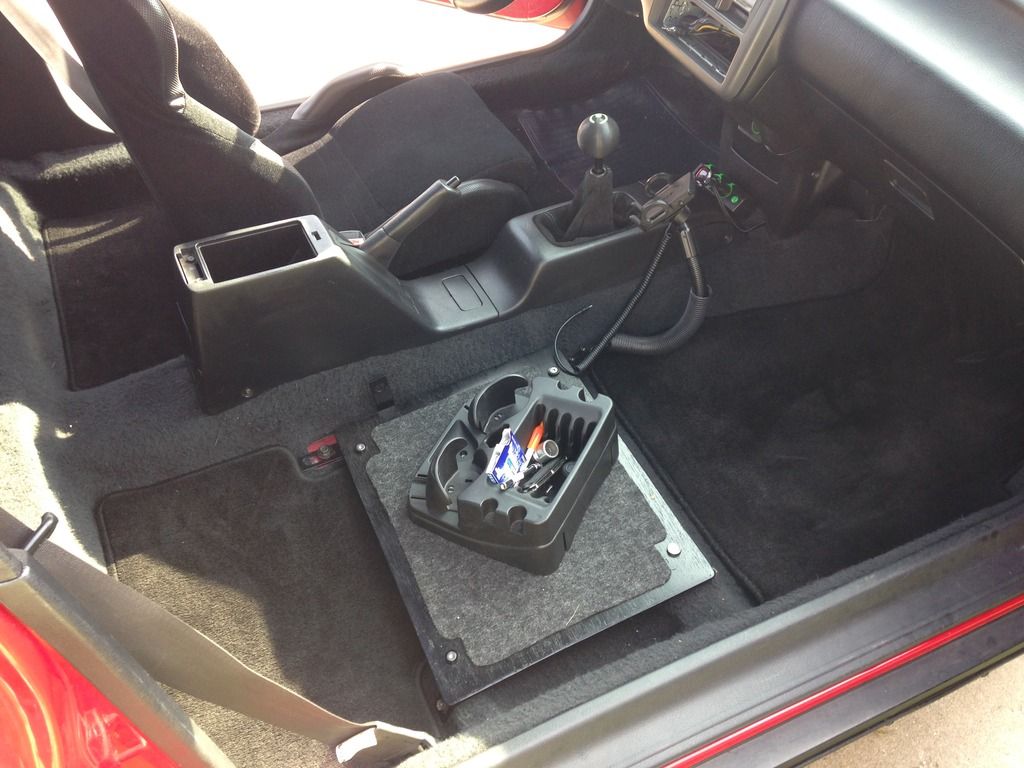
Not only will the "Auxiliary Table" serve as a new, and MUCH improved cup holder for my EG, but it will also host a triple power port (with eco-Green LED's to match the theme), and I will be adding a holder to host a quart of spare motor oil.
No one ever rides with me. When they do, I'll just unbolt the seat bracket bolts, remove the entire assembly, and bolt in a plush 4G Prelude seat (still have to get that done).
Part Two of this project coming soon! (paint + carpeting + install)
Until then, thank YOU for ecoTuning in!
Sorry for the lack of updates of late. Life is really screaming by of late...
So, I ordered a set of Ebay brackets. They came in, and seem to be (surprisingly) decent quality. For the price, I figured I'd give them a shot. The metal, alone, would have cost me more.

However, they didn't fit the Sparco bolt holes. So, got some thick steel, some Grade 10 (some is actually higher grade) bolts in Troutman, NC, and got to work making a solution. Pics below tell the story.


I placed the seat on top of the set-up above, and used a curved-tip pick (pictured below) to carefuly lift off the seat at each corner and make a scratch on the tape where the bolts holes should go. Obviously, I tested to find the best location for the seat before making the scratches. Once I "picked" out the bolt hole locations, I then marked and drilled my holes. Real easy-peasy.


Then added super-strong hardware: bolts, washers, crush washers, and even a super big lug nut was included (solely to serve as a spacer). Final assembly will also include blue Loctite.

Test fit= Perfecto! Not too far up, just the right distance for me from the steering wheel.
And oh, oh, so perfectly LOW! Very happy with the fitment.


I love the fact that this seat has a quick-collapse bar in the rear. Very cool.

Now, the brackets only came as a pair. Pair was $50. Seller would not just sell the Drivers side bracket. So, I had to do something with the other. I got a little bit creative, and decided to use the Passenger's side bracket to handle an issue I've had with the car since day one. I'm sure any EG owner can resonate!


Not only will the "Auxiliary Table" serve as a new, and MUCH improved cup holder for my EG, but it will also host a triple power port (with eco-Green LED's to match the theme), and I will be adding a holder to host a quart of spare motor oil.
No one ever rides with me. When they do, I'll just unbolt the seat bracket bolts, remove the entire assembly, and bolt in a plush 4G Prelude seat (still have to get that done).
Part Two of this project coming soon! (paint + carpeting + install)
Until then, thank YOU for ecoTuning in!
06-17-2015, 11:14 PM
#204
Honda-Tech Member

Join Date: Dec 2014
Posts: 51
Likes: 0
Received 0 Likes
on
0 Posts
All 90s hondas have horrible cupholders...i always make sure i have a passenger if im going to get food and we have to have drinks in the car. Looking good so far man
06-18-2015, 03:27 AM
#205
Honda-Tech Member
Join Date: Jan 2008
Location: PA
Posts: 745
Likes: 0
Received 0 Likes
on
0 Posts
my best cup holder has been either a newish roll of duct tape or my work boots sitting on the passenger floor boards. I wedge the toe of the boots under the passenger seat and it will hold a big gulp 72 oz-whatever gluttonous soda through any windy mountain road
06-20-2015, 06:20 AM
#207
Honda-Tech Member
Thread Starter
Update 6/20/2015: Sparco + Auxiliary Table (Part Two)
Things are now all wrapped up on the Sparco seat install! I drove it around the block a bit and if feels awesome. Very pleased and feel blessed that I found such a great deal on the seat to begin with. I’ll disclose here: I paid $50 for it, due to the rip it had. The rip was a simple fix, and I did showcase how I repaired the rip several updates back. The brackets were $50 shipped for both on Ebay, and the bolts/steel totalled about another $25. Primer and Topcoat paint cans totalled $8.
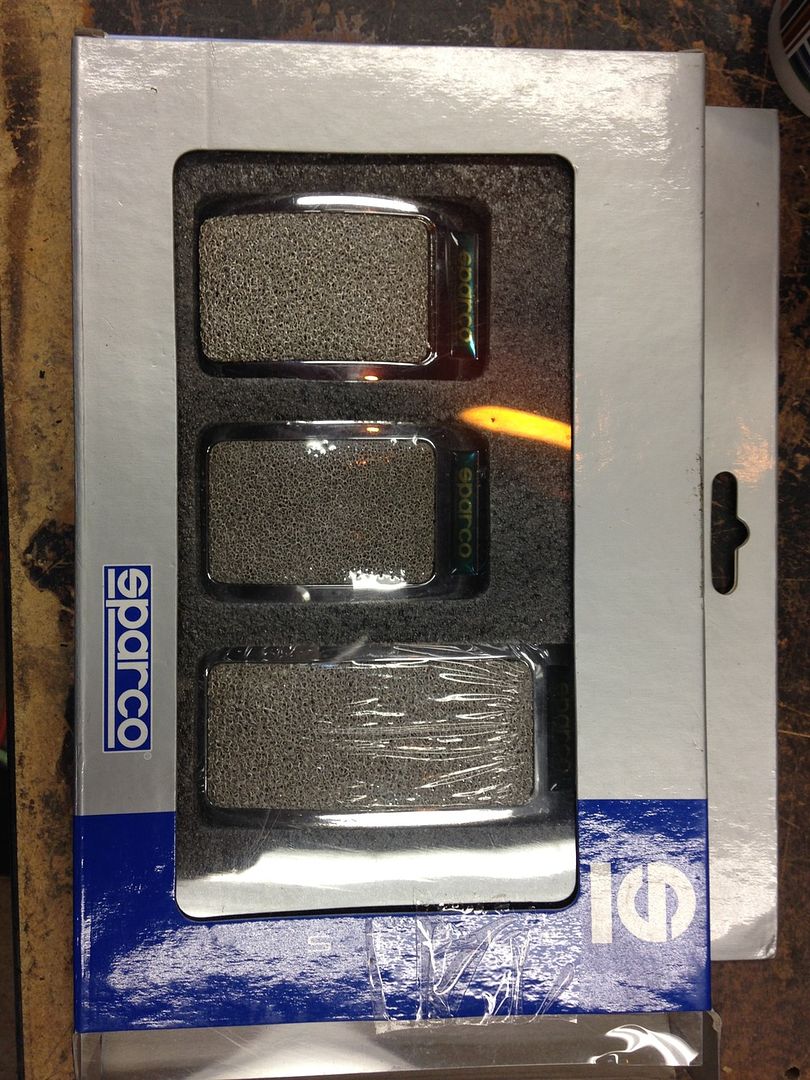
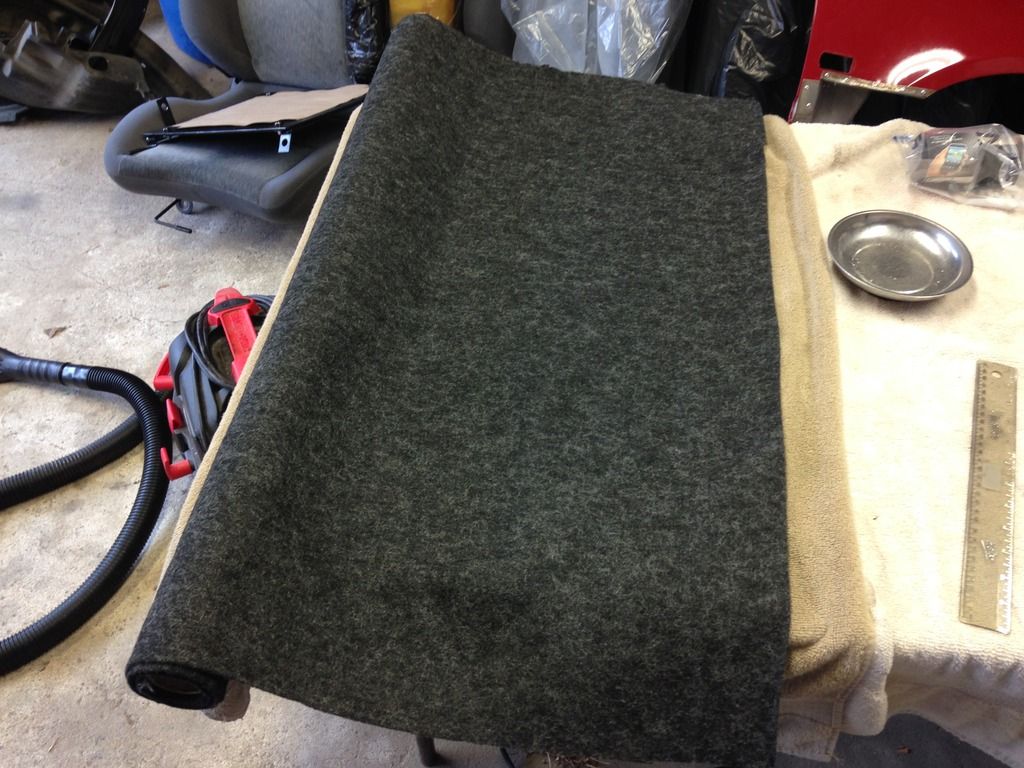
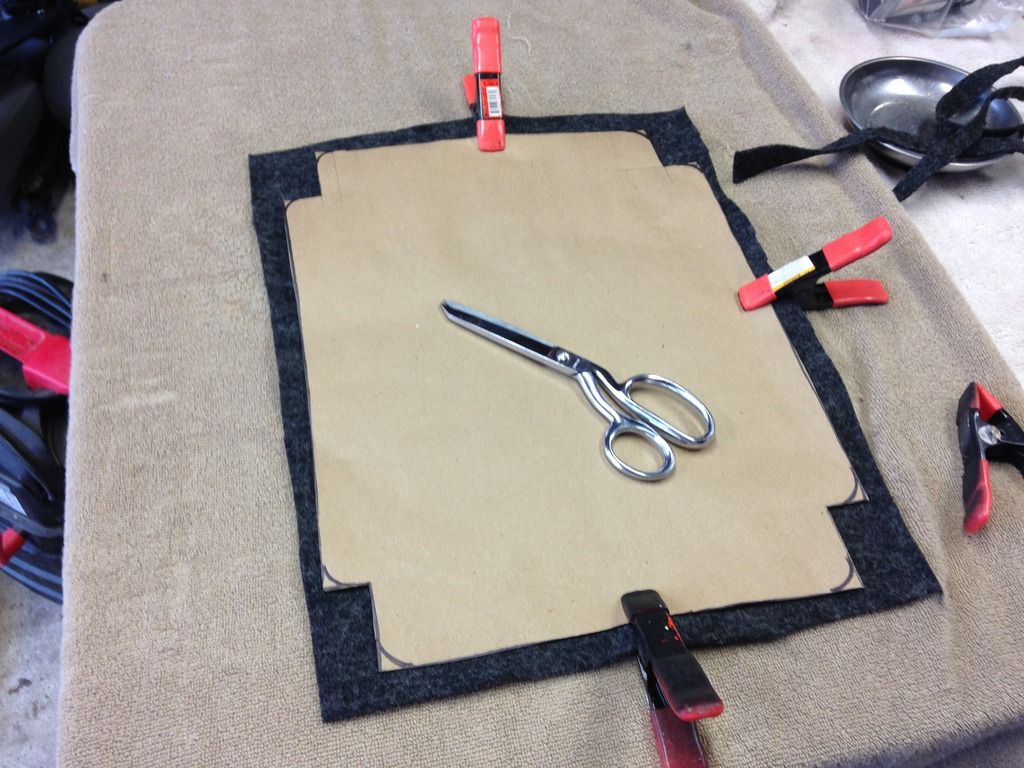
For the auxiliary table, I used the same paint. The mini console was $8 from Autozone. The dark grey “speaker carpet” was $5 plus shipping for a very large roll, and everything else (headliner spray + SS/Allen head bolts, etc...) I already had on hand. The Sparco pedals ARE real, and though I only paid $16 shipped on Ebay for them (Sparco badging was blotted out in the Ebay post, for whatever reason), they typically retail for around $50 on other online stores. I also bought a Sparco lumbar pillow, which you’ll see in a future post. I paid $20 shipped for it. So, all in all, I’m about $200 in for the interior bits shown in this post. However, I’ve been collecting all of the bits for months, so it FEELS like I paid nothing, ha!
OK...some progress pics. .
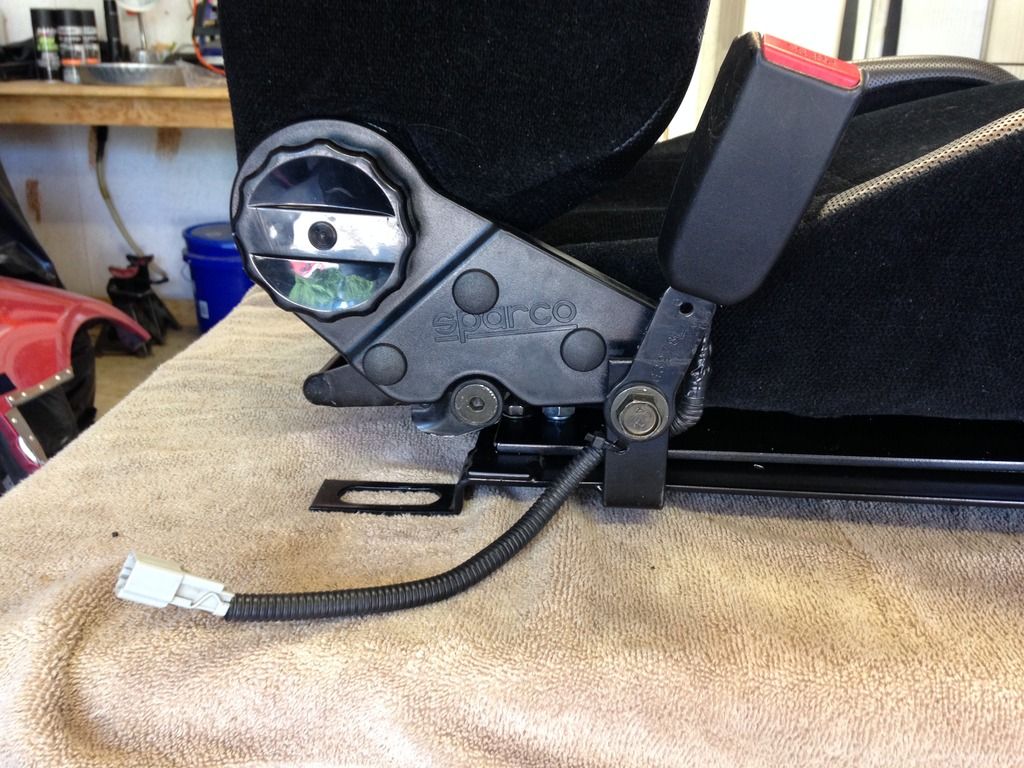
Here’s the completed bracket/seat set up, post paint. Paint used was RustoLeum auto primer followed by RustoLeum Satin Black.
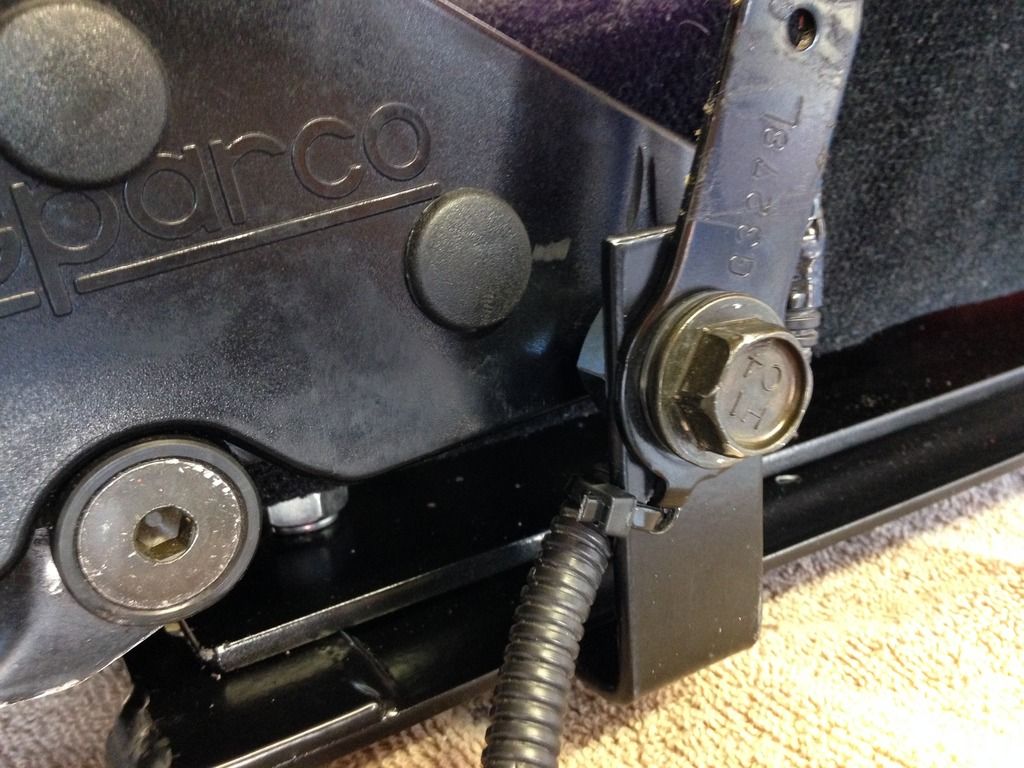
Next, I need to include this hole here into my bracket, to hold up the seat belt indicator wiring neatly under the seat.
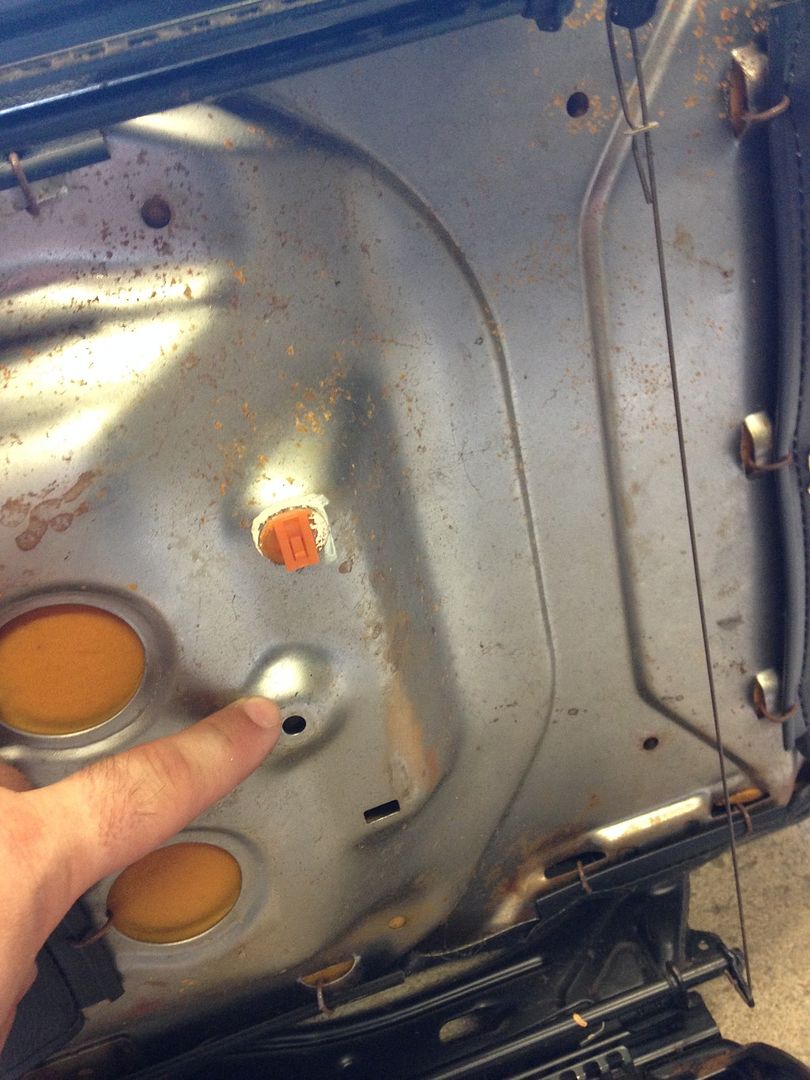
So, I drilled the hole pictured here:
The final matter to take care of with the seat prior to install was the seat belt buckle. I marked up a hole to drill to hold the mounting tab that holds the buckle from rotating.
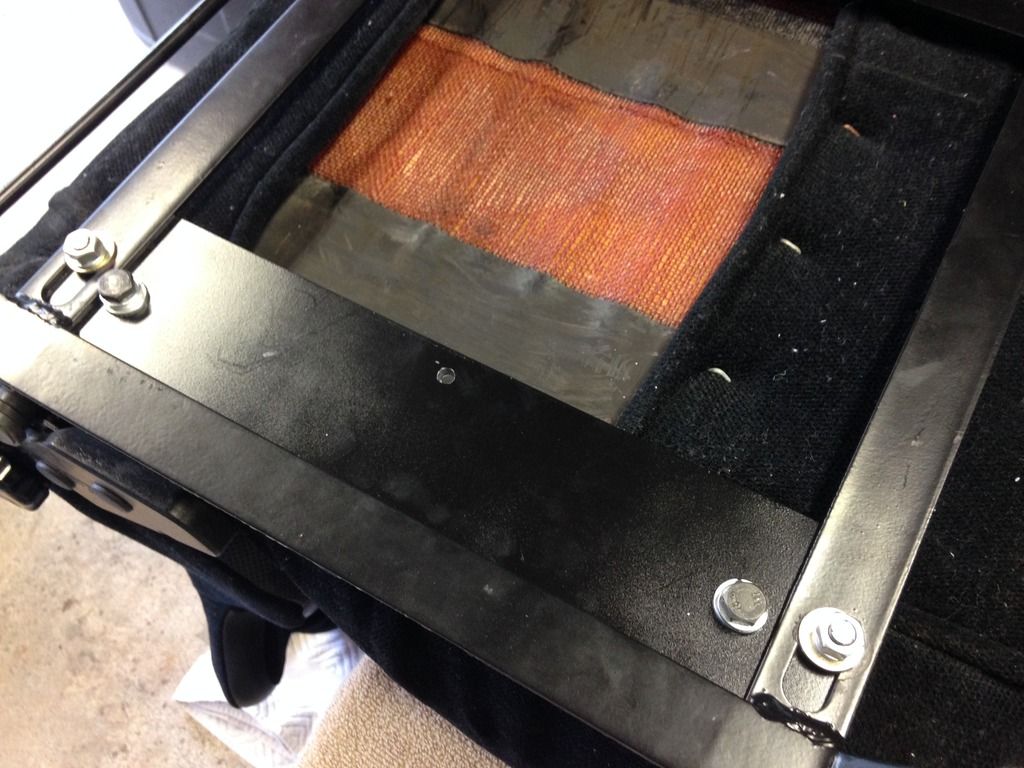
Bolted up, and ready to go:
It should be added that blue Loctite was added to all bolts on the seat setup:
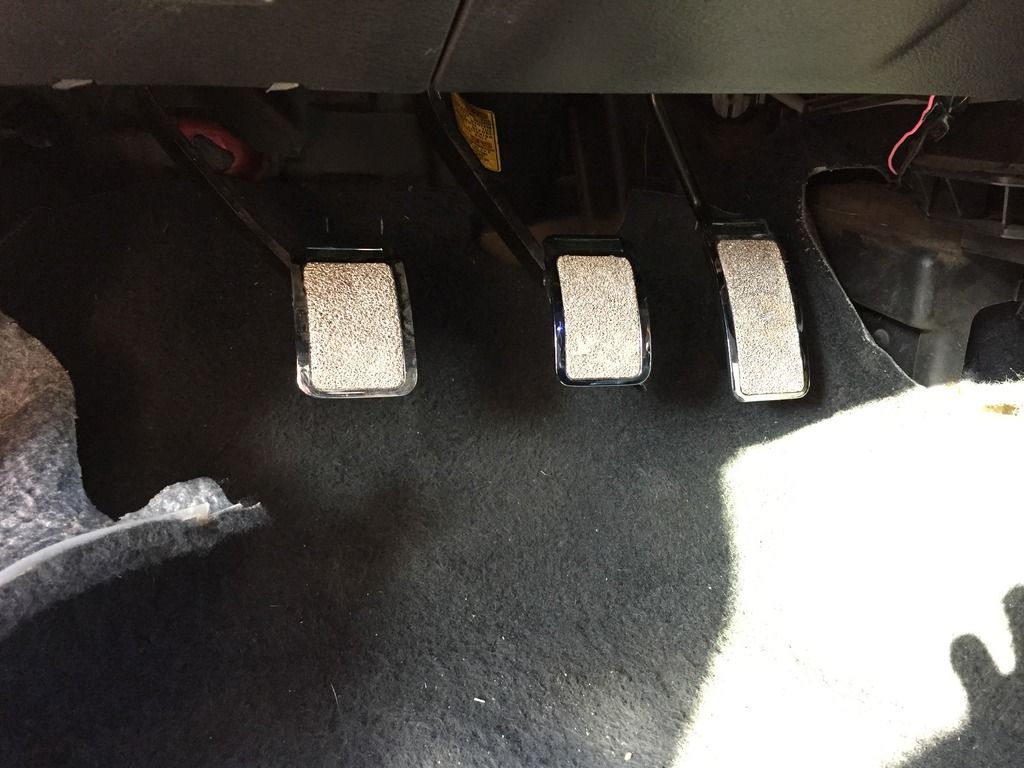
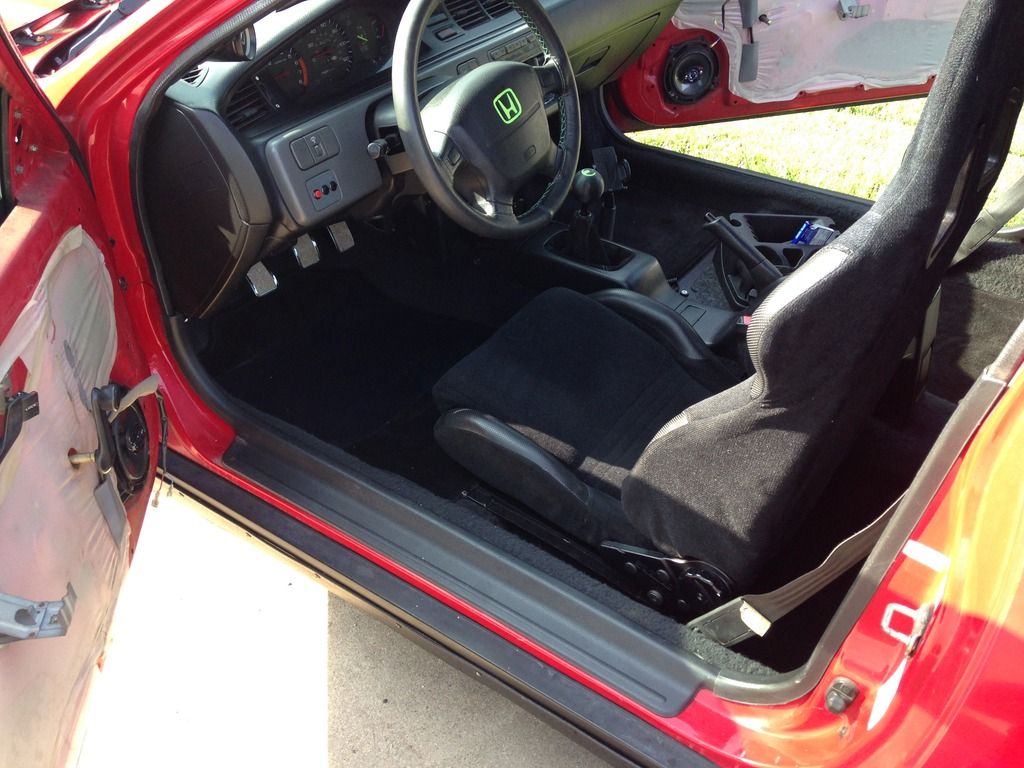
Before installing the seat, I needed to install the pedals. They are drill-in pedals. I’ve installed several sets of these types of pedals (JDM DC5/S2000, etc...). They look great, but are always a PITA to drill and bolt up. So, I picked a time in the early morning several days back, and proceeded to sweat it out. Here’s the pics...

After 3 broken drill bits and a bunch of cutting oil (and sweat) later....All done:
Here’s a photo-story of the finishing work completed on the Auxiliary Table:


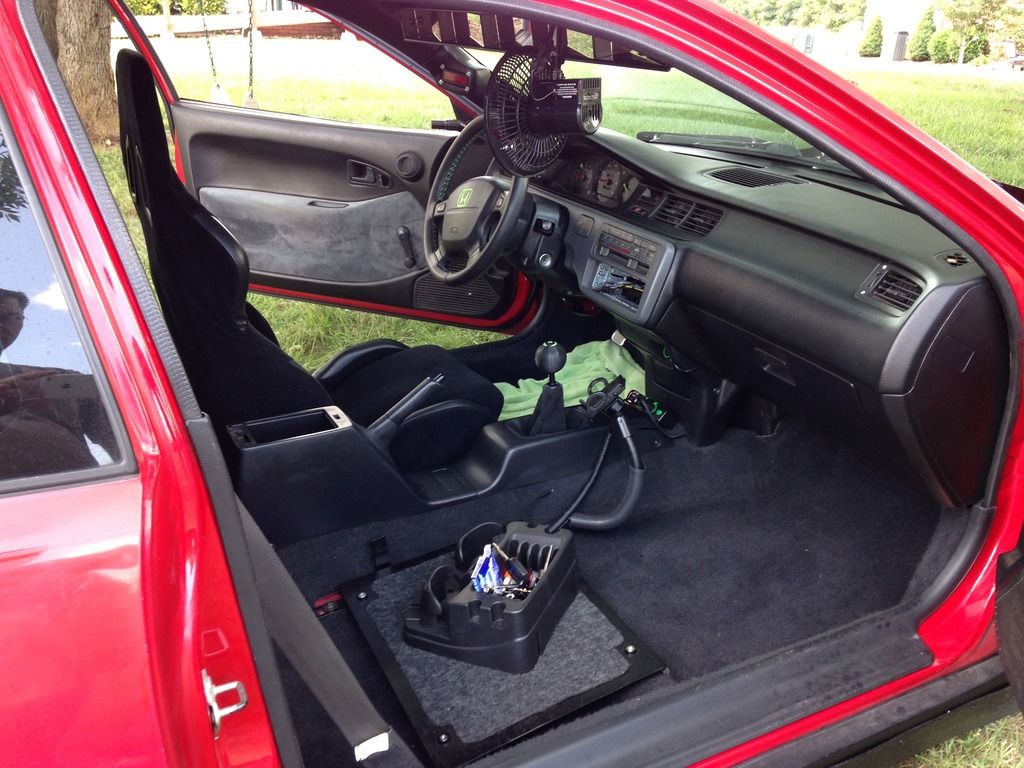
And here’s the complete Sparco Seat + Aux. Table set-up:
I have much more interior work still yet to do, so I’ll certainly keep updating as I slowly plug along. I regret to report back to you that the glue I used for the headliner sucks!!!!! It is certainly NOT heat resistant, as advertised on the can. Even despite my net tint, a windshield reflector, and the fact that I’ve had the Civic in the garage port for the last 4 weeks, the headliner is sagging in multiple spots. Man, oh man... So, the headliner has to come back out to be hit with a different type of glue I’m struggling to find the motivation, to be honest....Anyway, I’ll get it done!
Until my next post, thank YOU for ecoTuning in!
Things are now all wrapped up on the Sparco seat install! I drove it around the block a bit and if feels awesome. Very pleased and feel blessed that I found such a great deal on the seat to begin with. I’ll disclose here: I paid $50 for it, due to the rip it had. The rip was a simple fix, and I did showcase how I repaired the rip several updates back. The brackets were $50 shipped for both on Ebay, and the bolts/steel totalled about another $25. Primer and Topcoat paint cans totalled $8.
For the auxiliary table, I used the same paint. The mini console was $8 from Autozone. The dark grey “speaker carpet” was $5 plus shipping for a very large roll, and everything else (headliner spray + SS/Allen head bolts, etc...) I already had on hand. The Sparco pedals ARE real, and though I only paid $16 shipped on Ebay for them (Sparco badging was blotted out in the Ebay post, for whatever reason), they typically retail for around $50 on other online stores. I also bought a Sparco lumbar pillow, which you’ll see in a future post. I paid $20 shipped for it. So, all in all, I’m about $200 in for the interior bits shown in this post. However, I’ve been collecting all of the bits for months, so it FEELS like I paid nothing, ha!
OK...some progress pics. .
Here’s the completed bracket/seat set up, post paint. Paint used was RustoLeum auto primer followed by RustoLeum Satin Black.


Next, I need to include this hole here into my bracket, to hold up the seat belt indicator wiring neatly under the seat.

So, I drilled the hole pictured here:

The final matter to take care of with the seat prior to install was the seat belt buckle. I marked up a hole to drill to hold the mounting tab that holds the buckle from rotating.

Bolted up, and ready to go:


It should be added that blue Loctite was added to all bolts on the seat setup:

Before installing the seat, I needed to install the pedals. They are drill-in pedals. I’ve installed several sets of these types of pedals (JDM DC5/S2000, etc...). They look great, but are always a PITA to drill and bolt up. So, I picked a time in the early morning several days back, and proceeded to sweat it out. Here’s the pics...


After 3 broken drill bits and a bunch of cutting oil (and sweat) later....All done:

Here’s a photo-story of the finishing work completed on the Auxiliary Table:


And here’s the complete Sparco Seat + Aux. Table set-up:


I have much more interior work still yet to do, so I’ll certainly keep updating as I slowly plug along. I regret to report back to you that the glue I used for the headliner sucks!!!!! It is certainly NOT heat resistant, as advertised on the can. Even despite my net tint, a windshield reflector, and the fact that I’ve had the Civic in the garage port for the last 4 weeks, the headliner is sagging in multiple spots. Man, oh man... So, the headliner has to come back out to be hit with a different type of glue
I’m struggling to find the motivation, to be honest....Anyway, I’ll get it done! Until my next post, thank YOU for ecoTuning in!
06-23-2015, 12:09 PM
#209
Honda-Tech Member
Thread Starter
07-07-2015, 01:42 PM
#210
Honda-Tech Member
Thread Starter
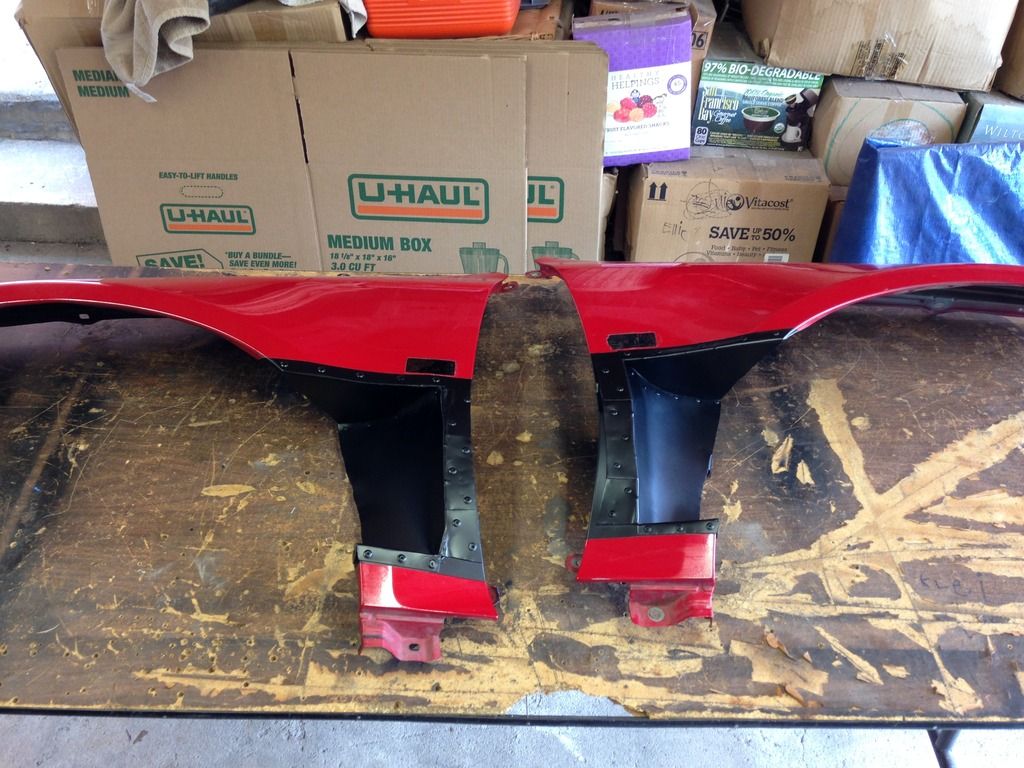
Update 7/7/2015: Cut-Away Fenders Completed and Painted
The fender fabrication is finally done. Work time has been scarce of late, but I did managed to hammer these out and get them painted.
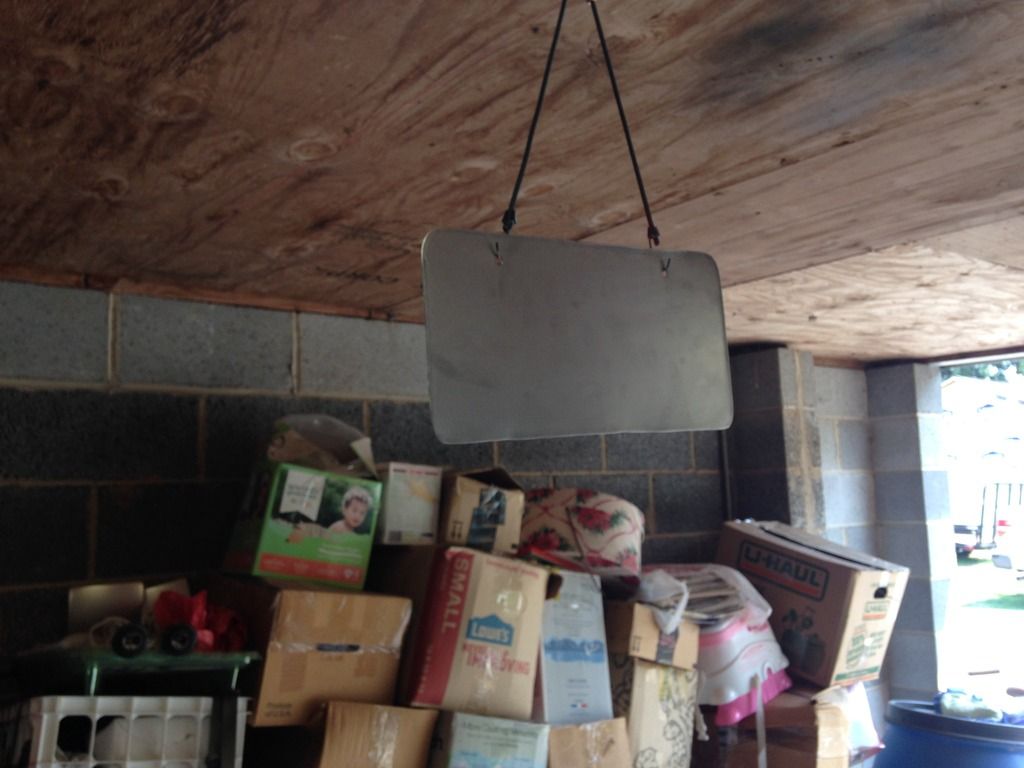
I also fabbed up a plate frame for shows and photo sessions.
All pieces in today's post were primed and then painted with black Duplicolor Trim Paint.
I hope to install the fenders and get the car back on the road asap.
Here's the pics:
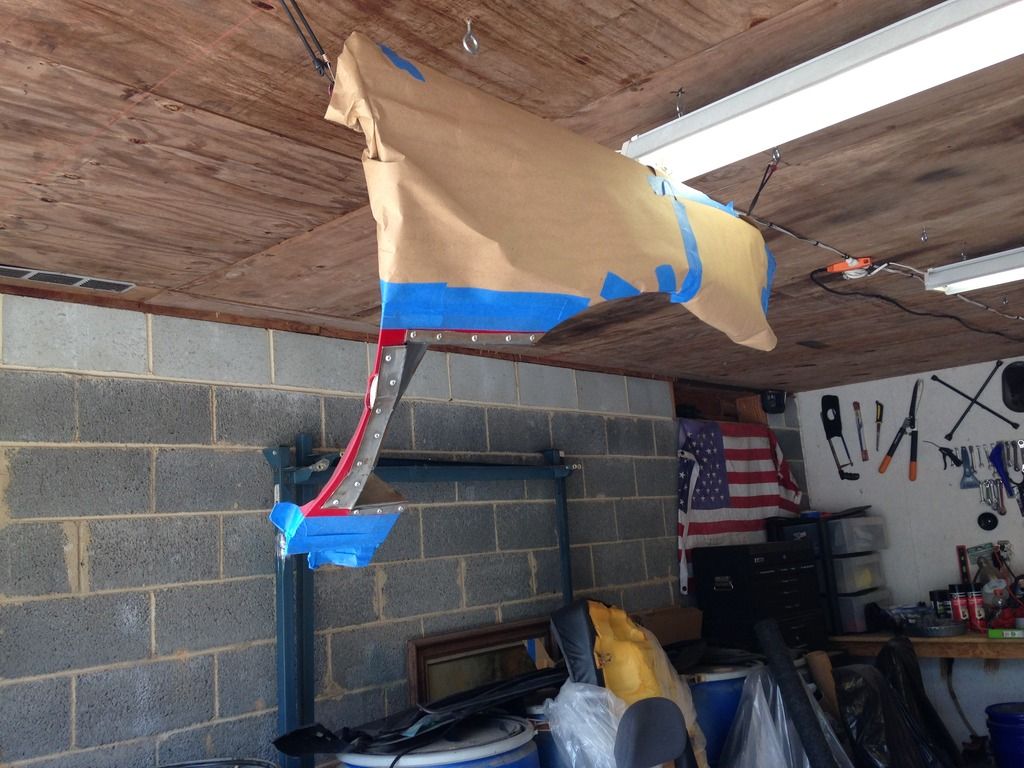
In primer:
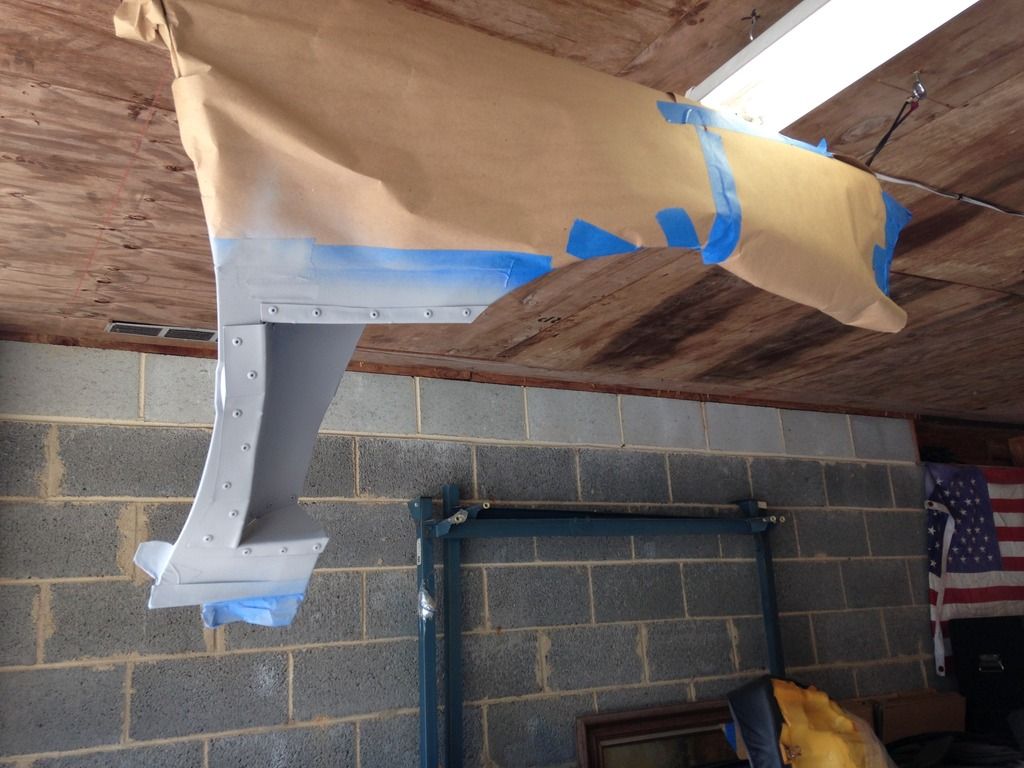
All finished up:
Until next time, thank YOU for ecoTuning in!
The fender fabrication is finally done. Work time has been scarce of late, but I did managed to hammer these out and get them painted.
I also fabbed up a plate frame for shows and photo sessions.
All pieces in today's post were primed and then painted with black Duplicolor Trim Paint.
I hope to install the fenders and get the car back on the road asap.
Here's the pics:


In primer:


All finished up:

Until next time, thank YOU for ecoTuning in!
07-08-2015, 10:43 PM
#211
Honda-Tech Member
Thread Starter
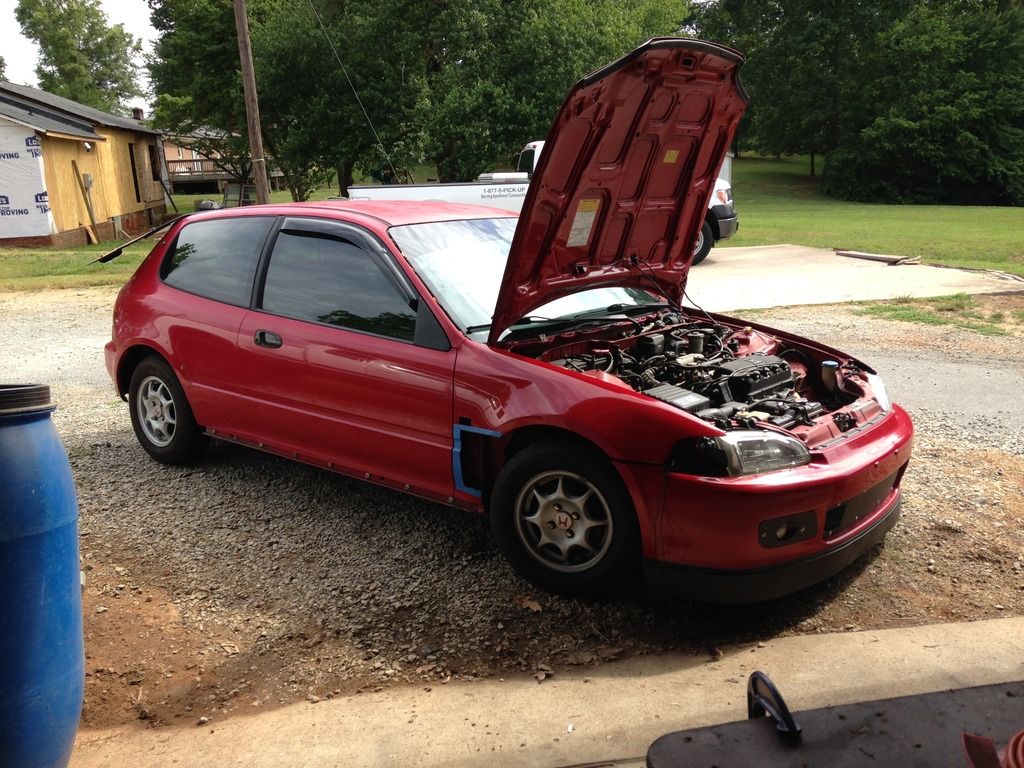
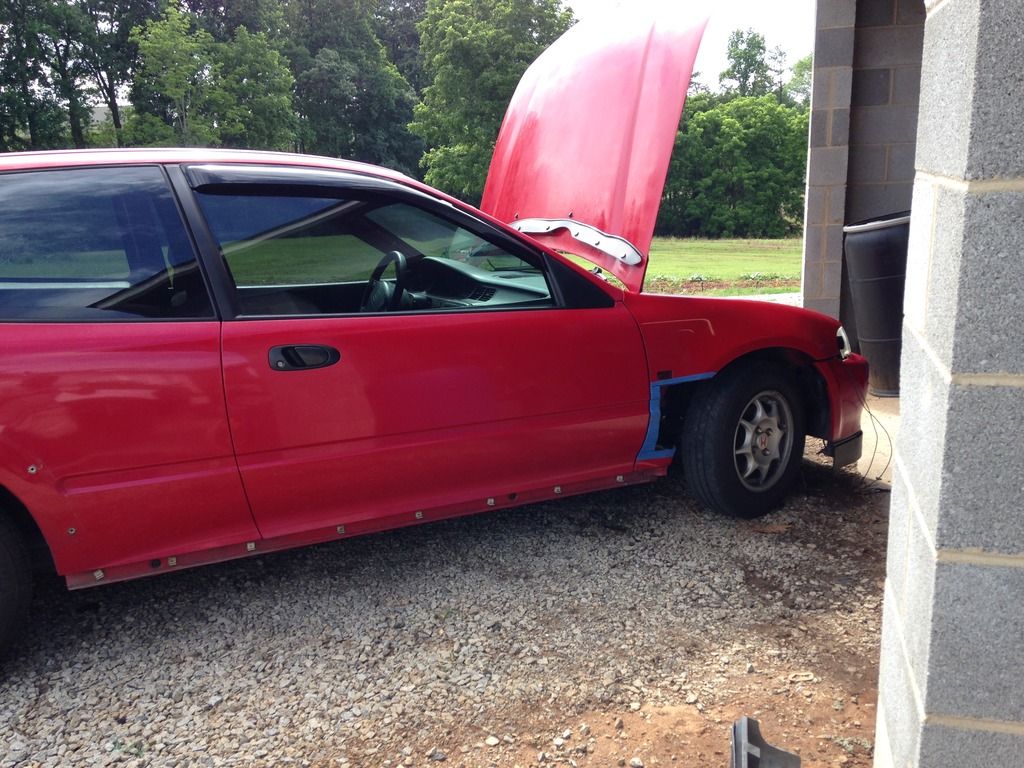
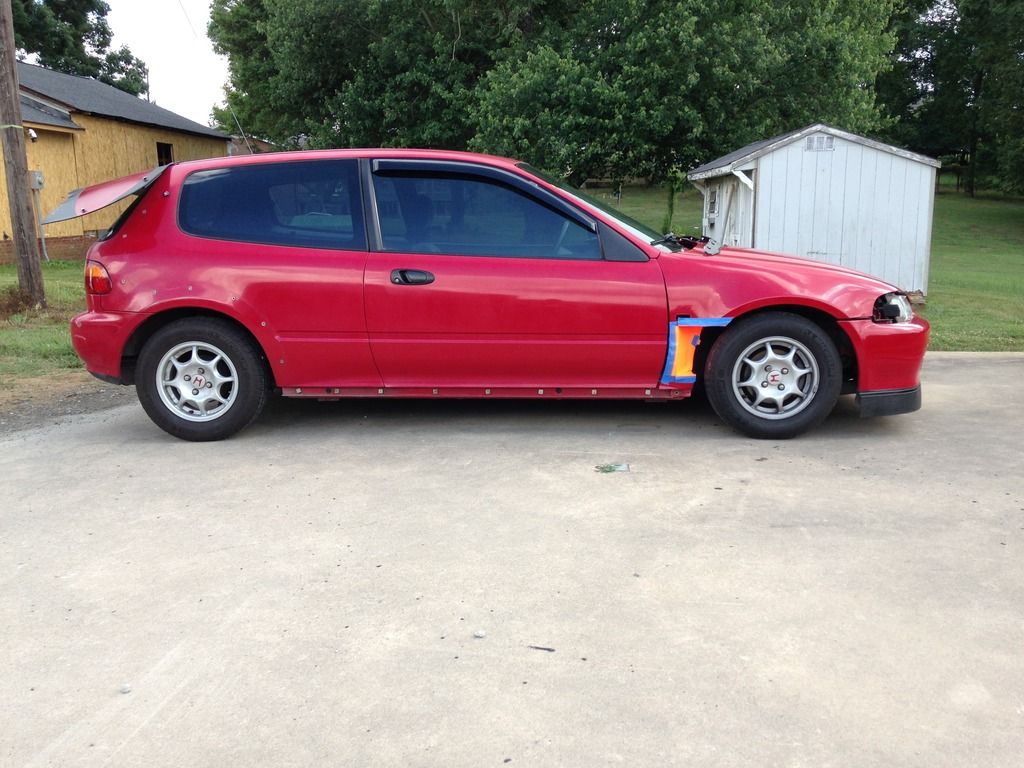
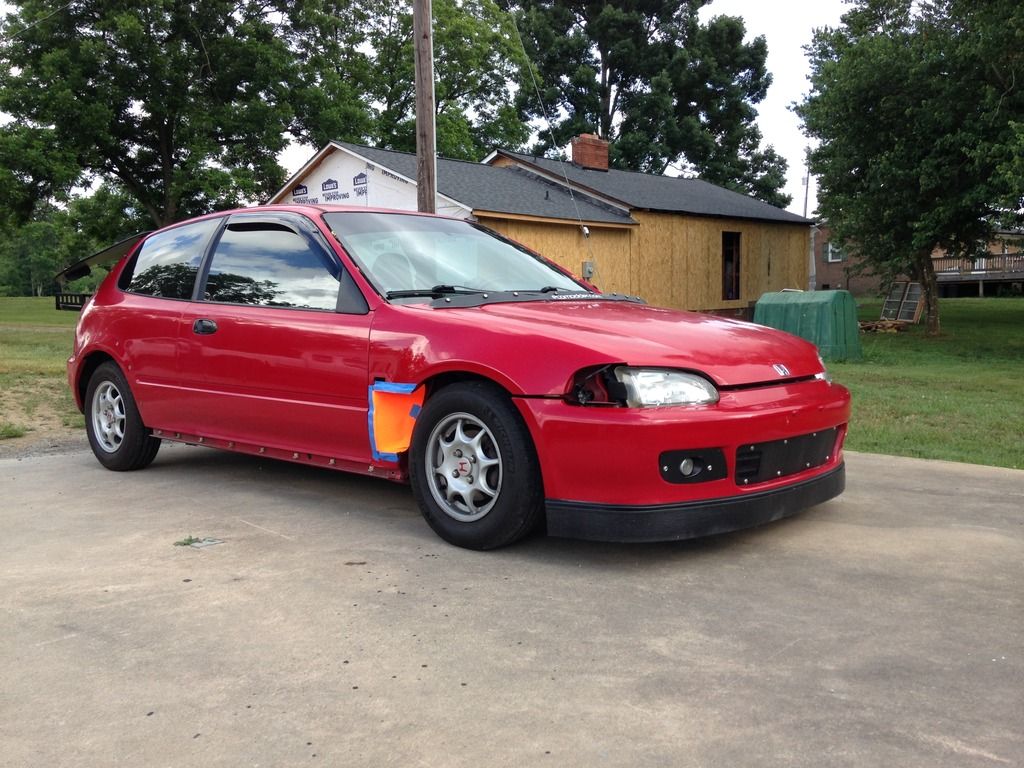
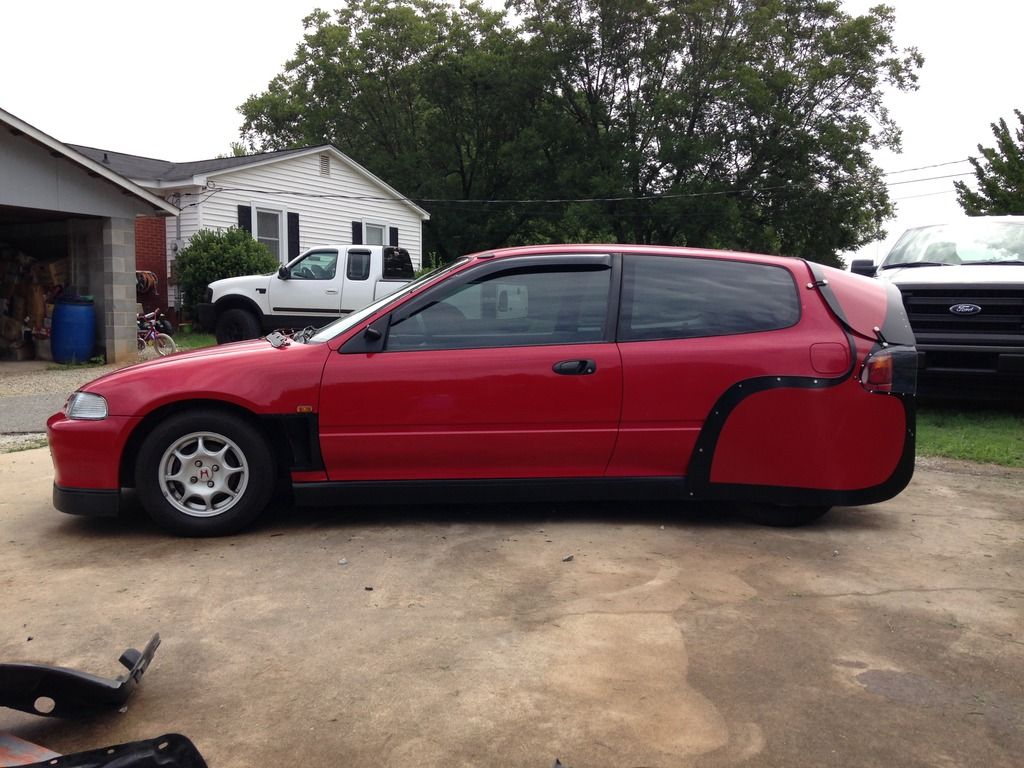
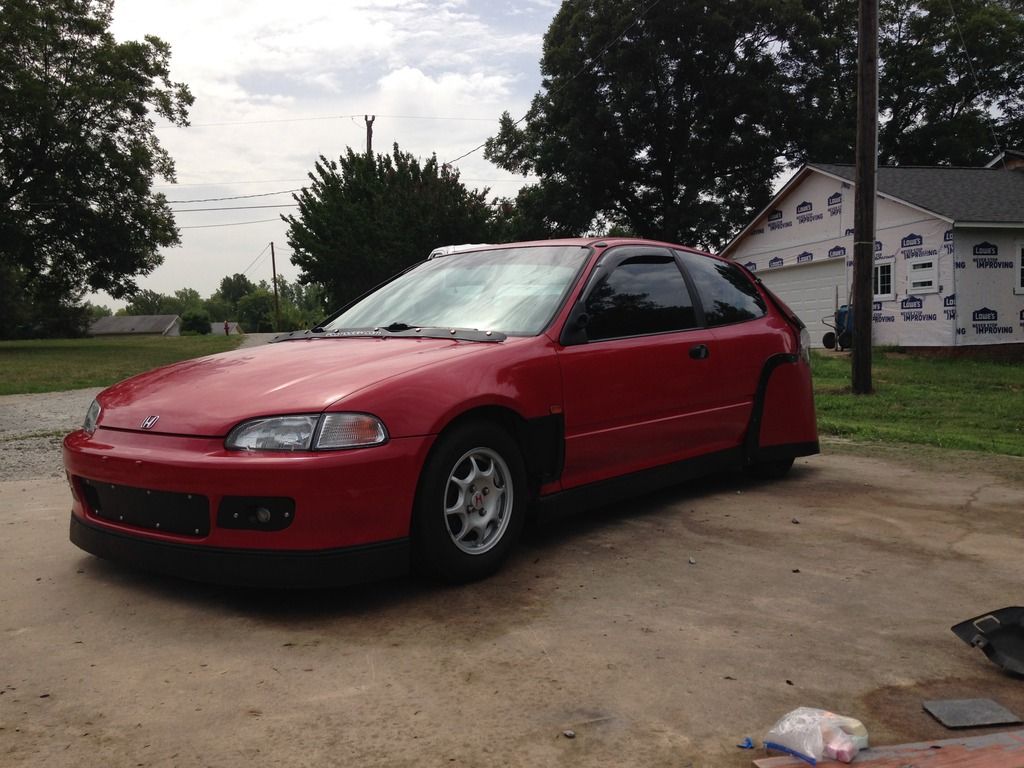
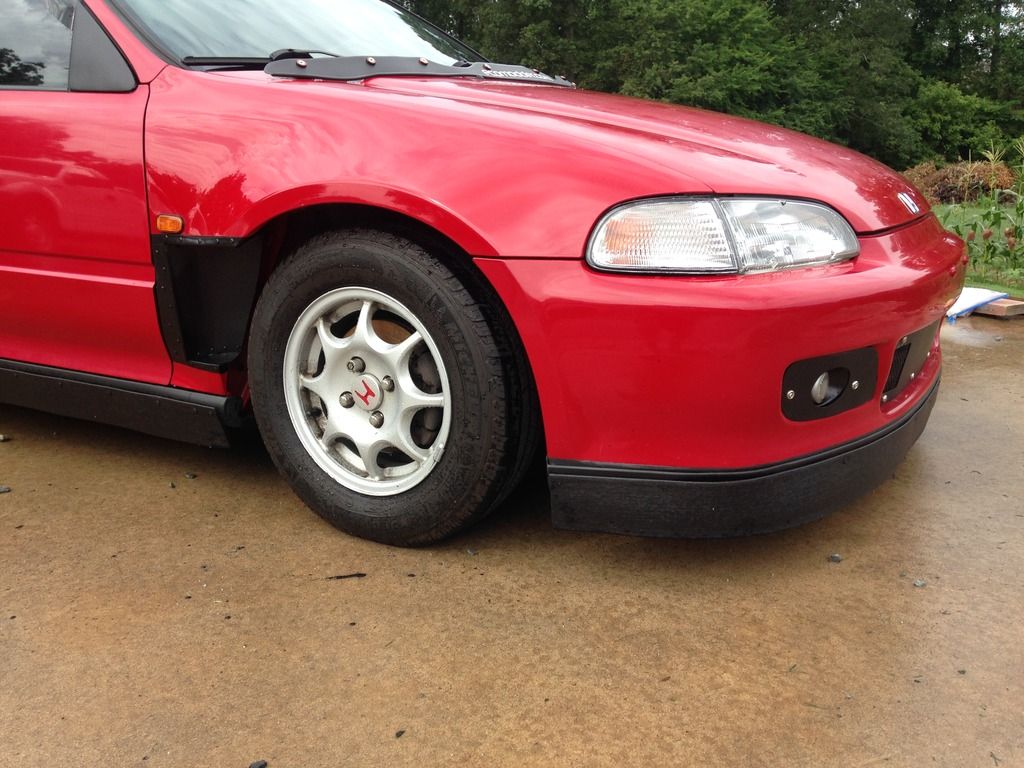
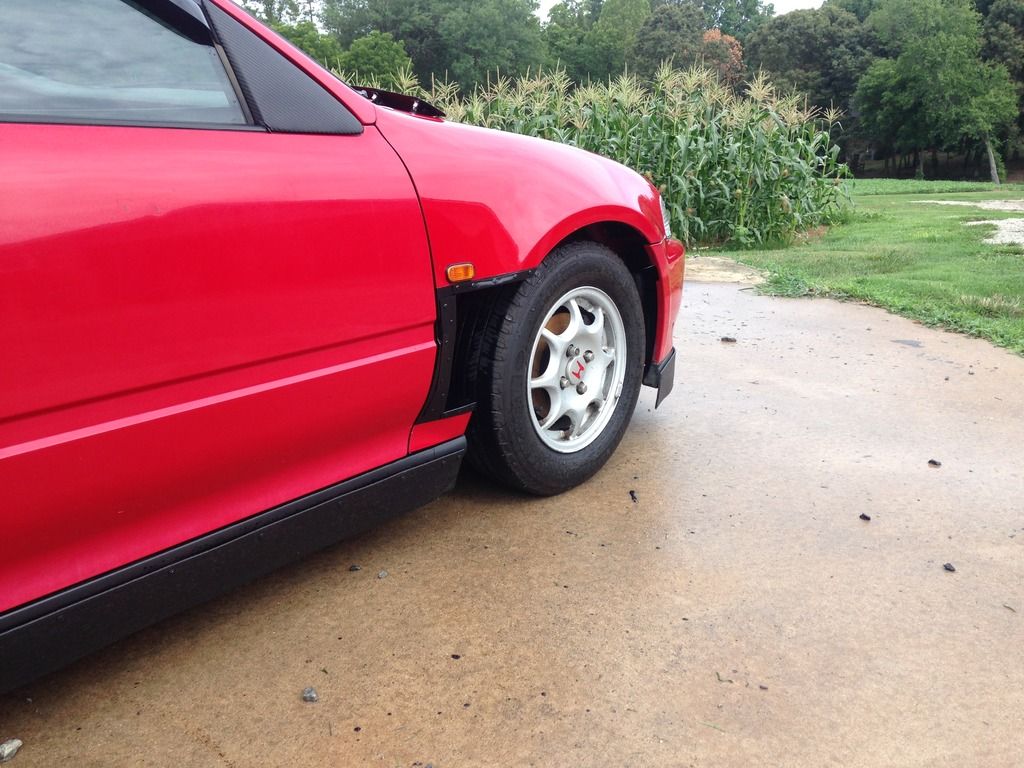
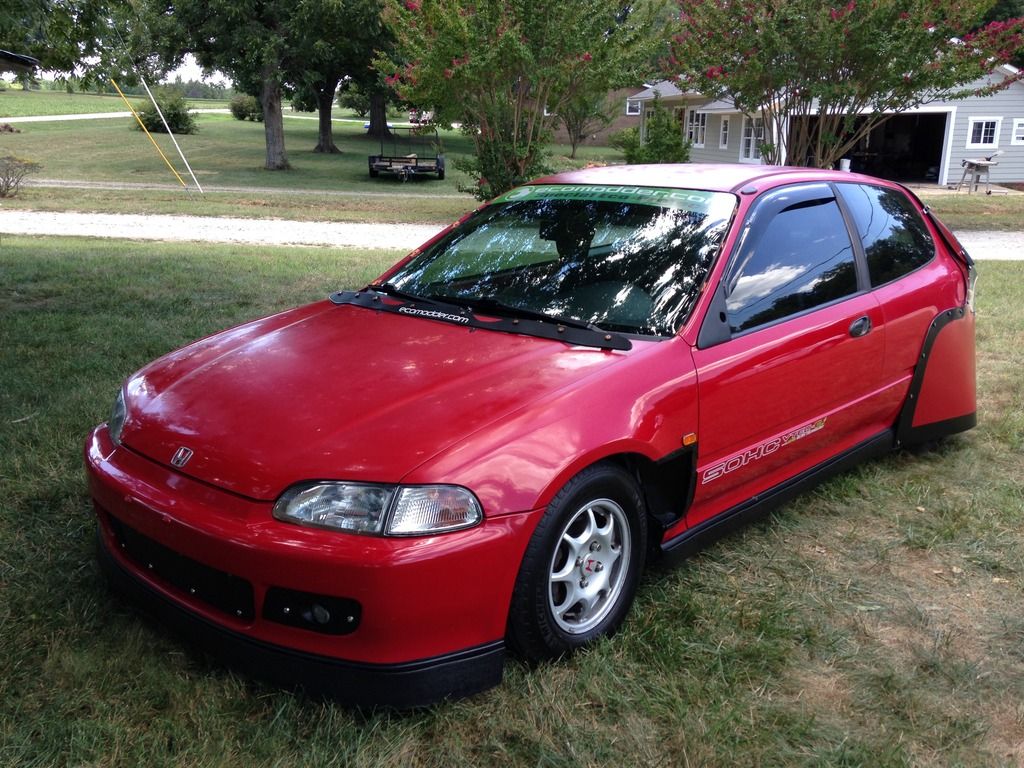
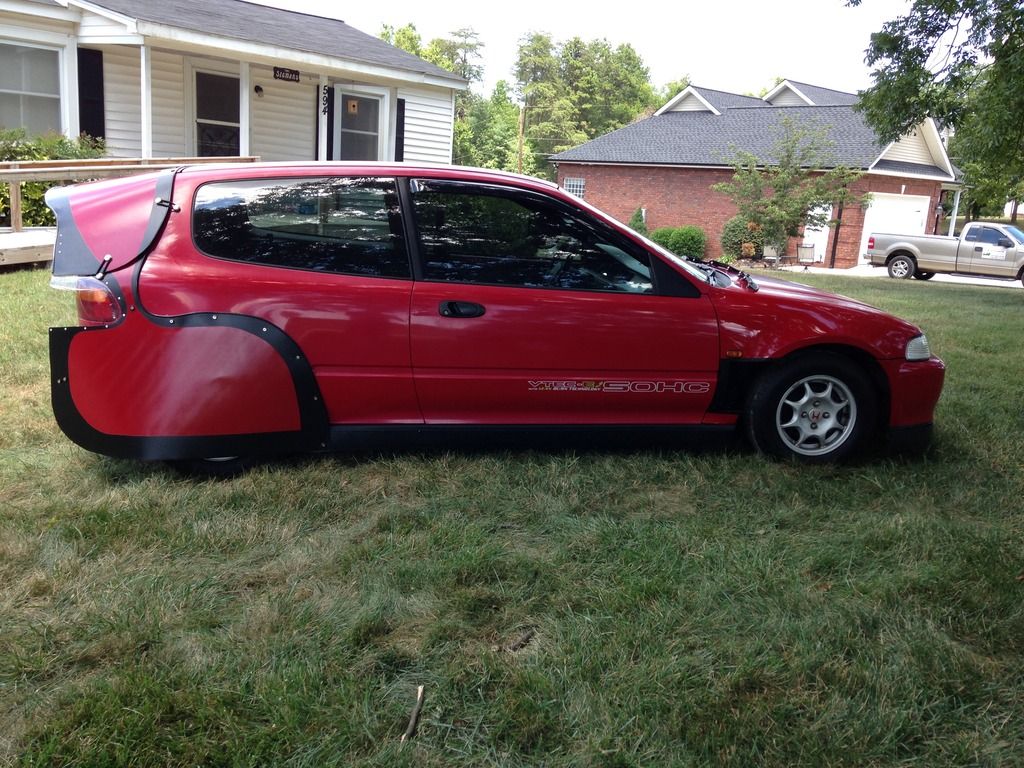
Update 7/9/2015: Cut-Away Fenders Installed
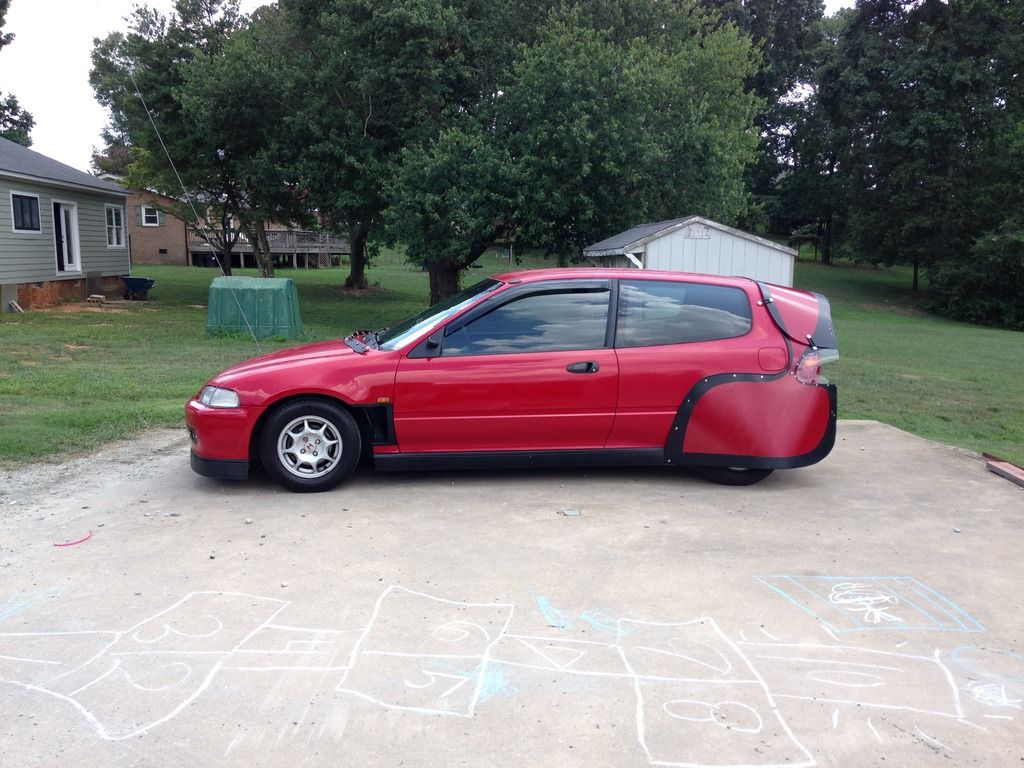
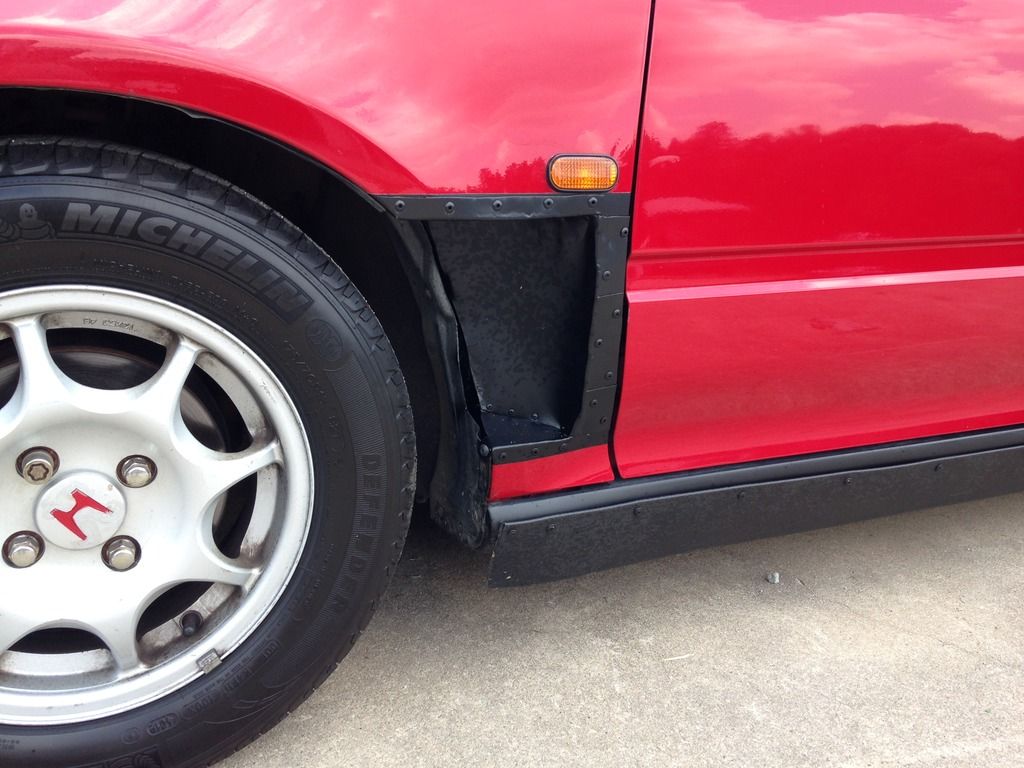
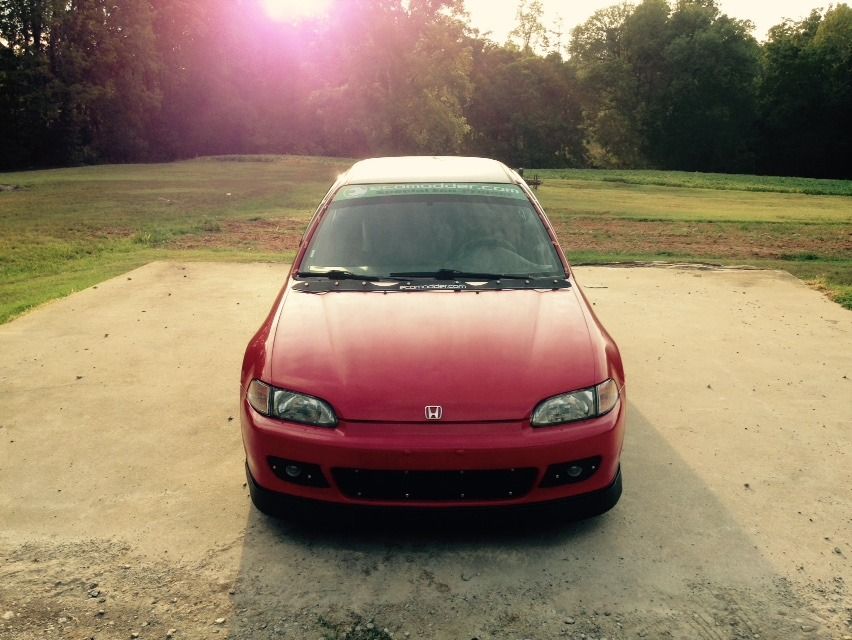
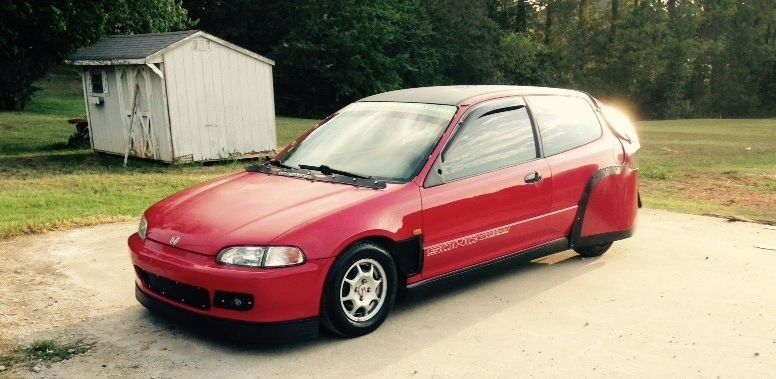
Hello all, I got up early yesterday and got the modified fenders and all the other bits back on the car. It feels good to see the car back in one piece again. I haven't driven the VX yet, as I still have to fit the fender liners to it. However, I must confess, it's hard for me to be modest with my thoughts on the outcome of these fenders. I think they look awesome! I feel they really pull in together both the red/black and eco themes well throughout the outside of the car.
OK, here's some progress pics:
First, I added some electrical loom to the JDM side marker lighting and drilled it in place with some rubber clamps.
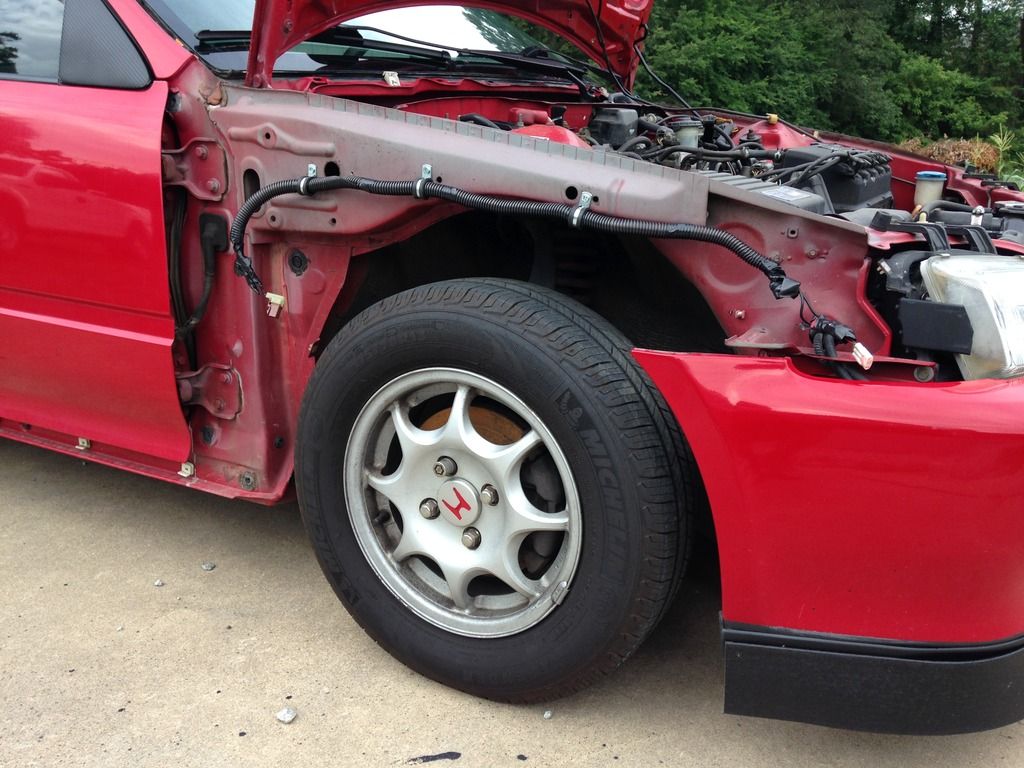
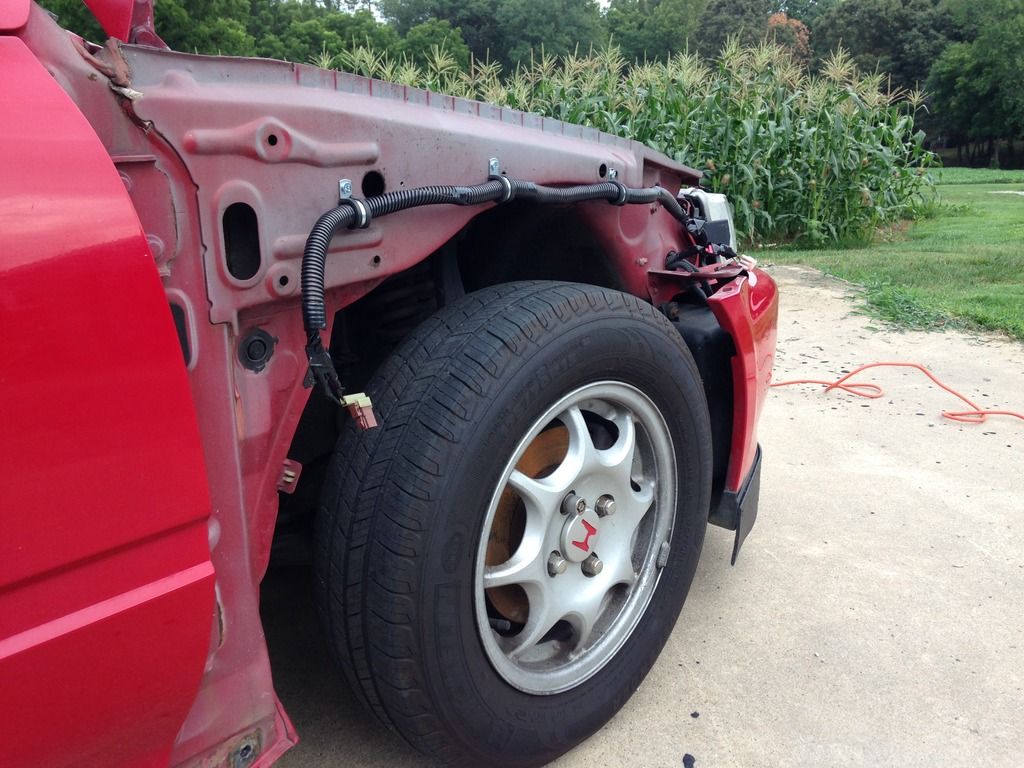
Then I fitted the fenders. To my surprise, there was little warping of the original fender shape (due to the mods) to work through when fitting them back on to the car. The passengers side was OEM-like in fitment. The drivers side, however, was a bit more difficult for some reason. I had to work about 20 minutes on that side to get things to line up correctly.
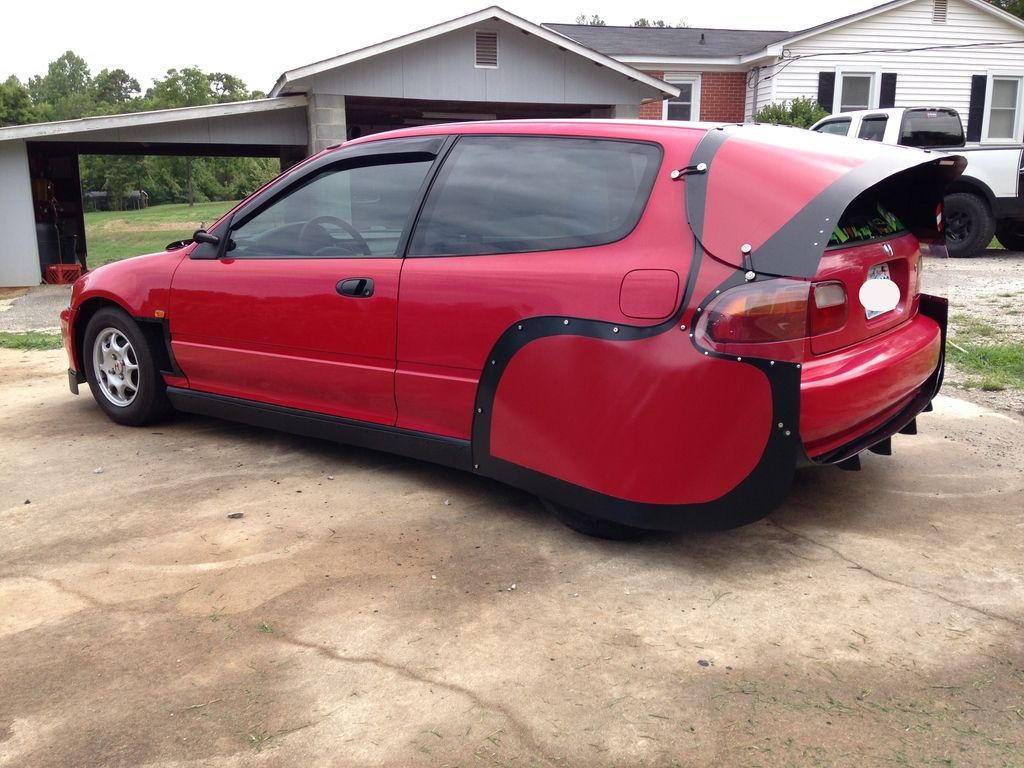
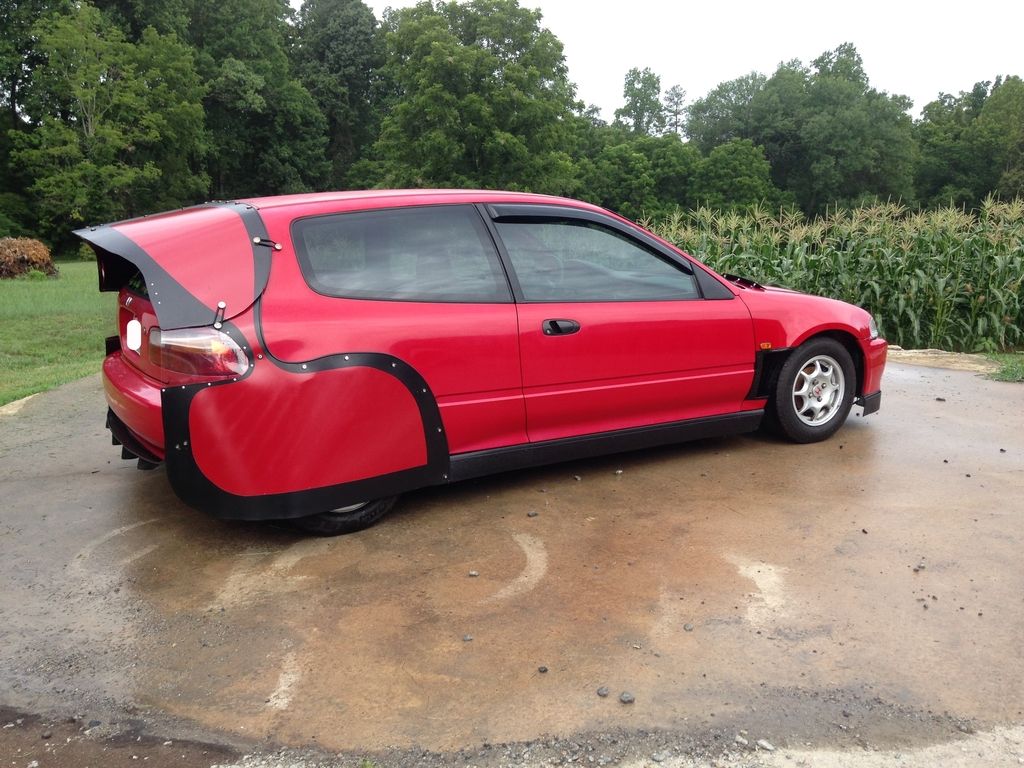
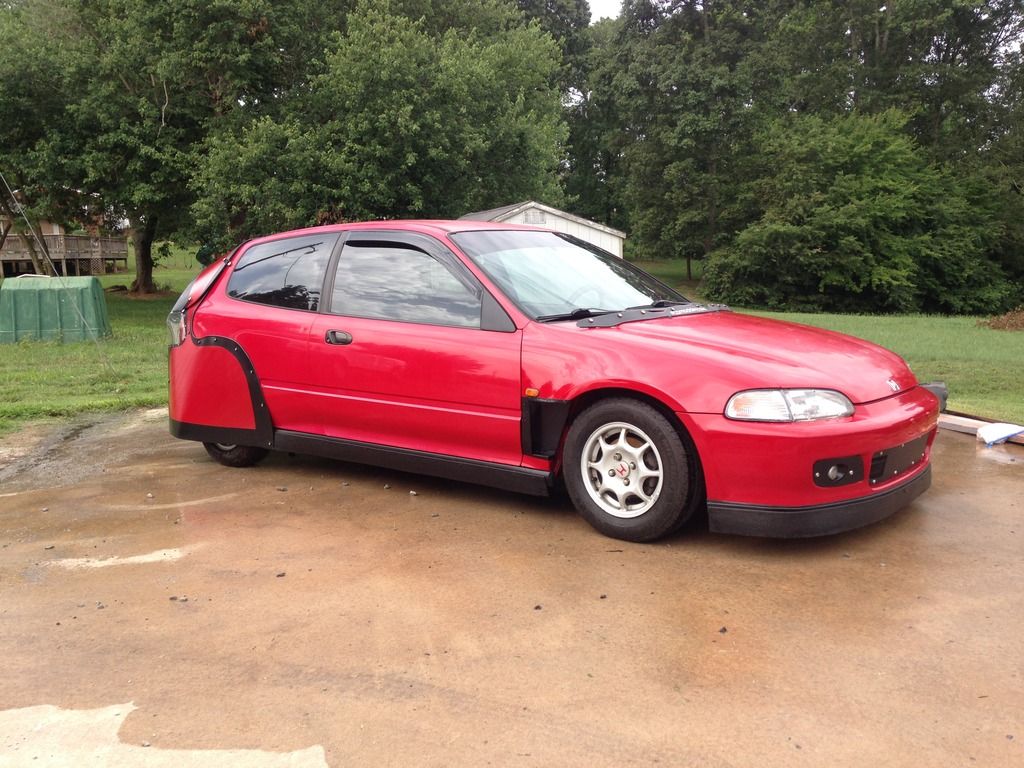
Showing some tire treads from behind!
And here's my new plate frame for shows and photo shoots. Thanks to Victor on EcoModder.com for the free decal!
Here's what's I have planned for the rest of this summer and fall tuning season:
- Finish fitting Fender Liners
- Multiple custom-designed decals for exterior to carry forth eco and VX theme
- CF Vinyl to roof (hopefully I don't mess it up this time)
- Smooth wheel covers
- Door panels dye'd black w/ green stitched accents
- keyless entry added
- Wink Mirror
- Herculiner on rear hatch area (where carpet doesn't cover)
- Re-wrap headliner
- Freshly-dyed black interior installed
- Engine bay clean up and dress up
- Ceramic front brake pads
- Bleed brakes
- Coolant system flush
- Magnetic engine and tranny oil drain plugs
- Royal Purple synthetic transmission oil
Anyone following the thread knows by now that I hop around like a bunny rabbit in the order of my updates. So, I'm not sure what I'll post next.
But..until then, thank YOU for ecoTuning in!
Hello all, I got up early yesterday and got the modified fenders and all the other bits back on the car. It feels good to see the car back in one piece again. I haven't driven the VX yet, as I still have to fit the fender liners to it. However, I must confess, it's hard for me to be modest with my thoughts on the outcome of these fenders. I think they look awesome! I feel they really pull in together both the red/black and eco themes well throughout the outside of the car.
OK, here's some progress pics:
First, I added some electrical loom to the JDM side marker lighting and drilled it in place with some rubber clamps.


Then I fitted the fenders. To my surprise, there was little warping of the original fender shape (due to the mods) to work through when fitting them back on to the car. The passengers side was OEM-like in fitment. The drivers side, however, was a bit more difficult for some reason. I had to work about 20 minutes on that side to get things to line up correctly.


Showing some tire treads from behind!

And here's my new plate frame for shows and photo shoots. Thanks to Victor on EcoModder.com for the free decal!
Here's what's I have planned for the rest of this summer and fall tuning season:
- Finish fitting Fender Liners
- Multiple custom-designed decals for exterior to carry forth eco and VX theme
- CF Vinyl to roof (hopefully I don't mess it up this time)
- Smooth wheel covers
- Door panels dye'd black w/ green stitched accents
- keyless entry added
- Wink Mirror
- Herculiner on rear hatch area (where carpet doesn't cover)
- Re-wrap headliner
- Freshly-dyed black interior installed
- Engine bay clean up and dress up
- Ceramic front brake pads
- Bleed brakes
- Coolant system flush
- Magnetic engine and tranny oil drain plugs
- Royal Purple synthetic transmission oil
Anyone following the thread knows by now that I hop around like a bunny rabbit in the order of my updates. So, I'm not sure what I'll post next.
But..until then, thank YOU for ecoTuning in!
07-08-2015, 11:03 PM
#212
Honda-Tech Member
Join Date: Aug 2005
Location: New York
Posts: 1,181
Likes: 0
Received 0 Likes
on
0 Posts
You're making great gas mileage look cool! Props on all the fab work, take this over an Insight any day.
07-20-2015, 03:00 PM
#213
Honda-Tech Member
Thread Starter
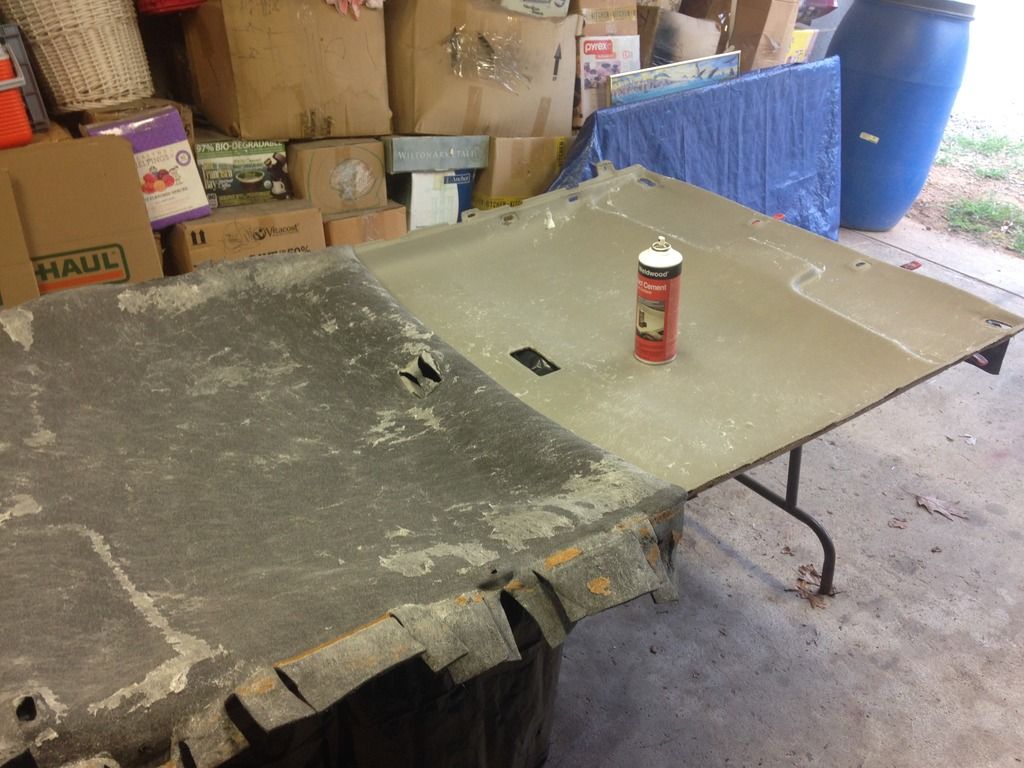
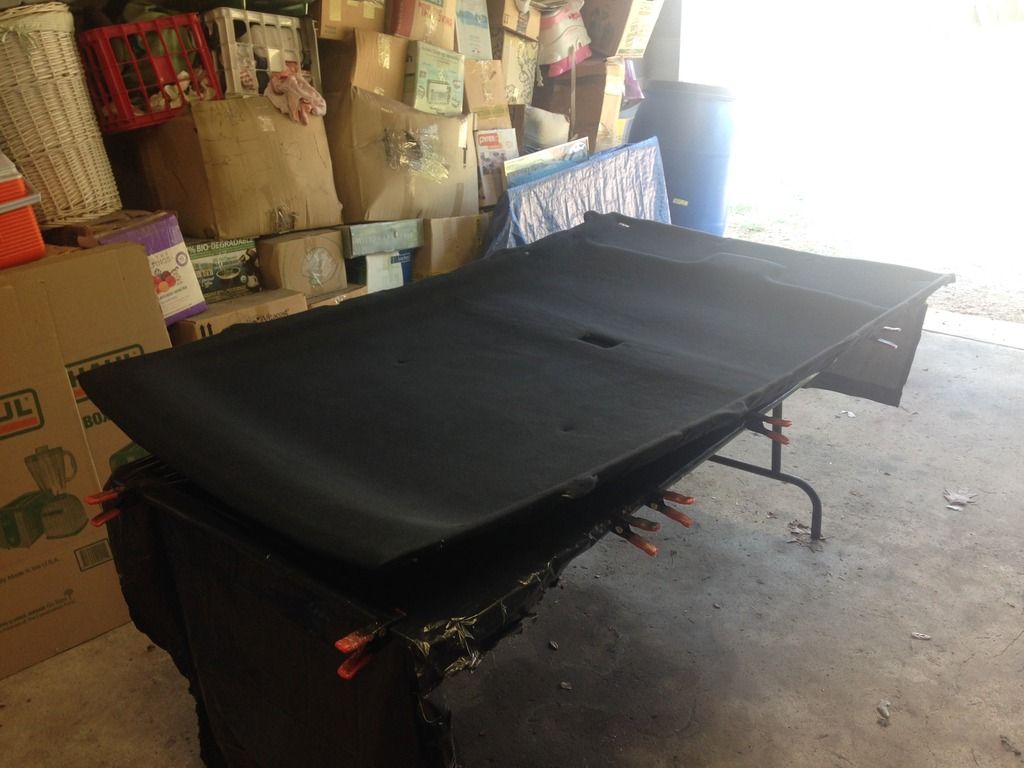
Update: 7/20/2015- Bedliner Coating to Hatch Area + Headliner Re-Wrap
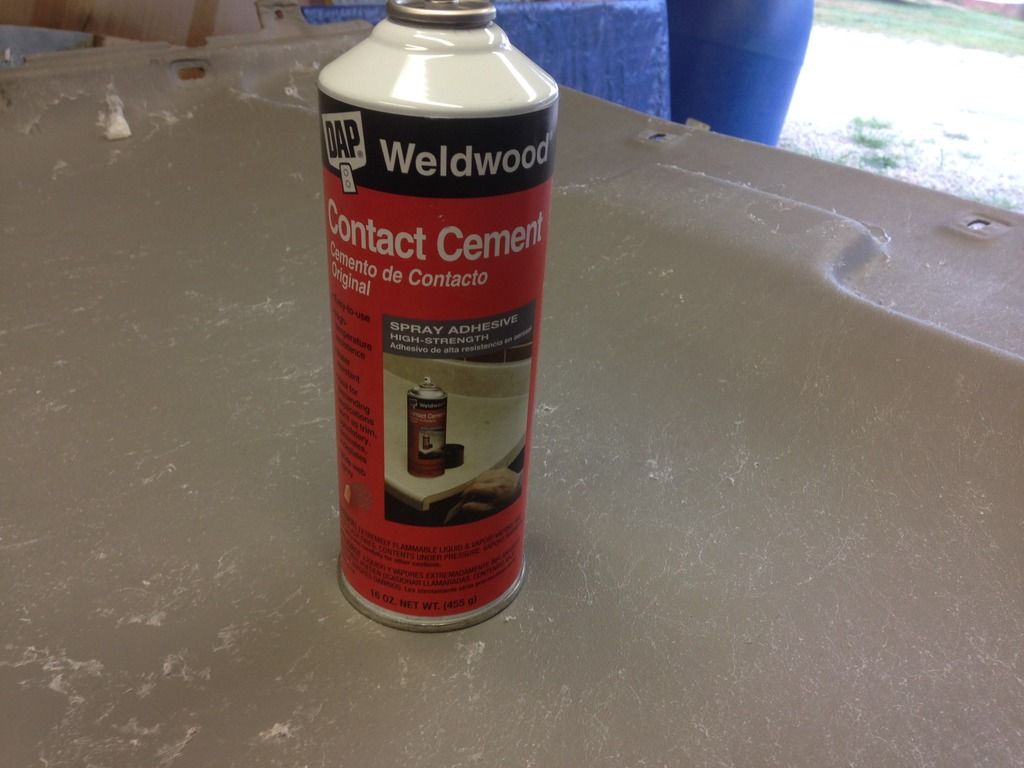
Hello all, I had a productive weekend on the project. I need to get the interior components back in. However, before I did so, the headliner needed to be re-wrapped. As previously mentioned, the Loctite Professional (irony on both fronts) failed, and the summer heat melted it like butter. So, I did some research and used a DAP Weldwood spray-able Contact Cement. Costs circa $12 per can, and is available at Home Depot. I used 1.25 cans to do the headliner. So far, this product appears to have done the trick. Apparently, this is the stuff all the pro shops recommend. It used to only be available as a liquid in can that would need to be thinned and then sprayed through a painters gun. Thankfully, capitalism won, and it's now available to DIY mortals like me in a convenient spray can format. Pics below tell the story.
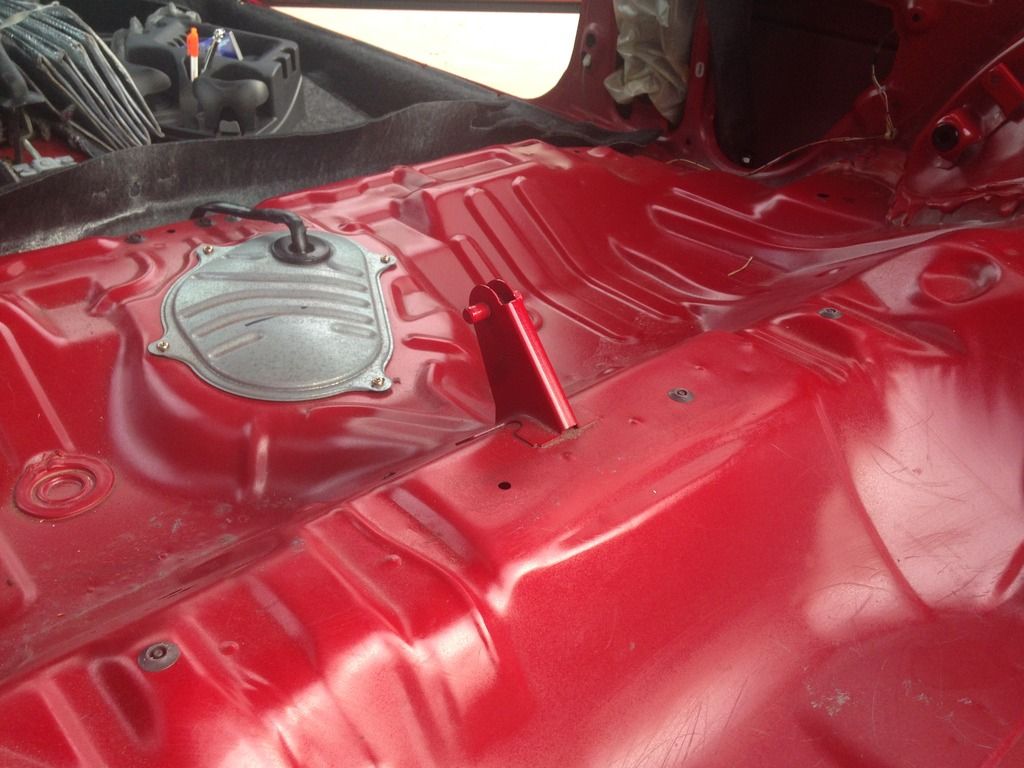
Also, before the interior panels went back in, I handled a couple of other important items in the hatch area.
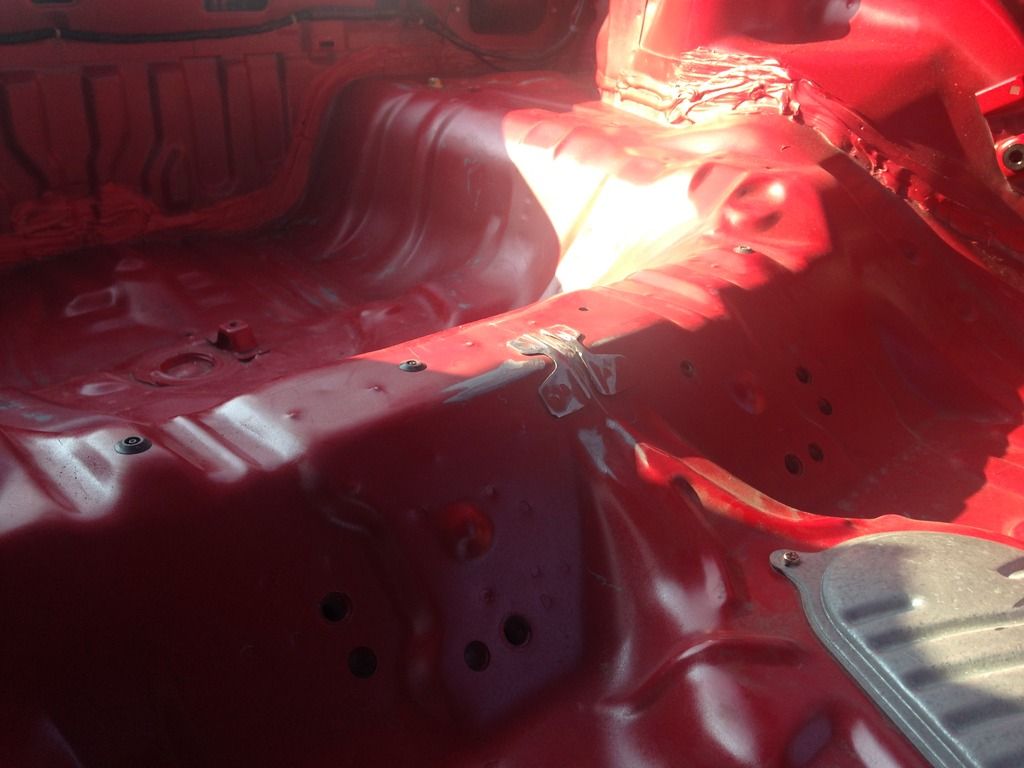
(1) Removed the rear seat bracket. Cut and grinded it down. I kept the base and spot welds present, so I didn't make any holes in the floor board.
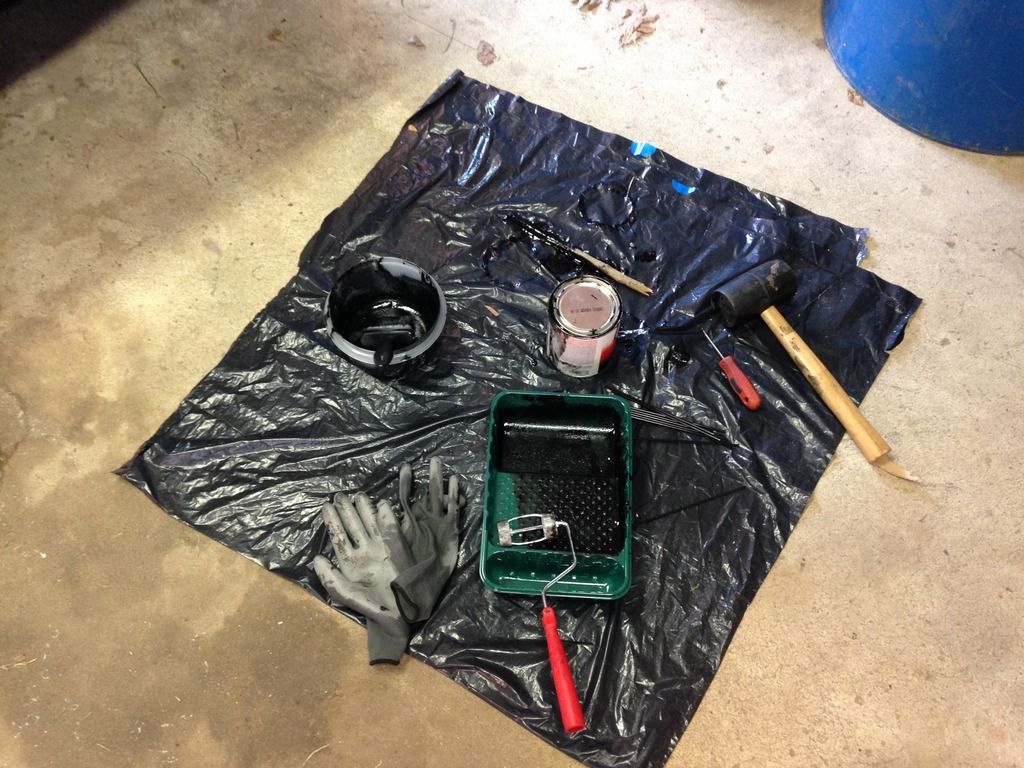
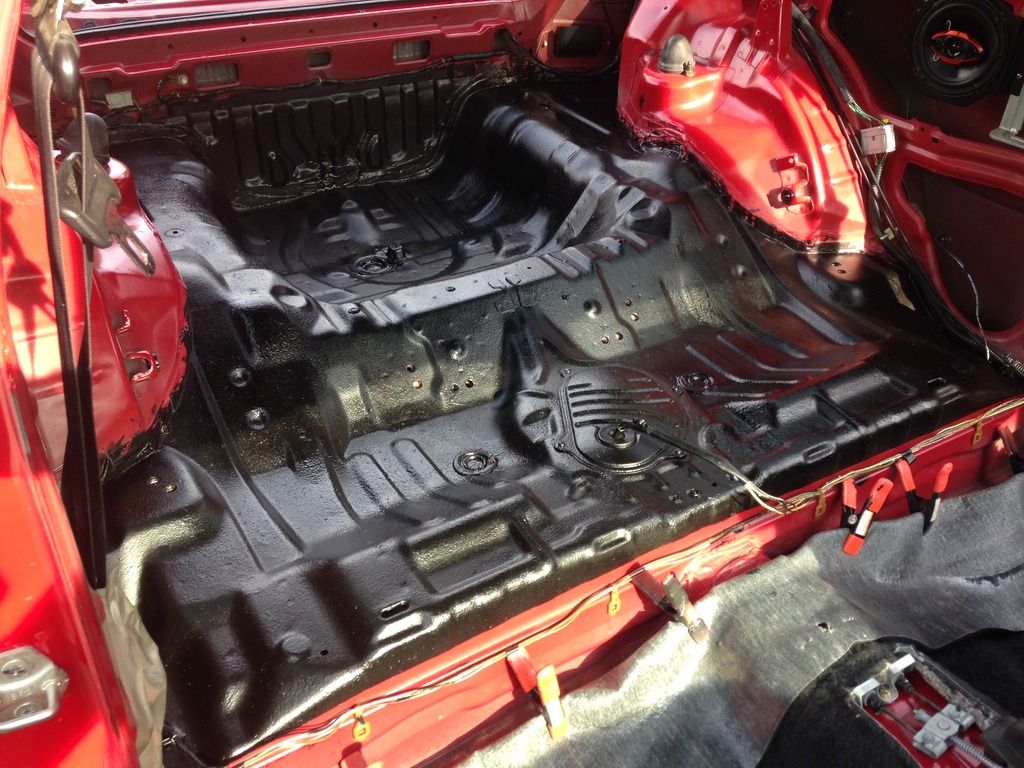
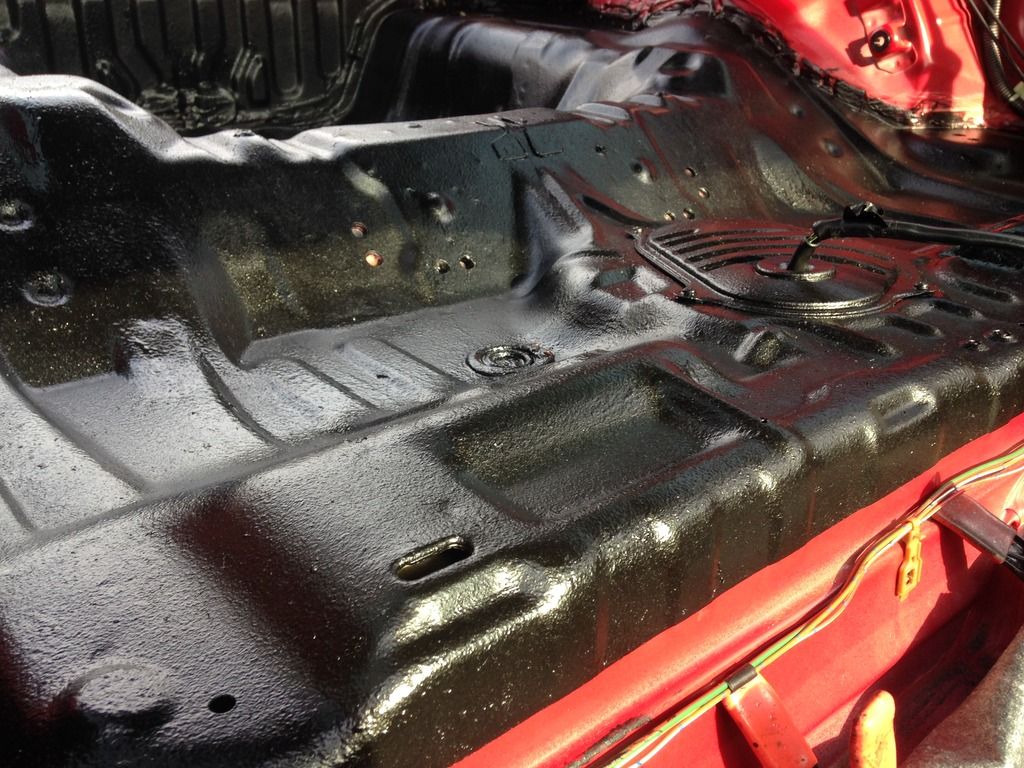
(2) I laid down some Duplicolor Bedliner from Autozone. One small quart did the trick ($21) with a bit leftover to spare. Took two coats to get good coverage. Basically, brushed on the sides and tight areas, then rolled the rest with a small roller. Laid some painters tape down at the front to create a clean line there. The cars finished interior will go smoothly from carpet in the front to bedliner in the back, and there should be a nice black throughout the interior now (no red).
In addition to aesthetics, another important role for the bedliner is to dampen some of the road noise. I laid some down on my CRX project years ago and it does dampen considerably. Stating the obvious, this will now be a one-seater vehicle, and the car will remain partially stripped in the rear. All interior plastics will be present on re-assembly, but no rear seats/carpet/floorboard.
Before:
After:
Laying down the Bedliner:
First Coat Down:
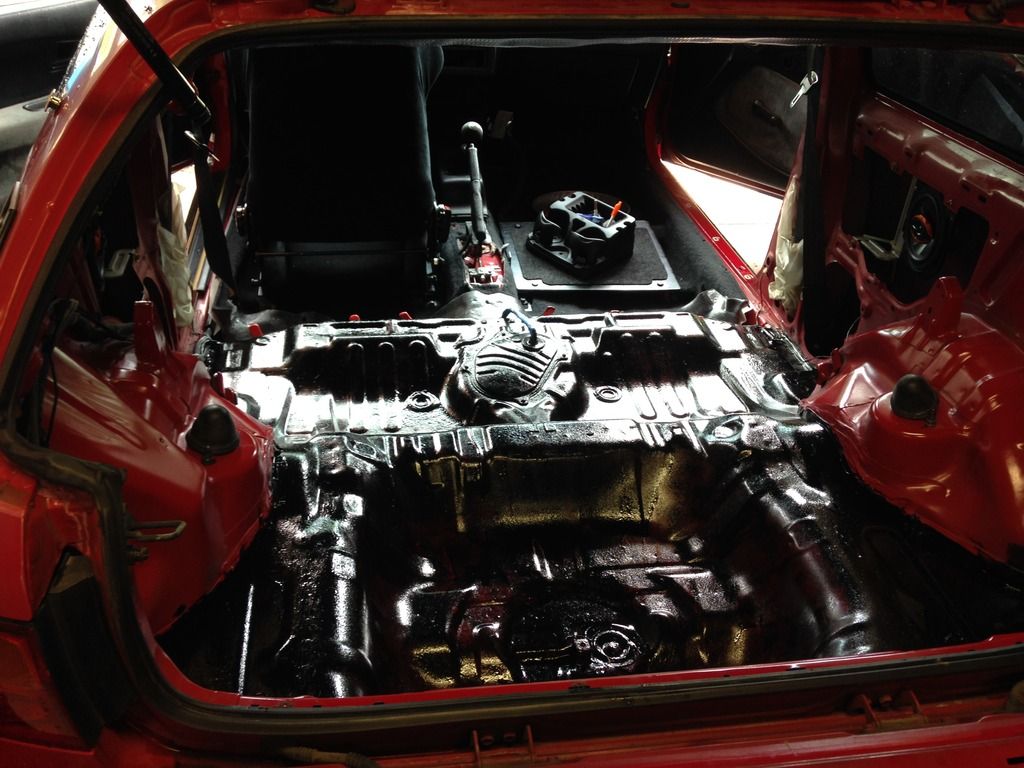
All done:
Until next time, thank YOU for ecoTuning in!
Hello all, I had a productive weekend on the project. I need to get the interior components back in. However, before I did so, the headliner needed to be re-wrapped. As previously mentioned, the Loctite Professional (irony on both fronts) failed, and the summer heat melted it like butter. So, I did some research and used a DAP Weldwood spray-able Contact Cement. Costs circa $12 per can, and is available at Home Depot. I used 1.25 cans to do the headliner. So far, this product appears to have done the trick. Apparently, this is the stuff all the pro shops recommend. It used to only be available as a liquid in can that would need to be thinned and then sprayed through a painters gun. Thankfully, capitalism won, and it's now available to DIY mortals like me in a convenient spray can format. Pics below tell the story.


Also, before the interior panels went back in, I handled a couple of other important items in the hatch area.
(1) Removed the rear seat bracket. Cut and grinded it down. I kept the base and spot welds present, so I didn't make any holes in the floor board.
(2) I laid down some Duplicolor Bedliner from Autozone. One small quart did the trick ($21) with a bit leftover to spare. Took two coats to get good coverage. Basically, brushed on the sides and tight areas, then rolled the rest with a small roller. Laid some painters tape down at the front to create a clean line there. The cars finished interior will go smoothly from carpet in the front to bedliner in the back, and there should be a nice black throughout the interior now (no red).
In addition to aesthetics, another important role for the bedliner is to dampen some of the road noise. I laid some down on my CRX project years ago and it does dampen considerably. Stating the obvious, this will now be a one-seater vehicle, and the car will remain partially stripped in the rear. All interior plastics will be present on re-assembly, but no rear seats/carpet/floorboard.
Before:

After:

Laying down the Bedliner:

First Coat Down:

All done:


Until next time, thank YOU for ecoTuning in!
07-28-2015, 08:00 PM
#214
Honda-Tech Member
Thread Starter
Update 7/28/2015: Interior Restoration Continued + Misc. Exterior Details
Hello all, just a bit of an update to keep the thread going.
First off, since the VX isn't hitting the roads daily nowadays, I gave the thing a good wash and found it a car cover. Was supposed to be a "size 2" cover, but thanks to the eco mods, needed a "size 3" cover :p
Now you see it:
Now you don't:

Also, I finished getting the fender liner's back on. I'm ashamed to post these results, but... it is what it is. My only excuse for the Amateur-Hour results below is (1) It was hot outside and I was tired and (2) it was just hard to line up the cuts.
Ugly in 3...
2....
1....
The other side is about the same, so I'll spare you all another picture. However, all said, the air flow is still better I hope than with no fender liners at all.
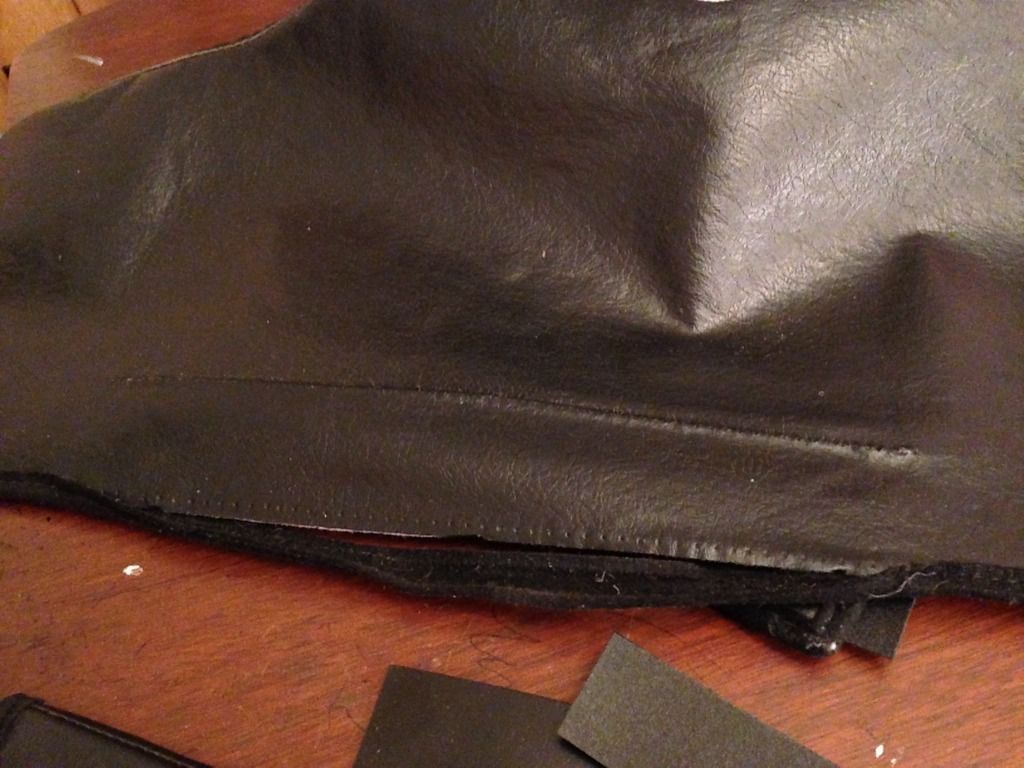
Next order of business was to modify the OEM bra. Many of you commented about the little spoilers integrated in to the bra possibly upsetting aero. So, I took them off. Just need to have a seamstress sew back up the front liner, and the bra can be re-installed with a smooth aero now.

Then, I decided to paint the face of the MPGuino amber with some translucent Tamiya model paint. Came out pretty awesome. Amber glow now at night versus the red. Now matches the rest of the dash lights.
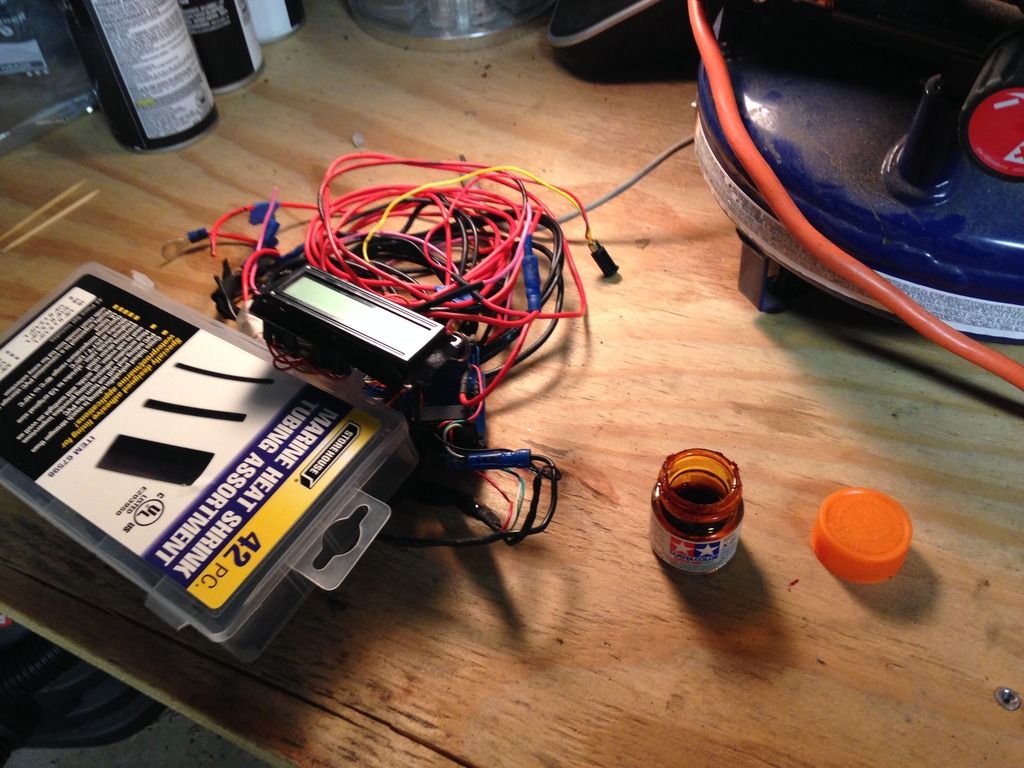
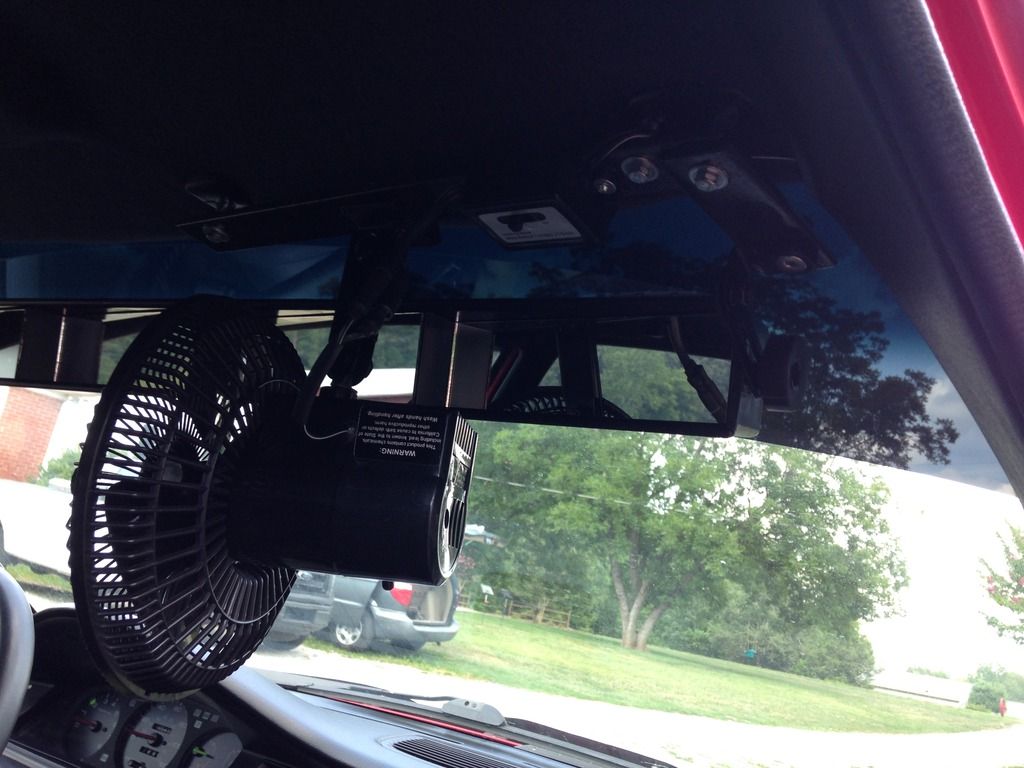
Then, I made a quick-disconnect for the fan, as my wife hates riding with it.
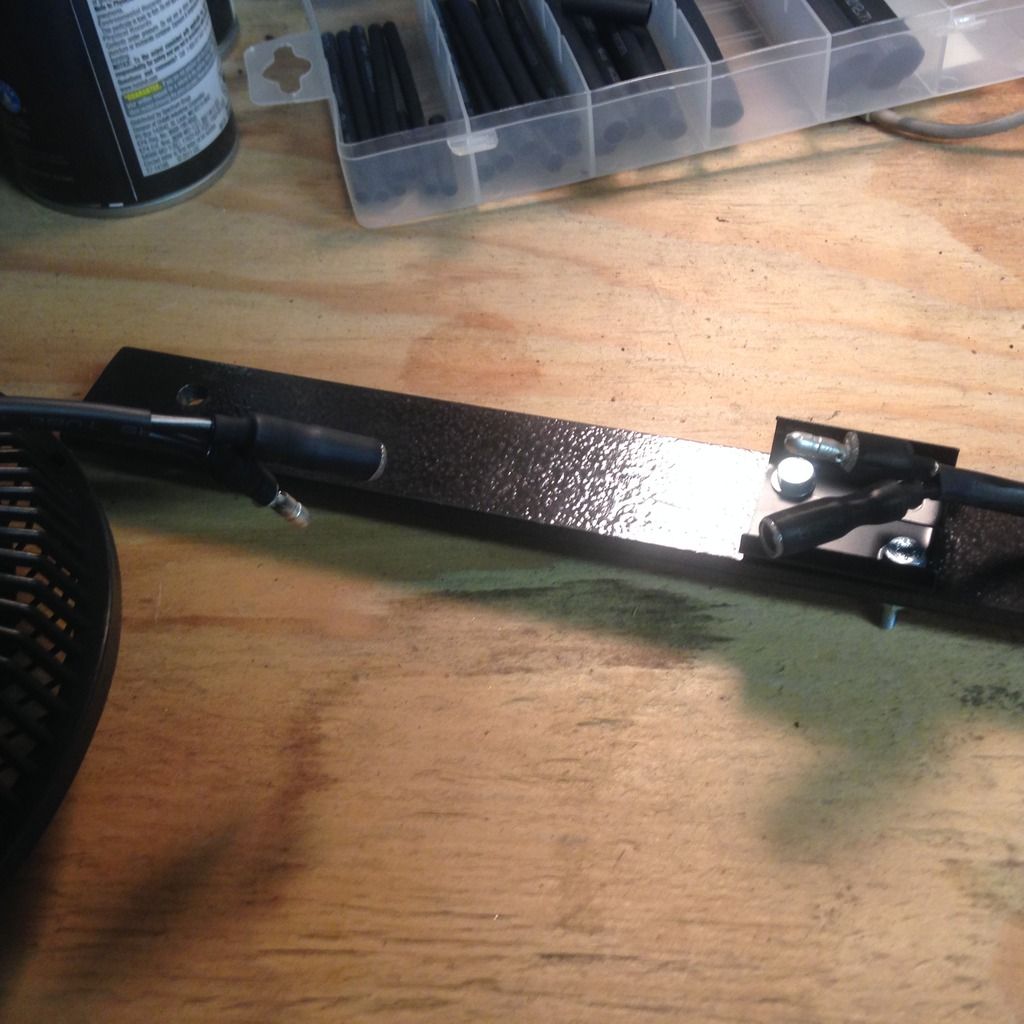
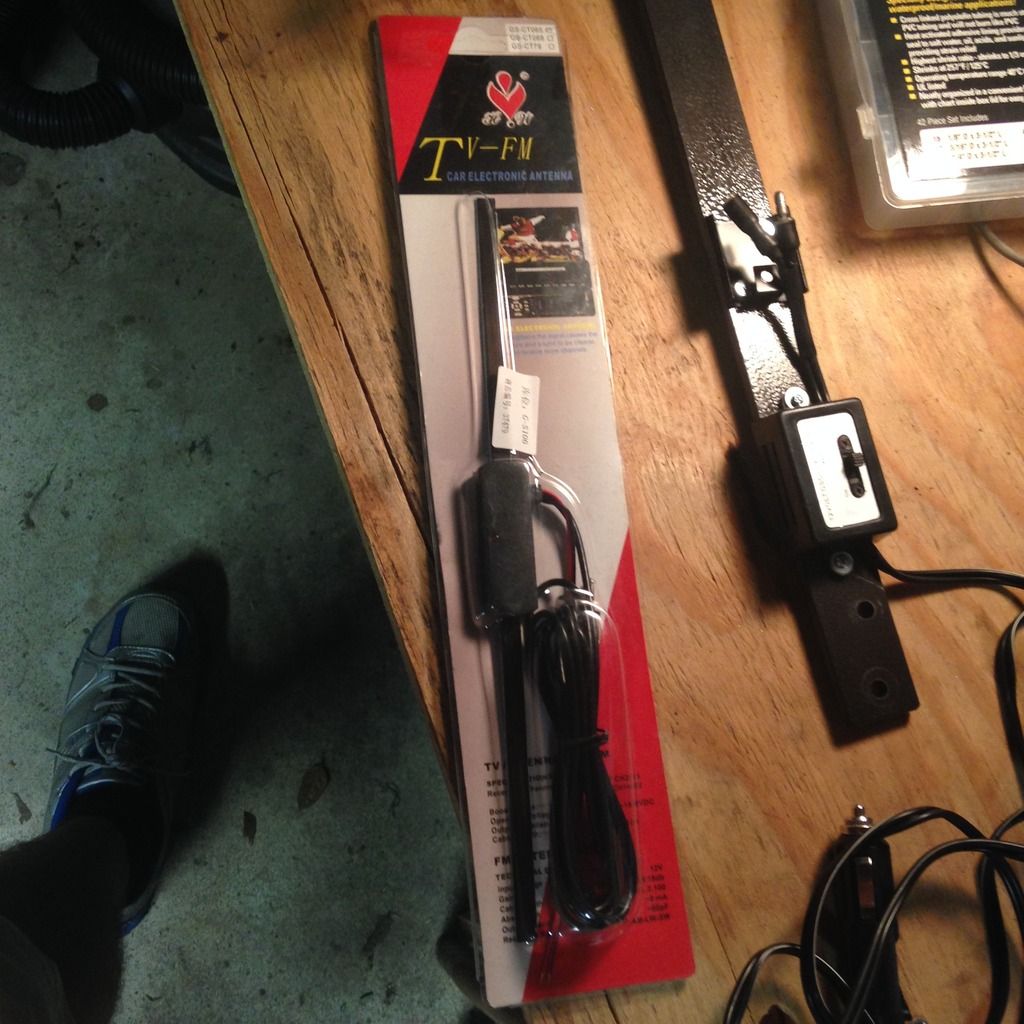
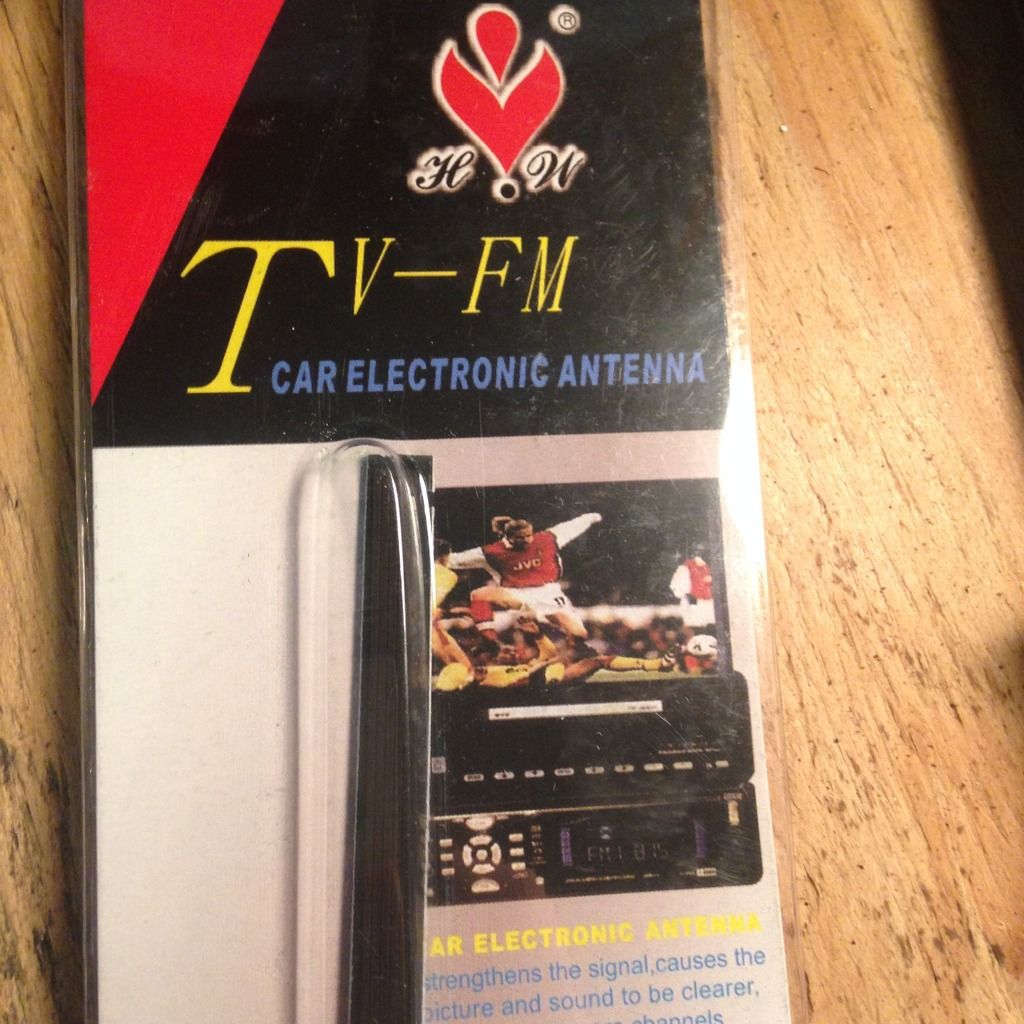
I also wired and installed a powered windshield mount antenna.
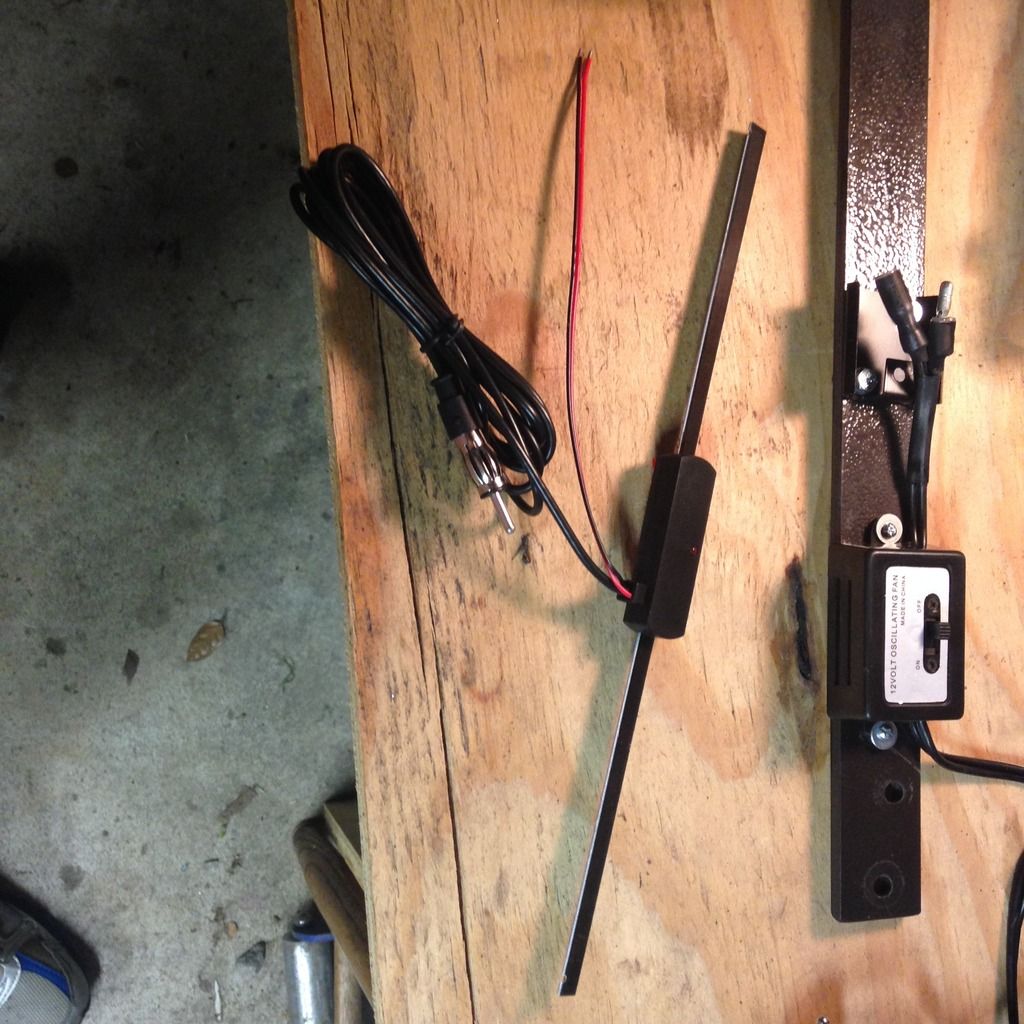
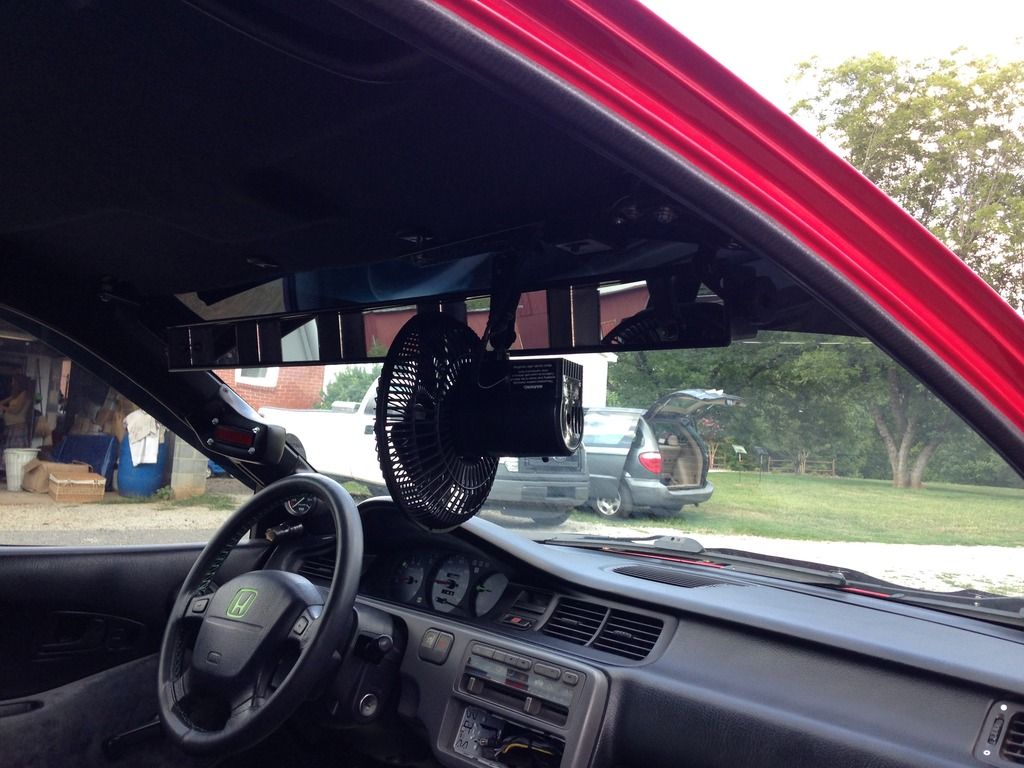
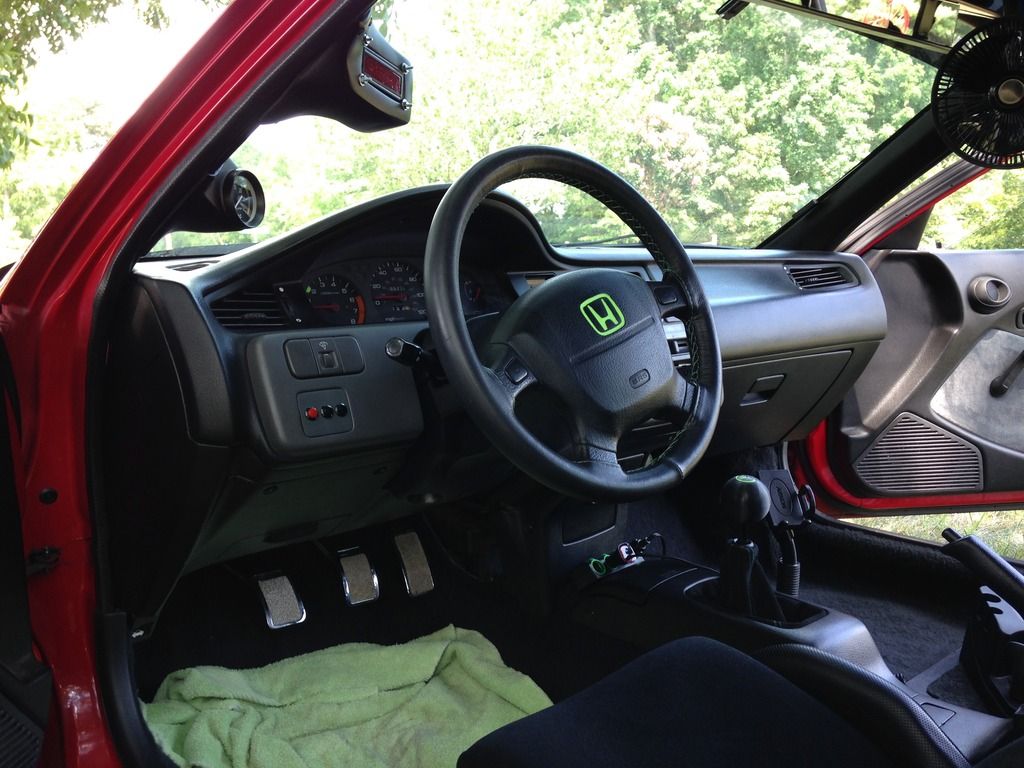
Then, I made some brackets to get a golf cart mirror in place. I won't say "Wink" because this is not a fan-boy mod for me. For an eco-build, it's actually quite functional. No stickers will be placed on my mirror, but if you do that kind of thing, I certainly don't judge you.
The brackets are made to tie in with the OEM visor mounting holes on the left side, and with the existing fan mount I made months ago on the right side.
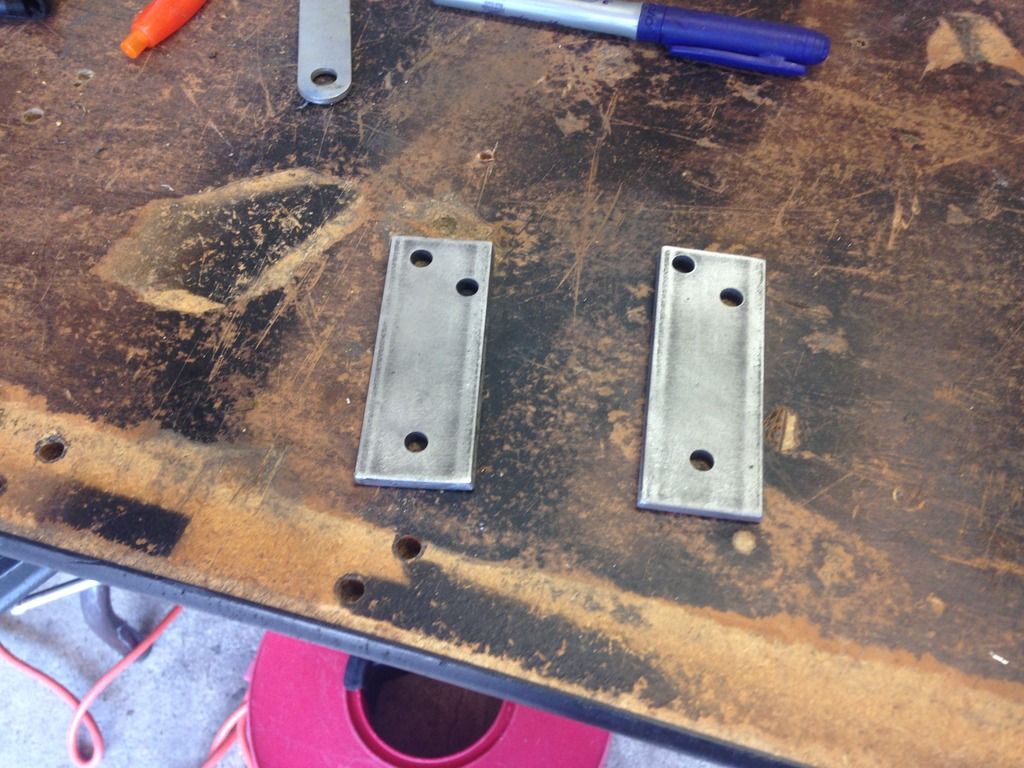
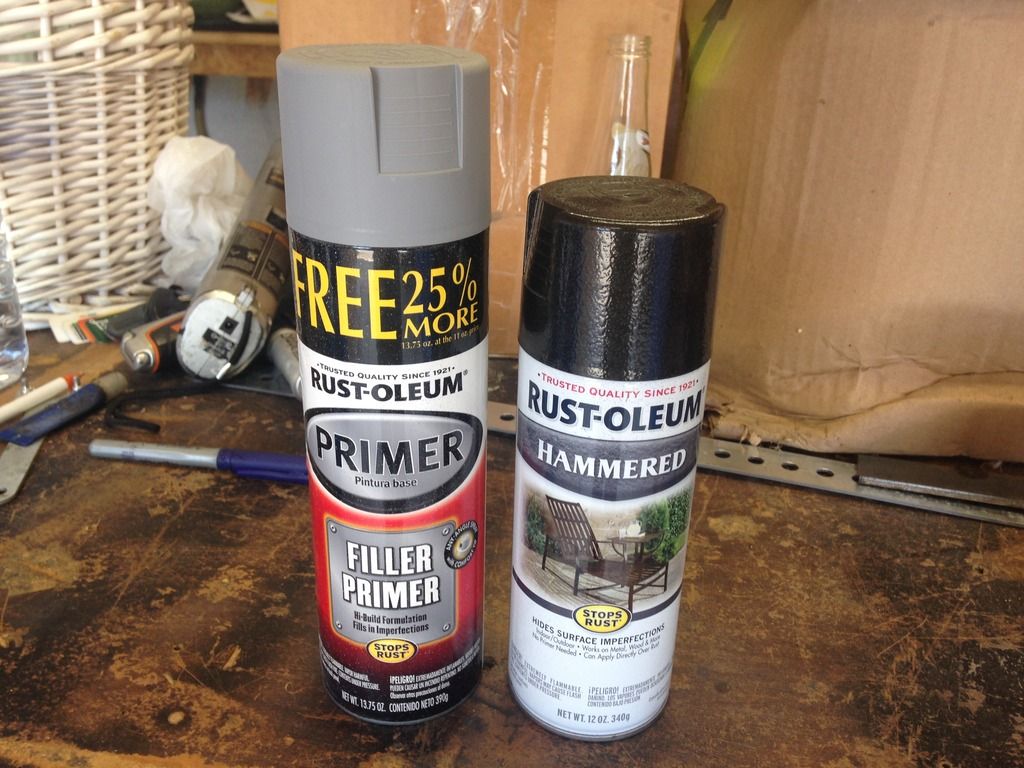
Brackets got primer + Rustoleum Hammered dark-granite paint (to match the fan mount I did months ago).
Finished results are great. Awesome visibility with no outside mirrors. No more goofy blind spot mirrors on the glass like I had before, and there is no interference fitment-wise with the "EcoolBreeze" fan set up.
Then, I re-installed the headliner, and FINALLY got the black-dyed interior bits back in.

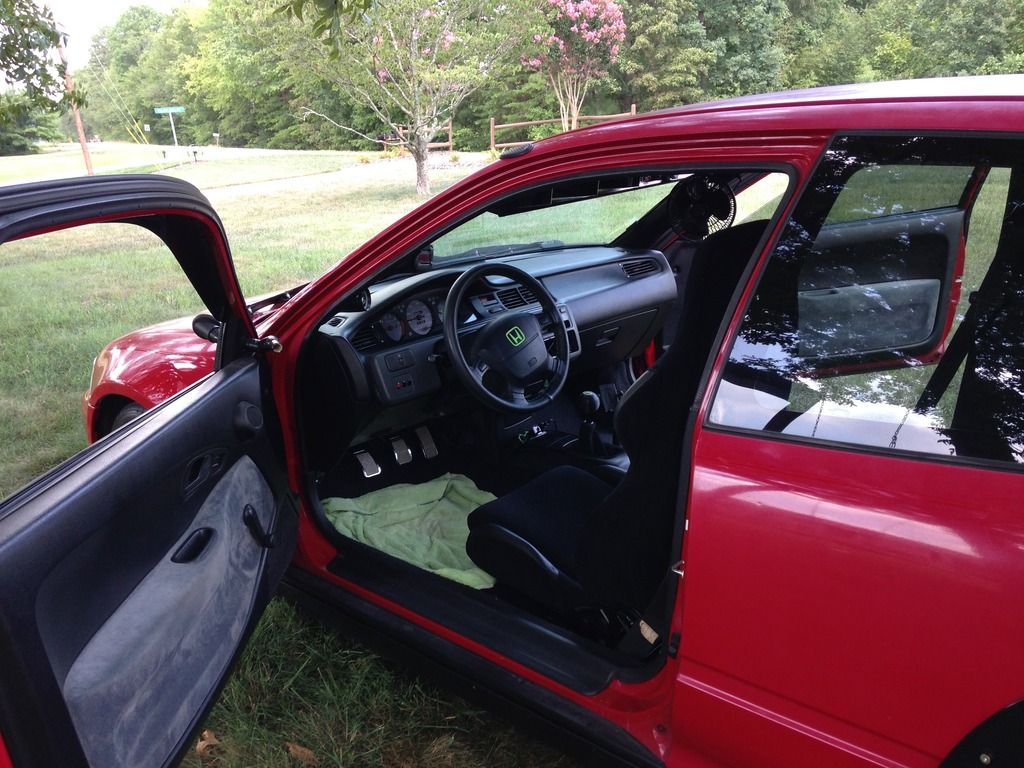
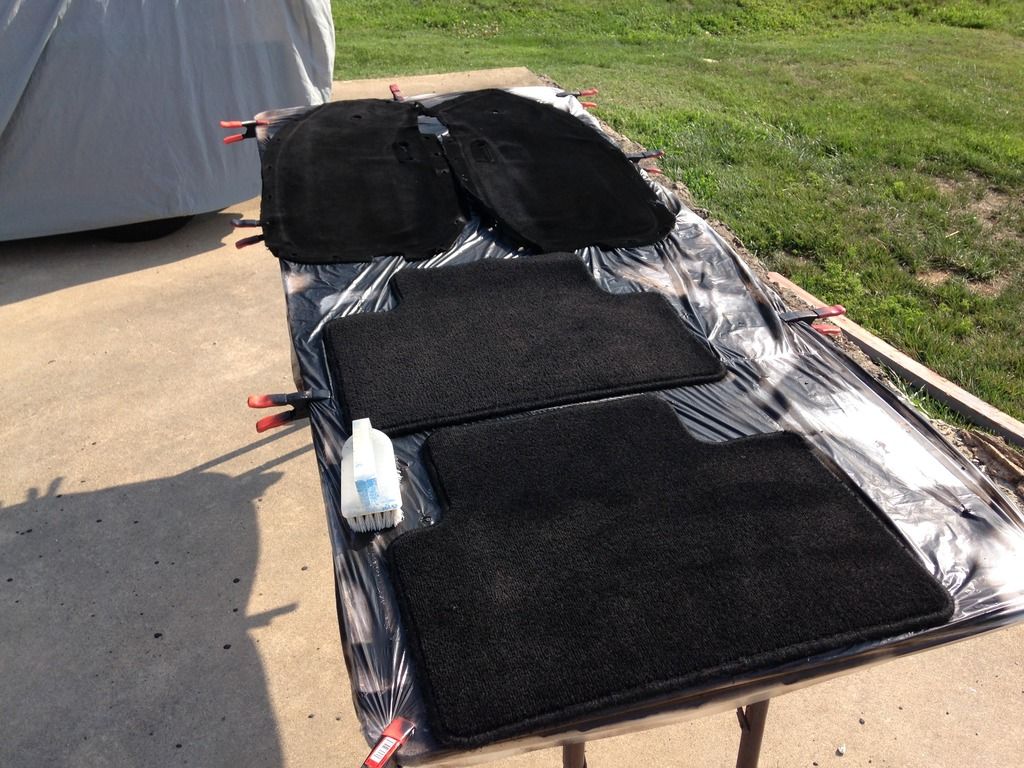
And to wrap up this post, I started restoring my door card panels and OEM floor mats. I opted to dye them all, and (so far) I'm glad I did. I wanted OEM mats, but they didn't come in black for the EG, only the EK (at least to my knowledge).
I used this product, as I have had great success with it before:
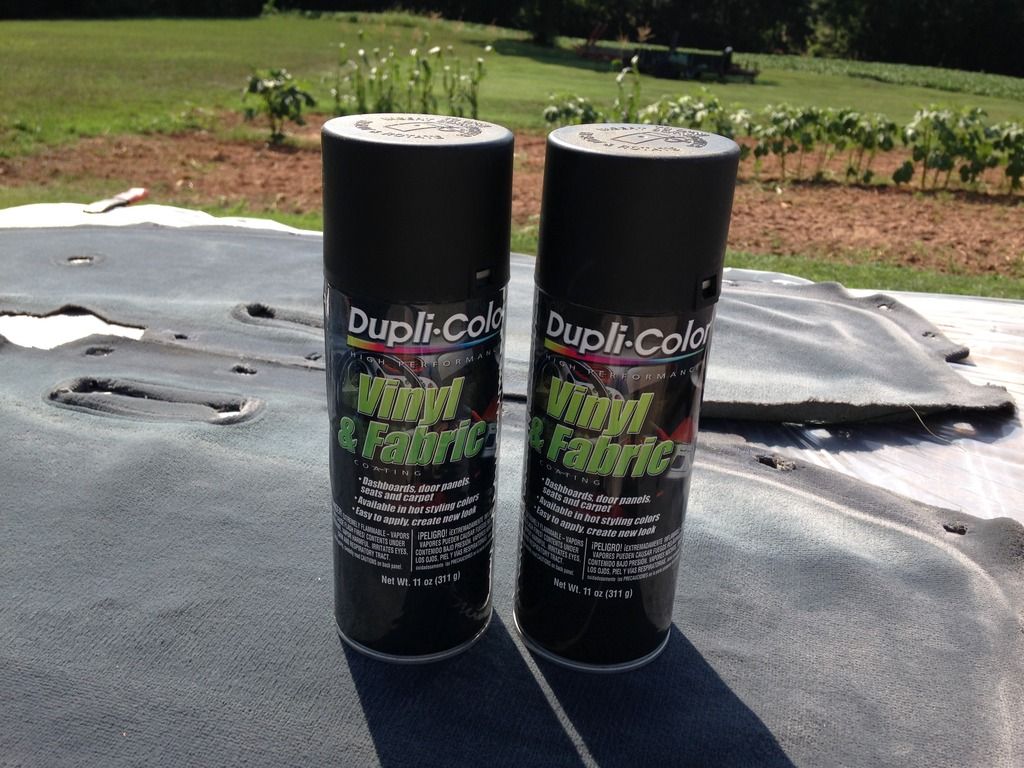

Also, I followed this tutorial, which I put together on an RSX forum years ago, in case any were wondering what and how: Link is here:
DIY ITR Blue/Red Carpet; OEM Quality, Cheap, and Easy! UPDATE on WEAR 6/30 - Club RSX Message Board
^ Crazy that I made that post back in 2012 and members there are still doing and uploading their own pics. It's now pretty tried and true. Give it a shot on your own carpets!
While removing the fabric from the door cards, noticed my door card plastic says "CTR" on the mold stamp. Civic Type R? Hey, just goes to show for VX owners... "If it's not a Type R, it's not a tight car!"

Anyway!...Here's the before pics of the pieces:
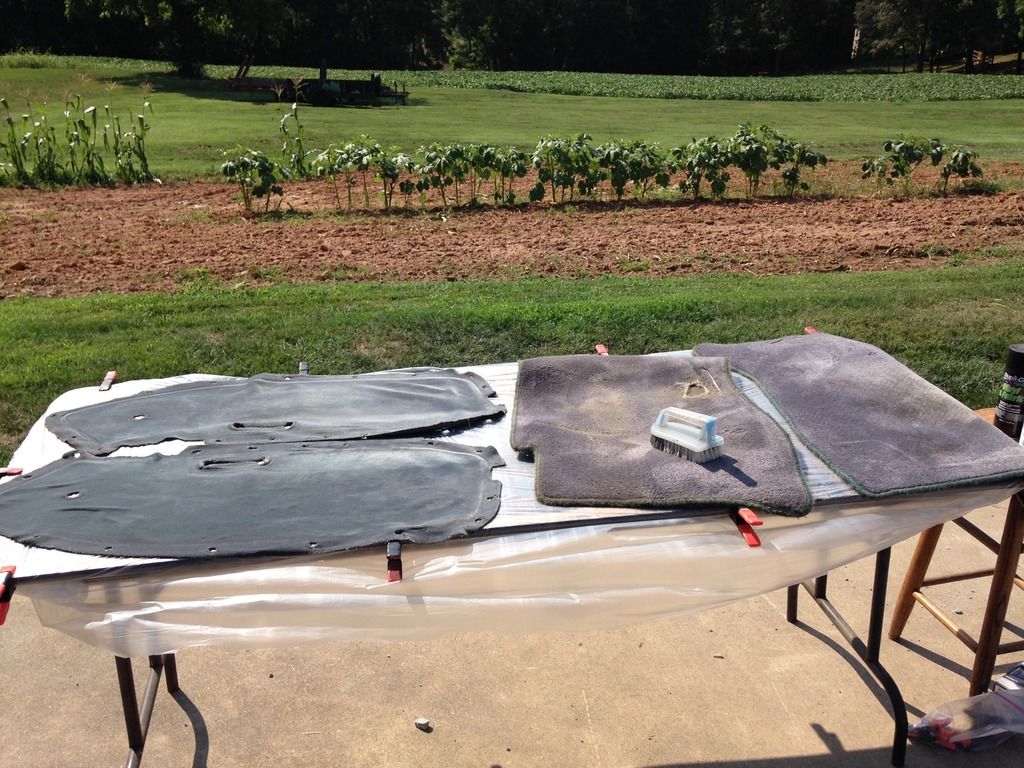
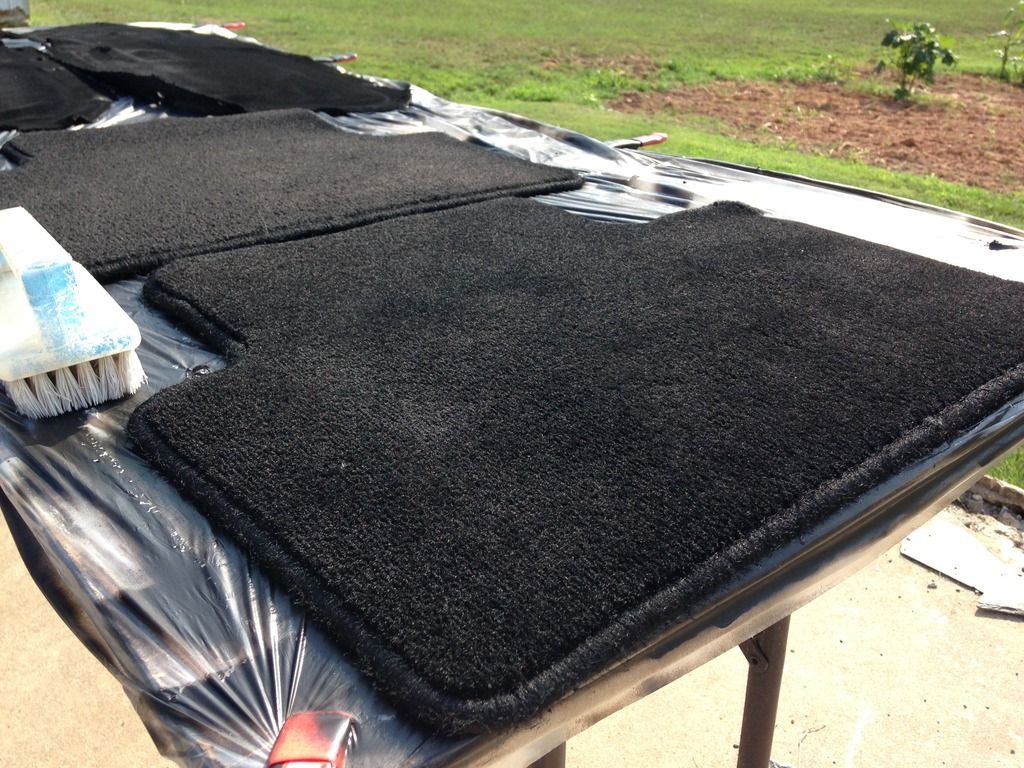
During (painted on the left, not painted on the right)
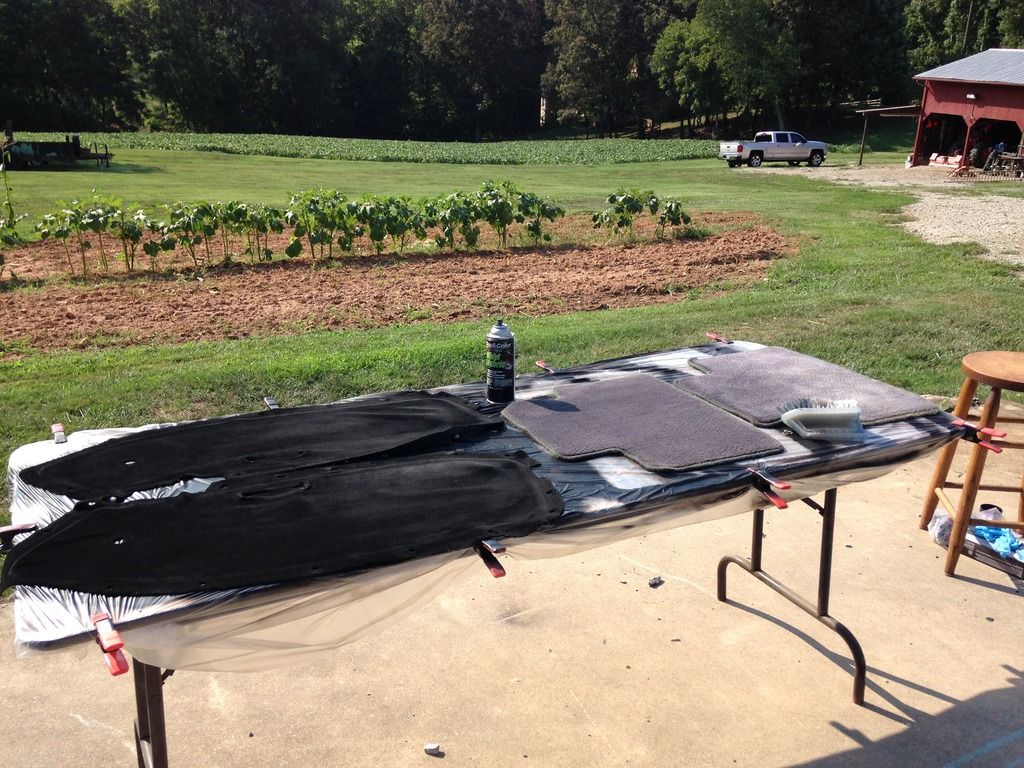
And after:
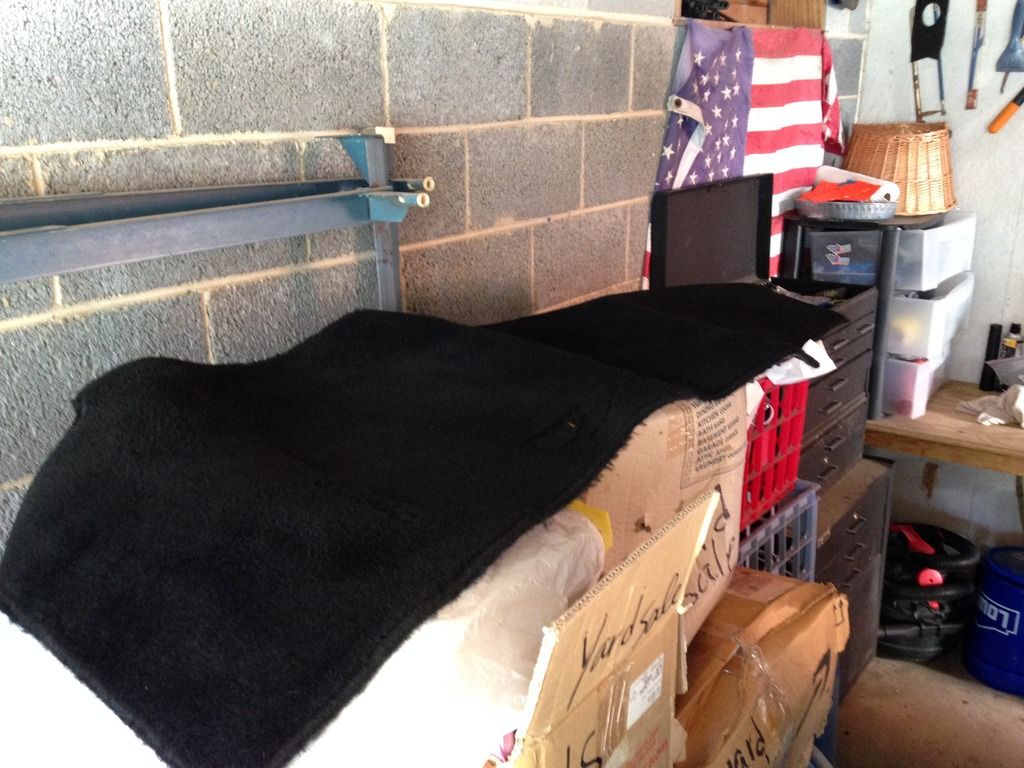
I'll finish the mats restoration by placing a large black vinyl heel pad on the drivers side that I ordered online months ago for about $6 plus shipping. I'll post on that install process with pics on a future post.
Lots of other things to do for August. I'll try to keep busy with stuff and keep posting.
Until next post, thank YOU for ecoTuning in!
Hello all, just a bit of an update to keep the thread going.
First off, since the VX isn't hitting the roads daily nowadays, I gave the thing a good wash and found it a car cover. Was supposed to be a "size 2" cover, but thanks to the eco mods, needed a "size 3" cover :p
Now you see it:

Now you don't:

Also, I finished getting the fender liner's back on. I'm ashamed to post these results, but... it is what it is. My only excuse for the Amateur-Hour results below is (1) It was hot outside and I was tired and (2) it was just hard to line up the cuts.
Ugly in 3...
2....
1....


The other side is about the same, so I'll spare you all another picture. However, all said, the air flow is still better I hope than with no fender liners at all.
Next order of business was to modify the OEM bra. Many of you commented about the little spoilers integrated in to the bra possibly upsetting aero. So, I took them off. Just need to have a seamstress sew back up the front liner, and the bra can be re-installed with a smooth aero now.


Then, I decided to paint the face of the MPGuino amber with some translucent Tamiya model paint. Came out pretty awesome. Amber glow now at night versus the red. Now matches the rest of the dash lights.

Then, I made a quick-disconnect for the fan, as my wife hates riding with it.

I also wired and installed a powered windshield mount antenna.


Then, I made some brackets to get a golf cart mirror in place. I won't say "Wink" because this is not a fan-boy mod for me. For an eco-build, it's actually quite functional. No stickers will be placed on my mirror, but if you do that kind of thing, I certainly don't judge you.
The brackets are made to tie in with the OEM visor mounting holes on the left side, and with the existing fan mount I made months ago on the right side.

Brackets got primer + Rustoleum Hammered dark-granite paint (to match the fan mount I did months ago).

Finished results are great. Awesome visibility with no outside mirrors. No more goofy blind spot mirrors on the glass like I had before, and there is no interference fitment-wise with the "EcoolBreeze" fan set up.


Then, I re-installed the headliner, and FINALLY got the black-dyed interior bits back in.


And to wrap up this post, I started restoring my door card panels and OEM floor mats. I opted to dye them all, and (so far) I'm glad I did. I wanted OEM mats, but they didn't come in black for the EG, only the EK (at least to my knowledge).
I used this product, as I have had great success with it before:


Also, I followed this tutorial, which I put together on an RSX forum years ago, in case any were wondering what and how: Link is here:
DIY ITR Blue/Red Carpet; OEM Quality, Cheap, and Easy! UPDATE on WEAR 6/30 - Club RSX Message Board
^ Crazy that I made that post back in 2012 and members there are still doing and uploading their own pics. It's now pretty tried and true. Give it a shot on your own carpets!
While removing the fabric from the door cards, noticed my door card plastic says "CTR" on the mold stamp. Civic Type R? Hey, just goes to show for VX owners... "If it's not a Type R, it's not a tight car!"

Anyway!...Here's the before pics of the pieces:

During (painted on the left, not painted on the right)

And after:


I'll finish the mats restoration by placing a large black vinyl heel pad on the drivers side that I ordered online months ago for about $6 plus shipping. I'll post on that install process with pics on a future post.
Lots of other things to do for August. I'll try to keep busy with stuff and keep posting.
Until next post, thank YOU for ecoTuning in!
08-01-2015, 02:29 AM
#215
Honda-Tech Member
Thread Starter
Update 8/1/2015- Floor Mats Done + Custom Vinyl
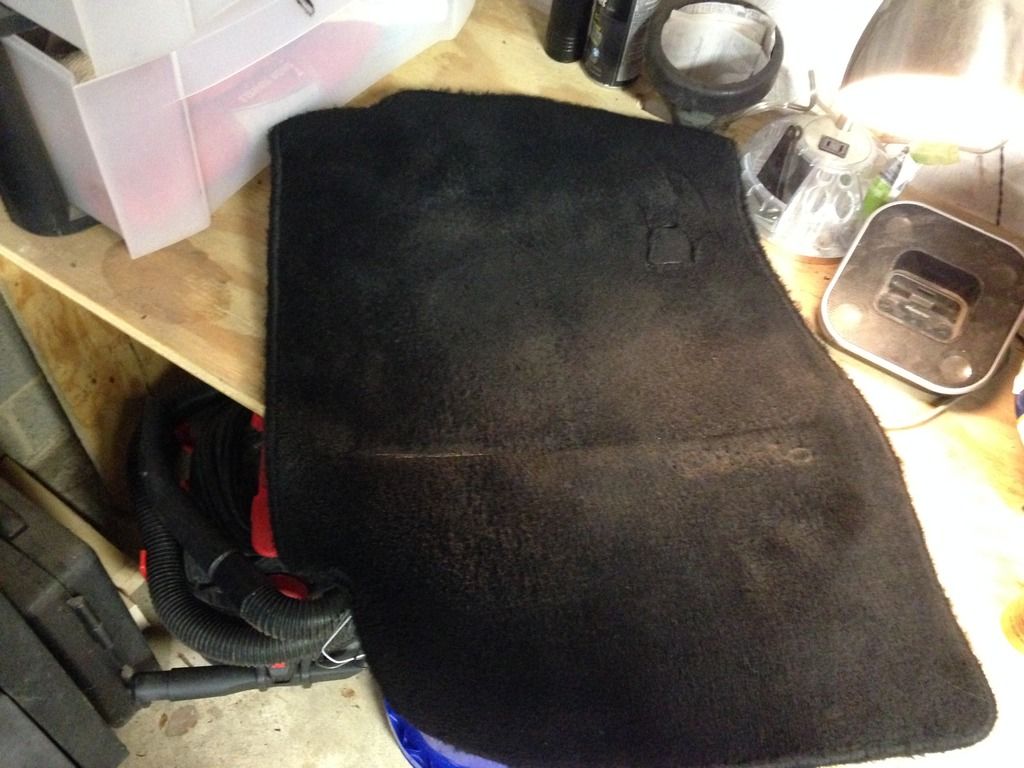
Floor mats are now done. Here's how I finished off the drivers floor mat with a large vinyl heel pad...
What I was left with after last post:
Here's the large vinyl heel pad and a tube of Liquid Nails Heavy Duty contact cement:
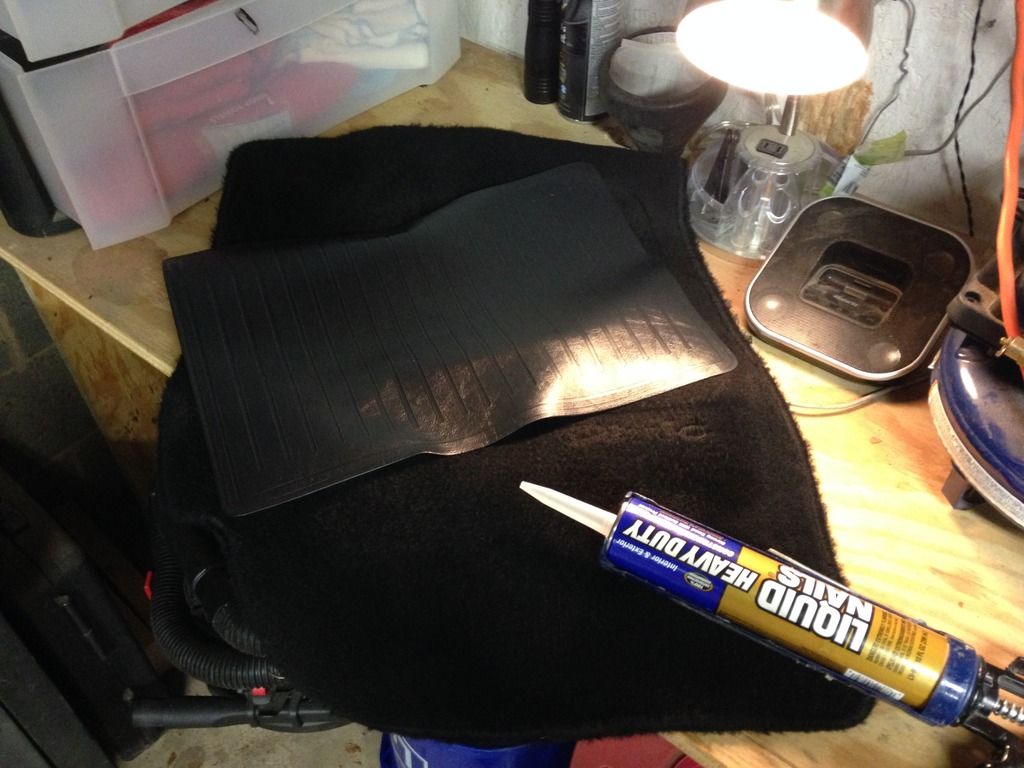
Basically, I took a caulking gun and applied the contact cement liberally to the bottom of the vinyl heel pad, running it about .5" from the perimeter/edge of the pad and all throughout the center. Then, I pressed and rolled the pad onto the mat with a clean paint roller...
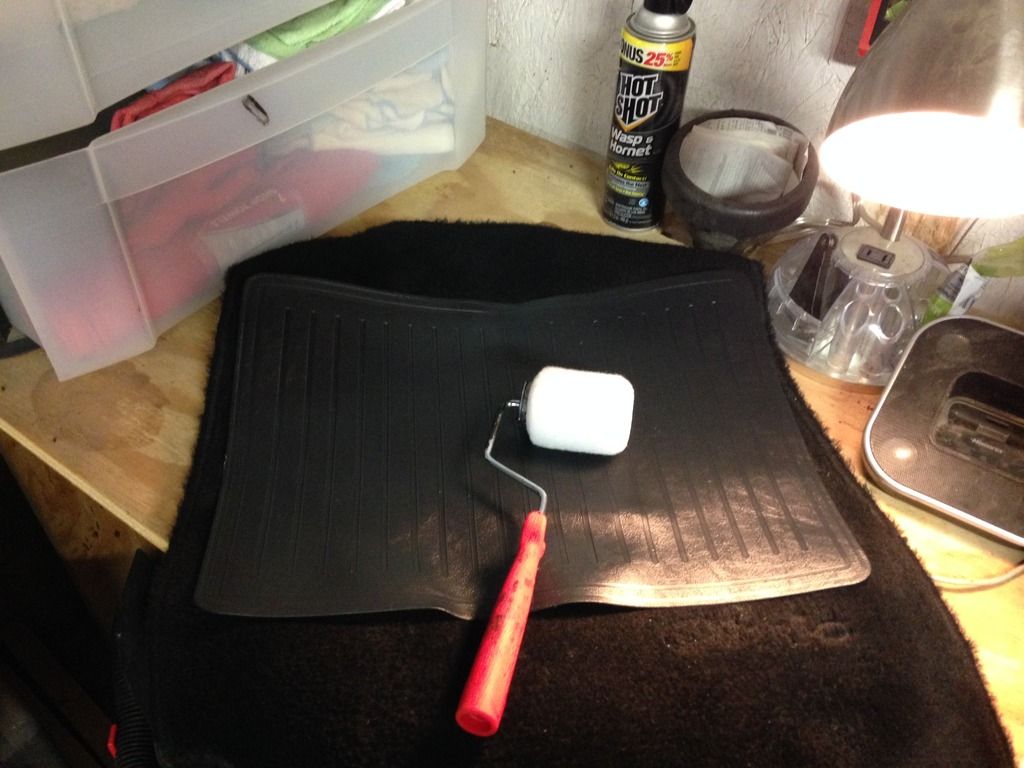
Then, I let it dry with some weighted objects on top over night:
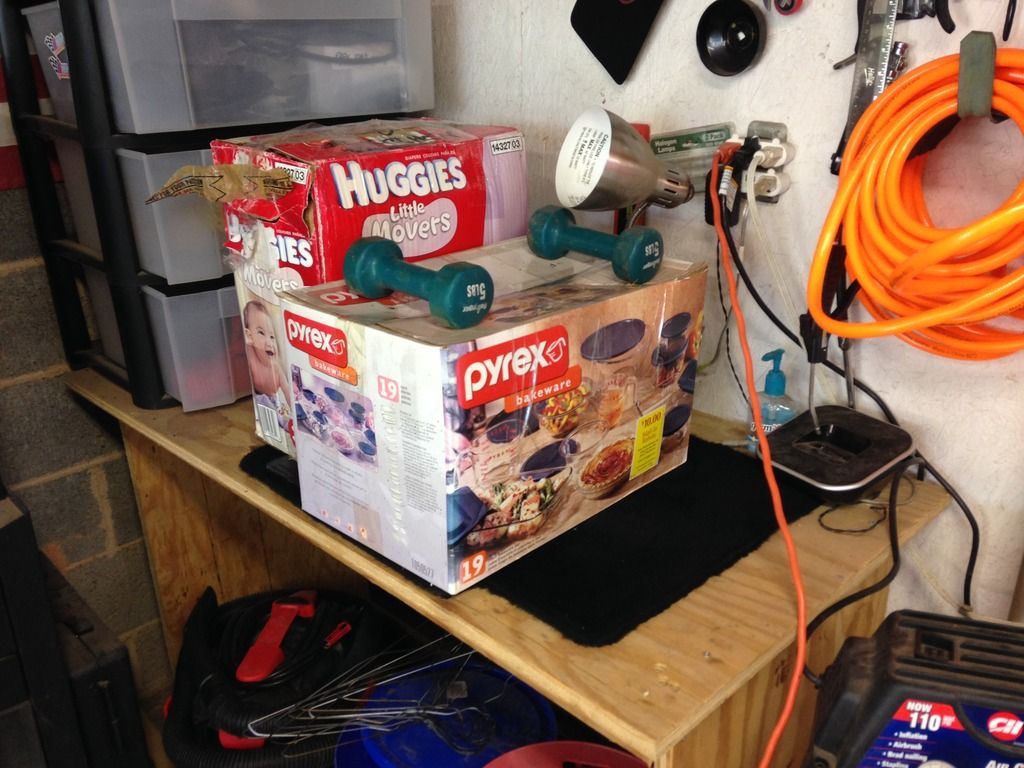
..and Voila! Good to go
Then, I headed to D.I.G. (Designer Ink Graphics) in downtown Mooresville, NC to pick up the custom vinyl graphics to finish off the exterior. This has been about an 8 month long part of this project for me. Glad to see them finally hit print :D
I'll start installing them asap and get up some pics.
Until next post, thank YOU for ecoTuning in!
Floor mats are now done. Here's how I finished off the drivers floor mat with a large vinyl heel pad...
What I was left with after last post:

Here's the large vinyl heel pad and a tube of Liquid Nails Heavy Duty contact cement:

Basically, I took a caulking gun and applied the contact cement liberally to the bottom of the vinyl heel pad, running it about .5" from the perimeter/edge of the pad and all throughout the center. Then, I pressed and rolled the pad onto the mat with a clean paint roller...

Then, I let it dry with some weighted objects on top over night:

..and Voila! Good to go


Then, I headed to D.I.G. (Designer Ink Graphics) in downtown Mooresville, NC to pick up the custom vinyl graphics to finish off the exterior. This has been about an 8 month long part of this project for me. Glad to see them finally hit print :D

I'll start installing them asap and get up some pics.
Until next post, thank YOU for ecoTuning in!
08-01-2015, 10:39 AM
#216
Honda-Tech Member
Thread Starter
Update: 8/1/2015- Decal Install Part One
Got most of the decals on the car today! Had a yard sale too, just did the decals while people were in and out. Had some eco-conversations with people too, which was nice.
I'll let the pictures do most of the talking, but overall, the quality of the decals + install process was great.
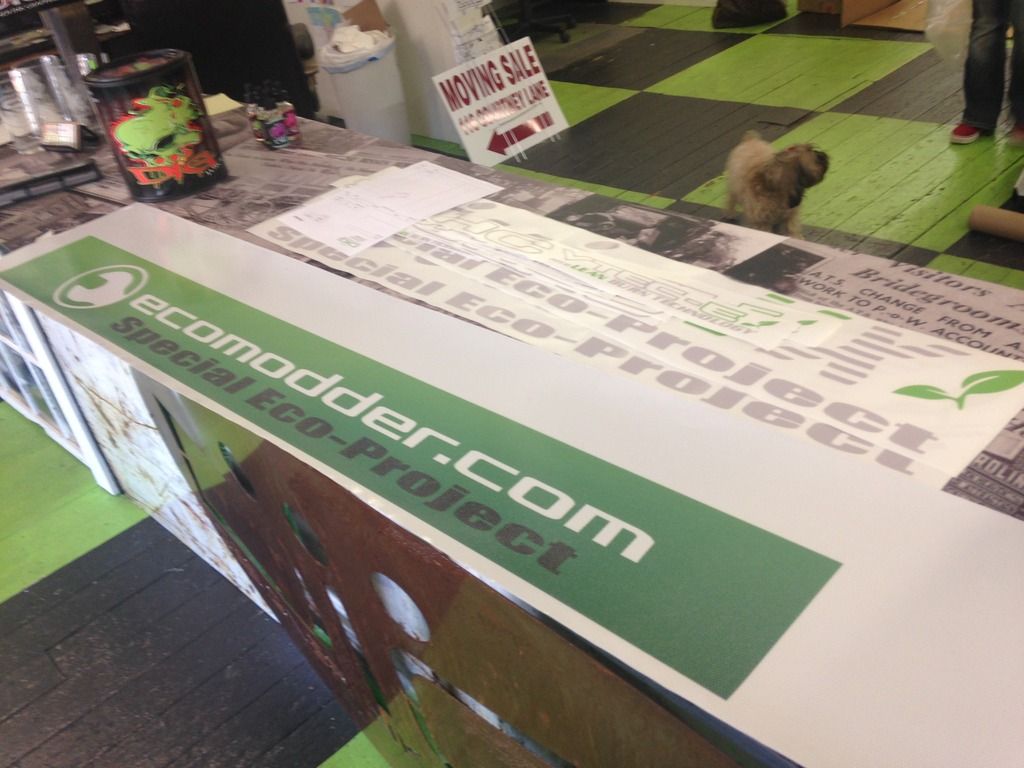
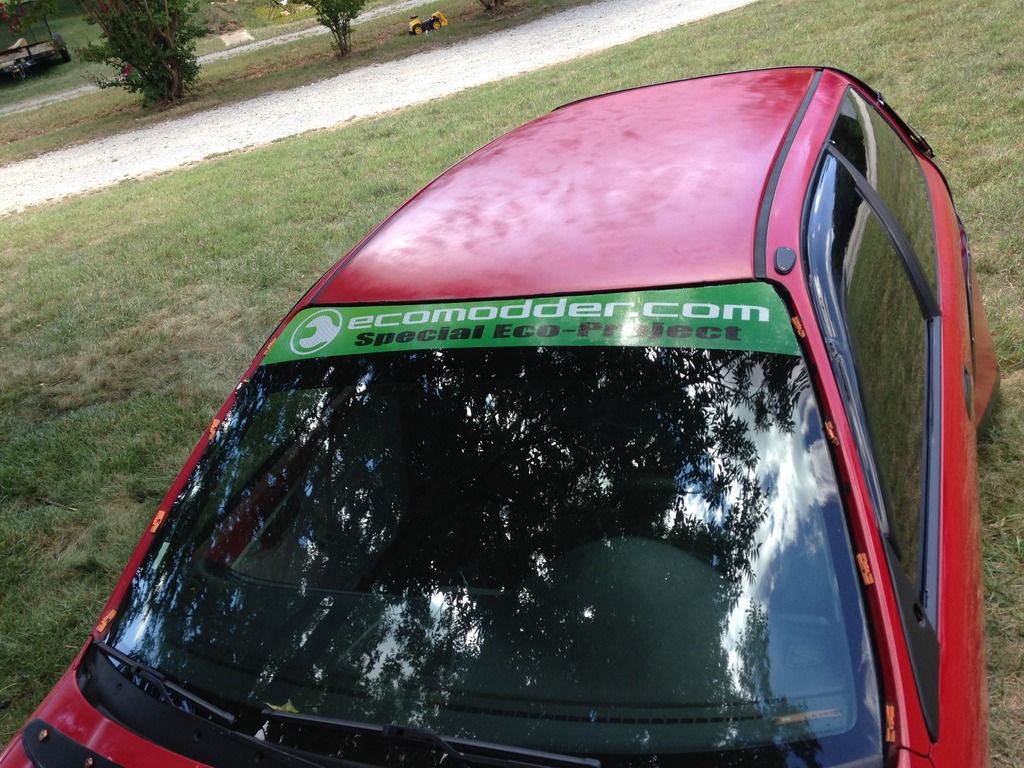
Here's an EcoModder windshield banner I created. It was printed on perforated vinyl, which was also laminated at the shop for extra protection.
Also, I recreated the Civic VX rear hatch decal, but with a few eco twists :D

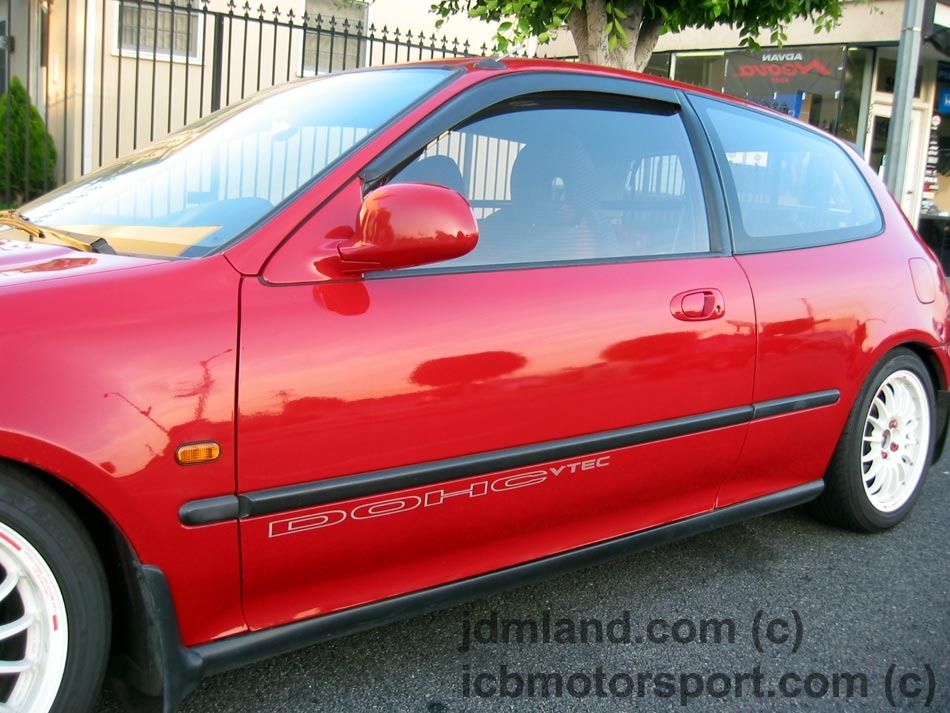
Next, I spoofed the JDM SiR door decals, but switched them up a good bit for my application.
Here's a picture of the original OEM Sir Honda door decals, which I pulled off of the ICB Motorsports website.
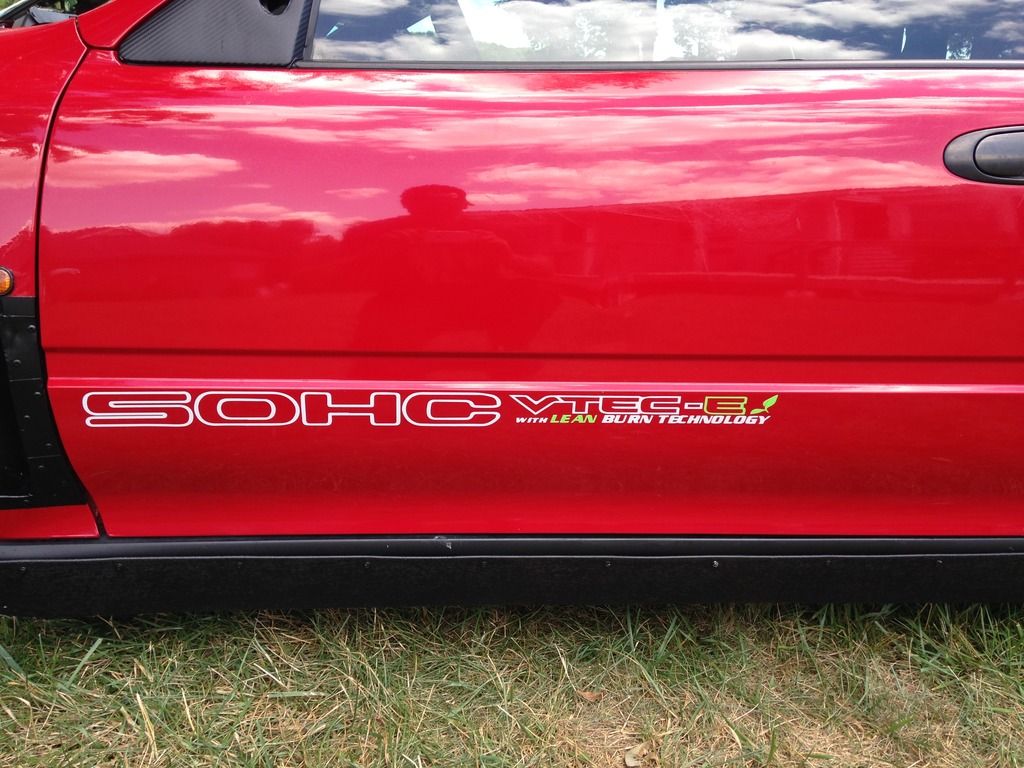
...and here's a special OG VX eco-rendition!
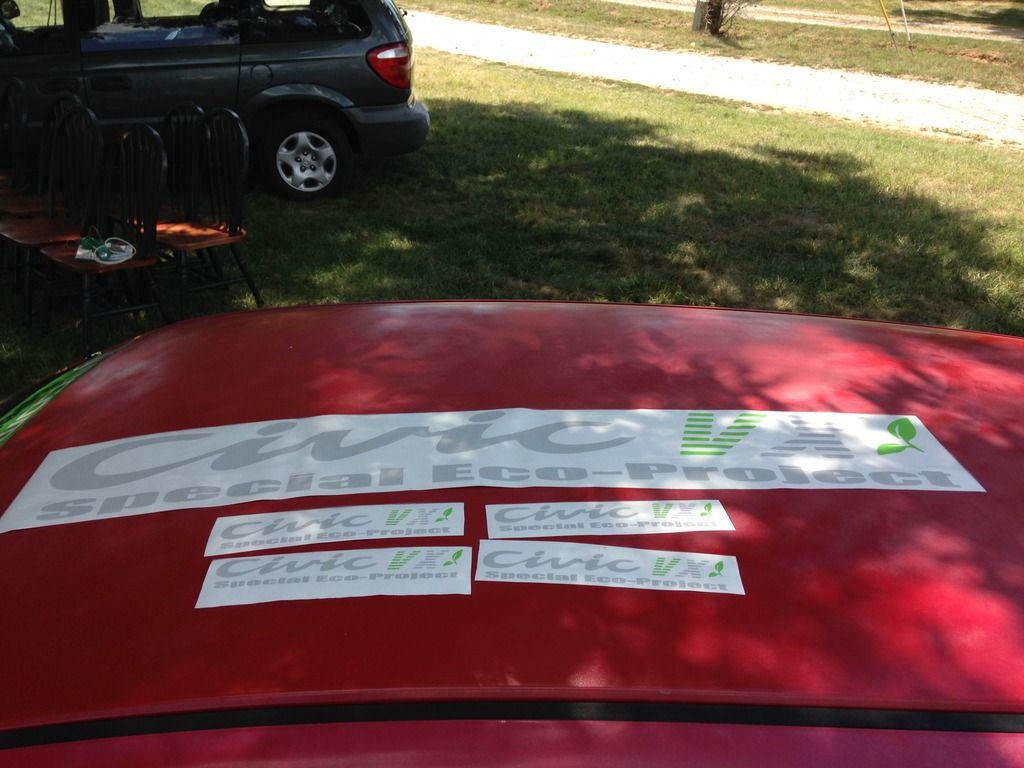
...and here's the rest of the decals I have yet to install. The large one is for the roof. It will be placed atop a Carbon Fiber vinyl that is on the way from Cali. The other four will go on the smooth wheel covers that I hope to make in the coming months.
More to come. Until then, thank YOU for ecoTuning in!
Got most of the decals on the car today! Had a yard sale too, just did the decals while people were in and out. Had some eco-conversations with people too, which was nice.
I'll let the pictures do most of the talking, but overall, the quality of the decals + install process was great.
Here's an EcoModder windshield banner I created. It was printed on perforated vinyl, which was also laminated at the shop for extra protection.

Also, I recreated the Civic VX rear hatch decal, but with a few eco twists :D

Next, I spoofed the JDM SiR door decals, but switched them up a good bit for my application.
Here's a picture of the original OEM Sir Honda door decals, which I pulled off of the ICB Motorsports website.

...and here's a special OG VX eco-rendition!


...and here's the rest of the decals I have yet to install. The large one is for the roof. It will be placed atop a Carbon Fiber vinyl that is on the way from Cali. The other four will go on the smooth wheel covers that I hope to make in the coming months.

More to come. Until then, thank YOU for ecoTuning in!
08-03-2015, 12:23 AM
#217
Honda-Tech Member
congrats on all the innovation and homebrew style of this build. it takes a lot of "i dont care what anyone else thinks" mentality to go all out like you have.
I keep waiting for you to get eco tires and see you get mpg in the 80s.
One of my dailies is a chevy volt, and since I get to charge for free at work and at home (friendly apartment manager) so I can appreciate the desire to maximize mpg. its weird, but I look forward to driving in traffic because it uses more battery juice to maintain higher freeway speeds.
08-07-2015, 02:36 PM
#218
Honda-Tech Member
Thread Starter
congrats on all the innovation and homebrew style of this build. it takes a lot of "i dont care what anyone else thinks" mentality to go all out like you have.
I keep waiting for you to get eco tires and see you get mpg in the 80s.
One of my dailies is a chevy volt, and since I get to charge for free at work and at home (friendly apartment manager) so I can appreciate the desire to maximize mpg. its weird, but I look forward to driving in traffic because it uses more battery juice to maintain higher freeway speeds.
I keep waiting for you to get eco tires and see you get mpg in the 80s.
One of my dailies is a chevy volt, and since I get to charge for free at work and at home (friendly apartment manager) so I can appreciate the desire to maximize mpg. its weird, but I look forward to driving in traffic because it uses more battery juice to maintain higher freeway speeds.
08-09-2015, 08:13 PM
#219
Honda-Tech Member
Thread Starter
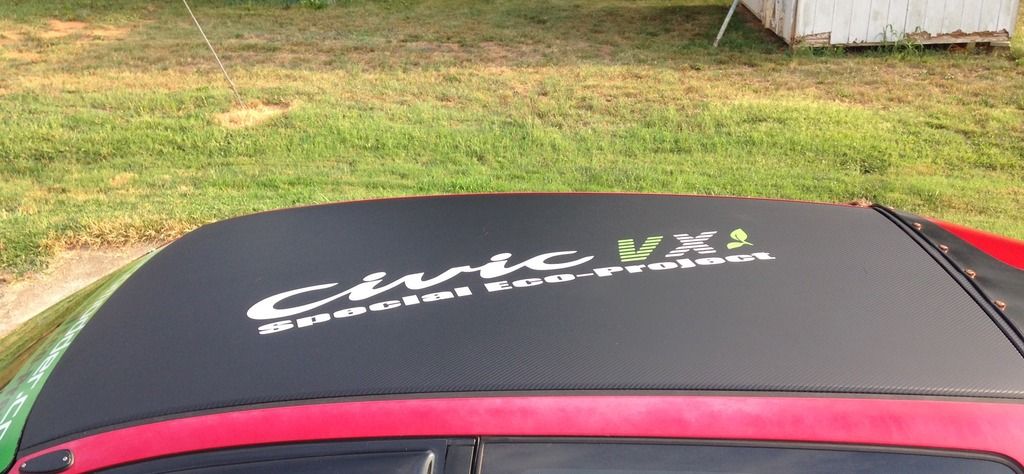
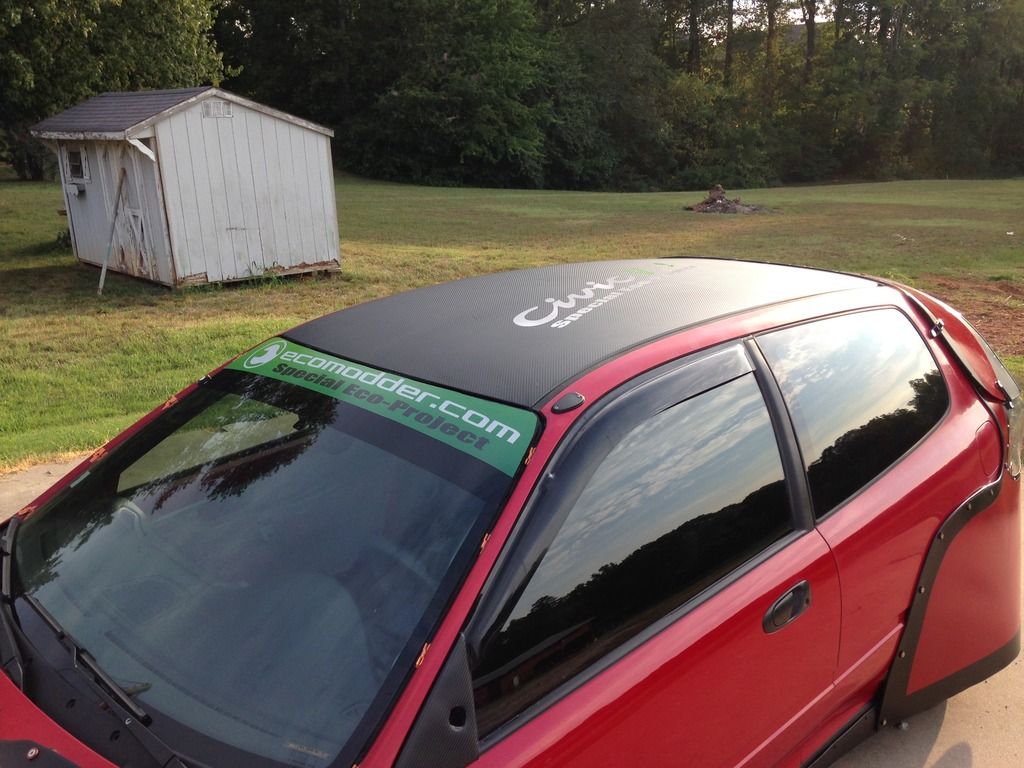
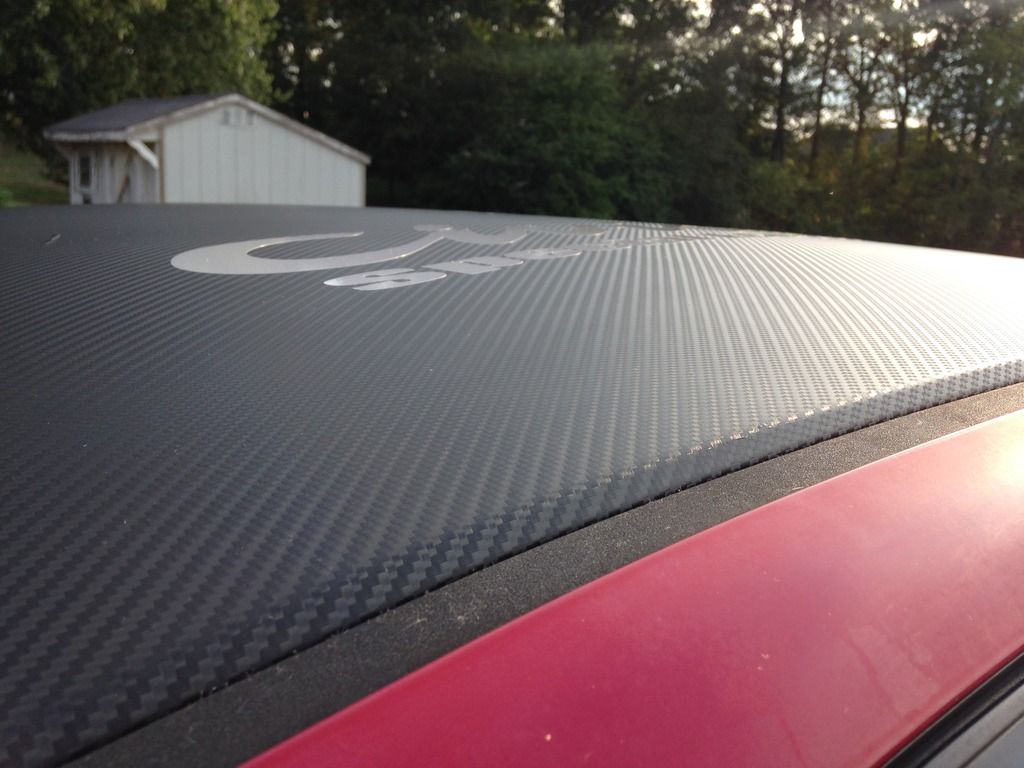
Update: 8/9/2015- CF Vinyl and Decals on Roof
Hello friends. Here's some more vinyl work. Finally, after several attempts to "fix" the appearance of the roof, I've come to a resolution.
Ebay CF Vinyl (4 ft x 6 ft ); used the new "bubble free" vinyl option. I then added a custom graphic.
The roof was tough. I found that using a soap/water mix to aid in the install of vinyl creates a mega-fail situation. Code red fail. So, after another roll of CF vinyl arrived 5 days later, I actually decided to follow the instructions. Degreased the heck out of the hood (and roof moldings) with Purple Power, then used Isoproyl Alcohol to get it "squeaky" clean. Then, the vinyl stuck. A Harbor Freight-sourced heat gun, an exacto knife, a squeegee, and a lot of patience were also used to help things along.
Outcome:
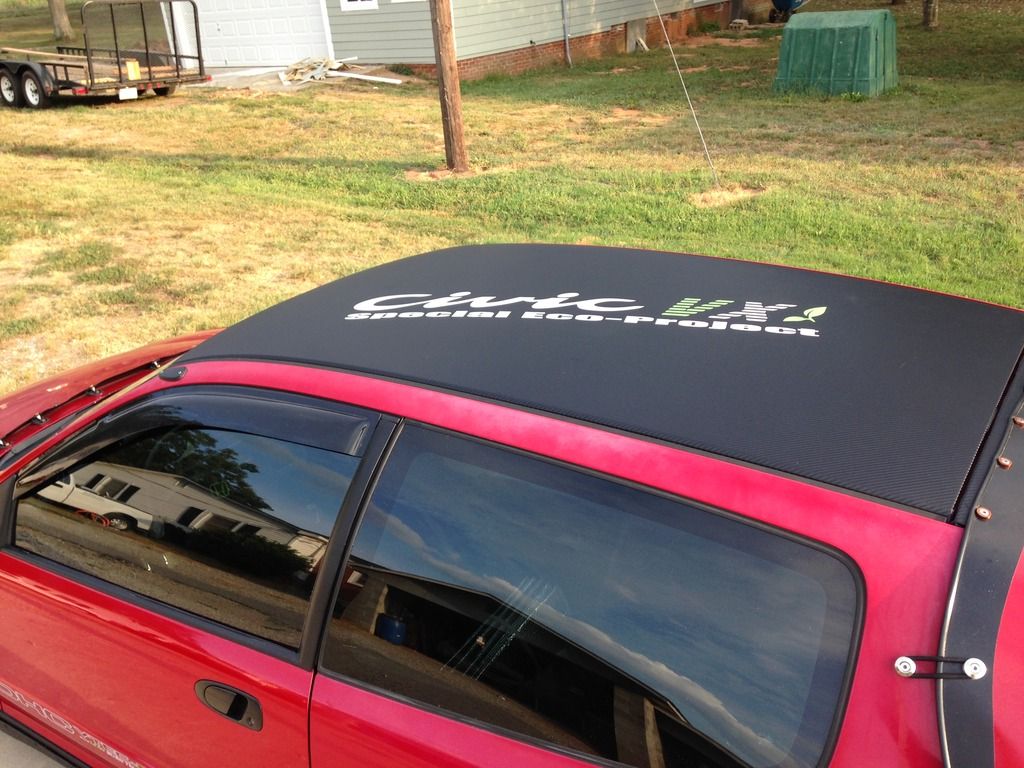
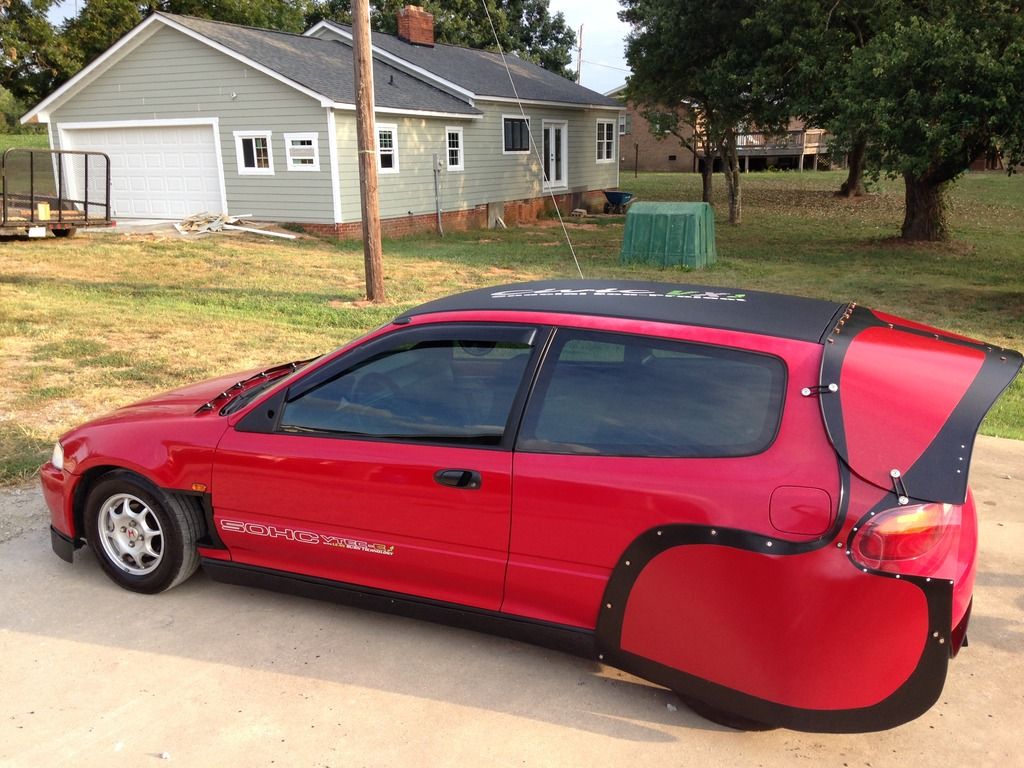
A big thank you to D.I.G. (Designer Ink Graphics) in downtown Mooresville for their help with my custom graphic design and printing for these last few updates. They are a great company to work with!
Until next time, thank YOU for ecoTuning in!
08-10-2015, 07:20 AM
#220
Honda-Tech Member
Join Date: Oct 2006
Location: Covered in Tattoos, NYC
Posts: 755
Likes: 0
Received 0 Likes
on
0 Posts
Update: 8/9/2015- CF Vinyl and Decals on Roof
Hello friends. Here's some more vinyl work. Finally, after several attempts to "fix" the appearance of the roof, I've come to a resolution.
Ebay CF Vinyl (4 ft x 6 ft ); used the new "bubble free" vinyl option. I then added a custom graphic.
The roof was tough. I found that using a soap/water mix to aid in the install of vinyl creates a mega-fail situation. Code red fail. So, after another roll of CF vinyl arrived 5 days later, I actually decided to follow the instructions. Degreased the heck out of the hood (and roof moldings) with Purple Power, then used Isoproyl Alcohol to get it "squeaky" clean. Then, the vinyl stuck. A Harbor Freight-sourced heat gun, an exacto knife, a squeegee, and a lot of patience were also used to help things along.
Outcome:
A big thank you to D.I.G. (Designer Ink Graphics) in downtown Mooresville for their help with my custom graphic design and printing for these last few updates. They are a great company to work with!
Until next time, thank YOU for ecoTuning in!
08-11-2015, 06:31 AM
#221
Honda-Tech Member
Thread Starter
I stopped "saving bucks" a few posts back on this build. It's now more of a science and fine art for me. I'm an artist, just as many others on this forum are. The radical effort here is no different than someone who obsesses over every last internal modification so they can squeeze half a pound more boost safely into the engine to eek a tenth of a second off their drag time. Or someone who spends $200 more on their Rywire order so they can get the mil-spec firewall connection rather than just pushing it through a gasket hole. It's the pursuit of excellence. We all share it.
I have a huge smile on my face riding this thing around. That's what matters. That, and the 100mpg I'm currently getting cruising at 50mph right now. I also enjoy the many different types of looks, the thumbs ups, the people who pull beside me to have passengers take pictures on the roadways, the gas station conversations, and all the things that come along with having something different from the norm. It's fun to share my experiences and the knowledge I've gained from the ecomodding community. I've also become more frugal as an individual, as other areas of my personal life have been affected as a result of knowledge gained during this build.
I also suggest that it's been nice to get away from the norm and do something different (aesthetically) with a Civic. Say what you want, but the work on this car is clean. I know that sounds boastful, but I suppose that's just how I feel. I've obsessed over every bolt, and every cut, and every polish, and much prep and organization has gone into this build. I believe that my work shows that, and I don't see anyone here arguing against it. It's important to me that I represented the eco community well with this project. So, being frank, to hear you say that I ruined the chassis...it is offensive to me. In my area, I think people are truly surprised to see a cleanly built Honda.
Finally, I don't feel that I wasted a "clean" VX hatch either. The VX was designed to be the Ferrari of fuel economy. It wasn't designed to be a drag or open wheel racer (though it certainly makes for a great one, as has been proven time and time again). Thus, I feel that my efforts here are much more along the same vein of what Honda envisioned on their design tables with this car.
Good luck with your future auto endeavors, and please stop back by here anytime you like.
08-11-2015, 09:38 AM
#222
-Intl Steve Krew
Do you think you'll see an increase in interior heat temps with the vinyl black roof? I also notice you got rid of the intake pipe on your driver blockoff plate, what was the reason for getting rid of it?
08-11-2015, 11:44 AM
#223
I like the tuna here
OP, don't listen to StreetLethal's ignorance. I love both sides of the coin, HP/timeslips, as well as MPG/gas receipts. You have done an amazing job on this VX!