
OG's VX Build: HyperMile Driving with some JDM Styling!
 10-23-2014, 04:37 PM
#51

I plan on doing a mirror delete after seeing how well yours turned out. I also plan on supplementing it with a wink mirror but i have always wanted one of those. Though i still plan on doing interior side mirrors as-well. It maybe overkill but i really like my car and dont wanna wreck it over something stupid like a blind-spot.
Although here in PA you only need one mirror, the rear view. Legally anyhow.
Although here in PA you only need one mirror, the rear view. Legally anyhow.
 10-24-2014, 02:56 AM
#52
Trust me when I say the wink mirror leaves minimal blind spots. If you look to your left, your right, then in the mirror, you should not have any issues. It takes some getting use to, but the wink mirror is pretty cool. Definitely not the same level as the twin interior mirrors though!
10-24-2014, 05:04 AM
#53
Honda-Tech Member
Thread Starter
I plan on doing a mirror delete after seeing how well yours turned out. I also plan on supplementing it with a wink mirror but i have always wanted one of those. Though i still plan on doing interior side mirrors as-well. It maybe overkill but i really like my car and dont wanna wreck it over something stupid like a blind-spot.
Although here in PA you only need one mirror, the rear view. Legally anyhow.
Although here in PA you only need one mirror, the rear view. Legally anyhow.
Trust me when I say the wink mirror leaves minimal blind spots. If you look to your left, your right, then in the mirror, you should not have any issues. It takes some getting use to, but the wink mirror is pretty cool. Definitely not the same level as the twin interior mirrors though!
The main reason that I didn't go with the Wink mirror is because of the larger (convex) clip-on rear-view mirror that I discovered at Walmart a couple of years back. It's $10 and always in stock. I discovered them a couple of years back while we had a Dodge Caravan, and were looking for ways to monitor the kiddos while driving. I discovered that they, not only allowed for visibility to the rear seat area, but also allowed for a nearly 180-degree view of the road. I have run one on every car since. Find them in the auto-section, if your interested. I believe "Auto Impressions" makes them.
Long story short, between my WDM (Walmart Domestic Market) clip-on in the middle, and the two "school bus" mirrors on the side, I (pretty much) never turn my head.
Hope this helps.
10-24-2014, 05:58 AM
#54
Oh! NO worries. I was replying to Nave with my previous comment. I wasn't sure if he wanted another opinion, so I gave mine anyway haha. I know you've got yourself covered. I like your set up though. I think yours is probably better than the wink mirror.
10-25-2014, 04:40 AM
#55
Honda-Tech Member
Thread Starter
Update 10/25: Milestone MPG Stat + EcoSafety Sign (Part One)
Yesterday I filled up after my first full tank using the newly-installed MPGuino. I was hoping to hit 60 mpg on 87-octane. I did not. I hit 64.5!! This was a huge surprise. I still can't believe it. I guess since I've now hit my MPG goal for this project...I'll keep on going :D
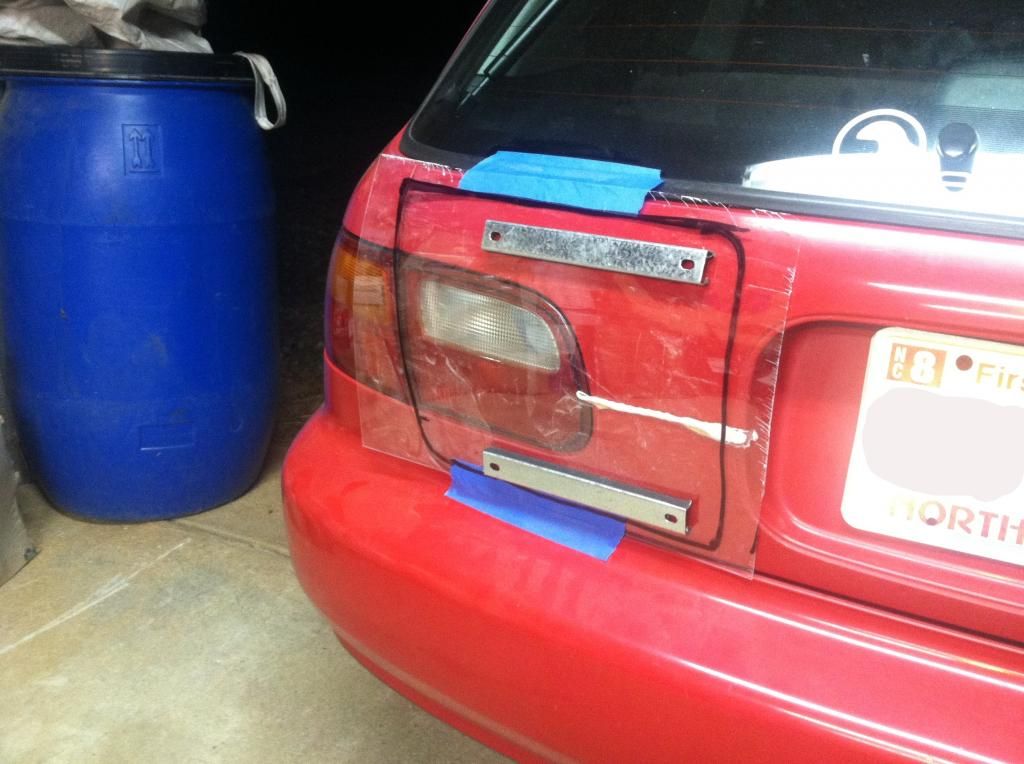
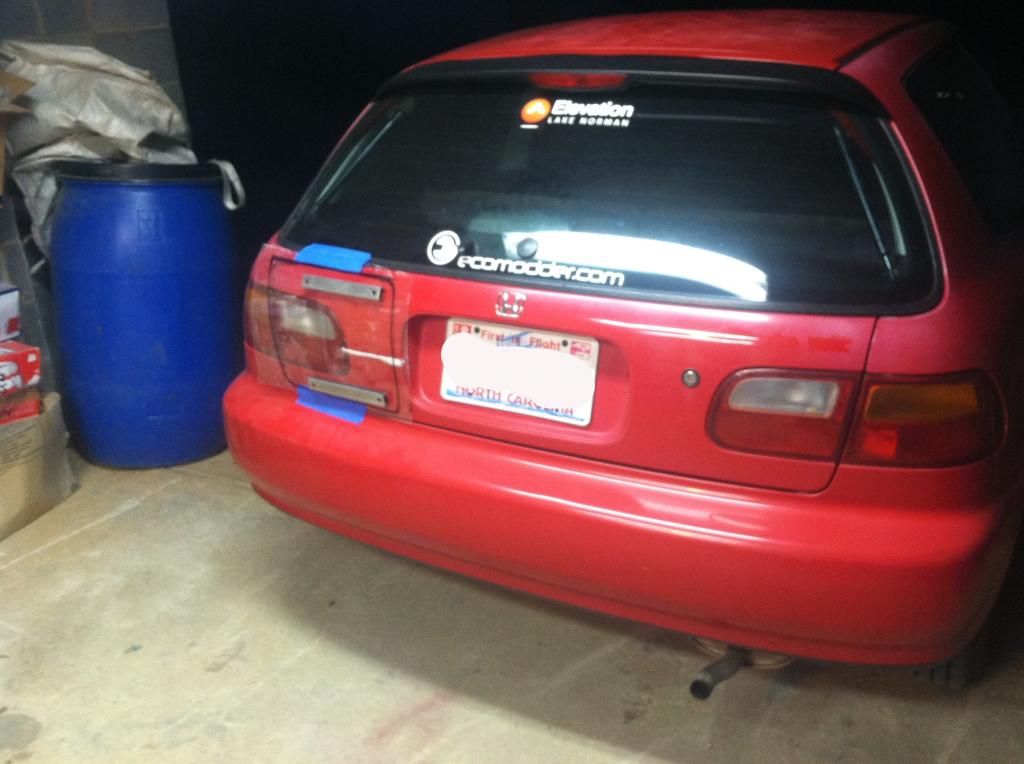
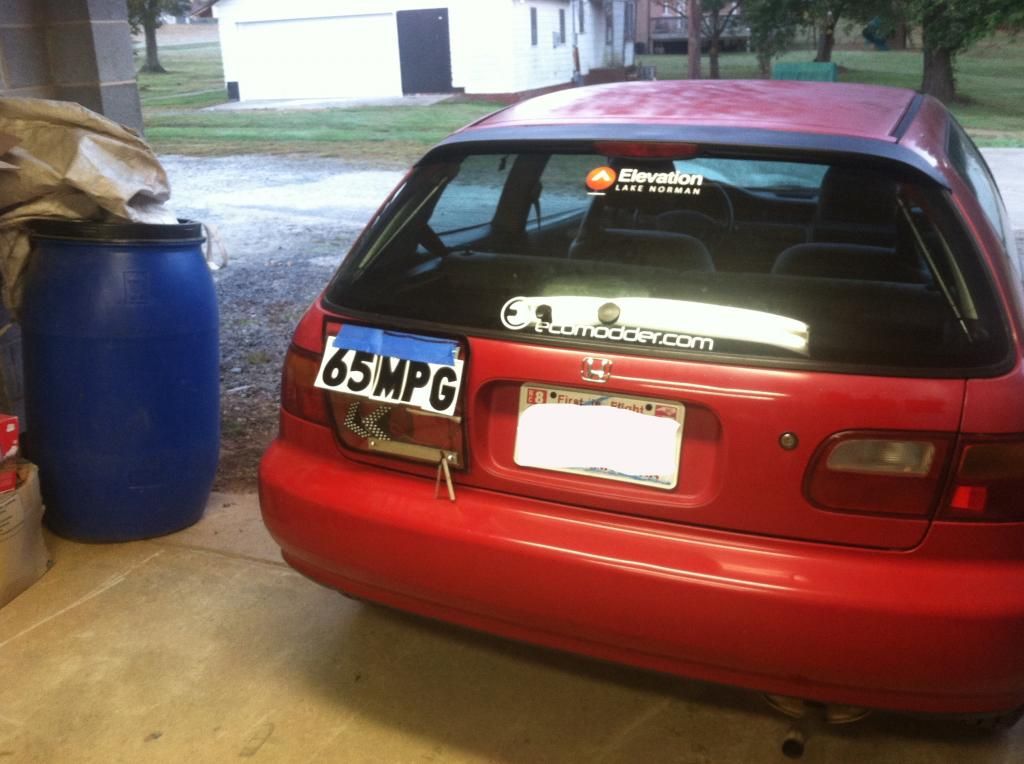
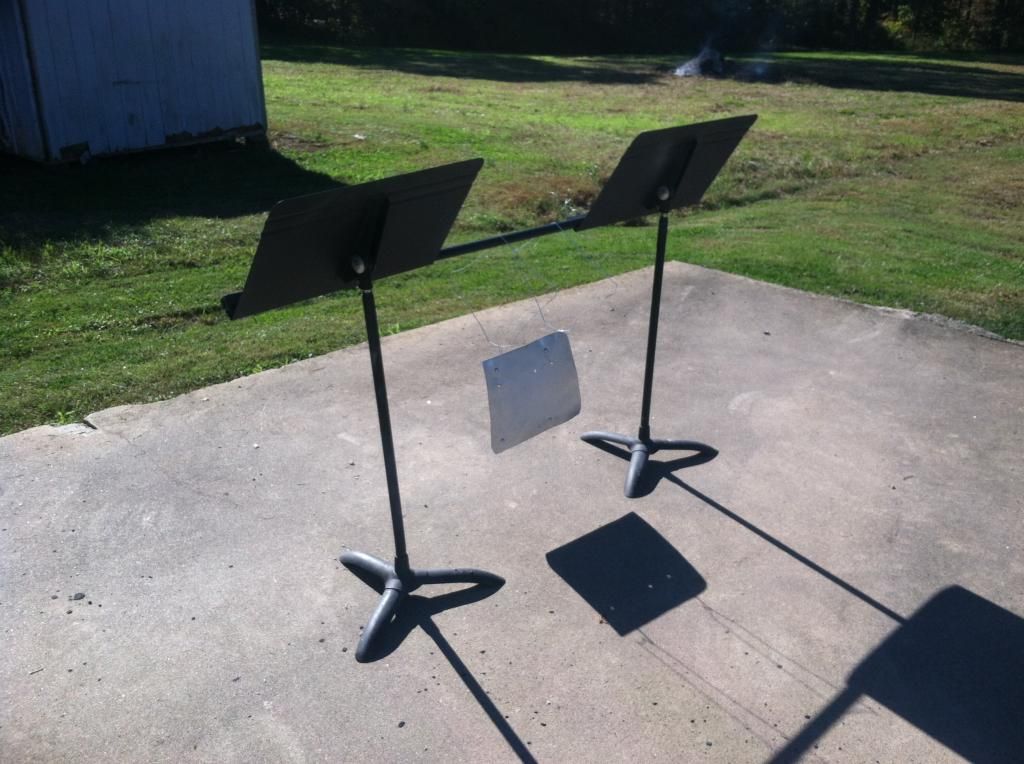
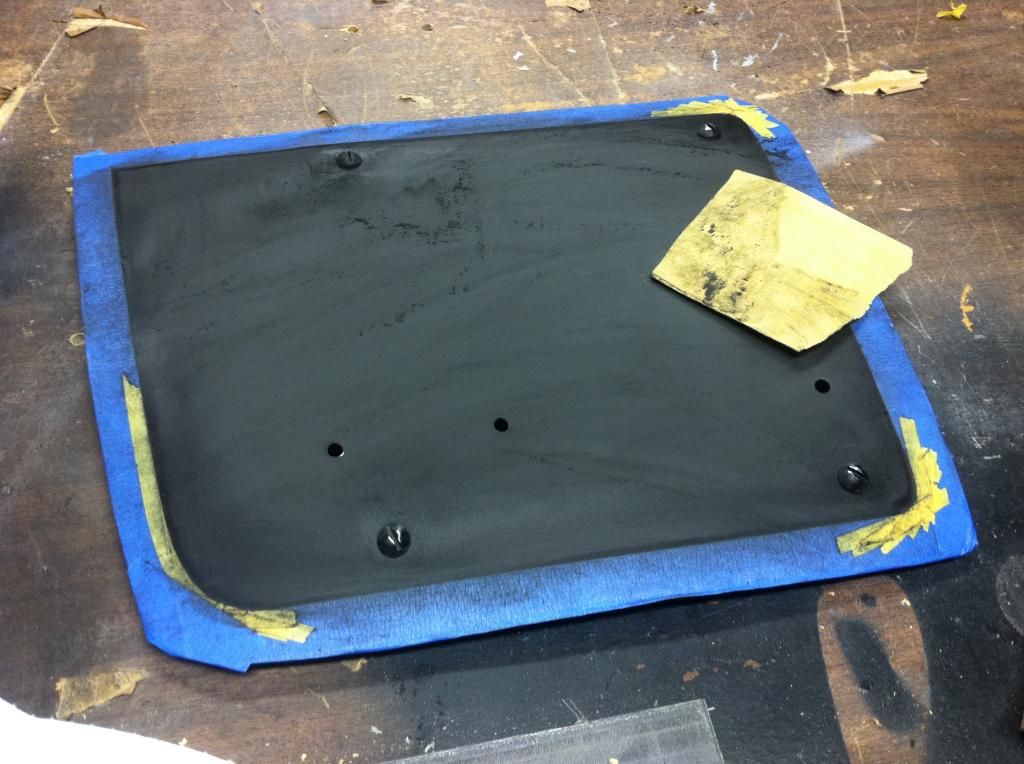
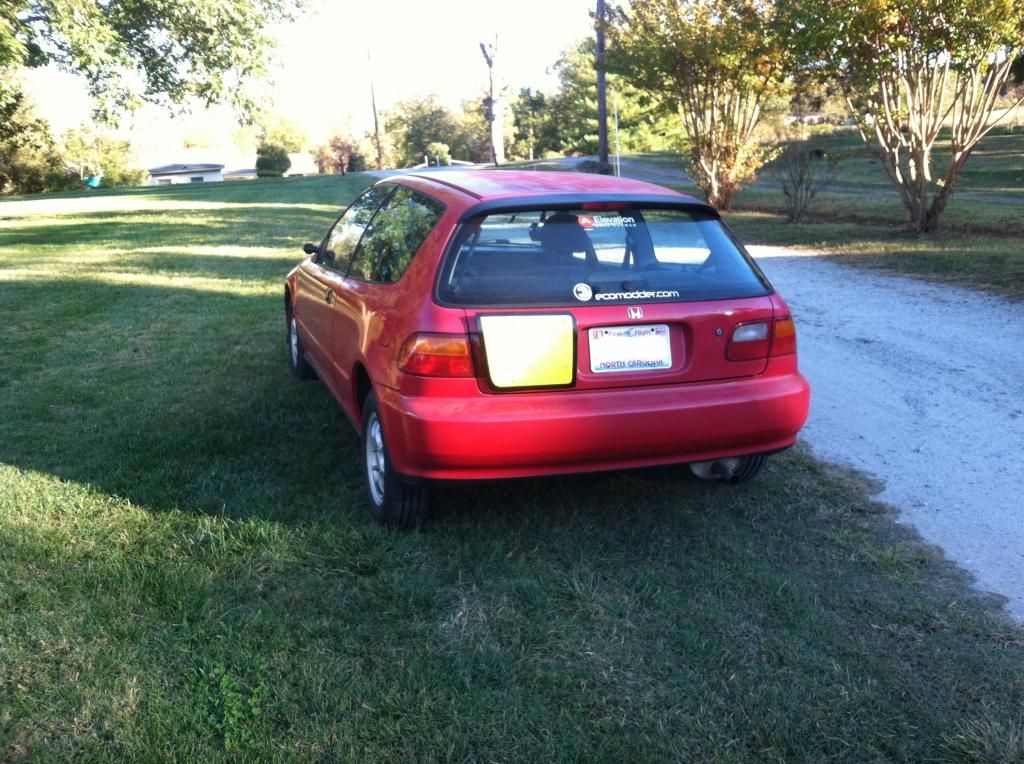
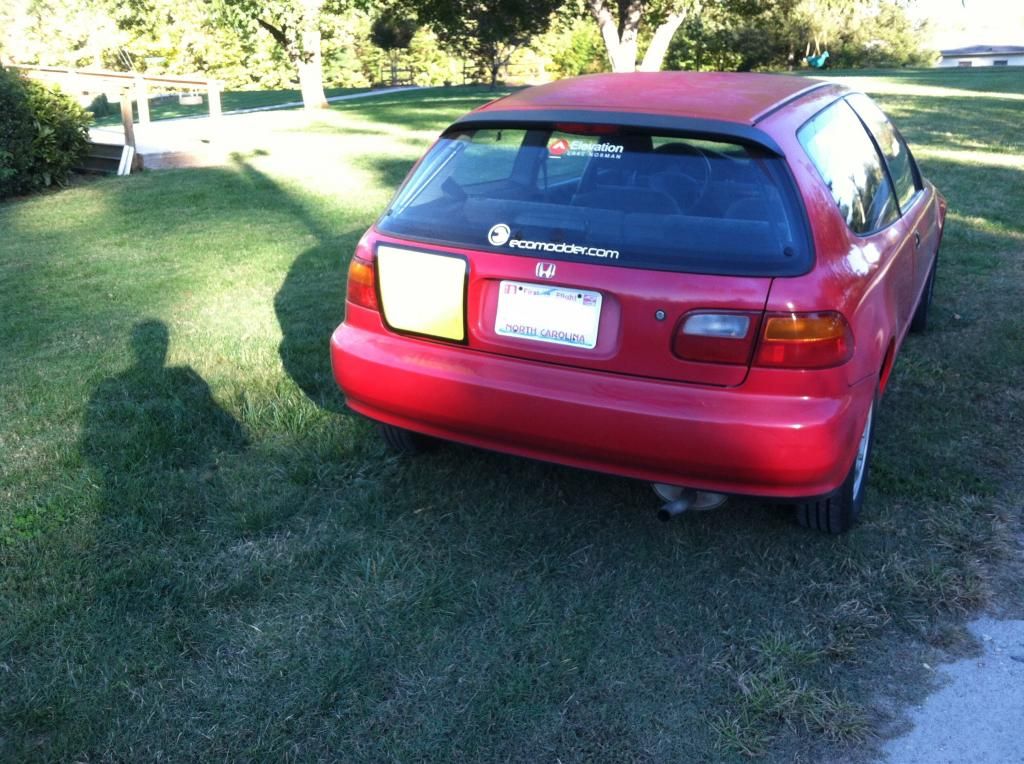
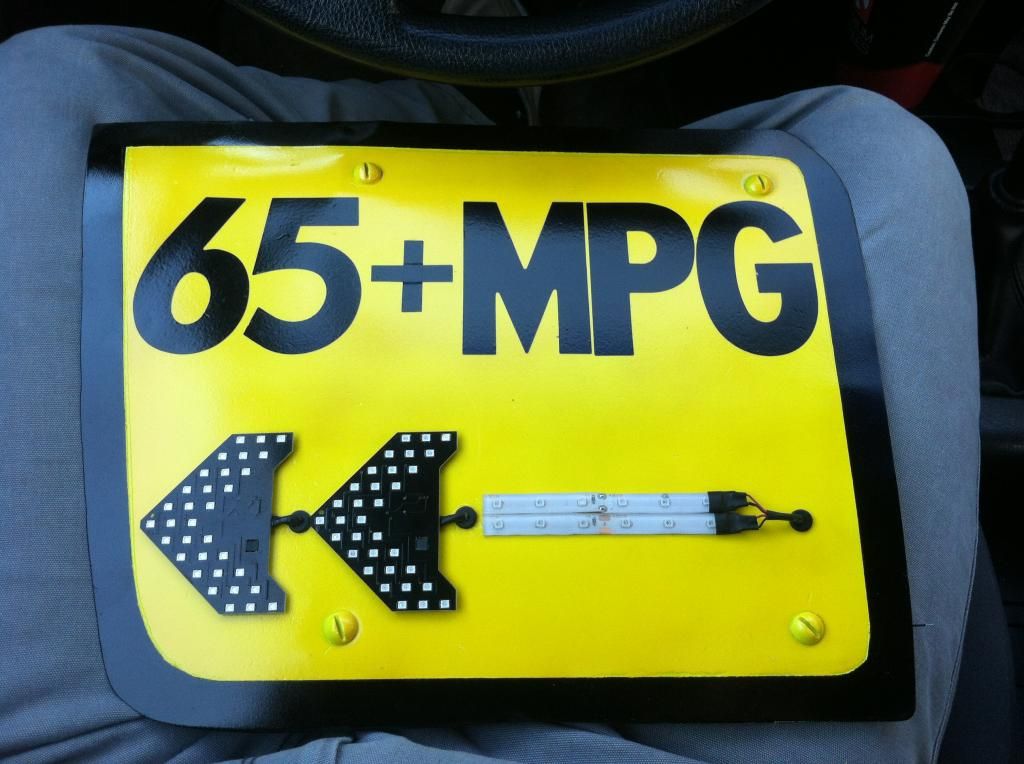
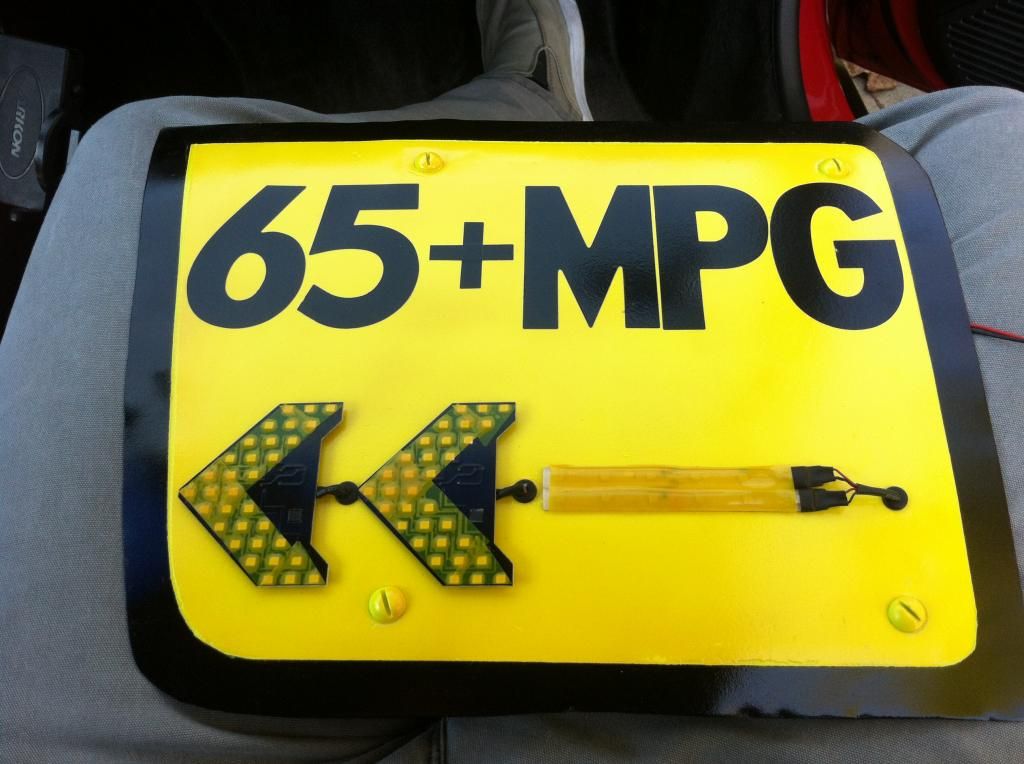
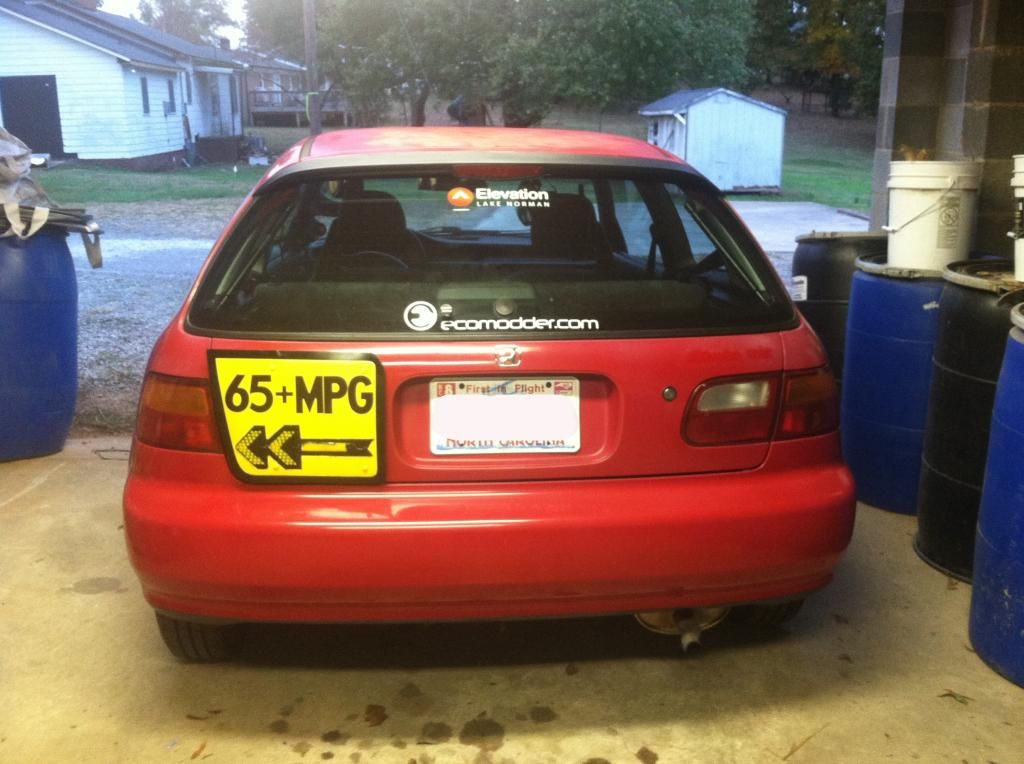
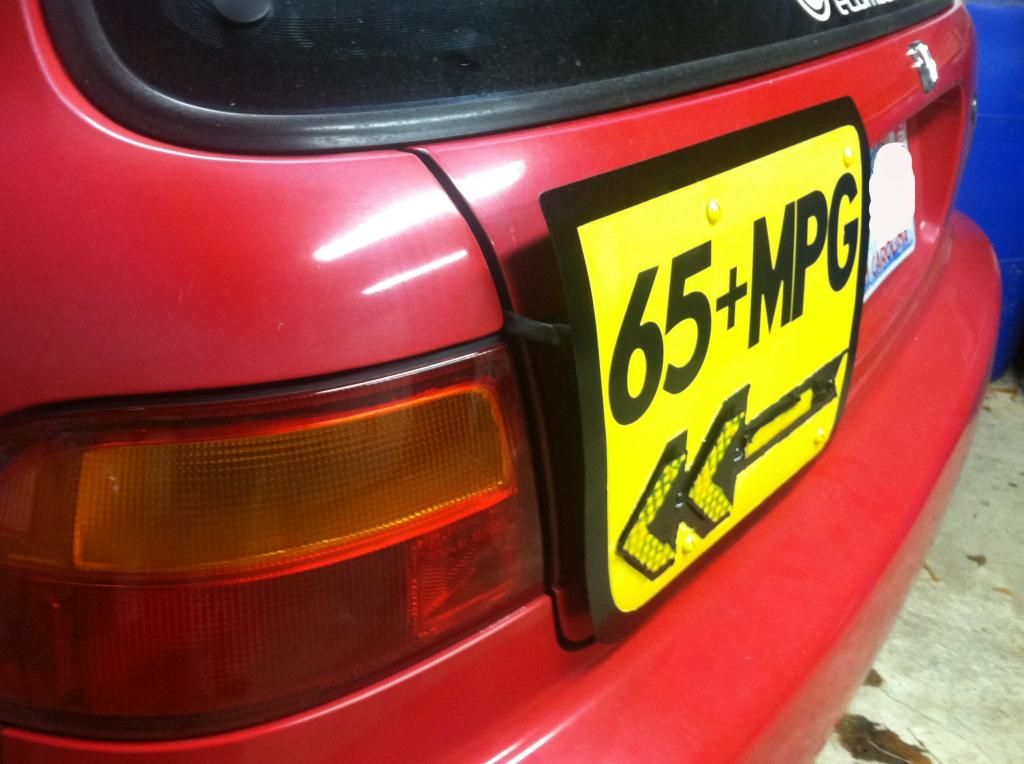
OK, now on to this weekends project: I'll refer to it as an EcoSafety sign. Interstate traffic during my commutes is viscous. I'm hoping that having this sign on the hatch will help me and all other pedal-pushers on the road to stay: (1) sane ; (2) alive. My wife is not too thrilled about it's addition, claiming "I will not ride with you!". She may just be lying, and perhaps secretly thinks this sign is kinda sexy. But just in case she if fo-real... as you can see, I've designed the EcoSafety to mount to some magnetic dealer license plate tag holders, so that I can remove it easily when she wants to ride (or in case the cops don't like my sign and it's flashing arrows).
Pics below tell the mock-up I completed this morning. I used a thick plastic see-through sheet, which made quick work of things. The final version, of course, will be made out of a thin sheet metal. It's a great weekend to paint, so I'm fortunate.
Mock-Up
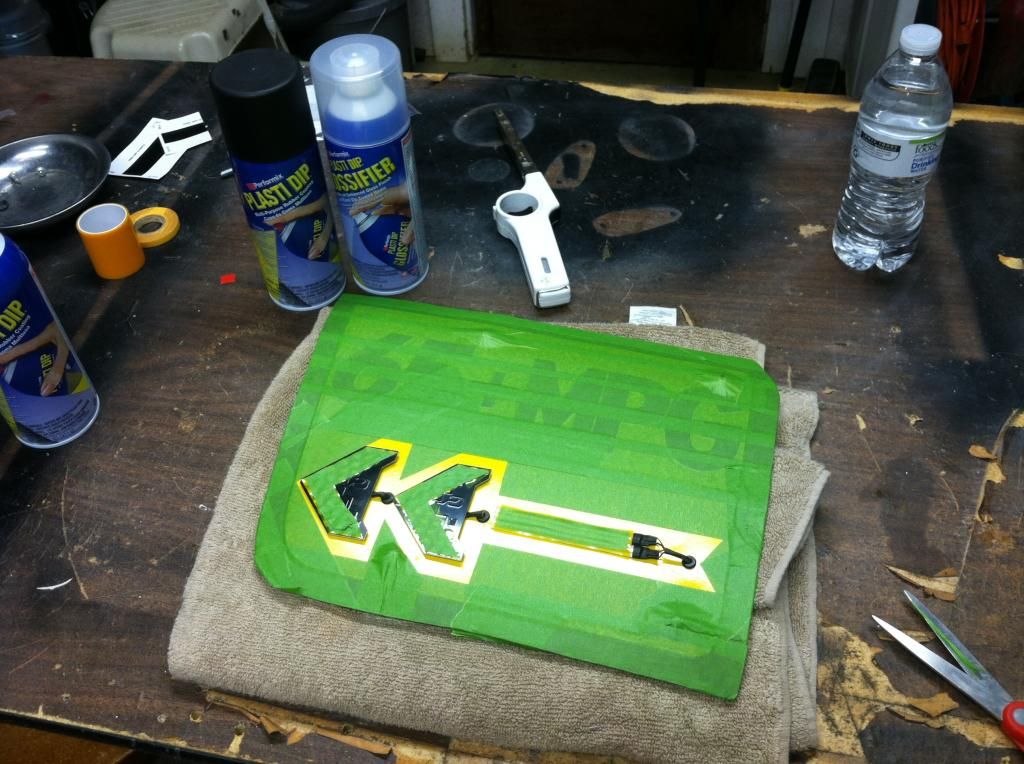
Various materials for this Project:
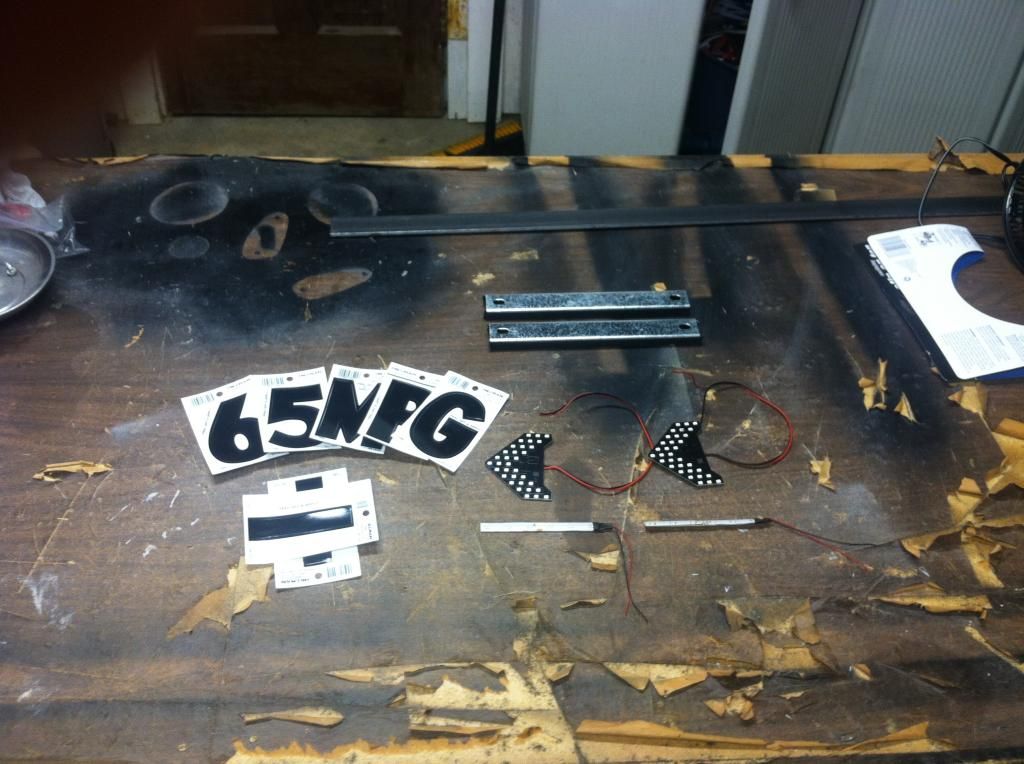
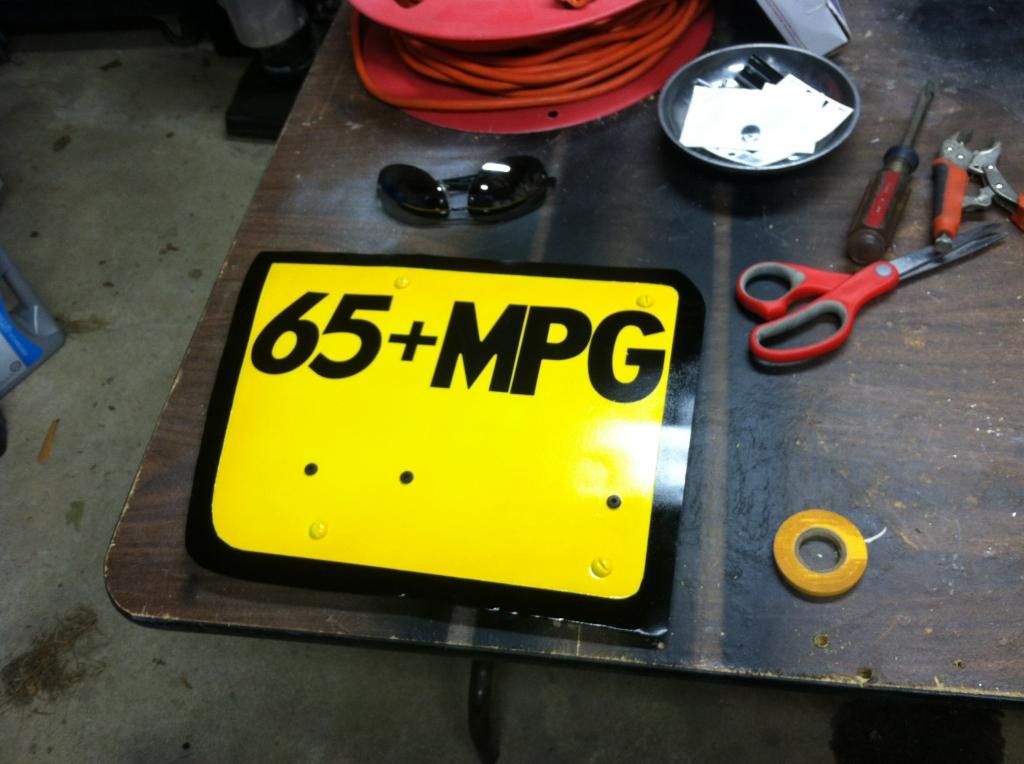
Final-Shape

Mocked-Up Design Layout
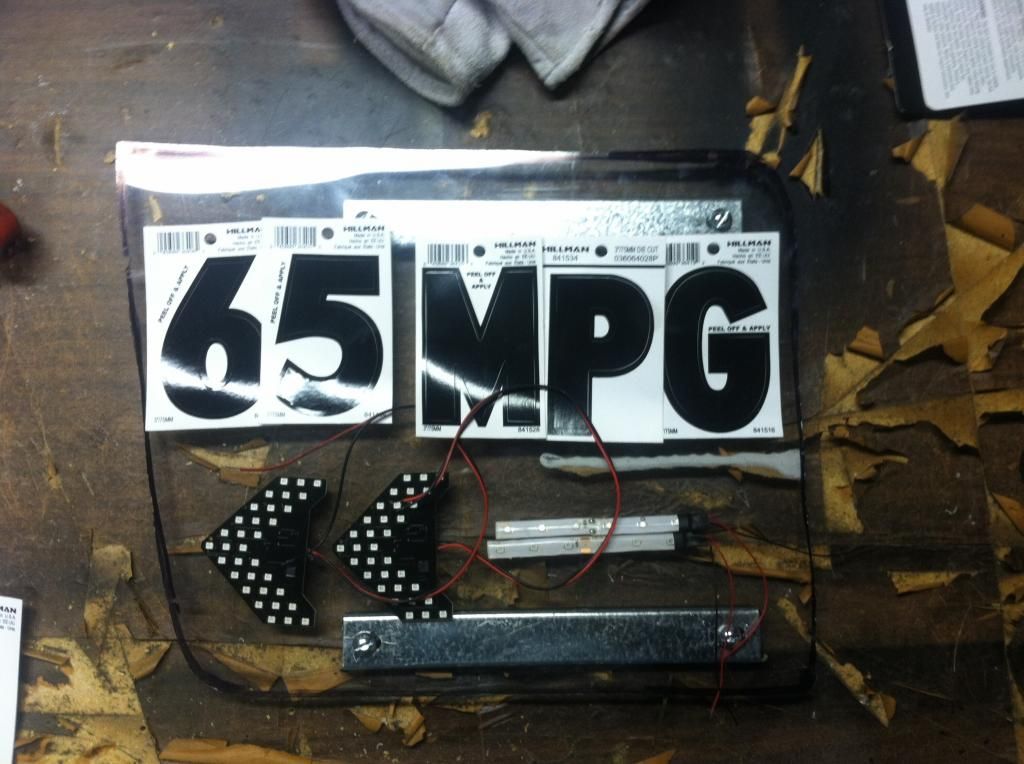
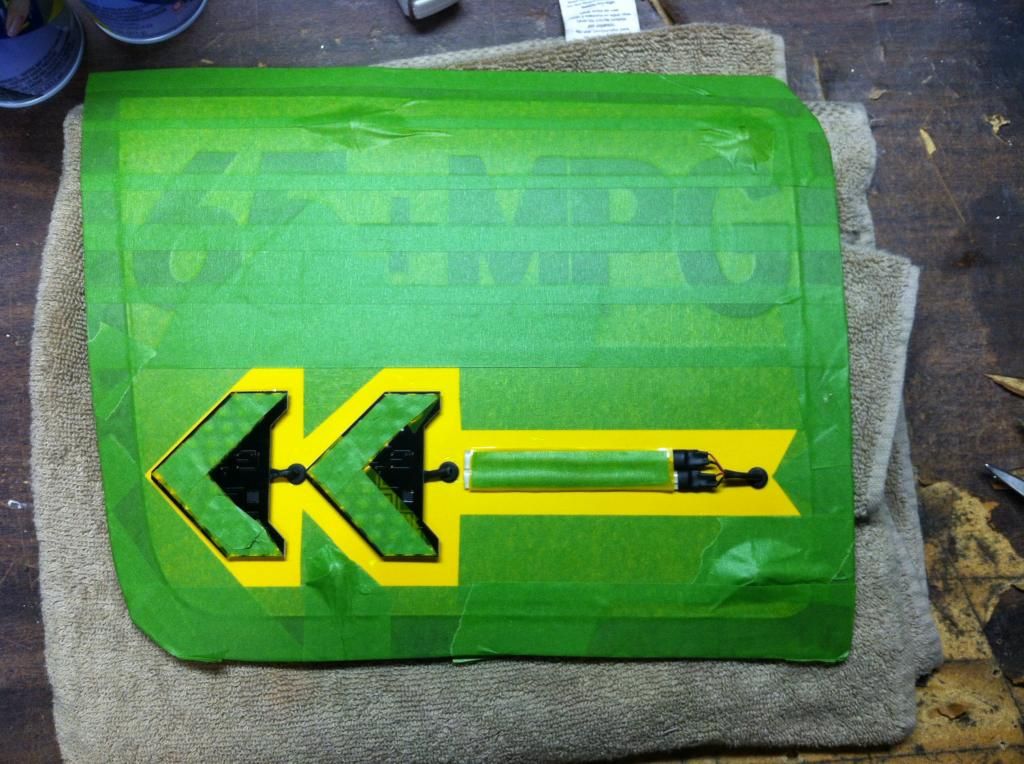
"Dirty" mock-up
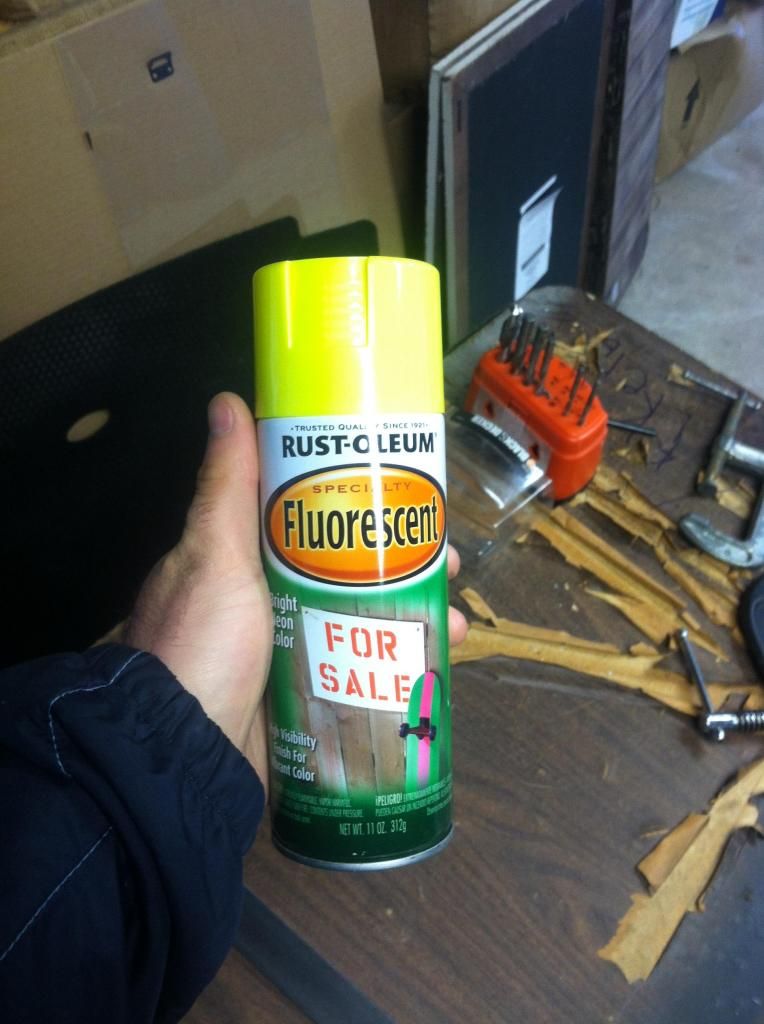
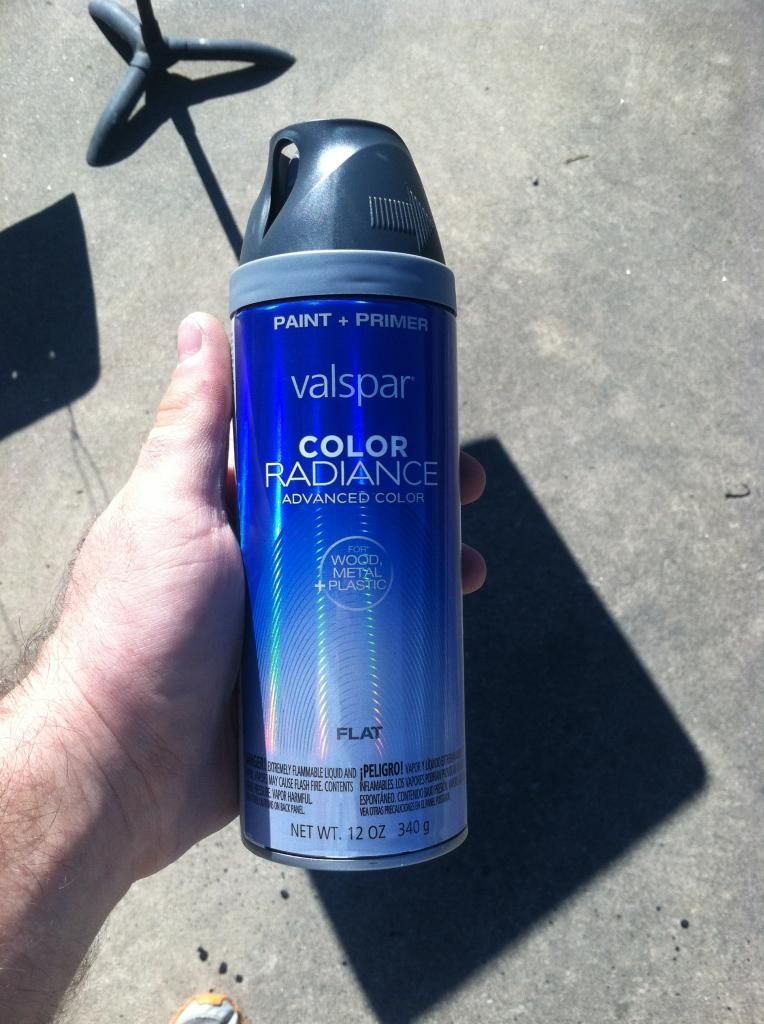
Paint for the final panel
I'll continue and post more on the EcoSafety sign as I go.
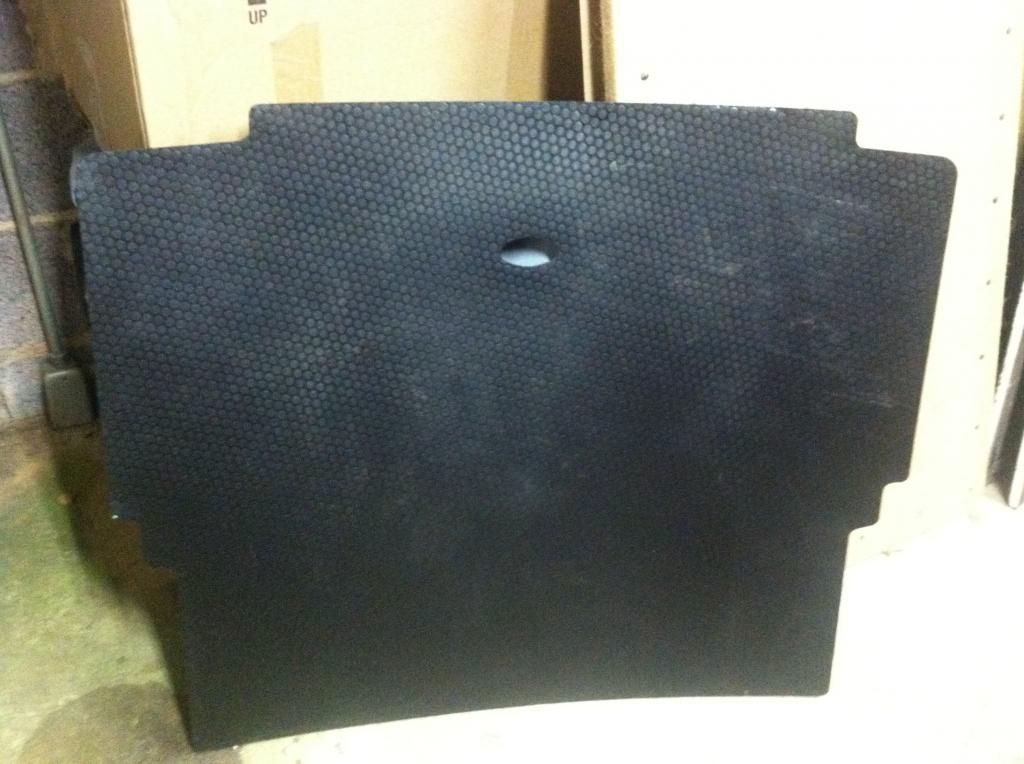
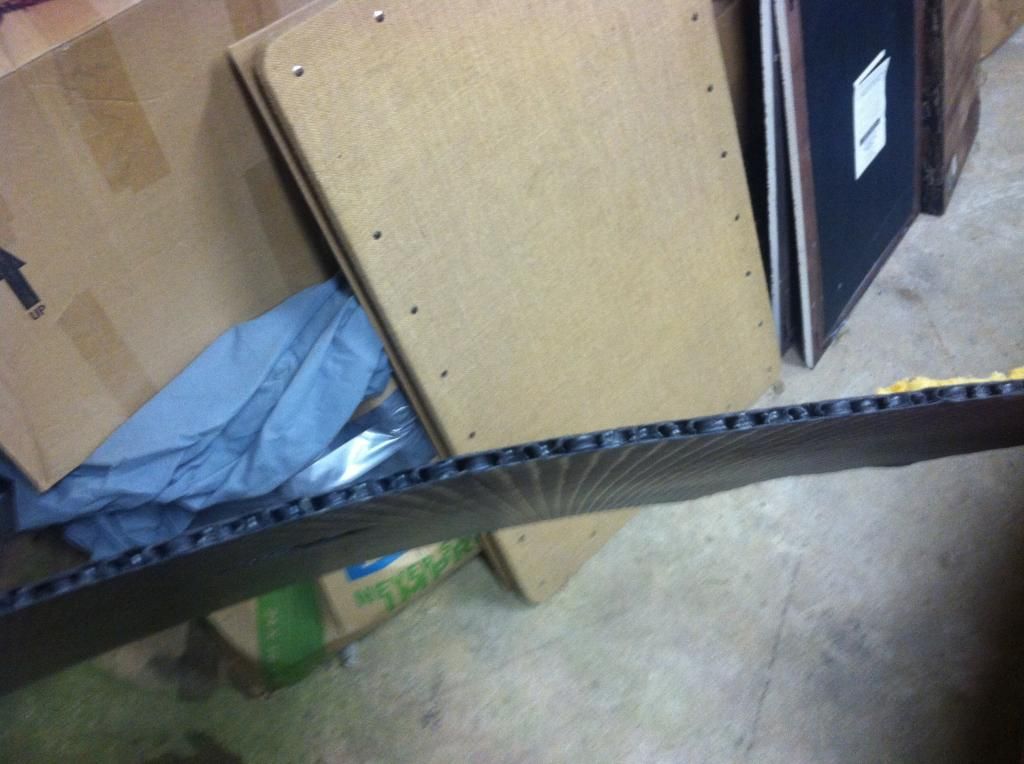
Also, I'll be using this material I found to make a grille block and fog light covers. It WAS the flimsy floorboard in my hatch. Sorry material for a hatch floorboard, but a perfect material for what I need it for. Easy to cut, yet resilient to impacts and the elements. Alright!
More to come. Thanks for eco-tuning in!
Yesterday I filled up after my first full tank using the newly-installed MPGuino. I was hoping to hit 60 mpg on 87-octane. I did not. I hit 64.5!! This was a huge surprise. I still can't believe it. I guess since I've now hit my MPG goal for this project...I'll keep on going :D

OK, now on to this weekends project: I'll refer to it as an EcoSafety sign. Interstate traffic during my commutes is viscous. I'm hoping that having this sign on the hatch will help me and all other pedal-pushers on the road to stay: (1) sane ; (2) alive. My wife is not too thrilled about it's addition, claiming "I will not ride with you!". She may just be lying, and perhaps secretly thinks this sign is kinda sexy. But just in case she if fo-real... as you can see, I've designed the EcoSafety to mount to some magnetic dealer license plate tag holders, so that I can remove it easily when she wants to ride (or in case the cops don't like my sign and it's flashing arrows).
Pics below tell the mock-up I completed this morning. I used a thick plastic see-through sheet, which made quick work of things. The final version, of course, will be made out of a thin sheet metal. It's a great weekend to paint, so I'm fortunate.
Mock-Up


Various materials for this Project:

Final-Shape

Mocked-Up Design Layout

"Dirty" mock-up

Paint for the final panel

I'll continue and post more on the EcoSafety sign as I go.
Also, I'll be using this material I found to make a grille block and fog light covers. It WAS the flimsy floorboard in my hatch. Sorry material for a hatch floorboard, but a perfect material for what I need it for. Easy to cut, yet resilient to impacts and the elements. Alright!


More to come. Thanks for eco-tuning in!
10-25-2014, 11:12 AM
#56
Honda-Tech Member

Join Date: Sep 2012
Posts: 40
Likes: 0
Received 0 Likes
on
0 Posts
That corrugated plastic stuff is great for an inexpensive block off or under-tray. It weighs next to nothing and is quite durable. It's also easy to cut into any shape and you can paint it. A great source for that stuff: political signs, which just happen to be everywhere now since it is election season.
10-25-2014, 05:32 PM
#58
Honda-Tech Member
Thread Starter

I wanted the design to be easily recognizable, quickly, from 50 ft. out. All that is currently on it, plus "TY!" may have been "too much information" anyway...
At the end of the day, if it doesn't have a positive effect: (1) It will come down; (2) it only cost me about $25; (3) it's always fun trying something new.
 10-26-2014, 07:35 PM
#59
Honestly, I can understand being proud of a hypermiling car. But, to shove it in people's face is a bit unnecessarily braggadocios. Something like these stickers would seem more then adequate to me: MPG + Sticker #2685 - $3.60 : Stickernerd, crazy cheap vinyl stickers
10-27-2014, 12:13 PM
#60
Honda-Tech Member
Thread Starter
^^Thank you. The sign was never meant to brag at all. It is to explain to other drivers why I am driving the way that I am. Actually, I'm doing this to try and not be rude.
When a vehicle is going extremely slow, or is having issues, it puts it's flashers on to signal to other drivers that it is going to be slower, so they can react quickly and work around it.
It's the same premise here. Though I am not driving extremely slow, I am driving a good bit slower than 98% of the rest of the traffic on the road. This sign is an attempt at an accommodation. I'm letting them know up-front: I'm slower, and here's why.
I think that most drivers would, at the least, respect that I'm trying to let them know and to work around the car. I'll be in the slow lane, not the passing line. They can just shoot right around me, no big deal. As stated, CLT traffic in rush hour is very viscious. Driving the speed limit puts you at a risk, as most drivers drive 10-15 mph over the limit on the way home. I've nearly gotten in an accident twice now. Not b/c of my doing, just others careless/aggressive driving.
Sign should be well-received. We'll, I hope. If it's not, I'll have a call to make. At the least, I've had a blast so far on this small project.
10-29-2014, 08:58 AM
#61
Honda-Tech Member
Thread Starter
Update 10/29/2014: Sun Visor Delete + Ecool Breeze
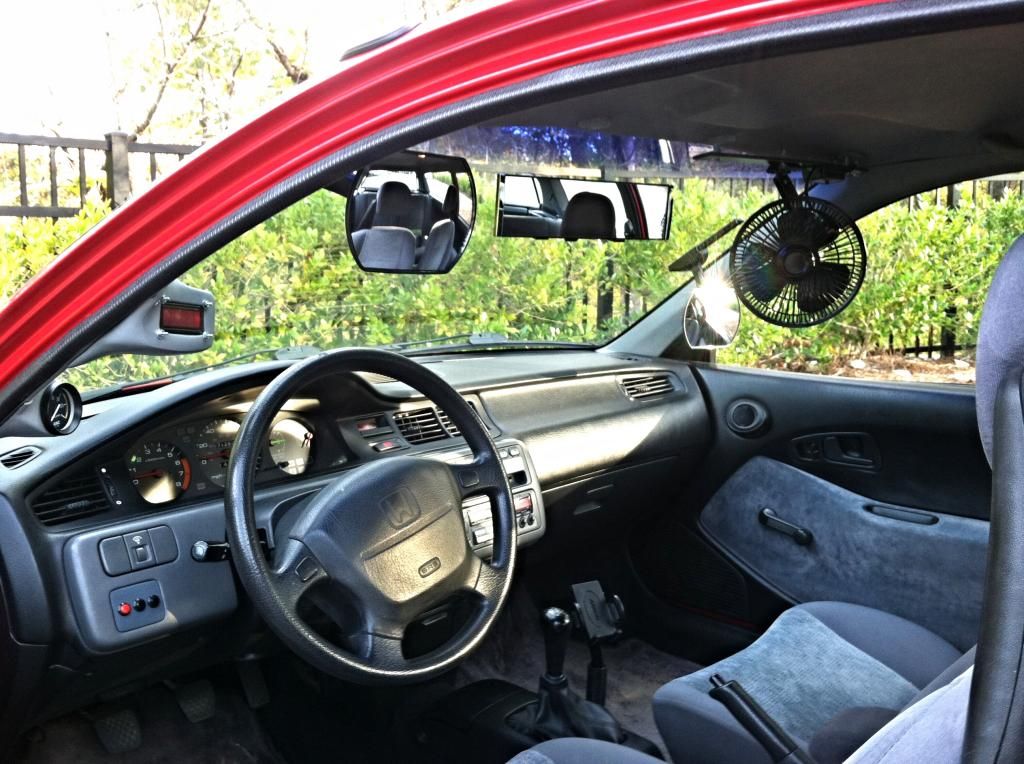
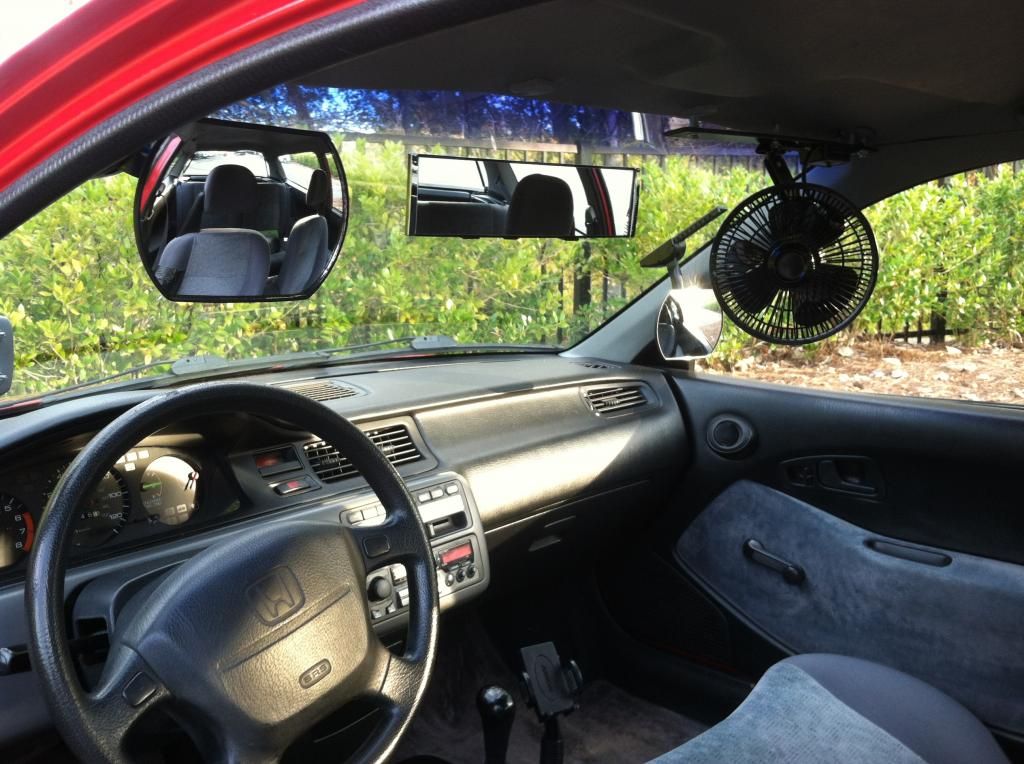
Hello all, back here with some more eco-related updates. I didn't get any aero-work started this past weekend, but instead worked on finishing up adding a fan to the interior. I figured I should finish this project asap, while the weather was still warm enough for me to put such a fan to use. It’s now done, and running great! I love it. I’ll call this mod my “Ecool Breeze”. So, follow along and “let me take you to an island of the Ecool breeze”. (Terrible Shaggy pun, younger members likely won’t get it…so, sorry).
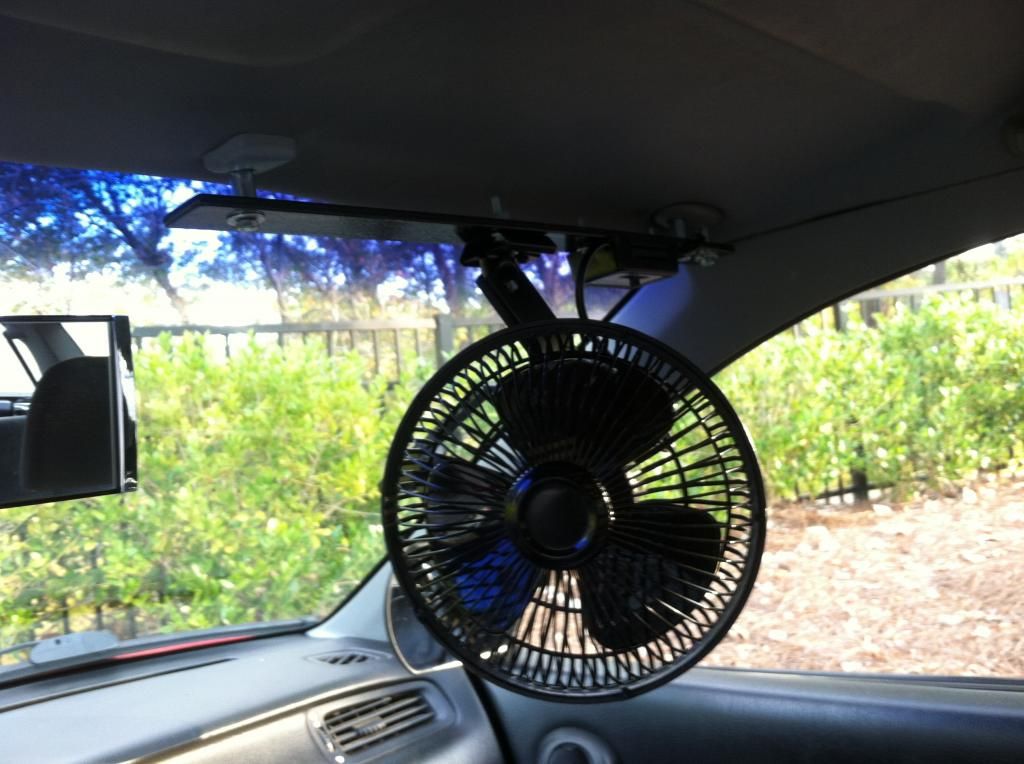
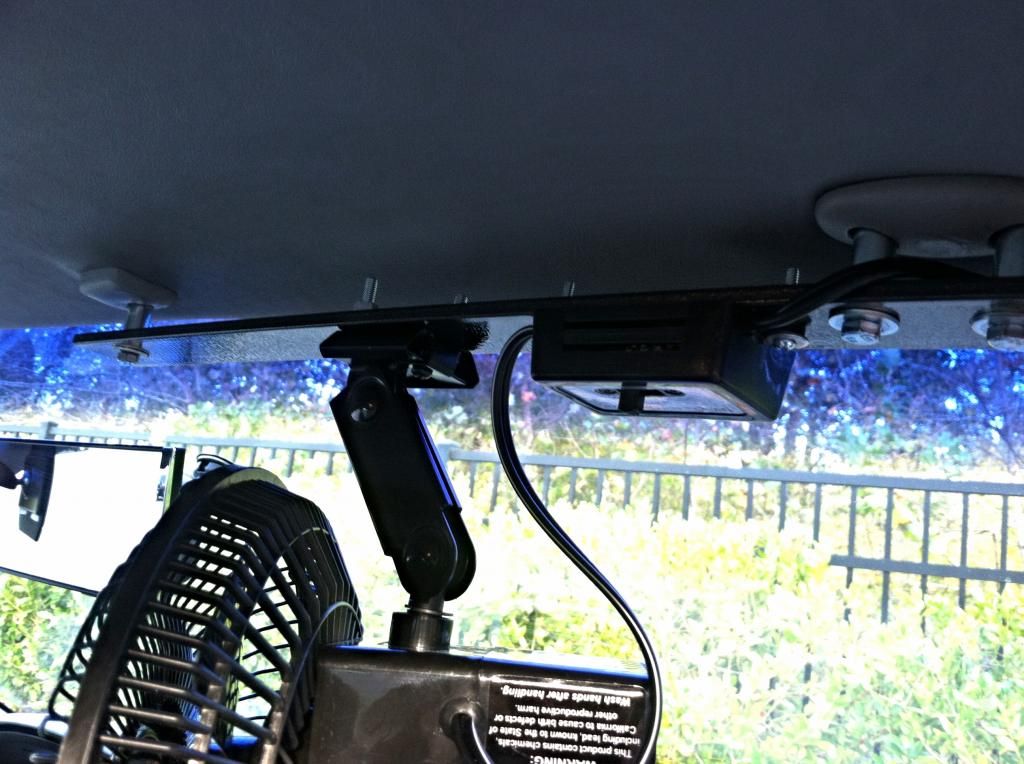
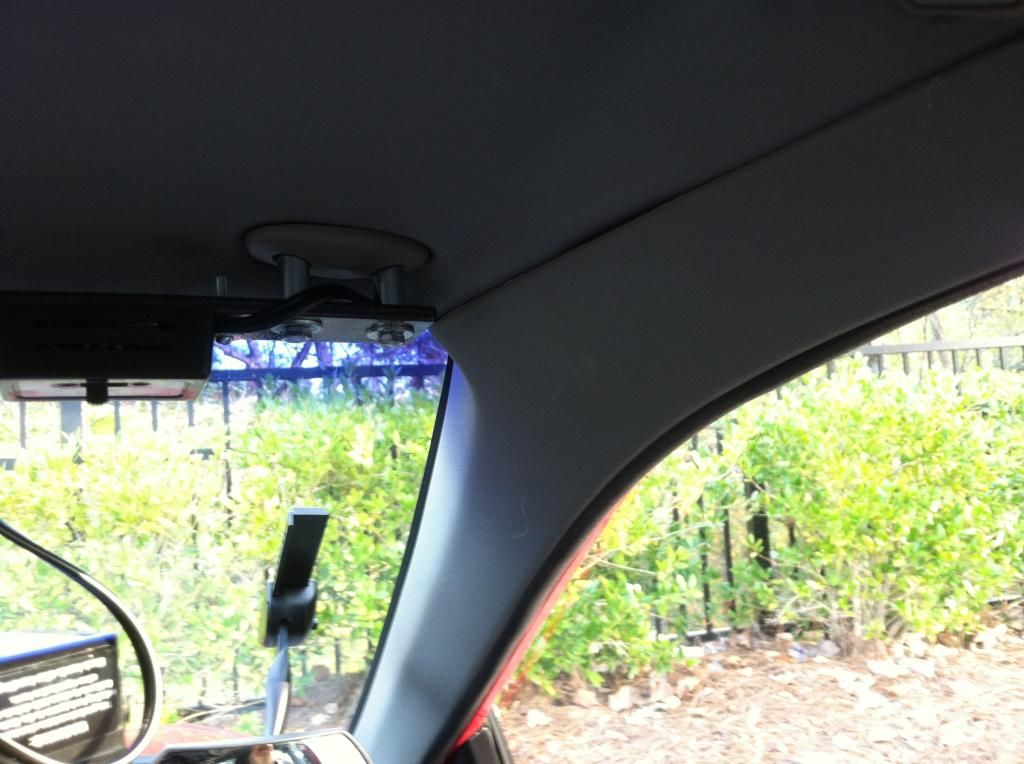
I didn't take many process-pics for the fan install, but it involved making a template from cardboard of the existing passenger side visor mounting holes, then transferring the template to cut out of a piece of 1/8" metal bar. I also added holes for the fan mounting base and switch panel to the mounting bar.
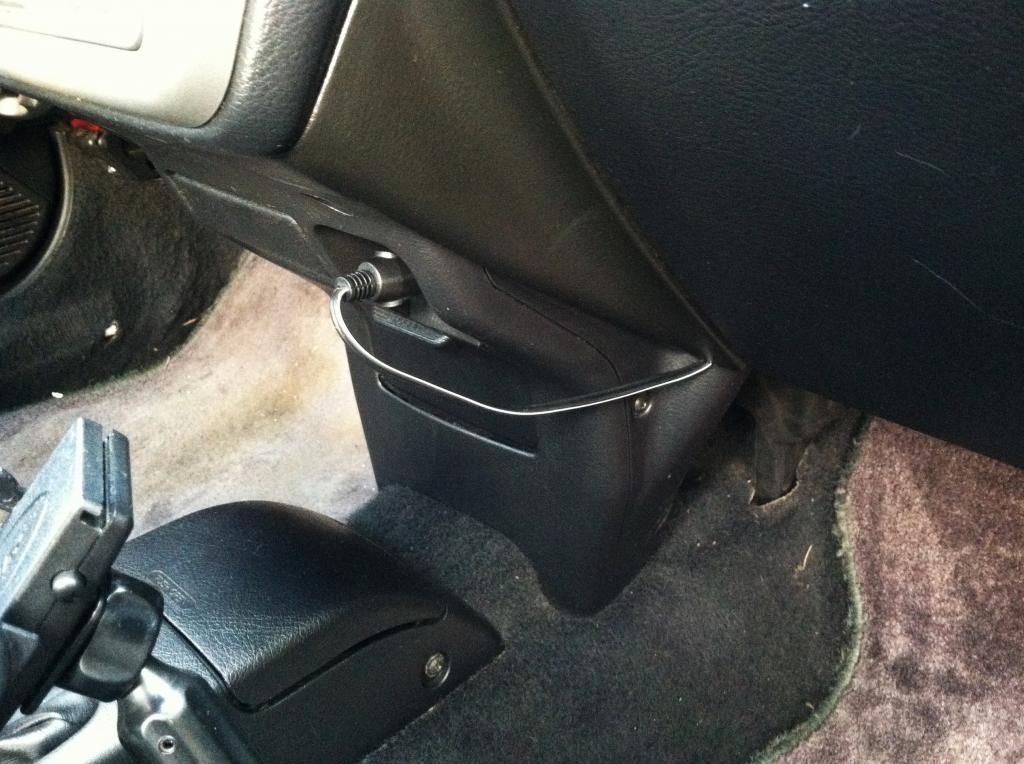
I decided to do a visor delete while I was at it, and used the existing visor bases/mounting plastics to incorporate into the fan mount design. Modified OEM pieces now serve as “blanks” for the driver’s side of the car, and offer cleaner mounting points for the fan on the passenger side of the car. The fan wiring runs down the passenger A-Pillar and sneaks into the cigarette lighter connection, for a cleaner look.
Pics:
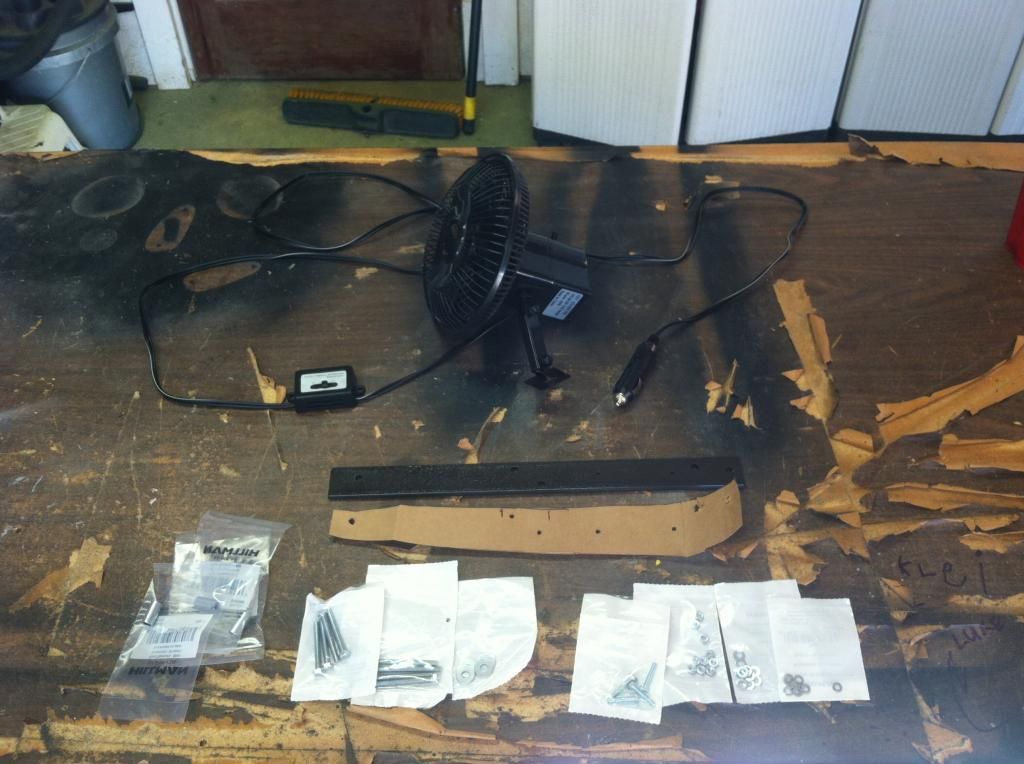
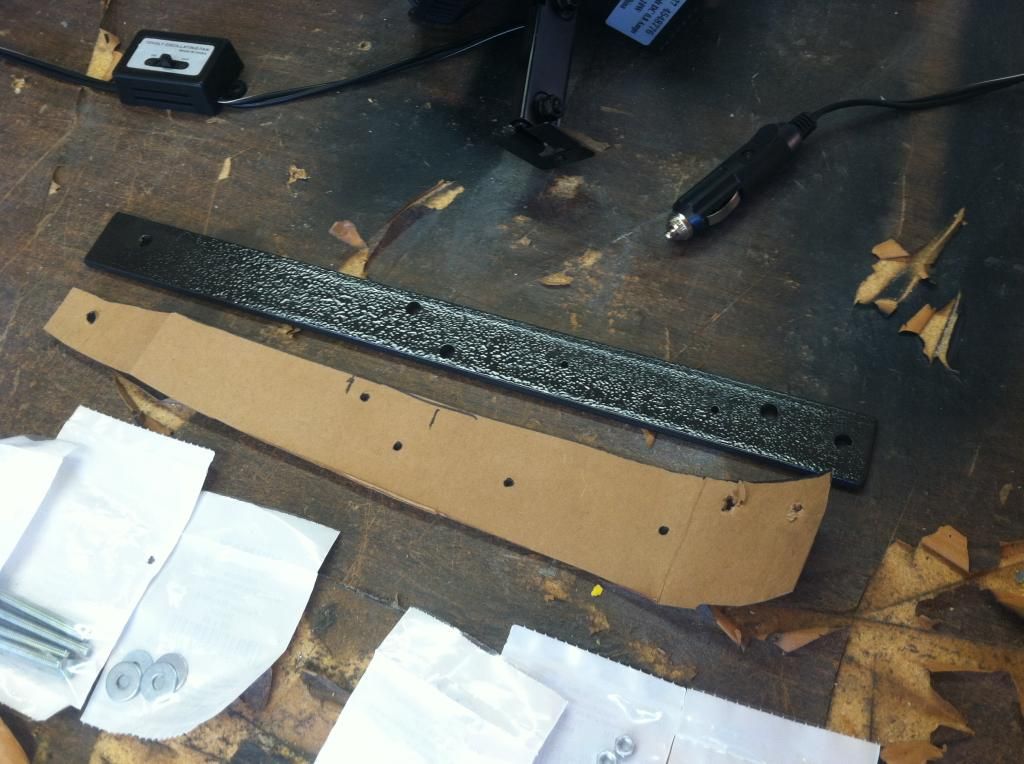
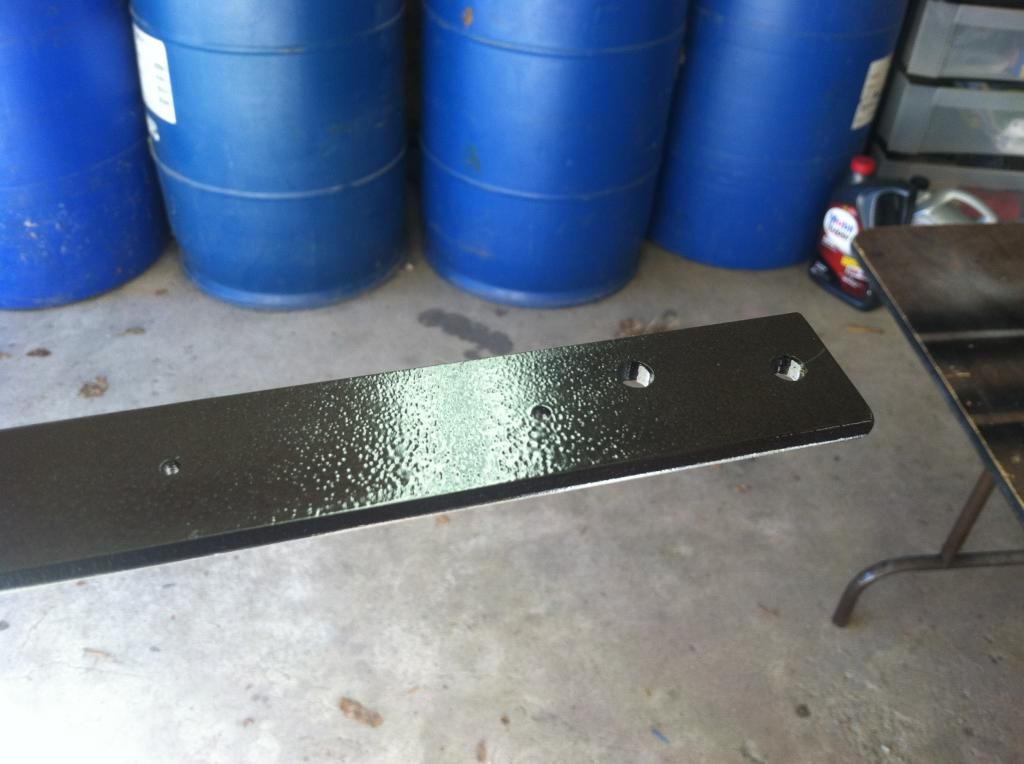
RustOLeum hammered paint was used for the topcoat on the fan mount.
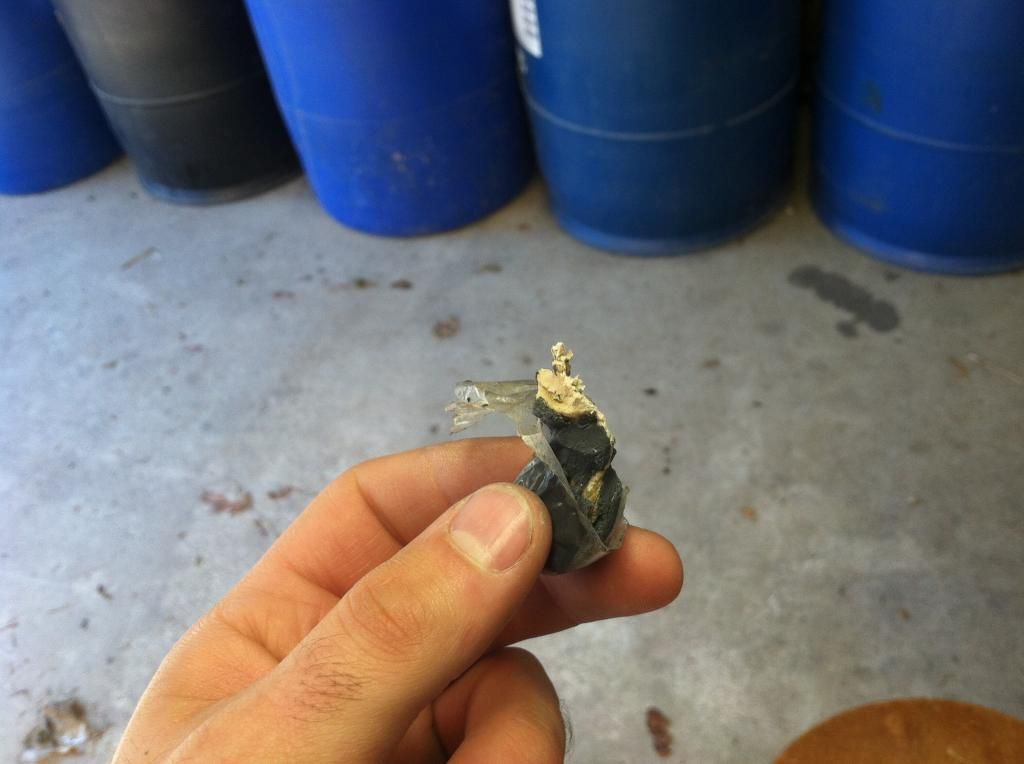
Here's how I modified OEM visor clips. I used a dremel bit to file them down, then Bondo filled the holes, then sanded, then used some SEM light gray to bring out an OEM-like finish.
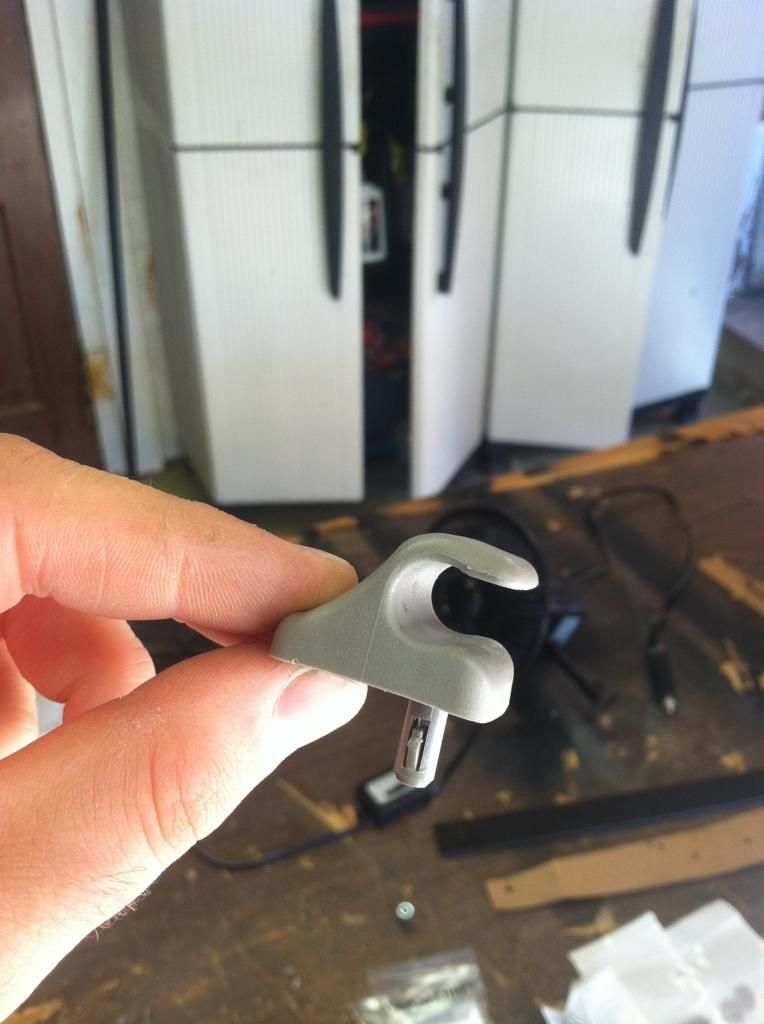
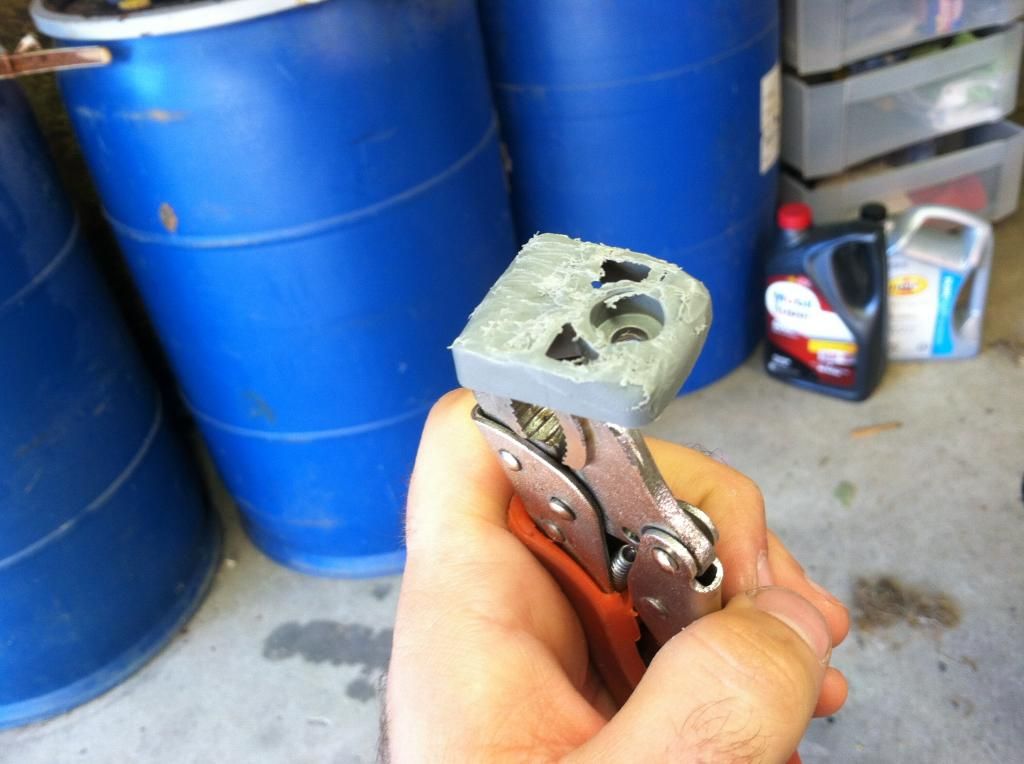
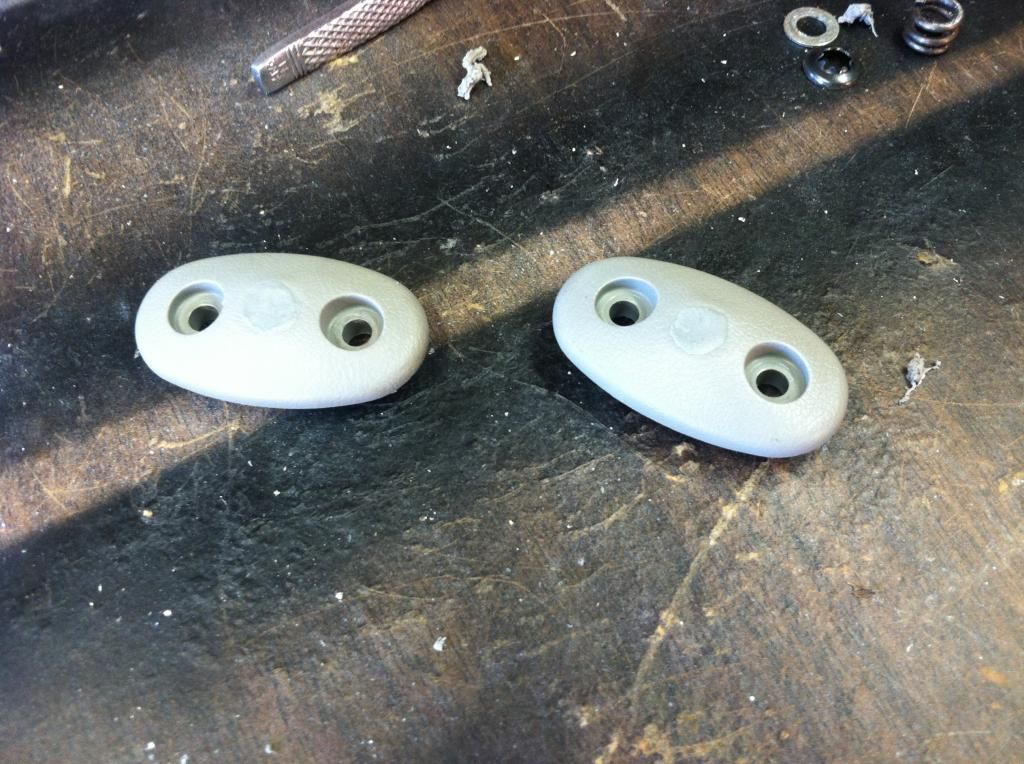
For the far left/right visor mounting bases, I filled the center hole where the visor post once ran with an adhesive putty I got at Harbor Freight a while back. Iv'e used this stuff for all kinds of projects. Really cool, as you roll the two parts together like play-doo, then fix it in place, and it dries to a hard and strong finish. It sticks to plastics well. I remembered that it dried to a dull gray color as well. It turns out that the color was nearly a perfect match to my OEM interior, so no paint/bondo was needed. i just filled the holes and smoothed out the tops a little by hand, then let them set to dry, and voila: Fixed and (I feel) very presentable!
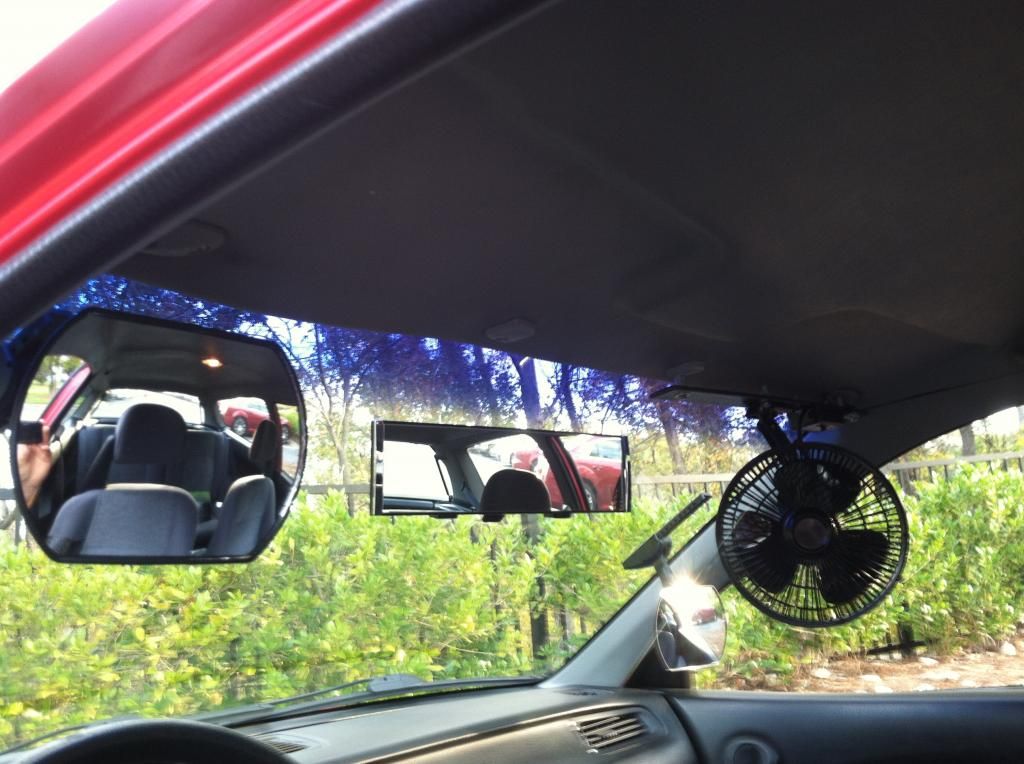
For those wondering, I no longer have a use for the drivers side visor. I can’t pull it down anyway due to the mirrors at the sides of the car. Fortunately, the side mirrors are large enough that I can lean and hide from glare behind them on moments of intense sun glare. I also have…wait for it…
sunglasses. :cool:
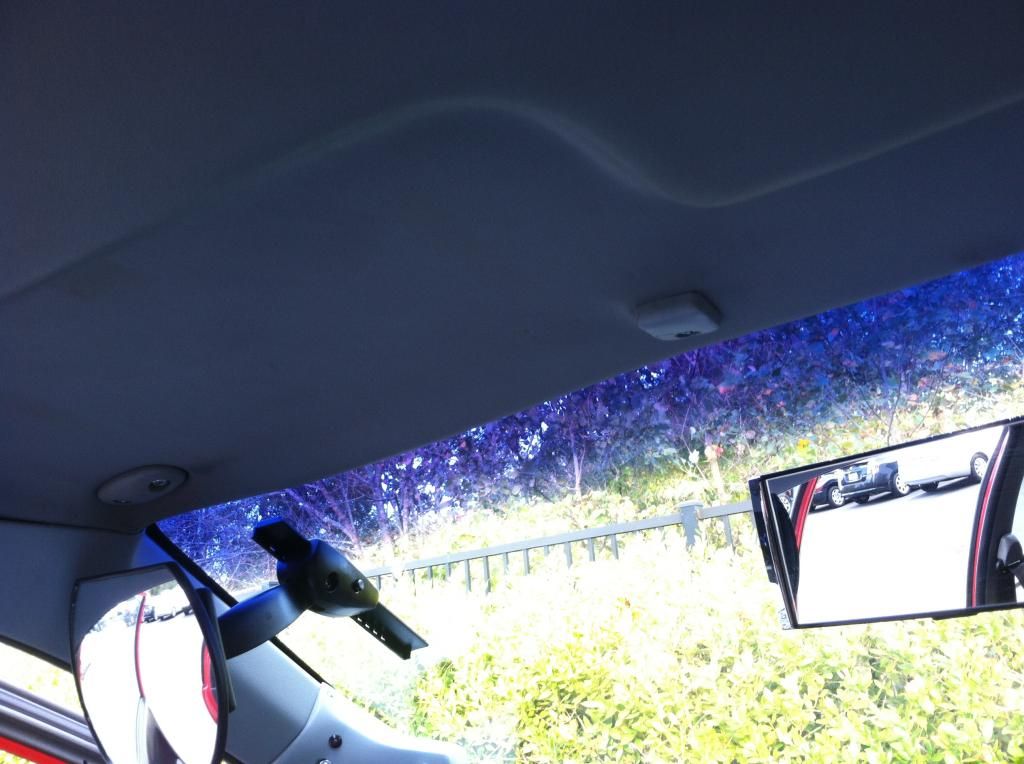
Finished Pics of the new set-up:
I’ll be back soon with pics of the finished EcoSafety sign. It’s about 95% done at this point.
As always, thank so much for EcoTuning in.
Hello all, back here with some more eco-related updates. I didn't get any aero-work started this past weekend, but instead worked on finishing up adding a fan to the interior. I figured I should finish this project asap, while the weather was still warm enough for me to put such a fan to use. It’s now done, and running great! I love it. I’ll call this mod my “Ecool Breeze”. So, follow along and “let me take you to an island of the Ecool breeze”. (Terrible Shaggy pun, younger members likely won’t get it…so, sorry).
I didn't take many process-pics for the fan install, but it involved making a template from cardboard of the existing passenger side visor mounting holes, then transferring the template to cut out of a piece of 1/8" metal bar. I also added holes for the fan mounting base and switch panel to the mounting bar.
I decided to do a visor delete while I was at it, and used the existing visor bases/mounting plastics to incorporate into the fan mount design. Modified OEM pieces now serve as “blanks” for the driver’s side of the car, and offer cleaner mounting points for the fan on the passenger side of the car. The fan wiring runs down the passenger A-Pillar and sneaks into the cigarette lighter connection, for a cleaner look.
Pics:


RustOLeum hammered paint was used for the topcoat on the fan mount.

Here's how I modified OEM visor clips. I used a dremel bit to file them down, then Bondo filled the holes, then sanded, then used some SEM light gray to bring out an OEM-like finish.


For the far left/right visor mounting bases, I filled the center hole where the visor post once ran with an adhesive putty I got at Harbor Freight a while back. Iv'e used this stuff for all kinds of projects. Really cool, as you roll the two parts together like play-doo, then fix it in place, and it dries to a hard and strong finish. It sticks to plastics well. I remembered that it dried to a dull gray color as well. It turns out that the color was nearly a perfect match to my OEM interior, so no paint/bondo was needed. i just filled the holes and smoothed out the tops a little by hand, then let them set to dry, and voila: Fixed and (I feel) very presentable!


For those wondering, I no longer have a use for the drivers side visor. I can’t pull it down anyway due to the mirrors at the sides of the car. Fortunately, the side mirrors are large enough that I can lean and hide from glare behind them on moments of intense sun glare. I also have…wait for it…
sunglasses. :cool:
Finished Pics of the new set-up:


I’ll be back soon with pics of the finished EcoSafety sign. It’s about 95% done at this point.
As always, thank so much for EcoTuning in.
Last edited by OG Wagon; 10-29-2014 at 09:13 AM.
10-30-2014, 05:43 AM
#63
Honda-Tech Member
Thread Starter
10-31-2014, 07:31 AM
#64
Honda-Tech Member
Thread Starter
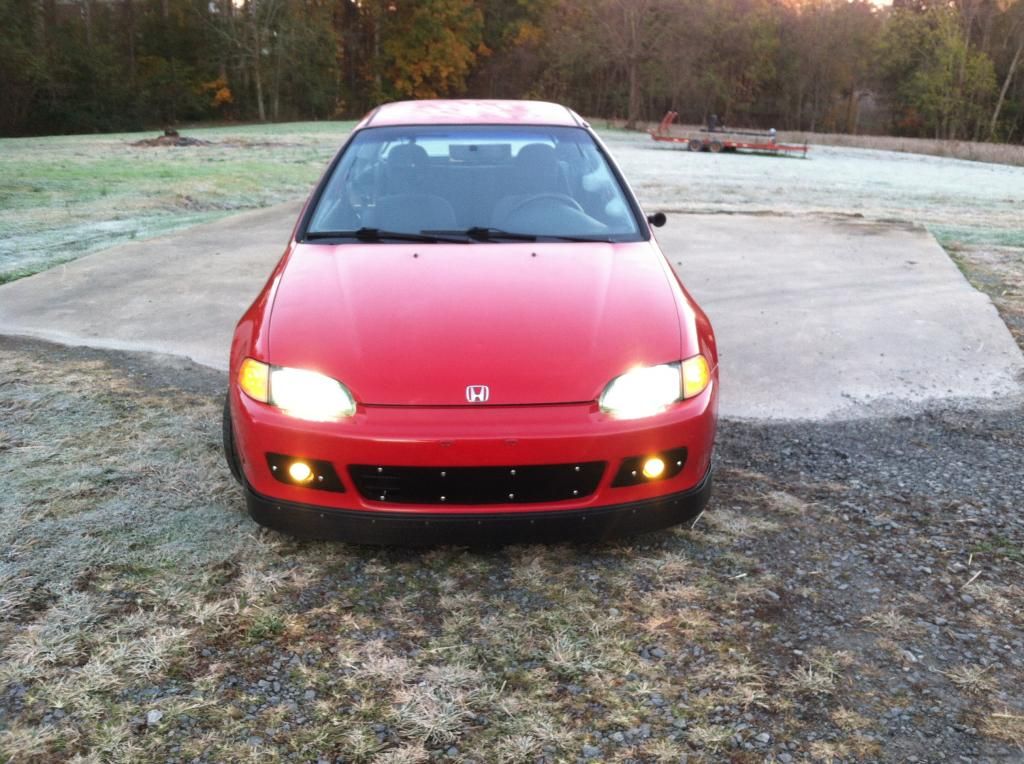
Update 10/31/14: Front Grille Block + Fog Light Covers
Hello all, here's an update to the project. I was off yesterday, and had some extra time to (finally) get this project done.
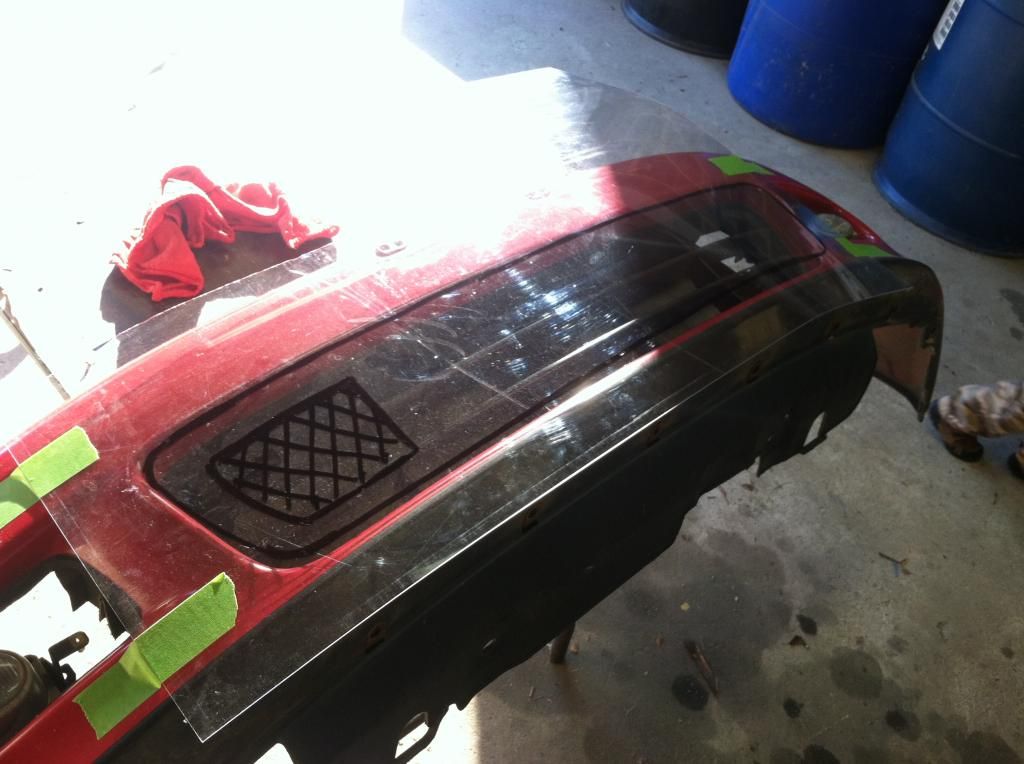
I started with the Grille Block first. I mocked up the design by using some medium-thick clear plastic that was sourced from an old poster frame.
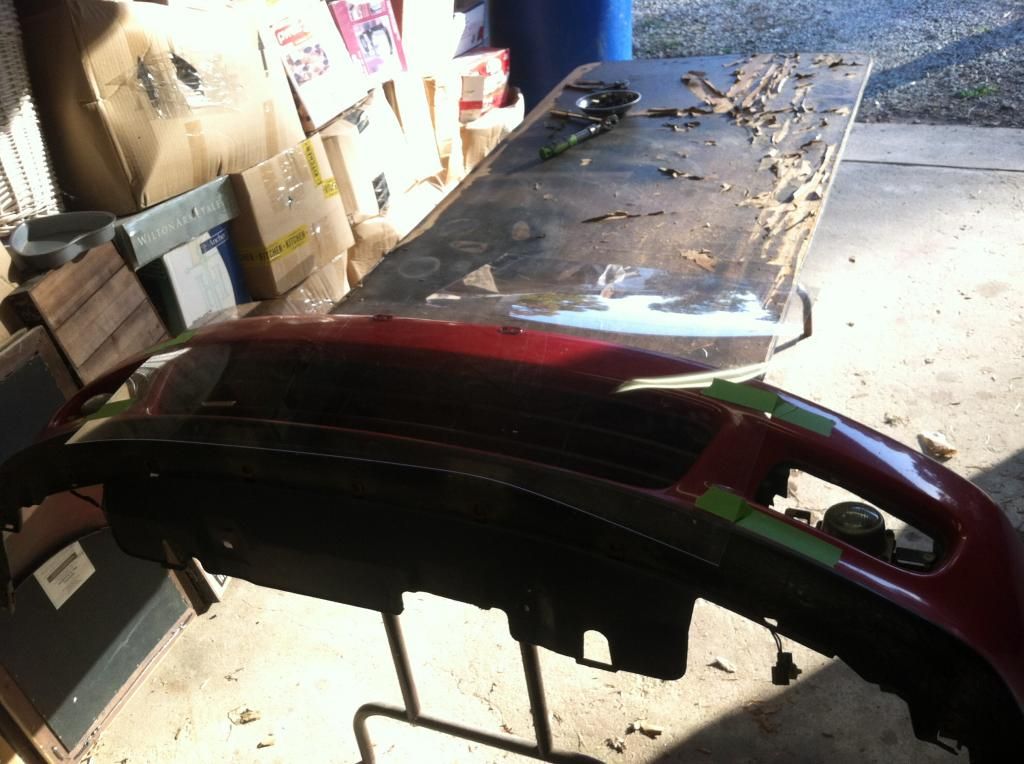
I then used a (Magnum) sharpie to mock up the shape of the finished panel.
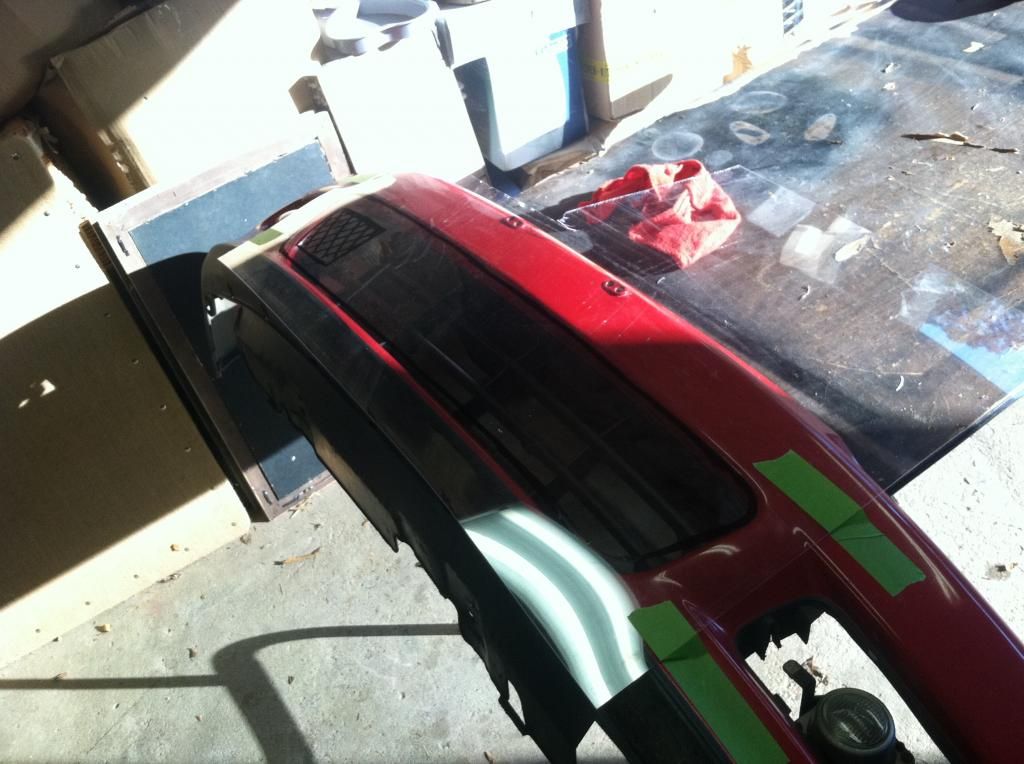
The shape was then cut out and I did some more test fitting/cutting to get it to the correct fitment. The translucent plastic made the mock-up incredibly easy.
I choose the location of a breather hole for the radiator at this point as well.
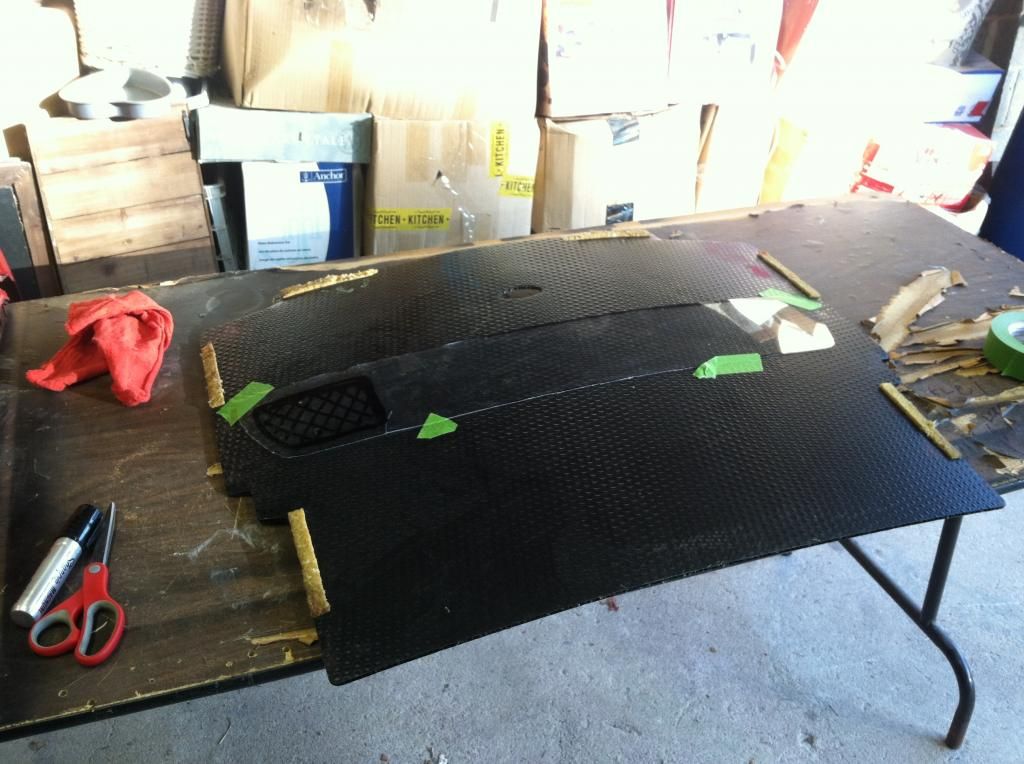
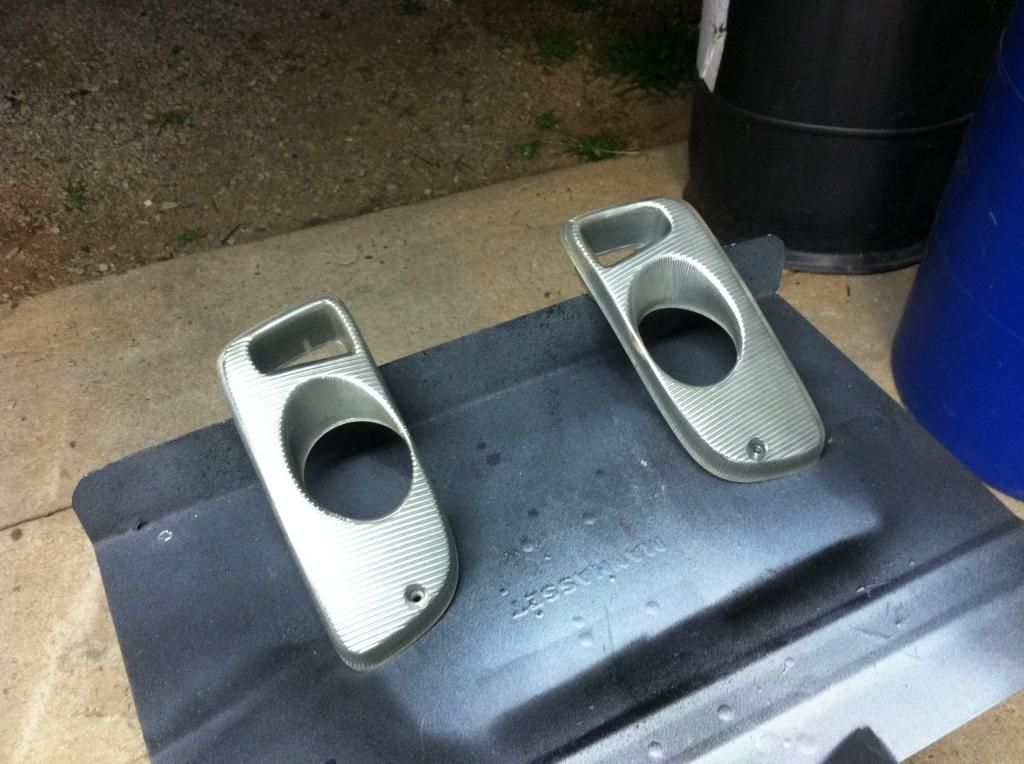
The design was then transferred to the finish material. As shared in a past post, the material I'm using here was actually the OEM base board material from the hatch that came with the car. It was bowed and no longer suitable as a floorboard. However, it's PERFECT for this project. The black doesn't need paint, won't chip off, is weather/impact resistant, strong yet lightweight, cut-able with shears, has a cool spherical stamping/design...the list goes on.
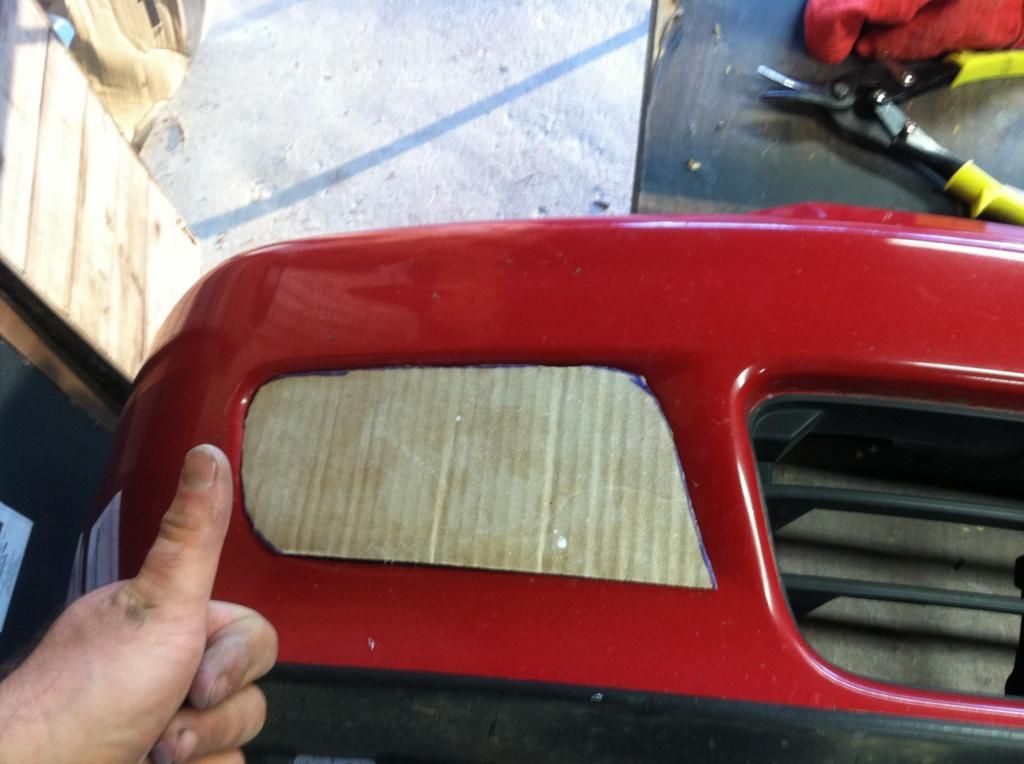
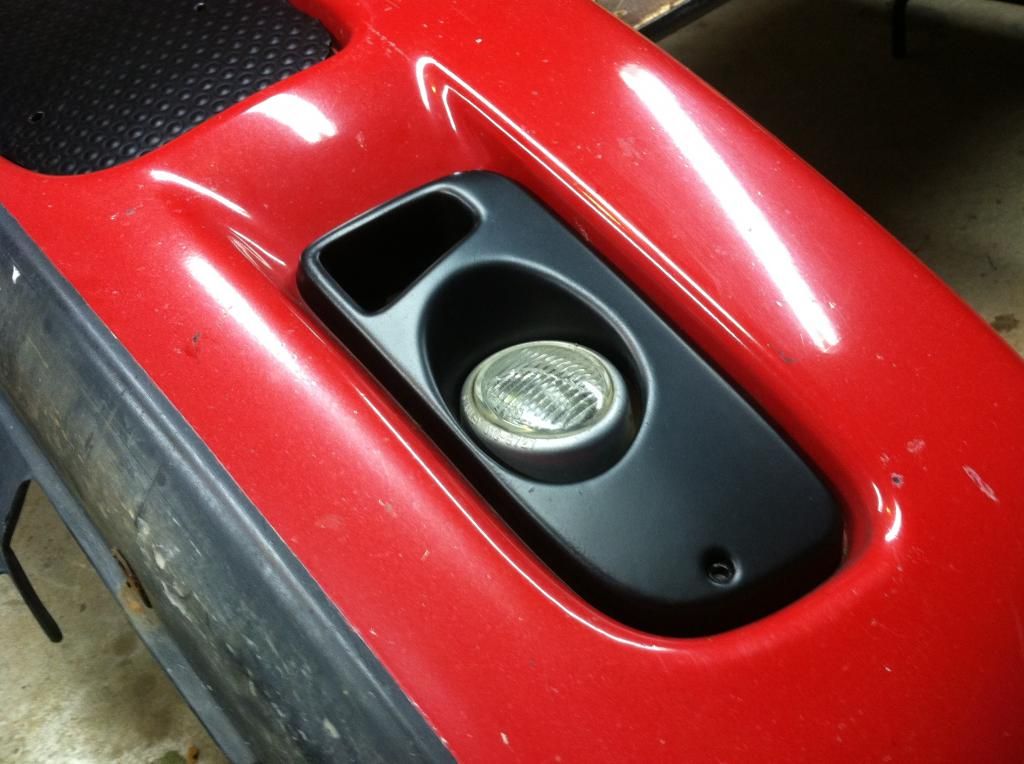
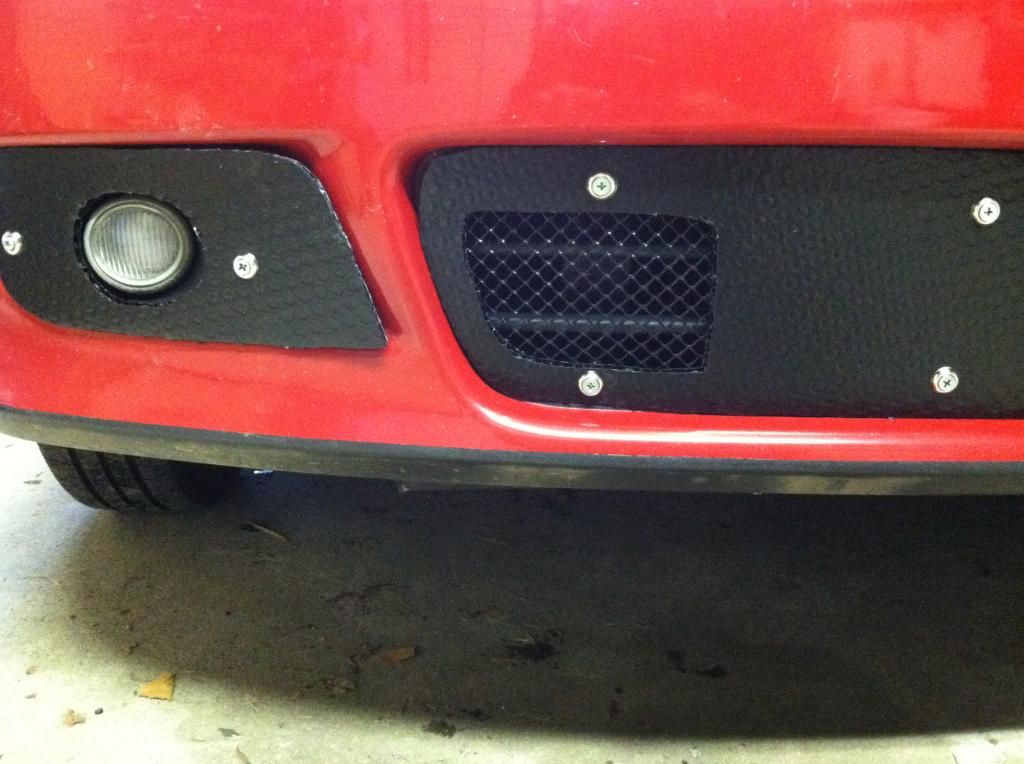
I then completed the fog covers. The goal of these covers is to smooth out airflow over the fogs, voiding the OEM recession. Initially, templates were made of cardboard to design and check fitment.
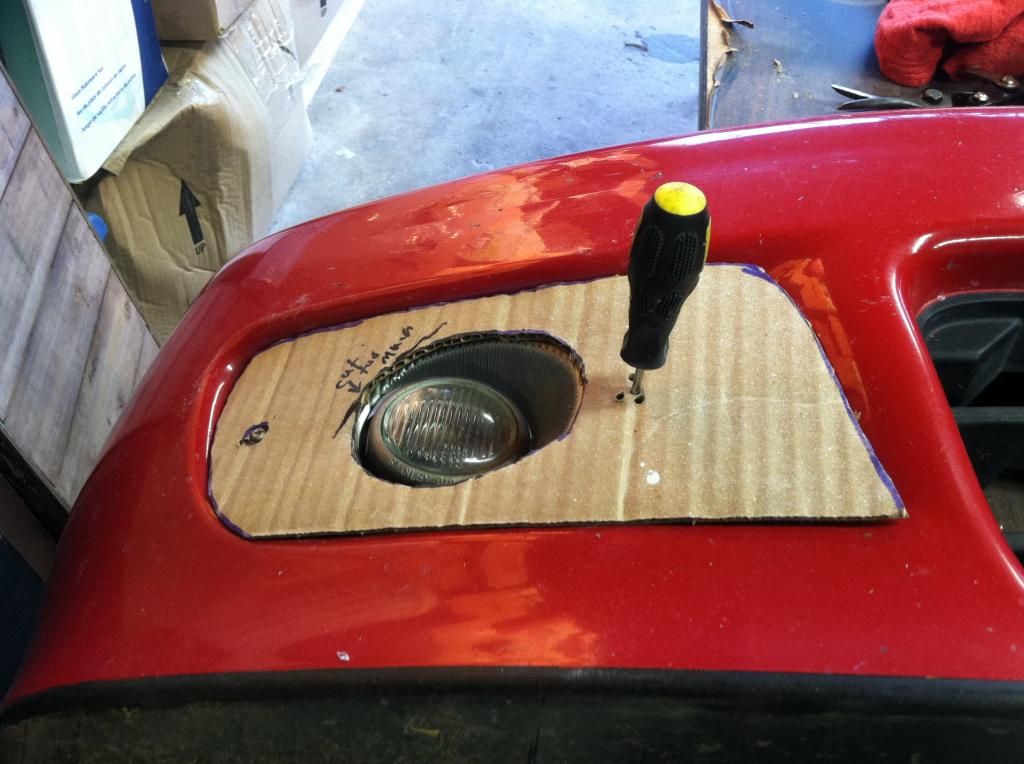
Fog light holes were then cut...
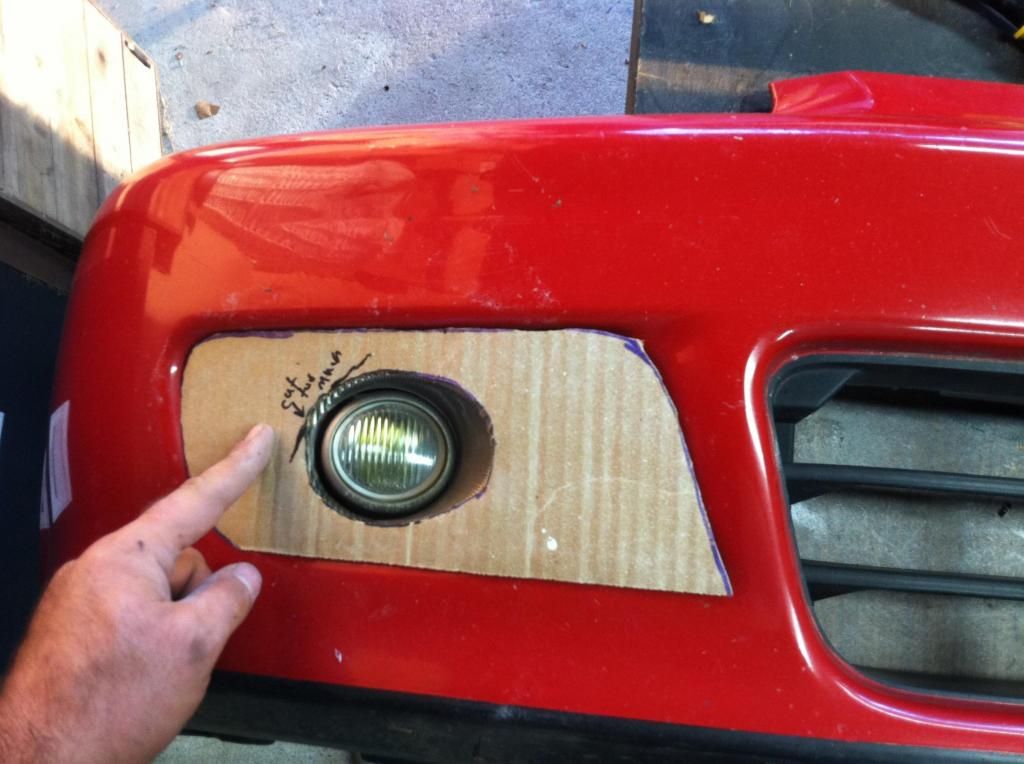
Holes locations where then integrated using the OEM fog light cover hole locations.
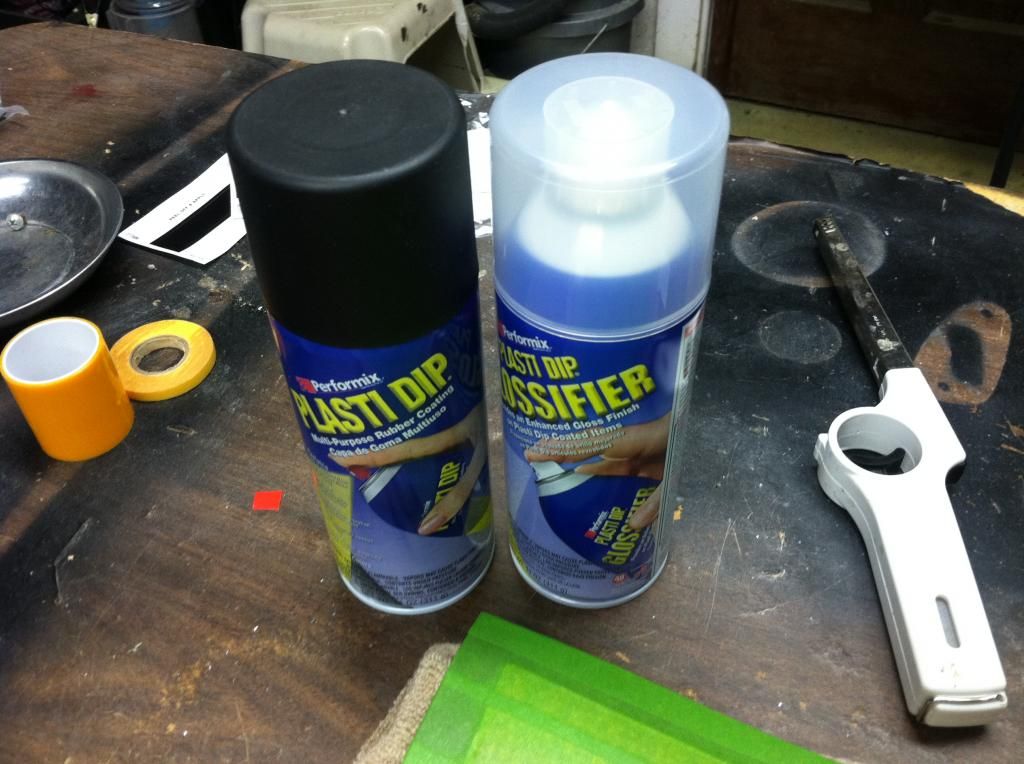
Since the covers were black, the OEM fog covers (underneath) needed to be black as well, since a small portion of them still shows through the new covers. I am very fortunate to have an OEM fog light set. For that reason, I wanted all mods to them to be totally reversible. So, PlastiDip was choosen to cover them, in case I ever wanted to remove the coating and go back to an OEM set-up.
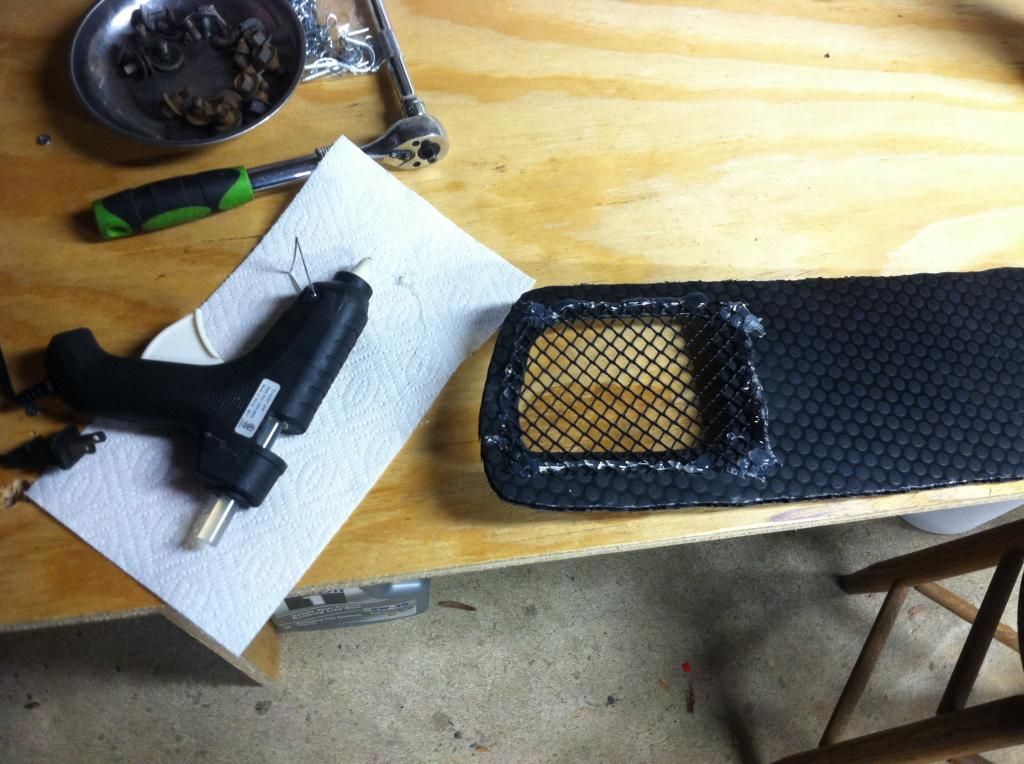
I picked up a roll of black plastic Gutter Guard from Lowers for a few bucks for the radiator hole, just to clean up the look a bit. It was cut then hot-glued into place.
I used finish washers on the frontside. Nuts, washers, and lock washers were used on the backside to bolt everything down. I forgot to take a pic of the back of the bumper. Sorry about that! Basically, I cut (4) 1.5" x circa 5" strips of the same material I made the grille block out of. I used those strips to brace against the backside of the OEM grille and to bolt the grille block to. The material is sturdy enough to serve this purpose well.
-And here's some pics of the end result.
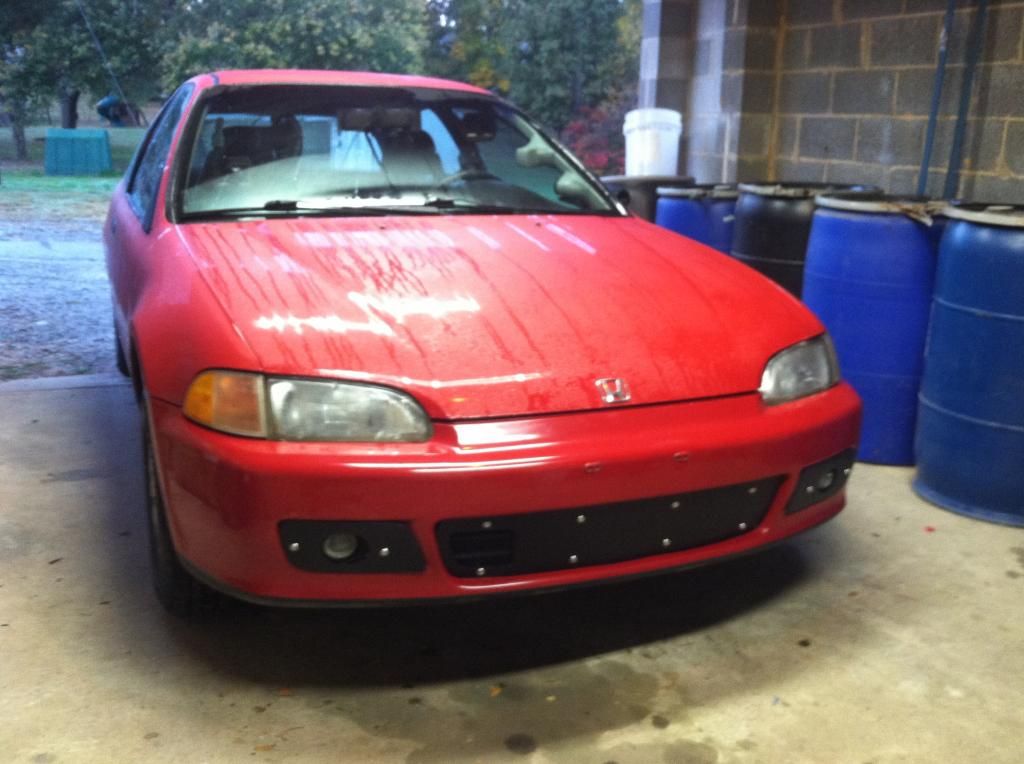
The bolts and washers will get painted with some black touch up paint asap.
Up next for the project, beginning this weekend:
- Front Air Dam (extension)
- Finish EcoSafety Sign + wiring
- Set up a new work bench that I got for free at my part-time job
As always, thanks for EcoTuning in!
Hello all, here's an update to the project. I was off yesterday, and had some extra time to (finally) get this project done.
I started with the Grille Block first. I mocked up the design by using some medium-thick clear plastic that was sourced from an old poster frame.

I then used a (Magnum) sharpie to mock up the shape of the finished panel.

The shape was then cut out and I did some more test fitting/cutting to get it to the correct fitment. The translucent plastic made the mock-up incredibly easy.
I choose the location of a breather hole for the radiator at this point as well.

The design was then transferred to the finish material. As shared in a past post, the material I'm using here was actually the OEM base board material from the hatch that came with the car. It was bowed and no longer suitable as a floorboard. However, it's PERFECT for this project. The black doesn't need paint, won't chip off, is weather/impact resistant, strong yet lightweight, cut-able with shears, has a cool spherical stamping/design...the list goes on.

I then completed the fog covers. The goal of these covers is to smooth out airflow over the fogs, voiding the OEM recession. Initially, templates were made of cardboard to design and check fitment.

Fog light holes were then cut...

Holes locations where then integrated using the OEM fog light cover hole locations.

Since the covers were black, the OEM fog covers (underneath) needed to be black as well, since a small portion of them still shows through the new covers. I am very fortunate to have an OEM fog light set. For that reason, I wanted all mods to them to be totally reversible. So, PlastiDip was choosen to cover them, in case I ever wanted to remove the coating and go back to an OEM set-up.


I picked up a roll of black plastic Gutter Guard from Lowers for a few bucks for the radiator hole, just to clean up the look a bit. It was cut then hot-glued into place.

I used finish washers on the frontside. Nuts, washers, and lock washers were used on the backside to bolt everything down. I forgot to take a pic of the back of the bumper. Sorry about that! Basically, I cut (4) 1.5" x circa 5" strips of the same material I made the grille block out of. I used those strips to brace against the backside of the OEM grille and to bolt the grille block to. The material is sturdy enough to serve this purpose well.
-And here's some pics of the end result.


The bolts and washers will get painted with some black touch up paint asap.
Up next for the project, beginning this weekend:
- Front Air Dam (extension)
- Finish EcoSafety Sign + wiring
- Set up a new work bench that I got for free at my part-time job
As always, thanks for EcoTuning in!
Last edited by OG Wagon; 10-31-2014 at 08:30 AM.
10-31-2014, 07:32 PM
#65
Honda-Tech Member

Join Date: Oct 2014
Posts: 4
Likes: 0
Received 0 Likes
on
0 Posts
i find this really interesting. i dabbled with hypermileing in my dads 528 5 speed car. Got it up to around 45 going from Charleston to Nashville .
Workmanship on your car is fantastic and i dig all the things you've done
Workmanship on your car is fantastic and i dig all the things you've done
11-03-2014, 07:00 AM
#66
Honda-Tech Member
Thread Starter
Thanks so much good sir. Honored by your feedback.
11-03-2014, 07:00 AM
#67
Honda-Tech Member
Thread Starter
Update 11/3/14: Front Air Dam Extension + LED Interior "Lighting Conversion"
It was a busy weekend full of fall fun for the family, but I did manage to get a couple of things knocked on this project. To complete the front bumper modifications and (hopefully) lower drag, I built a front air dam extension onto the OEM VX/Si front lip.
I started out with some of this stuff, which I got from Lowes. It was pricey, but I felt worth the extra $$ versus the flimsy plastic garden trim:

I used SS bolts and nylon nuts and washers to bolt everything up. I also drilled out recessed holes and flush-mounted bolt heads, to keep all of the bolts flush-mounted on the front side. I was pretty sick on my stomach when doing this project as I ate too much at a birthday party . As a result, below is the only process-pic I have from this project:
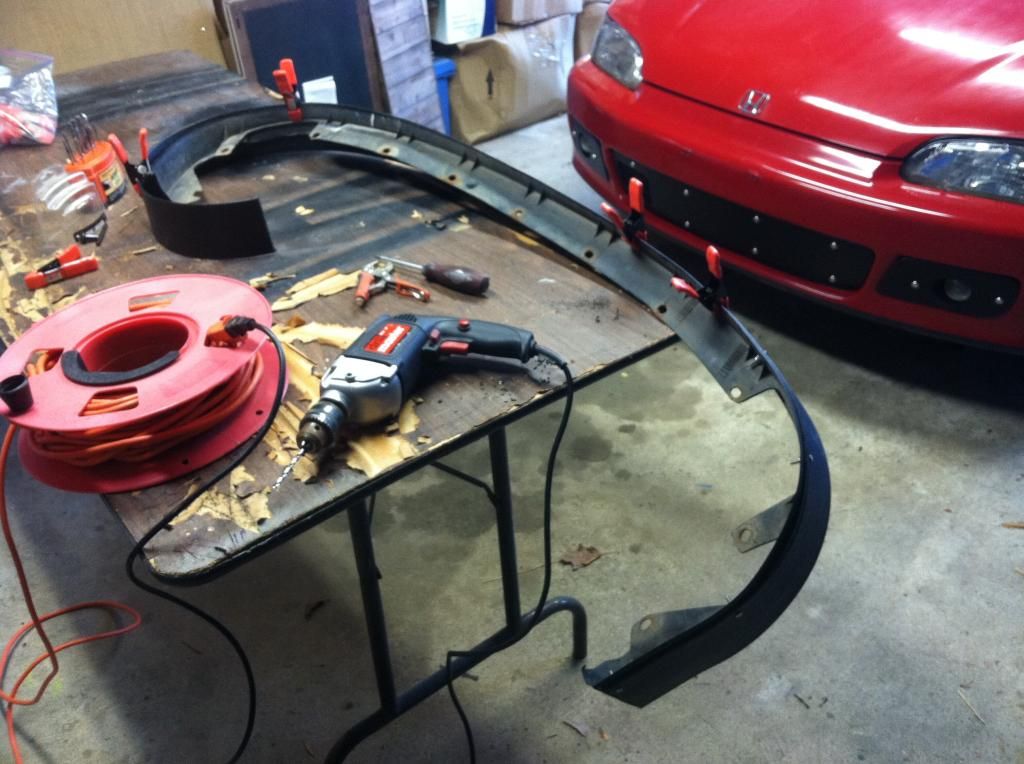
Basically, it entailed wrestling with the (curled up) composite trim and getting it to "un-roll" log enough to get succesfully bolted around the OEM lip. I used the existing mounting holes on the OEM lip as template to help me evenly space my new holes. I veered slightly on the outer-most corners, adding an extra screw, to help hold the shape/contour of that curve.
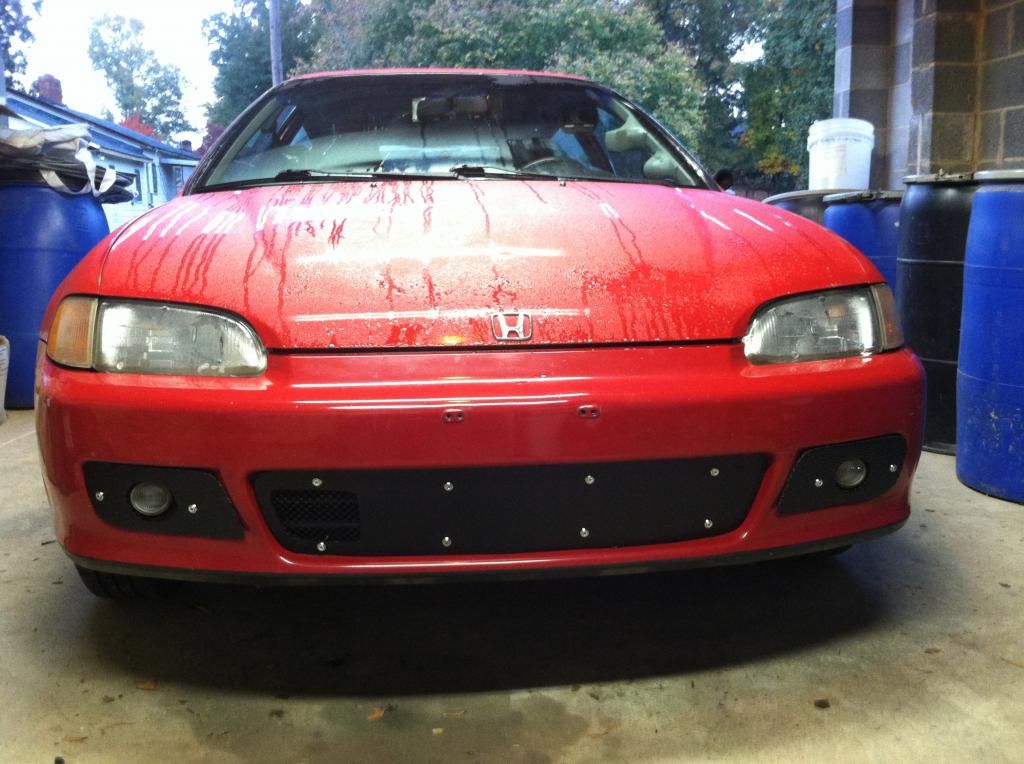
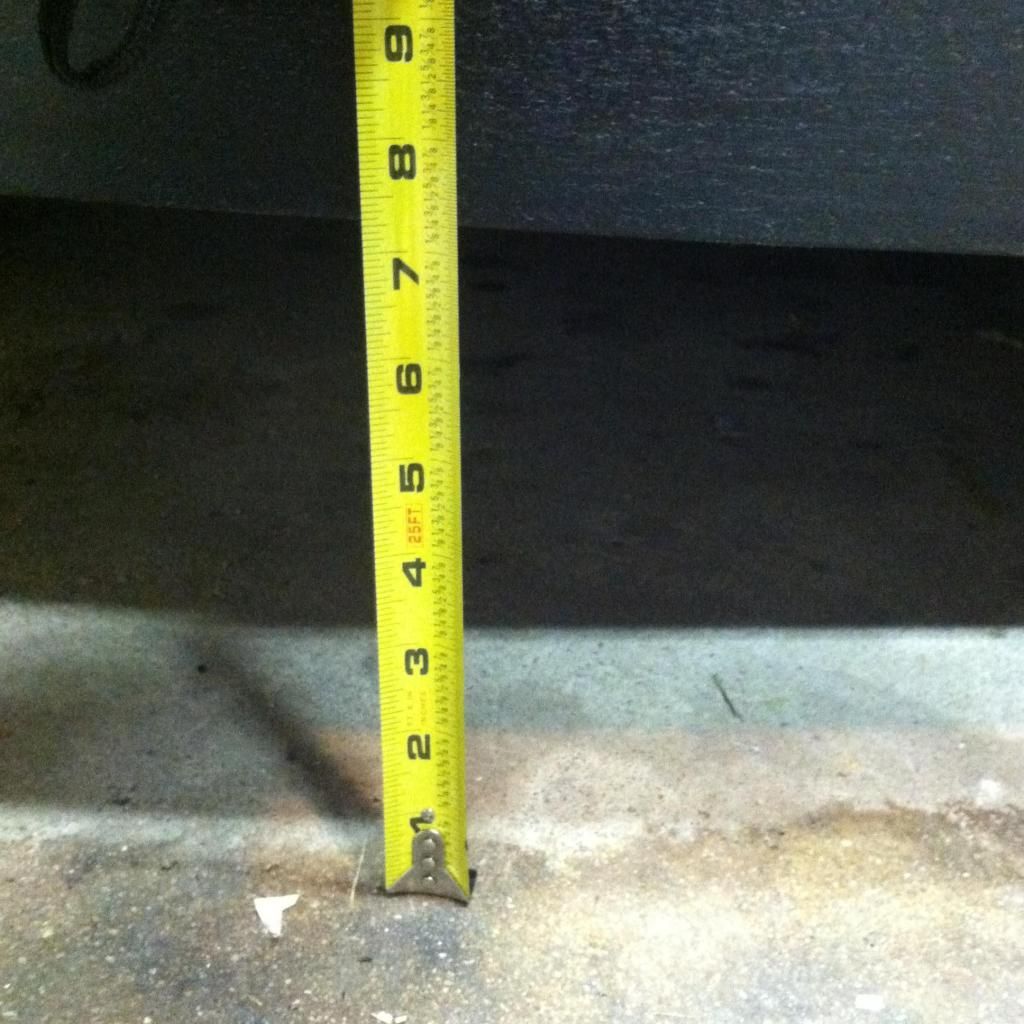
Ok, so here’s the finished results. I’ll be honest, I was grinning ear to ear when I bolted this up to the bumper. :p
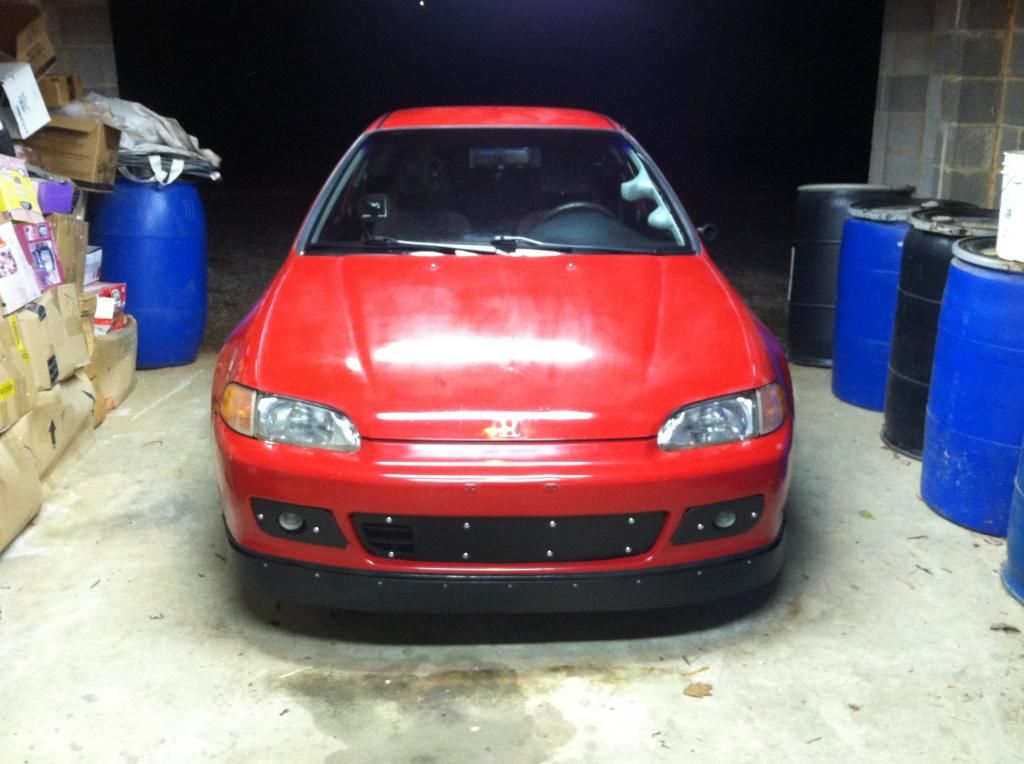
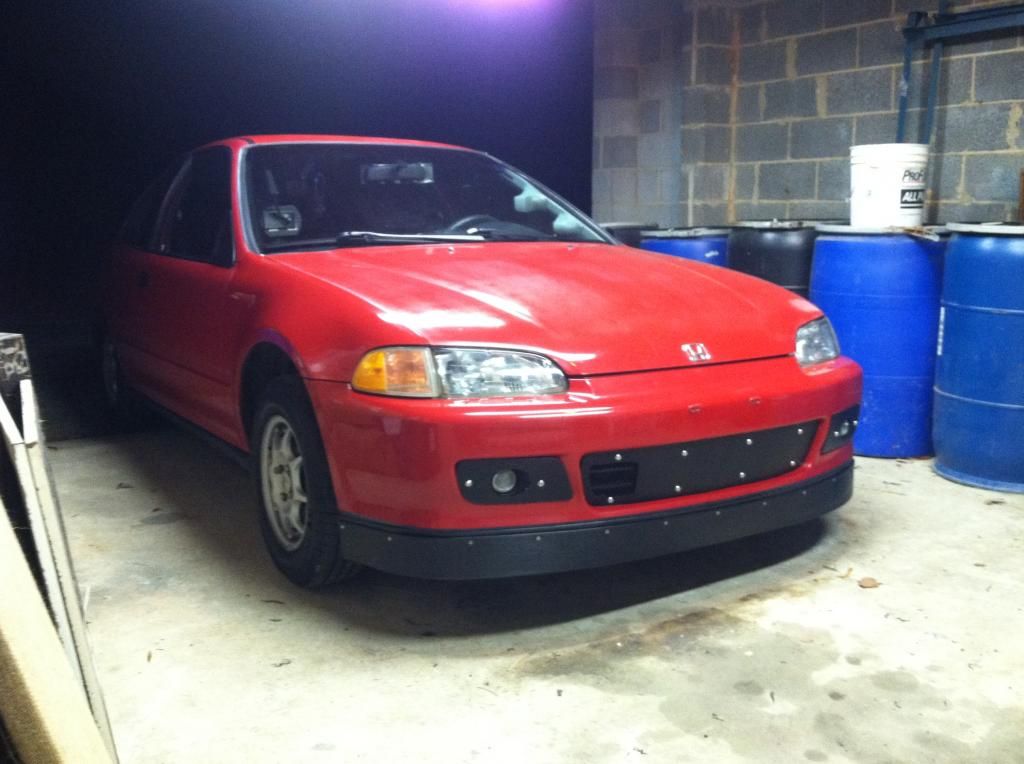
I'm currently about 7.5" from the floor with this new air dam extension bolted up. That should give me room for a 2.5" drop later down the road, with about 4.5-5" of clearance at the front. Not great, but not terrible either. Definitely daily-drive able, I think.
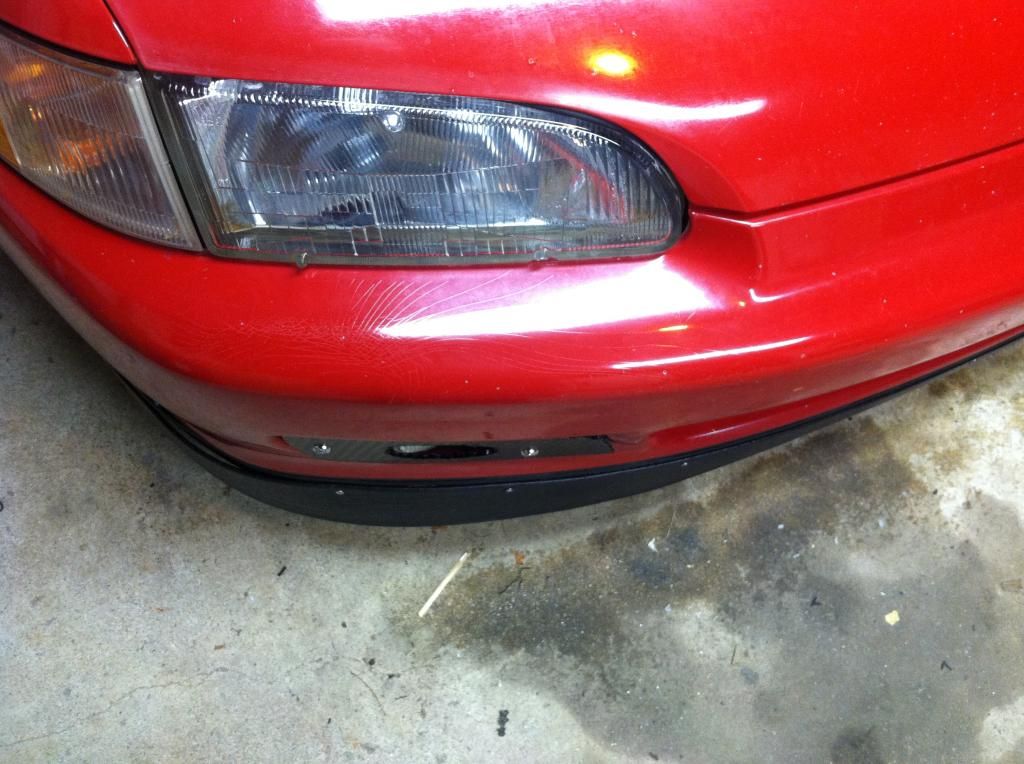
..and here’s another picture of the fog covers, to give you an idea of how they make things flush with the bumper. No more recession on the fog holes.
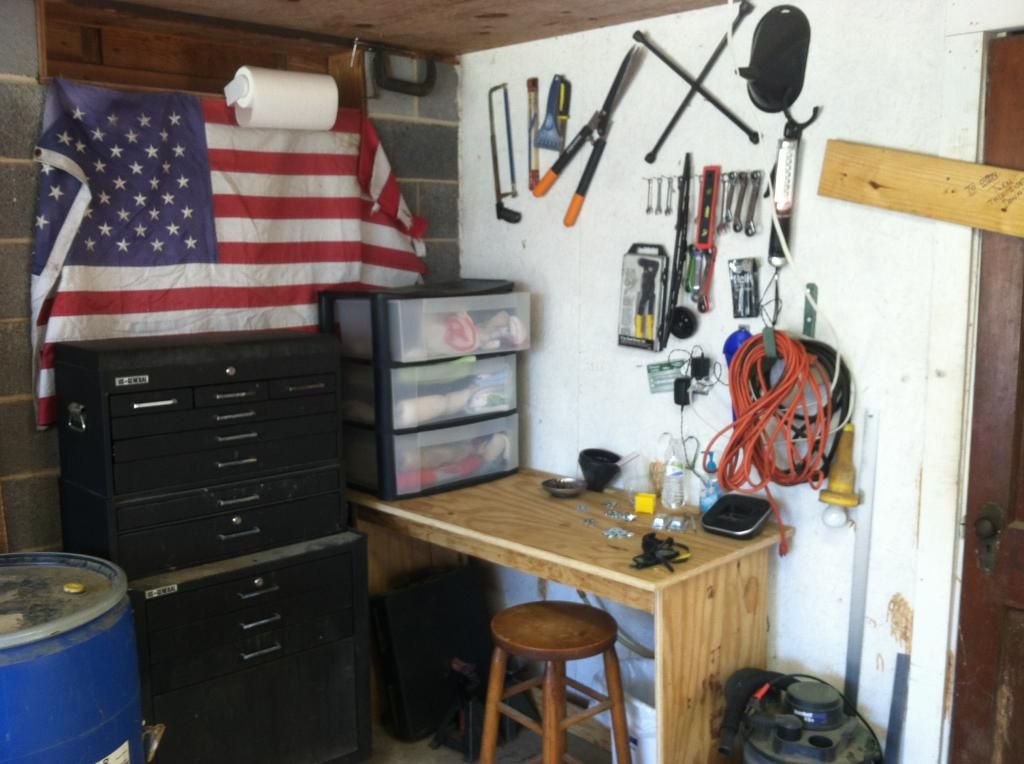
I work a part-time job collecting waste from apartment complexes. So far, I've scored a fully functional vacuum (ours broke, so this was a huge blessing); a nice waste basket for the garage; some bulletin boards for the kids homeschooling; a 57" one-year old LED flat screen TV (needs $100 worth of repairs); and most recently, an awesome work bench/table that someone apparently did not need anymore. All that to say, my workspace just got a whole lot more awesome-er...
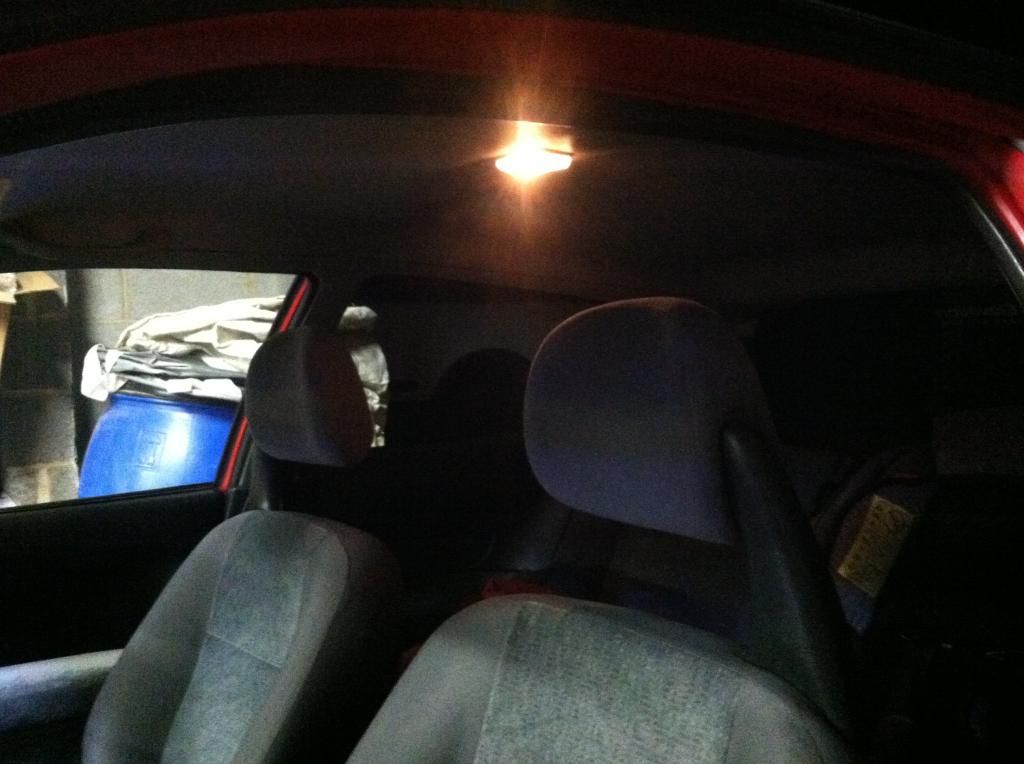
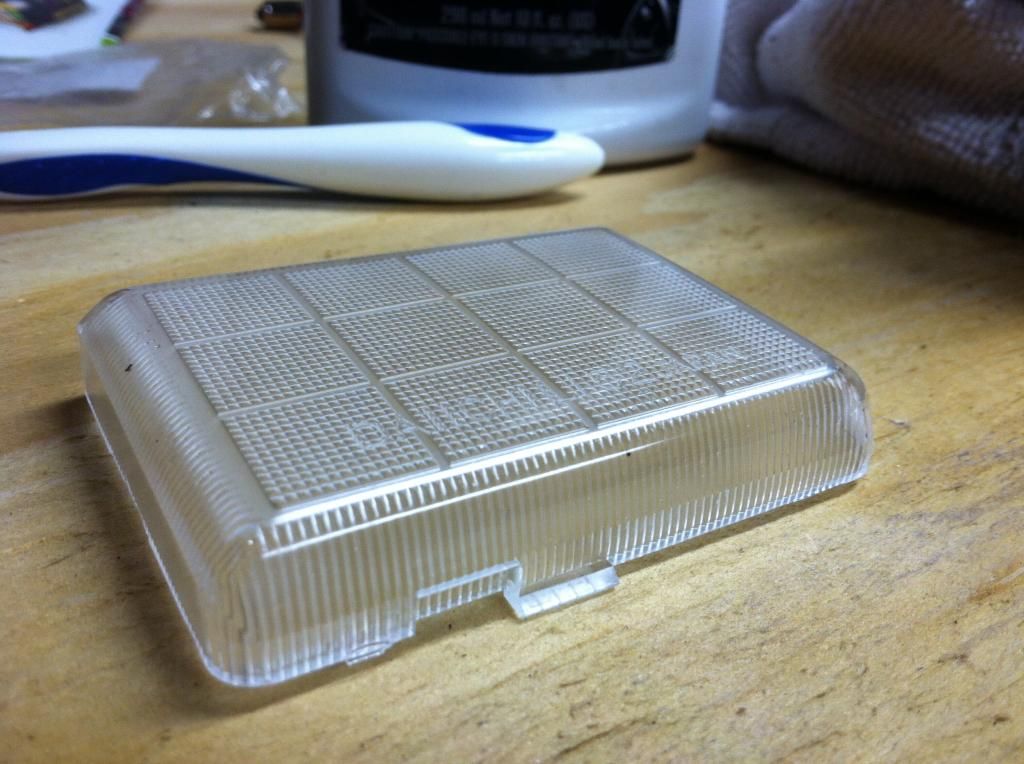
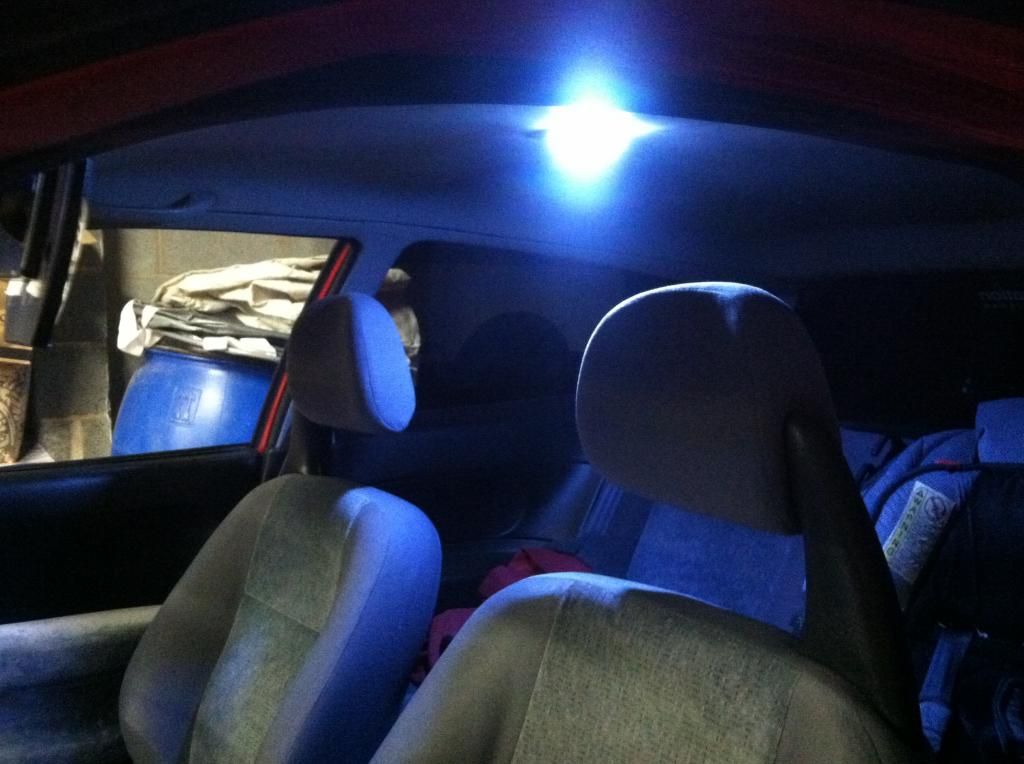
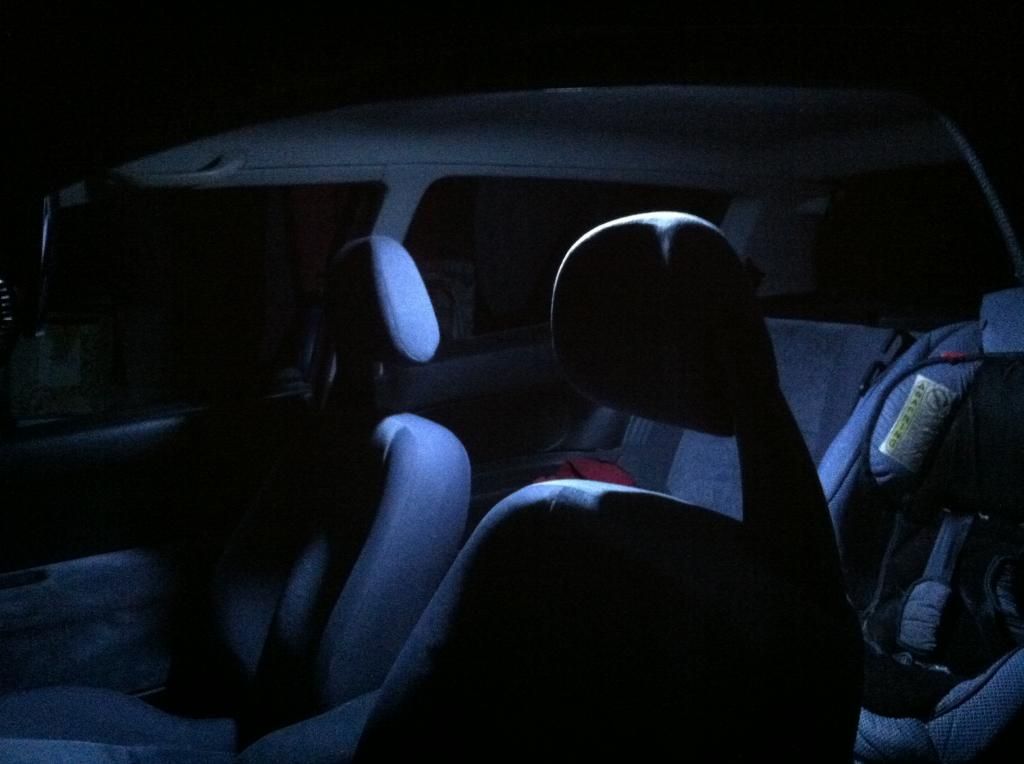
...and finally, sweet lil' update here. My LED Interior "conversion" came in. The VX only has one interior bulb, so the conversion was...rather simple :p
$1.57 on Ebay (shipped) from China. Took 3 weeks, but hey, at that price who can complain? :cool:
Old Stuff:
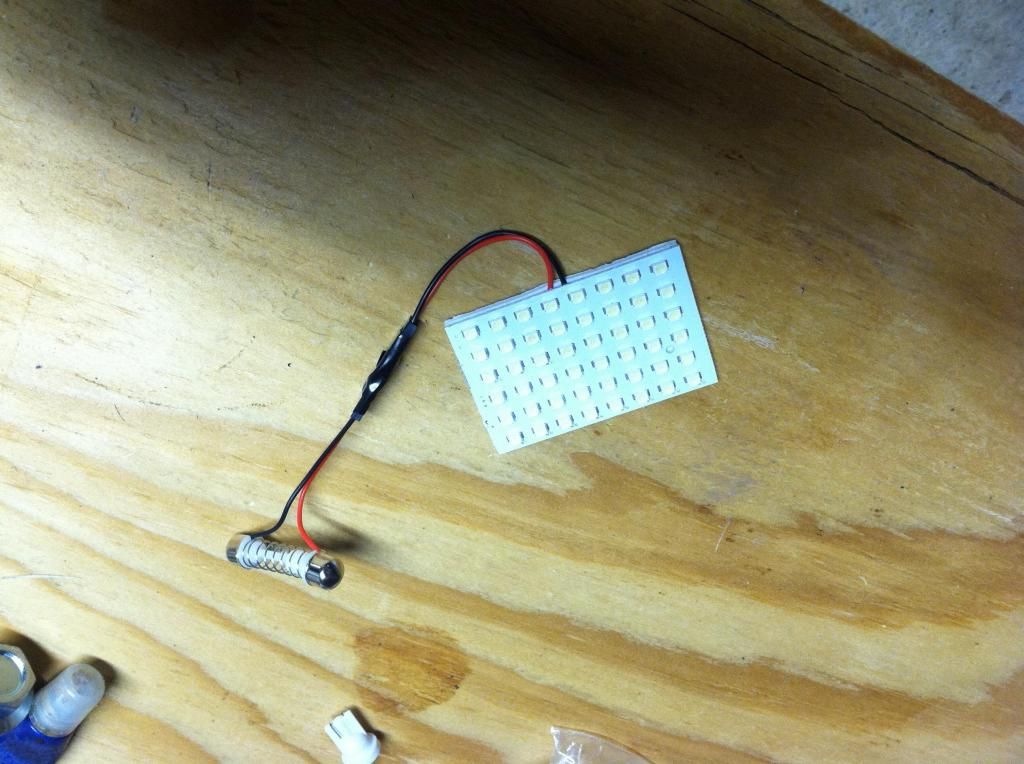
New Stuff:
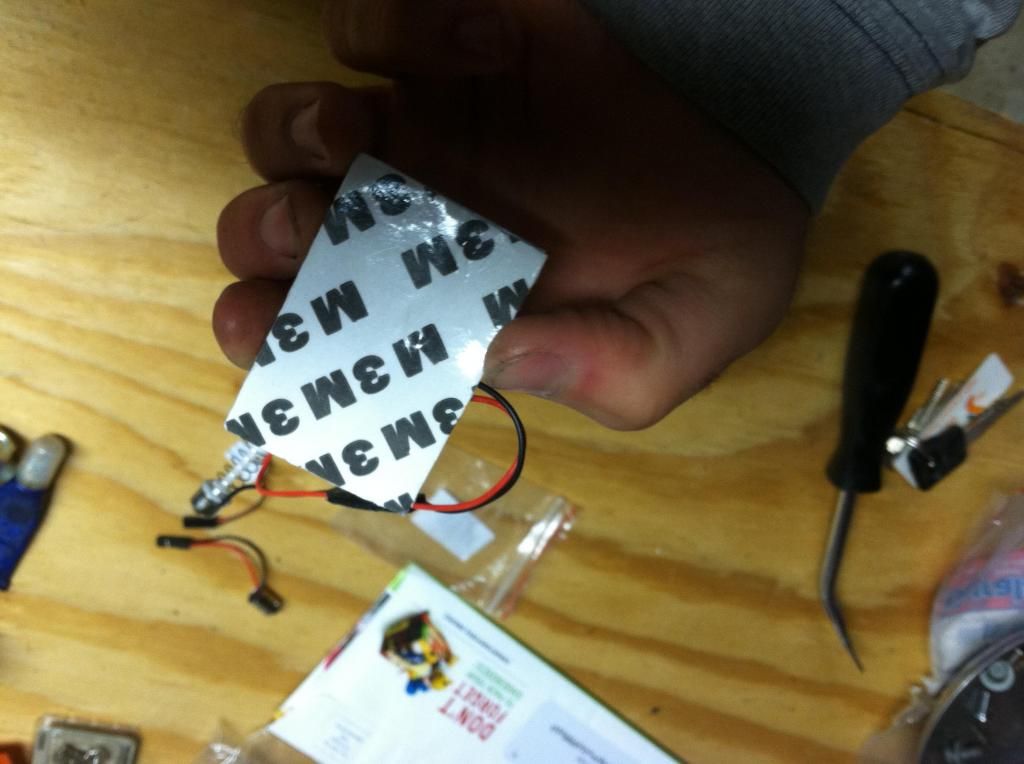
Came with quality "M3M3M" tape, hahaha!
More to come. As always, thanks for EcoTuning in!
It was a busy weekend full of fall fun for the family, but I did manage to get a couple of things knocked on this project. To complete the front bumper modifications and (hopefully) lower drag, I built a front air dam extension onto the OEM VX/Si front lip.
I started out with some of this stuff, which I got from Lowes. It was pricey, but I felt worth the extra $$ versus the flimsy plastic garden trim:

I used SS bolts and nylon nuts and washers to bolt everything up. I also drilled out recessed holes and flush-mounted bolt heads, to keep all of the bolts flush-mounted on the front side. I was pretty sick on my stomach when doing this project as I ate too much at a birthday party
. As a result, below is the only process-pic I have from this project: 
Basically, it entailed wrestling with the (curled up) composite trim and getting it to "un-roll" log enough to get succesfully bolted around the OEM lip. I used the existing mounting holes on the OEM lip as template to help me evenly space my new holes. I veered slightly on the outer-most corners, adding an extra screw, to help hold the shape/contour of that curve.
Ok, so here’s the finished results. I’ll be honest, I was grinning ear to ear when I bolted this up to the bumper. :p


I'm currently about 7.5" from the floor with this new air dam extension bolted up. That should give me room for a 2.5" drop later down the road, with about 4.5-5" of clearance at the front. Not great, but not terrible either. Definitely daily-drive able, I think.

..and here’s another picture of the fog covers, to give you an idea of how they make things flush with the bumper. No more recession on the fog holes.

I work a part-time job collecting waste from apartment complexes. So far, I've scored a fully functional vacuum (ours broke, so this was a huge blessing); a nice waste basket for the garage; some bulletin boards for the kids homeschooling; a 57" one-year old LED flat screen TV (needs $100 worth of repairs); and most recently, an awesome work bench/table that someone apparently did not need anymore. All that to say, my workspace just got a whole lot more awesome-er...

...and finally, sweet lil' update here. My LED Interior "conversion" came in. The VX only has one interior bulb, so the conversion was...rather simple :p
$1.57 on Ebay (shipped) from China. Took 3 weeks, but hey, at that price who can complain? :cool:
Old Stuff:

New Stuff:

Came with quality "M3M3M" tape, hahaha!


More to come. As always, thanks for EcoTuning in!
11-03-2014, 01:59 PM
#68
Honda-Tech Member
Thread Starter
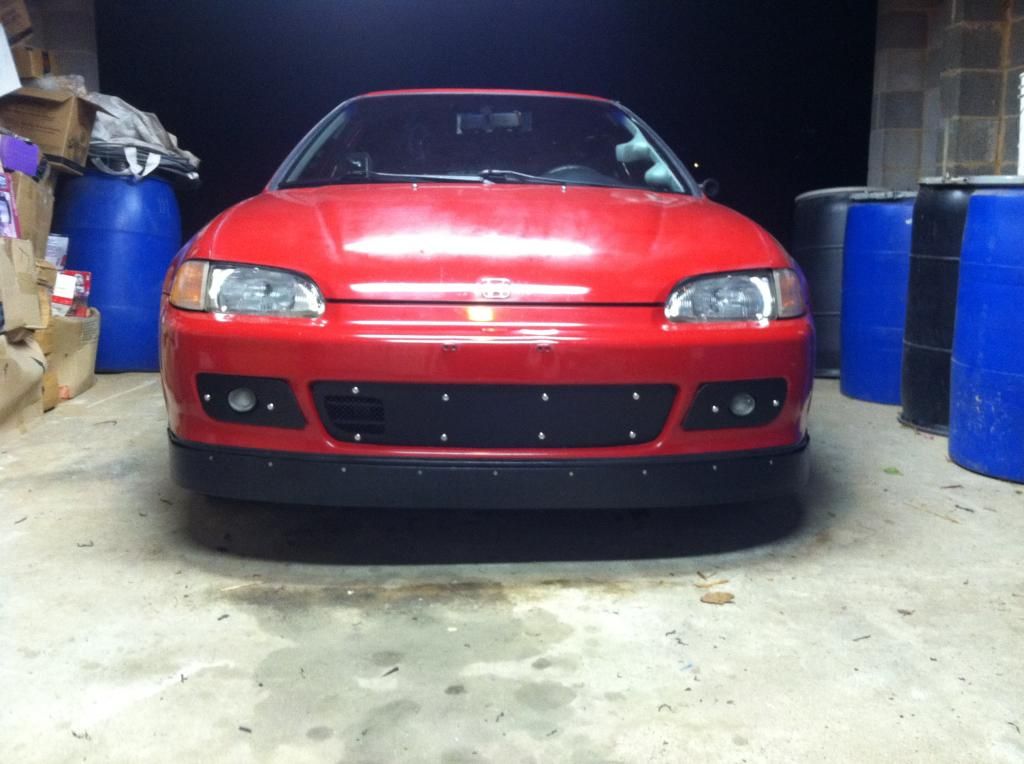
Fitment is actually pretty good on this air dam, though certainly not store-bought perfect. I'm hoping the form will settle in a bit more on the corners over time/heat exposure, etc... But really, I'm quite happy with it, for an hour or so of elbow grease and some landscaping material. My personal favorite part about the outcome of this was...and this was strictly coincidence/me getting lucky...that the distance from the top of the black trim on the bumper to the beginning of the OEM VX lip is the exact same distance I decided to go down from the VX lip to the beginning of the lawn edging. It's about 1/4" for each, if you look in the pics. It's the mirror image of this measurement that I feel really ties in the design rather smoothly coming off of the bumper.
Here's some more pics. One side I did a decent job with the fitment in my cut as the bumper ends near the wheel-well (drivers side). The other side...missed it by about 1/8". Urggg. I didn't lose sleep over it last night, but I sure did think about it quite a few times!

Here's some more pics. One side I did a decent job with the fitment in my cut as the bumper ends near the wheel-well (drivers side). The other side...missed it by about 1/8". Urggg. I didn't lose sleep over it last night, but I sure did think about it quite a few times!


The following users liked this post:
11-03-2014, 06:08 PM
#69
Honda-Tech Member
Love the look.
Have you noticed an increase in mileage since the aero mods?
Also, have you looked into some lightweight aftermarket wheels? Like say a 15" for when you decide to lower it
Have you noticed an increase in mileage since the aero mods?
Also, have you looked into some lightweight aftermarket wheels? Like say a 15" for when you decide to lower it
11-04-2014, 05:02 AM
#70
Honda-Tech Member
Thread Starter
What I have noticed a very significant amount of improvement on is the aero-function of the car. The Civic is now much more stable at 45+ mph speeds through heavy wind currents. I used to get tossed all about. But now, I hardly feel any turbulence at the wheel. The grill block/fog cover additions helped a lot with this. But, when I added the air dam, it really knocked the rest of the turbulence out.
Hope this helps.
11-05-2014, 07:03 AM
#71
Honda-Tech Member
Thread Starter
Update 11/5/2014: EcoSafety Sign; Part 2
Hello all. The fabrication is now done on the EcoSafety sign. I need to go back and do some touch-up paint work around the outline of the arrows. Unfortunately, despite my efforts to aid with an Exacto knife, the tape lines did not release with precision due to the elasticity of Plasti-Dip paint.
Here’s some progress pics:
In primer:
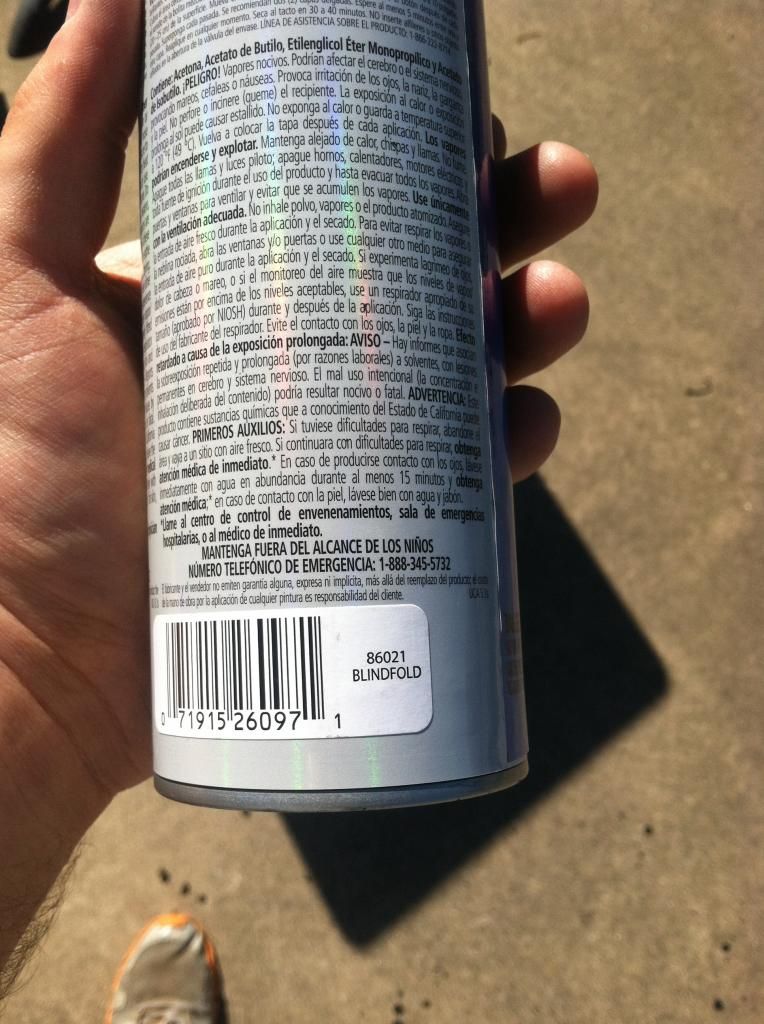
I used the same primer that I used to paint the MPGuino button board on my dash. Here’s a couple of pics of the can, in case anyone is looking for a paint with a close match to the OEM 92-95 Civic dash trim color. I bought it at Lowes for a bit under $4.
I then sanded the primed panel to remove orange-peel:
Next, I sprayed on a layer of white basecoat, to help a few coats of this stuff to really pop out:
A few layers of clear-coat was sprayed on top to seal everything in.
All dried and test fitting:
Decals applied. I sourced these vinyl die-cut letters at Lowes, in the mailbox/sign section; circa 50 cents per letter; a plus sign was not available so an "I" was cut up into pieces and those pieces were used to create a "+" shape. While I didn't take pictures of it, I temporarily placed some thin striping tape from my old model cars kit on the bottom and top of the space allotted for the letters. I used these tape lines as guide marks to help me place the decals as even/straight as possible.
I then drilled holes for the wiring, set rubber grommets in their place, and taped the arrows onto the panel:
3M amber tape was applied as an overlay (mainly for aesthetic purposes):
Next, I masked off a shape for the arrow:
3 Coats of Plasti-Dip black and 2 Coats of Glossifier were then applied (for aesthetic purposes, but also to protect the electrical circuits/wiring):
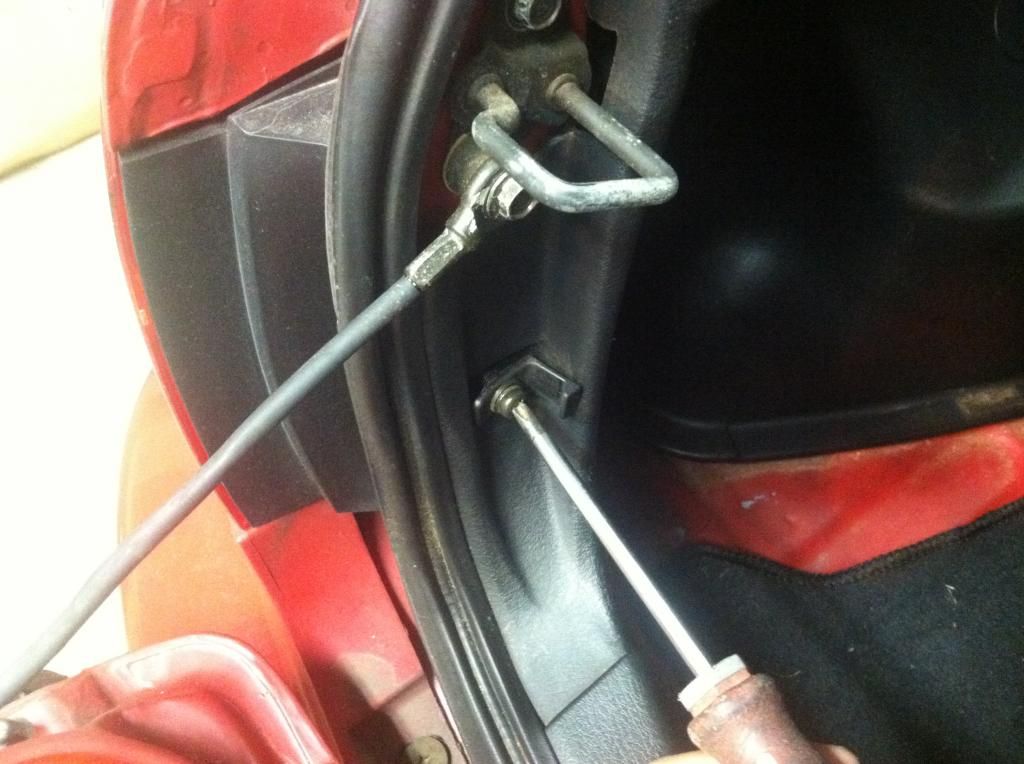
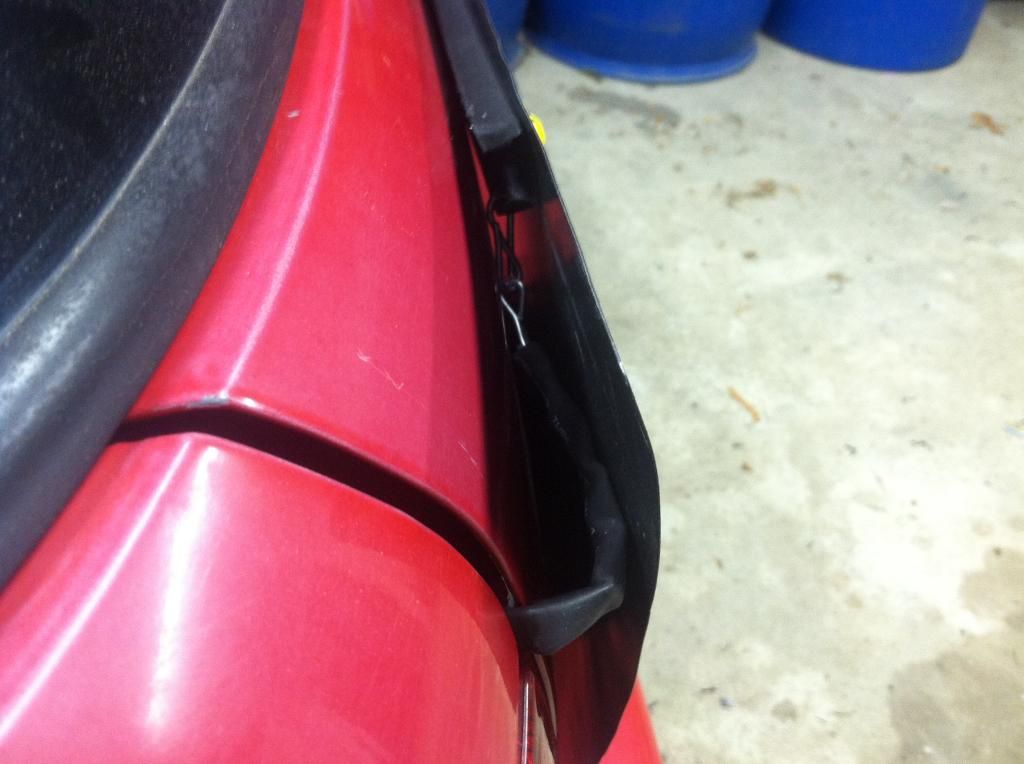
Next, I set to create an anchor for the sign, in case a strong gust of wind ever caught a corner and wanted to force it off of the car. I choose a bolt just inside the tailgate to bolt the anchor up to:
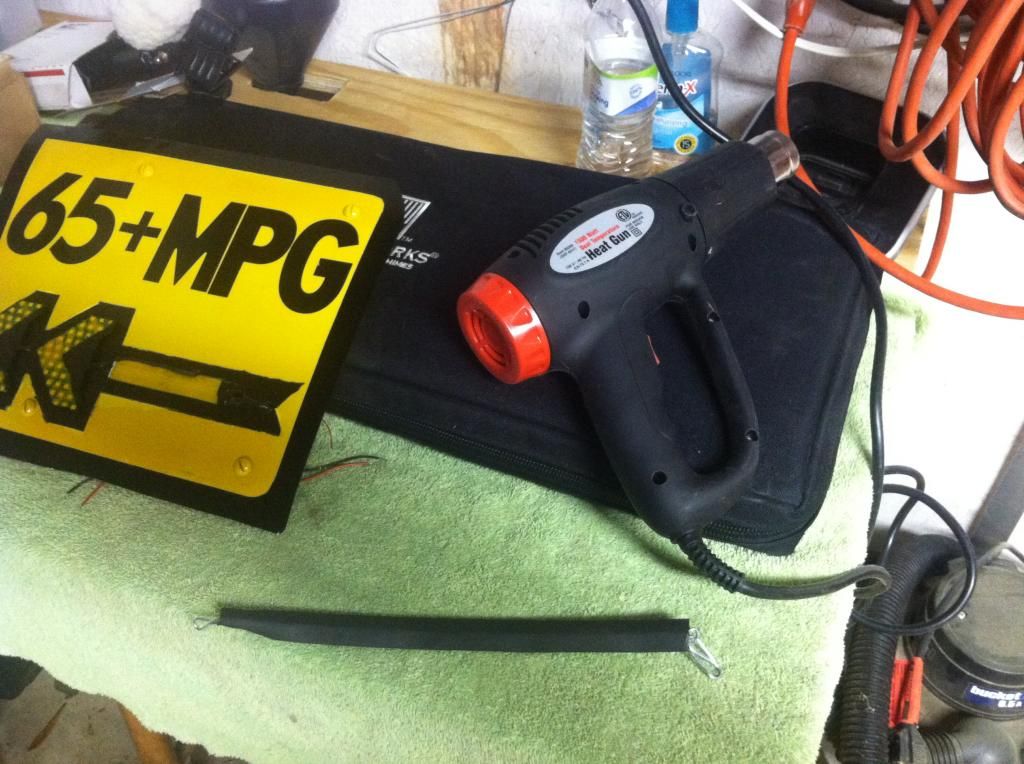
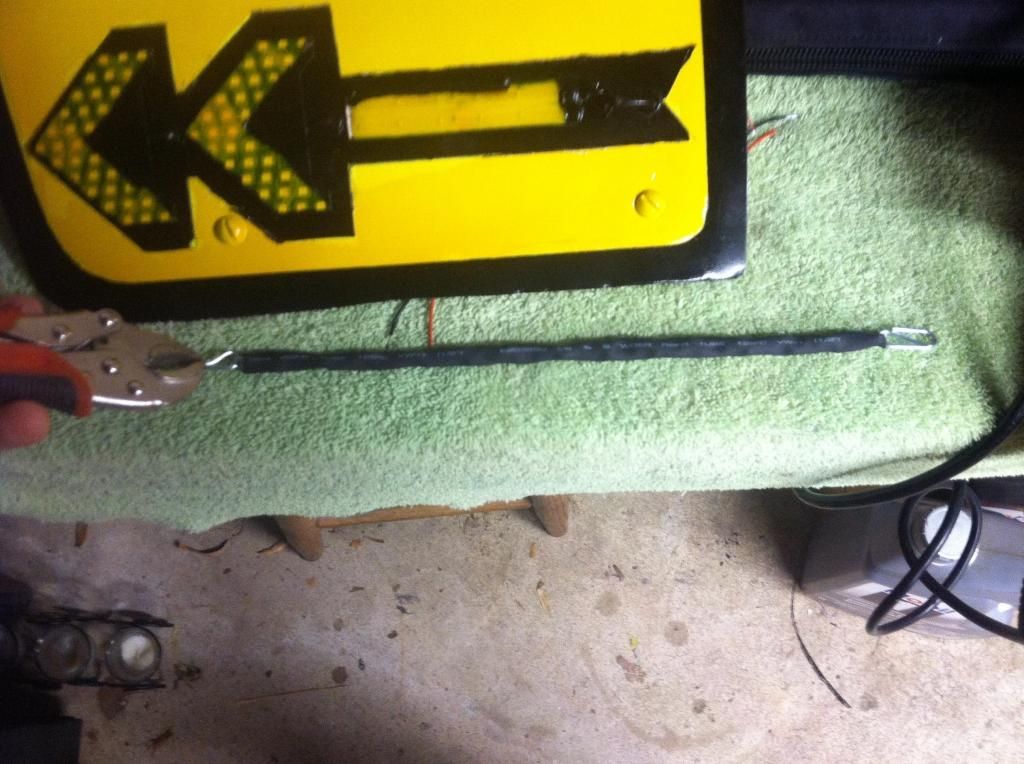
I then cut some thin chain to length and sleeved it with heat shrink. I used a heat gun to shrink everything into place. Hooks were crimped to both ends. One end was bolted to the hatch at the aforementioned location. The other end was looped and crimped into a hole drilled on the top magnetic bracket of the sign.
Everything all buttoned up and ready to ride:
Today’s maiden voyage went great. So far, the sign appears to be well received, other than a few of my colleagues laughing at me in the office. :D
I did find one thing rather odd. I suspected people would just blast right by me when they saw the sign. However, many just stayed behind me and rode along. Not tailgating me, but keeping a healthy/respectful distance. It was like…the sign was giving me more respect. No one was mad at all. No honks, nothing like that. Appears the signing is making life safer. I felt a bit like Forrest Gump, leading the runners cross-nation. People just jumped right in
So far, the EcoSafety sign appears to be living up to it’s name. As always, I'll continue to keep you updated. Wiring work will be next on the list to (finally) finish this part of the project.
Thanks for EcoTuning in.
Hello all. The fabrication is now done on the EcoSafety sign. I need to go back and do some touch-up paint work around the outline of the arrows. Unfortunately, despite my efforts to aid with an Exacto knife, the tape lines did not release with precision due to the elasticity of Plasti-Dip paint.
Here’s some progress pics:
In primer:

I used the same primer that I used to paint the MPGuino button board on my dash. Here’s a couple of pics of the can, in case anyone is looking for a paint with a close match to the OEM 92-95 Civic dash trim color. I bought it at Lowes for a bit under $4.


I then sanded the primed panel to remove orange-peel:

Next, I sprayed on a layer of white basecoat, to help a few coats of this stuff to really pop out:
A few layers of clear-coat was sprayed on top to seal everything in.
All dried and test fitting:


Decals applied. I sourced these vinyl die-cut letters at Lowes, in the mailbox/sign section; circa 50 cents per letter; a plus sign was not available so an "I" was cut up into pieces and those pieces were used to create a "+" shape. While I didn't take pictures of it, I temporarily placed some thin striping tape from my old model cars kit on the bottom and top of the space allotted for the letters. I used these tape lines as guide marks to help me place the decals as even/straight as possible.

I then drilled holes for the wiring, set rubber grommets in their place, and taped the arrows onto the panel:

3M amber tape was applied as an overlay (mainly for aesthetic purposes):

Next, I masked off a shape for the arrow:


3 Coats of Plasti-Dip black and 2 Coats of Glossifier were then applied (for aesthetic purposes, but also to protect the electrical circuits/wiring):

Next, I set to create an anchor for the sign, in case a strong gust of wind ever caught a corner and wanted to force it off of the car. I choose a bolt just inside the tailgate to bolt the anchor up to:

I then cut some thin chain to length and sleeved it with heat shrink. I used a heat gun to shrink everything into place. Hooks were crimped to both ends. One end was bolted to the hatch at the aforementioned location. The other end was looped and crimped into a hole drilled on the top magnetic bracket of the sign.


Everything all buttoned up and ready to ride:


Today’s maiden voyage went great. So far, the sign appears to be well received, other than a few of my colleagues laughing at me in the office. :D
I did find one thing rather odd. I suspected people would just blast right by me when they saw the sign. However, many just stayed behind me and rode along. Not tailgating me, but keeping a healthy/respectful distance. It was like…the sign was giving me more respect. No one was mad at all. No honks, nothing like that. Appears the signing is making life safer. I felt a bit like Forrest Gump, leading the runners cross-nation. People just jumped right in
So far, the EcoSafety sign appears to be living up to it’s name. As always, I'll continue to keep you updated. Wiring work will be next on the list to (finally) finish this part of the project.
Thanks for EcoTuning in.
Last edited by OG Wagon; 11-05-2014 at 07:18 AM.
The following users liked this post:
 11-06-2014, 06:28 AM
#73
Honda-Tech Member
This is definitely not the typical thread that I would be interested in but very cool. I may have to look into building a couple of these type of eco cars as a daily (my current daily is a crew cab truck) and maybe selling a few. Way better than paying much more for a newer hybrid that won't do as well thats for sure!
11-06-2014, 10:49 AM
#74
Honda-Tech Member
Thread Starter
Thanks dudes! Sometimes life's NOT as good in the "fast lane". ")
Thank you sir. You def should. Plus, the hybrids: their batteries die out over time, at about the 5-7 year mark. Then, your screwed.
This is definitely not the typical thread that I would be interested in but very cool. I may have to look into building a couple of these type of eco cars as a daily (my current daily is a crew cab truck) and maybe selling a few. Way better than paying much more for a newer hybrid that won't do as well thats for sure!
11-06-2014, 12:56 PM
#75
Honda-Tech Member
Join Date: Nov 2005
Location: Albuquerque, NM, USA
Posts: 202
Likes: 0
Received 0 Likes
on
0 Posts
The high voltage batteries in hybrids have gotten a bit better and last plenty longer than 5-7 years. Also, if you get your car regularly serviced at the dealership, both Honda and Toyota are very good about goodwilling the battery replacement, and covering some, a lot of, or all of the cost (Honda is a bit better). There are also aftermarket, remanufactured batteries from sketchy online sources and respectable suppliers coming available. So screwed you are not.
That said, I tend to agree that a well tuned small engine in a light car, like the Civic VX or CRX HF is the best option in the end, because the simpler the car the better.
I am still not really sure what the MPGuino does. I Googled it and everything. Is it a piggyback fuel and spark controller? What does it control?