
Joey's '00 EM1 EBP Restoration
 10-12-2014, 11:57 AM
#1
Honda-Tech Member
Thread Starter
The Older We Get The More We Search For Our Youth...
First of all, sorry for the crappy cell pics, I dont take my camera out to the garage and I usually work at night under shitty lights.
Hello everyone, I recently acquired a '00 EBP and I plan on restoring it for my 1y/o son as a future father/son car. Well, when these came out in '99 I was 19y/o, in college and working part time at a restaurant, so there was no way I could afford a brand new $24k car, but man did I not oogled for them everytime I saw one. The wheels, spoiler, lips, fogs - they all came together for one of the cleanest looks I have seen on a Honda - ever.
Around those days('97-'03), I built a few CRX's, EG's, Integras and such but never owned an EM1. A few years into the EM1's being out, you started seeing them in salvage yards and I did bring two EBP's back from the dead, after my brothers purchased them completely stripped. One of those received a B18C1 and the other an LS/vtec, and both swaps turned out great. Unfortunatley both cars were traded off long ago and that was as close as I got to owning an EBP.
Well I got away from modding cars, bought an AP1, kept it mostly stock, switched educations, got my automotive training, started working at Acura and then switched over to BMW(since they break more often ha) and sold the AP1. Now many years later, I'm a BMW/MINI shop foreman and I have decided it is time to built another Honda and after trying to decide on a specific model, it was only rgiht to get an EM1 and more importantly an EBP.
I looked online and found one closed enough for a good price. Seller was willing to take as many pics as possible and I was happy with the extremely clean quarter panels. These cars are 15y/o now and living in the northeast/rustbelt, you have to be aware of the problems you can get into when dealing with rust.
The car was in Michigan, so after renting a dolly from Uhaul I was on my way. Well about an hour and half on the road the seller calls and tells me the title hasn't been switched to his name, so it was a waste of money and time. I can't lie, I was pissed as hell but the seller told me he would work out the title issue and deliver the car himself. There was nothing else to do but trust him, so I drove back home and a week later, the guy came through on his word and delivered the car
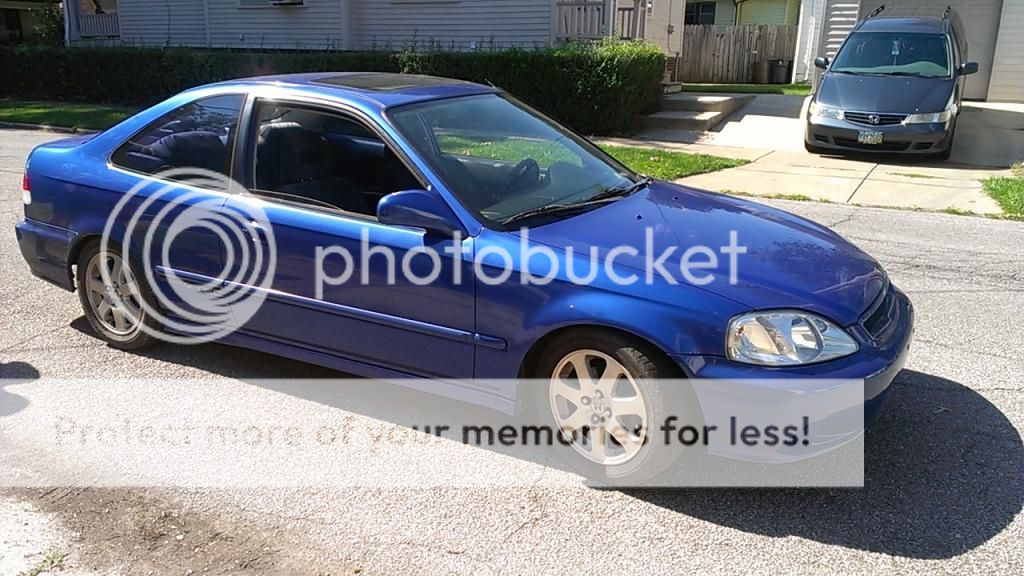
This was the first picture taken of it. Overall the body is clean with dents here and there. All the info the seller gave me was correct and there were absolutely no surprises.
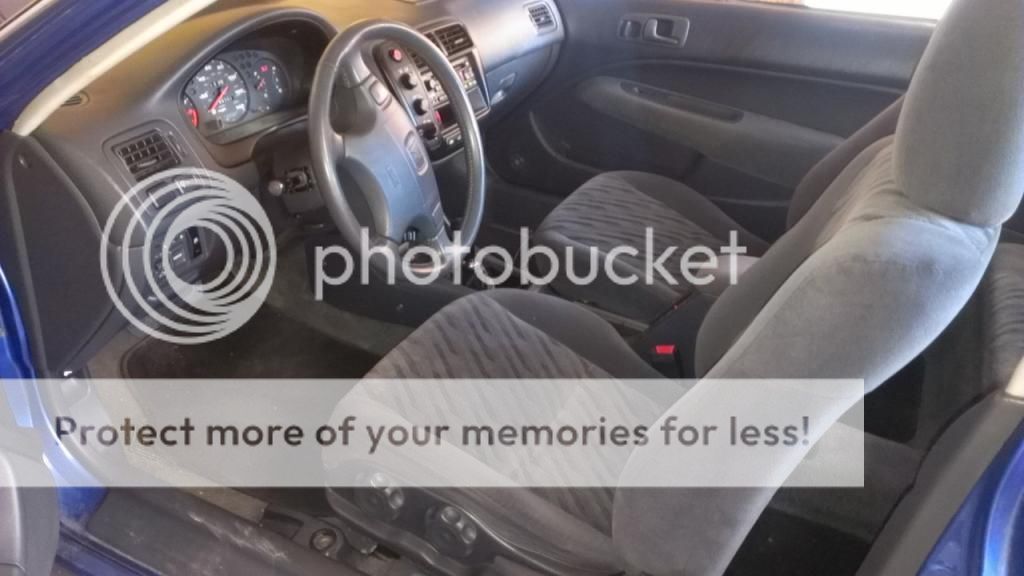
The interior, although not original to the car, is correct and in good shape. The cluster will need work since the fuel and temp gauges are inop.

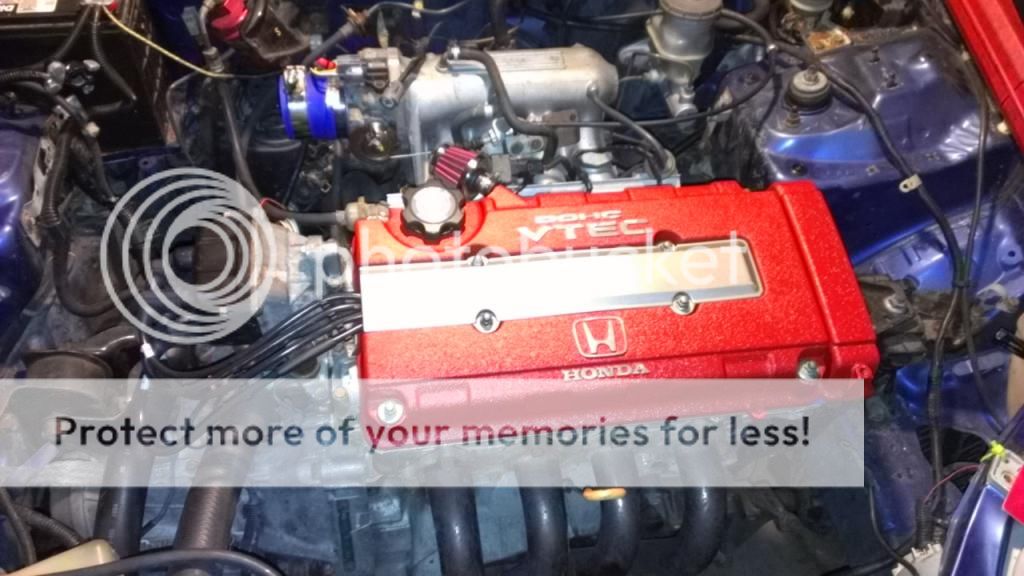
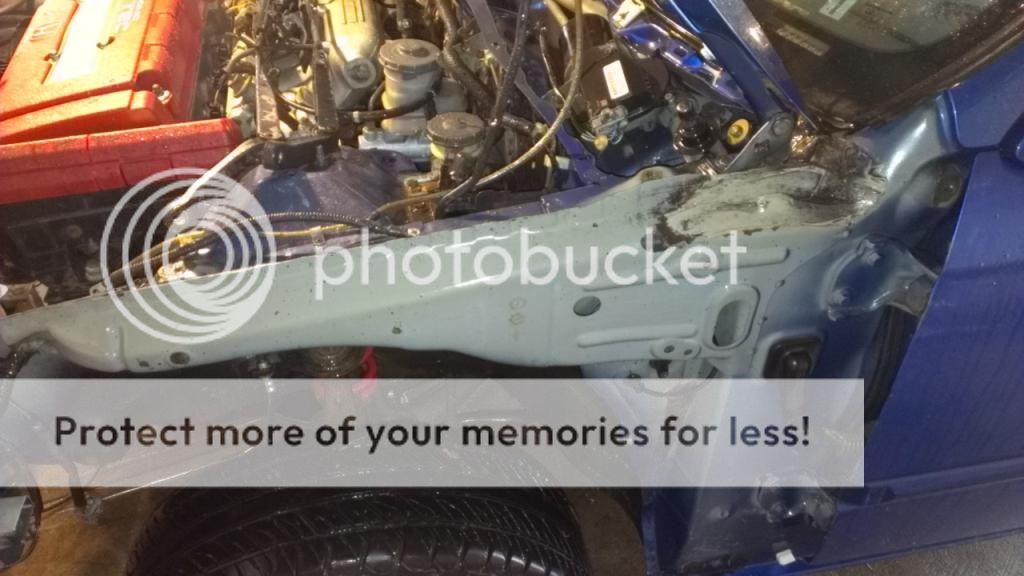
The engine is a B16A2 from a DelSol, so its the OBD2a, runing a chipped p28 with jumper harness. Im removing the p28 ecu and going back to the p2e. For that I'll need to run some extra sensors but will get it all figured out in due time.

Project begins - 8/18-19/14
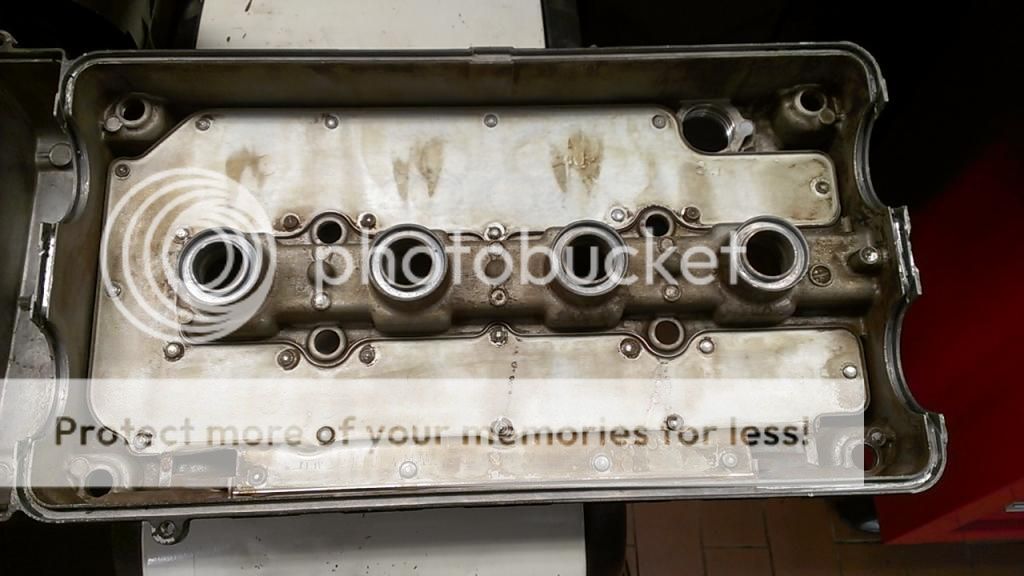
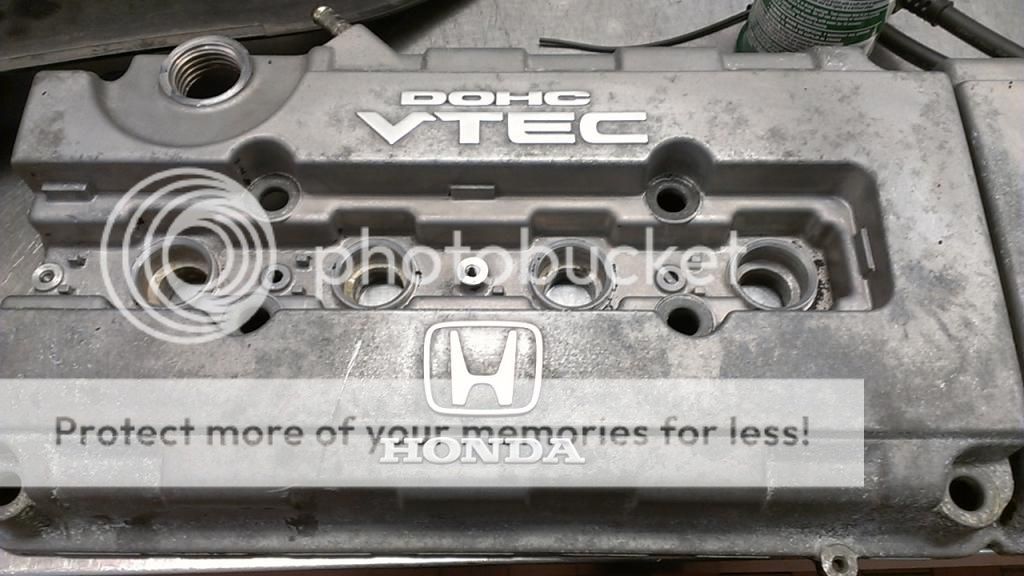
Removed the valve cover to inspect valvetrain and see the condition of the engine. Glad to see minor discoloring expected with such an old engine. Nothing looks unevenly worn, no chips, scratches or unusual. Sorry no real pics of the valvetrain.
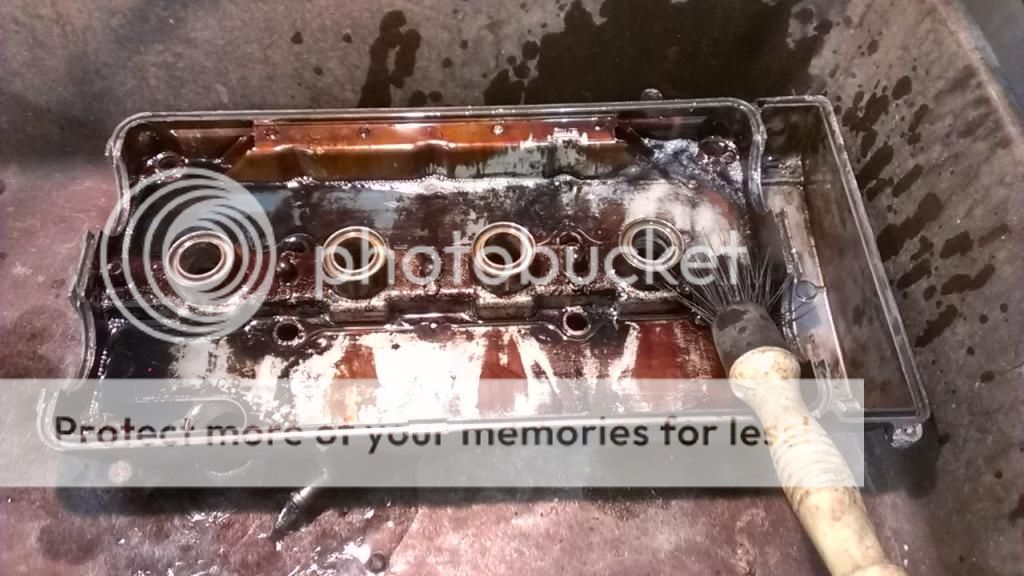
Took the valve cover to work for cleaning.
Here it is in the parts washer.
Better
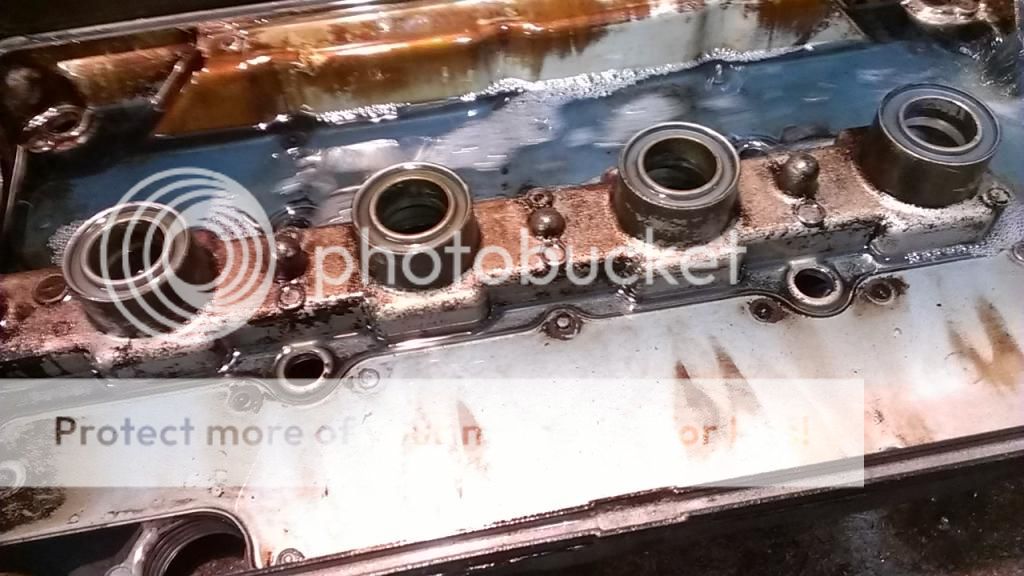
Even better
Best
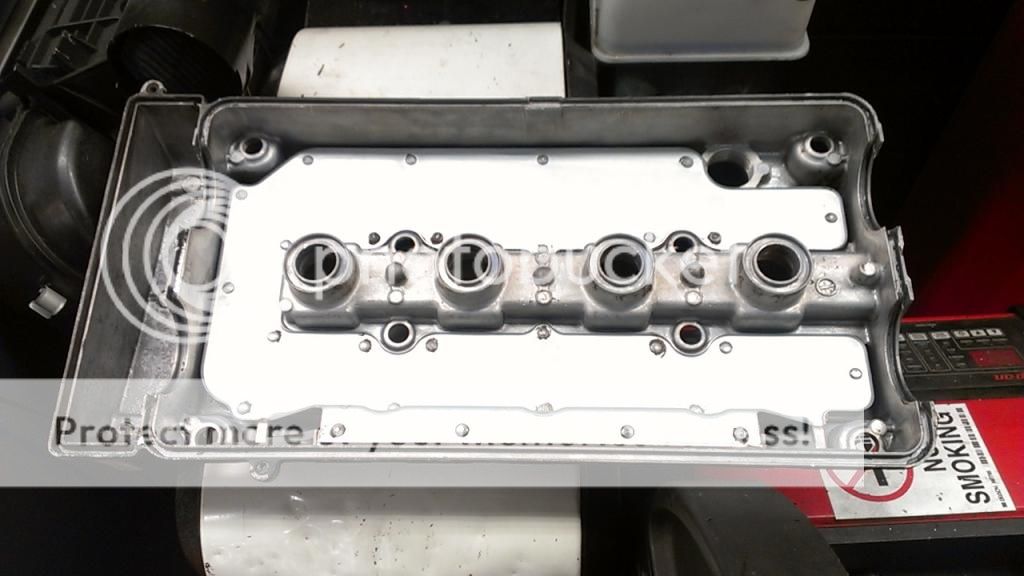
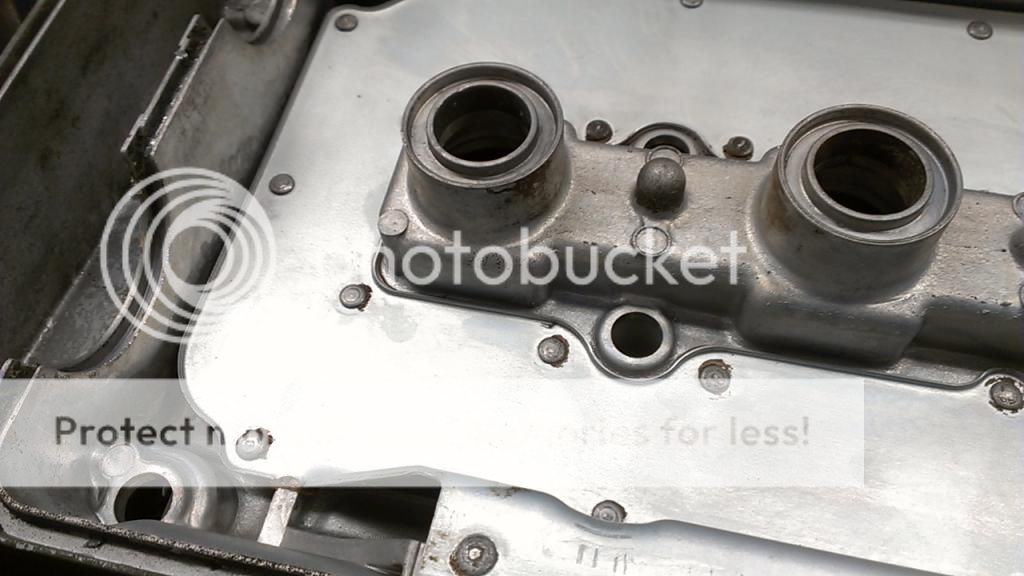
I think it came out phenomenal. You may be wondering why I bothered to clean it so thoroughly, and honestly, it was just cause. Why not? I had the extra time and materials.
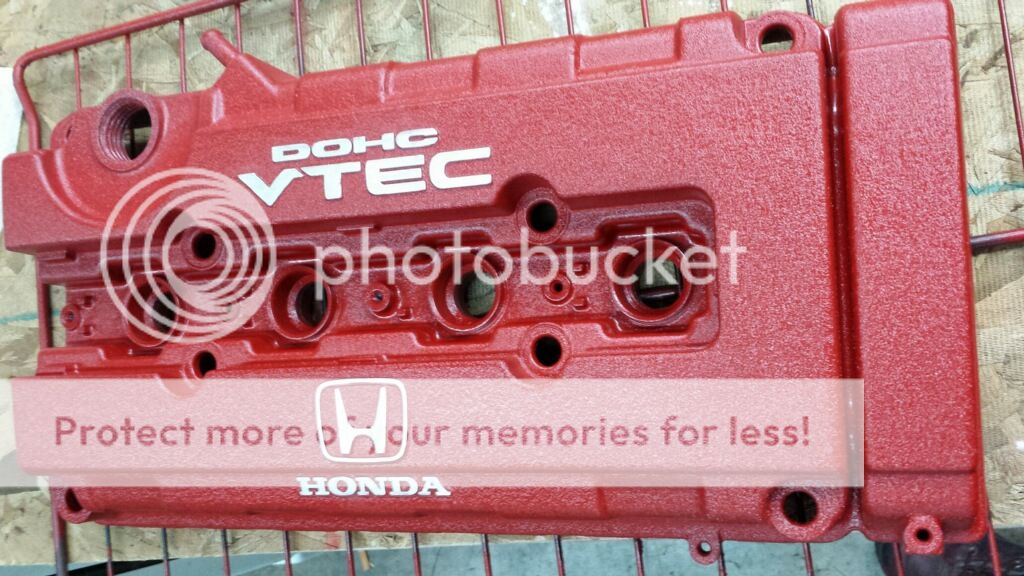
The top of the valve cover needed some attention. I used Aircraft Remover and took off all the leftover black wrinkle paint.
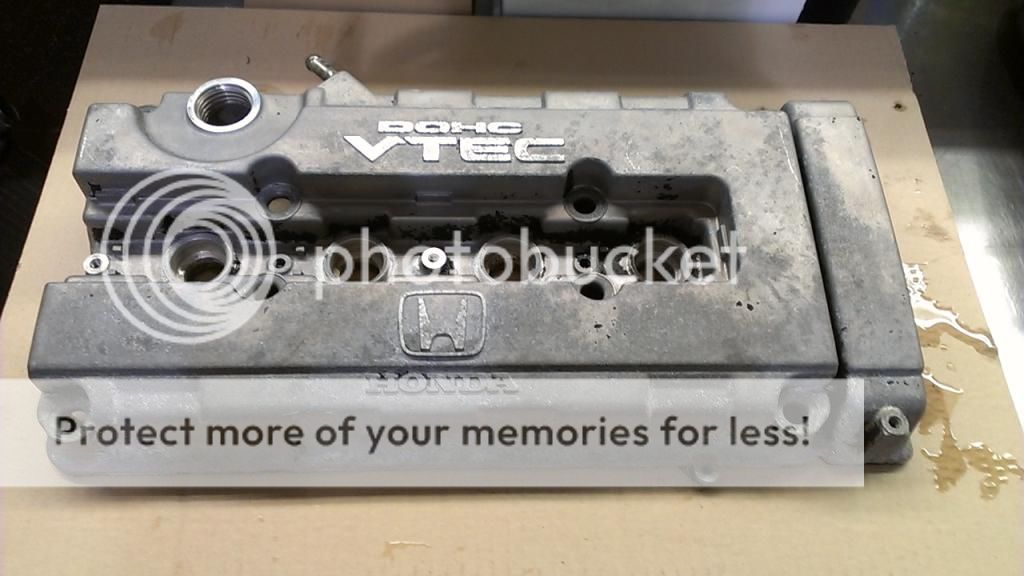
Second round
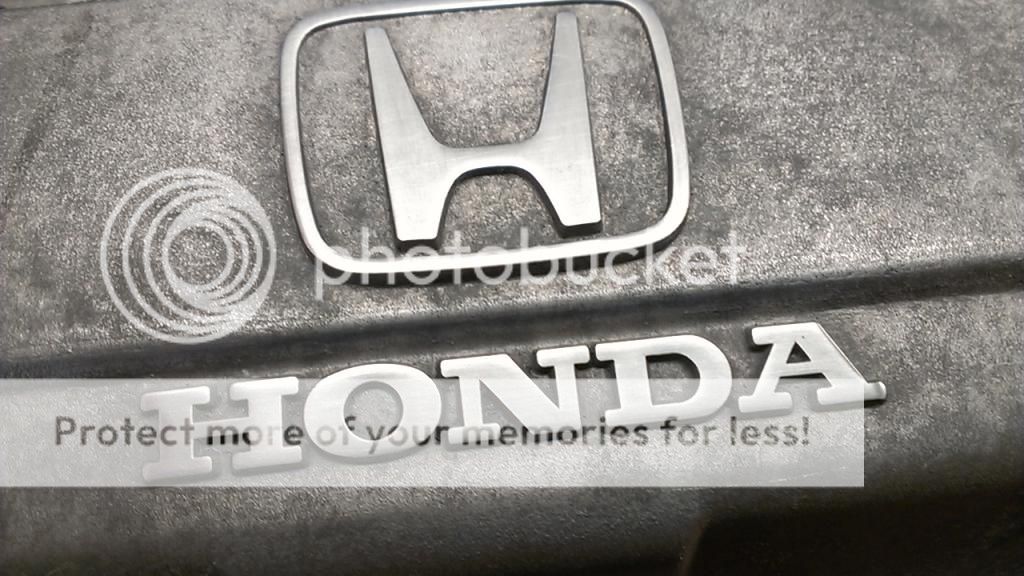
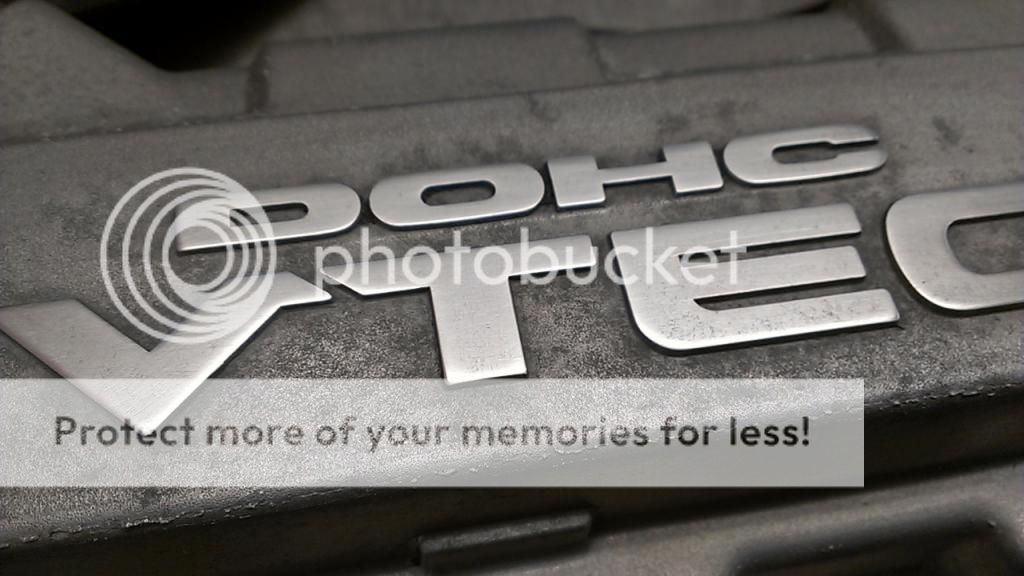
Soft polishing of the enblems
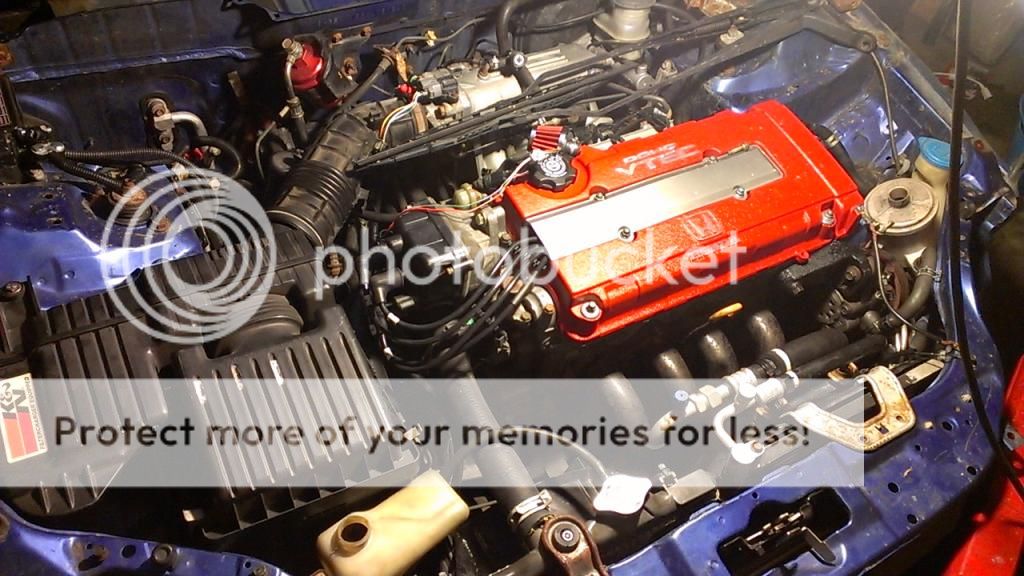
BOOM!!! Decided to go with the wrinkle red powder coat for a nice contrast in the engine bay. Now onto the engine work.
Engine Maintenance - 8/20/14
Before putting the "new" valve cover in the engine, I wanted to do a few simple maintenace things to it.
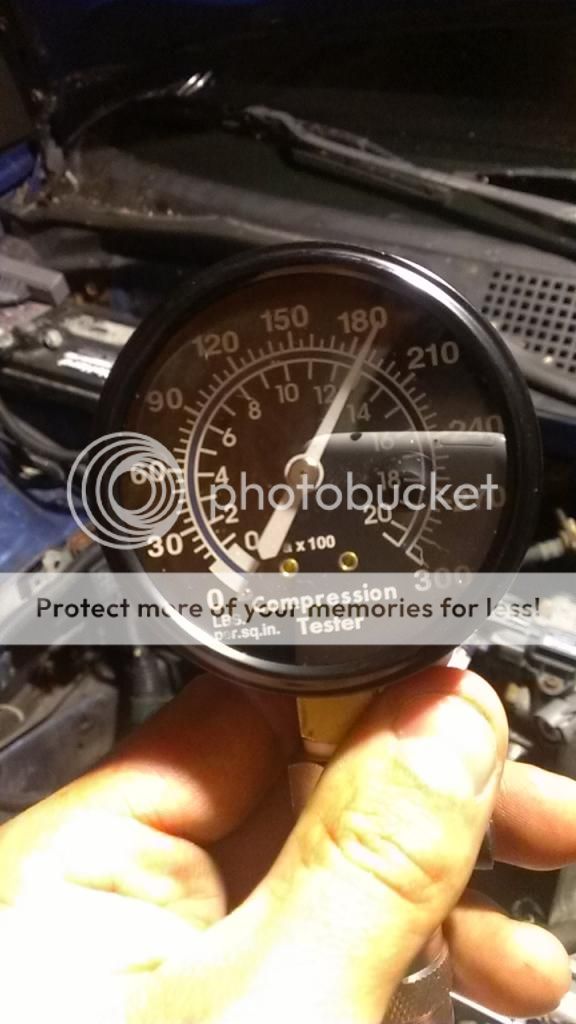
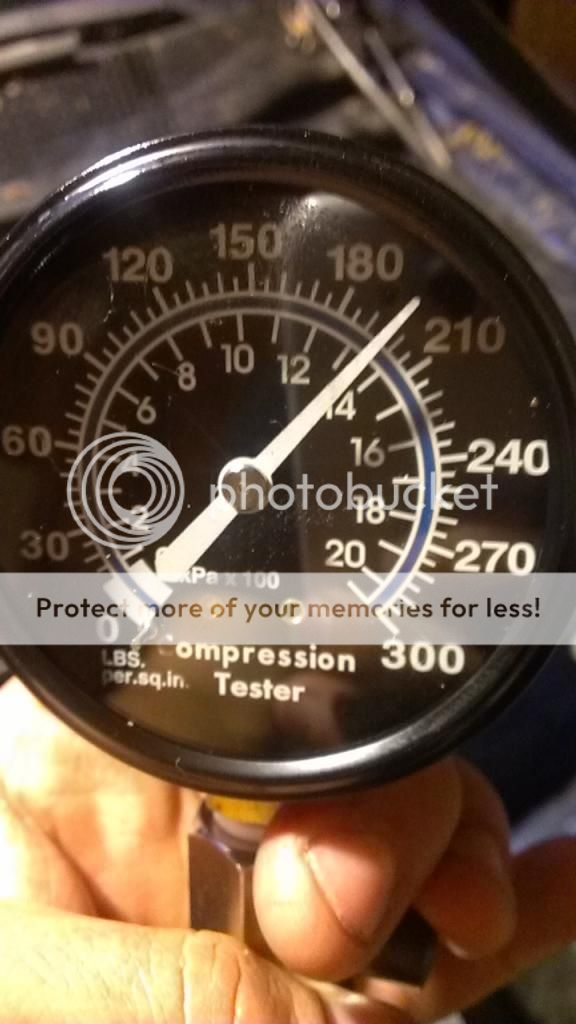
Performed a super quick compression test on it, just to see how healthy it was.
#1 Cylinder
#2 Cylinder

#3 Cylinder
#4 Cylinder
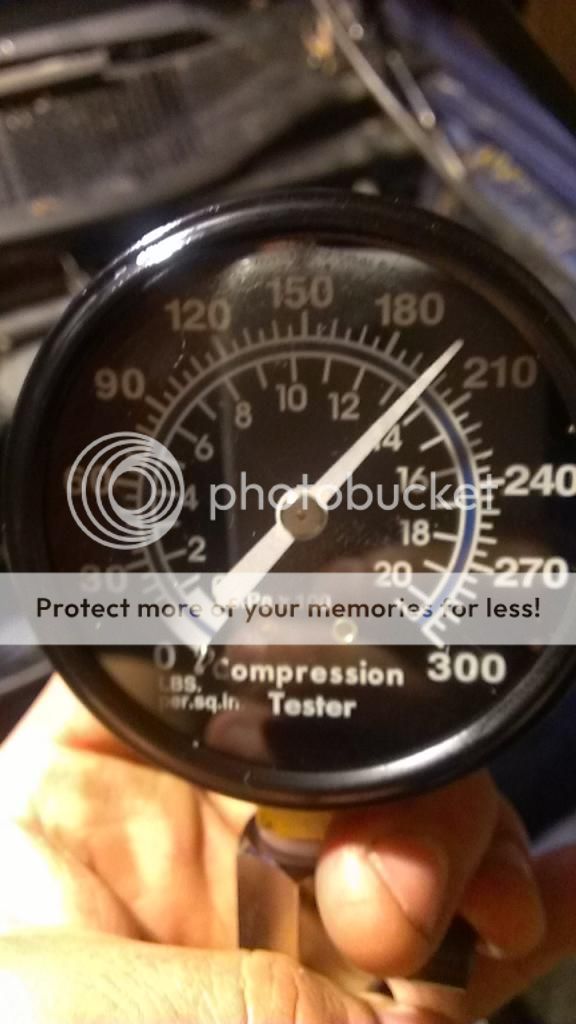
Overall not bad. I'm sure that with a valve adjustment I can get them all over 210psi. Honestly, as it is right now, I'm super happy.
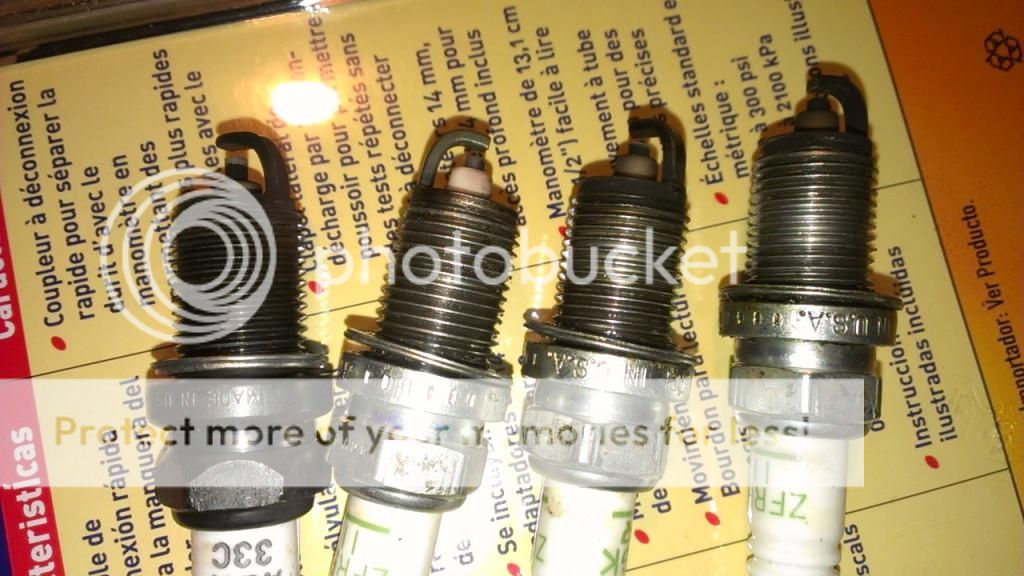
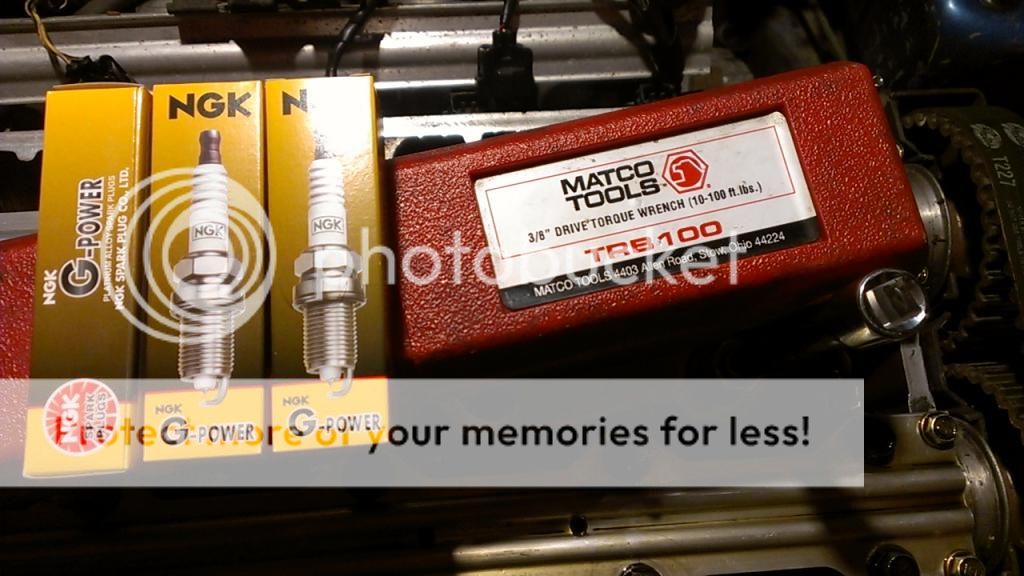
Old spark plugs out. They looked so so... Going to be using NGK G Power Platinum.
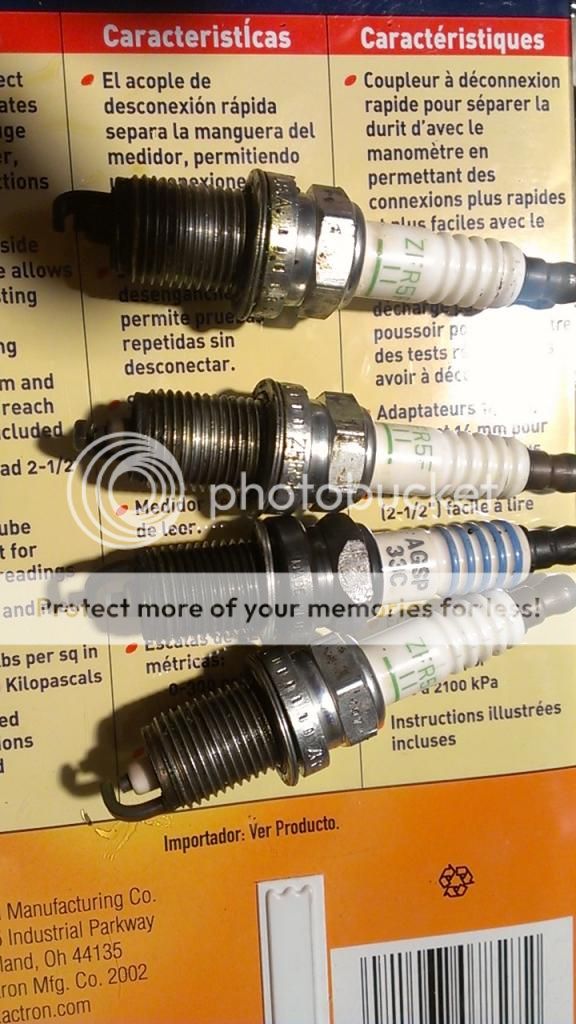
Weird how it had 3 NGK's and 1 Motorcraft :banghead:
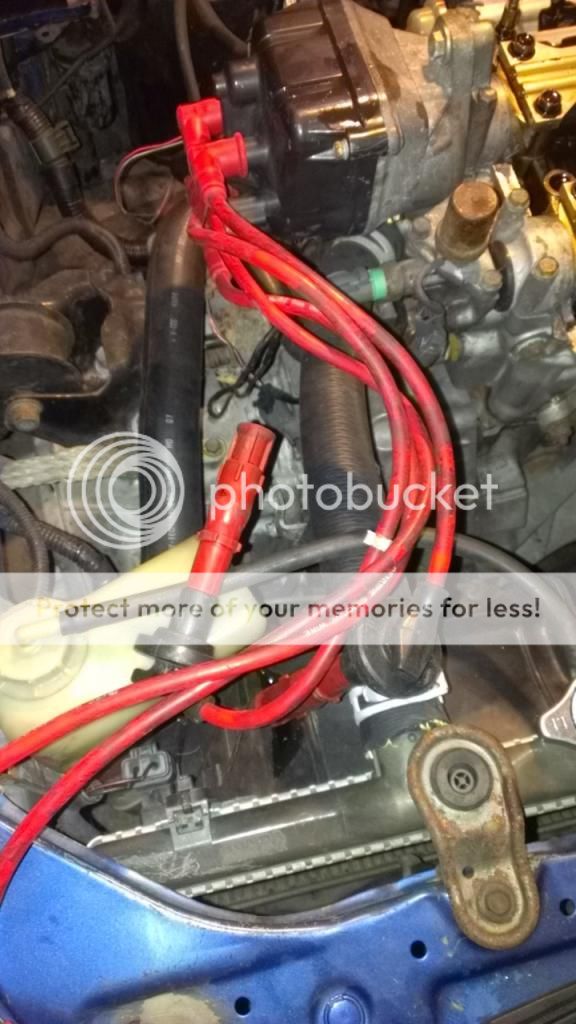
Old plug wires out. They felt extremely rubbery, as if the sillicone rubber was deteriorating and melting.
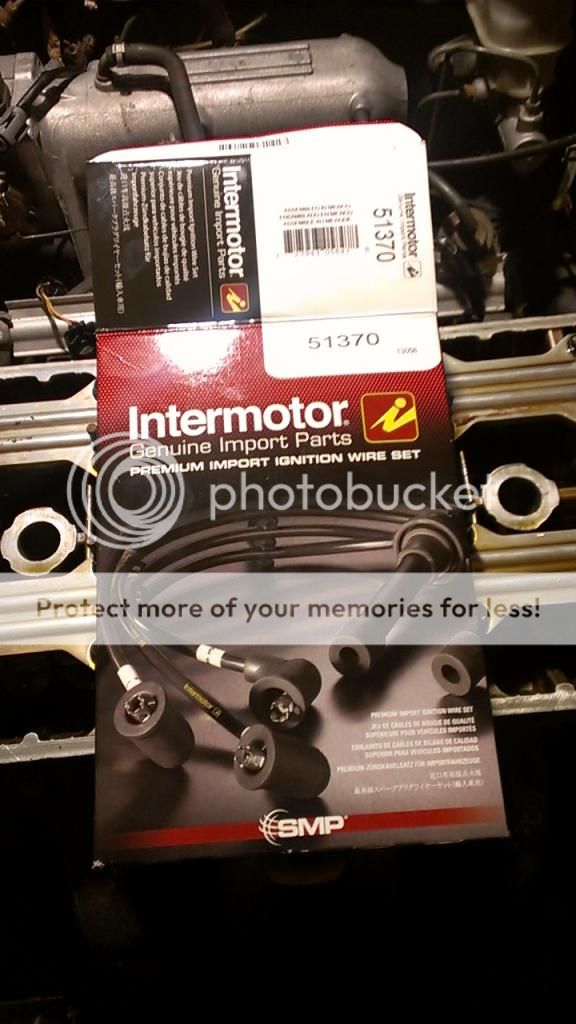
Going to replace them with SMP/Intermotor brand. I have been using them for quite awhile and like them a lot. Good quality, good price and pretty much always in stock.
Old ones - corroded connectors.
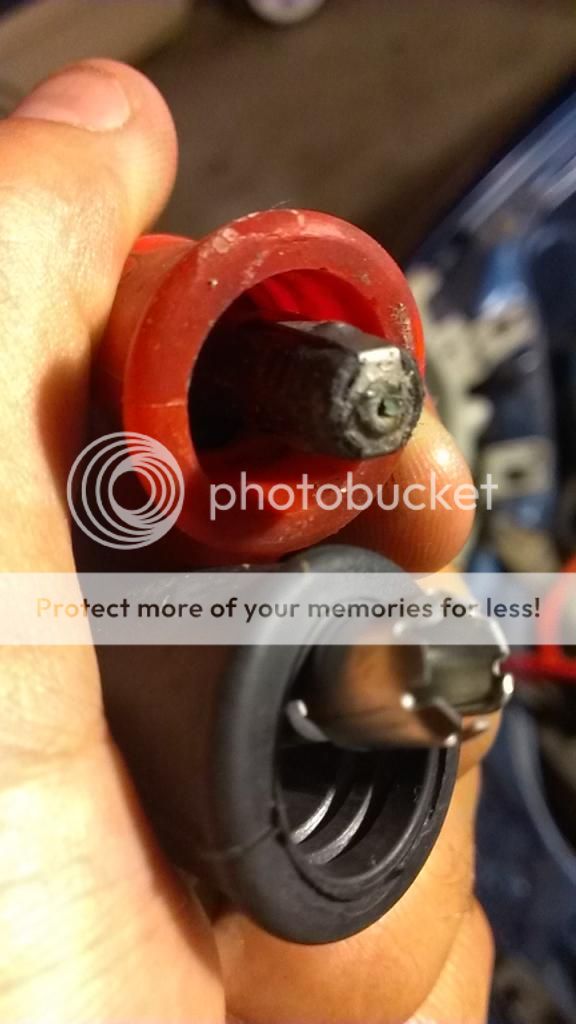
Hmmmm... they were made in Poland and I have never seen this before. I gotta see if this new assembly chamges the overall quality.
Keep the old ones on the ready, just in case.
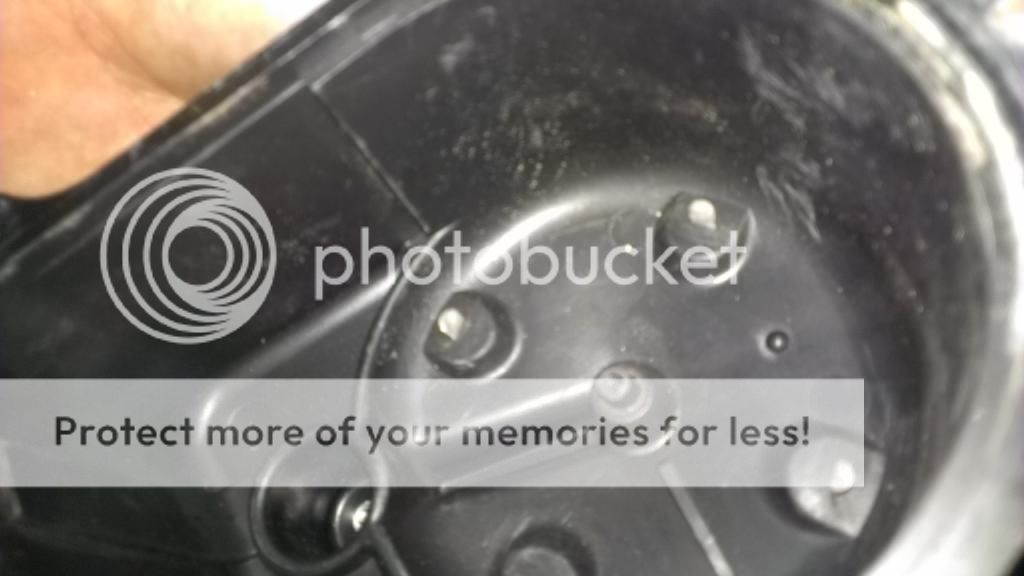
The rotor looked a bit crusty so I decided to clean it up. Kinda hard to tell with the cell pics.
Clean the cap too!
Removed the old, dry rotted gasket.
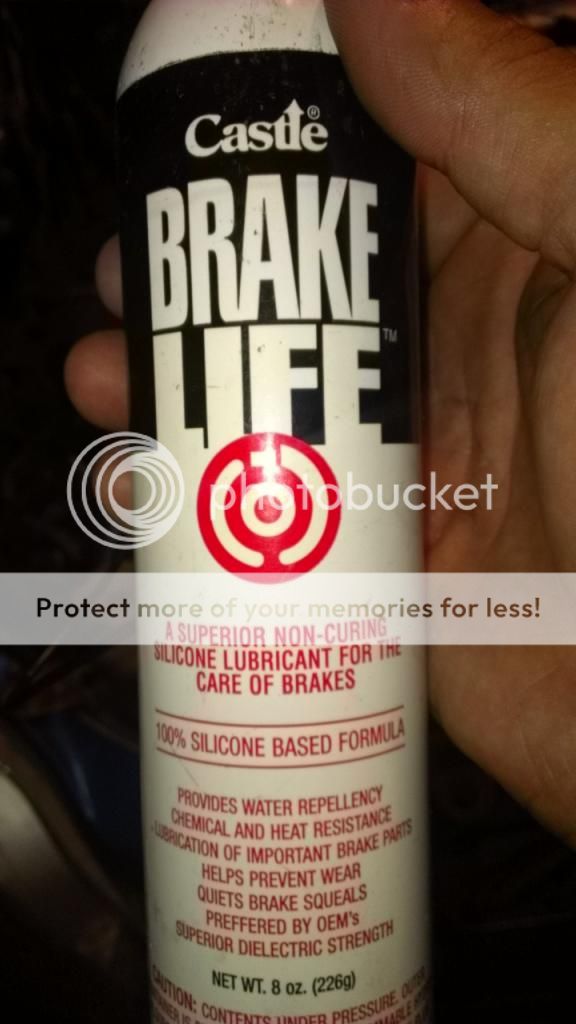
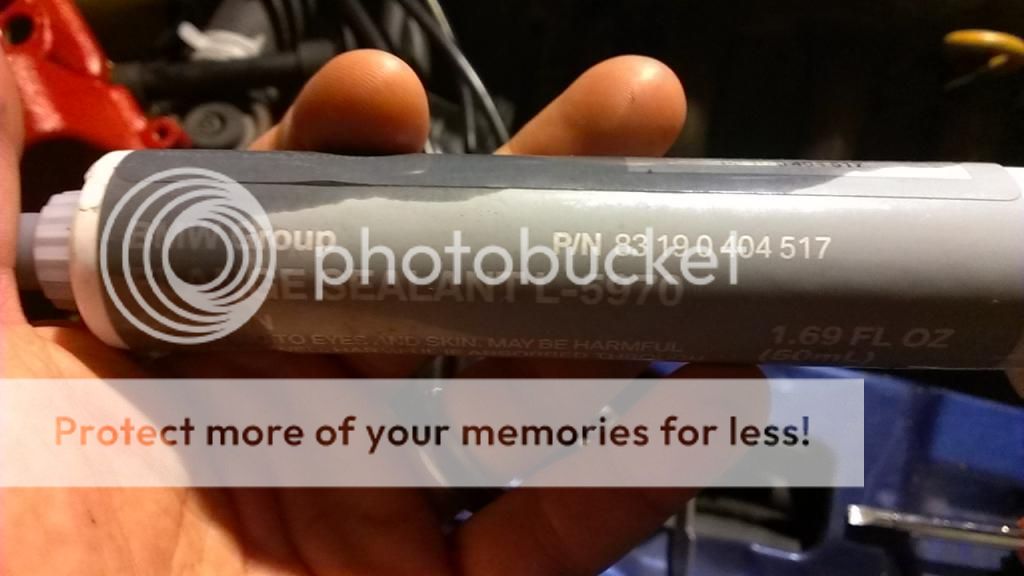
I used this on the new gasket. It keeps it lubricated
and slows the rotting.
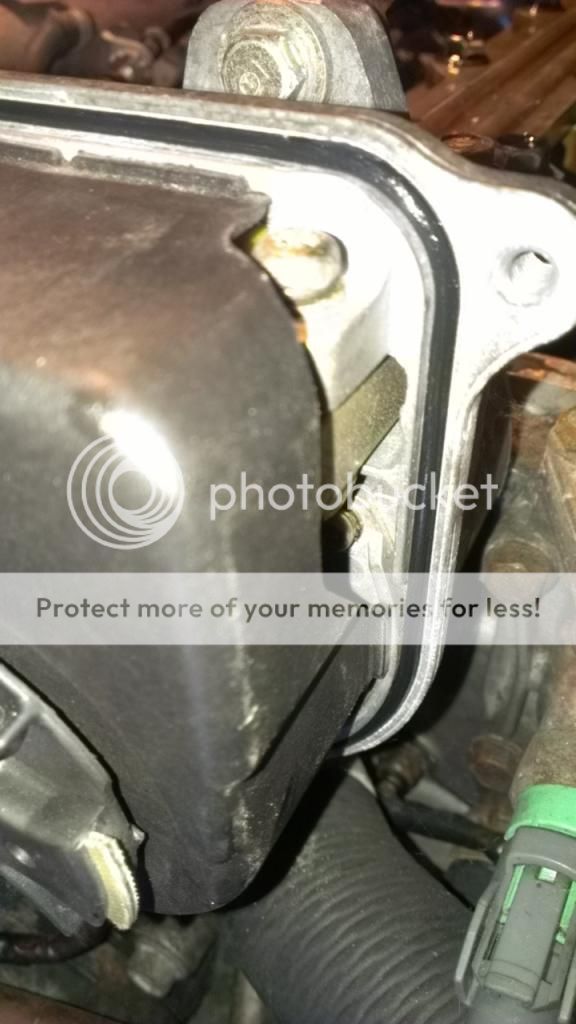
New one on
I also lubed the bolts that hold the cap in place, therefor I wont have any issues removing them later. While the cap is out, make sure you check all the screws in the distributor and thighten them.
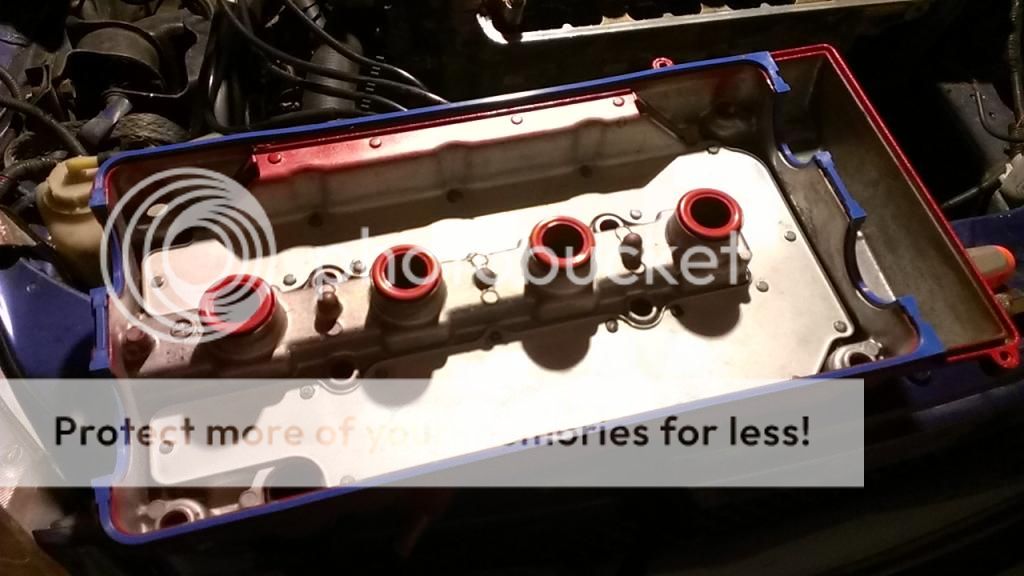
Next will be to install the valve cover gasket kit and "new" vale cover. Then moving onto the wiring and sensors.
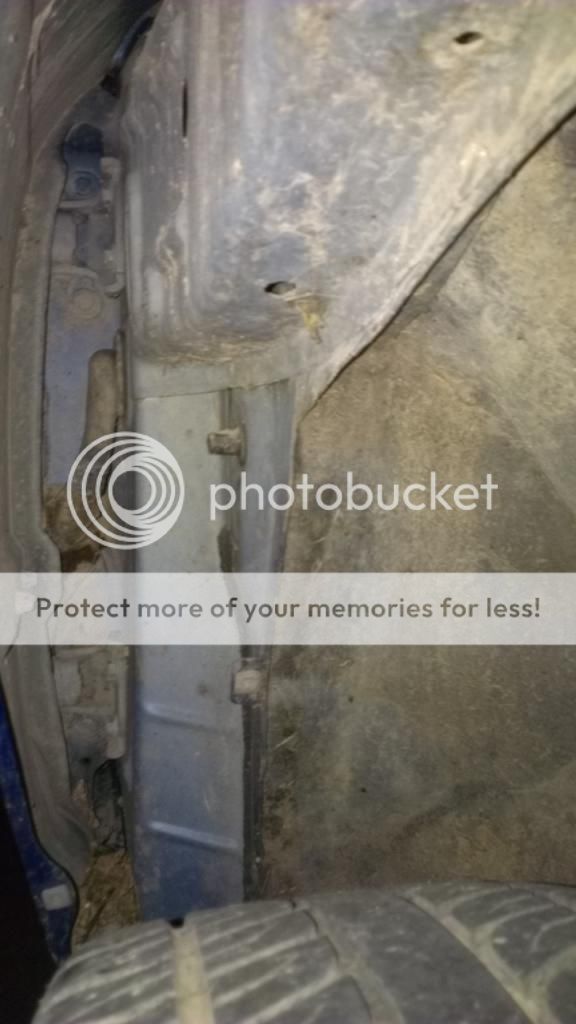
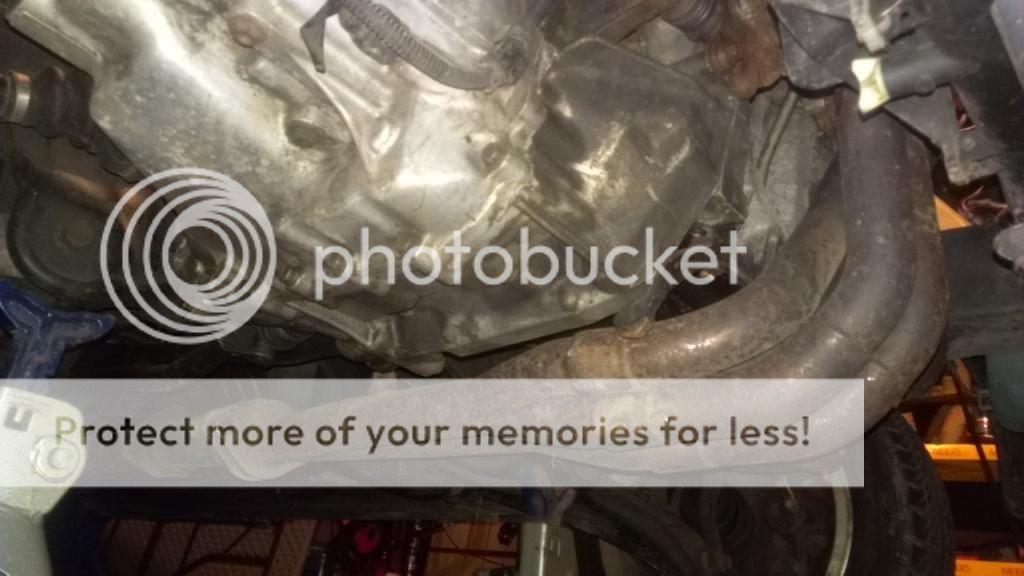
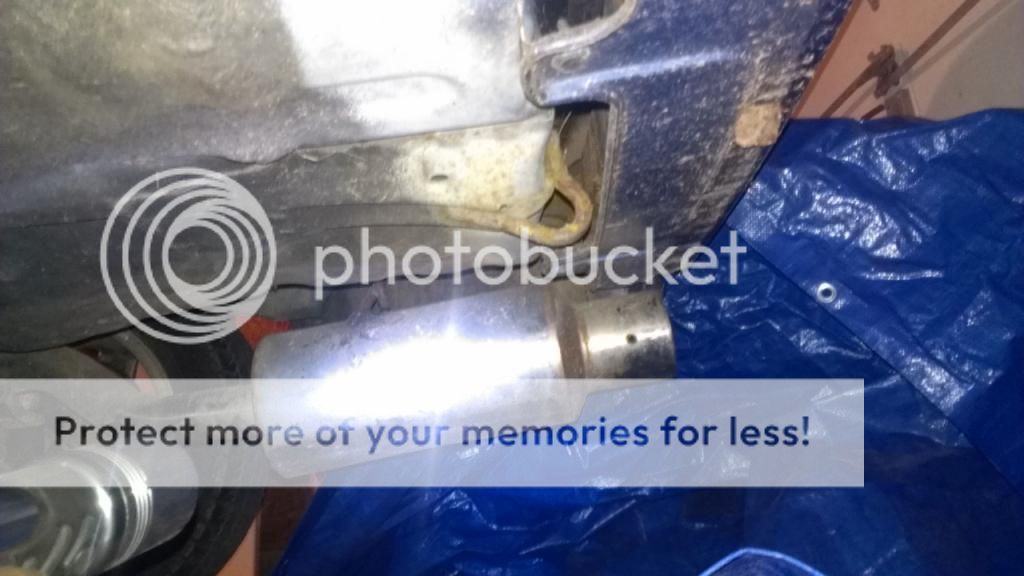
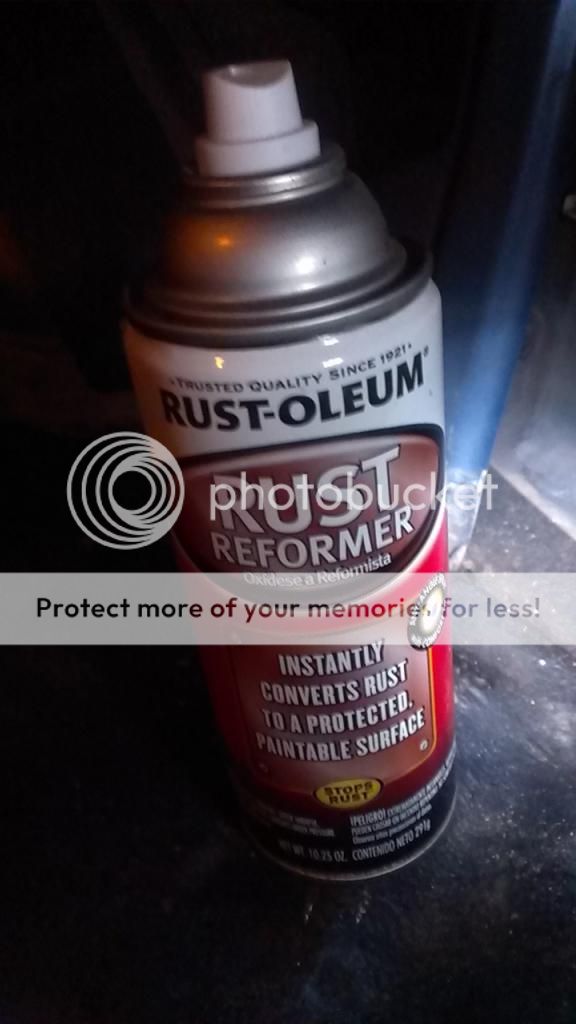
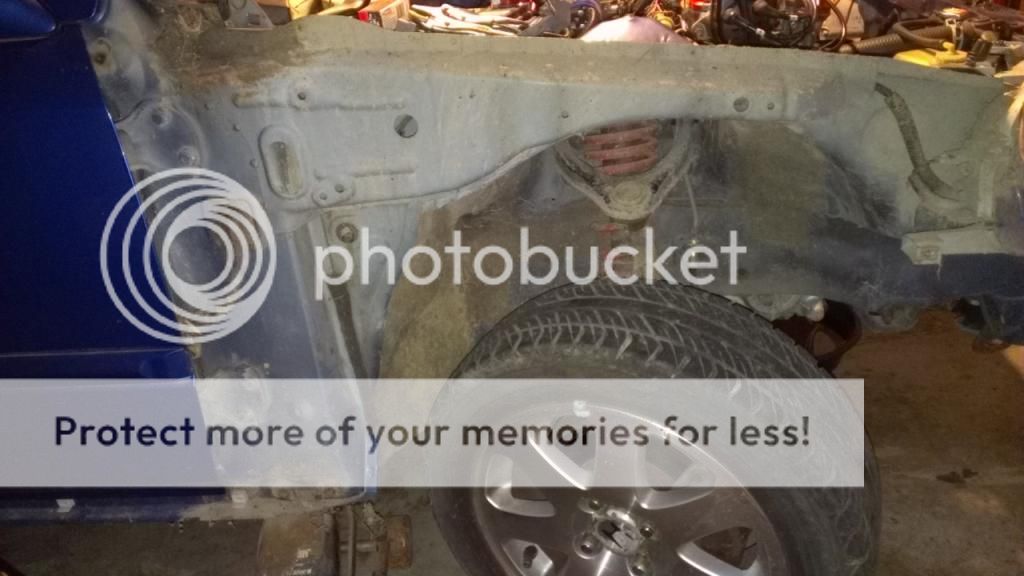
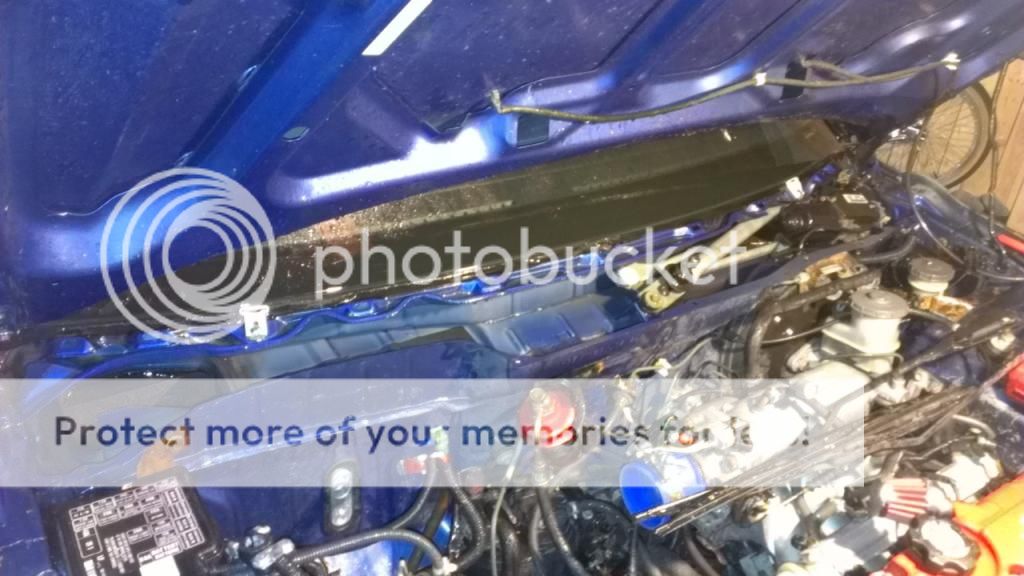
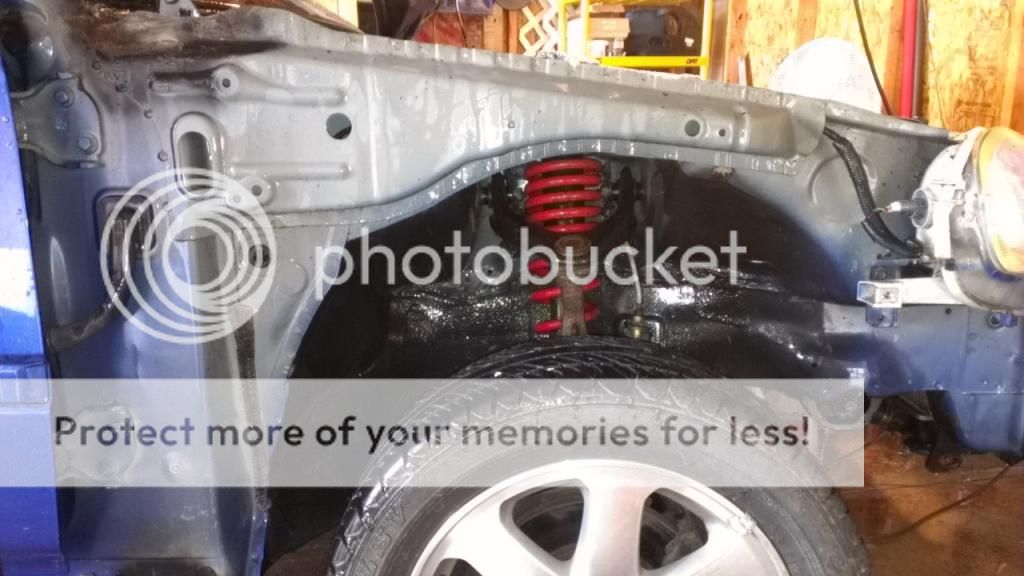
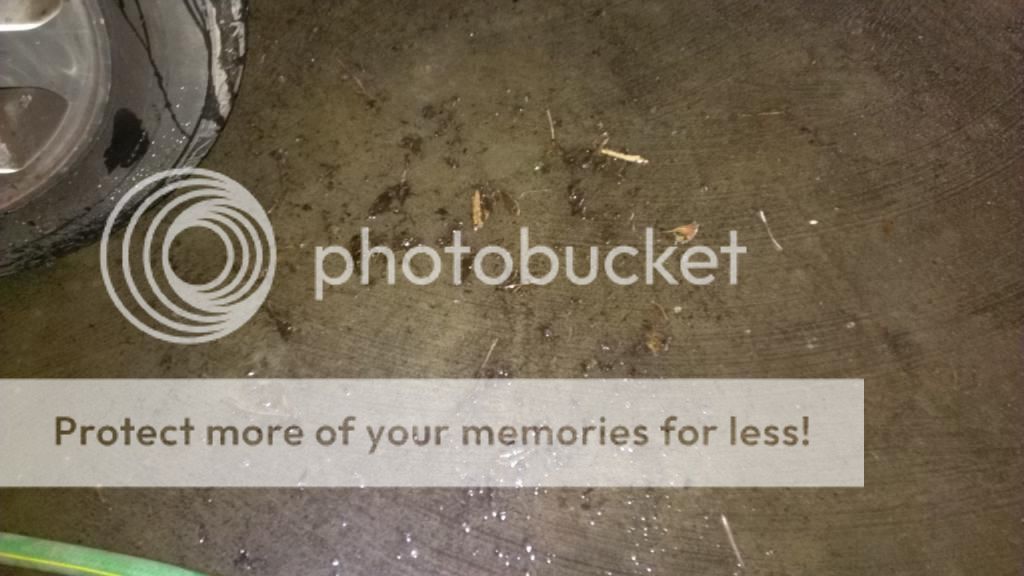
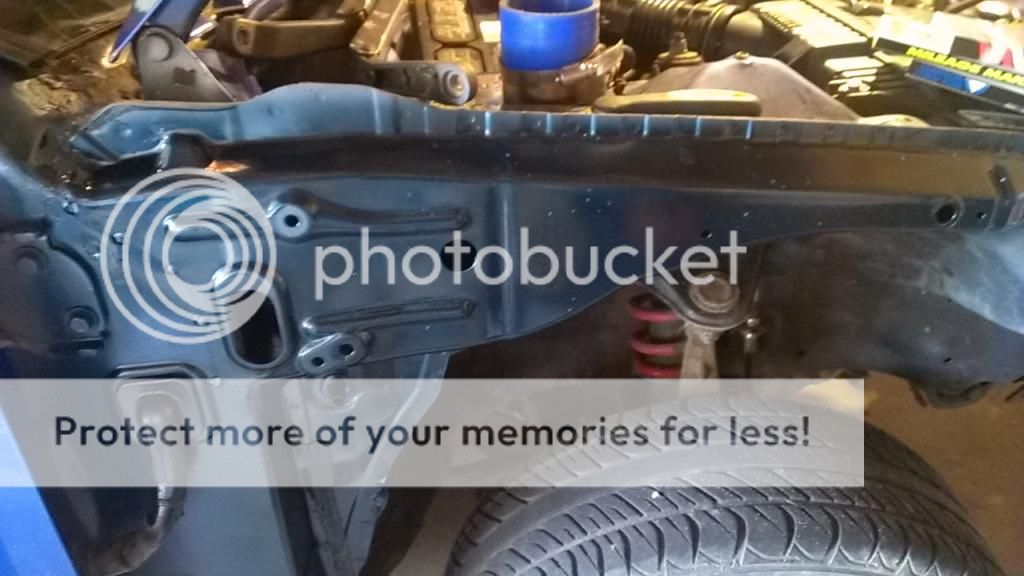
While I was out there I put the car on jackstands and took a bunch of underbody pics. Car has a lots of dirt wedged in all places, so the cleanign will be fun. i'll be doing the dissansembly and cleaning soon, but first I need to order some POR15.
This is not rust, this is dirt.
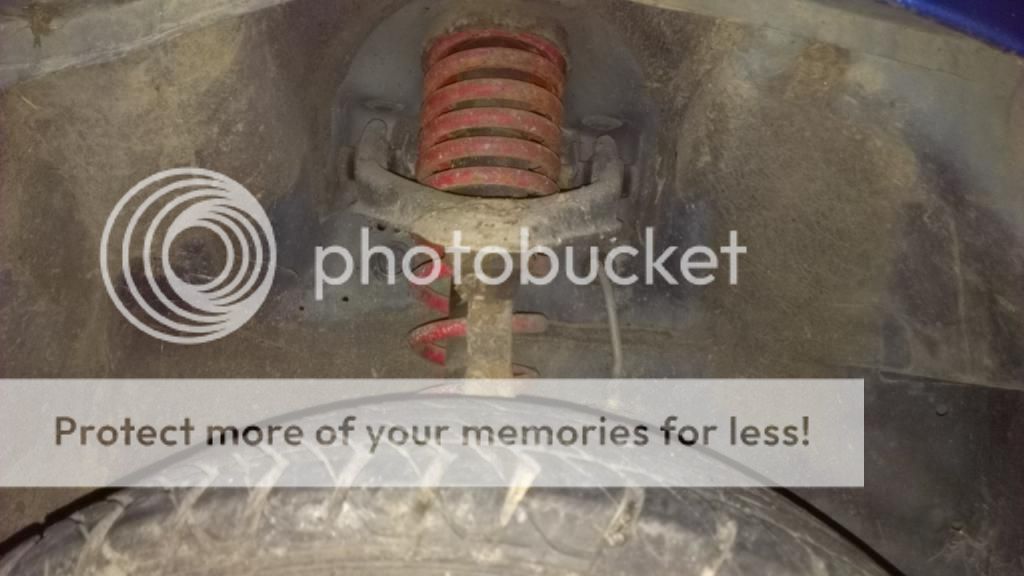
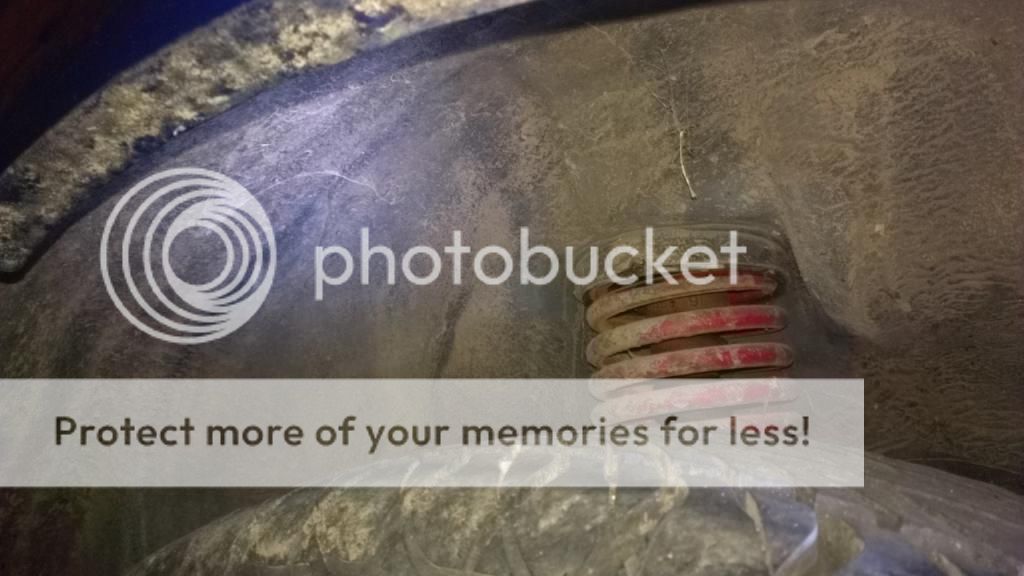
Skunk2 springs
More dirt
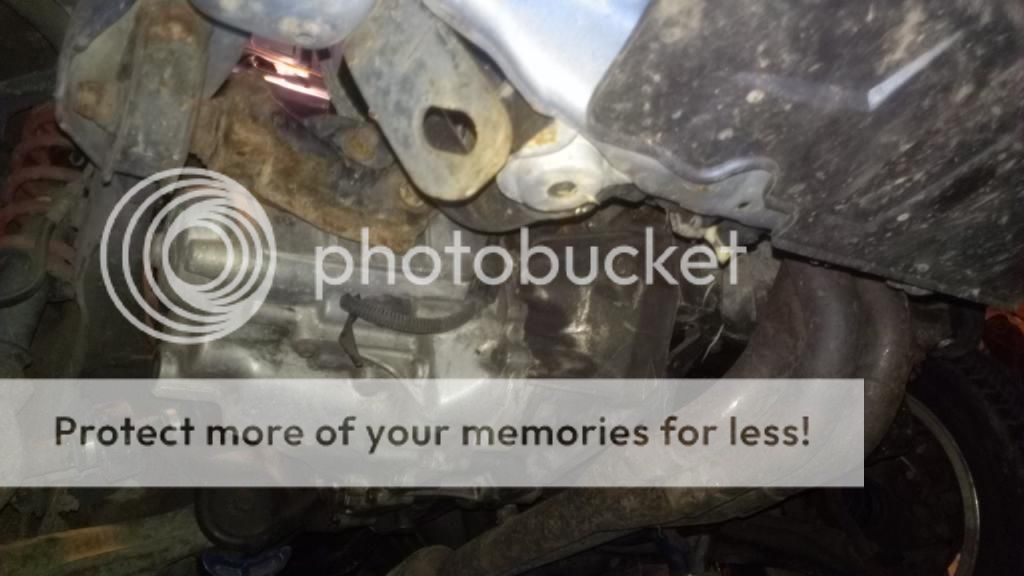
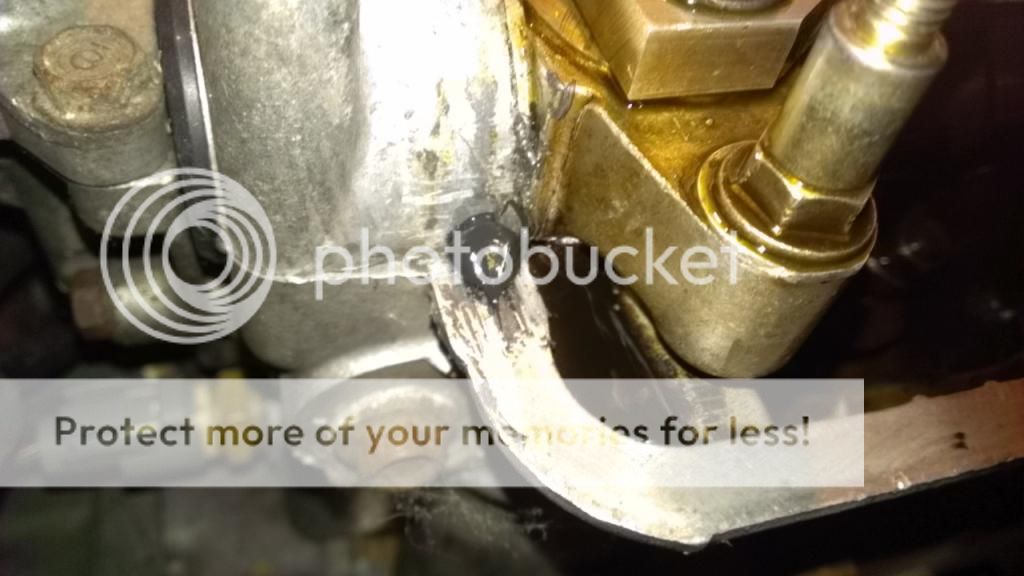
No leaks. Unknown header.
More dirt
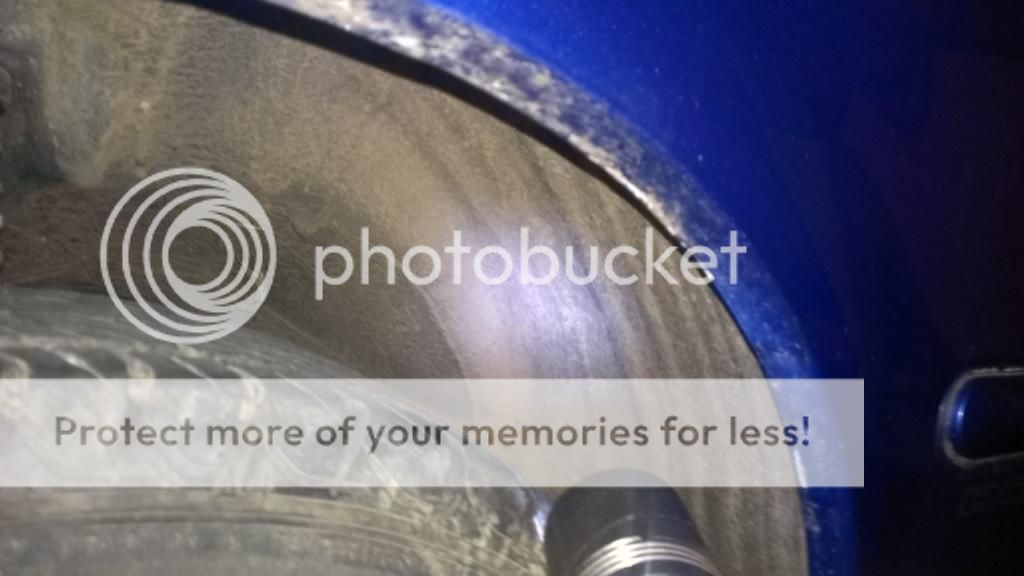
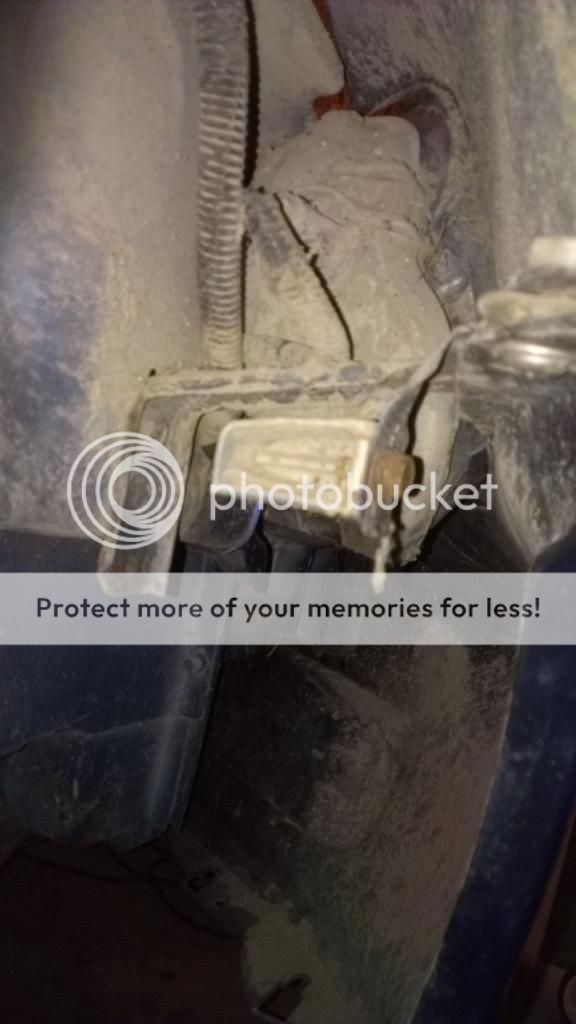
Back is somewhat clean. The left lower control arm mounting point has a slight bent, but it doesnt seem to throw off the angle.
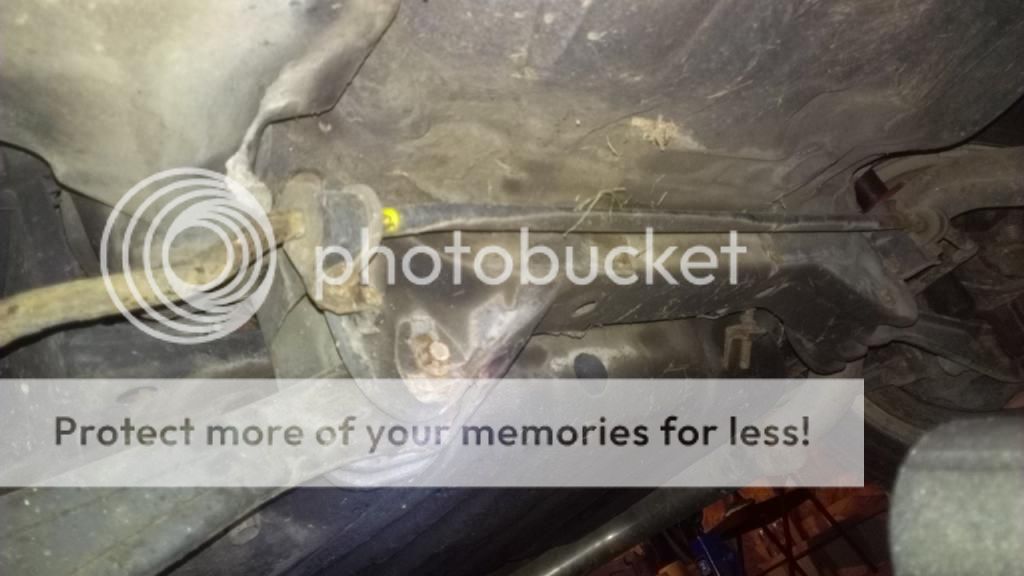
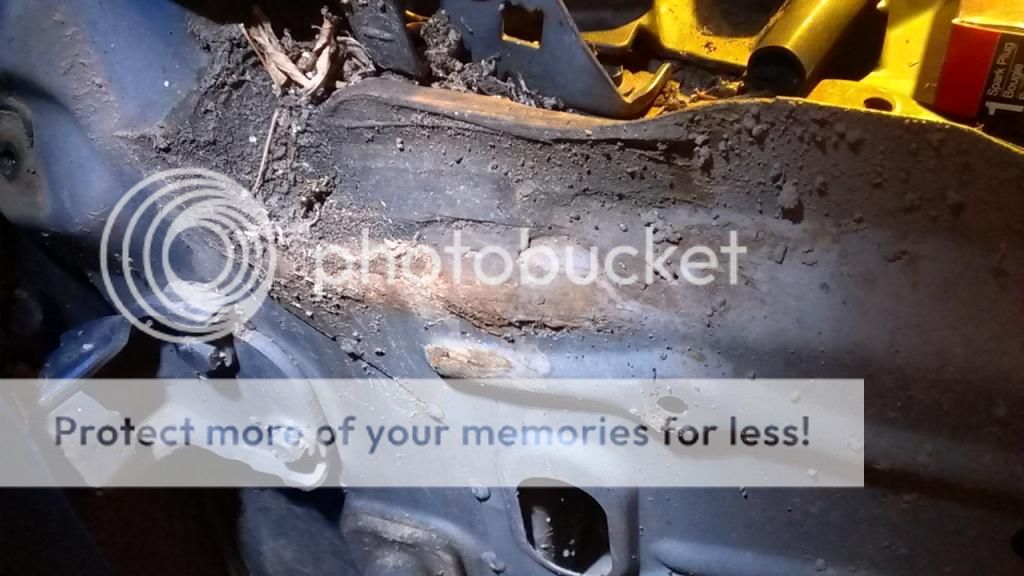
Unknown muffler... I hate the ricer sound
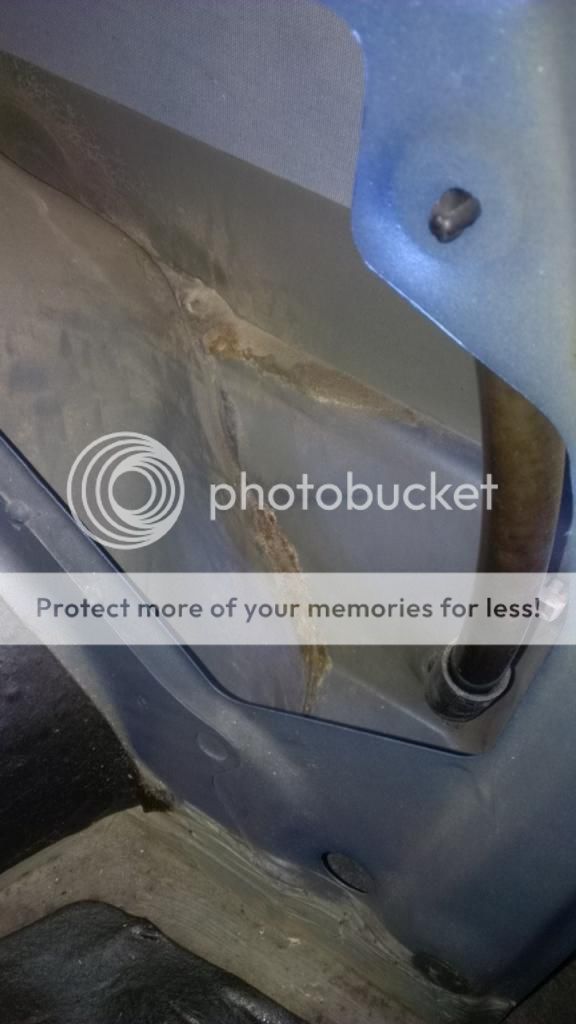
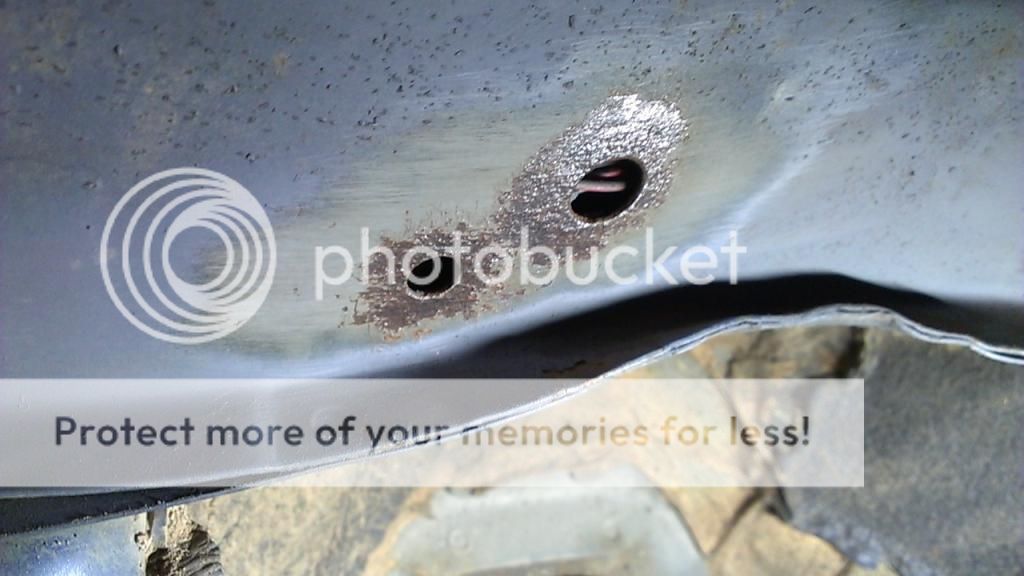
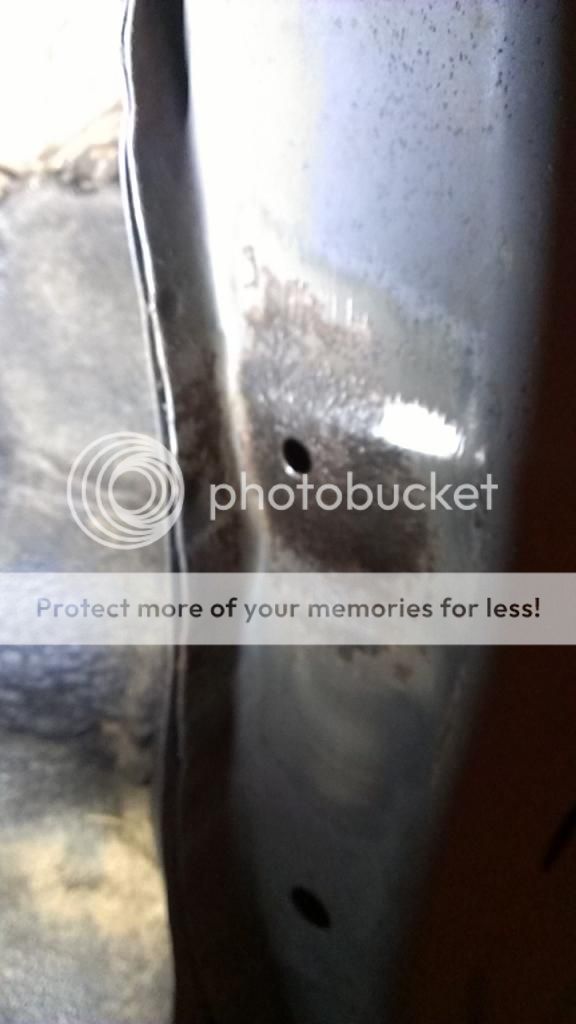
Some rust starting to poke its head in the trunk edges.
**** youuuuu!!!!!!
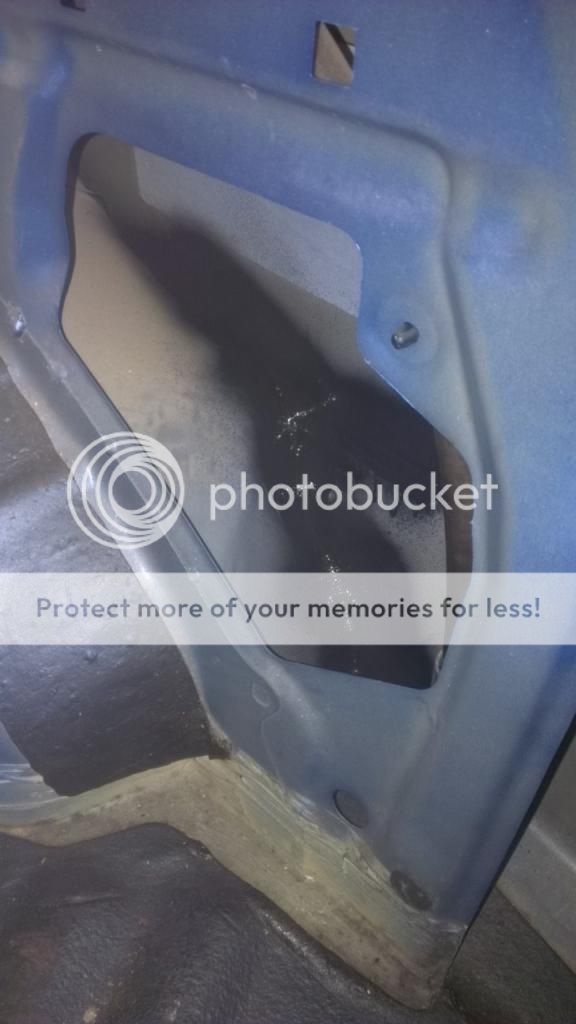
Did both sides even though the other side looked clean. Why take a gamble? Once I get the POR15, Ill be sure to seal off those areas.
Well that's about it for now. Ordering more parts and materials but first going to figure out the engine and engine wiring mess. Once that's done, I'll get to the body cleaning and sealing.
Thanks for reading my super long rambles...
First of all, sorry for the crappy cell pics, I dont take my camera out to the garage and I usually work at night under shitty lights.
Hello everyone, I recently acquired a '00 EBP and I plan on restoring it for my 1y/o son as a future father/son car. Well, when these came out in '99 I was 19y/o, in college and working part time at a restaurant, so there was no way I could afford a brand new $24k car, but man did I not oogled for them everytime I saw one. The wheels, spoiler, lips, fogs - they all came together for one of the cleanest looks I have seen on a Honda - ever.
Around those days('97-'03), I built a few CRX's, EG's, Integras and such but never owned an EM1. A few years into the EM1's being out, you started seeing them in salvage yards and I did bring two EBP's back from the dead, after my brothers purchased them completely stripped. One of those received a B18C1 and the other an LS/vtec, and both swaps turned out great. Unfortunatley both cars were traded off long ago and that was as close as I got to owning an EBP.
Well I got away from modding cars, bought an AP1, kept it mostly stock, switched educations, got my automotive training, started working at Acura and then switched over to BMW(since they break more often ha) and sold the AP1. Now many years later, I'm a BMW/MINI shop foreman and I have decided it is time to built another Honda and after trying to decide on a specific model, it was only rgiht to get an EM1 and more importantly an EBP.
I looked online and found one closed enough for a good price. Seller was willing to take as many pics as possible and I was happy with the extremely clean quarter panels. These cars are 15y/o now and living in the northeast/rustbelt, you have to be aware of the problems you can get into when dealing with rust.
The car was in Michigan, so after renting a dolly from Uhaul I was on my way. Well about an hour and half on the road the seller calls and tells me the title hasn't been switched to his name, so it was a waste of money and time. I can't lie, I was pissed as hell but the seller told me he would work out the title issue and deliver the car himself. There was nothing else to do but trust him, so I drove back home and a week later, the guy came through on his word and delivered the car
This was the first picture taken of it. Overall the body is clean with dents here and there. All the info the seller gave me was correct and there were absolutely no surprises.
The interior, although not original to the car, is correct and in good shape. The cluster will need work since the fuel and temp gauges are inop.
The engine is a B16A2 from a DelSol, so its the OBD2a, runing a chipped p28 with jumper harness. Im removing the p28 ecu and going back to the p2e. For that I'll need to run some extra sensors but will get it all figured out in due time.
Project begins - 8/18-19/14
Removed the valve cover to inspect valvetrain and see the condition of the engine. Glad to see minor discoloring expected with such an old engine. Nothing looks unevenly worn, no chips, scratches or unusual. Sorry no real pics of the valvetrain.
Took the valve cover to work for cleaning.
Here it is in the parts washer.
Better
Even better
Best
I think it came out phenomenal. You may be wondering why I bothered to clean it so thoroughly, and honestly, it was just cause. Why not? I had the extra time and materials.
The top of the valve cover needed some attention. I used Aircraft Remover and took off all the leftover black wrinkle paint.
Second round
Soft polishing of the enblems
BOOM!!! Decided to go with the wrinkle red powder coat for a nice contrast in the engine bay. Now onto the engine work.
Engine Maintenance - 8/20/14
Before putting the "new" valve cover in the engine, I wanted to do a few simple maintenace things to it.
Performed a super quick compression test on it, just to see how healthy it was.
#1 Cylinder
#2 Cylinder
#3 Cylinder
#4 Cylinder
Overall not bad. I'm sure that with a valve adjustment I can get them all over 210psi. Honestly, as it is right now, I'm super happy.
Old spark plugs out. They looked so so... Going to be using NGK G Power Platinum.
Weird how it had 3 NGK's and 1 Motorcraft :banghead:
Old plug wires out. They felt extremely rubbery, as if the sillicone rubber was deteriorating and melting.
Going to replace them with SMP/Intermotor brand. I have been using them for quite awhile and like them a lot. Good quality, good price and pretty much always in stock.
Old ones - corroded connectors.
Hmmmm... they were made in Poland and I have never seen this before. I gotta see if this new assembly chamges the overall quality.
Keep the old ones on the ready, just in case.
The rotor looked a bit crusty so I decided to clean it up. Kinda hard to tell with the cell pics.
Clean the cap too!
Removed the old, dry rotted gasket.
I used this on the new gasket. It keeps it lubricated
and slows the rotting.
New one on
I also lubed the bolts that hold the cap in place, therefor I wont have any issues removing them later. While the cap is out, make sure you check all the screws in the distributor and thighten them.
Next will be to install the valve cover gasket kit and "new" vale cover. Then moving onto the wiring and sensors.
While I was out there I put the car on jackstands and took a bunch of underbody pics. Car has a lots of dirt wedged in all places, so the cleanign will be fun. i'll be doing the dissansembly and cleaning soon, but first I need to order some POR15.
This is not rust, this is dirt.
Skunk2 springs
More dirt
No leaks. Unknown header.
More dirt
Back is somewhat clean. The left lower control arm mounting point has a slight bent, but it doesnt seem to throw off the angle.
Unknown muffler... I hate the ricer sound
Some rust starting to poke its head in the trunk edges.
**** youuuuu!!!!!!
Did both sides even though the other side looked clean. Why take a gamble? Once I get the POR15, Ill be sure to seal off those areas.
Well that's about it for now. Ordering more parts and materials but first going to figure out the engine and engine wiring mess. Once that's done, I'll get to the body cleaning and sealing.
Thanks for reading my super long rambles...
 10-12-2014, 12:02 PM
#2
Honda-Tech Member
Thread Starter
Progress Update 8/22/14
Went out to the garage last night and got some stuff done.
Installed the new plugs, gasket kit and valve cover.
Plugs torqued to 13.5ft/lbs.
Works just as good as Hondabond and its free
Dab the cam corners.
New Fel-Pro gasket kit.
Done!
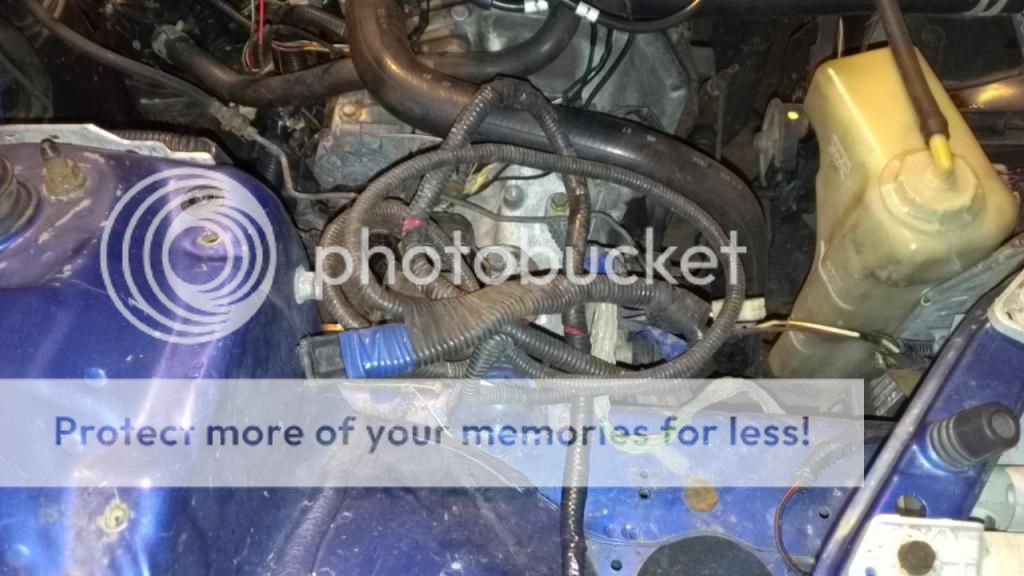
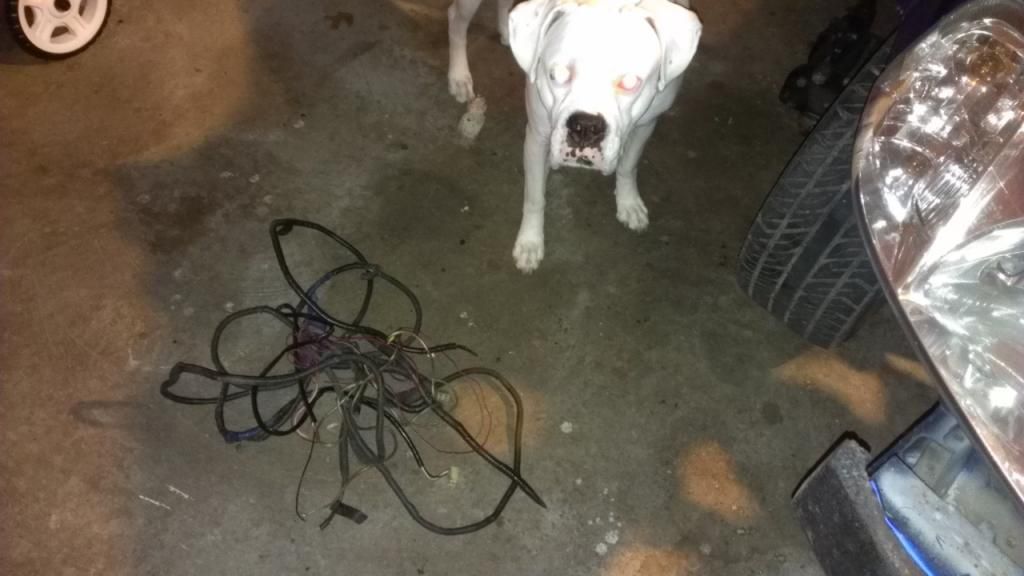
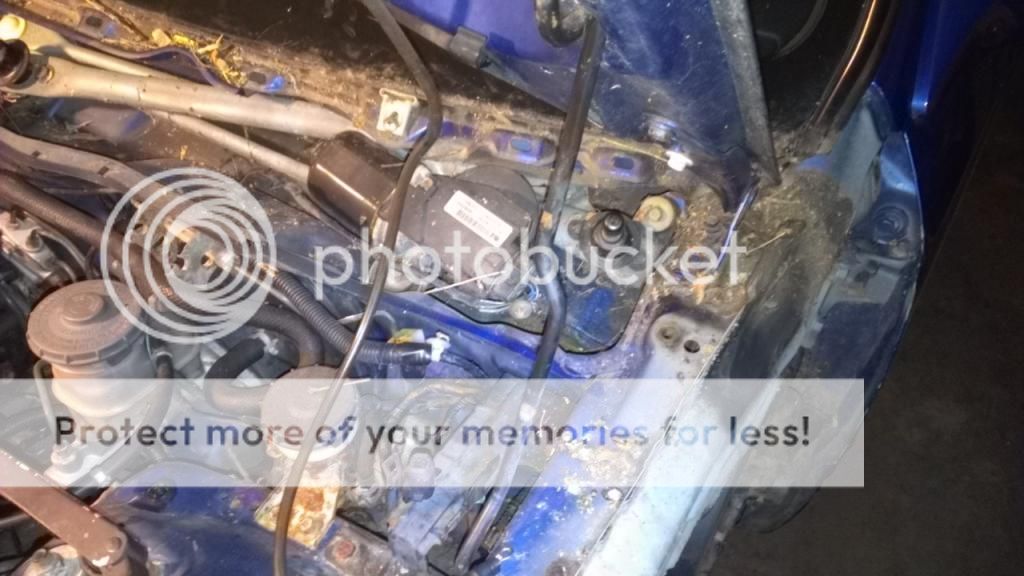
I had a bunch of wires all around the engine bay. Seems like they were used for fog lamps. Those are coming out.
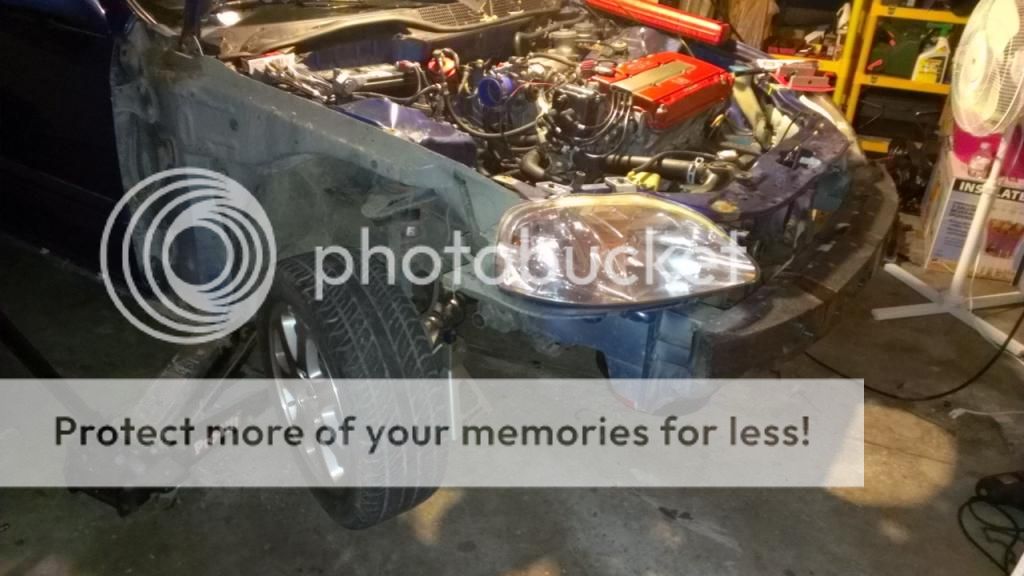
Bumper had to come off to get the wire loom, so I took off the fenders too.
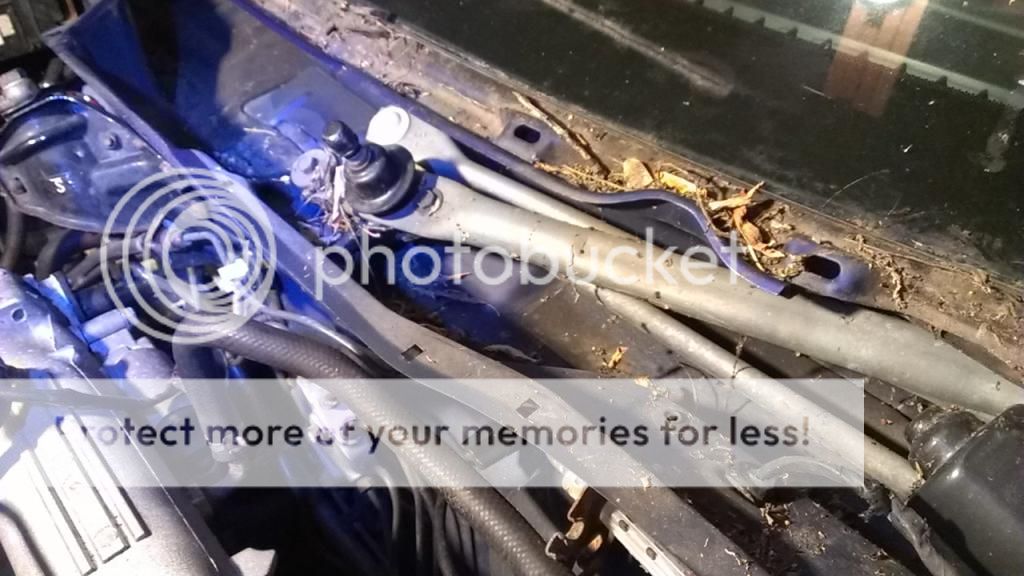
Took me 20 minutes removing the harness from under the dash, there were zip ties all over the place and the wires just looped over everything. Next I have to clean the dash rust
My dog hates this wireloom. What a mess....
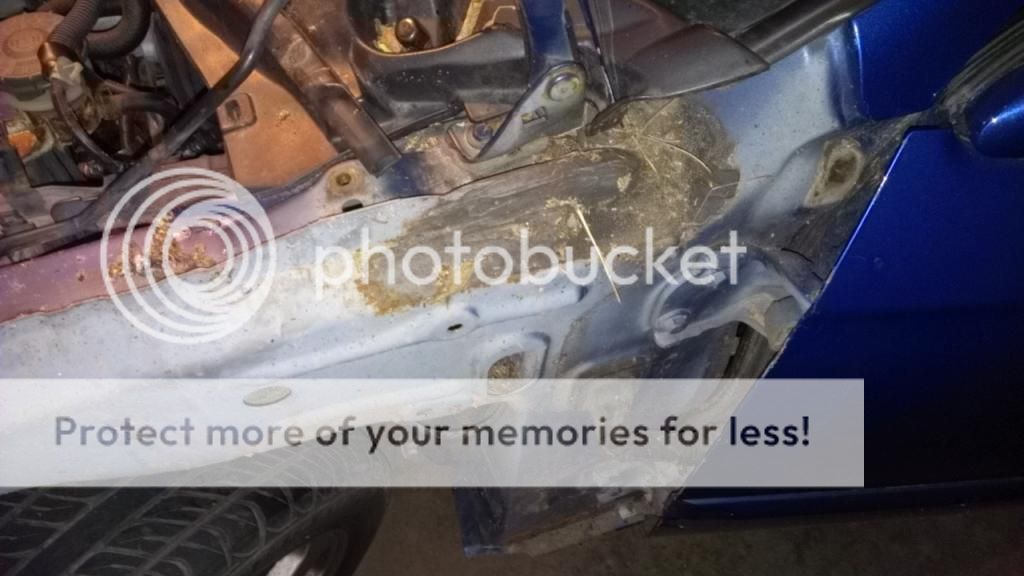
Fenders removed. Getting ready to clean off the dirt and rust and seal them.
Went out to the garage last night and got some stuff done.
Installed the new plugs, gasket kit and valve cover.
Plugs torqued to 13.5ft/lbs.
Works just as good as Hondabond and its free
Dab the cam corners.
New Fel-Pro gasket kit.
Done!
I had a bunch of wires all around the engine bay. Seems like they were used for fog lamps. Those are coming out.
Bumper had to come off to get the wire loom, so I took off the fenders too.
Took me 20 minutes removing the harness from under the dash, there were zip ties all over the place and the wires just looped over everything. Next I have to clean the dash rust
My dog hates this wireloom. What a mess....
Fenders removed. Getting ready to clean off the dirt and rust and seal them.
10-12-2014, 12:03 PM
#3
Honda-Tech Member
Thread Starter
Progess Update 8/23/14
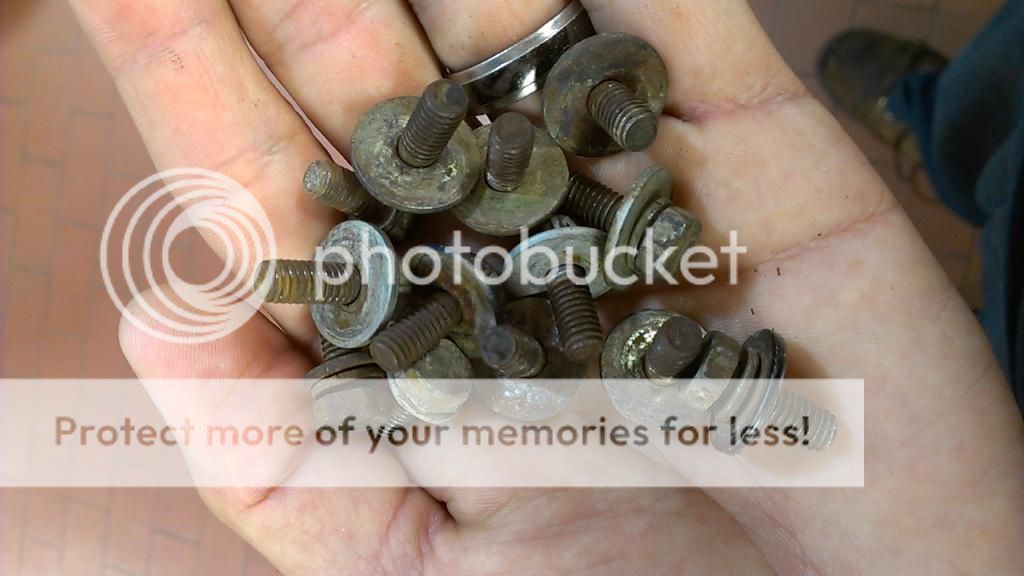
After taking off the fenders I had all the original but extremely rusty bolts in my hands and decided to clean them up. I took them to work yesterday and used a few simple chemicals and some elbows grease.
Old, dirty and abused...
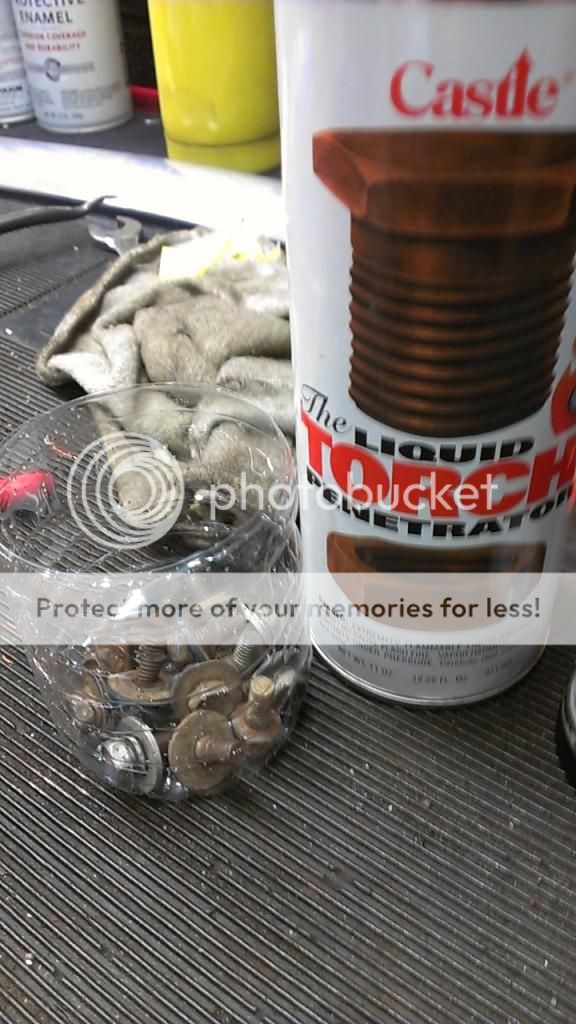
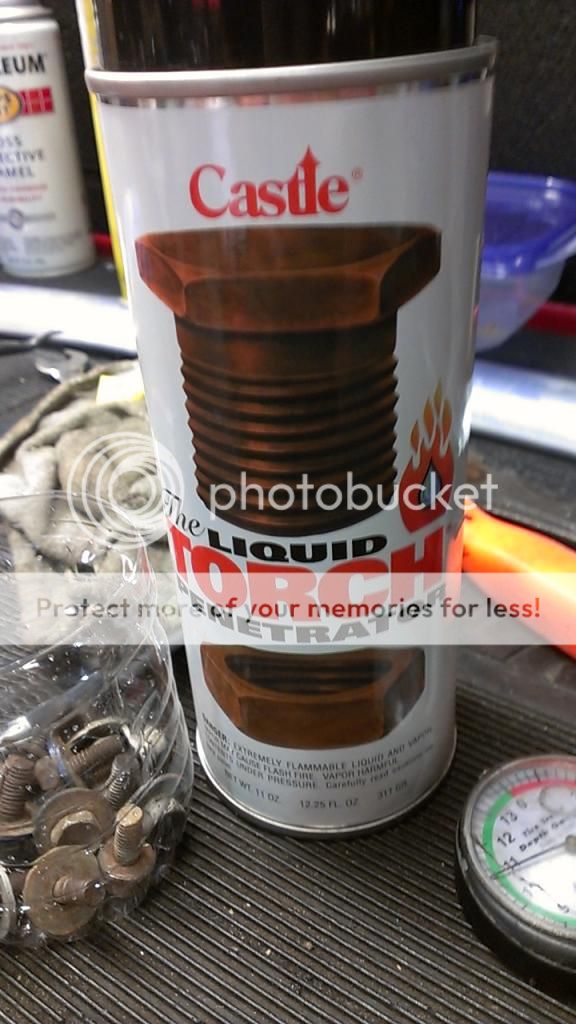
First I used a rust penetrant. WD40, PB Blaster and any other type will work. This is what we use at work. Throw the bolts/screws in a container and let them soak for awhile.
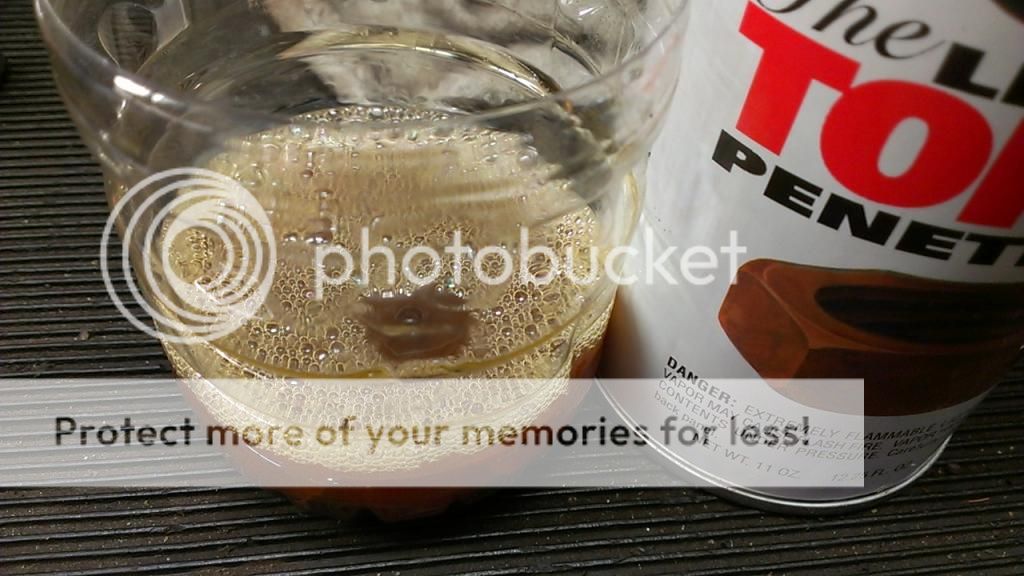
After it soaked for about half hour on the penetrant, I replaced it with brake fluid. Brake fluid eats rust and breaks down paint.
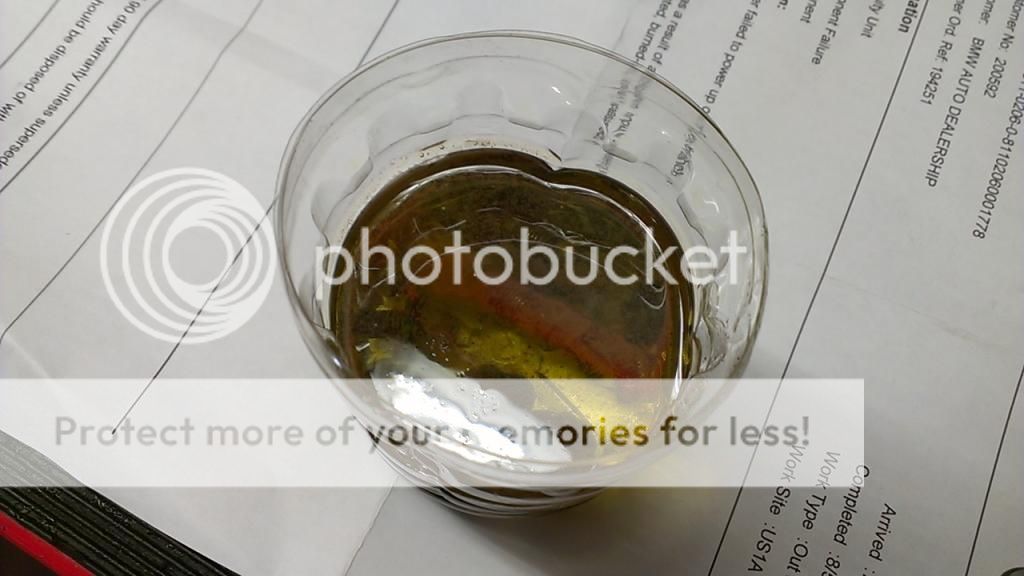
You can see the rust "bubbling" away from the bolts.
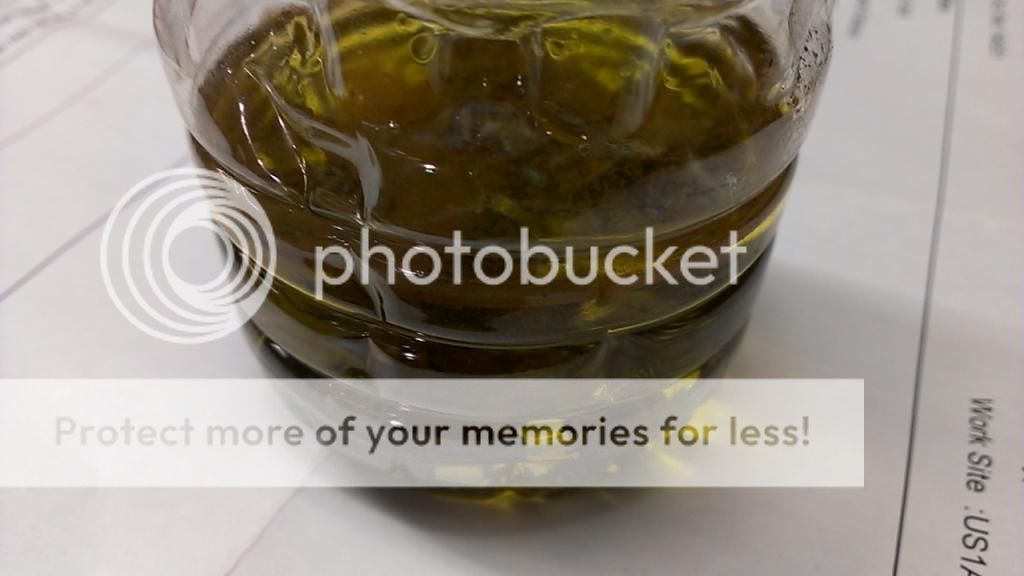
This is how they look right after draining the brake fluid and hitting them with some brake cleaner. Good but not great.
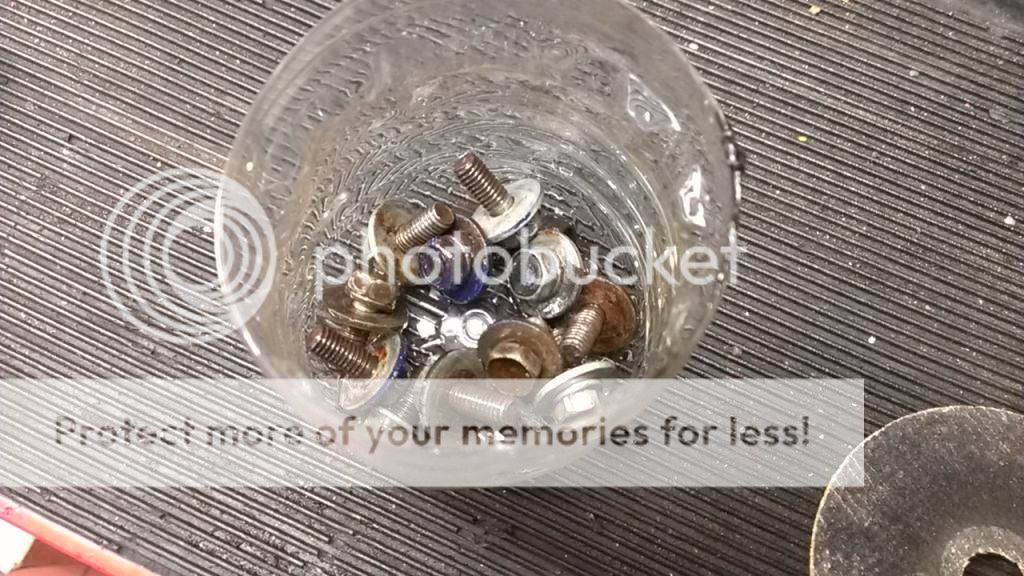
Since the shop was slow yesterday I decided to use the wire wheel and do some work.
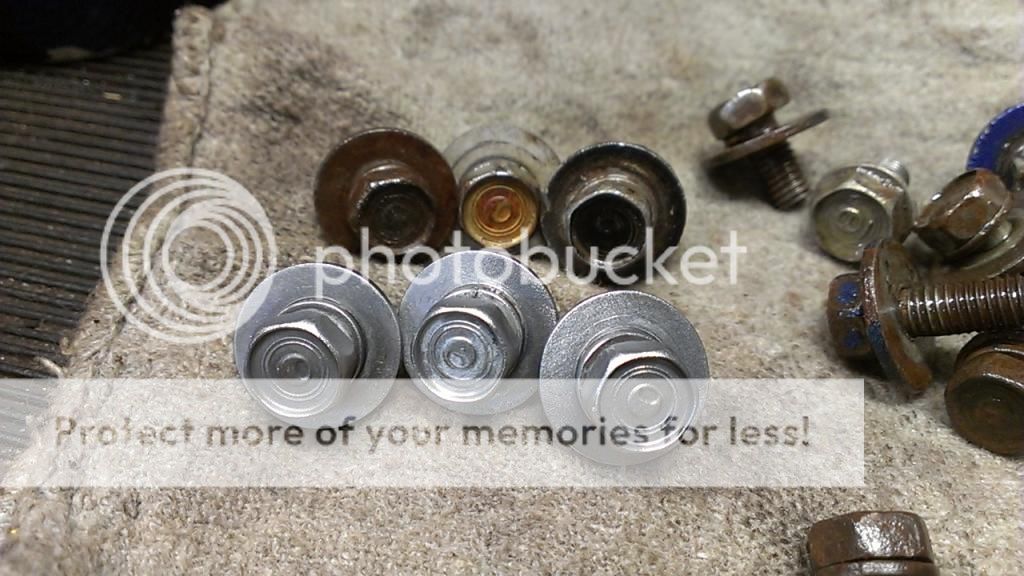
I then did all the other ones and hit them up with a layer of clear coating.
Now they are ready to be reused. Always use a bit of anti seize on them, so the thread don't get corroded.
Yes, I know I can buy a whole engine "dress-up" kit, but that's not what I like. I'm all about survivors and keeping most of the stuff original. It may sound dumb, but that's just me.
Talking about survivors, I did the carfax on the vin and man this car is truly a survivor. I'm the 9th owner and it has always lived in the rustbelt. So to be this clean, after all the man-handling and weather conditons, I think its insane. Now it finally will receive the attention it deserves. Plans call for removal of the cowl panel, cleaning, preppin, sealing and painting the chassis. Then onto the engine wiring mess.
I have some oem goodies on the way which will continue to bring this car to original status
:D
After taking off the fenders I had all the original but extremely rusty bolts in my hands and decided to clean them up. I took them to work yesterday and used a few simple chemicals and some elbows grease.
Old, dirty and abused...
First I used a rust penetrant. WD40, PB Blaster and any other type will work. This is what we use at work. Throw the bolts/screws in a container and let them soak for awhile.
After it soaked for about half hour on the penetrant, I replaced it with brake fluid. Brake fluid eats rust and breaks down paint.
You can see the rust "bubbling" away from the bolts.
This is how they look right after draining the brake fluid and hitting them with some brake cleaner. Good but not great.
Since the shop was slow yesterday I decided to use the wire wheel and do some work.
I then did all the other ones and hit them up with a layer of clear coating.
Now they are ready to be reused. Always use a bit of anti seize on them, so the thread don't get corroded.
Yes, I know I can buy a whole engine "dress-up" kit, but that's not what I like. I'm all about survivors and keeping most of the stuff original. It may sound dumb, but that's just me.
Talking about survivors, I did the carfax on the vin and man this car is truly a survivor. I'm the 9th owner and it has always lived in the rustbelt. So to be this clean, after all the man-handling and weather conditons, I think its insane. Now it finally will receive the attention it deserves. Plans call for removal of the cowl panel, cleaning, preppin, sealing and painting the chassis. Then onto the engine wiring mess.
I have some oem goodies on the way which will continue to bring this car to original status
:D
10-12-2014, 12:04 PM
#4
Honda-Tech Member
Thread Starter
Progress Update 8/24/14
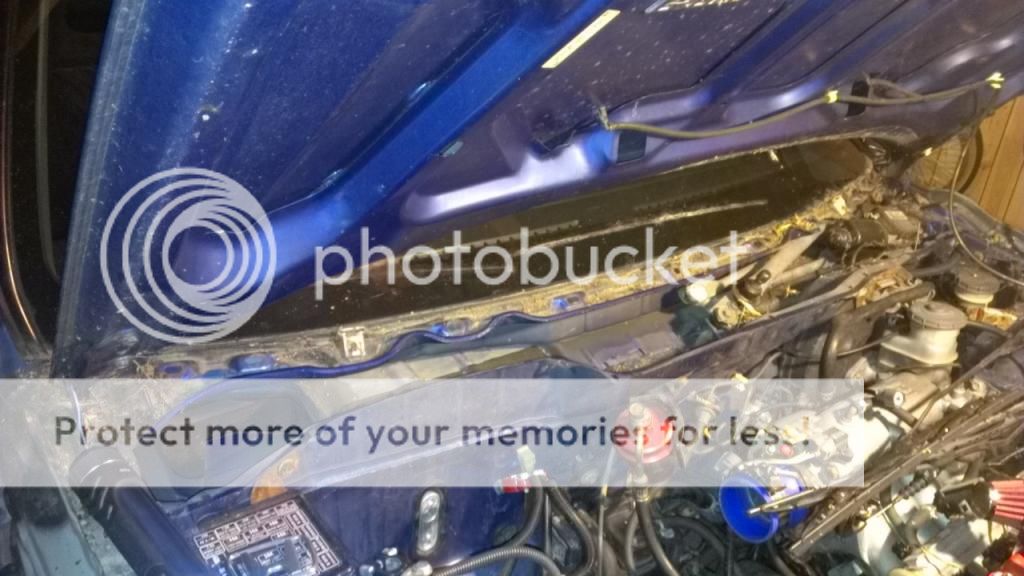
Went out to the garage this morning and cleaned out the cowl panel and front chassis/fender areas. Waiting for the water to dry before taking the wire wheel to it.
Vacuum the crap out.
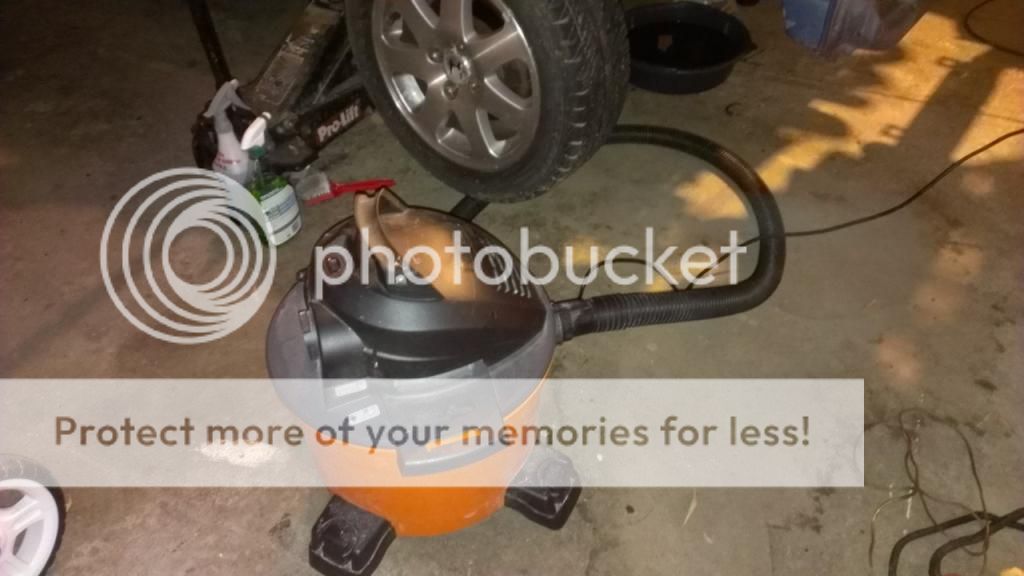
Better
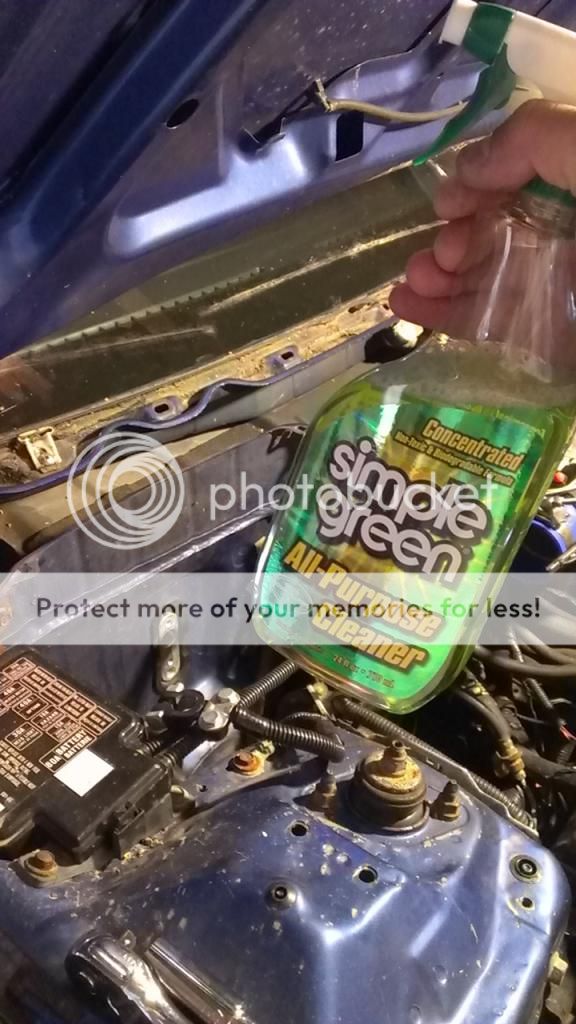
Spray some simple green and scrub the **** out of it.
Hose it all off.
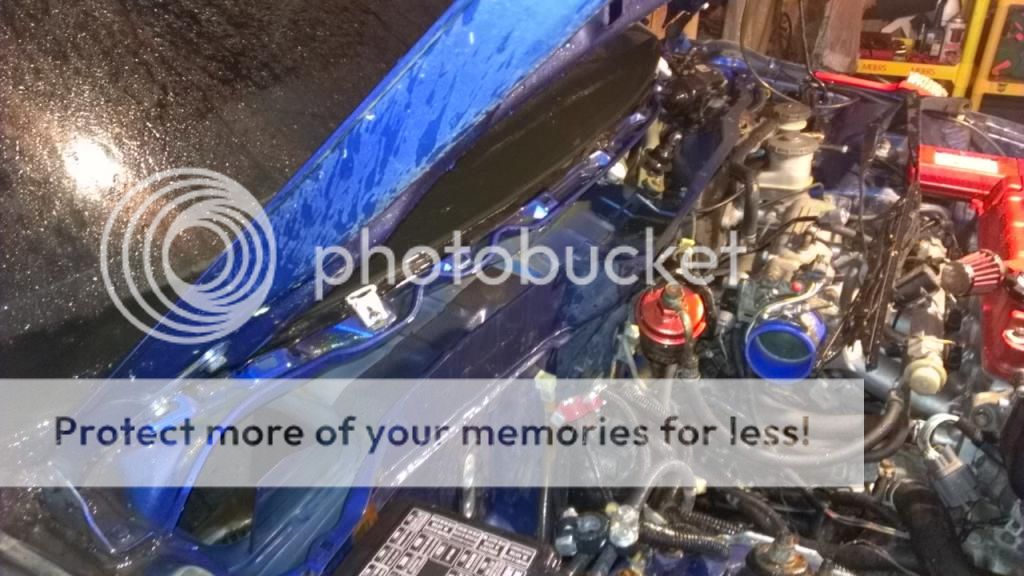
Waaaayyyy better!!!
Next onto the chassis.
The tunnels were full of dirt, leaves, nuts and crap...
Next is the wire wheel to the rust and primer sealant then paint. Afte that, onto the engine
Went out to the garage this morning and cleaned out the cowl panel and front chassis/fender areas. Waiting for the water to dry before taking the wire wheel to it.
Vacuum the crap out.
Better
Spray some simple green and scrub the **** out of it.
Hose it all off.
Waaaayyyy better!!!
Next onto the chassis.
The tunnels were full of dirt, leaves, nuts and crap...
Next is the wire wheel to the rust and primer sealant then paint. Afte that, onto the engine
Trending Topics
10-13-2014, 04:33 PM
#9
Honda-Tech Member
Thread Starter
8/24/14
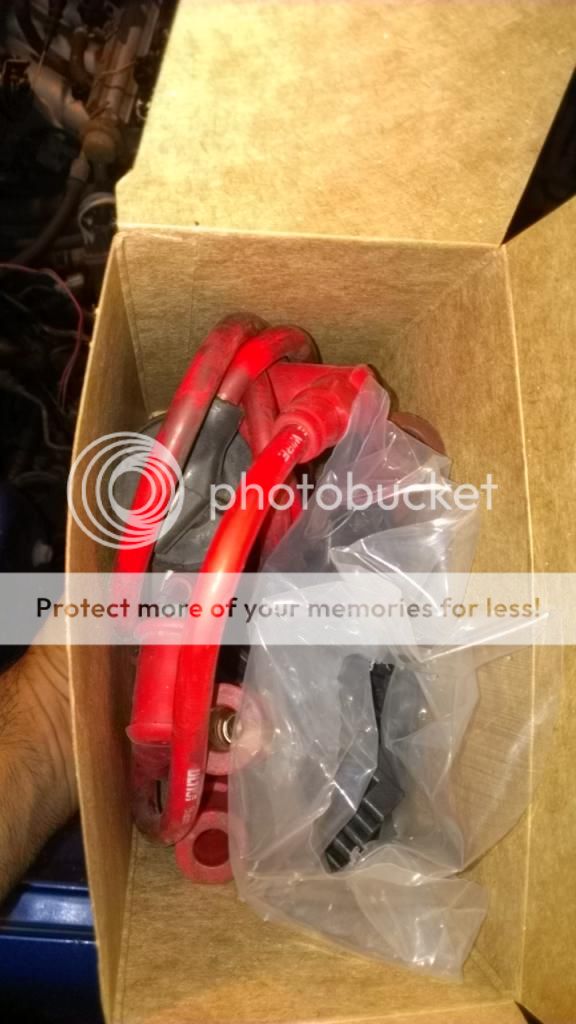
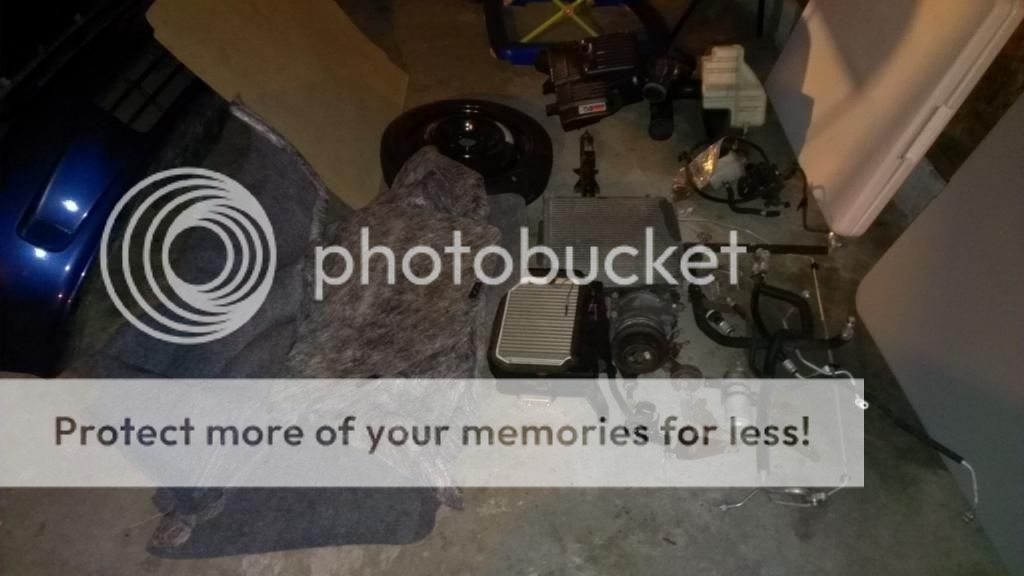
Found some OEM goodies locally.
Complete AC system - heater box, compressor, condenser, fan, lines, hoses, bolts and clamps. Complete PS system but rack - pump, bracket, hoses and reservoir. Complete intake assembly. Spare tire, wheel and jack. Trunk liner, side panels and cardboard.
This bitch is coming together nicely
Progress Update 8/26/14
Got a lot done last night, was out in the garage 'till 1am
Installed the AC system, PS system(besides the high pressure hose) and the intake. The routing of the ac lines was a pita since I coudn't remember worth a damn, but it all came together.
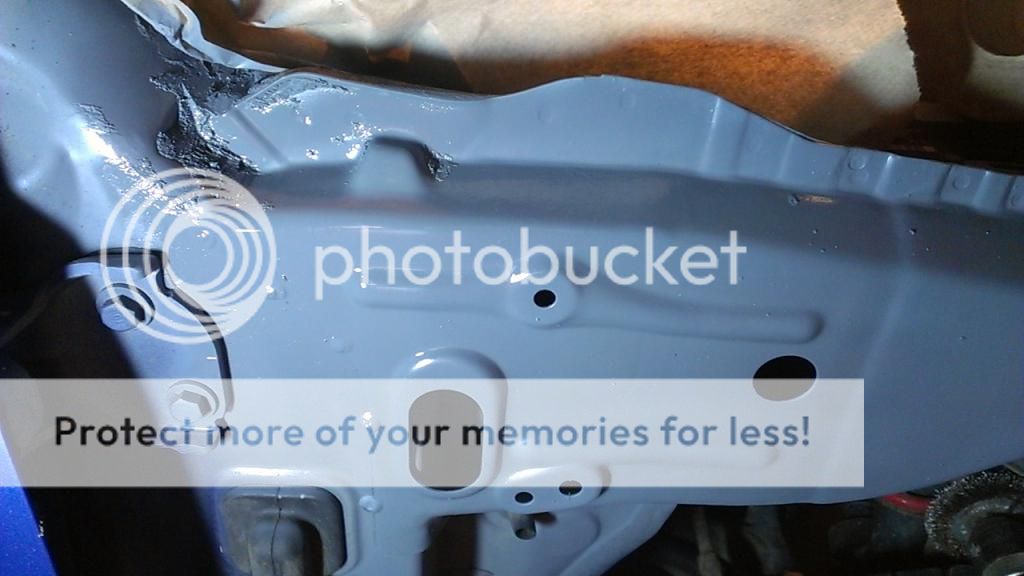
I also cleaned out the chassis and sprayed primer on it. I'm going to let it sit till tomorrow and throw a coat of grey paint over it then clear coat.
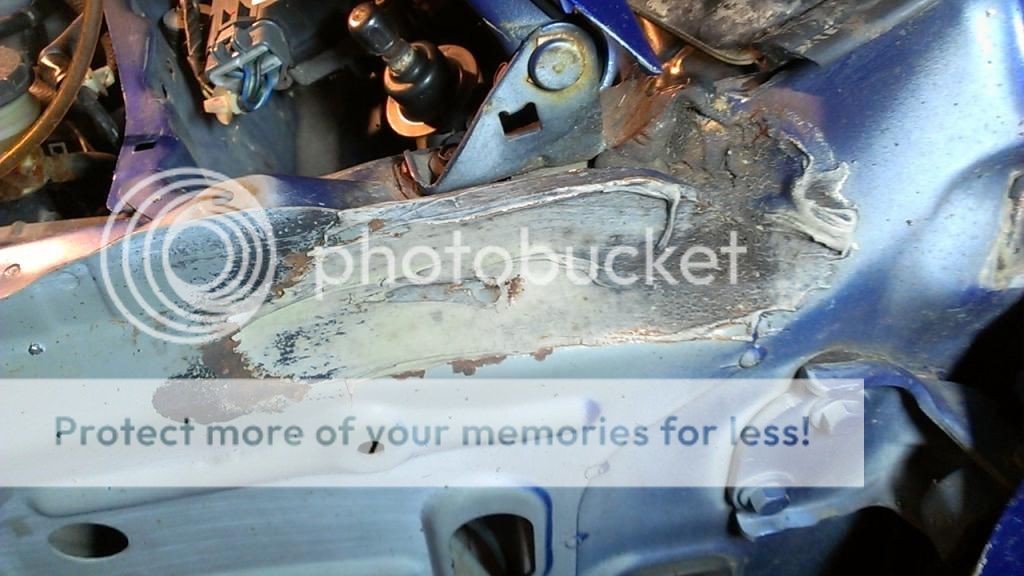
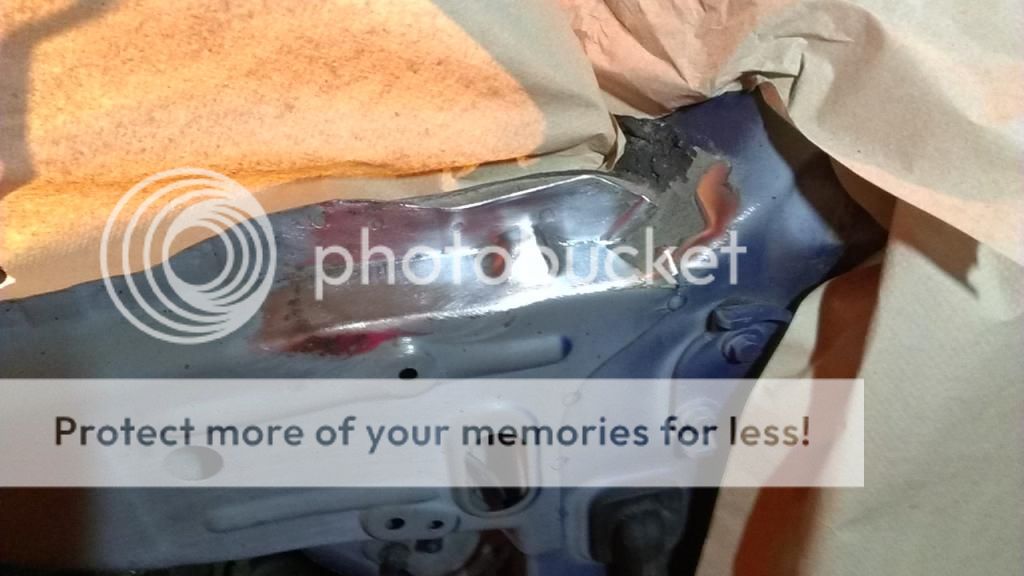
This was under the tunnel. It was starting to bubble badly.
Sorry I got into a groove and didn't take as many pics as I should had. But all that was wire-wheeled was cleaned and primered.
The engine compartment is looking more like it's supposed to, not sure what to do with the aftermarket header. Anybody got an oem unit for sale cheap?
Still got a few pieces to source but all should be easy to find new. One big question, is there a separate AC harness, cause I'm missing a plug for the condenser assembly? It's a 4pin plug and I can't find the male end anywhere. I may have to run new wires, gotta find the diagram.
Found some OEM goodies locally.
Complete AC system - heater box, compressor, condenser, fan, lines, hoses, bolts and clamps. Complete PS system but rack - pump, bracket, hoses and reservoir. Complete intake assembly. Spare tire, wheel and jack. Trunk liner, side panels and cardboard.
This bitch is coming together nicely
Progress Update 8/26/14
Got a lot done last night, was out in the garage 'till 1am
Installed the AC system, PS system(besides the high pressure hose) and the intake. The routing of the ac lines was a pita since I coudn't remember worth a damn, but it all came together.
I also cleaned out the chassis and sprayed primer on it. I'm going to let it sit till tomorrow and throw a coat of grey paint over it then clear coat.
This was under the tunnel. It was starting to bubble badly.
Sorry I got into a groove and didn't take as many pics as I should had. But all that was wire-wheeled was cleaned and primered.
The engine compartment is looking more like it's supposed to, not sure what to do with the aftermarket header. Anybody got an oem unit for sale cheap?
Still got a few pieces to source but all should be easy to find new. One big question, is there a separate AC harness, cause I'm missing a plug for the condenser assembly? It's a 4pin plug and I can't find the male end anywhere. I may have to run new wires, gotta find the diagram.
10-13-2014, 04:37 PM
#10
Honda-Tech Member
Thread Starter
Found a local with more OEM stuff and had to jump on it.
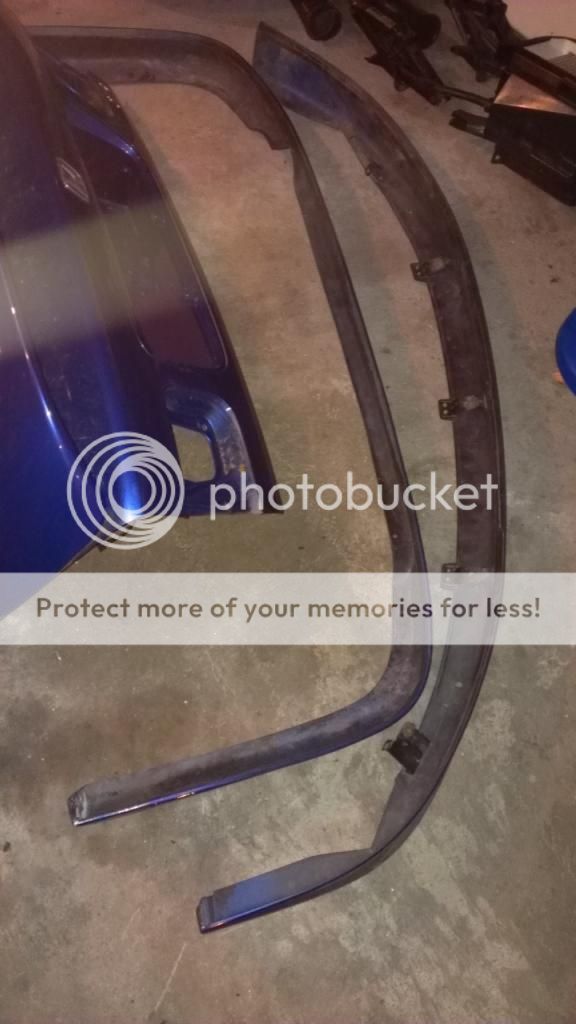
OEM trunk and spoiler. My trunk was replaced by the previous owner with a shitty painted/pitted one, so when my dude told me about this one, I was on it. It will need a good cleanup and some por15 but I coudn't pass it up.
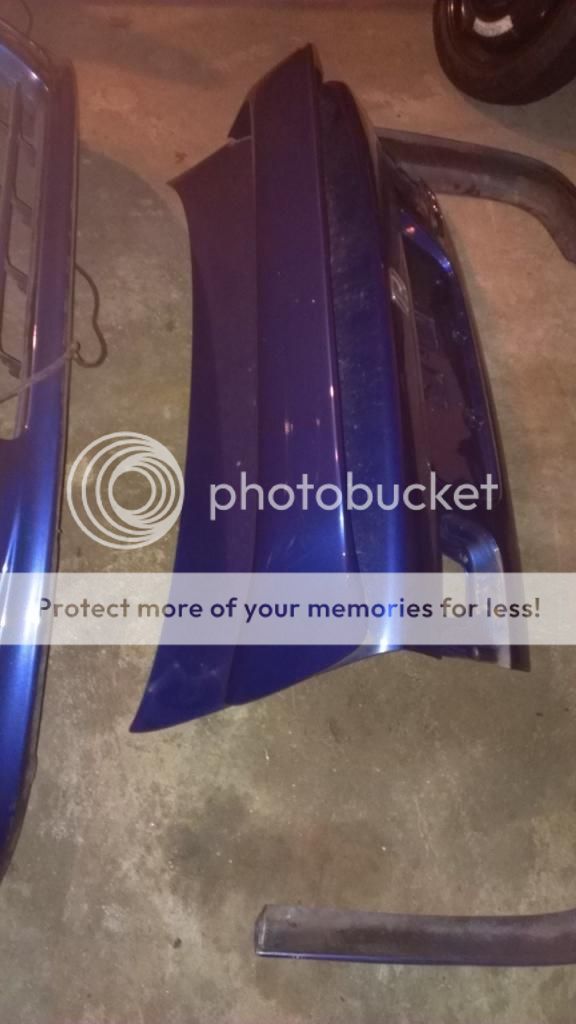
Also got the oem front lip and a urethane back piece. The paint on the back one matches really well and will finish off the exterior look.'
Progress Update 9/4/14
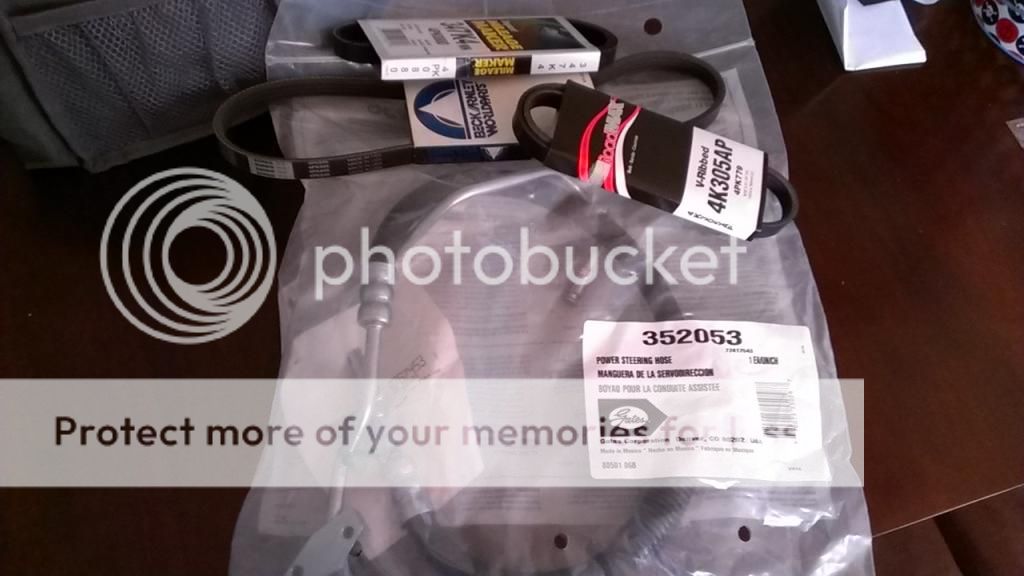
Ordered the high pressure power steering line from rockauto.com for $44, when Honda wanted $116. Went ahead and got the belts while I was there, all at $2.99 each. I know they are cheap but I don't want to spend too much on belts to then find out the AC compressor or PS pump is shot.
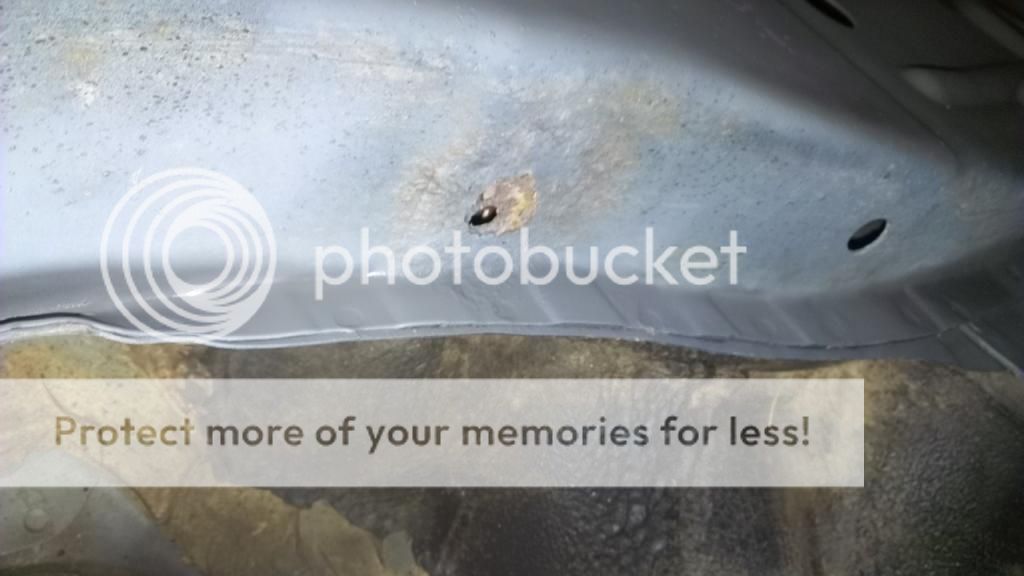
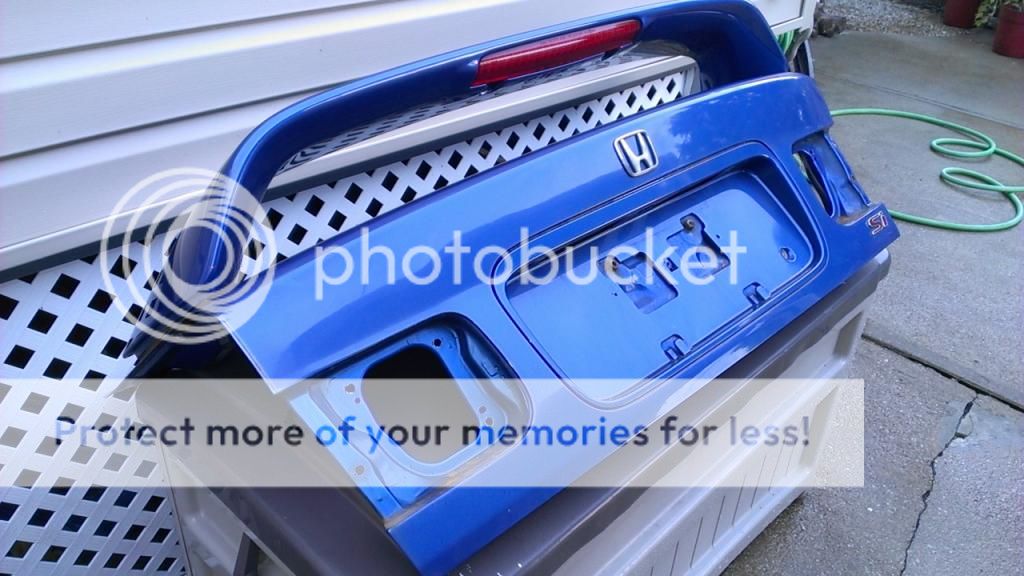
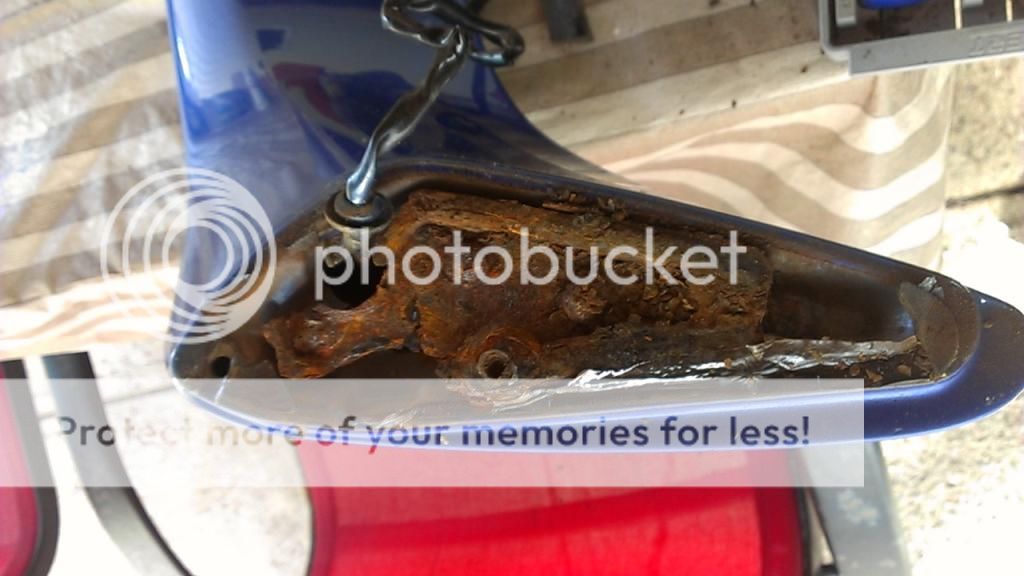
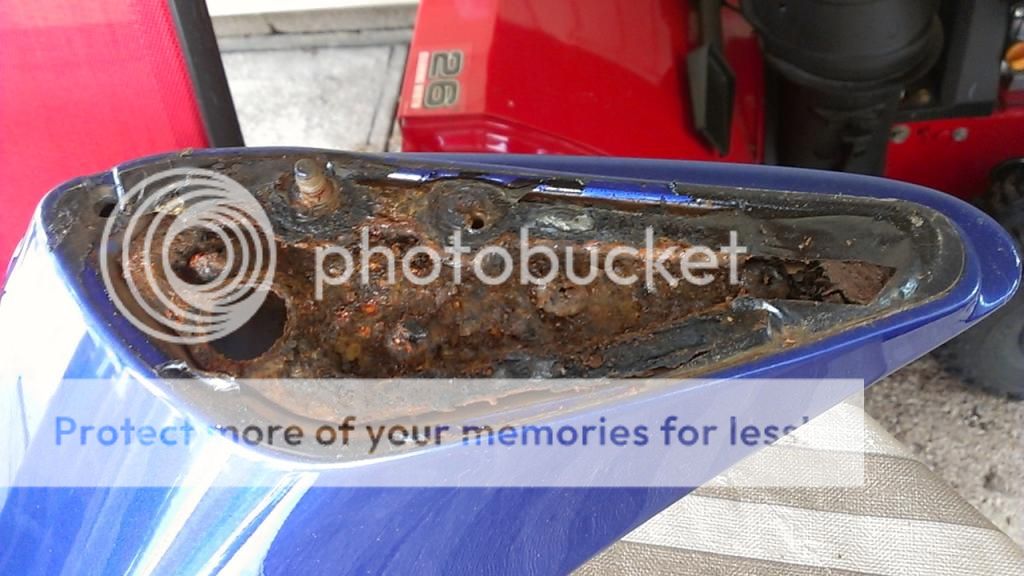
And here are better pics of the trunk assy. As you can see, it has some minor surface rust and somebody drilled some extra holes around the og tail light ones, so I'm going to have to coat them with some anti rust paint.
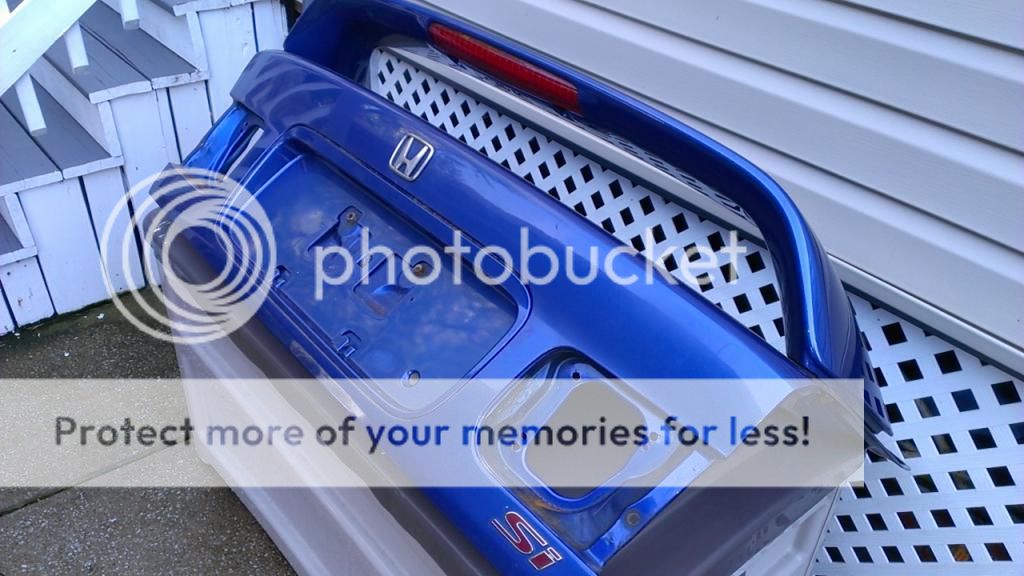

OEM trunk and spoiler. My trunk was replaced by the previous owner with a shitty painted/pitted one, so when my dude told me about this one, I was on it. It will need a good cleanup and some por15 but I coudn't pass it up.
Also got the oem front lip and a urethane back piece. The paint on the back one matches really well and will finish off the exterior look.'
Progress Update 9/4/14
Ordered the high pressure power steering line from rockauto.com for $44, when Honda wanted $116. Went ahead and got the belts while I was there, all at $2.99 each. I know they are cheap but I don't want to spend too much on belts to then find out the AC compressor or PS pump is shot.
And here are better pics of the trunk assy. As you can see, it has some minor surface rust and somebody drilled some extra holes around the og tail light ones, so I'm going to have to coat them with some anti rust paint.
10-13-2014, 04:39 PM
#11
Honda-Tech Member
Thread Starter
Progress Update 9/8/14
Well things didn't pan out as I hoped. Tried to install the front lip but turns out the front bumper is not oem and doesn't have the proper bolt/screw placement for the lip.
I could had made it work but decided to source an oem bumper instead. I sent out a few texts over the weekend and turns out a close friend has an ebp front bumper sitting in his garage that's been there for years. He needs a rear trunk for his own project, so the plan is to swap my old trunk for his bumper. Well now I gotta work on the trunk instead...
So I'm trying to swap over the trunk assy and all the time I'm moving the "new" trunk with the spoiler, I'm hearing these "pebbles" running around the trunk and I'm like "What the ****???" So I decide to investigate what this noise is all about...
And this is what I find. **** ME!!!
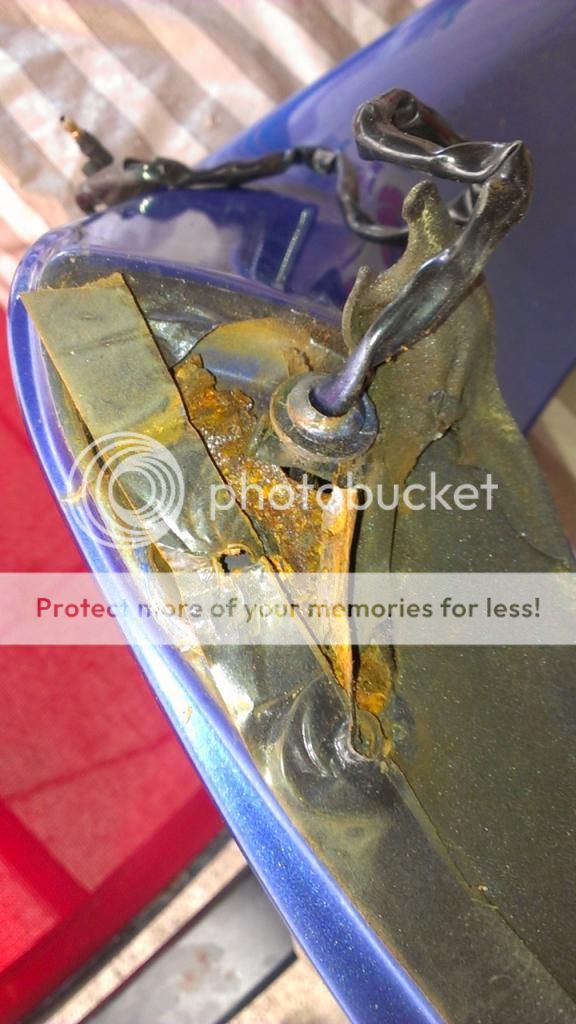
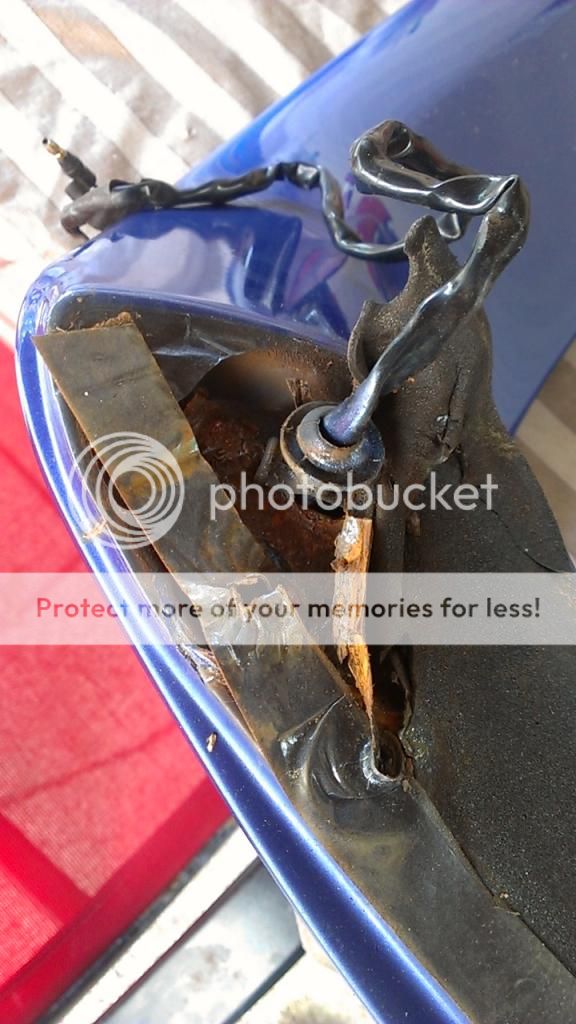
So the spoiler brackets are fucked and all the broken rust is rattling around the inside of the spoiler. Now I'm trying to see if I can find these, if not, then I'm going to have to have my father fiberglass/fabricate a new metal support plate. This is soooooo ******* annoying.
The trunk will also need to be redone. Its got rust bubbles forming on the location where the spoiler sat. So that's gonna be a pain in the *** too. I didn't want to do any type of painting at the moment, but this needs atention asap.
Needless to say, it was a dissapointing weekend. I wanted to get the lips and trunk finished but nothing got done. I also wanted to get the power steering set but I'm waiting on the pressure sensor, so I can't even get that done. I still can't locate the ac wiring and I haven't made it to the junkyard to grab one.
I need to remind myself that this is a long term project, it just sucks when you find **** like this...
Well things didn't pan out as I hoped. Tried to install the front lip but turns out the front bumper is not oem and doesn't have the proper bolt/screw placement for the lip.
I could had made it work but decided to source an oem bumper instead. I sent out a few texts over the weekend and turns out a close friend has an ebp front bumper sitting in his garage that's been there for years. He needs a rear trunk for his own project, so the plan is to swap my old trunk for his bumper. Well now I gotta work on the trunk instead...
So I'm trying to swap over the trunk assy and all the time I'm moving the "new" trunk with the spoiler, I'm hearing these "pebbles" running around the trunk and I'm like "What the ****???" So I decide to investigate what this noise is all about...
And this is what I find. **** ME!!!
So the spoiler brackets are fucked and all the broken rust is rattling around the inside of the spoiler. Now I'm trying to see if I can find these, if not, then I'm going to have to have my father fiberglass/fabricate a new metal support plate. This is soooooo ******* annoying.
The trunk will also need to be redone. Its got rust bubbles forming on the location where the spoiler sat. So that's gonna be a pain in the *** too. I didn't want to do any type of painting at the moment, but this needs atention asap.
Needless to say, it was a dissapointing weekend. I wanted to get the lips and trunk finished but nothing got done. I also wanted to get the power steering set but I'm waiting on the pressure sensor, so I can't even get that done. I still can't locate the ac wiring and I haven't made it to the junkyard to grab one.
I need to remind myself that this is a long term project, it just sucks when you find **** like this...
10-13-2014, 04:48 PM
#12
Honda-Tech Member
Thread Starter
Thanks to everyone that has replied. Glad to see other EM1 owners showing love to these cars like they deserve. As you guys can tell this is a project that has been going on another forum and I'm just copying and pasting the posts.
As of right now the car is put away for winter and I'm gathering parts. I have already gotten another oem front lip, aftermarket fog lamps(stock look), oem front bumper with minor scratches and another oem hood with just the top edges slightly bent. All these parts will work nicely with my plans on painting the car next year, we will see.
Since my temp gauge was inop(needle broken), I went ahead and ordered a new temp/fuel assy from Honda for $35 new, cant beat that. It should be here in the next few days. So finally the cluster will work and I'll be able to track the engines' temperature.
I'm now looking for a clutch(prob oem), exhasust system and suspension parts. I'm thinking of getting the "Energy Suspension 16.18110R - Hyper-FlexMaster Set", anybody else used it? Any issues?
I'll keep updating this thread with info, parts and questions.
Thanks for the support!!!
10-13-2014, 05:45 PM
#13
Steve at Heart
Looks like the start of a good restoration.  for bringing it back.
For the clutch you may check out either Exedy or Competition Clutch. Energy bushings are decent. Some people don't like them because of the noise. Hardrace is also a possibility which is a hardened rubber.
for bringing it back. For the clutch you may check out either Exedy or Competition Clutch. Energy bushings are decent. Some people don't like them because of the noise. Hardrace is also a possibility which is a hardened rubber.
10-14-2014, 02:32 AM
#14
Honda-Tech Member
Thread Starter
Looks like the start of a good restoration. for bringing it back.
For the clutch you may check out either Exedy or Competition Clutch. Energy bushings are decent. Some people don't like them because of the noise. Hardrace is also a possibility which is a hardened rubber.
for bringing it back. For the clutch you may check out either Exedy or Competition Clutch. Energy bushings are decent. Some people don't like them because of the noise. Hardrace is also a possibility which is a hardened rubber.
Yeah I was thinking exedy for the clutch and I'll prob end up getting that energy suspension kit. I think with the right grease(Mobil SHC1500 FullSyntec) I shouldn't have any noise issues.
10-14-2014, 03:15 PM
#16
Honda-Tech Member
Thread Starter
Thanks!
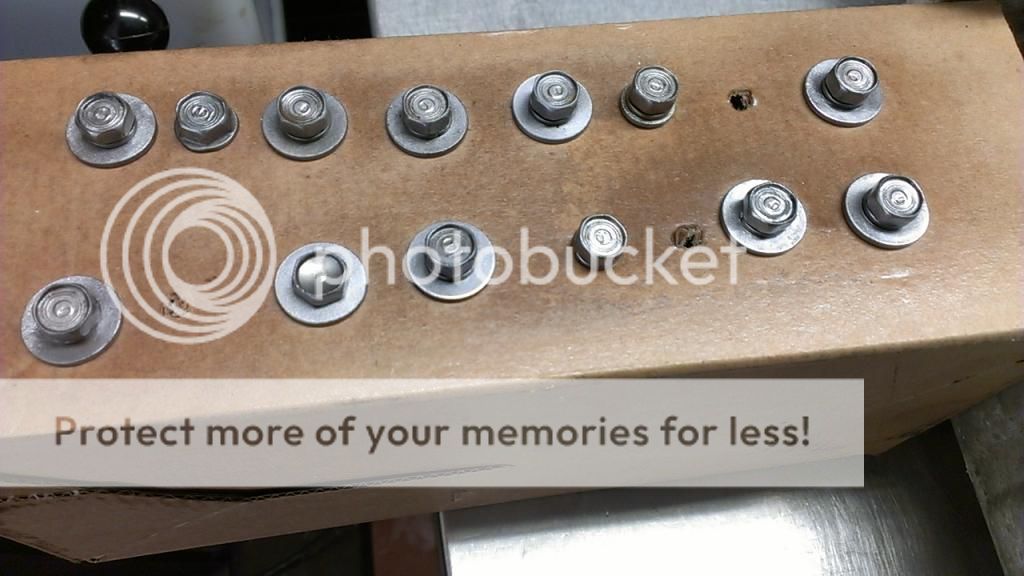
Yeah I could had gone with those fancy bolts and washers but why bother when these ones came from Honda and a bit of attention was all that was needed.
I just installed my new temp/fuel gauge kit from Honda, so the cluster is all put back together
Yeah I could had gone with those fancy bolts and washers but why bother when these ones came from Honda and a bit of attention was all that was needed.
I just installed my new temp/fuel gauge kit from Honda, so the cluster is all put back together
10-14-2014, 03:35 PM
#17
Honda-Tech Member
Thread Starter
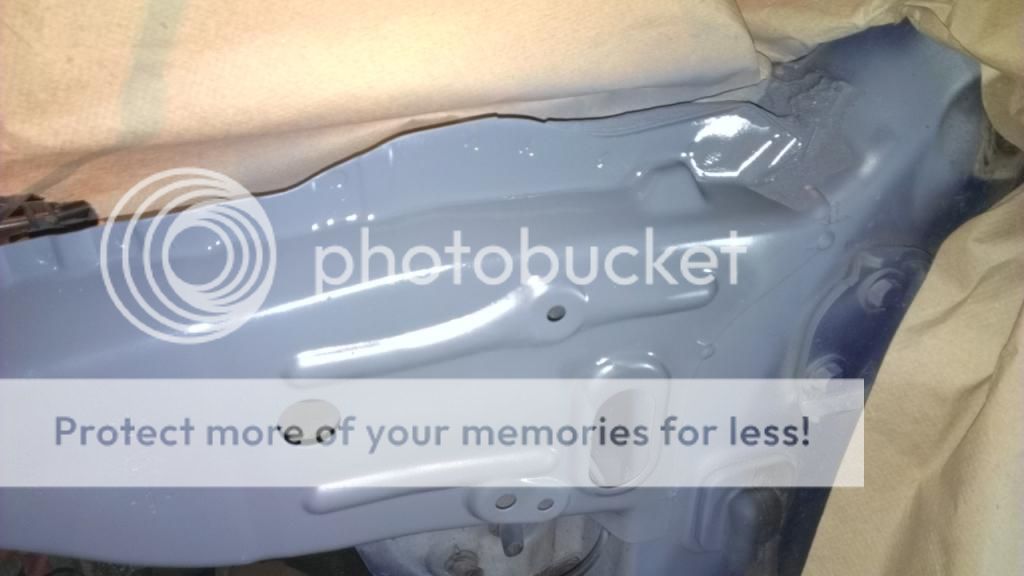
I did finish the chassis tunnels
Only took one pic, sorry. Used some old paint I had just to cover them for now. Plan will be to do a complete paintjob, including the chassis, so all I need now is protection from the elements.
[/quote]
Only took one pic, sorry. Used some old paint I had just to cover them for now. Plan will be to do a complete paintjob, including the chassis, so all I need now is protection from the elements.
[/quote]


 10-17-2014, 09:23 AM
#25
Honda-Tech Member
Join Date: Feb 2009
Location: Wisconsin
Posts: 539
Likes: 0
Received 0 Likes
on
0 Posts
Very good. I will continue to follow this. One thing worth noting. You said it was a b16a2 out of a del sol. But the del sol had a b16a3. So the a2 would be the correct engine for your si.