
Harmonator84's Project Log
 01-25-2007, 01:02 PM
#1
Honda-Tech Member
Thread Starter
Join Date: Nov 2005
Location: My Garage
Posts: 3,394
Likes: 0
Received 0 Likes
on
0 Posts
::Updated on page 18::
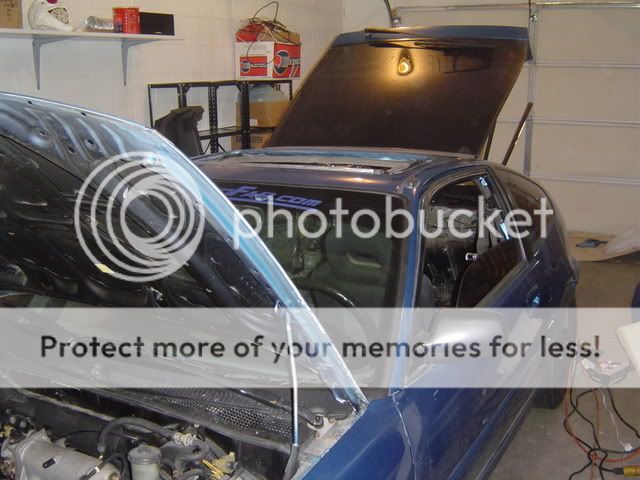
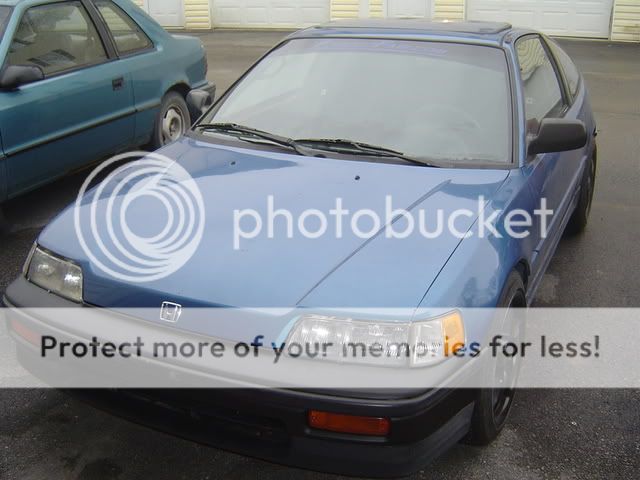
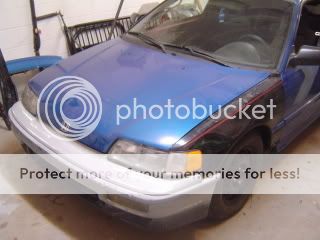
Almost everyone has a project thread so I figured why not. Plus I think it will really help me stay motivated to working on the car. I really want to get the car looking nice and running really good so I can attend meets and such. Heres a picture of my car just before I bought it.
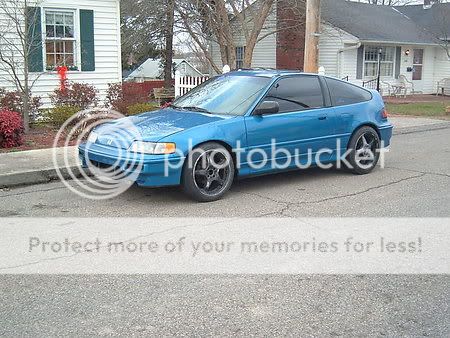
Its a 1990 crx si that I purchased for $2500. The car has 91k on the body and 60k on the motor. The engine is a b18a bolted to a LS trans. Exedy stage 1 clutch, and poly motor mounts. The motor has a blox intake manifold and a unknown name header connected to 2.5" exhaust. The car is seating on tokiko struts and H&R springs. The shoes are 16" konig villain wheels. The inside is pretty stock other than a short shifter and the battery being relocated to the trunk.
The body of the car is in pretty good shape. There is a dent in the driver side quarter panel and one on the driver side fender. The front bumper has also been cut where there used to be a fmic.
My future plans for the heart is probably install some cams and do a Lsvtec. Also planing on doing a wire tuck. I have already had to replace the orings on my injectors.
There is alot of things I want to do to the car like..."in no order"
1.)Install mugen bodykit or find stock 90-91 front bumper
2.)Repaint rims flat black and install new tires
3.)Get or Fix driverside seat(has rip like all other crx's)
4.)Fix or replace sunroof with carbon fiber plug
5.)Fix body damage on rear quarter
6.)Buy driverside front fender
7.)Repaint car
8.)Tune up(plugs, wires, fuel filter, etc.)
9.)Relocate the battery from behind the passenger seat to farther back.
I have some extra parts from my two other crx's that I am going to swap around with. I also have a mugen bodykit that I am up in the air about installing.
Here are some random pics...
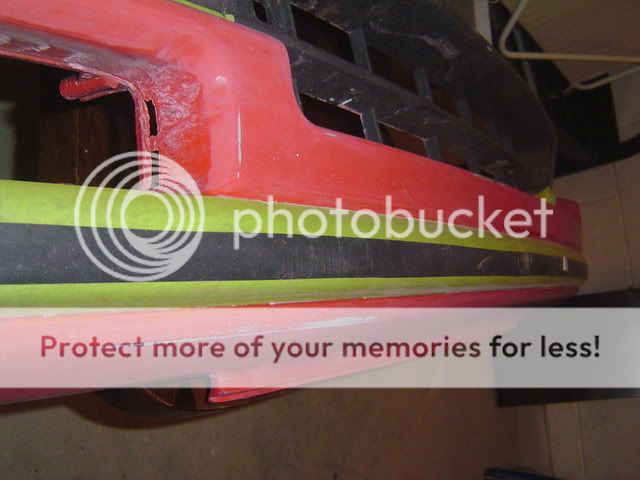
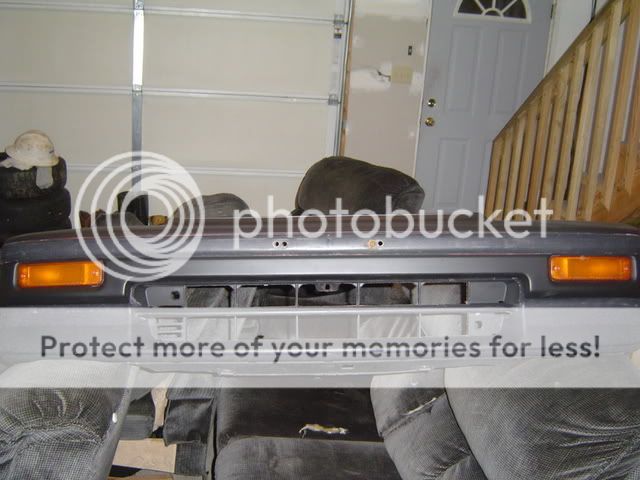
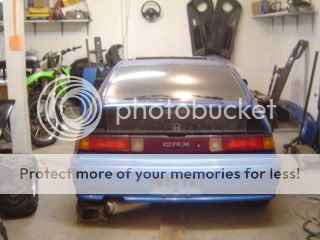
Here is a side view of the car. I took the bumper off and put on a extra I had from a 88 crx.
I took the bumper back off and started sanding it down with some 600 and 400 grit paper. I think this picture is before I started sanding. I will take a picture of it when I am done tonight.

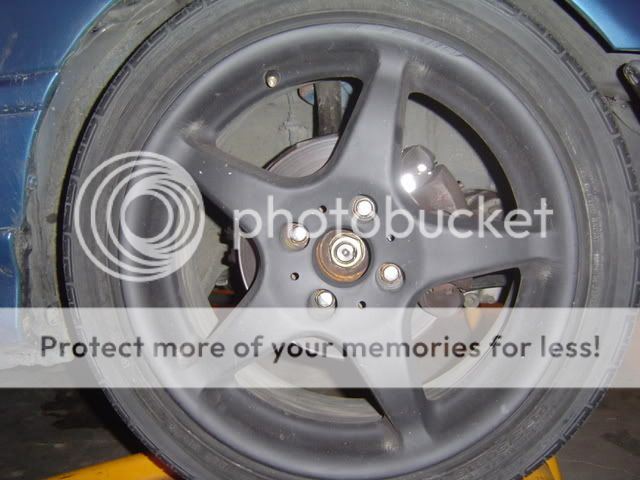
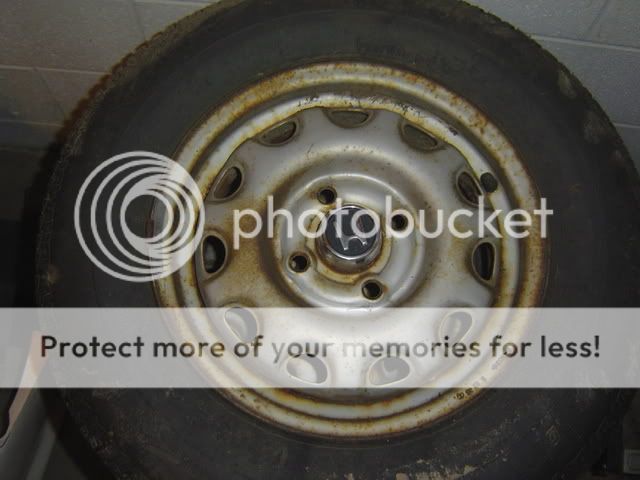
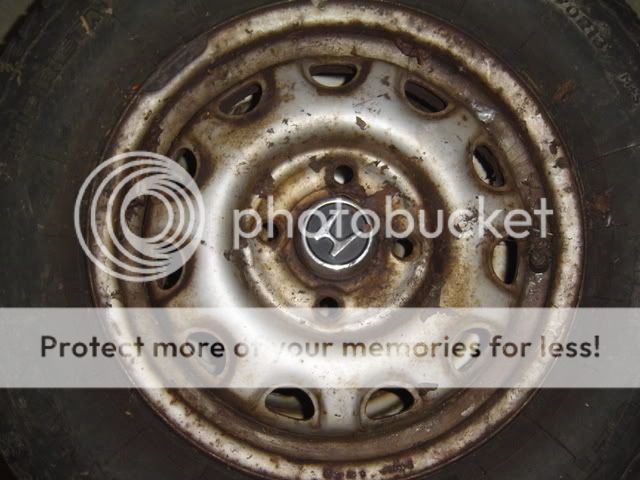
Here is a picture of the rims. The are not in the best shape in the world. Looks like they have been painted 1,000 times. So I am going to sand them down and repaint them the right way.
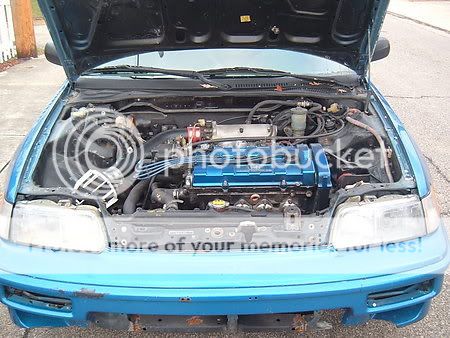
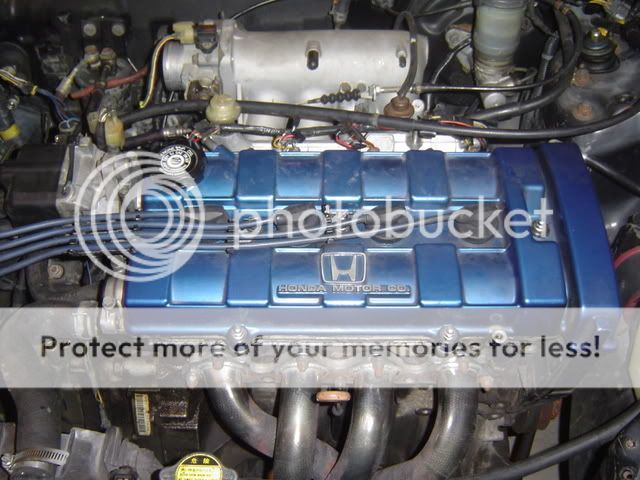
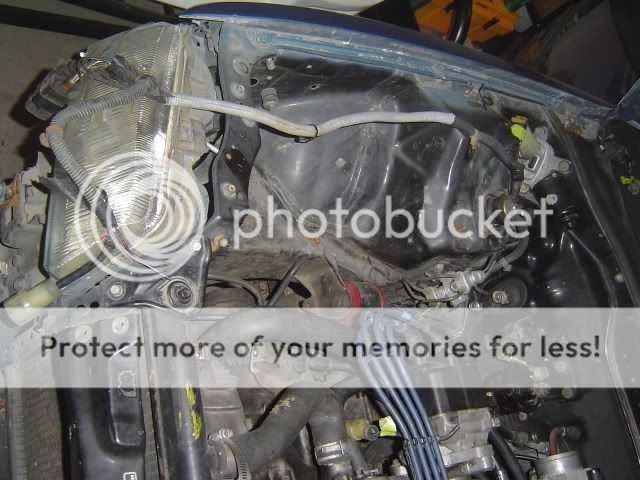
Heres closer picture of my motor and my intake manifold. The CAI is off because I am sanding it down and painting it also. The guy that had the car before me kinda quite on the car when it came to making his wiring look clean. So I have to go back and heat shrink all my wires and such.
I currently have the sunroof off because it doesnt line up that good. I am thinking maybe a new gasket kit will help. Has anyone else had this problem?
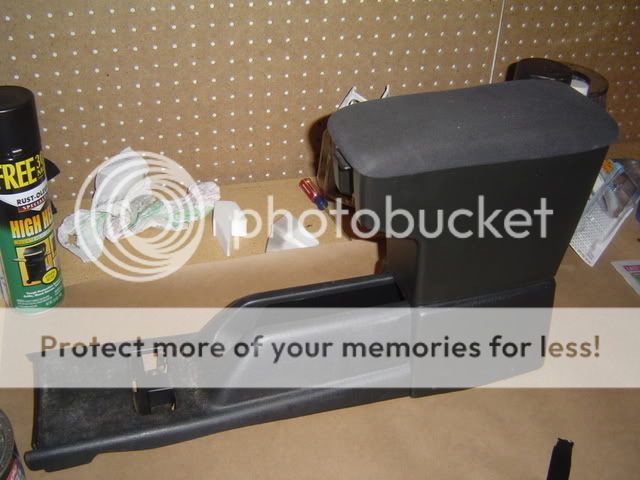
I found this in the back of the car.
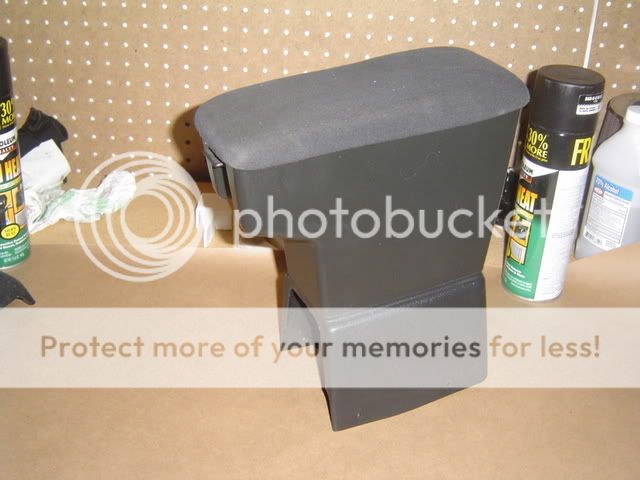
I coundnt believe it. I have seen these things go for like 200 bucks on ebay. I am thinking about selling it so I took the center console piece from one of my other crx's and epoxyed it too it. If anyone is interested in it let me know.
I will update this thread everyday that I work on the car. I dont really want to pull this car out of my garage till I am pretty much done with it. I am open to all opinions about the car. Thanks.
Matt
<U><FONT COLOR="red">***UPDATE*** 1/26/07</FONT></U>
I finished sanding the bumper down with 400 grit. It didnt turn out to bad. I am not really worried about the looks of it though because I really dont want to even use it. I am going to paint it black tomorrow.
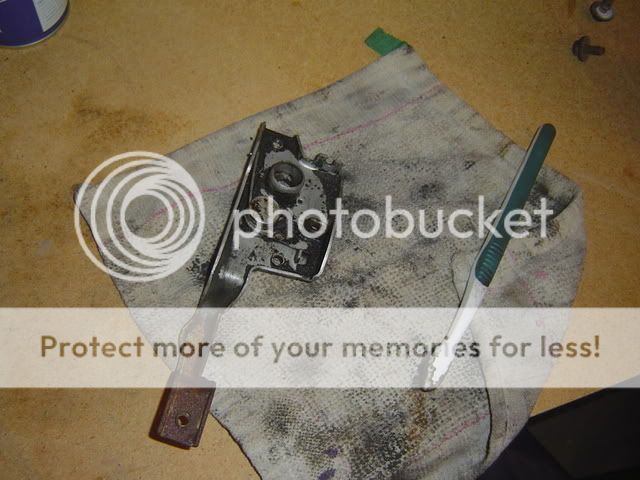
I worked on my hood latch. It doesnt open up to good so I took it off and cleaned it with some brake cleaner then some WD and a tooth brush.
Here is a picture of the rims I am going to sand down and paint black to use a temps untill I get my 16s done. I dont want to rush on anything on this car.
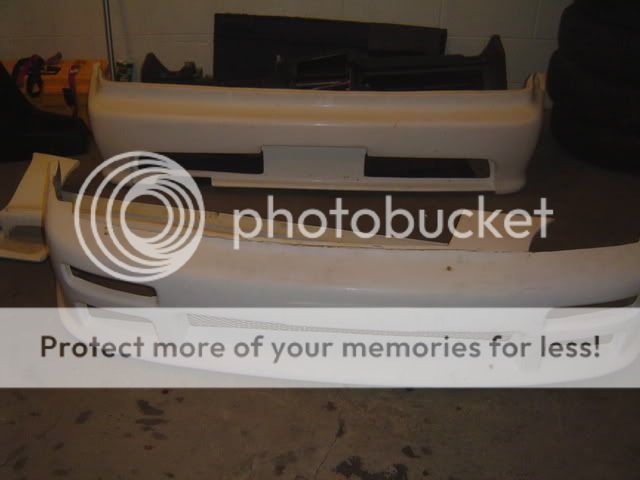
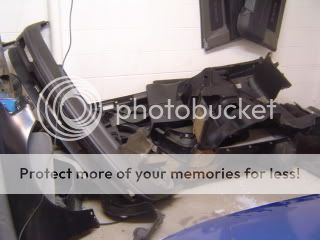
Here is the bodykit I have. I bought it awhile back for like 50 bucks or something. It doesnt fit perfect and I would have to do some modding to it. Other than my cars front bumper it looks pretty good...so I dont know if i want to use it or not.
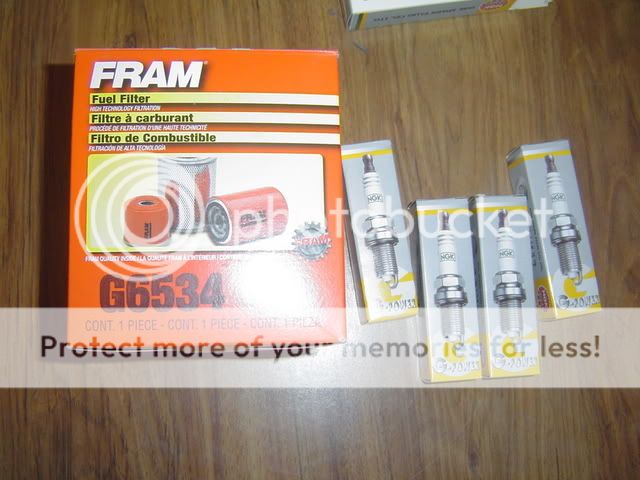
My fuel filter and spark plugs came in the other day. I am going to try install them tomorrow also. An oil change is also in the plan book for tomorrow.
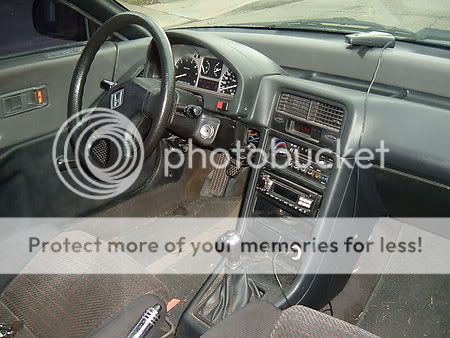
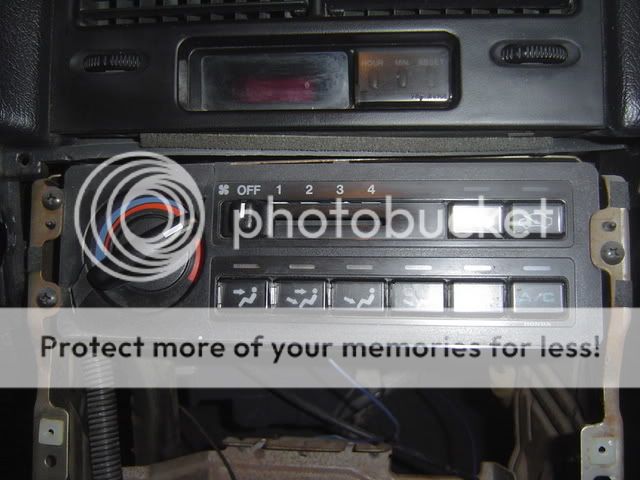
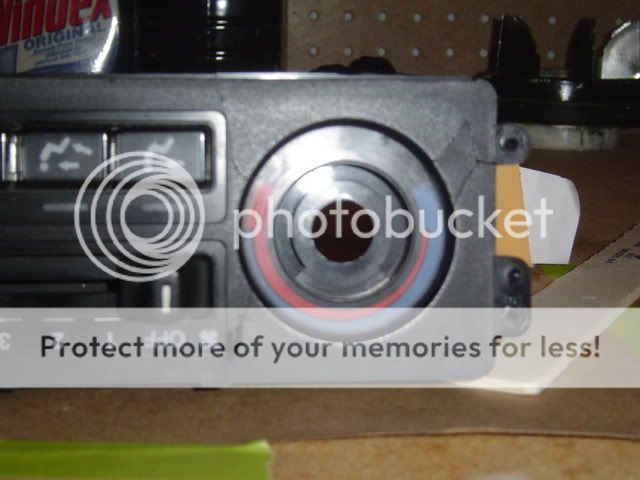
As you can see my climate control is also cracked. Sad part is I just sold a mint one about a month ago. Ahh I still got 218 bucks out of it...hehe. I am going to take this one off and epoxy the back of it. Should hold it in pretty good.
When I bought the car it came with 2 ecus. One is the stock 90 crx si ecu, and the other is for the LS integra. The only thing is that integra one has been chipped. Right now I have the crx ecu in the car but I will probably put the other back in.

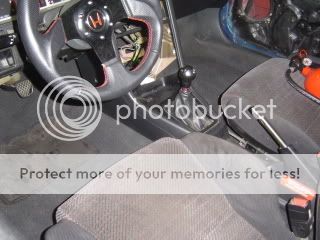
Here is the best mod I could have done to the car. I think it gave me 5 horsepower to the rear wheels...lol

<U><FONT COLOR="red">***UPDATED***1/28/07</FONT></U>
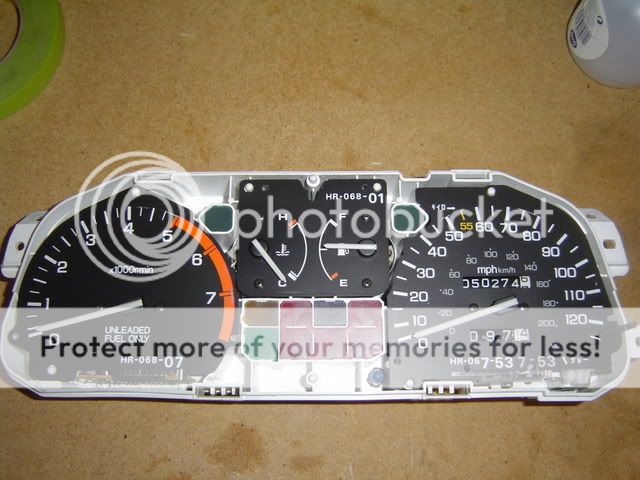
Today I finally got back to working on the car. Its been so cold and snowy here I just havent been up to doing much. I was looking around yesterday and I came across the how-to-paint your gauge needles. I really thought that they would look awesome in red. So I took an extra set of gauges I had and started taping them off. I then used some model car paint to touch them up. I think they turned out pretty nice. Heres pics of before and after...
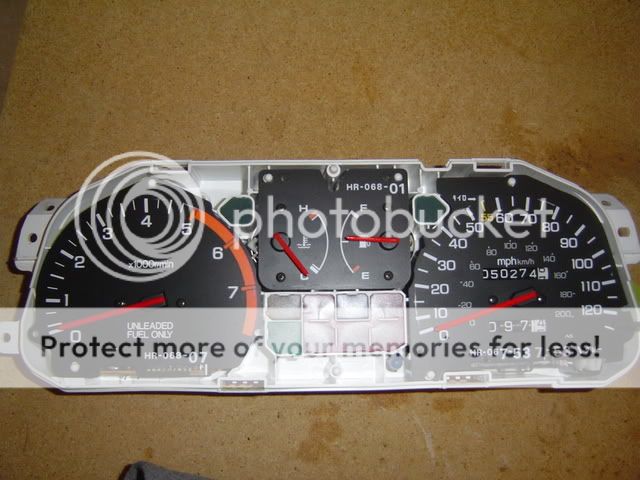
What do you guys think???
Today I also went ahead and changed my fuel fitler. Easy install...and nothing leaks!
<U><FONT COLOR="blue">UPDATED ON THE NEXT PAGE!!!</FONT></U>
<U><FONT COLOR="red">***UPDATE*** 2/4/07</FONT></U>
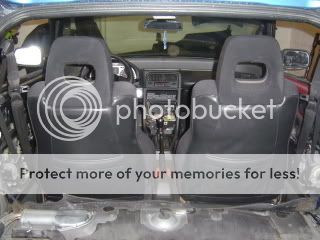
Last night I went to bed early so I could get a fresh start on the honda. So this morning I went down to my garage and started taking interior peices out. I removed the intire back interior and started removing the seats. I took alittle break and was looking around the car when I found some horriable.....RUST.....Well not really rust but where rust has been. I couldnt believe it. I thought that my car had been 100% rust free all its life. By the looks of it there was a rust spot above the driver side rear fender that someone went in and patched it up with a new piece of metal. The welds do not look bad and it looks like they stopped the rust from coming back pretty good. I am thinking about going in and spray some rust preventive in my fenders just to be safe. Either way today is still a sad day.
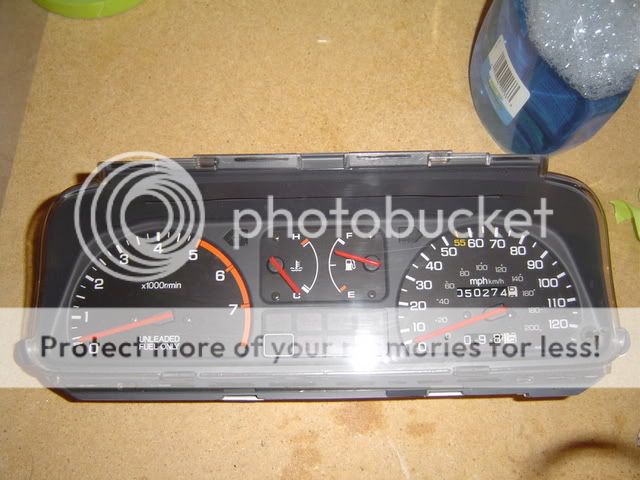
After being depressed about my fenders I went ahead and put my gauge back together. Later tonight I am going to get the one out of the Si and paint it the same way. I am pretty pleased with the results.
Then came the rims. I have been dreading this for awhile now. All four of the rims have rust on them and needed sanding down. I took some 150 grit to them and I must say they feel great now"smooth". I think they are going to turn out really good. I was only able to get two of the rims done before my hands started hurting. I figured I would take alittle break and get ready for the superbowl. GO BEARS!!!
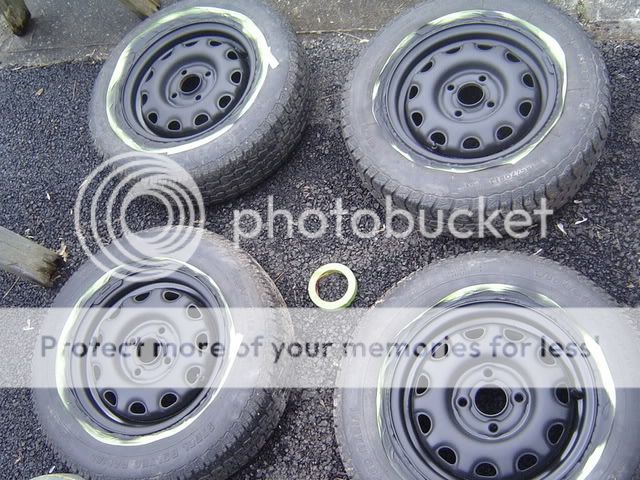
Here is some pictures of the rims and tires that came off of my Dx. Which by the way I only gave 100 bucks for the intire car..hehe. Pretty good deal since I have sold over 500 dollars of parts off of it.
Before
After
Tread is pretty good on them! I know people usually do this little test with pennys but sorry I am to rich to have pennys! haha
I am going to paint the rims flat black with blue center caps.( Have the little H in blue)...
Let me know what you guys think. Need some opinions here guys. Come on help me out!!!
<U><FONT COLOR="red">***UPDATE*** 2/5/07</FONT> </U>
Well today I wasnt able to do very much. I did get the rest of the rims sanded down though. As soon as it warms up alittle bit I am going to paint everything. Right now the paint would never dry. I have to work tomorrow so its probably going to be hard for me to do anything...but if I get the time I am going to sand the trim pieces down and prep them for paint also. There is no pictures for today because like I said all I did was sand down some rims. I am sure you guys dont wanna see 13" sanded rims.
Any comments are welcomed! Thanks.
<U><FONT COLOR="red">***UPDATE 2/11/07***</FONT></U>
I finally got some progress done on the car. I have been pretty busy lately so bare with me.
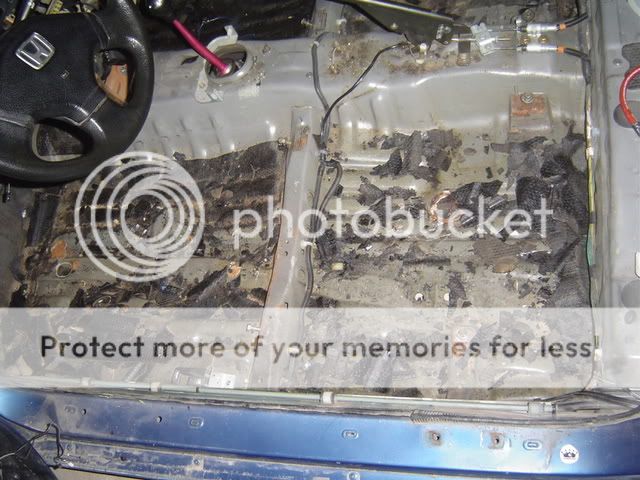
I started out by taking the carpet out. My first opinon was to just clean the carpet. But after taking the carpet out I am leaning more towards just buying some new carpet. I am still going to vacuum it out and see the condition on it.
After taking the carpet out I learned alot about the car. I am also VERY glad that I took the carpet out. There was MOLD on the passenger side, I couldnt believe it. I am going thoroughly scrup it with some cleaner tomorrow.


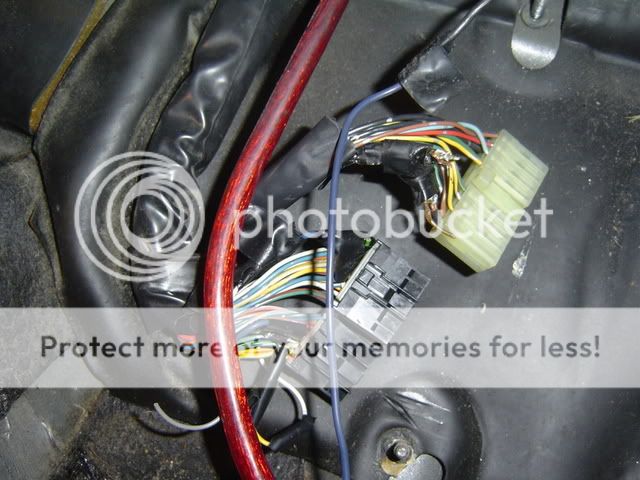
When I had the carpet out I ran across some problems. I had alot of wires under there that went to nothing. Most of them went to where there used to be some kind of stereo system install in the car. But there were two wires that I didnt know where they went to. 1 of the wires were blue and the other was red. I followed the blue wire through the firewall and it lead to the fan. So thats great my fan was not even hooked up. The second wire(red one) just went up towards the A pillar. I was not able to follow it so I was hoping someone might have a idea of what this wire goes to. If nobody can help me I guess I will just have to start tugging or something.
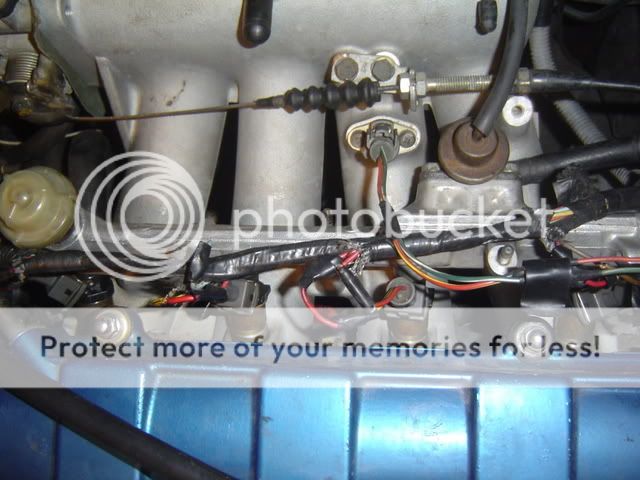
Also I took a better look at my connections going to my ecu. I dont think this guy cared to much about detail. I would like to go through and disconect all these are make sure they are sodered and heatshrinked. As you can see in the picture it doesnt look 100%. By the way the big red wire you see in the picture goes back to my battery where he done the relocation and the blue wire...well like I said on one end it leads to the fan and the other goes to nothing.
I took a break from the floor and started on my climate control. This thing is cracked bad...After about a hour of pulling on this thing I finally got it out. Here it is in all its glory before getting epoxyed up. I will take a picture of the final product tomorrow when it drys.
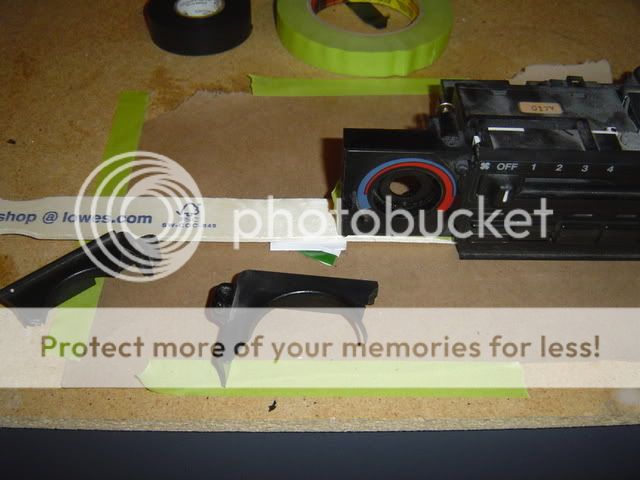
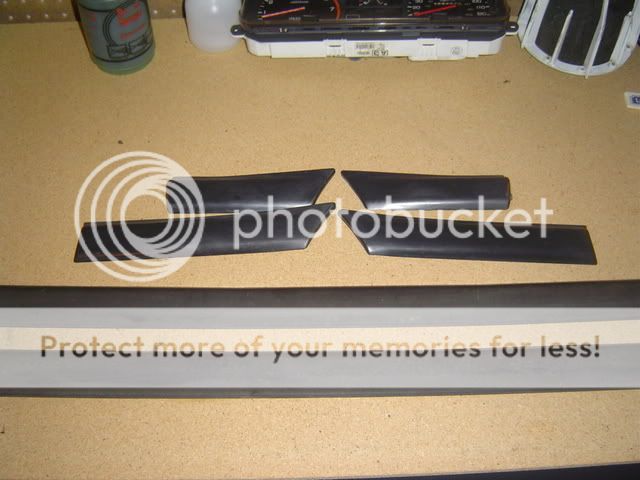
While the climate control was drying I went ahead and cleaned my moldings that came from my HF. I think the car will look better with black moldings instead of painted like the car. I would like to have some opinions on this though.
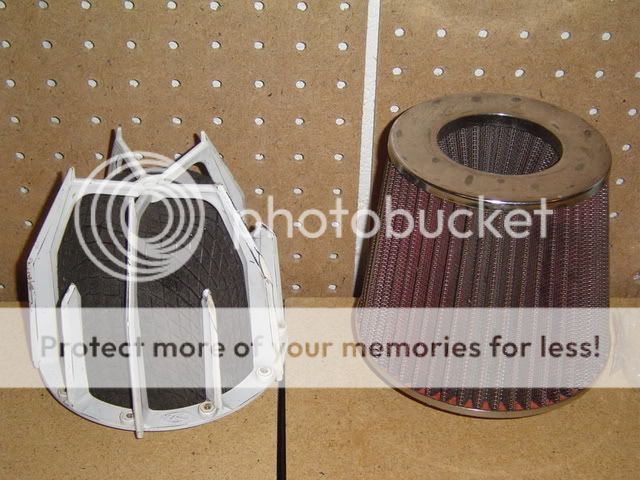
Finally I leave you today with another question. Acouple years ago I was using the filter you see on your right. The car came with the filter on the left. Which do you guys think I should ride with? Just thought I would throw in some questions to get my posts rolling.
Thanks once again for visiting my build. Please if you view my build give me some opinions or at least a bump.
<U><FONT COLOR="red">*** UPDATE 2/12/07***</U></FONT>
Just wanted to pop on here and inform you guys on what the status of the car is today. I started out by finishing the climate control. I also figured out where the unknown red wire went to. It went to the doors for the door speakers. I guess it was to go to a amp or something. I removed all the extra wires I found in the car. While the door panels were removed I found out I had 1 orginally red door and 1 orginally black door. I think this car was once in bad shape. I went ahead and ripped the window tint off the two front windows also.
I was going to call it a day and just rest before going to work tomorrow but instead I started something that I almost wish I didnt. I started removing that tar stuff from the floor board. I was just sitting there talking to my gf and picking at the tar stuff. Well if you know me then you would know that I HAVE to have everything perfect. SOOOOOO here I am still hacking away at this stuff. A hammer and a screw driver is working pretty good but it is very time consuming.
Well I guess I am going to go back to the garage to start hacking away. I will upload some pictures tonight before I go to bed.
Here are some pictures of my progress today.
Heres the finished climate control. I think I still need one of those plates for it though.
But still yet its holding in great.
Then here is my progress so far on removing the tar. It actually hasnt been that bad considering what I have heard from others. I didnt have to use dry ice or anything, just a hammer and screwdriver. I think where its cold is helping me out.
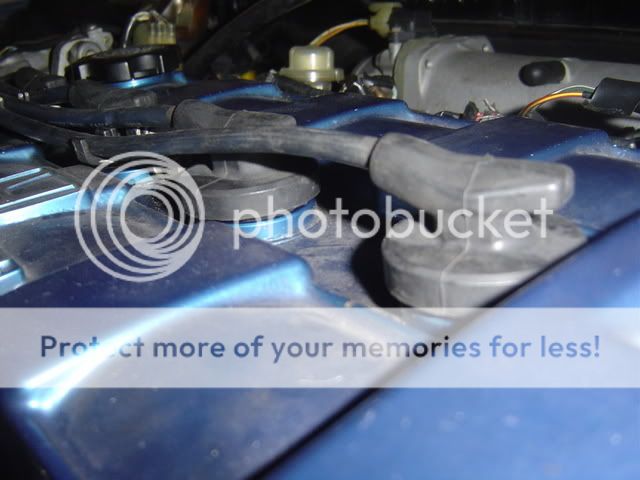
Finally I decided to go ahead and install my spark plugs. I ordered NGK plugs acouple weeks ago. The ones from the car were not in bad shape, actually they looked pretty good. But changing plugs is just something I do to all cars I buy. After I installed them and put the plug wires back on I came across alittle problem. I couldnt get the plug wires to snap all the way down on it. I mean I hear them click but there is still a gap between the lip on the plug wire and the valve cover. I dont think its supposed to be like this. Is it because I dont have the spark plugs on there tight enough? Heres a picture, I hope this helps.
Any help would be great. Thanks and if view the page please give me a bump.
<FONT COLOR="red"> <U>***UPDATE 2/19/07***</U></FONT>
I havent had a update in about a week. So I figured I would catch everyone up on what I have been doing to the car. The tar is 99% removed...thank god. Removing this stuff has taking up more time then I had wanted. If I knew it was going to be this hard I think I would have just left it on there. But its pretty much done, I just have 1 little spot that is being a pain to get up. The climate control has dried and the epoxy is holding it really well. I am going to put one more coat of epoxy on it tomorrow and it should be ready to go.
I am still having a problem with my plug wires. I tried to pull the wire to where it would go farther down on the spark plug, but its just not working...I cannot get it to budge.
Thats pretty much all I have been doing to the car lately. But when I was walking away from the car that little dent on the driver side quater panel just bugged me. I went in from behind it and pushed on it alittle. It just started cracking the paint so I eased off. I dont want to really mess to much with the body till after the summer. Now to the pictures....
Here is where I left the floor. As you can see the only spot left is under the steering wheel.
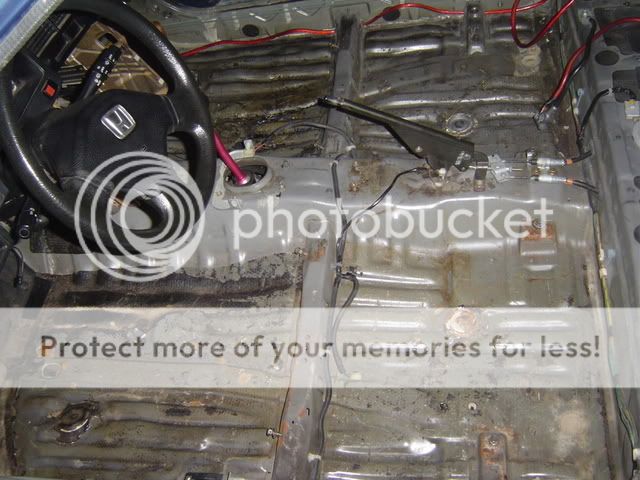
Like I said the floor has taken up 99.9% of my time so I really have no other progress pictures. Here is a picture of how I left her...notice the taillight piece is out because I was working on that dent.

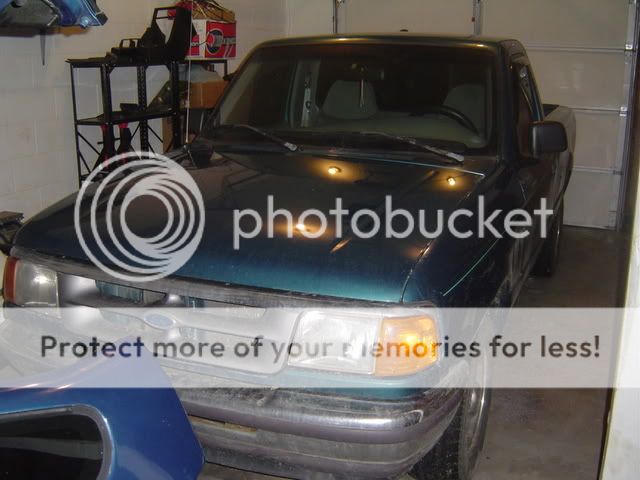
Here is just a random picture. Its of my DD, a 97 ford ranger. Its payed for and I have yet to have any problems with it. The truck only has 90k and I bought it when it had 45k. Its nothing special but it saves me from having to drive the crx everyday. Notice how its really dirty, Ky weather sucks right now.
I will leave you guys with alittle knowledge. After I removed pretty much all of the tar I bagged it all up and weighed it to see how much weight is really lost from doing this. Remember I did not remove it to make me "faster", I only did it because there was mold on it. Anyways the tar only weights 5 lbs....NOT worth the time of removing it. If you really want to be faster just go on a diet.
<U><FONT COLOR="red">***UPDATE*** 2/25/07</FONT></U>
Today it was actually warm outside, so I woke up kinda early and got started spraying. I first sprayed down the rims and bumper with the water hose to get all the junk off them. Then I started the paint...
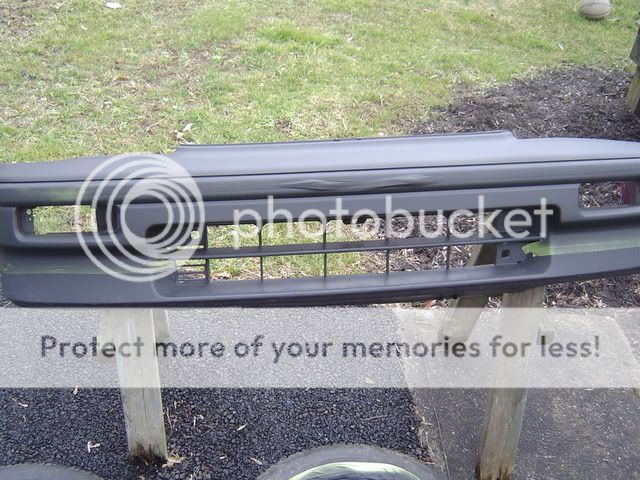
Here is the front bumper after I layed down a tack coat.
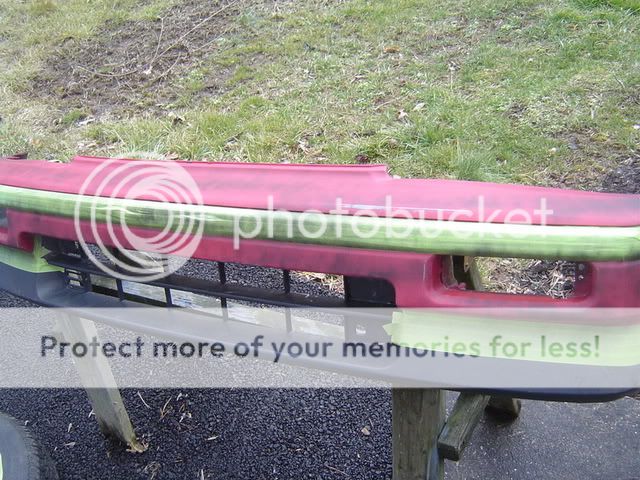
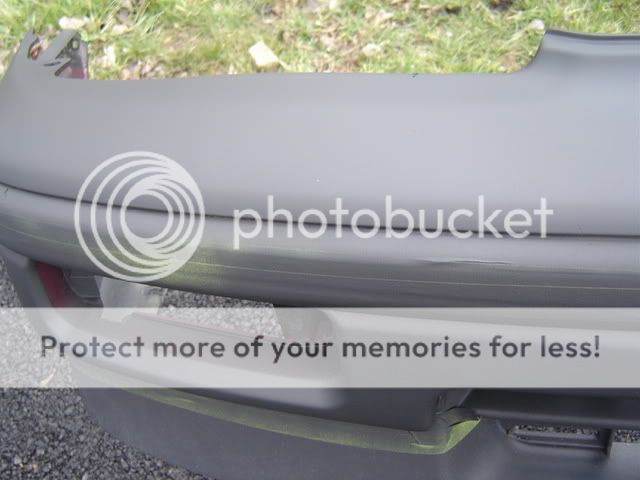
Here is after acouple coats. The second picture is a close up. You might be able to see the little fish eyes because I forgot to tack everything down.
Here is a picture of the rims. The tape is still on there because I am going to go back over them with a clear coat. I dont want the paint to scratch off.
Here is a close up of one of the rims. I dont know what to do with the center caps. I kinda want to up some blue in there somehow. Either have the H blue or the back ground blue...idk.

I also painted the ebrake handle and the cold air induction frame thing. I painted them blue...the didnt really turn out all that bad. I just forgot to snap some pictures.
If its nice again tomorrow I will be laying down the clear coats and probably put the bumper on the car. Any comments are welcomed. I need some help choosing weither to paint the H logo blue or black. Help me out guys.
<U><FONT COLOR="red">***UPDATE*** 3/5/07</FONT></U>
It has been very hard to do anything to the car lately because of work. It also doesnt help that I have an extra living room suite in my garage taking up all the room. I did at least manage to go pick up my rims and front bumper. I also went ahead and put the marker lights in the front bumper. It doesnt look that bad I still think I am going to back with some bumper paint and paint the trim, I think it would really make the bumper look good. The bumper has about 3 coats of paint and 4 coats of clear. I dont think I am even going to use this bumper just something that is there for a option.
Heres some updated pictures.
The red you still see around the trim is just where I wetsanded the bumper and it ran off onto the trim. You can also see around the bottom where I didnt tape everything off and got some overspray on it. I will clean it all off later...


<U><FONT COLOR="red">***UPDATE*** 3/10/07</FONT></U>
Today I am getting started alittle late on the car. My plans for today are to take the driver side fender off and see if I can beat some life into it. I am also going to change my rims and prob clean some of the interior up alittle. Here is a picture of how she looks right now.
<U><FONT COLOR="red">***UPDATE*** 3/25/07</FONT></U>
I know some of you guys have been wondering what the hell I have been doing lately to my car. Well really I havent been doing a whole lot. The past couple of weeks my main goal has been to sale some of the parts off my other two crx's...I need to get them gone. Anyways, somewhere in the middle of all this I figured I would do a wire tuck to my car.
The main reason I wanted to fix the wiring was because there was alot of short cuts done. Some of the wires were not sodered or even taped together. So I figured why not go all out and do a tuck...Here is a summary of how this week has went...
Tuesday - I just spent all day just looking at all the wires, following to where they all went.
Wednesday - Went to lowes and spent 60 bucks on wire/ shrink tubing/ sodering gun/ etc.
Thursday - I got to labeling everything.
Friday - I had everything pulled into the cab and was trying to lay everything together.
Saturday(today) - I went down and started extending everything.
I still find this kinda hard for me to do. Why it has taken me so long is because I find myself just sitting there looking at all the wires. I get scared that I am going to forget where stuff goes sometimes... Either way it has already started now and there is no return.
During all this I have found quite abit of wires that were not being used. Hopefully I can atleast figure out where they are supposed to go or where they went.
Now on to the pictures. I dont have many yet because the tuck is NOWHERE near being done but this atleast shows some progress. This first picture is how the engine bay looks as of right now.

Here is how the cab looks

Here is two things I dont know what they are. The first one I am almost 99.9 percent positive that its for the AC. Could someone let me know for sure.
In the picture its the wires that are hanging over my headlight, it goes back into the cab through the heating unit.
The second thing looks like a ground to me. Not sure though. Could someone clearify.
I know its hard to tell by looking at these pictures, if better pictures would help let me know.
But I guess thats it for now. I WILL be working on the car later and I will TRY to post pictures or atleast a update. Thanks guys.
<FONT COLOR="red"> <U>***UPDATE 12/2/07***</U></FONT>
Alright I know it has been ALONG time since I have been on HT, or even looked at my honda. The main reason has been because of work. Work and I bought acouple new toys...All that kinda takes up my time. But I did get the interior in and drive the car some today. There is still ALOT of things need to be done.
I dont have the fan hooked up right and the right rear brake is sticking, etc... Then its on to the body, which will take acouple more days.
Well here is some pictures...
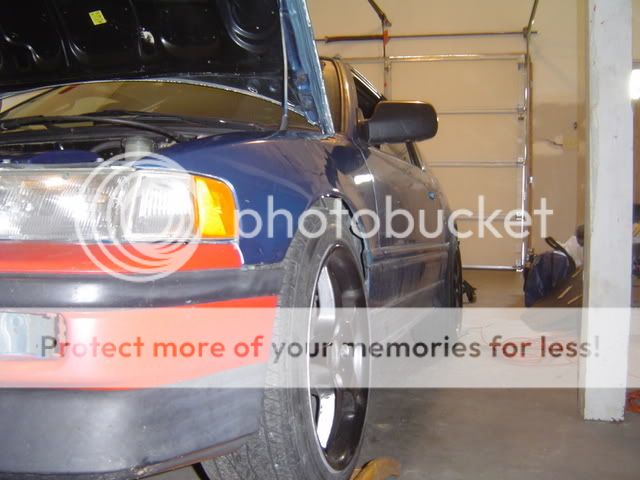
Notice the front bumper is primered. I had to do some work on it...it still needs acouple more coats.

The fender is something else I need to touch up. I was just seeing if I could get everything lined out. I pretty much got the fender for free so I cannot complain about it being black.
Here is a picture before I put the fender on...Just to show you how I loomed all the wires up. Didnt turn out to bad.
Interior

Anybody want some parts....come get it!
Now here is some extra pictures....Here is my new toys...
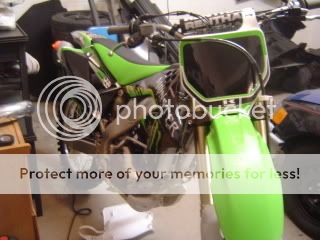
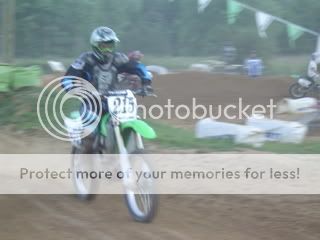
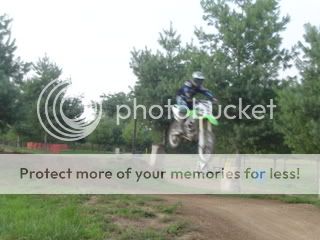
My 07 Kx250F
01 Raptor 660 (for sale)
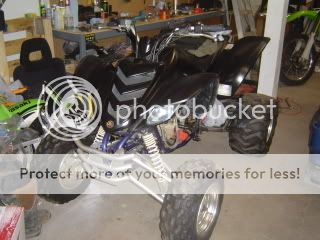
This is what kept me busy all summer!


Well thats all I got...
Help me out and bump when you read. Thanks.
<FONT COLOR="red"> <U>***UPDATE 3/30/08***</U></FONT>
Wow...Its been along time since I have posted on my build thread. I mean I had to pull it up out of the archives! I really hate that I have let the car go like this...Its just work had my hung up there for along time plus with my dirtbike all my spare time went towards racing. BBBBBUUUUUTTTTT I have finally started back on the car!!! Trying to get this thing finished up so I can finally drive the car I bought well over a year ago!
Anyways yesterday I woke up and just starting tinkering with the car. I started out by buying all new ball joints and bushings for the front. I am tired of the ride quality and I figured it was time to replace everything. So I went to the garage and started taking off everything under the fender. But there is 1 thing I am not able to remove....the tie rod end. I see that there is a nut there threaded on but I cannot get it loose. You guys know any way of getting that thing off. Here is what I am talking about.
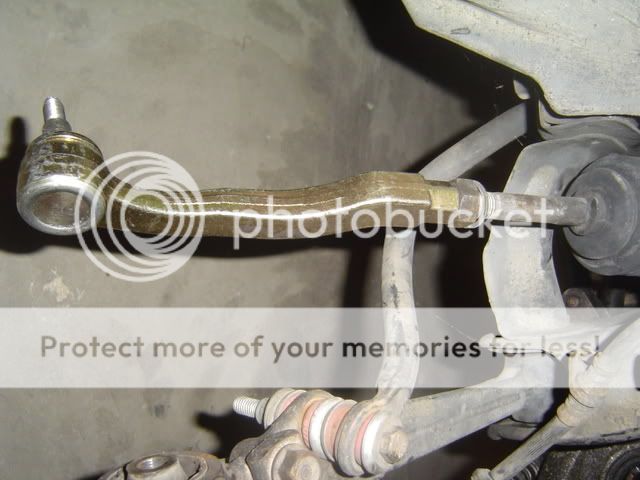
Well after fighting with that for about a hour I figured it was time to move on. Next on the list was the hood latch cable. I had a extra one laying around and since after you popped the hood you couldnt get it to latch back with mine. So I swapped them out and presto...hood opens and shuts great now!
Next on the list was the rims. I pulled on out and layed the aircraft remover to her. I will let you guys know that the spray on works MUCH better then the brush on. I used both and trust me you can tell a BIG difference. Here is a before and after.
As you can see there is still alittle paint left on it. Maybe another coat of the stuff and she will be ready for sanding and repainting.
Finally I decieded to conquer the driver side seat swap. I didnt really take a before picture even though I wish I had. Anyways here is some pictures of the progress and the final product.
And the outcome...

Overall I think the job went pretty good. I tried to get the cover on there as tight as I could. I will say its a PAIN getting all the hog pins out! My fingers are still hurting from doing this. There is no real easy way....just have to suck it up and work. Another hard part is removing the foam from the seat. Now the one I was throwing away I didnt care I just pulled her off. But the one I was trying to reuse...ehhh that was alittle harder. I found its easier if you stick your hand up into the seat and try wiggling your fingers in between the seat cushion and the frame. I have to tell you though BE CAREFULLLLLL there is alot of sharp points in on the frame and its easy to get cut! Anyways here is the tools I used to do the seat swap
The job was really worth it after seeing the finishing product. I didnt put the seat back into the car last night because when I got done it was 2 in the morning. Sooo today when I get back from town I will install them back into the car and snap some pics.
Well thats it for today. Mainly the only thing I have left to do to the car is install the new ball joints/bushings and finish the rims. Get some exhaust work done and then its on to paint. Thanks for viewing!
::Updated on page 18::
Modified by harmonator84 at 6:56 PM 5/18/2008
Almost everyone has a project thread so I figured why not. Plus I think it will really help me stay motivated to working on the car. I really want to get the car looking nice and running really good so I can attend meets and such. Heres a picture of my car just before I bought it.
Its a 1990 crx si that I purchased for $2500. The car has 91k on the body and 60k on the motor. The engine is a b18a bolted to a LS trans. Exedy stage 1 clutch, and poly motor mounts. The motor has a blox intake manifold and a unknown name header connected to 2.5" exhaust. The car is seating on tokiko struts and H&R springs. The shoes are 16" konig villain wheels. The inside is pretty stock other than a short shifter and the battery being relocated to the trunk.
The body of the car is in pretty good shape. There is a dent in the driver side quarter panel and one on the driver side fender. The front bumper has also been cut where there used to be a fmic.
My future plans for the heart is probably install some cams and do a Lsvtec. Also planing on doing a wire tuck. I have already had to replace the orings on my injectors.
There is alot of things I want to do to the car like..."in no order"
1.)Install mugen bodykit or find stock 90-91 front bumper
2.)Repaint rims flat black and install new tires
3.)Get or Fix driverside seat(has rip like all other crx's)
4.)Fix or replace sunroof with carbon fiber plug
5.)Fix body damage on rear quarter
6.)Buy driverside front fender
7.)Repaint car
8.)Tune up(plugs, wires, fuel filter, etc.)
9.)Relocate the battery from behind the passenger seat to farther back.
I have some extra parts from my two other crx's that I am going to swap around with. I also have a mugen bodykit that I am up in the air about installing.
Here are some random pics...
Here is a side view of the car. I took the bumper off and put on a extra I had from a 88 crx.
I took the bumper back off and started sanding it down with some 600 and 400 grit paper. I think this picture is before I started sanding. I will take a picture of it when I am done tonight.
Here is a picture of the rims. The are not in the best shape in the world. Looks like they have been painted 1,000 times. So I am going to sand them down and repaint them the right way.
Heres closer picture of my motor and my intake manifold. The CAI is off because I am sanding it down and painting it also. The guy that had the car before me kinda quite on the car when it came to making his wiring look clean. So I have to go back and heat shrink all my wires and such.
I currently have the sunroof off because it doesnt line up that good. I am thinking maybe a new gasket kit will help. Has anyone else had this problem?
I found this in the back of the car.
I coundnt believe it. I have seen these things go for like 200 bucks on ebay. I am thinking about selling it so I took the center console piece from one of my other crx's and epoxyed it too it. If anyone is interested in it let me know.
I will update this thread everyday that I work on the car. I dont really want to pull this car out of my garage till I am pretty much done with it. I am open to all opinions about the car. Thanks.
Matt
<U><FONT COLOR="red">***UPDATE*** 1/26/07</FONT></U>
I finished sanding the bumper down with 400 grit. It didnt turn out to bad. I am not really worried about the looks of it though because I really dont want to even use it. I am going to paint it black tomorrow.
I worked on my hood latch. It doesnt open up to good so I took it off and cleaned it with some brake cleaner then some WD and a tooth brush.
Here is a picture of the rims I am going to sand down and paint black to use a temps untill I get my 16s done. I dont want to rush on anything on this car.
Here is the bodykit I have. I bought it awhile back for like 50 bucks or something. It doesnt fit perfect and I would have to do some modding to it. Other than my cars front bumper it looks pretty good...so I dont know if i want to use it or not.
My fuel filter and spark plugs came in the other day. I am going to try install them tomorrow also. An oil change is also in the plan book for tomorrow.
As you can see my climate control is also cracked. Sad part is I just sold a mint one about a month ago. Ahh I still got 218 bucks out of it...hehe. I am going to take this one off and epoxy the back of it. Should hold it in pretty good.
When I bought the car it came with 2 ecus. One is the stock 90 crx si ecu, and the other is for the LS integra. The only thing is that integra one has been chipped. Right now I have the crx ecu in the car but I will probably put the other back in.
Here is the best mod I could have done to the car. I think it gave me 5 horsepower to the rear wheels...lol
<U><FONT COLOR="red">***UPDATED***1/28/07</FONT></U>
Today I finally got back to working on the car. Its been so cold and snowy here I just havent been up to doing much. I was looking around yesterday and I came across the how-to-paint your gauge needles. I really thought that they would look awesome in red. So I took an extra set of gauges I had and started taping them off. I then used some model car paint to touch them up. I think they turned out pretty nice. Heres pics of before and after...
What do you guys think???
Today I also went ahead and changed my fuel fitler. Easy install...and nothing leaks!
<U><FONT COLOR="blue">UPDATED ON THE NEXT PAGE!!!</FONT></U>
<U><FONT COLOR="red">***UPDATE*** 2/4/07</FONT></U>
Last night I went to bed early so I could get a fresh start on the honda. So this morning I went down to my garage and started taking interior peices out. I removed the intire back interior and started removing the seats. I took alittle break and was looking around the car when I found some horriable.....RUST.....Well not really rust but where rust has been. I couldnt believe it. I thought that my car had been 100% rust free all its life. By the looks of it there was a rust spot above the driver side rear fender that someone went in and patched it up with a new piece of metal. The welds do not look bad and it looks like they stopped the rust from coming back pretty good. I am thinking about going in and spray some rust preventive in my fenders just to be safe. Either way today is still a sad day.
After being depressed about my fenders I went ahead and put my gauge back together. Later tonight I am going to get the one out of the Si and paint it the same way. I am pretty pleased with the results.
Then came the rims. I have been dreading this for awhile now. All four of the rims have rust on them and needed sanding down. I took some 150 grit to them and I must say they feel great now"smooth". I think they are going to turn out really good. I was only able to get two of the rims done before my hands started hurting. I figured I would take alittle break and get ready for the superbowl. GO BEARS!!!
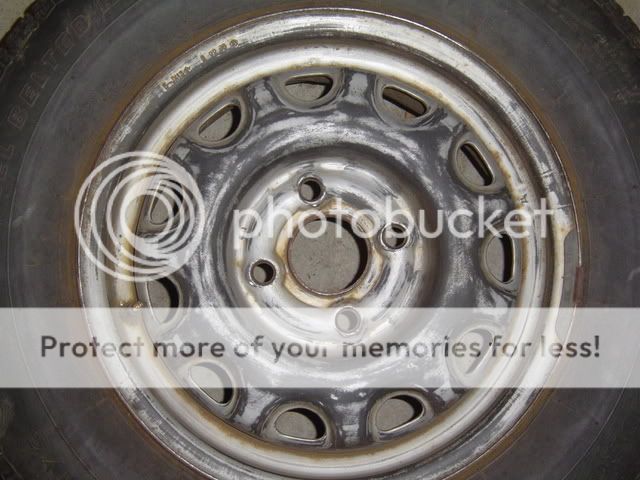
Here is some pictures of the rims and tires that came off of my Dx. Which by the way I only gave 100 bucks for the intire car..hehe. Pretty good deal since I have sold over 500 dollars of parts off of it.
Before
After
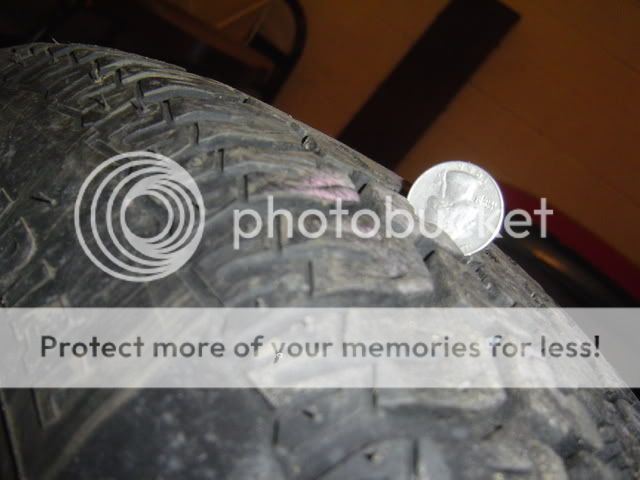
Tread is pretty good on them! I know people usually do this little test with pennys but sorry I am to rich to have pennys! haha
I am going to paint the rims flat black with blue center caps.( Have the little H in blue)...
Let me know what you guys think. Need some opinions here guys. Come on help me out!!!
<U><FONT COLOR="red">***UPDATE*** 2/5/07</FONT> </U>
Well today I wasnt able to do very much. I did get the rest of the rims sanded down though. As soon as it warms up alittle bit I am going to paint everything. Right now the paint would never dry. I have to work tomorrow so its probably going to be hard for me to do anything...but if I get the time I am going to sand the trim pieces down and prep them for paint also. There is no pictures for today because like I said all I did was sand down some rims. I am sure you guys dont wanna see 13" sanded rims.
Any comments are welcomed! Thanks.
<U><FONT COLOR="red">***UPDATE 2/11/07***</FONT></U>
I finally got some progress done on the car. I have been pretty busy lately so bare with me.
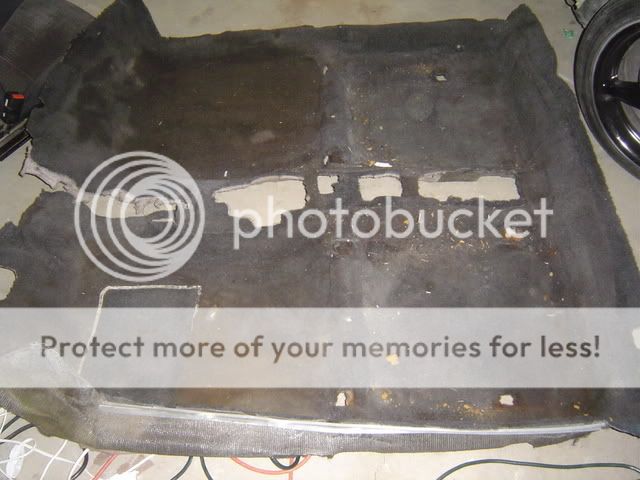
I started out by taking the carpet out. My first opinon was to just clean the carpet. But after taking the carpet out I am leaning more towards just buying some new carpet. I am still going to vacuum it out and see the condition on it.
After taking the carpet out I learned alot about the car. I am also VERY glad that I took the carpet out. There was MOLD on the passenger side, I couldnt believe it. I am going thoroughly scrup it with some cleaner tomorrow.
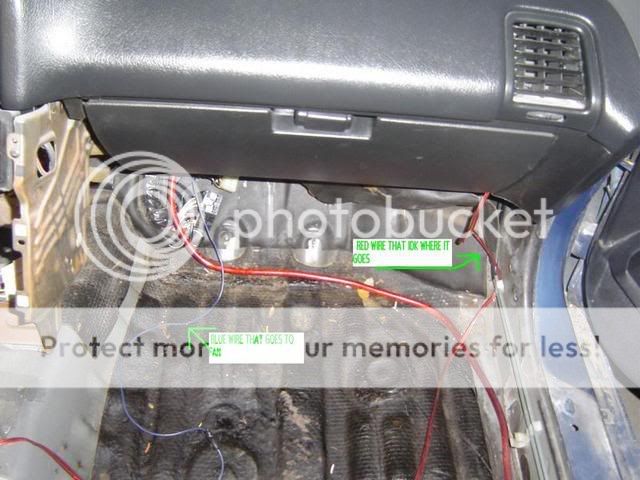
When I had the carpet out I ran across some problems. I had alot of wires under there that went to nothing. Most of them went to where there used to be some kind of stereo system install in the car. But there were two wires that I didnt know where they went to. 1 of the wires were blue and the other was red. I followed the blue wire through the firewall and it lead to the fan. So thats great my fan was not even hooked up. The second wire(red one) just went up towards the A pillar. I was not able to follow it so I was hoping someone might have a idea of what this wire goes to. If nobody can help me I guess I will just have to start tugging or something.
Also I took a better look at my connections going to my ecu. I dont think this guy cared to much about detail. I would like to go through and disconect all these are make sure they are sodered and heatshrinked. As you can see in the picture it doesnt look 100%. By the way the big red wire you see in the picture goes back to my battery where he done the relocation and the blue wire...well like I said on one end it leads to the fan and the other goes to nothing.
I took a break from the floor and started on my climate control. This thing is cracked bad...After about a hour of pulling on this thing I finally got it out. Here it is in all its glory before getting epoxyed up. I will take a picture of the final product tomorrow when it drys.
While the climate control was drying I went ahead and cleaned my moldings that came from my HF. I think the car will look better with black moldings instead of painted like the car. I would like to have some opinions on this though.
Finally I leave you today with another question. Acouple years ago I was using the filter you see on your right. The car came with the filter on the left. Which do you guys think I should ride with? Just thought I would throw in some questions to get my posts rolling.
Thanks once again for visiting my build. Please if you view my build give me some opinions or at least a bump.
<U><FONT COLOR="red">*** UPDATE 2/12/07***</U></FONT>
Just wanted to pop on here and inform you guys on what the status of the car is today. I started out by finishing the climate control. I also figured out where the unknown red wire went to. It went to the doors for the door speakers. I guess it was to go to a amp or something. I removed all the extra wires I found in the car. While the door panels were removed I found out I had 1 orginally red door and 1 orginally black door. I think this car was once in bad shape. I went ahead and ripped the window tint off the two front windows also.
I was going to call it a day and just rest before going to work tomorrow but instead I started something that I almost wish I didnt. I started removing that tar stuff from the floor board. I was just sitting there talking to my gf and picking at the tar stuff. Well if you know me then you would know that I HAVE to have everything perfect. SOOOOOO here I am still hacking away at this stuff. A hammer and a screw driver is working pretty good but it is very time consuming.
Well I guess I am going to go back to the garage to start hacking away. I will upload some pictures tonight before I go to bed.
Here are some pictures of my progress today.
Heres the finished climate control. I think I still need one of those plates for it though.
But still yet its holding in great.
Then here is my progress so far on removing the tar. It actually hasnt been that bad considering what I have heard from others. I didnt have to use dry ice or anything, just a hammer and screwdriver. I think where its cold is helping me out.
Finally I decided to go ahead and install my spark plugs. I ordered NGK plugs acouple weeks ago. The ones from the car were not in bad shape, actually they looked pretty good. But changing plugs is just something I do to all cars I buy. After I installed them and put the plug wires back on I came across alittle problem. I couldnt get the plug wires to snap all the way down on it. I mean I hear them click but there is still a gap between the lip on the plug wire and the valve cover. I dont think its supposed to be like this. Is it because I dont have the spark plugs on there tight enough? Heres a picture, I hope this helps.
Any help would be great. Thanks and if view the page please give me a bump.
<FONT COLOR="red"> <U>***UPDATE 2/19/07***</U></FONT>
I havent had a update in about a week. So I figured I would catch everyone up on what I have been doing to the car. The tar is 99% removed...thank god. Removing this stuff has taking up more time then I had wanted. If I knew it was going to be this hard I think I would have just left it on there. But its pretty much done, I just have 1 little spot that is being a pain to get up. The climate control has dried and the epoxy is holding it really well. I am going to put one more coat of epoxy on it tomorrow and it should be ready to go.
I am still having a problem with my plug wires. I tried to pull the wire to where it would go farther down on the spark plug, but its just not working...I cannot get it to budge.
Thats pretty much all I have been doing to the car lately. But when I was walking away from the car that little dent on the driver side quater panel just bugged me. I went in from behind it and pushed on it alittle. It just started cracking the paint so I eased off. I dont want to really mess to much with the body till after the summer. Now to the pictures....
Here is where I left the floor. As you can see the only spot left is under the steering wheel.
Like I said the floor has taken up 99.9% of my time so I really have no other progress pictures. Here is a picture of how I left her...notice the taillight piece is out because I was working on that dent.
Here is just a random picture. Its of my DD, a 97 ford ranger. Its payed for and I have yet to have any problems with it. The truck only has 90k and I bought it when it had 45k. Its nothing special but it saves me from having to drive the crx everyday. Notice how its really dirty, Ky weather sucks right now.
I will leave you guys with alittle knowledge. After I removed pretty much all of the tar I bagged it all up and weighed it to see how much weight is really lost from doing this. Remember I did not remove it to make me "faster", I only did it because there was mold on it. Anyways the tar only weights 5 lbs....NOT worth the time of removing it. If you really want to be faster just go on a diet.
<U><FONT COLOR="red">***UPDATE*** 2/25/07</FONT></U>
Today it was actually warm outside, so I woke up kinda early and got started spraying. I first sprayed down the rims and bumper with the water hose to get all the junk off them. Then I started the paint...
Here is the front bumper after I layed down a tack coat.
Here is after acouple coats. The second picture is a close up. You might be able to see the little fish eyes because I forgot to tack everything down.
Here is a picture of the rims. The tape is still on there because I am going to go back over them with a clear coat. I dont want the paint to scratch off.
Here is a close up of one of the rims. I dont know what to do with the center caps. I kinda want to up some blue in there somehow. Either have the H blue or the back ground blue...idk.
I also painted the ebrake handle and the cold air induction frame thing. I painted them blue...the didnt really turn out all that bad. I just forgot to snap some pictures.
If its nice again tomorrow I will be laying down the clear coats and probably put the bumper on the car. Any comments are welcomed. I need some help choosing weither to paint the H logo blue or black. Help me out guys.
<U><FONT COLOR="red">***UPDATE*** 3/5/07</FONT></U>
It has been very hard to do anything to the car lately because of work. It also doesnt help that I have an extra living room suite in my garage taking up all the room. I did at least manage to go pick up my rims and front bumper. I also went ahead and put the marker lights in the front bumper. It doesnt look that bad I still think I am going to back with some bumper paint and paint the trim, I think it would really make the bumper look good. The bumper has about 3 coats of paint and 4 coats of clear. I dont think I am even going to use this bumper just something that is there for a option.
Heres some updated pictures.
The red you still see around the trim is just where I wetsanded the bumper and it ran off onto the trim. You can also see around the bottom where I didnt tape everything off and got some overspray on it. I will clean it all off later...
<U><FONT COLOR="red">***UPDATE*** 3/10/07</FONT></U>
Today I am getting started alittle late on the car. My plans for today are to take the driver side fender off and see if I can beat some life into it. I am also going to change my rims and prob clean some of the interior up alittle. Here is a picture of how she looks right now.
<U><FONT COLOR="red">***UPDATE*** 3/25/07</FONT></U>
I know some of you guys have been wondering what the hell I have been doing lately to my car. Well really I havent been doing a whole lot. The past couple of weeks my main goal has been to sale some of the parts off my other two crx's...I need to get them gone. Anyways, somewhere in the middle of all this I figured I would do a wire tuck to my car.
The main reason I wanted to fix the wiring was because there was alot of short cuts done. Some of the wires were not sodered or even taped together. So I figured why not go all out and do a tuck...Here is a summary of how this week has went...
Tuesday - I just spent all day just looking at all the wires, following to where they all went.
Wednesday - Went to lowes and spent 60 bucks on wire/ shrink tubing/ sodering gun/ etc.
Thursday - I got to labeling everything.
Friday - I had everything pulled into the cab and was trying to lay everything together.
Saturday(today) - I went down and started extending everything.
I still find this kinda hard for me to do. Why it has taken me so long is because I find myself just sitting there looking at all the wires. I get scared that I am going to forget where stuff goes sometimes... Either way it has already started now and there is no return.
During all this I have found quite abit of wires that were not being used. Hopefully I can atleast figure out where they are supposed to go or where they went.
Now on to the pictures. I dont have many yet because the tuck is NOWHERE near being done but this atleast shows some progress. This first picture is how the engine bay looks as of right now.
Here is how the cab looks
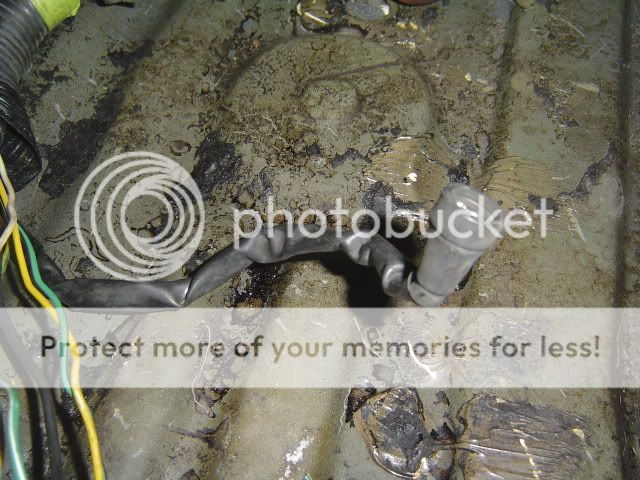
Here is two things I dont know what they are. The first one I am almost 99.9 percent positive that its for the AC. Could someone let me know for sure.
In the picture its the wires that are hanging over my headlight, it goes back into the cab through the heating unit.
The second thing looks like a ground to me. Not sure though. Could someone clearify.
I know its hard to tell by looking at these pictures, if better pictures would help let me know.
But I guess thats it for now. I WILL be working on the car later and I will TRY to post pictures or atleast a update. Thanks guys.
<FONT COLOR="red"> <U>***UPDATE 12/2/07***</U></FONT>
Alright I know it has been ALONG time since I have been on HT, or even looked at my honda. The main reason has been because of work. Work and I bought acouple new toys...All that kinda takes up my time. But I did get the interior in and drive the car some today. There is still ALOT of things need to be done.
I dont have the fan hooked up right and the right rear brake is sticking, etc... Then its on to the body, which will take acouple more days.
Well here is some pictures...
Notice the front bumper is primered. I had to do some work on it...it still needs acouple more coats.
The fender is something else I need to touch up. I was just seeing if I could get everything lined out. I pretty much got the fender for free so I cannot complain about it being black.
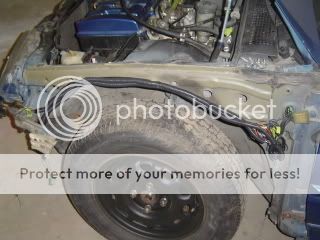
Here is a picture before I put the fender on...Just to show you how I loomed all the wires up. Didnt turn out to bad.
Interior
Anybody want some parts....come get it!
Now here is some extra pictures....Here is my new toys...
My 07 Kx250F
01 Raptor 660 (for sale)
This is what kept me busy all summer!
Well thats all I got...
Help me out and bump when you read. Thanks.
<FONT COLOR="red"> <U>***UPDATE 3/30/08***</U></FONT>
Wow...Its been along time since I have posted on my build thread. I mean I had to pull it up out of the archives! I really hate that I have let the car go like this...Its just work had my hung up there for along time plus with my dirtbike all my spare time went towards racing. BBBBBUUUUUTTTTT I have finally started back on the car!!! Trying to get this thing finished up so I can finally drive the car I bought well over a year ago!
Anyways yesterday I woke up and just starting tinkering with the car. I started out by buying all new ball joints and bushings for the front. I am tired of the ride quality and I figured it was time to replace everything. So I went to the garage and started taking off everything under the fender. But there is 1 thing I am not able to remove....the tie rod end. I see that there is a nut there threaded on but I cannot get it loose. You guys know any way of getting that thing off. Here is what I am talking about.
Well after fighting with that for about a hour I figured it was time to move on. Next on the list was the hood latch cable. I had a extra one laying around and since after you popped the hood you couldnt get it to latch back with mine. So I swapped them out and presto...hood opens and shuts great now!
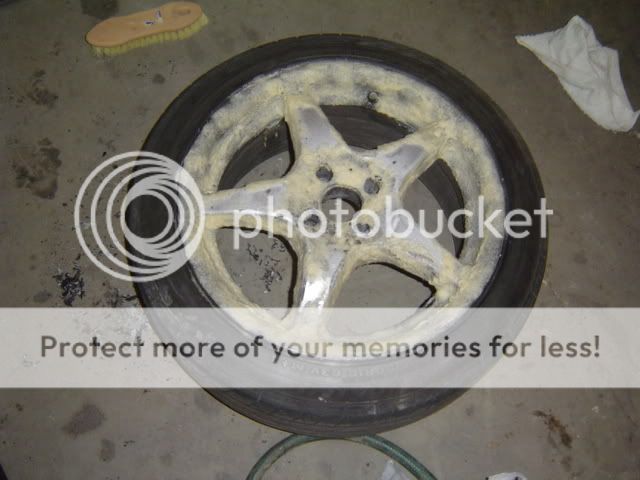
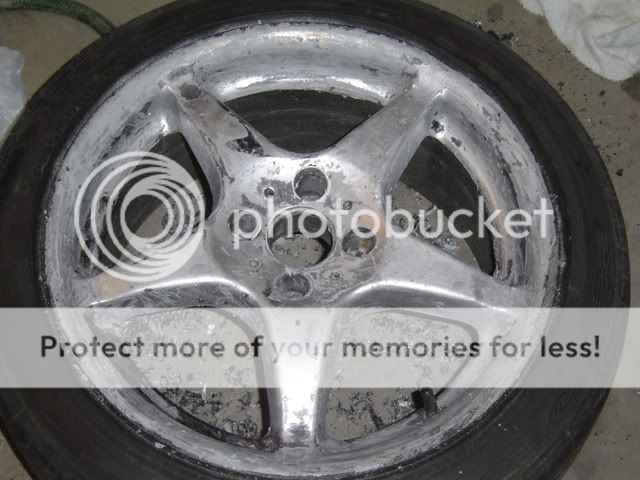
Next on the list was the rims. I pulled on out and layed the aircraft remover to her. I will let you guys know that the spray on works MUCH better then the brush on. I used both and trust me you can tell a BIG difference. Here is a before and after.
As you can see there is still alittle paint left on it. Maybe another coat of the stuff and she will be ready for sanding and repainting.
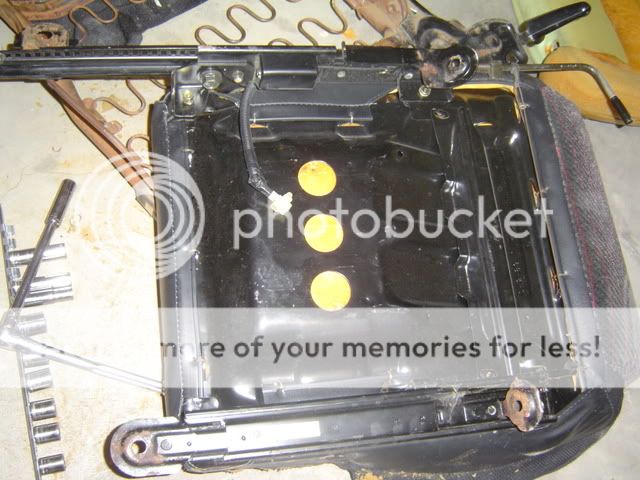
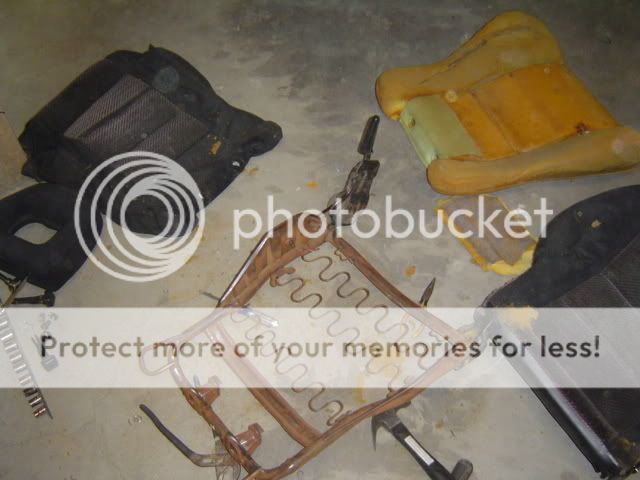
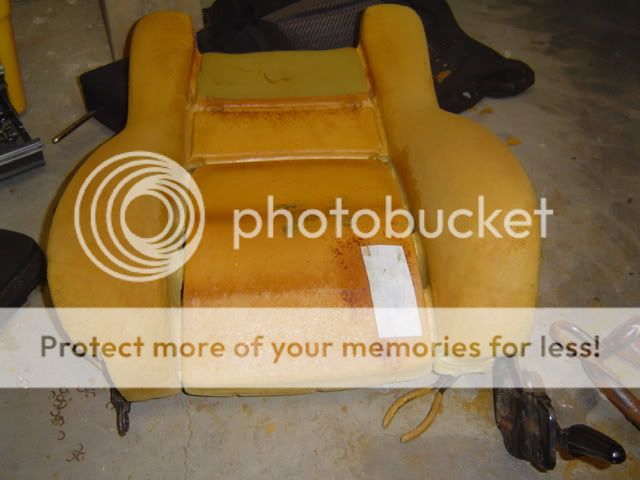
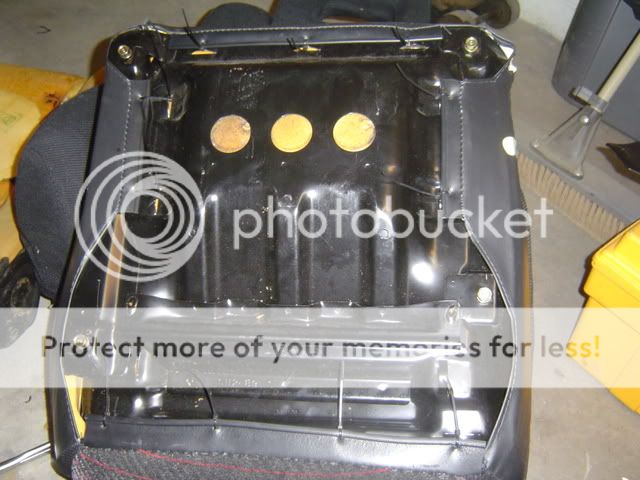
Finally I decieded to conquer the driver side seat swap. I didnt really take a before picture even though I wish I had. Anyways here is some pictures of the progress and the final product.
And the outcome...
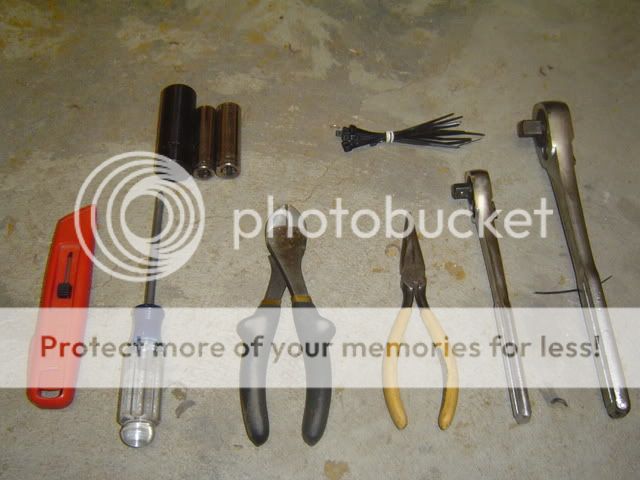
Overall I think the job went pretty good. I tried to get the cover on there as tight as I could. I will say its a PAIN getting all the hog pins out! My fingers are still hurting from doing this. There is no real easy way....just have to suck it up and work. Another hard part is removing the foam from the seat. Now the one I was throwing away I didnt care I just pulled her off. But the one I was trying to reuse...ehhh that was alittle harder. I found its easier if you stick your hand up into the seat and try wiggling your fingers in between the seat cushion and the frame. I have to tell you though BE CAREFULLLLLL there is alot of sharp points in on the frame and its easy to get cut! Anyways here is the tools I used to do the seat swap
The job was really worth it after seeing the finishing product. I didnt put the seat back into the car last night because when I got done it was 2 in the morning. Sooo today when I get back from town I will install them back into the car and snap some pics.
Well thats it for today. Mainly the only thing I have left to do to the car is install the new ball joints/bushings and finish the rims. Get some exhaust work done and then its on to paint. Thanks for viewing!
::Updated on page 18::
Modified by harmonator84 at 6:56 PM 5/18/2008
 01-25-2007, 03:11 PM
#5
Honda-Tech Member
i'll trade you my black 90-91 crx si front bumper and lip for that armrest/console. 
edit: oh, and not ALL crx's have a tear on the drivers seat.
edit: oh, and not ALL crx's have a tear on the drivers seat.
01-25-2007, 03:18 PM
#7
Honda-Tech Member
Thread Starter
Join Date: Nov 2005
Location: My Garage
Posts: 3,394
Likes: 0
Received 0 Likes
on
0 Posts
<TABLE WIDTH="90%" CELLSPACING=0 CELLPADDING=0 ALIGN=CENTER><TR><TD>Quote, originally posted by STREETWERKZ »</TD></TR><TR><TD CLASS="quote">i'll trade you my black 90-91 crx si front bumper and lip for that armrest/console.
</TD></TR></TABLE>
Idk about that. The guy I bought the car off of works at some dealer where he said he can get me a new one for like 70 bucks or so. I think the console might go for alittle more then that..thanks though.
<TABLE WIDTH="90%" CELLSPACING=0 CELLPADDING=0 ALIGN=CENTER><TR><TD>Quote, originally posted by gymkhanaguy »</TD></TR><TR><TD CLASS="quote">good luck with the build up!</TD></TR></TABLE>
<TABLE WIDTH="90%" CELLSPACING=0 CELLPADDING=0 ALIGN=CENTER><TR><TD>Quote, originally posted by SkipMic2006 »</TD></TR><TR><TD CLASS="quote">hell yeah nice work so far!</TD></TR></TABLE>
Thanks. I will try to keep it updated often so keep a watch.
Trending Topics
01-25-2007, 03:22 PM
#8
Honda-Tech Member
<TABLE WIDTH="90%" CELLSPACING=0 CELLPADDING=0 ALIGN=CENTER><TR><TD>Quote, originally posted by harmonator84 »</TD></TR><TR><TD CLASS="quote">Idk about that. The guy I bought the car off of works at some dealer where he said he can get me a new one for like 70 bucks or so. I think the console might go for alittle more then that..thanks though.
</TD></TR></TABLE>
good luck.
</TD></TR></TABLE>
good luck.
01-26-2007, 12:43 PM
#17
Honda-Tech Member
Thread Starter
Join Date: Nov 2005
Location: My Garage
Posts: 3,394
Likes: 0
Received 0 Likes
on
0 Posts
<TABLE WIDTH="90%" CELLSPACING=0 CELLPADDING=0 ALIGN=CENTER><TR><TD>Quote, originally posted by Slystone »</TD></TR><TR><TD CLASS="quote">a 90-91 bumper look better than the one you find 88-89
</TD></TR></TABLE>
I am currently looking for a 90-91 bumper.
<TABLE WIDTH="90%" CELLSPACING=0 CELLPADDING=0 ALIGN=CENTER><TR><TD>Quote, originally posted by Wilky »</TD></TR><TR><TD CLASS="quote">Ooh, you have a build thread too! </TD></TR></TABLE>
LOL. yeah I think we started ours like the same time.
01-27-2007, 10:27 AM
#18
Honda-Tech Member
Thread Starter
Join Date: Nov 2005
Location: My Garage
Posts: 3,394
Likes: 0
Received 0 Likes
on
0 Posts
I got my forsale thread back up and going guys. So if there is any parts you are needing you can just message me on here. Thanks guys and keep the comments and ideas coming.
http://www.hondamarketplace.com/zerothread/1781024
http://www.hondamarketplace.com/zerothread/1781024
 01-29-2007, 02:49 PM
#25
Honda-Tech Member
Thread Starter
Join Date: Nov 2005
Location: My Garage
Posts: 3,394
Likes: 0
Received 0 Likes
on
0 Posts
<TABLE WIDTH="90%" CELLSPACING=0 CELLPADDING=0 ALIGN=CENTER><TR><TD>Quote, originally posted by gibsanez »</TD></TR><TR><TD CLASS="quote">I am jealous of that 5k redline. Throw in a v-tak engine and freak out anyone in the passenger seat. </TD></TR></TABLE>
Yea that tach is actually out of my HF. I just took it out to practice before I did the other one. I am going to sell that tach now. If you want it let me know before I put her on ebay.
<TABLE WIDTH="90%" CELLSPACING=0 CELLPADDING=0 ALIGN=CENTER><TR><TD>Quote, originally posted by Creator »</TD></TR><TR><TD CLASS="quote">look in CRX Toad's signature....he sells plates for the climate controls. Steady as she goes </TD></TR></TABLE>
Yea I seen that. I am going to epoxy it all first then prob go with one. Thanks.
<TABLE WIDTH="90%" CELLSPACING=0 CELLPADDING=0 ALIGN=CENTER><TR><TD>Quote, originally posted by jdmazm »</TD></TR><TR><TD CLASS="quote">yezzirr! what about gold or bronze on the rims?</TD></TR></TABLE>
IDK. I was thinking black rims. Kinda thinking about staying with the all black and blue theme. I dont know what gold or bronze would look like...
</TD></TR></TABLE>Yea that tach is actually out of my HF. I just took it out to practice before I did the other one. I am going to sell that tach now. If you want it let me know before I put her on ebay.
<TABLE WIDTH="90%" CELLSPACING=0 CELLPADDING=0 ALIGN=CENTER><TR><TD>Quote, originally posted by Creator »</TD></TR><TR><TD CLASS="quote">look in CRX Toad's signature....he sells plates for the climate controls. Steady as she goes </TD></TR></TABLE>
Yea I seen that. I am going to epoxy it all first then prob go with one. Thanks.
<TABLE WIDTH="90%" CELLSPACING=0 CELLPADDING=0 ALIGN=CENTER><TR><TD>Quote, originally posted by jdmazm »</TD></TR><TR><TD CLASS="quote">yezzirr! what about gold or bronze on the rims?</TD></TR></TABLE>
IDK. I was thinking black rims. Kinda thinking about staying with the all black and blue theme. I dont know what gold or bronze would look like...