
Wheel Bearing replacement using the hub tamer(no press needed)
 05-26-2007, 09:27 PM
#1
Honda-Tech Member
Thread Starter
Join Date: Jun 2001
Location: Long Island, NY, USA
Posts: 909
Likes: 0
Received 0 Likes
on
0 Posts
To start off I just bought a used 94 GSR and have been fixing many things, the latest was the wheel bearing was going. As everyone knows, the tried and true method is to remove the entire arm and get the hub and bearing pressed out with a press as well as the bearing pressed back in. If you don't have a press then the task becomes hard as you need to bring it to someone to get done while your car is out of commission. Well I heard about a tool that lets you do the job without a press and thought I should try it. It is called the hub tamer but there are other similar tools out there like the hub shark as well as cheaper copies without all the pieces and now I know why.
I ended up buying mine from the thetoolwarehouse.com, awesome place and unbelievably quick "free" shipping if you buy a certain amount. Now to the install...
Before you start, make sure you have all the necessary tools and parts. At a minumum you will need a new wheel bearing( I used OEM from Honda), C clip pliers(make sure they can work on c clips that are about 3", some can't), new axle nut(you can reuse but I usually do not as they are cheap and once you hammer in the top it sometimes is not possible to reuse), dremel with cutting wheel or similar, various ratchets and socket, socket for axle nut, for sockets, the hub tamer needs at least a 1" impact socket that most standard sets do not have, you also need larger but you can get buy without it as you will see, impact wrench( I use dewalt cordless), etc....
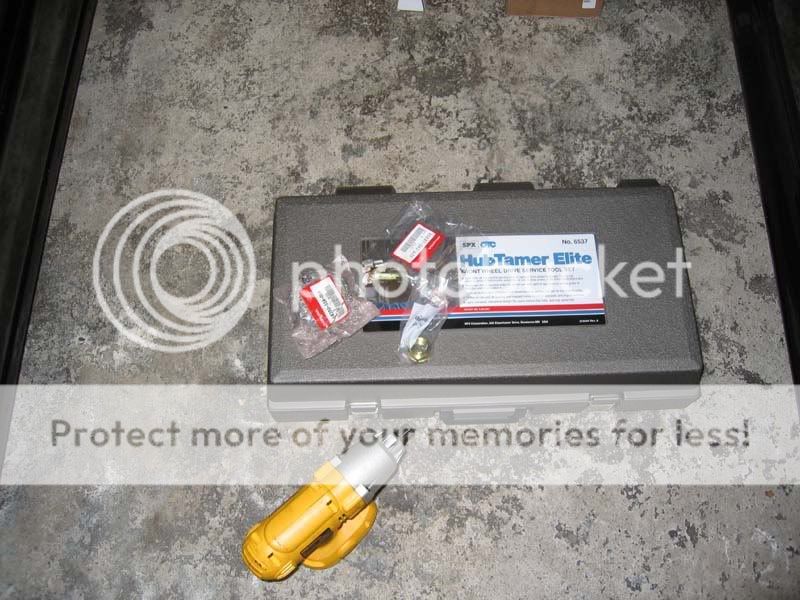
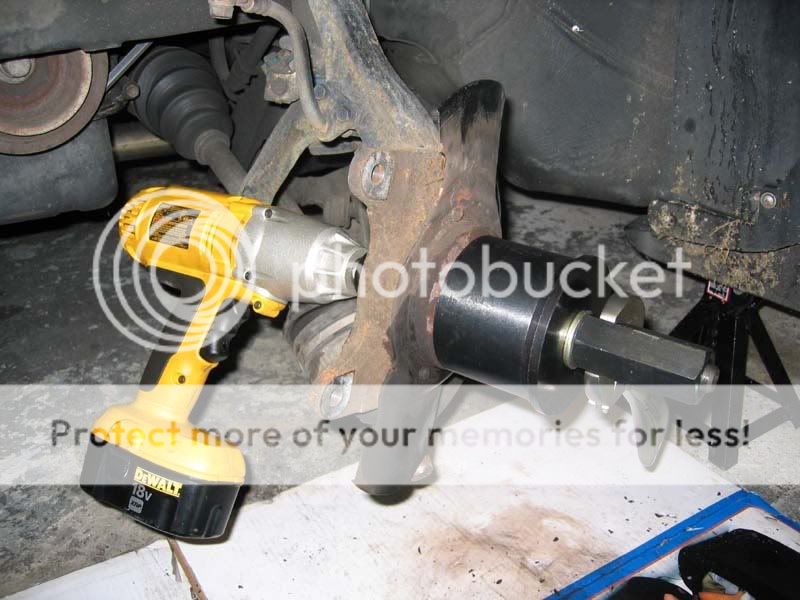
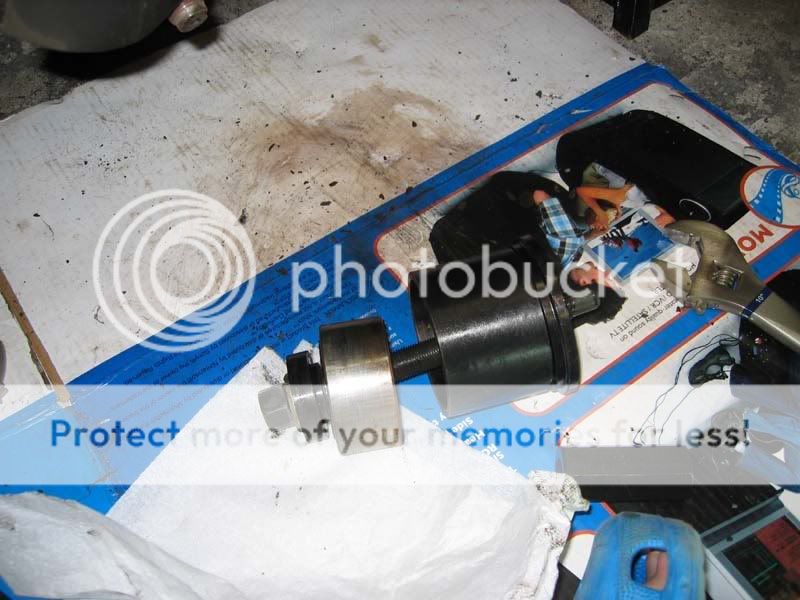
Here is the hub tamer and my impact wrench.
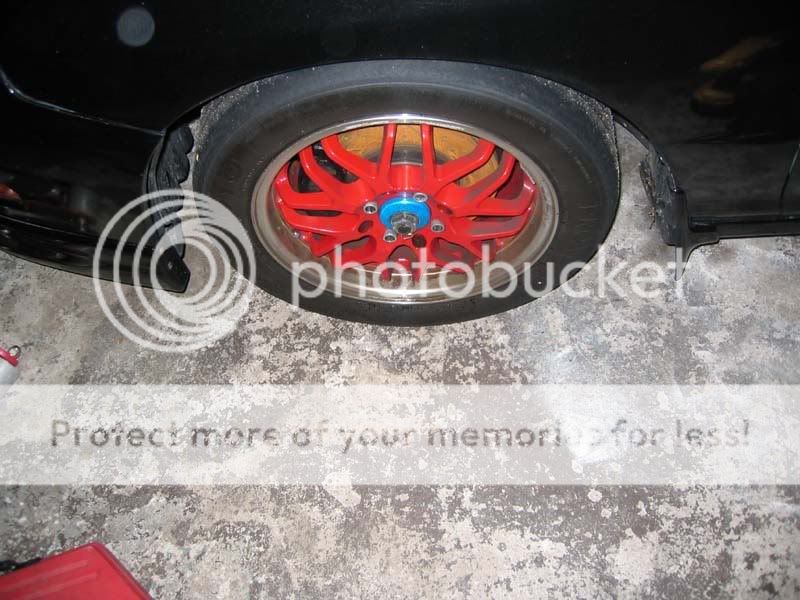
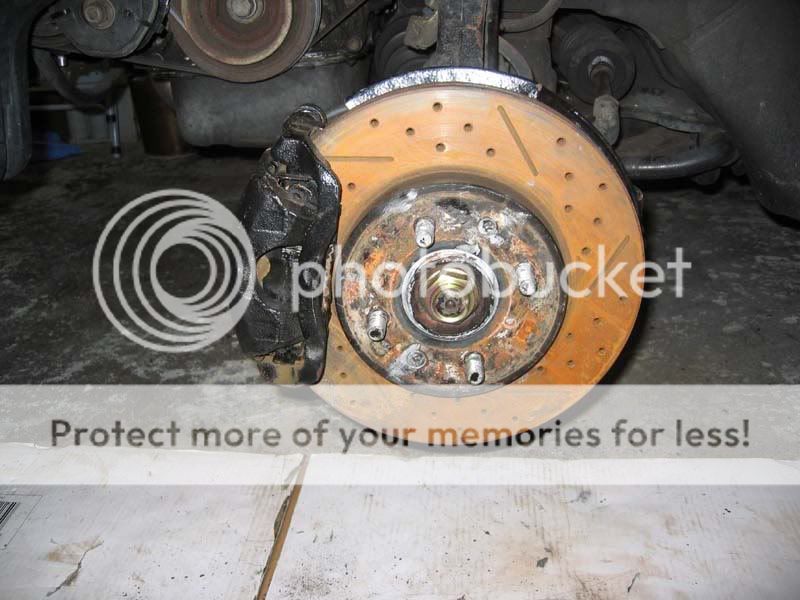
Here is the wheel before we start, jack up car, remove wheel
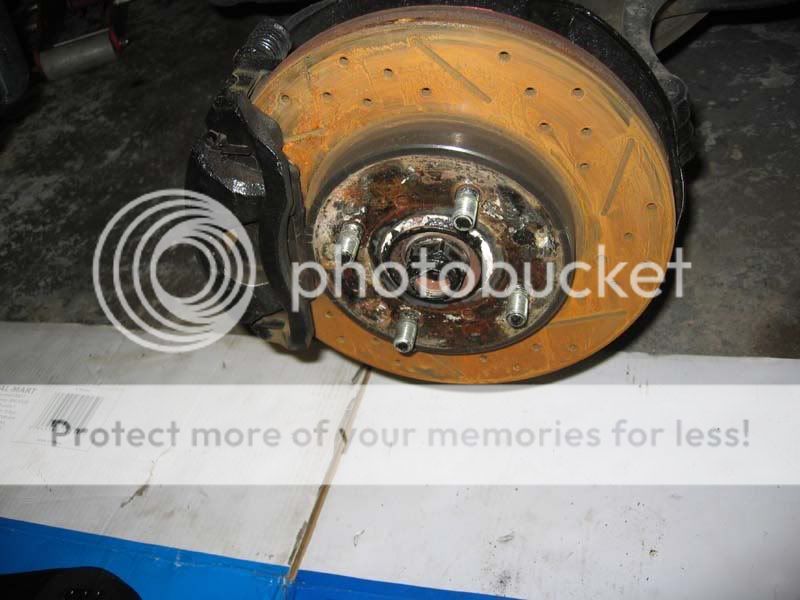
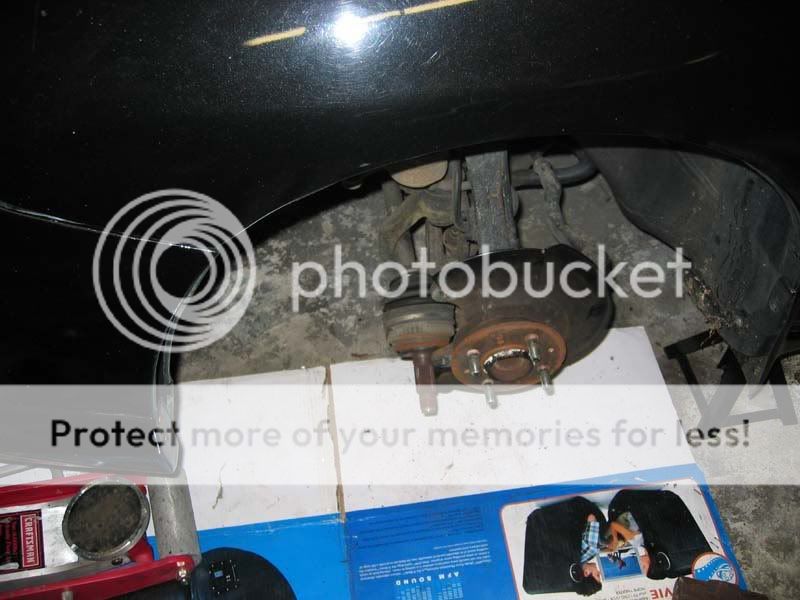
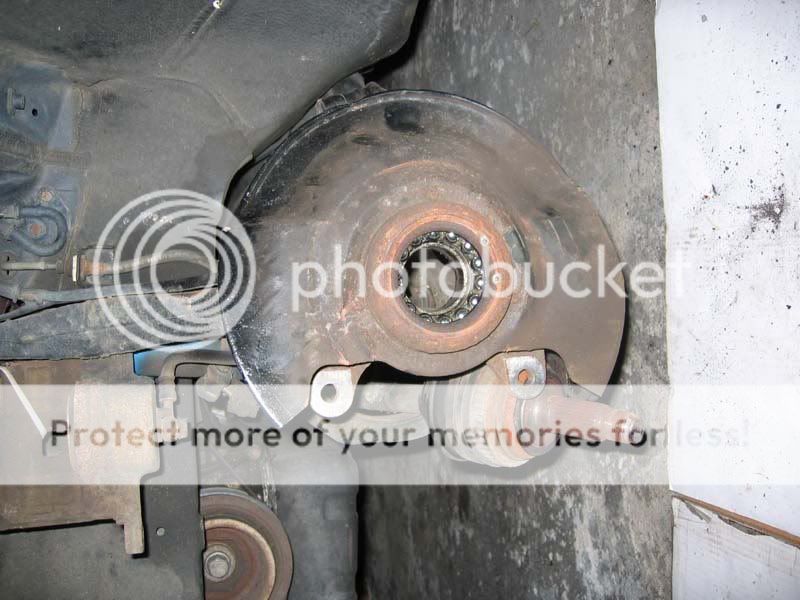
Remove, brake caliper and zip tie or metal wire it to something, remove caliper bracket, brakes pads, make sure you use impact socket on brake rotor screws, then remove the brake rotor.
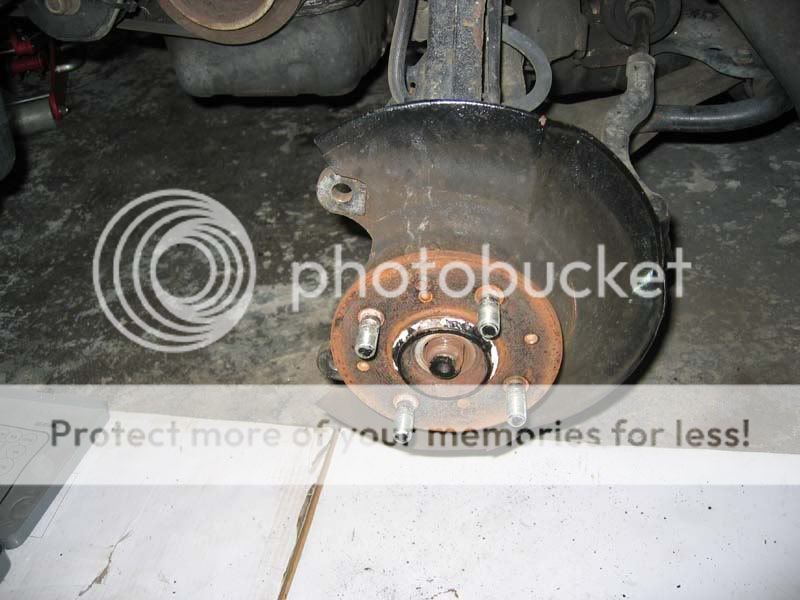
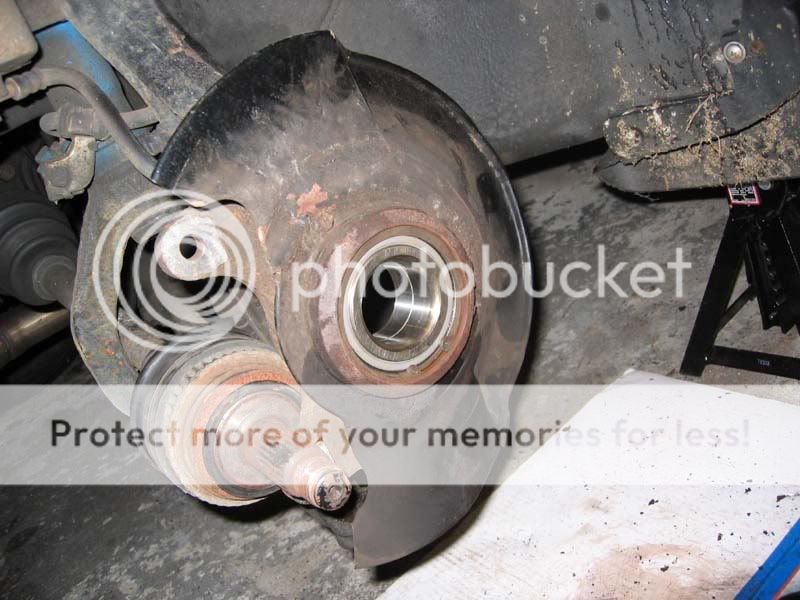
Here is what it looks like after you remove the above mentioned items.
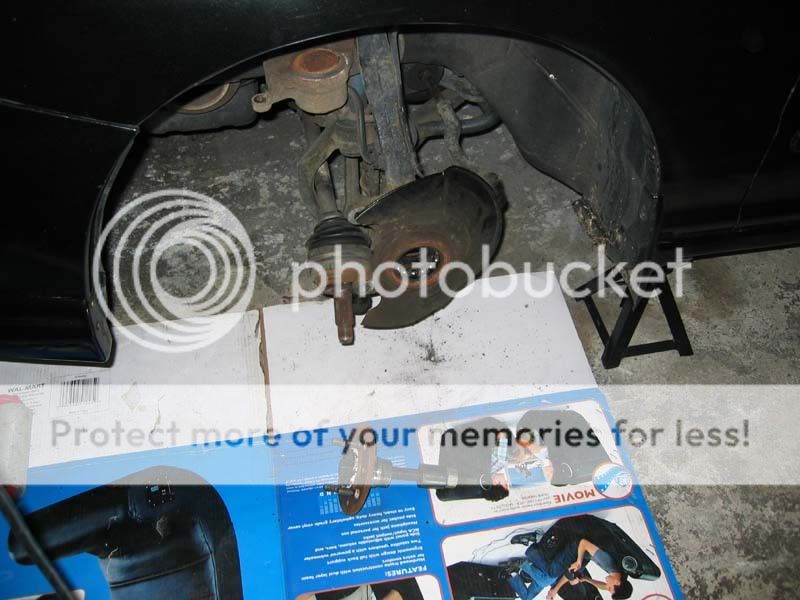
Next items you need to remove is the axle nut, usually this is on tight but mine came off with a blast of the impact gun, search elsewhere if yours is stuck for the varous other methods to get off, I suggest spraying some pb blaster and waiting before you try again. I did not take many pictures at this part because there are others elsewhere, but after you get the nut off you need to unbolt the lower shock fork attached to the arm, then unbolt the lower ball joint. When I went to do mine I noticed ther cotter pin was missing , remove the nut and use the We-Todds-method to break the ball joint free, it works so well, why do it any other way, for my method because I do not have a craftsman socket I used my mastercraft 10" adjustable wrench! Once loose you can pull the axle out of the hub...
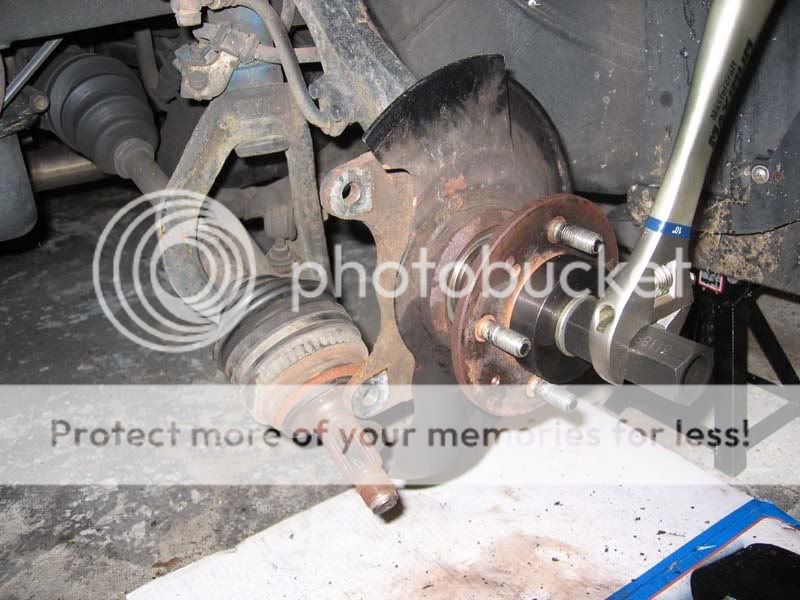
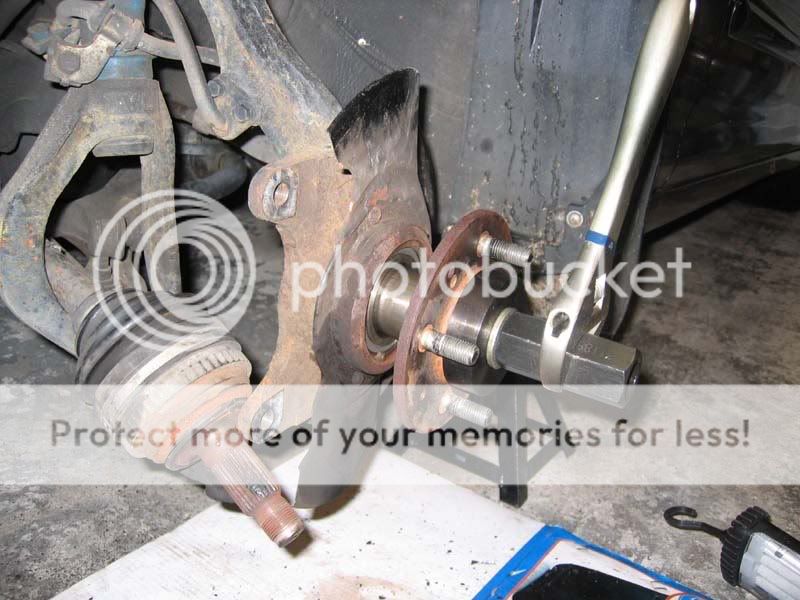
Attache the hub tamer shoe horn and bolts to the hub, as you turn the hub will be pressed out. If it is stuck you take the BFH and hit it from behind.
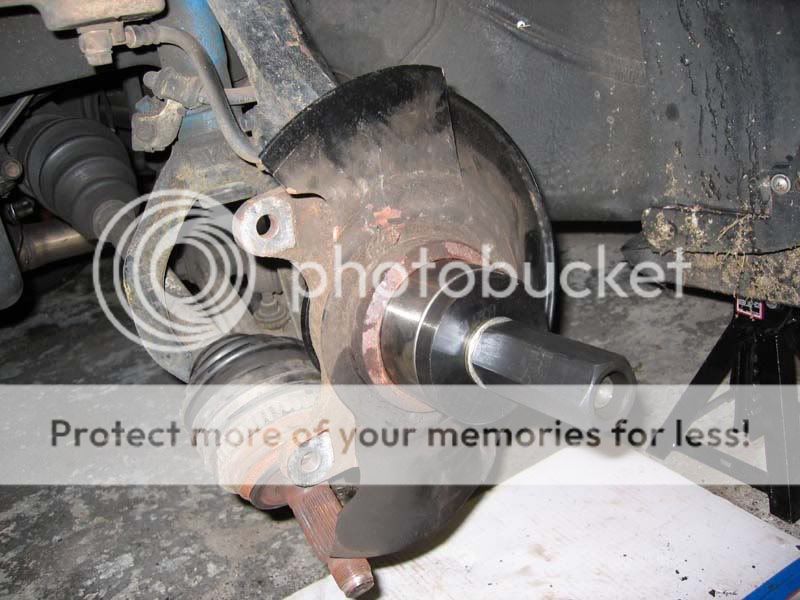
You will notice once you get the hub out, the race is almost always attached to it
Another shot of the race on the hub
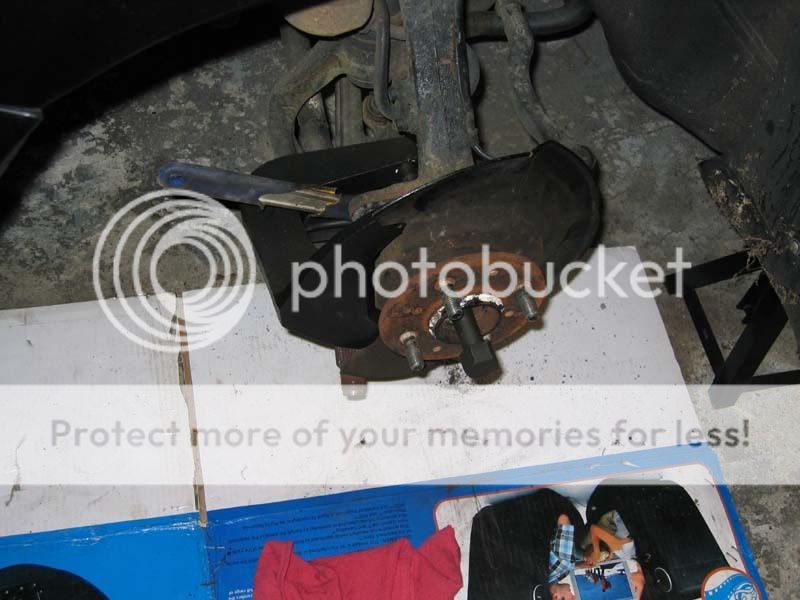
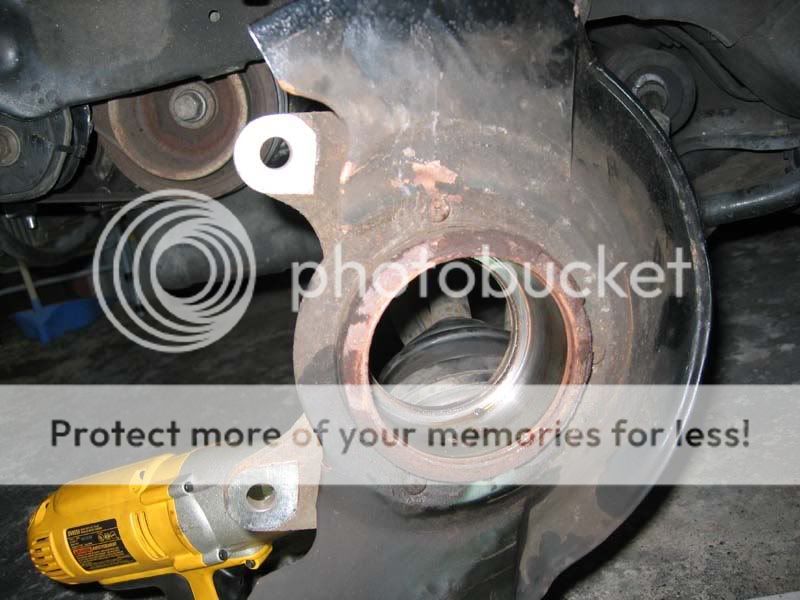
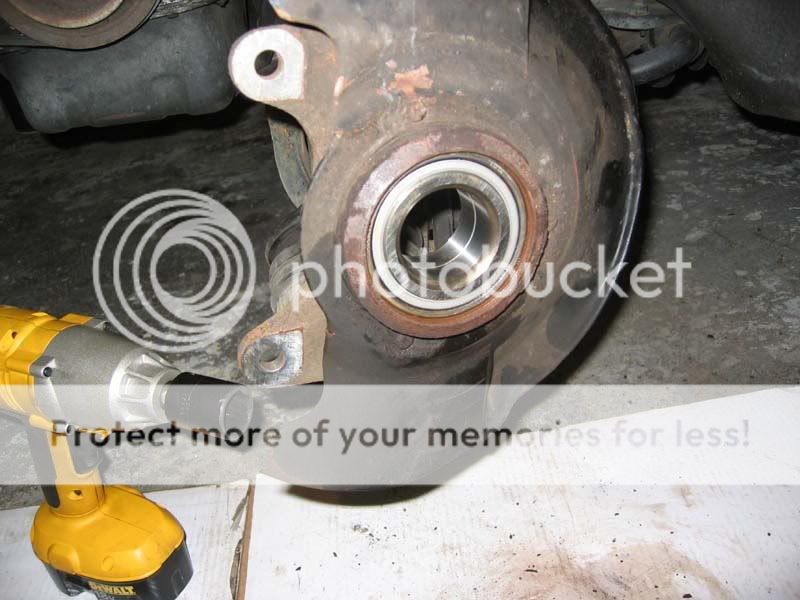
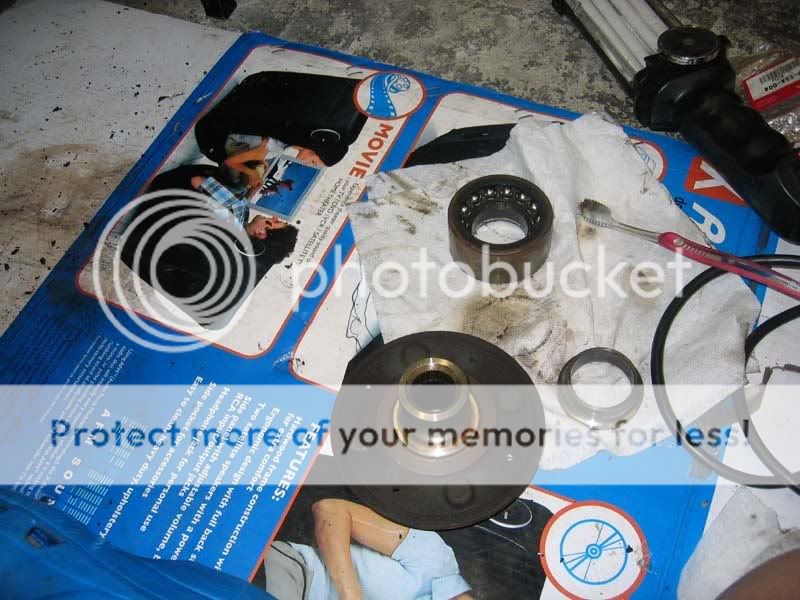
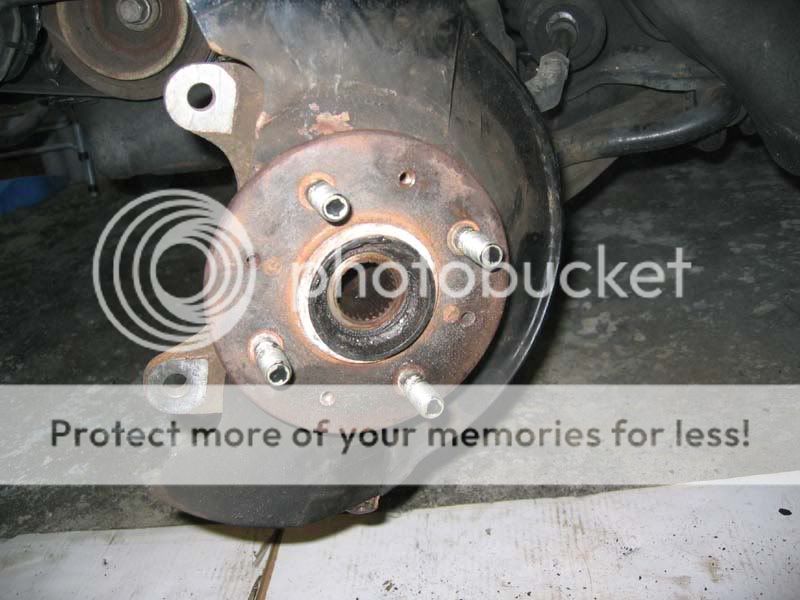
Here is the shot of the bearing without front race still on the car, you can also see the c clip that has to be removed before you can get the bearing out.
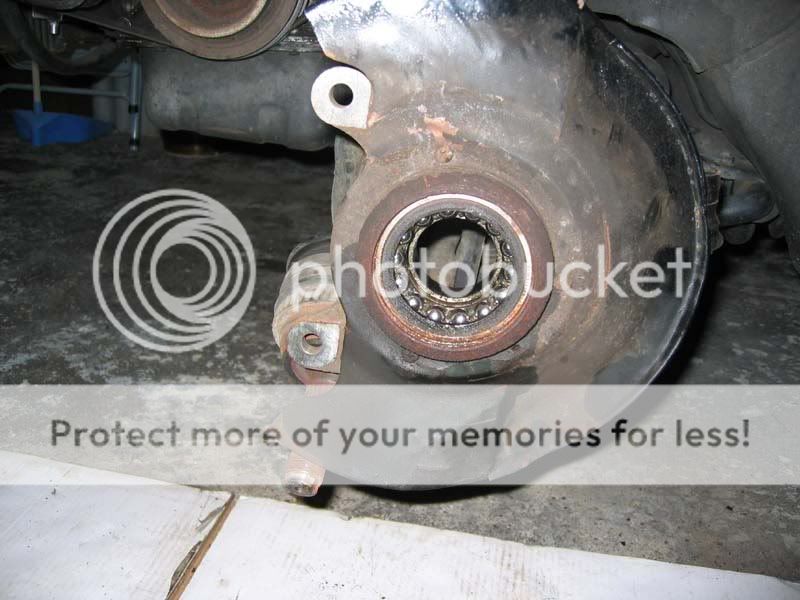
Here is a pic with the c clip removed
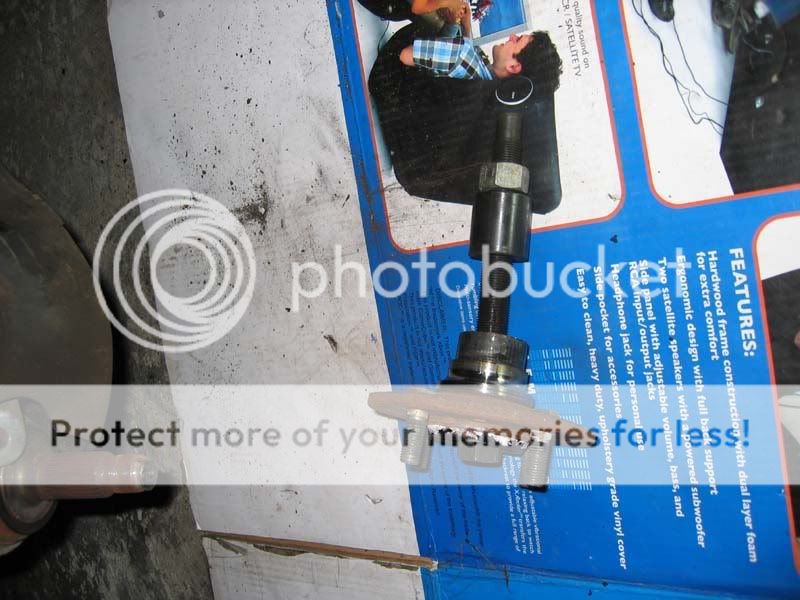
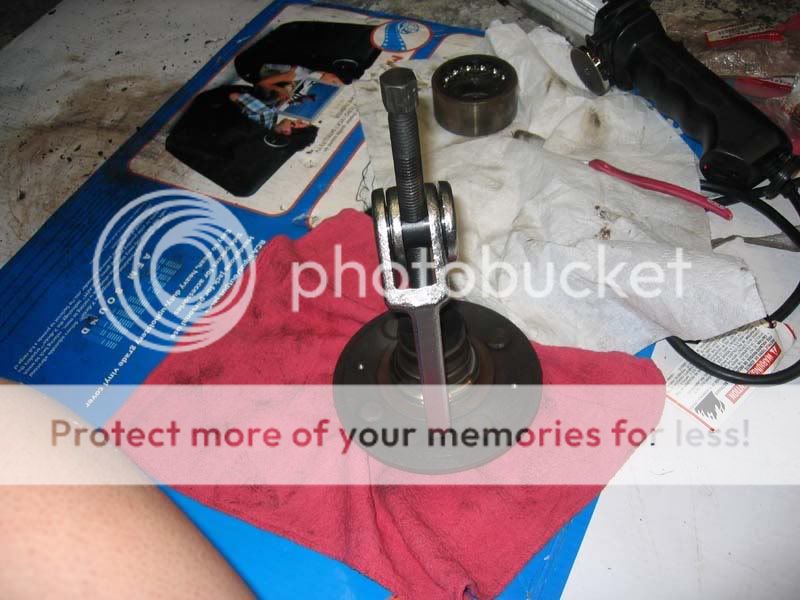
Here is a pic with the hub tamer bearing removal tools on. The instructions tell you to put an impact socket on the front with the long shaft but I did not have a socket that large, most in that size will be for 3/4" sockets or larger, what you can do is use your 1" socket on the back of the other side, it worked the same, not sure if this will wear out the tool prematurely but it worked fine, the tool works basically as a horizontal press.
Yeah, bearing removed , was easier than I thought using the tool.
Pic of bearing attached to the tool.
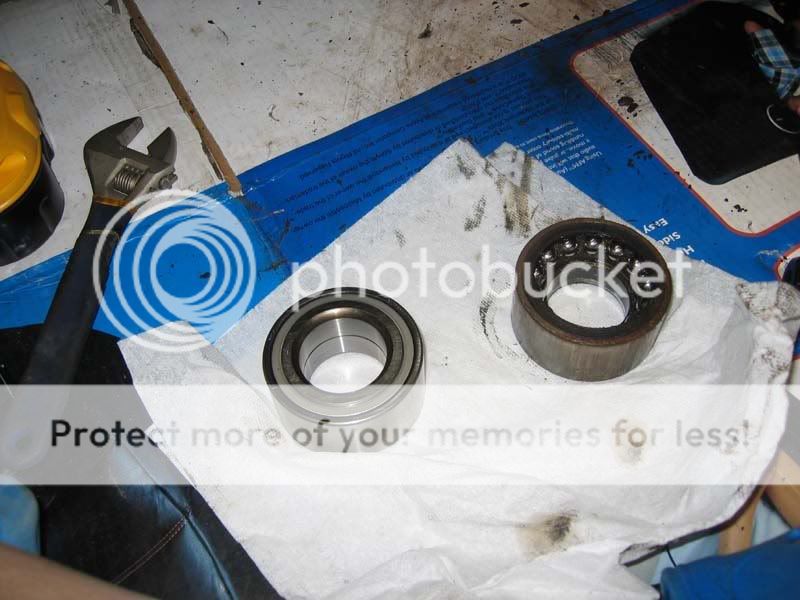
New bearing next to old bearing.
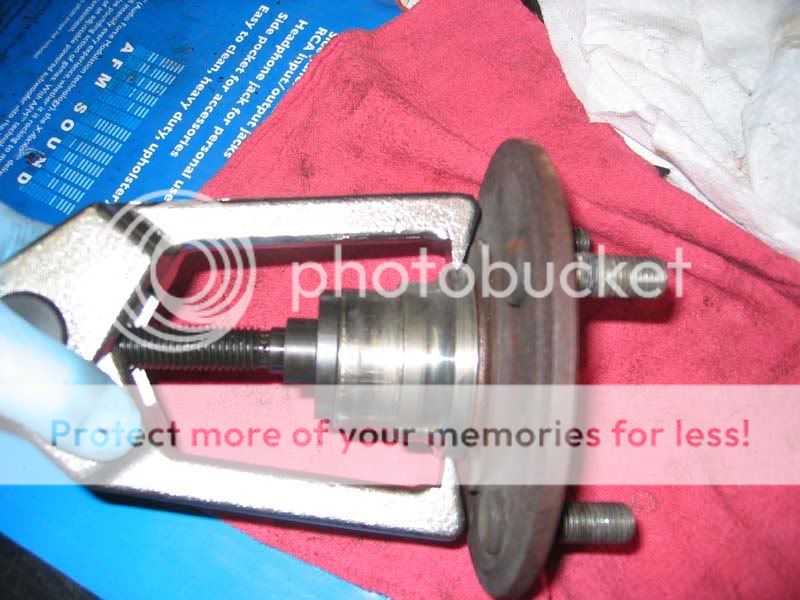
Pic of tool to press the bearing in.
Bearing installed, was easier than the removal.
Pic of C clip reinstalled, this was a bitch to get in as even with the pliers I had it was just barely large enough for the clip, so make sure your pliers are big enough.
Now here is where all the work went, the race puller included and most you buy will not work on the honda race because the room is so narrow to slide the fingers underneath. What you need to do is take your handy dremel and cutting wheel and make some indents for the race puller to grip on, once you get this done you can use the race puller.
Here is a side shot of the indents, I actually had to redo them as they were not deep enough.
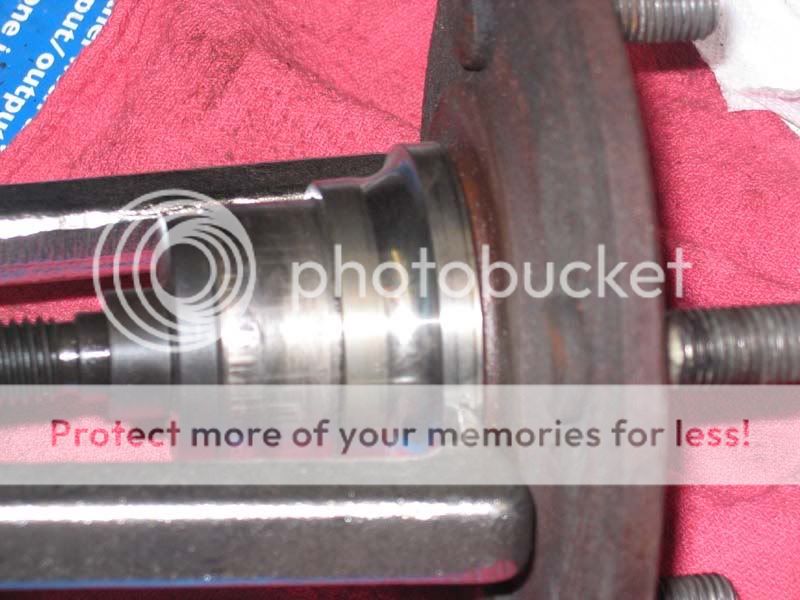
Close up shot of grooves I cut.
Success, race removed.

Close up shots of groove I cut, I got happy with the dremel and was about to cut it off, then I thought that I better not, as I may cut the hub by accident.
Hub tamer tool is also used to press the hub back in. I might have used it too well as I think I pressed it in too much, make sure you do not as the lugs will be close to the spindle arm.
Side shot of hub being pressed in.
Hub is installed
Reinstall all the things you took off and remember to use anti seize on everything and a cotter pin on the lower nut for the ball joint.
The hub tamer is a fairly expensive tool, list is over $500 and street price is still approx. $300.(another user got one off of ebay for less!) There are cheaper ones without the big U shaped piece and race puller, you can get these ones for about $100 or less. The reason most of these will work is because the U is for support to remove the hub but in actuallity on hondas once you have the nut piece and press assembled, when you hit it from behind it will usually brake the race free and then the hub comes with it. Reinstall does not require the U shaped piece, still I like the convenience of having all the correct tools readily available so I got it. I look at it as paying for itself after one job as most places charge you about 3 hours labor or more to do the job as they charge for removing the whole arm when you do not need to with this tool.
Hopefully this helps some of you with the install as it was always something that scared me before I did it. Not sure if I called all the parts the correct name, if I have not please let me know and I will edit the message.
Modified by AW at 10:29 PM 4/27/2008
Modified by AW at 10:39 PM 4/27/2008
Modified by AW at 10:42 PM 4/27/2008
Modified by AW at 6:36 AM 4/28/2008
I ended up buying mine from the thetoolwarehouse.com, awesome place and unbelievably quick "free" shipping if you buy a certain amount. Now to the install...
Before you start, make sure you have all the necessary tools and parts. At a minumum you will need a new wheel bearing( I used OEM from Honda), C clip pliers(make sure they can work on c clips that are about 3", some can't), new axle nut(you can reuse but I usually do not as they are cheap and once you hammer in the top it sometimes is not possible to reuse), dremel with cutting wheel or similar, various ratchets and socket, socket for axle nut, for sockets, the hub tamer needs at least a 1" impact socket that most standard sets do not have, you also need larger but you can get buy without it as you will see, impact wrench( I use dewalt cordless), etc....
Here is the hub tamer and my impact wrench.
Here is the wheel before we start, jack up car, remove wheel
Remove, brake caliper and zip tie or metal wire it to something, remove caliper bracket, brakes pads, make sure you use impact socket on brake rotor screws, then remove the brake rotor.
Here is what it looks like after you remove the above mentioned items.
Next items you need to remove is the axle nut, usually this is on tight but mine came off with a blast of the impact gun, search elsewhere if yours is stuck for the varous other methods to get off, I suggest spraying some pb blaster and waiting before you try again. I did not take many pictures at this part because there are others elsewhere, but after you get the nut off you need to unbolt the lower shock fork attached to the arm, then unbolt the lower ball joint. When I went to do mine I noticed ther cotter pin was missing
, remove the nut and use the We-Todds-method to break the ball joint free, it works so well, why do it any other way, for my method because I do not have a craftsman socket I used my mastercraft 10" adjustable wrench! Once loose you can pull the axle out of the hub...Attache the hub tamer shoe horn and bolts to the hub, as you turn the hub will be pressed out. If it is stuck you take the BFH and hit it from behind.
You will notice once you get the hub out, the race is almost always attached to it
Another shot of the race on the hub
Here is the shot of the bearing without front race still on the car, you can also see the c clip that has to be removed before you can get the bearing out.
Here is a pic with the c clip removed
Here is a pic with the hub tamer bearing removal tools on. The instructions tell you to put an impact socket on the front with the long shaft but I did not have a socket that large, most in that size will be for 3/4" sockets or larger, what you can do is use your 1" socket on the back of the other side, it worked the same, not sure if this will wear out the tool prematurely but it worked fine, the tool works basically as a horizontal press.
Yeah, bearing removed
, was easier than I thought using the tool.Pic of bearing attached to the tool.
New bearing next to old bearing.
Pic of tool to press the bearing in.
Bearing installed, was easier than the removal.
Pic of C clip reinstalled, this was a bitch to get in as even with the pliers I had it was just barely large enough for the clip, so make sure your pliers are big enough.
Now here is where all the work went, the race puller included and most you buy will not work on the honda race because the room is so narrow to slide the fingers underneath. What you need to do is take your handy dremel and cutting wheel and make some indents for the race puller to grip on, once you get this done you can use the race puller.
Here is a side shot of the indents, I actually had to redo them as they were not deep enough.
Close up shot of grooves I cut.
Success, race removed.
Close up shots of groove I cut, I got happy with the dremel and was about to cut it off, then I thought that I better not, as I may cut the hub by accident.
Hub tamer tool is also used to press the hub back in. I might have used it too well as I think I pressed it in too much, make sure you do not as the lugs will be close to the spindle arm.
Side shot of hub being pressed in.
Hub is installed
Reinstall all the things you took off and remember to use anti seize on everything and a cotter pin on the lower nut for the ball joint.
The hub tamer is a fairly expensive tool, list is over $500 and street price is still approx. $300.(another user got one off of ebay for less!) There are cheaper ones without the big U shaped piece and race puller, you can get these ones for about $100 or less. The reason most of these will work is because the U is for support to remove the hub but in actuallity on hondas once you have the nut piece and press assembled, when you hit it from behind it will usually brake the race free and then the hub comes with it. Reinstall does not require the U shaped piece, still I like the convenience of having all the correct tools readily available so I got it. I look at it as paying for itself after one job as most places charge you about 3 hours labor or more to do the job as they charge for removing the whole arm when you do not need to with this tool.
Hopefully this helps some of you with the install as it was always something that scared me before I did it. Not sure if I called all the parts the correct name, if I have not please let me know and I will edit the message.
Modified by AW at 10:29 PM 4/27/2008
Modified by AW at 10:39 PM 4/27/2008
Modified by AW at 10:42 PM 4/27/2008
Modified by AW at 6:36 AM 4/28/2008
 05-26-2007, 10:05 PM
#2
Honda-Tech Member
Join Date: Mar 2001
Location: WV, USA
Posts: 8,119
Likes: 0
Received 0 Likes
on
0 Posts
wow. Its really easy with the press like I use, but that thing seems like it work really well too. How much did you actually do with just a cordless drill.
Nice write up
Nice write up
05-27-2007, 09:03 AM
#4
Honda-Tech Member
Thread Starter
Join Date: Jun 2001
Location: Long Island, NY, USA
Posts: 909
Likes: 0
Received 0 Likes
on
0 Posts
It is actually a Dewalt Cordless Impact wrench, I have had it for about 3 years now. At the time I got it, it was the most powerful cordless impact wrench at 300 ft/lbs of torque. Now there are more powerful ones like the IR cordless at 360 ft/lbs but I probably won't upgrade until they get to 400 ft/lbs or if mine breaks. It is amazing what they can do with cordless tools now!
<TABLE WIDTH="90%" CELLSPACING=0 CELLPADDING=0 ALIGN=CENTER><TR><TD>Quote, originally posted by Erik95LS »</TD></TR><TR><TD CLASS="quote">How much did you actually do with just a cordless drill.
Nice write up </TD></TR></TABLE>
<TABLE WIDTH="90%" CELLSPACING=0 CELLPADDING=0 ALIGN=CENTER><TR><TD>Quote, originally posted by Erik95LS »</TD></TR><TR><TD CLASS="quote">How much did you actually do with just a cordless drill.
Nice write up
</TD></TR></TABLE>
Trending Topics
05-28-2007, 08:10 AM
#10
Honda-Tech Member
iTrader: (1)
Join Date: Jan 2002
Location: Nowhere and Everywhere
Posts: 29,530
Likes: 0
Received 52 Likes
on
46 Posts
oh man, I sure wish I had seen this a few months ago when I had my wheel bearings replaced.
Oh well, I had those and my lower ball joints replaced for about $300 (parts + labor).
Oh well, I had those and my lower ball joints replaced for about $300 (parts + labor).
05-28-2007, 10:27 AM
#12
Join Date: Jun 2006
Location: MD
Posts: 328
Likes: 0
Received 0 Likes
on
0 Posts
Excellent write up! I am starting my bearing swap with the same tool this weekend. PLEASE fix the pics...if you need hosting, PM me I will gladly host these pics for you. 
05-28-2007, 05:32 PM
#15
Honda-Tech Member
Thread Starter
Join Date: Jun 2001
Location: Long Island, NY, USA
Posts: 909
Likes: 0
Received 0 Likes
on
0 Posts
The pics seem to be working, they are hosted on We-todd, let me know if you need them and can email them to you if they are down
<TABLE WIDTH="90%" CELLSPACING=0 CELLPADDING=0 ALIGN=CENTER><TR><TD>Quote, originally posted by wildcarditr102 »</TD></TR><TR><TD CLASS="quote">Excellent write up! I am starting my bearing swap with the same tool this weekend. PLEASE fix the pics...if you need hosting, PM me I will gladly host these pics for you. </TD></TR></TABLE>
<TABLE WIDTH="90%" CELLSPACING=0 CELLPADDING=0 ALIGN=CENTER><TR><TD>Quote, originally posted by wildcarditr102 »</TD></TR><TR><TD CLASS="quote">Excellent write up! I am starting my bearing swap with the same tool this weekend. PLEASE fix the pics...if you need hosting, PM me I will gladly host these pics for you.
</TD></TR></TABLE>
05-28-2007, 08:52 PM
#17
Join Date: Jun 2006
Location: MD
Posts: 328
Likes: 0
Received 0 Likes
on
0 Posts
<TABLE WIDTH="90%" CELLSPACING=0 CELLPADDING=0 ALIGN=CENTER><TR><TD>Quote, originally posted by AW »</TD></TR><TR><TD CLASS="quote">The pics seem to be working, they are hosted on We-todd, let me know if you need them and can email them to you if they are down</TD></TR></TABLE>
Yea, they work now. Must have been maintenance/system downtime.
Yea, they work now. Must have been maintenance/system downtime.
05-28-2007, 11:13 PM
#18
Honda-Tech Member
Thread Starter
Join Date: Jun 2001
Location: Long Island, NY, USA
Posts: 909
Likes: 0
Received 0 Likes
on
0 Posts
PB Blaster does wonders, try that then impact wrench, if you don't have an impact wrench use a breaker bar with a 3ft extension or longer. PB blaster has always worked for me without having to resort to heat which kills the bearing, if you are changing the bearing then heat may be the way to go.
<TABLE WIDTH="90%" CELLSPACING=0 CELLPADDING=0 ALIGN=CENTER><TR><TD>Quote, originally posted by wildcarditr102 »</TD></TR><TR><TD CLASS="quote">
Yea, they work now. Must have been maintenance/system downtime. </TD></TR></TABLE>
<TABLE WIDTH="90%" CELLSPACING=0 CELLPADDING=0 ALIGN=CENTER><TR><TD>Quote, originally posted by wildcarditr102 »</TD></TR><TR><TD CLASS="quote">
Yea, they work now. Must have been maintenance/system downtime.
</TD></TR></TABLE>
07-08-2007, 07:43 AM
#22
Go Tigers!
<TABLE WIDTH="90%" CELLSPACING=0 CELLPADDING=0 ALIGN=CENTER><TR><TD>Quote, originally posted by 92civicx »</TD></TR><TR><TD CLASS="quote">hey man what happened to the pics???</TD></TR></TABLE>
wetoddid racing is down
wetoddid racing is down
07-30-2007, 02:10 PM
#23
Honda-Tech Member
Join Date: Sep 2004
Location: far EAST SIDE, NY, USA
Posts: 307
Received 0 Likes
on
0 Posts
would you conisder renting your tool to a fellow NYer?
sweet write up by the way
sweet write up by the way
08-02-2007, 08:05 AM
#25
Junior Member
Join Date: Feb 2006
Posts: 53
Likes: 0
Received 0 Likes
on
0 Posts
Definately a great write up, I've never even seen or heard of this tool kit. "But now I know", "And knowing is half the battle!"