
Stripping your valve cover
 06-25-2011, 09:44 PM
#1
Honda-Tech Member
Thread Starter
Hi all, I picked up a valve cover from my friends 1990 Acura Integra since he ran his out of oil and let me salvage parts. For the longest time I've been wanting to get the dang thing clean, and since I'm due for an oil change, and timing belt and water pump. I figured I'd clean it so it would be ready to install.
I decided to strip it clean. And decided to make a write up to help you guys, even though its an easy task, I figured I'd help everyone I could that was afraid to ask.
Now it was ALOT uglier, but i power washed most of the loose stuff off before laying down the stripper.
Materials:
GLOVES, I know its a given, but do NOT underestimate this stuff lol
A pan to hold the liquid stripper
A brush (I used a small one)

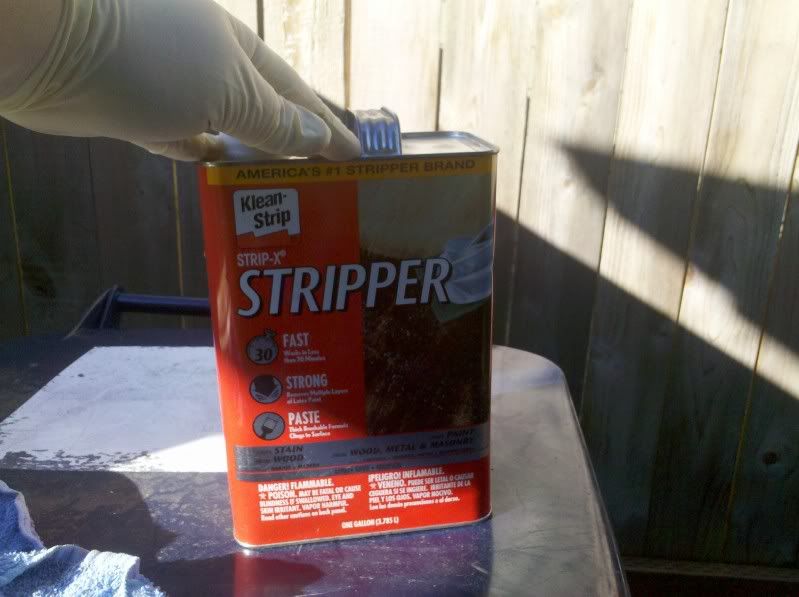
Paint stripper, can be any really. Doesn't have to be aircraft stripper. I just used a multi-use paint stripper, one for wood and metal.
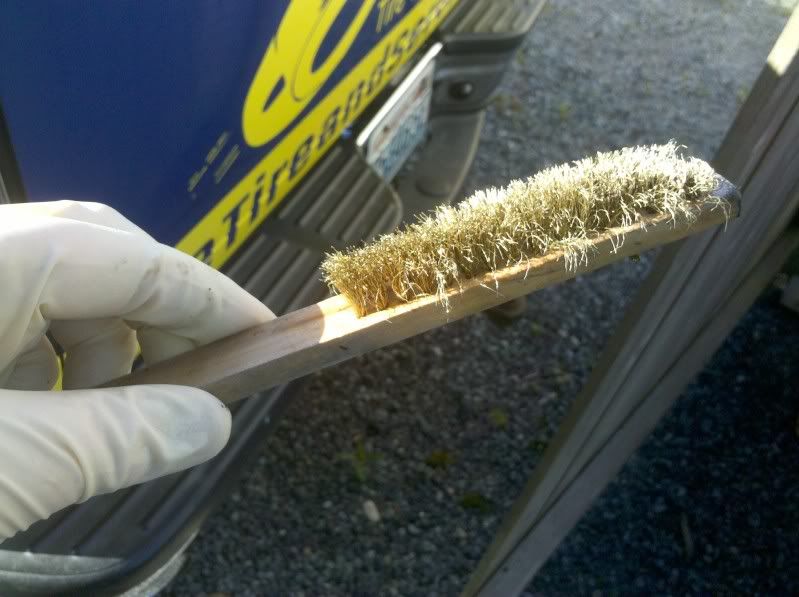
A soft metal wire brush to scrape off the paint w/o harming the cover
Some towels to wipe down the valve cover and clean it off.
Now this stuff will get everywhere so put the valve cover on some table you don't care for. I used my trash can
And time of course
Here is my progress:
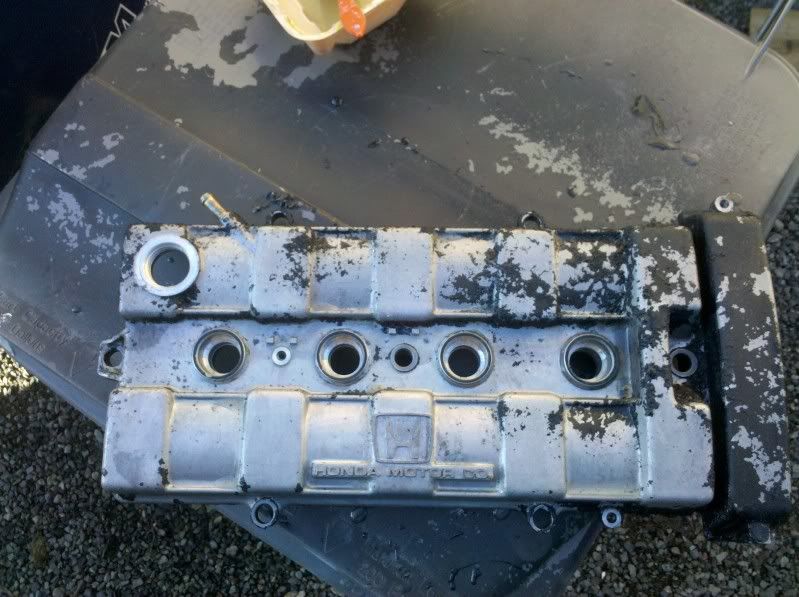
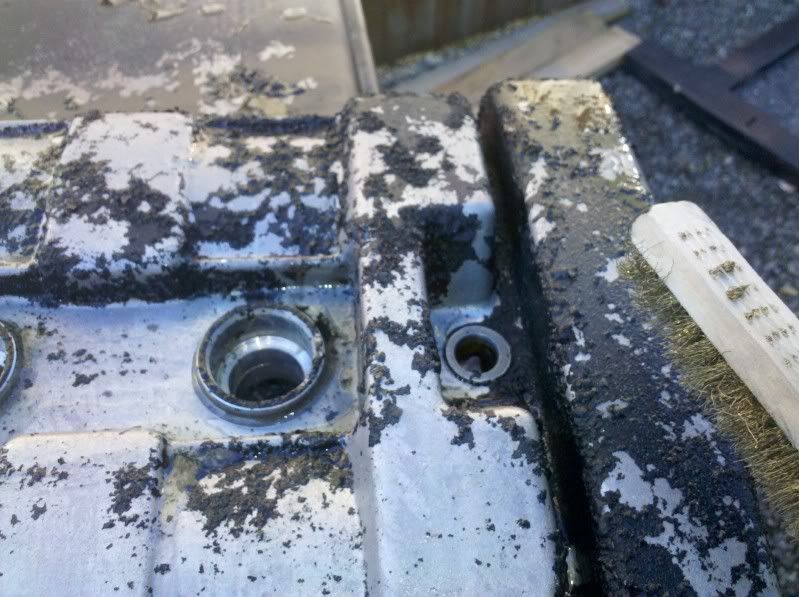
Here's what it looked like after i power washed it, but before I started, as you can see how UGLY it looked.
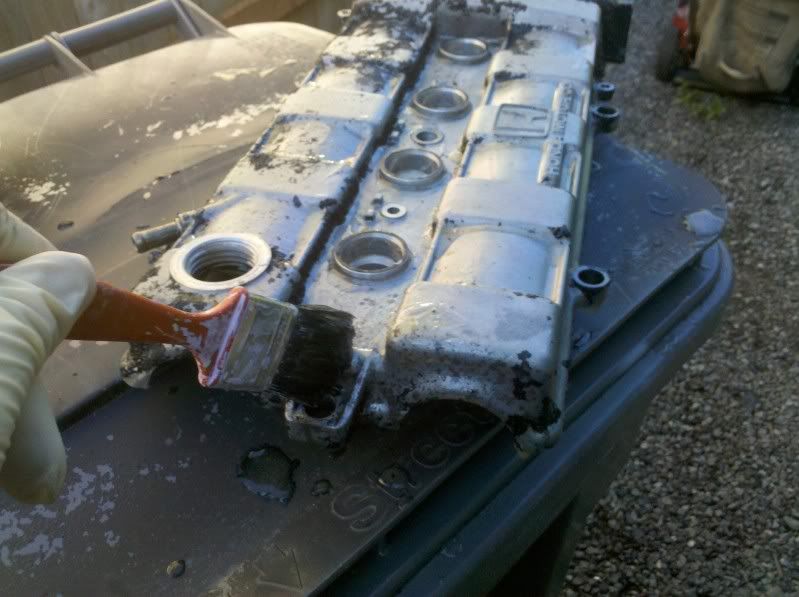
Now I was VERY generous laying this stuff on, I had a huge can and wasn't too shy with it.
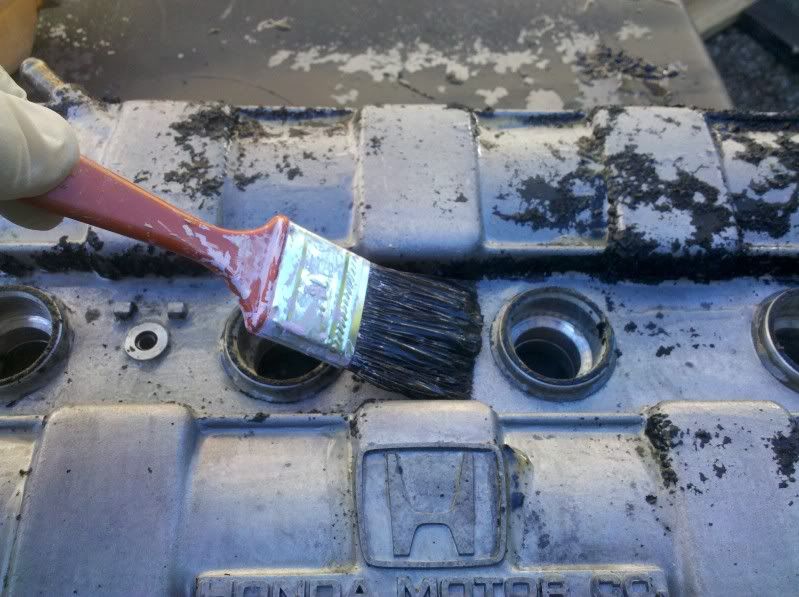
Just get your brush and pretend like your painting your valve cover and lather it on, like I said, don't be shy.
Once you apply a coat of thinner/stripper, go grab a beer, or for the ones not old enough a soda and relax for a few ten minutes.
Relaxed and having your thirst quenched, go look at your progress.
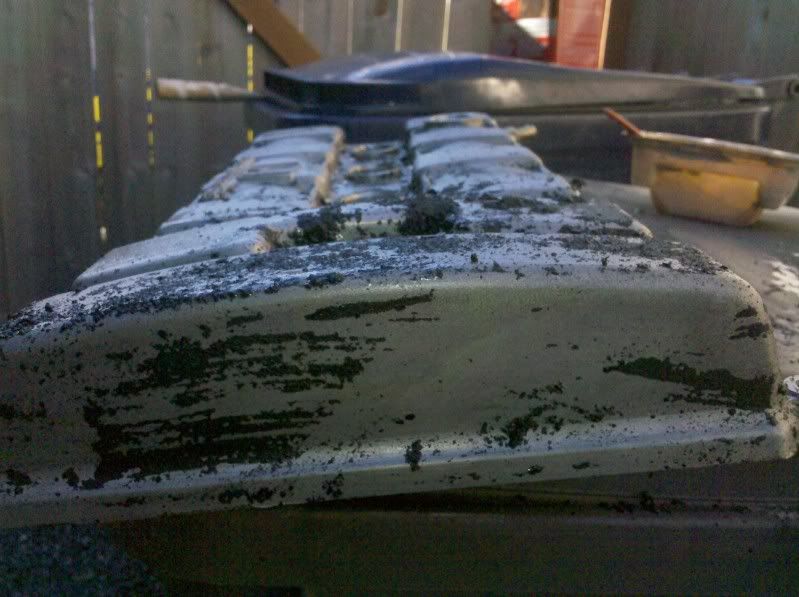
It should start looking flakey like this....
Once it starts looking like that, take a tooth brush or soft metal brush and start flaking off the paint.
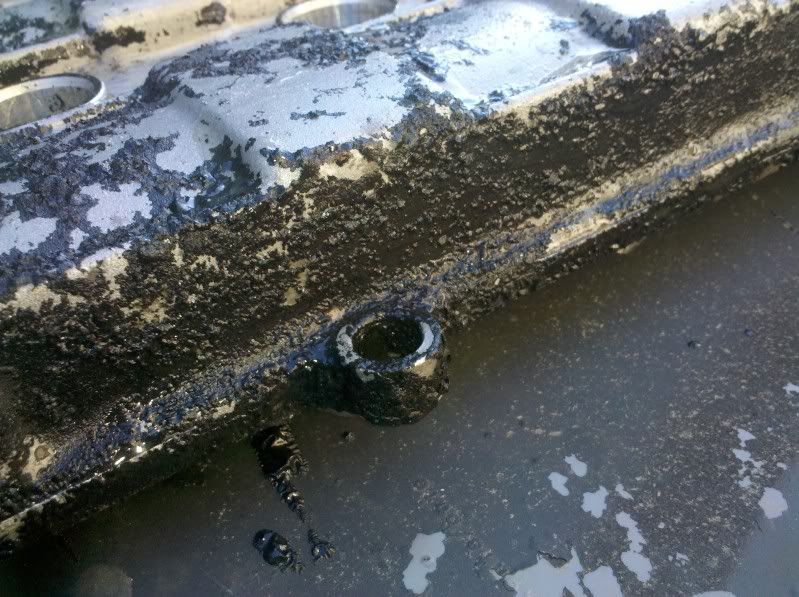
Now, there will be some tough spots like this. So just lather another coat on and have another drink
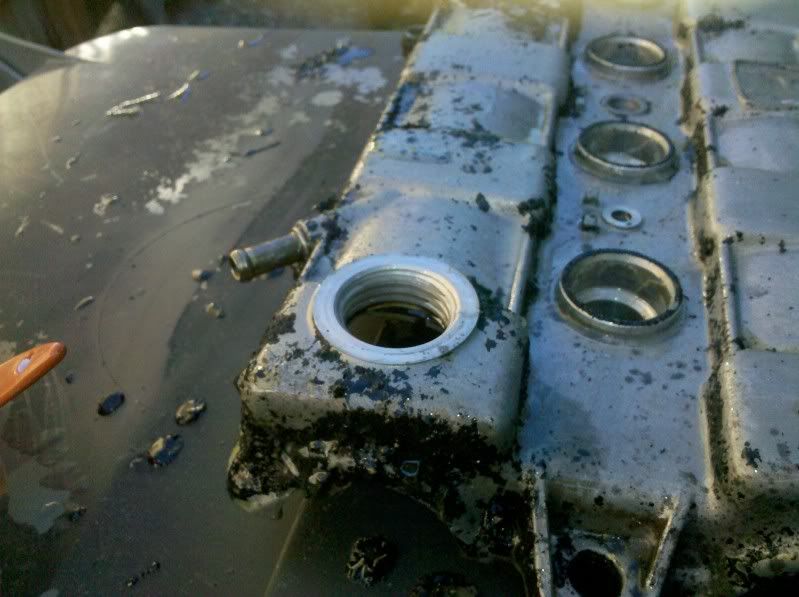
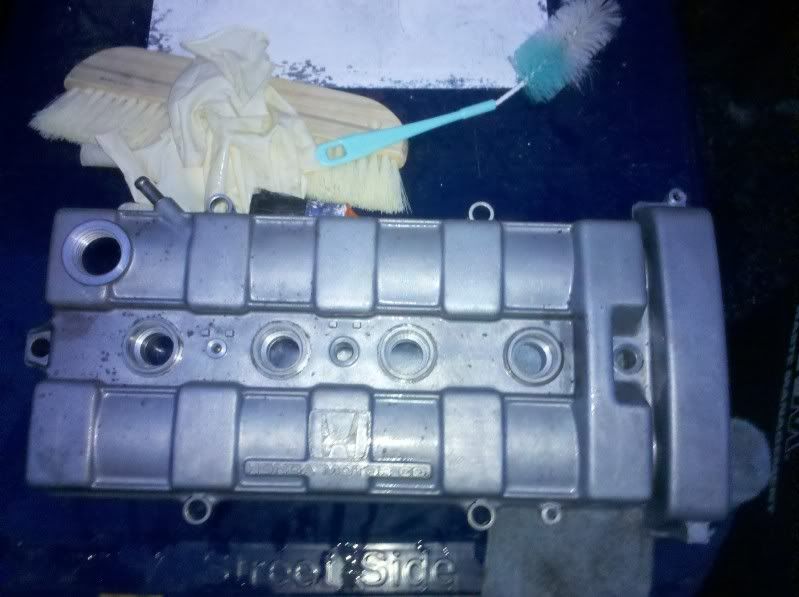
After awhile you should have the whole top clean, congrats!
Here's what mine looked like....
Before:
After:
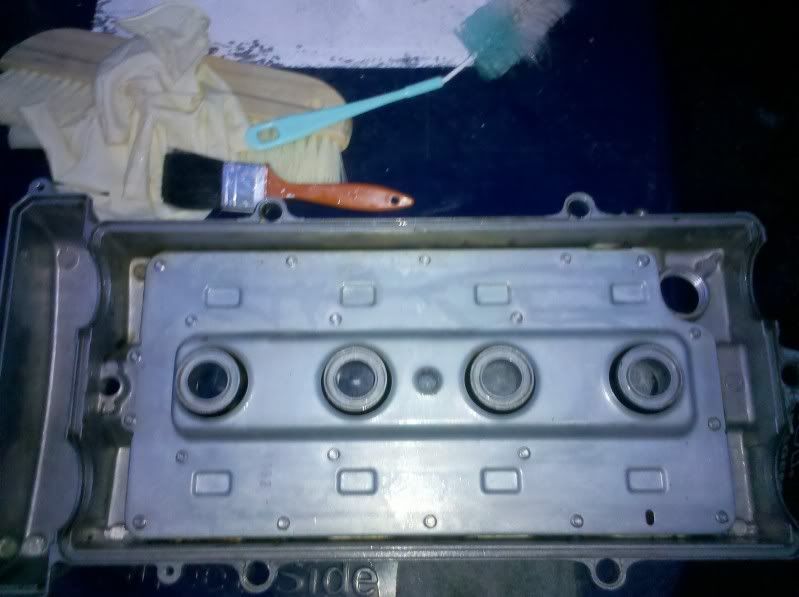
Now I wanted to clean the whole thing, so i worked on the underside as well. It had shown quite some use and had burnt oil on it so i figured i should.
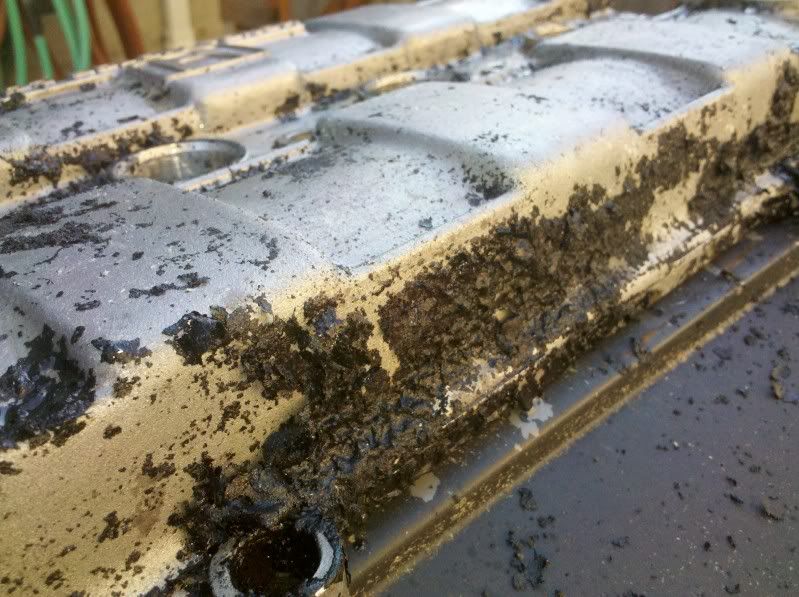
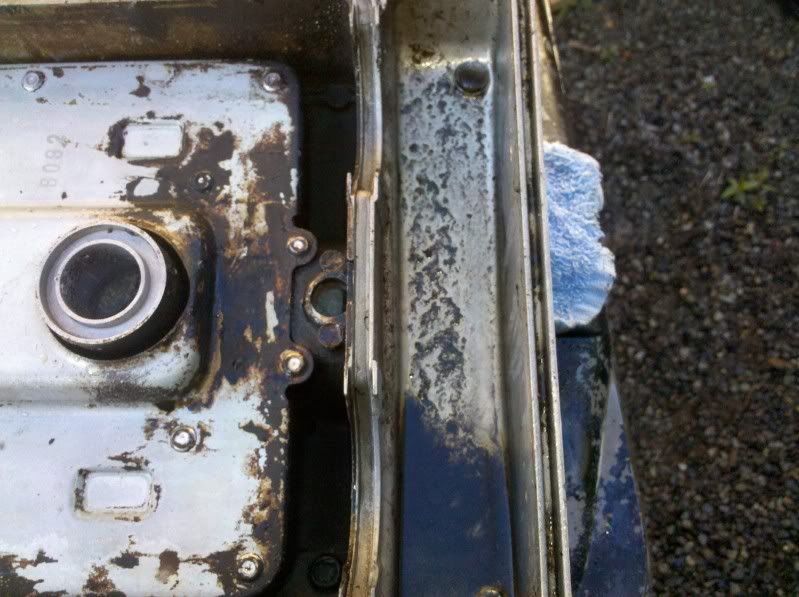
Here's what the burnt oil looked like on the inside....
So like the topside, lather (what ever product you bought) all over the underside. Let sit for another 15-20 minutes and start scraping! Your going to have to work it a little harder to get the corners and burnt stuff off, but dammit, its worth it!
Here's what i got, and what you should have. (if not, work harder)
Use a towel and dry it off. and.....
Congrats!
And now you have a nice clean valve cover to paint or do what ever you want to! I myself am just going to keep it like it is cause thats how i want it.
Now i hope this is as easy for you as it was for me, and hope this helps MANY people. Now your ready to go out and take on the world! Just kidding!
I decided to strip it clean. And decided to make a write up to help you guys, even though its an easy task, I figured I'd help everyone I could that was afraid to ask.
Now it was ALOT uglier, but i power washed most of the loose stuff off before laying down the stripper.
Materials:
GLOVES, I know its a given, but do NOT underestimate this stuff lol
A pan to hold the liquid stripper
A brush (I used a small one)
Paint stripper, can be any really. Doesn't have to be aircraft stripper. I just used a multi-use paint stripper, one for wood and metal.
A soft metal wire brush to scrape off the paint w/o harming the cover
Some towels to wipe down the valve cover and clean it off.
Now this stuff will get everywhere so put the valve cover on some table you don't care for. I used my trash can
And time of course
Here is my progress:
Here's what it looked like after i power washed it, but before I started, as you can see how UGLY it looked.
Now I was VERY generous laying this stuff on, I had a huge can and wasn't too shy with it.
Just get your brush and pretend like your painting your valve cover and lather it on, like I said, don't be shy.
Once you apply a coat of thinner/stripper, go grab a beer, or for the ones not old enough a soda and relax for a few ten minutes.
Relaxed and having your thirst quenched, go look at your progress.
It should start looking flakey like this....
Once it starts looking like that, take a tooth brush or soft metal brush and start flaking off the paint.
Now, there will be some tough spots like this. So just lather another coat on and have another drink
After awhile you should have the whole top clean, congrats!
Here's what mine looked like....
Before:
After:
Now I wanted to clean the whole thing, so i worked on the underside as well. It had shown quite some use and had burnt oil on it so i figured i should.
Here's what the burnt oil looked like on the inside....
So like the topside, lather (what ever product you bought) all over the underside. Let sit for another 15-20 minutes and start scraping! Your going to have to work it a little harder to get the corners and burnt stuff off, but dammit, its worth it!
Here's what i got, and what you should have. (if not, work harder)
Use a towel and dry it off. and.....
Congrats!
And now you have a nice clean valve cover to paint or do what ever you want to! I myself am just going to keep it like it is cause thats how i want it.
Now i hope this is as easy for you as it was for me, and hope this helps MANY people. Now your ready to go out and take on the world! Just kidding!
Last edited by Jeffaj20; 10-28-2011 at 08:28 AM. Reason: spell check :]


") 06-26-2011, 10:07 AM
06-26-2011, 10:07 AM
#5
Honda-Tech Member
Thread Starter
06-26-2011, 11:51 AM
#7
Honda-Tech Member
Thread Starter
So no, with his ignorance and stupidity with cars, he never changed the oil.
He eventually blew off steam and let me salvage a few parts from it before he junked it, like: the leather gsr seats; the valve cover; brand new distributor; and new spark plug wires. *win*
Trending Topics
 06-26-2011, 09:02 PM
#9
Honda-Tech Member
Thread Starter
06-27-2011, 02:17 PM
#13
Honda-Tech Member
Join Date: Aug 2003
Location: Albuquerque, N.M., USA
Posts: 603
Likes: 0
Received 0 Likes
on
0 Posts
That d@mn valve cover looked like it was already stripped, lol. I used that same stripper on mine when I did mine. Also if anyone else does their valve cover Orielly's carries VHT wrinkle black now. If you want red then the best place to get it would be ebay.
06-27-2011, 08:53 PM
#14
Honda-Tech Member
Thread Starter

Sweet! Thanks!
 06-28-2011, 12:27 PM
#17
Honda-Tech Member
nice right up but like mentioned above aircraft remover spray is much easier to use! i use it on every vc i re paint, you my friend have a lot of time on your hand lol
07-07-2011, 04:36 PM
#18
Honda-Tech Member
Thread Starter
Thanks you guys, yeah aircraft stripper works best. But I have no job, and saw this in my garage and used it lol
07-31-2011, 09:26 AM
#21
Honda-Tech Member
Thread Starter
08-01-2011, 10:30 PM
#23
Honda-Tech Member
Join Date: Feb 2010
Location: where the birds poop
Posts: 114
Likes: 0
Received 0 Likes
on
0 Posts
wow. props to you man! doing a write up instead of just posting a thread with a question in it! no sarcasm involved. legit good write up, been wanting to do this to my gsr vc
08-03-2011, 05:26 PM
#24
Honda-Tech Member
Thread Starter
