
How to wire your horn for aftermarket steeing hubs, fixed/quick release.
 03-19-2015, 03:06 PM
#1
Honda-Tech Member
Thread Starter
I'm aware there are a few youtube videos on this BUT there is no thread on here(H-T) that showed it. I've done this a few times but I figured it could help some ppl. This method taps into the relay plug in the under the dash fuse box, I've used the SRS harness to but this one is much friendlier imo. This applies to the quick release hubs from NRG to your "ebay special" fixed one which I practiced on.
needed:
Wire stripper or sharp exact-o knife
star screw driver
2ft or 14-16 AWG
spade or ring terminal for 14-15 AWG
good light source
Before I start the pics i'll say this, disconnect your negative battery terminal and remove the knee cover aka trim piece that hides the steering column.
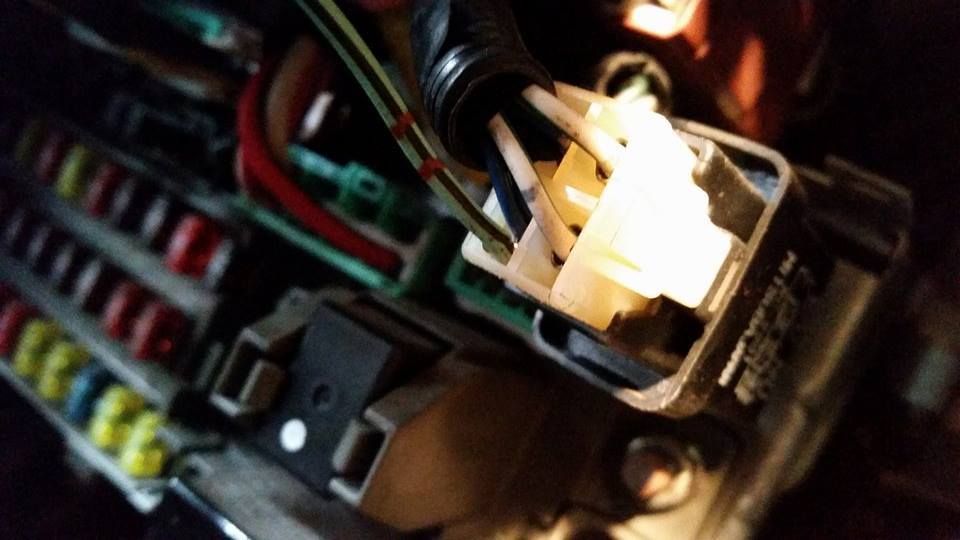
After you've done the first two steps locate the under the fuse box and look in the very top right corner, you'll see the horn relay. Get your 14-16 AWG out and strip about 3/4 of an inch of 1 end and twist it with your fingers, next find the left bottom most wire and press in your striped wire it should go in about 1/2 and inch. The wire colour is blue with a stripe it should sit pretty snug if you really you can put soe electrical tape around it and the blue one to help secure it.
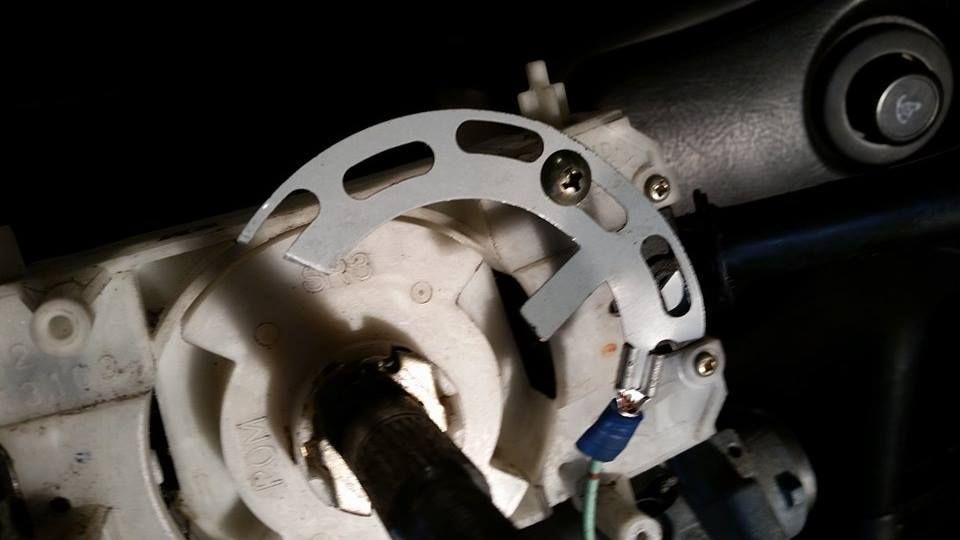
This step separates the fixed and QR ppl, if you have a fixed hub strip the other end and add a spade terminal and then plug that to the lead coming off you horn button and you'll be done. For the QR ppl your quick release unit should come with 2 circular rings that look like the one in the pic, except whole get your good wire cutters and cut it in half or just under it won't worst as a whole. As for mounting it as you can see there will be 4 threaded studs pick one and get your self a little screw and put it through one of the holes and clamp it to the stud of your choice, and bend that little lip up as it needs to touch the brass back of the "(short) hub". Next strip half an inch of the free end and pick either a spade or ring terminal, if you chose a ring terminal you can just loop it around that screw you just installed. If not you'll notice the inside of the ring has a thick enough outer circle that the spade terminal can be clamped on, use a set of pliers and squeeze it tighter if needed all depends on your spade size.
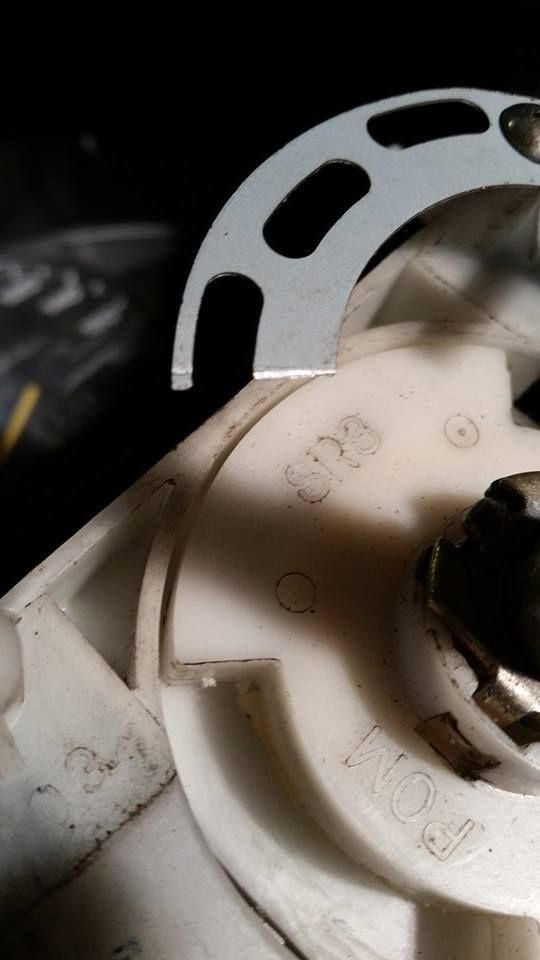
Remember cut and keep the section that has that little lip that goes to in center of the circle, you're kind of screwed if you don't granted you do get 2 rings but still. If you cant get your hands on a spade or ring terminal for what ever reason you "can" strip about and inch off the free end and twist it around the thinnest outer ring, I don't recommend that but if need be.
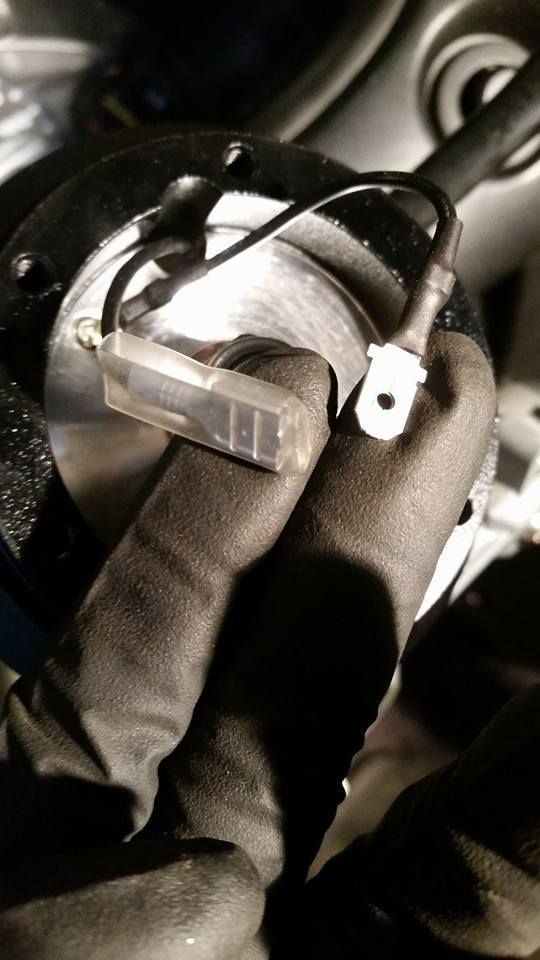
Now you'll see 2 wires coming from your short hub, you need the quick release unit it's self for the next step as it comes with the base mount for the QR. Connect those 2 wires to the wires n the base mount from the QR and screw it down with the provided screws from the QR. These wires like to strip eventually I have found it would hurt to wrap them in electrical tape individually, the main reason being that they are very scrunched up in the space between the base mount and hub ultimately what it will do if it strips is ground out your horn. That doesn't mean you won't have a horn that means your horn will stuck on! worst case if that happens pull over disconnect your battery and pull the sire from the relay or if you can reach bend that tab I talked about earlier away from the brass back of the short hub.

Now you can test your horn to be fair you can try it earlier as soon as you trip the 2nd free end of your wire just so long as the battery is connected, but I would say wait till you finish with the ring for the short hub. So to test it when you're at this point just grab an allen key or socket and press it between the 2 raised points on the wheel you'll be completing the circuit and the horn will work. If not you have other issues which I will not cover here as there are lots of reasons what I can say is make sure the ring is tight when you screw it to the steering column, same with the spade or ring terminal and where you put the wire into the relay those are your wear points.

For those with a fixed hub, after you have the 1 end in the relay take the 2nd end a put a spade terminal on run it up through the hub trying not to snag it on anything as it will have to spin with your wheel. You'll be looking as something like this on your horn button clip the terminal on here bolt your wheel up and press the button, the horn button in this pic is from a Vertex wheel yours may be different but the same idea applies your hub is the ground.
Last edited by B_Swapped93; 03-19-2015 at 03:52 PM.
 03-19-2015, 04:20 PM
#2
Honda-Tech Member
Thread Starter
someone with Authoritah pls edit the "R" into the title...I can't.
 05-23-2015, 11:08 AM
#5
Honda-Tech Member
iTrader: (1)
Join Date: Aug 2003
Location: Left Coast : High Altitude, Top Floor
Posts: 7,616
Likes: 0
Received 1 Like
on
1 Post
After you've done the first two steps locate the under the fuse box and look in the very top right corner, you'll see the horn relay. Get your 14-16 AWG out and strip about 3/4 of an inch of 1 end and twist it with your fingers, next find the left bottom most wire and press in your striped wire it should go in about 1/2 and inch. The wire colour is blue with a stripe it should sit pretty snug if you really you can put soe electrical tape around it and the blue one to help secure it.

What happens when either the metal piece you bent or the back of the hub scrapes off enough metal to lose contact? Remove the steering wheel and Re-adjust that metal tab again or buy a new hub if too much material is removed over time?
Originally Posted by B_Swapped93
Now you'll see 2 wires coming from your short hub, you need the quick release unit it's self for the next step as it comes with the base mount for the QR. Connect those 2 wires to the wires n the base mount from the QR and screw it down with the provided screws from the QR. These wires like to strip eventually I have found it would hurt to wrap them in electrical tape individually, the main reason being that they are very scrunched up in the space between the base mount and hub ultimately what it will do if it strips is ground out your horn. That doesn't mean you won't have a horn that means your horn will stuck on! worst case if that happens pull over disconnect your battery and pull the sire from the relay or if you can reach bend that tab I talked about earlier away from the brass back of the short hub.
05-23-2015, 11:12 AM
#6
Yea this isn't the "right" way to do it at all.... I guess I'll make a DIY on Monday.
BUT as for the metal tab he bent it'll work fine. There's nothing to grind it. It contacts a smooth greased metal plate.
The OEM "Horn Shoe" from a 91 civic is what I'm using to do mine.
Also if anybody needs a resistor to bypass the SRS hit me up.
https://honda-tech.com/sale-10/fs-re...2-25w-3248618/
05-23-2015, 06:34 PM
#7
Honda-Tech Member
Thread Starter
As burnoutboy said the tab is flush with the hub adapter it's meant to be used as such. Not everyone is good with wiring we all know that this works just fine for daily use or to pass safety/inspection. It's and NRG product no hiding their stuff is cheap works bell is a lot better that's how the wires strip they provided too much length.

Thread
Thread Starter
Forum
Replies
Last Post
TouringAccord
Honda Civic / Del Sol (1992 - 2000)
8
03-08-2004 03:05 AM