
Fixing Up a Turd: A Build Thread


 05-11-2016, 07:15 PM
#105

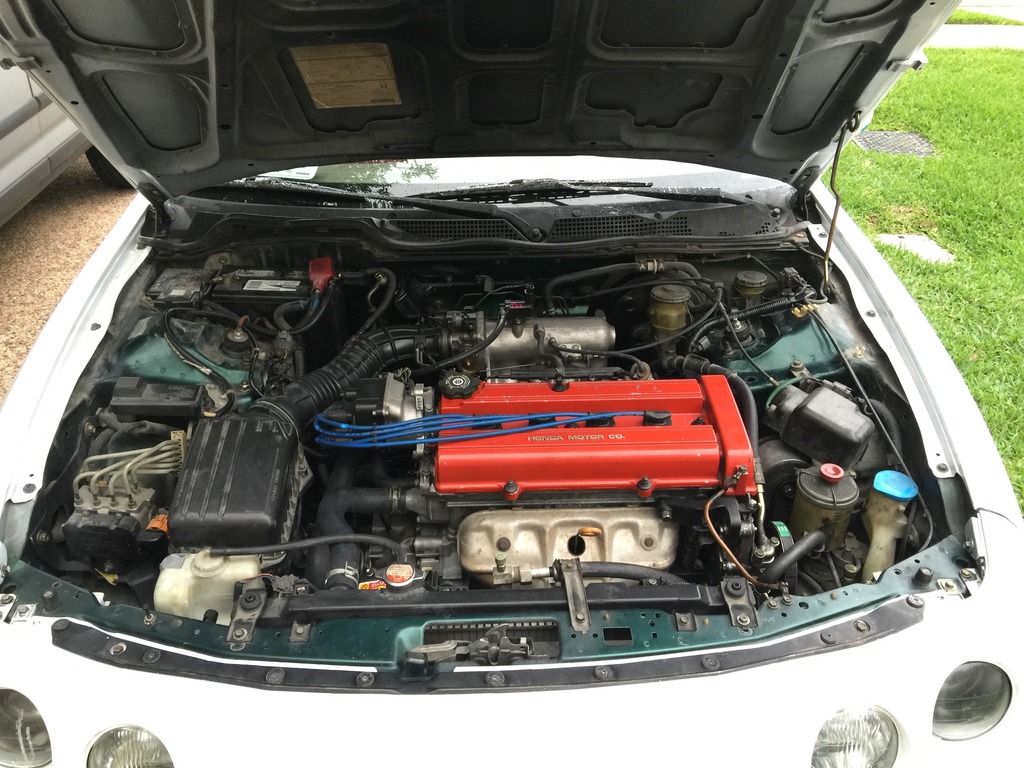
Nothing really interesting this week. I did finish putting the engine bay back together and refilled the power steering system which I emptied out during the swap, but I still need to replace the clutch master cylinder, refill/bleed it, have the AC recharged (I'm not going to do it myself, it was exposed to the atmosphere so I'm going to have a shop pull a vacuum on it then recharge it), and then install the new rear calipers and bleed the brakes.
I did order new wheels (15x7 MB Weapon in bronze) though...only to be told several hours later that they are out of stock and no longer produced, so now I'm back to having no idea what wheels I want. TE37's would be ideal, but I don't think I can make myself spend more than $1500 on wheels for a car like this, so I'm back to undecided. If I can find a set of bronze TE37's in the right size and bolt pattern for less than that though I'd jump on it.
Edit: Got the new clutch master cylinder installed last night, and so far no oil or transmission fluid leaks. I also found out that the top fitting on my power steering pump is leaking, I think it's just the O-ring so it shouldn't be too big a deal to replace it.
Part 25
Last edited by MotorMouth93; 06-10-2016 at 11:55 AM.
05-13-2016, 10:39 PM
#106
Anti-GDD White Knight Simp
Older wheels, like Desmond, or SSR, are awesome legit and can be had for around 1500 or less. I HIGHLY recommend you check out skidmarks wheel and tire (imadeskidmarks.com)
You won't regret it. But you might have regretted those knock off wheels
You won't regret it. But you might have regretted those knock off wheels
05-14-2016, 10:18 PM
#107
I spent most of the afternoon bleeding my clutch, installing the new brakes in the rear, and then bleeding the brake system. Then we took it for a test drive.
So far, the B20 really doesn't feel much different to drive than the B18. and I haven't noticed any of the extra torque that so many people seem to praise. I just kinda tossed the distributor on there so in theory the ignition timing could be retarded enough to cut down on the power, but I doubt that's it and I'll check it when I get a timing light. The engine runs great, doesn't overheat, doesn't smoke, and generally sounds healthy. The rebuilt transmission works flawlessly, every gear clicks nicely into place and 3/4 no longer grind. The LSD seems to be doing it's job as the inside tire is chirping in turns now. Also, nothing seems to leak, which is amazing. Before, the engine bay was a bit smokey all the time and the car smelled like burning oil from all the oil dumping on the exhaust, but that doesn't seem to be an issue at all anymore.
Now I just have to finish polishing the clear coat. A few months ago I burned though the clear and paint when I hit a high spot on the very bottom edge of the driver side door, so I have to fix that and reclear the whole door, in addition to finish the buffing. So far, the hood, passenger door, and both fenders have been buffed and actually look pretty darn good.
Part 26
Last edited by MotorMouth93; 06-10-2016 at 11:55 AM.
05-15-2016, 05:15 PM
#109
Anti-GDD White Knight Simp
I think it's the fact that it's the larger displacement b20 means it has the potential for better power. A few bolt ons and tuning should do the trick
05-20-2016, 11:12 PM
#110
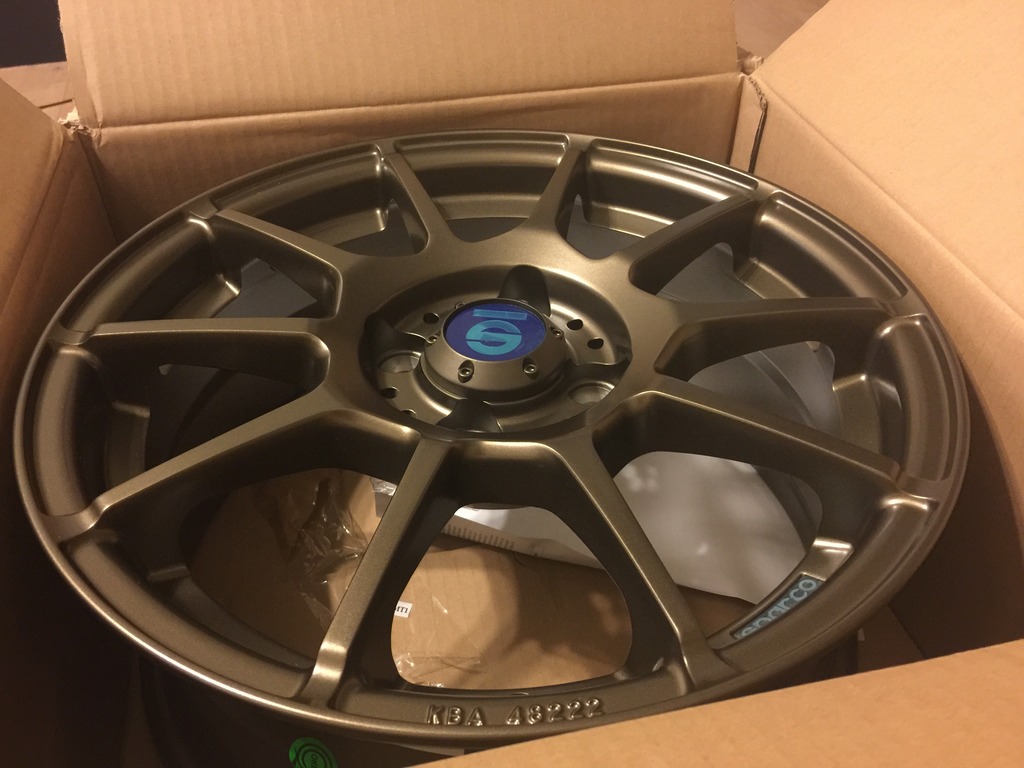
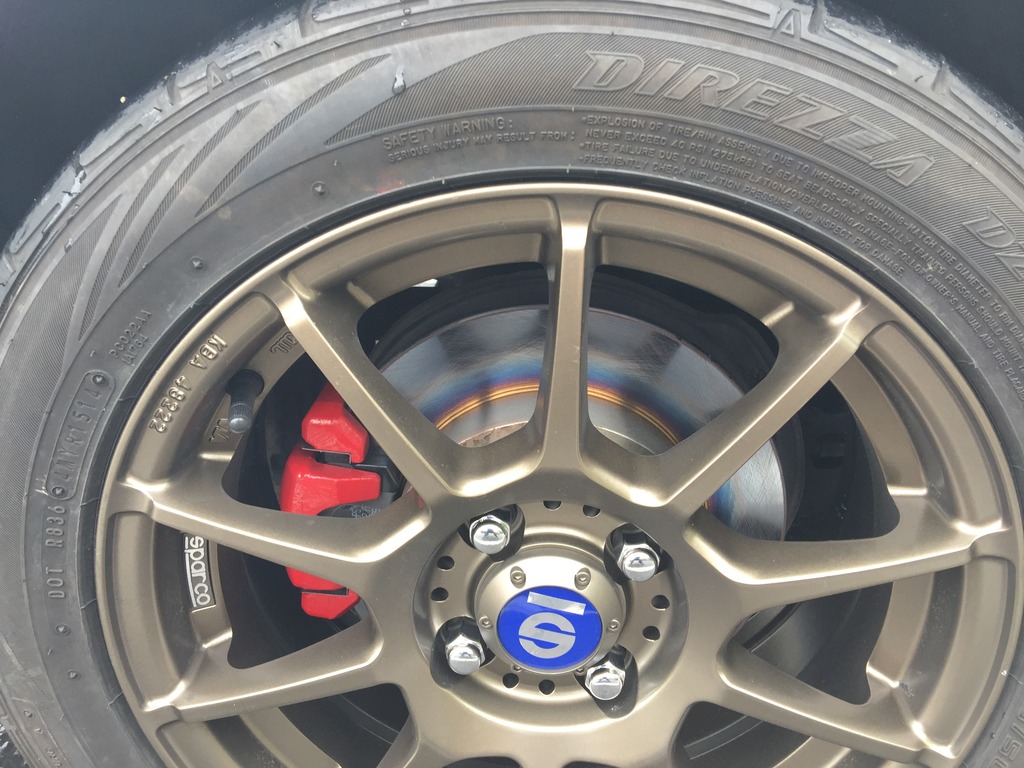
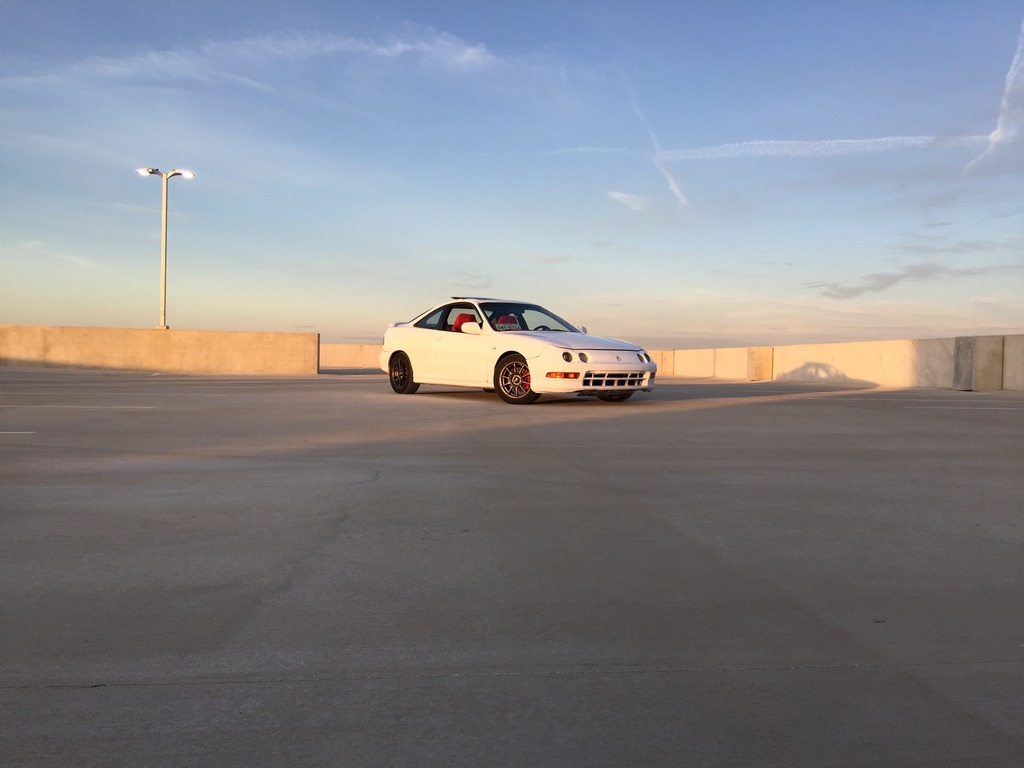
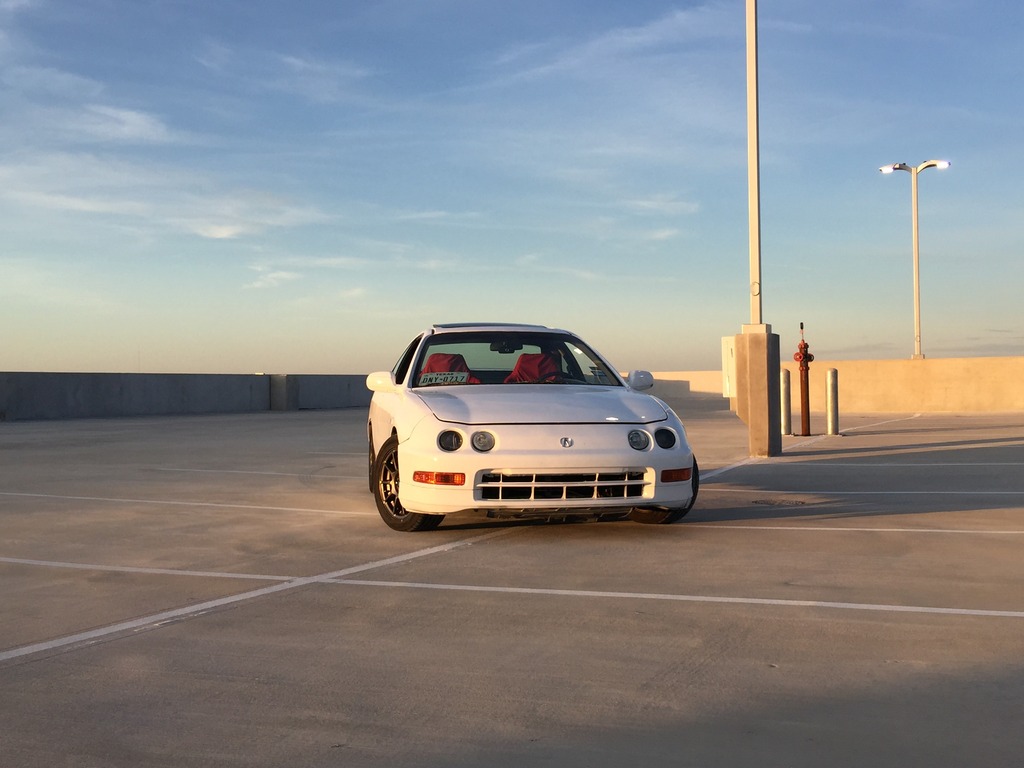
And finally the first real update: wheels. After giving up finding any 15" bronze 4x100 TE37's for a reasonable price I just said screw it and bought a set of Sparco Assetto Gara wheels in bronze. They're made by OZ and have overwhelmingly positive reviews, and I'm really happy with them except for the cheap looking center caps. There's a few imperfections in the finish but none of them are anywhere that can be seen when the wheel is mounted, but at this prince point perfection isn't really desired or expected. A purist would probably cringe, but this is still a $1200 car at heart. I'm hoping to get them mounted up this weekend.
I also ordered some OEM moisture barriers for the doors (to replace the ones I made out of trash bags that buzz like crazy when listening to music) as well as some foam speaker baffles to keep water off my door speakers, as well as a new flasher relay so I can run LEDs in all my exterior lights.
Part 27
Last edited by MotorMouth93; 08-30-2017 at 07:14 AM.
05-22-2016, 10:40 PM
#112
Thanks.
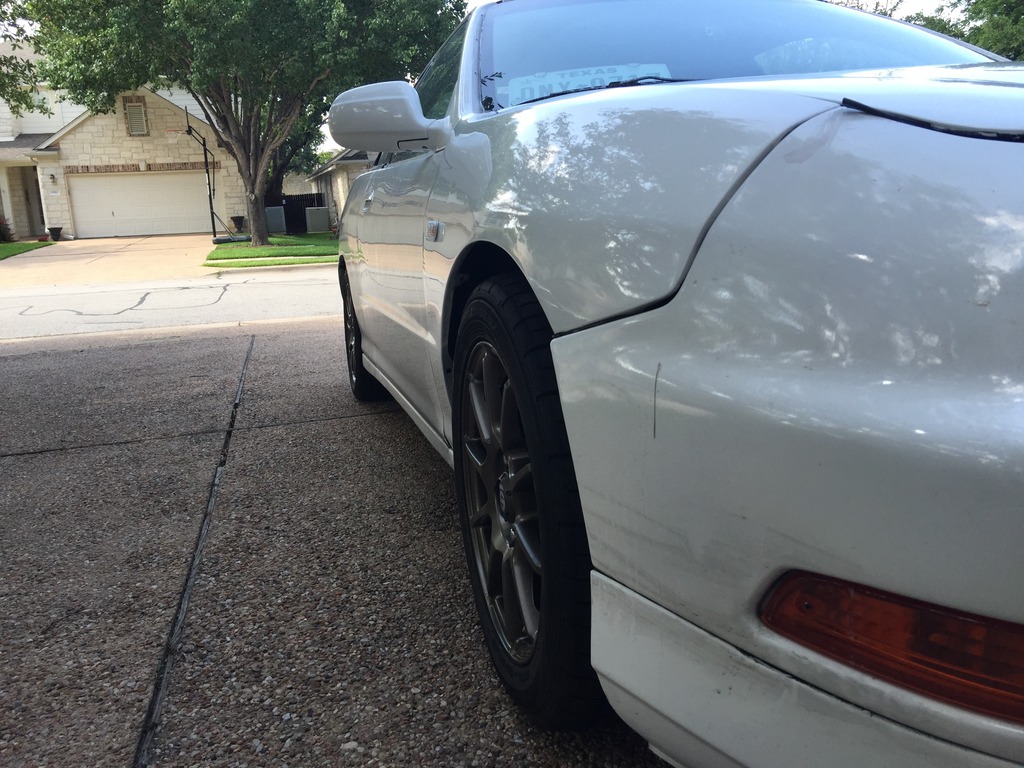
I got them mounted up, I still need an alignment though so I took all the wheels off and had a shop move over the tires and balance them. At some point I need to properly attach the front bumper.

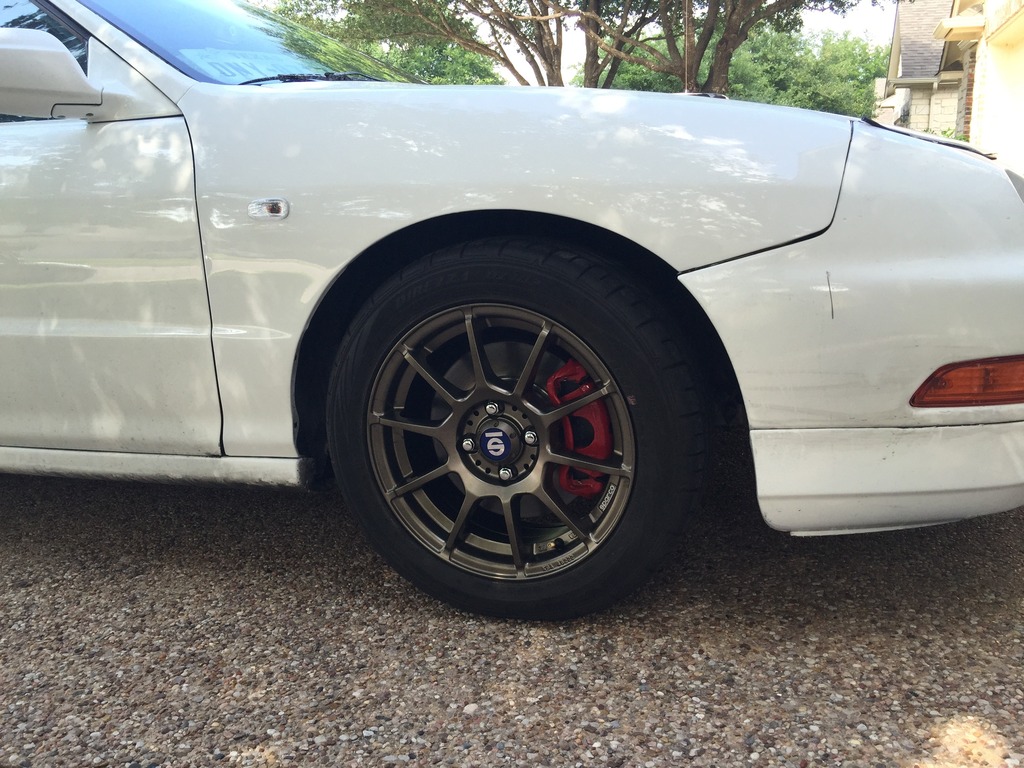
The new wheels stick out a little further than the old ones (and are 6.5" wide instead of 6"), which I think looks better. Subtle difference, but it's a bit more flush now.
I finally got around to instalilng my new handbrake cables as well, which took roughly four hours and I tore up my hands pretty good in the process. I didn't take any pictures because nobody cares about handbrake cables, but it is really nice to not have the car roll down any slight incline regardless of whether the brake is set.
Part 28
I got them mounted up, I still need an alignment though so I took all the wheels off and had a shop move over the tires and balance them. At some point I need to properly attach the front bumper.
The new wheels stick out a little further than the old ones (and are 6.5" wide instead of 6"), which I think looks better. Subtle difference, but it's a bit more flush now.
I finally got around to instalilng my new handbrake cables as well, which took roughly four hours and I tore up my hands pretty good in the process. I didn't take any pictures because nobody cares about handbrake cables, but it is really nice to not have the car roll down any slight incline regardless of whether the brake is set.
Part 28
Last edited by MotorMouth93; 08-30-2017 at 07:15 AM.
05-28-2016, 03:04 AM
#113
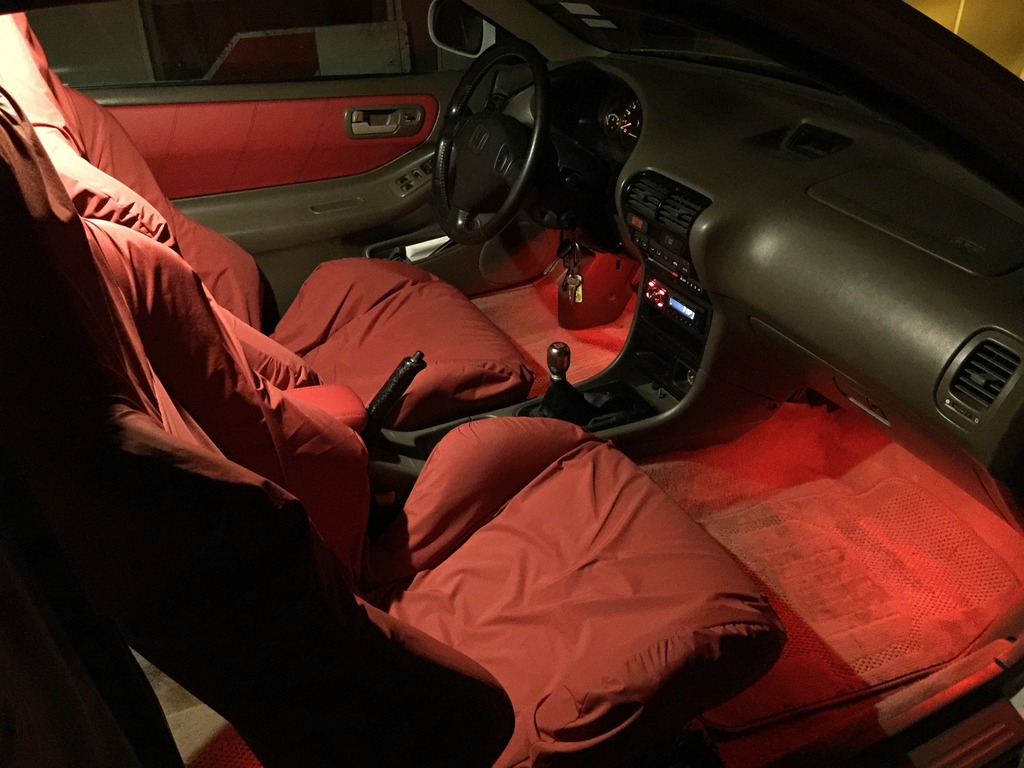
I finally got around to installing the LED strips I've had for a while. Ever since I saw the footwell lighting in a buddy's Mustang a few years ago I've wanted to do it, and I finally did.
I didn't want to have wires strung all under the dash haphazardly so I measured out the lengths of wire I'd need, put them together, and wrapped it all in 1/4" wire loom and electrical tape. The connectors at the ends are Deans Micro Plugs, which are tiny, gold plated, and work great in my experience, and the 3 blade connectors are for the switch to turn them on and off.
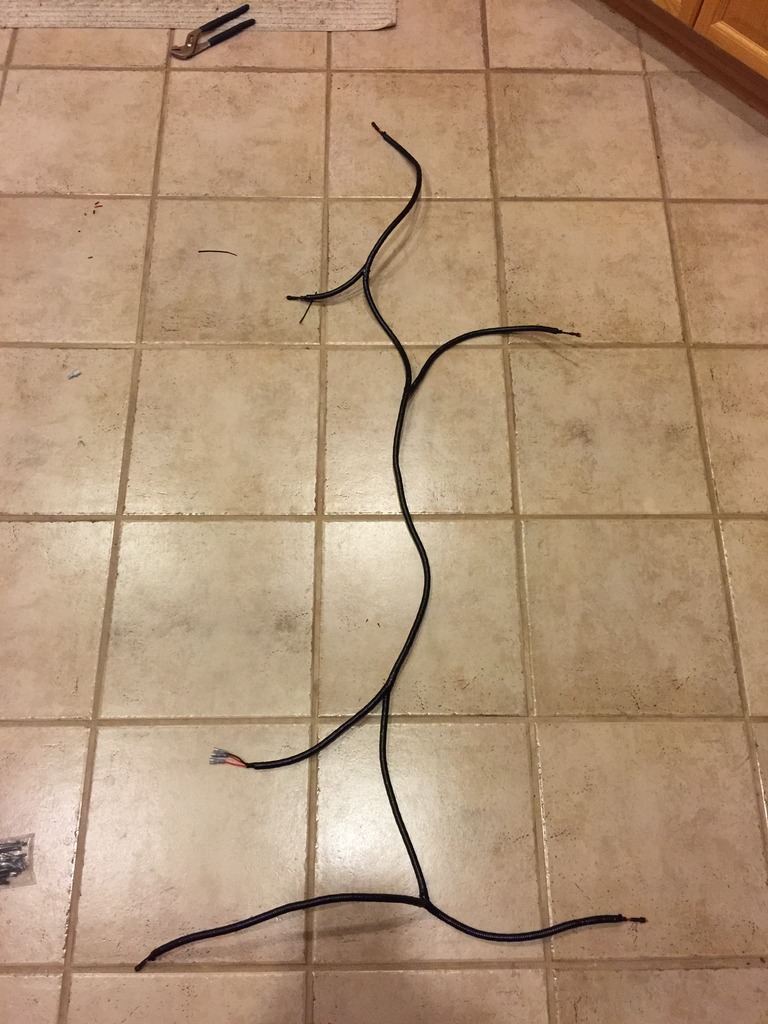
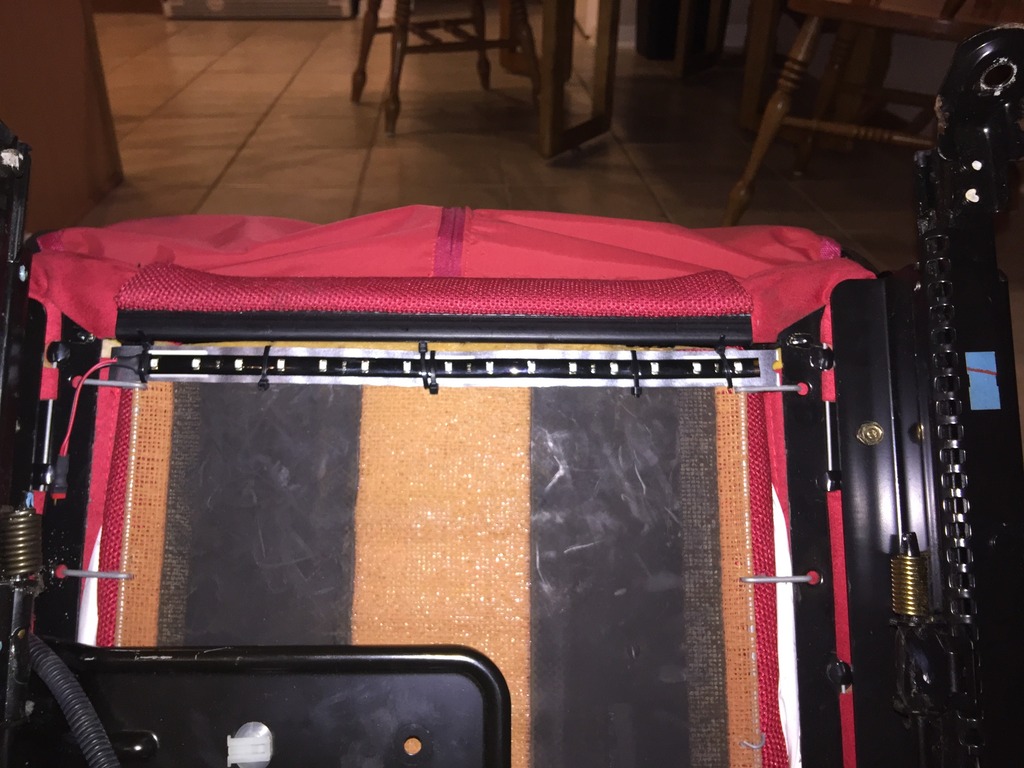
I used the thin steel that plumbers use to secure pipes to hold the LED strips in place, it probably wasn't necessary on the back seats but it's nice to have a stiffer support behind the flimsy LED strip, and it'll be easier to remove later on if I ever have to, just cut the zip ties. I forgot to take pictures of the front but I can if anyone cares.
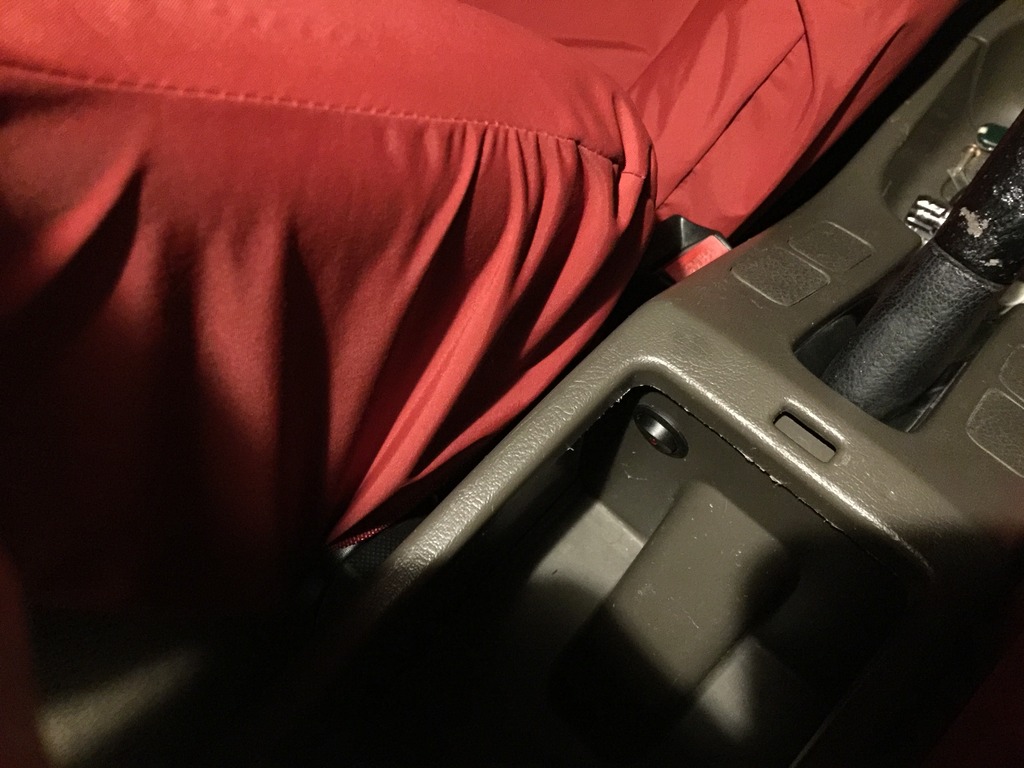
Here's the switch, hidden in the console. These are wired into the same circuit as the cluster and dash lights, so they only turn on with the parking lights and the brightness is controlled by the dimmer ****. The switch lets me disable them completely if I need to for whatever reason.
And here they are.
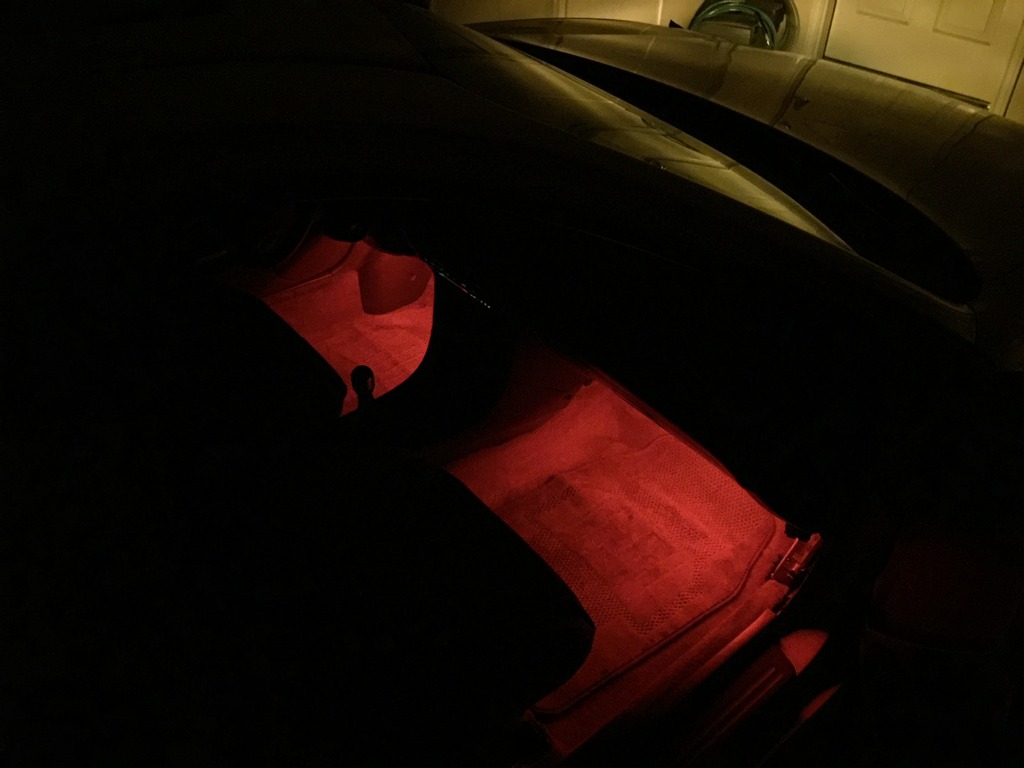
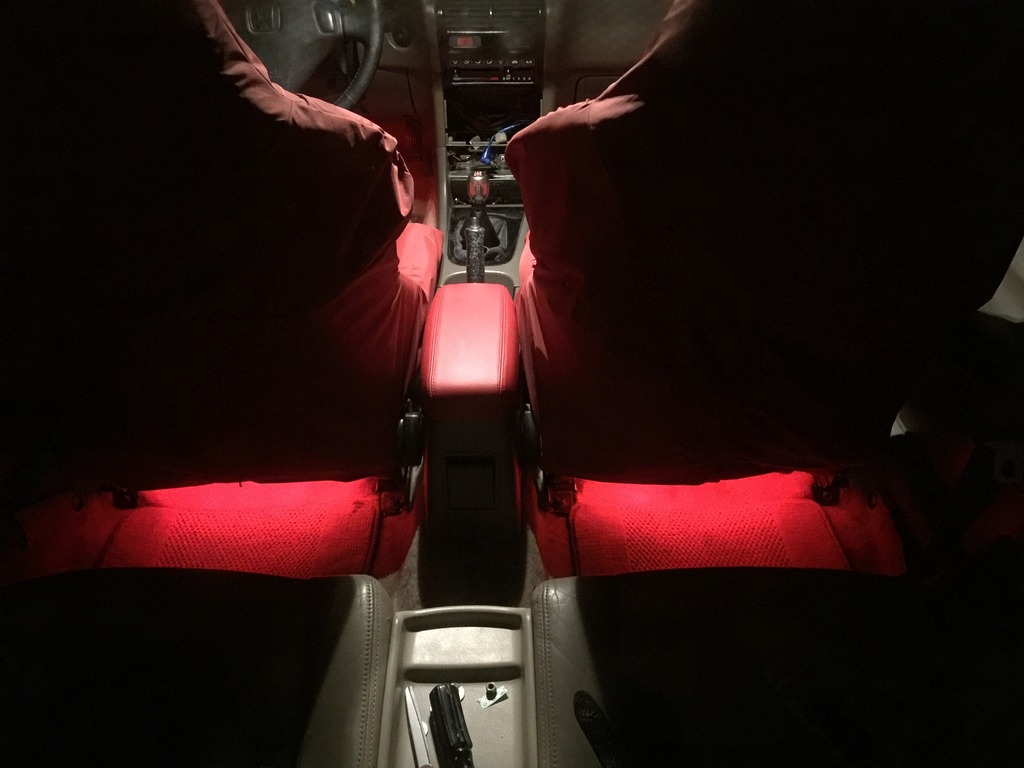
Yeah, it's kinda tacky but I like it, and I love making wire harnesses even more.
Part 29
I didn't want to have wires strung all under the dash haphazardly so I measured out the lengths of wire I'd need, put them together, and wrapped it all in 1/4" wire loom and electrical tape. The connectors at the ends are Deans Micro Plugs, which are tiny, gold plated, and work great in my experience, and the 3 blade connectors are for the switch to turn them on and off.
I used the thin steel that plumbers use to secure pipes to hold the LED strips in place, it probably wasn't necessary on the back seats but it's nice to have a stiffer support behind the flimsy LED strip, and it'll be easier to remove later on if I ever have to, just cut the zip ties. I forgot to take pictures of the front but I can if anyone cares.
Here's the switch, hidden in the console. These are wired into the same circuit as the cluster and dash lights, so they only turn on with the parking lights and the brightness is controlled by the dimmer ****. The switch lets me disable them completely if I need to for whatever reason.
And here they are.
Yeah, it's kinda tacky but I like it, and I love making wire harnesses even more.
Part 29
Last edited by MotorMouth93; 08-30-2017 at 07:16 AM.
05-28-2016, 06:45 PM
#114
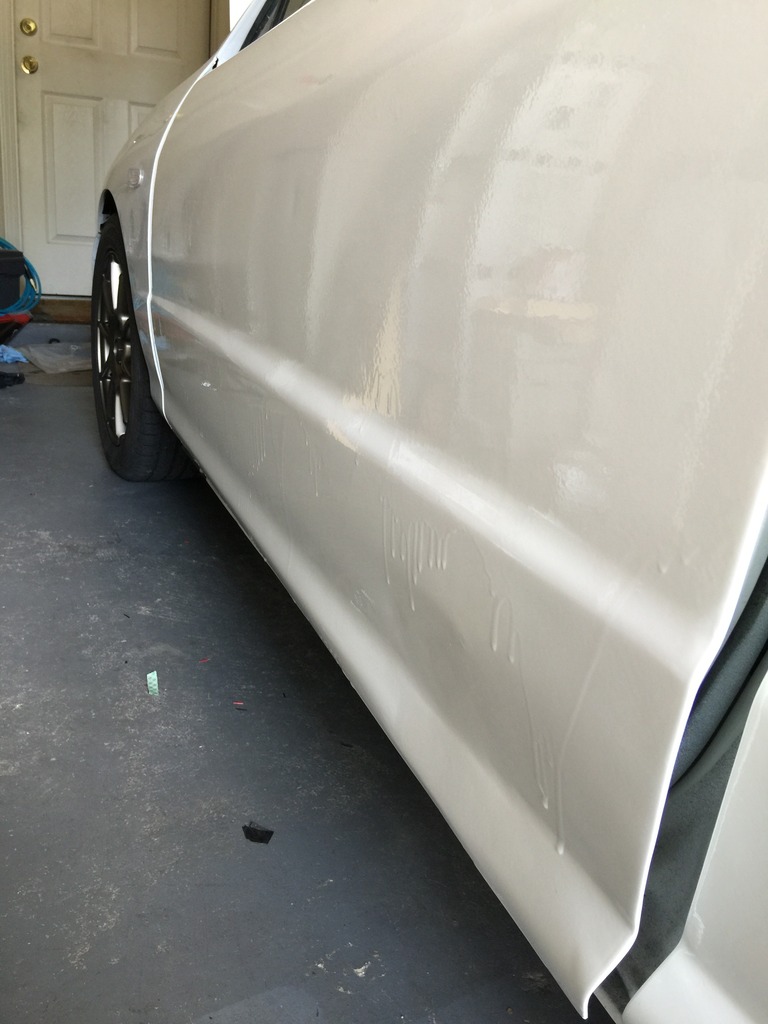
The main item of this weekend is the driver side door. A few months ago I was careless and sanded through the clear coat while wetsanding and I shoved it to the back of my mind. I finally redid it, and the results were disastrous. Apparently I had some serious beginners luck or something the first time but now I've got clear coat runs for days. It can be fixed with enough hours of sanding though, so I guess that's a plus.
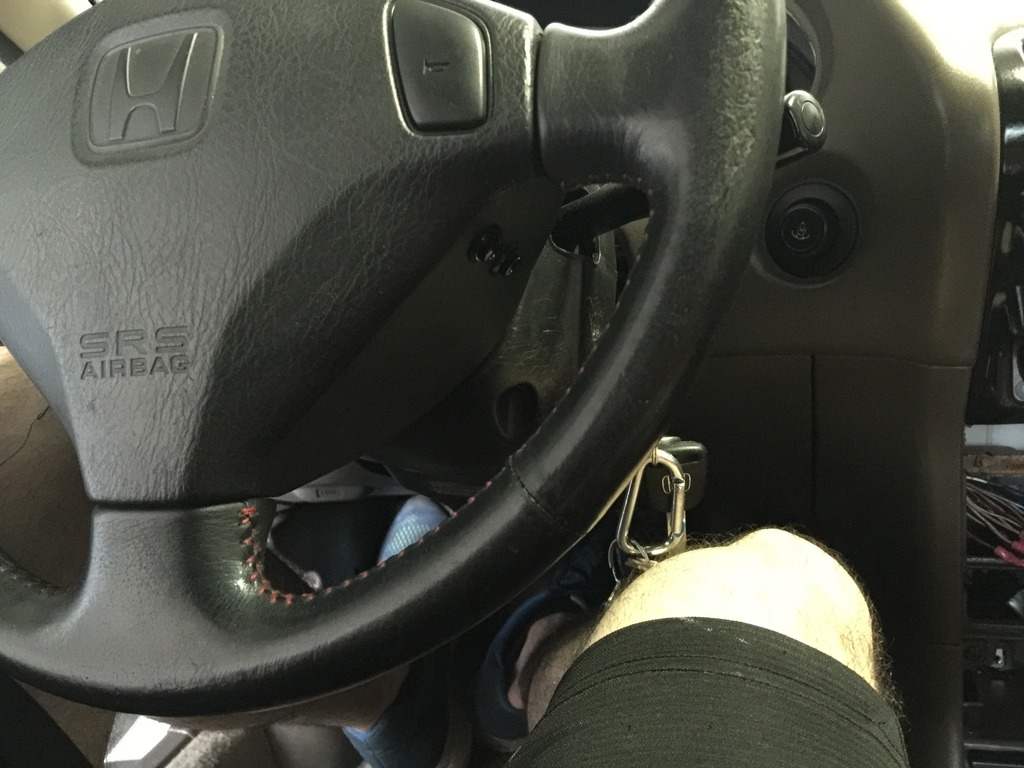
I also installed some cruise control buttons. I haven't had CC since I replaced the steering wheel ~9 months ago. I originally was going to use an RSX cruise control pod but that would look out of place, so I went with a more subtle approach. I drilled 2 holes in the side of the wheel and installed pushbutton switches, one for the resume/accel and one for set/decel, then desoldered the connector from the originally CC pod and soldered it to wires which are attached to the switches.
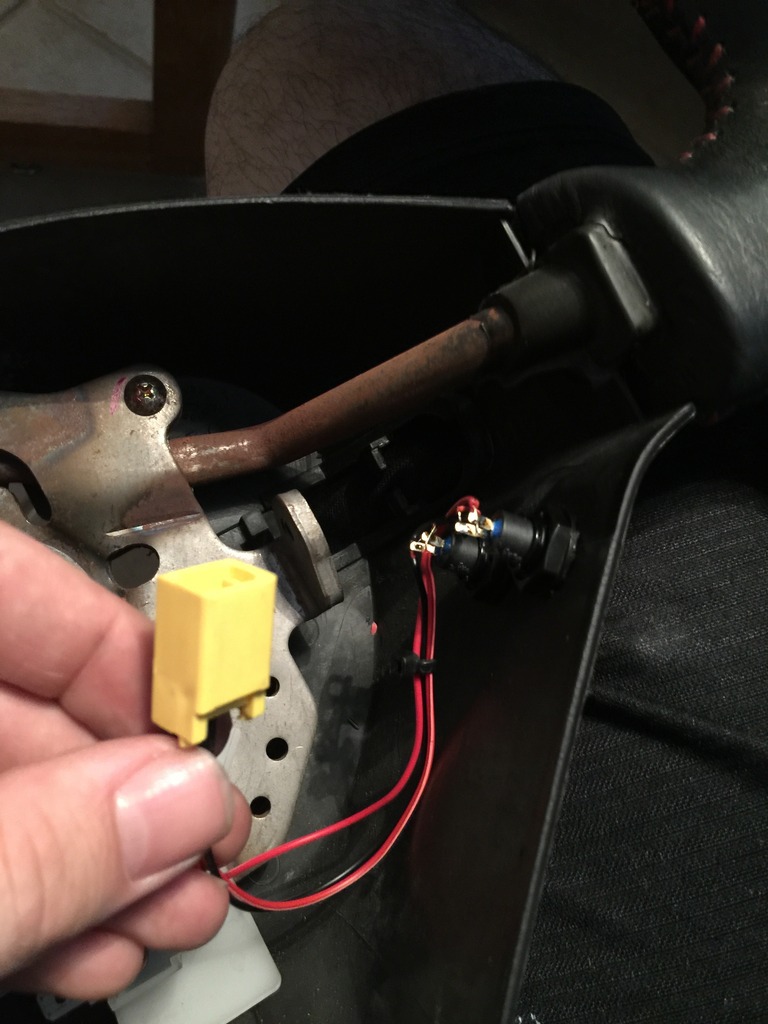
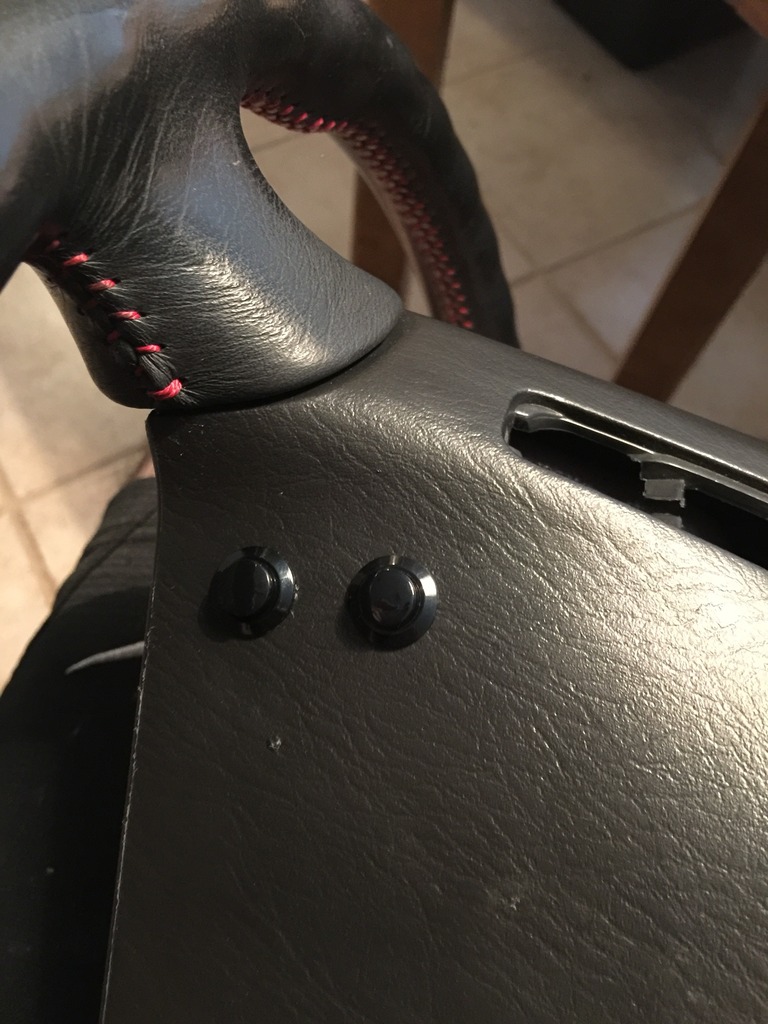
Still accessible but almost invisible.
Part 30
I also installed some cruise control buttons. I haven't had CC since I replaced the steering wheel ~9 months ago. I originally was going to use an RSX cruise control pod but that would look out of place, so I went with a more subtle approach. I drilled 2 holes in the side of the wheel and installed pushbutton switches, one for the resume/accel and one for set/decel, then desoldered the connector from the originally CC pod and soldered it to wires which are attached to the switches.
Still accessible but almost invisible.
Part 30
Last edited by MotorMouth93; 08-30-2017 at 07:18 AM.
06-06-2016, 07:54 AM
#115
I had a fairly productive weekend over the past few days. On Saturday I got the suspension aligned properly for the first time, it's really amazing to not have the car pulling to the right all the time now lol. Previously, the rear toe was off slightly because the guys doing the alignment couldn't figure out how to work the adjustable toe arms and didn't bother to ask.
Then I had the AC recharged as well, AC seems to work better than before but still not great, but it works well enough to keep the car comfortable so that's not a can of worms I want to open right now.
Then I installed my new OEM window sill trim pieces and took it through a touchless car wash. When I finish the polishing process I'll wax it and use a proper car wash system, but for now it'll keep me from going crazy.
I also had one of my rear caliper stick, which resulted in some nice colors and funny smells. Turns out the stud on the brake pad wasn't in the groove on the caliper piston, which for some reason was causing some intermittent sticking.
Here's a few other pictures.
I also ordered some used OEM splash guards and am looking for a front lip now, not sure if I'll go with an ITR lip or some Ebay thing though.
Last edited by MotorMouth93; 08-30-2017 at 07:20 AM.
06-22-2016, 11:27 PM
#116
Sneak peak of whats to come, I've spent the past few days designing this custom ECU chip.
- EEPROM emulator powered by a 168mhz ARM processor.
- Engine maps are stored on a micro SD card and then copied to RAM at startup so no burning EEPROMs, binaries can be loaded via the micro USB jack or by removing the SD card and sticking it in a computer.
- Real time map modification over USB
- Datalogger output over USB
- And whatever other **** I get around to programming in.
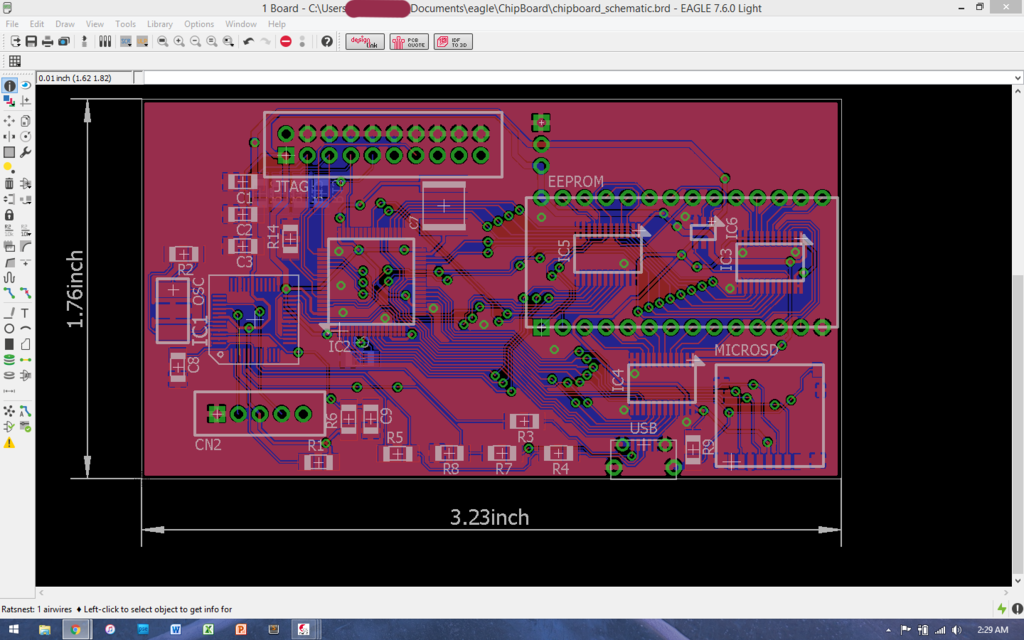
* All of this depends on my actually finishing it, which may or may not happen. Some of you might remember how my last project like this ended up.
- EEPROM emulator powered by a 168mhz ARM processor.
- Engine maps are stored on a micro SD card and then copied to RAM at startup so no burning EEPROMs, binaries can be loaded via the micro USB jack or by removing the SD card and sticking it in a computer.
- Real time map modification over USB
- Datalogger output over USB
- And whatever other **** I get around to programming in.
* All of this depends on my actually finishing it, which may or may not happen. Some of you might remember how my last project like this ended up.
Last edited by MotorMouth93; 12-14-2017 at 08:48 AM.
06-23-2016, 01:07 AM
#117
Shit Posts: 15
The interior lights look great.
How did you wire them to the cluster?mwould be sweet to be able to dim mine.
What does your wiring look like on a schematic?
Ground from lights goes to switch, ground from switch goes to body ground.
And power from cluster wire goes straight to lights?
Btw, GL on the runs. So many of them. Looks like it will be faster to sand flat and re do it again no?
 06-23-2016, 08:13 AM
#119
Sneak peak of whats to come, I've spent the past few days designing this custom ECU chip.
- EEPROM emulator powered by a 168mhz ARM processor.
- Engine maps are stored on a micro SD card and then copied to RAM at startup so no burning EEPROMs, binaries can be loaded via the micro USB jack or by removing the SD card and sticking it in a computer.
- Real time map modification over USB
- Datalogger output over USB
- And whatever other **** I get around to programming in.
* All of this depends on my actually finishing it, which may or may not happen. Some of you might remember how my last project like this ended up.
06-23-2016, 09:01 PM
#120
The interior lights look great.
How did you wire them to the cluster?mwould be sweet to be able to dim mine.
What does your wiring look like on a schematic?
Ground from lights goes to switch, ground from switch goes to body ground.
And power from cluster wire goes straight to lights?
How did you wire them to the cluster?mwould be sweet to be able to dim mine.
What does your wiring look like on a schematic?
Ground from lights goes to switch, ground from switch goes to body ground.
And power from cluster wire goes straight to lights?

The dash lights are controlled by the red (ground) and the red/black (+12V) wires in the 16 pin connector behind the cluster. The red wire swings between 0V and 7V or so depending on the dimmer setting, so when it's at 0V the dash lights get 12V total, and when it's at 7V the dash lights see 5V total.
The switch on the diagram is the thing on the far right, and mine has an LED in it that turns on when the lights are on so that's why it has an LED next to it, but for a regular dimmer or switch that wouldn't be necessary. If you have any questions about it feel free to ask.
If I could do it again, I would have wired the floor lights into the red/black and chassis ground instead of the dimmer though, that way they could be dimmed separately from the dash lights using a dimmer switch in place of the switch, but it works okay as-is and feels a little more integrated into the car because of it.
The parts to build it are relatively cheap so if I can get it working 100% and people are willing to pay $100-$150 for it then it would probably be worth my time to look into it.
Last edited by MotorMouth93; 12-14-2017 at 08:50 AM.
07-11-2016, 12:40 PM
#121
I've been all over the place when it comes to this car lately.
For the past month or so I've had the transmission out of it trying to find a whining noise, which turned out to be bad differential bearings. I think they were damaged when I removed them from the open diff.
Also just in, the OBX LSD is a giant turd like most of you already knew. I noticed a large amount of build up on the transmission magnet and I'd only been driving the car for 1000 miles or so. Upon disassembling the differential, I found that one of the small gears was pretty much shredded while the other 9 were in almost perfect shape, it's almost like they forgot to heat treat it. Anyways, I'm going back to an open diff for a while.
Last weekend I traded the old B18B1, old wheels, and the exhaust manifold for a B18C1 head and intake manifold and then picked up a GSR short block for $160. This may or may not be the start of a rather involved turbo B18C1 engine build, or I might just freshen up the head and slap it on the B20 then call it a day.
I also have some new wheel studs, wheel bearings, and lower ball joints for the suspeneion, as well as splash guards for the front end and mounting hardware all waiting to be installed.
Last edited by MotorMouth93; 12-14-2017 at 08:50 AM.
07-14-2016, 09:39 AM
#122
Anti-GDD White Knight Simp
I vote for the type r head on the b20, best of both worlds. And then if you did turbo, it would be more effective with more displacement
 07-25-2016, 09:42 PM
#125
Agreed. It's also a much more enjoyable road. If you don't have $10k you feel like burning in a bank account trust me, the ls/vtec is the better way to go. Have done boost before on a Honda. It costs much more than you'll ever think it will and is just a hell of a lot of work to make it reliable. Even then it never really is.