
danteisme's 1996 DB8-Found and Rebuild Thread

 08-22-2014, 04:48 AM
#27
that's my goal! it won't be finished until probably this time next year, but that's ok. i can wait.
over the winter will be maintenance and repair work to the motor, and hopefully start working on the body work and get the car ready for new paint next year.
over the winter will be maintenance and repair work to the motor, and hopefully start working on the body work and get the car ready for new paint next year.
08-25-2014, 04:45 AM
#28
moar updates!!
i didnt get as far as i wanted to this weekend, but i want to make sure i do it right rather than rush it.
i drained the fuel tank so i can hopefuly drop it this week or this long weekend. i think my sending unit may be bad though. the gas gauge read a hair below half and i drained 3.5-4 gallons top out of the tank...i feel like there definitely should have been more in there than that.
i prepped the motor to sit for a while not running, removed the battery and hooked it up to a trickle charger.
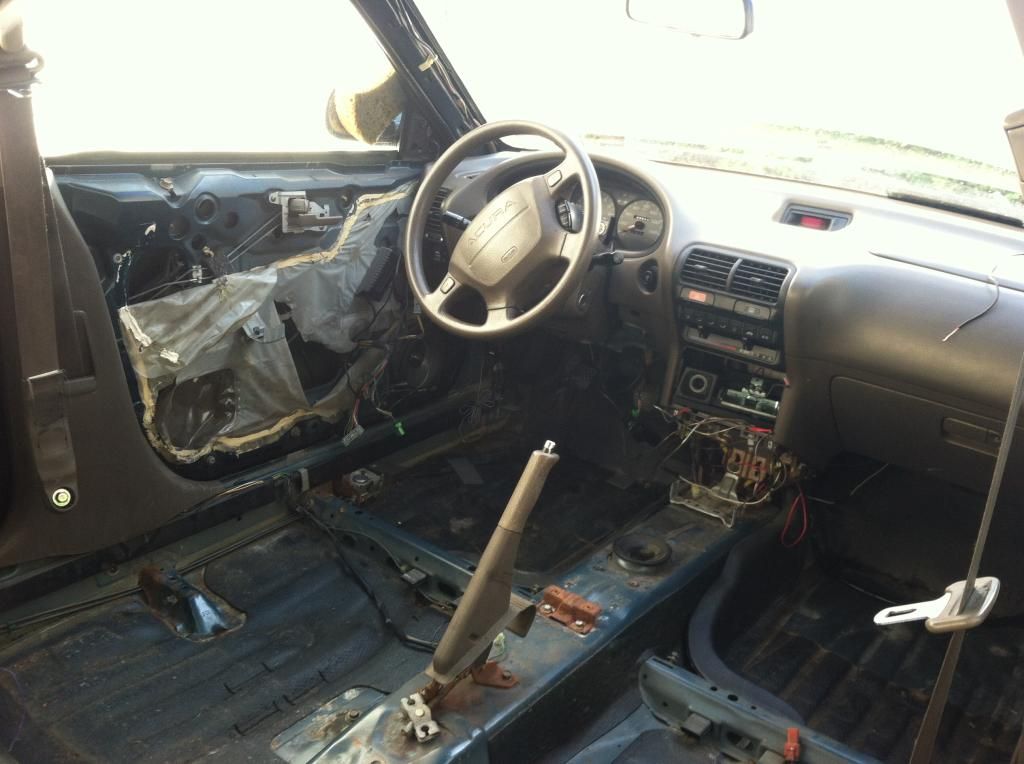
removed the rest of the interior, cleaned up some wiring i ran into...and i cant complain about it. it is the wiring i did like 10 years ago before i knew anything about anything about cars...so thats my own fault lol. i'll be starting that from scratch.
came across some rust in the car floor, mainly where feet are sitting and under the dead pedal. only 1 spot looks real bad, the rest is surface rust. BUT, i think i'm going to remove the sound deadening to make sure there is nothing underneath that.
pay no attention to the wiring, its horrible!
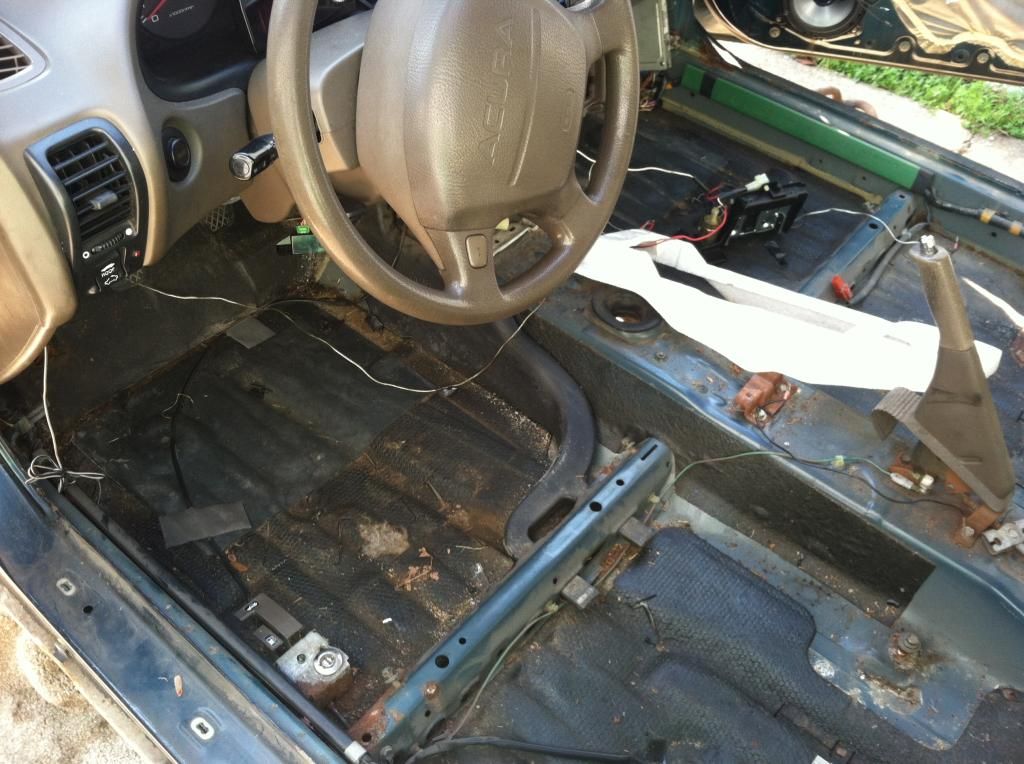
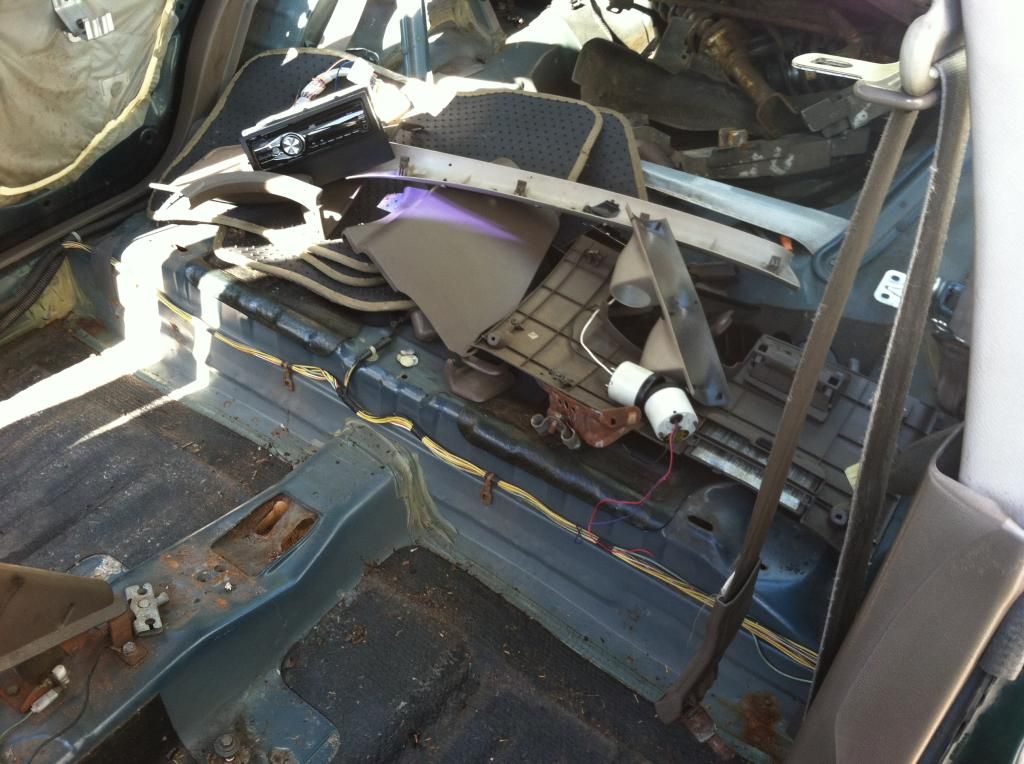
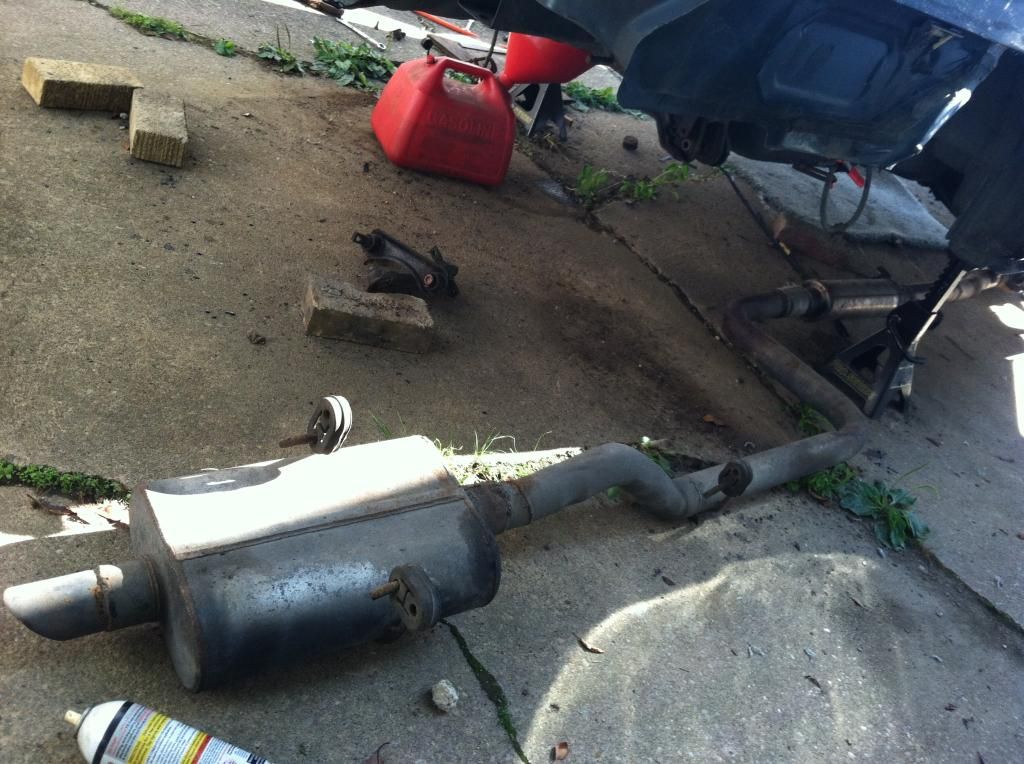
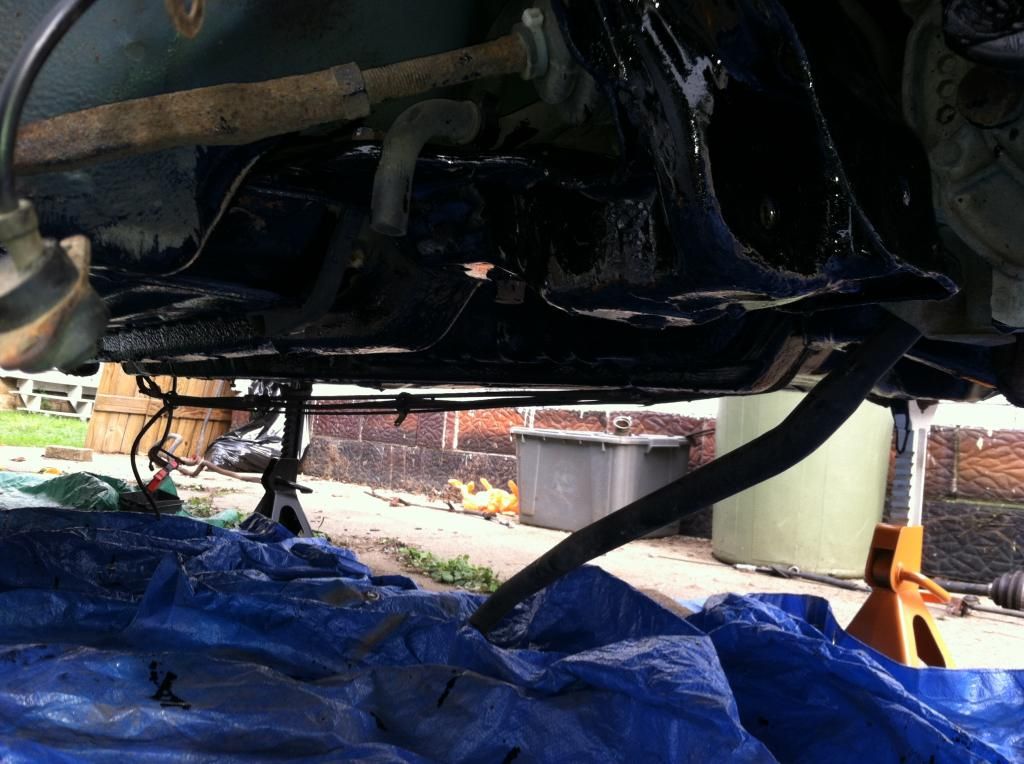
got the exhaust dropped
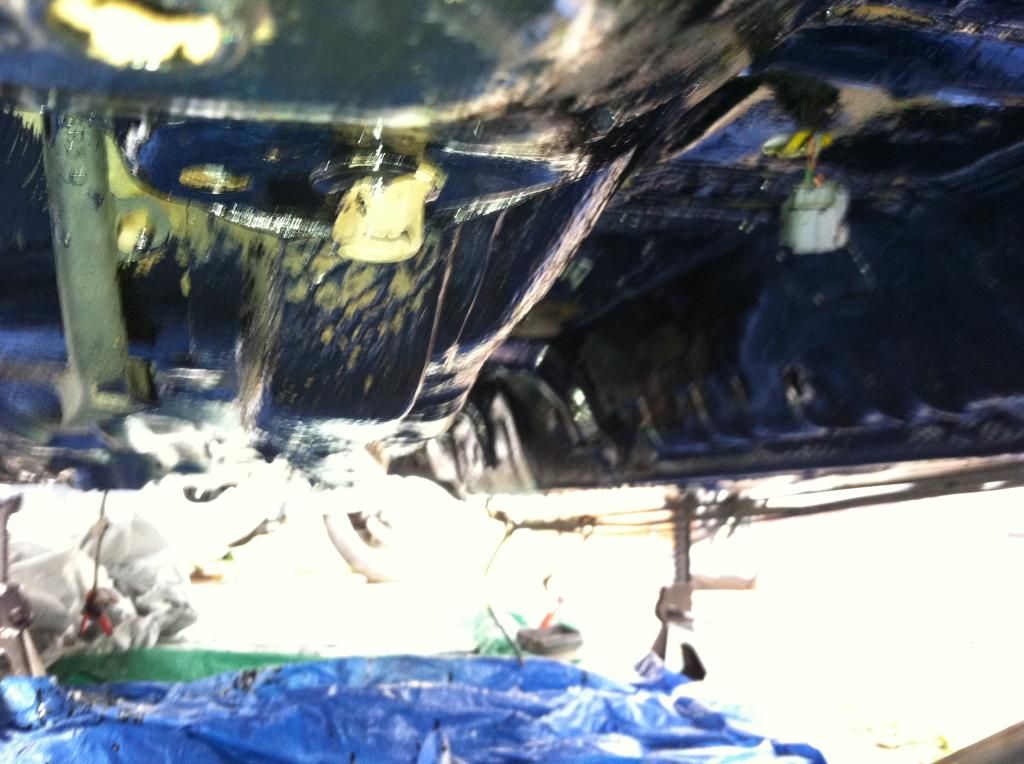
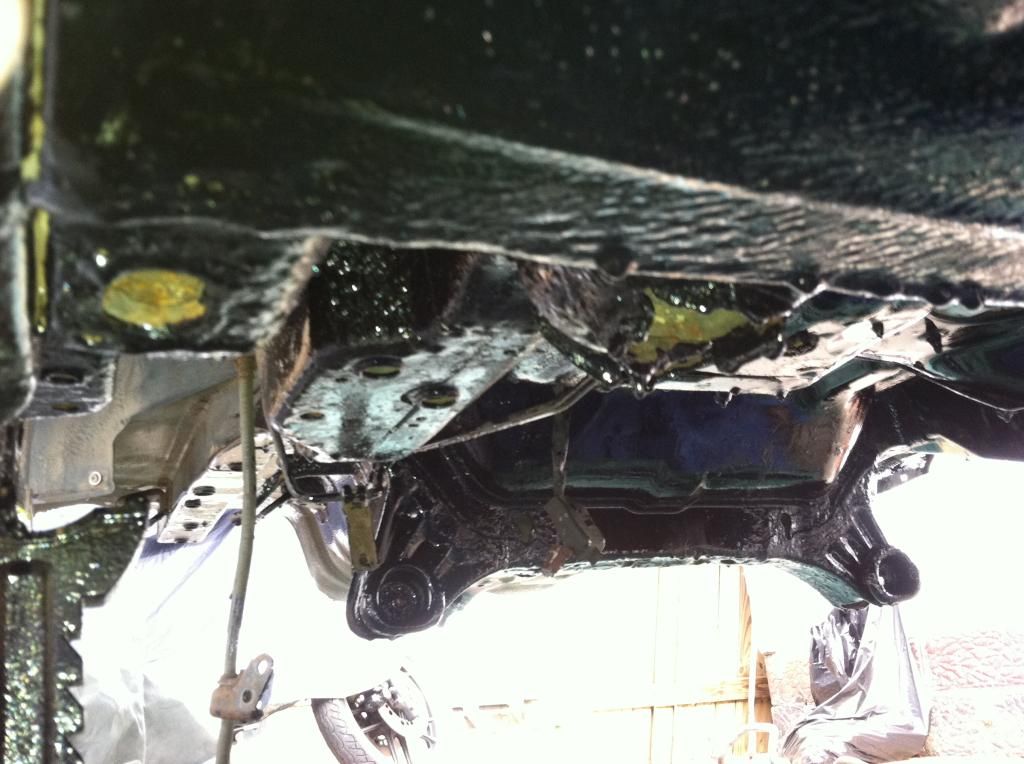
this spot is starting to get iffy. its still solid, so hopefully chassis saving this area will protect it and prevent it from getting worse...i'd like to be able to run my ebrake cables after this project.
this spot looks worse than what it is, its just surface. i was able to scrape it off.
shift linkage is toast...no way around that.
so next is to drop the tank...where the filler neck connects to the tank...it looks like it has become one piece of metal. how do i disconnect the filler neck from the body of the car so i can drop the tank/neck all as one piece?
i plan on disconnecting everything inside the car, putting a jack under the tank, removing the tank straps (i hope they cooperate...) and then slowly lower it and disconnect whatever else as i lower it down. sound like a good plan?
as for the sound deadening, i'm on the fence about removing it. i mean, i know i should to make sure i have solid material under those things...but it looks like it will be a huge pita to remove.
after that, some quality time with some roloc discs and then getting that underside prepped for chassis saver.
i didnt get as far as i wanted to this weekend, but i want to make sure i do it right rather than rush it.
i drained the fuel tank so i can hopefuly drop it this week or this long weekend. i think my sending unit may be bad though. the gas gauge read a hair below half and i drained 3.5-4 gallons top out of the tank...i feel like there definitely should have been more in there than that.
i prepped the motor to sit for a while not running, removed the battery and hooked it up to a trickle charger.
removed the rest of the interior, cleaned up some wiring i ran into...and i cant complain about it. it is the wiring i did like 10 years ago before i knew anything about anything about cars...so thats my own fault lol. i'll be starting that from scratch.
came across some rust in the car floor, mainly where feet are sitting and under the dead pedal. only 1 spot looks real bad, the rest is surface rust. BUT, i think i'm going to remove the sound deadening to make sure there is nothing underneath that.
pay no attention to the wiring, its horrible!


got the exhaust dropped


this spot is starting to get iffy. its still solid, so hopefully chassis saving this area will protect it and prevent it from getting worse...i'd like to be able to run my ebrake cables after this project.

this spot looks worse than what it is, its just surface. i was able to scrape it off.

shift linkage is toast...no way around that.

so next is to drop the tank...where the filler neck connects to the tank...it looks like it has become one piece of metal. how do i disconnect the filler neck from the body of the car so i can drop the tank/neck all as one piece?
i plan on disconnecting everything inside the car, putting a jack under the tank, removing the tank straps (i hope they cooperate...) and then slowly lower it and disconnect whatever else as i lower it down. sound like a good plan?
as for the sound deadening, i'm on the fence about removing it. i mean, i know i should to make sure i have solid material under those things...but it looks like it will be a huge pita to remove.
after that, some quality time with some roloc discs and then getting that underside prepped for chassis saver.
08-26-2014, 11:39 PM
#29
Honda-Tech Member
Join Date: May 2013
Location: NorCal
Posts: 48
Likes: 0
Received 0 Likes
on
0 Posts
I've been complaining about my Integra's ignition wiring for a while now and your most recent post makes me realize that it's not so bad after all.
08-27-2014, 05:45 AM
#30
well, at least it was easily fixable. the only wire left is the valet switch from my alarm. all of the other random splices will be dealt with much better this time around. they were all leftover from my gauges and neon lights from like 10 years ago lol
08-28-2014, 10:05 AM
#31
this weekend some work should really get done...if i can get my air compressor running again. my dad needed his back, if i really need it i can probably borrow it again. but, its a PITA to go back and forth.
taking tomorrow off so i have a 4 day weekend. friday and saturday will be house stuff(putting up fence posts, putting up walls in the garage, and fixing front porch). sunday and monday will be all integra stuff. i hope the tank will be dropped with out major issues, then i'm ready to prep and coat the underside of the car.
also a little tip that i came across that actually works pretty well that i thought i would pass along. all of the bolts from the suspension are not in terrible shape, but definitely rusty. i put the bolts in a coffee container filled with apple cider vinegar. left them in there for 3 days and you would not believe the junk that dissolved off of them. the bolts don't look perfect, but they look pretty good. i'll probably give them a final cleaning with some brake cleaner and clean up the threads prior to re-installation. i'll see if i can snap a before and after picture with the last batch of suspension bolts.
 .. Patience is key my man.
09-02-2014, 05:03 AM
.. Patience is key my man.
09-02-2014, 05:03 AM
#33
well, the house work took over most of the weekend, and the rain basically took up the rest. i fought with the gas tank for an hour and then we parted ways for the day. i do not want to break any of those bolts off.
i wanted to start removing the sound deadening to make sure there was no rust under neath but i have not been able to go get any dry ice (they are open the 8-430, i work 8-430 sooo....)
so i had some canned air...and while i was waiting for a day i could go get some dry ice, i decided an upside down can of air gets pretty cold...lets try it. and it works removing the sound deadening! you cant remove a whole ton with just one can of air, but if you do not have access to dry ice i imagine one could use a bunch of cans of this stuff.
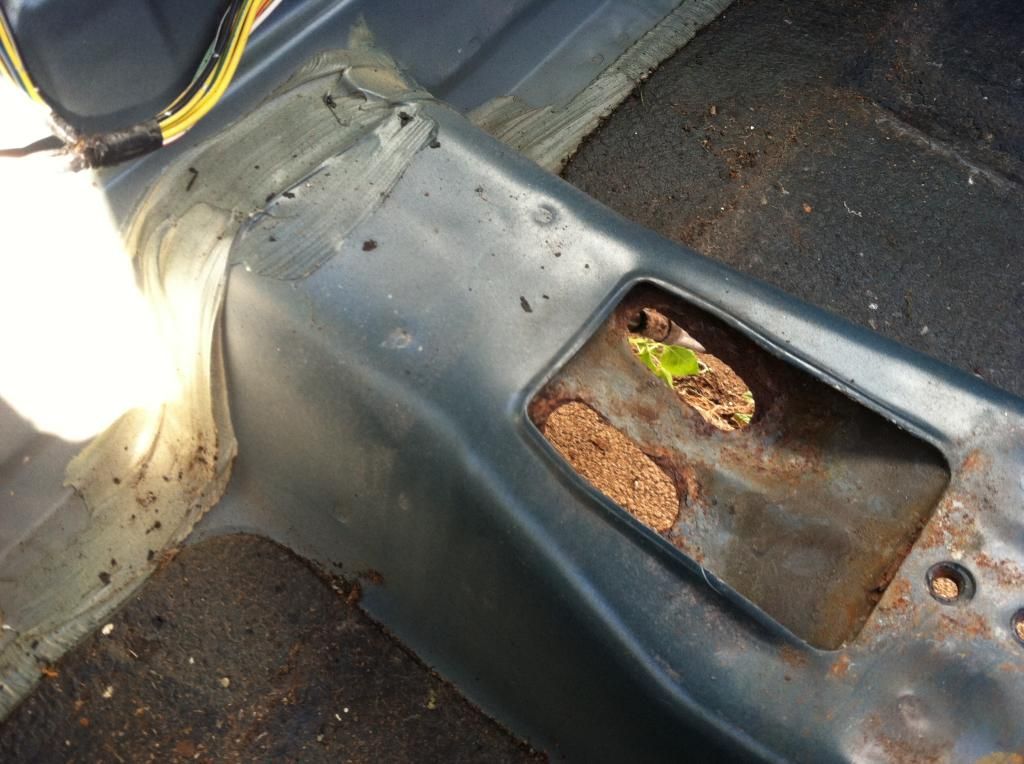
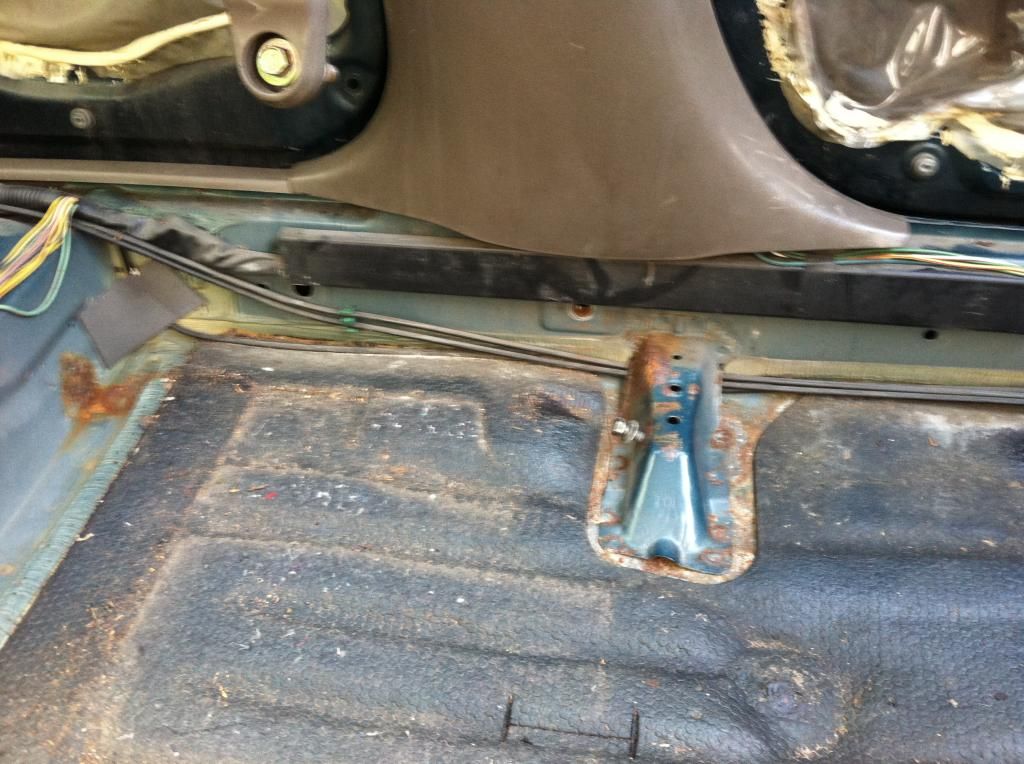
here is the extent of my car updates...disappointing but meh..
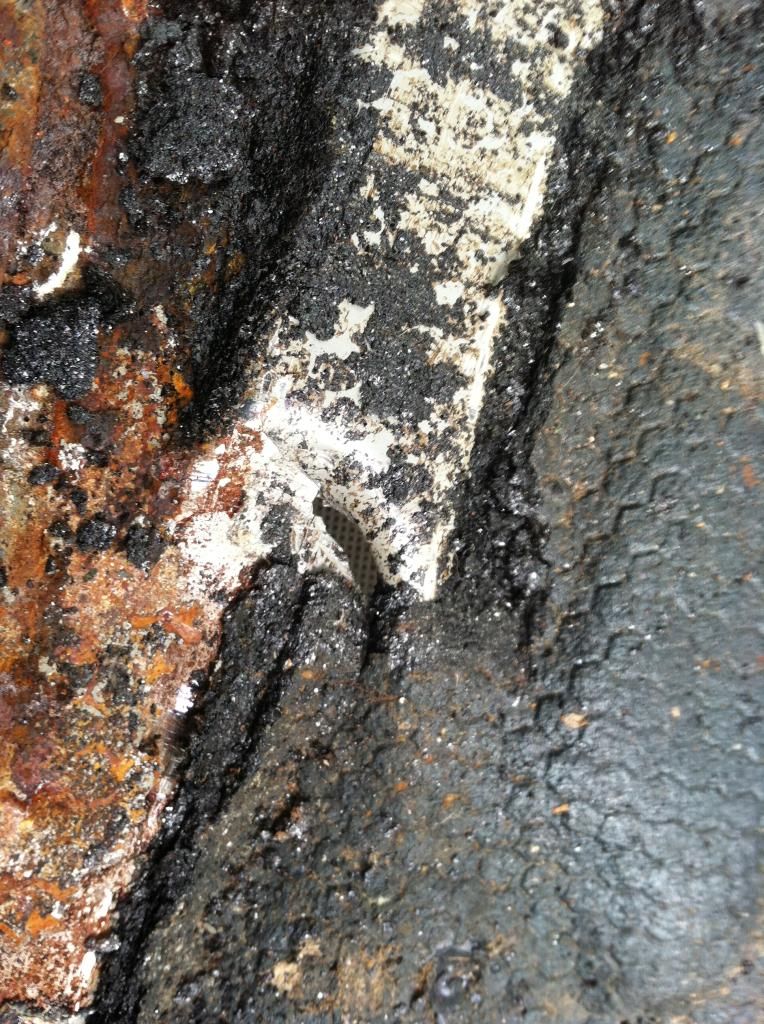
before i started, it had been pouring buckets of rain all day. what would make water leak in this spot? i couldnt find a trail leading to this point anywhere?

here is how much deadening you can remove with one can of air
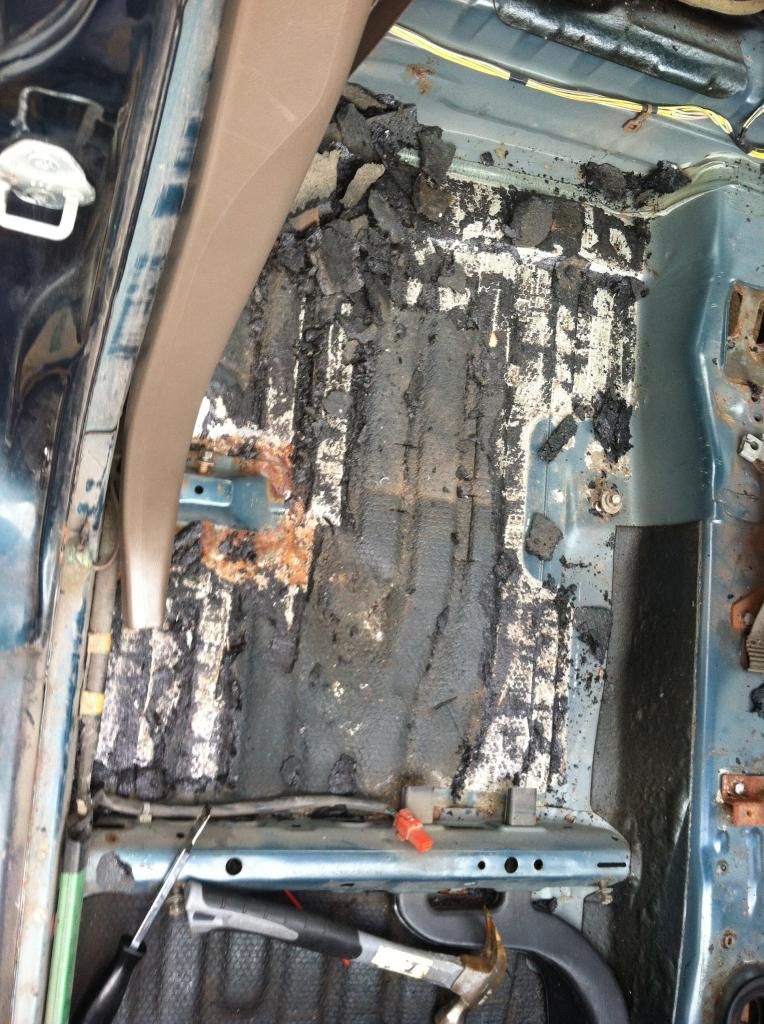
i used a gasket scraper and a hammer to remove what i could. however, you really really want to watch the angle you are holding that scraper. i didnt realize how upright i was holding mine as i was hitting it with the hammer and i made this oops.
sooo once i get this all removed, i'll be busting out the welder so i can weld that hole up.
i have no pictures of the fuel tank removal since it won this past weekend.
i wanted to start removing the sound deadening to make sure there was no rust under neath but i have not been able to go get any dry ice (they are open the 8-430, i work 8-430 sooo....)
so i had some canned air...and while i was waiting for a day i could go get some dry ice, i decided an upside down can of air gets pretty cold...lets try it. and it works removing the sound deadening! you cant remove a whole ton with just one can of air, but if you do not have access to dry ice i imagine one could use a bunch of cans of this stuff.
here is the extent of my car updates...disappointing but meh..
before i started, it had been pouring buckets of rain all day. what would make water leak in this spot? i couldnt find a trail leading to this point anywhere?

here is how much deadening you can remove with one can of air

i used a gasket scraper and a hammer to remove what i could. however, you really really want to watch the angle you are holding that scraper. i didnt realize how upright i was holding mine as i was hitting it with the hammer and i made this oops.

sooo once i get this all removed, i'll be busting out the welder so i can weld that hole up.
i have no pictures of the fuel tank removal since it won this past weekend.
09-02-2014, 06:30 PM
#34
Honda-Tech Member
Join Date: Feb 2004
Location: That's the wrong tone... I'm Skunk2 certified.
Posts: 1,926
Likes: 0
Received 2 Likes
on
2 Posts
i also got around to a compression test. 200-200-200-205.
with a little luck, this weekend i'll have the motor prepped for a long dormant period, i'll have the fuel system dropped along with the exhaust and shift linkage. after that it will be time for some quality time with a bunch of roloc discs under the car getting the under carriage prepped for the rust destroying primer and chassis saver.
what kind of roloc discs do you use specifically? im at this stage on my subaru chassis, and dont know the best way to grind down the rust and what to seal it with. any advice?
09-03-2014, 04:54 AM
#35
well, i'm not sure if i should be calling them roloc discs now that i look at them. that is what they remind me of but i'm not sure if that is what they are. i may need to upgrade these, i won't know for sure until i get started. i picked them up from harbor freight.
09-04-2014, 04:30 AM
#36
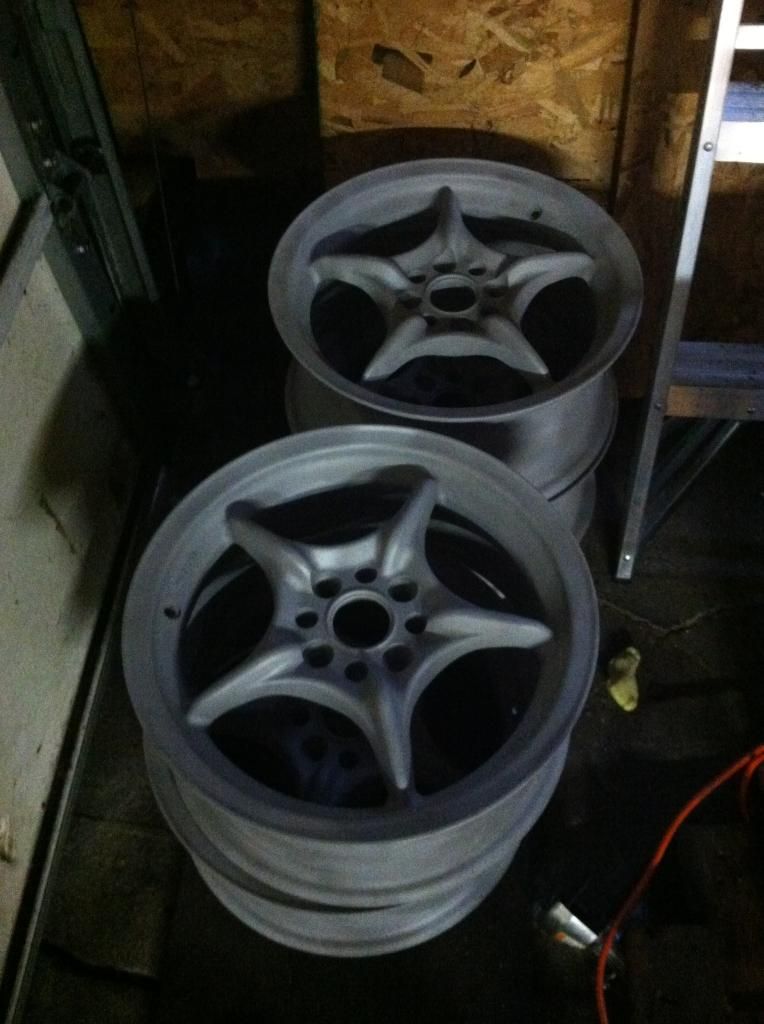
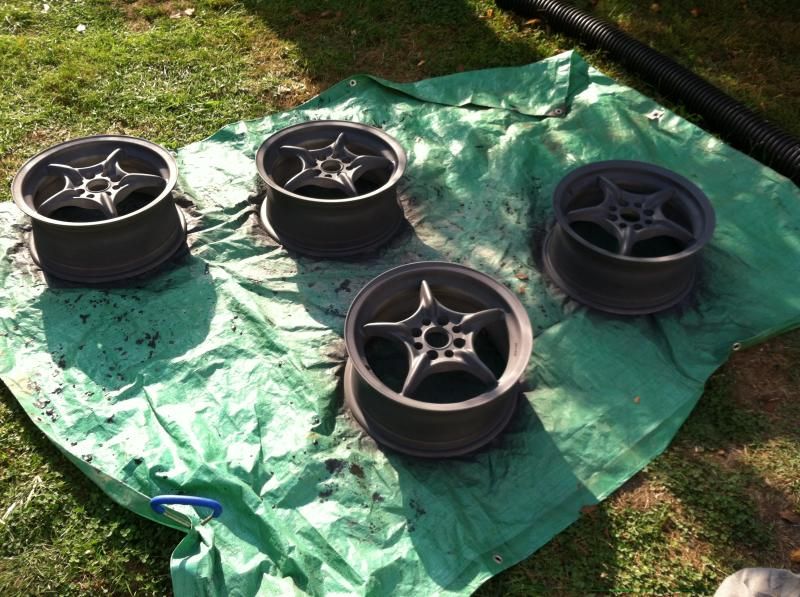
very small update. the tires that came with my car were absolutely trashed. the guy must not have heard of an alignment...the insides had metal hanging out. so i had the tires removed and i had the paint stripped off of them. not sure if i want to go the powder coating route, or if i just want to repaint them. i've heard pros and cons for both.
also, my brother still had his steel wheels from his g2 integra. so i snatched them up and picked up some tires for $5 each just so i can wheel the car around when i reassemble it.
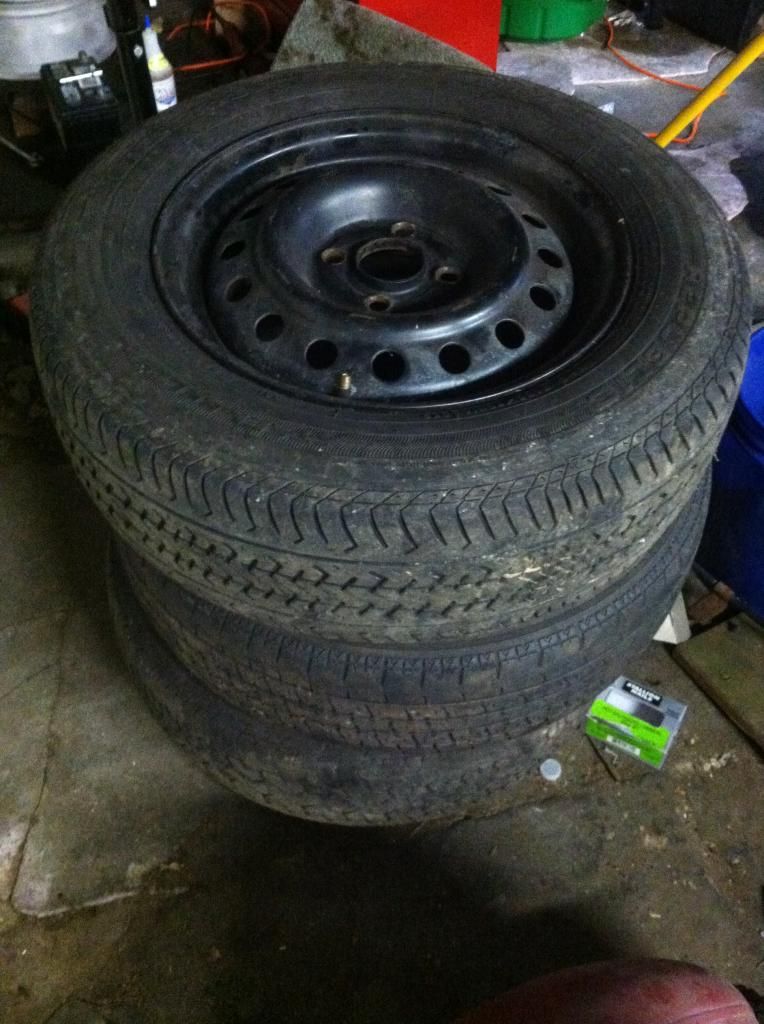
also, my brother still had his steel wheels from his g2 integra. so i snatched them up and picked up some tires for $5 each just so i can wheel the car around when i reassemble it.


 09-08-2014, 06:11 AM
#38
more small updates!
more small updates.
i forgot to show a picture of what the container of my old bolts and apple cider vinegar looks like after 3 days.
yuck...

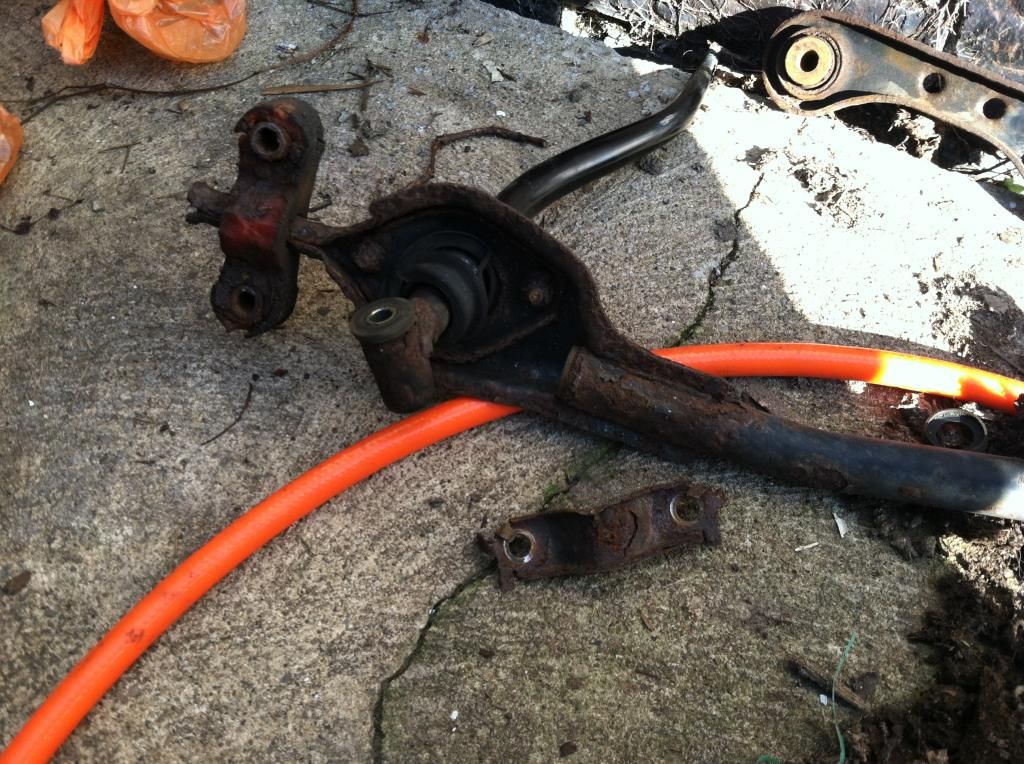
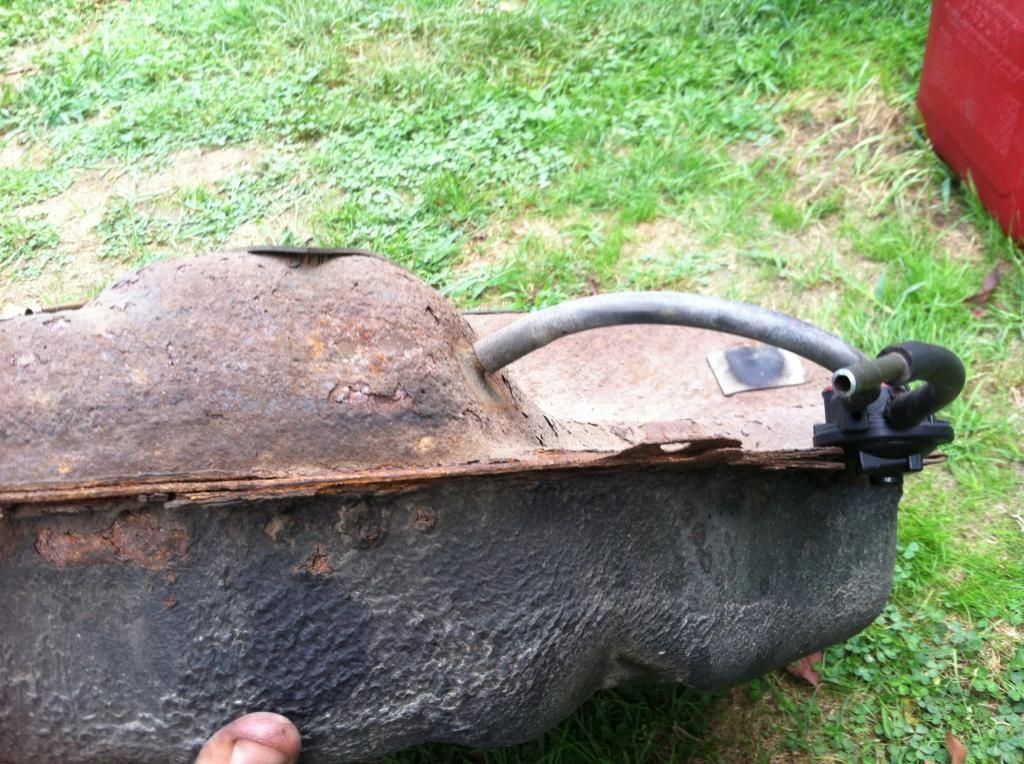
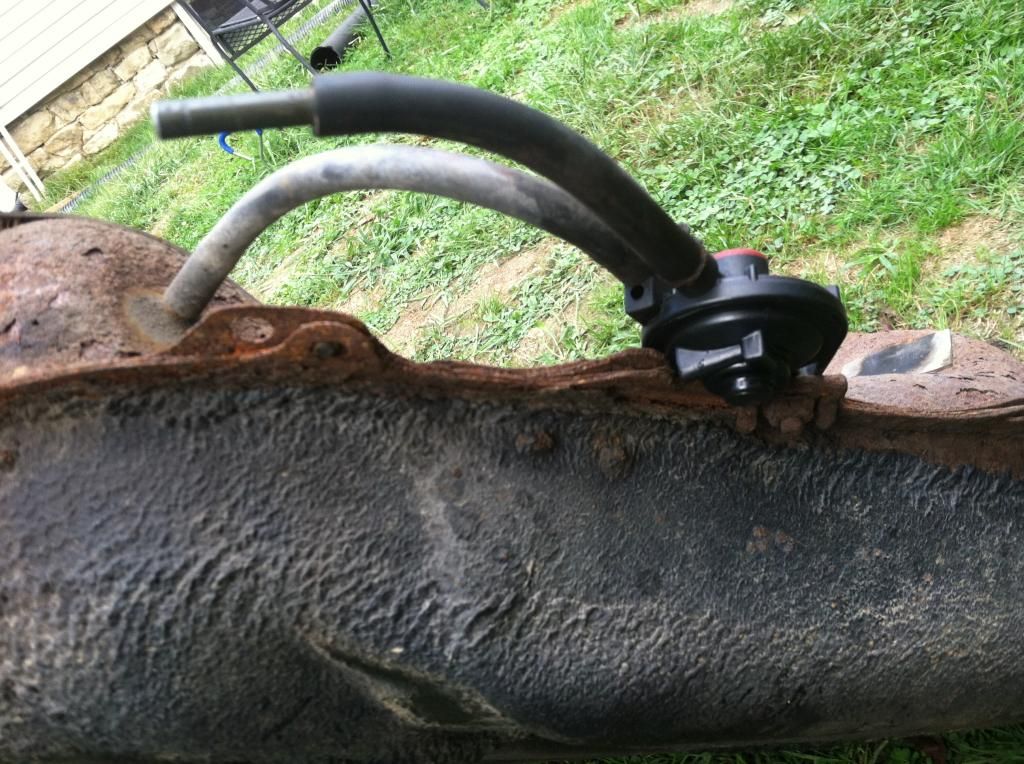
fuel tank has been dropped, but not without casualty...
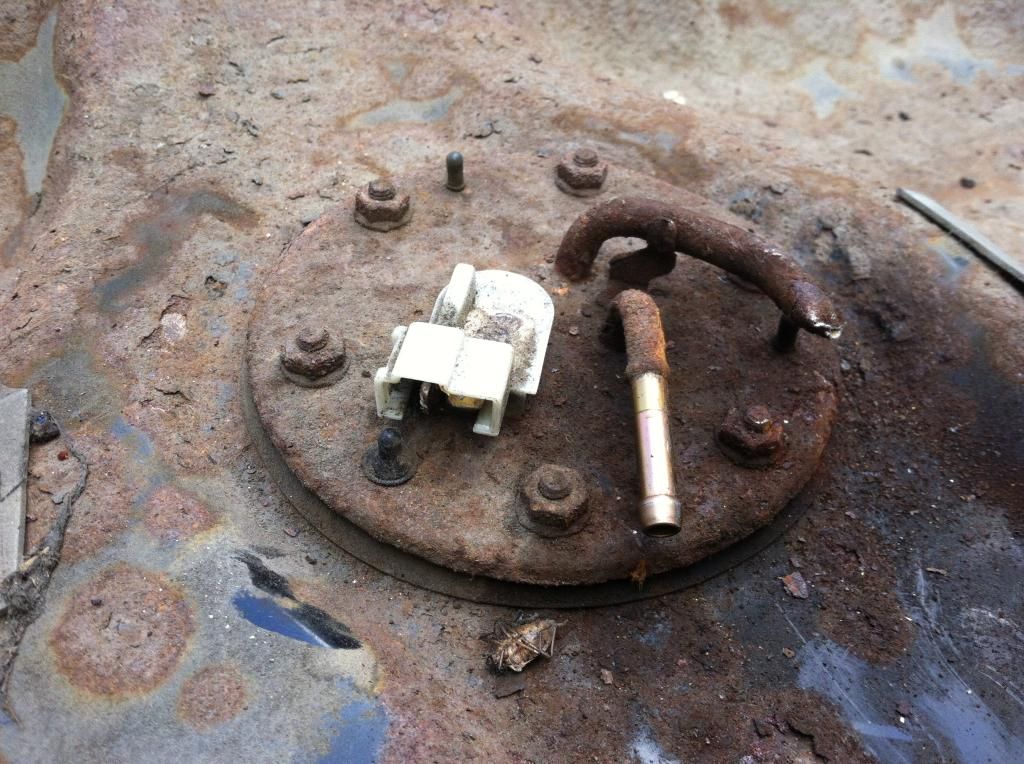
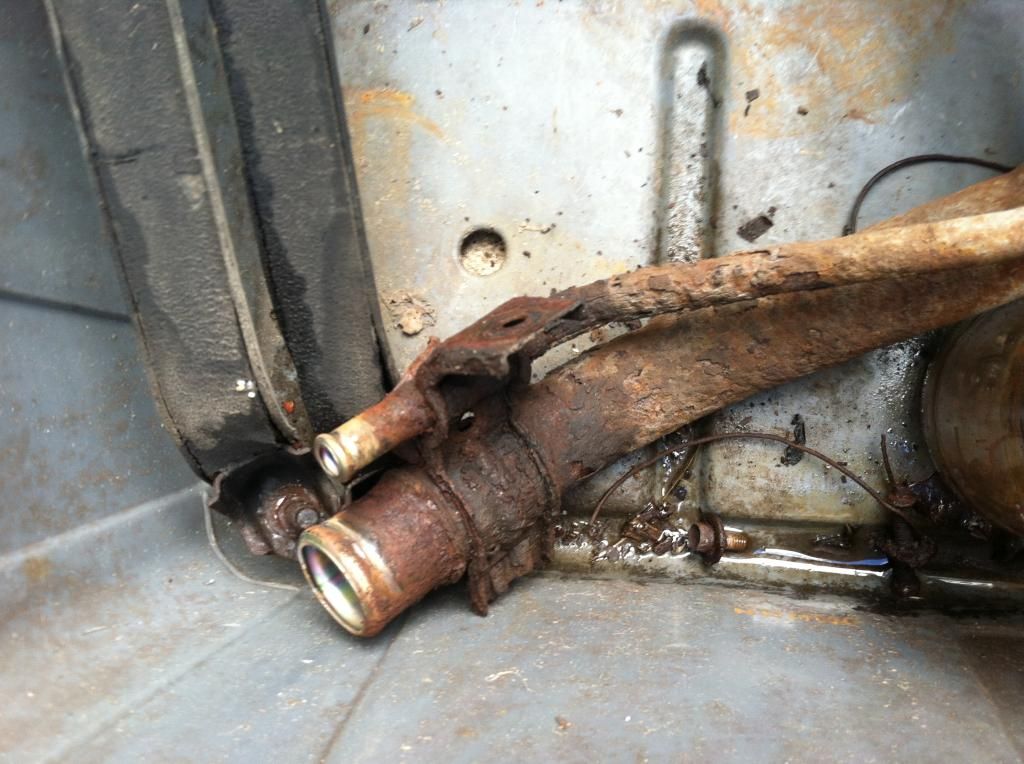
i'm just going to buy another mount to fix this problem, but the other end is all boogered up now and broken too. how does one replace that connection point from the car???
i'm not 100% sure i want to re-use this tank. my original plan was just to coat it and re-use it.. what do you guys think?
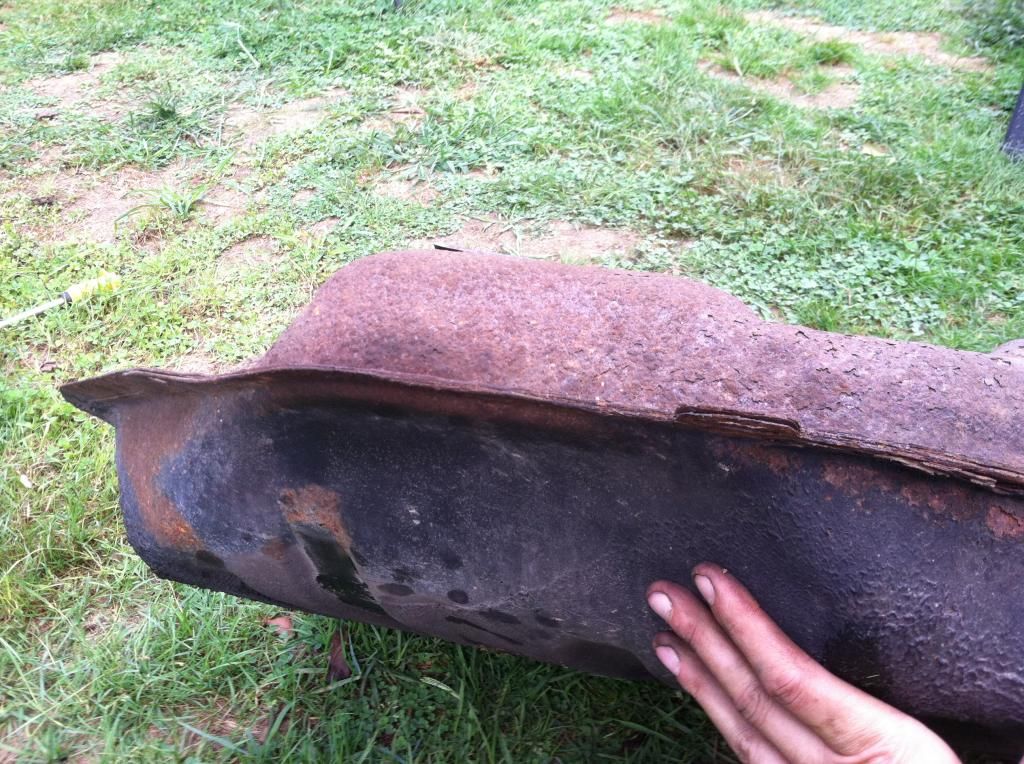
filler neck is completely shot
also after re-reading my application instructions for chassis saver, i think i'm going to significantly reduce my amount of prep time before painting. it says, "Chassis Saver™ has been formulated for application directly to clean sandblasted steel or right over tightly adhering rust and scale. Only if your surface to be painted is completely smooth will you need a primer."
i'm just going to knock off the loose rust and just apply the chassis saver without the tons of scuffing and priming i was planning to do . it's overkill, and the chassis saver probably would not have adhered correctly.
more small updates.
i forgot to show a picture of what the container of my old bolts and apple cider vinegar looks like after 3 days.
yuck...

fuel tank has been dropped, but not without casualty...

i'm just going to buy another mount to fix this problem, but the other end is all boogered up now and broken too. how does one replace that connection point from the car???
i'm not 100% sure i want to re-use this tank. my original plan was just to coat it and re-use it.. what do you guys think?


filler neck is completely shot

also after re-reading my application instructions for chassis saver, i think i'm going to significantly reduce my amount of prep time before painting. it says, "Chassis Saver™ has been formulated for application directly to clean sandblasted steel or right over tightly adhering rust and scale. Only if your surface to be painted is completely smooth will you need a primer."
i'm just going to knock off the loose rust and just apply the chassis saver without the tons of scuffing and priming i was planning to do . it's overkill, and the chassis saver probably would not have adhered correctly.
09-08-2014, 05:07 PM
#39
Honda-Tech Member

Join Date: Apr 2014
Posts: 186
Likes: 0
Received 0 Likes
on
0 Posts
Definitely buy another tank ! And you should sandblast then apply the chassis saver, feels good to know the rust is completely gone
09-09-2014, 05:12 AM
#40
I should probably look into sandblasting the bad areas. i'm worried about blasting being too aggressive on some of the bad spots and may end up blasting a hole straight through the car
09-16-2014, 04:19 AM
#42
well, my home computer has officially crapped out on me...so from now on my updates will be made via my work computer lol. oh well.
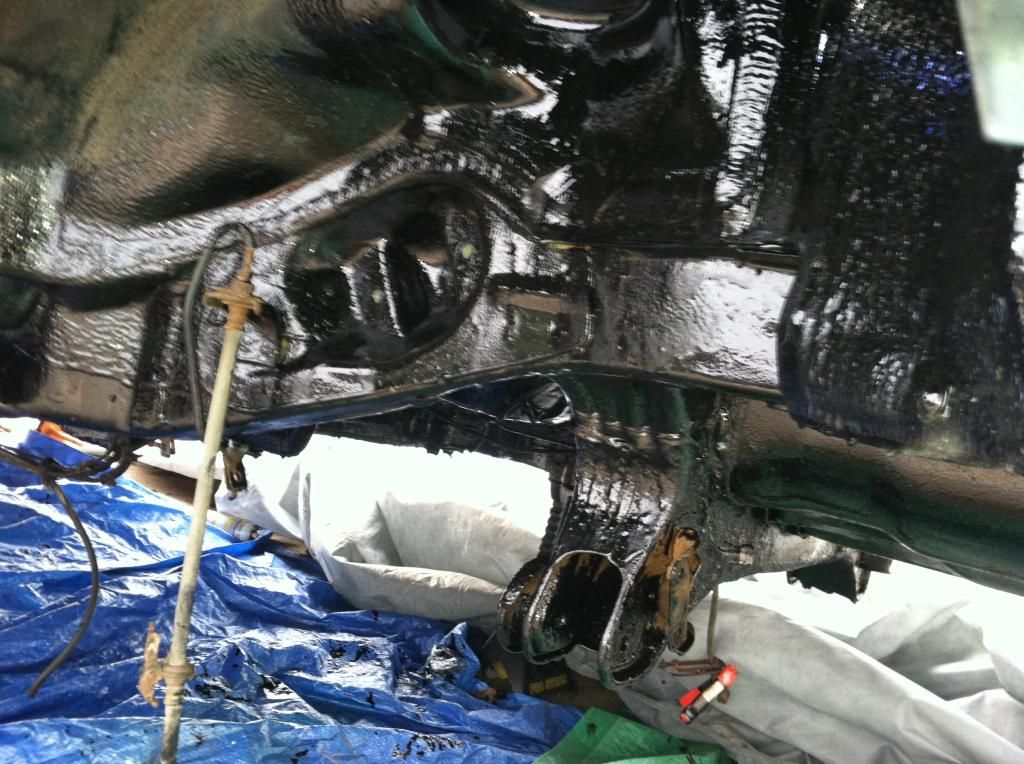
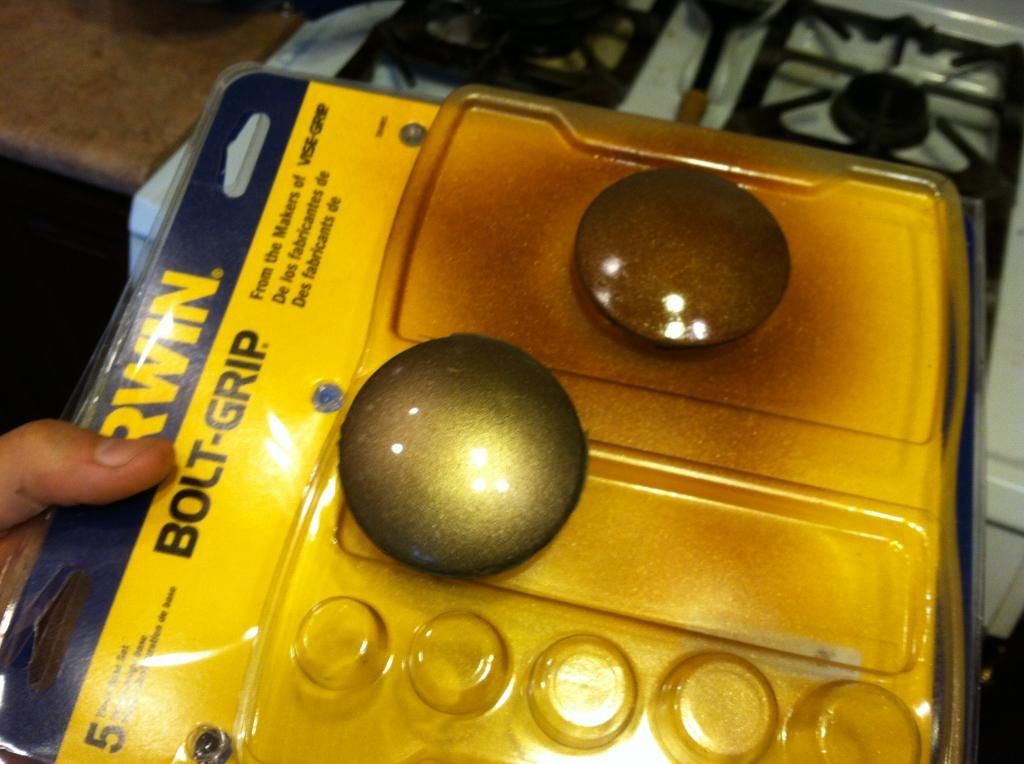
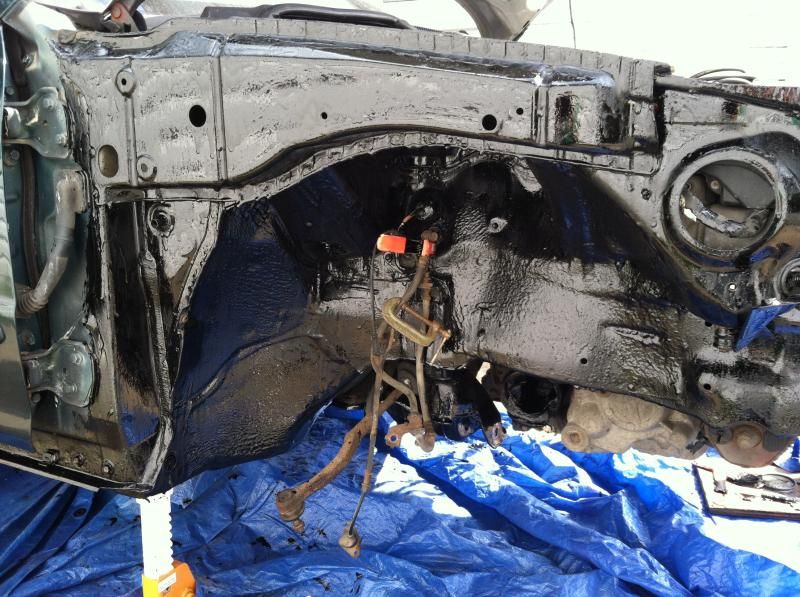
so i have some pics of the first coat of chassis saver. i need to buy more so i can make a second coat, it really did not go as far as i thought it would. i used less when i did my truck frame, but that was a lot less surface area. after taking these pics, i see some spots i missed that i will get on the second coat. also, the swar bar brackets in the rear are still on and i have not painted the chassis saver in those spots yet because i am waiting for my bolt grip socket from irwin to show up. they are all kinds of rounded off.
by the way, i was hesitant buying this bolt grip sockets but man, i am impressed. the work fantastic. so far (providing i have the correct size socket) they have gotten every rounded/rusted/mangled up bolt off the car. so on to some pics...
i'm not sure if i would get gloss black if i had to do it over again. it is really glossy, actually makes it a little difficult to tell where i applied the stuff and where i didnt.

sorry, this one is all kinds of blurry
pay no attention to these brackets, i'll coat that area behind them up when i get more chassis saver and the bolt grip tool. same for the wheel wells, i need to do them yet along with the area behind the front and rear bumpers
and lastly, i'm looking for some opinions. i'm changing up the wheel color possibly. on the left is the color they were last year (a little more lighter gold than i'd like this time) and on the right is a color from rustoleum. i think i like them, but not sure if they would end up being too dark on the car. whats your guy's opinion???
so i have some pics of the first coat of chassis saver. i need to buy more so i can make a second coat, it really did not go as far as i thought it would. i used less when i did my truck frame, but that was a lot less surface area. after taking these pics, i see some spots i missed that i will get on the second coat. also, the swar bar brackets in the rear are still on and i have not painted the chassis saver in those spots yet because i am waiting for my bolt grip socket from irwin to show up. they are all kinds of rounded off.
by the way, i was hesitant buying this bolt grip sockets but man, i am impressed. the work fantastic. so far (providing i have the correct size socket) they have gotten every rounded/rusted/mangled up bolt off the car. so on to some pics...
i'm not sure if i would get gloss black if i had to do it over again. it is really glossy, actually makes it a little difficult to tell where i applied the stuff and where i didnt.

sorry, this one is all kinds of blurry


pay no attention to these brackets, i'll coat that area behind them up when i get more chassis saver and the bolt grip tool. same for the wheel wells, i need to do them yet along with the area behind the front and rear bumpers

and lastly, i'm looking for some opinions. i'm changing up the wheel color possibly. on the left is the color they were last year (a little more lighter gold than i'd like this time) and on the right is a color from rustoleum. i think i like them, but not sure if they would end up being too dark on the car. whats your guy's opinion???
 09-16-2014, 08:08 PM
#43
Honda-Tech Member
Join Date: Apr 2014
Posts: 186
Likes: 0
Received 0 Likes
on
0 Posts
I mean , look into it diffrent kinds of material leave good effects , and if it does make a whole thats good, now you know what needs replacing and what doesn't
09-22-2014, 04:50 AM
#45
some more updated pics for you guys.
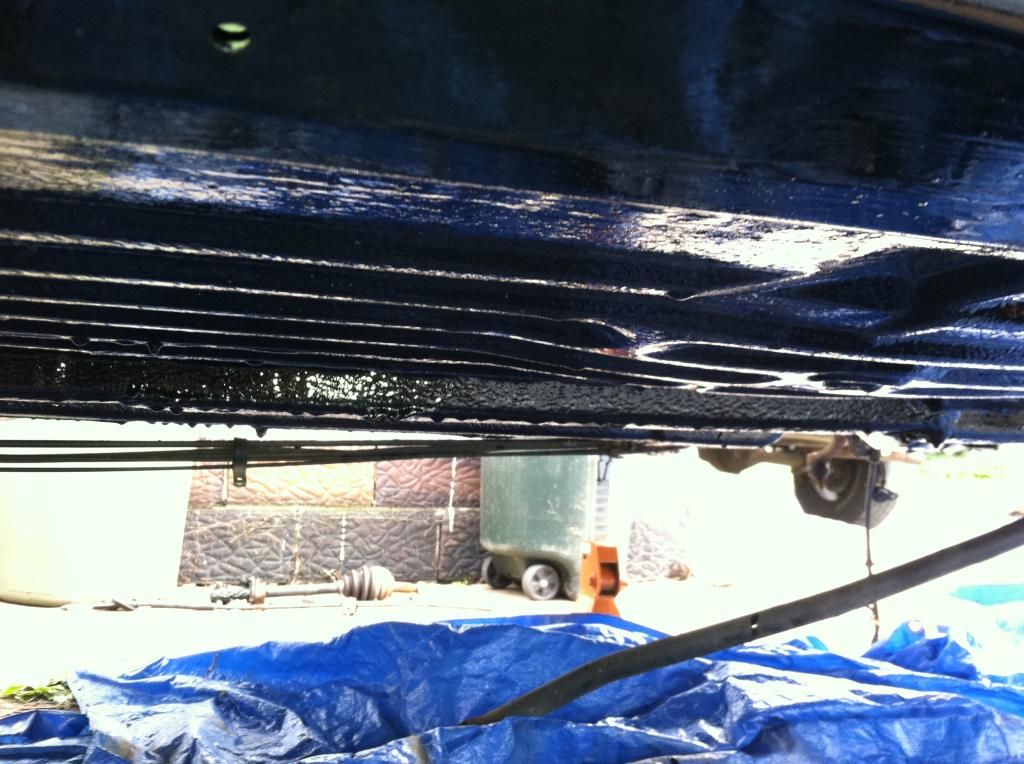
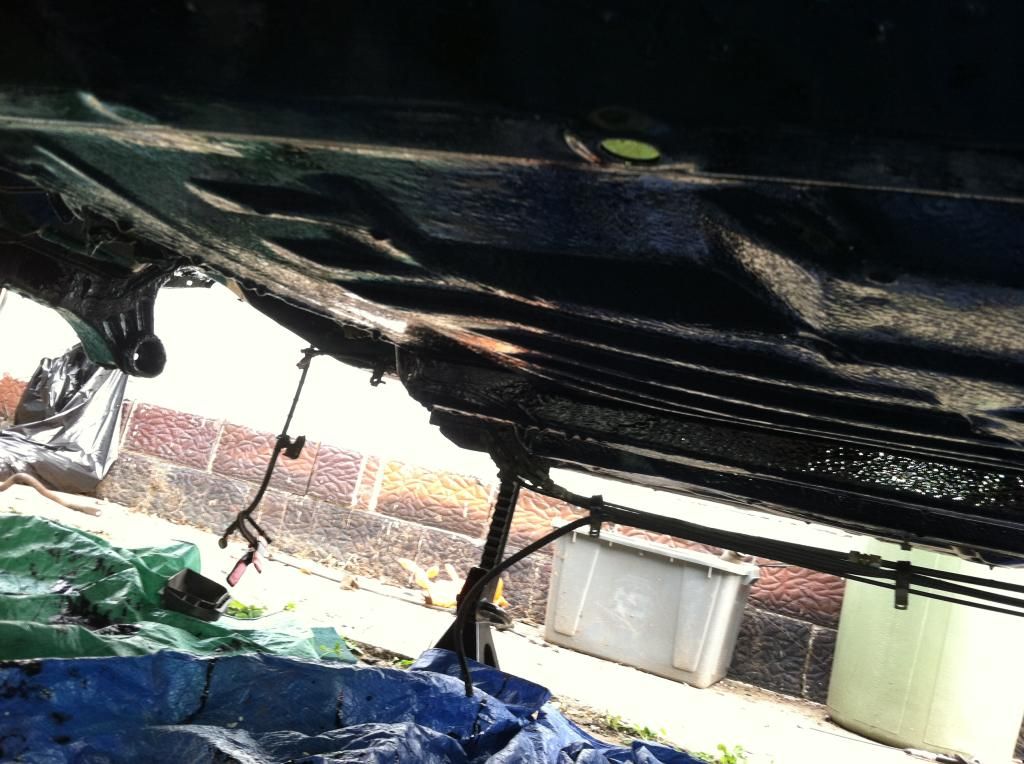
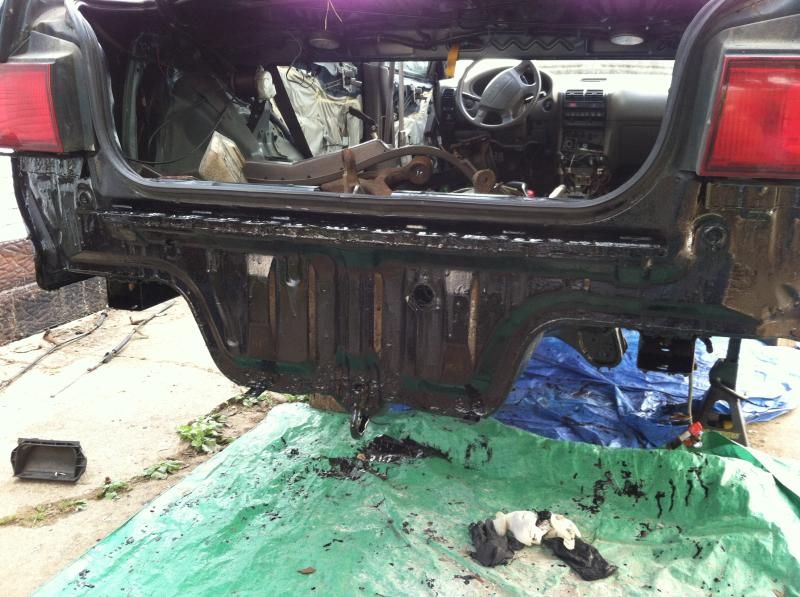
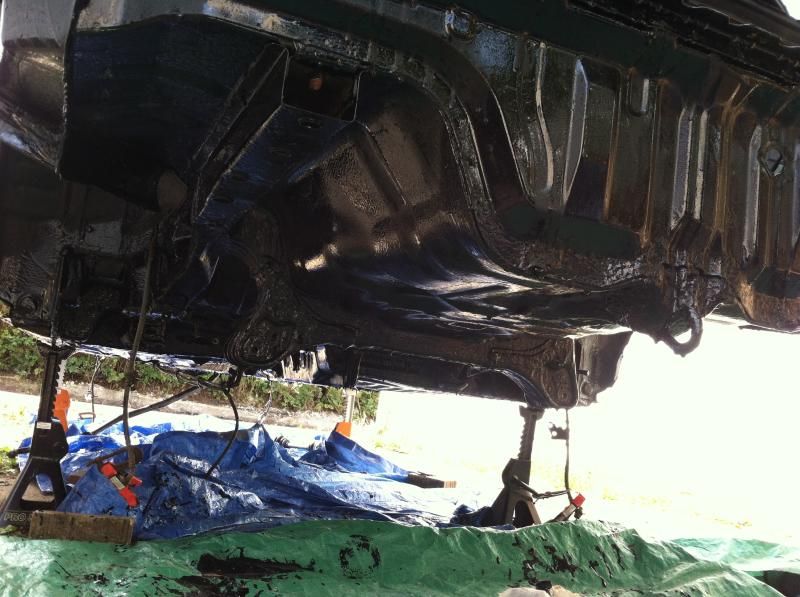
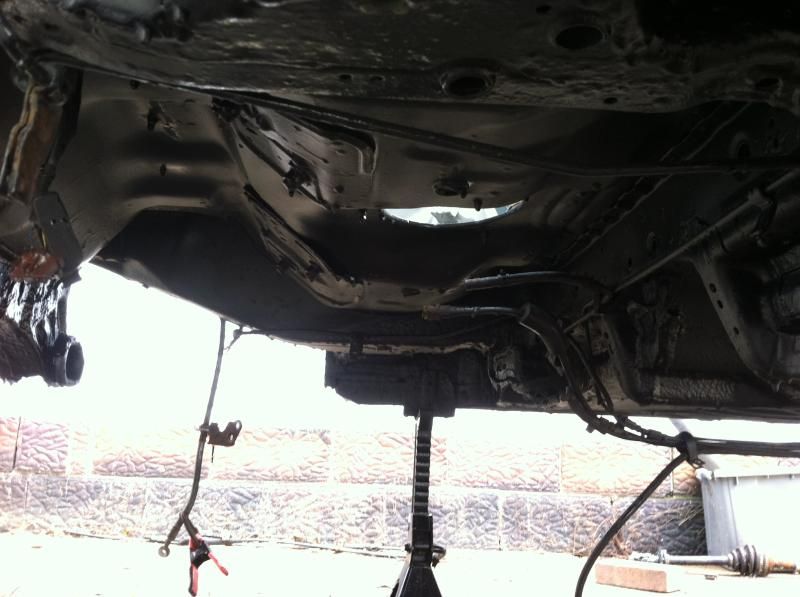
i put the second coat of chassis saver on everything.

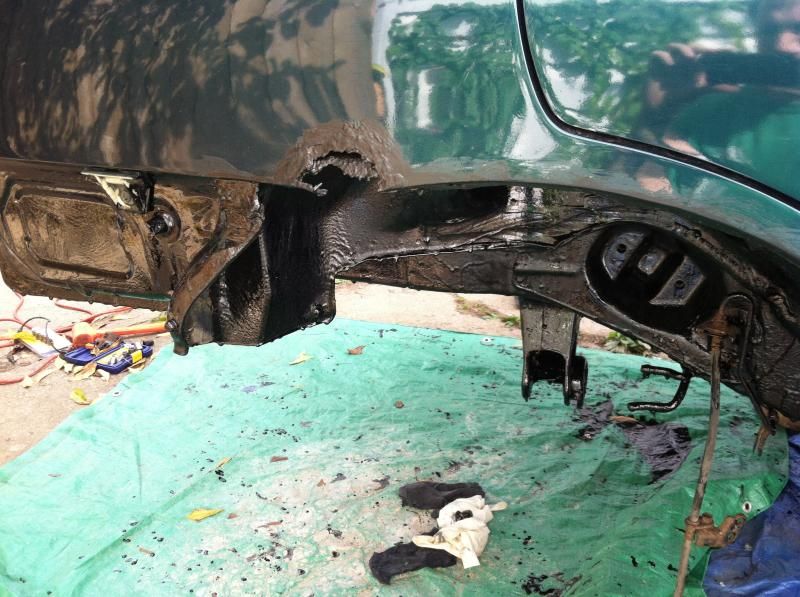
(chassis saver on the rust hole is not the permanent fix!)
Then i did the inside parts of the chassis that i couldnt get to with a brush.
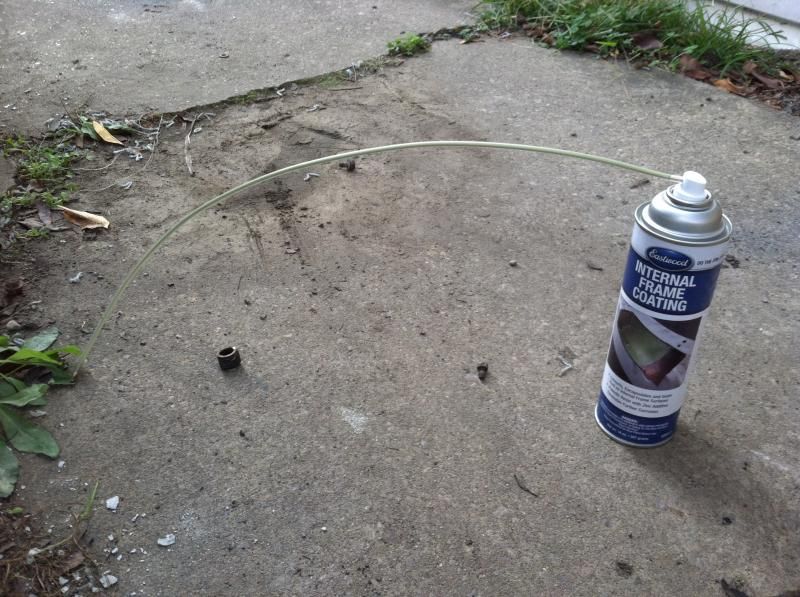
if you guys havent seen this stuff before, this stuff is cool. you run the line up through where ever you want to spray the rust converter/proofer, hit the button and the nozzle sprays out of 4 jets on the tip. here is a video clip from their website:
Then on sunday to top everything off, i rubberized undercoated the surfaces (i left the rear panel of the trunk and the front clip and rad support without the undercoating and just topped them with a coat of epoxy chassis paint).

no more shiny.


Then last, i primed up my wheels
maybe this weekend i'll finish ripping out the sound deadening and figure out where the hell the water is coming in on the driver's side.
after that, i wont be able to buy any more parts until after the wedding. that whole thing seems to be sucking my wallet dry...
i think i'll get my front knuckles, control arms, and rear control arms and round up my bearings and new bushings so i can drop them off at the shop i go to. that way while i'm gone on my honeymoon, hopefully they can press the new bearings and the new bushings so they are ready to install when i get back.
it will be slow for a little bit, but after the wedding stuff is over i should be able to keep buying more parts and work more on the car.
stay tuned!
i put the second coat of chassis saver on everything.


(chassis saver on the rust hole is not the permanent fix!)


Then i did the inside parts of the chassis that i couldnt get to with a brush.

if you guys havent seen this stuff before, this stuff is cool. you run the line up through where ever you want to spray the rust converter/proofer, hit the button and the nozzle sprays out of 4 jets on the tip. here is a video clip from their website:
Then on sunday to top everything off, i rubberized undercoated the surfaces (i left the rear panel of the trunk and the front clip and rad support without the undercoating and just topped them with a coat of epoxy chassis paint).

no more shiny.


Then last, i primed up my wheels

maybe this weekend i'll finish ripping out the sound deadening and figure out where the hell the water is coming in on the driver's side.
after that, i wont be able to buy any more parts until after the wedding. that whole thing seems to be sucking my wallet dry...
i think i'll get my front knuckles, control arms, and rear control arms and round up my bearings and new bushings so i can drop them off at the shop i go to. that way while i'm gone on my honeymoon, hopefully they can press the new bearings and the new bushings so they are ready to install when i get back.
it will be slow for a little bit, but after the wedding stuff is over i should be able to keep buying more parts and work more on the car.
stay tuned!
 12-12-2014, 10:31 AM
#47
Honda-Tech Member
Join Date: Apr 2014
Posts: 186
Likes: 0
Received 0 Likes
on
0 Posts
moar updates!!
i didnt get as far as i wanted to this weekend, but i want to make sure i do it right rather than rush it.
i drained the fuel tank so i can hopefuly drop it this week or this long weekend. i think my sending unit may be bad though. the gas gauge read a hair below half and i drained 3.5-4 gallons top out of the tank...i feel like there definitely should have been more in there than that.
i prepped the motor to sit for a while not running, removed the battery and hooked it up to a trickle charger.
H
removed the rest of the interior, cleaned up some wiring i ran into...and i cant complain about it. it is the wiring i did like 10 years ago before i knew anything about anything about cars...so thats my own fault lol. i'll be starting that from scratch.
came across some rust in the car floor, mainly where feet are sitting and under the dead pedal. only 1 spot looks real bad, the rest is surface rust. BUT, i think i'm going to remove the sound deadening to make sure there is nothing underneath that.
pay no attention to the wiring, its horrible!
got the exhaust dropped
this spot is starting to get iffy. its still solid, so hopefully chassis saving this area will protect it and prevent it from getting worse...i'd like to be able to run my ebrake cables after this project.
this spot looks worse than what it is, its just surface. i was able to scrape it off.
shift linkage is toast...no way around that.
so next is to drop the tank...where the filler neck connects to the tank...it looks like it has become one piece of metal. how do i disconnect the filler neck from the body of the car so i can drop the tank/neck all as one piece?
i plan on disconnecting everything inside the car, putting a jack under the tank, removing the tank straps (i hope they cooperate...) and then slowly lower it and disconnect whatever else as i lower it down. sound like a good plan?
as for the sound deadening, i'm on the fence about removing it. i mean, i know i should to make sure i have solid material under those things...but it looks like it will be a huge pita to remove.
after that, some quality time with some roloc discs and then getting that underside prepped for chassis saver.
12-12-2014, 10:46 AM
#48
actually it wasnt bad at all, even with as rusty as it was. i got a used one from further south so it looks 10000X better than this one did.
and i am quite terrible at updating this thread. i need to make sure i update both of my build threads here and on the other site lol
and i am quite terrible at updating this thread. i need to make sure i update both of my build threads here and on the other site lol
12-12-2014, 11:06 PM
#49
Honda-Tech Member
Join Date: Apr 2014
Posts: 186
Likes: 0
Received 0 Likes
on
0 Posts
actually it wasnt bad at all, even with as rusty as it was. i got a used one from further south so it looks 10000X better than this one did.
and i am quite terrible at updating this thread. i need to make sure i update both of my build threads here and on the other site lol
and i am quite terrible at updating this thread. i need to make sure i update both of my build threads here and on the other site lol
01-11-2015, 10:33 AM
#50
doh! i apologize for not keeping this updated.
i used an irwin bolt grip socket to remove the bolts. works like a charm!
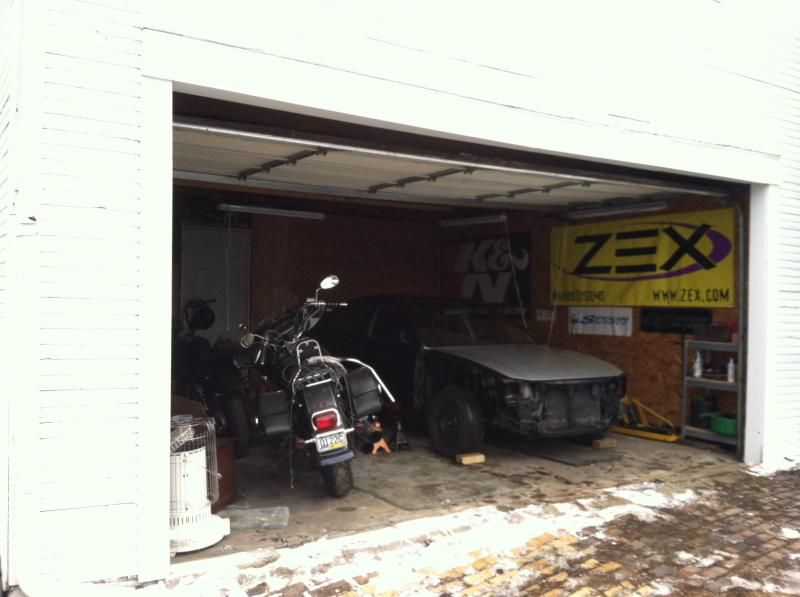
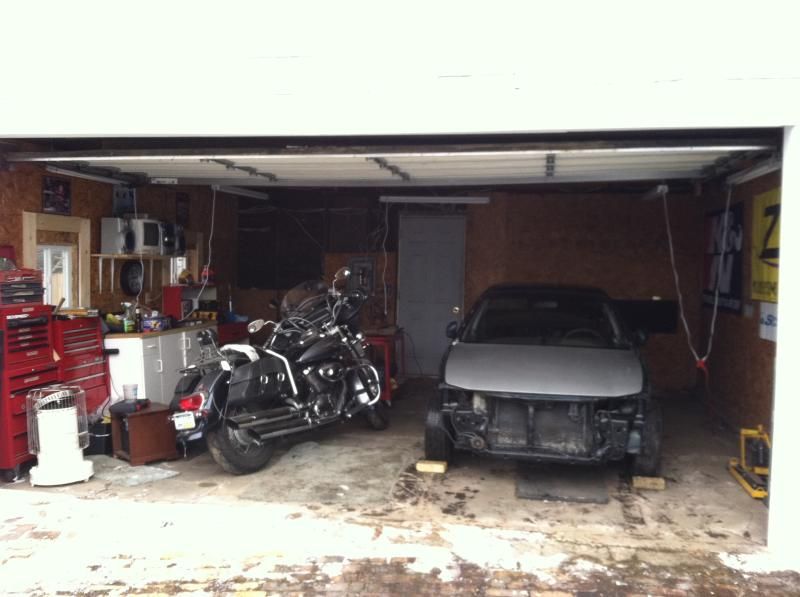
so since i havent been keeping this page updated i'll just upload the progress from today. my dad and my brothers helped me push her from the driveway, up the alley into the garage. now hopefully i get my heating situation up and working and then i can wrench in the garage all winter.
as it turns out, there was way more room than i had anticipated.
i used an irwin bolt grip socket to remove the bolts. works like a charm!
so since i havent been keeping this page updated i'll just upload the progress from today. my dad and my brothers helped me push her from the driveway, up the alley into the garage. now hopefully i get my heating situation up and working and then i can wrench in the garage all winter.
as it turns out, there was way more room than i had anticipated.

