
Australian GSR
 11-10-2014, 04:12 PM
#76
Honda-Tech Member
Join Date: Feb 2007
Location: Melbourne, Victoria, Australia
Posts: 441
Likes: 0
Received 0 Likes
on
0 Posts
There is no way the rear link can dictate the position of the rear roll center. If you disconnect the rear upper and lower link, the control arm will pivot around the main trailing arm bushing, if you hook the upper and lower links up it will still pivot around the axis of the rear trailing arm bushing.
(I didn't realize this wasn't in the road race autox forum)
(I didn't realize this wasn't in the road race autox forum)
If you disconnect the upper and lower links the trailing arm won't be pivoting around anything when subject loads from the tyre, it will flop around completely incapable of reacting to lateral forces imparted on the suspension by the tyre....
 12-08-2014, 07:47 AM
#77
Honda-Tech Member
Join Date: Aug 2003
Location: OR, USA
Posts: 140
Likes: 0
Received 0 Likes
on
0 Posts
First, off great thread and build info. We always love threads like this here.
I've read through all the posts and think your reasoning is quite logical and valid on many subjects. There is only one real bone I have to pick, and that has to do with bumpsteer.
To start off, I am a mechanical engineer as well and have read every single book written on the subject of automotive suspension (IMHO Dixon's two books are easily the best written and most comprehensive).
So, I ask you, why do you think increasing positive caster on FWD chassis is beneficial? I ask you this because I once compiled the data for every single FWD car made by Honda and the Honda engineers never went much above two degrees on their FWD chassis. These are known collectively as some of the best handling FWD vehicles in the world. IMHO, there is a very good reason for that.
Now, I too have played with increasing positive caster in various ways, but the ABSOLUTE WORST modification I ever did to my car was swap the Front UCA from left-to-right. I didn't understand it right away, and in fact, I didn't even have that many problems until I tried to race my car in the rain at an AutoX. It was basically undriveable in those low mu conditions, and especially in the slaloms. I began to wonder if the UCA swap had increased my bumpsteer because the car was really unstable in the wet. Turns out, it had, and the fix was to put it back to stock.
Now, you have done two mods that have greatly increased caster and bumpsteer (you even admitted it yourself in one post). To correct this, you had to create a new tie-rod (at I don't know what expense) to rectify some it, but you still have bumpsteer anyway.
IMHO, you should reset the caster angles back to within stock specifications by removing those washers, and swapping back the Front UCA's.
After reading this thread, it makes me a little happy that I've always been a very frugal engineer. I think you have thrown resources and money at a problem only to exacerbate it. I, for one, simply don't have the means to make some of the mods that you have made, such as with the RTA.
While I think its really cool the modifications you did to the RTA, I think you spent alot of time and money and didn't address the real issue with the whole RTA, and that is the fact that it weighs too much and has a sloppy bushing that is useless in racing conditions. I don't think the rear lateral loads were high enough to cause much distortion in the RTA, and it doesn't matter anyway because that sloppy rubber is the weakest link. Not to mention, you'll have to throw those custom RTA's out if you ever want to upgrade to the significantly stiffer Type-R 5-bolt versions (I believe they have a wider track as well).
Also, if I could rebuild my front uprights, I would do it to the 5-bolt Type-R versions, and definitely consider a shotpeen or cryotreatment if I had the money to spend.
12-08-2014, 06:14 PM
#78
Honda-Tech Member
Thread Starter
Join Date: Jun 2014
Location: Australia
Posts: 83
Likes: 0
Received 0 Likes
on
0 Posts
First, off great thread and build info. We always love threads like this here.
I've read through all the posts and think your reasoning is quite logical and valid on many subjects. There is only one real bone I have to pick, and that has to do with bumpsteer.
Thank you that's very kind, I appreciate the time you've taken to construct this response!
To start off, I am a mechanical engineer as well and have read every single book written on the subject of automotive suspension (IMHO Dixon's two books are easily the best written and most comprehensive).
So, I ask you, why do you think increasing positive caster on FWD chassis is beneficial? I ask you this because I once compiled the data for every single FWD car made by Honda and the Honda engineers never went much above two degrees on their FWD chassis. These are known collectively as some of the best handling FWD vehicles in the world. IMHO, there is a very good reason for that.
Just to be clear, I'm only running 3.5+ deg castor. I agree with everything you've written but consider that Honda had to set castor to provide the best compromise between stability, camber gain and low speed steering effort etc etc.
I'm tuning my car to perform better on a circuit where the average speed is much higher and I am willing to compromise tyre wear and low speed effort to gain any extra advantage in lateral load, stability and feel.
Now, I too have played with increasing positive caster in various ways, but the ABSOLUTE WORST modification I ever did to my car was swap the Front UCA from left-to-right. I didn't understand it right away, and in fact, I didn't even have that many problems until I tried to race my car in the rain at an AutoX. It was basically undriveable in those low mu conditions, and especially in the slaloms. I began to wonder if the UCA swap had increased my bumpsteer because the car was really unstable in the wet. Turns out, it had, and the fix was to put it back to stock.
I can't explain why you found swapping the UCA's left to right to be the worst modification ever, but I can believe haphazardly changing any single aspect of the suspension system without considering the effect on the whole will be detrimental.
Now, you have done two mods that have greatly increased caster and bumpsteer (you even admitted it yourself in one post). To correct this, you had to create a new tie-rod (at I don't know what expense) to rectify some it, but you still have bumpsteer anyway.
Based on anecdotal evidence of myself and others who have driven the car it does not exhibit excessive bumpsteer, the car is great under brakes, on bumpy roads and at high speed.
Every change I have made to the suspension has been measured and modelled with the Susprog suspension software.
After every physical change i re-measure the points on the car to confirm it's within +/-5mm.
This allows me to make educated decisions on things like tie rod height.
When I installed the tie rod kit I re-positioned the rod end higher than the original pivot point of the ball joint to correct for all the changes i've made ie, the lower ride height, the castor, the camber, the lower ball joints.
I believe the car has close to stock bumpsteer, but i should measure it on the car sometime soon.
IMHO, you should reset the caster angles back to within stock specifications by removing those washers, and swapping back the Front UCA's.
After reading this thread, it makes me a little happy that I've always been a very frugal engineer. I think you have thrown resources and money at a problem only to exacerbate it. I, for one, simply don't have the means to make some of the mods that you have made, such as with the RTA.
While I think its really cool the modifications you did to the RTA, I think you spent alot of time and money and didn't address the real issue with the whole RTA, and that is the fact that it weighs too much and has a sloppy bushing that is useless in racing conditions. I don't think the rear lateral loads were high enough to cause much distortion in the RTA, and it doesn't matter anyway because that sloppy rubber is the weakest link. Not to mention, you'll have to throw those custom RTA's out if you ever want to upgrade to the significantly stiffer Type-R 5-bolt versions (I believe they have a wider track as well).
My main motivation was to change the position of the lower arm attachment point (to correct my roll centre), the only reason I welded a gusset to the arm is because it was easy to do once I was already set up for welding the LCA extension on.
Also, if I could rebuild my front uprights, I would do it to the 5-bolt Type-R versions, and definitely consider a shotpeen or cryotreatment if I had the money to spend.
Last edited by DailyTrackDc2; 12-09-2014 at 03:11 AM.
12-09-2014, 09:29 AM
#79

this is some incredible work you have done to your integra!
so the Vti-R is basically like the JDM Si-vtec, only with different styled side markers.
I'm converting my USDM 4door 94 integra gsr to a JDM Si vtec and the only thing I have left to do is cut my fenders for the side markers and wire them up. However, i am confused as to how the proper Factory signaling sequence should be.
With the headlights off, do the side markers obvously blink in sync with the front bumper turn signals , correct? Or am I wrong?
If the headlights are ON, I know that the front bumper turn signals alternate between the clear and amber part; however, when does the side marker blink? - when the clear or amber part of the turn signal blinks?
if you could record a video I would REALLY appreciate it!
Gonna follow this thread closely as I want to fine tune the suspension as well, I've learned alot thus far from you.
keep up the good work and thanks in advance.
 01-23-2015, 09:32 PM
#81
Honda-Tech Member
Thread Starter
Join Date: Jun 2014
Location: Australia
Posts: 83
Likes: 0
Received 0 Likes
on
0 Posts
If you were wondering why this thread had gone a bit quiet the last two months its because:
1) It's Summer and it's too hot for track events (and driving a car with no air con during the day)
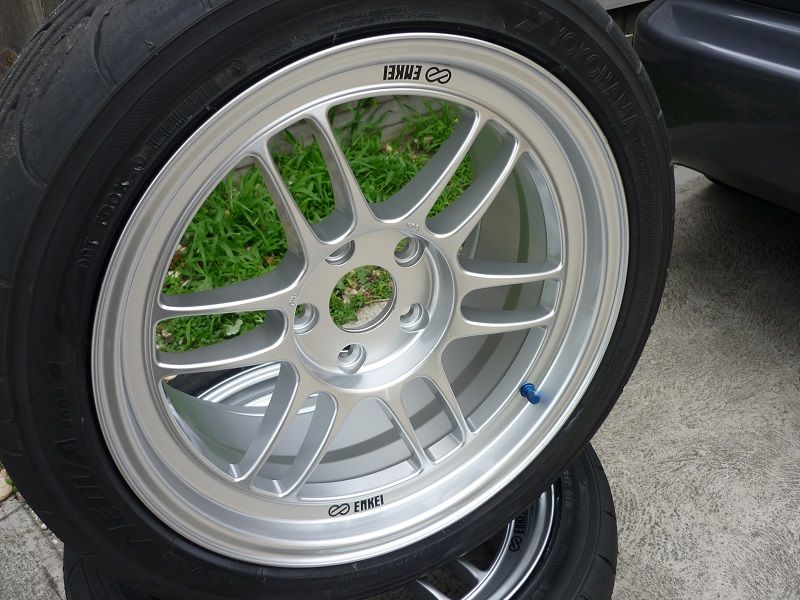
2) I've been waiting for these new wheels to turn up
During the last track day I got pretty frustrated with the tyres that were on the car, during laps 1-3 they were pretty good but by lap 4 I found the car struggling for grip.
I knew the tyres I had on the car were not on the same level as RS3's or AD08Rs etc but I didn't appreciate the difference until I went for a passenger ride in an EF fitted with a set of Hankook RS3s,
I was amazed at how hard the tyres could be pushed. I decided I was going to have to change my set up
I evaluated the various set ups I have seen other people running then decided on a 17/16 staggered set up.
The main reason for this is so I can get a readily available 245 tyre for the front.
So the specs on the wheels are:
WEDS Sports TC-005 17 x 9 +34 PCD 5x114.3
WEDS Sports TC-005 16 x 7 +33 PCD 4x100
Tyres:
Front: Advan AD08R 245/40R17
Rear Advan AD08R 205/45R16
The wheels were sourced from Japan through Jesse Streeter. I would recommend his service to anyone, he is quick to respond to emails and charges a reasonable fee for all the running around he has to do on your behalf.
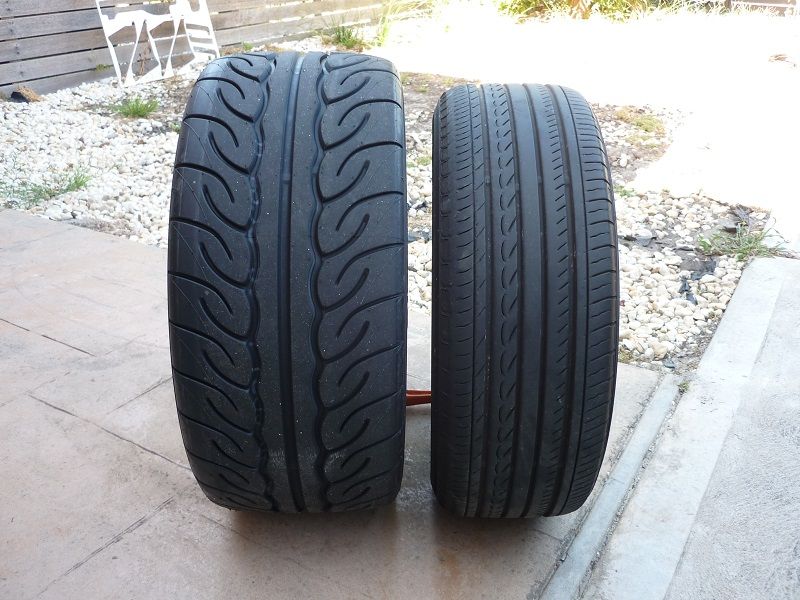
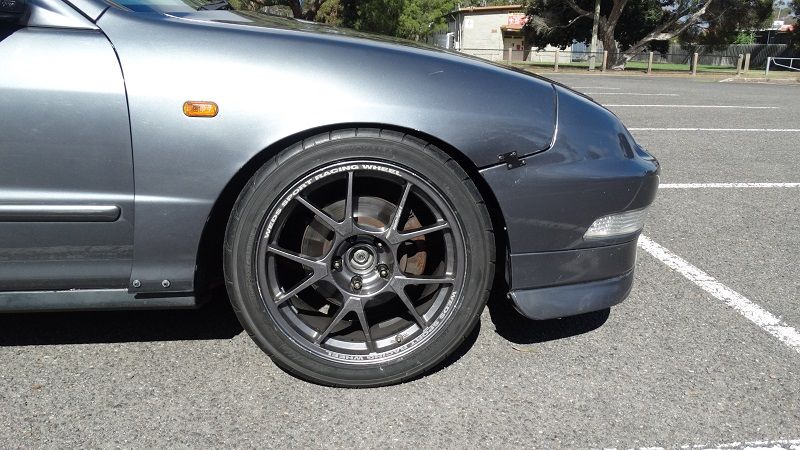
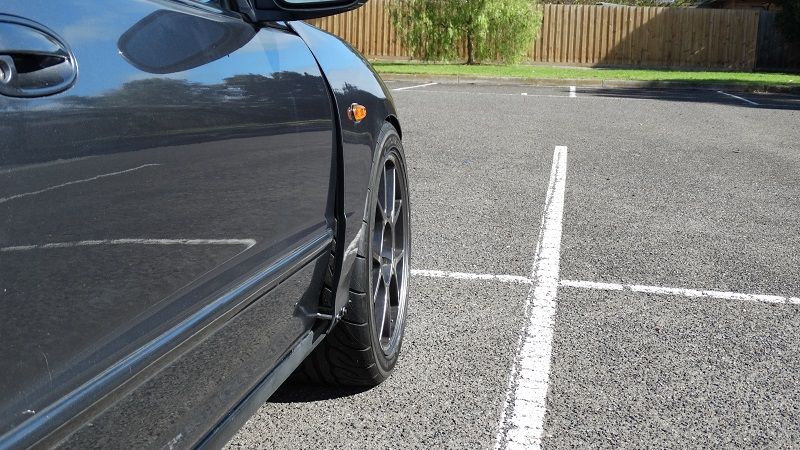
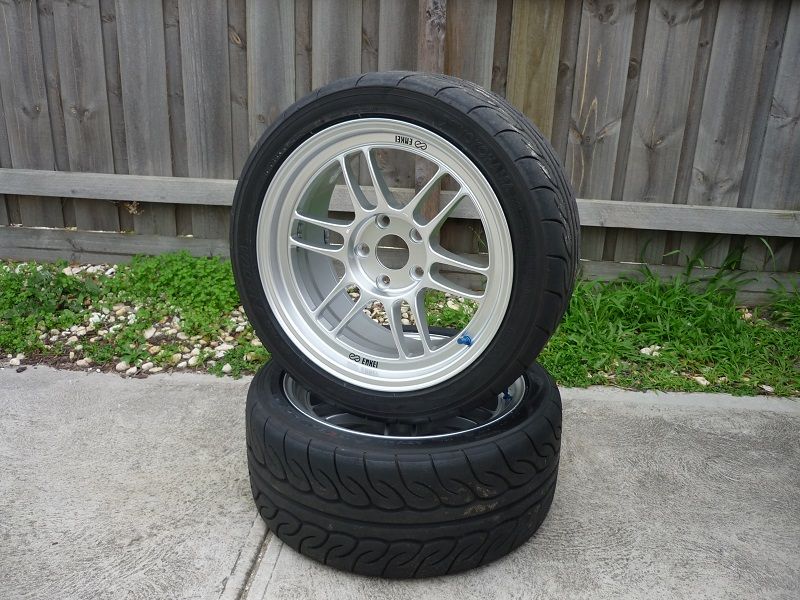
When i first picked up the wheels from the tyre shop I was a bit shocked at how big the 245 tyre looked.
Here's a comparison between the 195/45R15 that I was running on the front and the new wheel
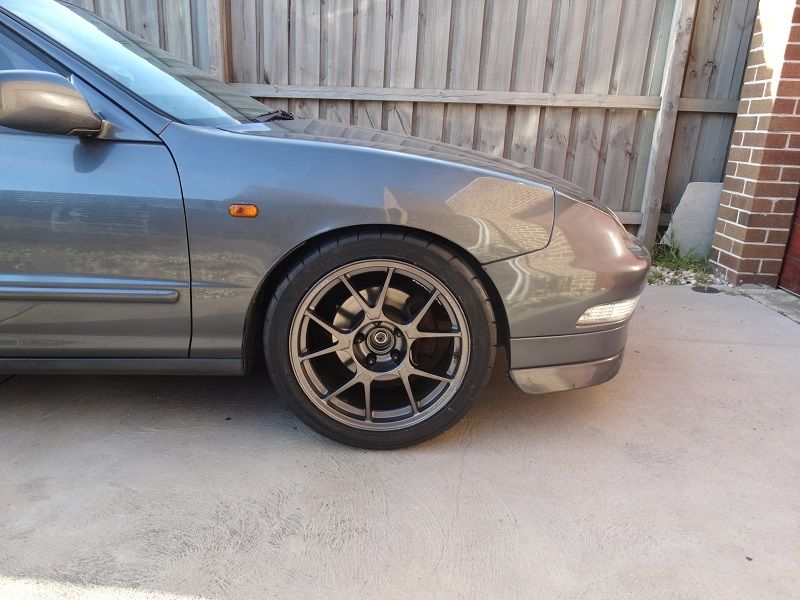
It's a tight fit up front. I'd say the offset is just about perfect. Anything from a +34 to a +38 will fit as long as you a willing to make some compromises in the wheel arch.
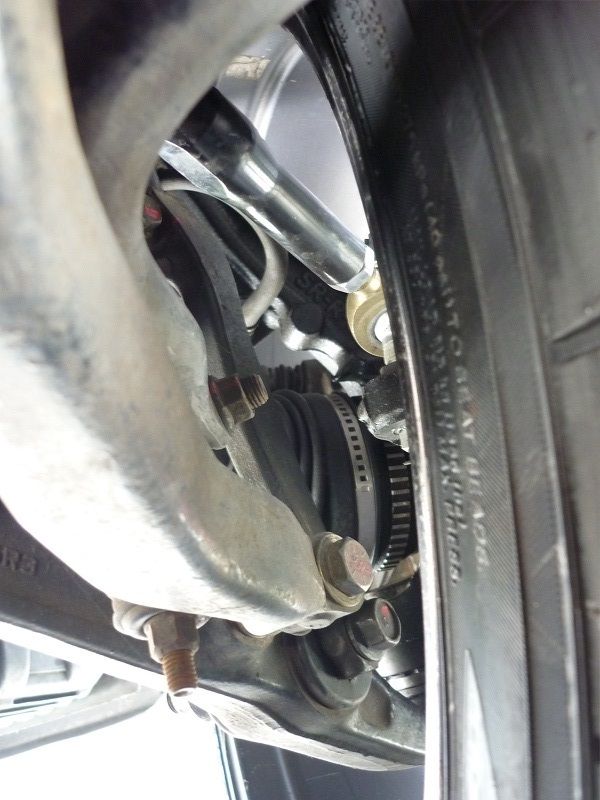
You can see the clearance from the back side of the rim to the tie rod and LCA is good. If you remember back to when I installed my tie rod parts you will recall the lock limiting spacer I slipped on between the inner rack end and the rack shaft.
That little modification is paying off now. I can go lock to lock without worrying about the wheels fouling on something solid.
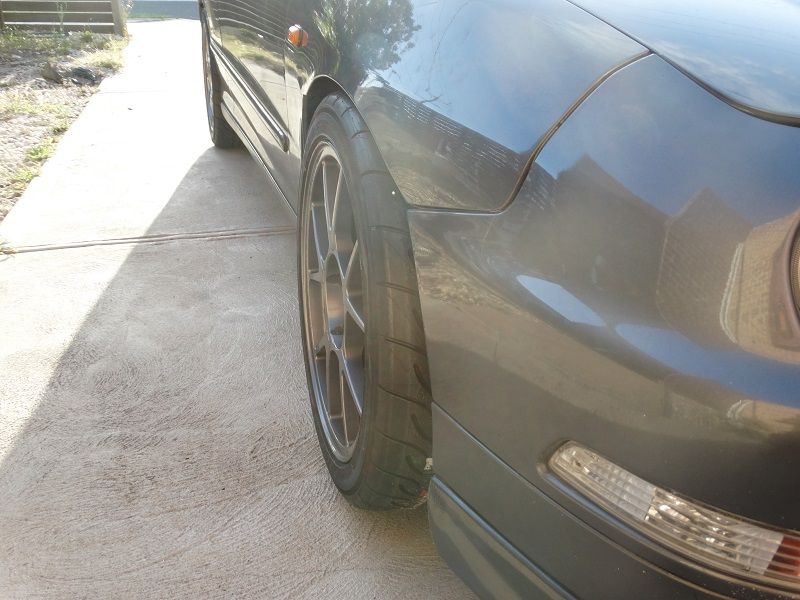
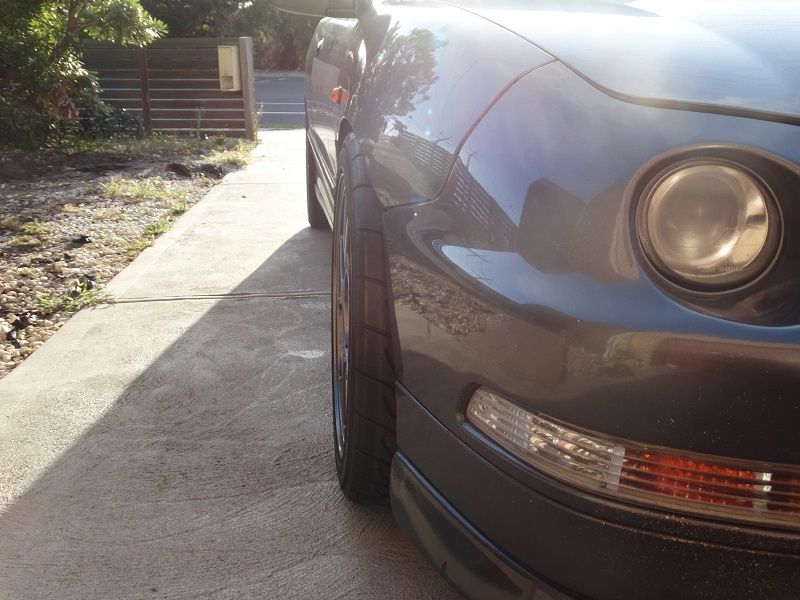
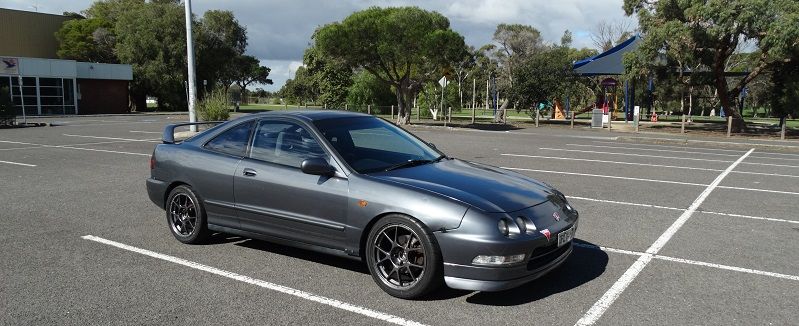
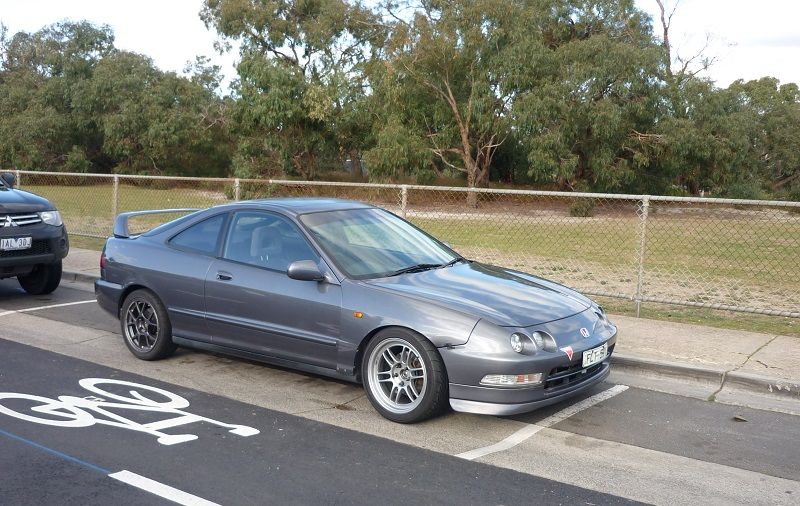
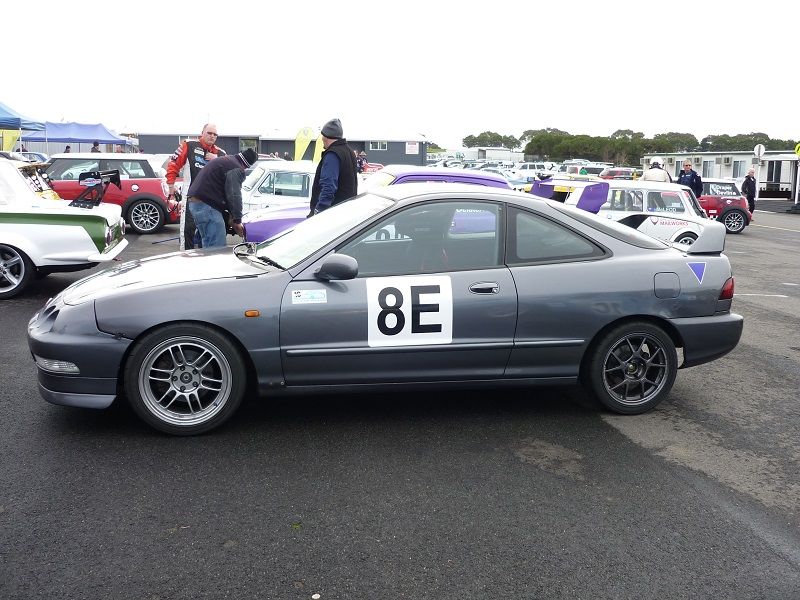
My friend took some nice side on photos with his good camera. Once he shoots those across to me i'll post them up.
Now that the wheels are on I will work on refining the set up. I will be looking into new height adjustable suspension in the near future to help level the car out
1) It's Summer and it's too hot for track events (and driving a car with no air con during the day)
2) I've been waiting for these new wheels to turn up
During the last track day I got pretty frustrated with the tyres that were on the car, during laps 1-3 they were pretty good but by lap 4 I found the car struggling for grip.
I knew the tyres I had on the car were not on the same level as RS3's or AD08Rs etc but I didn't appreciate the difference until I went for a passenger ride in an EF fitted with a set of Hankook RS3s,
I was amazed at how hard the tyres could be pushed. I decided I was going to have to change my set up
I evaluated the various set ups I have seen other people running then decided on a 17/16 staggered set up.
The main reason for this is so I can get a readily available 245 tyre for the front.
So the specs on the wheels are:
WEDS Sports TC-005 17 x 9 +34 PCD 5x114.3
WEDS Sports TC-005 16 x 7 +33 PCD 4x100
Tyres:
Front: Advan AD08R 245/40R17
Rear Advan AD08R 205/45R16
The wheels were sourced from Japan through Jesse Streeter. I would recommend his service to anyone, he is quick to respond to emails and charges a reasonable fee for all the running around he has to do on your behalf.
When i first picked up the wheels from the tyre shop I was a bit shocked at how big the 245 tyre looked.
Here's a comparison between the 195/45R15 that I was running on the front and the new wheel


It's a tight fit up front. I'd say the offset is just about perfect. Anything from a +34 to a +38 will fit as long as you a willing to make some compromises in the wheel arch.


You can see the clearance from the back side of the rim to the tie rod and LCA is good. If you remember back to when I installed my tie rod parts you will recall the lock limiting spacer I slipped on between the inner rack end and the rack shaft.
That little modification is paying off now. I can go lock to lock without worrying about the wheels fouling on something solid.

My friend took some nice side on photos with his good camera. Once he shoots those across to me i'll post them up.
Now that the wheels are on I will work on refining the set up. I will be looking into new height adjustable suspension in the near future to help level the car out


 04-25-2015, 09:07 PM
#83
Honda-Tech Member
Thread Starter
Join Date: Jun 2014
Location: Australia
Posts: 83
Likes: 0
Received 0 Likes
on
0 Posts
Ok so it's been a few months since my last update but progress on the car has been pretty steady
in preparation for this years events
In my last post I showed the 17/16 stagger WEDS sports set up on the car, well bolting the wheels on and tootling around was cool but actually getting the set up ready for track work has taken
quite a lot of work beyond that
One of the first modifications i did to the car was to install a bargin set of Tanabe Dc2r fitment shocks.
These were fine at the time, they lowered the car a little bit and were suitable for the v555 tyres however I felt this spring/shock combo would be too soft and under damped to run with the AD08r's
One Saturday I stripped the old shocks out of the car and bolted on the WEDS and with the help of a a few jacks mocked up the car at full bump, ride height and full droop positions
This was a valuable exercise as I was able to see what modifications would be needed to the front inner arches and take dimensions for new shocks
I contacted MCA in Queensland and ordered a set of Red Series coilovers.
For those that arn't familiar with MCA's product the red series are valved to suit your specific spring rate and feature a single adjustment **** for dampening (hard/soft)
While waiting for the shocks to be built I replaced the front and rear anti-roll bar bushes and modified the front inner arches
When I mocked up the car at ride height I found that even with the stock guards flared as much as possible the front tyres were still touching the guard at the very top.
I looked at fitting bolt on flares but since i had pulled the guards out so far already I really only needed another 10mm of clearance not 40mm+
I decided to space the back of the guard out where it mounts to the sill
I made up a bracket that bolts to the original guard mounting hole and comes up inside the guard then i have 2 different sized spacers (long/short) from that plate out to the backside of the guard.
This way I can use the long spacers to space the guard out when the big wheels are on and then if i want to make the car a little more discreet, i can put the short spacers in and the guard will sit flush with the door like normal
So as you can imagine it takes weeks for all of the above to come together,
Today was the first day I've had it all on the car and from my quick test drive everything feels solid and the tyres don't rub. Win
In February my flatmate and I wired a Link G4 extreme into the car. Martyn re-made the engine loom and replaced all the plugs and connectors.
As we stripped the old engine loom we found the majority of the old connectors were hard and brittle, most of them broke as we un-clipped them. Although it's not the primary benefit of re-wiring the engine, i think it was pretty good to replace all these parts before they caused an issue at the track.
You can see we've replaced the distributor with an AEM cam trigger and gone to an individual coil set up.
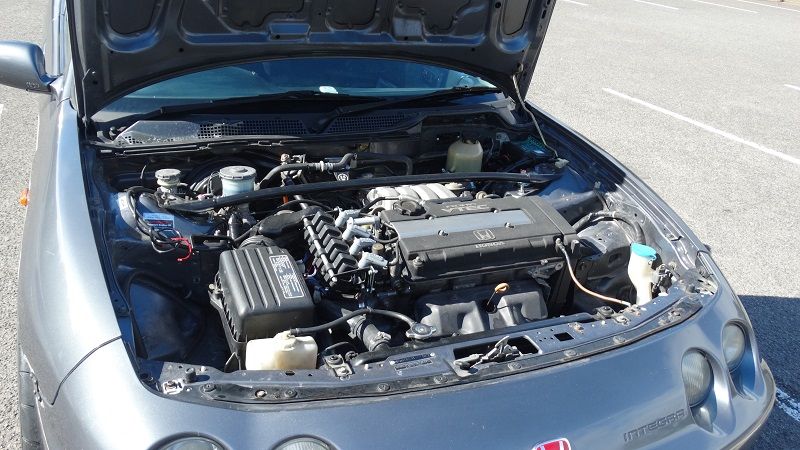
The car was then tuned and made 106kw at the wheels. Yep nothing earth shattering but the engine certainly felt better to drive after the tune.
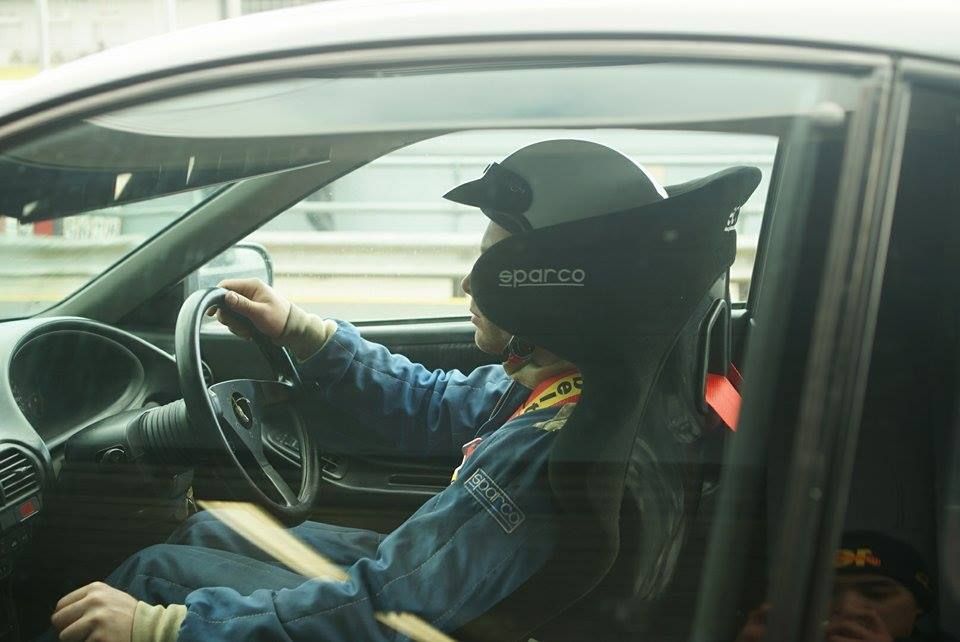
So i'm expecting the car to corner a fair bit harder with the new tyres and new suspension so it seemed like replacing the standard drivers seat with something more suitable would be a good idea
I picked up this sparco circuit seat for a good deal and then sourced a 3" Sabelt harness to go with it.
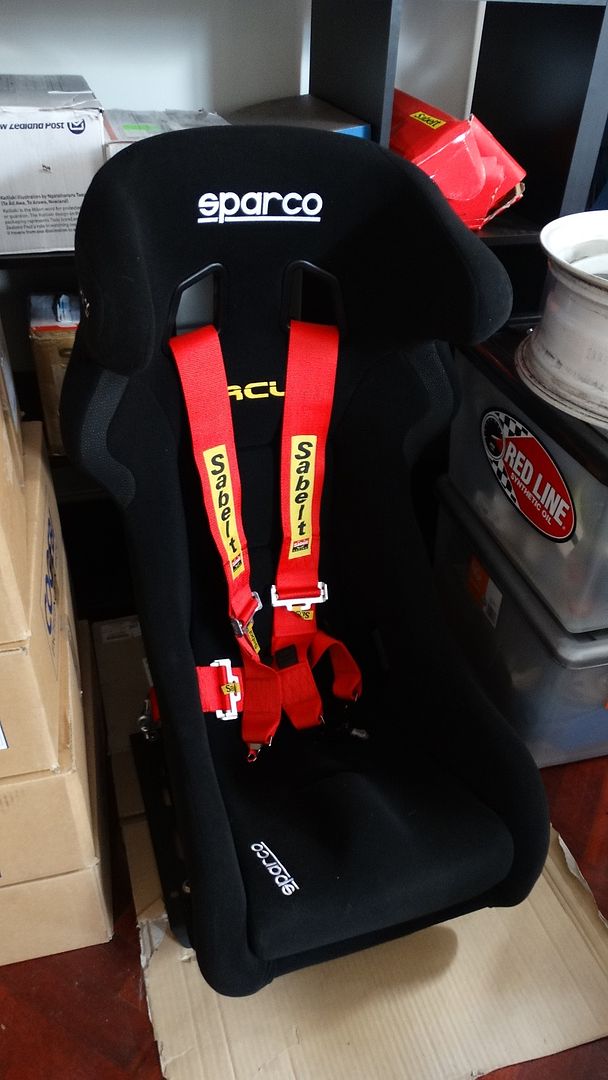
I've got a PCI seat mount to adapt the seat into the car
I'll be running the car at Sandown race way on the 9th of May and then at Winton on the 24th.
I'm hoping all this work will pay off and the car and I will set some new PBs!
in preparation for this years events
In my last post I showed the 17/16 stagger WEDS sports set up on the car, well bolting the wheels on and tootling around was cool but actually getting the set up ready for track work has taken
quite a lot of work beyond that
One of the first modifications i did to the car was to install a bargin set of Tanabe Dc2r fitment shocks.
These were fine at the time, they lowered the car a little bit and were suitable for the v555 tyres however I felt this spring/shock combo would be too soft and under damped to run with the AD08r's
One Saturday I stripped the old shocks out of the car and bolted on the WEDS and with the help of a a few jacks mocked up the car at full bump, ride height and full droop positions
This was a valuable exercise as I was able to see what modifications would be needed to the front inner arches and take dimensions for new shocks
I contacted MCA in Queensland and ordered a set of Red Series coilovers.
For those that arn't familiar with MCA's product the red series are valved to suit your specific spring rate and feature a single adjustment **** for dampening (hard/soft)
While waiting for the shocks to be built I replaced the front and rear anti-roll bar bushes and modified the front inner arches
When I mocked up the car at ride height I found that even with the stock guards flared as much as possible the front tyres were still touching the guard at the very top.
I looked at fitting bolt on flares but since i had pulled the guards out so far already I really only needed another 10mm of clearance not 40mm+
I decided to space the back of the guard out where it mounts to the sill
I made up a bracket that bolts to the original guard mounting hole and comes up inside the guard then i have 2 different sized spacers (long/short) from that plate out to the backside of the guard.
This way I can use the long spacers to space the guard out when the big wheels are on and then if i want to make the car a little more discreet, i can put the short spacers in and the guard will sit flush with the door like normal
So as you can imagine it takes weeks for all of the above to come together,
Today was the first day I've had it all on the car and from my quick test drive everything feels solid and the tyres don't rub. Win


In February my flatmate and I wired a Link G4 extreme into the car. Martyn re-made the engine loom and replaced all the plugs and connectors.
As we stripped the old engine loom we found the majority of the old connectors were hard and brittle, most of them broke as we un-clipped them. Although it's not the primary benefit of re-wiring the engine, i think it was pretty good to replace all these parts before they caused an issue at the track.
You can see we've replaced the distributor with an AEM cam trigger and gone to an individual coil set up.

The car was then tuned and made 106kw at the wheels. Yep nothing earth shattering but the engine certainly felt better to drive after the tune.

So i'm expecting the car to corner a fair bit harder with the new tyres and new suspension so it seemed like replacing the standard drivers seat with something more suitable would be a good idea
I picked up this sparco circuit seat for a good deal and then sourced a 3" Sabelt harness to go with it.

I've got a PCI seat mount to adapt the seat into the car
I'll be running the car at Sandown race way on the 9th of May and then at Winton on the 24th.
I'm hoping all this work will pay off and the car and I will set some new PBs!
05-09-2015, 01:30 AM
#84
Honda-Tech Member
Thread Starter
Join Date: Jun 2014
Location: Australia
Posts: 83
Likes: 0
Received 0 Likes
on
0 Posts
Today I ran the car at an Alfa club track day at Sandown Raceway,
The day was well organised with sign in and scrutineering completed well before 8:30
All week I had been checking the various weather forecasts sites and most predicted rain at around 10am, thankfully the weatherman was off the mark and we saw no rain all day.
There was a whole mix of cars entered including an R35, 991 GT3, few Skylines, couple of Exiges and almost a entire run group of mx5s.
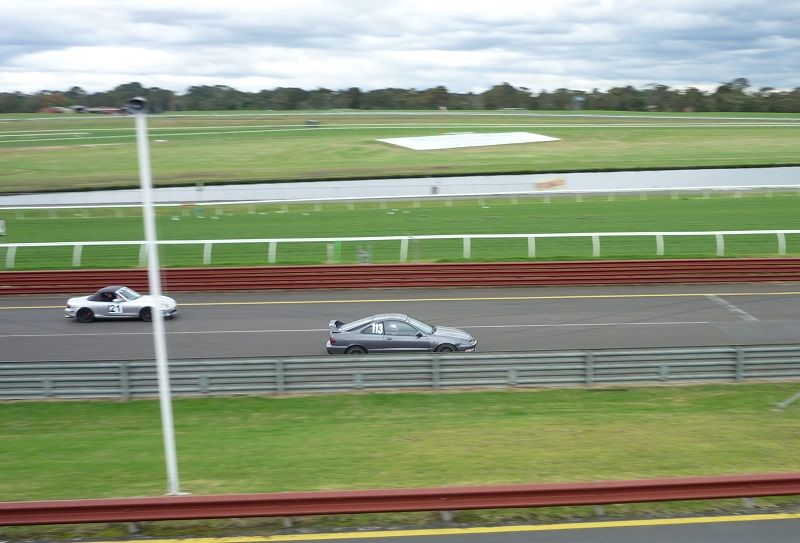
In the first session I ran at the front of run group 4 and managed to get some clear laps in resulting in a new PB of 1:34.39 (1 second improvement)
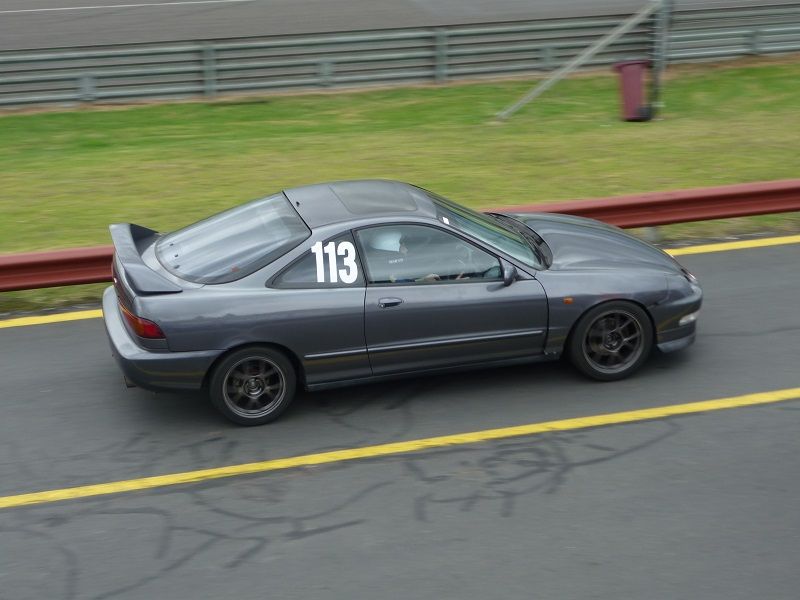
In the second session I changed run groups and found myself in the middle of a pack of mx5s!
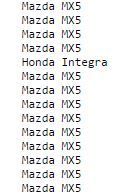
This is a snapshot from the results table, pretty much every lap was spent trying to get past these cars and get a clean run. The flag marshalls were waving the blue flag for the cars in front but there were still a few moments going side by side into the braking zone of T1 when the car in front didn't let off.
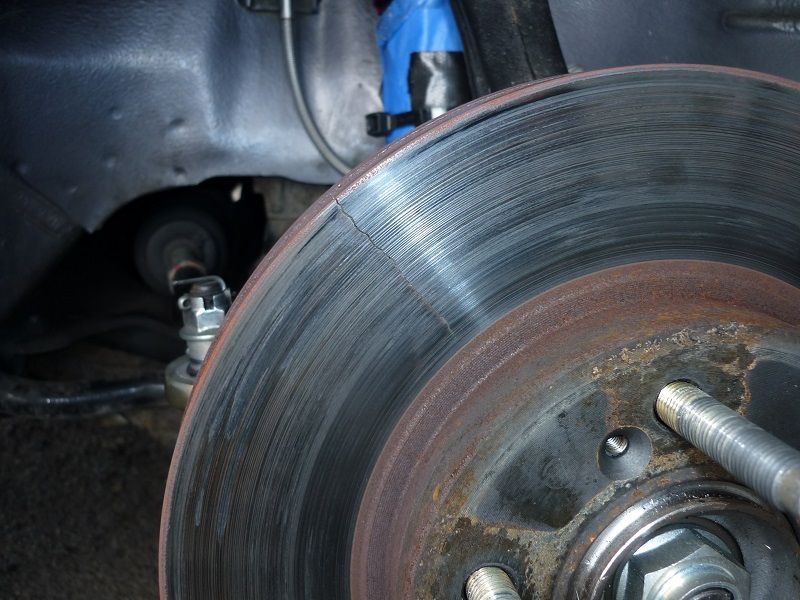
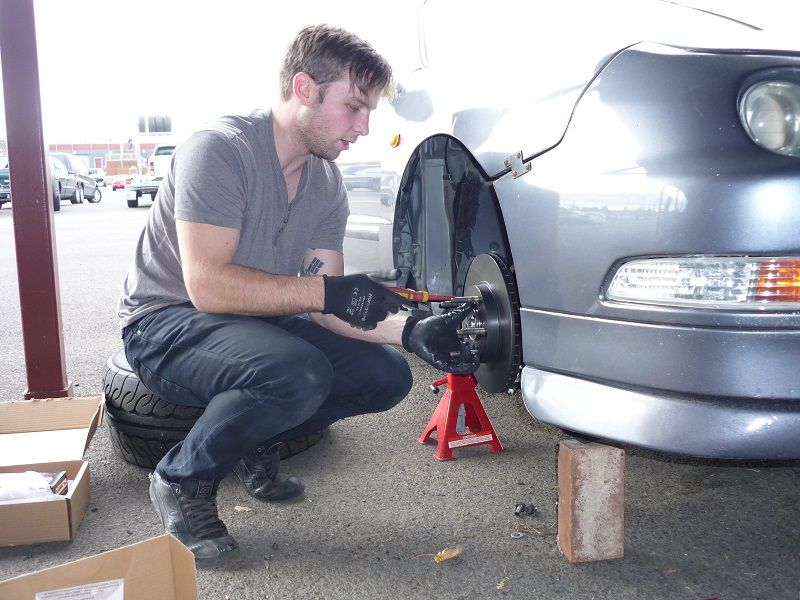
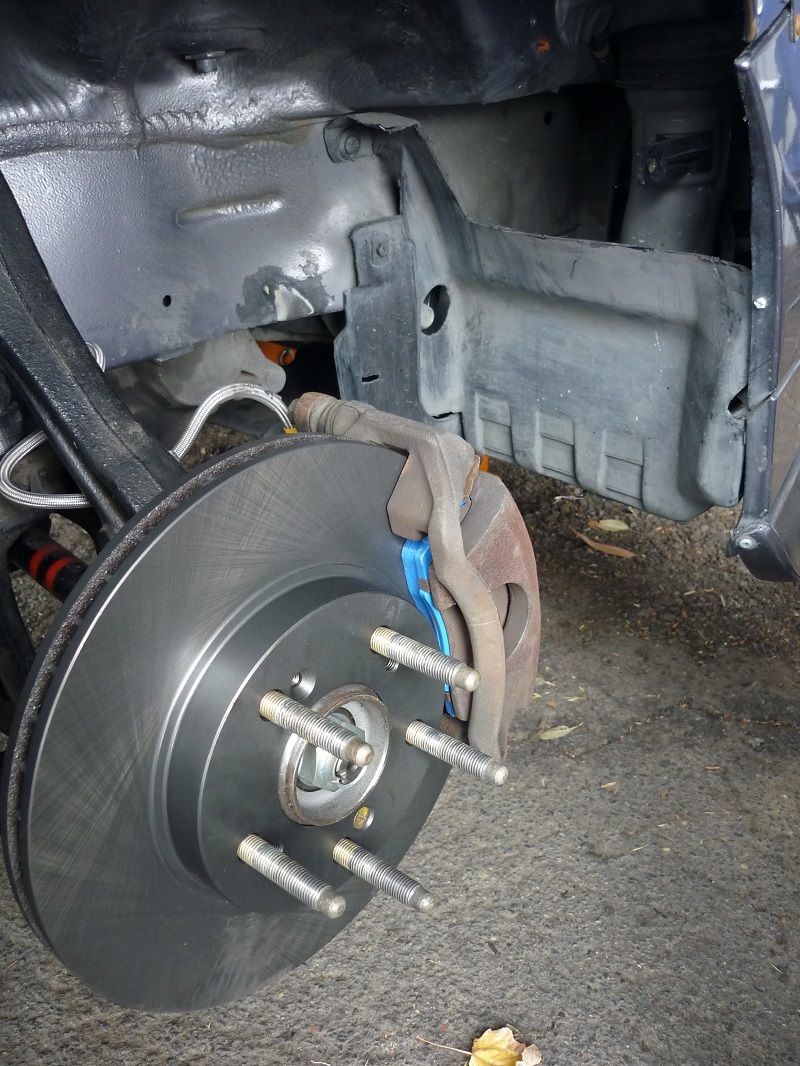
After the session, I found my front right brake rotor cracked. I knew the rotor was suspect and had new rotors and pads ready to go on, unfortunately i left them at home! (brought everything else through!) Tom was kind enough to run me home to get them and then it was just a case of installing the rotors and pads at the track
Lunch break brake install!
With the modifications i've done to the car over the summer I expected to drop more like 3-4 seconds so although it was a good day i've left a few seconds on the table. Next time!
The day was well organised with sign in and scrutineering completed well before 8:30
All week I had been checking the various weather forecasts sites and most predicted rain at around 10am, thankfully the weatherman was off the mark and we saw no rain all day.
There was a whole mix of cars entered including an R35, 991 GT3, few Skylines, couple of Exiges and almost a entire run group of mx5s.
In the first session I ran at the front of run group 4 and managed to get some clear laps in resulting in a new PB of 1:34.39 (1 second improvement)

In the second session I changed run groups and found myself in the middle of a pack of mx5s!
This is a snapshot from the results table, pretty much every lap was spent trying to get past these cars and get a clean run. The flag marshalls were waving the blue flag for the cars in front but there were still a few moments going side by side into the braking zone of T1 when the car in front didn't let off.

After the session, I found my front right brake rotor cracked. I knew the rotor was suspect and had new rotors and pads ready to go on, unfortunately i left them at home! (brought everything else through!) Tom was kind enough to run me home to get them and then it was just a case of installing the rotors and pads at the track

Lunch break brake install!


With the modifications i've done to the car over the summer I expected to drop more like 3-4 seconds so although it was a good day i've left a few seconds on the table. Next time!

 05-30-2015, 04:55 AM
#85
Honda-Tech Member
Thread Starter
Join Date: Jun 2014
Location: Australia
Posts: 83
Likes: 0
Received 0 Likes
on
0 Posts
So just prior to the Sandown event I replaced the original oem radiator cap with a Spoon 1.3 bar unit,
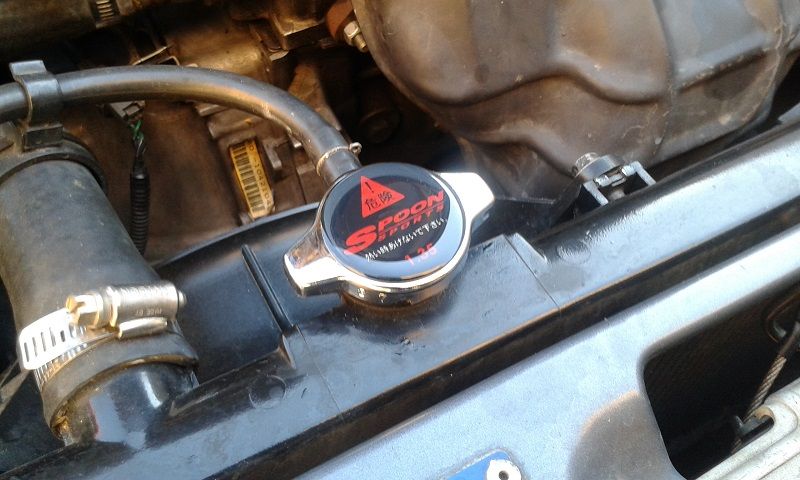
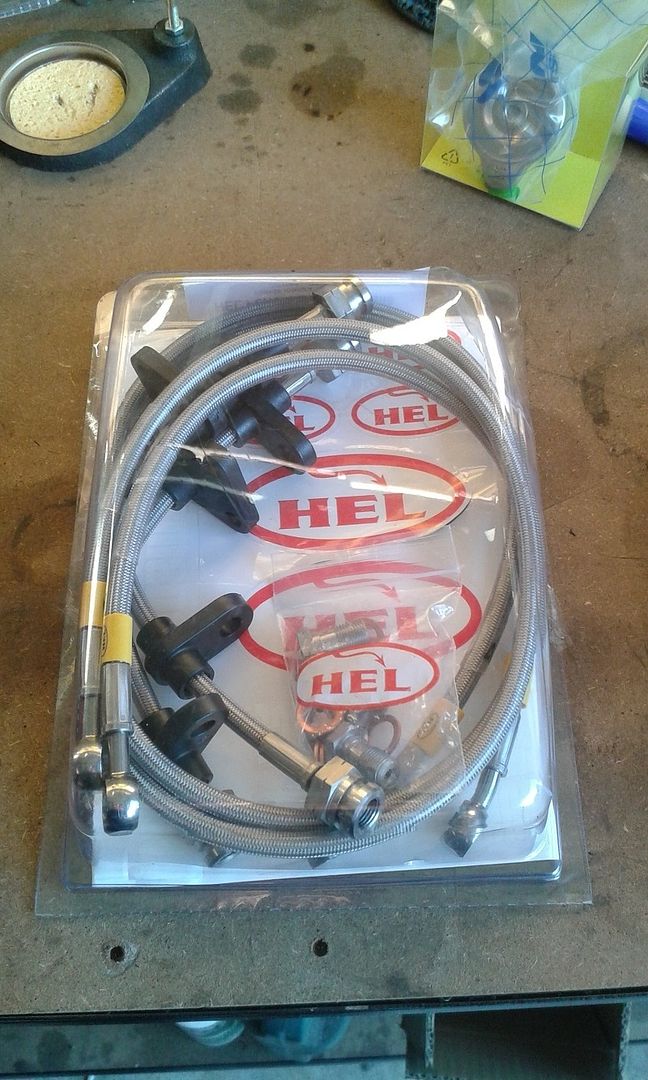
and at the same time I swapped out the brake lines with a HEL braided line kit. The original rubber lines were looking a bit tired and i didn't want to risk a brake line failure given the reasonable price to replace them.
A couple of weeks ago I went up to Winton to spectate while a friend was running his car, after each session I would meet him in the pits and ask him how his car felt and after a few sessions I noticed that straight out of the driver's seat he would only give short, not very specific answers, things like "yeah alright" or "the car felt good" At the time i thought he was just not very good at retaining specifics about what the car was doing and relaying them to his team but
Then at Sandown the other week my friend Tom was asking me the same things after each session, and I found myself only giving minimal answers. I realised that, for me at least, the track session is pretty taxing, and when I first step out of the car my mind is still spinning, so trying to give any feedback about what the car is doing is pretty hard.
I'm sure those stories of Senna asking for another 2 psi in his front right tyre as soon as he stepped out of the car are true but it's a different story when you're still trying to learn tracks let alone working out what the car wants.
So my strategy is to sit down the day after the event and annotate a track map with my thoughts, here's my feedback from Sandown
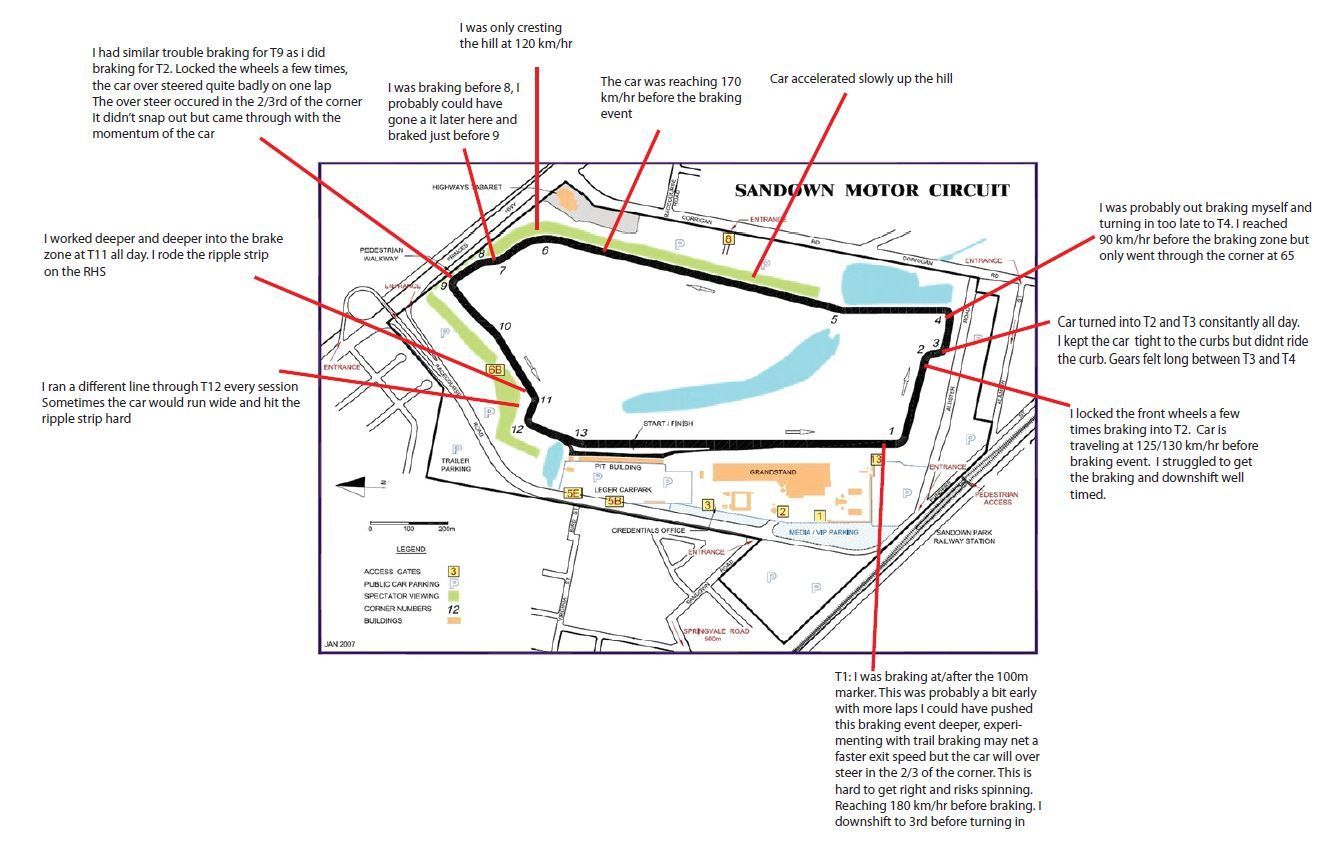
Looking at my notes, I mention the brakes locking or out braking myself a few times so I concluded that something is not quite right with my brake set up
My brake set up at Sandown:
No ABS
1" Master Cylinder + Abs booster
280mm front rotor + ITR caliper + Hawk blue pads
260mm rear rotor + Vti-r caliper + bendix pads (repco)
braided lines
The symptoms I described sounded like I had too much front bias and since dc2r's come with 260mm rear brakes i thought that a good place to start would be to upgrade the rear brakes to 260mm
So i brought a set of DC2r caliper brackets thinking that the type R and Vtir rear caliper would be the same, turns out they arn't and dc2r has it's own specific rear caliper. I didn't have time to source a set of dc2r calipers so I went to the pick a part and found a set of prelude rear calipers which will work, but have the bleed nipple in the wrong spot.

After running around doing all this a street test debunked my theory and although the car seemed a little better it still locked its front brakes pretty easily.
When I street tested the car I only had the small 195/50/15 tyres on and so it was conceivable that with the AD08r's (and 17's) on the car would be alright.
Since I had another track day booked in for the following weekend I didn't have any other option than to run with it.

and at the same time I swapped out the brake lines with a HEL braided line kit. The original rubber lines were looking a bit tired and i didn't want to risk a brake line failure given the reasonable price to replace them.

A couple of weeks ago I went up to Winton to spectate while a friend was running his car, after each session I would meet him in the pits and ask him how his car felt and after a few sessions I noticed that straight out of the driver's seat he would only give short, not very specific answers, things like "yeah alright" or "the car felt good" At the time i thought he was just not very good at retaining specifics about what the car was doing and relaying them to his team but
Then at Sandown the other week my friend Tom was asking me the same things after each session, and I found myself only giving minimal answers. I realised that, for me at least, the track session is pretty taxing, and when I first step out of the car my mind is still spinning, so trying to give any feedback about what the car is doing is pretty hard.
I'm sure those stories of Senna asking for another 2 psi in his front right tyre as soon as he stepped out of the car are true but it's a different story when you're still trying to learn tracks let alone working out what the car wants.
So my strategy is to sit down the day after the event and annotate a track map with my thoughts, here's my feedback from Sandown

Looking at my notes, I mention the brakes locking or out braking myself a few times so I concluded that something is not quite right with my brake set up
My brake set up at Sandown:
No ABS
1" Master Cylinder + Abs booster
280mm front rotor + ITR caliper + Hawk blue pads
260mm rear rotor + Vti-r caliper + bendix pads (repco)
braided lines
The symptoms I described sounded like I had too much front bias and since dc2r's come with 260mm rear brakes i thought that a good place to start would be to upgrade the rear brakes to 260mm
So i brought a set of DC2r caliper brackets thinking that the type R and Vtir rear caliper would be the same, turns out they arn't and dc2r has it's own specific rear caliper. I didn't have time to source a set of dc2r calipers so I went to the pick a part and found a set of prelude rear calipers which will work, but have the bleed nipple in the wrong spot.


After running around doing all this a street test debunked my theory and although the car seemed a little better it still locked its front brakes pretty easily.
When I street tested the car I only had the small 195/50/15 tyres on and so it was conceivable that with the AD08r's (and 17's) on the car would be alright.
Since I had another track day booked in for the following weekend I didn't have any other option than to run with it.
05-30-2015, 04:56 AM
#86
Honda-Tech Member
Thread Starter
Join Date: Jun 2014
Location: Australia
Posts: 83
Likes: 0
Received 0 Likes
on
0 Posts
I drove the car up to Benalla on Saturday afternoon in preparation for the exe track day at Winton the following day.
I made the fender spacers adjustable so I can convert the car back to a more subtle "road" spec to drive on the highway.
I put the standard seat back in and fit the 15" wheels, it's still loud and bumpy but its survivable
It's funny to think back to when I was younger and I would look at full on track cars and think "yeah I'd daily drive that!" I had no idea haha
So track day morning comes, the weather is a little cold but at least its dry. After a quick meet and greet I get myself set up with a spot in the pits and we go through scrutineering and driver briefing
I got put in group C so i was in the third group of cars out on track.
Group A go out and from the pits we can see a few cars go off the track. When the drivers come in they were all reporting a pretty slippery track.
Group B go out and about mid session there was a pretty big incident, a car went into the wall and that slowed everything up for a while.
When my group finally got called I was one of the first cars into the staging area and ended up being the first car out on track
I had a passenger with me and we did a few laps to feel out the track and then on about lap 5 or 6 I tried to go just a bit quicker through the sweeper and the rear end came around on me.
I couldn't save it and the car looped around and went backwards over this nasty ripple strip. BANG!
After I apologized to my passenger I drove back onto the track but realised immediately something wasn't right .
I thought maybe we had de-beaded a tyre and drove the car cautiously back to the pits
When we got back to the pits we jumped out of the car to survey the damage, we check the tyres and they seemed to be alright but then as I stepped back i noticed one of the rear wheels had a bit more camber than it should have
Yep snapped the right rear camber arm! those of you who know will probably take one look at that and see it is a cheap ebay camber arm made from aluminium. It serves me right, i knew I should have replaced it!
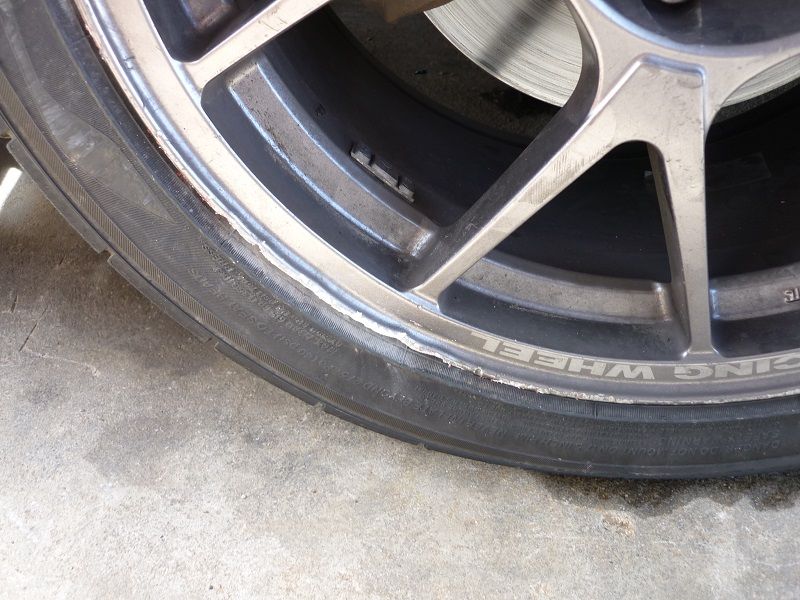
That wasn't the entirety of the damage through, the front left rim took a hammering as well
That pretty much ended my day. I was lucky enough to get a ride in an Evo which was an eye opening experience! It was great to experience what 10 seconds a lap faster than what I was doing felt like, braking in a car like that is a whole different thing!
I took a risk driving my car up to Winton and it was a pretty sombre moment when I realised i might be up for the cost of a flat bed to get the car back to town. Amazingly there was an offer from a fellow attendee to tow my car back on his trailer (his car was still road legal) and if it came to it that would have been much appreciated however
I managed to thread the broken portion of the camber arm back into the adjuster although this shortened the camber arm by about 15mm but at least the wheel wasn't rubbing on the spring anymore.
I fitted a couple of washer under the chassis side of the camber arm to space it out a bit but still ended up with like -6 deg camber on that wheel
Amazingly it held on like that and I was able to drive it the 3 hours back home.
I made the fender spacers adjustable so I can convert the car back to a more subtle "road" spec to drive on the highway.
I put the standard seat back in and fit the 15" wheels, it's still loud and bumpy but its survivable
It's funny to think back to when I was younger and I would look at full on track cars and think "yeah I'd daily drive that!" I had no idea haha
So track day morning comes, the weather is a little cold but at least its dry. After a quick meet and greet I get myself set up with a spot in the pits and we go through scrutineering and driver briefing

I got put in group C so i was in the third group of cars out on track.
Group A go out and from the pits we can see a few cars go off the track. When the drivers come in they were all reporting a pretty slippery track.
Group B go out and about mid session there was a pretty big incident, a car went into the wall and that slowed everything up for a while.
When my group finally got called I was one of the first cars into the staging area and ended up being the first car out on track
I had a passenger with me and we did a few laps to feel out the track and then on about lap 5 or 6 I tried to go just a bit quicker through the sweeper and the rear end came around on me.
I couldn't save it and the car looped around and went backwards over this nasty ripple strip. BANG!
After I apologized to my passenger I drove back onto the track but realised immediately something wasn't right .
I thought maybe we had de-beaded a tyre and drove the car cautiously back to the pits
When we got back to the pits we jumped out of the car to survey the damage, we check the tyres and they seemed to be alright but then as I stepped back i noticed one of the rear wheels had a bit more camber than it should have

Yep snapped the right rear camber arm! those of you who know will probably take one look at that and see it is a cheap ebay camber arm made from aluminium. It serves me right, i knew I should have replaced it!
That wasn't the entirety of the damage through, the front left rim took a hammering as well

That pretty much ended my day. I was lucky enough to get a ride in an Evo which was an eye opening experience! It was great to experience what 10 seconds a lap faster than what I was doing felt like, braking in a car like that is a whole different thing!
I took a risk driving my car up to Winton and it was a pretty sombre moment when I realised i might be up for the cost of a flat bed to get the car back to town. Amazingly there was an offer from a fellow attendee to tow my car back on his trailer (his car was still road legal) and if it came to it that would have been much appreciated however
I managed to thread the broken portion of the camber arm back into the adjuster although this shortened the camber arm by about 15mm but at least the wheel wasn't rubbing on the spring anymore.
I fitted a couple of washer under the chassis side of the camber arm to space it out a bit but still ended up with like -6 deg camber on that wheel

Amazingly it held on like that and I was able to drive it the 3 hours back home.
05-30-2015, 04:56 AM
#87
Honda-Tech Member
Thread Starter
Join Date: Jun 2014
Location: Australia
Posts: 83
Likes: 0
Received 0 Likes
on
0 Posts
During the week I took the front rim to a tyre shop and got them to spin it up, they found the rim was pretty buckled
I'll look into getting it repaired but I'm now booked in for another event in August and I don't want to be worried about these wheels (i've had to get the other one repaired already) so i've ordered two RPF1's for the front .
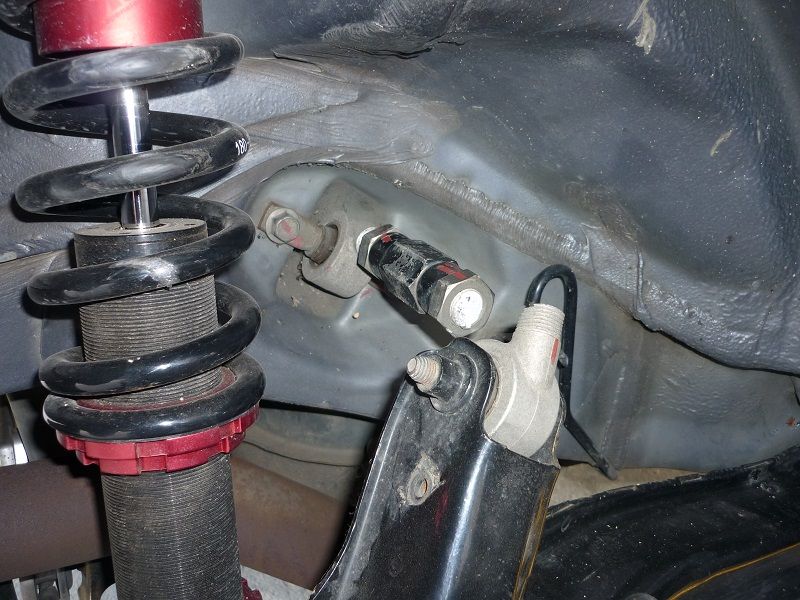
Today I got the replacement camber arms installed, went with hardrace
You can visualize how the asymmetrical design of the ebay camber arm loads the thread in bending.
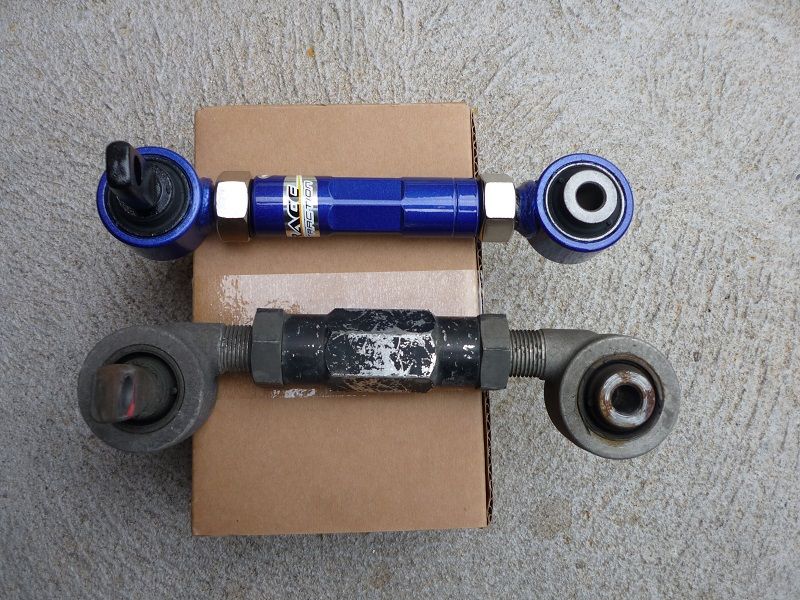
I like that the hardrace camber arm is steel and that they even supply bevel washer between the locking nuts and the adjuster body to prevent the nuts vibrating loose, the only thing i don't like about the hardrace part is that the threaded portion is welded the the bush sleeve but you couldn't forge or machine that part from one piece and still sell them for under $200
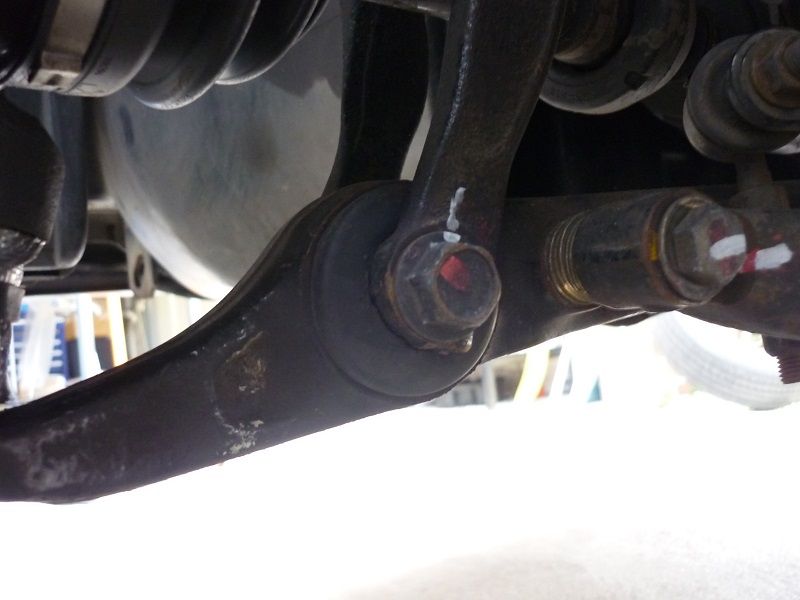
Camber arm installed
If anyone was wondering what urethane LCA bushes look like after 12 months, check out the image below
The bush has fallen apart all around the crush tube, i replaced the urethane bushes I had in the lca with some hardrace hardened rubber bushes.
The shock fork was much easier to install over the standard style rubber bushes than the urethane.
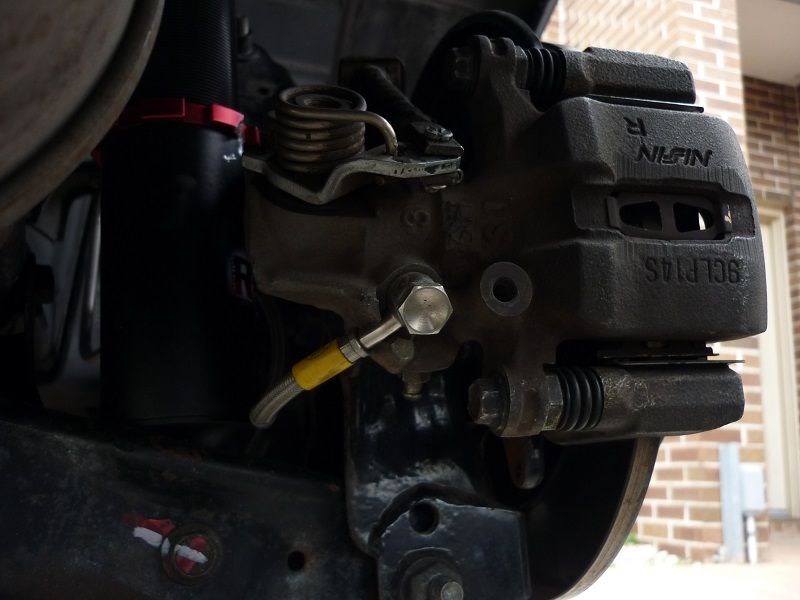
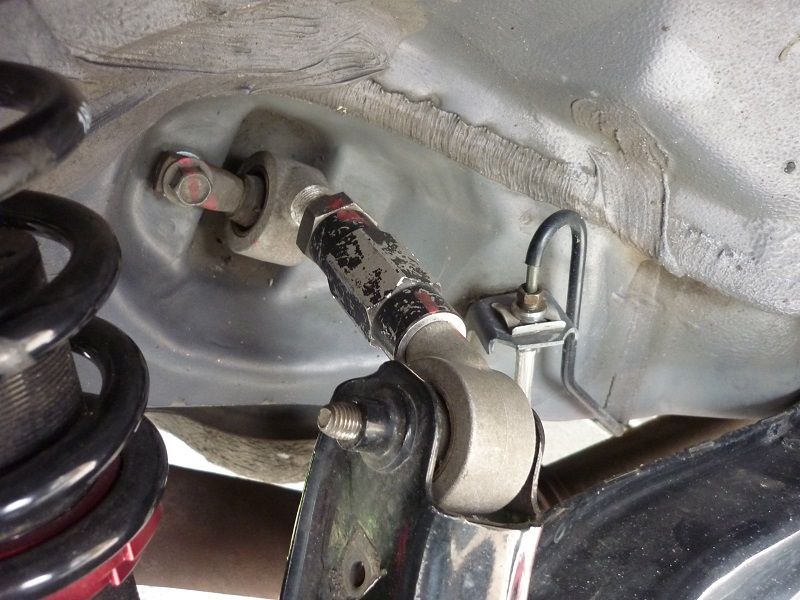
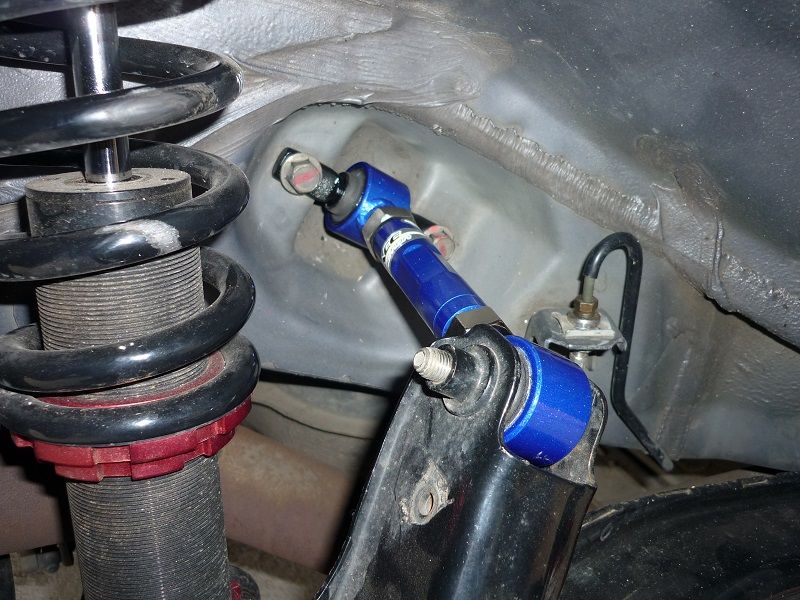
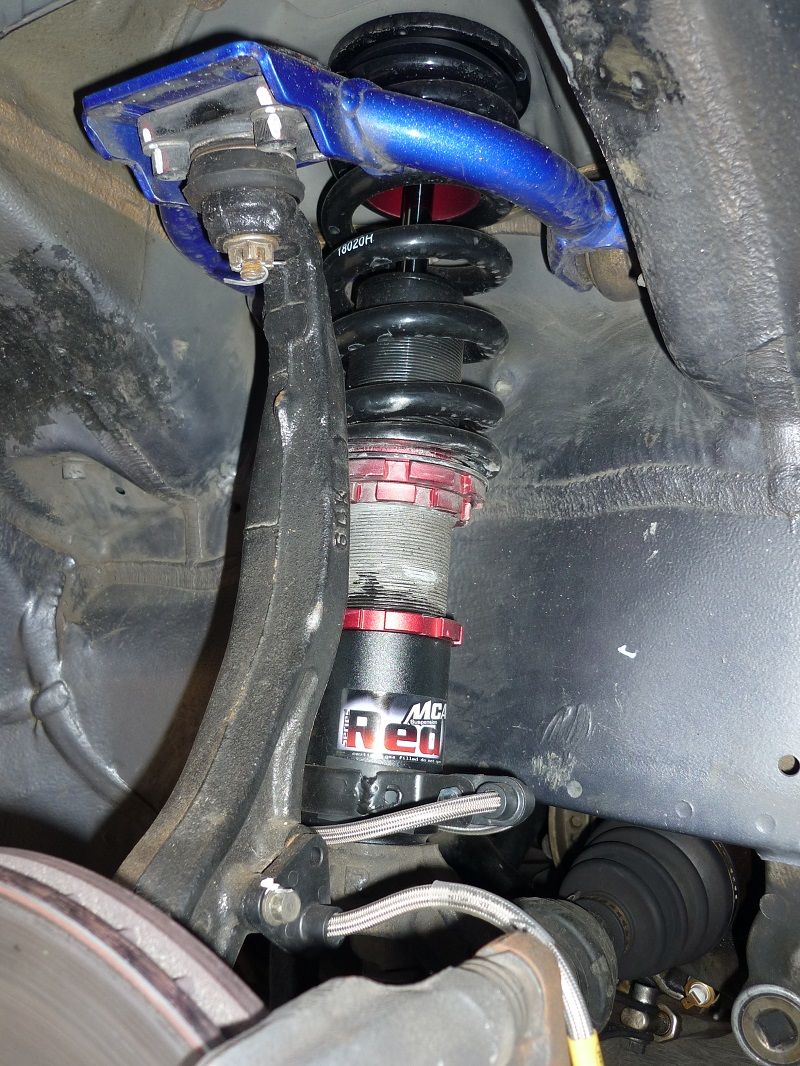
Nice shot of the front MCA red coilovers in the wheel arch, you can just see the little brake line bracket i made up
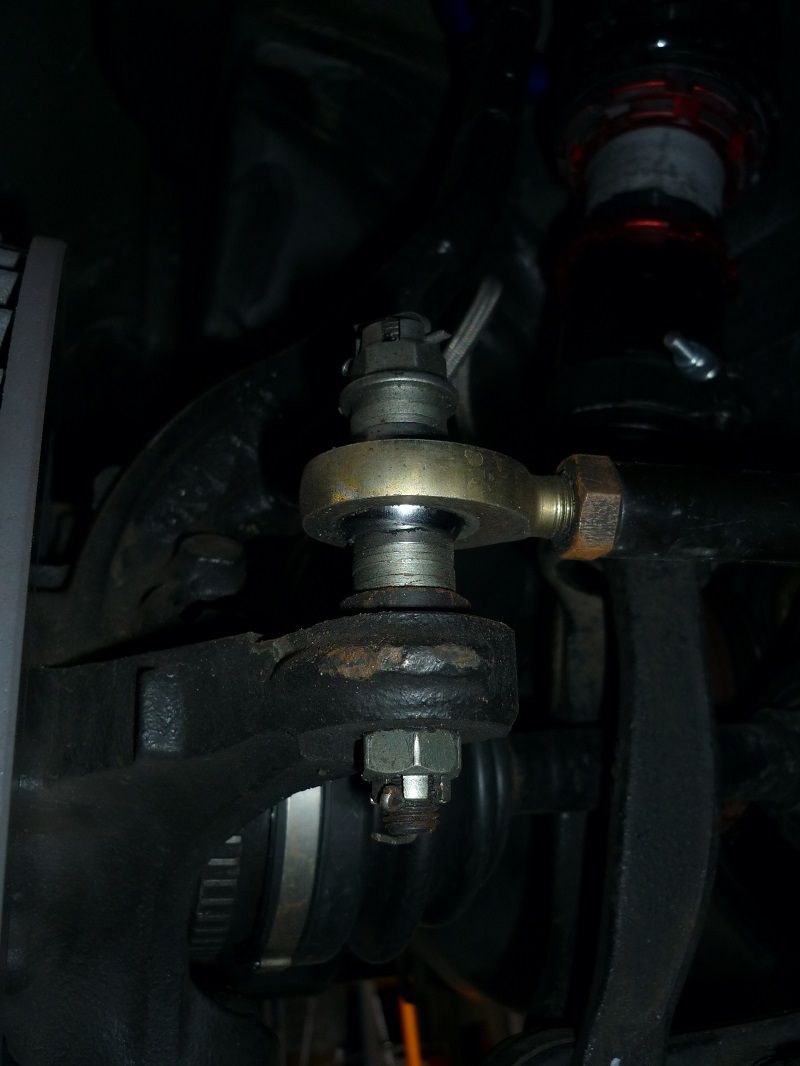
I was glad to see that even with a decent hit to the wheel my tie rod stub is undamaged! I've done probably 3000 kms with the rod end style tie rod kit installed and no there is no play in the rod end and i haven't had any other issues with them.
In those 4-5 laps I got to complete at Winton I got the impression that the brake situation has been improved with the 260mm rear rotors and slightly larger rear pistion caliper. I brought Fred Puhn's Brake Handbook which is an excellent guide to braking systems and has helped me work out what my next step should be.
I've ordered a set of Hawk blue pads for the rear so I don't have a pad bias contributing to the issue then I've decided to delete the booster and convert the car to unboosted brakes with a smaller master cylinder and modified pedal ratio.
I'll be getting rid of the standard proportioning valve and the splitting the brake circuits front to rear instead of diagonally, I'll then fit a tilton adjustable proportioning valve to the rear circuit and use that to fine tune the rear brakes
Hopefully in a few weeks time i'll know if all that lot fixes my issue! (just learning how to brake properly would probably be easier!)
I'll look into getting it repaired but I'm now booked in for another event in August and I don't want to be worried about these wheels (i've had to get the other one repaired already) so i've ordered two RPF1's for the front .
Today I got the replacement camber arms installed, went with hardrace
You can visualize how the asymmetrical design of the ebay camber arm loads the thread in bending.

I like that the hardrace camber arm is steel and that they even supply bevel washer between the locking nuts and the adjuster body to prevent the nuts vibrating loose, the only thing i don't like about the hardrace part is that the threaded portion is welded the the bush sleeve but you couldn't forge or machine that part from one piece and still sell them for under $200
Camber arm installed

If anyone was wondering what urethane LCA bushes look like after 12 months, check out the image below

The bush has fallen apart all around the crush tube, i replaced the urethane bushes I had in the lca with some hardrace hardened rubber bushes.
The shock fork was much easier to install over the standard style rubber bushes than the urethane.
Nice shot of the front MCA red coilovers in the wheel arch, you can just see the little brake line bracket i made up

I was glad to see that even with a decent hit to the wheel my tie rod stub is undamaged! I've done probably 3000 kms with the rod end style tie rod kit installed and no there is no play in the rod end and i haven't had any other issues with them.

In those 4-5 laps I got to complete at Winton I got the impression that the brake situation has been improved with the 260mm rear rotors and slightly larger rear pistion caliper. I brought Fred Puhn's Brake Handbook which is an excellent guide to braking systems and has helped me work out what my next step should be.
I've ordered a set of Hawk blue pads for the rear so I don't have a pad bias contributing to the issue then I've decided to delete the booster and convert the car to unboosted brakes with a smaller master cylinder and modified pedal ratio.
I'll be getting rid of the standard proportioning valve and the splitting the brake circuits front to rear instead of diagonally, I'll then fit a tilton adjustable proportioning valve to the rear circuit and use that to fine tune the rear brakes
Hopefully in a few weeks time i'll know if all that lot fixes my issue! (just learning how to brake properly would probably be easier!)
05-30-2015, 06:11 AM
#88
Honda-Tech Member
Well damn, sucks that the rear UCA broke so far from your home
Been thinking of getting the hardrace ones for my civic instead of these skunk2s i still need to install
Been thinking of getting the hardrace ones for my civic instead of these skunk2s i still need to install
06-01-2015, 12:54 PM
#89
Honda-Tech Member
iTrader: (1)
Join Date: Jan 2002
Location: Nowhere and Everywhere
Posts: 29,530
Likes: 0
Received 52 Likes
on
46 Posts
Wow, sick build and thread! Early on I was like "dang man why use adjustable toe links, when they can end up different lengths on each side" and then on Page 3 I read that you took the time to make sure they were set to equal lengths. Excellent. 
And those LCA bushings!! Once again I say, polyurethane sucks for suspension bushings. I had poly shifter bushings that disintegrated after awhile, and I switched back to OEM rubber. The only poly bushings currently in use on my car are in my Function7 rear LCA's. And I think those are holding up fairly well. Everything else on my car is HardRace rubber.
And those LCA bushings!! Once again I say, polyurethane sucks for suspension bushings. I had poly shifter bushings that disintegrated after awhile, and I switched back to OEM rubber. The only poly bushings currently in use on my car are in my Function7 rear LCA's. And I think those are holding up fairly well. Everything else on my car is HardRace rubber.
06-02-2015, 03:30 AM
#91
Honda-Tech Member
Thread Starter
Join Date: Jun 2014
Location: Australia
Posts: 83
Likes: 0
Received 0 Likes
on
0 Posts
Thanks for the responses,
I saw that this thread got another mention in the HT newsletter, whoever is writing the blurbs has got me blushing haha much appreciated.
I've got a prototype master cylinder mount on the 3d printer tonight so hopefully i'll have an update on the new manual brake arrangement tomorrow.
I saw that this thread got another mention in the HT newsletter, whoever is writing the blurbs has got me blushing haha much appreciated.
I've got a prototype master cylinder mount on the 3d printer tonight so hopefully i'll have an update on the new manual brake arrangement tomorrow.
06-03-2015, 03:57 AM
#92
Honda-Tech Member
Thread Starter
Join Date: Jun 2014
Location: Australia
Posts: 83
Likes: 0
Received 0 Likes
on
0 Posts
So on Sunday morning I went parts scavanging and collected a 7/8 MC and pedal box from a DC4
I took the booster from the dc4 as well and then cut the guts out of it to get the push rod shaft, this came in handy when trying to work out what length my new push rod will need to be
On Monday night I measured up the parts and had think about what would be required to mate the MC to the pedal box directly
I modeled up something resembling a bracket adaptor then managed to sneak it on the 3d printer overnight tuesday

This enabled me to check that I had measured the two bolt patterns correctly and then work out the what the length of the push rod needs to be
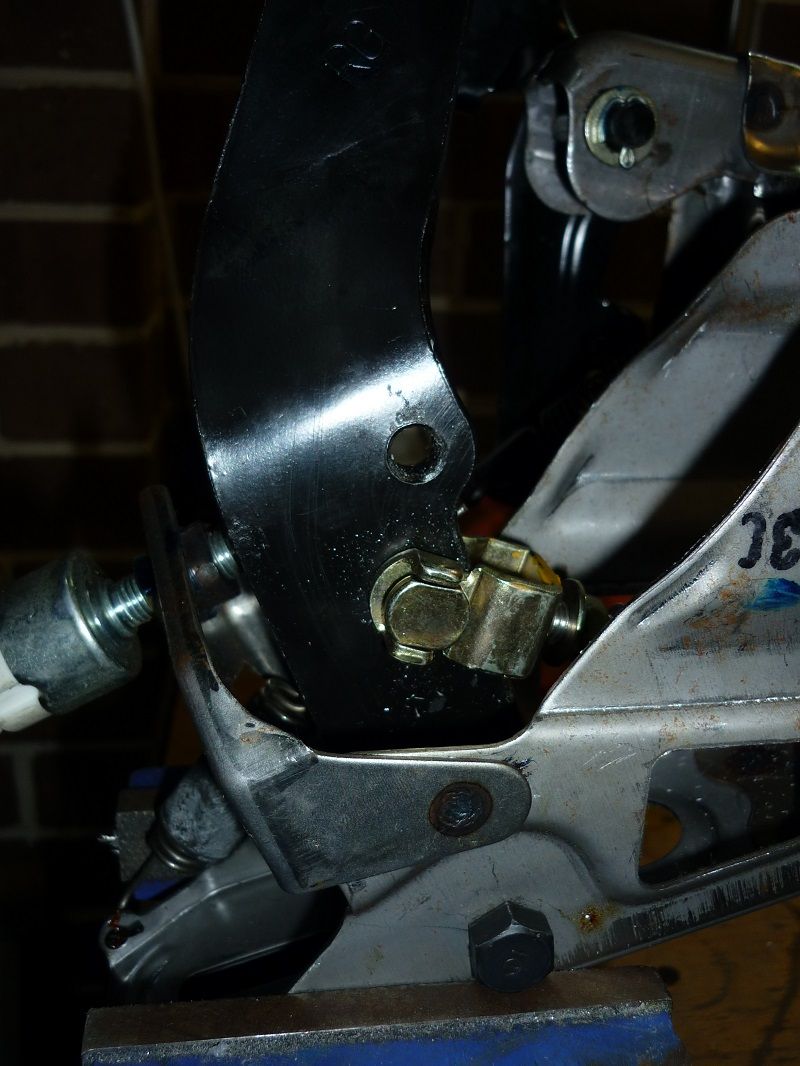
To achieve a 6:1 pedal ratio, I found that I needed to drill a hole 25mm up from the original in the pedal. Fortunately there is enough meat in the pedal to do this
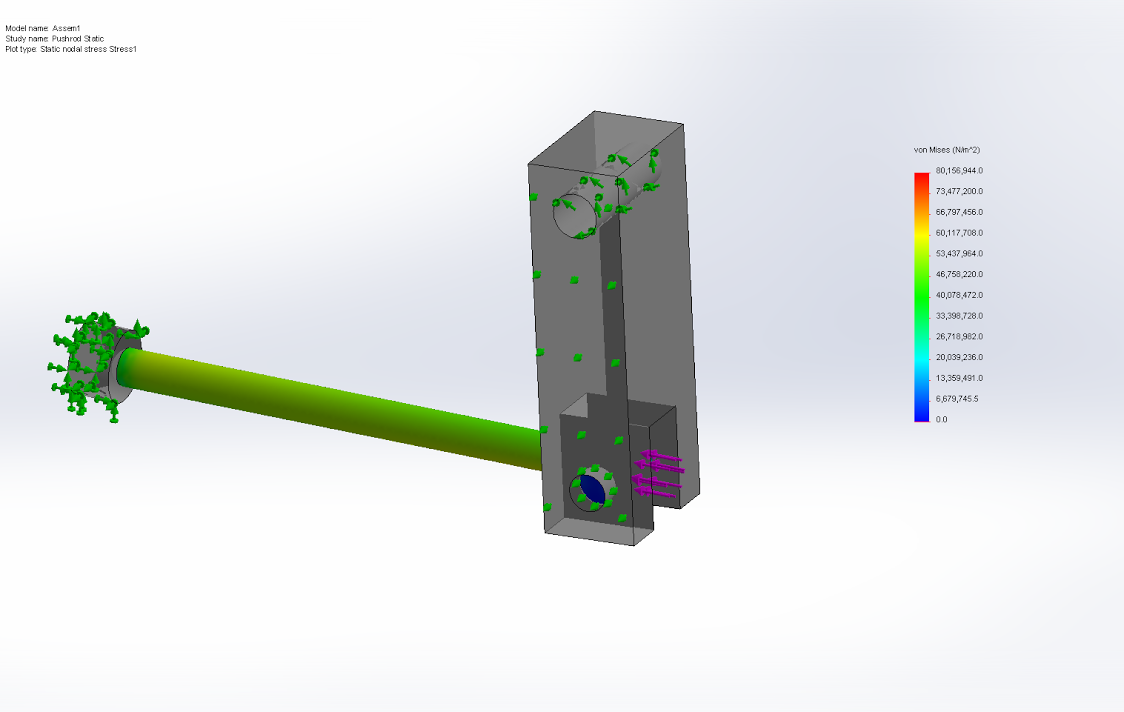
I fashioned a push rod out of half of the original pushrod from the booster and half an m8 cap screw
I quickly checked the stiffness of the pushrod with a rough simulation, turns out an 8mm push rod is plenty strong enough
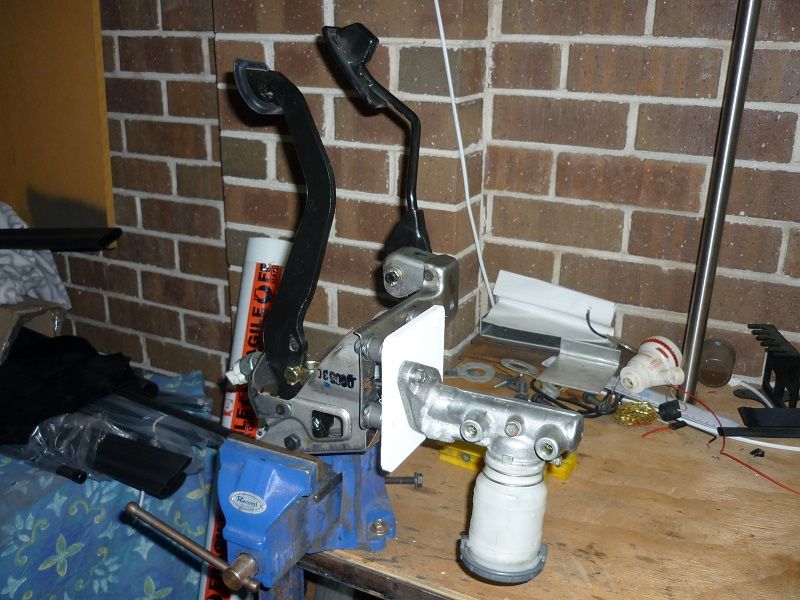
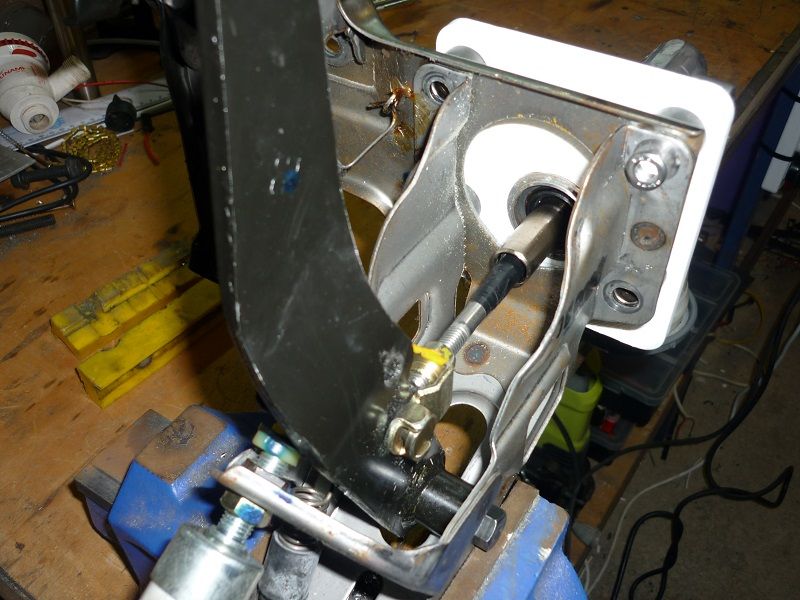
Here you can see how the assembly will sit in the car
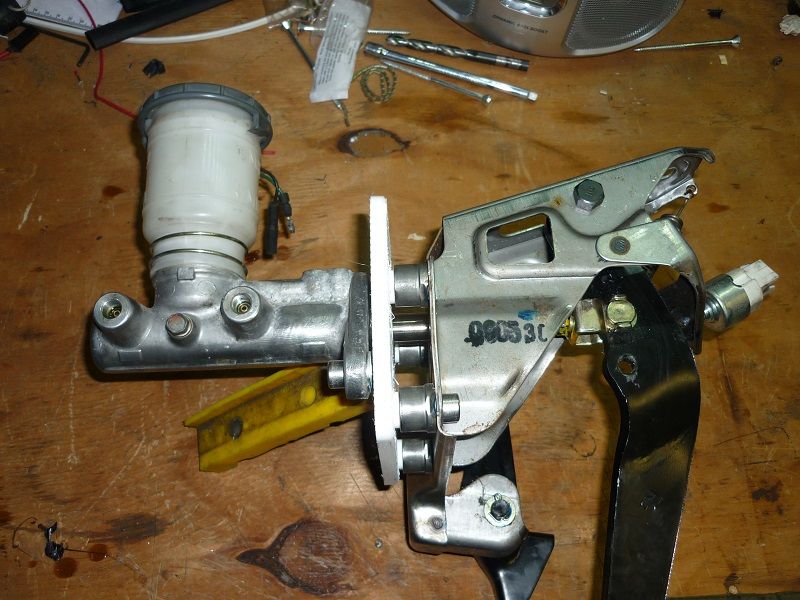
The printed bracket is strong enough that I can cycle the pedal through it's arc and check the clearance around the clevis and feel the free play,
My initial impression is that this set up will work out just fine!
I took the booster from the dc4 as well and then cut the guts out of it to get the push rod shaft, this came in handy when trying to work out what length my new push rod will need to be
On Monday night I measured up the parts and had think about what would be required to mate the MC to the pedal box directly
I modeled up something resembling a bracket adaptor then managed to sneak it on the 3d printer overnight tuesday

This enabled me to check that I had measured the two bolt patterns correctly and then work out the what the length of the push rod needs to be

To achieve a 6:1 pedal ratio, I found that I needed to drill a hole 25mm up from the original in the pedal. Fortunately there is enough meat in the pedal to do this

I fashioned a push rod out of half of the original pushrod from the booster and half an m8 cap screw

I quickly checked the stiffness of the pushrod with a rough simulation, turns out an 8mm push rod is plenty strong enough

Here you can see how the assembly will sit in the car

The printed bracket is strong enough that I can cycle the pedal through it's arc and check the clearance around the clevis and feel the free play,
My initial impression is that this set up will work out just fine!
06-19-2015, 09:11 PM
#95
Honda-Tech Member
Thread Starter
Join Date: Jun 2014
Location: Australia
Posts: 83
Likes: 0
Received 0 Likes
on
0 Posts
So the RPF1's I ordered turned up last week and on Friday i dropped them off at the tyre shop to swap my tyres over.
Specs on these wheels are 17" x 9.5" +35
I'm going to keep pushing with this 17/16 stagger idea, even through it's causing me issues at every turn haha
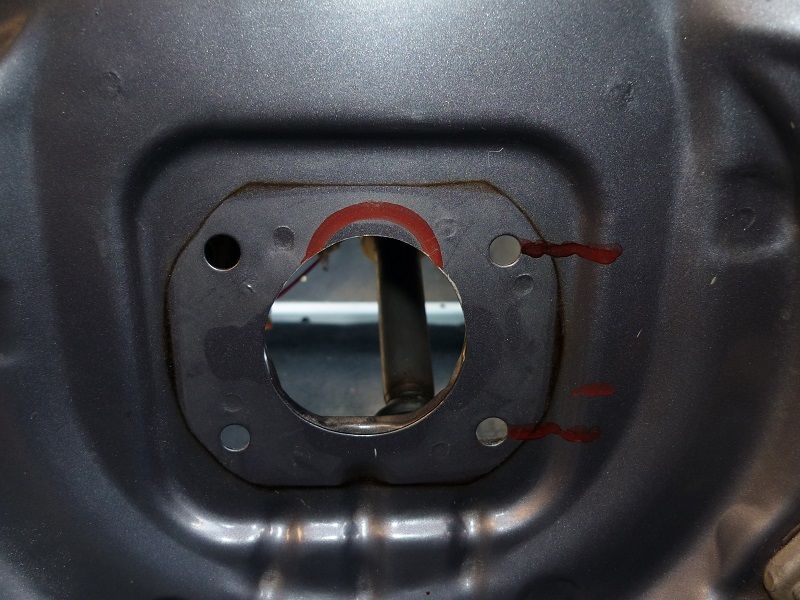
I've spent the last week getting the 7/8 master cylinder mounted into the car
The firewall needed a little die grinding to allow clearance for the master cylinder in it's new position
I didn't take any photo's of the new pushrod before I installed it, but what i did was have the machine shop who milled the adapter plate, take an m8 bolt cut it to the length i worked out that I would need it to be then on the cut end recreate the profile from the oem booster pushrod.
This worked out great; the result is a pushrod with rolled threads (stronger than cut threads), no welds (so no HAZ), zinc plated, the required hardness (or close to it) and the correct profile to match the master cylinder
You can see the adaptor plate in this picture:
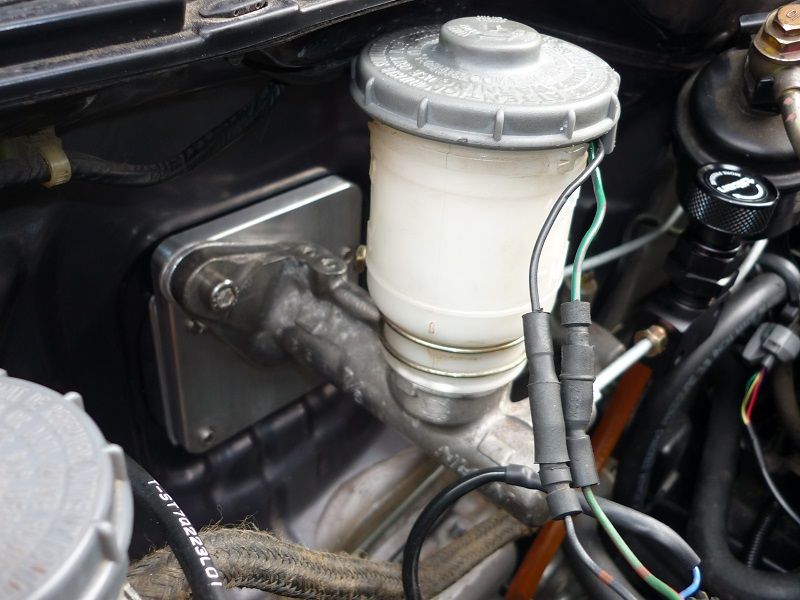
I had to make a couple of 2.5mm spacer plates to space the adaptor plate out from the firewall so that it cleared the firewall joggle
I then found that my master cylinder reservoir was hard up against the edge of the firewall that the rear of the bonnet seals against, so I made another couple of spacers to bring the MC another 5mm out
You can see how close it is in the photo above.
With everything bolted up i can still get the reservoir cap on and off so I run it like this for now and if I feel like getting another adapter machined up i'll adjust the design to compensate.
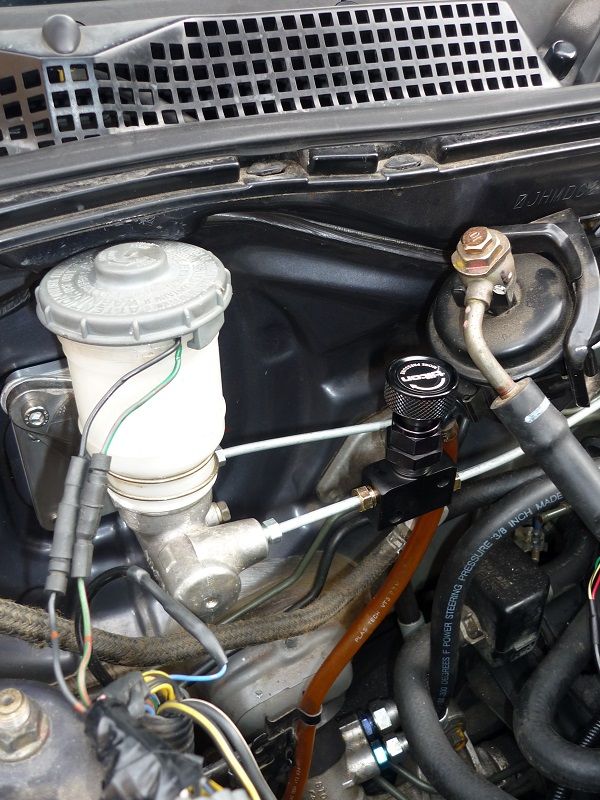
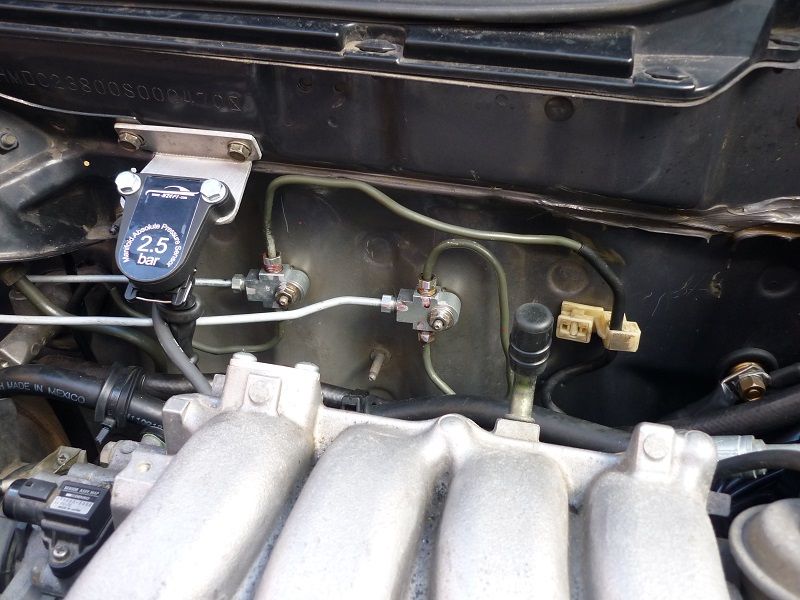
You can see where the Tilton proportioning valve has ended up, I was a bit confused as to how to actually adapt the hardlines into the tilton unit. The instructions pdf that Tilton provides is not very clear on what you're supposed to do (or i'm not very perceptive haha)
What I've done is use a bubble flare on the tube and a tube nut with a section of non-threaded shank at the end, initial impression is that this has sealed but I won't know for sure until we get the system bleed up properly.
Speaking of bleeding! It turns out that the "tee" fittings i've sourced to converge the LHS and RHS hardlines, of the front and rear circuits respectively are not the type suited to the "inverted flare" that our Honda hardlines use.
When we tried to bleed the system this morning the fluid just pushed out the top of the fitting!
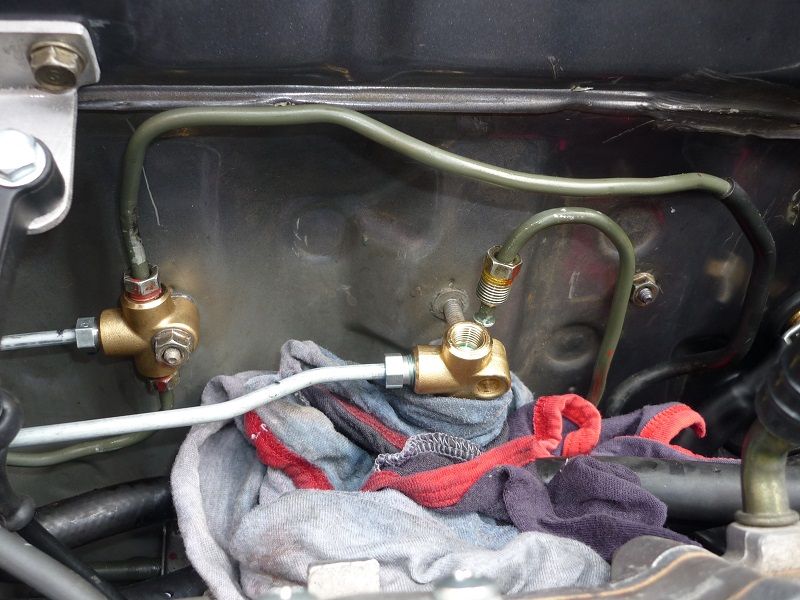
Luckily it looks like Brakequip make a "tee" that has the correct inverted flare style female connections and so I'll order a couple of those on Monday and we should be back in business!
This little project has given me quite the education in brake system components!
Specs on these wheels are 17" x 9.5" +35
I'm going to keep pushing with this 17/16 stagger idea, even through it's causing me issues at every turn haha


I've spent the last week getting the 7/8 master cylinder mounted into the car
The firewall needed a little die grinding to allow clearance for the master cylinder in it's new position
I didn't take any photo's of the new pushrod before I installed it, but what i did was have the machine shop who milled the adapter plate, take an m8 bolt cut it to the length i worked out that I would need it to be then on the cut end recreate the profile from the oem booster pushrod.
This worked out great; the result is a pushrod with rolled threads (stronger than cut threads), no welds (so no HAZ), zinc plated, the required hardness (or close to it) and the correct profile to match the master cylinder
You can see the adaptor plate in this picture:

I had to make a couple of 2.5mm spacer plates to space the adaptor plate out from the firewall so that it cleared the firewall joggle
I then found that my master cylinder reservoir was hard up against the edge of the firewall that the rear of the bonnet seals against, so I made another couple of spacers to bring the MC another 5mm out

You can see how close it is in the photo above.
With everything bolted up i can still get the reservoir cap on and off so I run it like this for now and if I feel like getting another adapter machined up i'll adjust the design to compensate.
You can see where the Tilton proportioning valve has ended up, I was a bit confused as to how to actually adapt the hardlines into the tilton unit. The instructions pdf that Tilton provides is not very clear on what you're supposed to do (or i'm not very perceptive haha)
What I've done is use a bubble flare on the tube and a tube nut with a section of non-threaded shank at the end, initial impression is that this has sealed but I won't know for sure until we get the system bleed up properly.
Speaking of bleeding! It turns out that the "tee" fittings i've sourced to converge the LHS and RHS hardlines, of the front and rear circuits respectively are not the type suited to the "inverted flare" that our Honda hardlines use.
When we tried to bleed the system this morning the fluid just pushed out the top of the fitting!

Luckily it looks like Brakequip make a "tee" that has the correct inverted flare style female connections and so I'll order a couple of those on Monday and we should be back in business!
This little project has given me quite the education in brake system components!
06-20-2015, 01:03 AM
#96
Honda-Tech Member
Thread Starter
Join Date: Jun 2014
Location: Australia
Posts: 83
Likes: 0
Received 0 Likes
on
0 Posts
07-18-2015, 05:20 AM
#98
Honda-Tech Member
Thread Starter
Join Date: Jun 2014
Location: Australia
Posts: 83
Likes: 0
Received 0 Likes
on
0 Posts
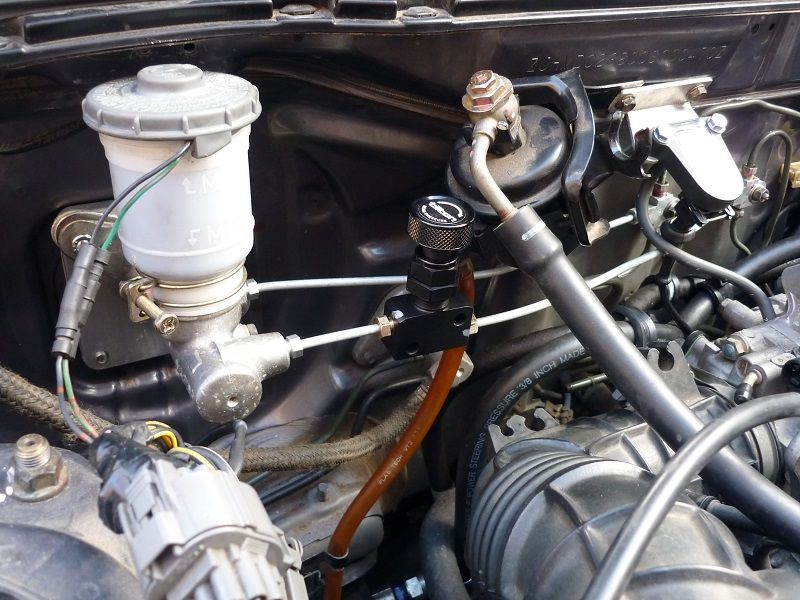
So last weekend I got a couple of the correct inverted flare "T" fittings and bolted those into place, completing the manual brake conversion
As you can see I've just bent the original brake lines around to fit, less than ideal but I don't want to take the engine out just yet.
The first attempt to bleed the system resulted in a pedal with about 20mm of dead travel before it would feel firm.
I was eager to see where the brake bias had ended up so we took the car for a brief test drive anyway
My first impression was that the fronts were much less prone to "pinching" or locking up when you got on the pedal at high (for the road) speeds (100 - 80 km/hr)
I was happy for this to be the case as eliminating that issue was the whole point of this exercise!
However if I held constant pressure on the pedal, as the car slowed though the 40 km/hr range it would still lock the fronts.
Now it could be argued that one should be easing off the pedal as the car slows down and on track that is the case but in this instance I was trying to identify which wheels would lock first.
So the modifications I've done haven't over powered the rear brakes, if anything it's still got front bias
For reference:
- This was with the proportioning valve adjusted to give the rear brakes full pressure.
- This was also with the 15 x 6 wheels and 195 tyres on up front.
I figured that it might be a different story with the larger wheels and stickier tyres, it's logical that the brake balance would shift rearward with that combo on the front.
As I was driving it around the block I noticed the temp gauge start to move around, that set the warning bells ringing as normally the temp gauge is rock solid
I found it odd through because the needle would settle back to its normal position when I was idling at lights (where i would have expected the temp to soar if there was an issue)
Last time I drove it, the car was fine and the chance of the water pump failing just sitting in the driveway is pretty slim.
My guess was that the temperature sensor was playing up somehow
I parked the car for a week and then this morning when I had a chance to get back to it
I started by cleaning the temperature sensor, when I first pulled it off I could see that there was some oil around it and it way pretty dirty in general
After cleaning the plug out I applied some dielectric grease to the terminals and reinstalled it
then I connected the laptop to the ECU and checked all the parameters to do with the cooling system.
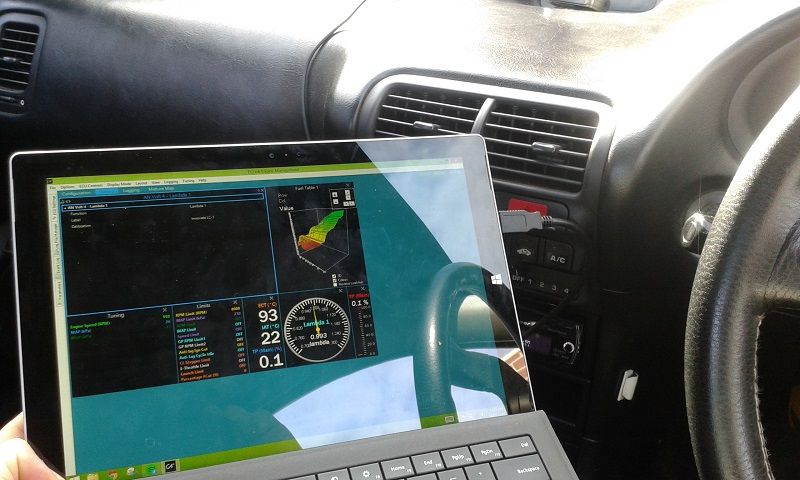
- The electric fan was working, I could switch it manually and check that.
- The electric fan is set to come on at 94 degrees
- The analog input value from the temp sensor seemed to match the movement of the gauge on the dash
- I let the car run for about 20 mins in the driveway and it came up to temp and then regulated temperature just fine.
Who knows, maybe it was just the sensor playing up on that day.
Back to the manual brake conversion story
I bled the brakes again, this time quite a lot of air came out of the rear circuit and the pedal feel improved to something resembling normal pedal feel
It probably needs yet another bleed but you can feel that it's building pressure right from the top of the pedal now.
I bolted the track day wheels on and took the car for another drive
The temperature gauge came up to it's usual position and stayed there so that was good.
The brakes felt much better this time,
The feel is bit wooden, the brakes don't have that instant bite at 20 km/hr you get with a boosted set up.
Pedal effort is different, you do have to press down a little harder initially (and increase following distances!) but you adjust to it quickly and it doesn't feel so hard that your leg would tire out or anything like that.
It still locked the fronts with the track wheels up front but only at lower speeds so i don't know if that's really an issue or not.
I don't think I'm going to be able to get a real gauge of where the brakes are at until I run the car on track again, you just can't replicate track conditions on the road
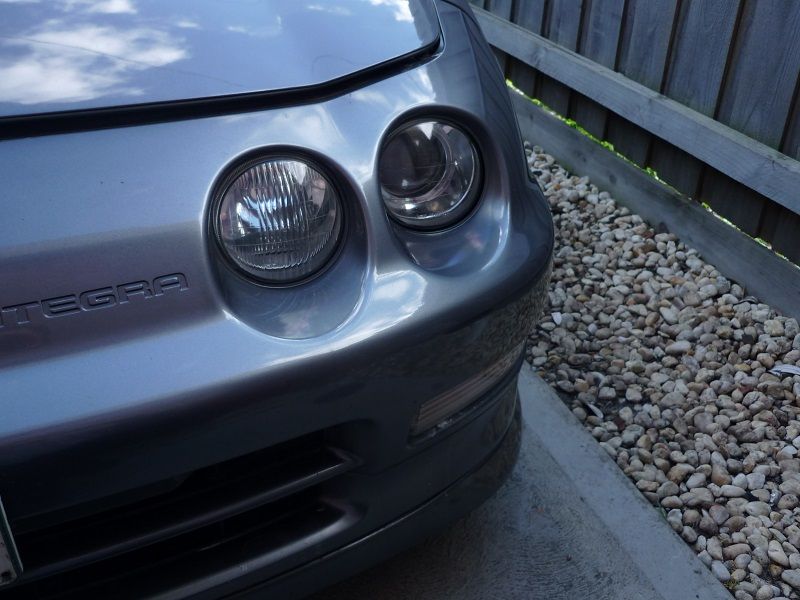
The headlight lenses have been looking rather dull and yellowed so I decided to try rejuvenate them with a head light restoration kit
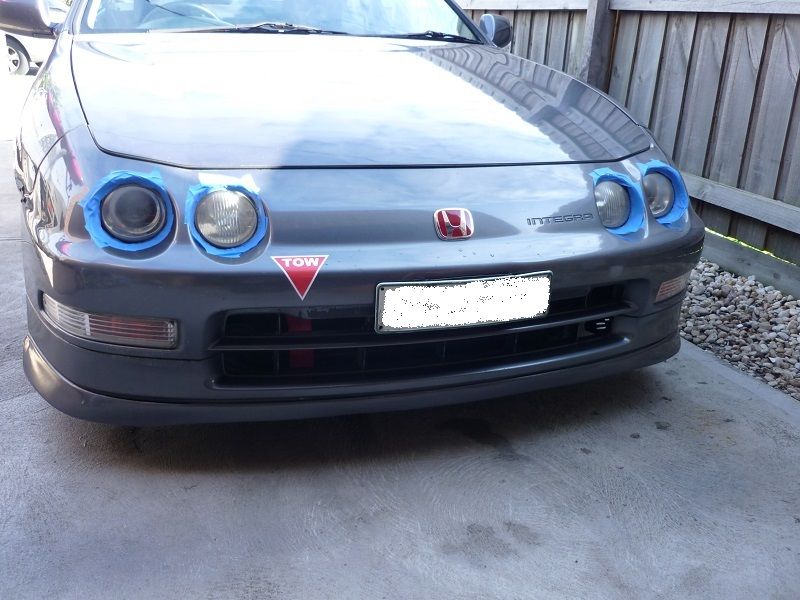
Before

After
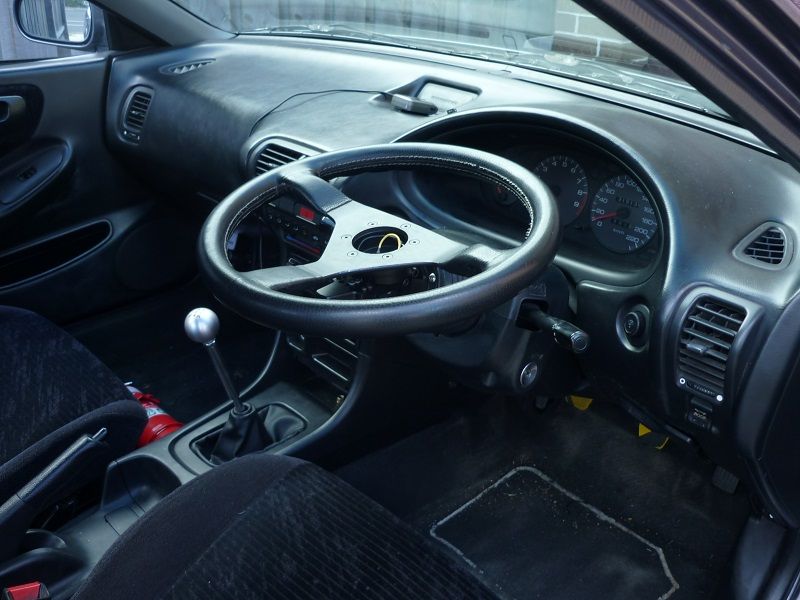
At the last event I found it quite difficult to get in and out of the Sparco seat, with my short legs, the front of the seat is quite close to the bottom of the steering wheel. This makes it hard to get your waist out of the seat
I've installed a flip up boss to resolve this issue
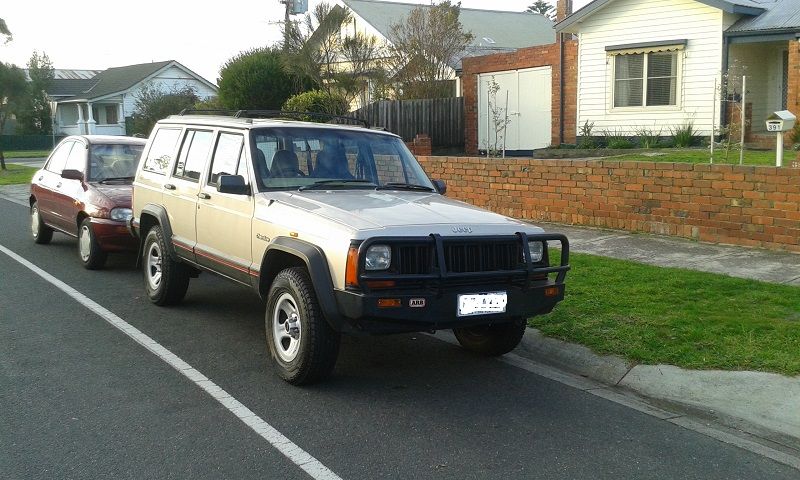
And finally
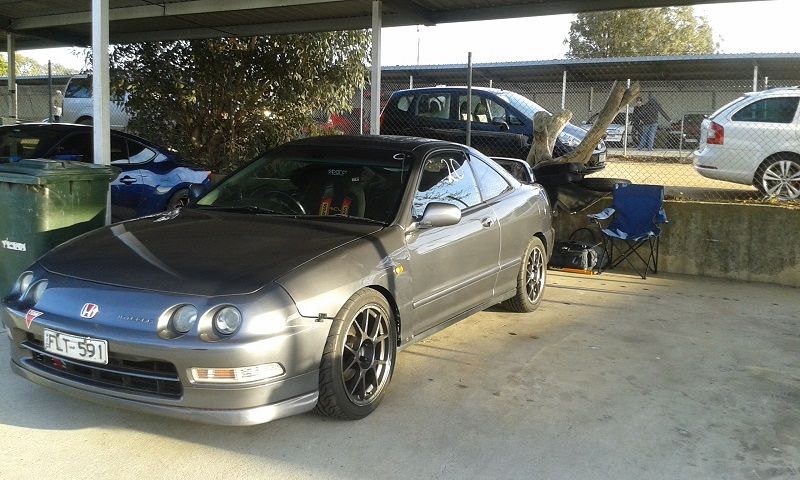
I've brought a daily/tow vehicle

As you can see I've just bent the original brake lines around to fit, less than ideal but I don't want to take the engine out just yet.

The first attempt to bleed the system resulted in a pedal with about 20mm of dead travel before it would feel firm.
I was eager to see where the brake bias had ended up so we took the car for a brief test drive anyway
My first impression was that the fronts were much less prone to "pinching" or locking up when you got on the pedal at high (for the road) speeds (100 - 80 km/hr)
I was happy for this to be the case as eliminating that issue was the whole point of this exercise!
However if I held constant pressure on the pedal, as the car slowed though the 40 km/hr range it would still lock the fronts.
Now it could be argued that one should be easing off the pedal as the car slows down and on track that is the case but in this instance I was trying to identify which wheels would lock first.
So the modifications I've done haven't over powered the rear brakes, if anything it's still got front bias
For reference:
- This was with the proportioning valve adjusted to give the rear brakes full pressure.
- This was also with the 15 x 6 wheels and 195 tyres on up front.
I figured that it might be a different story with the larger wheels and stickier tyres, it's logical that the brake balance would shift rearward with that combo on the front.
As I was driving it around the block I noticed the temp gauge start to move around, that set the warning bells ringing as normally the temp gauge is rock solid
I found it odd through because the needle would settle back to its normal position when I was idling at lights (where i would have expected the temp to soar if there was an issue)
Last time I drove it, the car was fine and the chance of the water pump failing just sitting in the driveway is pretty slim.
My guess was that the temperature sensor was playing up somehow
I parked the car for a week and then this morning when I had a chance to get back to it
I started by cleaning the temperature sensor, when I first pulled it off I could see that there was some oil around it and it way pretty dirty in general
After cleaning the plug out I applied some dielectric grease to the terminals and reinstalled it
then I connected the laptop to the ECU and checked all the parameters to do with the cooling system.

- The electric fan was working, I could switch it manually and check that.
- The electric fan is set to come on at 94 degrees
- The analog input value from the temp sensor seemed to match the movement of the gauge on the dash
- I let the car run for about 20 mins in the driveway and it came up to temp and then regulated temperature just fine.
Who knows, maybe it was just the sensor playing up on that day.
Back to the manual brake conversion story
I bled the brakes again, this time quite a lot of air came out of the rear circuit and the pedal feel improved to something resembling normal pedal feel
It probably needs yet another bleed but you can feel that it's building pressure right from the top of the pedal now.
I bolted the track day wheels on and took the car for another drive
The temperature gauge came up to it's usual position and stayed there so that was good.
The brakes felt much better this time,
The feel is bit wooden, the brakes don't have that instant bite at 20 km/hr you get with a boosted set up.
Pedal effort is different, you do have to press down a little harder initially (and increase following distances!) but you adjust to it quickly and it doesn't feel so hard that your leg would tire out or anything like that.

It still locked the fronts with the track wheels up front but only at lower speeds so i don't know if that's really an issue or not.
I don't think I'm going to be able to get a real gauge of where the brakes are at until I run the car on track again, you just can't replicate track conditions on the road
The headlight lenses have been looking rather dull and yellowed so I decided to try rejuvenate them with a head light restoration kit

Before

After

At the last event I found it quite difficult to get in and out of the Sparco seat, with my short legs, the front of the seat is quite close to the bottom of the steering wheel. This makes it hard to get your waist out of the seat
I've installed a flip up boss to resolve this issue

And finally
I've brought a daily/tow vehicle
 07-24-2015, 03:01 PM
#99
Honda-Tech Member

Join Date: Dec 2012
Location: Erie, Pa
Posts: 16
Likes: 0
Received 0 Likes
on
0 Posts
I've been following your build for a while now, thanks for posting such a depth of information of the modifications you are making. I don't think my track teg will ever be as extreme, but its great to see what can be done with some well thought out engineering.
Now that Jeep, those can't be common in Australia, right?
Now that Jeep, those can't be common in Australia, right?
08-05-2015, 06:09 AM
#100
Honda-Tech Member
Thread Starter
Join Date: Jun 2014
Location: Australia
Posts: 83
Likes: 0
Received 0 Likes
on
0 Posts
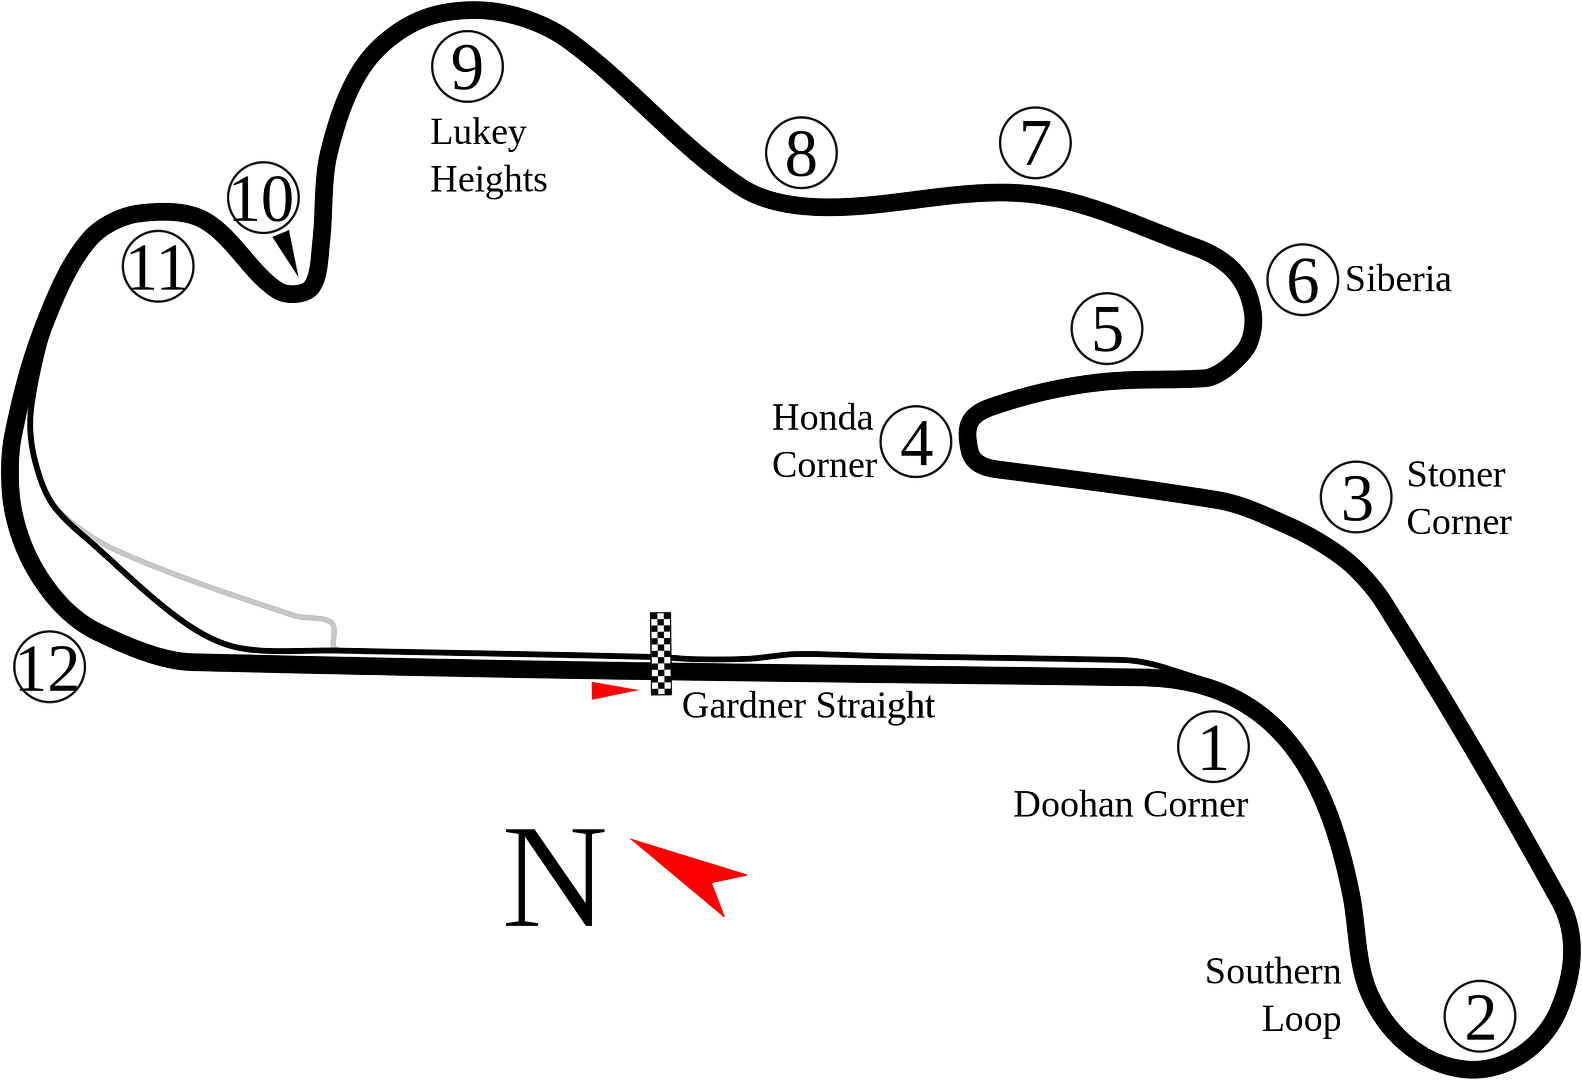
This last weekend I competed with the car as part of a 6 man team in the Phillip Island 6 hour regularity relay event
For anyone not familiar with how a regularity works
The score for each team is based on the total number of laps you complete during the 6 hour period + bonus laps and - penalties
You nominate a lap time and then during the event every lap you do is compared to your nominated time.
If you lap slower than your nominated time but you're within 2.5s of that time you're awarded Bonus laps, more bonus laps the closer you get
If you lap faster than your nominated time you're penalized and they take laps off you.
It's not intended to be like door to door racing where people will overtake aggressively but overtaking is not policed in the same was as it would be at a track day and with 50 cars on the track
at traffic is a major element of the event
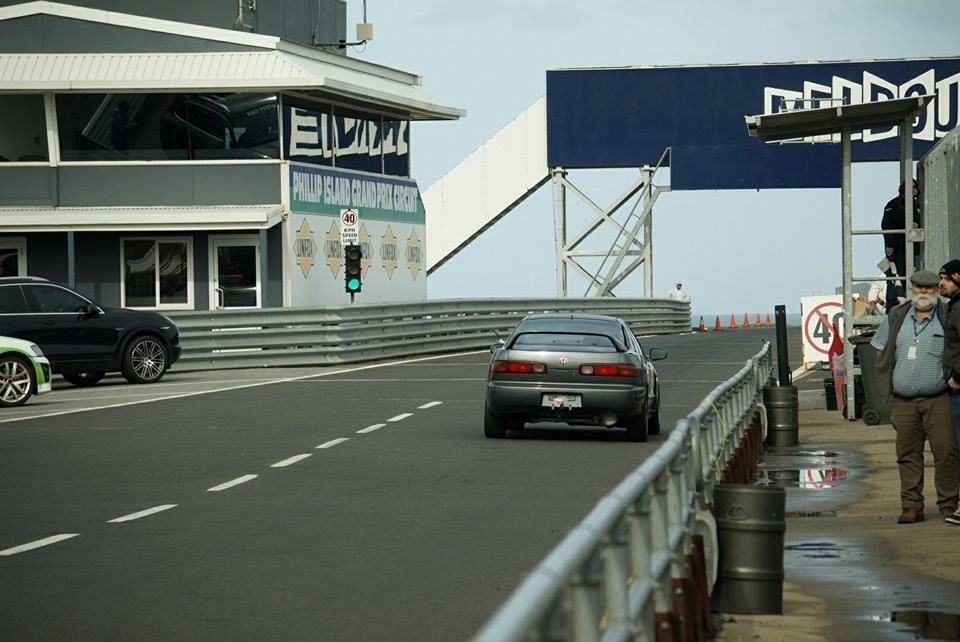
Phillip Island is regarded as one of Australia's best tracks, it has a long straight into a fast T1, sweepers that you can take flat out and elevation change. All of which are a welcome change from Winton's relatively slow, flat layout
I was lucky enough to be teamed up with a great bunch of people,

Our team the Vaudevillians, consisted of:
2x Hondas
2x Mx5s
2x Toyota Echos
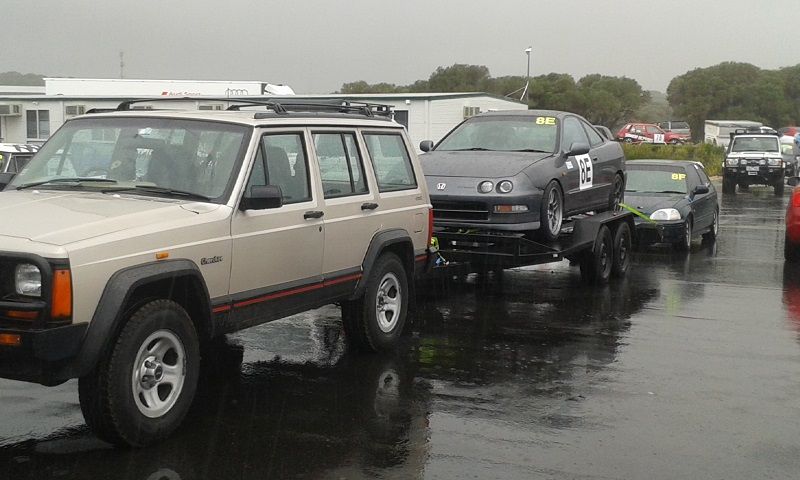
All our cars are street registered and I was the only one to trailer their car to the track.
We arrived on Saturday morning to a wet track
I was first out on the wet track and it was a pretty stressful few laps!
I'd never been around the track before so I just slotted behind a mx5 and tried not to get collected by the more experienced drivers coming through. It didn't take long for the session to get red flagged, on my in lap I saw 2 cars in the kitty litter and one in the barrier
Thankfully the rain subdued and by the time my second session came around the track was drying off
Here's a little video from the second session.
https://www.youtube.com/watch?v=Q_JAfTsKZpk&feature=youtu.be I didn't managed to get any footage from the faster laps at the end of the weekend because the gopro didn't want to stick to the rear window anymore
My fastest time for the weekend was a 2:02.9 which I was ecstatic about! I'm sure a sub 2 min lap would be achievable with a bit more fine tuning of my lines and more commitment everywhere
The team ended up coming 28th out of 50 for the regularity.
I think we were a bit too ambitious with our nominated times but given that this was our first attempt at the event and none of us really knew what to expect we were shooting in the dark a little.
Our placing in the points certainly didn't effect how much we enjoyed the event and importantly we came away with all our car's in one piece!
I didn't lock a wheel braking all weekend so I think that converting the car to manual brakes has been a great success!
Even in the wet the brakes were solid and progressive, probably one of the better modifications i've done to the car.
The other Honda in the team was Rhys's Ek
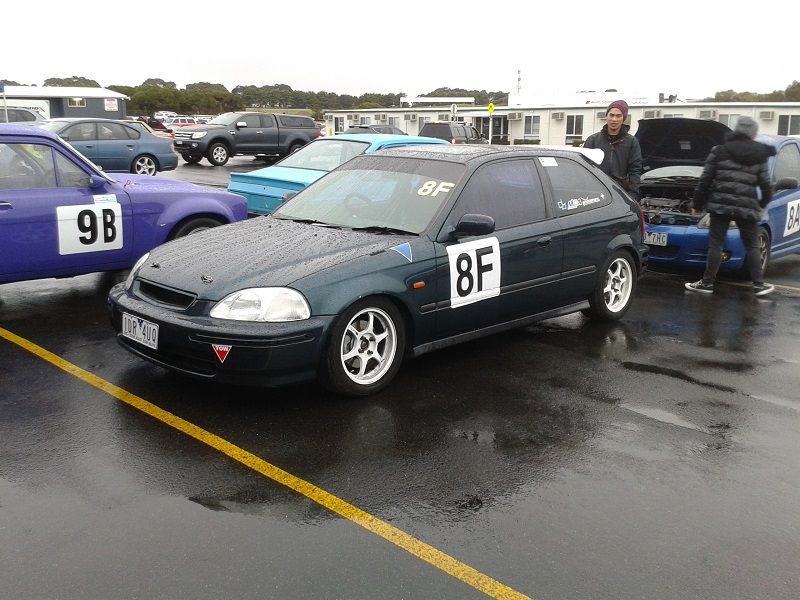
Rhys had just fitted a new exhaust and was loving every minute out on track. This EK goes really well!
This E-AT with a B18c was also at the event in one of the other teams, i didn't get a chance to talk to the owner but it looked to be pretty quick

For anyone not familiar with how a regularity works
The score for each team is based on the total number of laps you complete during the 6 hour period + bonus laps and - penalties
You nominate a lap time and then during the event every lap you do is compared to your nominated time.
If you lap slower than your nominated time but you're within 2.5s of that time you're awarded Bonus laps, more bonus laps the closer you get
If you lap faster than your nominated time you're penalized and they take laps off you.
It's not intended to be like door to door racing where people will overtake aggressively but overtaking is not policed in the same was as it would be at a track day and with 50 cars on the track
at traffic is a major element of the event
Phillip Island is regarded as one of Australia's best tracks, it has a long straight into a fast T1, sweepers that you can take flat out and elevation change. All of which are a welcome change from Winton's relatively slow, flat layout

I was lucky enough to be teamed up with a great bunch of people,

Our team the Vaudevillians, consisted of:
2x Hondas
2x Mx5s
2x Toyota Echos
All our cars are street registered and I was the only one to trailer their car to the track.
We arrived on Saturday morning to a wet track

I was first out on the wet track and it was a pretty stressful few laps!
I'd never been around the track before so I just slotted behind a mx5 and tried not to get collected by the more experienced drivers coming through. It didn't take long for the session to get red flagged, on my in lap I saw 2 cars in the kitty litter and one in the barrier

Thankfully the rain subdued and by the time my second session came around the track was drying off
Here's a little video from the second session.
https://www.youtube.com/watch?v=Q_JAfTsKZpk&feature=youtu.be I didn't managed to get any footage from the faster laps at the end of the weekend because the gopro didn't want to stick to the rear window anymore


My fastest time for the weekend was a 2:02.9 which I was ecstatic about! I'm sure a sub 2 min lap would be achievable with a bit more fine tuning of my lines and more commitment everywhere
The team ended up coming 28th out of 50 for the regularity.
I think we were a bit too ambitious with our nominated times but given that this was our first attempt at the event and none of us really knew what to expect we were shooting in the dark a little.
Our placing in the points certainly didn't effect how much we enjoyed the event and importantly we came away with all our car's in one piece!
I didn't lock a wheel braking all weekend so I think that converting the car to manual brakes has been a great success!
Even in the wet the brakes were solid and progressive, probably one of the better modifications i've done to the car.
The other Honda in the team was Rhys's Ek

Rhys had just fitted a new exhaust and was loving every minute out on track. This EK goes really well!
This E-AT with a B18c was also at the event in one of the other teams, i didn't get a chance to talk to the owner but it looked to be pretty quick
